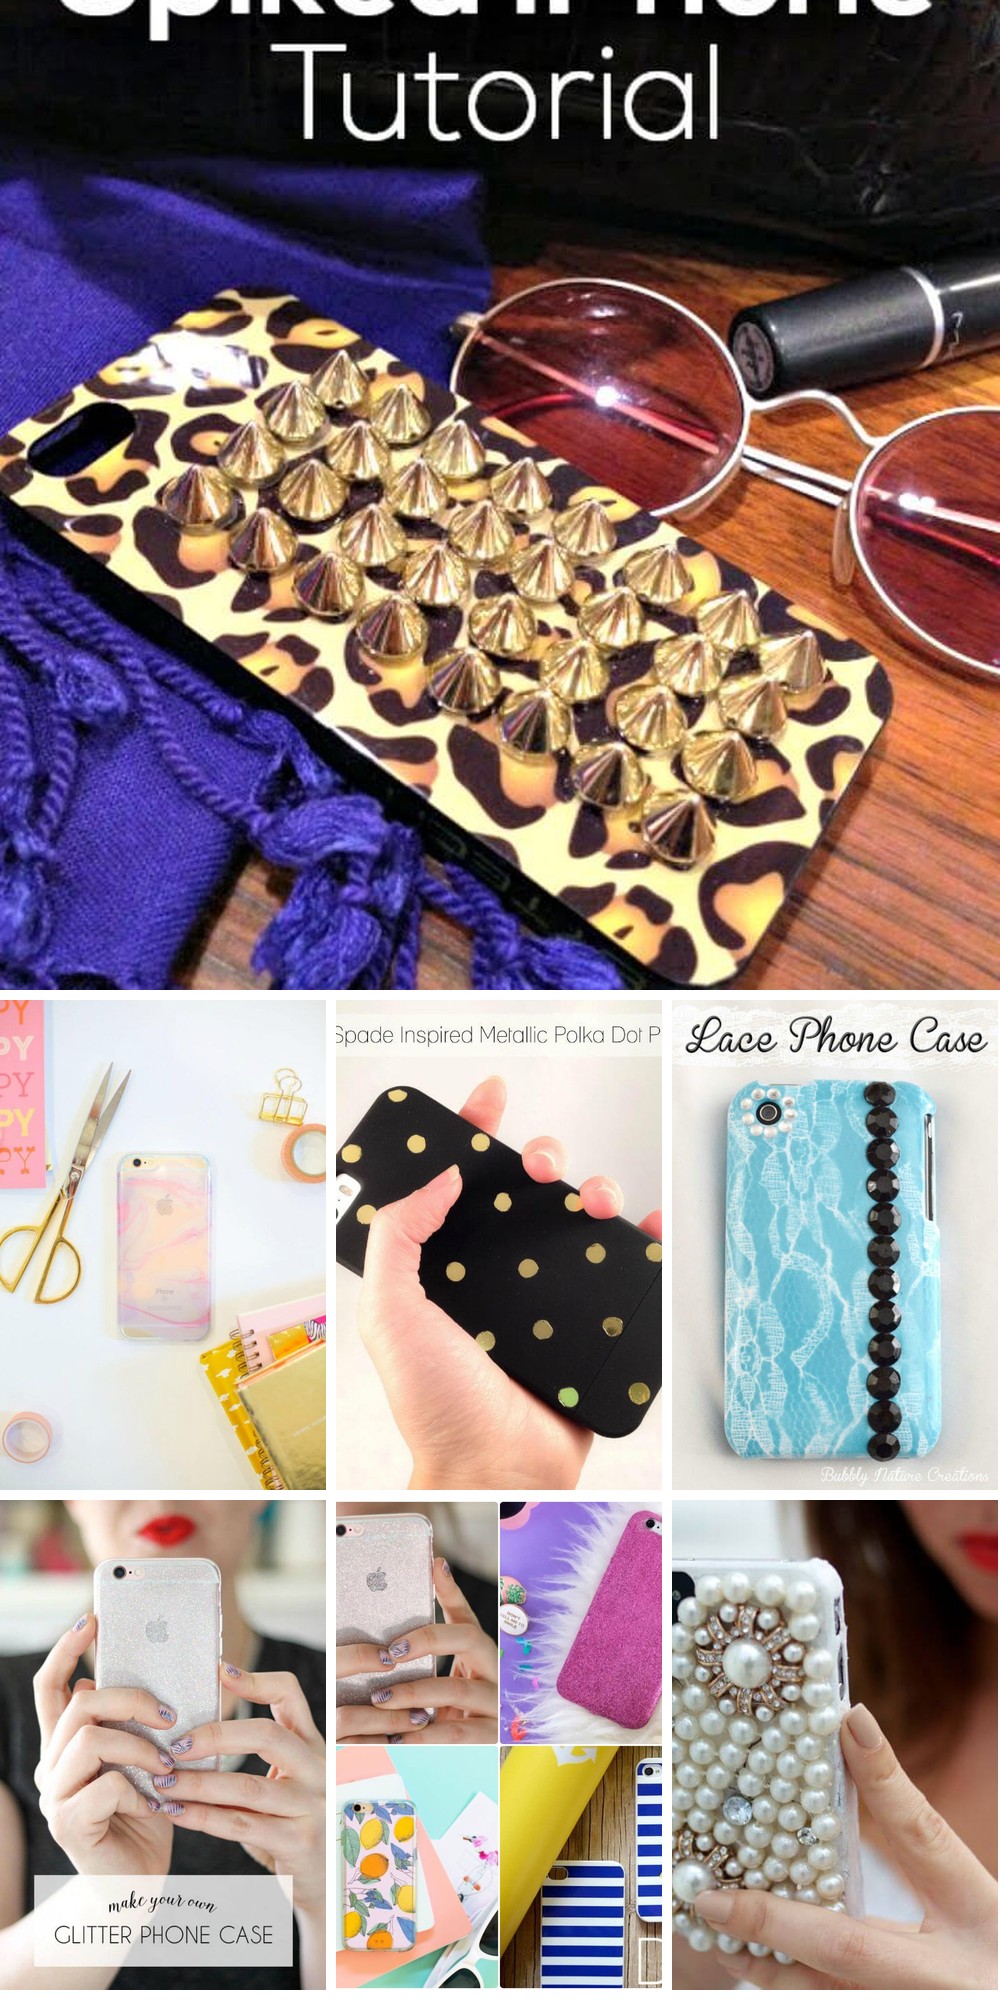
Unleash your creativity and personalize your smartphone with a DIY phone case that truly reflects your unique style. This comprehensive guide takes you by the hand, providing step-by-step instructions to help individuals with varying crafting skills bring their 25 innovative DIY phone case ideas to life. From sourcing the ideal materials to adding the final touches, we’ll cover every essential aspect of creating your own phone case. Additionally, we’ll share valuable insights on customization options, maintenance tips, and troubleshooting common issues that may arise. Whether you’re a seasoned crafter or just starting out, this guide is your ultimate resource for transforming your smartphone into a one-of-a-kind masterpiece.
How to Make a Phone Case – Step by Step Guide
Transforming your phone with a custom case is an excellent way to showcase your individuality while engaging in a creative and fulfilling DIY experience. In this post, we’ll take the first step towards creating a charming and visually appealing phone case from the ground up. Let’s embark on this journey together!
What You’ll Need:
When crafting with resin, a variety of materials can be used to enhance the final product. Silicone, commonly employed for caulking purposes, can help smooth out air bubbles or imperfections in the finished piece. Another versatile substance is cornstarch, which serves as an effective thickening agent for resin mixtures. Additionally, disposable gloves are essential for protecting one’s hands from staining and residue buildup during the crafting process. For temporary storage or protection of delicate pieces, cling wrap can be used to keep them safe from damage. Card stock can serve as a base or backing material, providing a sturdy foundation for more intricate designs. A rolling pin is useful for flattening out air pockets or bubbles in the resin, ensuring a smooth finish. An Exacto knife can be employed to carefully cut and shape resin, allowing for greater control over the final product. For adding color and vibrancy to your creations, acrylic paint can be used in conjunction with paintbrushes. Finally, glaze – applied after the resin has cured – provides an extra layer of protection against scratches or fading, while also imparting a glossy sheen to the finished piece.
Instructions:
To create your silicone phone case, start by preparing the dough. Begin by donning disposable gloves to protect your hands. In a bowl, combine silicone and cornstarch, gradually adding more cornstarch as needed until you achieve a dough-like consistency that’s not too sticky or dry. Knead the mixture until it’s smooth and pliable.Next, prepare your phone for casing by wrapping it entirely in cling wrap. To differentiate the top from the bottom and provide added screen protection, place a piece of card stock on the screen, marking its orientation.Now it’s time to shape the phone case. Dust your work surface with cornstarch and roll out the silicone dough to an adequate thickness – not too thin to avoid tearing, but not too thick. Press your wrapped phone into the dough, then carefully remove any excess silicone around the edges. Feel free to add designs or decorations using small pieces of the silicone dough.Allow the silicone case to air dry completely, which may take several hours or overnight depending on its thickness and environmental conditions.Once dry, carefully remove your phone from the case. Use an Exacto knife to mark and cut out precise openings for the camera, volume buttons, and charging port. Take your time with this step to ensure accuracy.To add a pop of color, paint your phone case using acrylic paint in the colors of your choice. Depending on the paint’s opacity, you may need multiple coats to achieve a uniform look. Allow each coat to dry completely before applying the next.Finally, apply a glaze over the painted case for a beautiful, protective finish. Two layers should suffice for a glossy effect. Let the glaze dry thoroughly before handling your new phone case.
Maintaining Your Phone Case
For optimal longevity, maintain your custom phone case by wiping it down delicately with a damp cloth. Additionally, steer clear of exposing it to harsh environmental conditions like extreme temperatures or coming into contact with abrasive materials that could cause scratches.
Video Tutorial
To enhance the process of creating a one-of-a-kind phone case from scratch, I recommend supplementing the written guide with a step-by-step video tutorial available on YouTube. The visual demonstrations in this video provide an additional layer of clarity, making it even easier to follow along and achieve professional-looking results. By combining the instructions with the video’s visual aids, you’ll be able to create a custom phone case that not only reflects your personality but also serves as a practical and stylish accessory for your device.
Customization Tips for Your DIY Phone Case
When it comes to making a DIY phone case, the possibilities are endless, but the key is to make it truly yours. You can start by selecting a base material that allows for customization, such as silicone, clear plastic, or leather. From there, let your personality shine through by choosing a theme that speaks to you – whether it’s a favorite color, a beloved pet, or a hobby. Add some personal touches with initials, birthstones, or symbols that hold meaning, and don’t be afraid to experiment with different techniques like painting, decoupage, or even knitting. Just remember to balance creativity with practicality by ensuring the case still fits comfortably in your pocket or bag and allows easy access to all buttons and ports. Finally, seal your design with a clear coat to protect it from wear and tear, and get ready to show off your unique style.
Troubleshooting Common DIY Phone Case Issues
When it comes to crafting a DIY phone case, things don’t always go as planned. Despite the excitement and creativity involved in this project, unexpected setbacks can arise. In order to overcome these hurdles and achieve a successful outcome, it’s essential to identify and address common issues that may pop up along the way.
Case Doesn’t Fit
When dealing with a phone case that’s either too tight or too loose, there are a few simple solutions to achieve the perfect fit. If your case is made of silicone or plastic, you can try heating it up with a hairdryer to make it more pliable. This will allow you to gently stretch the case to adjust its fit around your phone. Once you’ve achieved the desired snugness, let the case cool before handling your device again. On the other hand, if the case is too loose, consider adding a thin layer of padding inside the case to provide a more secure fit. This may require some trial and error, but it can be an effective way to get the case fitting just right.
Design Peeling Off
When the paint or decorations on your case start to peel off, it’s a common problem that can be frustrating and aesthetically unappealing. To address this issue, consider applying a clear sealant over your design to provide an added layer of protection. It’s essential to choose a sealant that is compatible with the material your case is made of, as some materials may react negatively to certain types of sealants. By taking this step, you can help extend the life of your case and maintain its appearance for a longer period.
Difficulty Applying Decorations
One common issue that can arise when decorating a phone case is the difficulty in getting the decorations to adhere properly. To overcome this problem, it’s essential to start with a clean and dry surface on the case. This will provide a stable foundation for the decorations to bond to. Additionally, choosing the right adhesive is crucial, as different materials require specific types of bonding agents. For instance, if you’re working with a hard plastic or metal case, a strong adhesive like super glue may be necessary, whereas softer materials like fabric or silicone might benefit from a more flexible adhesive like fabric glue.
Bubbles Under Decals
When it comes to dealing with air bubbles trapped under decals or stickers, there are a couple of strategies you can employ to get rid of them. One approach is to use a pin to carefully poke a small hole in each bubble, followed by a gentle press to release the trapped air. For larger decals, applying them slowly and smoothing out any bubbles as you go can be an effective way to eliminate this issue.
Case Looks Bulky
When it comes to decorating your case, a common challenge many face is the appearance of bulkiness. However, with a little creativity and consideration for design, this issue can be easily overcome. By opting for flat decorations such as paint, decals, or thin layers of fabric, you can add visual interest without sacrificing the sleekness of your case. On the other hand, bulky items like large beads or charms should be avoided, as they can quickly overwhelm the overall aesthetic. By making conscious choices about the types of decorations you use, you can maintain a clean and streamlined look that still showcases your personal style.
Color Fading
When you notice the color on your DIY phone case starting to fade away, it’s time to take action. Instead of resigning yourself to a worn-out case, consider using UV-resistant materials and coatings to prevent further fading. This simple solution can make all the difference in keeping your case looking vibrant for longer. But that’s not all – it’s also crucial to keep your phone out of direct sunlight when not in use. By addressing these common issues, you’ll be able to enjoy a functional, durable, and great-looking DIY phone case. And remember, as with any DIY project, patience and creativity are key to achieving the best results.
Sustainability in DIY Phone Cases
Crafting an eco-friendly DIY phone case not only fosters creativity, but it’s also an opportunity to contribute to a more sustainable lifestyle. To make the switch from traditional phone cases, follow these simple steps.
Choose Sustainable Materials
When it comes to creating an eco-friendly base for your product, there are several options available that prioritize sustainability. For instance, biodegradable materials like Flaxstic offer a plant-based alternative to traditional plastics. This innovative material is made from a combination of flax straw and bioplastic elastomer, making it a highly renewable resource. Similarly, natural fibers such as organic cotton or hemp provide a sustainable option that requires minimal water usage and no toxic pesticides. For a touch of natural elegance, consider sustainably harvested wood or cork, which meets rigorous FSC certification standards. Additionally, rapidly renewable resources like bamboo and merino wool are excellent choices for their low environmental impact.
End-of-Life Disposal
When a phone case reaches the end of its useful life, there are eco-friendly options to consider. Composting is a viable solution if the case is made from compostable materials. Simply break it down and add it to your home compost pile. Alternatively, look into local recycling programs that accept old phone cases. These programs can help repurpose the materials into new products, reducing waste and the environmental impact of manufacturing.
Maintenance and Care for DIY Phone Cases
To extend the lifespan of your DIY phone case and minimize the frequency of replacements, it’s essential to prioritize its maintenance. This can be achieved by following a simple routine that keeps your case in top condition.
Regular Cleaning
When it comes to cleaning your case, subtlety is key. Opt for a gentle approach by using a soft cloth and mild soap to wipe down the surface. Avoid exposing the material to harsh chemicals that could potentially cause damage. If you’re dealing with stubborn stains, don’t reach for abrasive cleaners or scouring pads – instead, try utilizing alcohol wipes to gently lift away dirt and debris. By taking this careful approach, you’ll be able to effectively clean your case without compromising its integrity.
Protecting the Design
To ensure your custom phone case stands the test of time, it’s essential to apply a clear sealant to any painted designs or decorative elements. When selecting a sealant, make sure it’s compatible with the material of your case. This simple step can significantly prolong the lifespan of your design. Additionally, prolonged exposure to direct sunlight can cause colors to fade, so it’s crucial to keep your case out of direct sunlight. By taking these precautions, you’ll not only preserve the appearance of your custom phone case but also contribute to a more sustainable future. Every small action counts, and making environmentally conscious choices is an important step in reducing our collective ecological footprint.
Advanced Techniques for Your DIY Phone Case
As you’ve honed in on the fundamentals and are eager to elevate your DIY phone case game, consider these sophisticated techniques to imbue your project with a polished sheen. By incorporating these advanced methods, you’ll be able to push the boundaries of what’s possible and create a truly unique piece that showcases your skills.
Working with Resin
Transform ordinary objects into breathtaking works of art by incorporating resin casting techniques. One innovative approach involves combining flowers, glitter, or beads with layers of resin to create stunning 3D designs. Begin by pouring a layer of resin into your chosen mold or container, followed by the addition of your decorative elements. Finish by sealing the design with another layer of resin. As the resin cures, you’ll be left with a durable and visually striking creation that showcases your creativity.
Leather Crafting
When working with leather, consider incorporating leather tooling techniques to create intricate designs and patterns. This process requires a set of specialized tools, but the end result is well worth the investment. To ensure the longevity of your leatherwork, be sure to seal the finished product to protect it from wear and tear.
Incorporating Electronics
Elevate your creation with embedded LED lights that add an unparalleled level of customization. By incorporating these tiny yet mighty lights, you can craft intricate patterns or even convey messages by spelling out words. To guarantee a seamless experience, opt for battery-powered LEDs and ensure the wiring is secure to prevent any potential issues.
Using Advanced Materials
Transforming your phone case into a dynamic masterpiece is within reach with the incorporation of thermochromic paint and hydro dipping techniques. This innovative approach allows you to create a visually striking design that changes color with temperature, adding an interactive element to your case. By applying this paint over a base design, you can create an immersive experience for the user. On the other hand, hydro dipping presents a marbled effect by submerging your case in water with floating spray paint, resulting in a unique and captivating pattern. As you delve into these advanced techniques, you’ll be able to craft a phone case that truly sets itself apart and showcases your creativity. Feel free to experiment and combine methods to create something entirely original and breathtaking.
FAQs for DIY Phone Cases
Embarking on a DIY adventure to create your own phone case can be an exciting and creative outlet for self-expression. To ensure a seamless start, we’ve addressed some frequently asked questions that will guide you through the process.
What materials do I need to make a DIY phone case?
To create a unique and personalized DIY phone case, gather a clear or solid-colored base material as the foundation. Supplement this with decorative elements such as paint, stickers, fabric, or other creative mediums that align with your desired design. Additionally, secure your design with a protective sealant to ensure longevity and durability.
Can I use any type of paint on my phone case?
When it comes to painting a case, it’s essential to choose the right type of paint. Acrylic paint is often a good option, as are paints specifically designed for use on plastic or silicone surfaces. The specific choice will depend on the material your case is made of. Additionally, once you’ve painted your design, be sure to seal it with a clear coat to prevent chipping and ensure that your artwork remains vibrant over time.
How can I add texture to my phone case?
Elevate the visual appeal of your project by incorporating unique textures through the strategic application of materials such as lace, textured paper, or 3D paint. When adding these elements, be meticulous in your approach, ensuring they are securely attached to the case and treated with a sealant to preserve their integrity.
Is it possible to make a phone case that’s eco-friendly?
When it comes to crafting eco-friendly designs, there are several options to explore. For instance, opt for sustainable materials such as biodegradable plastics, cork, and bamboo. Additionally, don’t overlook the potential of upcycling existing materials you may already possess. This not only reduces waste but also adds a unique touch to your creations.
How do I ensure the decorations stay on the case?
When crafting a unique design, it’s crucial to choose the right adhesive for your materials and ensure that the case surface is thoroughly cleaned beforehand. This ensures a strong bond between the materials and prevents any debris or residue from interfering with the decoration process. To maintain the integrity of your design, seal the case once the decorations are applied, providing an added layer of protection against scratches, fading, or other forms of damage.
Can I make a phone case if I’m not artistic?
In fact, you don’t need to be an artist to create a stunning phone case. One of the simplest ways is to utilize readily available design aids such as stencils, stickers, and pre-made decorative elements. These tools allow you to add a touch of personality to your case without requiring any artistic skill.
How do I protect my DIY phone case from wear and tear?
To ensure the longevity of your design, apply a high-quality sealant that provides a clear finish. When storing the case, take care to shield it from extreme temperature fluctuations and prolonged exposure to direct sunlight, as this can cause unwanted damage or discoloration.
What should I do if my phone case doesn’t fit properly after decorating it?
When struggling to fit your phone into its case, try employing a gentle approach. Begin by applying warm air from a hairdryer to loosen any stubborn materials. Gently stretch the case over your device, taking care not to apply too much pressure that could cause damage. On the other hand, if the case feels too roomy, introduce a thin layer of padding within to provide a snugger fit. This minor adjustment can make all the difference in ensuring your phone remains securely encased.
How can I make a phone case with a professional look?
To take your DIY projects to the next level, consider incorporating advanced techniques such as resin casting, leather tooling, or hydro dipping into your workflow. By mastering these methods, you’ll not only produce striking results but also refine your skills and develop patience necessary for achieving a high-quality finish.
What if I make a mistake while decorating my case?
When faced with minor errors during the decorating process, take a deep breath and know that they’re easily correctable. For instance, if the paint is still wet, you can simply wipe it off and begin anew. Similarly, if decorations are misplaced or not quite right, gently remove them and reapply. This approach allows you to maintain your momentum and avoid feelings of frustration or disappointment.
Can I change the design of my phone case later?
When it comes to designing your DIY phone case, the possibilities are endless. One of the best things about this project is that you can update your design as frequently as you like. However, before applying a new design, be sure to thoroughly remove any old decorations and sealant to ensure a smooth transition. With these FAQs guiding you along the way, you’ll be well-prepared to unleash your creativity and create a truly one-of-a-kind DIY phone case that reflects your personal style. So go ahead, get creative, and have fun!
25 Amazing DIY Phone Case Ideas
Transform your mobile experience by unleashing the creativity within you. With an array of innovative and playful design options, you can turn your device into a one-of-a-kind accessory that reflects your personality. Discover 25 extraordinary DIY phone case ideas that will inspire you to get crafty and showcase your personal style.
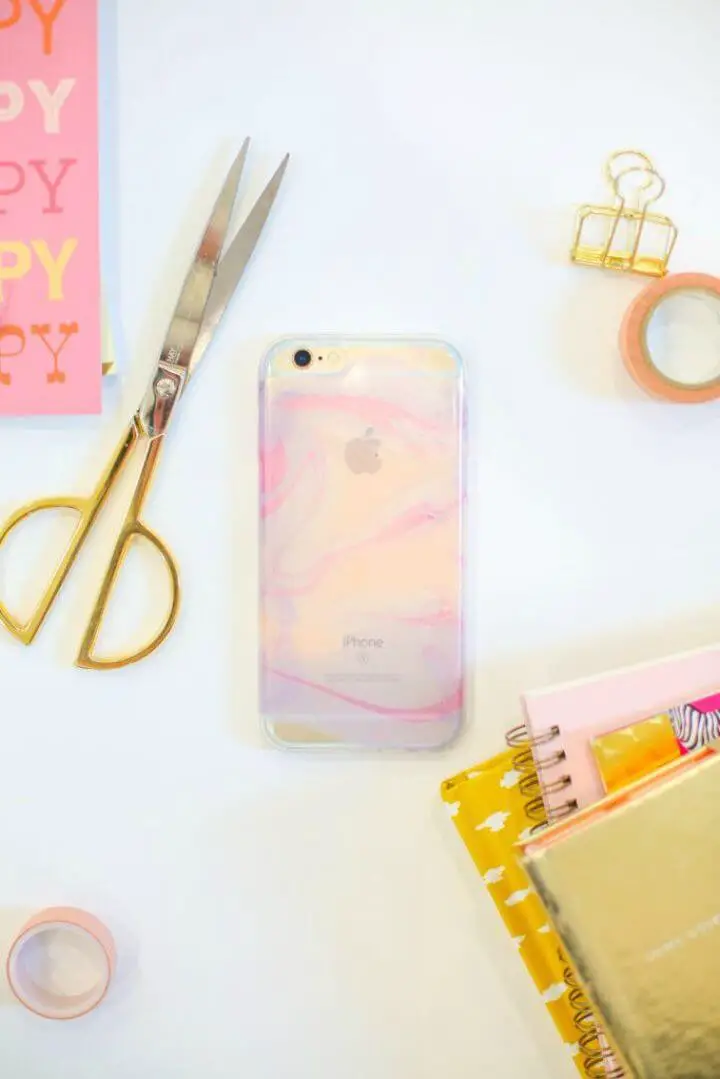
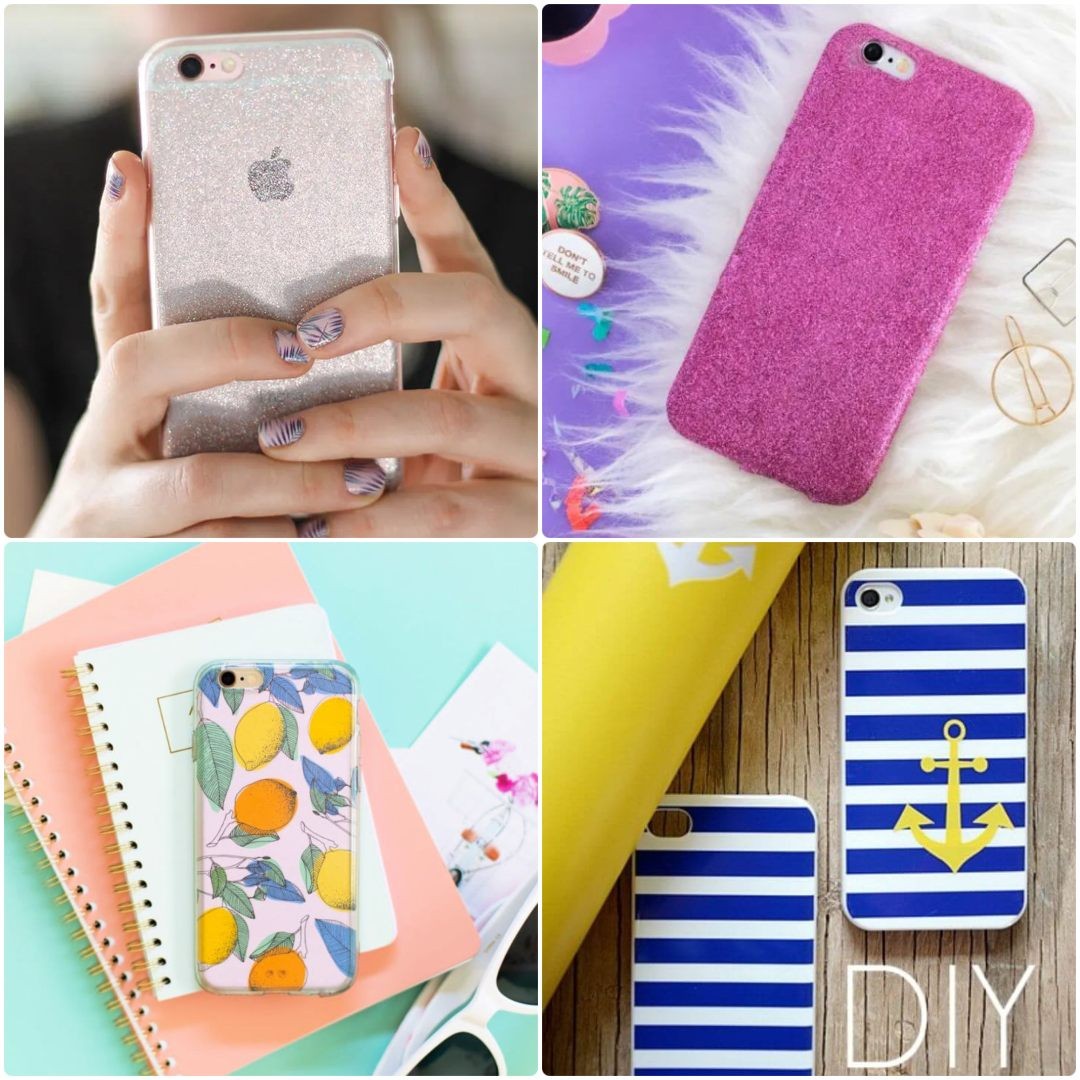
Unique DIY Glitter Phone Case
Want to elevate your phone’s appearance without sacrificing its original color? This DIY phone case tutorial provides an easy, no-frills solution to transform a plain clear case into a sparkling canvas of self-expression. By applying transparent glitter vinyl, you can maintain the phone’s natural hue while adding a unique touch that reflects your personality.
With this project, creating two stylish designs is remarkably straightforward: a simple yet striking glitter case or a chic triangle pattern case. Both options require minimal effort – simply cut the vinyl to size, stick it onto the case, and trim the edges for a seamless finish.
The glitter vinyl not only enhances your phone’s look but also allows you to express your individuality beyond ordinary clear cases. Unleash your creativity today with this simple yet effective phone case upgrade.
Nail Polish Marbled Cell Phone Case
Elevate your mobile experience with these innovative DIY phone case ideas that combine creativity and functionality. One such unique approach involves transforming your cell phone case into a work of art using nail polish. This versatile project allows you to infuse your device with personalized flair, selecting shades that reflect your individual style. Not only do these marbled designs add visual appeal, but they also withstand daily wear and tear, making them perfect for travel or handling by little ones. By following this easy-to-follow guide, you’ll gain the skills to craft stunning masterpieces that will make your phone stand out from the crowd. This DIY endeavor is not only fun but also adds an artistic touch to your everyday essentials.
No Sew DIY iPhone Case
To add a personal touch to your iPhone, create a charming DIY phone case using leftover felt scraps. This 5-minute craft is perfect for upcycling felt scraps and provides a practical solution to protect your phone. The finished product features a convenient pocket for storing money or other small items, as well as a strap to secure lip gloss. Both sides of the case showcase colorful stripes and a delightful little heart, making it both elegant and functional. A standard felt sheet is the ideal size for this project, which requires only a few basic tools – a ruler, pencil, and glue. Not only will your phone be protected, but you’ll also be reducing waste by repurposing felt scraps. With caution in mind to avoid any accidental burns when securing the lip gloss strap, you’re ready to create one for yourself and your friends with this simple and engaging DIY project.
How to Make Copper & Marble Phone Case
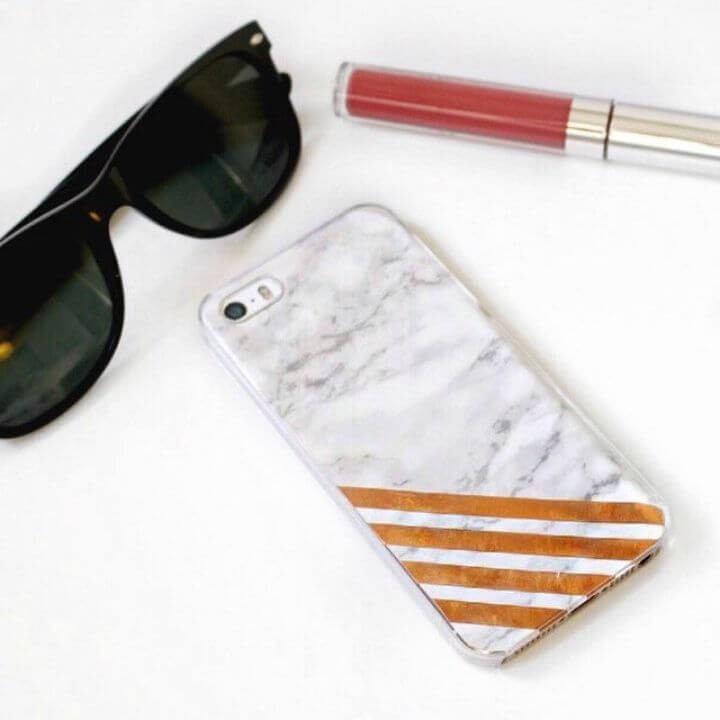
Transform your phone’s ordinary appearance into an extraordinary statement piece by upcycling leftover supplies. This DIY guide will take you on a journey of creativity, as we craft a stunning marble and copper phone case that exudes both elegance and rustic charm. With just a few simple steps – tracing, cutting, and placing – anyone can create this unique accessory without requiring any professional skills. The best part? You can easily customize your phone’s look by swapping out the supplies to match your mood or style, making it an affordable way to keep your phone looking fresh and exciting.
Make Your Own Nautical Phone Case
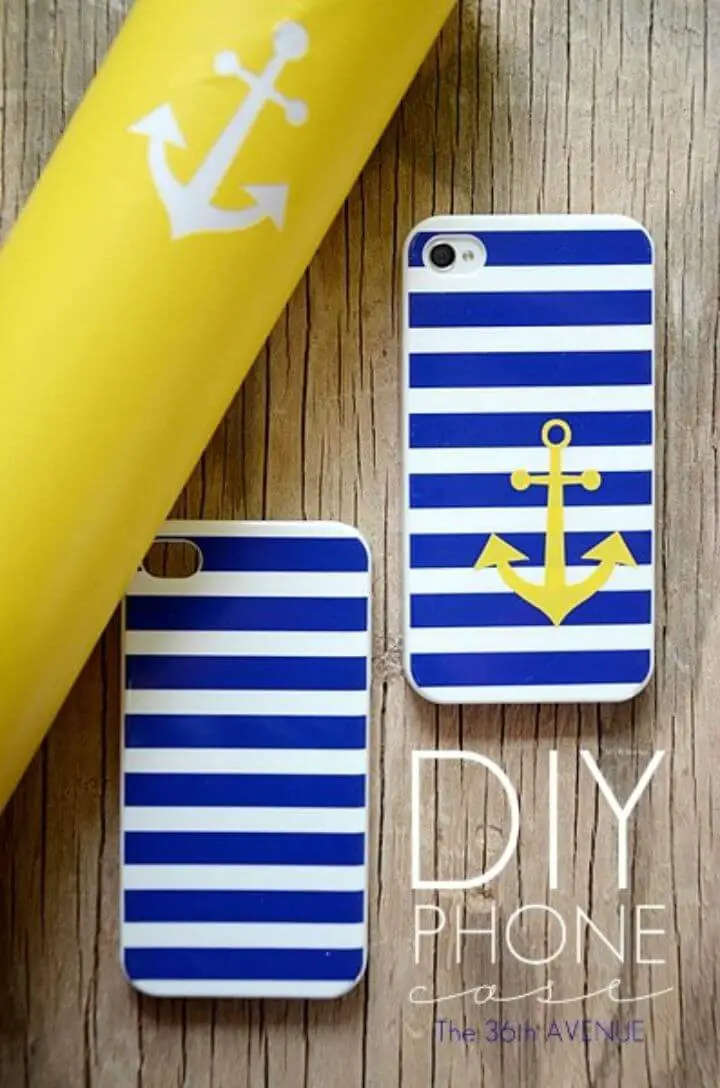
Unleash your inner designer with these DIY phone case ideas that let you show off your style without breaking the bank. Transforming your plain phone cover into a stunning nautical masterpiece is easier than you think, thanks to just three simple items: a silhouette machine, adhesive vinyl, and your phone case. With this straightforward tutorial, you’ll learn how to use these materials to create eye-catching designs like an anchor – all readily available at the Silhouette store. Simply cut out your design with the silhouette machine, peel off the vinyl, and stick it onto your case for a instant upgrade. This cost-effective project lets you personalize your device and give it a fresh new look that’s uniquely yours.
How to Make Wool Felt Phone Case
Discover the versatility of wool felt crafting by creating a one-of-a-kind phone case. This DIY project is not only portable but also budget-friendly compared to other knitting endeavors. With just a few simple materials – authentic wool felt, embroidery floss, clear nylon thread, and scissors – you’ll be able to craft a protective cover for your phone that reflects your personal style. Simply cut the wool felt, add decorative designs with embroidery floss, and stitch the sides together. You can secure the case with a snap or tuck in the flap, allowing for endless design possibilities. The result is a unique, handmade accessory that will keep your phone safe while also showcasing your creativity.
Awesome DIY Pearl iPhone Case

Transform your iPhone with a DIY pearl case that’s sure to turn heads. Begin by elevating a basic case using white fabric paint as the foundation. Add some glamour with clip-on earrings from Forever 21 or similar retailers, and top it off with a faux pearl necklace. Secure these elements with E-6000 glue for a luxurious finish. Take it up a notch by repurposing rhinestones from broken jewelry to add an extra touch of flair. While it may add a slight weight, the positive attention you’ll receive will be well worth it. This creative project not only breathes new life into old jewelry but also injects your everyday tech with personal style and a dash of creativity.
Making Puffy Paint Phone Cases
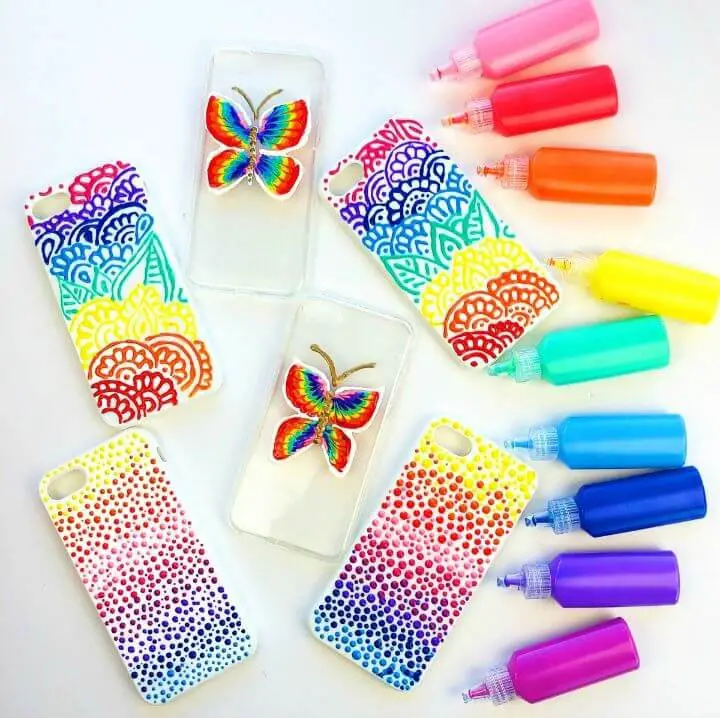
Give your phone a pop of personality with these easy DIY phone case ideas. Using Tulip Dimensional Fabric Paint, you can unleash your creativity and create vibrant, whimsical designs like butterflies and mandalas on your clear or white iPhone case. The multi-pack offers a wide range of colors, from metallic to rainbow hues, allowing you to add an artistic touch to your device. To get started, simply follow these three simple steps: first, draw the outline of your design; next, fill it in with the paint; and finally, refine the details using toothpicks. This DIY project is perfect for anyone looking to make their phone case truly one-of-a-kind. With a little creativity, you can turn an ordinary accessory into a statement piece that reflects your unique style.
DIY Pressed Flower iPhone Case
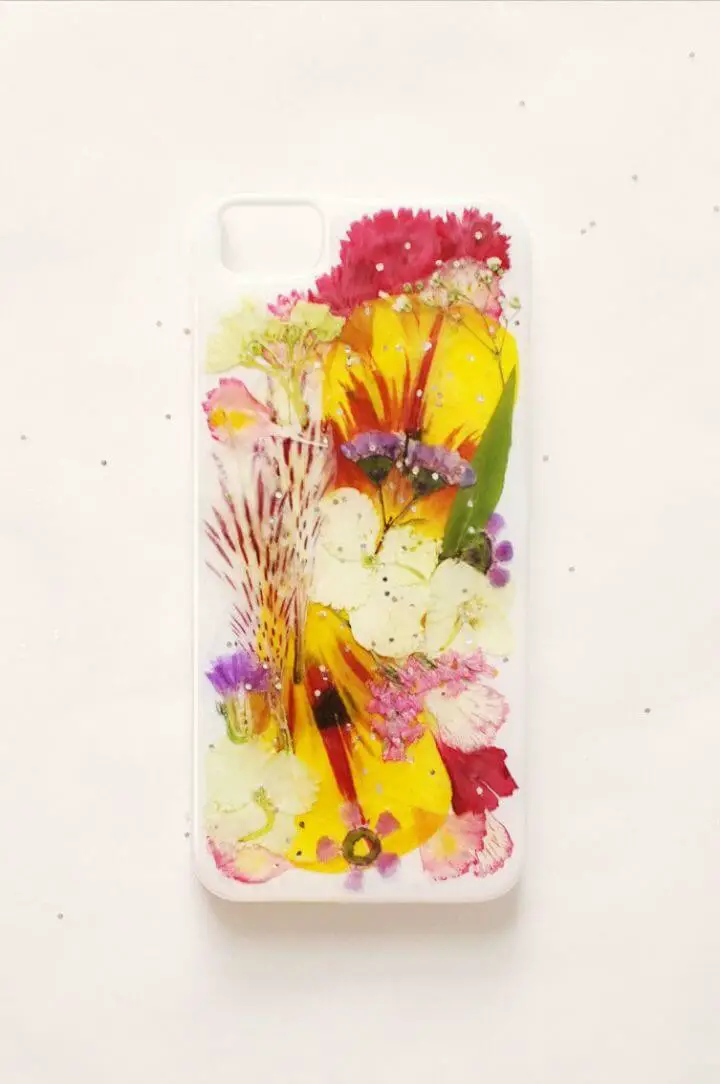
Bring a touch of nature’s splendor to your daily routine with this one-of-a-kind, handmade flower power smartphone case. The vibrant colors and unique charm are the result of combining pressed flowers, resin, and creative craftsmanship. This step-by-step guide will walk you through the process of arranging flowers, applying resin, and bringing the beauty of carnations, baby’s breath, tulips, statice, wax flowers, hydrangeas, and alstroemeria to life. The finished product not only preserves the fleeting loveliness of these blooms but also adds a pop of color to your daily interactions with every call or message. Let the magic of nature’s colors inspire you to start crafting your own piece of floral elegance today!
Spiked Iphone Using Jewelry & Metal Tabs
Give your mobile style a bold boost with a DIY studded leopard print phone case that combines fashion and functionality in perfect harmony. By following a simple, 10-minute process, you can transform a plain leopard print case into an eye-catching accessory that exudes sophistication and allure. Simply arrange adhesive dots and studs into a pattern that reflects your personal style using basic tools like a ruler and tweezers. As the end result, you’ll be left with a unique phone case that not only adds flair to your gadget but also expresses your personality. Embrace this quick and satisfying DIY project to instantly elevate your mobile’s aesthetic and make it truly one-of-a-kind.
Adorable DIY Gold Leaf iPhone Cases
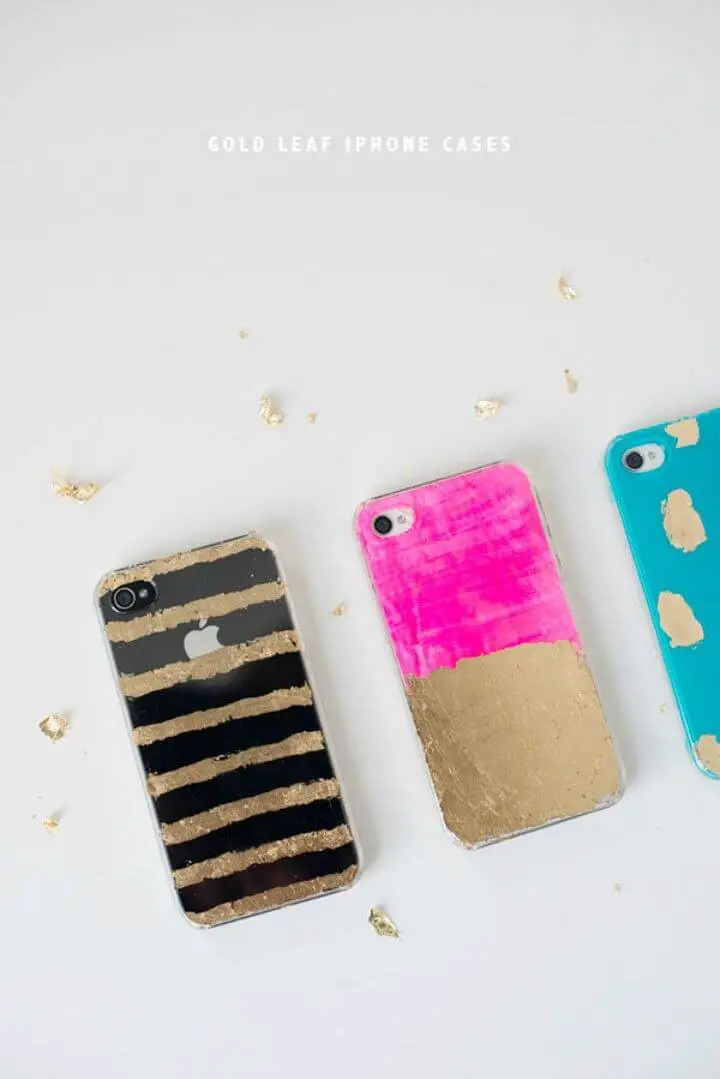
Unlock your creativity and give your iPhone a one-of-a-kind makeover by crafting a bespoke DIY case. With just a few simple tools, including clear iPhone cases, gold leaf, gilding cream, paintbrushes, acrylic paint, and Mod Podge, you can transform your device into a stunning piece of personal art. Start by applying the gilding cream to paint your design of choice onto the case, followed by the delicate placement of gold leaf details. Next, add some color to the rest of the case with your preferred hue, then seal everything in place with a layer of Mod Podge. This unique and stylish project is not only a great way to protect your phone from daily wear and tear, but also a fantastic way to express your individuality and make your device truly stand out.
Make a Fabric-Covered Phone Case
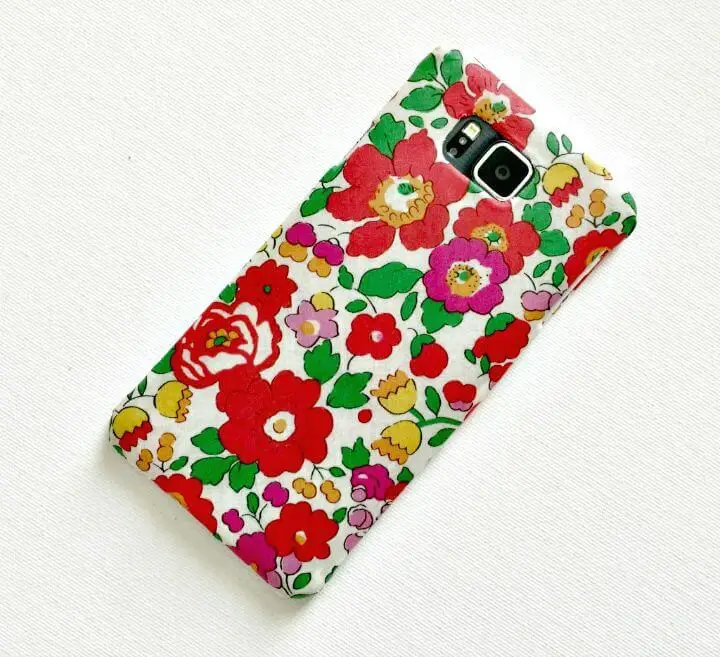
Elevate your mobile experience with a one-of-a-kind DIY fabric-encased phone case that perfectly captures your personal style. This charming project combines the elegance of Liberty London prints, lightweight cotton fabric, and Martha Stewart’s renowned Decoupage formula to create a phone case that not only looks fabulous but also withstands dishwasher cycles. To get started, begin by tracing your phone case onto paper as a template for cutting out your fabric. Next, apply the decoupage medium to both the fabric and the phone case itself. Once the initial layer is set, carefully smooth the fabric over the case, ensuring a seamless fit. Allow the three layers of decoupage to dry for approximately 1.5 hours between each application. As you wait out the drying time, your fabric will begin to transform, losing its tackiness and taking on a soft, subtle texture. One crucial step remains: patiently wait out the 28-day curing process, allowing the fabric to fully harden into a durable, washable phone case that mirrors your unique personality.
Kate Spade Inspired Metallic Polka Dot Phone Case
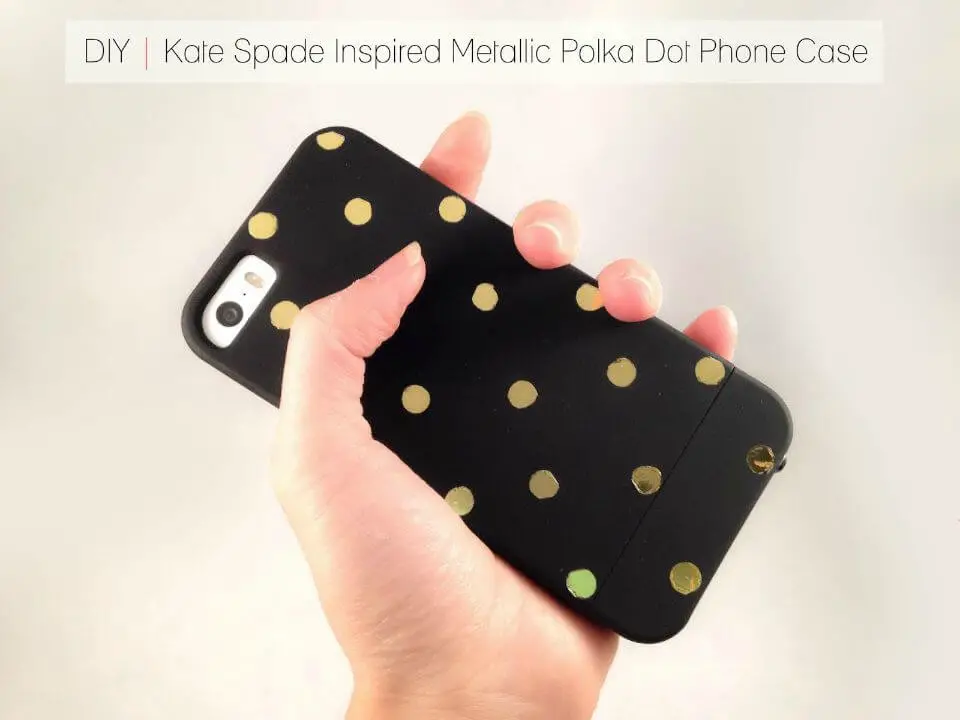
Transform a basic $3 phone case into a show-stopping accessory reminiscent of Kate Spade’s signature style with this DIY metallic polka dot project. By using metallic tape, wax paper, and a hole punch, you can create a one-of-a-kind phone case that rivals trendy designs without breaking the bank. The process is surprisingly straightforward: start by sticking the metallic tape to the wax paper, then punch out small polka dots. Arrange them on your phone case for a chic and customized finish. What’s more, this project offers unparalleled versatility – simply remove the dots and redecorate whenever you want to give your phone case a fresh new look. With this DIY endeavor, you can stay stylish without sacrificing your personal flair.
Simple DIY Lace Phone Case
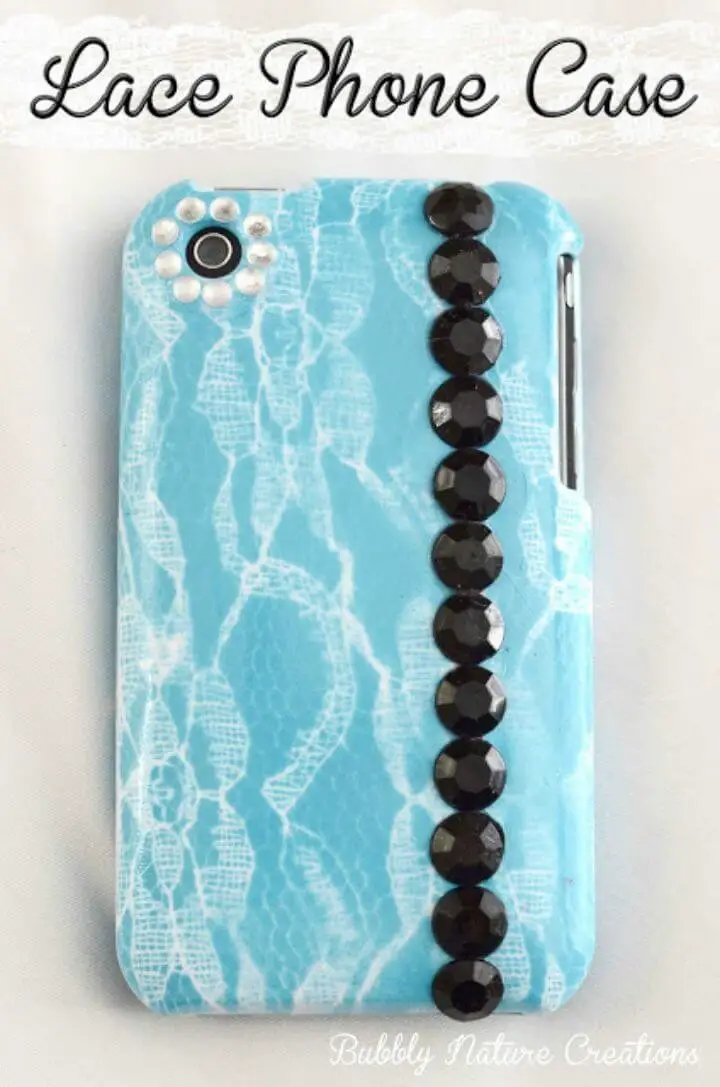
Elevate your phone’s style game by creating a one-of-a-kind DIY lace phone case. This easy project transforms a plain phone case into a beautiful piece of art that showcases your personal flair. To get started, you’ll need a hard plastic phone case, spray paint in your chosen color, tape, wide lace trim or fabric, and optional rhinestones for added sparkle. If your case has an overly glossy finish, a bit of sandpaper can help achieve a smoother surface.
The process is straightforward: simply secure the lace over the case, lightly spray paint it, and then remove the lace to reveal a delicate pattern. For an extra touch of glamour, you can add rhinestones using super glue. While this project’s simplicity makes it accessible to crafters of all levels, durability may be a concern – any suggestions for improving the paint application process are welcome.
With this DIY phone case, you’ll be able to add a touch of vintage charm to your phone and express your unique style. So why not give it a try? With a little creativity and some basic crafting supplies, you can create a truly special accessory that reflects your personality.
DIY Marbled Phone Case
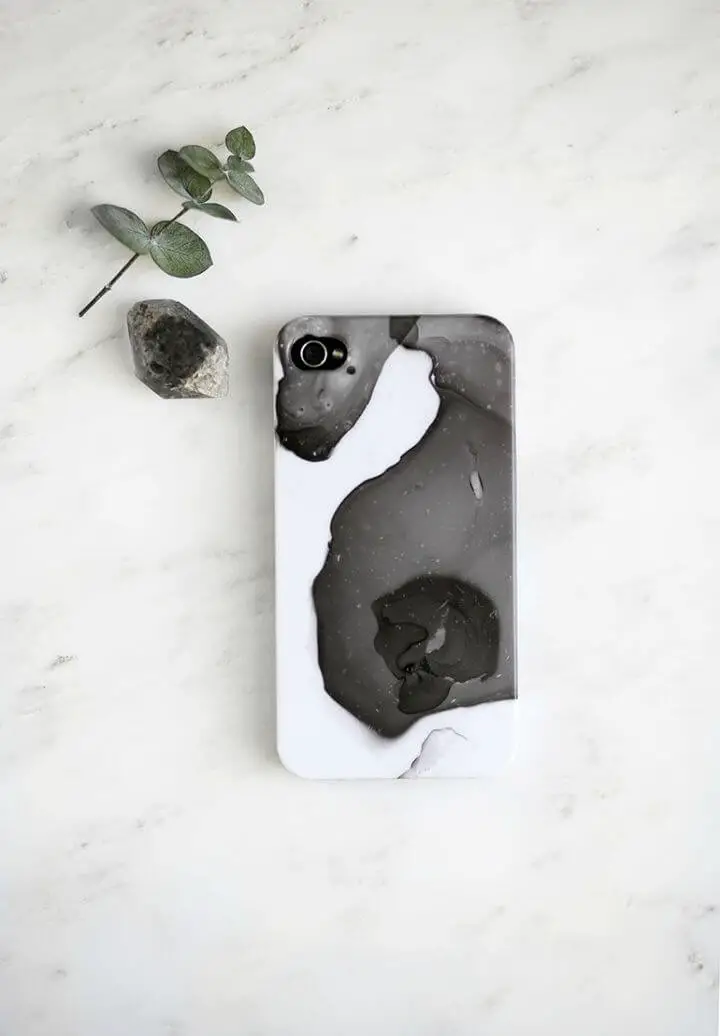
Transform your smartphone’s plain exterior into a vibrant masterpiece with an easy DIY nail polish phone case project. By combining a white phone case, an old bowl, and some colorful nail polish, you can create a one-of-a-kind accessory that reflects your personal style. The best part? This fun and creative crafting session takes just minutes to complete. Gather some friends, order a few supplies, and get ready to unleash your creativity and give your phone accessories a unique makeover.
Pretty Pressed Flower Phone Case
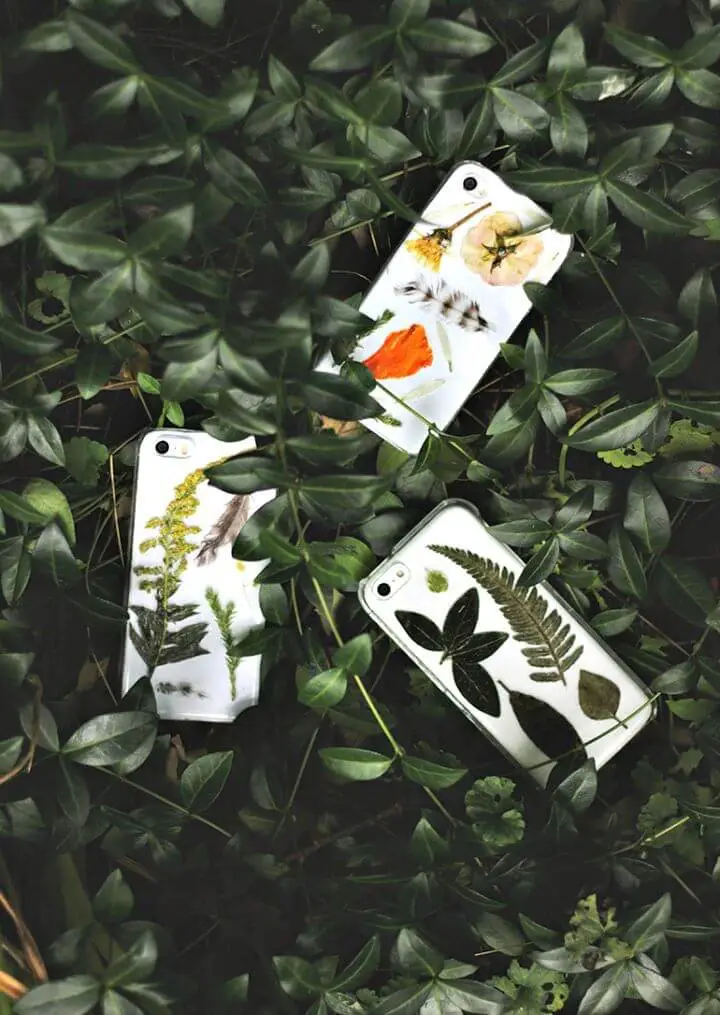
Transform your phone into a stunning canvas with DIY pressed flower phone cases. This simple yet creative project harmoniously blends nature’s charm with practicality. Start by collecting an assortment of alluring ferns, leaves, and flowers. Use a flower press or heavy books to flatten them. Then, choose between clear or white phone case materials, depending on your personal preference. Arrange the pressed flowers on the case, secure them with a touch of Mod Podge glue, and finish with several coats of topcoat for durability. This fun and engaging project not only adds a unique touch to your phone but also keeps the warmth of summer alive throughout the fall. Get creative and craft your own floral phone case masterpiece today!
Quick DIY Sweetheart Phone Case
Surprise your sweetheart with a heartfelt DIY phone case that’s as unique as their love for you. This easy and budget-friendly project is the perfect way to celebrate Valentine’s Day, combining creativity and thoughtfulness in a beautiful, one-of-a-kind gift. With just a few simple materials like a clear phone case, tissue paper, self-adhesive laminating sheets, and scissors, you can create a stunning piece of art that showcases your love and appreciation. This thoughtful gesture is sure to melt their heart and leave a lasting impression.
Nail Varnish Marbling Phone Case Design
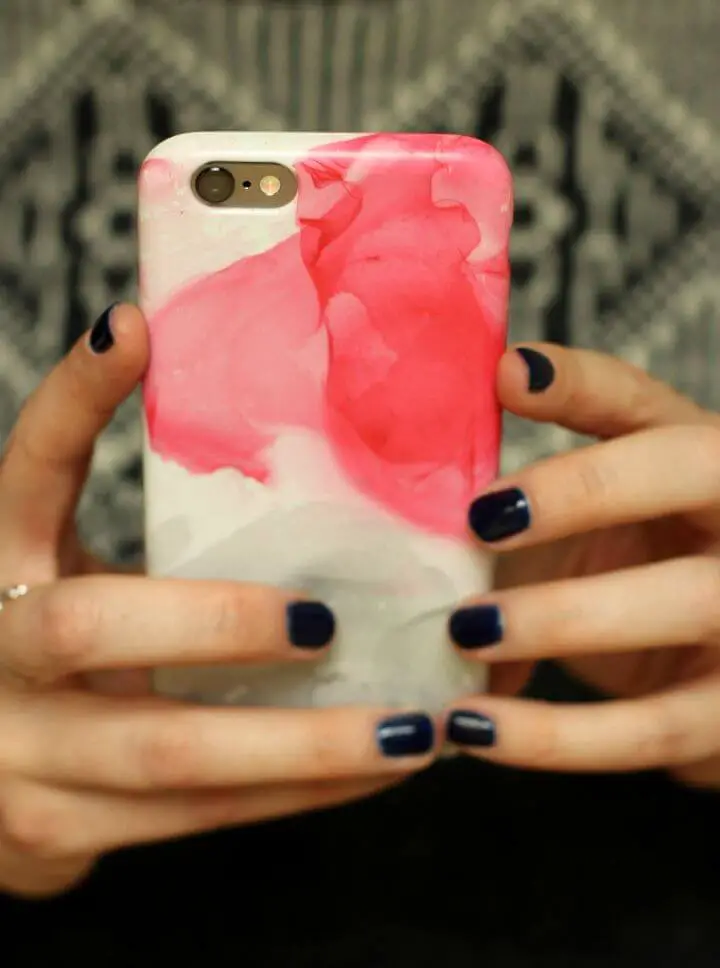
Transform your ordinary phone case into a work of art with this innovative DIY project. By combining nail varnish, warm water, and a dash of creativity, you can create a one-of-a-kind masterpiece that reflects your unique style. This easy-to-follow guide will walk you through the process of making mesmerizing marbling effects on your phone case, using readily available supplies. As you swirl the nail varnish onto the water’s surface, dip your case, and wait patiently for the design to set, you’ll be surprised at how a simple accessory can become a stunning statement piece. Not only will this project provide a practical way to protect your phone, but it also offers an excellent outlet for creative self-expression.
DIY Rainbow Button iPhone Case
Transform your iPhone with a vibrant and functional DIY project that combines creativity and practicality: a rainbow button phone case. This colorful creation not only adds a pop of personality to your device but also provides protection, making it a unique piece of art. To create this masterpiece, you’ll need an affordable clear iPhone case, an array of colorful buttons, E-6000 glue, and optional Mod Podge or Sealer. The assembly process is surprisingly simple, allowing for effortless customization and creativity, as you turn your iPhone into a reflection of your style and personality. Once completed, be prepared to draw admiring glances and consider gifting this charming upgrade to tech enthusiasts in your life.
Dress Your Tech with Printed Vinyl
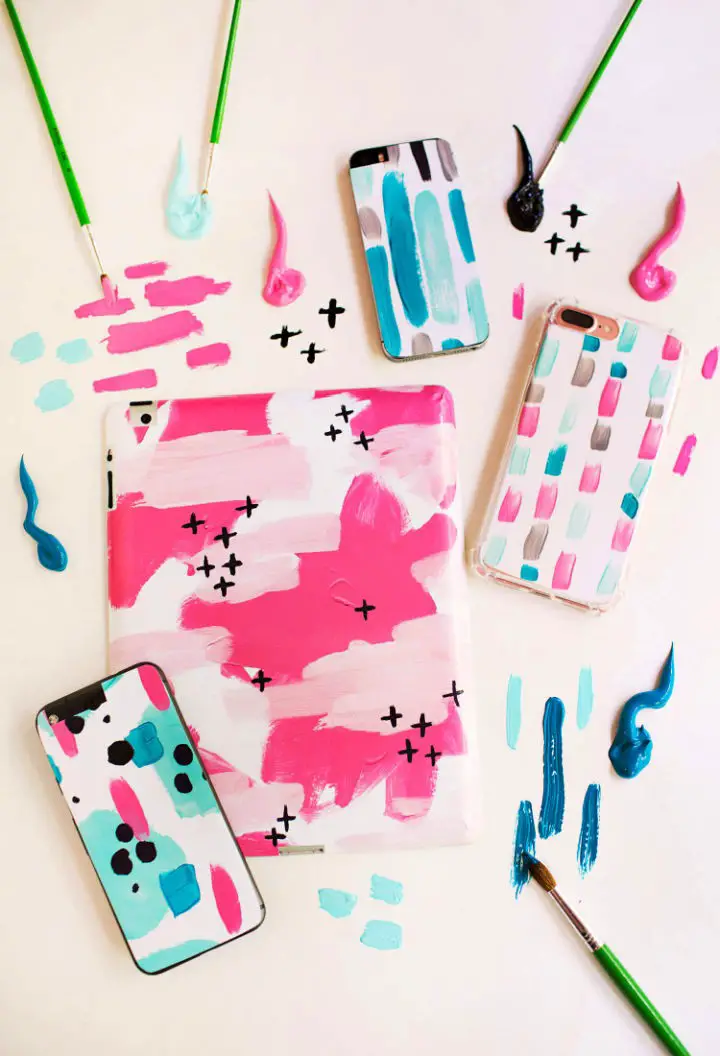
Transforming your everyday tech accessories into unique works of art is now possible with DIY phone case ideas. This creative endeavor combines the joy of painting with the versatility of vinyl decals, allowing you to express your individual style and personality. With a minimal investment in materials, you can turn plain devices into vibrant masterpieces that reflect your artistic vision. The process is not only therapeutic but also rewarding, as you get to create pieces that are truly one-of-a-kind. To start, gather mixed media paper, paints, brushes, scrap notebook paper, an inkjet printer, inkjet vinyl paper, and an X-Acto knife. Let your imagination run wild as you design colorful abstract patterns or any other style that resonates with you. As you embark on this artistic journey, you’ll find the therapeutic benefits of painting and the satisfaction of creating something truly personal.
DIY Printable Smart Phone Case Design
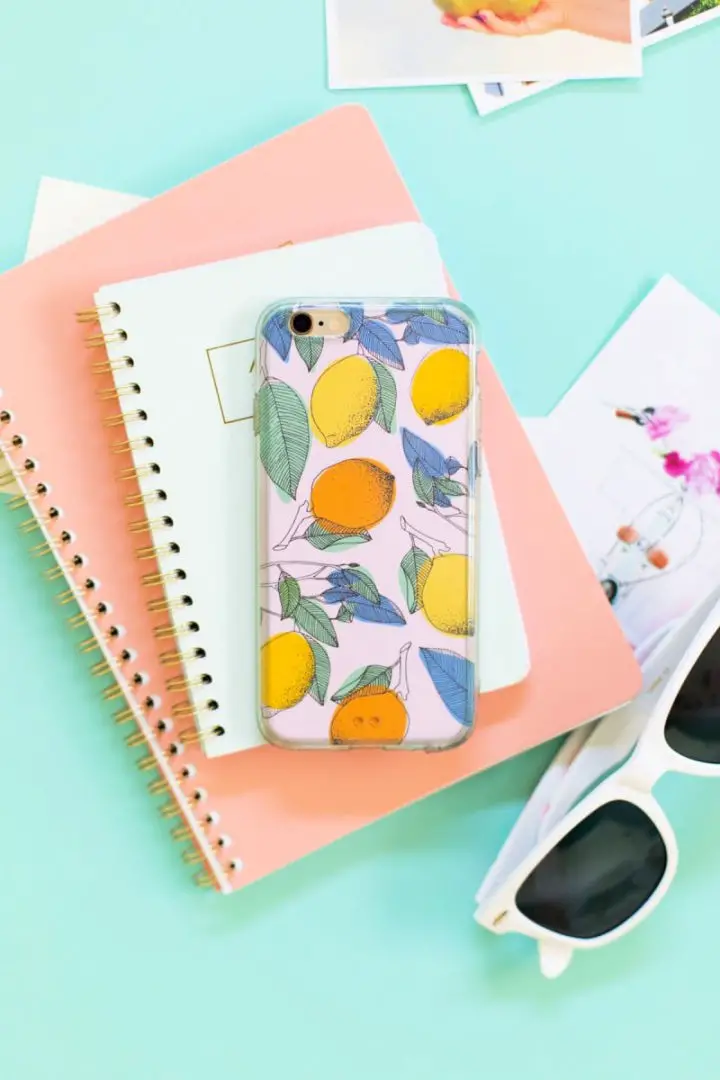
Transform your smartphone into a vibrant travel companion with this DIY guide to creating colorful phone case designs inspired by spring and summer adventures. With just a few simple materials like a clear phone case, printable cases, a printer, scissors or a craft knife, you can bring a pop of color to your daily escapades. Simply print out the design, cut it to fit, and slip it into your phone case for a travel-ready look that’s sure to capture memories of your island getaway or daydreaming escapades.
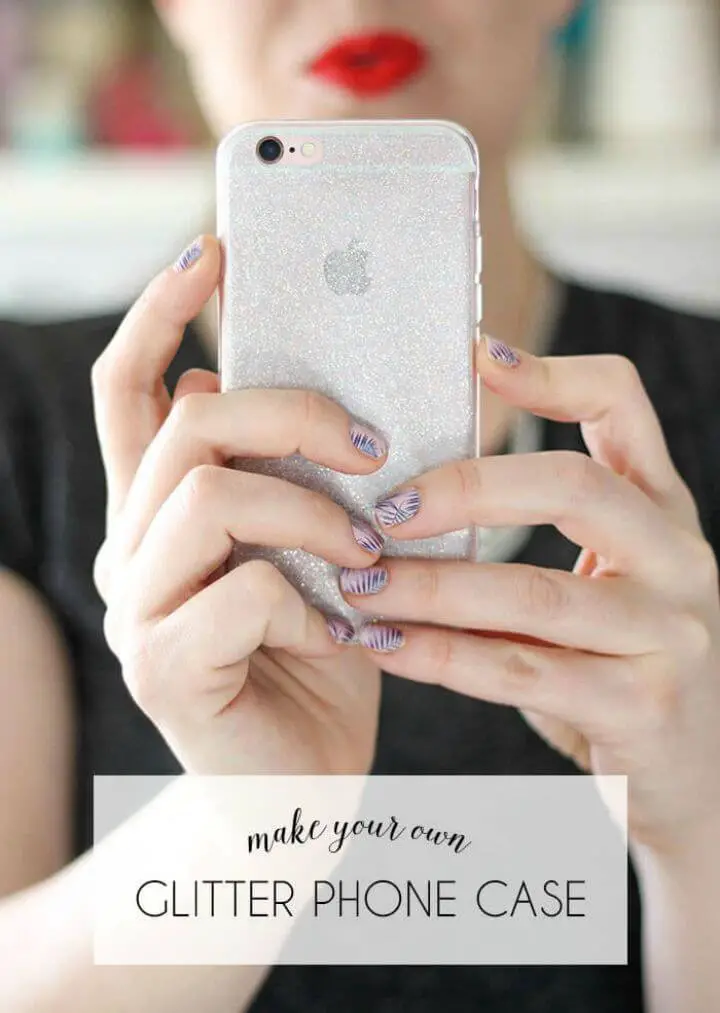
Make Glitter Phone Case in Four Easy Steps
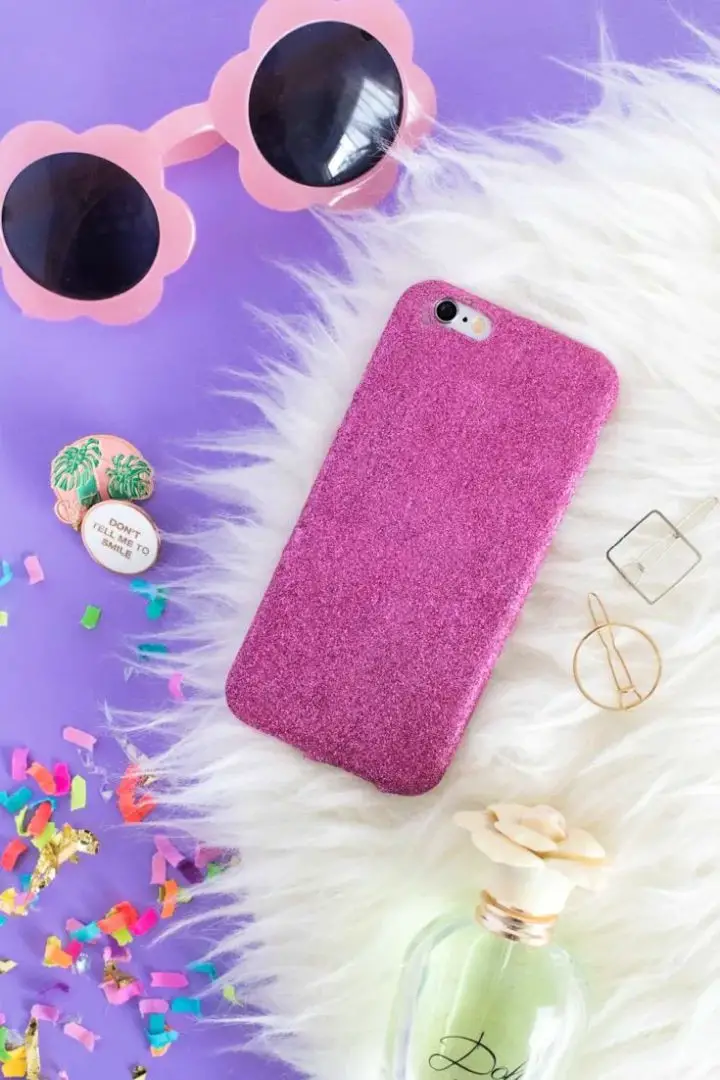
Transform your device into a masterpiece of self-expression by crafting a DIY phone case that’s uniquely yours. Combine simplicity with glamour by creating a dazzling glitter phone case using a clear phone case, Mod Podge Gloss, and your preferred shade of sparkle. For those new to DIY projects, fear not – this endeavor requires minimal effort and can be accomplished in no time. The process begins with a thorough cleaning of the case using rubbing alcohol and cotton balls, ensuring a smooth transformation. This creative outlet is perfect for teens looking to give their devices a back-to-school makeover or adults seeking a fun and personalized accessory. Moreover, these glittery phone cases make thoughtful gifts for friends and loved ones, allowing you to showcase your artistic flair while spreading joy. So why settle for an ordinary phone case when you can create something extraordinary? Get creative and let your individuality shine!
Tapestry iPhone Case Tutorial
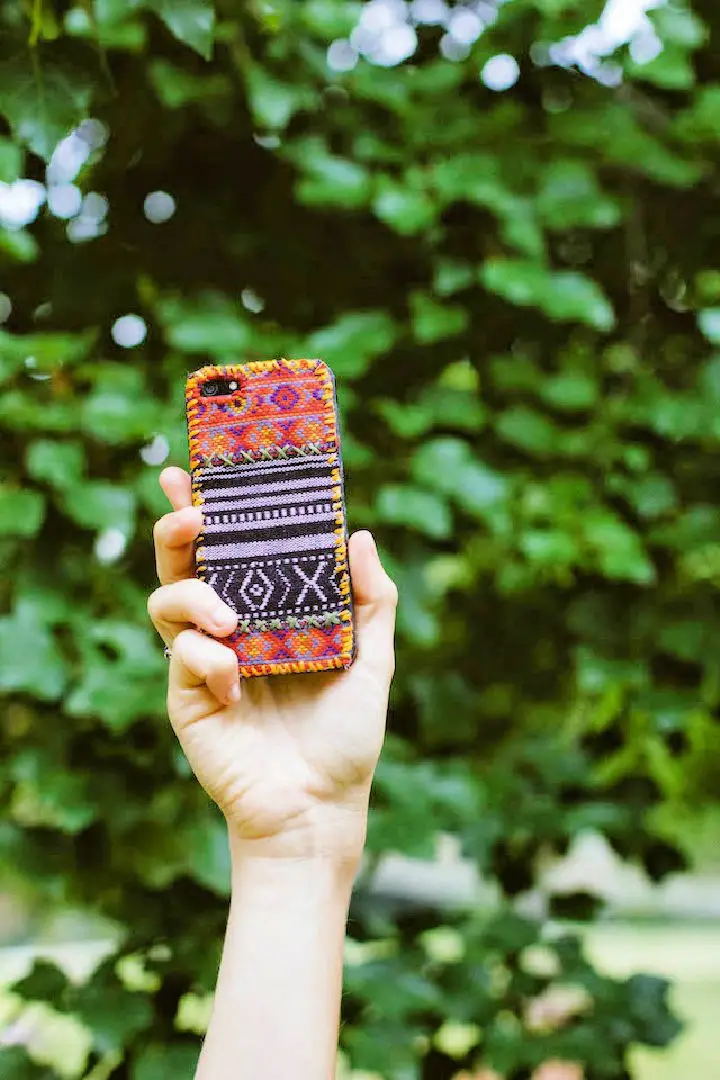
Transform your iPhone case into a one-of-a-kind tapestry masterpiece with this innovative DIY project. With an initial investment of just $2, you can turn a generic case into a personalized work of art that showcases your unique style. This creative endeavor involves repurposing materials like tapestry fabric or ribbon, alongside everyday crafting essentials such as E6000 glue, embroidery thread, a needle, and a sewing machine. By combining functionality with affordability and creativity, this project presents the perfect opportunity to express yourself while adding a touch of uniqueness to your device. Make your iPhone case a true reflection of your personality today!
DIY Phone Case With Cricut
Transform old phone cases into eco-friendly masterpieces with these innovative DIY ideas. By upcycling, you’ll not only reduce waste but also create a unique accessory that reflects your personality. Using a Cricut machine and vinyl, you can design custom phone cases with unlimited possibilities. With Creative Fabrica’s vast library of graphics, fonts, and patterns at your disposal, the creative process becomes seamless. To get started, gather minimal materials: a Cricut Maker or Explore, vinyl, phone cases, weeding tools, acrylic sealer, and your preferred designs. Follow simple instructions to turn an ordinary case into an extraordinary work of art. Elevate everyday technology use with your DIY phone case, showcasing your personal style and flair.
Phone Case with Personalized Vinyl
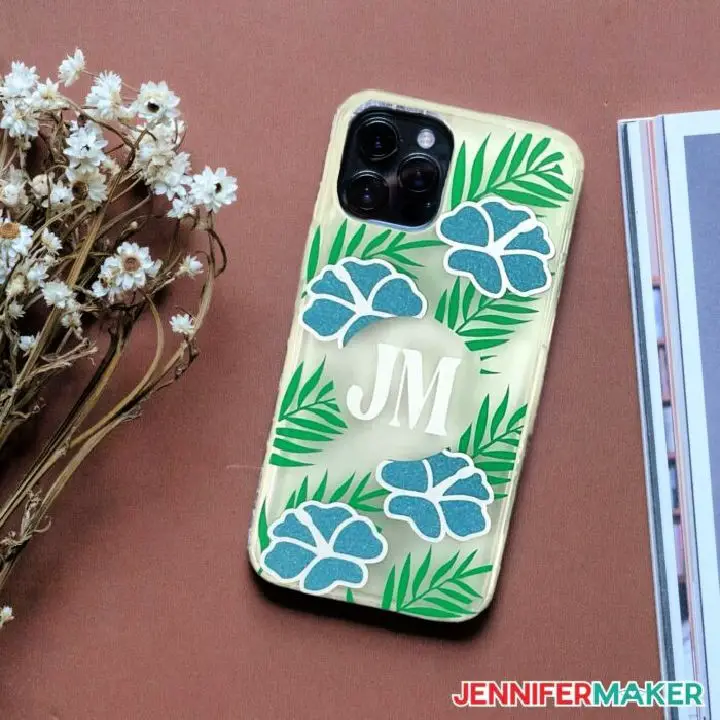
Transform the ordinary into something extraordinary by designing your own personalized vinyl phone case using this easy DIY tutorial. This project is all about adding a touch of uniqueness to your phone’s case, and with the help of a Cricut cutting machine, you can create a wide range of designs that reflect your personal style. Whether you’re looking for a customized iPhone case or want to adapt these instructions for another cell phone model, this guide has got you covered.
With only 5 minutes of preparation time and 20 minutes of busy work, you’ll have your very own one-of-a-kind phone case ready in just 45 minutes. And the best part? This DIY project is surprisingly affordable, with an estimated cost of $20. Imagine having a phone case that truly reflects your personality – it’s the perfect way to keep your phone trendy and make a statement.
So why wait? Start crafting your own unique phone case today and get ready to show off your personalized style!
Conclusion:
As we bring our journey of 25 innovative DIY phone case ideas to a close, I hope you’ve been motivated to venture into the realm of customizing and safeguarding your device with flair. This comprehensive guide aimed to provide everything you need to craft a one-of-a-kind phone case, from selecting eco-friendly materials to refining advanced techniques for a polished finish. The essence of creating an exceptional DIY phone case lies in embracing patience, nurturing creativity, and persevering through any challenges that may arise. So, gather your supplies, follow our step-by-step process, and give your phone the makeover it deserves with confidence!
