Transforming ordinary paper into extraordinary origami hand fans is an art form that combines cultural heritage with personal creativity. This ancient craft not only yields beautiful, functional accessories but also serves as a relaxing hobby and a unique gifting option. By distilling the process into 15 DIY paper fan projects, anyone can tap into their creative potential and breathe new life into traditional crafts. As we delve into the world of origami hand fans, you’ll discover not just the necessary materials and step-by-step methods but also the rich cultural tapestry that surrounds these charming artifacts. With each section carefully designed to guide you through the crafting process, you’ll be well on your way to creating a breezy accessory or decorative piece that reflects your personal style. Join us as we embark on this creative journey, where imagination and elegance come together in perfect harmony.
The Cultural Tapestry of Paper Fans
Paper fans are not just simple tools to beat the heat; their significance extends far beyond functional utility. In many Asian cultures, these delicate wonders have been an integral part of daily life and cultural heritage for centuries. As we explore their storied past, it’s clear that paper fans hold more than just a physical purpose – they carry with them the history and traditions of generations.
A Symbol of Elegance and Artistry
In Japan, paper fans have long been intertwined with tradition and cultural iconography, often evoking images of geisha, samurai, and the exquisite craftsmanship of kimono. With their rich history, these fans have fulfilled various roles, ranging from ceremonial props to symbols of prestige and social standing. The Japanese fan, or ‘sensu,’ has undergone a transformation over time, becoming a canvas for artistic expression and a subtle means of conveying meaning within the complex etiquette of Japan’s traditional culture.
Fans Across Dynasties
China’s history with paper fans dates back over 3,000 years, with the earliest known examples emerging in the 2nd century BCE. Initially, these delicate items were reserved for royalty and nobility, crafted from luxurious materials such as feathers and silk. As time passed, fans became more widespread, with bamboo and paper versions gaining popularity among the general population. The Chinese fan, or ‘shan’, serves not only to provide relief from the heat but also embodies elegance and serves as a canvas for artistic and poetic expression.
The Fan’s Journey Westward
In Victorian England, the allure of paper fans transcended Asian borders, captivating the hearts of the British elite. This delicate art form evolved into a subtle language, allowing individuals to convey complex emotions and messages in a society governed by strict social norms. The fan became an indispensable accessory for the fashionable ladies of the era, serving as a discreet means of expressing everything from approval to envy.
Preserving the Legacy
Paper fans are a treasured relic of cultural heritage and artisanal expertise. As coveted collectibles, mementos, and even sources of modern inspiration, they embody the rich stories and traditions that have been passed down through generations. By delving into their history and cultural significance, we not only marvel at their beauty but also gain insight into the people and communities who have shaped them over time. This understanding enriches our appreciation for paper fans, making them a true treasure to behold.
How to Make a Paper Fan: Step by Step Guide
Crafting a Japanese fan can be a captivating experience, allowing you to create something both aesthetically pleasing and practical. This DIY project offers the perfect opportunity to get creative, whether it’s for a costume, decorative piece, or simply as a fun hobby. With a little patience and imagination, anyone can successfully follow this step-by-step guide and produce their very own Japanese fan.
Necessary Materials
To craft a traditional Japanese-style lantern, you’ll need to gather the following materials: a set of sturdy bamboo sticks, which will form the structure’s framework. You’ll also require a thin yet durable pin or small nail to hold everything together securely. To add an extra layer of durability and aesthetic appeal, use paper glue to bond your chosen paper to the lantern’s surface. The traditional choice for this task is washi paper, renowned for its strength and beauty. A good pair of scissors will also come in handy as you trim and shape your materials to achieve the desired look.
Step 1: Lay Out the Sticks
To begin crafting the rustic fan, start by carefully arranging ten sticks parallel to each other on a level surface. Ensure the sticks are spaced equally apart and aligned at one end, preserving harmony throughout the structure.
Step 2: Secure the Sticks Together
To assemble the structure, start by inserting the thin pin or nail through the pre-drilled holes in each stick. These holes are typically located near one end of the stick. If your sticks don’t have pre-made holes, you’ll need to create your own using a small drill or needle. Once all the sticks are threaded onto the pin or nail, twist it gently to secure them together and ensure they’re evenly spaced.
Step 3: Position the Sticks Evenly
To establish a solid base for your decorative fan, begin by arranging the sticks in a semi-circular formation. It’s crucial to maintain consistent spacing between each stick to ensure a symmetrical and visually appealing outcome. By doing so, you’ll create a foundation that allows for easy construction of the rest of the piece.
Step 4: Prepare the Paper
Begin by positioning your semi-circular arrangement of sticks on the selected paper. Utilize a pencil to carefully outline the perimeter of the sticks, tracing the shape of the fan’s arc. Next, employ scissors to trim away any excess paper, adhering to the line you’ve created, ensuring a precise and symmetrical cut.
Step 5: Make and Attach the Fan Surface
To create a smooth surface for your fan, draw a smaller arc within the initial cutout. This will prevent the edges of the paper from extending beyond the sticks when you apply glue and attach it to the framework. When applying adhesive, use a sparing touch on each stick, then carefully place the paper over them, pressing gently to ensure a bubble-free and creaseless bond.
Step 6: Let It Dry
Before handling your fan, ensure that it has been given ample time to fully dry. The drying process can take several hours, depending on the type of glue used in its construction. It’s crucial not to use or fold the fan until it is completely dry, as this can prevent damage to the delicate materials and craftsmanship involved. A patient approach will help you preserve your work for a long time.
Step-by-step Video Tutorial
While a step-by-step video tutorial on YouTube, such as ‘How to Make Japanese Fans’, provides an in-depth visual guide to making Japanese fans, this written instruction offers a comprehensive overview of the process. The combination of both formats allows for a clear understanding and easy replication of each technique. Crafting your own Japanese fan can be a thrilling and fulfilling experience, permitting personal expression and incorporating traditional nuances.
Unleashing Creativity: Personalizing Your DIY Paper Fans
Transforming ordinary paper into extraordinary art is an inviting way to tap into your creative side and infuse any gathering or living space with a personalized touch. The process of crafting custom paper fans is not only an excellent way to add a whimsical flair to parties, rooms, or events but also provides a delightful outlet for self-expression. With a few simple steps, you can turn plain paper into one-of-a-kind masterpieces that reflect your unique style and personality.
Choose Your Palette
When it comes to crafting a unique visual identity for your event, start by choosing a color scheme that resonates with your personality or aligns with the theme. Consider bold and vibrant hues, soft pastel shades, or even a single-color focus. To add an extra layer of visual interest, experiment with combining patterns and solid colors. This harmonious blend can result in a visually striking design that truly reflects your event’s unique character.
Add Textures and Layers
To add depth and visual interest to your fan art, experiment with combining different textures and materials. Try incorporating unique textures like tissue paper, cardstock, or even fabric into your design. By layering these various elements, you can create a visually striking 3D effect that makes your fans truly pop.
Decorate with Details
Elevate your fan decor to the next level by incorporating personal touches like stickers, stamps, ribbons, and washi tape. These small flourishes can breathe new life into a plain fan, turning it into a unique masterpiece. For those who feel artistic, consider drawing or painting directly onto the paper to add an extra layer of creativity and make your fan truly one-of-a-kind.
Make It Interactive
Allow children to add their unique touch to the project by engaging them in a creative activity, such as doodling on the paper prior to folding. Not only does this personalized approach make the finished product more meaningful, but it also creates a special and memorable crafting experience for kids.
Handle with Flair
Customizing the handle of a fan is an opportunity to unleash your creativity and add a personal touch. While the fan itself can be modified in various ways, the handle provides a blank canvas just waiting for your artistic flair. Consider painting the sticks with vibrant colors or adorning them with ribbons, beads, or other decorative elements that reflect your personality or match the style of your fan. Whatever approach you choose, the end result is sure to be a one-of-a-kind accessory that not only serves its functional purpose but also showcases your individuality.
Functional and Fashionable
Your audience’s enthusiasm knows no bounds – they can seamlessly blend function and fashion. Fans become not just practical tools for beating the heat, but also trendy accessories or special party favors. By embracing these creative ideas, you’ll craft one-of-a-kind paper fans that showcase your imagination and flair. Let your creativity shine while keeping it easy to follow and enjoyable!
Crafting Safely: Essential Safety Tips for DIY Paper Fans
For crafters of all ages, creating DIY paper fans is an enjoyable and engaging activity that can bring hours of creative fulfillment. But before you start cutting, folding, and decorating, it’s crucial to prioritize safety to avoid any unpleasant experiences. When crafting with family or friends, these simple yet essential safety tips will ensure a fun and stress-free experience for everyone involved.
Choose the Right Workspace
Create an ideal environment for your craft by choosing a well-lit area that provides ample space to move around freely. A clutter-free and organized workspace not only minimizes the risk of accidents but also enhances the overall experience, allowing you to focus on the creative process without distractions.
Handle Tools with Care
When utilizing scissors and other cutting instruments, it’s essential to exercise caution. This is particularly crucial when children are present, as they may require guidance on proper usage. To minimize risks, provide young ones with child-friendly safety scissors and maintain close supervision during their use. Additionally, always prioritize your personal safety by cutting in a direction away from your body and keeping your fingers at a safe distance from the blades.
Be Mindful of Adhesives
As you work with adhesives and tapes, remember to prioritize safety and consider potential allergens. For projects involving children, choose hypoallergenic options to minimize the risk of adverse reactions. Additionally, take precautions when working with strong-smelling materials by ensuring proper ventilation to avoid inhaling harmful fumes.
Paper Cuts Prevention
When navigating the realm of paper handling, it’s easy to overlook the importance of caution. However, the consequences of neglecting this simple precaution can be as painful as they are avoidable: paper cuts. A minor mishap that can occur when folding or cutting paper, these tiny tears can quickly escalate into a larger problem if not addressed. Fortunately, there’s a solution in sight – employing tools like paper folders or bone folders can significantly reduce the risk of paper cuts by allowing for clean, precise folds.
Keep Your Crafting Area Tidy
Maintaining a tidy environment by consistently removing debris and disposing of waste products has a dual benefit. Not only will it enhance the aesthetic appeal of the area, but it will also significantly decrease the likelihood of incidents such as falls, trips, and mishaps occurring, thereby promoting a safer living or working space.
Store Tools Properly
When you’ve completed your DIY paper fan project, it’s crucial to secure all tools and materials in a location inaccessible to young children. This is particularly important when it comes to sharp objects that could cause injury if not properly stored. By prioritizing safety throughout the crafting process, you can rest assured that everyone involved will be protected from harm. As a result, you’ll be able to fully appreciate the creative and enjoyable aspects of DIY crafting without any undue stress or concern.
Overcoming Obstacles: Troubleshooting DIY Paper Fan Creation
When attempting to craft DIY paper fans, unexpected challenges can arise. To help you navigate these obstacles and achieve success, this guide outlines the most common issues that may arise during the creative process, providing valuable solutions to get you back on track.
Fan Folds Aren’t Lining Up
When dealing with uneven fan folds, it’s often due to inconsistent folding techniques. To achieve crisp, symmetrical results, incorporate precision into your process. Begin by introducing a small crease at the edge, then proceed to fold in an accordion-like manner, maintaining consistent fold widths throughout. By doing so, you’ll eliminate any discrepancies and ensure your fan folds align perfectly.
Fan Won’t Stay Open
To resolve the issue of a fan that won’t stay open, make sure the central seam is securely fastened. You can achieve this by applying a strong adhesive or utilizing a stapler to attach the ends of the paper together at the center. When employing glue, allow it to fully dry before unfolding the paper to ensure a sturdy and reliable fan.
Paper Rips During Folding
When working with delicate papers, it’s crucial to take precautions to ensure they don’t tear during the folding process. A simple solution is to opt for a sturdier paper that can withstand the folding without compromising its integrity. Alternatively, you can reinforce the folds with clear tape to prevent any damage. To achieve a smooth fold, apply gentle yet even pressure to avoid applying too much stress on the paper, which could lead to tears or creases.
Fan Looks Lopsided
Ensuring symmetrical alignment is crucial when crafting a balanced fan. A common issue that can lead to an uneven design is an off-center string attachment. To prevent this, take a moment to accurately measure and mark the precise center of your paper strip before securing the string or using a clip. This simple step ensures a harmonious distribution of fibers, resulting in a visually appealing and well-balanced fan.
Decorations Fall Off
When decorations fall off your DIY paper fan, it’s often a sign that the adhesive isn’t suitable for the material. To resolve this issue, consider using a hot glue gun for more substantial embellishments or double-sided tape for lighter ones. Ensure the surface is clean and dry before applying any decorations to achieve a secure bond. By heeding these troubleshooting tips, you’ll be well-equipped to create stunning DIY paper fans that exude perfection with a combination of patience and practice.
Preserving Your Paper Fans: Maintenance and Storage Tips
When you’ve invested time and effort into crafting unique DIY paper fans, it’s essential to take care of them to preserve their beauty and extend their lifespan. To keep your handmade fans in pristine condition, consider these simple yet effective tips for maintenance and storage.
Keep Them Clean
When it comes to maintaining the integrity of paper fans, one of the most crucial tasks is removing dust and debris that tends to accumulate over time. This is particularly important if your fans are displayed or stored for extended periods. To effectively clean these delicate items, begin by using a soft, dry cloth to gently wipe down the surface. For more intricate designs featuring crevices or narrow spaces, consider employing a soft-bristled brush or compressed air to meticulously remove dust without causing any damage to the paper. By taking these simple steps, you can ensure that your paper fans remain in excellent condition and continue to delight for years to come.
Avoid Moisture
When it comes to storing paper fans, it’s essential to maintain a dry environment to prevent warping and damage. Ideally, keep them in an area with low humidity, such as a closet or shelf away from any sources of moisture. If you’re particularly concerned about maintaining a dry space, consider using silica gel packets in your storage area to actively absorb excess moisture. By doing so, you can ensure your paper fans remain in good condition and continue to perform well when needed.
Flat Storage
When storing fans that are not in use, it’s essential to maintain their shape and prevent damage. To achieve this, store them flat in a storage box or drawer rather than stacking them on top of each other. If you do need to stack them, insert a piece of acid-free paper between each fan to act as a buffer and protect the surfaces from potential scratches.
Prevent Fading
To preserve the vibrant hues of your paper fans, it’s essential to keep them away from direct sunlight. This can be achieved by storing them in a dark, enclosed space or utilizing a box with a light-blocking material. If you intend to display your fans, consider implementing a rotation system to ensure that each fan spends an equal amount of time facing the light source, thereby minimizing prolonged exposure and the subsequent color degradation.
Repairing Damage
When issues arise with your fan’s material – such as tears or unfolding of seams – prompt and simple repairs are possible using clear tape or a glue stick. To achieve the most effective fixes, address any damage quickly to prevent further deterioration.
Reusable Containers
To extend the lifespan of your paper fans, consider utilizing clear plastic containers with lids for storage. This approach not only safeguards them from dust and light exposure but also enables you to visually inspect the contents without opening the container, simplifying the process of locating a specific fan. By adopting proper maintenance and storage practices, you can ensure your paper fans remain in good condition, ready for use on future occasions.
Eco-Friendly Farewell: Disposing of DIY Paper Fans
As you prepare to bid farewell to your handcrafted DIY paper fans, it’s crucial to ensure a environmentally responsible exit. To avoid any negative ecological consequences of your creative endeavors, follow these guidelines for disposing of your paper fans in an eco-friendly manner.
Recycling Your Paper Fans
When it comes to recycling paper fans, the good news is that most of them can be reused. The key is to make sure you remove any non-paper components like ribbons or plastic decorations beforehand. Once you’ve done that, flatten the fans out to save space in the recycling bin and prevent any contaminants from entering the mix. Make sure they’re also completely dry and free from any food residue.
Composting: Returning to Nature
When it comes to disposing of plain, uncoated paper fan remnants, composting presents a fantastic opportunity to give back to nature while creating nutrient-rich soil. Simply tear the fans into smaller fragments to facilitate the decomposition process and watch as they transform into a valuable addition to your garden’s ecosystem.
Repurposing with Purpose
Before discarding paper fans, explore alternative uses that can breathe new life into them. For instance, you can repurpose them as custom book covers, add an artistic twist to origami projects, or utilize their sturdy structure as packing material for delicate items. By doing so, you’ll not only reduce waste but also showcase your creativity and resourcefulness.
Donation: Sharing the Joy
When discarding your DIY paper fans, consider giving back to the community by donating them to local schools, art programs, or community centers. These institutions can utilize them for educational purposes, such as teaching creative skills, or incorporate them into event decorations, fostering a sense of excitement and engagement. By adopting eco-friendly disposal methods, you’ll not only minimize waste but also contribute to a more sustainable future. Every small action counts, and your thoughtful approach will help pave the way for a greener tomorrow.
FAQs About DIY Paper Fans
Crafting DIY paper fans sparks imagination, but it also raises several questions. To empower your creative endeavors, here’s a collection of answers to frequently asked inquiries, ensuring you embark on this artistic adventure with precision and panache.
What type of paper is best for making paper fans?
When it comes to crafting the perfect fan, a reliable starting point is selecting a suitable paper material. To achieve optimal results, you’ll want to opt for a lightweight yet sturdy option that can withstand the demands of folding and shaping. For this purpose, three top contenders emerge: scrapbook paper, card stock, and even basic copy paper for more straightforward designs. Each has its unique strengths, making it crucial to consider your specific creative vision before making a final decision.
How do I make my paper fan stay open?
To ensure a secure fan installation, consider reinforcing the base with a reliable fastening method. A simple yet effective approach is to utilize a paperclip or staple to prevent the fan from shifting or falling over. Alternatively, you can opt for a more permanent solution by employing a strong adhesive or durable tape. These measures will help keep your fan stable and functioning efficiently.
Can I make a paper fan using recycled materials?
For a creative and eco-friendly approach, feel free to repurpose materials like old newspapers, book pages, or any other sturdy paper you can find. Before getting started, make sure they’re clean and strong enough to withstand the folding process without tearing or ripping.
How can I prevent my paper fan from tearing?
When it comes to creating origami, using high-quality paper is crucial for achieving the desired results. Opting for a thicker sheet of paper or reinforcing the folds with clear tape can significantly improve the overall appearance and durability of your final product. To avoid any mishaps, approach folding with caution and finesse, taking care not to pull or tug on the paper excessively. Instead, focus on gentle, deliberate movements that allow you to maintain control and precision as you shape the paper into its desired form.
What can I use for the handle of my paper fan?
When crafting your DIY wind chime, you have a variety of materials at your disposal to create the perfect sound-producing mechanism. Consider using popsicle sticks, wooden skewers, or even sturdy straws as the foundation for your project. Secure them to the base of the fan using a reliable adhesive like glue or a strong fastening agent such as tape.
How do I make a rounded edge on my paper fan?
To achieve a seamless transition from folded to unfolded, begin by delicately trimming the edges of the fan to create a rounded silhouette. Perform this step prior to fully extending the fan’s blades.
Can I decorate my paper fan with markers or paint?
When it comes to folding paper crafts, a crucial step often gets overlooked: ensuring the surface is completely dry and free of any residue from inks or paints. This simple yet important detail can mean the difference between a crisp, precise fold and an unsightly smudge that mars the entire design.
Is it possible to make a two-sided paper fan?
To create a unique and eye-catching craft, combine two pieces of paper, ensuring that the decorative sides are facing outward. Once the adhesive has dried, proceed to fold the papers together, taking care not to smudge or disturb the designs. This innovative approach will add an intriguing texture and visual interest to your finished project.
How do I make a large paper fan?
To accommodate larger fans, consider using larger sheets of paper or combining multiple folded sections by attaching them to each other at the base and then securing the handle.
Can I make a paper fan without using glue?
When it comes to securing the base of your DIY project, you may not need to rely on traditional adhesives like glue after all. A quicker and more versatile approach might be to utilize everyday office supplies like staples or paper clips. By doing so, you’ll not only save time but also provide a secure hold for your project’s foundation.
How do I store my paper fans when not in use?
To ensure the longevity of your paper fans, store them in a flat, dry area. When stacking multiple fans, separate each one with acid-free paper sheets to prevent sticking. Additionally, by addressing these frequently asked questions, you’ll be well-prepared to create stunning and long-lasting paper fans. As with any skill, mastering the craft requires practice, so don’t be afraid to try out different techniques and materials as you develop your skills.
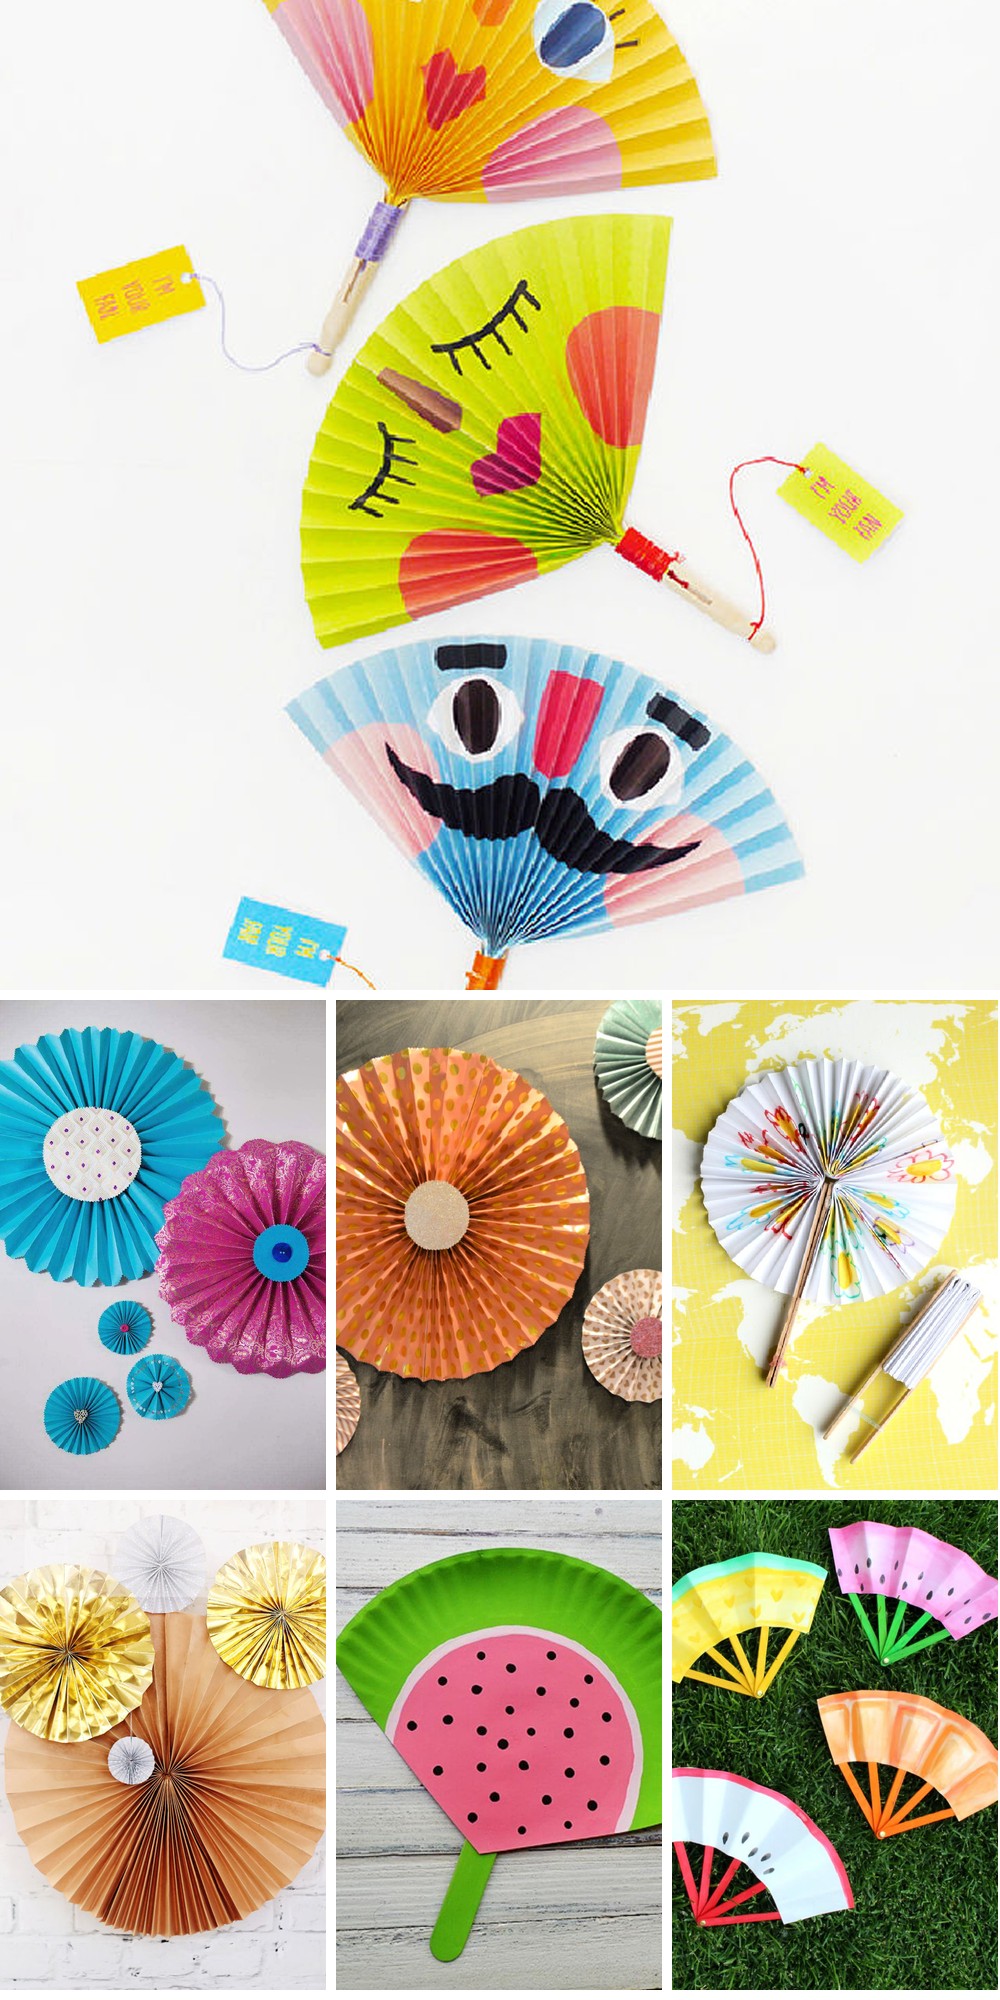
15 DIY Paper Fans to Make Your Own Origami Hand Fans
Unleash your creativity and create stunning origami hand fans with this collection of 15 simple and accessible DIY paper fan tutorials. Whether you’re looking for a unique party favor or a thoughtful gift, these elegant fans are perfect for any celebration.
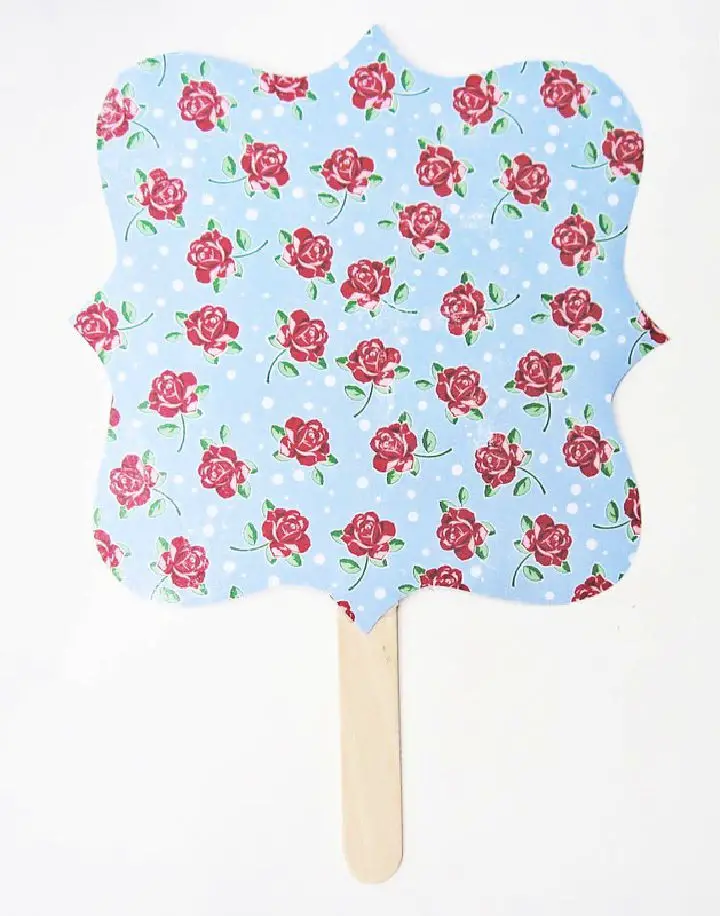
Quick and Easy DIY Paper Fans
Creating personalized paper fans with kids is an enjoyable and simple summer craft project that’s perfect for sparking imagination and staying cool. To get started, use the DIY Party Board to cut out colorful scrapbook paper into fan shapes. Next, punch holes in popsicle sticks and secure them using brads. Then, glue the sticks onto the paper, fold, and voilà! Your unique handcrafted fan is ready to keep you or your little ones cool on hot summer days. This activity not only fosters creativity but also provides a functional accessory for beating the heat. Don’t be afraid to choose bold and vibrant papers to add an extra layer of fun to your creation!
Make Your Own Summer Paper Fans
Looking for a fun and creative summer activity that will engage kids? Look no further than making paper fans with Mr Printables! This simple and entertaining project requires just a few basic materials, including paper, wooden dolly pegs, and string. With free printable templates and easy-to-follow instructions provided by the site, anyone can create these colorful fans. Not only do they offer a great way to beat the heat on warm days, but crafting paper fans also sparks imagination and encourages creativity. Take it to the next level by personalizing your fans with unique paper designs or adding a touch of color with blank versions. As you fold each piece, enjoy the process and watch as the smiles grow – and so does the refreshing breeze!
Homemade Paper Fruit Fans for Kids
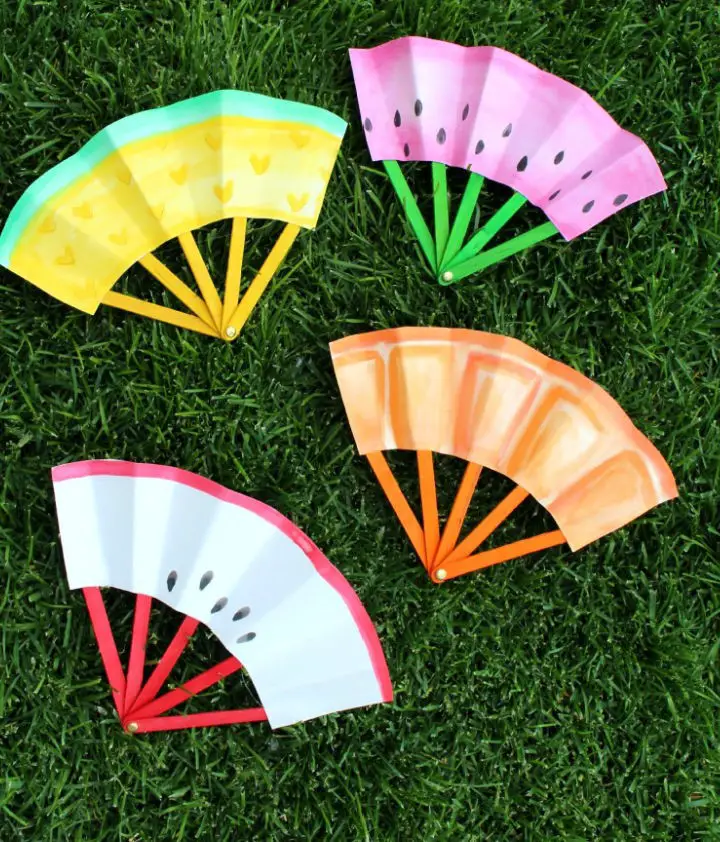
Unleash your little ones’ creativity this summer by crafting DIY Fruit Fans with The Idea Room’s simple and fun approach. As the mercury rises, let your kids stay cool while exploring their artistic side. All you need is a drill, colored Popsicle sticks, watercolor paints, paper, and either a glue gun or regular glue. Follow straightforward steps to design, paint, and assemble these charming fans. Add personal touches with fruit shapes or patriotic designs for special occasions. This engaging activity will let your kids enjoy the crafting process just as much as the refreshing results.
How to Make a Summer Paper Fan for Kids
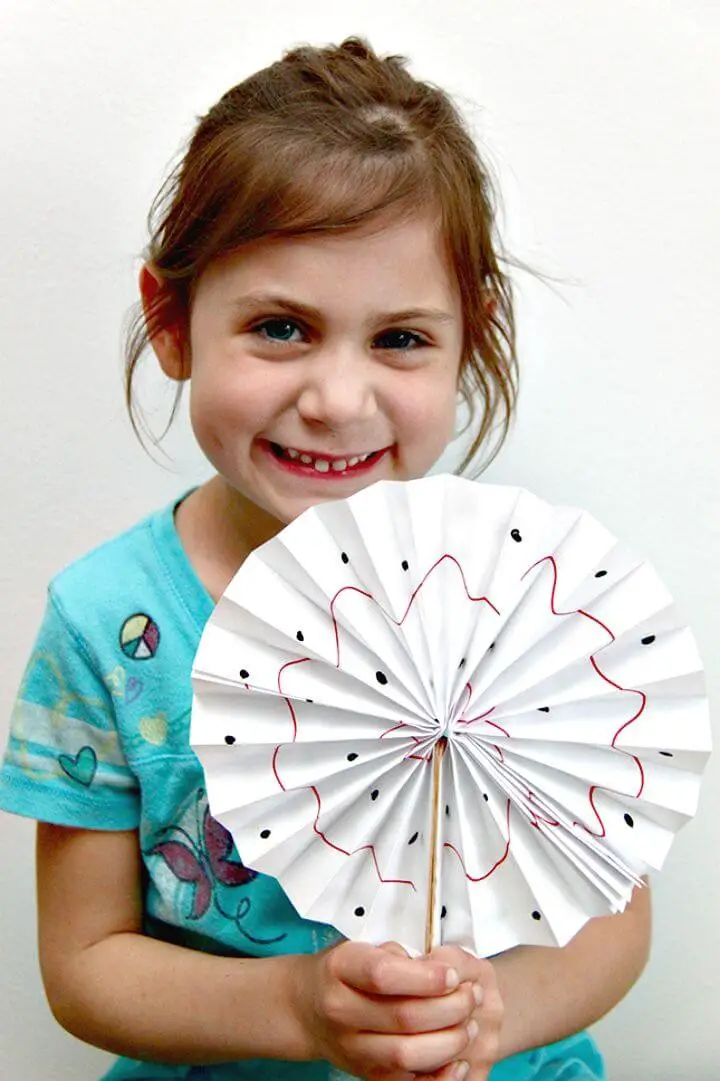
Beat the summer heat with a fun and creative activity that’s perfect for kids! With just a few simple materials like paper, paint markers, glitter, and popsicle sticks, you can create a one-of-a-kind paper fan that not only keeps you cool but also fosters artistic expression and fine motor skills. Simply follow our easy-to-follow guide to make your very own vibrant paper fan, perfect for beach trips or poolside play. With an adult’s help, kids can even add some hot glue gun steps to take their creations to the next level. Let the breeze of your handmade fan delight you as you enjoy the sunshine with your little ones.
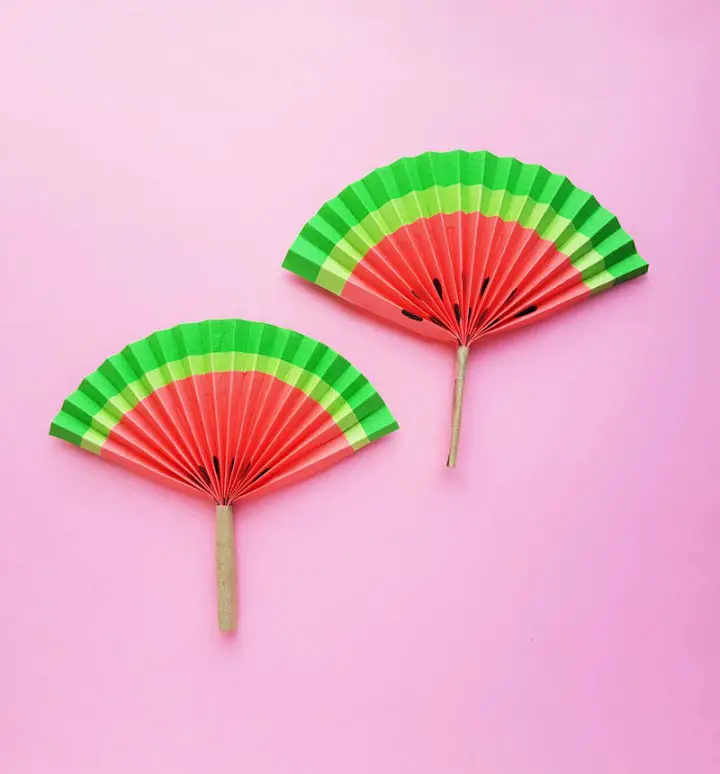
DIY Paper Plate Watermelon Fan
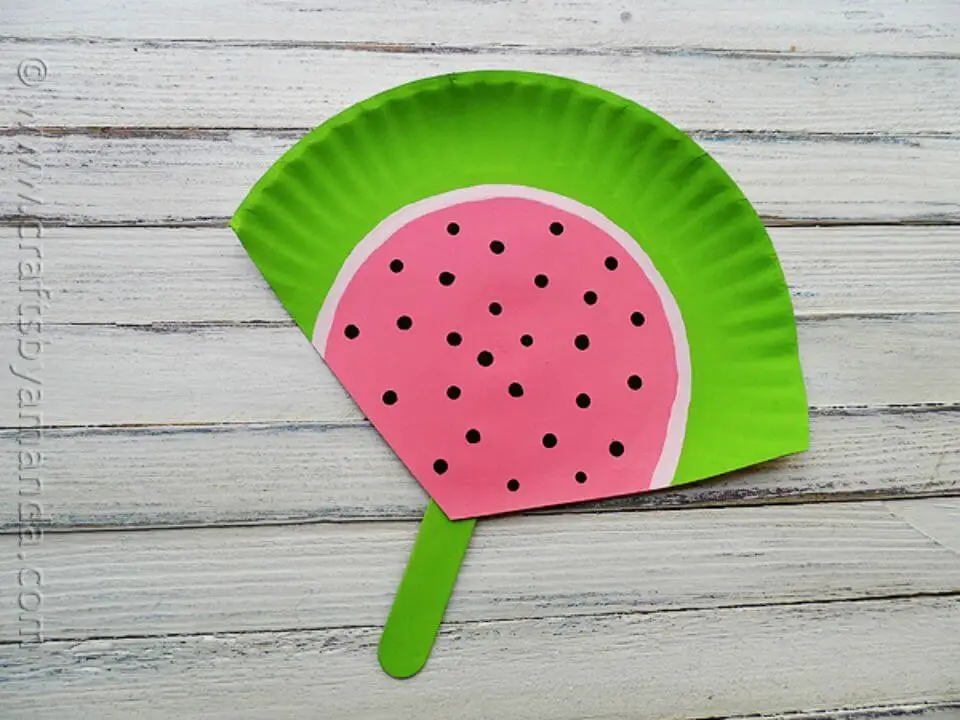
Summer is the perfect time to get creative with kids, and what better way than making paper plate watermelon fans? This engaging craft project is ideal for camps or classroom activities, as it not only encourages artistic expression but also provides a fun and functional way to beat the heat. With basic supplies like paper plates, jumbo craft sticks, acrylic paint, scissors, and glue at hand, you can help your little ones create these adorable, hand-held fans that are sure to bring a smile. Simply cut the plates into watermelon slice shapes, get creative with some colorful paint, and attach a handle using glue. The result is not only a delightful craft but also a functional way for kids to stay cool on hot days.
Make a Paper Fan for New Years
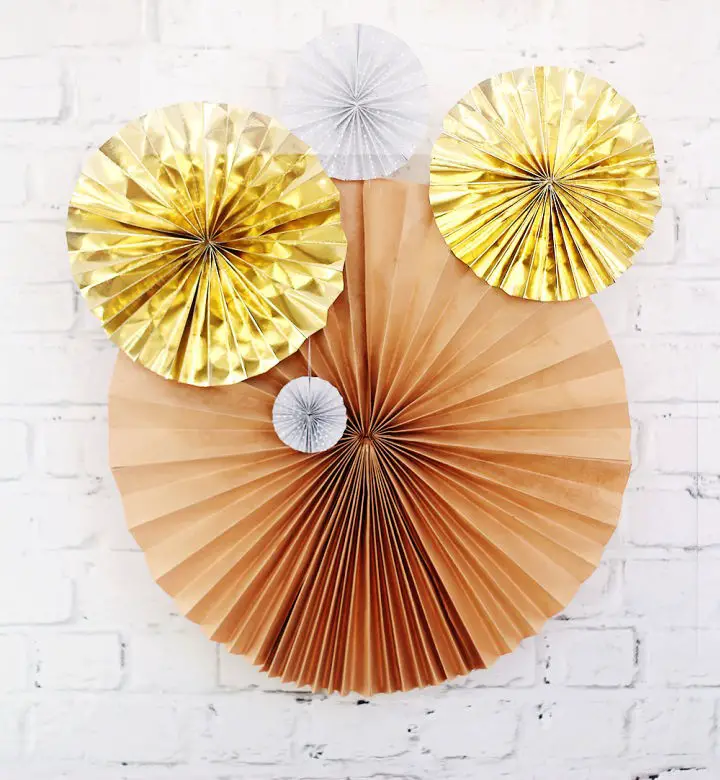
As the clock strikes midnight, make your New Year’s Eve celebration unforgettable with a dash of creative charm! With just a few simple materials – wrapping paper, scissors, glue, and needle and thread – you can transform leftover wrapping paper into mesmerizing decorations that will illuminate your party space. Start by folding a strip of wrapping paper into a concertina shape, then combine three of these to form a dazzling fan. Secure it with glue and voilà! You’ll have an instant festive flair that’s as unique as your celebrations.
Beautiful DIY Paper Melon Fans
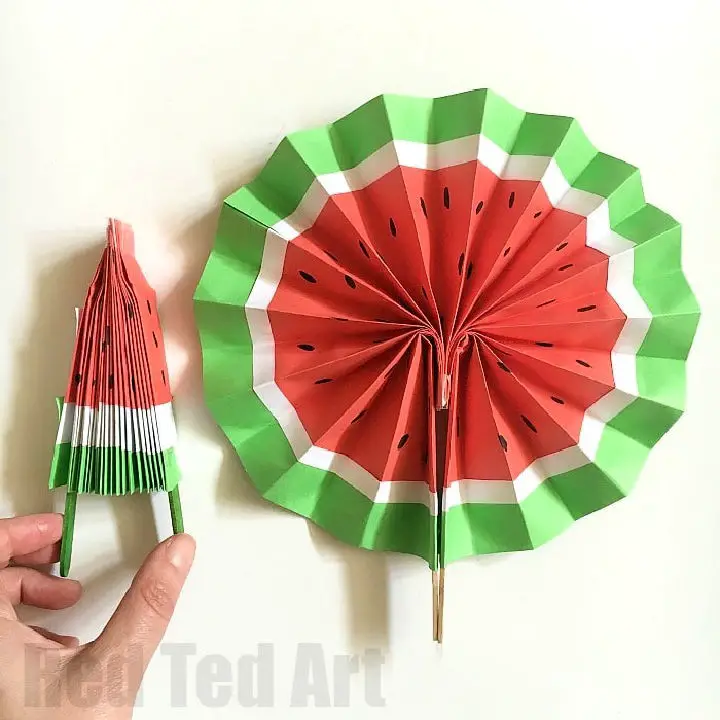
Transform ordinary A4 paper into extraordinary melon paper fans with Red Ted Art’s engaging DIY guide, perfect for livening up summer crafts or adding a pop of color to any party or room decor. With just a few basic supplies like glue sticks, craft sticks, tape, and optional pens for decoration, you can create your own vibrant and playful watermelon designs. Follow the easy-to-follow step-by-step instructions to cut, fold, and assemble your paper into a refreshing melon-themed fan that’s sure to bring a smile. And if you’re feeling inspired, explore other creative paper toy projects for endless possibilities.
How to Make Your Own Paper Fan
Step into the world of creative crafting with Pretty Paper Party Things, where imagination knows no bounds! Unleash your creativity by downloading a customizable template to craft stunning fans that will keep your summer gatherings cool and refreshing. For an added touch of whimsy, take ordinary utensils and transform them into show-stopping table decor by wrapping them in doilies and twine. And why stop there? Elevate the humble mason jar sippy cup with vibrant plastic paper designs, giving your party drinks a chic and modern twist that’s sure to wow your guests. With these simple yet impactful ideas, you’ll be adding a dash of personalized flair to every celebration, making each event truly unforgettable.
Simple and Easy DIY Paper Fans
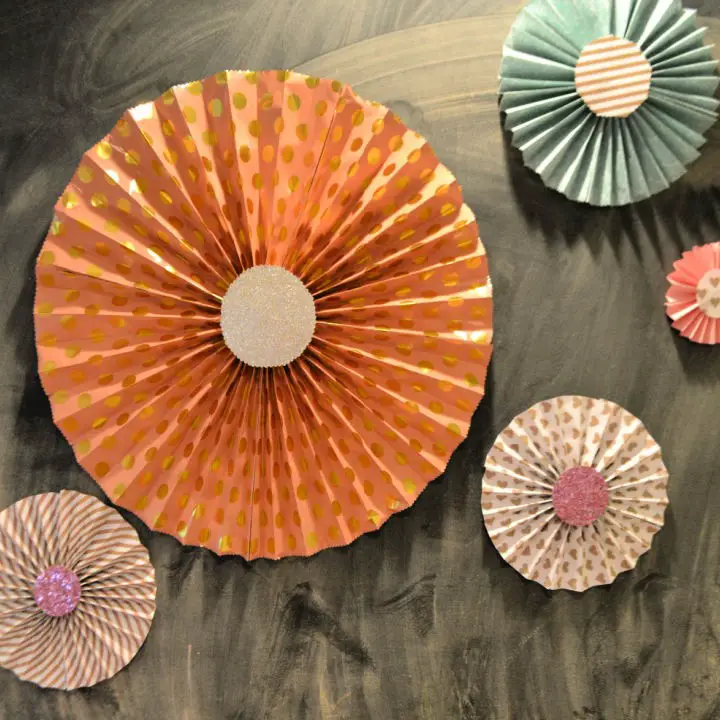
Add a dash of personal flair to your next celebration by crafting your own whimsical paper fans with Moms Without Answers’ easy-to-follow DIY tutorial. This budget-friendly project requires just a few simple tools – a glue gun, scissors, and twine – as well as some colorful paper that reflects your party’s unique style. The result is not only visually stunning but also remarkably easy to create. Simply follow the step-by-step guide to fold, assemble, and hang your paper fans, transforming any event space into a charming haven. Perfect for birthday bashes, casual gatherings, or even a ballet-themed soiree, these DIY decorations are sure to elevate your party’s aesthetic and leave a lasting impression on your guests.
How to Make Folding Paper Fans
Transform your everyday essentials into unique and functional keepsakes by crafting your own folding paper fans. This refreshing DIY project is a perfect solution for beating the heat, whether you’re lounging at the beach or hiking through the wilderness. With minimal materials like cardstock, skewers, and some basic crafting tools, you can create a fan that not only adds a touch of personal flair to your belongings but also provides a cooling breeze on those sweltering days. The comprehensive guide offers clear instructions for both handcrafted and Cricut Maker methods, allowing you to effortlessly fold, score, and assemble your creations. Get creative and stay cool with this engaging and practical craft activity.
Cool Homemade Watermelon Paper Fan
Beat the heat this summer by unleashing your creativity with a delightful watermelon paper fan from Moms and Crafters. This fun and easy-to-make craft is perfect for family gatherings, summer camps, or even as a unique party favor. With just a few simple materials like colored paper, cardstock, glue, markers, scissors, and clear tape, you’ll be creating your own refreshing breeze in no time. Simply follow the step-by-step instructions to layer green and pink strips, add some seed details, fold the design into an accordion shape, and secure it all with a handle. As you craft, you’ll experience a burst of creativity and a personal cooling effect on those hot summer days.
Easy Steps to Make Paper Fans
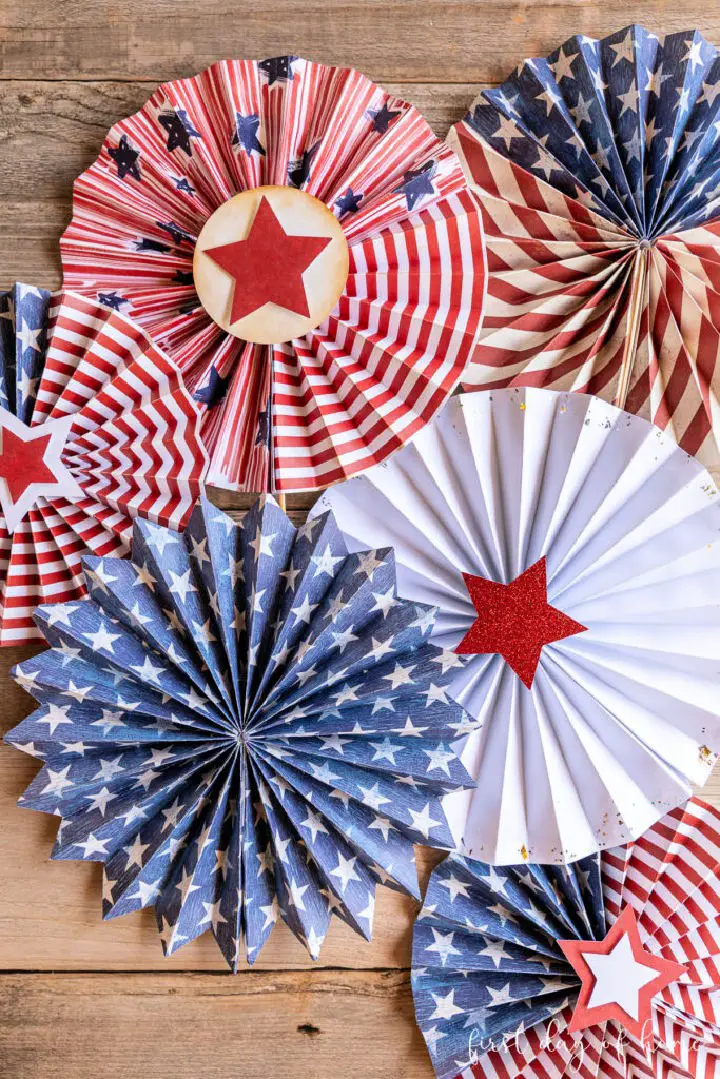
Create charming paper fans with ease using our step-by-step tutorial! With First Day of Home’s guidance, you’ll be able to personalize your fans for any special event or celebration. Start by selecting the perfect scrapbook paper, then add a touch of whimsy with wooden skewers or string. Each step is designed to be engaging and easy to follow, making this project perfect for crafters of all levels. To take it to the next level, learn helpful tips like how to achieve a vintage look or store your fans for future use. Whether you’re creating party decorations or a stunning centerpiece, these paper fans will add a dash of creativity to any occasion. So why wait? Dive into this guide and start making your own unique and stylish paper accessories today!
Making Folded Paper Fans for Preschooler’s
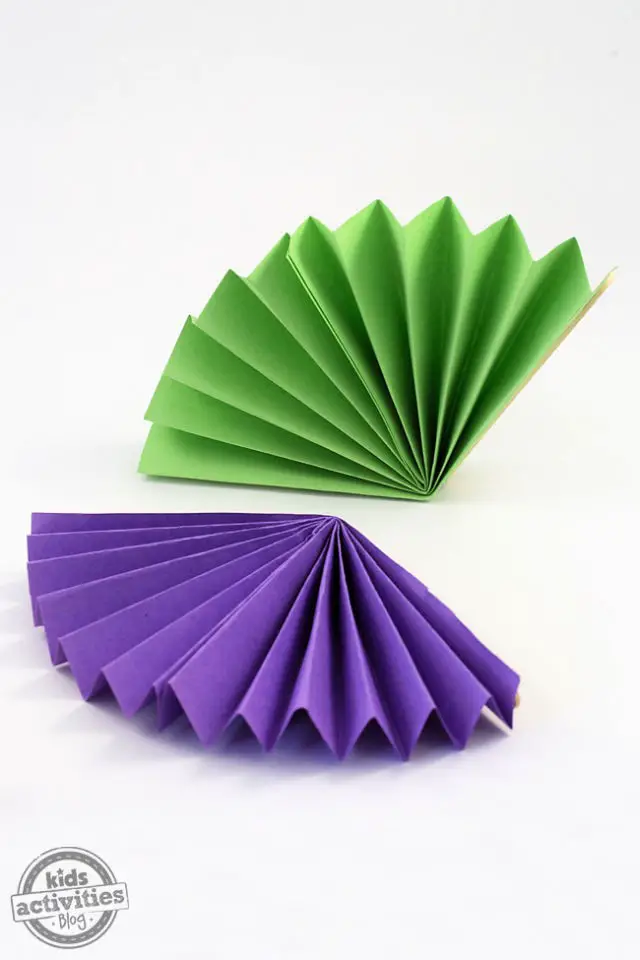
A timeless craft activity that’s both enjoyable and functional on hot days is creating a paper fan. By following simple steps, kids can make their own vibrant paper fans using basic materials such as construction paper and popsicle sticks. This engaging project is suitable for children of all ages, helping to develop their fine motor skills with each accordion fold. With step-by-step instructions guiding the process, it’s easy for kids to create a colorful, handmade accessory that’s perfect for staying cool. To add an extra layer of creativity, kids can personalize their fans by adding their own artistic touches, making this project ideal for school, home, or camp crafts.
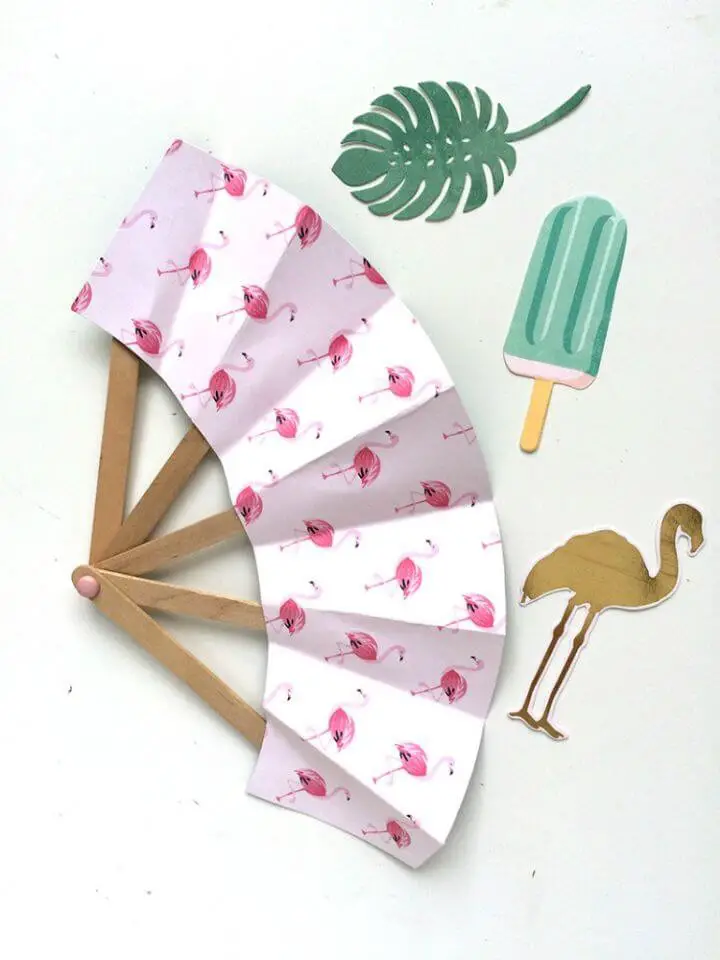
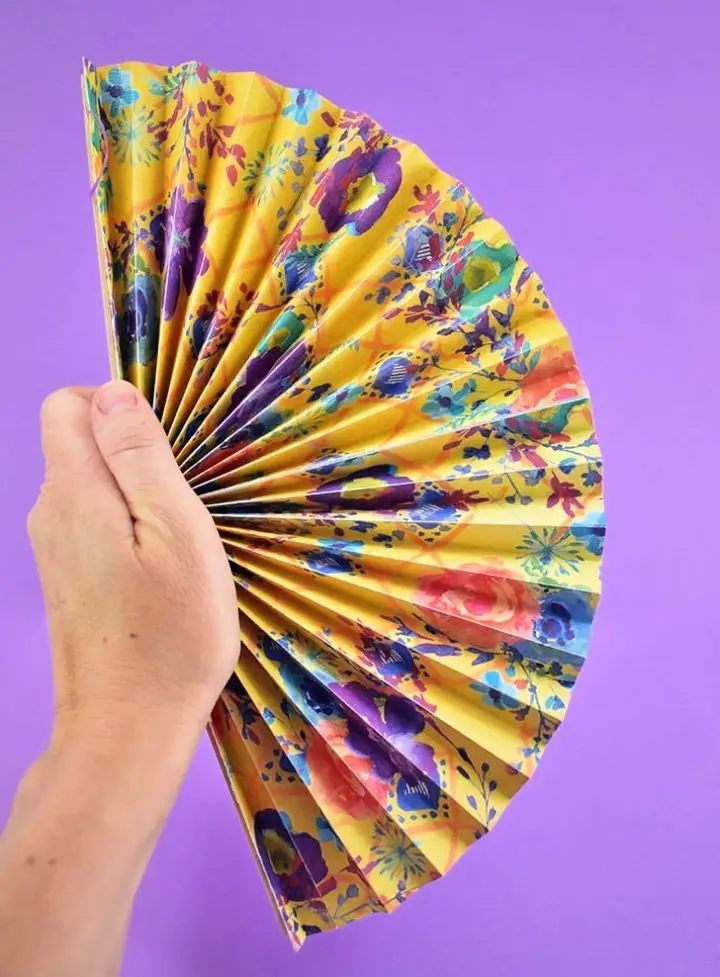
Easy-Peasy DIY Pocket Folding Paper Fan
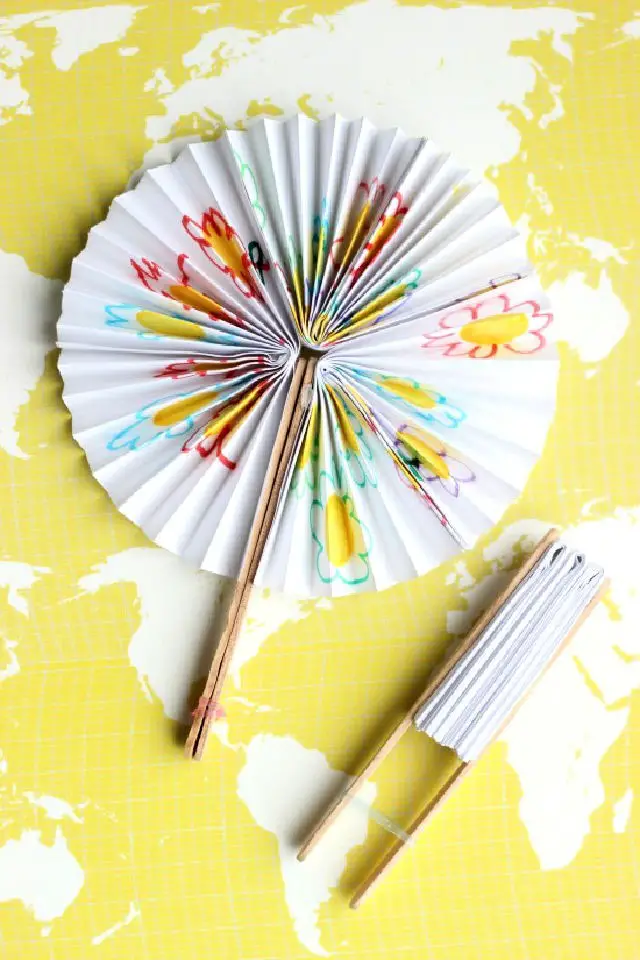
Transforming a mundane summer into an exciting adventure with the kids? Look no further! Our DIY Pocket Fan tutorial is an effortless way to create a functional and stylish accessory that’s perfect for warm weather days. By combining creativity, problem-solving, and practicality, this project allows youngsters to design and build their very own handheld fan using basic supplies like plain paper, popsicle sticks, and a mini hairband.
With its easy-to-follow instructions, this activity is an excellent opportunity to bond with the kids while making something both functional and fun. Whether you’re planning a summer camp, birthday party, or simply a creative afternoon, this pocket fan project promises to be a thrilling experience for children who love to express themselves through art.
Wonderful Handmade Coloured Paper Fans
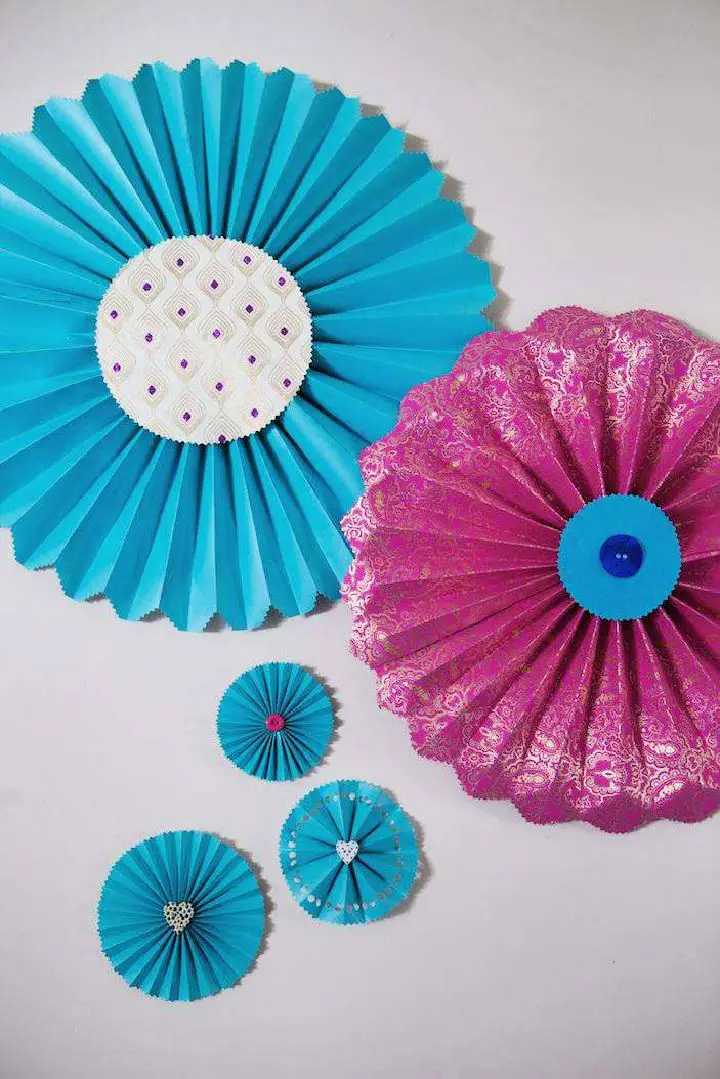
Unlock the power to transform any space with vibrant handmade paper fans from Rock n Roll Bride! Kathryn Williams’ expert DIY tutorial takes you by the hand, walking you through the creation of these show-stopping decorations that add a personal touch to your events or home decor. With minimal yet essential supplies like wrapping paper, buttons, a craft knife, and a glue gun at your disposal, crafting these eye-catching fans becomes an accessible and enjoyable experience for craft enthusiasts of all levels.
Conclusion:
Crafting origami hand fans through DIY projects not only offers a fun and creative outlet but also provides an opportunity to bridge the past with the present by embracing ancient traditions and cultural artistry. This journey into making paper fans is comprehensive, from selecting materials and personalizing each fan with unique decorations to ensuring their proper maintenance. The process allows for experimentation with traditional techniques or modern designs, resulting in a sense of pride and satisfaction as you hold your self-made, elegant paper fan. As symbols of elegance and artistry, these delicate creations continue to flutter gracefully in our hands and hearts.
