Transforming your living space with a DIY ottoman is an effortless way to infuse functionality and style. These versatile pieces seamlessly serve as footrests, additional seating, and even coffee tables, making them an invaluable addition to any room. With 25 distinct DIY ottoman designs, you’ll have a plethora of options to choose from, ensuring you find the perfect match for your home decor and personal taste. The process may seem intimidating at first, but with the right guidance, it’s an achievable project for anyone willing to give it a try.
The journey begins by understanding the essential materials and tools needed, followed by step-by-step instructions that guide you through each stage of the process from start to finish. Whether you’re looking to add storage, repurpose an existing piece of furniture, or simply tailor an ottoman to your unique style, these guides have got you covered.
Get ready to dive into the detailed guide below and unlock your creativity as you build a custom ottoman that stands out in your home. Let’s explore how to bring these unique DIY ottoman ideas to life!
Why Make a DIY Ottoman?
While making a DIY ottoman may require some effort, the end result is well worth it. Not only will you save money compared to buying one from a store, but you’ll also gain the satisfaction of knowing that you’ve created something entirely unique and tailored to your personal style. With the freedom to customize every aspect of your project, you can design an ottoman that perfectly complements your home’s decor. This DIY endeavor is not only cost-effective, but it’s also an excellent opportunity to learn new skills or hone existing ones, such as woodworking, sewing, or upholstery. By choosing to DIY, you’ll be promoting sustainability by potentially repurposing materials or upcycling furniture. And let’s not forget the sense of achievement that comes with completing a project from start to finish – it’s a tangible reward for your effort and creativity, adding personal value to your home.
How To Make An Ottoman
Creating a bespoke ottoman can elevate the personality of your home décor by combining practicality with visual appeal. The process is accessible for both novice DIY enthusiasts and experienced crafters alike. By following this step-by-step tutorial, you’ll be able to design and build a custom ottoman that harmoniously complements your living space. It’s essential to exercise patience and attention to detail to ensure a polished finish. Let’s embark on this creative journey together.
Materials and Tools Required
Before you embark on this DIY project, make sure to have the following materials and tools at hand. The list includes a variety of items that cater to different aspects of building a sofa frame.
For the frame itself, you will need wood of varying sizes depending on your desired dimensions. Additionally, four wooden legs are required to provide stability to the structure. To secure these components together, you’ll need screws in two different lengths – 1.5 inches and 3 inches.
When it comes to shaping the frame, a drill is an essential tool that will allow you to make precise holes for your screws. On the other hand, the comfort of your sofa’s seating area relies on the high-density foam that you’ll need to cut to size.
To complete the basic structure of your sofa, you’ll also require plywood for the top layer and batting to provide a soft foundation. A staple gun with staples will come in handy when attaching these elements together.
The final touches to your sofa’s appearance can be achieved by adding fabric of your choice. If you want to add an extra layer of comfort and protection, consider using an inner lining made of flannel or cording. For any trimming or cutting required during the process, scissors will prove to be a valuable asset.
Step-by-Step Instructions
To build a sturdy and comfortable ottoman, start by preparing the wooden legs. Paint or stain the four legs to match your desired aesthetic, allowing them to dry completely before assembly. Next, construct the frame by drilling and screwing together the wooden panels at the corners using 1.5-inch screws. Utilize three screws per corner for enhanced stability.Once the frame is built, secure the corner supports by placing cut boards inside each corner and attaching them with 3-inch screws driven through each side. This will provide a solid foundation for the ottoman’s structure.Next, install the center support beam, ensuring it is perfectly centered within the frame. Secure this beam at both ends using screws to reinforce the frame.For the interior, lay the foam and plywood top on the batting, making sure the batting is cut sufficiently large to cover the top of the board. Staple the batting in place, working from the center to the corners, and trim any excess material. If desired, you can add an inner lining by stapling flannel or a similar fabric to the inside of the ottoman.To complete the exterior, apply your chosen fabric wrong side up, positioning the ottoman top centrally on the fabric. Cut the fabric so there’s enough material to staple onto the plywood, and secure it with staples starting from the center and moving towards the corners. Be sure to pleat the corners neatly for a professional finish.If you want to add an extra touch of elegance, consider adding cording along the plywood edge. Measure, cut, and staple the cording in place, using a ‘V’ cut at the corners to allow for smooth fabric movement.Finally, assemble the ottoman by placing the top part (the plywood and foam) on a table, aligning it with the box part of the ottoman. Screw these parts together securely, then attach the legs by screwing the leg plates into each corner and attaching the legs themselves.
Video Tutorial
To enhance your understanding of the ottoman-making process, I recommend supplementing this text with a visual guide. Jann Newton’s YouTube tutorial offers a comprehensive, step-by-step demonstration that can help bridge any comprehension gaps. By following along with her video, you’ll gain a deeper appreciation for each stage of construction and be better equipped to create your own stunning ottoman.
Choosing the Right Fabric for Your DIY Ottoman
Selecting the right fabric for a DIY ottoman is a vital decision that not only impacts its aesthetic appeal but also affects its durability and ease of maintenance. As you embark on this project, it’s essential to consider the various fabric options available, each with its unique characteristics, advantages, and disadvantages. By understanding these factors, you’ll be better equipped to choose patterns and colors that harmoniously complement your interior design.
Cotton
Cotton fabric boasts a multitude of benefits that make it an attractive option for various design themes. Its versatility stems from the wide range of colors and patterns available, allowing designers to effortlessly incorporate it into any aesthetic. Furthermore, cotton fabrics are often machine washable, rendering them practical for households with young children or pets that require frequent cleaning. The breathability of cotton makes it a comfortable choice for warm climates, where temperatures can soar. However, cotton’s durability is not as robust as some other fabrics, resulting in wear and tear over time – particularly in high-traffic areas. Additionally, its stain resistance leaves much to be desired, as it has a tendency to absorb spills and stains with ease.
Leather
One of the primary advantages of choosing a leather ottoman is its exceptional durability. The material is incredibly resilient and can withstand significant wear and tear, making it a great choice for a piece that’s going to be used frequently. Additionally, spills are easily wiped clean, and the leather doesn’t absorb odors, which can be a major plus in high-traffic areas.
Another benefit of leather ottomans is their aesthetic appeal. The material has a luxurious feel that can fit seamlessly into both traditional and modern decors. However, there are some drawbacks to consider. One of the most significant cons is the cost – genuine leather can be quite expensive, although faux leather options are available for those on a budget.
It’s also important to note that leather ottomans require regular maintenance to prevent cracking. This includes conditioning the material regularly to keep it looking its best.
Velvet
While velvet is often sought after for its luxurious texture and sheen, it also boasts exceptional comfort qualities, making it an excellent option for upholstery purposes. In fact, its softness is a major drawcard, providing users with an unparalleled level of coziness. However, this indulgent fabric does come with some drawbacks. For instance, cleaning velvet can be a daunting task, often requiring the expertise of professionals to remove stubborn stains and spills. Furthermore, velvet’s delicate nature means it may not withstand heavy use or wear, which can lead to visible signs of deterioration over time.
Microfiber
Microfiber’s versatility is undeniable, offering a range of benefits that make it an attractive option for families. Its durability ensures resistance to stains and wear, making it well-suited for high-traffic living spaces. Additionally, microfiber’s ease of cleaning allows most spills to be effortlessly wiped away with a damp cloth, minimizing the hassle of deep cleaning. Furthermore, its softness provides a comfortable seating surface that invites relaxation. However, microfiber also has some drawbacks. One of its main cons is its tendency to attract lint and pet hair due to static buildup. Additionally, some may find its aesthetic appeal lacking in comparison to other luxurious fabrics.
Choosing Patterns and Colors
When selecting a fabric for your DIY ottoman, consider the room’s palette as well as the ottoman’s intended placement. Neutral colors tend to work well in most spaces, while vibrant patterns can add a touch of personality. The size of the pattern also plays a crucial role – large designs suit spacious rooms, whereas small patterns or solid colors are more suitable for smaller areas.
The lighting conditions in your room will also impact how the fabric appears. To ensure accuracy, place the fabric sample in its intended location and assess how it looks under different lighting scenarios.
By thoughtfully considering the fabric type, pattern, and color, you can create an ottoman that not only meets your aesthetic desires but also serves a practical purpose. Ultimately, strike a balance between style and functionality to enjoy your DIY project for years to come.
Customization Ideas for Your DIY Ottoman
Transforming a DIY ottoman into a reflection of your personal taste is an exciting project. By incorporating custom elements, you can take this humble furniture piece and turn it into a showstopping centerpiece that showcases your individuality. In the following sections, we’ll explore various customization ideas to help you bring your unique vision to life.
Tufting Techniques
Tufting techniques can elevate the appearance of an ottoman, giving it a sumptuous and inviting aura. Two popular methods are diamond tufting and biscuit tufting. Diamond tufting is characterized by its geometric patterns, which involve threading a long needle through the fabric and foam to create diamond-shaped tufts. The thread is then pulled tight and secured with buttons or other fasteners. In contrast, biscuit tufting produces a more modern look with square or rectangular patterns. This method involves marking a grid on the ottoman’s surface, sewing or attaching buttons at each intersection to create a puckered effect, and securing the fabric around these points.
Piping and Trim
Transforming your ottoman with piping or trim can elevate its appearance and add a touch of sophistication. To achieve this look, you’ll need to follow these steps: First, select a fabric that either contrasts with or complements the ottoman’s existing material, depending on your desired aesthetic. This will help create visual interest or harmonize with the surrounding environment. Next, measure and cut the fabric strips to the required length, then sew them around a cord to form piping. Finally, attach the piping or trim to the edges of your ottoman cover using either a sewing technique or fabric glue for a no-sew option.
Button Accents
To elevate the aesthetic appeal of your ottoman, consider incorporating fabric-covered buttons in conjunction with tufting. Here’s how to achieve this look: Start by choosing a fabric for your buttons that complements or contrasts with your ottoman cover, allowing you to match or mix and match with your existing design elements. To create the buttons themselves, utilize a button-making kit, which is readily available at most craft stores and simplifies the process. When it comes to placement, decide whether you want the buttons to be part of a tufting pattern or simply serve as decorative accents that add visual interest to your ottoman’s surface. Once you’ve determined the placement, secure the buttons using a strong thread or specialized button-tufting needle, ensuring they are firmly attached to the ottoman’s surface. By experimenting with these customization techniques, you can create a one-of-a-kind ottoman that not only provides comfort but also injects a personal touch into your space.
Storage Solutions for Your DIY Ottoman
Hidden Storage
When it comes to maximizing space, a DIY ottoman can be a game-changer. Not only does it provide a comfortable place to rest your feet, but it also offers a clever way to stash away clutter. By incorporating hidden storage compartments, you can keep your living room or bedroom tidy and organized. For instance, you could store blankets, magazines, and remotes in separate sections, making it easy to find what you need without having to search the entire room.To get started, consider the types of items you’ll be storing and design your ottoman accordingly. A single large compartment might work well for bulky items like throw blankets, while multiple smaller sections can help keep smaller items like remotes and magazines organized. When designing the compartments, think about how you’ll access them. One popular method is to create a hollow base beneath the cushion, which can be lifted up to reveal the storage space. Alternatively, you could incorporate drawers into the ottoman’s sides, which can be cleverly disguised to maintain the ottoman’s aesthetic appeal.In terms of construction, it’s essential to use lightweight materials for the inner compartments to ensure they’re easy to open and won’t put undue strain on the ottoman’s structure. Plywood or MDF are excellent choices for their combination of strength and lightness. By following these tips, you can create a functional and stylish DIY ottoman that will help keep your space clutter-free and organized.
Lift-Top Ottomans
A functional lift-top ottoman boasts a convenient hinged top, allowing effortless access to storage space. This design is particularly useful for larger items that require quick retrieval. To ensure a seamless experience, opt for safety hinges specifically designed for lift-top applications. These guarantee a smooth opening and controlled closure, preventing the lid from slamming shut unexpectedly.
When it comes to installation, secure attachment of the hinges is crucial. Use screws long enough to anchor the hinges but not so long that they pierce through to the other side. Furthermore, consider the safety of users, especially children. Safety hinges will prevent fingers from getting caught, but it’s also essential to balance the lid’s weight to avoid it being too heavy to lift or slamming down unexpectedly.
By prioritizing safety in your design, you’ll achieve a secure and functional DIY ottoman with hidden storage or a lift-top that blends style with functionality.
Styling Your DIY Ottoman
Not only does transforming a DIY ottoman inject personality into your living space, but it also significantly elevates the room’s visual appeal. To take this statement piece to the next level, consider these easy-yet-effective styling tricks:
Color Coordination
A harmonious interior design is all about striking the right color notes. When it comes to choosing a color for your DIY ottoman, consider the colors already present in your furniture and room decor. The goal is to create a complementary color scheme that adds depth and visual interest without overwhelming the space. To achieve this, think of your existing furniture as a canvas. If you have a neutral-toned room, a bold pop of color like teal or mustard can inject vibrancy. Conversely, an ottoman in soft pastel or earth tones can serve as a calming anchor in a brightly colored room.
Layering with Rugs
When it comes to positioning an ottoman on a rug, the impact goes beyond simply defining a cozy seating area. The combination creates a visually appealing space that’s rich in texture and color. To achieve this, select a rug that harmoniously complements both the ottoman and overall room decor. If you want to create a focal point, consider a contrasting rug that highlights the ottoman’s presence. Conversely, a cohesive color scheme can foster a sense of unity throughout the space. Moreover, the rug’s texture plays a crucial role in enhancing the inviting atmosphere of your seating area; a plush rug, for instance, can add warmth and comfort, further emphasizing the cozy ambiance.
Accessorizing
Transforming your ottoman into a stunning piece that reflects your personality is as simple as adding the right accessories. A decorative tray can be used as a stylish surface for organizing items or serving drinks, instantly elevating its functionality. Add a few coffee table books, a small vase with fresh flowers, or other decorative items to give it an elegant touch. These thoughtful additions not only enhance your ottoman’s aesthetic appeal but also reveal your unique style and interests. When styling your DIY ottoman, strive for balance by experimenting with different textures, colors, and accessories to make it truly stand out in your home.
Repurposing Old Furniture into Unique Ottomans
Revamping old furniture into one-of-a-kind ottomans not only reduces waste but also injects personality into your living space. By repurposing items like coffee tables, wooden crates, or vintage suitcases, and reinvigorating existing ottomans, you can create a unique piece that reflects your style. With a little creativity, the possibilities are endless.
Upcycling Old Furniture into Ottomans
Transforming Ordinary Pieces into Functional Ottomans
In this era of repurposing and upcycling, turning old coffee tables, wooden crates, or vintage suitcases into storage ottomans is a fantastic way to breathe new life into discarded items. By following these step-by-step guides, you can create one-of-a-kind pieces that not only add functionality but also become conversation starters.
The first approach involves transforming an old coffee table into a storage ottoman. Start by selecting a table with the right height for your desired ottoman size. Sand down any rough edges to prepare the surface, then apply a fresh coat of paint or stain if you desire a new color or finish. Next, create a cushion top by cutting foam to size and covering it with your chosen fabric. Finally, attach the cushion to the table top using a staple gun for a secure fit.
Another creative option is to turn wooden crates into storage ottomans. This approach requires connecting two or more crates together to achieve your desired size. Sand and paint or stain the crates to match your desired aesthetic. Attach casters to the bottom for mobility, then create a cushioned top as described earlier. The resulting ottoman will have a unique, rustic charm.
For a truly quirky option, consider repurposing vintage suitcases into storage ottomans. Start by selecting a sturdy suitcase, then attach wooden legs to the bottom for support. If you want to add an extra layer of comfort, create a cushioned top as described earlier. This approach will result in a one-of-a-kind piece that is sure to spark conversation.
With these step-by-step guides, you can turn ordinary pieces into functional and stylish ottomans that reflect your personal style and creativity.
Reupholstering Existing Ottomans
To revitalize your ottoman’s appearance, you’ll need a few essential tools and materials: a fabric of your choice, a staple gun, scissors, screwdriver, and replacement foam if needed. Here’s a step-by-step guide to help you achieve a fresh look:Firstly, carefully remove the existing fabric from the ottoman. Use this as a template to cut out new fabric that matches its dimensions. If the foam beneath is worn out, consider replacing it with new foam cut to size.Next, lay your chosen fabric over the ottoman top, smoothing it out and stapling it in place underneath. Make sure the fabric is pulled taut to ensure a smooth finish. Once secured, trim any excess fabric that may be visible.Finally, reattach the top of the ottoman to its base if necessary. With these simple steps, you’ll have transformed your ottoman’s look and given it a fresh new lease on life.
Tips for Success
When it comes to revamping an ottoman, the fabric choice is crucial. Opt for a durable material that can withstand regular use, as this will ensure your new creation remains stylish and functional over time. Consider adding embellishments like buttons, piping, or tufting to give your piece a unique touch and elevate its overall aesthetic. But functionality should also be top of mind – think about incorporating wheels for effortless mobility or crafting a hollow interior that can store essentials, adding an extra layer of practicality to this already versatile furniture piece. By taking on a DIY ottoman project, you’ll not only be able to put your personal stamp on the final result, but you’ll also be contributing to a more eco-friendly lifestyle by repurposing and upcycling. The end result is a one-of-a-kind creation that’s as stylish as it is sustainable.
DIY Ottoman FAQs
Embarking on a DIY ottoman project can be a thrilling adventure, allowing you to infuse your home with a unique and personalized touch. To ensure a successful and stress-free experience, we’ve compiled answers to some of the most common inquiries, providing valuable insights to guide you every step of the way.
How do I choose the right fabric for my ottoman?
When selecting an ottoman fabric, it’s essential to consider three key factors. First, think about durability – choose a material that can withstand regular use and wear without showing signs of fatigue. This is particularly important if the ottoman will be a hub of activity in your home. Next, consider style – select a fabric that complements your existing decor by matching patterns, colors, and textures. Finally, think about maintenance – opt for a fabric that’s easy to clean and maintain, such as removable covers that can be quickly washed.
Can I turn an existing piece of furniture into an ottoman?
Repurposing old furniture can be a fantastic way to breathe new life into a piece and create a one-of-a-kind addition to your home. Take an existing coffee table or chair, for instance, and transform it into a functional ottoman that adds texture and interest to the room. To ensure the structure remains sturdy, you’ll need to adapt the steps for attaching foam, batting, and fabric to suit the piece you’re transforming. With a little creativity and some basic DIY skills, you can turn an old favorite into a modern masterpiece.
How do I add storage to my DIY ottoman?
When crafting a storage ottoman, the initial step is to create or modify its frame to accommodate a hollow interior. A critical design consideration is the attachment mechanism for the top panel, which should be secured with hinges rather than being fixed permanently. This intentional design choice allows the top to lift and swing open, granting access to the stored items within.
What tools do I need for a DIY ottoman project?
To embark on your DIY project, you’ll want to gather the fundamental tools necessary for the task. This includes a versatile selection of equipment, such as drills, screwdrivers, staple guns, scissors, and measuring tapes. If you’re working with wood, it’s also advisable to have a saw handy. With these essential tools at your disposal, you’ll be well-prepared to tackle even the most ambitious projects.
How can I ensure my DIY ottoman is sturdy?
Craft a robust structure by starting with high-quality wooden frames that can withstand the test of time. Implement a secure fastening system using screws to guarantee snug joints, thereby preventing any potential weaknesses or vulnerabilities. To further fortify your design, incorporate corner braces within the frame’s interior, providing an additional layer of support and stability. Finally, verify that the legs are thoroughly attached and engineered to handle the weight and stress you intend to place upon them, ensuring a sturdy foundation for your project.
How do I upholster the ottoman for a smooth finish?
To achieve a polished finish, begin by tightly stretching the batting over the foam and securing it with staples. This same process applies to your fabric, starting from the center of each side and working towards the edges. When approaching corners, fold and tuck the fabric in a neat manner before stapling to prevent any bulkiness. For added elegance, consider inserting an inner lining layer between the batting and fabric for a seamless appearance.
Can I make a DIY ottoman without woodworking skills?
While traditional woodworking techniques may not be necessary for every DIY ottoman, there are still plenty of creative options available. For instance, using an old tire, bucket, or basket as the base is a great way to get started. These projects typically involve covering the base with foam and fabric, which requires minimal tools and no cutting or drilling of wood. With these no-sew and low-woodworking options, you can still achieve a unique and functional piece that reflects your personal style. Making a DIY ottoman can be an incredibly rewarding experience, as it allows you to combine creativity, functionality, and a sense of accomplishment. By choosing the right materials, tools, and approach, you can craft a beautiful and inviting piece that adds a touch of personality to any room.
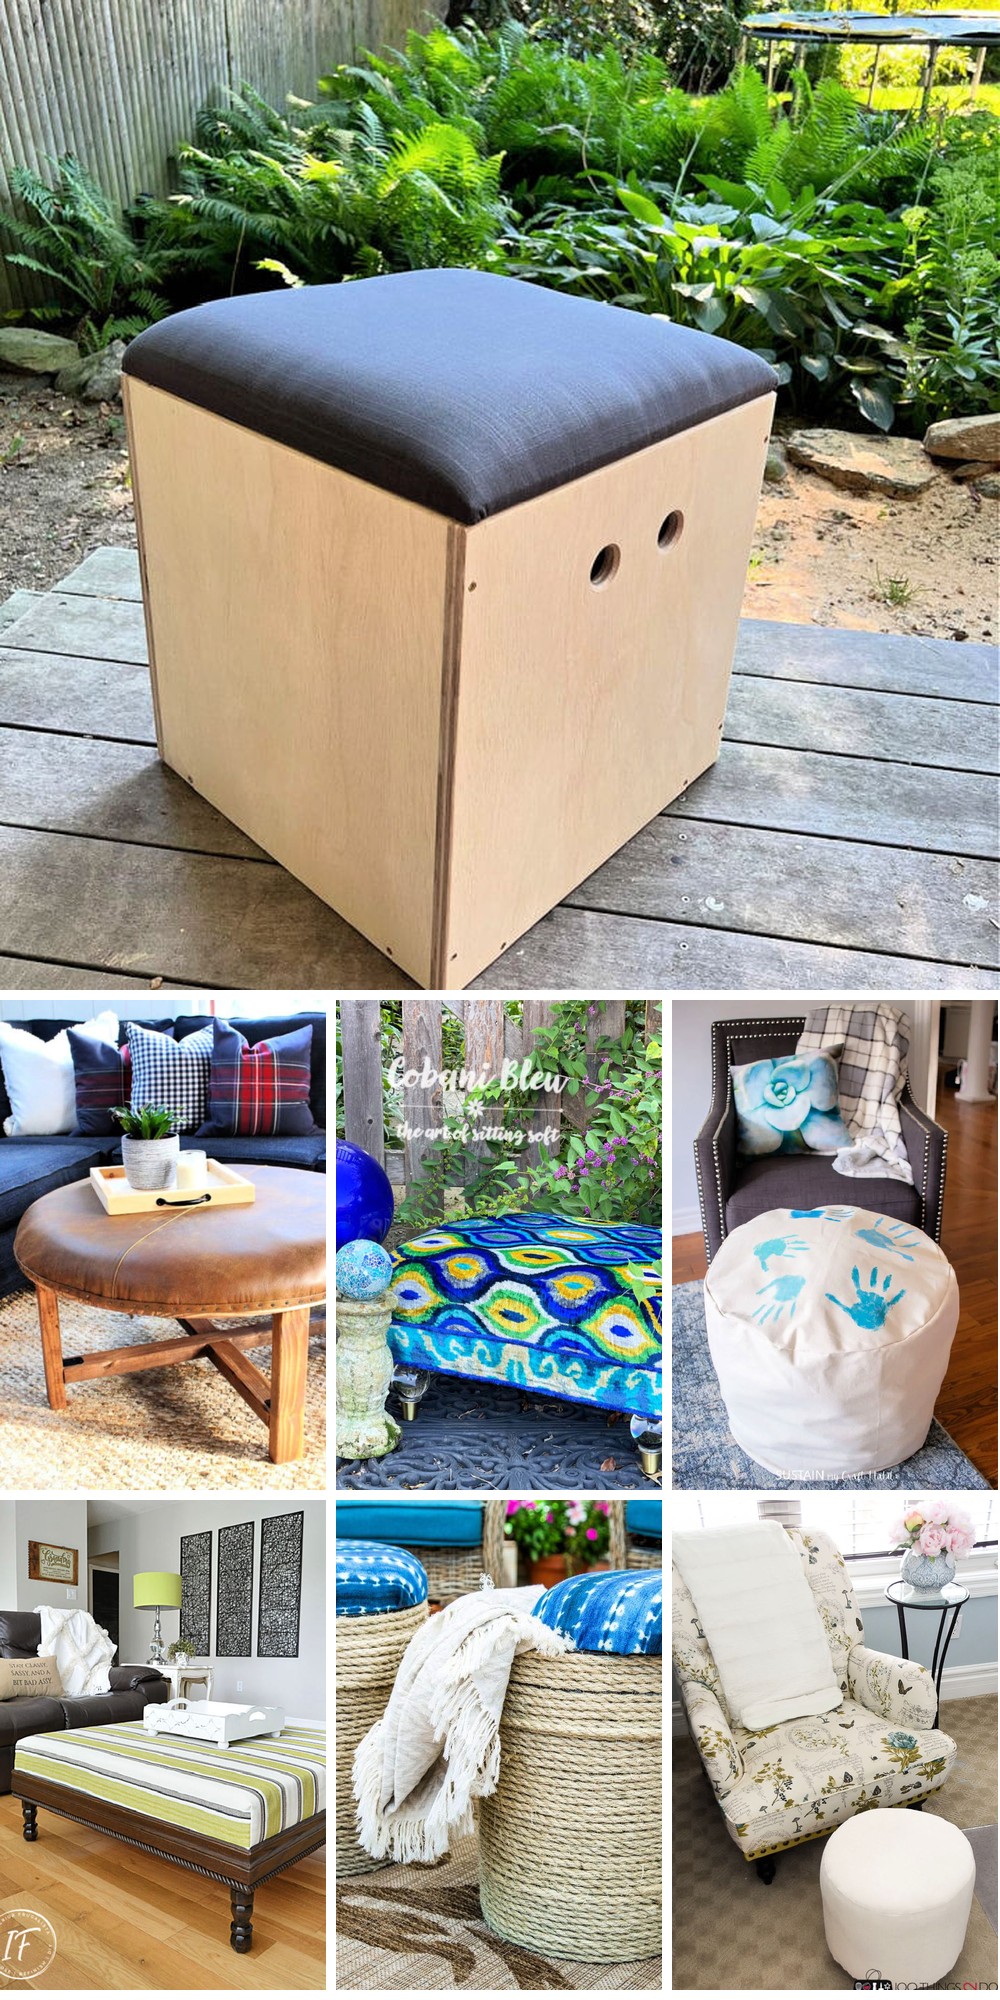
25 Unique DIY Ottoman Ideas (How to Make an Ottoman)
Transform your living space into a haven of comfort and style by unleashing the creative potential within. Explore 25 innovative DIY ottoman projects that marry form and function, offering a wealth of inspiration for crafting the perfect seating solution. From rustic to modern, and playful to elegant, these unique tutorials will guide you in creating an ottoman that reflects your personality and meets your needs.
How to Make an Ottoman
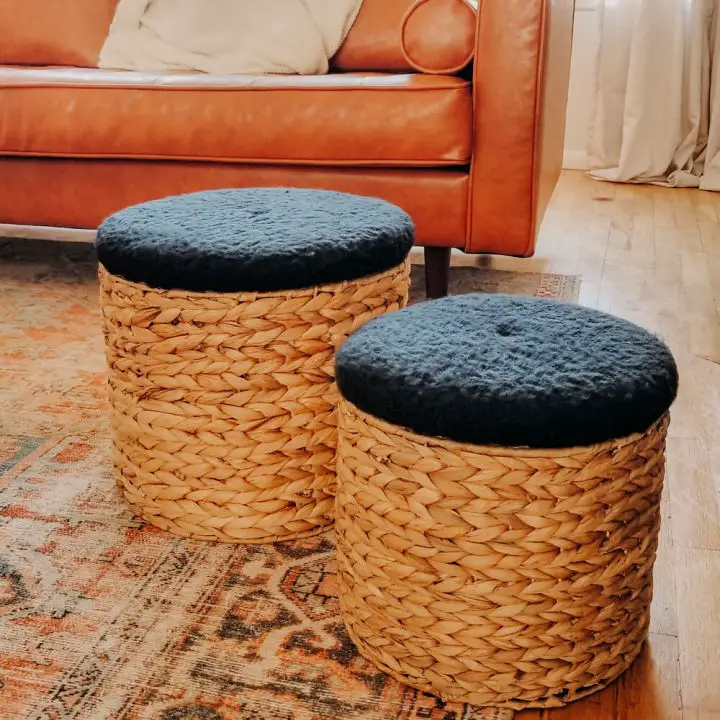
Transform your living space with a stylish and budget-friendly DIY ottoman, courtesy of Brooke Summers’ practical guide. By repurposing everyday materials like baskets, foam, fabric, and basic tools, you can create a one-of-a-kind piece that exudes charm and comfort without breaking the bank. With Brooke’s clear instructions, you’ll navigate each step from selecting the perfect basket to building the cushioned top, ensuring your handmade ottoman is not only visually appealing but also sturdy and functional.
Round Leather Upholstered Ottoman
Jaime Costiglio’s DIY guide masterfully navigates the process of crafting a round leather-upholstered ottoman, a versatile and stylish addition to any living space. The project’s core lies in its thoughtful blend of quality materials, including Simpson Strong-Tie connectors and luxurious Montana buckskin leather, which harmonize durability with visual appeal. This ottoman is ideal for storing books, holding remotes, or serving as a comfortable footrest, and its customization options – such as carpet tacks and hand-stitched seams – allow users to infuse their creation with unique personality. The guide is meticulously structured to ensure the construction of a sturdy base, with the flexibility to incorporate an upholstered top cushion. For those seeking to create functional furniture with a professional finish, Jaime Costiglio provides the detailed instructions and valuable insights necessary for a successful DIY adventure.
Modern DIY Farmhouse Tufted Ottoman
Transforming your living space into a cozy retreat is just a tufted ottoman away. By crafting a modern farmhouse-style ottoman, you can add both form and function to any room without breaking the bank. Amber Simmons’ comprehensive tutorial makes it easy to build a custom piece that’s uniquely yours. With a fraction of the cost of store-bought options, this DIY project is perfect for those who crave hands-on creativity and personalized touches in their home. By following clear instructions, you’ll learn to cut and assemble wood, create a plush tufted top, and finish with a stain of your choice. This step-by-step guide is designed to help you unlock your DIY skills and bask in the satisfaction of a beautifully crafted ottoman that’s both sturdy and stylish.
Quick and Easy Ottoman
Crafting a cozy and sturdy ottoman can be a rewarding weekend DIY project. With Charleston Crafted’s detailed plans and Kreg’s BuildSomething.com step-by-step guide, even novice builders can create a functional seating option that doubles as a comfortable footrest. The project requires minimal materials – an 8-foot 2×4, scrap plywood, foam, and fabric – making it an affordable addition to your living space. Whether you’re looking to complement existing furniture or create a standalone piece, this DIY ottoman promises durability and style. By embarking on this project, you’ll be crafting a piece that combines functionality with homemade charm, perfect for adding a personal touch to your home.
Build a Wooden Storage Ottoman
Transform your home with a stylish and functional piece using this DIY storage ottoman guide from Family Handyman. The comprehensive, step-by-step instructions are ideal for intermediate DIY enthusiasts, requiring only half a day to complete and an investment of $50-100. Without the need for upholstery skills or extensive woodworking expertise, this project is perfect for adding a personalized touch while maintaining a clutter-free living space. With easy joinery and minimal tools required, you can create a custom-made storage ottoman that seamlessly blends style with practicality.
Make Your Own Ottoman
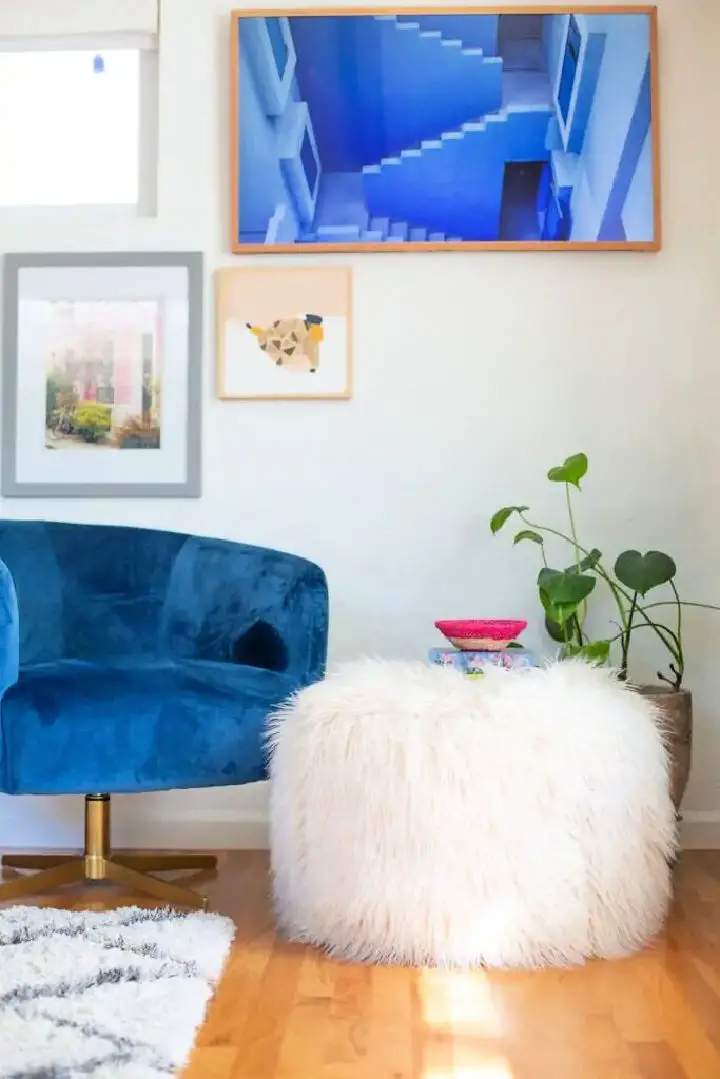
Elevate your home decor with a dash of handmade charm by creating your own DIY ottoman. For those new to sewing, Lovely Indeed provides a comprehensive guide that breaks down the process into manageable steps. This practical tutorial empowers you to transform a blanket or fabric of your choice into a stylish and functional floor pouf, effortlessly enhancing any room’s ambiance. By following this straightforward and detailed instructions, you’ll learn how to cut precise squares, sew them together, and finish with a cozy ottoman that’s as beautiful as it is useful.
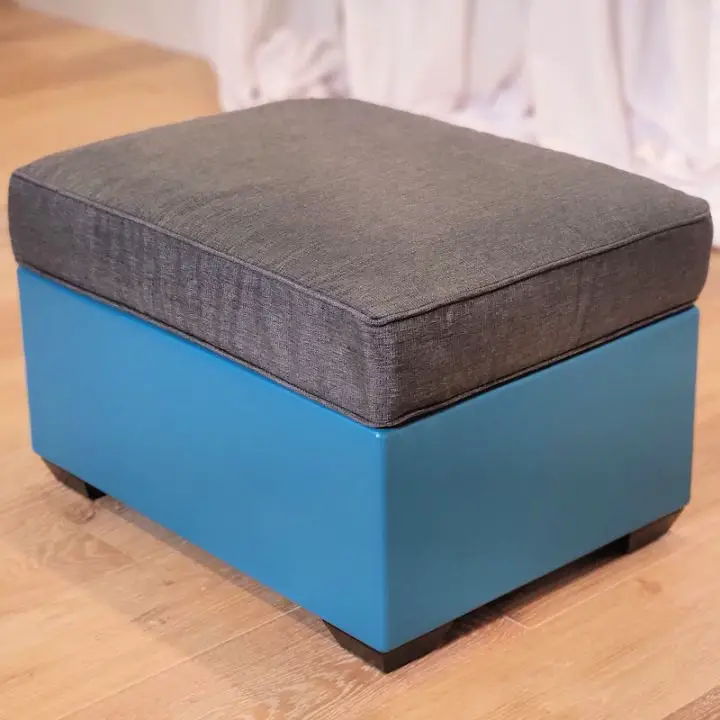
Easy DIY Storage Ottoman
Transform your living space by crafting a one-of-a-kind DIY Storage Ottoman with our comprehensive two-part tutorial. In the second part of this series, we’ll walk you through every step of the upholstery process, providing clear and concise guidance to help you create a stylish and functional piece that reflects your personal style. From applying foam padding to adding the finishing touches with fabric-covered buttons, we’ve broken down each step into manageable tasks. Whether you’re looking to elevate your decor or maximize storage space, this engaging tutorial is designed to empower you to bring your custom creation to life – perfect for any room in your home.
DIY Leather Upholstered Ottoman
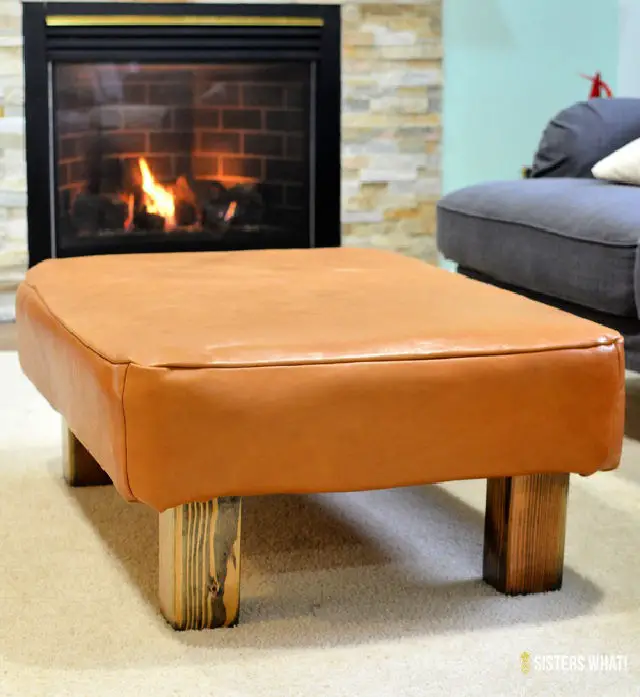
Breathe new life into an old ottoman or coffee table by transforming it into a stylish and durable piece with a DIY leather upholstered cover. With a step-by-step guide from Sisters, What!, reupholstering an ottoman becomes a fun and achievable project for those who enjoy hands-on activities. The key to success lies in selecting high-quality upholstery leather and meticulously following the process of sanding and staining the legs, sewing and fitting the leather. This comprehensive tutorial will not only revive a well-loved item but also elevate the overall aesthetic and longevity of your home decor.
Making Upholstered Ottoman Footstool
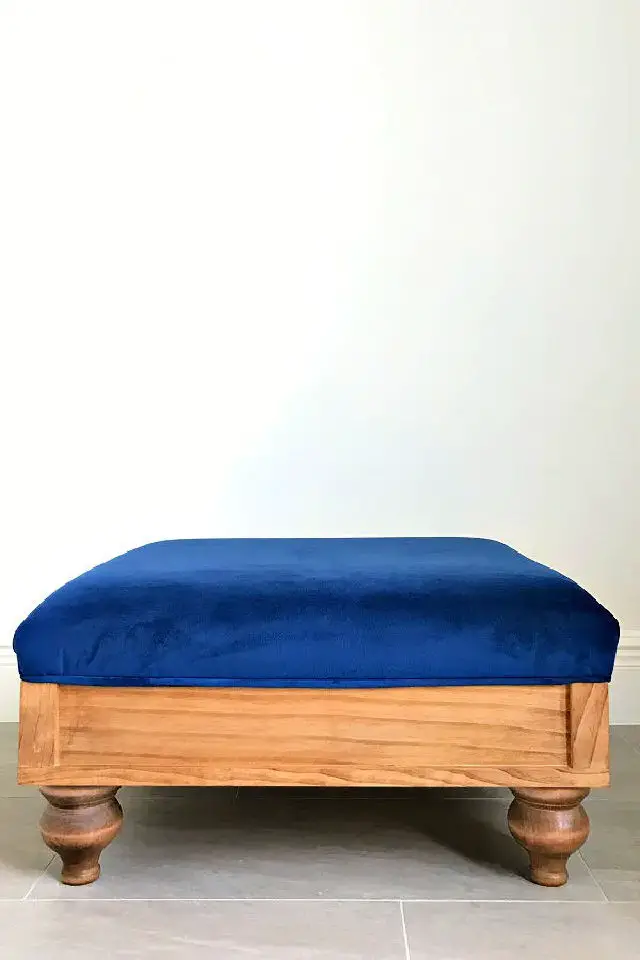
Transforming your home decor without denting your wallet is a breeze with a DIY upholstered ottoman footstool project. For a mere $25, you can create a stunning piece that will elevate your living space and provide extra seating and a cozy spot for your feet. By combining simple materials like concrete forms, plywood, foam, and upholstery fabric, you’ll be able to craft an ottoman that exudes style and functionality. The House of Wood’s comprehensive tutorial offers step-by-step guidance, making the assembly process both effortless and rewarding. With clear instructions and valuable tips, you’ll gain the confidence to tackle this project and reap the benefits in no time.
Ottoman Bench From a Repurposed Coffee Table

Transforming an old coffee table into a stylish ottoman bench is a creative and budget-friendly way to infuse your living space with a touch of elegance. This DIY project, inspired by Bless’er House’s detailed guide, involves repurposing thrifted furniture to create a design-driven piece that boasts a distressed wood finish and tufted upholstery. The tutorial offers step-by-step instructions for selecting materials, achieving the desired weathered look, and mastering the art of upholstery, ensuring a rewarding DIY experience. By breathing new life into discarded furniture, this project not only adds a personalized touch to your home décor but also provides a unique seating solution that showcases your crafting skills.
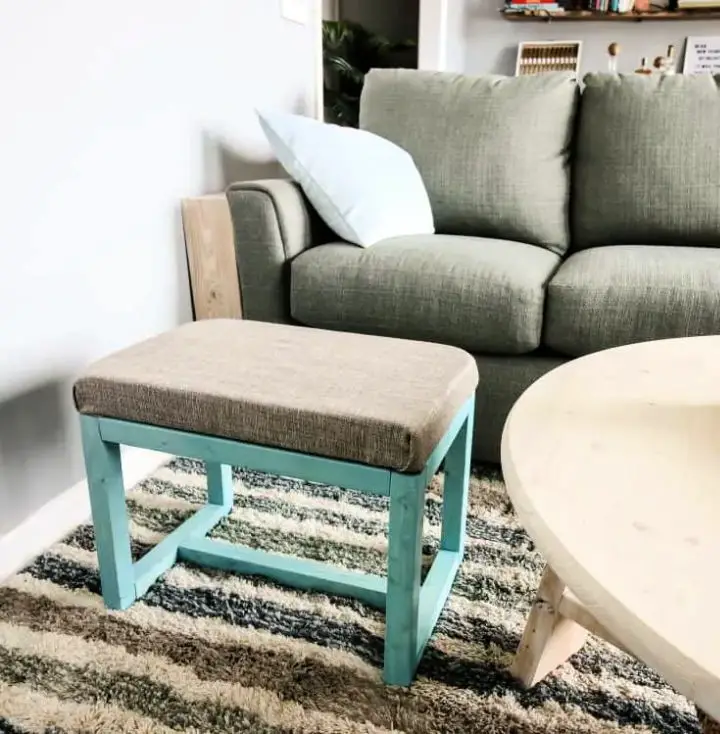
Make an Upholstered Footstool
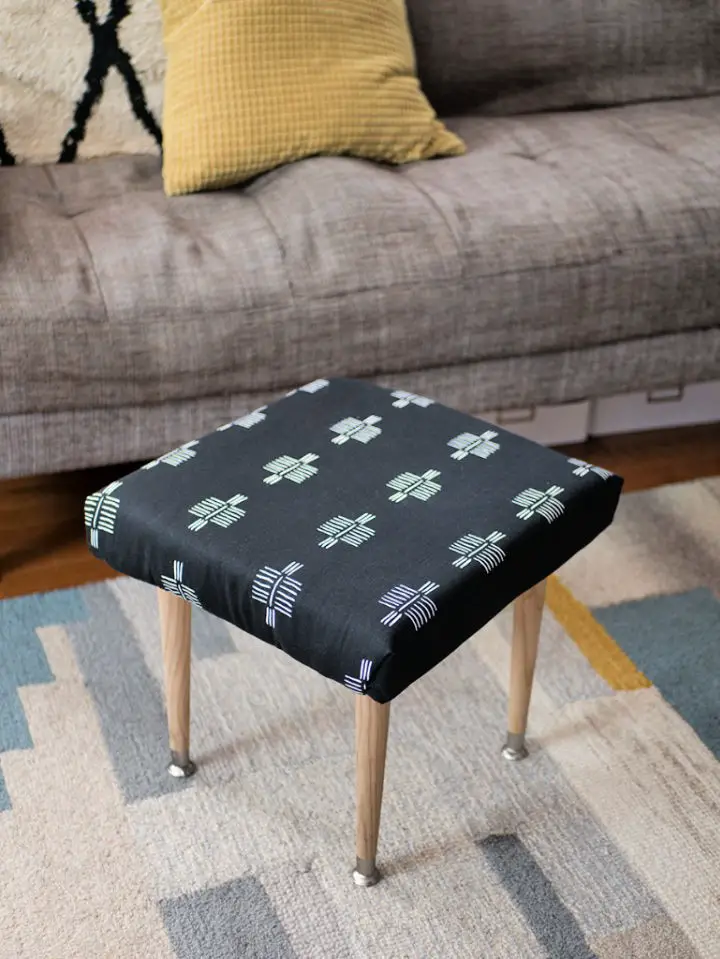
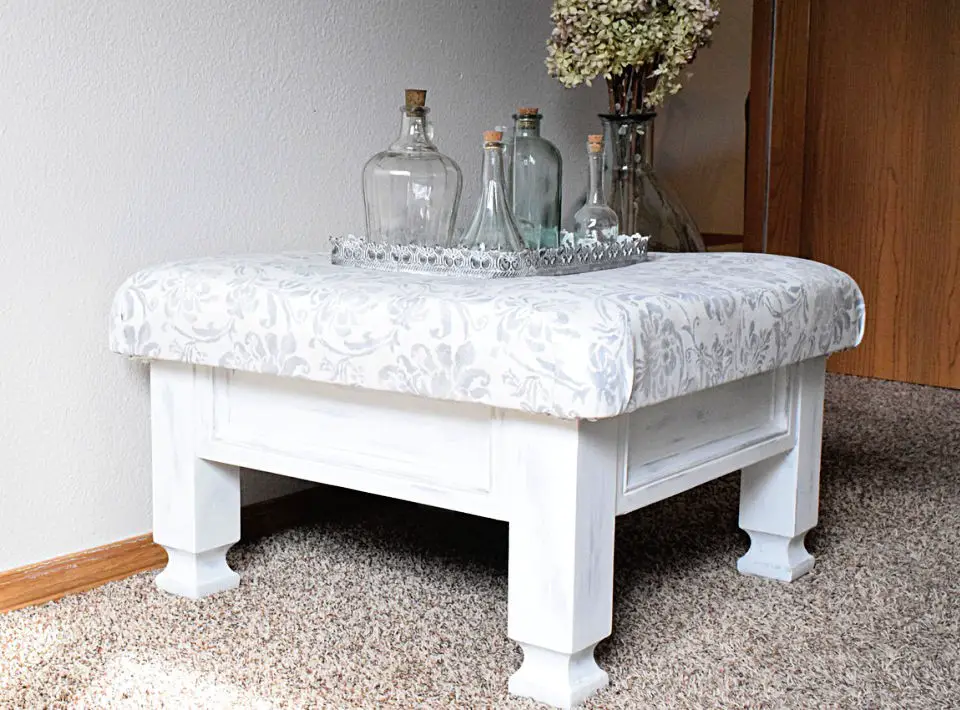
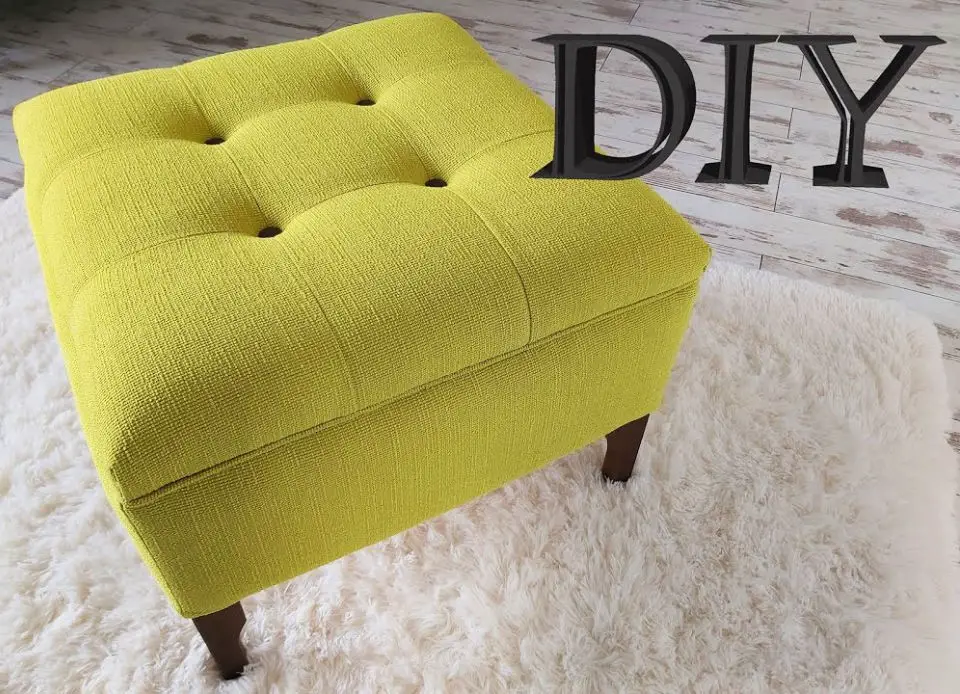
Transforming your living space with a customized upholstered footstool is easier than you think. The Homesteady’s DIY guide will walk you through the process of creating a soft-cornered footstool, perfect for families with young children on-the-go. This project requires a sturdy wooden base, plush high-density foam, your choice of fabric, and a few basic tools like a drill and staple gun. With these materials, you can create a multi-functional piece that serves as both a cozy resting spot and an impromptu seat. By attaching table legs and carefully wrapping the fabric in place with staples or other fasteners, you’ll be able to enjoy the fruits of your labor – a beautifully crafted footstool that adds both style and practicality to any room.
Easy to Make Tire Ottoman
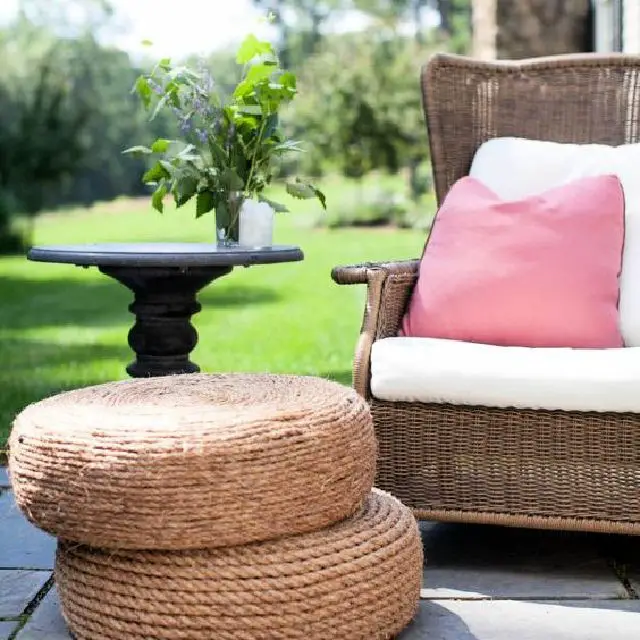
Elevate your outdoor space with a dash of creativity and eco-friendliness by transforming old tires into unique rope ottomans. By following the inspiring guide from House Beautiful, you can upcycle discarded rubber tires into stylish pieces that not only add a touch of individuality to your patio or deck but also promote sustainability. With just a few simple materials like rope, plywood, and furniture legs, you can craft a durable and attractive piece of furniture perfect for warm-weather lounging. By following the step-by-step instructions, you’ll learn how to cut, screw, glue, and seal your way to a one-of-a-kind masterpiece that not only enhances your home décor but also supports environmentally conscious living.
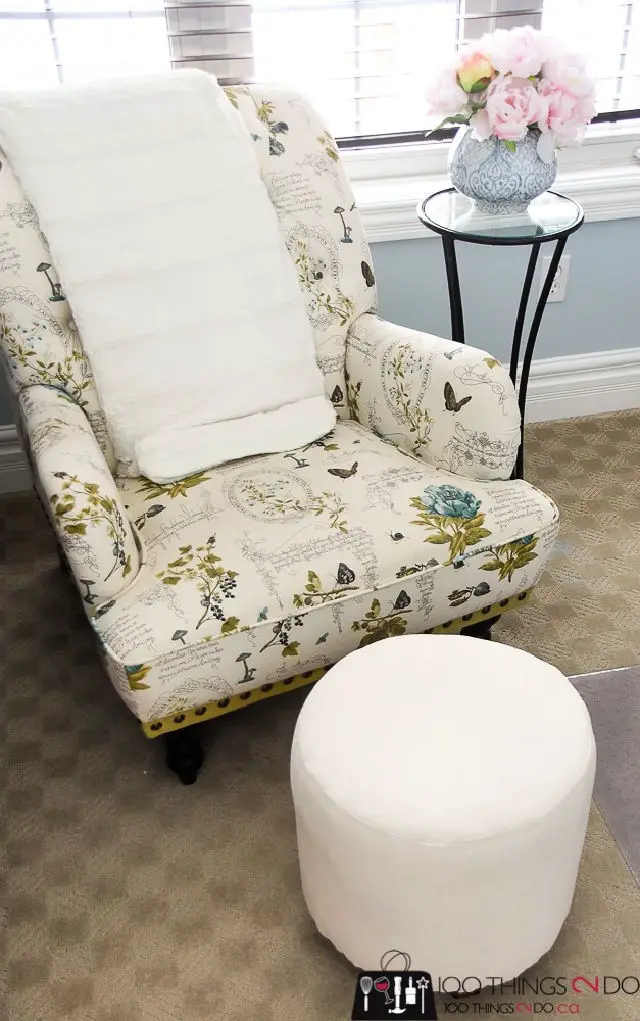
How to Make a Bucket Ottoman
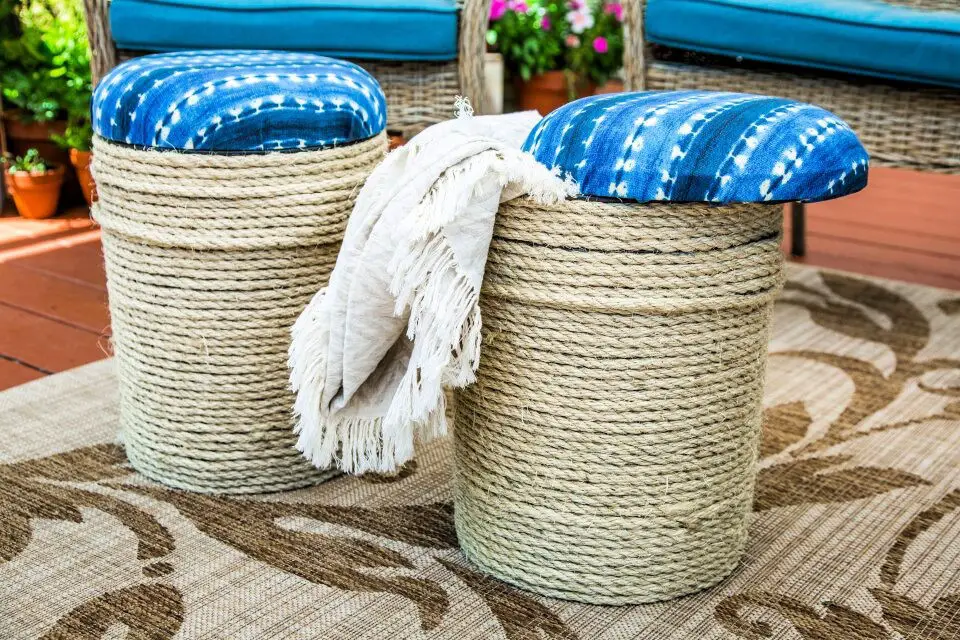
Transforming a humble plastic bucket into an elegant and functional ottoman is easier than you think, thanks to Orly Shani’s comprehensive DIY guide on the Hallmark Channel. The creative process begins with cutting foam to fit the bucket lid, securing it with hot glue and a staple gun, followed by wrapping it in a sturdy fabric like mudcloth. A series of detailed steps then unfolds, including tracing the lid onto foam, crafting a plywood round, stretching and stapling the fabric, and trimming excess material. This DIY project is ideal for injecting a touch of sophistication and versatility into your indoor or outdoor living space. By following Orly Shani’s clear and concise instructions, you can create a stylish ottoman that not only serves as a comfortable seating option but also sparks fascinating conversations with friends and family.
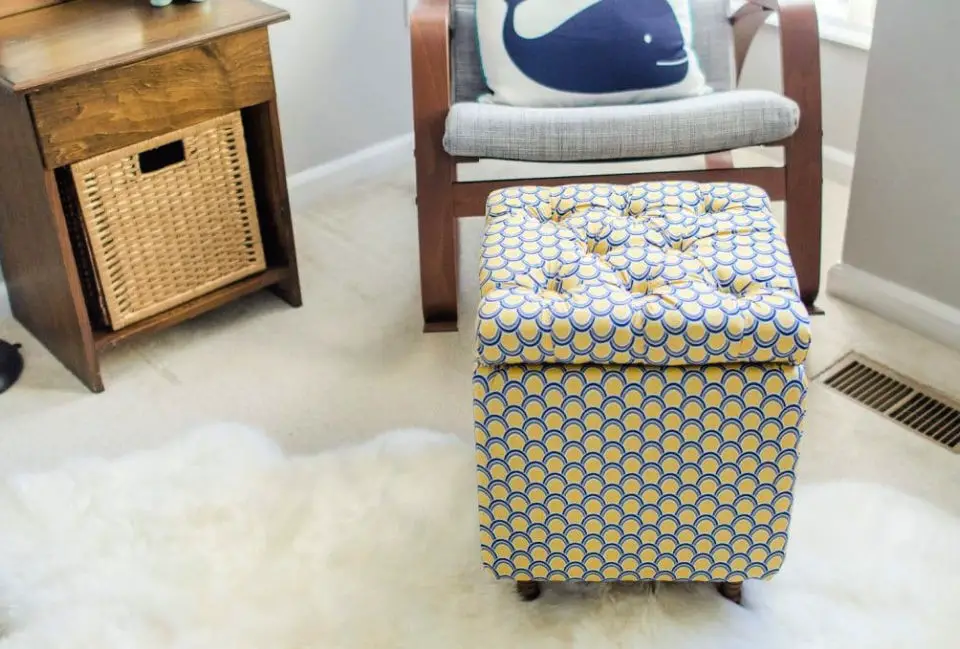
Upholstered Storage Ottoman Step-by-Step
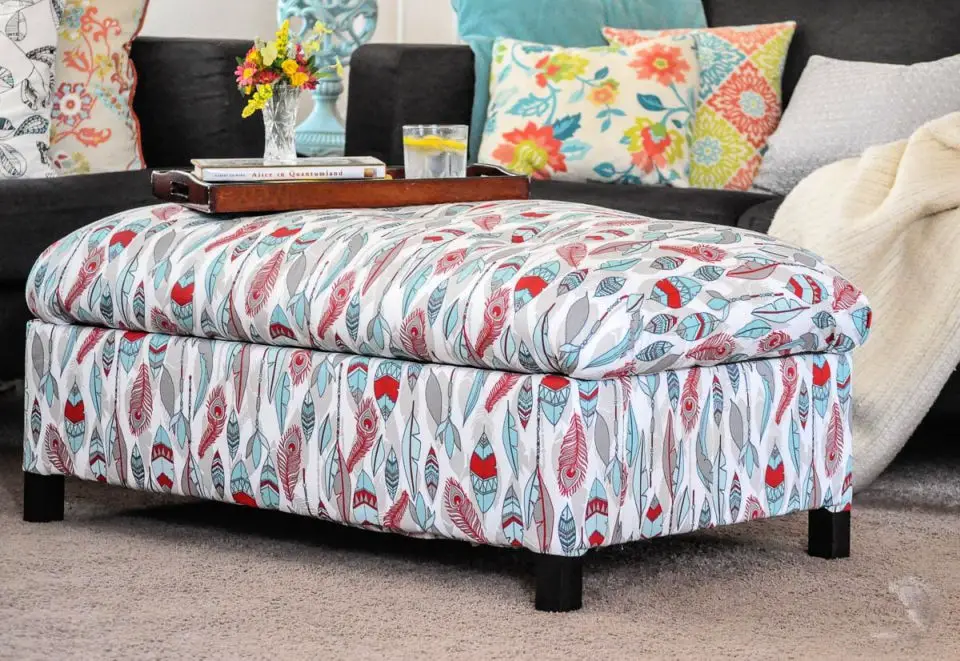
Add a touch of personalization to your living room with a DIY upholstered storage ottoman that doubles as a functional space for storing blankets or games. The comprehensive tutorial on Anika’s DIY Life takes you through the process of building and upholstery, resulting in a unique piece that serves as both a cozy footstool and coffee table alternative when paired with a tray. With clear instructions and a straightforward approach, this project is accessible to even those without extensive DIY experience. By combining creativity and the right tools, you can craft an ottoman that not only enhances your decor but also provides practical storage solutions. The tutorial covers every step from constructing the frame to adding the finishing touches of tufting, ensuring you have all the necessary information to create a stunning piece you’ll be proud to display.
Making an Ottoman
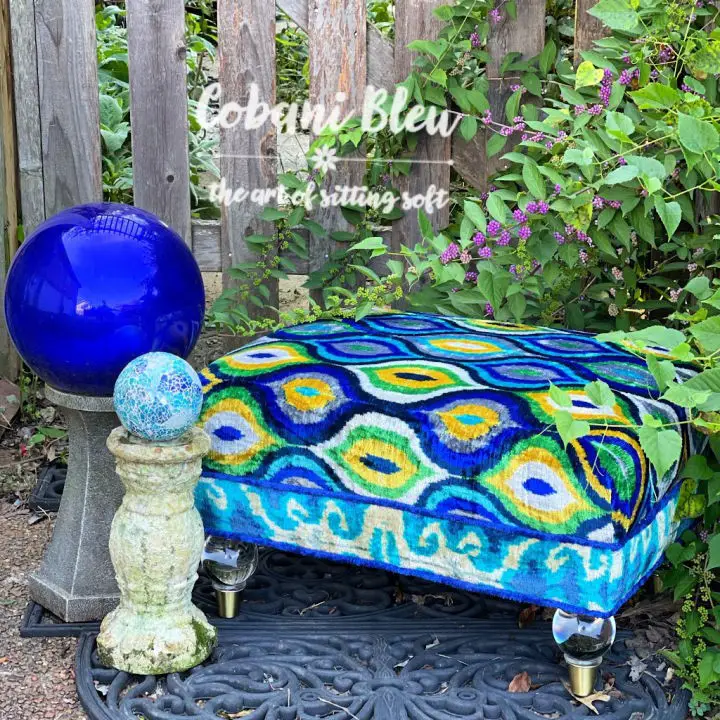
Indulge in the creative freedom of crafting an one-of-a-kind ottoman with Cobani Bleu’s engaging online course, DIY Ottoman: One Weekend To WOW! Perfect for upholstery newcomers, this comprehensive guide takes you on a journey of designing, building, and embellishing your personalized piece. With projects ranging from benches to cocktail ottomans and vanity stools, the course provides a well-rounded introduction to the art of upholstery. Step-by-step instructions make the process accessible and enjoyable, allowing you to revel in your handiwork by the end of the weekend.
How to Sew Storage Ottoman
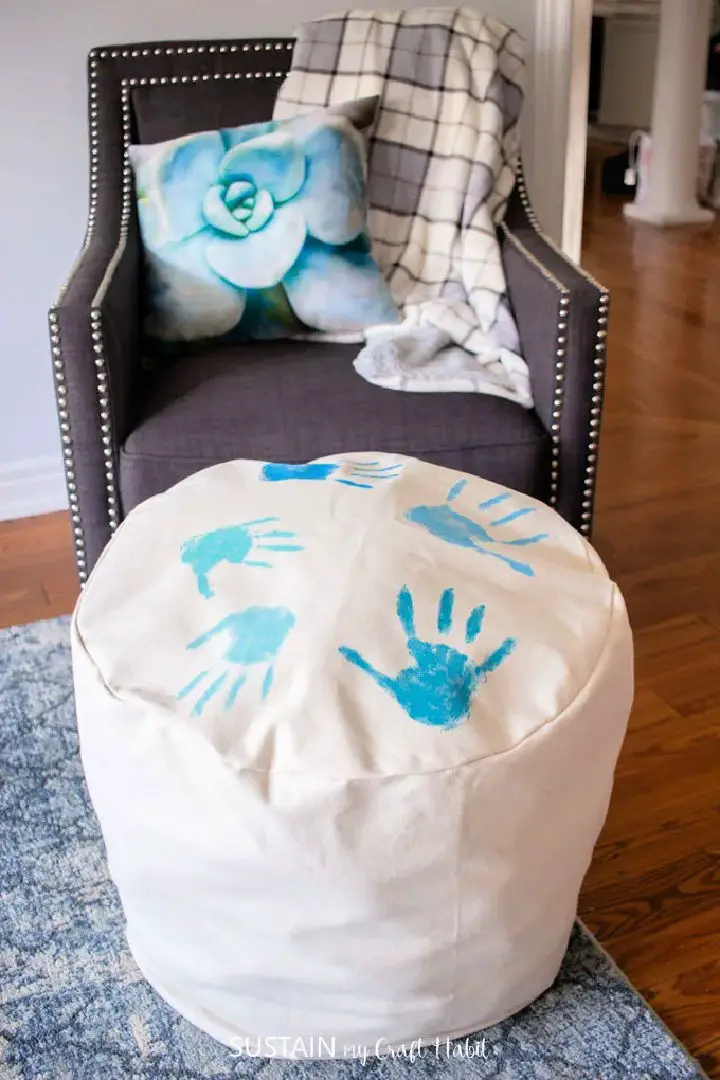
Transform your living area with a practical and stylish DIY storage ottoman, inspired by Jane and Sonja’s collaborative effort on Sustain My Craft Habit. This project not only provides an instant decluttering solution for your family room by concealing toys, blankets, and other items, but it also doubles as a plush pillow perfect for relaxation. Crafted from long-lasting canvas material, this sewing project presents a creative and budget-friendly approach to storage dilemmas. The optional incorporation of hand-stamped designs adds a personal touch, rendering the ottoman a delightful and functional addition to any home. By following the clear, step-by-step guidelines, you can create your own useful piece that keeps your space organized and inviting.
DIY Coffee Table Turned Ottoman
Take an old coffee table and breathe new life into it by transforming it into a stylish and functional ottoman with this DIY project from Timeless Creations. Start by giving the piece a fresh coat of chalk paint, followed by a custom-cut cushion wrapped in your chosen fabric. The tutorial is designed to be easy to follow, walking you through each step with clarity and precision.
From preparing the table for painting to applying a chic distressing technique and mastering the art of upholstery with simple stapling, this project has got you covered. With detailed instructions and practical tips at your disposal, you’ll have all the tools necessary to create a unique ottoman that’s sure to become a conversation starter in any room.
This DIY project is perfect for those who love to repurpose furniture and enjoy a hands-on approach to home decor.
Build a Large Upholstered Ottoman
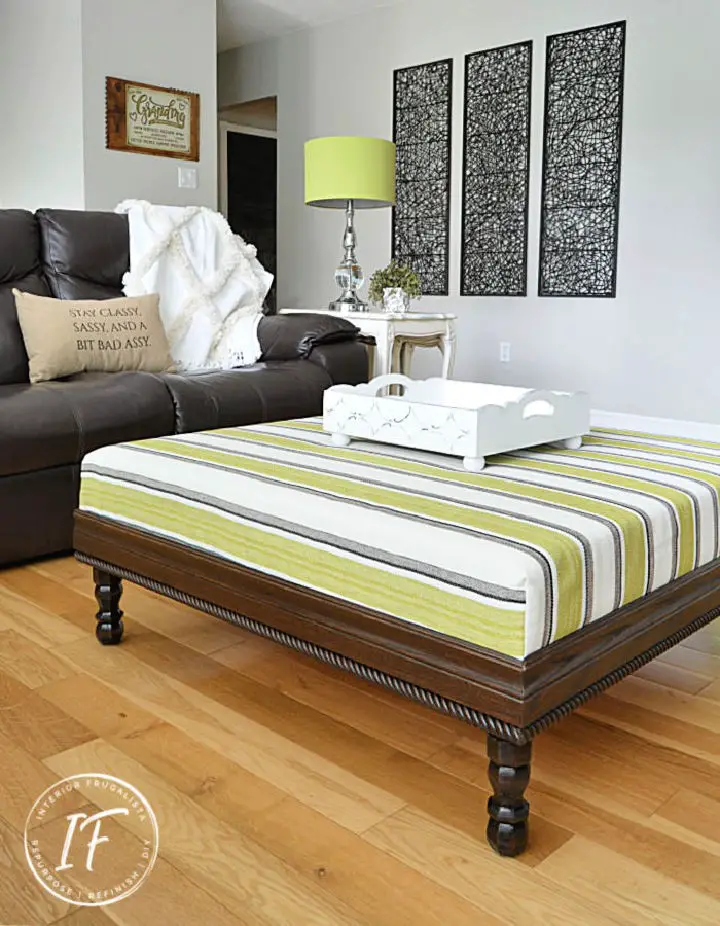
Embark on a DIY adventure to create a one-of-a-kind large upholstered ottoman with Marie-Interior Frugalista’s comprehensive guide. This meticulous tutorial takes you by the hand, providing step-by-step instructions that cover every aspect of the process – from selecting materials to applying the final upholstery touches. As you work through the guide, you’ll gain the confidence and skills to craft a piece of furniture that not only serves as a comfortable addition to your living space but also showcases your creativity and craftsmanship. With its clear and concise language, this tutorial makes the process enjoyable and accessible, ensuring that even those new to DIY projects can achieve professional-looking results.
Making a Dorm Room Storage Ottoman
Transform your compact space into a functional haven with Jaime Costiglio’s innovative DIY Dorm Room Storage Ottoman design. This multifunctional piece not only provides an additional seating option or step stool but also offers ample hidden storage, keeping your area organized and clutter-free. With a comprehensive guide, Jaime walks you through the construction process, sharing expert tips on crafting a professional-looking cushioned top using tools like table saws, drills, and staple guns. The design incorporates thoughtful details such as finger holds for portability and plastic feet for floor protection, resulting in both practicality and style. Perfect for dorms, playrooms, or small living spaces, this clever solution maximizes your living area with ease. Visit Jaime Costiglio’s website to access the printable PDF plans and detailed instructions, getting you started on creating this smart storage solution.
How to Make a Tufted Fabric Ottoman
Transforming an old table into a stunning tufted fabric ottoman is now within reach, thanks to Ashley Johnston’s comprehensive guide on Make It & Love It. This step-by-step tutorial takes you through the process from selecting the ideal materials to adding the finishing touches of attaching the legs. The result? A unique piece that not only provides a comfortable seating option but also enhances the overall aesthetic of your living space. With easy-to-follow instructions and expert tips, you’ll be able to breathe new life into an unused kitchen table or coffee table and create a cozy ottoman that reflects your personal style. Choose from a variety of fabrics to add a touch of elegance and personality to your room, making this DIY project the perfect way to express your creativity.
Making a Storage Ottoman
Whether you’re a crafty enthusiast or simply looking for a unique way to add functionality to your living space, building a storage ottoman can be a fun and rewarding DIY project. By combining basic tools with a little creativity, you can transform simple wooden crates into an attractive, upholstered piece that not only enhances the aesthetic of your room but also provides additional storage. This guide will walk you through the step-by-step process of constructing a sturdy base, adding mobility with casters, and completing the look with a soft, tufted top. The result is a versatile ottoman that invites relaxation while keeping your belongings neatly organized. With this project, you’ll be able to craft an ottoman that’s sure to generate conversation and admiration from all who see it.
DIY Upholstered Ottoman From Scratch
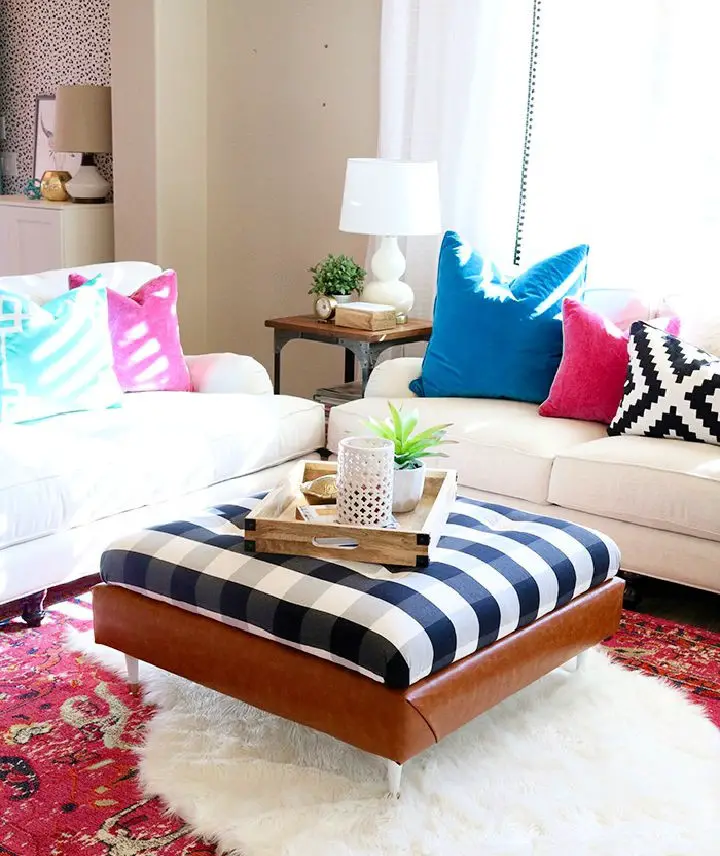
Transform your living space by creating a one-of-a-kind DIY ottoman inspired by the iconic Buffalo Check style. With Rebecca Propes Design & DIY’s step-by-step guide, you can easily elevate an IKEA ottoman into a statement piece of furniture that reflects your personal taste and adds a touch of sophistication to any room.
The comprehensive tutorial covers everything from selecting the perfect feet and preparing the base and cushion to achieving the signature tufted look. You’ll gain the confidence and skills needed to create a true showstopper that combines fabric, texture, and pattern in a unique and captivating way.
Embark on a creative journey that not only enhances your home’s décor but also provides an overwhelming sense of accomplishment when you see your handiwork come to life. Get ready to take your interior design to the next level with a show-stopping ottoman that reflects your personality and style.
Homemade Bucket Storage Ottoman
For crafty individuals seeking a unique way to personalize their living space, creating a tufted ottoman footstool can be a fulfilling DIY project. By following a comprehensive YouTube tutorial, you can transform simple materials into an elegant piece of furniture that combines comfort and style. The process involves measuring and cutting the base, adding padding for optimal comfort, and meticulously applying tufts to achieve the classic buttoned look. With guidance, even those new to upholstery can produce professional-quality results. All you need to get started is a few basic tools, supplies, and a willingness to create. Take the plunge and enjoy crafting a beautiful, personalized addition to your home decor.
DIY Upholstered Ottoman From Scratch
Looking to elevate your home’s aesthetic with a one-of-a-kind DIY upholstered ottoman? Look no further! Abbotts At Home provides a step-by-step guide to building a stunning piece that combines functionality with flair. Perfect for crafty individuals seeking a unique way to personalize their living space, this project is designed to be accessible and engaging, even for those new to woodworking or upholstery. With clear instructions and precise guidance, you’ll navigate the process from fabric selection to final touches, culminating in a beautifully finished piece that can be completed over a weekend.
Ottoman With Storage Tutorial
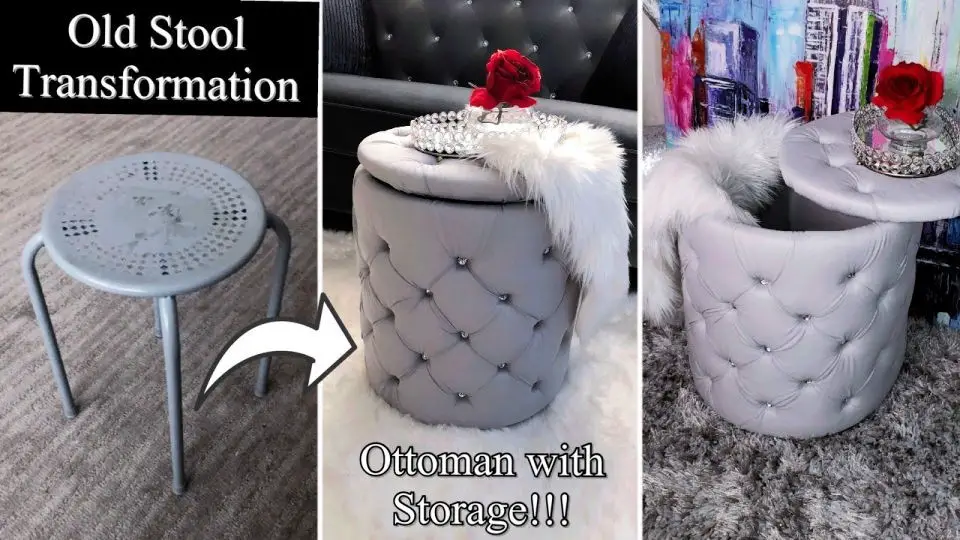
Transforming an old iron stool into a stylish ottoman with storage is a creative way to breathe new life into existing furniture, while also adding functionality to your home. A step-by-step YouTube tutorial by Yoduvh Essentials provides a detailed guide on how to achieve this DIY project. The process involves wrapping the stool with a sturdy board, adding cushioning, and finishing it with elegant fabric and crystal buttons. This unique piece of furniture not only offers additional seating but also conceals a hidden storage solution, perfect for craft enthusiasts or those looking to add a personal touch to their living space. With this DIY project, you can easily elevate the look of any room in your home and gain inspiration for your next home decorating endeavor.
Conclusion:
As we wrap up our exploration of 25 distinctive DIY ottoman ideas, it’s clear that the possibilities for creating a one-of-a-kind ottoman are truly limitless. By combining creative fabric selection with thoughtful storage or custom upholstery, you can revolutionize any room and make it your own. This comprehensive guide has demystified the process, providing everything from essential materials to step-by-step instructions and expertly addressed FAQs – making it easier than ever to bring your unique ottoman vision to life. We’re confident that this guide will spark your creativity, empowering you to craft an ottoman that not only provides comfort but also perfectly reflects your personal style and meets your functional needs.
