Why Make Your Own DIY Oil Lamp?
Embracing the art of DIY oil lamp-making offers numerous benefits that cater to various needs and preferences. This crafty endeavour is characterised by its eco-friendly, cost-effective, customizable, satisfying, emergency preparedness-oriented, and gift-giving aspects.
On an environmental note, opting for a DIY approach allows you to reuse materials like mason jars or old wine bottles, thereby reducing waste and repurposing items in a creative manner. This sustainable approach is not only kinder to the environment but also fosters a sense of resourcefulness and frugality.
From an economic standpoint, making oil lamps at home can be significantly cheaper than purchasing premade ones. With basic supplies like cooking oil, cotton wicks, and jars, you can create multiple lamps at a fraction of the cost, making it a budget-friendly option.
Customisation is another key aspect of DIY oil lamp-making. By tailoring the final product to your exact liking, whether it’s the size, scent, or style, you’re ensuring that the lamp perfectly matches your décor and personal preferences, allowing for a high degree of creative expression.
The process of making an oil lamp can also be a satisfying experience, as it allows you to unwind and engage in a calming activity. This sense of accomplishment is often accompanied by a feeling of pride and fulfillment.
Furthermore, DIY oil lamps can serve as a practical component of your emergency kit, providing a reliable source of light during power outages or other situations where electricity is unavailable.
Finally, handmade oil lamps make thoughtful, personalized gifts that demonstrate care and creativity. They are unique and special presents that will be cherished by friends and family.
In summary, DIY oil lamp-making offers a sustainable, economical, and personalized lighting solution that not only provides warmth and charm but also fosters a sense of resourcefulness, creativity, and satisfaction.
How to Make DIY Mason Jar Oil Lamps: A Step-by-Step Guide
Elevate your home’s ambiance with a unique and sustainable DIY project – making oil lamps using mason jars. This straightforward guide will cover two distinct styles: an oil-burning candle and a lantern, empowering you to create a reliable and eco-friendly lighting solution that’s as easy on the wallet as it is gentle on the environment.
Materials Needed
To create your own homemade candles, you’ll need a few basic supplies. Start with mason jars, as pint-sized ones work particularly well. You’ll also require cotton wicks, specifically those made from 100% cotton that are quarter-inch thick. For the wax itself, opt for vegetable or canola oil. Don’t forget to stock up on mason jar lids and rings, which you’ll use to seal your candles. To create a hole in the lid for your wick, have a drill or sharp tool at the ready. If you’re aiming to create a lantern-style candle, be sure to pick up some needle nose pliers and wire as well.
Step 1: Preparing Your Mason Jar Candle
To begin modifying your mason jar lid, start by drilling a hole in its center that is slightly smaller than the thickness of your chosen wick. This ensures a secure fit once the wick is inserted. Next, feed the cotton wick through the hole from the bottom up, taking care not to force it too aggressively as this might cause it to become stuck. If necessary, gently pull the wick through until it’s fully seated. Once the wick is in place, fill the jar almost to the top with cooking oil, leaving approximately a half-inch of the wick exposed. Finally, secure the lid and wick combination onto the jar using its accompanying ring.
Step 2: Lighting Your Candle
Permit the wick to fully saturate with the oil by allowing it to soak for a few minutes prior to ignition. Once ready, simply light the wick in the same manner as you would a traditional candle. Although there may be some initial smoke as the cotton ignites, this will quickly dissipate as the soy wax melts and burns cleanly.
Step 3: Crafting Your Mason Jar Lantern
To create a Wick Holder, utilize needle nose pliers to craft a wire loop that will securely grasp the wick. Next, fashion a base that allows the wick to rest several inches above the jar’s bottom. This setup enables the wick to remain submerged in the oil while still allowing it to be easily ignited and maintained.Subsequently, attach the wick to the wire loop and position it within the jar. Carefully pour a few inches of cooking oil into the jar, ensuring the wick tip remains above the oil’s surface. This crucial step enables a steady fuel supply for the lantern while preventing excessive oil consumption.Finally, permit the wick to absorb some oil before gently pulling it up with the wire, igniting it, and subsequently lowering it back into the jar. As the flame stabilizes, you’ll be rewarded with a warm, reliable light source that can be enjoyed for hours.
Step 4: Maintenance and Safety
When it’s time to refill the oil for your candle and lantern, don’t forget to inspect the wick as well. Check if it needs to be replaced or simply trimmed to ensure a clean burn. For added caution, always keep an eye on these light sources, avoiding the temptation to leave them unattended. If you’re using cooking oil that’s been repurposed for this use, take the extra step of filtering it to eliminate any residual food particles, ensuring a safer and cleaner burning experience.
Video Tutorial
For an interactive and comprehensive guide to creating DIY Mason Jar Oil Lamps, I recommend pairing this written tutorial with the accompanying YouTube video. The visual walkthrough not only provides a step-by-step demonstration of the process but also offers a more engaging and intuitive learning experience. By combining both resources, you’ll gain a deeper understanding of the project’s intricacies and be better equipped to replicate it. In addition to providing a unique and cozy ambiance in any setting, these lamps also offer an eco-friendly alternative for lighting. As with any candle or lantern-based product, safety is paramount; always supervise your lamps while they’re lit to ensure a safe and enjoyable experience. With that said, I encourage you to take on this fun and rewarding DIY project and enjoy the benefits of sustainable lighting in your own home.
FAQS on DIY Oil Lamps
Embarking on a DIY oil lamp-making adventure can be an invigorating experience, offering a perfect blend of creativity and accomplishment. To ensure a seamless start, let’s address some frequently posed queries that will guide your journey from inception to completion.
What kind of oil can I use for my DIY oil lamp?
For a DIY oil lamp, you have a range of oil options at your disposal. Some popular choices include vegetable oil, canola oil, olive oil, and paraffin lamp oil, which is smokeless and odorless. When selecting an oil for indoor use, it’s crucial to prioritize safety and suitability, particularly if you’re sensitive to fragrances or scents.
How do I make the wick for my oil lamp?
When crafting your own wick, you’ll need either 100% cotton yarn or string. Alternatively, you can opt for pre-made cotton wicks, which are readily available at craft stores. To get started, ensure the wick is the correct size for your lamp and trim it to the desired length for a clean and efficient burn.
Can I add scent to my oil lamp?
When it comes to adding a fragrant twist to your oil lamp, incorporating a few drops of essential oils into the lamp oil can be a great way to create a pleasing aroma while the lamp is burning. But before you get started, make sure to choose an essential oil that’s compatible with the type of oil you’re using in your lamp, as some blends may not mix well together.
How long will my DIY oil lamp burn?
The lifespan of your homemade oil lamp is influenced by three primary factors: the dimensions of the vessel, the volume of oil employed, and the density and composition of the wick. While these variables impact the overall duration of the lamp’s burn time, a small mason jar oil lamp can typically operate for several hours when filled to capacity with oil.
Is it safe to leave an oil lamp burning unattended?
When it comes to burning oil lamps, vigilance is key. To avoid potential hazards, ensure you maintain a clear view of the lamp at all times. For added safety, position the lamp on a sturdy, heat-resistant surface that’s well-clear of any flammable materials.
How do I extinguish an oil lamp safely?
When it’s time to put out an oil lamp, do so safely by employing a trusty metal snuffer or cleverly placing a lid over the jar to starve the flame of the oxygen it needs to survive. For your own protection and the integrity of the lamp, avoid the temptation to blow directly on the flame as this can lead to messy splatters of hot oil.
Can I use recycled jars and bottles for making oil lamps?
When it comes to creating a unique and sustainable lamp, using recycled jars and bottles can be a fantastic approach. Not only does this method align with eco-friendly values, but it also allows you to infuse your lighting fixture with personal touches. However, before repurposing these containers for your lamp, make sure they are thoroughly cleaned and free from any cracks or chips that could compromise their structural integrity.
How do I clean my DIY oil lamp after use?
When it comes time to clean your DIY oil lamp, there are a few key steps to follow. First, ensure all remaining oil has been emptied from the container. Next, give the container a thorough washing with soap and warm water to remove any residue or debris. Once clean, rinse the container thoroughly and dry it before its next use. It’s also important to check the wick for cleanliness and dryness, replacing it if necessary to maintain optimal performance. By following these simple cleaning steps, you’ll be able to enjoy your homemade oil lamp with peace of mind, knowing it’s safe and well-maintained.
15 Homemade DIY Oil Lamp Ideas
Unleash your creativity by crafting 15 unique homemade DIY oil lamp ideas in the comfort of your own home. With simple and accessible projects, you’ll be amazed at how easily you can transform a humble oil lamp into a stunning centerpiece that adds warmth and ambiance to any room.
Wonderful DIY Essential Oil Lamp

Transform your living space into a fragrant oasis by crafting a DIY essential oil lamp, as shared by AnnMarie John. This creative project not only fills the air with your preferred scents but also adds a touch of charm to your decor. By combining simple ingredients like essential oils, light olive oil, floating wicks, and a Mason Jar, you can create an oil lamp that reflects your personal style. Take it to the next level by incorporating decorations such as flowers or stones, and enjoy the added benefit of a safer alternative to traditional candles that can be easily extinguished with water or a jar lid. This enjoyable and eco-friendly DIY project promises to elevate your home’s ambiance with delightful aromas.
How to Make a Mason Jar Oil Candle Lamp

Transform your space into a cozy retreat by crafting charming mason jar oil lamps with Hearth and Vine’s comprehensive guide. This delightful DIY project harmoniously blends natural elements like pine cones, evergreens, and cinnamon sticks with the inviting aromas of essential oils, all contained within a classic mason jar. As you follow the step-by-step instructions, you’ll find that safety and aesthetic appeal seamlessly come together, making these oil lamps perfect for gifting or personal use. Whether you’re seeking to add warmth and elegance to your home decor or create thoughtful holiday presents, this engaging tutorial ensures a delightful experience.
Making an Oil Lamp From Scratch
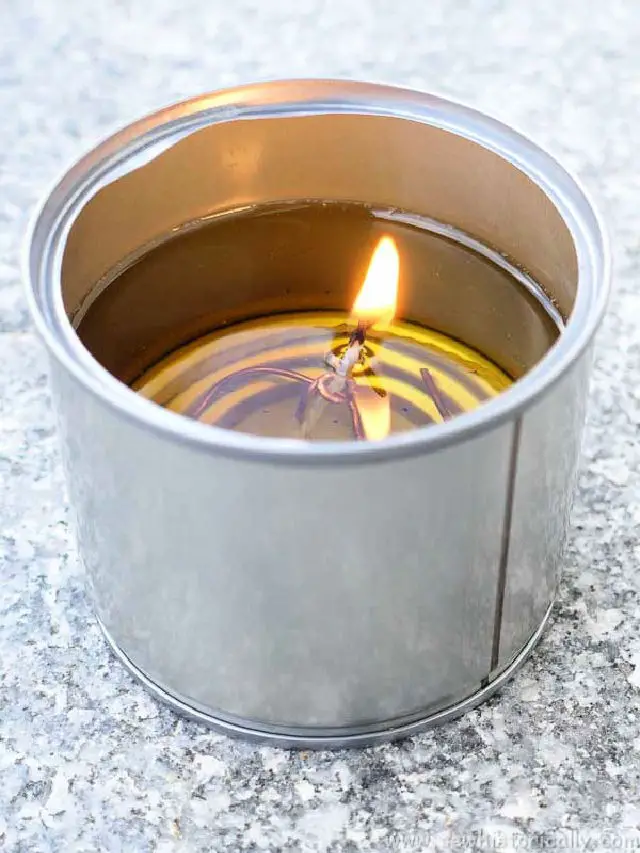
Create a sustainable oil lamp in mere minutes with Sew Historically’s easy DIY tutorial. This eco-friendly project is perfect for those who value environmentally conscious crafts and require a reliable light source during power outages or for outdoor ambiance. With just a tin can, vegetable oil, cotton string, and some wire, you can craft a charming oil lamp that offers a steady flame, minimal soot, and no unpleasant odors. Not only is this project cost-effective, but it’s also a safer alternative to traditional candles. Suitable for both indoor and outdoor use, your handmade oil lamp can be a creative way to repurpose cooking grease, providing a warm and inviting glow.
Homemade Mason Jar Oil Lamp
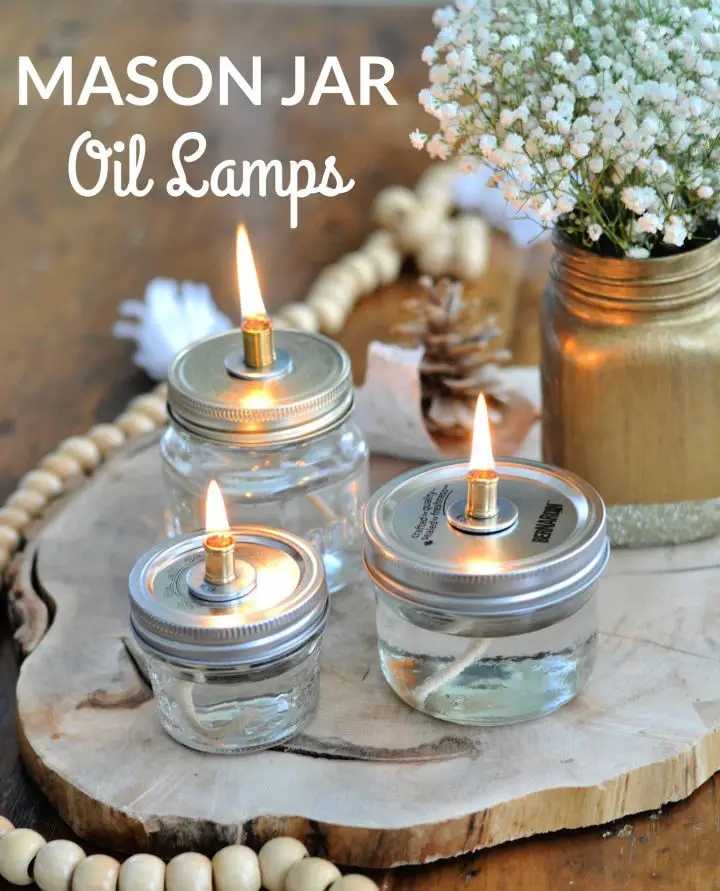
Transform any space into a cozy retreat by crafting a homemade Mason jar oil lamp. This charming lighting solution is perfect for intimate gatherings or as a unique centerpiece for your next event. To get started, collect small Mason jars, paraffin lamp oil, and a few basic hardware supplies. The process is straightforward: drill a hole in the lid, thread a wick, and fill the jar with oil. For an added touch of sophistication, customize your lamp by using colored oils or infusing it with soothing essential oils. Not only will these oil lamps add a warm ambiance to any room, but they’ll also provide a soft, comforting glow that’s sure to brighten up even the longest winter nights.
Easy DIY Magical Mason Jar Oil Lamp
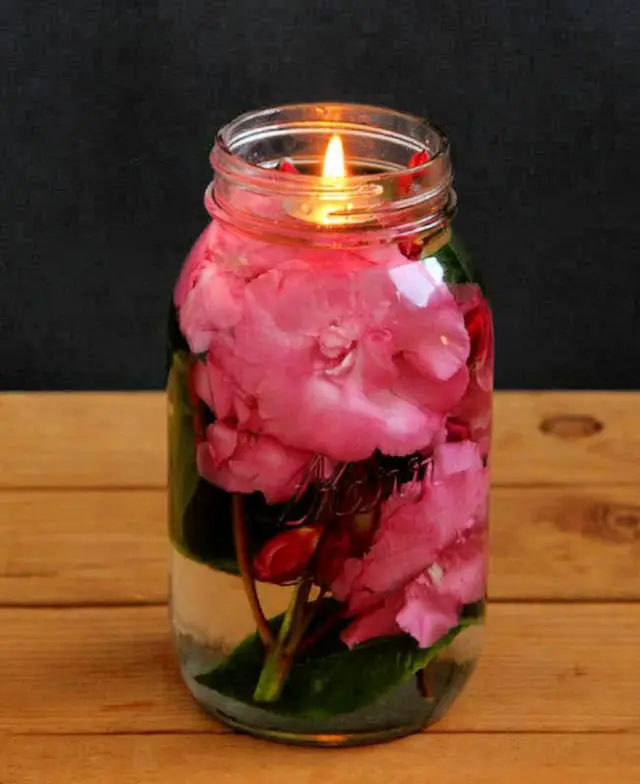
Transform your space into a whimsical haven with a homemade mason jar oil lamp, courtesy of A Piece Of Rainbow’s ingenious DIY project. This clever creation elevates everyday items to an enchanting level of ambiance, boasting not only visual appeal but also safety and longevity. With just three simple ingredients – clear water, vegetable oil, and floating wicks – you can craft these captivating oil candles in mere minutes. Add a personal touch with decorative elements like flowers or pebbles, and bask in the serene glow perfect for intimate gatherings or relaxing evenings. By following our straightforward steps, you’ll effortlessly bring warmth and charm to your surroundings.
Turn Booze Bottles Into Oil Lamp
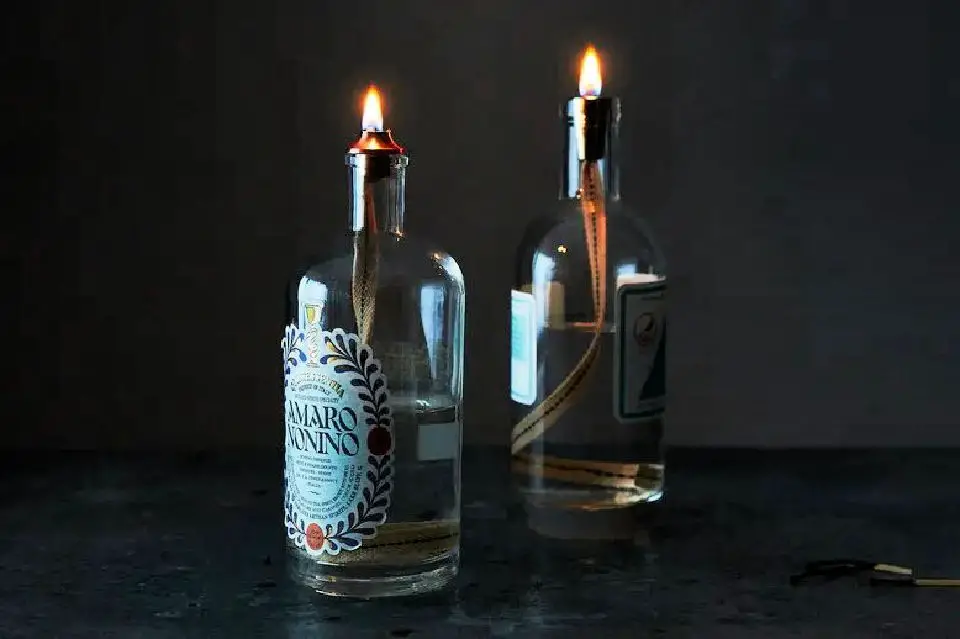
Transform discarded whiskey containers into captivating oil lamps with a simple DIY project from Food52. Begin by thoroughly cleaning the bottle, then fill it with smokeless, odorless lamp oil. Next, insert a cotton wick through a wick holder to create a warm and inviting light source. This timeless technique lends a touch of sophistication and coziness to any room, making it an ideal choice for intimate gatherings or as a distinctive decor piece. By following these easy steps, you can safely breathe new life into your favorite bottles and enjoy the ambiance of soft lighting.
Make Your Own Oil Lamp – Step by Step
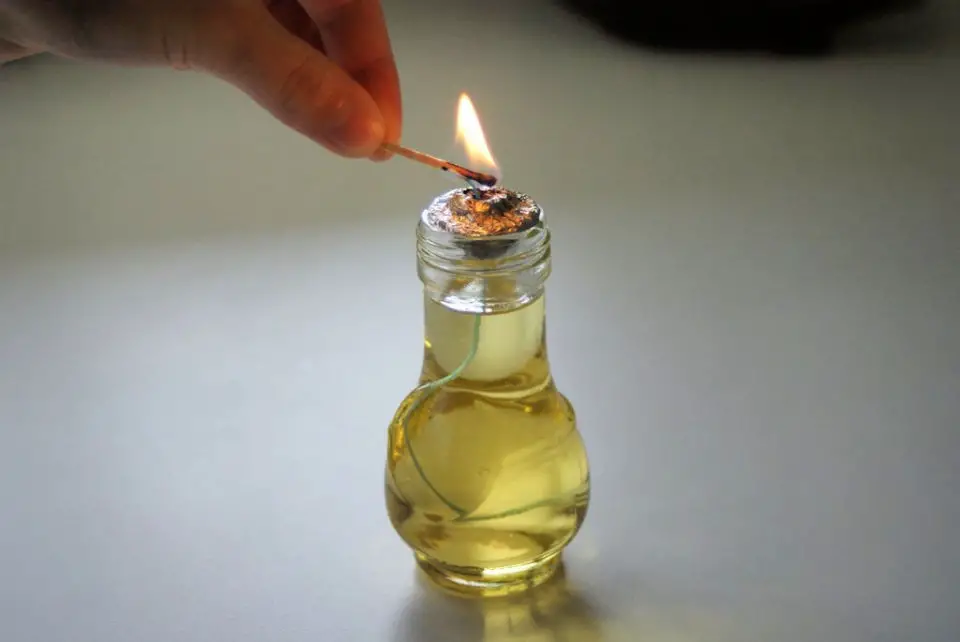
With minimal materials, you can create a charming oil lamp that exudes warmth and coziness. Simply gather a jar of your choice, a wick, and some aluminum foil, then follow Instructables’ step-by-step guide to assemble the components and light your lamp safely. This DIY project is not only straightforward but also allows for customization to match your home’s unique decor. As you bring this traditional light source to life, you’ll enjoy the satisfaction of crafting a functional piece that’s perfect for illuminating any space or serving as a thoughtful handmade gift.
Beginner-Friendly DIY Oil Lamp
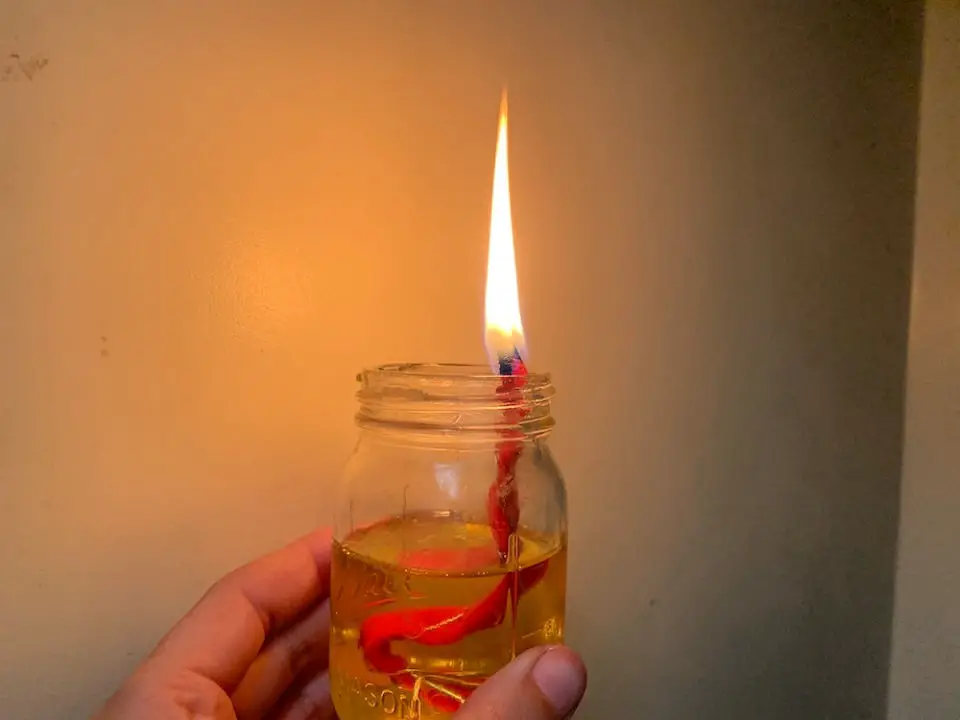
Transforming a humble glass jar into a warm and inviting oil lamp is an accessible and rewarding DIY endeavor. With just a few everyday items, including a small glass container, a cotton thread, and your preferred oil such as olive oil, you can create a unique ambiance that’s perfect for cozying up indoors or illuminating outdoor gatherings during power outages. By following this straightforward guide, you’ll be able to craft a functional oil lamp that not only adds a touch of rustic charm to your space but also provides a reliable source of light when the lights go out.
Handmade Glass Bottle Oil Lamp
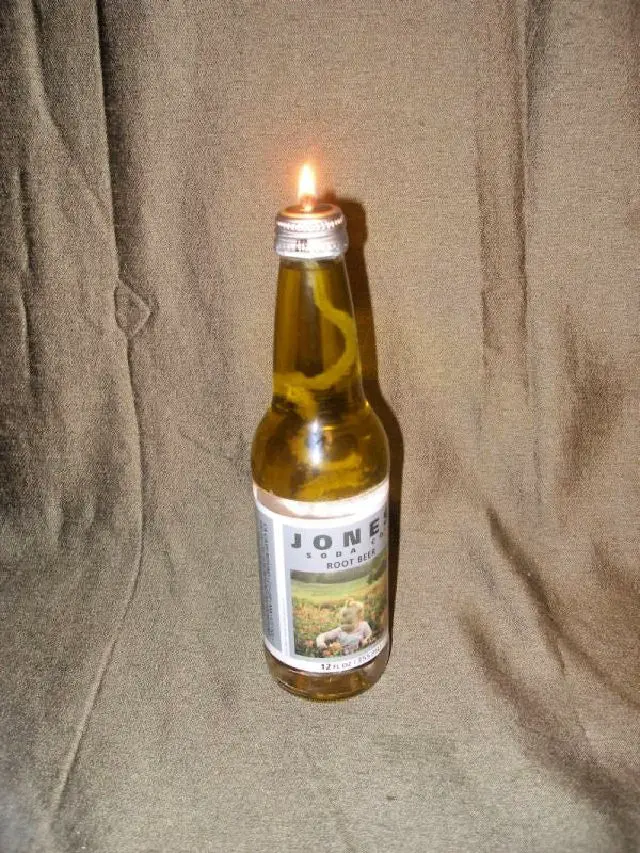
Transform an ordinary glass bottle into an extraordinary oil lamp with the help of Instructables. This DIY project is a great way to upcycle an empty glass bottle with a screw-on metal lid, turning it into a charming and potentially romantic light source. The process is straightforward and budget-friendly, allowing you to customize your lamp by filling it with a combination of water and oil or all oil, depending on your preference. The result is not only a functional lamp but also a decorative piece that adds a warm ambiance to any setting, making it a delightful addition to your home. With clear and easy-to-follow instructions, you’ll have fun creating a piece that’s just as enjoyable to use as it was to make.
Making Semi Precious Stone Oil Lamps
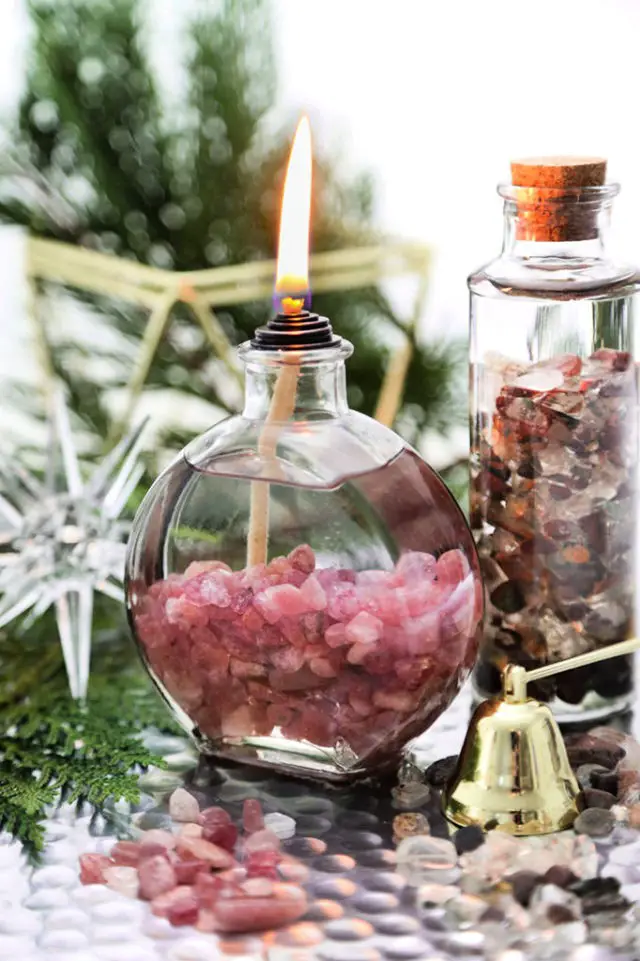
Craft a unique semi-precious stone oil lamp with this step-by-step DIY guide. These handmade creations exude warmth and sophistication, making them perfect for personal use or as a thoughtful gift. Select from an array of stones, such as rose quartz to infuse your space with love, ghost quartz to attract good fortune, or strawberry quartz to promote relaxation. To get started, collect the following materials: a glass bottle, cotton wick, tumbled stone chips, a heat-resistant bead or washer, and paraffin lamp oil. Begin by thoroughly cleaning the glass vessel, then arrange your chosen stones in a visually appealing manner. Next, pour in the lamp oil, taking care not to overfill the container. Secure the wick in place with the provided bead or washer. Finally, ignite the flame and bask in the cozy ambiance your handmade oil lamp provides. With this easy-to-follow guide, you’ll be encouraged to let your creativity shine while crafting these beautiful, one-of-a-kind oil lamps.
Simple DIY Oil Lamp From a Mason Jar

As Hurricane Sandy loomed on the horizon, Washington D.C. residents scrambled to prepare for potential power outages. Amidst the chaos, one solution emerged: DIY oil lamps crafted from humble mason jars and household staples. This charming, eco-friendly alternative offers a reliable light source in times of need. To create your own, gather a few simple materials – a mason jar, a nail, hammer, cotton or jute twine, natural oil, and a dash of patience. First, punch a small hole in the lid, then fill the jar with oil and soak the wick before igniting. As with any open flame, exercise caution: never leave your lamp unattended to ensure safe illumination.
How to Make a Farmhouse-Style Oil Lamp

Transform an old cupboard door into a charming farmhouse oil lamp that exudes rustic charm, just like the one showcased on Prodigal Pieces. With Larissa’s step-by-step guidance, you’ll be able to recreate this delightful DIY project in no time. Start by thoroughly cleaning and prepping the door, then apply a coat of antique white latex paint to give it a soft, vintage glow. While the paint dries, take some time to tidy up any loose threads or debris that might detract from the lamp’s rustic patina. Next, add a personal touch with a grain sack stencil before finishing it off with a layer of gray wax for added texture and dimension. Finally, replace the wick to bring the lamp to life. Not only will this project enhance your home decor, but it’ll also provide a warm and cozy source of light during power outages. Ready to add some nostalgic charm to your space? Dive into this creative project and enjoy the warmth and character it brings.
DIY Oil Lamp Out of a Vintage Oil Can
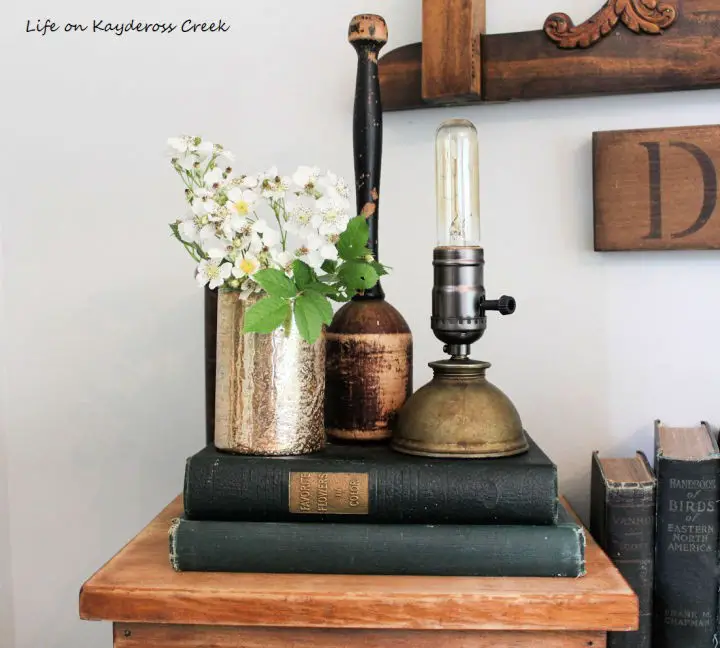
Turn an old oil can into a charming vintage-inspired lamp with this straightforward DIY guide. By repurposing a thrift store find, you’ll create a unique Edison bulb lamp that adds rustic charm to any room. This budget-friendly project requires minimal materials and can be completed in no time, making it perfect for personalized lighting on your desk or as a quaint night light. Not only will the lamp serve a functional purpose, but it’ll also become a conversation starter. Follow the simple steps from cleaning the can to assembling the lamp parts, and enjoy the satisfaction of creating a one-of-a-kind home accessory.
Make a Masson Jar Oil Lamp for the Bedroom

Transform your home into a cozy retreat by crafting a charming oil lamp using everyday items. This innovative project combines a bicycle tube valve, a jam bottle, and a bulb to create a beautiful, functional piece that radiates warmth. With the help of a step-by-step YouTube guide, you’ll be able to replicate this unique DIY masterpiece with ease. Perfect for those who enjoy hands-on activities and upcycling, this homemade oil lamp adds a touch of personality to any room. Join the creative community on YouTube and bring a sense of warmth and character to your space by creating your own unique ambiance.
Build a Steampunk Industrial Pipe Oil Lamp

Transform your living space with the unique charm of a DIY steampunk industrial pipe oil lamp. This engaging YouTube tutorial by Banjo Show provides a step-by-step guide on how to craft a visually striking oil lamp using industrial pipes, perfect for those who appreciate unconventional home decor. The project emphasizes safety, utilizing paraffin oil as a slow-burning and smoke-free option with a high flash point. To ensure peace of mind, the creator seals the valve with glue to prevent accidental opening. Whether you’re looking to enhance your own living space or create a thoughtful gift, this project combines creativity with a touch of vintage flair, bringing a sense of steampunk whimsy to your surroundings.
Conclusion:
Crafting your own DIY oil lamp is a transformative experience that combines creativity with practicality. Our comprehensive guide to 15 homemade DIY oil lamp ideas provides the perfect foundation for bringing your vision to life. As you navigate the process, you’ll discover not only a beautiful and functional piece but also a sense of accomplishment and pride in your handmade creation. Whether you’re seeking to add a unique touch to your space or exploring a new hobby, making an oil lamp is an excellent way to spark inspiration and creativity. Thank you for joining us on this illuminating journey, and we hope the experience has left you feeling motivated to create something truly special.
