With minimal investment of time and resources, crafting a DIY napkin holder can inject a touch of personality into your dining space or kitchen area. The vast array of 25 budget-friendly and accessible DIY napkin holder ideas ensures you’ll find the perfect design to suit your unique style. These projects cater to varying skill levels, allowing anyone to create something both beautiful and functional. By opting for a DIY approach, you’re not only acquiring a useful item but also cultivating a sense of creativity, self-expression, and fulfillment that comes with bringing your vision to life.
As you embark on this creative journey, you’ll discover that the process is just as rewarding as the end result. From selecting materials to adding the finishing touches, each step presents an opportunity to learn and refine your DIY skills.
Get ready to dive into a step-by-step guide, gather your necessary materials, and explore customization ideas that will bring your creative vision to life. Let’s proceed and see how you can create a napkin holder that harmoniously blends style and practicality.
How to Make Napkin Holder – Step by Step
As the DIY movement continues to gain momentum, recycling materials has become an integral part of our creative endeavors. Not only does it help us save money, but it also contributes to a more sustainable future. Among the many materials that can be repurposed is cardboard, often overlooked despite its vast potential. This project takes a simple piece of cardboard and transforms it into a stunning faux wood napkin holder, ideal for those who enjoy crafting and prioritize eco-friendliness.
Required Materials:
To create a unique piece of art, you’ll need to gather the following materials. Start with the basics: a small cardboard box and some sharpie markers for adding details. You’ll also need some masking tape for securing any loose edges or corners. For more precise cuts, have an Exacto knife or box cutter on hand. If you’re looking for extra precision, consider investing in a level to ensure your work is perfectly straight. Once you’ve got the foundation set, it’s time to add texture and depth. Mix Mod Podge with water according to the instructions (a 2:1 ratio is standard) and use it to apply strips of packing paper to create an interesting surface. For filling in any gaps or creating a smooth finish, pre-mixed joint compound is the way to go. Use a putty knife or Japan scraper to spread it evenly. To add some extra flair, grab a disposable chip brush and get to work. Once you’ve got your base coat applied, it’s time to sand down any rough edges. Use 220 grit sandpaper to smooth things out before moving on to the painting process. Mix up your favorite colors in acrylic, chalk, or latex paints and get creative! If you want to add some extra dimension, gel stain is a great option. Finally, seal everything off with poly acrylic for a clear matte finish. And don’t forget to use masking tape to clean up any stray bits of material.
Step-by-Step Guide
To transform a cardboard box into a unique napkin holder, start by selecting a box that matches the size of your napkins. Use a Sharpie to mark the desired dimensions on the box, taking care to remove any shipping tape or stickers. Next, secure the box with masking tape to add stability, and then cut along your marked lines using an Exacto knife and a level for precise edges. Once you’ve achieved the desired shape, use tape to conceal the edges from the front face to the bottom for a seamless finish.
The next step is to apply decoupage. Mix Mod Podge with water according to the manufacturer’s instructions, and then attach strips of packing paper to both the interior and exterior surfaces using this mixture. Allow it to dry overnight before proceeding.
To add texture, use joint compound to give your napkin holder thickness and durability. Apply the compound with a putty knife or scraper, and then draw lines on the surface to mimic wood grain using a disposable chip brush. Allow the compound to dry completely before sanding the surface smooth with 220-grit paper.
The final steps involve painting and sealing your napkin holder. After the joint compound is fully dry, paint the holder with a base coat that will help the gel stain adhere better and create a wood grain effect. Once the paint has dried, apply two coats of poly acrylic in a clear matte finish, allowing each coat to cure for at least 24 hours before using your new napkin holder.
Cleanup Tips:
To eradicate unwanted paint splatters on non-porous surfaces such as silicone mats or plastic trays, a simple yet effective solution is to employ masking tape. This method eliminates the need for water, making it an ideal approach for tackling these types of surfaces.
Video Tutorial
To further enhance your understanding of this project, we recommend consulting the accompanying step-by-step video tutorial available on Copper Cactus Crafts. The visual cues and techniques presented within will seamlessly integrate with the written instructions provided here, making the crafting process easier to comprehend and follow. By combining these two resources, you’ll be able to create a one-of-a-kind faux wood napkin holder that not only showcases cardboard’s versatility but also promotes eco-friendly practices by repurposing everyday items, ultimately reducing waste.
Customization Ideas for Your DIY Napkin Holder
Elevate your DIY napkin holder by infusing it with personal touches that reflect your style or make it a thoughtful gift for someone special. To do so, consider the following creative ways to customize your project:
Start with color and choose paints that harmonize with your kitchen’s aesthetic or take a bold approach with contrasting hues. Use acrylic paints for a durable finish and experiment with patterns like stripes, polka dots, or chevrons.
For a rustic look, try wood burning to create intricate designs or personalized messages. This technique requires a steady hand and the right tools, but the end result is stunning.
Alternatively, use decoupage to apply cutouts from magazines or specialty paper onto the wooden surface. Seal the design with a decoupage medium for a smooth finish.
Stenciling offers another way to add shapes, letters, or numbers to your napkin holder. This method is great for creating consistent designs or adding names for a personalized touch.
To introduce texture, glue on materials like burlap, lace, or textured paper. Experiment with different textures to find the look that suits you best.
Finally, embellish your napkin holder with accessories like beads, buttons, or small charms. These can be glued on to add a touch of whimsy or sparkle.
The key to a successful DIY project is to have fun and let your creativity shine. Don’t be afraid to mix and match ideas to create a one-of-a-kind napkin holder that reflects your unique style.
Troubleshooting Tips for DIY Napkin Holder Projects
While crafting a DIY napkin holder can be a fun and rewarding experience, it’s not uncommon to encounter a few setbacks along the way. Fortunately, many common issues can be resolved with a little patience and some troubleshooting techniques. Here are some expert tips to help you overcome typical challenges: Wood pieces that won’t align? Check if they’re cut evenly and smooth out any rough edges with sandpaper. Ensure you’re applying the right amount of pressure when gluing them together, as this can make all the difference. If glue isn’t holding as expected, try using a higher-quality adhesive and allowing it to set for the recommended time. You can also use clamps to apply gentle pressure while the glue dries. Paint streaks or bubbles? Use a high-quality brush and paint in one direction to prevent streaking. If bubbles do form, gently sand them down after the paint has dried and reapply another coat. When working with decoupage, smooth out any wrinkles by applying it from the center outward using a flat tool like a brayer or old credit card. And if stickers or decals are peeling off, make sure to clean the surface thoroughly before application and seal them with a clear finish once in place. Finally, when inserting screws or nails, pre-drill holes to prevent wood splitting by choosing the correct drill bit size for your hardware. With these tips at your disposal, you’ll be well on your way to creating a beautiful and sturdy napkin holder that will last for years to come.
Maintenance and Care for Your DIY Napkin Holder
To keep your DIY napkin holder in pristine condition and ensure it remains a stunning centerpiece for years to come, follow this straightforward guide on how to maintain and care for your handmade piece:
Dusting Regularly: Use a soft cloth or duster to gently sweep away any dust that accumulates, keeping the napkin holder looking clean and fresh.
Avoiding Water Damage: If your napkin holder is made of wood, it’s crucial to keep it dry. Wipe up any spills promptly and refrain from using it as a coaster for drinks to prevent damage.
Protective Coating: Apply a protective sealant to shield against scratches and stains, particularly if you’ve painted or stained the wood.
Gentle Cleaning: For stubborn stains, employ a slightly damp cloth with mild soap. Avoid harsh chemicals or abrasive cleaners that can compromise the finish.
Storage: When not in use, store your napkin holder in a dry place away from direct sunlight to prevent fading over time.
Refreshing the Look: Every so often, you might want to revitalize your napkin holder’s appearance with a new coat of paint or additional decorations to give it a fresh, revitalized look.
Environmental Impact of DIY Napkin Holders
When crafting a DIY napkin holder, consider the long-term effects of your material selections. To minimize your ecological footprint, follow these guidelines for making sustainable choices: Wood sourcing is crucial – look for certifications like FSC or PEFC to ensure responsible harvesting practices are in place. Non-toxic finishes are also essential; opt for water-based paints, stains, and sealants with low VOCs. Don’t forget about incorporating recycled elements into your design, whether that’s reclaimed wood, repurposed items, or biodegradable glues. Before shopping for new materials, take stock of what you already have at home that could be upcycled – an old picture frame can become a unique napkin holder with some creativity. Finally, think about the end-of-life cycle for your project; design it to allow for easy separation of parts for recycling or composting when it’s no longer needed. By making eco-conscious choices, you’ll not only reduce waste but also create a planet-friendly DIY project.
FAQs For DIY Napkin Holder
Discover the world of DIY napkin holders with a complete guide to getting started. From innovative ideas to practical tutorials, we’ve got you covered.
What materials do I need to make a DIY napkin holder?
To embark on this creative project, you’ll require a range of essential supplies, including wooden blocks, wood glue, sandpaper, paint or stain, paintbrushes, and decorative elements to infuse your creation with visual appeal. Additionally, consider incorporating recycled materials or eco-friendly options to add an environmentally conscious touch. A sealant will also be necessary to ensure the longevity of your finished piece.
How do I ensure the wooden pieces are aligned correctly?
When it comes to assembling your woodworking project, attention to detail is crucial. To achieve a seamless finish, start by using sandpaper to gently smooth out any uneven edges or surfaces. This will not only improve the overall aesthetic but also create a more stable bond when applying adhesive. To take it a step further, employ clamps to securely hold the pieces in place as the glue dries, ensuring a precise and durable connection.
What kind of paint should I use for my napkin holder?
When it comes to artistic endeavors, acrylic paint is an excellent choice due to its remarkable durability and bold color palette. For a more environmentally conscious approach, opt for non-toxic, water-based paints that are free from harsh chemicals.
Can I personalize my napkin holder?
Infuse your napkin holder with creativity by exploring various artistic mediums. From traditional painting techniques to unconventional methods like wood burning, decoupage, and stenciling, you can add a personal touch to this everyday item. For an extra layer of visual interest, consider incorporating textures through materials like fabric, paper, or natural elements. Alternatively, incorporate small decorative accents like beads and buttons to give your napkin holder a distinctive flair.
What should I do if the glue isn’t holding the pieces together?
When assembling wooden projects, it’s crucial to use the right adhesive – specifically, wood glue. To ensure a strong bond, apply a generous amount of glue to the joints, following the manufacturer’s instructions for setting times. For added stability and peace of mind, consider utilizing clamps to hold the pieces in place as the glue dries, allowing you to achieve professional-grade results.
How can I prevent paint streaks or bubbles?
To achieve a professional-looking finish with your painting project, it’s essential to use a high-quality brush that’s designed for the specific type of surface you’re working on. When applying the paint, always move in one direction, following the natural grain or texture of the material. This will help prevent unevenness and minimize the risk of bubbles forming. If you do encounter bubbles, don’t panic – simply allow the paint to dry completely before gently sanding the area smooth. Once you’ve removed any imperfections, you can reapply a thin layer of paint to maintain the desired color and sheen.
What if the paper wrinkles during decoupage?
To tackle stubborn wrinkles, start by smoothing out the paper from its center to its edges. Next, utilize a brayer or an old credit card to apply firm pressure. This straightforward technique can significantly reduce the appearance of creases.
How do I clean and maintain my napkin holder?
To maintain the longevity and appearance of your surfaces, it’s essential to establish a routine cleaning schedule. This involves using a soft, lint-free cloth to gently wipe away dust and debris on a regular basis. It’s also crucial to avoid exposing the surface to water or excessive moisture, as this can cause damage or discoloration. When dealing with stubborn stains, reach for a gentle cleaner containing mild soap. For added protection against scratches and wear, apply a high-quality sealant that’s specifically designed for your surface type.
How can I make my DIY project more environmentally friendly?
When crafting your eco-friendly napkin holder, consider selecting sustainable wood options, such as reclaimed or FSC-certified woods, to minimize the environmental impact of your project. In addition to eco-conscious materials, opt for non-toxic finishes and biodegradable adhesives to ensure a harmless end-of-life cycle for your design. To take it a step further, incorporate recycled materials into your napkin holder’s construction, allowing you to give new life to discarded items. As you finalize the design, keep in mind the importance of recyclability or compostability at its eventual end of life, ensuring that your creation can seamlessly transition from functional piece to natural resource.
What should I do if the wood splits when inserting screws or nails?
Before starting your project, take a crucial step by pre-drilling holes in your material to avoid splitting and ensure a smooth installation process. This simple yet essential step can make all the difference in achieving professional-looking results. Make sure to choose the correct drill bit size that matches the hardware you’re using, as using an incorrect size can lead to poor fitment or even damage to the surrounding material.
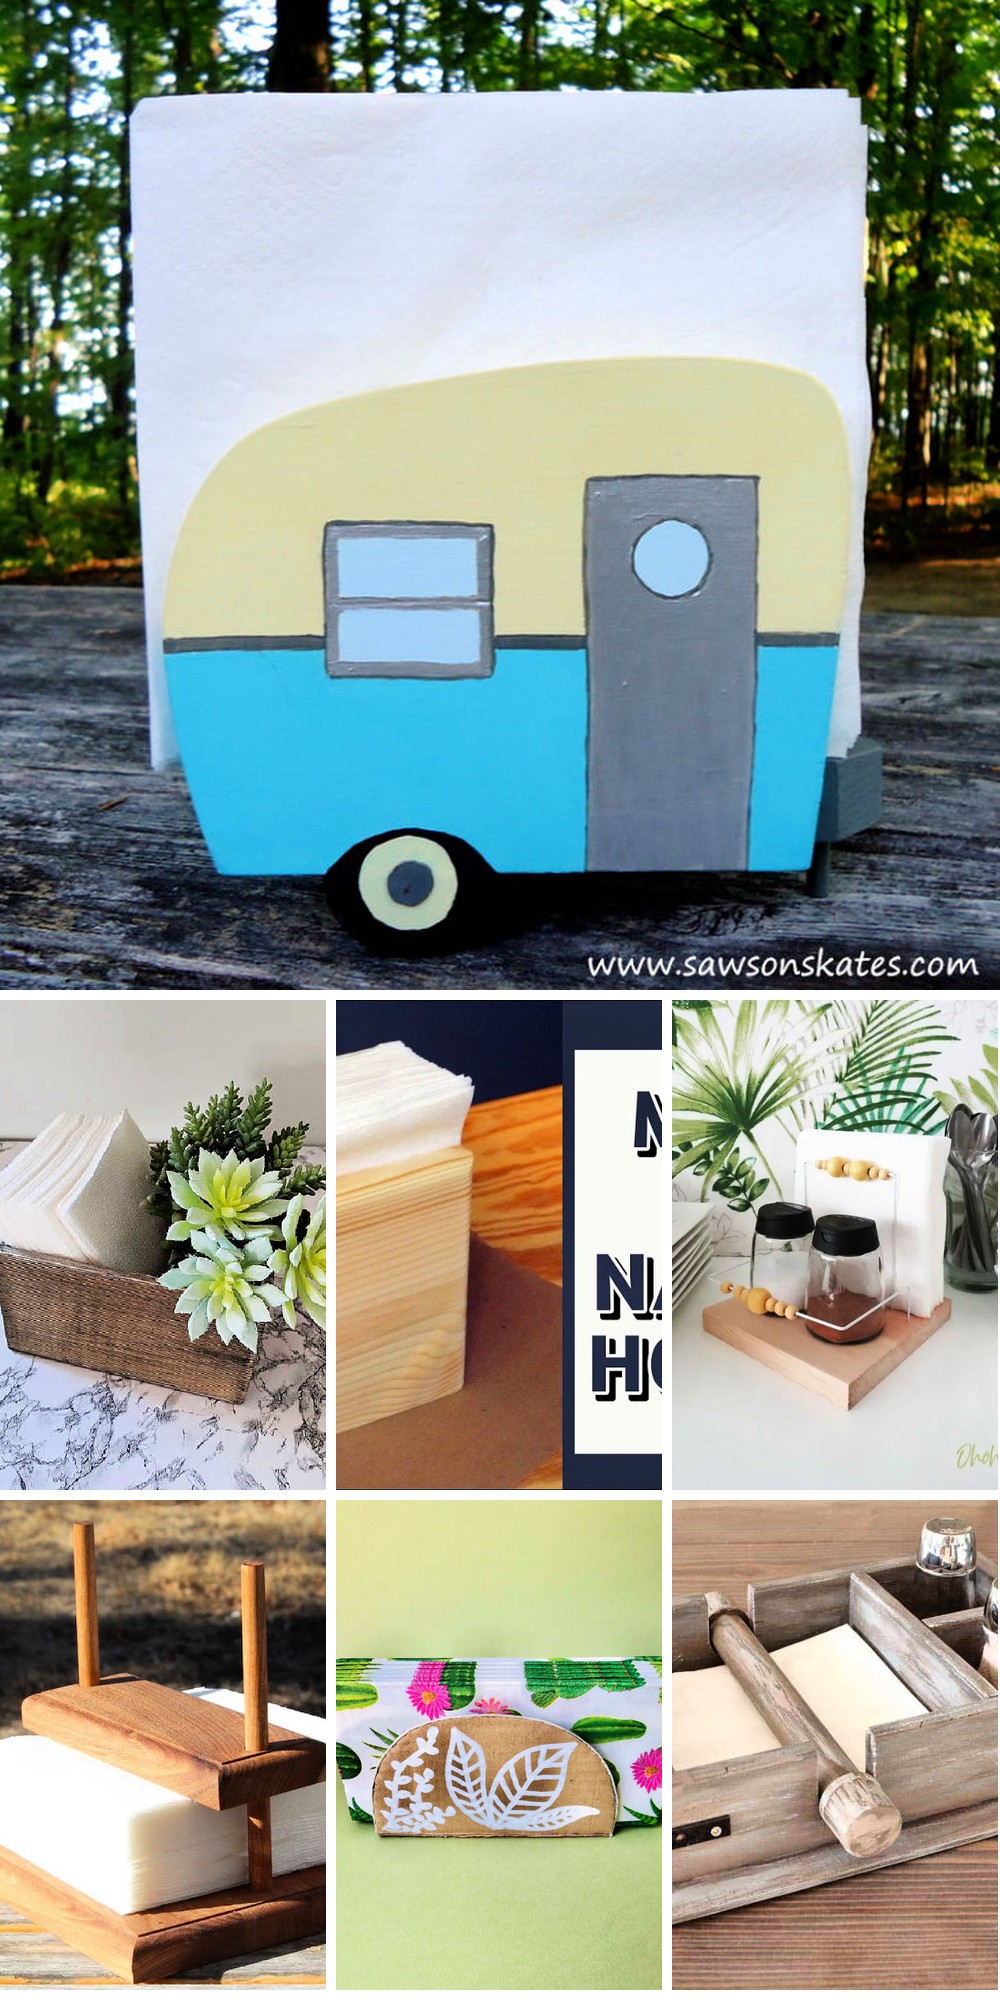
25 Cheap and Easy DIY Napkin Holder Ideas
Elevate the ambiance of your dining space without breaking the bank by exploring 25 innovative and easy-to-execute DIY napkin holder ideas. From rustic to modern, and simple to elaborate, these budget-friendly projects offer a world of creative possibilities for your table setting.
DIY Napkin Holder Out of Scrap Wood
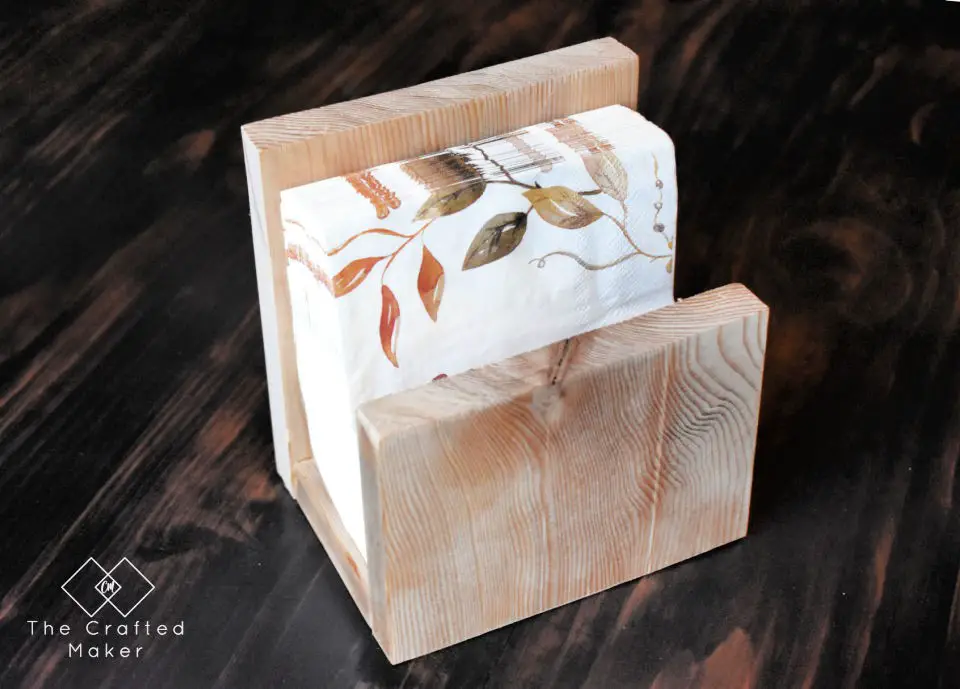
Transform your dining table with a charming DIY napkin holder crafted from repurposed wood. As the holiday season approaches, this project provides a thoughtful solution for managing messy mealtimes. With only a few essential supplies needed – scrap wood (cut into three pieces: 6 inches, 3 inches, and 4 inches), clamps, wood glue, your preferred paint, stain, or polyurethane finish, an applicator brush, tape measure, pencil or pen, saw (such as a circular saw), and sander – you’ll be creating a functional piece of art in no time. Begin by cutting the wooden pieces to the desired lengths, then smooth out any rough edges with sandpaper. Next, assemble the components using wood glue and clamps, allowing ample drying time. Once dry, apply your chosen finish to bring out the natural beauty of the wood. This rustic napkin holder is an ideal addition to your family gatherings, exuding a warm, cozy ambiance that’s perfect for fall table settings.
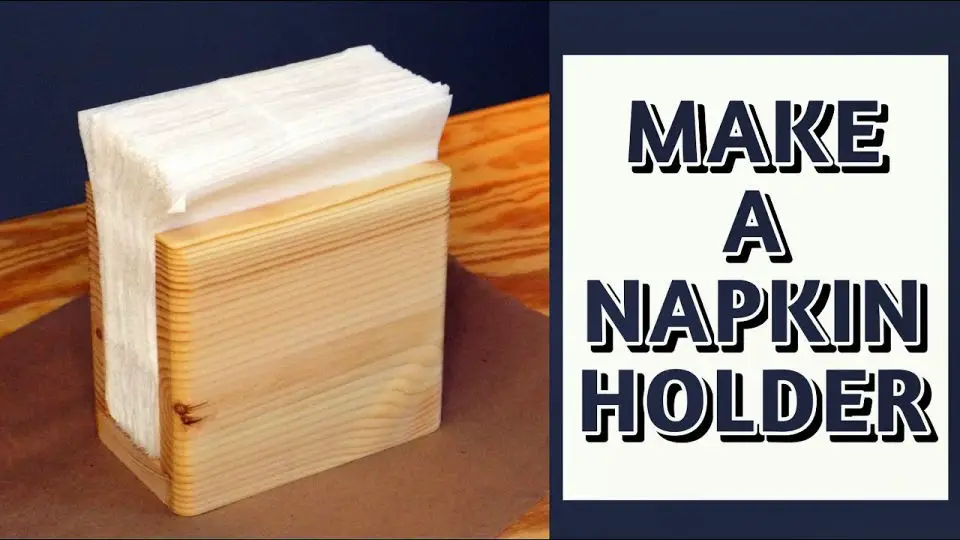
How to Make a Wooden Napkin Holder
This holiday season, consider gifting or creating a unique DIY wood napkin holder that brings a touch of rustic charm to your table décor. One such idea is an easy-to-make wooden napkin holder that doubles as a stylish decor piece. To bring this project to life, you’ll need a few essential materials like a 3/4 inch square dowel, wood glue, sandpaper, and stain or paint. Start by cutting and assembling the dowel pieces, then smooth out any rough edges with sandpaper before applying your desired color. The natural wood look is always in style, but feel free to get creative with different finishes. Once complete, you can proudly display your napkins in a neat and organized manner. For step-by-step instructions on building this rustic DIY wood napkin holder, be sure to check out the accompanying tutorial video.
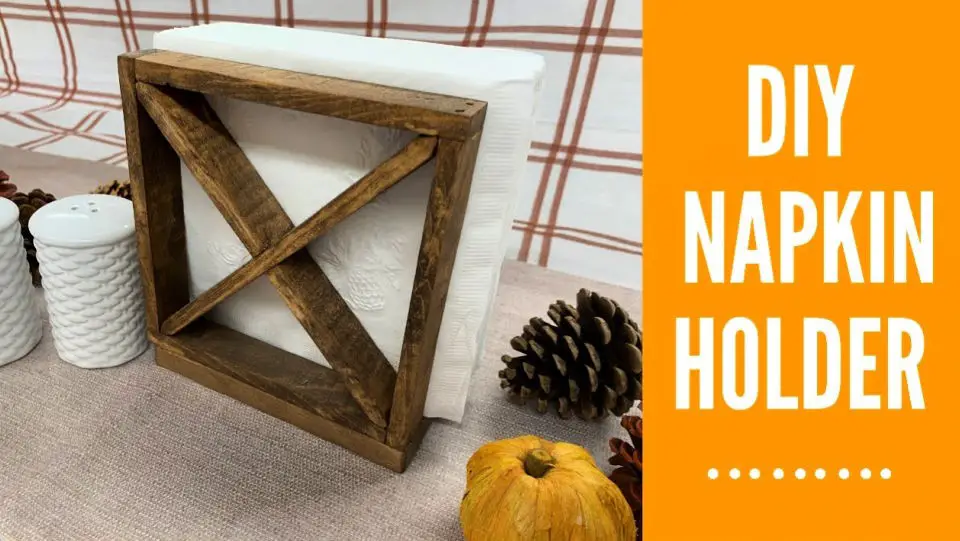
DIY Fall Napkin Holder Made From Dollar Tree Supplies

Elevate your Thanksgiving table’s autumnal ambiance with an effortless DIY fall napkin holder that won’t break the bank. Utilize Dollar Tree supplies and transform them into a charming centerpiece that keeps napkins conveniently within reach. This budget-friendly craft project is ideal for adding a touch of seasonal elegance to your home, perfect for buffets, dessert tables, or kids’ stations. Gather essential materials like plastic napkin holders, wooden leaf ornaments, stickers, fall-themed scrapbook paper, a hot glue gun, scissors, and a pencil. Follow the straightforward instructions to create a personalized fall napkin holder that radiates festive charm and injects warmth into your home.
Free Wooden Napkin Holder Plan
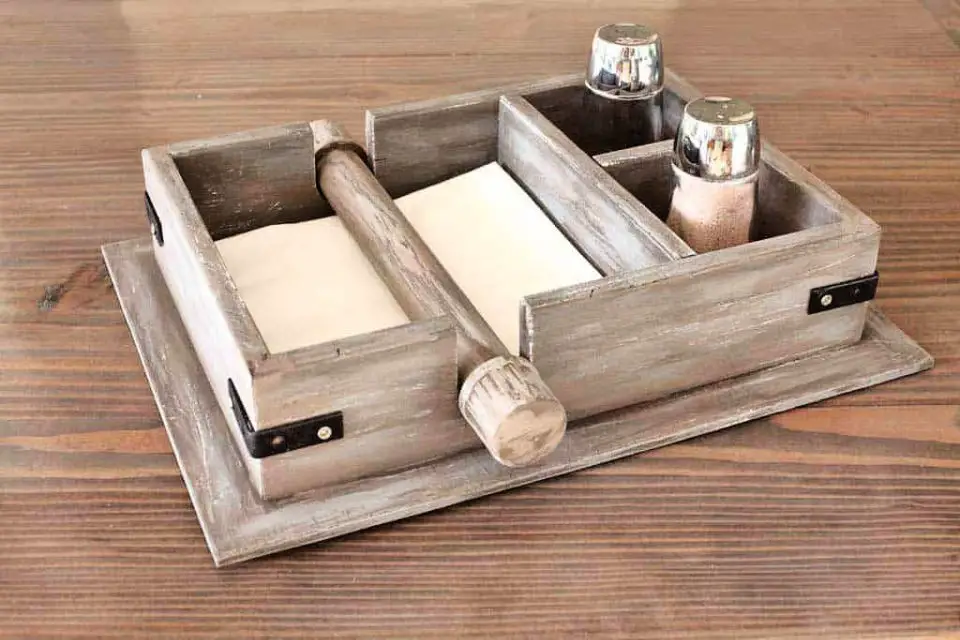
Transform your dining table into a charming focal point with a DIY napkin holder featuring built-in salt and pepper compartments. This accessible project reimagines scrap wood as a budget-friendly treasure, perfect for beginners. Begin by staining the holder to set the tone, then add rustic flair with two distinct chalk paints. The downloadable PDF includes detailed instructions and 3D illustrations to guide you through the process. The required materials include plywood, PVC pipe, PVC end caps, metal angles, wood glue, and stains. This elegant yet rustic napkin holder adds a touch of whimsy to your dining experience.
DIY Wood Slice Rustic Napkin Holder
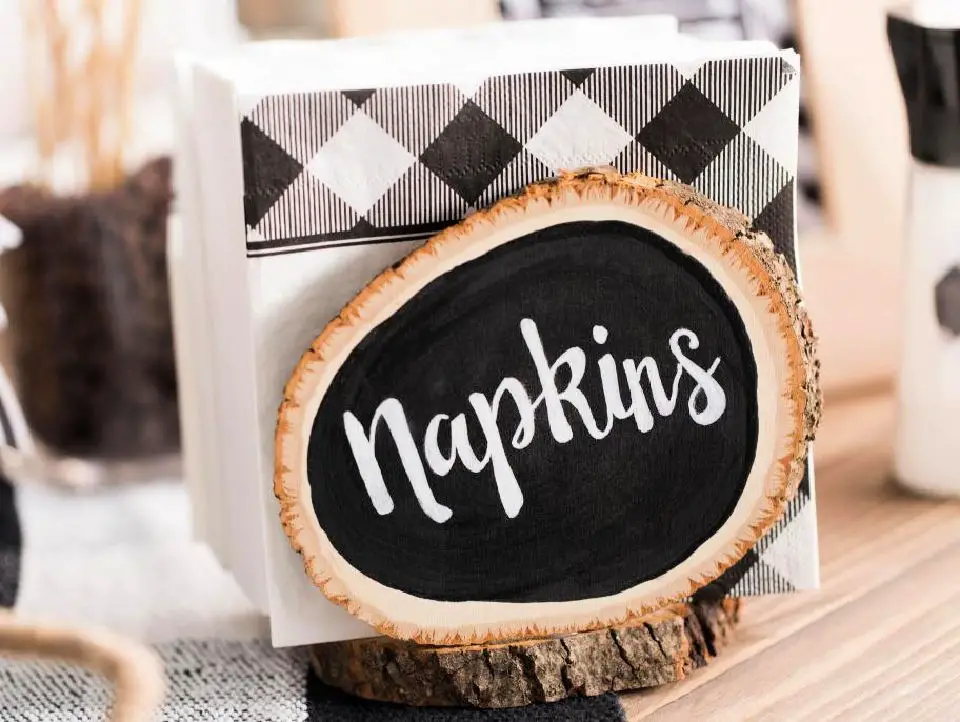
Transform your tabletop with a charming DIY wood slice rustic napkin holder, perfect for any occasion. This effortless project requires minimal supplies and 20-30 minutes of your time. By combining a free hand-lettered printable template, paint marker, and some basic crafting techniques, you’ll create a one-of-a-kind napkin holder that’s sure to impress your guests. Simply transfer the template design onto the wood slice, use a paint marker to make it permanent, and then attach a small stick to create a functional holder. Allow the glue to cure before placing your napkins inside and appreciating the rustic charm it brings to your table.
DIY Napkin Holder From 1/2″ Plywood Scraps
Elevate your table setting with these innovative DIY napkin holder ideas that seamlessly blend form and function. One such creation is a flat napkin holder crafted from 1/2 inch plywood scraps, designed to keep your napkins tidy and wrinkle-free for indoor and outdoor use. Its versatility lies in its ability to be customized to fit various napkin dimensions, making it an ideal addition to any table setting.To bring this project to life, you’ll need a few basic tools, including a miter saw, jigsaw, and brad nailer, as well as supplies like wood glue and edge banding. With these at your disposal, you can complete the project in just a few hours. The article’s comprehensive plans and video tutorial provide step-by-step guidance to ensure a smooth execution.Take it to the next level by getting creative with the finish – stain it, paint it, or leave it in its natural state. This practical napkin holder masterfully combines functionality and style, making it an excellent choice to enhance your table decor.
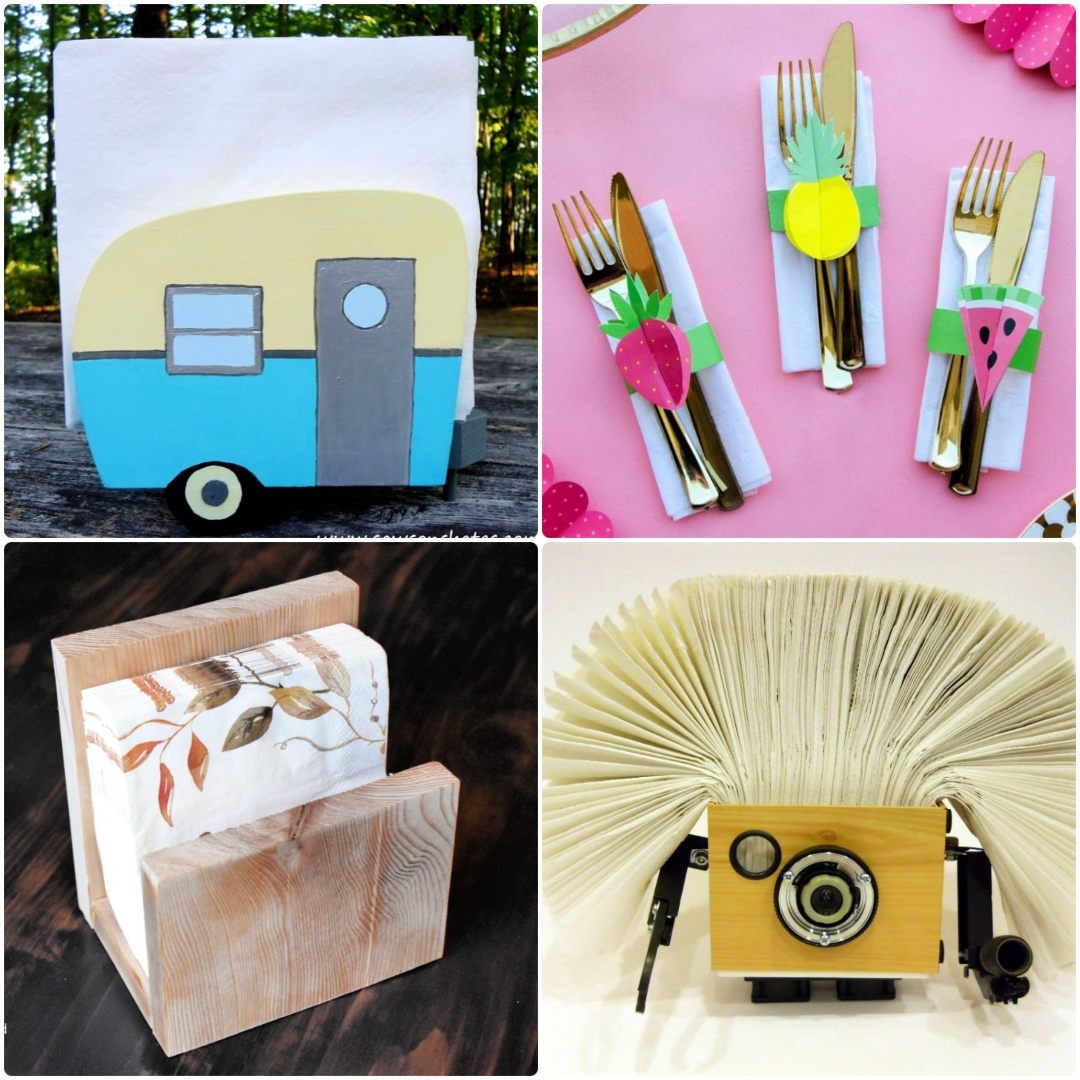
Painted Wood Vintage Camper Napkin Holder
Transform your dining table into a nostalgic haven by crafting a charming DIY-painted wood vintage camper napkin holder. This delightful project requires minimal materials and is perfect for upcycling scrap wood. A simple template, cut from 1×5 wood, serves as the foundation for this whimsical creation. By employing a ‘paint by number’ technique, you can achieve a unique and eye-catching design that’s reminiscent of a bygone era.
Delicate details such as windows, doors, and wheels are added to complete the camper’s retro aesthetic. A quick primer and coat of paint in your choice of colors will leave this charming napkin holder looking like a treasured vintage find.
This delightful DIY project is ideal for camping enthusiasts, outdoor enthusiasts, or anyone seeking to add a touch of whimsy to their table setting. So why not get creative and bring a dash of vintage charm to your dining experience?
Upcycled Cardboard Napkin Holder – Step-by-Step Instructions
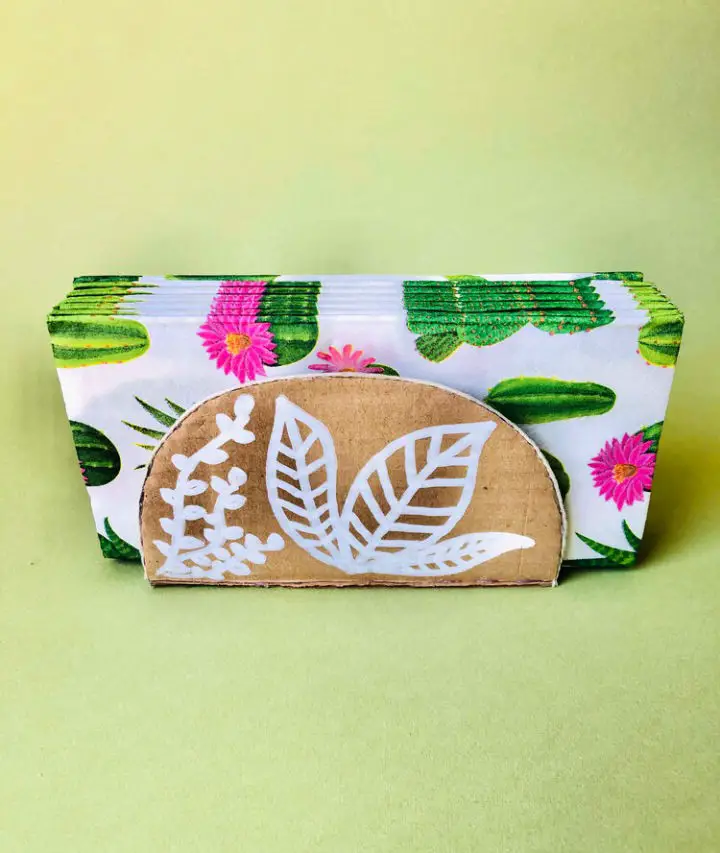
Unleash your creativity and transform everyday materials into stunning DIY napkin holders that harmoniously blend with your home’s aesthetic. Join our craft community and discover how to repurpose cardboard waste into a show-stopping centerpiece for your barbecue gatherings. To get started, collect the following materials: upcycled cardboard, scissors, jute cord, hot glue gun, and a white marker. Follow the step-by-step guide to construct an one-of-a-kind, eco-conscious napkin holder that will leave your guests impressed. As you embark on this project, let the excitement of your BBQ party season begin with these innovative and sustainable table decor ideas.
Cool DIY Tufted Napkin Holder
Transform your dining experience with these creative DIY napkin holder ideas that showcase your personal touch and artistic flair. Take inspiration from upscale restaurants’ stylish tufted booths and bring a unique charm to your party table. To create this stunning piece, gather 1/8″ MDF sheets, acrylic craft paint, wood glue, and a paintbrush. Load the provided cut file into your Glowforge app and effortlessly cut out the design using the laser cutter. Paint the pieces and assemble them with wood glue, allowing the adhesive to set overnight. The next day, you’ll have a beautifully crafted tufted napkin holder ready to impress your guests. With Glowforge’s versatility, feel free to experiment with various designs, from modern Chippendale shapes to whimsical options like mermaids or unicorns. The possibilities are endless!
How to Make an Abstract Napkin Holder
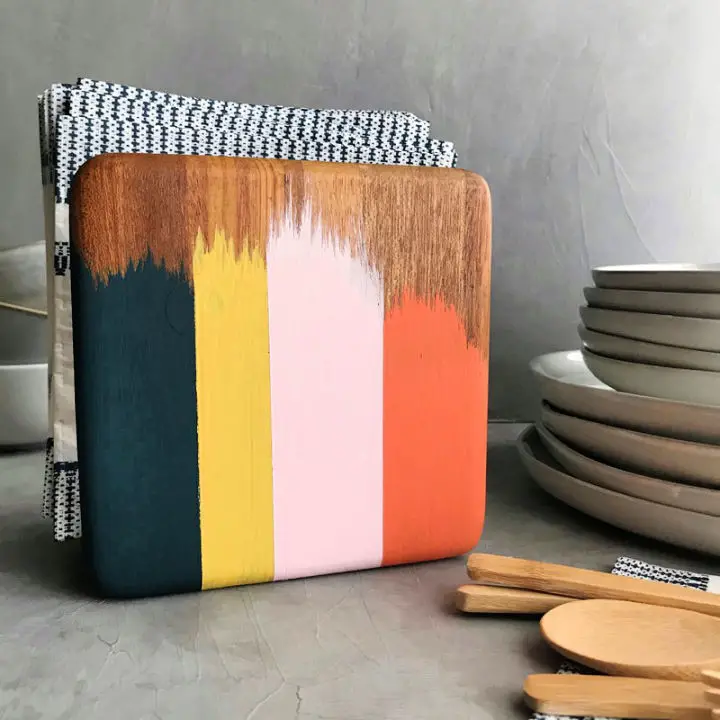
Elevate your kitchen’s style with a unique DIY abstract napkin holder, perfect as a thoughtful housewarming gift or to add a touch of personality to your own space. To get started, collect the necessary supplies: a napkin holder, one-step paints in Clean Slate, Holey Moley, Brooks Grey, Palmer Pink, and Massey Hill, a 1.5″ round tapered brush, painter’s tape, and a lint-free cloth. Then, follow the simple instructions to create a one-of-a-kind masterpiece that showcases your artistic expression. With minimal effort, you can transform an ordinary item into a stunning and personalized accessory for your kitchen.
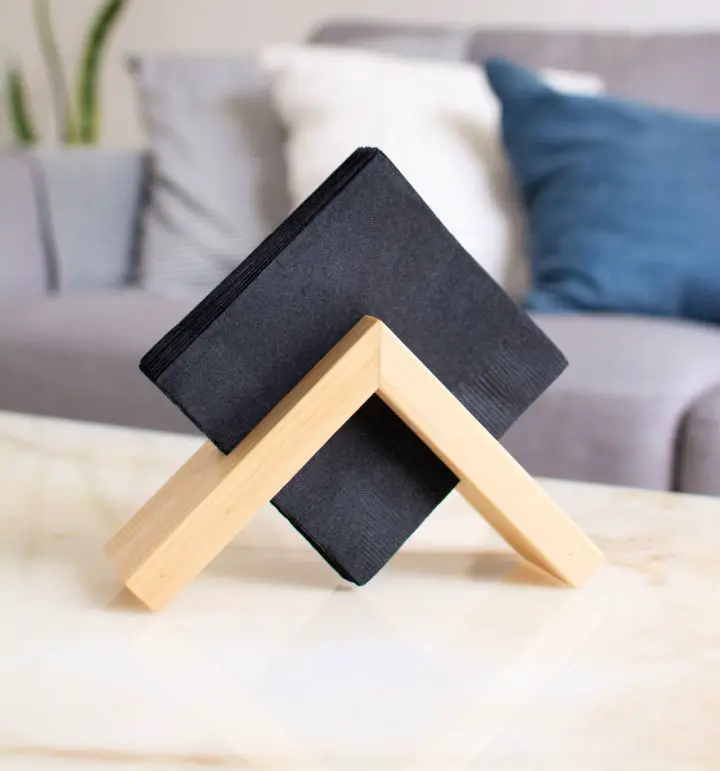
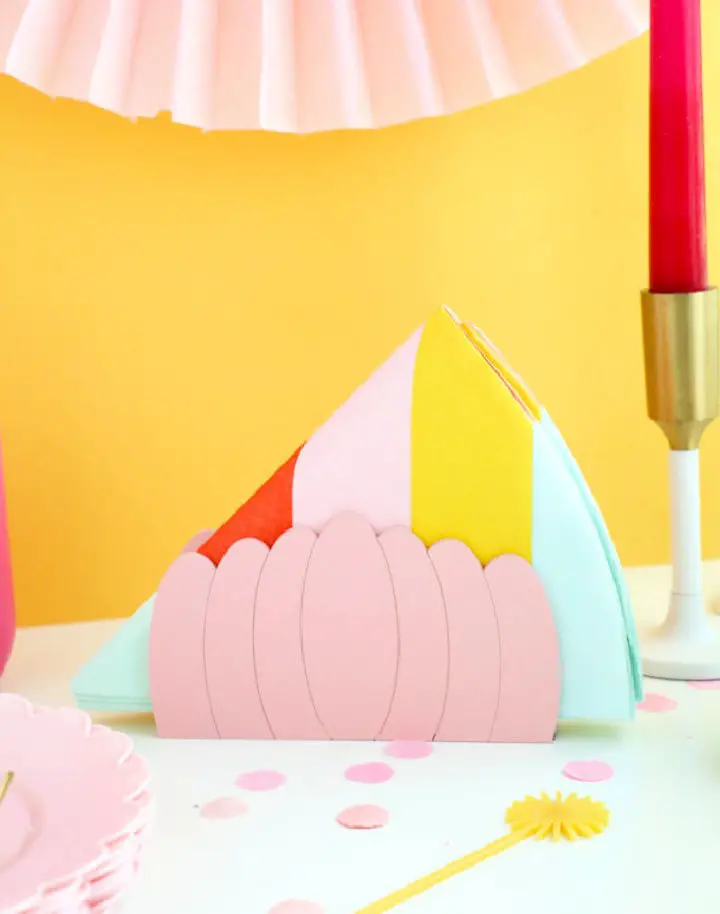
Snowy Mountain Napkin Holder Idea
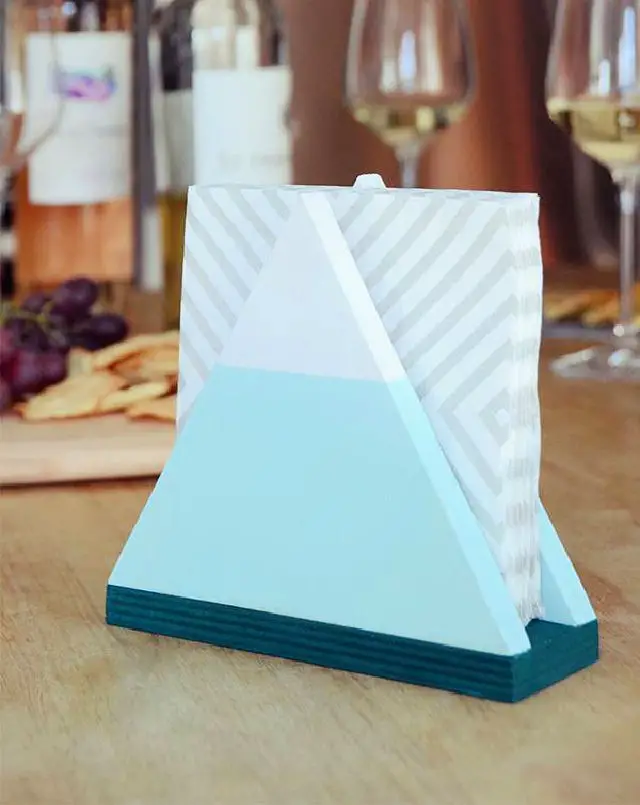
Elevate your dining experience with a touch of creativity by crafting a DIY napkin holder featuring a trendy snowy mountain motif. This simple yet stylish project can be achieved with minimal materials, including wood, acrylic craft paint, painter’s tape, and wood glue. The key to this design lies in cutting the wood into equilateral triangles and a rectangle, then painting them white, dark green, and light blue. By attaching the triangles to the rectangle using wood glue, you’ll create a modern interpretation of snowy mountains that’s sure to impress. Simply tuck your napkins between the ‘mountains’ and display them proudly on your table. Feel free to experiment with colors and tape angles to make your unique design stand out.
Modern DIY Napkin Holder Using Wood
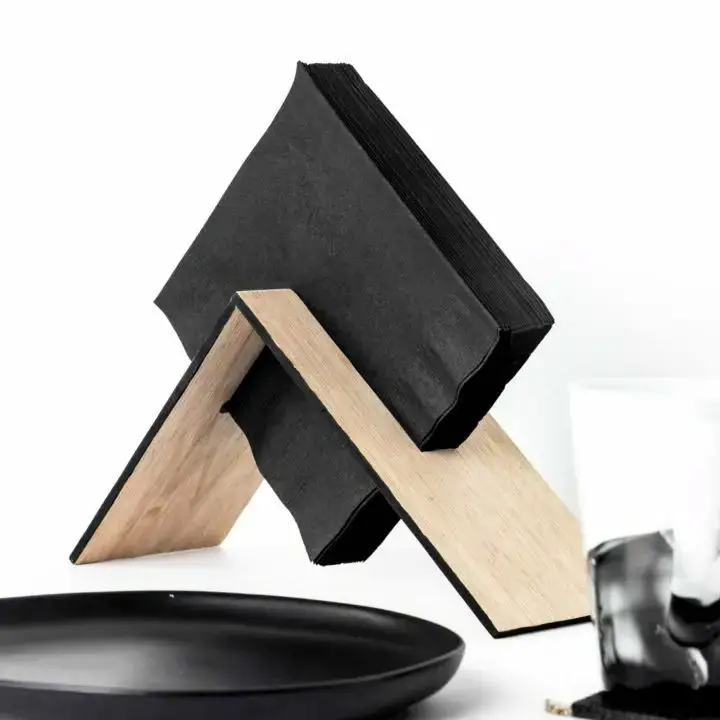
Transform your table setting into a stylish haven by crafting a modern wooden napkin holder in just a few simple steps. This unique, asymmetrical design not only adds a touch of flair but also provides a practical solution for keeping napkins organized and within reach. With a mere $10 investment and basic tools like a scroll saw and drill, you can create this stunning piece using birch plywood and a dash of paint. Follow the easy-to-follow step-by-step instructions to guide you through the process, from carefully cutting out the central rectangle to expertly gluing the pieces together and adding a pop of color with paint. This DIY project is perfect for beginners looking to add a touch of sophistication to their table decor.
Handmade Napkin Holder
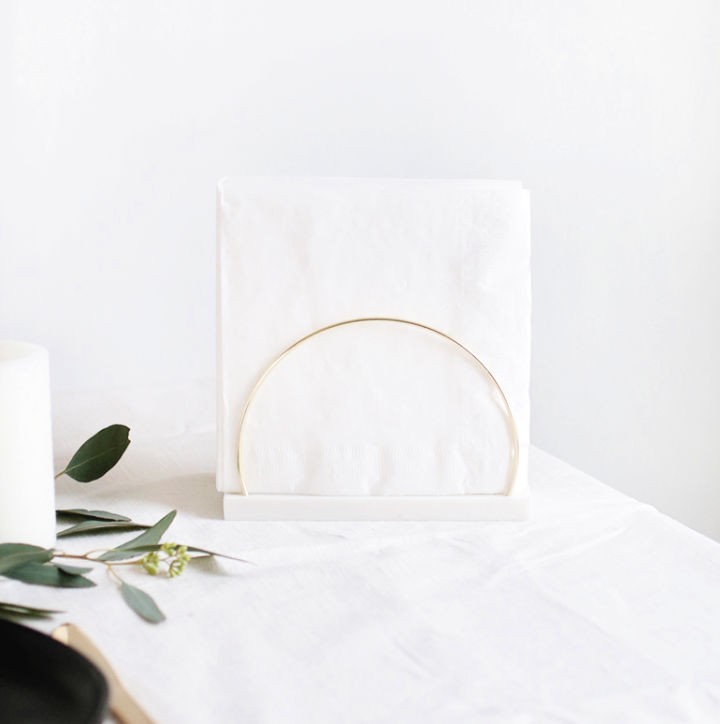
Transform your dining table with a one-of-a-kind napkin holder that exudes style and sophistication. This DIY endeavor requires minimal materials, including Corian and brass rings, making it an accessible project for crafty individuals of all skill levels. With step-by-step guidance and straightforward instructions, you’ll be able to create a sleek and modern design that adds a touch of elegance to your dining area. The tutorial walks you through the process of cutting the Corian to size, smoothing out rough edges, and attaching the brass rings. Whether you opt for Corian or paint wood white, this project is an excellent opportunity to showcase your DIY prowess and leave a lasting impression on your guests.
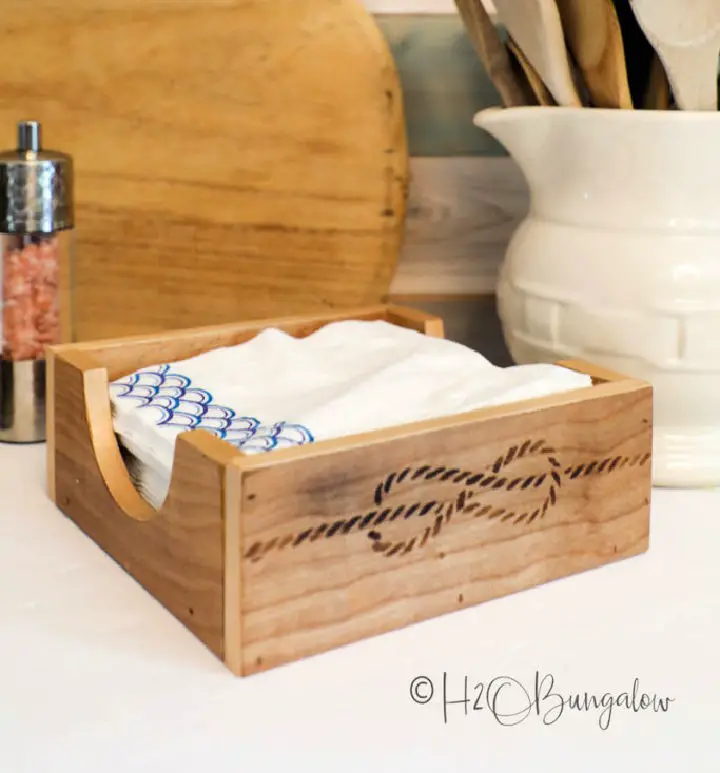
Homemade Napkins Tray Holder
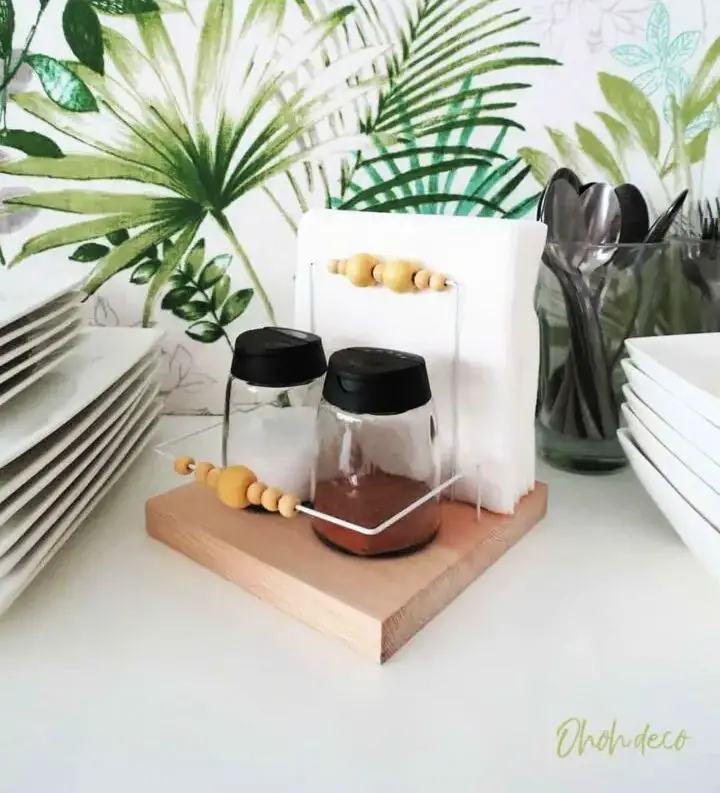
Create a one-of-a-kind napkin holder that showcases your DIY skills without breaking the bank. This unique project combines practicality and style, making it perfect for crafters of all skill levels. By upcycling wire coat hangers, wooden beads, silicon glue, and basic tools like a drill, saw, and ruler, you’ll create a sturdy base for holding napkins and keeping salt and pepper at the ready. The finished tray not only streamlines your table setting but also adds a touch of handmade charm to any occasion. Follow the simple measurements and instructions to bring this DIY napkin holder to life and enjoy a well-organized dining experience with a personal touch.
Amadeus the Napkins Holder Junkbot

Meet Amadeus, a one-of-a-kind solution to a common paper towel conundrum. This quirky DIY project, born from Instructables, repurposes a damaged speaker into a functional napkin holder and storage unit for multifold paper towels. The creative genius behind this project didn’t let a minor setback – the damaged speaker – deter them from finding an innovative way to organize their paper towels. With a dash of humor and resourcefulness, Amadeus keeps your paper towels tidy while also doubling as a brochure holder. This clever Junkbot showcases the author’s knack for thinking outside the box and turning challenges into opportunities. Stay tuned for more inspiring DIY projects that demonstrate the power of creative problem-solving.
DIY Wooden Napkin Holder

Transform your dining table into a haven of rustic charm with a DIY wooden napkin holder that exudes understated elegance. This clever project requires only basic materials – wood scraps, clamps, and glue – to create a functional yet stylish addition to any setting. The process begins by carefully cutting and assembling the wood stock in three distinct steps: preparation, construction, and finishing touches. Firstly, bond the wood pieces together with precision and strength, laying the foundation for a sturdy structure. Next, shape the individual components into their final forms, meticulously ensuring each piece fits seamlessly into place. Finally, seal your masterpiece with a coat of varnish to enhance its natural beauty and add soft felt pads to protect your tabletop from scratches. With its simplicity and distinctiveness, this wooden napkin holder is an ideal project for those seeking a creative outlet in woodworking that yields a practical and visually appealing result.
Napkin Holder and Faux Succulent Centerpiece Design
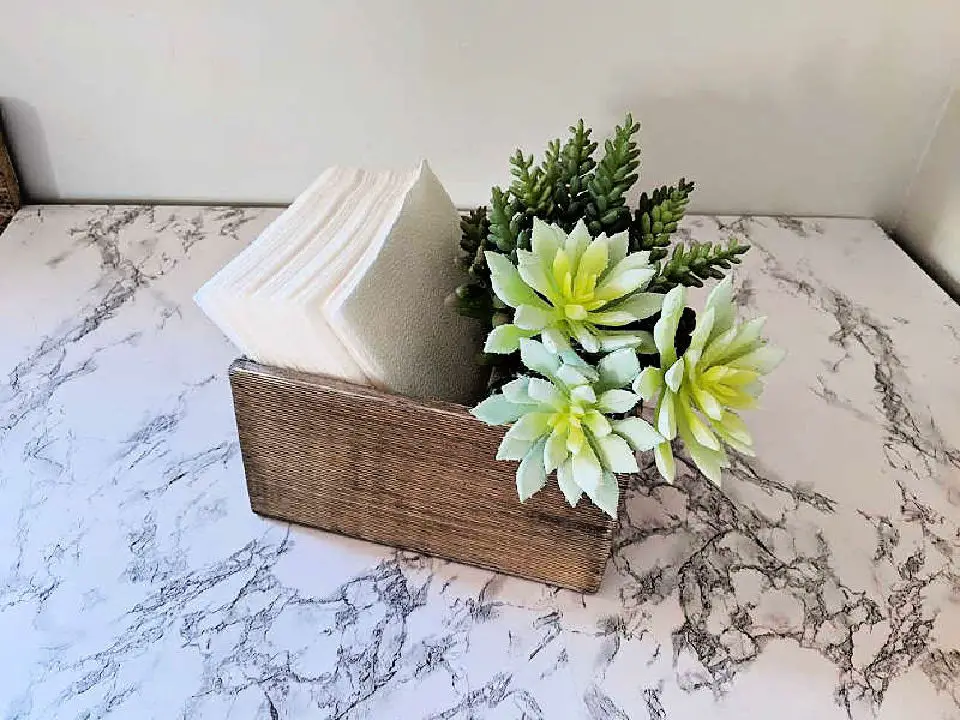
Transform your dining experience by crafting a unique and functional centerpiece that doubles as a napkin holder. This innovative combination of a faux succulent arrangement and a cleverly repurposed wooden planter box brings a touch of sophistication to your meals, effortlessly replacing cluttered napkin holders of the past. The project involves transforming an 8-inch square wooden planter box into a stylish storage solution by adding a foam brick inside. Simply insert artificial succulent stems into the foam, trim them as needed, and secure them in place. Add some green glass gems to the foam for a polished finish. This clever design allows you to store napkins on one side while displaying your succulent centerpiece on the other. With easy-to-follow instructions and endless design possibilities, you can create a personalized napkin holder that elevates your table setting and saves you from the chaos of scattered napkins.
How to Make Your Own Napkin Holder
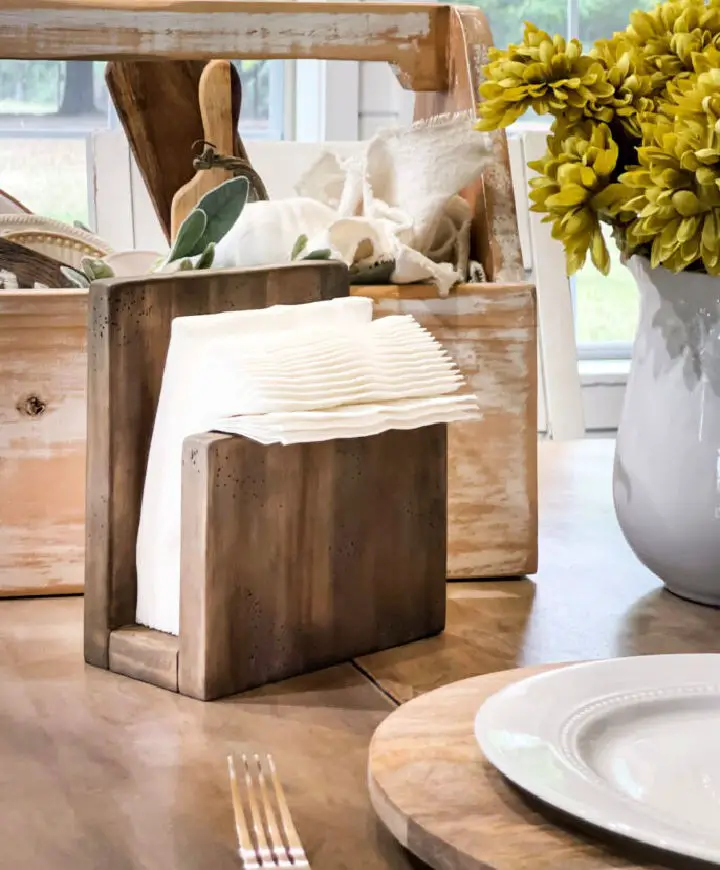
Transform your dining table into a warm and inviting space by crafting a one-of-a-kind napkin holder from reclaimed wood. This straightforward DIY project requires minimal tools and basic woodworking skills, allowing you to tailor the design to fit your preferred napkin size and style. The guide also shares expert tips on creating a rustic, weathered finish using oil-based gel stains and incorporating natural wormholes for added charm. With this budget-friendly and elegant DIY project, you’ll be able to elevate your table decor and impress your guests with a unique touch of personality.
Simple DIY Napkin Holder
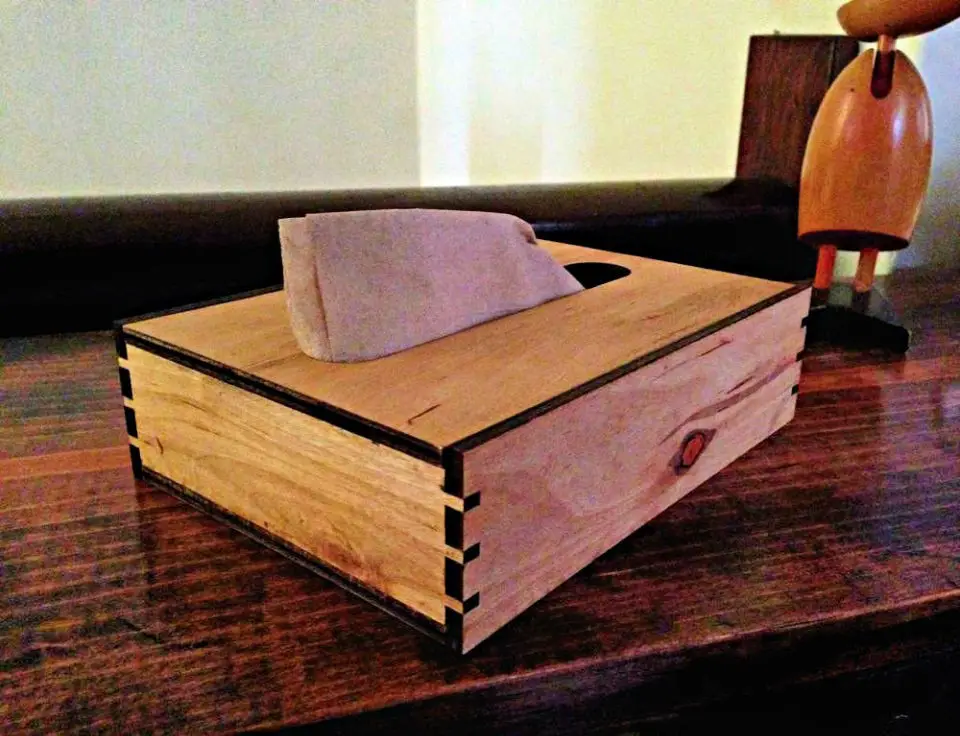
Transform leftover clean napkins into a one-of-a-kind functional napkin holder with the aid of a laser cutter. This DIY project empowers customization, allowing you to tailor dimensions and design using computer-aided design (CAD) software. By creating finger joints for the box via CAD, you can then export the parts as DXF files and easily laser-cut them using Corel Draw. Once assembled by gluing the joints and bottom frame together, secure the top cover with strategically positioned brackets. The end result is a sleek and practical napkin holder, ready to be filled and put to use.
DIY Paper Napkin Holder
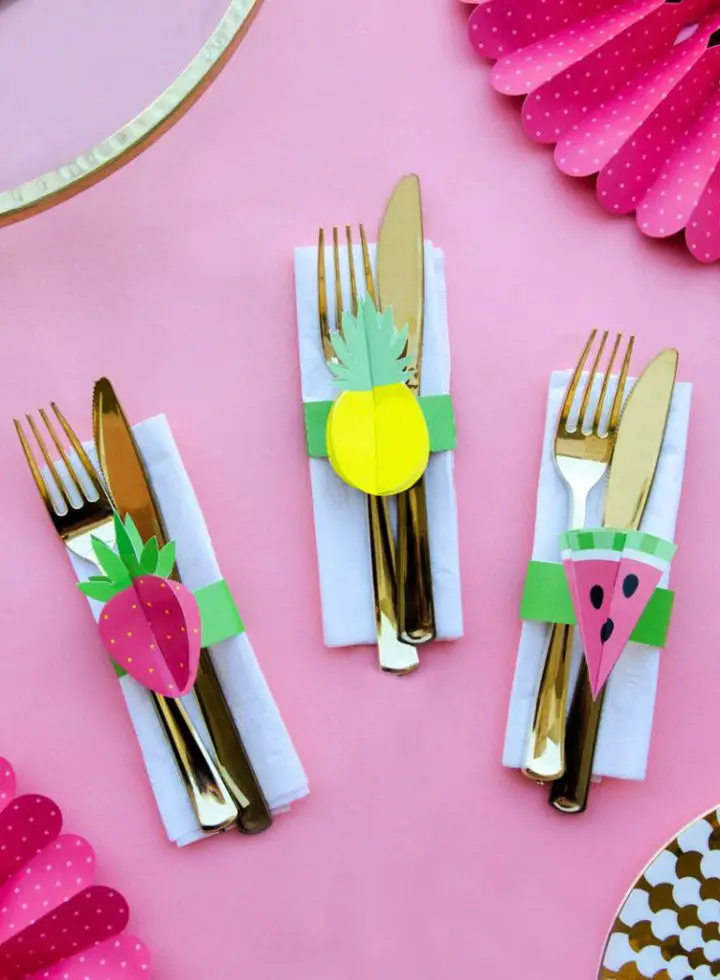
Transform your dining table into a haven of sophistication with these innovative DIY napkin holder ideas that seamlessly blend form and function. This season, inject some carefree charm into your gatherings by crafting delightful summer-themed paper napkin rings. With just a few basic materials like glossy white cardstock, a printer, scissors, and Chinet White Napkins, you can whip up these charming accents in no time. For an added layer of convenience, take advantage of the free downloadable printables to simplify the process. Simply cut out the fruit-shaped napkin rings, wrap them around your napkins, and secure them at the center. These whimsical creations will add a pop of personality to your table or kitchen, making your summer soirees truly unforgettable.
How to Make a Napkin Holder
Transforming your dining experience has never been easier or more creative than with this innovative DIY napkin holder. By combining a few basic materials, including wood, paint, and some fundamental tools like a saw and sandpaper, you can craft a one-of-a-kind piece that reflects your unique style while serving a practical purpose.
With clear, easy-to-follow instructions and a comprehensive video guide to walk you through the process, building this stylish napkin holder is within reach. Whether you’re hosting an intimate dinner party or simply seeking to elevate your everyday meals, this cost-effective DIY project is the perfect way to showcase your creativity while adding a touch of elegance to your table setting.
By embracing your inner DIY enthusiast and taking on this project, you’ll not only create a functional napkin holder that’s sure to impress your guests but also breathe new life into your dining area. So why settle for an ordinary experience when you can have an extraordinary one? Get creative and start building today!
Napkin Holder Scrap Wood Project

Bring a touch of creativity to your table settings with our DIY napkin holders that are easy to make and sure to impress. By repurposing scrap wood, you can create a functional and stylish holder that keeps your napkins in place, eliminating the need for awkwardly placed plates or worrying about them blowing away. The beauty of this project lies in its simplicity, allowing you to add a personal touch and customize it to fit your unique style. From rustic charm to elegant sophistication, the possibilities are endless. And the best part? You can make one today with minimal materials and tools. For the complete instructions and inspiration, head to the Home Built Workshop website and start crafting your own DIY napkin holder.
Make Your Own Napkin Holder
Elevate the ambiance of your dining experience by creating a bespoke napkin holder that exudes sophistication. This comprehensive guide will walk you through the process of crafting a stylish and practical napkin holder using woodworking techniques, perfect for adding a touch of elegance to your table setting.
To get started, gather your materials: choose your preferred type of wood, along with a saw, sandpaper, wood glue, clamps, and a finish that suits your taste. With meticulous preparation and attention to safety protocols, you’ll be able to create a stunning napkin holder that not only enhances your dining decor but also presents an opportunity to monetize your woodworking skills.
DIY Napkin Holder From Woolen and Newspaper
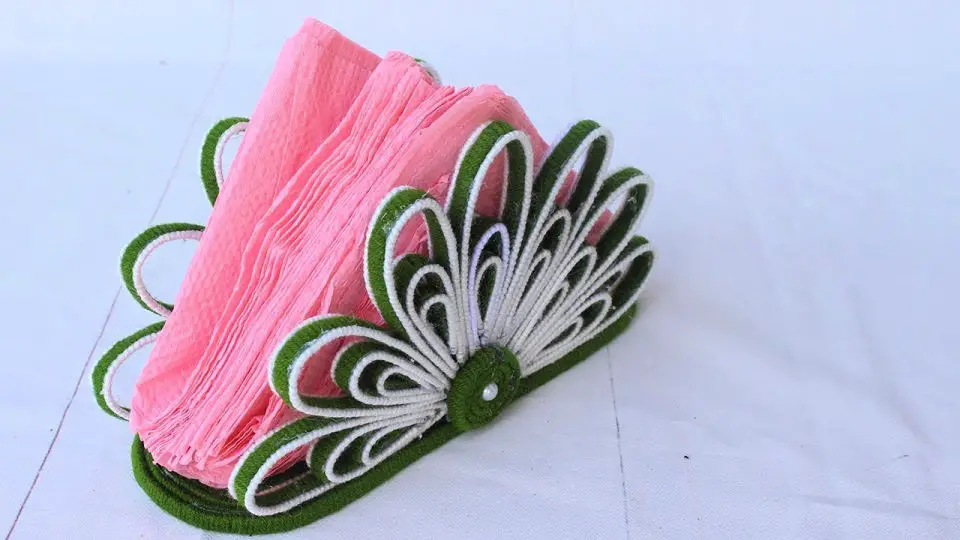
Transform your dining table into a stylish oasis with a creative DIY project that’s easy to execute. Combine the rustic charm of newspaper with the softness of woolen yarn to create a unique napkin holder that exudes elegance. This eco-friendly home decor idea is perfect for elevating your table settings and making a lasting impression on your guests.
To bring this vision to life, you’ll need just a few simple materials: woolen yarn, newspaper, glue, and scissors. Follow the step-by-step guide in our accompanying video tutorial to craft your one-of-a-kind napkin holder.
Showcase your creativity and commitment to sustainability by displaying your handmade masterpiece on your dining table. This charming napkin holder from woolen yarn and newspaper is sure to delight and inspire.
Making Your Own Farmhouse Napkin Holder
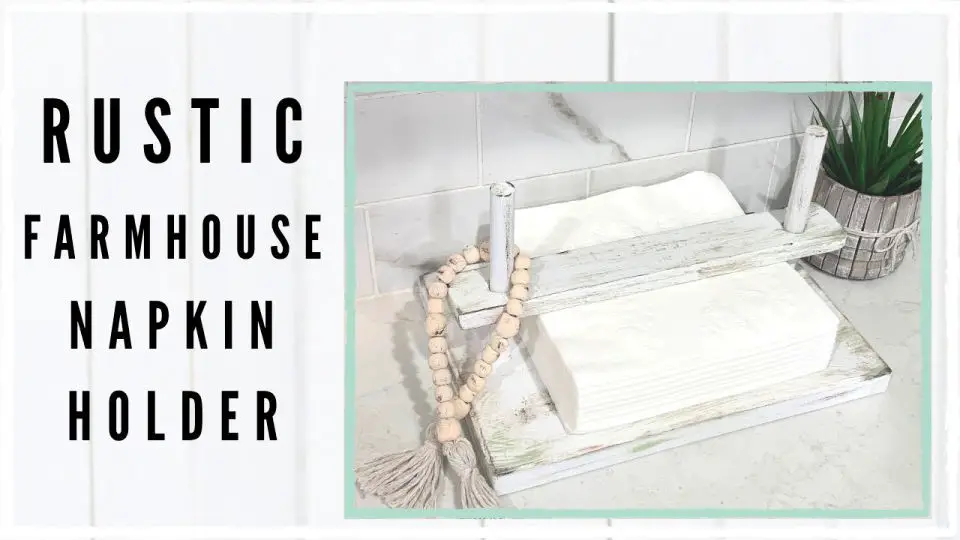
Create a warm and inviting farmhouse atmosphere in your home by crafting a charming rustic wooden napkin holder, a DIY project that’s perfect for beginners and experienced woodworkers alike. This easy-to-follow guide will walk you through each step of the process, ensuring a successful outcome. With basic woodworking skills and a few simple supplies, you can quickly bring this stylish and functional piece to life. So why not give it a try and add a touch of rustic charm to your dining table?
Conclusion:
Crafting a DIY napkin holder that reflects your personal style doesn’t have to break the bank or require extensive expertise. With 25 affordable and straightforward ideas at your disposal, you can create a stunning piece that elevates your dining table or kitchen decor. From sourcing materials to following our comprehensive guide, incorporating customization tips, and learning how to maintain your handiwork, you’ll be empowered to take on this project with confidence. Moreover, each creative endeavor presents an opportunity to infuse personal touches, troubleshoot any issues that may arise, and consider the environmental implications of your creations. As you embark on this journey, remember to have fun and revel in the unique charm your DIY napkin holder brings to your home.
