Why Make Your Own DIY Mouse Pad?
While creating a DIY mouse pad may seem like a trivial task, the end result is a functional and tailored accessory that can elevate any workspace experience. The benefits of making your own mouse pad are multifaceted, ranging from its practicality to its potential for personalization.
Personalization:
When it comes to setting up your workspace, your mouse pad is an integral part of the equation. Rather than settling for a generic, cookie-cutter option, why not take things to the next level by creating a one-of-a-kind DIY masterpiece? With customizability at its core, you can infuse your mouse pad with personality and flair that perfectly complements your unique style. Whether it’s a sentimental photograph or a fabric pattern that harmonizes with the aesthetic of your room, a bespoke mouse pad is the perfect way to express yourself and make a statement.
Cost-Effective:
Transforming a mundane office accessory into a creative project, making your own DIY mouse pad is a budget-friendly and eco-conscious endeavor. Instead of settling for generic store-bought options, you can craft a unique piece using everyday materials that would otherwise go to waste. For instance, repurpose old jeans or books, or opt for more conventional materials like cork or fabric scraps. With minimal investment, you can create a personalized mouse pad that reflects your personality and adds a touch of personality to your workspace.
Comfort and Ergonomics:
While commercial mouse pads may provide a basic surface for your mouse, they often fall short in terms of providing adequate comfort and support for your wrists and hands. By taking a DIY approach, you can easily enhance the comfort level by adding extra cushioning or designing a custom wrist rest to help alleviate strain that comes with prolonged computer use.
Environmentally Friendly:
When it comes to reducing waste and minimizing our carbon footprint, making conscious choices in our daily lives becomes crucial. One simple yet effective way to do so is by upcycling materials and utilizing what you already have at home. A prime example of this is creating your own mouse pad from readily available resources. Not only does this approach help reduce the environmental impact of manufacturing new products, but it also fosters a sense of resourcefulness and creativity.
Gift-Giving:
A thoughtful and personalized gift, handmade mouse pads are ideal for celebrating milestones like a new job, college transition, or the setup of a home office. The recipient will surely cherish this unique present, tailored to their individuality.
Learning Opportunity:
By embarking on DIY endeavors like crafting your own mouse pad, you’ll gain hands-on experience with various skills, including sewing, lamination techniques, and adhesive manipulation. This creative pursuit provides an opportunity to hone your craft, expanding your repertoire of technical abilities that can be leveraged in future projects.
Getting Started
To start creating your unique DIY mouse pad, let’s dive into the process. Begin by selecting the material that best suits your design vision. Fabric, cork, leather, or even repurposed items from around the house are all viable options. As you choose your material, think about its texture and how it will interact with your mouse.
Next, gather the necessary tools for your project. Depending on your design’s complexity, you may need scissors, glue, a sewing machine, or even paint. Make sure to have everything at the ready before starting.
Now, find inspiration in tutorials or create your own design from scratch. Remember that patience and creativity are key to a successful DIY project.
Once you’ve settled on a design, don’t be afraid to experiment with different shapes, sizes, and accessories like wrist rests or decorative elements. The beauty of a DIY project lies in its ability to evolve as you go along.
Finally, share your creation with the world! Share pictures with friends or on social media, and who knows, you might just inspire others to get crafty themselves.
Creating your own DIY mouse pad is a simple yet rewarding project that not only enhances your workspace but also showcases your personal style. So why not give it a try? The results are sure to be well worth the effort.
How to Make a Mouse Pad
Creating a customized mouse pad that reflects your personality is an achievable and enjoyable DIY project. To get started, follow this easy-to-follow guide, which will walk you through the process of crafting a one-of-a-kind mouse pad that not only showcases your style but also serves as a practical accessory for your computer setup.
Materials You’ll Need:
To create a custom mousepad, you’ll need to gather some basic materials. First, choose your base material – options include cork, cardboard, or foam. For the top layer, select from fabric, leather, or special mouse pad surfaces designed specifically for gaming. Next, prepare your cutting tool: scissors or a craft knife will do the trick. To bring everything together, you’ll need an adhesive like glue or spray adhesive. If you want to add some extra flair, consider incorporating decorative elements such as paint, stickers, or images for decoupage – though this is entirely optional.
Instructions:
To create a custom mouse pad, start by selecting a sturdy base material like cork or foam that will provide the necessary structure. Next, cut the base to your preferred shape and size using scissors or a craft knife. For the top layer, choose a material that allows for smooth gliding, such as fabric or leather. Cut this layer slightly larger than the base to ensure it wraps around the edges seamlessly. Apply an even coat of adhesive or use spray adhesive to secure the top layer onto the base, smoothing out any bubbles that may form. Once the adhesive is dry, trim any excess material and seal the edges for a clean finish. If desired, you can customize your mouse pad with paint, printed images, or other decorations to make it truly unique. For added durability, consider sealing the surface with clear varnish or laminate. With these steps, you’ll have a one-of-a-kind mouse pad that reflects your personal style.
Tips for Success:
When crafting your DIY mouse pad, it’s essential to start with a solid foundation by ensuring the base material is consistently flat and even. This will prevent any awkward bumps or unevenness from compromising your gaming or computing experience. As you apply the top layer, take care to press out any air bubbles that may form, as these can cause distractions during long sessions.To further optimize your mouse pad, consider adding a wrist rest designed for comfort and positioning. A well-placed wrist rest can significantly reduce strain and fatigue, allowing you to work or play with greater ease. Don’t be afraid to think outside the box (or mouse pad) – get creative with shapes and designs to create a one-of-a-kind accessory that reflects your personality and adds a touch of flair to your workspace.
FAQs About DIY Mouse Pads
What materials do I need to make a DIY mouse pad?
To create a custom mouse pad, you’ll typically require a few basic materials. These include a base material to serve as the foundation of your project, such as cork, cardboard, or foam. You’ll also need a top layer that provides the necessary texture and grip for your mouse, like fabric, leather, or a specialized mouse pad surface. In addition to these primary components, you’ll need some way to secure them together, which can be accomplished with scissors or a craft knife, as well as an adhesive such as glue or spray adhesive. If you want to add some personality to your DIY mouse pad, you may also consider incorporating optional decorative elements like paint, stickers, or images for decoupage.
Can I make a mouse pad without sewing?
The DIY mouse pad project’s versatility allows for creative freedom without requiring sewing skills. One popular approach is to utilize adhesives to bond the fabric or top layer to the base, eliminating the need for stitching altogether. A prime example of this no-sew method is gluing a piece of fabric directly onto a cork base or employing double-sided tape for a seamless finish.
How can I customize my DIY mouse pad?
Elevate your mouse pad game by unleashing your creativity and making it a true reflection of your personality. You can do this by selecting a fabric with a unique design that speaks to you, adding a pop of color with acrylic paint in your favorite hues, or incorporating images, stickers, or even stenciled quotes that showcase your individuality. To add an extra layer of protection and ensure your masterpiece remains intact, simply apply a clear varnish or laminate to seal the deal.
How do I prevent my DIY mouse pad from fraying?
Preventing fraying is crucial for maintaining the integrity of your project. There are several ways to achieve this, including sealing the edges with clear adhesive, which effectively prevents loose threads from unraveling. An alternative approach is to use bias tape or ribbon to create a finished edge, adding an aesthetic touch to your design. For projects that require more durability, selecting materials like leather that don’t fray easily can be a great option. Additionally, applying a fabric sealant or fray check along the edges can also help prevent fraying and ensure a professional-looking finish.
Is it cost-effective to make my own mouse pad?
Creating a custom mouse pad from scratch can be an economical and creative endeavor. By repurposing materials you already have at home, such as old clothing or book pages, and using affordable supplies, you can craft a unique mouse pad that not only saves you money but also allows for personalized expression. Not to mention, the end result is often more budget-friendly than purchasing one off the shelf.
Are DIY mouse pads durable?
While DIY mouse pads may not seem like a conventional solution, they can indeed rival their commercial counterparts in terms of durability. The key lies in the selection of materials and the attention to detail in their construction. By applying a layer of varnish or laminate to the surface, you can significantly extend the lifespan of your homemade mouse pad. Additionally, opting for sturdy base materials such as cork or foam ensures that your DIY creation remains robust and able to withstand the rigors of daily use.
How can I make my DIY mouse pad comfortable for my wrist?
To enhance the comfort of your DIY mouse pad, think about incorporating a wrist rest that caters to your specific needs. This can be achieved by opting for a thicker base material that provides additional cushioning and support. Alternatively, you could attach a padded wrist rest covered with soft fabric, such as cloth or silicone, to provide extra comfort and reduce strain on your wrist during extended use. It’s also essential to position the wrist rest in a way that allows your wrist to remain at a natural angle, thereby reducing the risk of discomfort and fatigue.
What if I don’t have any crafting experience?
Many beginners find comfort in the straightforward approach of popular DIY mouse pad tutorials, which walk them through every step with clarity. For those new to crafting, simple designs incorporating fabric and cork can be an excellent way to begin. The thrill of creating something personal and practical makes the process all the more enjoyable. With these answers at your disposal, you’ll feel confident in tackling a bespoke mouse pad that reflects your style while serving its purpose.
Alternative Materials for DIY Mouse Pads
When the need arises for an impromptu mouse pad or a creative DIY alternative, several everyday items can be repurposed to fill the gap. From household staples to scraps lying around, these materials offer effective solutions that ensure a smooth mouse glide, whether you’re working on a project or dominating in your favorite game.
Books or Magazines
When it comes to finding the perfect surface for your computer, stability is key. A large hardcover book or a stack of magazines can provide a flat and secure foundation for your laptop or tablet. To ensure optimal performance, opt for a book with a smooth cover that won’t hinder mouse movement. This simple solution can make all the difference in your computing experience.
Desk or Table Surfaces
Optical mice have come a long way, and many modern models function seamlessly without any need for special surfaces. However, it’s still crucial to ensure your work environment meets certain conditions. To get the most out of your mouse, start by providing a smooth and debris-free surface. This means giving your desk a good clean before getting started, as any obstacles can negatively impact the sensor’s performance.
Cardboard
When it comes to reducing waste, even the smallest changes can make a big impact. One simple yet effective approach is to repurpose everyday items in creative ways. For instance, a humble piece of cardboard can be transformed into an eco-friendly mouse pad that’s both functional and sustainable. Not only does this idea reduce the need for single-use products, but it also encourages personalization through customization – simply cut the cardboard to your preferred dimensions for a fit that’s tailored to your unique needs.
Fabric Scraps
When it comes to repurposing old fabrics, one creative solution is to transform them into functional surfaces that can be used as mouse pads. To do this, simply lay the fabric flat and use it as-is. If you’re concerned about the fabric shifting around or losing its shape, consider adding a non-slip backing to keep everything in place. This not only keeps your workspace tidy but also adds an eco-friendly touch to your daily routine.
Cutting Mats
For those who enjoy working on crafts, a self-healing cutting mat is an invaluable tool that offers a reliable and long-lasting surface for your projects. This innovative material not only provides a sturdy base for your mouse to glide smoothly but also allows minor scratches and cuts to heal themselves, eliminating the need for frequent replacement or tedious cleaning. Additionally, the printed grid lines on this mat can be a huge asset when working with precision, whether you’re designing intricate patterns or creating complex layouts. With its unique combination of durability and versatility, a self-healing cutting mat is an essential accessory for any crafter looking to streamline their workflow and minimize frustration.
Place Mats
Transforming your dining experience into a seamless desk setup has never been easier! By repurposing a dining table placemat as a makeshift mousepad, you can effortlessly bridge the gap between home and office. The best part? It’s an eco-friendly solution that eliminates the need for single-use mousepads. Moreover, many placemats are designed with ease of cleaning in mind, allowing you to quickly wipe away any messes or spills. With this simple hack, you’ll be enjoying a clutter-free workspace in no time.
Wax Paper or Parchment Paper
When in a hurry or in need of a makeshift solution, wax paper or parchment paper can provide a temporary reprieve from the issue. This unlikely duo offers a silky surface that allows your mouse to effortlessly glide across it. While they may not be the most ideal solutions, they can help alleviate the problem until a more permanent fix is implemented.
When selecting materials for an optimal user experience, consider factors such as texture, stability, and responsiveness. By experimenting with different options, you can find the perfect combination that suits both your preferences and your mouse’s sensor.
DIY Mouse Pad Ideas
Elevate your workspace by unleashing your creativity with DIY mouse pad ideas that exude your personal style. From simple yet effective designs to more elaborate and unique concepts, this collection of innovative projects will inspire you to add a dash of individuality to your computer setup.
DIY Rainbow Mouse Pad
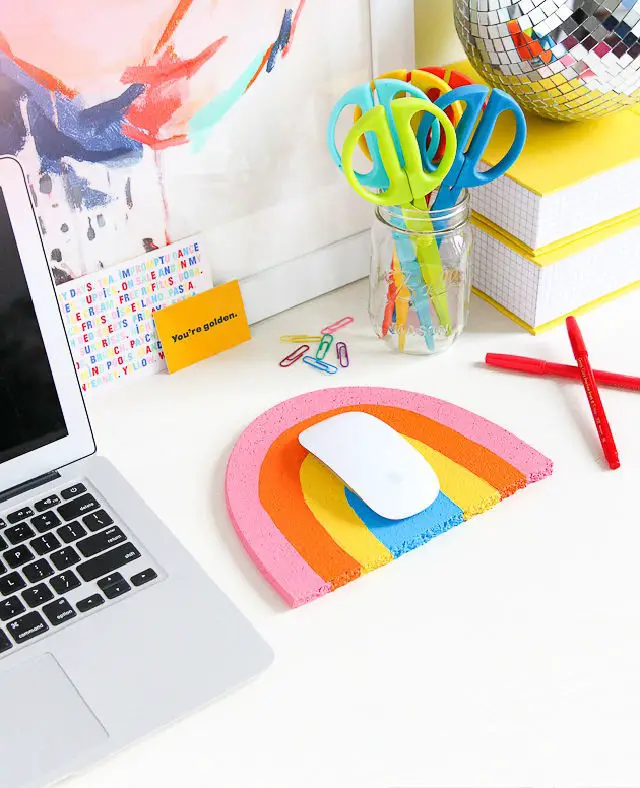
Transforming a plain workspace into a vibrant haven is just a few steps away. With The Crafted Life’s DIY Rainbow Mouse Pad tutorial, you can turn a humble cork board into a charming mouse pad that radiates joy. The process is remarkably straightforward, requiring only multi-surface acrylic paint, basic tools, and about an hour of your time. You’re guided through the two-step procedure with clear and concise instructions, making it accessible to anyone who wants to add some color to their desk setup. What’s more, Rachel Mae Smith’s engaging guide invites you to put your personal touch on the project by selecting your favorite hues, and even suggests using the cutouts as cheerful wall pinboards. This creative and functional craft project is sure to brighten up your day.
How to Make a Mouse Pad

Transform your desk space into a personalized haven by crafting your own custom mouse pad with Heather Handmade’s easy DIY project. This charming project requires only a few essential materials: your preferred fabric, batting, and basic sewing tools. Follow the simple step-by-step guide to trace, cut out, and sew together your chosen shape, then add a finishing touch with edging for a professional-looking finish. Not only is this sewing project functional, but it also makes for a thoughtful gift or fun back-to-school activity. As you embark on this creative journey, you’ll not only be adding a unique and practical fabric mouse pad to your workspace, but also infusing it with a personal touch that reflects your individuality.
Floral Mouse Pad Tutorial
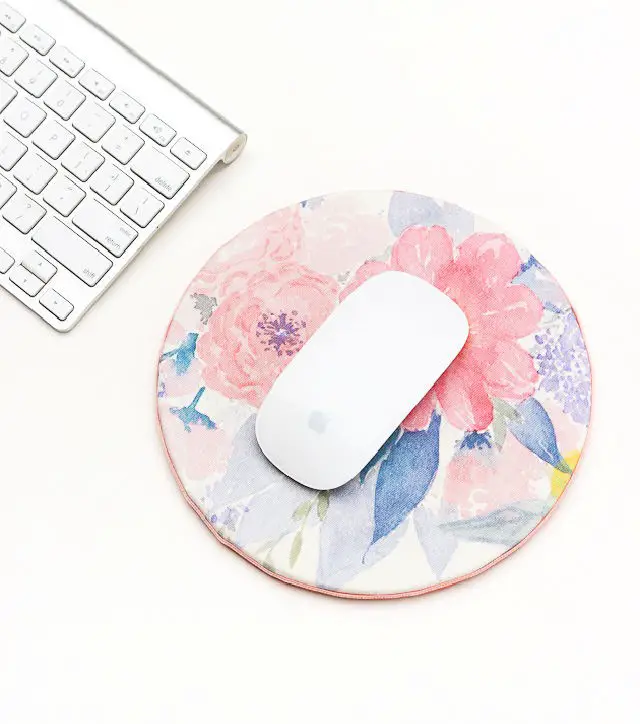
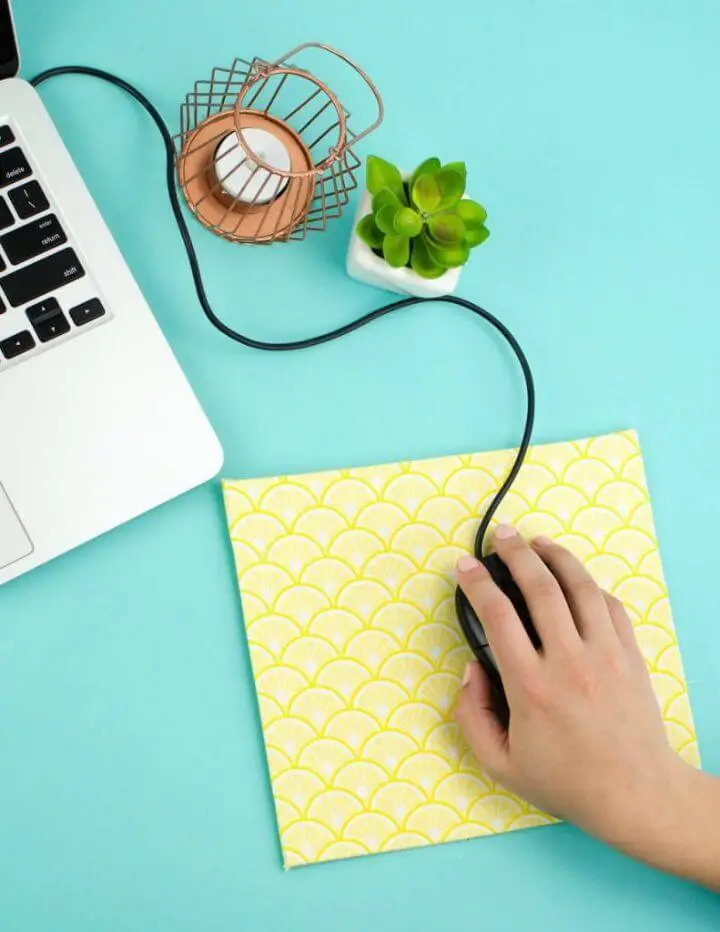
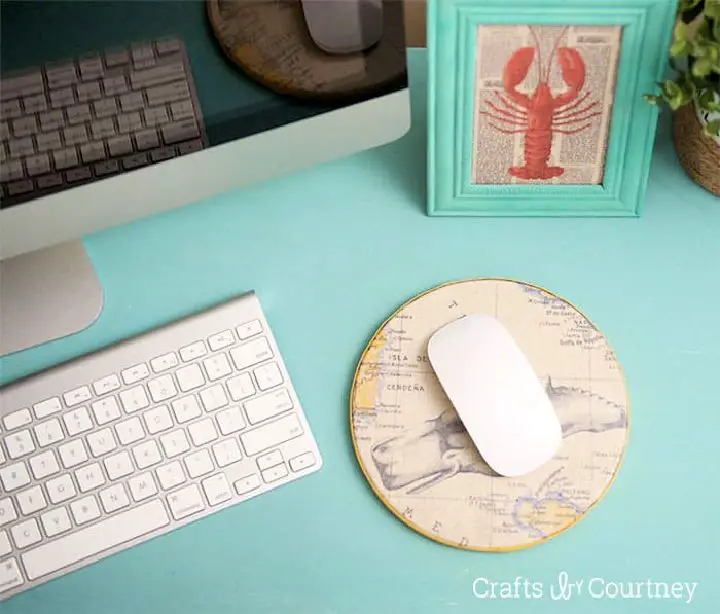
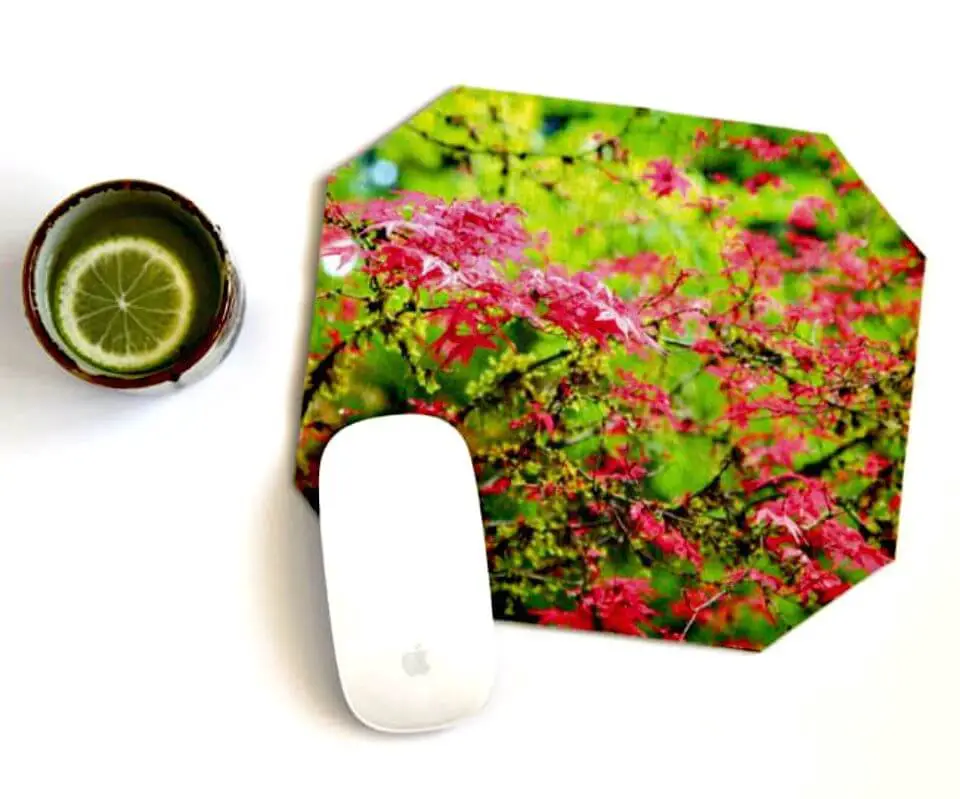
Transform your workspace into a haven with a DIY floral mouse pad, reminiscent of The Crafted Life’s creativity. In just 30 minutes, including drying time, you can turn a dull desktop accessory into a vibrant masterpiece. To start, gather a cork round, fabric of your choice, scissors, fabric mod podge, and a sponge brush. Cut the fabric, leaving an extra 2 inches to wrap around the cork for a seamless finish. Apply the mod podge to the cork, followed by laying the fabric evenly on top. Tuck and secure the excess fabric beneath for a neat presentation. Allow it to dry overnight before voilà – you have a one-of-a-kind mouse pad that brings a touch of nature and color to your office.
Make a Mouse Pad That You Can Personalize

Transforming a cork roll into a personalized mouse pad is an accessible DIY project that requires minimal materials. By following Northstory + Co’s straightforward guide, you can turn a simple supply into a functional and customized desk accessory. To get started, all you need is a cork roll, some paint, a foam brush, an alphabet stencil, and a dash of creativity. Begin by cutting the cork to your desired size, then unleash your imagination as you stencil on your unique design. The beauty of this project lies in its simplicity – with just a touch of acrylic paint, you can give your mouse pad a personal flair without the need for additional sealing. This DIY endeavor is perfect for those who prefer using a physical mouse with their laptop and want to add a personal touch to their workspace. By following these easy steps, you’ll enjoy crafting a mouse pad that’s both practical and stylish.
DIY Mouse Pad With Wrist Rest
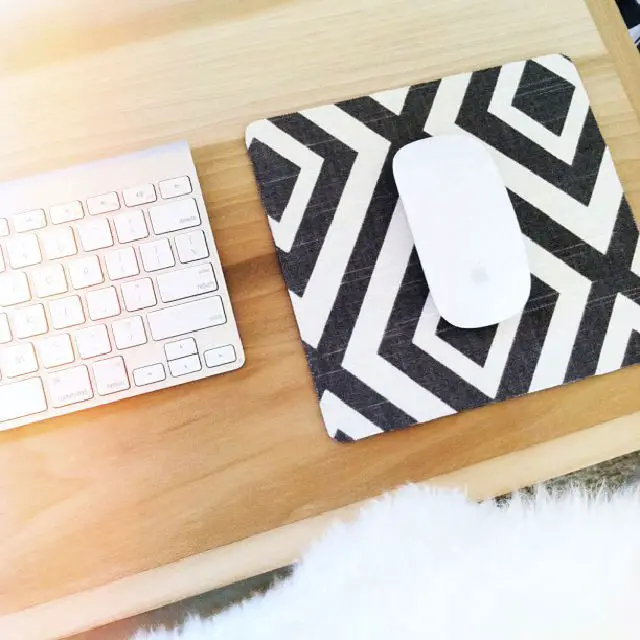
Transforming your workspace into a haven of comfort and individuality is a breeze with the simple yet ingenious DIY project of crafting a custom mouse pad with an integrated wrist rest. By repurposing an old yoga mat, you can create a unique accessory that not only provides ergonomic support but also showcases your personal style. The process begins by cutting the mat to size, followed by assembling layers for the wrist rest and covering it with fabric for a smooth gliding experience. To complete the pad, apply a finishing touch by edging it with homemade bias tape, resulting in a polished and professional-looking design. With clear instructions and a dash of creativity, you can easily create a one-of-a-kind mouse pad that elevates your workspace while easing daily computer tasks.
Make a Fabric Mouse Pad
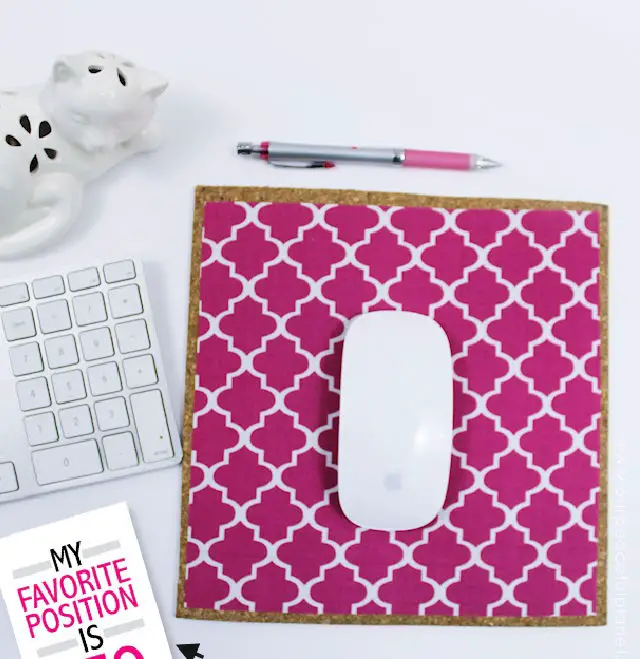
Elevate your workspace with a custom mouse pad that reflects your personal style! By following Purely Katie’s intuitive DIY guide, you can transform fabric scraps into a practical yet stylish accessory for your computer area. With just a few simple materials – including your favorite fabric, a cork trivet, and basic craft tools – you’ll be creating a one-of-a-kind piece in no time. This no-sew project is perfect for anyone looking to add a touch of uniqueness to their desk space, making it both functional and visually appealing.
Custom DIY Mouse Pad in 10 Minute
In just 10 minutes, you can transform ordinary materials into an extraordinary DIY mouse pad with the help of Craft Your Happiness’s easy-to-follow guide. The required supplies are surprisingly simple: cork, fabric, and spray adhesive. This cost-effective and fun project is perfect for adding a personal touch to your workspace, making it a great activity for teenagers as well. What sets this crafting experience apart is the attention to detail in achieving a smooth finish without air bubbles, courtesy of helpful tips on material handling. Flatten stiff cork with ease and unleash your creativity to create a mouse pad that mirrors your unique style and mood.
Make Your Own Gold Mouse Pad
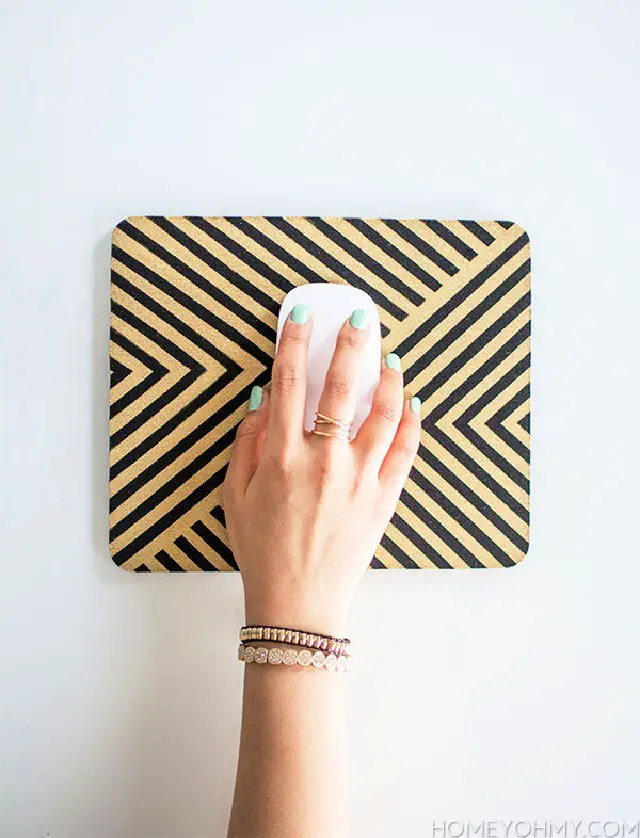
Transform your workspace into a sanctuary of sophistication by elevating a humble mouse pad into a luxurious gold masterpiece. With Homey Oh My’s straightforward yet captivating DIY guide, you’ll be amazed at how a few simple materials – including vinyl tape for precision, Rust-Oleum Gold Spray Paint for an opulent hue, and Mod Podge for added durability – can turn a mundane accessory into a statement piece that exudes elegance. As Amy walks you through the creative process with crystal-clear instructions, you’ll be swept up in the satisfaction of crafting something both functional and stylish, perfect for making your desk area truly one-of-a-kind.
DIY Pentagon Mouse Pad
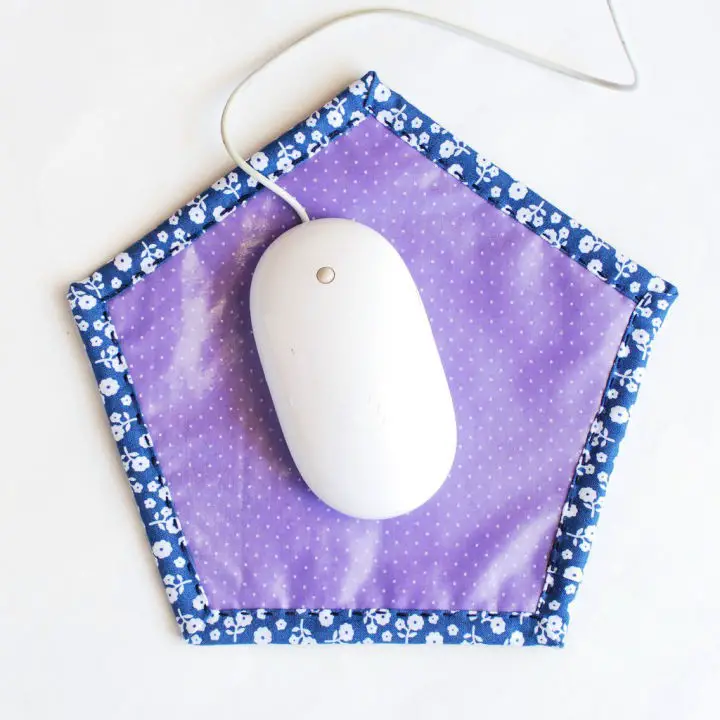
Crafting a custom mouse pad offers the perfect blend of personalization and functionality. With just a few simple materials, you can create a one-of-a-kind accessory for your computer setup using your favorite fabric. The added benefit of a laminated surface ensures durability and ease of cleaning. This DIY project is designed to be accessible to crafters of all skill levels, providing clear instructions on how to produce a stylish yet practical mouse pad. Whether used in your own home office or gifted to someone else, this homemade accessory can make a significant difference in daily computer use.
Making a Leather Mouse Pad
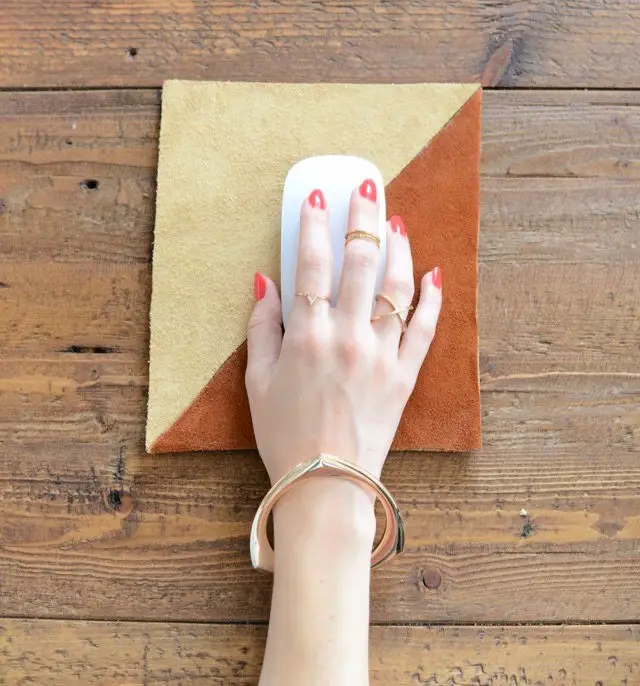
Elevate your workspace with a unique, handcrafted leather mouse pad. M Loves M offers a comprehensive DIY guide that will walk you through creating a stylish, two-toned leather accessory for your desk. This project is remarkably easy to execute, requiring just two pieces of contrasting leather and a small piece of corkboard as the foundation. With adhesive spray, an exacto knife, and a ruler at your disposal, you’ll be able to measure, cut, and adhere your way to a personalized office item that reflects your personal taste. For those seeking a more streamlined approach, consider using a single leather piece or adding a touch of whimsy with fabric paint dots. The beauty of crafting your own mouse pad lies not only in its simplicity but also in the opportunity it presents to infuse your daily workspace with a dash of personality and style.
Make Your Own Doily Mousepad
Transform an ordinary workspace accessory into a charming, lace-embellished piece of art with this unique Doily Mousepad tutorial. This straightforward guide empowers you to add a personalized touch to your desk with step-by-step instructions for adhering delicate doilies to mousepads using Mod Podge. The perfect DIY project for crafters of all levels, this endeavor can be completed in approximately a day and serves as a thoughtful handmade gift or stylish addition to one’s own office setup. By applying thin layers of Mod Podge and allowing adequate drying time, you’ll achieve the best results. Experience the joy of crafting and personalizing your workspace with this engaging and creative DIY project.
DIY Mouse Pad With Cricut Infusible Ink
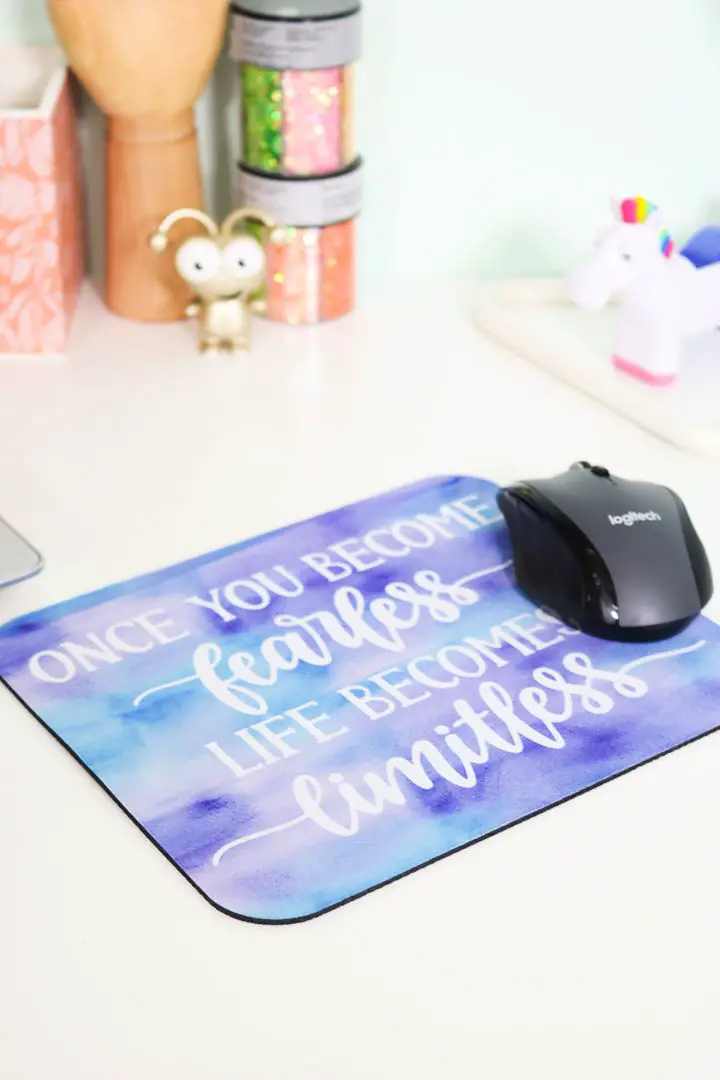
Transform your workspace into a personalized haven with a DIY mouse pad crafted using Cricut Infusible Ink. Following Angie Holden’s step-by-step guide from The Country Chic Cottage, you’ll discover how to elevate a plain mouse pad into a vibrant and custom accessory that boasts long-lasting durability. This creative process involves precision cutting, meticulous weeding with tweezers, and expert pressing onto a sublimation-ready mouse pad using the Cricut EasyPress. As you bring your design to life, you’ll not only add flair to your desk but also experience a sense of accomplishment. Whether you’re looking to spruce up your home office or give a thoughtful gift, this project offers the perfect blend of simplicity and flexibility, making it accessible to crafters of all levels.
How to Make Confetti Mouse Pad
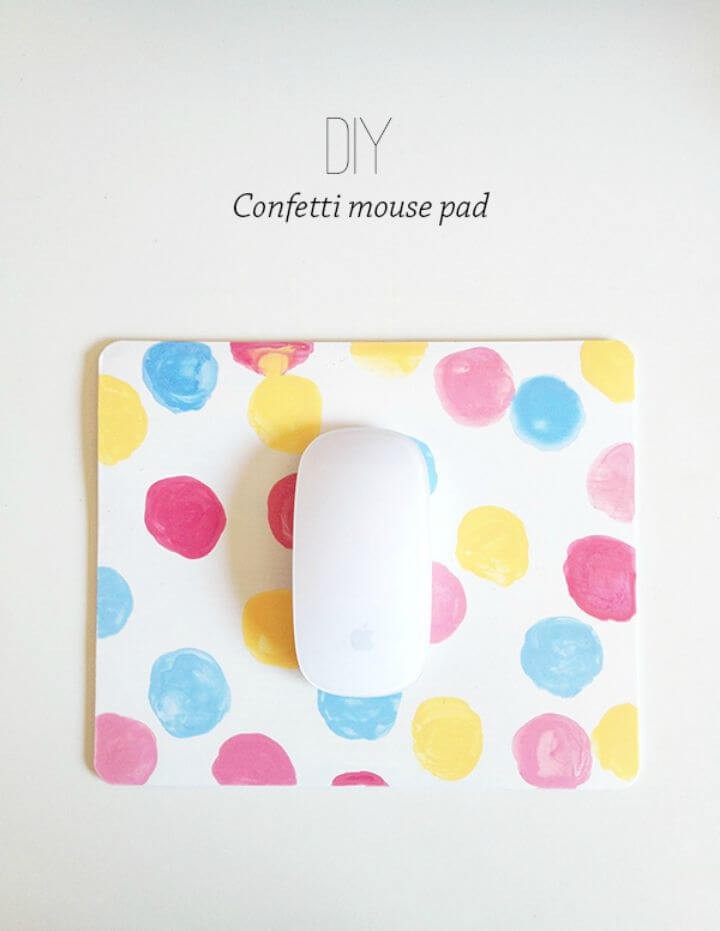
Give your workspace a splash of color and whimsy with a DIY confetti mouse pad that’s equal parts art and functionality. Begin by giving an old mouse pad a fresh start with a coat of primer, allowing it to dry completely before applying a base layer of white acrylic or spray paint. This provides a clean slate for your vibrant confetti design. Next, choose your favorite hues from a palette of acrylic paints and use a brush to dab on randomly placed dots, embracing the unpredictability that makes this project so charming. To add an extra layer of protection against daily wear and tear, finish off with a coat of varnish. This simple yet fulfilling craft not only provides a creative outlet but also yields a one-of-a-kind addition to your workspace that’s sure to bring a smile to your face.
No-Sew DIY Mouse Pad
Add a pop of personality to your workspace with a one-of-a-kind custom mouse pad. The DIY No-Sew Mouse Pad tutorial from A Little Craft In Your Day is an ideal project for crafters of all skill levels, requiring just 5 minutes and basic materials like fabric, foam, scissors, and glue. By simply cutting the fabric and foam to size, applying a small amount of adhesive, and folding the edges for a crisp finish, you’ll create a functional and stylish mouse pad that showcases your unique style. Perfect as a thoughtful gift or for personal use, this easy-to-follow craft project is sure to elevate your daily computing experience.
Easy DIY Gold Mouse Pad
Transforming a plain mouse pad into an elegant accessory for your office is easier than you think. With a few simple and budget-friendly DIY steps, you can turn a standard blue mouse pad into a stylish gold- striped addition to your workspace. The process involves cutting, painting, and sealing the mouse pad to achieve a durable and attractive finish. Using basic supplies like white craft paint, gold paint, scissors, blue painter’s tape, and Mod Podge, you’ll be able to create a unique and personalized design without needing any prior crafting experience. By following this straightforward tutorial, you can add a touch of sophistication to your desk today.
How to Make Pom Pom Mouse Pad
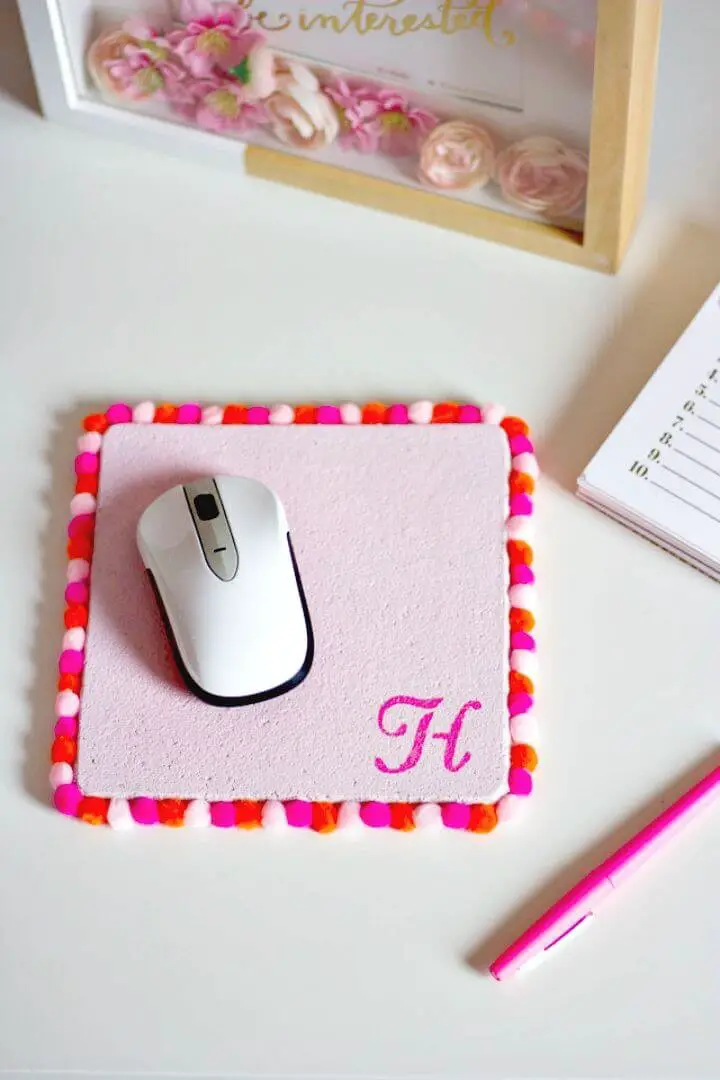
Transform your workspace into a reflection of your personality by creating a unique DIY Pom-Pom Mouse Pad. This clever project takes an ordinary cork trivet and turns it into a vibrant desk accessory that’s both functional and visually appealing. To get started, apply a base coat of acrylic paint to the trivet and add a personal touch with your monogram using a stencil. The finishing touch is adding a colorful border of pom-oms attached with hot glue, which not only adds a pop of color but also serves as a charming coaster when not in use. This easy-to-follow crafting idea is perfect for adding a bit of whimsy to your daily computer routine.
Creative Fabric Mouse Pad
Transform your workspace into a vibrant oasis by upcycling an old mousepad into a custom fabric one, courtesy of Dorsey Designs’ quick and easy tutorial. Say goodbye to dull desk accessories and hello to a personalized touch that’s as practical as it is enjoyable. With straightforward steps involving spray adhesive, your chosen fabric, and Mod Podge to seal the edges, this DIY project is perfect for those looking for a fun and cost-effective way to add some creativity to their office or home study area. The process is designed to be easy to follow, ensuring a satisfying crafting session that yields a unique piece that reflects your personality.
DIY Mouse Pad With Scrapbook Paper
Transforming your workspace with a custom DIY mouse pad has never been more exciting! With the help of Mod Podge Rocks’ simple and engaging tutorial, you can turn scrapbook paper into a one-of-a-kind masterpiece that showcases your personal style without breaking the bank.
This fun and easy-to-follow project involves just a few basic steps: cutting, pasting, and adding a dash of painting flair. The result is a unique mouse pad that not only adds a pop of color to your desk but also serves as a functional addition to your office or home study area.
The best part? You don’t need to be a crafting expert to create this masterpiece. With minimal tools like cork circles, Mod Podge Gloss, ribbon, and a few other essentials, you can dive into this project and elevate your workspace in no time.
Cheap DIY Photo Mouse Pad
Transforming your workspace into a personalized haven is just a 10-minute DIY project away, thanks to A Piece Of Rainbow’s straightforward guide. By repurposing an old mouse pad or starting from scratch with craft foam and fabric, you can create a unique and functional accessory that reflects your personality. The key lies in printing your desired image onto the fabric, which can then be attached to the mouse pad base. This simple yet satisfying project not only revamps your desk but also makes for an excellent customized gift. With clear instructions and easy-to-follow steps, you’ll end up with a practical and visually appealing mouse pad that you’ll love using daily.
Making a Cactus Mouse Pad
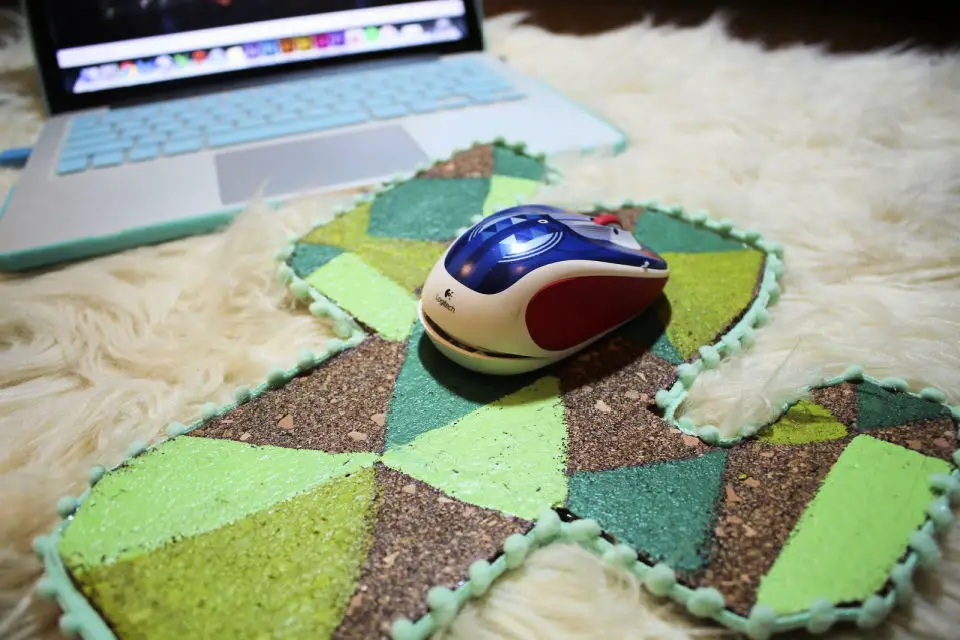
Transform your workspace into a reflection of your personality by crafting a one-of-a-kind DIY mouse pad inspired by The Botanical Texan’s creative guidance. This engaging project is ideal for those seeking to create a functional piece that showcases their personal style. By combining readily available materials such as cork board, paints, and Mod Podge, you’ll be able to follow the step-by-step process of designing a cactus-shaped mouse pad featuring a geometric pattern. The instructions are designed to be clear and accessible, allowing you to effortlessly paint, seal, and finish your creation with a decorative tassel ribbon. Take this opportunity to personalize your desk with a homemade mouse pad that is as unique as it is practical.
Conclusion:
Unleash your creative side and give your workspace a personalized touch by transforming everyday objects into one-of-a-kind mouse pads. Our collection of 20 innovative DIY projects offers endless possibilities to infuse your digital experience with a dash of uniqueness and functionality. From exploring unconventional materials to crafting designs that reflect your personality, these projects will guide you in creating a mouse pad that not only serves its purpose but also becomes a conversation starter on your desk. So why settle for the ordinary when you can create something extraordinary? Start crafting and discover how a simple DIY project can bring a smile to your face and a spark to your digital journey.
