Transform any room with a stylish DIY mirror frame. Explore 30 unique ideas catering to diverse tastes and budgets. From painted masterpieces to decoupage designs and embellishments, there’s something for everyone. But what if unexpected issues arise? Troubleshoot common problems like stubborn paint, uneven decals, or loose adornments to ensure your project stays on track. And remember, a well-maintained masterpiece is one that will stand the test of time – learn how to clean and inspect your work regularly. Join us as we delve into the world of DIY mirror frames, discussing maintenance tips, frequently asked questions, and creative inspiration.
How to Make a Mirror Frame – Step by Step Guide
Transforming a plain mirror into a stunning piece of art is within reach without requiring extensive DIY expertise. By combining basic tools, a willingness to learn, and an eye for design, you can craft a unique mirror frame that complements any room’s aesthetic. Follow this comprehensive guide to discover the secrets of creating a custom mirror frame that reflects your personal style.
What You’ll Need
When it comes to building a DIY mirror frame, having the right tools and materials can make all the difference. Here’s a list of what you’ll need to get started:
Essential Tools:
Tape measure: This will come in handy for measuring your space and calculating the size of your frame.
Screwdriver: A reliable screwdriver is necessary for assembling and attaching various components.
Drill and drill bits: You’ll need these to create precise holes for screws and other fasteners.
Marking pencil: This will help you mark cutting lines and make adjustments as needed.
Adhesive (e.g. Liquid Nails): A strong adhesive is necessary for bonding materials together. Gorilla Glue is also a great option.
Essential Materials:
Four 2.5-inch flat corner braces: These will help support your mirror and provide stability.
Black spray paint (hammered texture recommended for a rustic look): This adds a touch of elegance to your frame.
1-by-4 pressure-treated lumber: You’ll need this for the frame’s base and any additional structural elements.
Miter saw: A miter saw is perfect for making precise cuts in your lumber.
Sandpaper (220 grit and heavier): This will help smooth out any rough edges or splinters.
Clean towel or air gun: These are necessary for removing dust and debris from your work area.
Wood stain (of your choice): Choose a color that complements your home’s decor.
Lint-free cloth or old, clean t-shirt for staining: This will help you achieve a smooth, even finish.
Protective plastic or newspapers for work area: Keep your workspace clean and organized with these materials.
Optional: Lock washers for additional mirror support: These can provide extra stability and peace of mind.
Instructions
To start, measure your mirror’s width and length, adding an extra inch to each side to determine the required wood size. For the wood, opt for 1-by-4 pressure-treated lumber that matches your measurements. If you’re not comfortable cutting it yourself, most hardware stores will make the cuts for you. Use a miter saw to cut 45-degree angles on both ends of each piece, which will form the frame’s corners. Next, prepare the wood by sanding all surfaces with 220-grit sandpaper, gradually moving to heavier grits if needed to smooth out any imperfections. Don’t forget to sand the edges and ends as well. Before applying stain, wipe down the wood to remove any sawdust. Use a lint-free cloth to apply the stain in the direction of the wood grain, adding coats as necessary to achieve your desired color, allowing each coat to dry thoroughly between applications. While the wood is drying, prepare the flat corner braces by painting them black with spray paint, giving them a rustic look that complements the frame. Paint the screw ends but not the threads for added authenticity. Once the stained wood is dry, arrange the pieces on a flat surface to form your frame, ensuring the corners align correctly. Then, move to a well-ventilated area or garage for assembly. Apply adhesive in a wave pattern across two-thirds of the wood’s width, avoiding the edge to prevent it from being visible in the mirror’s reflection. Begin with the bottom piece and secure the sides and top, applying pressure until the glue sets. For faster setting, consider using a quick-set adhesive like Fuse it. Once the glue has dried sufficiently, attach the flat corner braces to each frame corner using pre-drilled holes and provided screws for added stability. Finally, inspect the entire frame for any missed spots or edges that may require additional staining or touch-ups. With those final touches complete, your custom mirror frame is now ready to elevate the aesthetic of your space.
Video Tutorial
To further enhance the customization process, I recommend supplementing this written guide with a step-by-step video tutorial available on YouTube. The visual explanations provided in the video serve as a valuable complement to the written instructions, facilitating an intuitive understanding of the steps involved. This comprehensive approach aims to simplify the process of creating a custom mirror frame, making it feasible for DIY enthusiasts of all skill levels to successfully complete the project.
Customization Ideas for Your DIY Mirror Frame
Transforming a plain mirror into a one-of-a-kind masterpiece isn’t just about utility – it’s a chance to infuse your living space with a dash of personality. To help spark your creativity, here are some innovative approaches to consider when crafting your DIY mirror frame.
Paint It Up
When it comes to choosing a frame color, the options are endless. To make a bold statement, consider a vibrant hue that contrasts sharply with your wall’s tone. Think fiery reds, deep blues, or sunshine yellows – these colors can’t help but grab attention. For a more subdued atmosphere, soft pastels like pale pinks, baby blues, and minty greens can create a calming ambiance. If you want to add some glamour, metallic paints in gold, silver, or copper can bring a luxurious feel to any room. With so many options available, the key is to choose a color that reflects your personal style and complements the space.
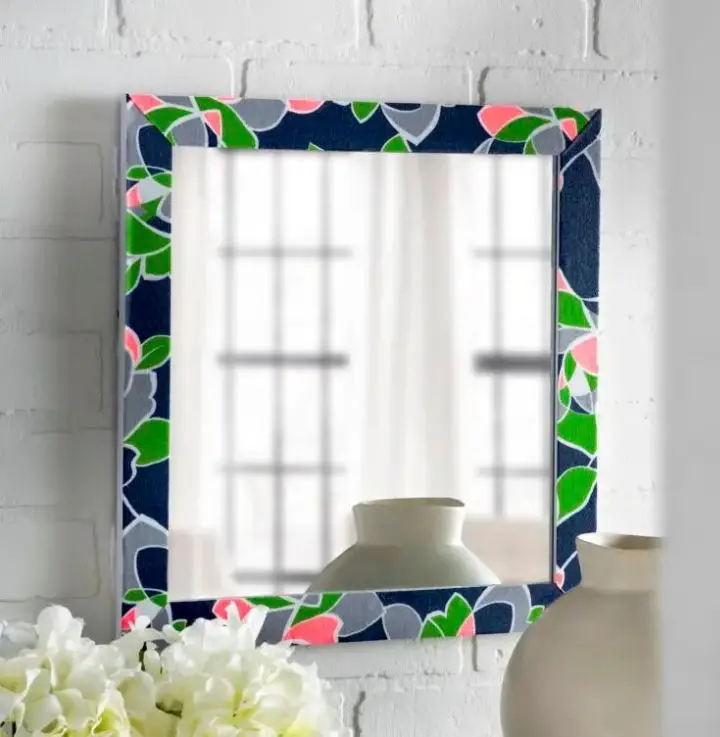
Decoupage Delight
When it comes to adding personality to your frame, the possibilities are vast. One approach is to incorporate patterned paper, which can bring a touch of elegance with floral designs or a pop of modernity with geometric patterns. Alternatively, consider wrapping your frame in fabric for a unique textured look that complements the room’s decor. For those who love adventure and travel, old maps offer a stylish and personal way to tell a story on your frame.
Embellish and Adorn
Transform a plain mirror into a stunning piece of art by incorporating beads, sequins, shells, stones, or natural elements like pressed flowers or leaves. For a touch of glamour, apply glue-on beads or sequins to create a frame that exudes sophistication and elegance. Alternatively, bring the beachy vibe indoors by decorating your frame with shells or pebbles, perfect for reminiscing about a special coastal getaway. If you’re looking for an organic look, consider adding pressed flowers or leaves to give your frame a natural, earthy feel. These unique decorations can be used to create a country-inspired setting or a nature lover’s retreat. By letting your creativity shine and experimenting with different materials, you’ll turn a simple mirror into a masterpiece that reflects your personal style and enhances your living space.
Troubleshooting Common Issues with DIY Mirror Frames
While creating a do-it-yourself mirror frame can be a fun and rewarding project, it’s not uncommon to run into a few challenges during the process. One of the most frequent hurdles DIY enthusiasts face is dealing with imperfections in the frame’s surface or edges. To overcome this issue, try using a sanding block or file to smooth out any rough spots, then wipe away any dust or debris with a soft cloth. Another common problem that can arise is difficulty securing the mirror to the frame. This can be particularly frustrating if you’re trying to get the perfect alignment between the two pieces. To make things easier, consider using adhesive-backed Velcro strips or small clips specifically designed for this type of project. These will not only help keep the mirror in place but also provide a clean and professional-looking finish.
Problem: Paint Not Adhering
Prior to applying paint, it’s crucial to ensure that the frame is thoroughly cleaned and sanded to create a smooth surface. This will help the paint adhere evenly and prevent any imperfections from being highlighted. Additionally, select a primer specifically designed for the type of material the frame is made of, as this will further enhance the paint job’s overall quality.
Problem: Uneven Decoupage
To ensure a seamless application, it’s crucial to spread the adhesive consistently and evenly across the surface you’re working with. This is particularly important when using materials like paper or fabric, where tiny air pockets can form if not properly addressed. By smoothing out the material as you apply the glue, you’ll be able to eliminate these bubbles and achieve a more professional-looking finish.
Problem: Loose Embellishments
To ensure a sturdy bond between materials, utilize a reliable adhesive and permit it to complete its curing process without interference. When dealing with larger or heavier items, consider augmenting the adhesive’s holding power by incorporating supplementary supports such as thin wires or mild steel nails. This strategic approach will facilitate a stronger and more long-lasting bond.
Maintenance Tips for Your DIY Mirror Frame
For optimal results, regularly maintain your mirror frame by implementing the following straightforward steps: Firstly, ensure that the glass surface remains free from streaks and smudges. To achieve this, simply wipe down the mirror with a lint-free cloth or microfiber towel after each use. Additionally, avoid using paper products or rough cloths as they may scratch the reflective surface. Furthermore, occasionally clean the frame’s exterior by dusting it gently with a soft-bristled brush or a dry cloth to prevent dirt and debris from accumulating. By following these easy maintenance tips, you’ll be able to keep your mirror frame looking its best for years to come.
Regular Cleaning
When it comes to cleaning your framed mirror, there are two key areas of focus: the frame itself and the glass surface. To tackle the frame, start by using a soft cloth to gently dust away any debris or dirt that may have accumulated. This will help prevent scratches on the surface. For the glass portion, use a specialized glass cleaner and a lint-free cloth to avoid leaving streaks or residue behind.
Periodic Check-ups
Regularly inspect your DIY mirror frame for signs of wear or damage, addressing any issues as soon as you notice them. Additionally, ensure all fittings and attachments are securely tightened to prevent loose connections. By adopting this proactive approach, you’ll be able to maintain the overall beauty and durability of your project, requiring only patience and attention to detail.
FAQs About DIY Mirror Frames
As you dive into your DIY mirror frame adventure, certain queries might arise. To demystify the process and ensure a successful outcome, here’s a rundown of the most frequently asked questions and their corresponding answers:
What materials do I need for a DIY mirror frame?
To embark on this DIY project, you’ll require a few essential components. First, you’ll need the actual mirror, which will serve as the centerpiece of your creation. Additionally, you’ll need materials to construct the frame around it, such as wood, metal, or plastic. A reliable adhesive is also crucial for ensuring a strong bond between the frame’s various parts. You may want to add some visual flair with paint or decorations, and finally, you’ll need suitable tools for cutting and assembling the frame to fit your mirror perfectly.
How do I choose the right size for my mirror frame?
To ensure a precise fit, start by measuring the mirror’s dimensions carefully. Next, consider the desired width of the frame. Once you have these two figures in hand, add the frame’s width to the mirror’s dimensions to determine the overall size of your decorative piece.
Can I use reclaimed wood for my frame?
Embracing the charm of reclaimed wood, while also doing your part for the environment, is a win-win situation. To reap these benefits, however, it’s essential to start with a piece that’s been properly cleaned and treated to ensure it’s free from any unwanted pests or contaminants.
What’s the best adhesive for attaching the frame to the mirror?
When it comes to bonding glass and its surrounding frame, a reliable and transparent adhesive is essential. For this purpose, epoxy-based or silicone-based adhesives are particularly suitable options. Their strong and clear bonding properties make them ideal for this type of application.
How can I ensure my frame is securely attached to the wall?
When installing mirrors, it’s crucial to select suitable wall anchors that can bear the weight of the reflective surface. Additionally, the frame should have a robust backing to provide adequate support for the mirror itself.
Can I make a frame without any woodworking skills?
When it comes to crafting unique and personalized frames for your treasured memories, you’re not limited to traditional framing techniques or materials. In fact, there are plenty of creative alternatives that don’t require any expertise in woodworking. You can explore the use of pre-made frame pieces or innovative materials like foam board or molding, which offer a seamless way to create one-of-a-kind frames without needing specialized tools.
How do I protect the frame from moisture in the bathroom?
To maintain the integrity of your bathroom’s frame, apply a waterproof sealant to the edges once you’ve completed the installation. Additionally, guarantee that the area surrounding the frame receives sufficient airflow to mitigate excessive humidity levels.
What are some eco-friendly materials I can use for my frame?
When it comes to choosing materials for crafting, consider the environmental impact by opting for sustainable alternatives. Bamboo, recycled plastic, and even repurposed items from around your home can be creative solutions that benefit the planet.
How can I add lighting to my mirror frame?
When it comes to adding an extra touch of sophistication to your display, consider attaching LED strip lights to the back or sides of the frame. This clever design element not only provides additional illumination but also gives your setup a sleek, modern aesthetic.
What should I do if the frame starts to chip or peel?
Gently buff the affected area to remove any imperfections, then reapply a fresh coat of paint or sealant to the frame to restore its original appearance. As you work through your DIY mirror project, remember these FAQs and let your creativity shine. With confidence and enthusiasm, bring your vision to life and enjoy the process of creating something truly unique.
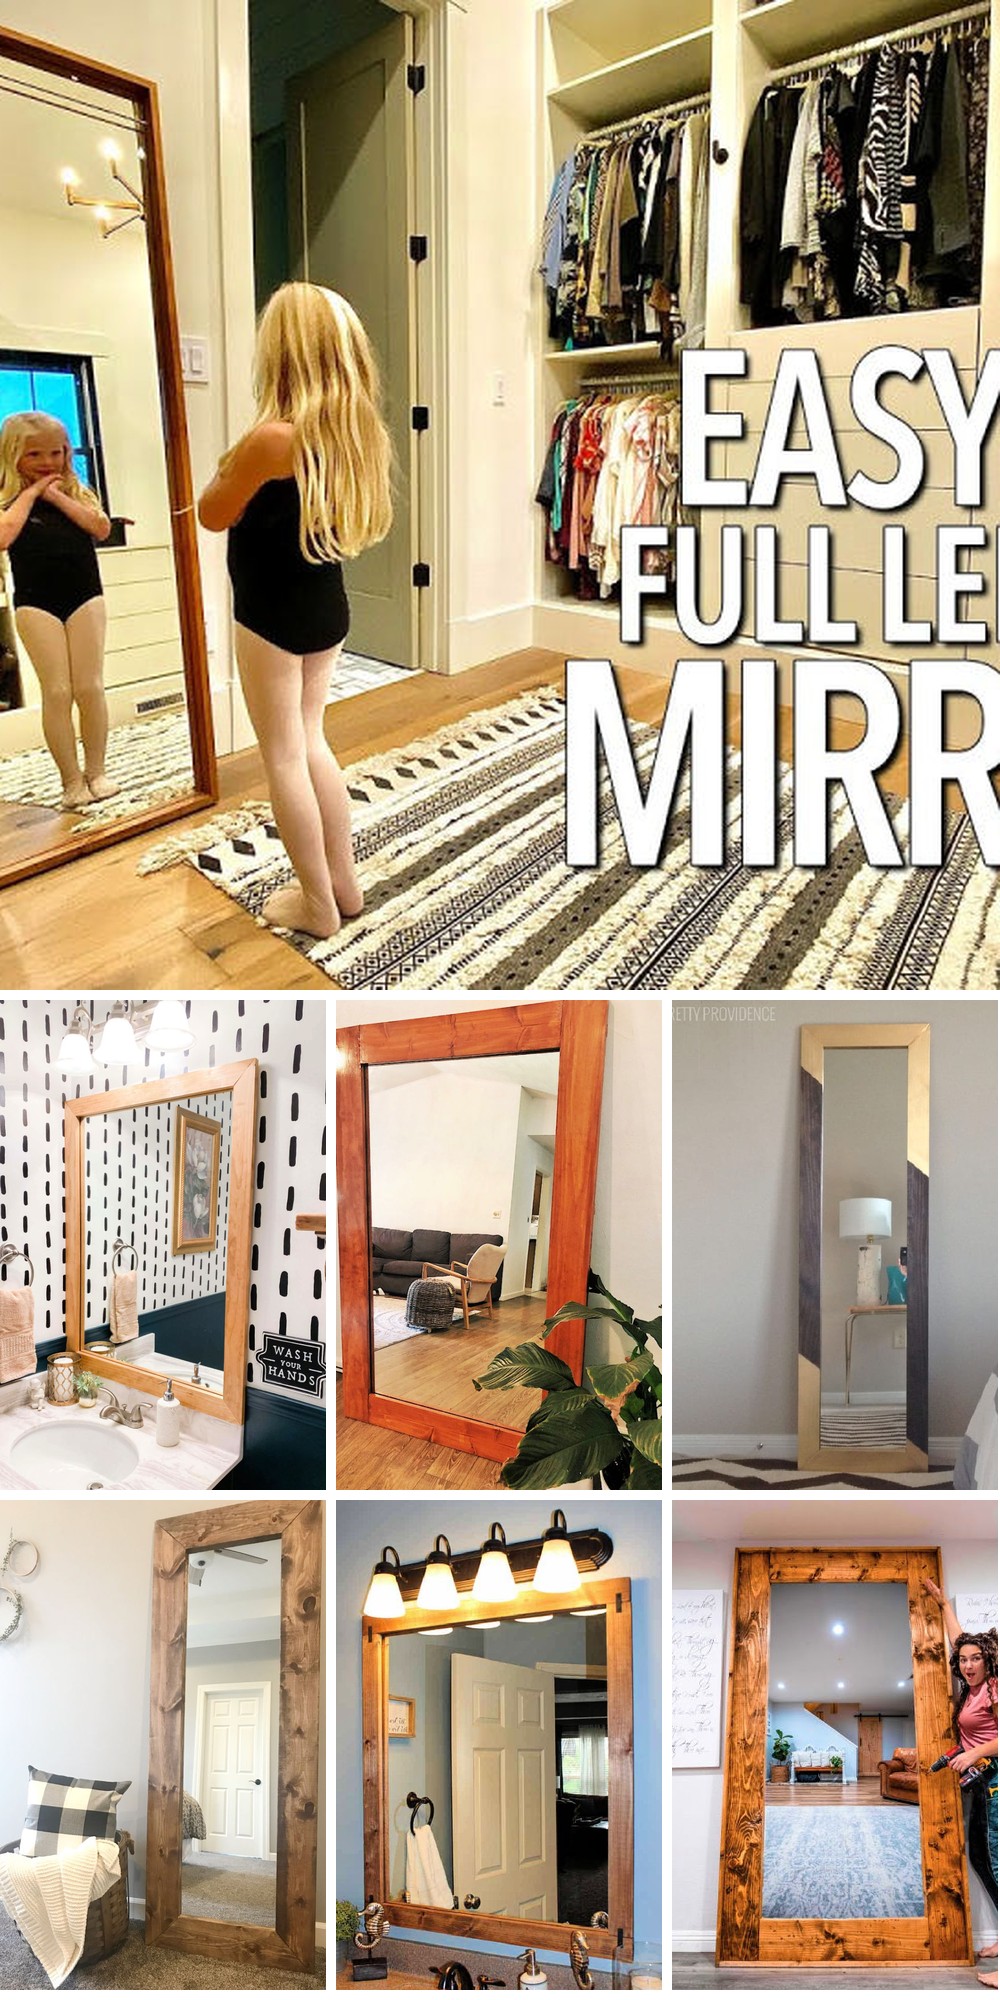
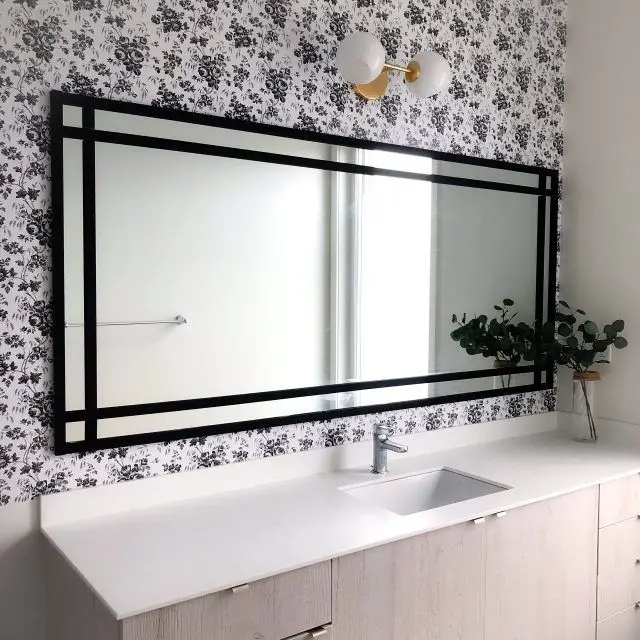
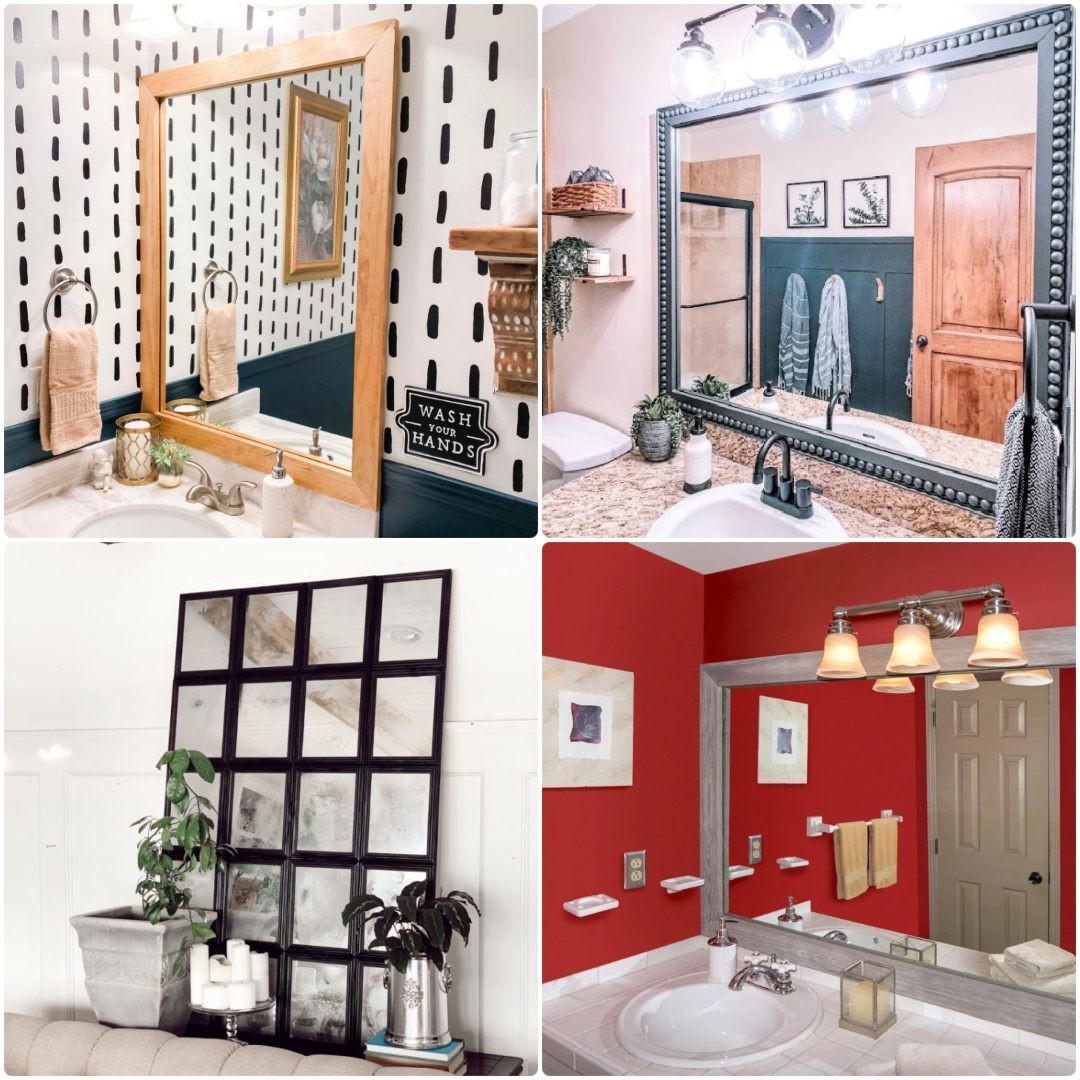
30 DIY Mirror Frame Ideas for Every Style
Transforming ordinary mirrors into extraordinary pieces of art is just a DIY project away. Imagine being able to infuse your personal style into the very space where you start your day – or end it, for that matter. To help you get started on this reflective journey, we’ve curated 30 unique and creative DIY mirror frame ideas, ranging from rustic charm to sleek modernity. From distressed wood to metallic accents, these projects will show you how to take your mirrors from bland to grand.
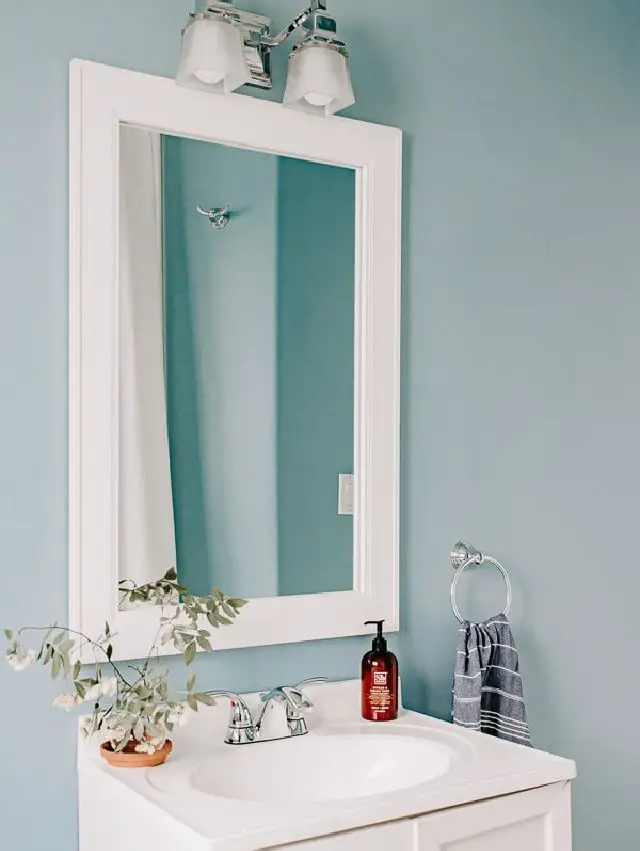
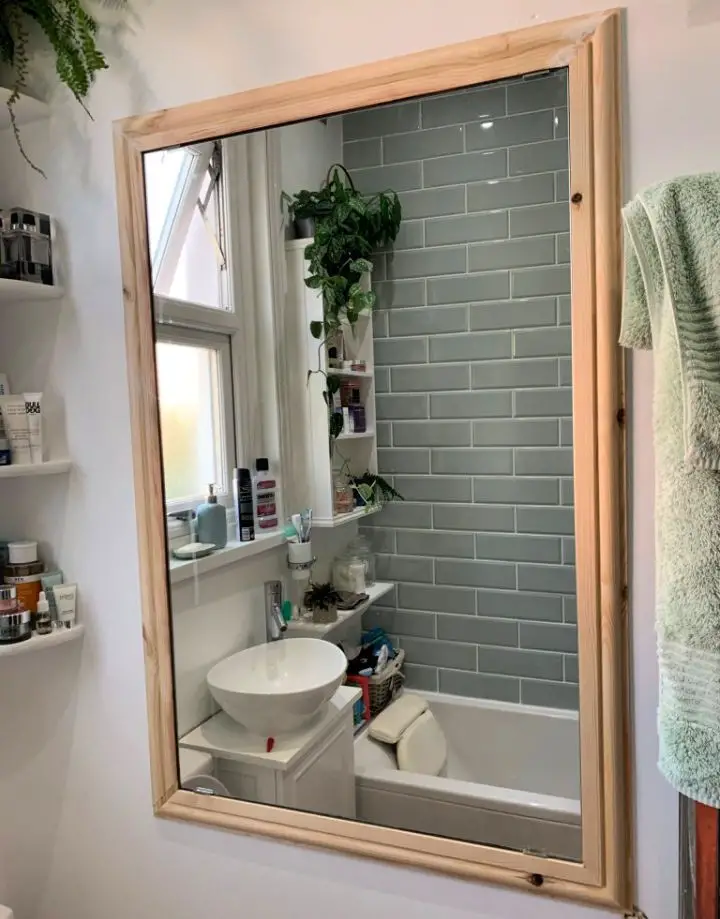
How to Frame a Bathroom Mirror
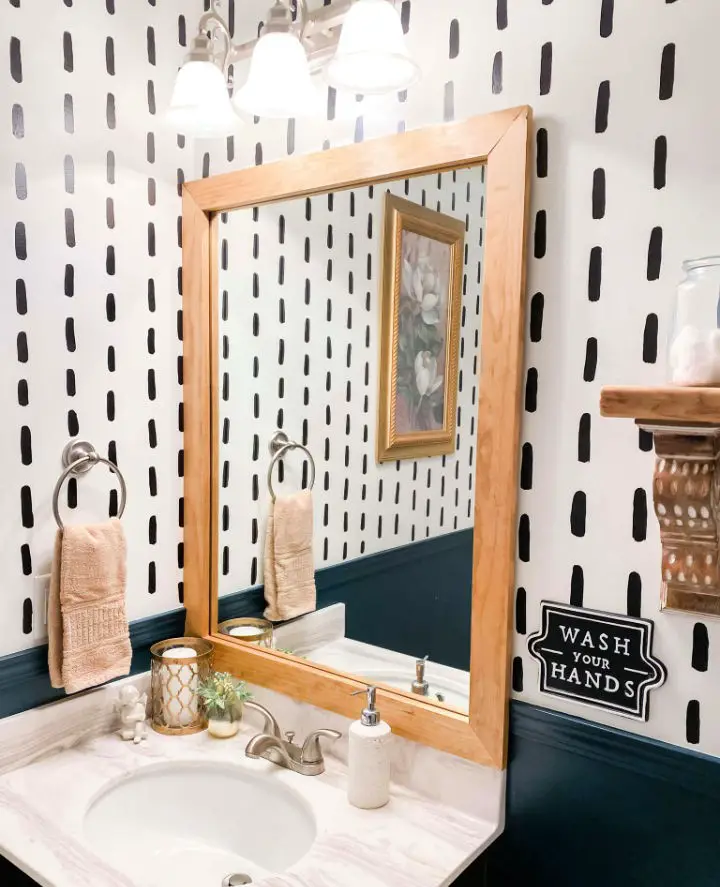
Transform your bathroom’s focal point into a work of art by crafting an elegant mirror frame using readily available materials like Loctite PL 530 Mirror adhesive, select pine boards, and your imagination. This DIY project not only elevates the aesthetic appeal of your space but also provides a unique opportunity to personalize your bathroom without breaking the bank.
By following these uncomplicated steps – construct the frame, apply a rich stain, seal it with a protective coating, add adhesive to secure the mirror, and finally place your newly framed reflection into its new home – you’ll be able to showcase your creative flair in every corner of your abode. Let the charm of your personality shine through in this simple yet impactful DIY project and make your bathroom a true sanctuary.
Rustic DIY Large Mirror Frame

Transforming a vintage mirror into a charming rustic frame is a DIY project that effortlessly injects warmth and character into any room’s decor. What was once discarded becomes a treasured piece, all thanks to the magic of upcycling. With just a few essential materials – an old mirror, laminate underlayment, clear silicone, pressure-treated pine dog-ear fence pickets, and Minwax stain – and some basic tools like gloves, a miter saw, and a hammer, you can breathe new life into an ordinary piece of glass. The process is surprisingly straightforward: precise measurements, carefully cut pickets aligned just so, and a dash of wood glue to hold everything in place. And the result? A show-stopping decorative accent that elevates your home’s rustic charm and proves that sometimes, it’s the simplest projects that yield the most impressive results.
Farmhouse Style Mirror Frame on a Budget
Transform your bathroom’s ordinary mirror into a statement piece without breaking the bank. For a rustic, countryside charm, try creating a DIY farmhouse-style mirror frame using faux barnwood. This budget-friendly project not only adds character to the room but also provides the flexibility to switch up styles as often as you like. Simply assemble the frame and voila! You’ve got a one-of-a-kind design that’s sure to elevate your bathroom aesthetic for just $25. With this simple woodworking project, you can say goodbye to bland mirrors and hello to personalized style.
Antiqued Panelled Mirror Frame Design
Transform your space with the timeless charm of an antique mirror panel without breaking the bank. This DIY project is a perfect blend of creativity and resourcefulness, allowing you to create a stunning piece that echoes the grandeur of expensive alternatives at a fraction of the cost. With just $30 worth of materials, including dollar store mirrors, heavy-duty glue, plywood, and spray paint, you can craft an antique mirror panel that becomes a focal point in your space. This endeavor is an excellent way to spend an afternoon, yielding a practical and budget-friendly alternative to store-bought pieces while providing a rewarding DIY experience. As you lovingly create this piece with your own hands, you’ll be delighted by the beauty it brings to your living space.
Easy DIY Bathroom Mirror Frame
Transform your bathroom’s ambiance with a DIY mirror frame idea that’s both stylish and budget-friendly. Take a builder-grade mirror from bland to grand by using pre-fabricated kits that make it easy to create a custom-fit frame in the style and color of your choice. With Frame My Mirror, you’ll have an array of options to match your bathroom’s unique aesthetic. The process is straightforward, requiring only basic measurements and a hammer. Assemble the frame quickly and securely attach it to your mirror for an instant, dramatic makeover. This DIY project is perfect for those seeking a speedy, affordable way to upgrade their bathroom’s look.
Make a Gold Parisian Mirror Frame
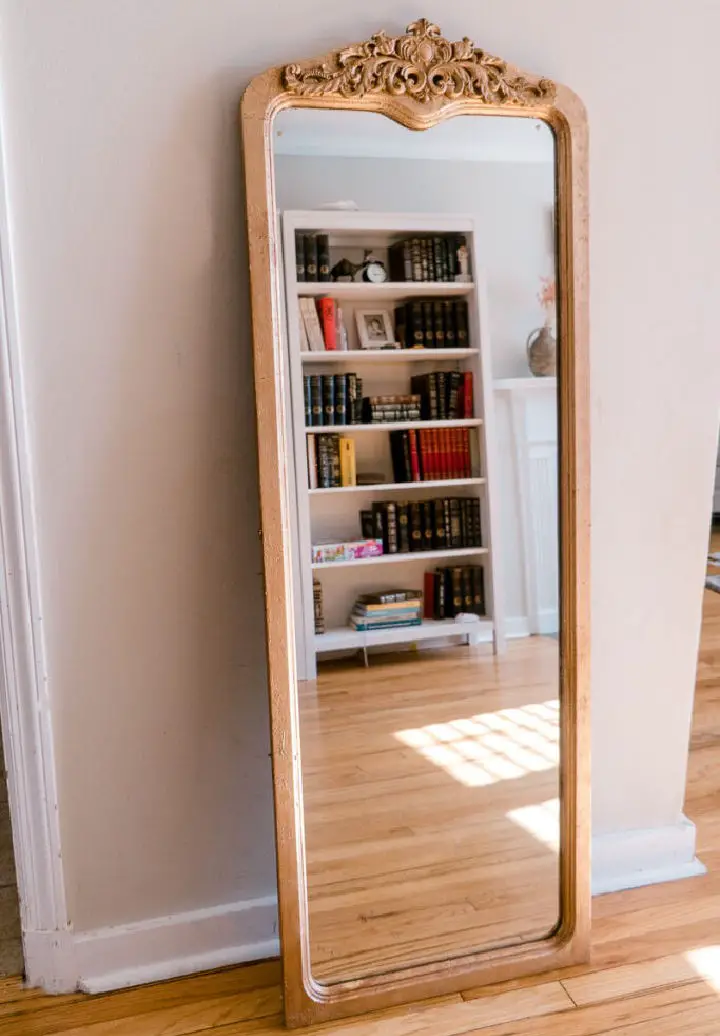
Transform a thrifted mirror into a breathtaking gold Parisian masterpiece through a DIY project that unlocks the inner artist within. This venture begins with a floor-sized mirror, guiding you through the process of elevating its drab frame into a stunning work of art. As you learn to apply gold leaf sheets to wooden surfaces, you’ll also discover the secrets to selecting the perfect gold leaf imitations, using Mod Podge as an effective adhesive, and adding a protective layer for longevity. The result is a majestic and one-of-a-kind gold Parisian mirror frame that can elevate any room’s ambiance without breaking the bank. Why not revive an old mirror and embark on this creative journey today?
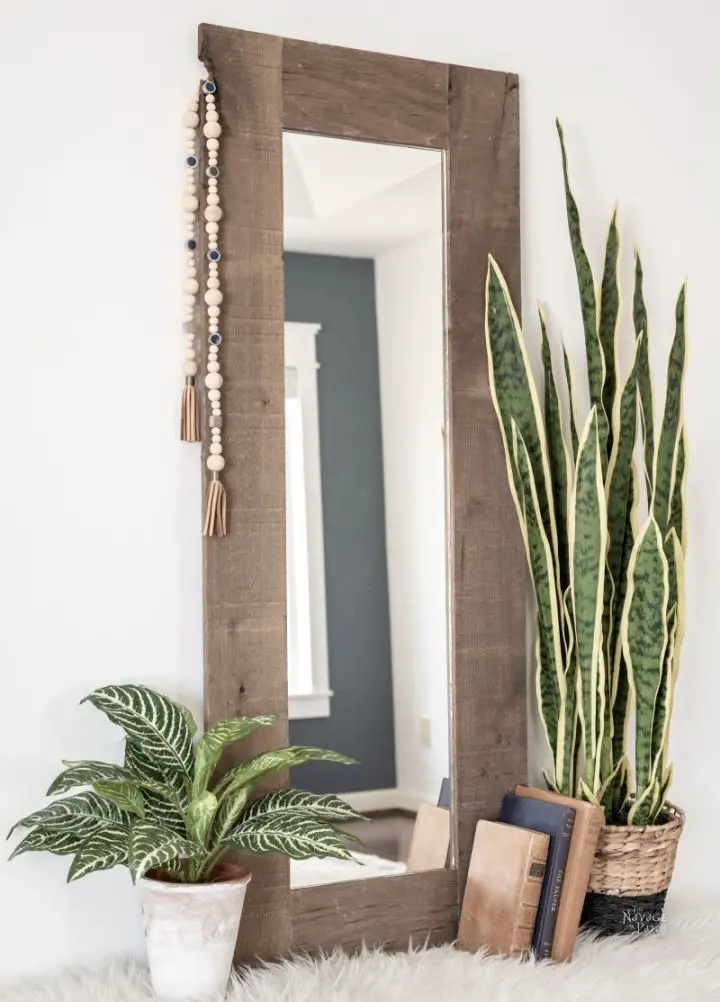
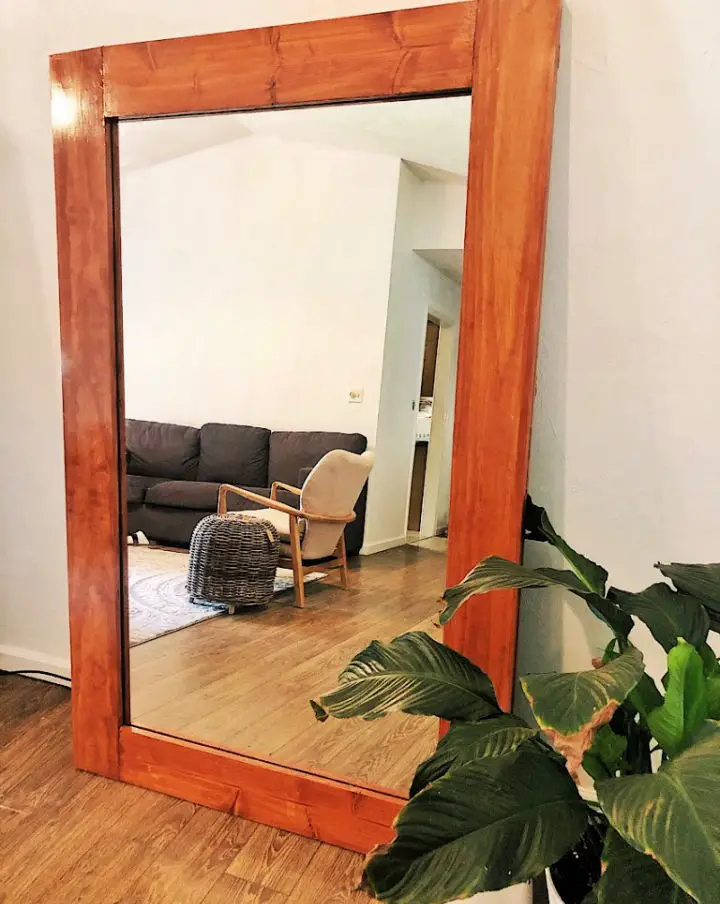
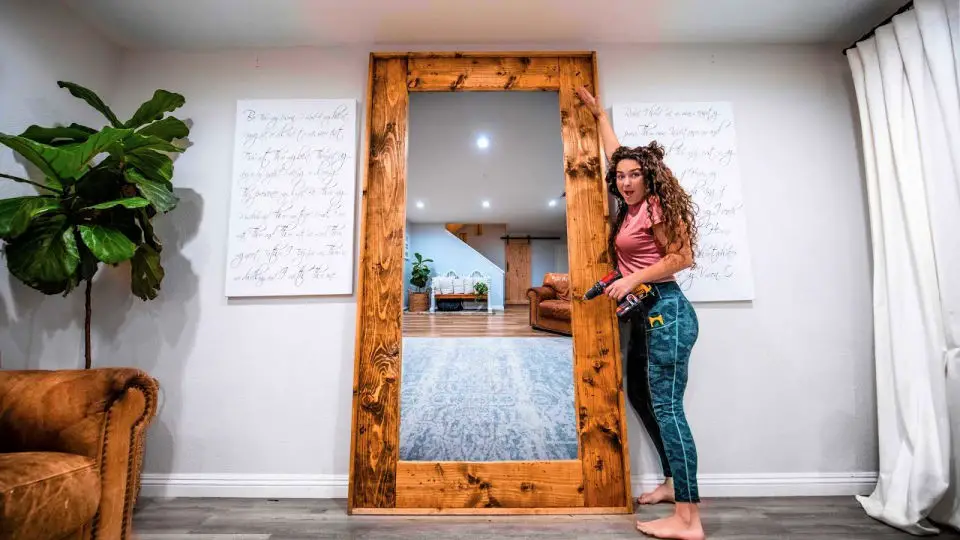
DIY Wood Framed Floor Mirror
Transforming an ordinary Goodwill mirror into an extraordinary wood-framed floor mirror, reminiscent of Pottery Barn’s pricey pieces, is now a DIY possibility. With determination and basic supplies, you can create a striking decor element that adds rustic charm to your living space. This user-friendly tutorial guides you through every step of the process, from preparing the salvaged mirror to assembling the new wood frame with beveled edges. The affordable project requires only a few essential tools, including a cordless drill, table saw, and hammer, as well as some basic supplies like screws, finished nails, wood glue, and thin wire. With a total cost of under $50, this DIY endeavor is an accessible way to add a unique statement piece to your home.
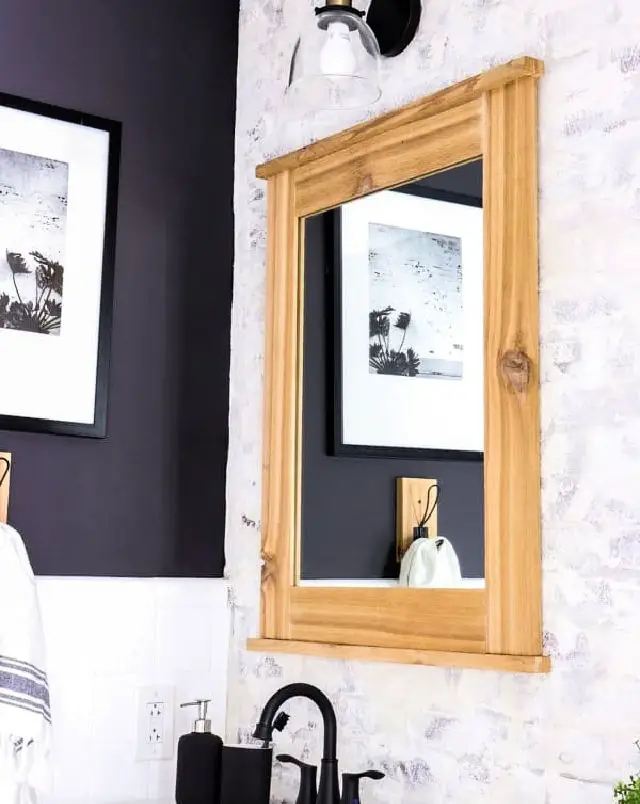
Make Your Own Mirror Frame
Revamp your bathroom’s centerpiece by crafting a custom DIY mirror frame, elevating a plain mirror to a beautiful piece that harmonizes with the surrounding decor. This cost-effective solution saves you the trouble of replacing an existing mirror, instead allowing you to transform it using basic materials like 1×3 boards, liquid nails, a staple gun, and wood stain. Select a stain color that resonates with your bathroom’s design or introduce a pop of fun accent color for added visual interest. Adding unique details such as corner braces or decorative wood trim further enhances the finished look. This low-commitment project yields instant gratification once the transformed mirror takes its place on your bathroom wall, inviting you to showcase your creativity and add a personal touch to your space.
Organic Shaped Wooden Mirror Frame Ideas
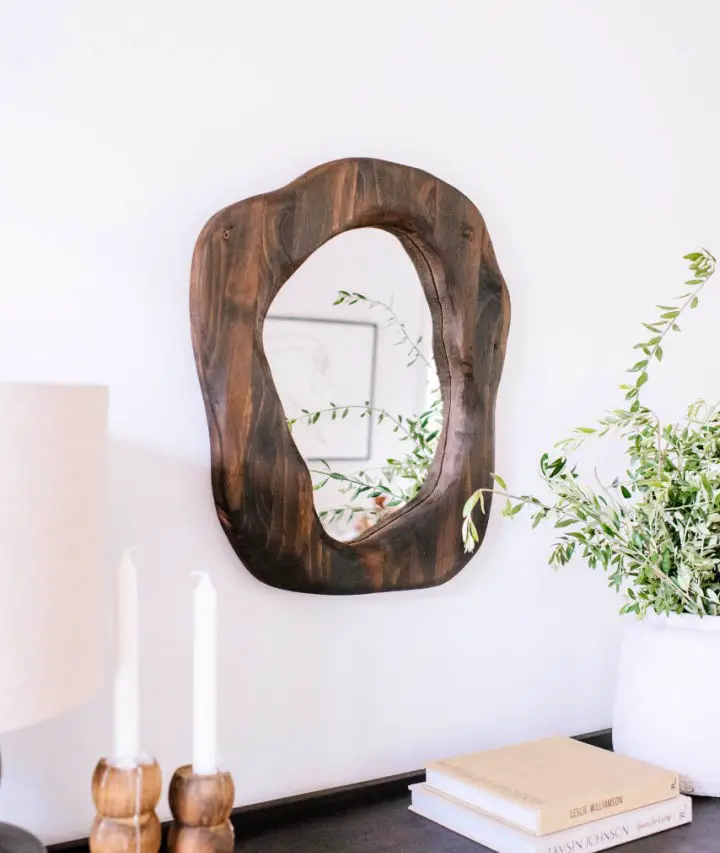
Transforming wood’s organic beauty into a unique home decor piece, create your own DIY wooden mirror with an undulating shape. This project combines the raw appeal of timber with the sophistication of a mirror, resulting in a refreshing addition to any room. To start, gather your materials: a frameless mirror, timber floor wax, a timber panel, stain, drill, jigsaw, clamps, and safety gear.
Begin by matching the size of your mirror to your timber piece. Sketch an organic shape onto both the mirror and timber, then carve out the frame from the wood using your jigsaw. Once you’ve achieved the desired shape, use a sander to smoothen the wooden frame before applying a coat of stain for a rustic finish.
Next, attach the mirror to the frame using screws and small MDF rectangles. Add a touch of rustic charm by securing a piece of rope to the back of the frame for hanging. The finished product embodies personal creativity and brings a unique touch to your interior spaces.
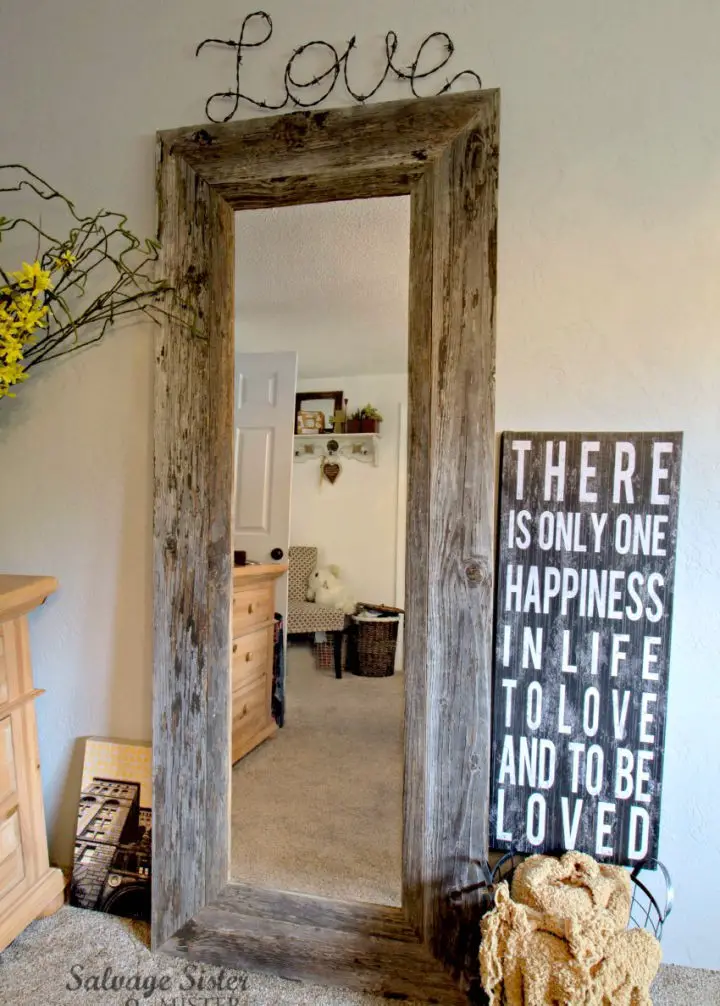
How to Build a Frame Around a Mirror
Elevate the ambiance of every room with a unique DIY mirror frame that’s as rustic as it is affordable. This versatile project is perfect for teenagers looking to create a full-length mirror in their bedroom or elsewhere, providing a space to explore and express themselves through dance, fashion, or self-discovery. The beauty of this design lies in its simplicity – glue a rectangular mirror to a thin hardboard and surround it with weathered wall boards or 1×4 pine lumber stained to your desired hue. With minimal effort and low costs, you can create a rustic-framed mirror that complements wooden interiors, adding style and charm to any room.
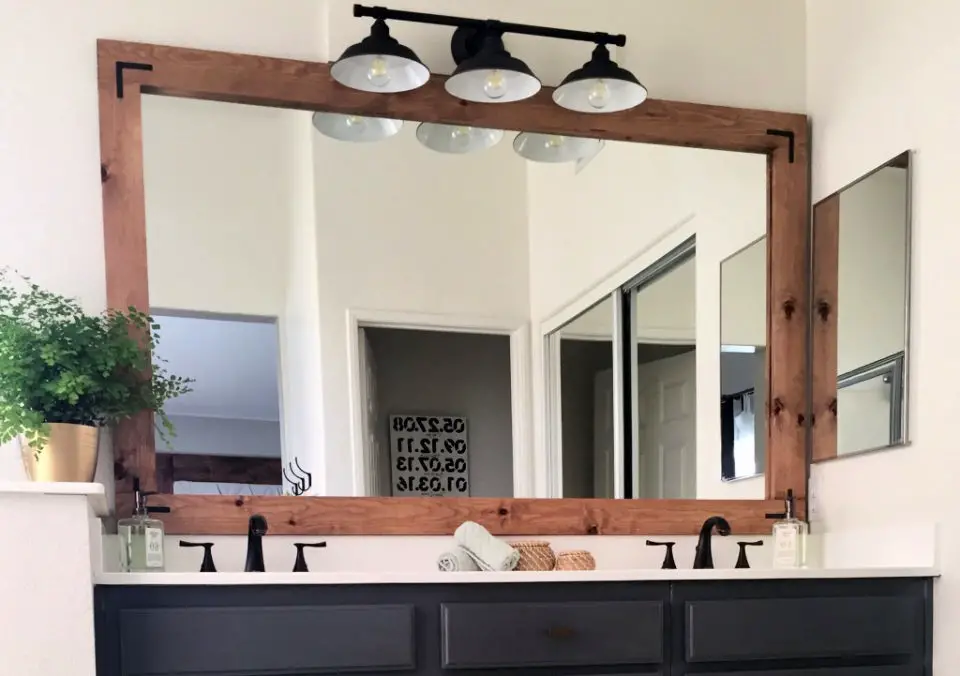
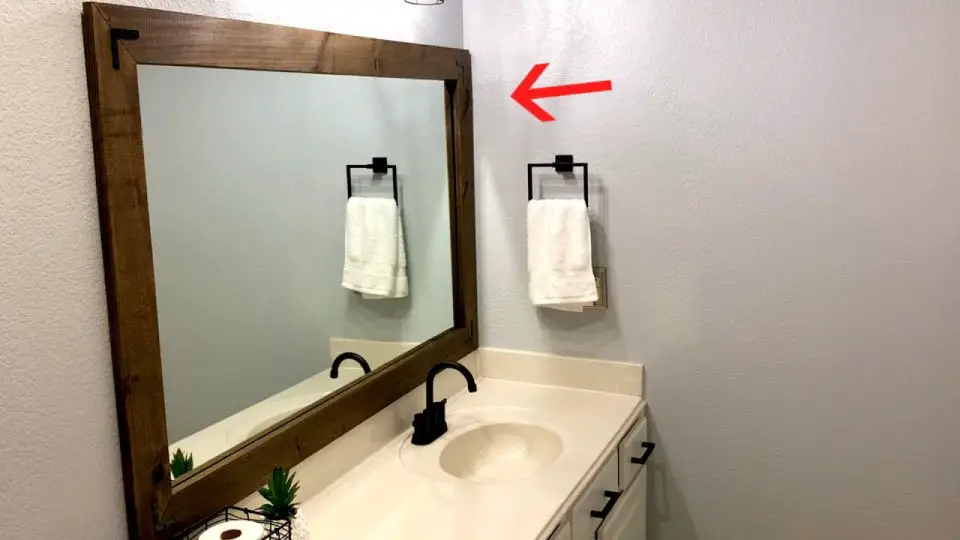
Handmade Double Framed Mirror
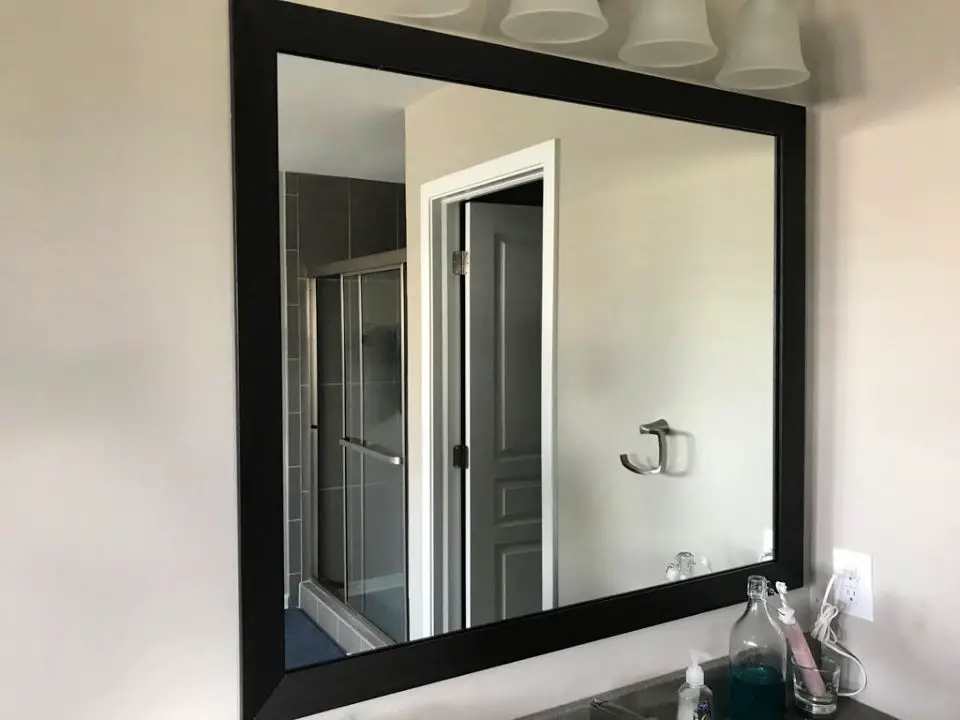
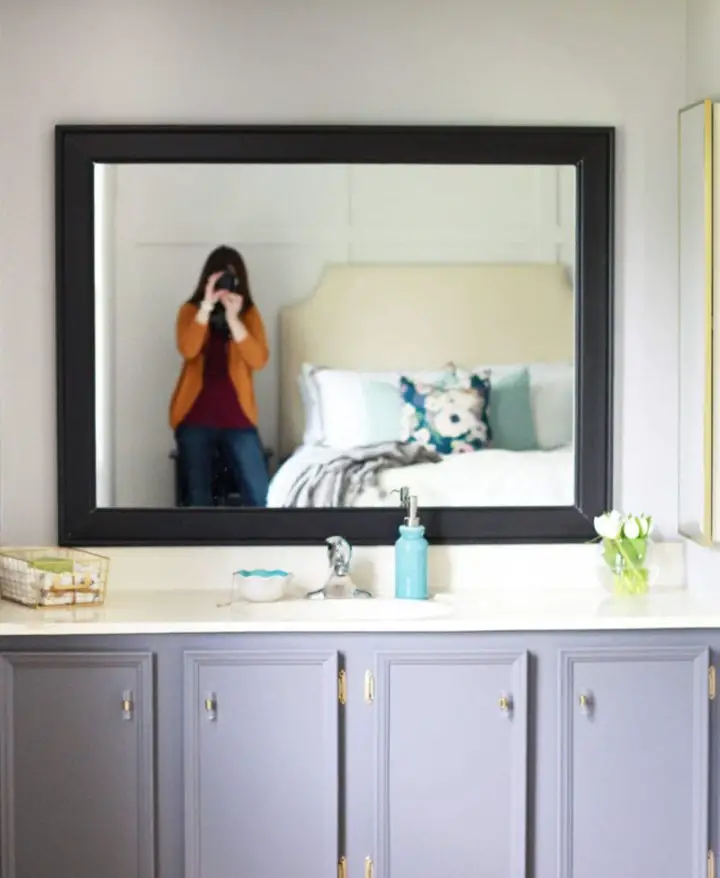
Take your ordinary bathroom mirror to the next level by giving it a stylish makeover without breaking the bank. By adding a frame to your builder-grade mirror, you can effortlessly upgrade the ambiance of your bathroom from bland to sophisticated French chic. The process is surprisingly straightforward and requires minimal investment – just $60 or less for the entire project! With basic materials like thin trim, liquid nail adhesive, paint, a miter saw, level, and measuring tape, you’ll be able to complete this DIY task in a few hours. As an added touch, consider creating an inside frame for an extra layer of flair. Not only will your bathroom mirror now reflect your unique style, but it will also become a stunning centerpiece that showcases your creativity.
Decoupage Mirror Frame for Beginners
Transform your living space with a unique DIY decoupage mirror project that combines Mod Podge, a wide-edged mirror, and your preferred fabric. This straightforward craft requires basic brushing and cutting skills, making it an excellent starting point for beginners. To get started, apply Mod Podge to your chosen fabric – such as a pillowcase – on a sheet of wax paper, ensuring the fabric doesn’t fray. Once dry, cut the fabric into long, thin strips that fit snugly over the mirror’s edge. Next, adhere the fabric to the frame using Mod Podge and let it dry. After drying, flip the mirror, trim any excess fabric with a craft knife, and voilà! Your customized decoupage mirror frame is ready. This project effortlessly revamps a dull mirror and adds a personal touch to your decor. Give it a try today and discover the joy of crafting with fabric.
Do It Yourself Architrave Mirror Frame
Elevate the ambiance of your bathroom with these innovative DIY mirror frame ideas that won’t break the bank. By crafting an architrave mirror frame, you can transform your space without incurring the expense of a store-bought solution. This practical tutorial showcases how to create a stylish and elegant frame using simple supplies like architrave, beading, and basic tools such as a miter box, saw, and No More Nails. With careful measurements and precise cutting, you can give your mirror a sophisticated makeover that will leave a lasting impression. Additionally, this guide provides valuable tips on avoiding common mistakes, ensuring that you don’t waste time on preventable errors. Perfect for a fun and relaxing afternoon project, these DIY mirror frame ideas are sure to enhance the appeal of your bathroom and add a touch of personality to your walls.
Cheap DIY Stick Framed Round Mirror
Elevate the humble mirror into a stunning focal point with these ingenious DIY projects. By repurposing affordable materials like cardboard, hot glue, sticks, and a 10-inch round mirror plate, you can create a harmonious blend of rustic charm and modern sophistication. The combination of natural textures and sleek reflective surfaces yields a versatile piece that effortlessly complements any room’s aesthetic.
With just a box cutter and pencil, shape your cardboard into a sturdy frame, then embellish it with an artistic arrangement of sticks for a unique, handmade touch. For added convenience, utilize command strips to hang your masterpiece securely.
This low-cost, innovative DIY endeavor invites you to unleash your creativity and inject a personal flair into your home’s interior design. As you craft your mirror frame, take pride in reflecting your style throughout every corner of your space.
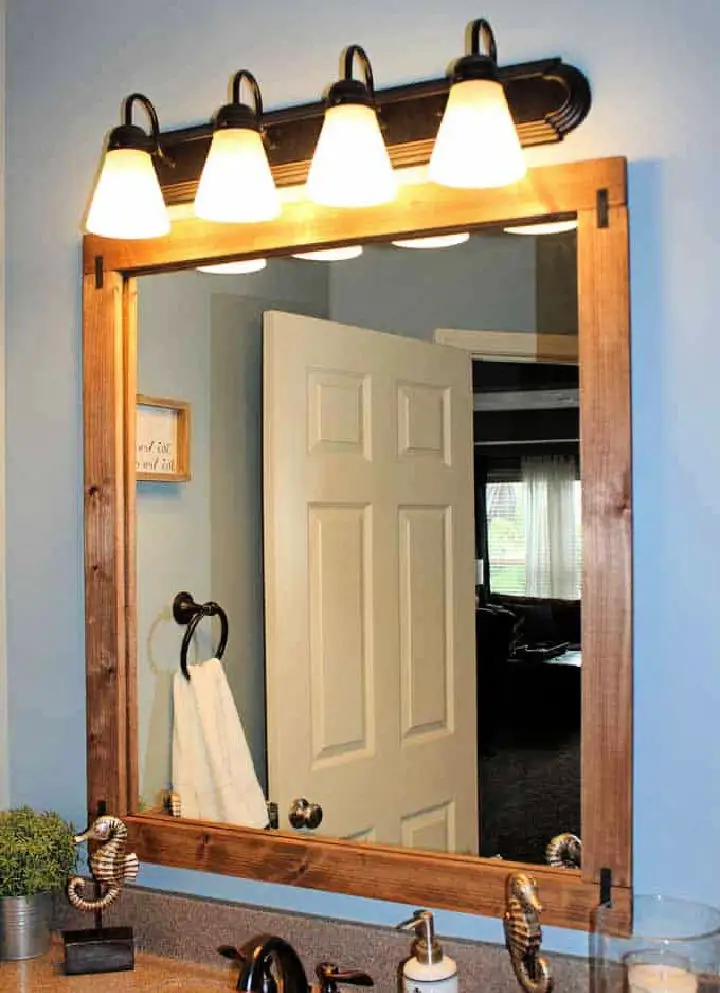
Building a Cedar Framed Mirror
Transform your bathroom space with a DIY cedar framed mirror, blending rustic elegance with practicality. This creative endeavor requires minimal expertise and accessible materials like cedar wood, mirror glass, wood glue, and D-rings, making it an ideal project for anyone looking to add a personal touch to their home decor. By following this step-by-step guide, you’ll be able to craft a beautiful and unique mirror frame within just three hours. The process involves cutting the mirror glass, building the cedar frame, and adding a distinctive farmhouse touch. As you work on this project, remember that sometimes the most valuable treasures can be created in your own home, rather than being found in stores.
How to Make Your Own Mirror Frame
Transforming a plain mirror into a stunning work of art is achievable with this DIY guide. By repurposing inexpensive materials like primed MDF board, PVC lattice molding, composite bead molding, and half-wooden balls, you can create a one-of-a-kind frame for under $50. This budget-friendly project not only adds visual interest to your bathroom but also saves significantly compared to purchasing an expensive mirror. With this step-by-step guide, you’ll be able to tackle the process from measurements and cuts to gluing and painting, all within a weekend’s time. Let’s get creative and take your bathroom decor to the next level!
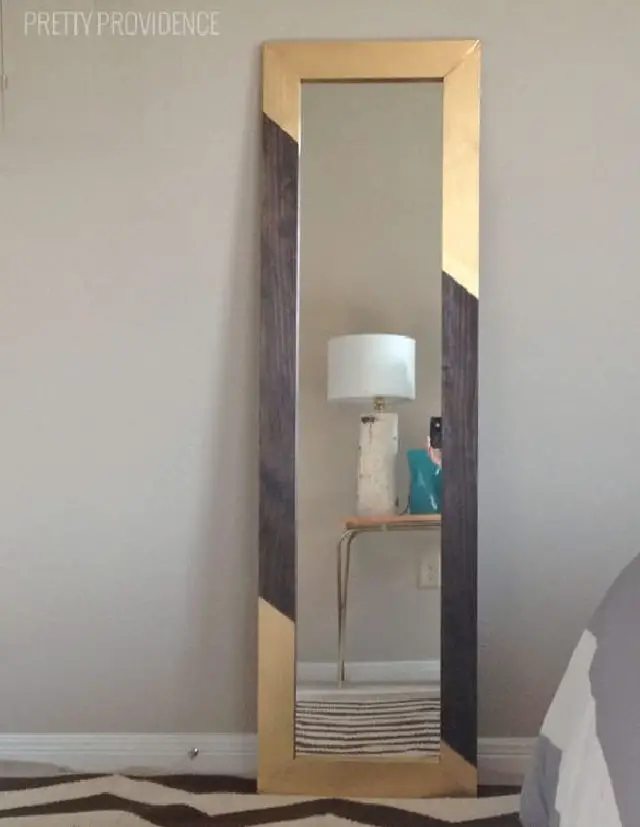
Modern DIY Mirror Frame for Under $30
Transform your space with a custom modern mirror frame that reflects your unique style. By giving an oversized mirror a DIY makeover, you can achieve a dramatic transformation using just a few simple supplies like 2×4 lumber boards, utility plywood, gorilla glue, screws, a drill, and wood stain. This easy and cost-effective project requires less than $30 and some of your time. In this step-by-step guide, I’ll share the straightforward method to build a sleek frame, along with valuable insights on what not to do, based on my personal experience. By following this tutorial, you’ll discover how to give your mirror an impressive, fresh look that fits your aesthetic and budget, while learning from the mistakes to avoid. Every detail, including the highs and lows of this journey, contributes to the final masterpiece – a beautifully reframed mirror that’s undeniably stunning.
Homemade Oversized Mirror Frame
Transform a thrifted oversized mirror into a stunning piece of decor with a DIY mirror frame project that’s both functional and aesthetically pleasing. The journey begins with the discovery of a $20 mirror on Craigslist, its minor imperfections, and the author’s vision to create a frame that conceals and elevates the mirror. With a few simple tools like a Kreg jig, circle saw, power drill, and materials such as Gorilla Wood Glue and Varathane Wood Stain, this affordable project promises an engaging and fulfilling task that adds a personal touch to your space and helps you pass the time creatively and productively.
DIY Wooden Mirror Frame for Entryway
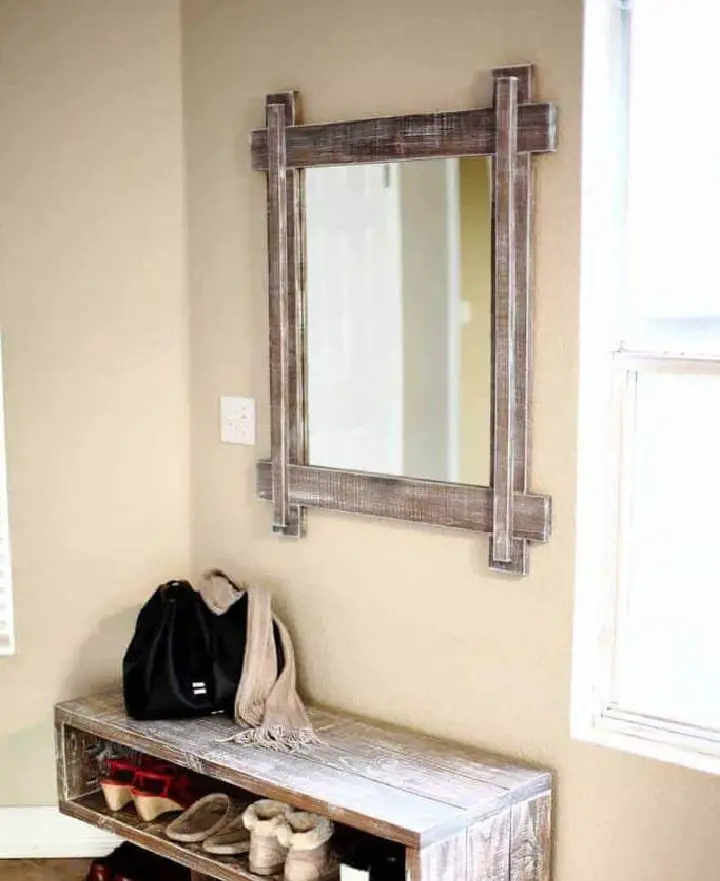
Transform your home’s ambiance with a one-of-a-kind DIY wooden mirror frame that combines functionality with style. This handcrafted masterpiece can be a stunning addition to your entryway, perfectly complementing your shoe rack bench. To create this unique piece, you’ll need just a few materials: a mirror, 1x4x6′ wood pieces, brad nails, wood screws, pre-stain, Briarsmoke stain, wood glue, and a plumbing strap.Following the step-by-step guide, you’ll learn to craft precise lap joint notches, cut a groove for the mirror, and achieve professional-looking results with proper staining and painting. The same stain and whitewash effect used on your shoe rack bench can also be applied here, creating a cohesive look that ties both pieces together.This project offers an engaging activity and a budget-friendly way to elevate your home decor. Create your wooden mirror frame today and experience the undeniable charm it brings to your space.
Making a Mirror Frame Out of Wood
Transform an old, inexpensive mirror into a stunning piece of decor by repurposing it as a DIY mirror frame. This straightforward project requires minimal tools, 1×3 boards, and some creative flair. While it may take some time, especially for those new to DIY projects, the end result will be well worth the effort. To get started, disassemble the mirror from its frame and measure out your 1×3 boards. Cut them to size, then glue and staple the pieces together to create the frame’s foundation. Once that’s done, you can move on to painting or staining the frame, adding a touch of elegance with gold spray paint if desired. With these simple steps, you’ll have a custom-made mirror frame that will add a touch of sophistication to any room in your home.
Rustic DIY Wooden Mirror Frame
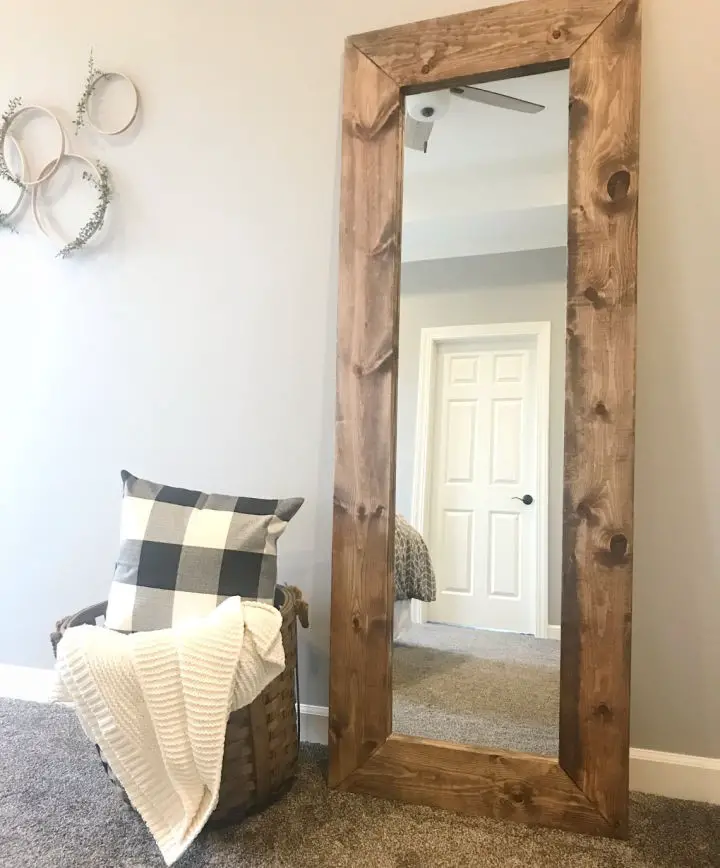
Transforming a basic full-length mirror into a stunning work of art is now possible with this easy DIY project. By using common board pine, a staple gun, a hammer, and some patience, you can create a unique rustic wooden mirror frame that adds character to any room. Start by carefully removing the existing frame from the mirror, then measure and cut your boards at a 45-degree angle for a professional finish. Once you’ve got your boards ready, sand them down for a smooth surface before assembling the frame with Liquid Nails adhesive. Let it dry for 24 hours before moving on to the next step. Stain the frame in a shade that highlights the wood’s natural beauty, seal it with a polycrylic finish, and finally attach the mirror to the frame. The result is a beautiful rustic mirror frame that offers an appealing aesthetic upgrade to a standard mirror and adds a touch of charm to your home decor.
How to Make a Mirror Frame
Elevate your interior decor without breaking the bank by transforming a standard builder mirror into a stunning piece using this straightforward DIY guide. With just a few hours of your time and some affordable materials like trim/molding, liquid nails, caulk gun, miter saw, level, painter’s tape, and an optional Dremel with sanding attachment, you can create a show-stopping frame that will grab attention in any room.
The process is remarkably simple: start by measuring and cutting the molding to fit your mirror. Next, prepare the space for your mirror clamps and attach the frame using liquid nails and painter’s tape. Throughout this project, precision is key, so be sure to have a level on hand to ensure perfect alignment.
This budget-friendly DIY endeavor proves that you don’t need to sacrifice style for affordability. With a little creativity and some basic tools, you can give your mirror the upgrade it deserves and enjoy the benefits of a beautifully crafted piece without emptying your wallet.
Build a Frame for a Wall Mirror
Transform your bathroom’s visual appeal with a DIY mirror frame project that’s as effortless as it is effective. By leveraging just a few simple tools and materials – including lumber, wood stain or paint, wood glue, mending plates, D-ring hangers, and drywall anchors – you can breathe new life into an otherwise ordinary builder-grade mirror. With this straightforward tutorial, you’ll learn how to measure your mirror for the perfect frame, apply a rich finish through staining or painting, assemble the structure, and securely fasten it to your wall. This budget-friendly makeover is designed to add a touch of sophistication to even the most humble bathroom, demonstrating that with a little creativity and physical effort, you can create a high-end aesthetic without breaking the bank.
DIY Mirror Frame With Scalloped
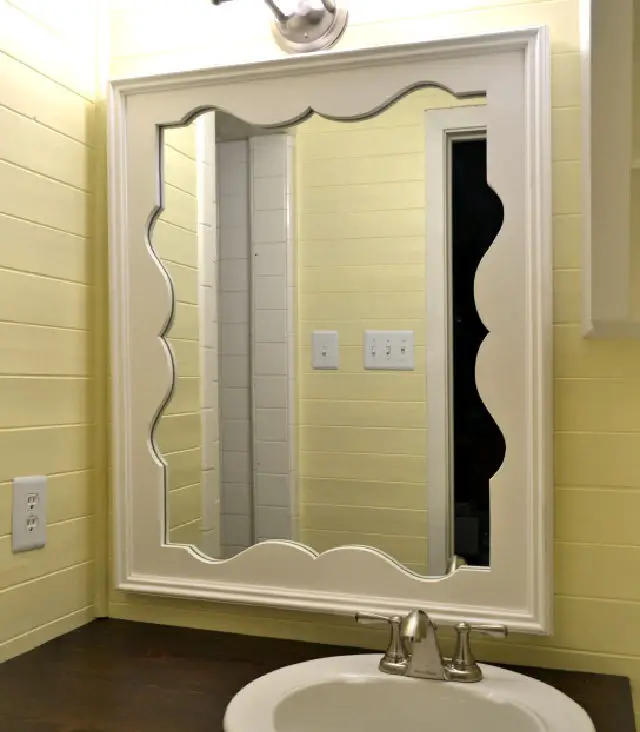
Transform your bathroom into an oasis of sophistication by crafting a scalloped mirror frame that exudes elegance. By leveraging readily available materials like MDF, decorative molding, mirror mastic, and a jigsaw, you can create a one-of-a-kind, custom-made mirror that perfectly complements your space’s unique charm. Not only will this project save you a substantial amount of money – approximately $25 compared to store-bought options costing over $300 – but it also offers an unparalleled chance to showcase your crafting prowess. To achieve this stunning bathroom accessory, follow the eight-step guide, which includes precise cutting, designing, attaching, and painting techniques. By opting for a DIY mirror frame, you’re not only creating a functional piece, but also demonstrating your artistic flair.
How to Make a Picture Frame Mirror
Transform your bathroom’s ambiance with a simple, yet impactful DIY picture frame mirror project. Elevate the aesthetic of your plain, builder-grade mirror by framing it with easy-to-find tools and supplies. Follow our step-by-step guide to gather your materials, cut the baseboards to size, assemble the frame, and paint it for a professional finish. If your mirror has clips, don’t worry – we’ll show you how to create notches for them too. By framing your mirror, you can significantly elevate your bathroom’s style quotient, proving that even small touches can make a big difference.
DIY Large Floor Mirror Frame Using Plywood
Transform your living space with a unique DIY large floor mirror frame crafted from plywood and other easily accessible materials. To achieve a professional look, start by creating the frame using 2″ x8″ x8′ planks, 1″ x3″ x8′ planks, and a sheet of plywood. Add a touch of sophistication by enhancing the natural wood grain with a stain, then complete your masterpiece. For an added vertical element, suspend your creation using a Z Bar Hanging System. This understated elegance project not only showcases your crafting skills but also your impeccable taste. With its affordable yet stylish design, this wood mirror frame makes a great addition to any room. Follow this easy tutorial and revamp your living area today!
Framing a Bathroom Mirror for Under $10
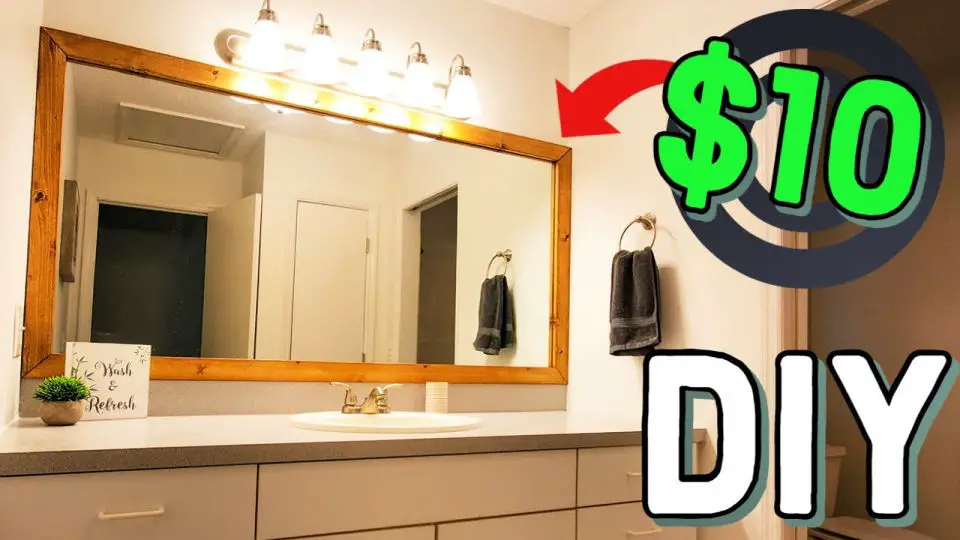
Transform your bathroom with an easy and budget-friendly DIY project: reframing a mirror. For less than $10, you can completely revamp the ambiance of your bathroom space. This versatile idea suits any bathroom, from modest to luxurious master suites.To get started, gather minimal materials: pine wood, stain, mirror adhesive or caulk. One can of stain can reframe up to 20 mirrors, making this a cost-effective solution for multiple bathrooms. You’ll also need a few basic tools like a miter saw, framing triangle, cutting brush, and adhesive.The process is simple and enjoyable, allowing you to achieve an impactful bathroom makeover without breaking the bank.
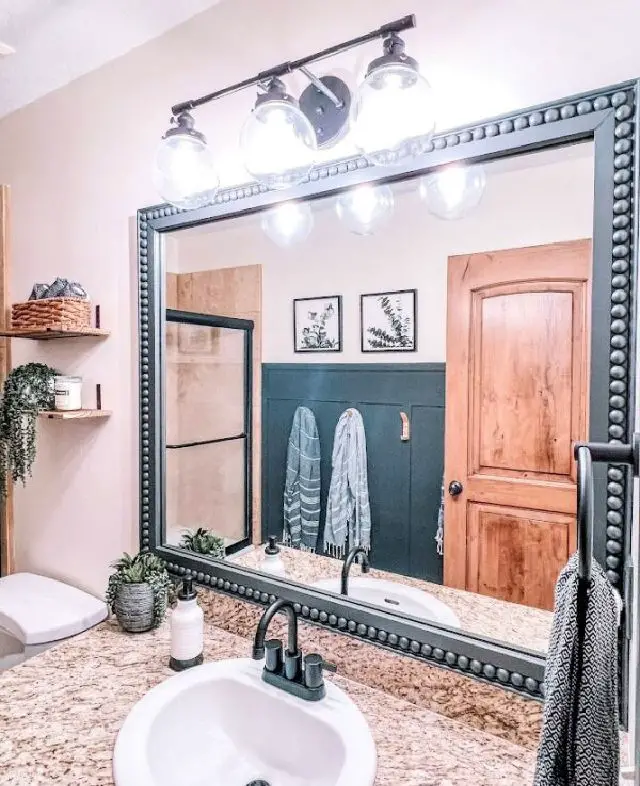
Custom Industrial Farmhouse Mirror Frame
Transform your bathroom into a cozy retreat without breaking the bank by embracing DIY techniques and readily available materials. This comprehensive guide walks you through the process of turning a dull space into an inviting oasis, where every detail is tailored to your personal taste. From using liquid nails fuze It adhesive to assembling a toolkit, selecting black square bathroom fixtures, and adding faux plants, this project lets you get creative with the materials and accessories that best suit your style. With a focus on staining wood, fixing brackets, and adding finishing touches, you’ll be amazed at the impressive result achieved without compromising on quality or aesthetic appeal. So put on your DIY hat and prepare to create a one-of-a-kind bathroom sanctuary that reflects your unique personality.
Simple DIY Full-Length Mirror Frame
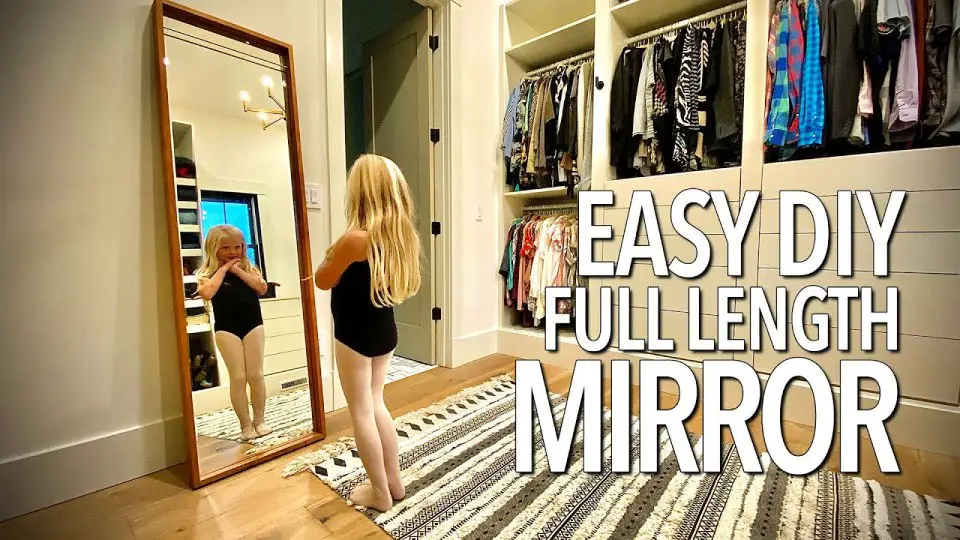
Transform your mirrors into stunning works of art with these ingenious DIY frame projects. Elevate the ambiance in any room with a striking full-length mirror that’s not only functional but also adds a touch of sophistication to your home decor. This step-by-step guide will walk you through creating an affordable and modern masterpiece using a cost-effective frameless mirror, plywood, and simple 1x3s. You’ll need a few handy tools like a Kreg Pocket Hole Jig, a miter saw, and more to bring this vision to life.
Not only does this mirror serve as a useful addition to any space, but its sleek design also provides a practical touch – allowing you to hang accessories with ease. With the help of DynaGrip Mirror adhesive and a thoughtful assembly process, you can create a chic piece that will elevate the aesthetic in any room. Today, take your DIY skills to the next level and give your home decor a fresh new look with this simple yet valuable project!
Creative Ornate Mirror Frame
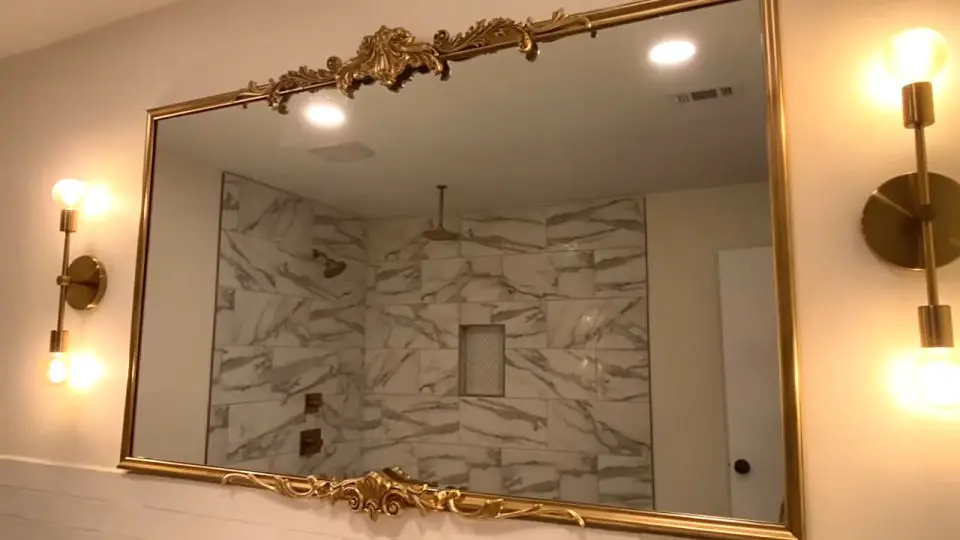
Elevate your interior design with a DIY ornate baroque mirror frame that effortlessly blends functionality with aesthetic appeal. By concealing unsightly mirror clips with an affordable yet high-end-looking solution, you can add a touch of sophistication to any room without breaking the bank. This project is perfect for a 60×36- inch mirror and can be completed with a total budget of just $118 – a fraction of what a similar-sized ornate mirror would cost! To create this masterpiece, you’ll need trim molding, ornate molding, gold spray paint, and ‘antique gold’ acrylic paint, all easily accessible from local stores. The guide provides expert tips on handling corners and little notches, ensuring the final product’s perfection. Not only will this project infuse style into your space, but it will also enable impressive savings. With this easy-to-follow guide, you can witness the transformation of your room in no time.
Conclusion:
These DIY mirror frame ideas have provided a treasure trove of customization options to cater to diverse styles and budgets. The comprehensive guide has covered every aspect, from creative painting and decoupage techniques to embellishing methods and troubleshooting common issues that may arise. By following the maintenance tips and frequently asked questions, you’ll be empowered to create a stunning mirror frame that showcases your individuality and personal flair. So, take the first step in crafting your ideal mirror frame today!
