Creating a DIY makeup organizer is not only an engaging creative pursuit, but also a sensible solution to maintain a well-organized and easily accessible makeup collection. Amidst the chaos of keeping our spaces tidy, these organizational concepts serve as a beacon of simplicity and efficiency. This comprehensive guide will walk you through the process of crafting your own makeup organizer, from conceptualization to final placement. Embarking on this DIY project may initially seem overwhelming, but with the right guidance and a dash of creativity, it can evolve into an enjoyable and fulfilling experience. This guide is designed to provide a wealth of ideas and tips tailored to assist you in selecting, planning, and completing your makeup organizer. Whether your collection is modest or extensive, and regardless of your crafting aptitude, securing a neat and stylish space for your makeup has never been more accessible. Let’s begin exploring the process of kickstarting your project and bringing those organizational concepts to fruition.
Why Make Your Own Makeup Organizer?
While making your own makeup organizer may not seem like a crucial task at first glance, it offers a multitude of benefits that can elevate the overall experience. For instance, you’ll have the freedom to tailor your creation to your unique needs and preferences, whether that’s opting for a specific size, color palette, or design aesthetic. This personal touch allows you to create an organizer that not only reflects your individual style but also serves as a functional piece that meets your specific requirements.
Moreover, crafting your own makeup organizer can be a cost-effective solution compared to purchasing pre-made alternatives. By repurposing materials you may already have at home or finding affordable options, you’ll save both money and space while still achieving the desired outcome.
Another advantage of DIY makeup organizers is their ability to optimize space in your bathroom or vanity area. Without the constraints of a store-bought organizer, you can design a piece that fits seamlessly into your existing setup, eliminating any frustration caused by mismatched dimensions.
Furthermore, this creative pursuit aligns with eco-friendly principles by promoting upcycling and reducing waste. By repurposing materials that would otherwise be discarded, you’ll not only contribute to a more sustainable lifestyle but also create something truly unique and valuable.
Lastly, consider gifting your handmade makeup organizer to friends or family members as a thoughtful present. The personal touch it brings will undoubtedly resonate with the recipient, making it a memorable and cherished gift.
Ultimately, the act of creating your own makeup organizer yields a sense of accomplishment and pride that can be hard to find in today’s fast-paced world. By embracing this creative endeavor, you’ll be investing in a project that is both practical and fulfilling, offering a tangible reminder of your skills and imagination.
How to Get Started with Your DIY Makeup Organizer
Transforming chaos into harmony, creating a personalized makeup organizer that reflects your unique style is an achievable feat, regardless of your crafting level. This straightforward guide will empower you to embark on this creative journey, bringing order to your beauty products and injecting personality into your space.
Choosing Your Project
Before diving into the world of makeup organization, it’s essential to reflect on your specific needs. Are you looking for a solution that caters specifically to your brushes, lipsticks, or perhaps something more comprehensive that can accommodate your entire collection? This self-assessment will help guide your decision-making process and ensure you find an organizer that meets your unique requirements.
Next, take a moment to consider the space where you plan to place your organizer. Measure the area carefully to guarantee that your project fits seamlessly into its intended spot – whether it’s on a vanity, in a drawer, or on a bathroom shelf. This thoughtfulness will prevent any potential frustration and ensure a harmonious coexistence between your makeup collection and its new home.
Finally, think creatively about the materials you’d like to use for your organizer. Draw inspiration from what’s readily available around you, as well as your personal style and preferences. The options are vast and varied, ranging from repurposed jars and wooden blocks to sewn fabric holders and upcycled boxes – so feel free to get crafty and make it your own!
Gathering Supplies
With the type of organizer selected, it’s time to assemble the necessary tools and materials. The specific supplies required will depend on the project at hand, but common crafting essentials include scissors, glue, paint, and sewing machines. Before making a purchase or order, take a moment to survey your surroundings – you might be surprised by the number of items already at your disposal. If you do need to make a trip to a craft store or place an online order, the process is straightforward, allowing you to get started with your project in no time.
Planning Your Project
Before diving into your crafting project, take the time to prepare and plan. Start by sketching out your design, even if it’s just a rough outline, to get a sense of the final product and guide yourself through the process. Be sure to note down key dimensions and make a list of all the parts you’ll need to create. This initial step will help keep your project on track and prevent costly mistakes later on. Additionally, schedule dedicated time for your project, whether it’s an afternoon or several days, to ensure consistent progress and minimize distractions.
Getting Creative
When it comes to personalizing your organizer, the possibilities are endless. You can infuse your unique style by incorporating colors, patterns, and embellishments that resonate with who you are. This is where creativity shines, and you can let your imagination run wild.But here’s the thing: even with the best-laid plans, things don’t always go according to script. And that’s perfectly fine. When a hiccup arises, instead of getting frustrated, view it as an opportunity to think outside the box and possibly come up with something even better than your original idea. By embracing flexibility, you can turn what initially seemed like a setback into a chance to grow and evolve.
Completion and Placement
As you stand back to admire your handmade makeup organizer, a sense of pride and accomplishment washes over you. The perfect spot is found for it, and the process of organizing your makeup items becomes a joyous task. Not only have you created a functional piece that reflects your personal style, but you’ve also infused your space with a touch of creativity. The true beauty of DIY projects lies in the journey, not just the destination. Savor every moment, from the initial inspiration to the final product, and don’t be afraid to embark on another creative adventure once you experience the fulfillment that comes from making something with your own hands.
FAQs on DIY Makeup Organizer Ideas
Crafting a personalized makeup organizer can be an enjoyable and functional endeavor. To guide you through the process, we’ve compiled a list of common inquiries that will help you embark on this creative journey.
What materials do I need to make a DIY makeup organizer?
When it comes to DIY projects, having the right materials and tools can make all the difference. A well-stocked arsenal of common supplies includes staples like wood, mason jars, plastic bottles, cardboard, fabric, paint, glue, and decorative embellishments such as glitter or washi tape. These everyday items can be repurposed and transformed into unique creations.For more involved projects, having access to specialized tools is crucial. This may include basic crafting essentials like scissors, a drill for tackling wood-based endeavors, a sewing machine for creating fabric organizers, and paintbrushes for adding the finishing touches.
How can I customize my makeup organizer?
When it comes to designing your makeup organizer, there are several key considerations to keep in mind. First and foremost, think about how you want the organizer to fit into your personal style or room decor. Adding visual interest through patterns, stickers, or even painting can help make the space truly yours.Another important factor is the size and shape of the organizer itself. Since makeup comes in a wide range of shapes and sizes, it’s crucial to design your organizer accordingly. Consider creating separate sections for specific items like brushes, lipsticks, or palettes – this will not only keep everything organized but also make it easier to find what you need when you’re in a hurry.Finally, the material you choose for your organizer can have a significant impact on its overall aesthetic. If you’re going for a rustic look, wood or mason jars might be the perfect choice. For a more modern take, acrylic or painted cardboard could be the way to go.
Is making a DIY makeup organizer cost-effective?
Creating a homemade makeup organizer offers a budget-friendly solution for those looking to maximize their cosmetics storage. By repurposing materials already at hand or utilizing items from around the house, individuals can sidestep the cost of purchasing a pre-packaged organizer and instead craft a customized system tailored to their unique needs.
How can I ensure my makeup organizer fits my space?
Before diving into the project, it’s crucial to take a step back and assess the space where your organizer will reside. Take precise measurements to guarantee a seamless fit. Furthermore, don’t overlook the importance of planning your design with dimensions in mind. A sketch or diagram can help prevent any size-related issues from arising. And if constraints dictate a smaller scale, consider opting for multiple compact organizers rather than one oversized solution.
Can I make a makeup organizer if I’m not very crafty?
With ease, many DIY makeup organizers cater to beginners, eliminating the need for advanced crafting expertise. Building confidence is as simple as starting with straightforward projects like upcycling jars or basic wooden containers. Furthermore, comprehensive tutorials and step-by-step instructions can serve as valuable resources, empowering individuals to tackle even the most daunting tasks.
What are some eco-friendly tips for making a makeup organizer?
When it comes to upcycling, reducing waste is a crucial aspect. One effective way to do this is by utilizing items you already have at home, such as cardboard boxes, glass jars, or wood scraps. By repurposing these materials, you’re not only giving them a new lease on life but also minimizing the amount of waste that ends up in landfills. Another eco-friendly approach is to opt for sustainable materials when purchasing supplies. Look for options like bamboo, recycled plastic, or biodegradable fabrics that have been crafted with the environment in mind. Finally, take the time to plan your project carefully to ensure you’re using materials efficiently and minimizing waste as much as possible. By doing so, you’ll be able to create something truly unique while also reducing your ecological footprint.
How can I make my DIY makeup organizer durable?
When it comes to crafting an effective DIY organizer, the choice of materials plays a significant role in its overall durability. To ensure your creation stands the test of time, opt for sturdy materials that have earned a reputation for their robustness, such as wood or thick cardboard. These options not only provide a solid foundation but also enable you to create structures that can withstand regular use.In addition to selecting strong materials, it’s crucial to utilize high-quality adhesives that can effectively bond components together. This is particularly important when working with materials that may be prone to warping or separation over time. By choosing an adhesive suitable for your specific materials, you can rest assured that any glued parts will remain securely attached.Finally, consider adding a protective finish to your organizer to further enhance its longevity. A sealant or similar coating can provide a barrier against wear and tear, helping to maintain the appearance and functionality of your creation over the long haul.
Can DIY makeup organizers be good gifts?
Handmade makeup organizers stand out as thoughtful and personalized presents that showcase your attention to detail. By tailoring an organizer to fit the recipient’s unique style and preferences, you’re sending a strong message of care and consideration. Furthermore, incorporating personal touches like their name or favorite hues can elevate the gift to new heights, making it truly one-of-a-kind.
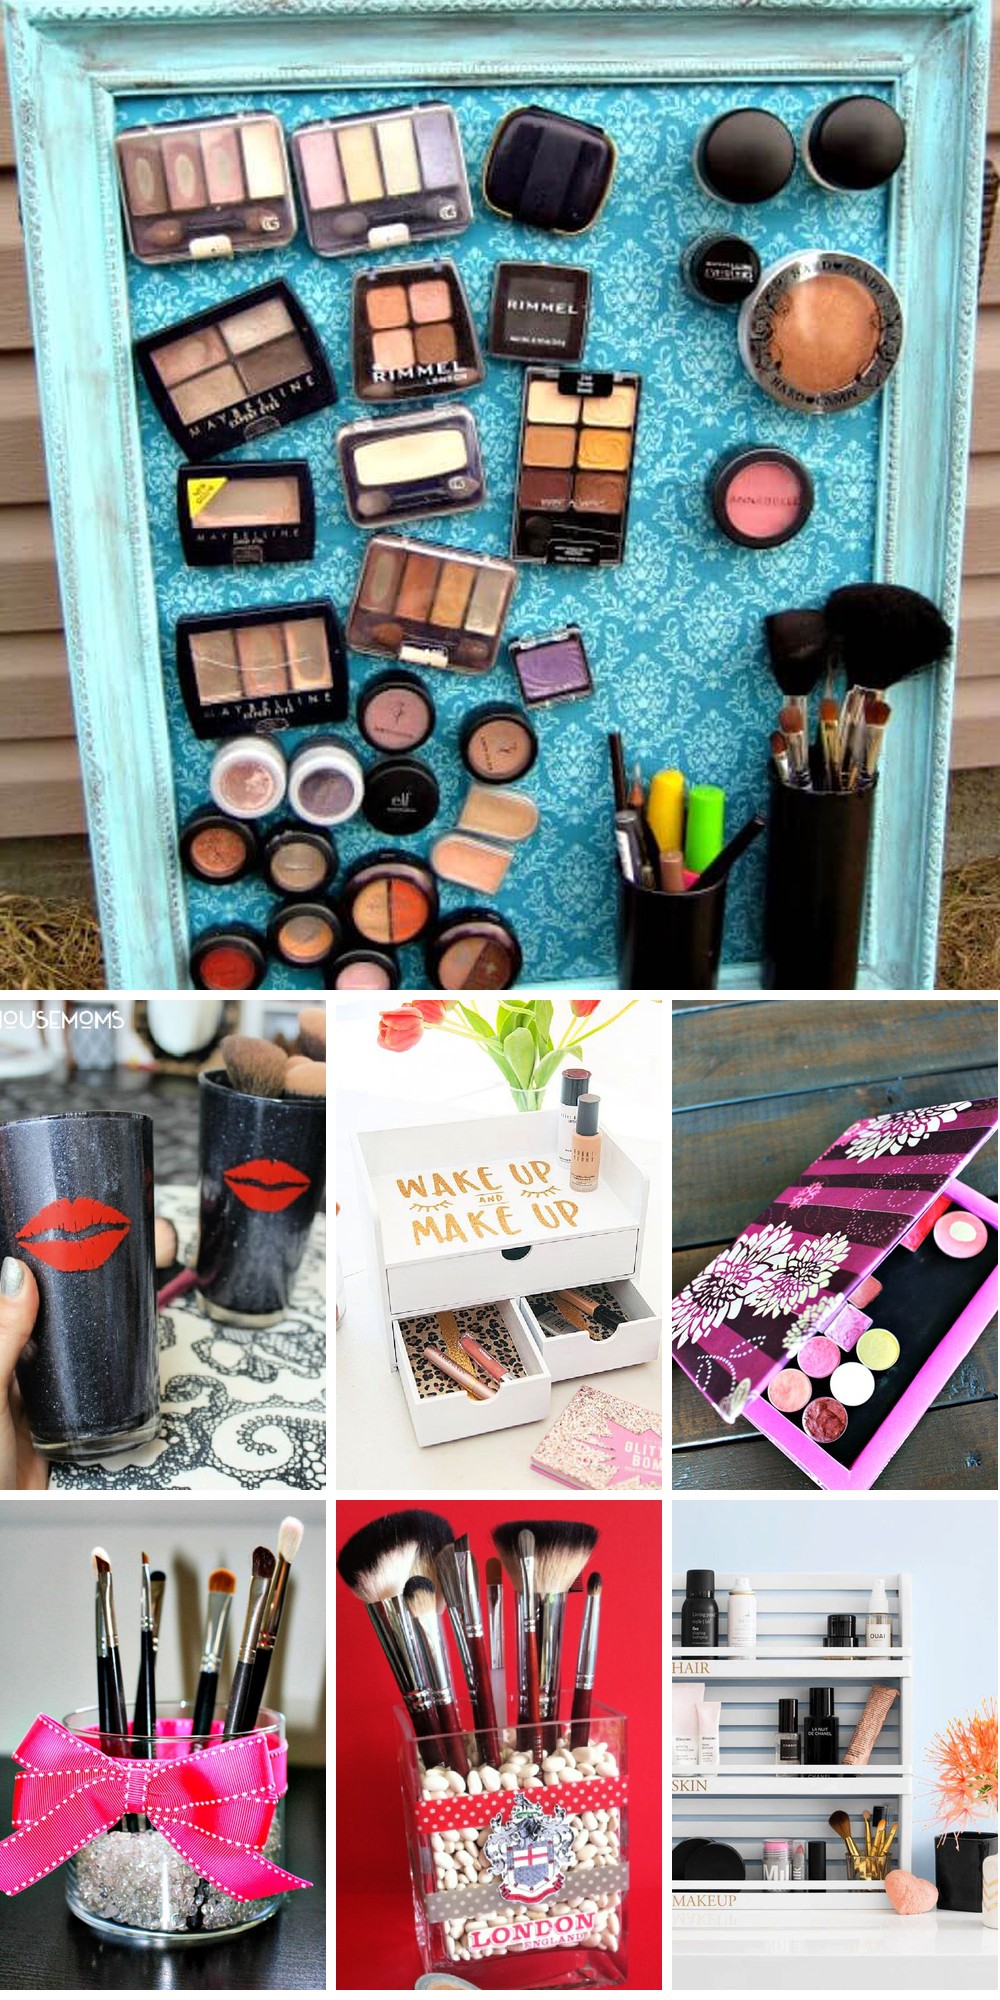
35 DIY Makeup Organizer Ideas
Unleash your creativity and transform your beauty routine by exploring 35 innovative DIY makeup organizer concepts. Our comprehensive guide will walk you through each project, empowering you to create a personalized space that harmoniously blends functionality with flair.
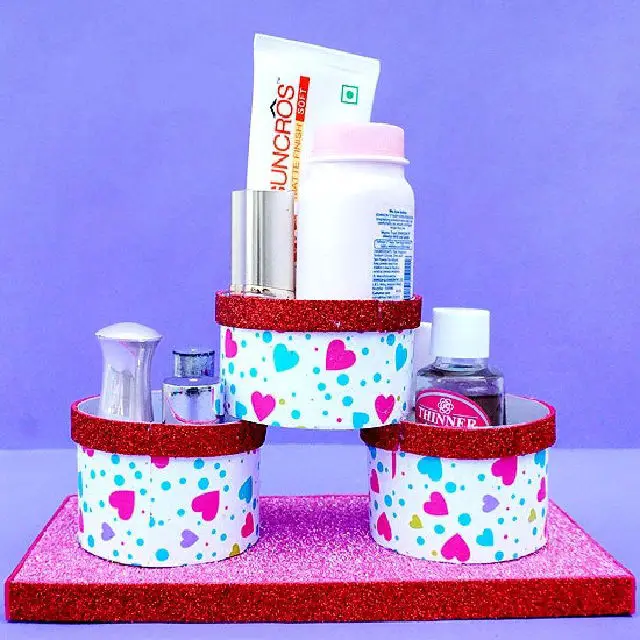
DIY Makeup Glitter Brush Holder
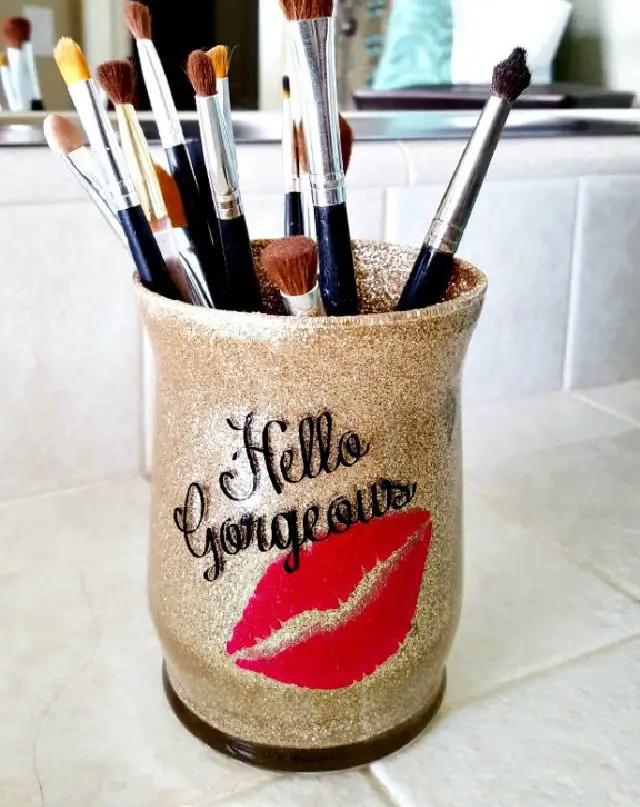
Transform your beauty routine into a dazzling display of creativity with this straightforward yet eye-catching DIY glitter makeup brush holder tutorial. This project is an excellent way to infuse some sparkle into your vanity, making it not only an enjoyable experience but also a highly adaptable one. Use these glittering creations to keep your makeup essentials organized or as unique presents for friends and loved ones. Whether you’re a seasoned crafter or just starting out, this tutorial will walk you through each step, ensuring a delightful crafting journey with stunning results.
Homemade Make-up Magnet Board
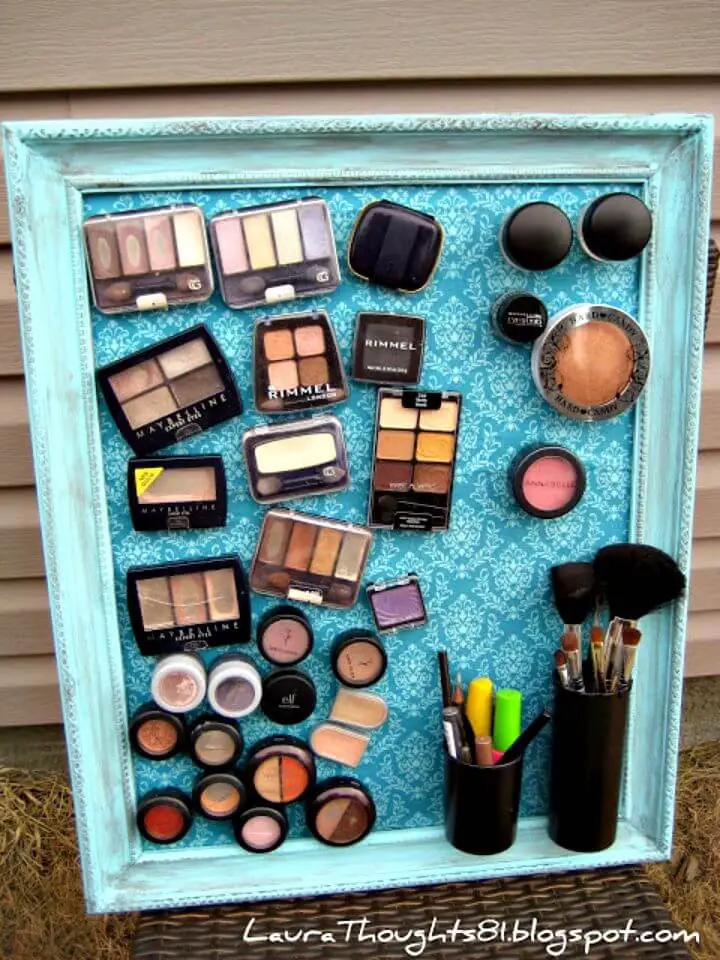
Transform your morning routine with a game-changing beauty solution. Say goodbye to digging through baskets and hello to a customized display of your favorite makeup products. The Make-up Magnet Board is an innovative DIY project that not only declutters your space but also adds a personal touch to your décor. By creating your own magnet board, you’ll be able to easily access and organize your beauty essentials with ease. Learn how to make your own at Laura Thoughts.
Making a Rolling Vanity – IKEA Hacks
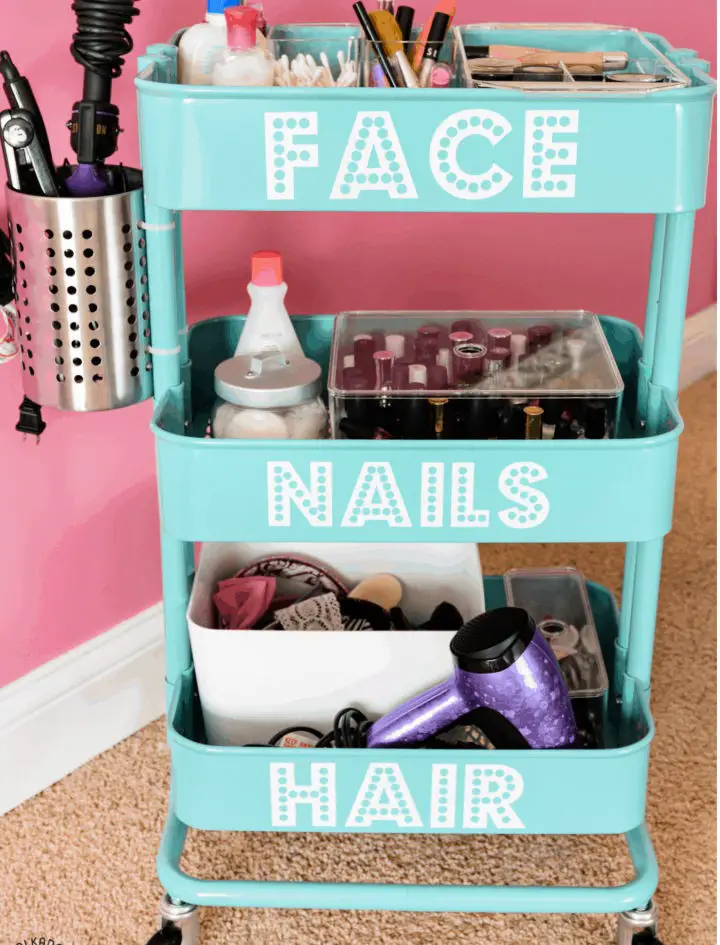
Transform your morning routine into a seamless experience by upcycling an IKEA Raskog into a versatile rolling vanity cart. This creative hack is perfect for small or shared spaces, offering a chic and functional solution to streamline your beauty and grooming regimen. With its metal utensil holders for hot tools and clear dividers for makeup, you’ll have everything you need at your fingertips. Whether you’re dealing with a tight bathroom, sharing living quarters with roommates, or navigating dorm life, this DIY project will liberate your daily routine. Simply visit Polka Dot Chair for a step-by-step guide to get started.
Make Your Own Makeup Brush Holder
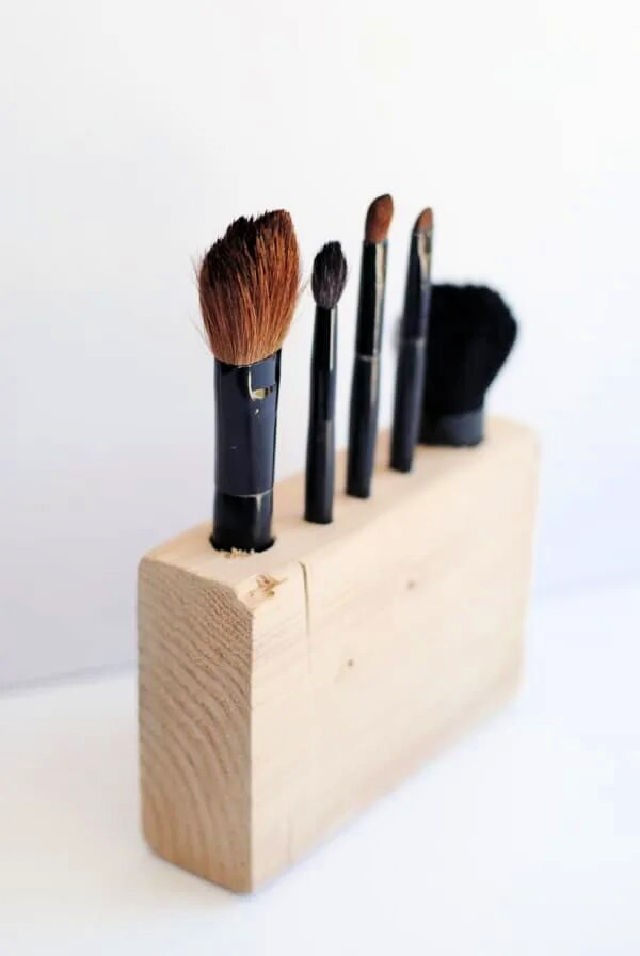
Want to upgrade your beauty routine without breaking the bank? Create a one-of-a-kind DIY wooden makeup brush holder that’s not only functional but also adds a touch of personality to your vanity. With just a few simple materials – including a piece of wood and a drill – you can craft a custom-sized organizer that perfectly fits your brushes, making it a thoughtful gift or a delightful addition to your own space.
How to Build a Makeup Organizer
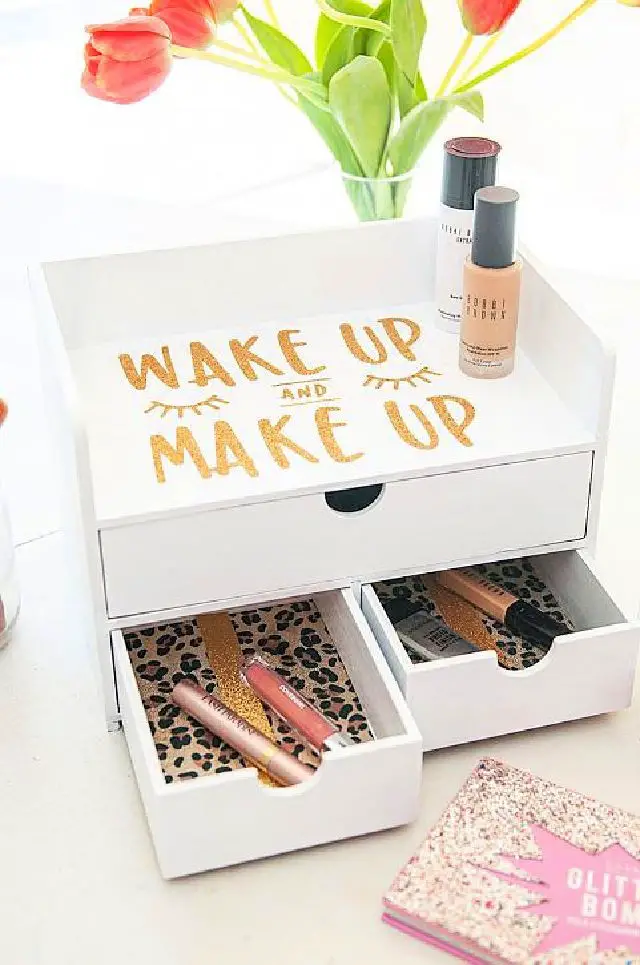
Get ready to transform your makeup storage from chaotic to captivating with a DIY makeover that reflects your unique style. Say goodbye to disorganization and hello to a functional space that’s as much fun as it is fabulous. Ready to inject some personality into your personal sanctuary? This DIY Makeup Organizer guide has got you covered, offering a dash of glamour and a whole lot of chic. Add shimmery leopard trim and glittery accents to make your beauty essentials shine, perfect for anyone looking to infuse their organizer with a touch of individuality – leopard lovers, rejoice!
DIY Plastic Bottle Make-up Organizer
Transform your chaotic space into a haven of order with this innovative guide to repurposing plastic bottles as organizers. As an eco-friendly and creative solution to optimize your storage, this tutorial is ideal for environmentally conscious individuals seeking to tailor their storage to suit their unique needs. By following the simple, step-by-step instructions on Instructables, you can effortlessly craft a customized organizer that not only declutters your surroundings but also saves you from relying on costly storage solutions.
Make a Leather and Copper Make up Organizer
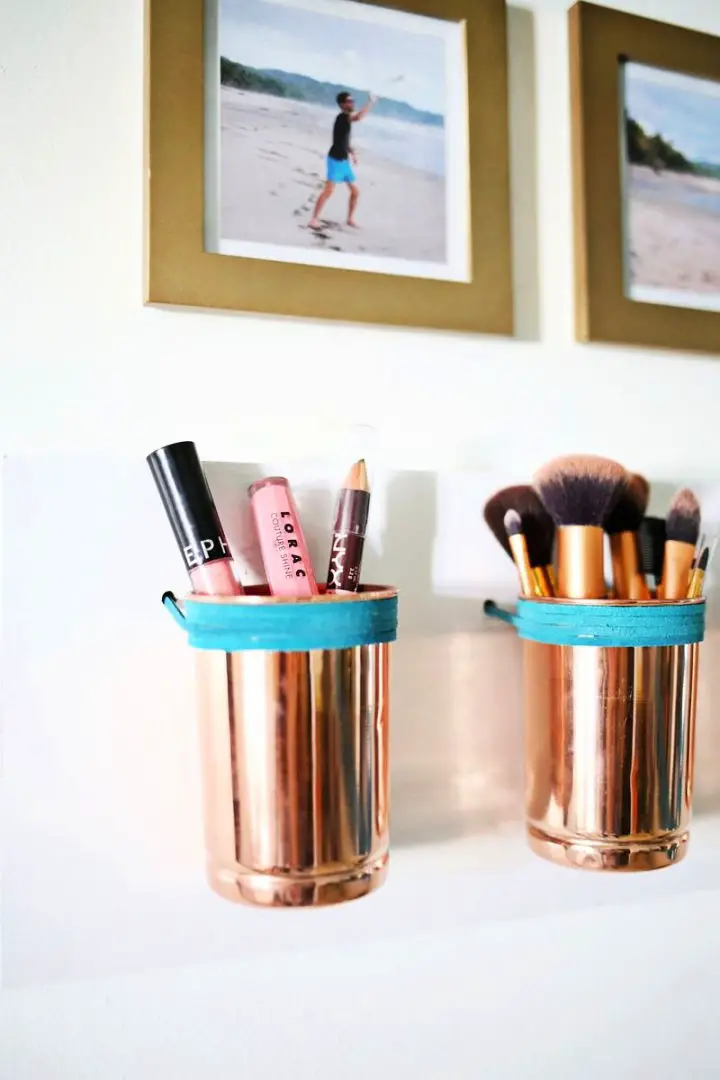
Elevate the ambiance of any room by transforming it with a sophisticated Leather & Copper Cup Organizer. This DIY project is perfect for storing makeup brushes, everyday essentials, or as a decorative accent to add a touch of modernity. By combining simple supplies like a wooden board, copper tumblers, and leather lace, you can create a functional piece that doubles as a stylish statement. With step-by-step guidance from A Beautiful Mess, crafting this organizer is a breeze. Take it to the next level by personalizing it with your favorite paint and lace colors, ensuring the final product reflects your unique aesthetic.
How to Sew Frame Organizer at Home
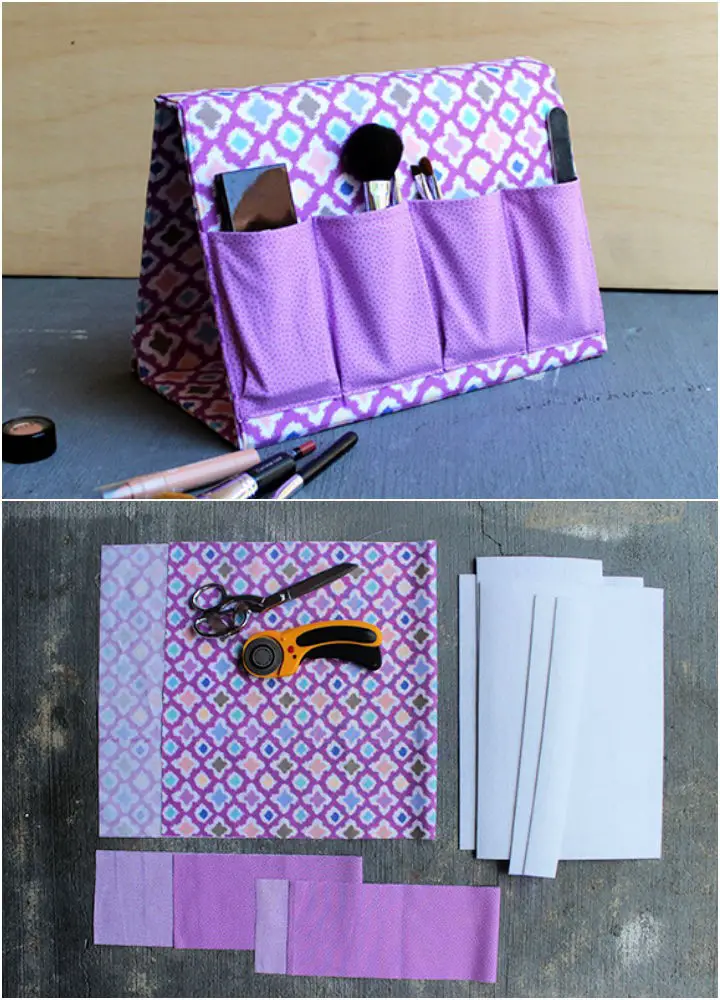
Transform your organizational game with the DIY A-Frame Organizer tutorial from Haberdashery Fun. This fabric-based storage solution folds into an A-shape, boasting four spacious pockets perfect for stashing makeup, brushes, and other essentials. Beyond its practicality, this project allows you to express your personal style through customization. With a clear guide on materials and sewing steps, you’ll be inspired to create this unique organizer as a thoughtful gift or for yourself.
Turn a Wood Spice Rack Into a Makeup Organizer

Elevate your beauty game by transforming a humble spice rack from Target into a sophisticated makeup organizer. Ditch the cluttered drawers and showcase your favorite products in style. With just a few simple steps, including a quick coat of spray paint, a protective finish, and some vinyl lettering, you can create a custom beauty rack that’s perfect for any space. Not only will it keep your daily essentials within easy reach, but it’ll also add a touch of elegance to your beauty routine.
Easy DIY Leather Makeup Brush Holder
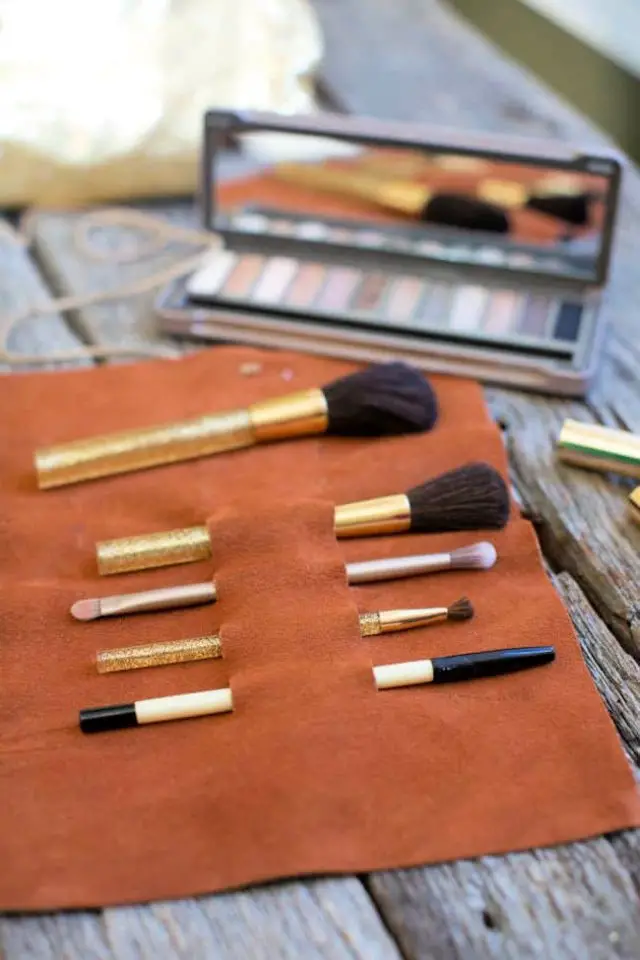
Transform your beauty routine with a sophisticated DIY Leather Makeup Brush Holder, perfect for elevating your own makeup game or gifting to a loved one. This simple yet chic craft requires just a few materials: a piece of leather, some cord, and an Exacto knife. With minimal effort, you can create a personalized holder that keeps your brushes organized, protected, and within easy reach. Whether it’s for everyday use at home or as a travel companion, this elegant solution is sure to impress.
Handmade Chevron Glitter Vanity Tray
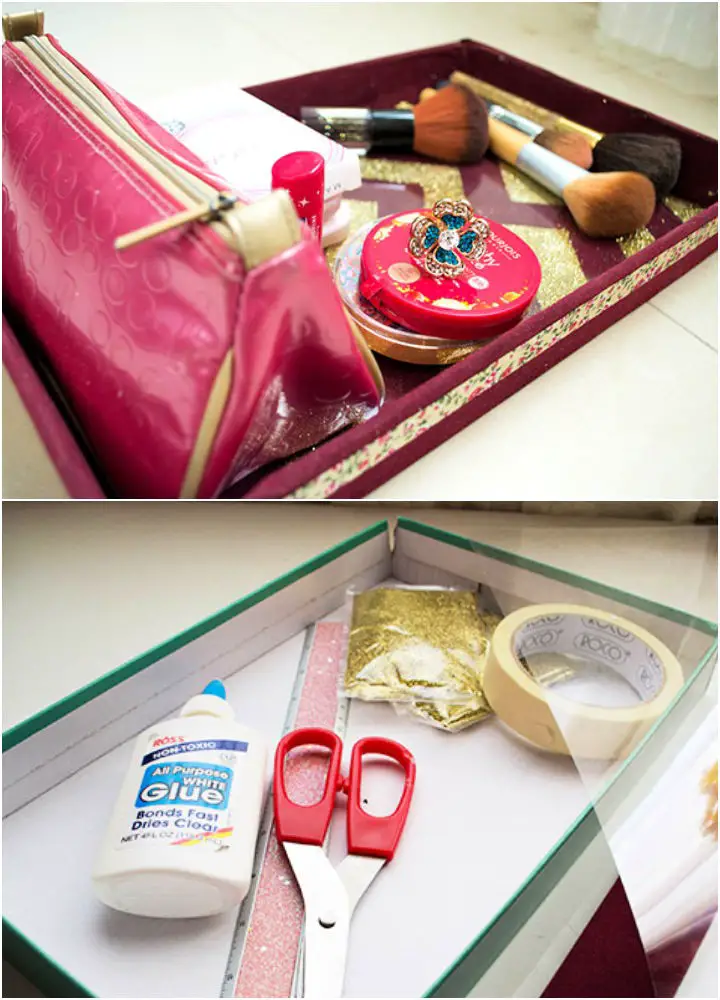
Elevate your morning routine with the charm of DIY projects. The Chevron Glitter Vanity Tray guide offers a unique opportunity to transform ordinary items into an elegant accessory for your vanity, perfect for organizing your beauty essentials in style. This easy-to-follow craft, complete with step-by-step instructions and visual aids, is ideal for anyone looking to add a touch of glamour to their space without breaking the bank. By following this DIY project, you can create a dazzling piece that will make your mornings a little brighter.
Making a Hanging Makeup Organizer
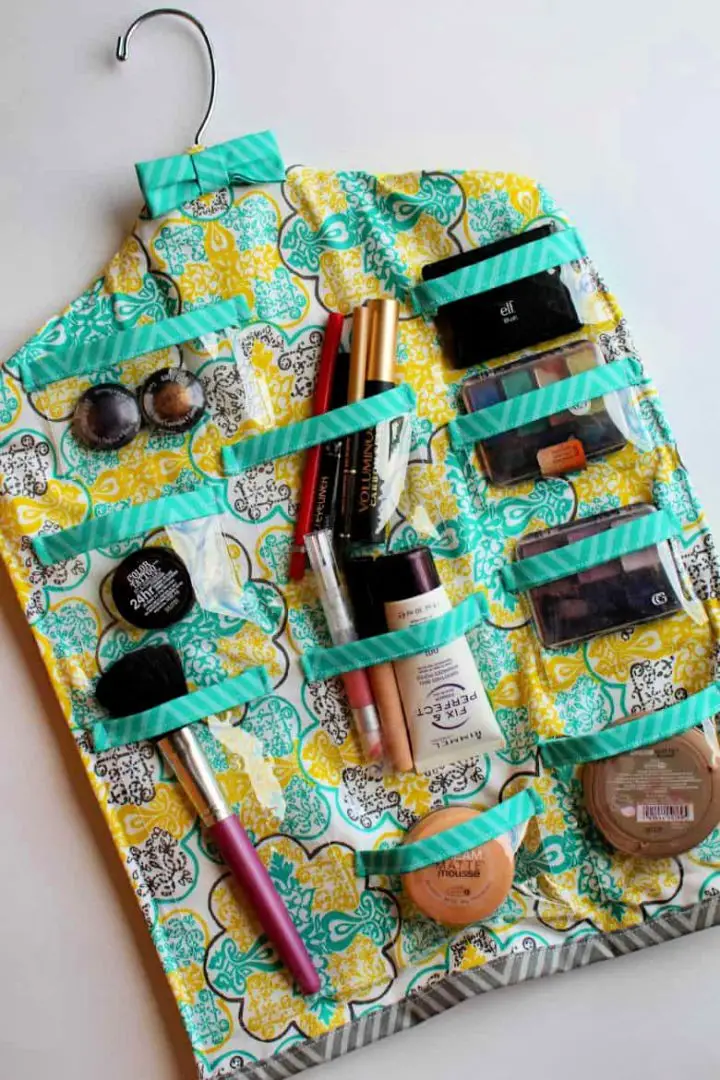
Transform your beauty routine with a dash of creativity! A clever DIY project from A Girl and A Glue Gun teaches you how to craft a hanging makeup organizer that seamlessly blends functionality with flair. This ingenious solution keeps all your essentials within easy reach, while maintaining a sleek and stylish appearance. Perfect for those who desire organization without compromising on visual appeal, this personalized makeup station is the perfect marriage of form and function. Follow a straightforward tutorial to create a customized hanging organizer that effortlessly keeps your beauty must-haves organized and at your fingertips.
How to Make a Roll-up Makeup Brush Case
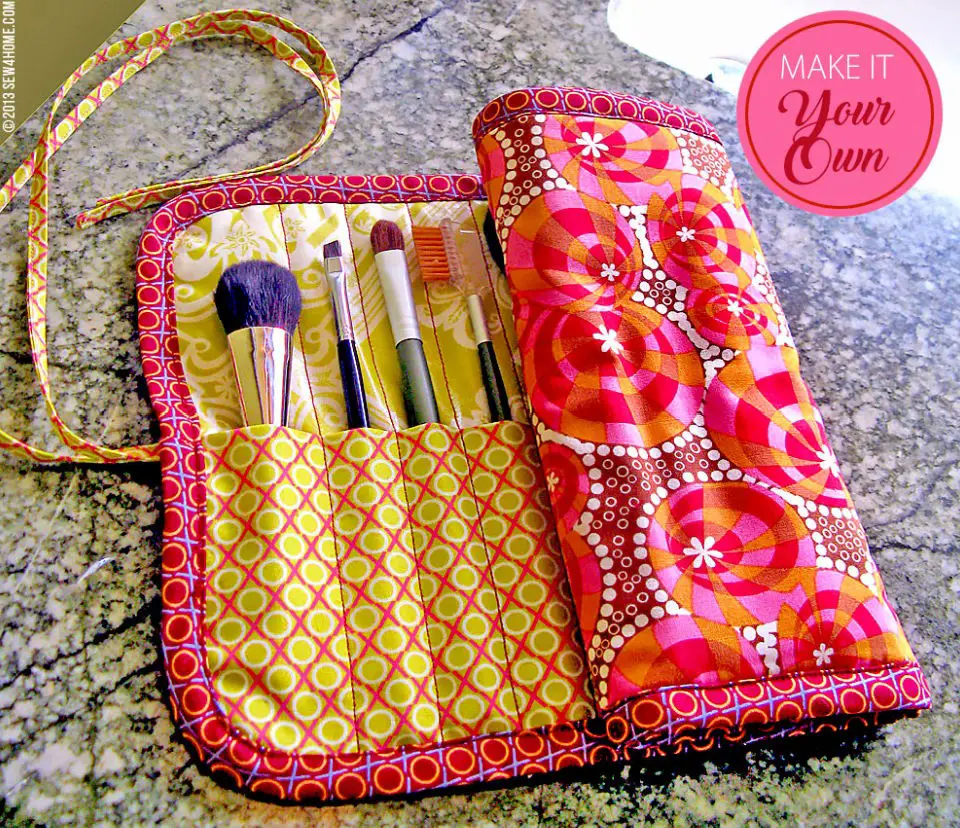
Take your makeup routine to the next level with this ingenious DIY Roll-Up + Tie Makeup Brush Caddy. This clever project seamlessly blends functionality with creativity, making it a must-have for any beauty enthusiast. By incorporating coordinating cotton fabrics and a smooth laminate interior, you’ll enjoy a tidy and easy-to-clean workspace, perfect for both home and travel use. As a thoughtful gift or a treat for yourself, the caddy’s compact design rolls up neatly and secures with stylish ties, making it an absolute must-have for any makeup lover. To add an extra layer of convenience, consider utilizing iron-on vinyl and pre-made bias tape for quick and effortless finishing. Get ready to elevate your beauty routine and discover the complete tutorial at Sew4Home.
DIY Washi Tape Makeup Brush Holder
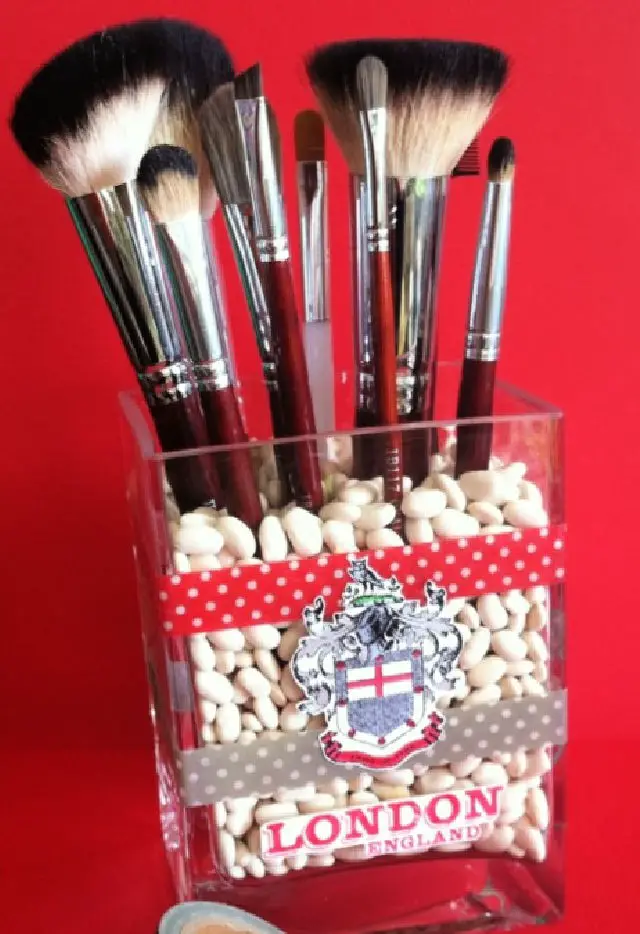
Elevate your beauty routine with a creative twist on makeup organization. By transforming a simple glass vase into a customized make-up brush holder using Washi Tape, you can add a dash of personality to your vanity or bathroom. This DIY project is not only functional but also visually appealing, making it perfect for anyone looking to inject some color and flair into their space. With an easy-to-follow tutorial that includes selecting vibrant Washi Tape colors, embossing, and assembling the holder, you’ll be hooked from start to finish. Ready to take your makeup brush storage game to the next level? Head over to LeroyLime for the full tutorial and get crafting today!
Make a Glitter Makeup Brush Holder
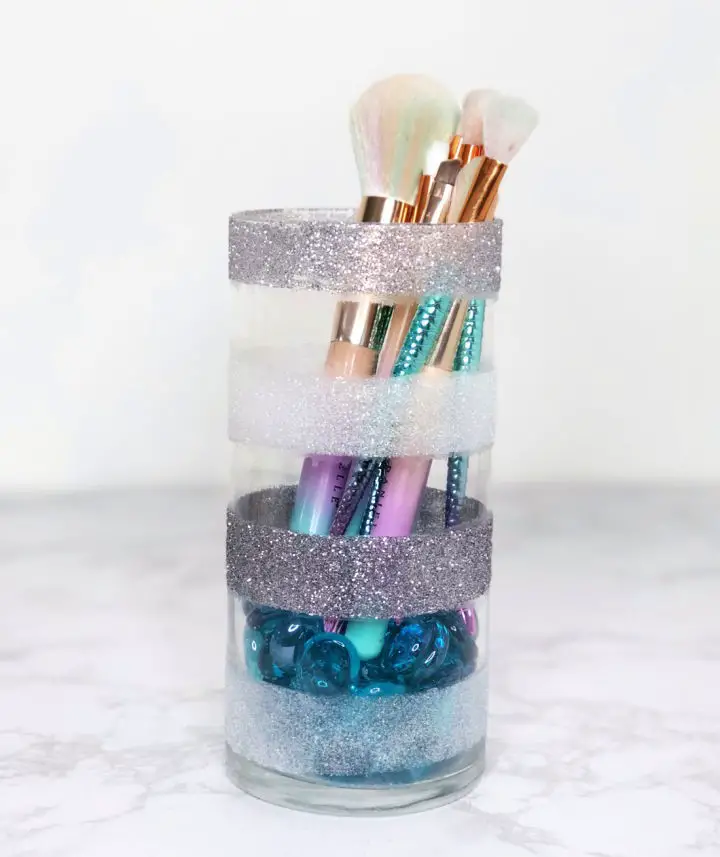
Transform your makeup space with a touch of elegance by crafting a stunning DIY Glitter Makeup Brush Holder. At LifeSheHas, we’re excited to share our step-by-step guide on how to create this chic and budget-friendly project using affordable materials from Dollar Tree. With just a clear vase, some glitter of your choice, and a few simple items, you can elevate your vanity with an eye-catching display that’s as functional as it is glamorous. Say goodbye to cluttered countertops and hello to a world of sparkle!
DIY Makeup Brush Holder From an Old Candle Jar
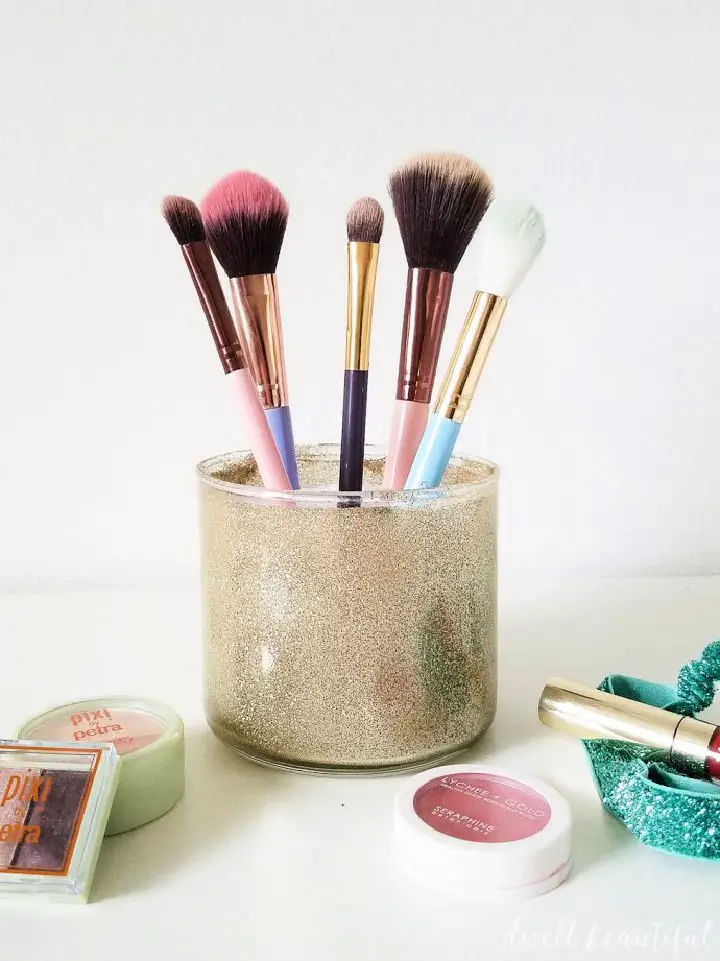
Elevate your vanity with a clever DIY project that transforms an old candle jar into a stunning makeup brush holder. This quick and easy tutorial, inspired by Dwell Beautiful, not only adds a touch of elegance to your décor but also promotes sustainability by giving new life to a discarded item. With just a few simple materials – including Mod Podge, glitter, and some basic supplies – you can create a chic and organized space for your makeup brushes that keeps them clean and within easy reach.
Homemade Swanky Two-Tier Organizer
Transforming your makeup table from chaotic to chic is now possible with the Swanky Two-Tier Organizer DIY project! By repurposing a humble metal can and two vintage plates, you can create an understated yet effective solution for keeping your cosmetics organized. This ingenious craft offers limitless customization opportunities, making it both a functional storage option and a stylish addition to any room. For a detailed guide on crafting this innovative organizer, head over to Picklee. Whether used for jewelry, pastries, or your cosmetic collection, this two-tiered masterpiece will effortlessly add a touch of elegance to its surroundings.
Easy Steps to Make Makeup Brush Holder
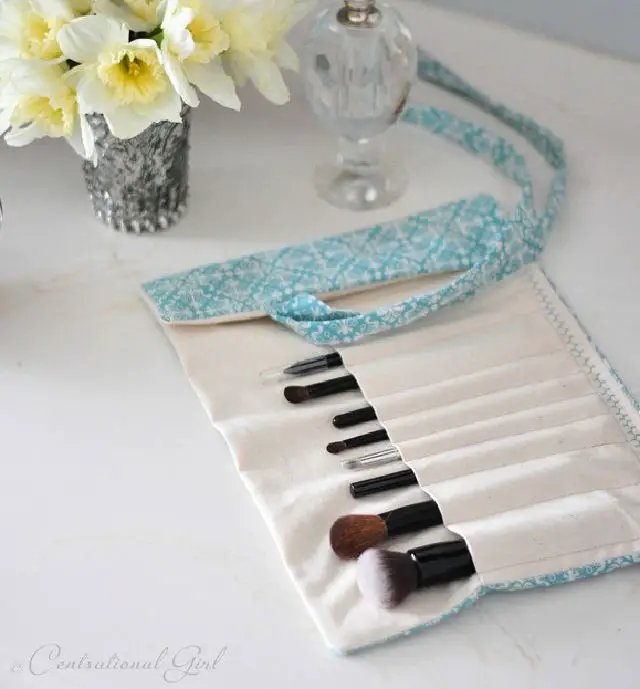
Transform your beauty routine with a charming, handmade makeup brush holder from Centsational Style. This DIY project breaks down the process into simple steps, making it easy to create a thoughtful gift or keep your own brushes organized. By sewing individual pouches and attaching them to a fabric holder, you’ll ensure your tools stay neatly stored and easily accessible. Plus, this clever design rolls up compactly for travel, showcasing the perfect blend of functionality and style. Take the plunge and create one for yourself!
Make Your Own Wooden Lipstick Holder
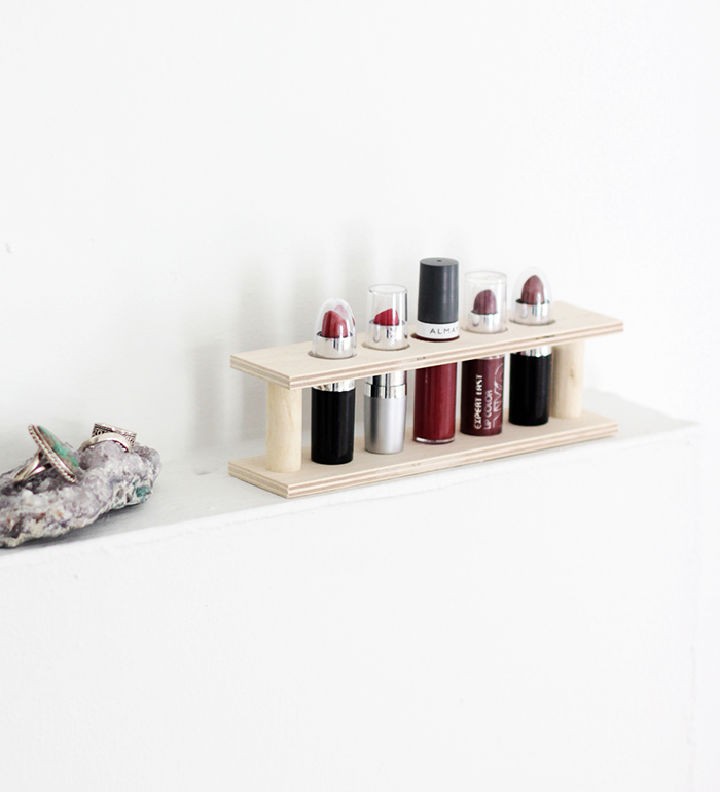
Transform the way you store your lipsticks with a personalized touch by creating your own lipstick holder using simple materials like birch plywood and a wooden dowel. This project not only serves as a practical solution for keeping your makeup essentials organized but also adds a stylish flair to your vanity or medicine cabinet. With just basic tools such as a drill and scroll saw, you’ll be guided through the measuring, drilling, and assembling process that’s accessible to DIY enthusiasts of all skill levels. By putting your own creative spin on this project, you can make it truly unique and reflective of your personal style.
DIY Scrap Wood Makeup Brush Storage
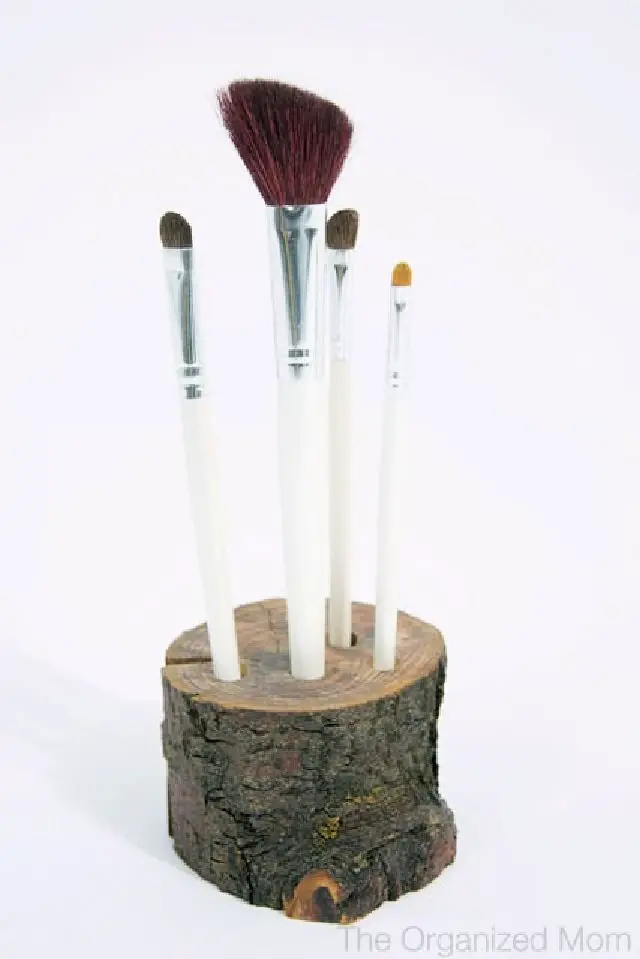
Transform your makeup routine by infusing it with a personal touch. With just a few simple steps, you can create your own DIY makeup brush storage solution, courtesy of Organized Mom. By combining a drill and a piece of wood, you’ll be able to craft a sleek stand that keeps your brushes organized, clean, and within easy reach. This clever project not only adds a dash of personality to your vanity setup but also ensures that your tools are always ready to go whenever inspiration strikes.
Rustic Mason Jar Makeup Organizer
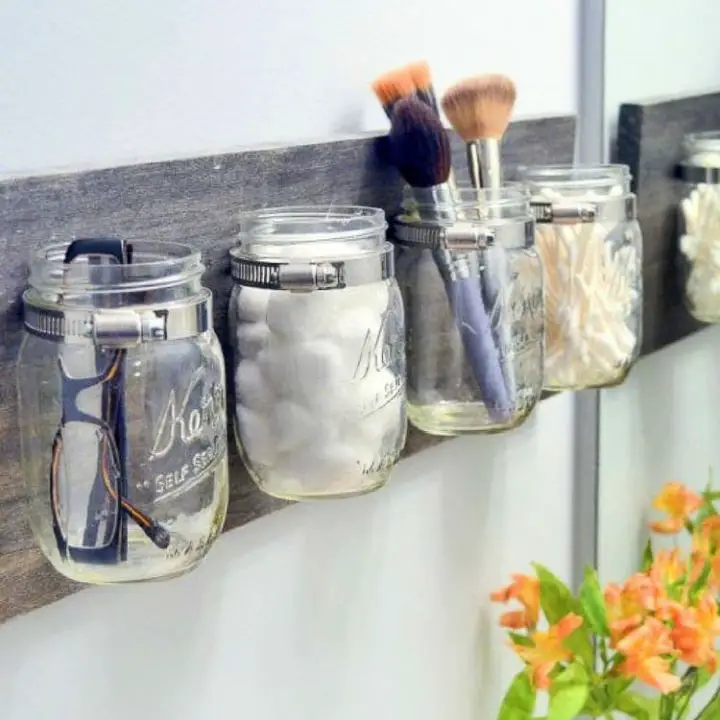
Transforming your space with a dash of farmhouse flair is just a few simple steps away with this ingenious DIY Mason Jar Organizer tutorial! This versatile storage solution is perfect for corralling bathroom essentials, kitchen utensils, or craft supplies in any room. With a minimal list of required materials – including mason jars, hose clamps, wood, and basic tools – you’ll be well on your way to creating a charming and functional organizer that’s sure to delight. Follow the easy-to-follow step-by-step instructions to bring this delightful project to life and learn how to craft your own at The DIY Playbook.
How to Make a Makeup Palette
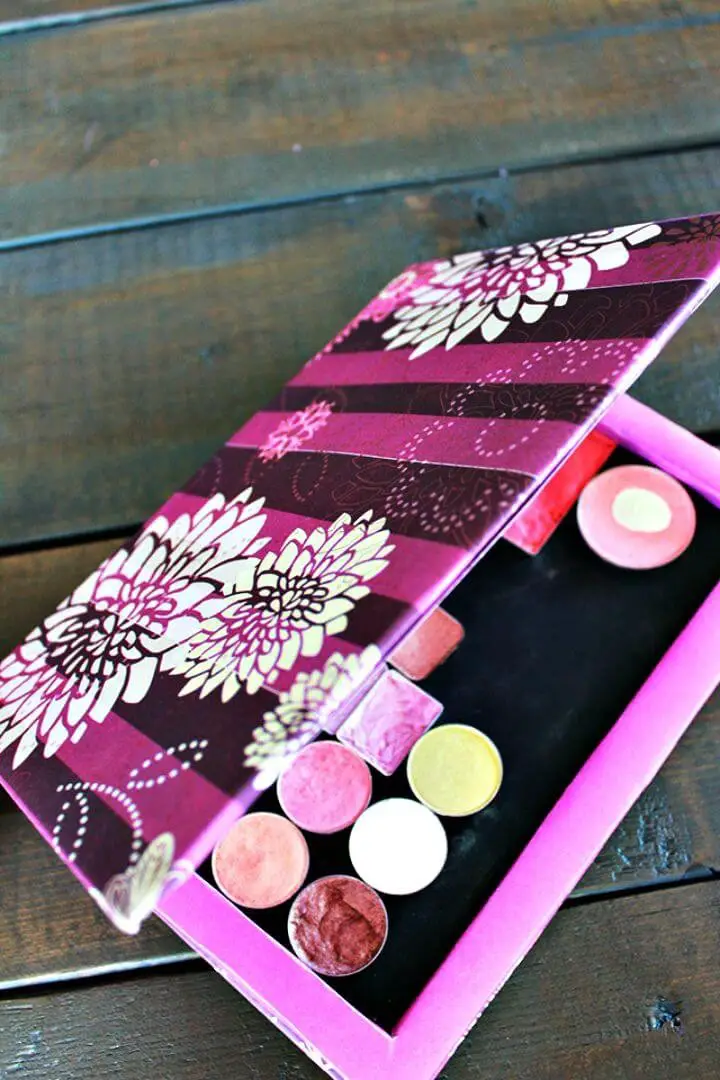
Unleash the power of customization by transforming your makeup collection with a DIY palette guide from Pretty Little Details. This easy-to-follow tutorial empowers you to create a tailored palette that seamlessly organizes your eyeshadows and powders, simplifying your daily beauty routine. As an added bonus, enter for a chance to win an exquisite Essie nail lacquer. With this fun and budget-friendly project, you’ll be able to declutter your collection and unlock the true potential of your makeup stash.
Cool DIY Glitter Makeup Brush Holder
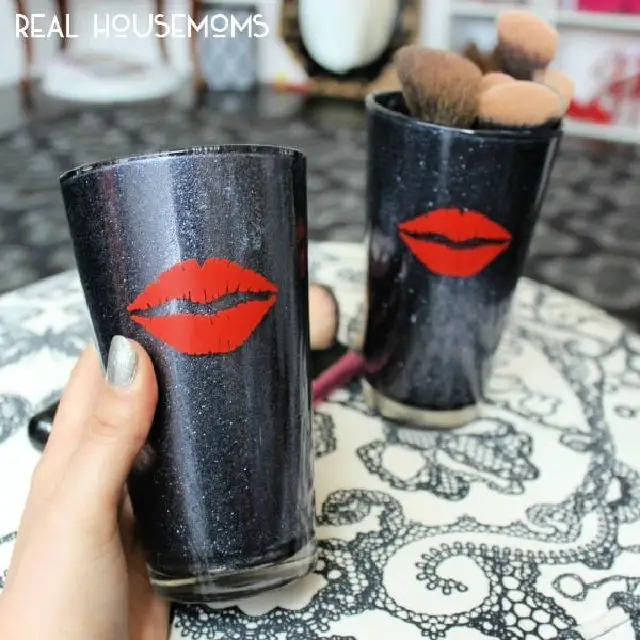
Add a touch of glamour to your beauty storage with this easy DIY project! I discovered a budget-friendly and playful way to create a glittery makeup brush holder using mostly Dollar Tree items. This versatile project isn’t just limited to holding makeup brushes – you can also use it for storing pencils, pens, or even as a decorative vase. The possibilities are endless! For a step-by-step guide on making these dazzling holders, check out Real Housemoms. This DIY will bring creativity and organization to your space with minimal effort.
Make a Ribbon Tie Vanity Basket
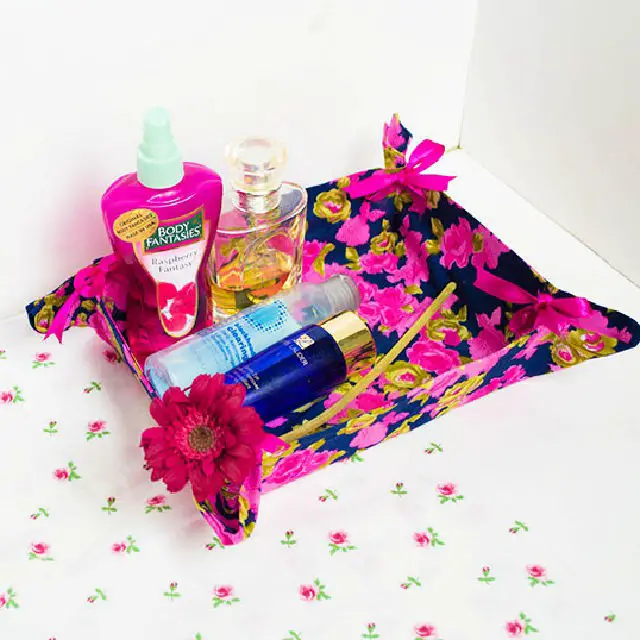
Transform your vanity into a stylish organizer with this unique DIY project that turns an upcycled cereal box into a charming Ribbon-Tie Vanity Basket. This versatile storage solution is perfect for perfumes, makeup, and lotions, adding a touch of elegance to any dressing table. With the help of basic supplies like fabric glue, a sewing kit, and some creativity, you can create this functional yet fashionable piece even if you’re not a seasoned sewer. As you follow the easy-to-learn instructions and helpful tips in this guide, you’ll be inspired to add your personal touch to your vanity area. For more creative ideas, visit Once Upon Her Dream.
Gilded China Dish Makeup Organizer
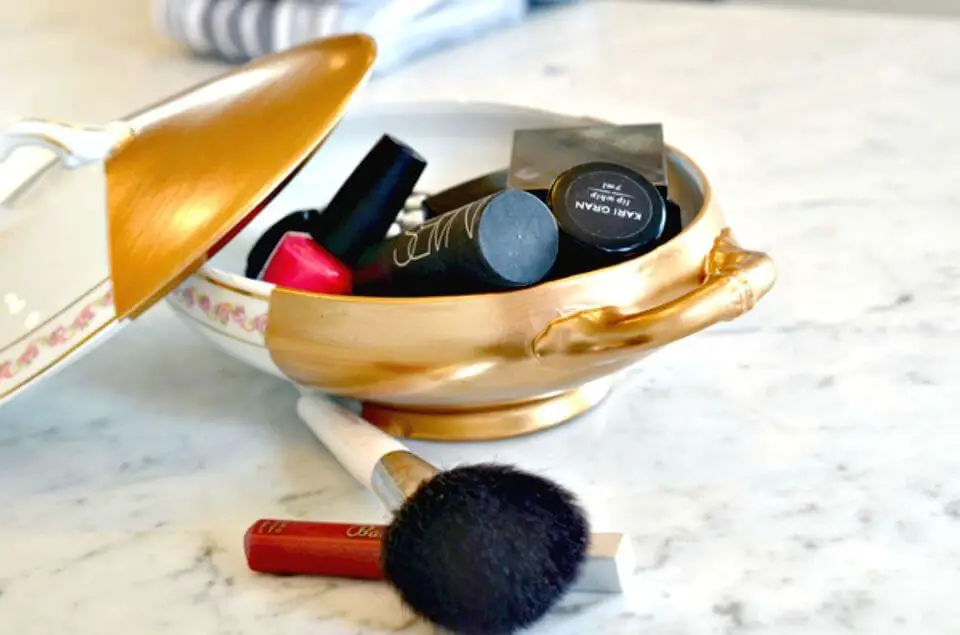
Breathe new life into your old, chipped china by transforming it into a stunning work of art using a simple gilding technique. This creative project was inspired by a family heirloom and the desire to add a touch of luxury to everyday dishes. With just a few basic materials, including a china dish, painter’s tape, liquid gold gilding, and some common tools, you can give your dinnerware a high-end makeover. Follow these easy-to-follow instructions to learn how to upcycle your china and bring elegance to your table setting. For a comprehensive guide on how to add sophistication to your dishes, visit Alexandra Hedin’s blog for more information.
Making a Glitter Dipped Makeup Brush Holder
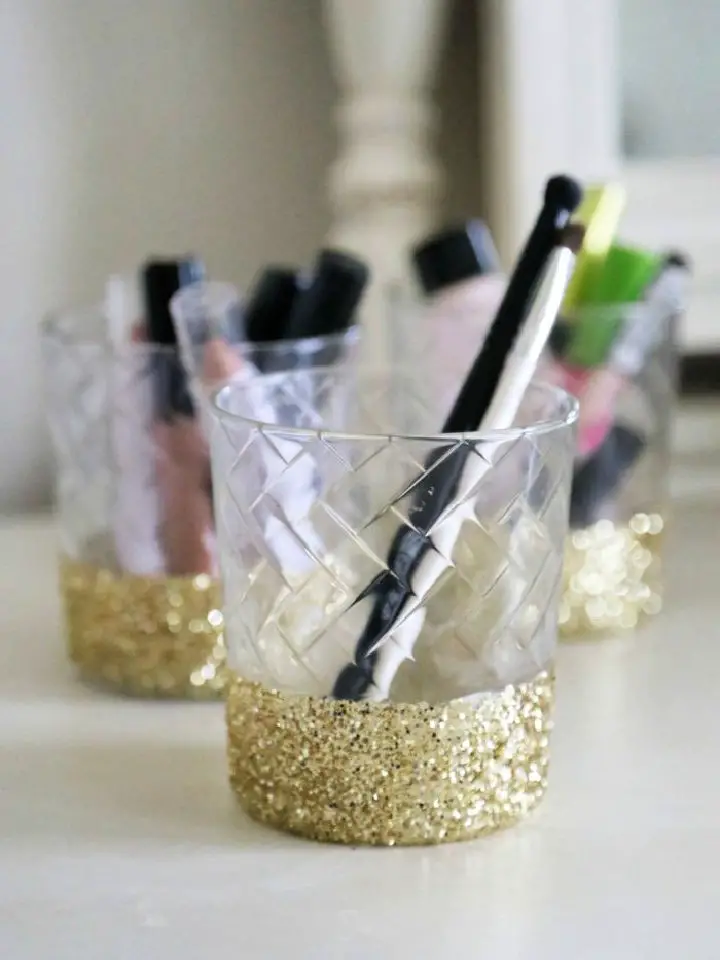
Add a touch of glamour to your space by creating a one-of-a-kind DIY Glitter Dipped Holder. This easy project can be used to store makeup brushes or small accessories, and its sleek design will complement any room’s decor. To get started, gather basic supplies like a glass cup, Mod Podge, glitter, and a dash of creativity. For a polished finish, opt for a straight- sided glass and apply the glitter with precision. Once you’ve achieved the desired sparkle, seal your masterpiece with a clear coat to prevent flaking and ensure it remains a stunning piece for years to come. With detailed instructions available on Lolly Jane, this charming holder is perfect as a thoughtful gift or a stylish accent that will elevate any room’s aesthetic.
Cute DIY Sharpie Makeup Storage Jars
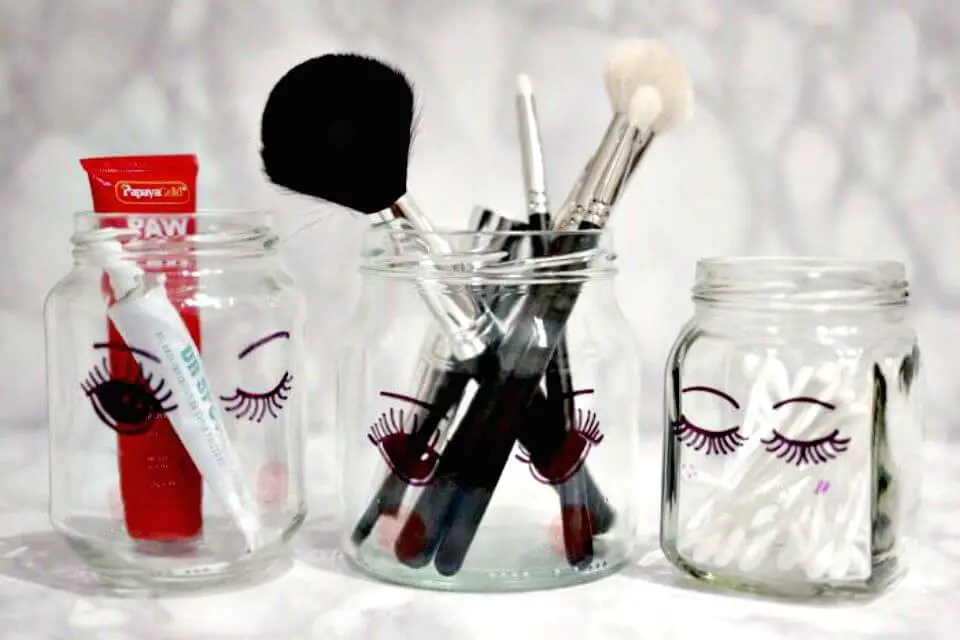
Transforming your makeup storage into a chic haven is easier than you think. By utilizing Sharpies, you can turn ordinary glass jars into bespoke containers for your beauty must-haves. This clever DIY guide takes inspiration from Miss Etoile’s charming chinaware, allowing you to effortlessly add a touch of elegance to your space. Say goodbye to clutter and hello to organized refinement. Ready to bring your vanity up to par with your personal style? For the full tutorial, visit Ling Yeung B and get creative!
Build a Fingernail Polish Display Stand
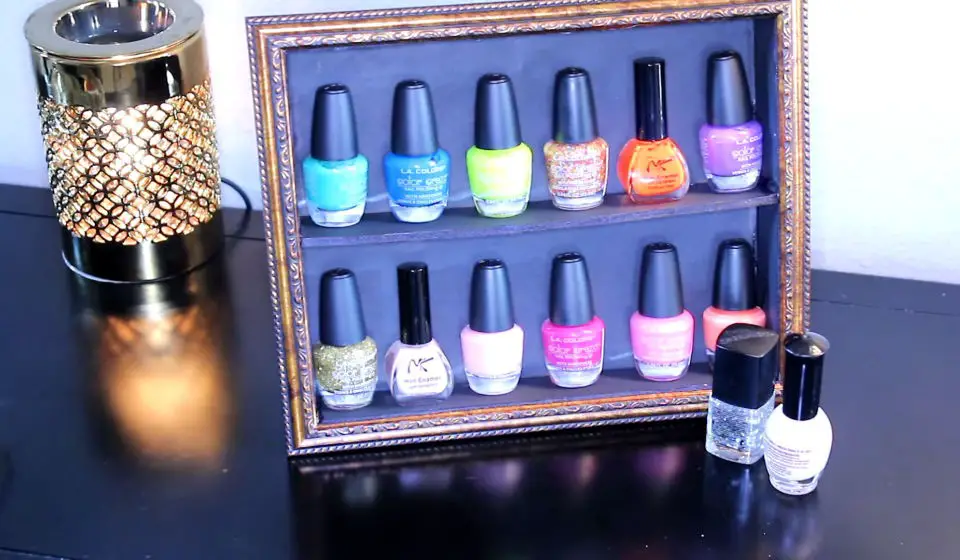
Transform your nail polish collection into a stunning display without breaking the bank! With just a few Dollar Tree items, you can create a chic and functional DIY Fingernail Polish Display Stand, courtesy of expert crafter Angela East. This beginner-friendly project requires minimal tools and offers a straightforward step-by-step process, making it perfect for adding a personal touch to your space or as a thoughtful handmade gift for loved ones.
How to Make a Makeup Brush Holder
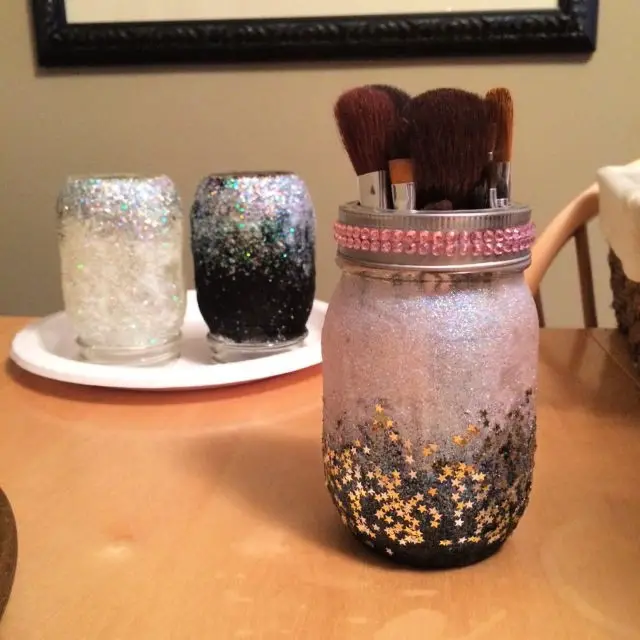
Transform your home decor with an easy and empowering DIY project – a dazzling makeup brush holder crafted from ordinary items. With just a few simple supplies, including Mason jars, glitter, Mod Podge, and more, you can unleash your creativity and turn humble objects into stunning pieces that add a touch of glamour to any space. This step-by-step guide is perfect for personal use or as a thoughtful gift, offering endless possibilities to add sparkle to your bathroom, office, or anywhere in between.
Quick and Easy DIY Makeup Brush Holder
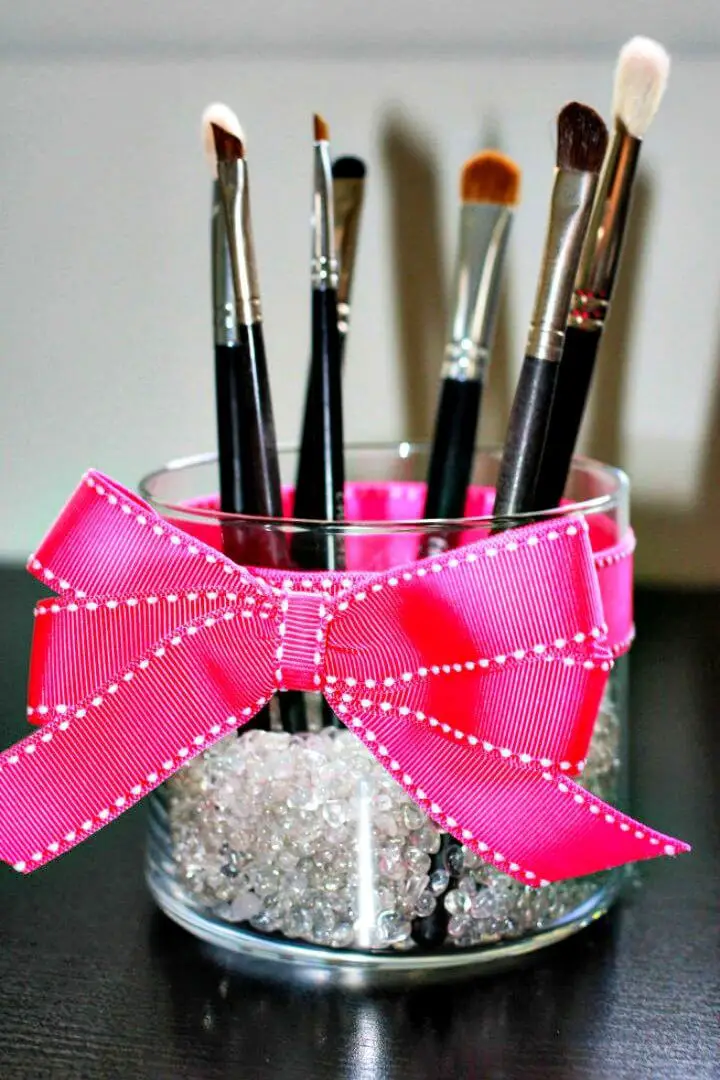
Unleash the crafty side of you and transform a dull day into a fun DIY session with this easy-to-follow Makeup Brush Holder tutorial from Pretty In Pigment. With just a few simple materials, including recycled candle jars, colorful ribbons, decorative beads, and basic crafting tools, you can give your vanity a chic makeover that’s both functional and personalized. This straightforward guide takes you step-by-step through the process of measuring, cutting, and tying the ribbon to create a beautiful bow that adds a touch of elegance to your holder. Not only will this project help keep your brushes organized, but it also provides an opportunity to express your creativity and add a unique touch to your space.
How Do You Make a Chapstick Holder
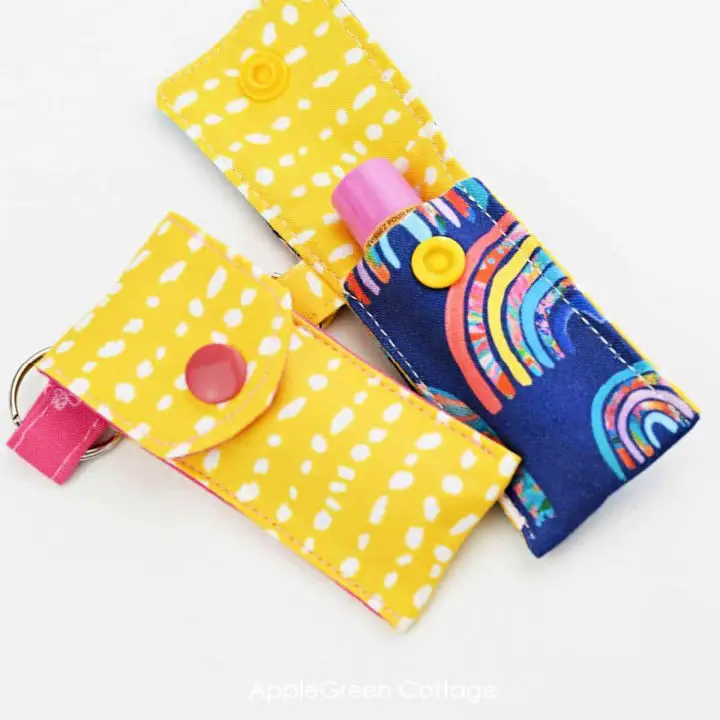
Say goodbye to the frustration of searching for your chapstick only to find it lidless and your belongings a mess. With this clever DIY project from AppleGreen Cottage, you can keep your lip balm within reach while keeping your bag organized. This quick and easy sewing tutorial allows you to personalize your chapstick holder with your favorite fabric, making it the perfect accessory for any sewing level. Whether attached to your keyring, backpack, or purse, this adorable solution ensures your lip balm is always at hand.
Inexpensive DIY Makeup Storage Idea
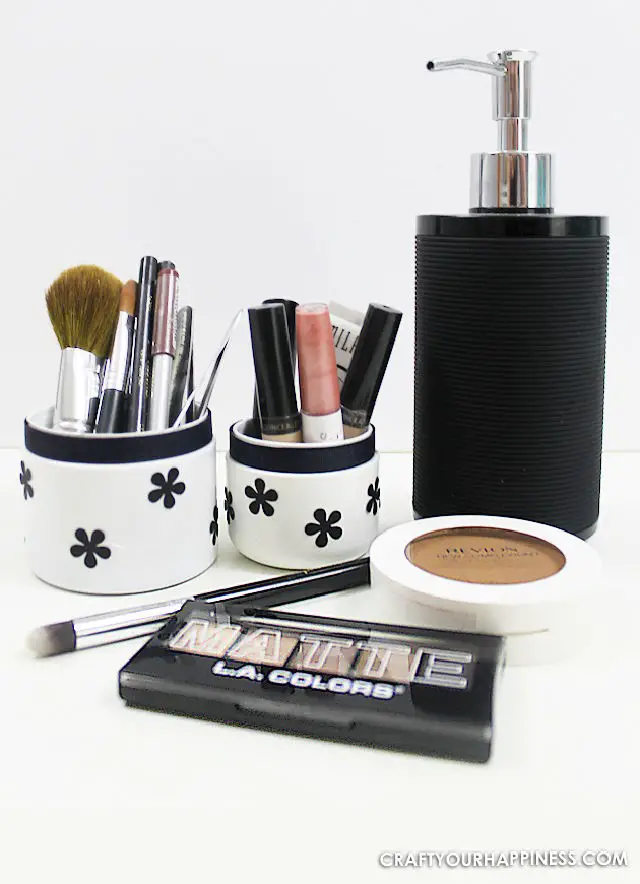
Transforming everyday containers into chic makeup storage is easier than you think! With just a few simple materials, including empty containers, paint, ribbon, and a flower punch, you can create a personalized makeup organizer that not only declutters your space but also adds a touch of elegance to your vanity. This DIY makeover is perfect for storing longer makeup items, such as eyeliners or mascaras, and can be customized to fit your personal style. By adding a splash of craftiness to your daily routine, you can elevate your makeup organization game and make getting ready feel like a spa-like experience. To get started, simply follow the easy steps outlined at Craft Your Happiness and watch as your makeup collection transforms into a beautiful, functional piece of art.
Build a Pencil and Makeup Organizer
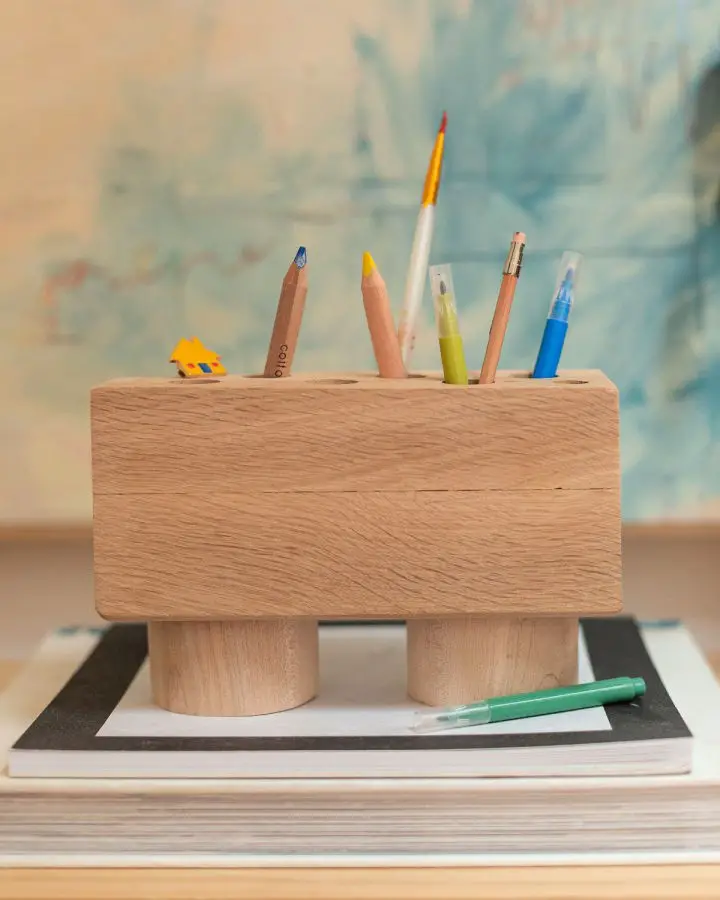
Transforming your space into a harmonious haven starts with the little things, like creating a chic DIY pencil holder or makeup organizer. This versatile caddy is perfect for any room, effortlessly keeping your essentials organized – whether that’s paintbrushes, makeup brushes, or pens. By following this simple guide, you can elevate your workspace or vanity to a more streamlined and sophisticated space. With just a few basic tools like wood, a saw, and a drill, you can craft a piece that not only serves its practical purpose but also doubles as a stylish decor item. For a comprehensive tutorial and more inspiration, head over to papernstitchblog.com. By incorporating this functional yet aesthetic DIY project into your space, you’ll be amazed at the difference it can make in creating a truly unique and inviting atmosphere.
DIY Jewelry and Makeup Holder With Dinnerware
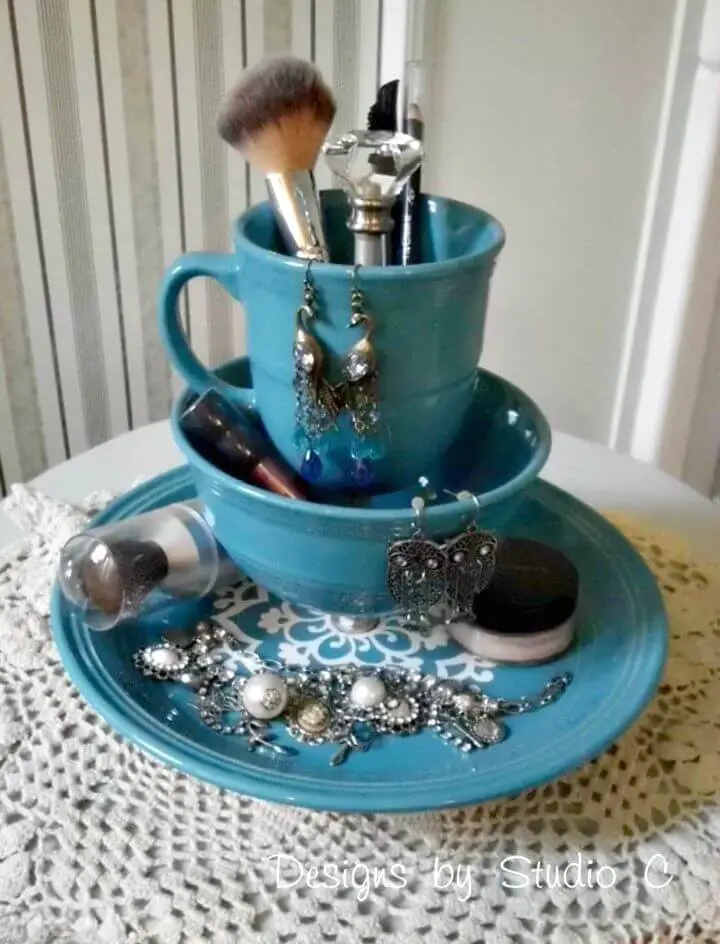
Elevate your jewelry and makeup organization with a creative DIY project that transforms cherished dinnerware into a stylish holder. By repurposing plates, bowls, and cups, you’ll create a one-of-a-kind organizer that not only serves a practical purpose but also adds a touch of personality to your space. Whether you’re looking to gift it or give your own vanity a fresh makeover, this project is surprisingly simple yet undeniably rewarding. For a comprehensive guide on making your own jewelry and makeup holder, visit Designs by Studio C for inspiration.
Make Your Own Makeup Caddy
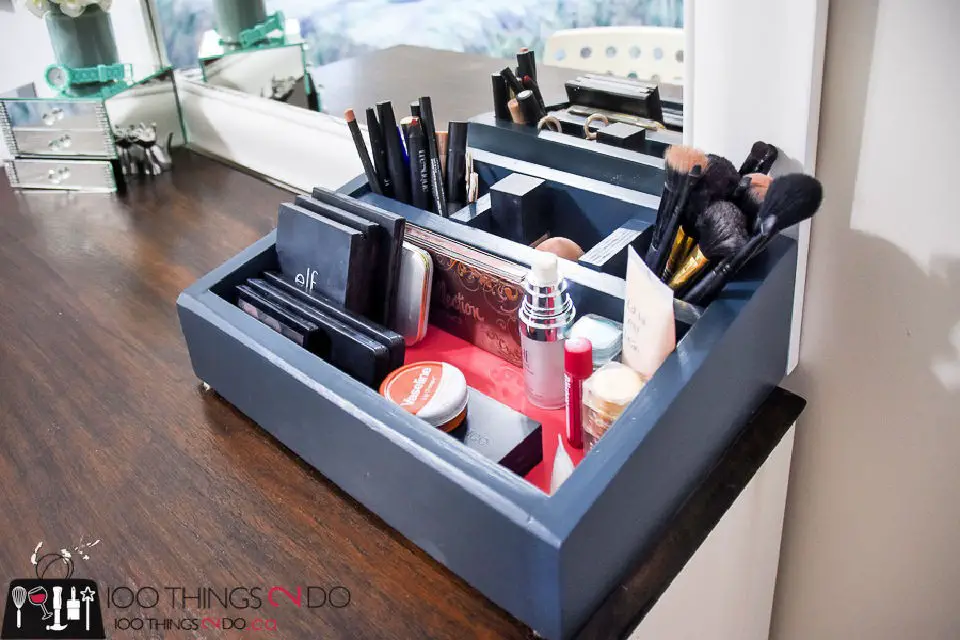
Transform your beauty routine with a functional and stylish DIY makeup caddy that’s perfect for organizing cosmetics and brushes. Inspired by endless YouTube makeup tutorials, this project is ideal for beginners who want to create a personalized vanity accessory without breaking the bank. With affordable materials like plywood providing durability, you can cut, assemble, and customize your makeup organizer with paint for a unique finish. This versatile storage solution is suitable for all ages and keeps essentials neatly sorted and accessible, making it perfect for makeup enthusiasts or anyone looking to tame clutter. Whether you’re a beginner or an experienced beauty lover, this DIY project will help you transform chaos into chic organization.
Conclusion
As this DIY journey comes to a close, it’s clear that creating 35 unique makeup organizer ideas has not only streamlined and personalized your space but also infused a sense of pride and ownership into your daily makeup routine. By walking you through the entire process – from selecting the perfect project to placing the final touches on your very own organizer – we’ve empowered you with the confidence to tackle any DIY challenge that comes your way. Whether you’re looking to create a straightforward storage solution or a one-of-a-kind masterpiece, the true secret to a successful DIY makeup organizer lies in embracing your creativity and finding joy in the process itself. We hope these ideas have sparked a sense of excitement and inspiration within you, motivating you to take on your makeup organization with gusto and panache.
