Transforming plain spaces into cozy sanctuaries is an art that combines creativity with practicality. By crafting a DIY Macrame Hammock or Chair, you can infuse your home or garden with a unique blend of aesthetics and functionality. The process itself becomes a rewarding journey, as you weave together high-quality cords and materials to create a one-of-a-kind piece that’s both visually stunning and invitingly comfortable. The sense of accomplishment is undeniable, and the end result serves as a testament to your creativity and skill.Before embarking on this DIY adventure, it’s essential to grasp the fundamental principles, including material selection, pattern creation, and technique mastery. This comprehensive guide will walk you through every step, from choosing the ideal cord to executing intricate patterns like the DIY Macrame Hanging Nest Swing. Whether you’re seeking inspiration for customization ideas, tips for maintenance, or solutions to common issues, this resource has got you covered.Are you ready to bring a touch of handmade magic to your space? Then join us on a journey through the world of DIY macrame hammocks and chairs, where creativity meets practicality.
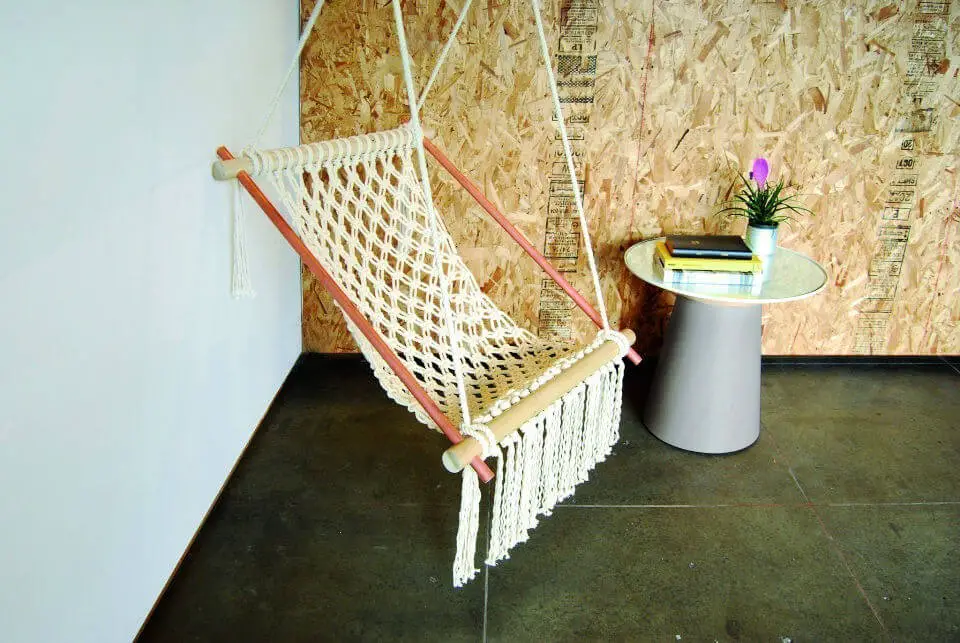
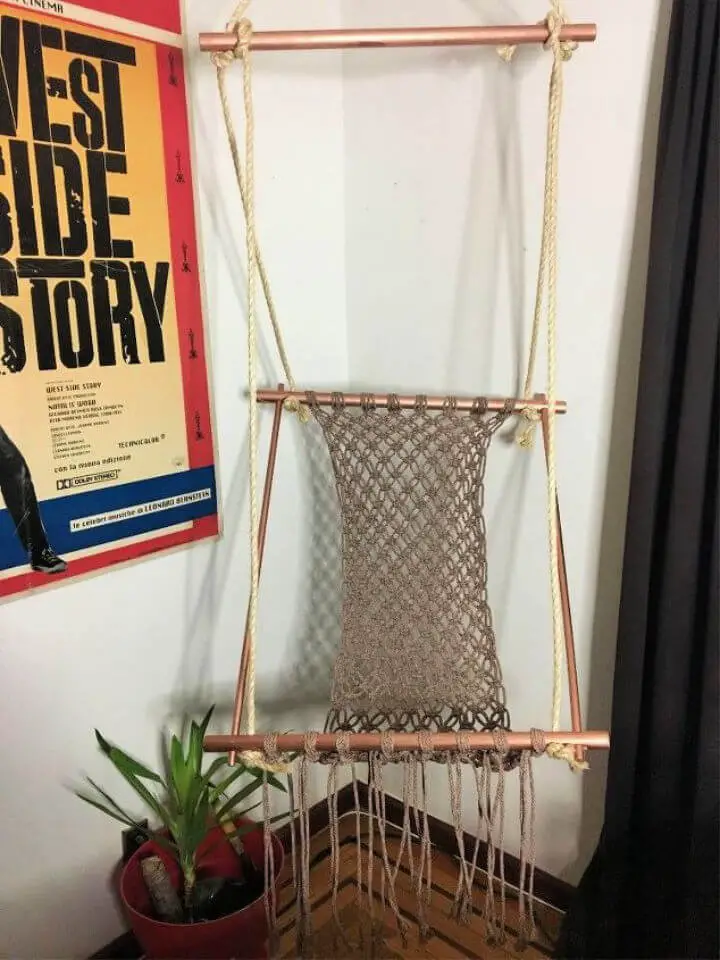
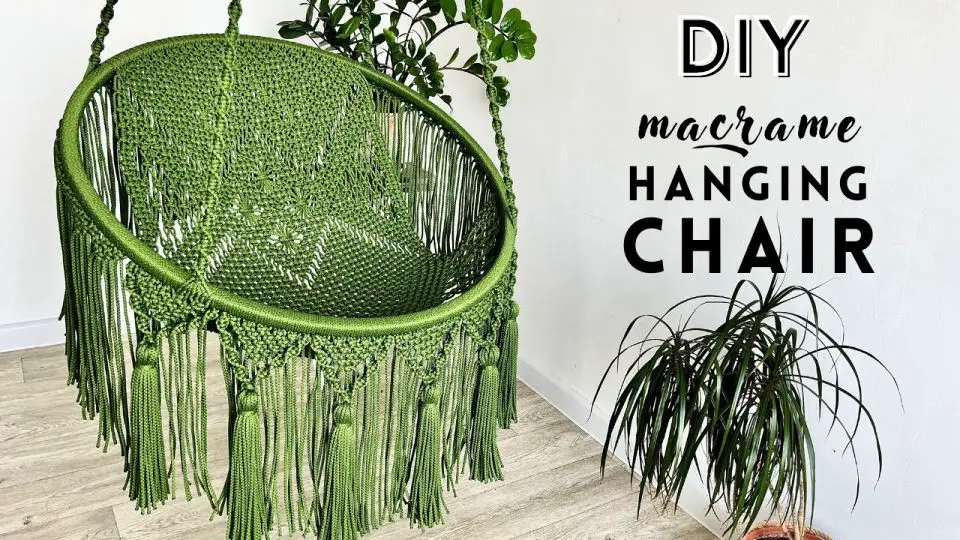
DIY Macrame Hanging Nest Swing
Transform your space with a one-of-a-kind DIY macrame hanging nest swing project that embodies bohemian charm and warmth. With its versatility, this guide is perfect for both novices and seasoned knotters looking to create a stunning and long-lasting macrame hammock chair. To further enhance the learning experience, refer to our accompanying step-by-step video tutorial on YouTube.
Materials Needed:
When it comes to the equipment required for this project, you’ll need a substantial amount of cord to work with. Specifically, you’ll need approximately 1080 meters (3543.3 feet) of high-quality polyester or cotton cord that can withstand the demands of your crochet hook and the metal rings. In addition to the cord, you’ll also require three distinct types of metal rings to provide structure and stability to your project. These will include one larger ring with a 30cm/11.8″ diameter and a thickness of either 20×20 or 15x15mm, as well as two smaller rings with an 80cm/31.5″ diameter and the same thickness options. A reliable 5mm crochet hook is also essential for getting the job done efficiently, along with some basic tools like scissors, a lighter, and a measuring tape to help you stay on track.
Step-by-Step Guide:
To create a cozy relaxation spot in your home or garden, make your own DIY macrame hammock using this step-by-step guide. Begin by preparing 18 strands of cord, each measuring 10 meters (32.8 feet), and folding them in half to loop onto the hook. Next, use two longer cords (12 meters/39.4 feet each) as working cords to make square knots around the bundle. Start weaving with these cords, aiming for a tight and even pattern, and wear gloves to protect your fingers from friction. As you achieve the desired weave length, secure your work and weave through larger metal rings (80cm/31.5″). To tighten and secure the hammock, randomly select a cord from the middle bundle and tie a simple knot, then proceed to weave around the entire circumference of the ring. Continue adding and folding cords onto the ring, ensuring even gaps (approximately 6-7cm apart) and building the seat by integrating a 30cm metal side ring into your weave. Use a combination of square knots and new cords to form the seat’s base, keeping the pattern tight and consistent for proper support. Finally, attach two 80cm metal rings on either side of the nest swing, ensuring they are parallel to the ground to form the main support of your hanging chair.
Hanging and Adjustments
To create a secure and comfortable hanging experience for your macrame nest swing, look for a sturdy beam or tree branch that can withstand the weight of at least one person. Once you’ve found the perfect anchor point, adjust the suspension cords as needed to achieve an even and harmonious seating height.
Video Tutorial
Pairing written guides with visual tutorials can be incredibly effective in helping readers grasp complex processes or crafts. For instance, watching a step-by-step guide on YouTube can provide clarity and ease any confusion that may arise from reading a written tutorial alone. This synergy is particularly useful when creating unique home decor pieces like DIY macrame hanging nest swings. By combining the written instructions with visual guidance, you’ll be able to create your own stylish, functional, and one-of-a-kind piece for your home. The YouTube video serves as a valuable companion to this written guide, allowing you to see each step come to life and make the crafting process even more accessible.
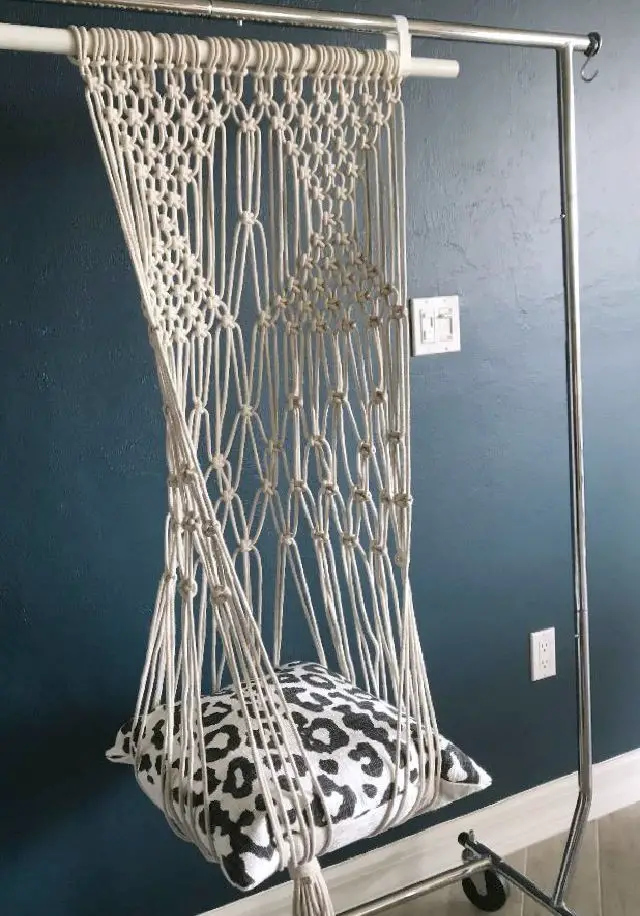
Customization Ideas for Your Macrame Hammock
Transforming a macrame hammock into a one-of-a-kind piece of art requires more than just tying knots; it’s an opportunity to unleash your creativity and bring your unique vision to life. To make your hammock truly special, consider incorporating the following personal touches: vibrant patterns achieved through the strategic use of colored cords, which can be used in bold combinations or subtle single hues. You can also elevate your design by adding beads, charms, or rings, such as wooden or ceramic beads for a natural look or metal charms for a modern twist. Experimenting with different knot styles is another way to add visual interest, moving beyond the standard square knot to more intricate designs like spirals or half-hitches. To complete the look, consider adding fringe along the edges of your hammock or attaching tassels at the corners for a playful touch. Additionally, creating adjustable loops can allow you to customize the height and tension of your hammock to suit your needs. The key is to approach the process with an open mind and a willingness to have fun, ultimately resulting in a hammock that reflects your personality and style.
Troubleshooting Common Issues
When creating your macrame hammock, you may encounter some obstacles. Fortunately, these common challenges can be easily overcome by following these troubleshooting tips.
Uneven knots can be addressed by using a ruler or a board with nails to maintain consistent spacing between each knot. Tension problems are another common issue that can be resolved by practicing consistent tightness as you work through the project and utilizing a dowel rod to keep lines straight. To prevent cords from twisting, hang your work from a fixed point as you add knots.
If you do happen to make a mistake, don’t worry – macrame is a forgiving craft. Simply undo the affected knots and start again. By addressing these common issues, you’ll be well on your way to creating a beautiful and sturdy macrame hammock.
Maintenance and Care for Your Macrame Hammock
To preserve the beauty and longevity of your macrame hammock, a thoughtful maintenance routine is crucial. Here’s how to keep your cozy retreat in pristine condition:
Firstly, regular cleaning is essential. Gently shake out any loose debris, then hand wash it with mild soap and cool water only when necessary. Avoid using harsh chemicals that could damage the fibers.
Next, drying is a vital step. Lay the hammock flat to air dry, ensuring it maintains its shape and doesn’t stretch. Never use a dryer, as the heat can shrink or compromise the material.
When not in use, store your hammock in a dry, cool place. A breathable container or cotton bag is ideal for protecting it from dust and pests.
Additionally, regular inspections are vital to identify any signs of wear or loose knots early on, preventing further damage.
Finally, be mindful of exposure to the elements. Prolonged sunlight can cause colors to fade, while moisture can lead to mildew. When possible, hang your hammock in a shaded, dry area.
By following these simple care instructions, you’ll keep your macrame hammock looking like new for years to come.
Environmental Impact and Sustainability of DIY Macrame Hammocks
To create an eco-friendly DIY project like a macrame hammock, it’s essential to consider the environmental impact from the onset. By adopting sustainable practices, you can reduce waste, conserve resources, and promote ethical labor standards. Here’s how: Start by choosing natural materials like cotton, jute, or hemp for your project. These biodegradable fibers have a lower carbon footprint compared to synthetic options. Next, opt for suppliers who practice sustainable farming methods. This not only supports the environment but also promotes fair labor practices. If you have old textiles lying around, consider repurposing them for your macrame project. This reduces waste and gives new life to unused items. When it comes to tools or lighting, prioritize energy-efficient options like LED lights and manual tools. Finally, support local artisans or suppliers whenever possible. Buying from locals cuts down on transportation emissions and boosts the local economy. By incorporating these eco-friendly practices into your DIY project, you’ll not only create a stunning macrame hammock but also contribute to a more sustainable future.
FAQs About DIY Macrame Hammocks
When venturing into the world of DIY macrame hammocks, several queries arise in one’s mind. To facilitate a seamless project experience, here are some frequently asked questions and their corresponding answers, designed to provide guidance throughout the process.
What materials do I need to start making a macrame hammock?
To embark on this DIY adventure, gather the essential materials: macrame cord, a hammock frame or a sturdy dowel serving as its foundation, a pair of scissors for precise cuts, and a measuring tape to ensure accurate measurements. If you desire to add an extra layer of visual appeal, consider incorporating beads or other decorative elements into your design.
How much cord will I need for my hammock?
When it comes to determining the right amount of cord for your hammock, several factors come into play. The primary consideration is the size of your hammock itself, as this will impact the overall length of cord needed. Additionally, the complexity of the hammock’s pattern can also influence the required cord length. A general guideline is to aim for a minimum of four times the length of your hammock, taking both these factors into account.
What is the best type of cord for a macrame hammock?
When it comes to selecting a material for your project, cotton cord is often a top contender due to its durability and comfort. But did you know that other options like polyester and nylon are available as well? These synthetic fabrics offer the added benefit of being highly resistant to the elements, making them an excellent choice for projects where weather resistance is crucial.
Can I make a macrame hammock if I’m a beginner?
As you begin your journey into the world of knot-tying, it’s essential to start with the basics. Begin by mastering simple knots and patterns before gradually moving on to more intricate designs. This approach will help you build a strong foundation, allowing you to tackle increasingly complex creations with ease.
How do I prevent my macrame hammock from stretching too much?
When it comes to selecting the right synthetic cord for your project, consider opting for polyester or nylon, as these materials tend to exhibit less elasticity than their natural counterparts. Alternatively, if you’re working with cotton, take a proactive approach by pre-soaking and drying the material before use. This simple step can help mitigate any potential stretching issues that may arise later in the process.
How do I clean my macrame hammock?
For optimal care, gently hand wash the item with a mild soap and cool water. Following this, lay it flat to air dry. It’s crucial to avoid exposing it to the harsh conditions of a washing machine or dryer.
Can I leave my macrame hammock outside?
When your decorative item is not being used, consider relocating it to a indoor environment to shield it from the harsh effects of nature. This precaution is particularly crucial for items crafted from natural materials, as they can be more susceptible to damage or degradation when exposed to the elements.
How long does it take to make a macrame hammock?
The duration of this process can fluctuate significantly, spanning anywhere from a handful of hours to several days, contingent upon the intricacies of the design and one’s proficiency.
What are some common mistakes to avoid when making a macrame hammock?
When it comes to setting up your hammock, attention to detail is crucial to ensure a comfortable and secure sleeping experience. This means avoiding common mistakes such as cutting the cord too short, tying knots that are either too tight or too loose, and neglecting to properly secure the hammock to its frame. By taking the time to get these details right, you’ll be rewarded with a restful night’s sleep in your hammock.
How can I make my macrame hammock more comfortable?
When it comes to achieving the perfect balance in your hammock’s tension, consider the intricate relationship between knot tightness and spacing. A loose knot and generous spacing can result in a softer, more pliable hammock that provides optimal comfort. On the other hand, tighter knots and closer spacing may yield a stiffer, more rigid structure. By adjusting these variables to suit your personal preference, you’ll be well on your way to creating a hammock that cradles your body just right.
Is it cheaper to make my own macrame hammock?
While it’s true that creating your own hammock from scratch can prove a budget-friendly endeavor, there are several factors to consider before embarking on this DIY adventure. One of the most significant advantages of making your own hammock is the potential cost savings. By carefully selecting materials and minimizing waste, you can enjoy a unique piece of furniture while keeping expenses in check. To ensure a successful outcome, it’s essential to arm yourself with the right knowledge and expectations. By doing so, you’ll be well-equipped to tackle your macrame hammock project with confidence.
10 DIY Macrame Hammock Patterns: DIY Macrame Chair
Transform your living space into a serene retreat by crafting your very own bohemian-inspired DIY macrame hammock. To get you started, we’ll take you through the process of creating a stunning DIY Macrame Chair, setting the stage for your future hammock-making endeavors.
How to Make a Macrame Hammock

Transforming your porch into a cozy retreat has never been more inviting! With our comprehensive guide, you’ll embark on a journey of creativity and self-sufficiency as we walk you through the process of crafting a one-of-a-kind macrame hammock. By combining basic knotting techniques with minimal materials, you’ll learn to measure and drill dowels, master the art of the macrame square knot, and assemble a robust frame for your hammock. Not only will you end up with a truly unique piece of furniture, but you’ll also experience the satisfaction of creating something with your own hands. So, gather your tools and let’s get started on this project – it’s time to elevate your relaxation space with a stylish, self-made macrame hammock that exudes handmade charm.
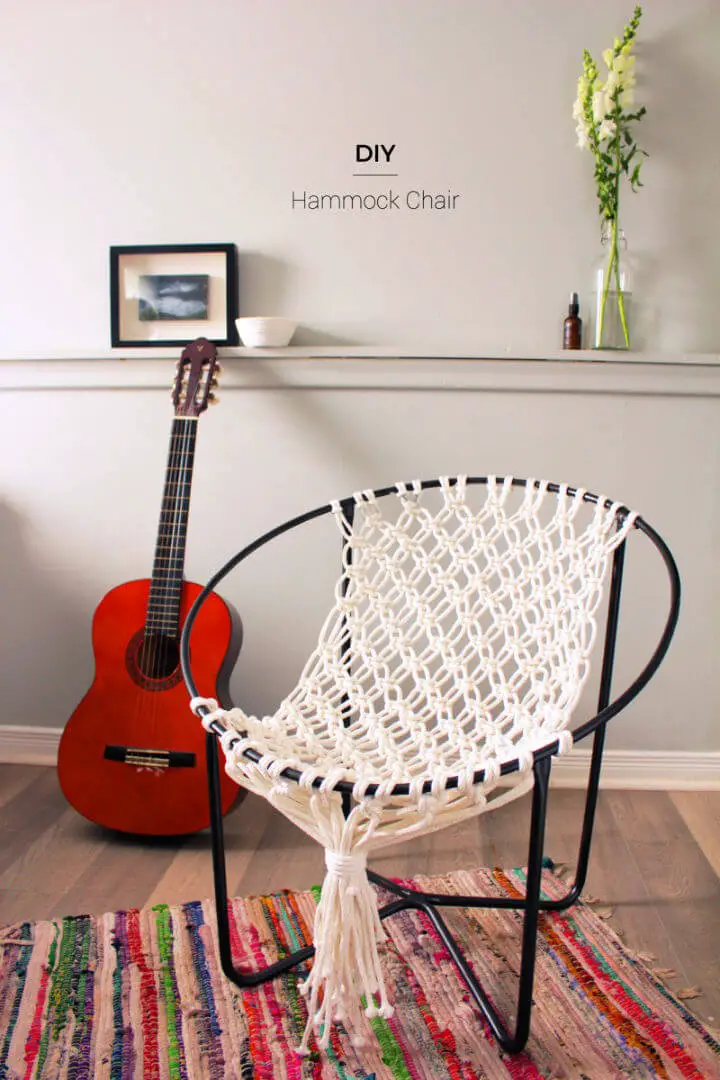
DIY Macrame Chair – Step by Step Instructions
Transform your living space into a warm retreat with the DIY Hanging Chair project from Cut Out + Keep. This comprehensive guide walks you through the step-by-step process of creating the Ovis Macramé Hanging Chair, a harmonious blend of sturdy structure and plush softness. By combining robust materials like metal, wood, and brass with the gentle texture of cotton ropes, this chair promises both support and comfort for a cozy experience.
With an arsenal of tools at your disposal, including a metal saw, drill bits, and masking tape, you’ll be able to cut, assemble, and meticulously craft every detail of your Hanging Chair. The instructions are crystal clear and methodical, making the build process both enjoyable and rewarding for DIY enthusiasts. As you bring this unique piece to life, get ready to create a showstopping centerpiece that will be the envy of any room.
Homemade Indoor Hanging Macrame Chair
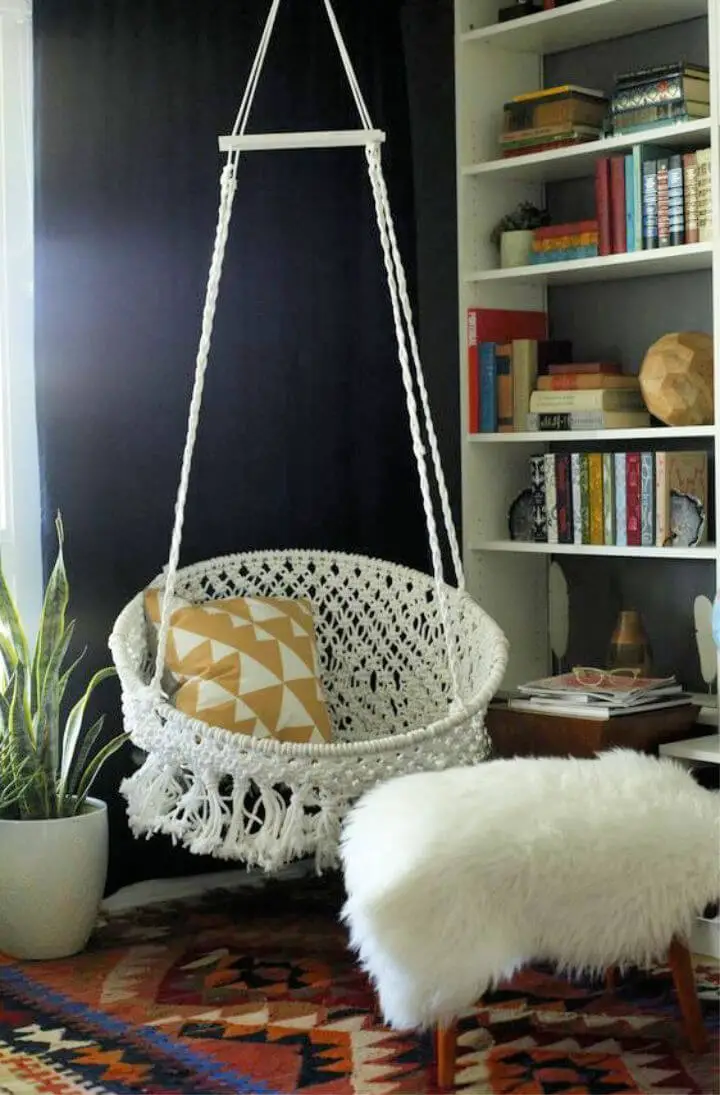
Transforming a simple saucer chair into a show-stopping hanging chair using macramé techniques can be an incredibly fulfilling DIY project. This hands-on endeavor requires patience and time, as intricate knotting is involved. Despite the challenge, the sense of accomplishment from creating a one-of-a-kind home decor piece is unparalleled. By following the step-by-step instructions, you’ll learn to master basic and alternating square knots, which can then be integrated into a sturdy and stylish chair design. With your materials at hand – including a clothesline, hula hoop, and poster board – get ready to craft a beautiful macramé chair that will add a touch of handmade charm to your living space.
Making a Hammock Chair Out of Macrame
Transform your outdoor or indoor spaces into a cozy retreat with the DIY Macrame Hammock Chair. This charming project is perfect for beginners, as Fish & Bull provides a free pattern that guides you through each step. With just basic macrame cord and a chair frame, you can create this inviting nook that’s sure to become your favorite spot to relax. The instructions are clear and easy to follow, breaking down the process into manageable knots and patterns. Once completed, you’ll have a one-of-a-kind hammock chair that exudes handmade charm and invites you to unwind. This engaging DIY task is not only fun but also fulfilling, allowing you to add a personal touch to your living space.
DIY Hardwood Dowels Macrame Chair
Discover the art of macrame with Hometalk’s comprehensive guide on creating a one-of-a-kind hanging chair. This project combines traditional knotting techniques with modern design, yielding a functional piece of furniture that exudes bohemian charm. With step-by-step instructions and a list of essential materials, including hardwood dowels, macrame cord, and a few simple tools, you’ll be guided through each stage, from cutting the dowels to securing the final knots. As you craft this unique chair, you’ll not only add a stylish touch to your space but also create a cozy retreat perfect for indoor or outdoor relaxation. The guide is designed to ensure a smooth execution of the project, resulting in a sturdy and comfortable piece that will be a cherished focal point in your home.
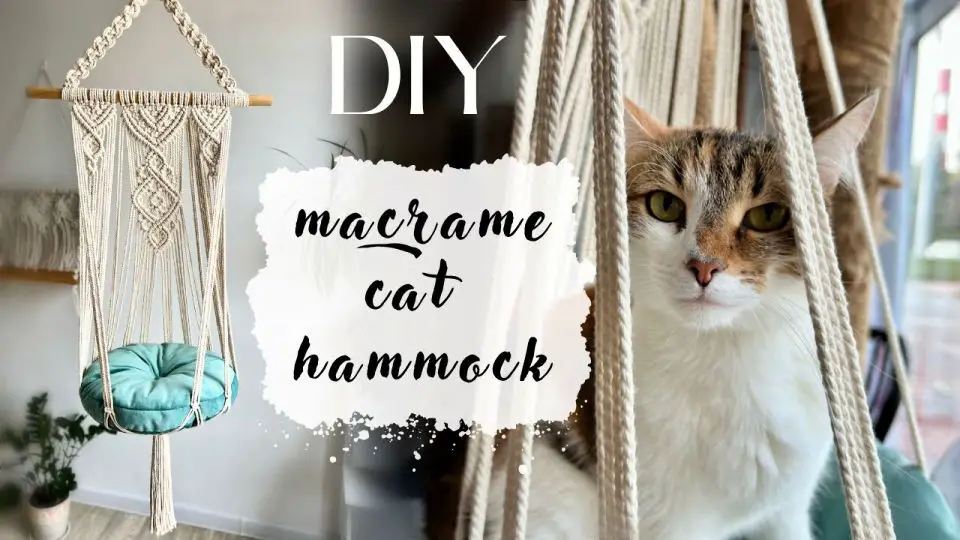
How to Make Your Own Macrame Cat Hammock
Transform your living space into a haven for both you and your feline companion with this simple yet charming macrame cat hammock tutorial from My French Twist. By following the easy-to-master square knot technique, even novice crafters can create a one-of-a-kind resting spot for their cat. To get started, gather a few basic materials: a wooden drapery rod, some cotton clothesline, and a plush throw pillow. With these elements in hand, you’ll be well on your way to crafting a unique and inviting piece of home decor that not only showcases your creativity but also provides a cozy retreat for your cat to snuggle up in. As the finished product takes shape, you can’t help but feel a sense of pride and accomplishment at having created something truly special – a true labor of love that brings joy to both you and your feline friend.
Handmade Macrame Hammock Tutorial
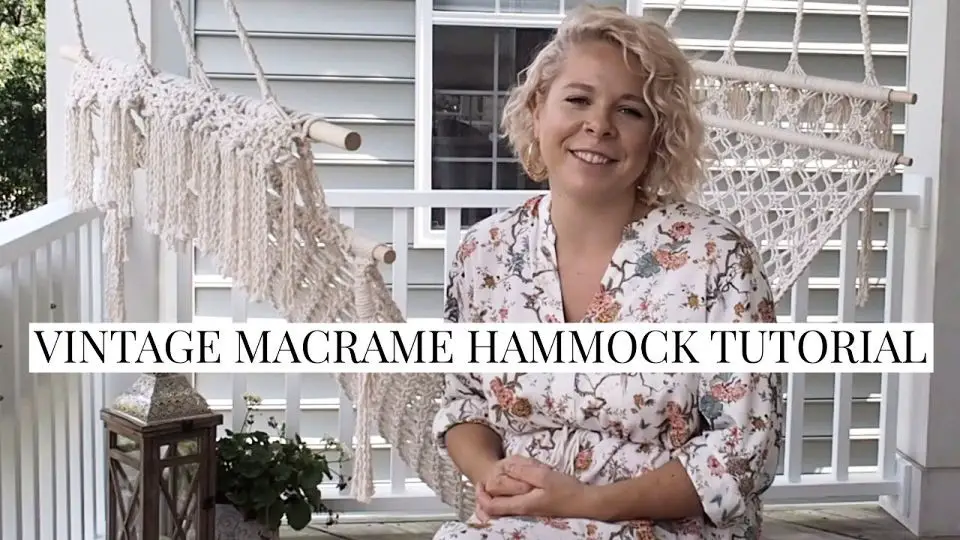
Discover the art of macrame with Megan Bell’s comprehensive YouTube tutorial on creating a vintage-inspired Macrame Hammock. This step-by-step guide delves into the intricacies of crafting a sturdy and unique hammock, featuring a classic design that adds a touch of nostalgia to any outdoor setting. With crystal-clear instructions and accompanying visual aids, Megan skillfully navigates the process from selecting the perfect cotton rope to expertly tying knots, making it an ideal project for DIY enthusiasts. As you work through each stage, you’ll be crafting a durable and cozy hammock that can withstand the elements, providing a sense of accomplishment and pride in your handmade creation.
Make Your Own Macrame Hammock
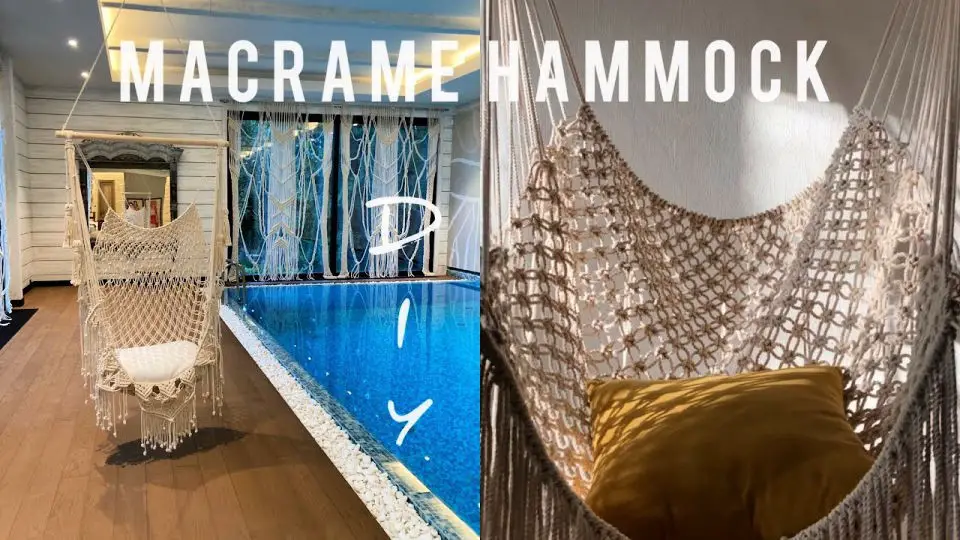
Immerse yourself in the creative process of crafting a unique macrame hammock chair, guided by YouTube’s comprehensive tutorial. This charming and comfortable hanging chair boasts dimensions of approximately 130/100 cm, requiring a wooden plank measuring 100 cm. To complete this project, you’ll need around 550-600 meters of polyester cord with a static core, measuring 5 mm in thickness. While the video uses a twisted cotton rope of 4.5 mm thickness for demonstration purposes, the tutorial’s step-by-step instructions cater to both macrame enthusiasts and DIY novices eager to add a personal touch to their living space. Gather your materials and embark on a relaxing creative journey that culminates in a cozy new addition to your home.
DIY Macrame Hanging Chair at Home
Transforming your living space with a dash of bohemian charm is now within reach. Creating a macrame hanging chair from scratch is an engaging DIY project that seamlessly blends style and coziness. With the aid of a comprehensive YouTube tutorial, you can skillfully craft a captivating swing using only a single ring as your foundation. The step-by-step video guide meticulously illustrates each knot and technique required to complete this intricate hammock chair. This visual-oriented approach empowers crafty individuals to successfully navigate the project, regardless of their experience level. To get started, use 5mm thick polyester or cotton cord and a sturdy metal profile ring as your canvas for weaving. Upon completion, this one-of-a-kind piece will serve as the perfect retreat for unwinding and a proud declaration of your craftsmanship.
Make a Macrame Cat Hammock
Step into the world of macrame crafting with our comprehensive YouTube tutorial, where we’ll guide you in creating a plush cat hammock that’s sure to become your feline friend’s go-to napping spot. Not only does this cozy abode provide a snug retreat for your pet, but it also adds a touch of eclectic charm to your home decor. By following along with our step-by-step instructions, even the most novice crafter can master the art of knotting a sturdy and visually appealing hammock using cotton twisted three-stand rope and a trusty wooden stick. Our tutorial is designed for crafters of all skill levels, prioritizing clarity and ease of understanding. With this comprehensive guide, you’ll be well on your way to creating a charming and functional addition to your living space that your cat will adore.
Conclusion:
As the final step in this DIY macrame journey, combining 10 hammock patterns with a DIY macrame chair creates a harmonious balance of artistic expression, practicality, and personal storytelling. Each meticulously tied knot not only shapes the cord into its intended form but also infuses your handmade piece with a tangible essence of your personality. The thrill of bringing an idea to life through manual dexterity is unparalleled, from choosing the ideal materials to meticulously following each step in crafting your swing or chair. We hope this comprehensive guide has sparked inspiration within you, expanded your craft repertoire, and perhaps even addressed common challenges along the way. With a handful of cords, a dedicated block of time, and an open mind, create something that not only sparks conversations but also serves as a peaceful retreat.
