Why Build a DIY Light Box?
Investing time in making a DIY light box is an opportunity to revolutionize the way you approach photography, product presentation, and even online selling. By creating your own lighting solution, you’ll enjoy several benefits that make it a worthwhile project.
One of the most significant advantages is cost-effectiveness. Professional lighting equipment can be pricey, but with a DIY light box, you can create high-quality lighting using affordable materials found at home or in your local hardware store. This not only saves you money but also allows for greater flexibility in your creative process.
Customization is another key aspect of building a DIY light box. Whether you need to accommodate larger items, specific lighting conditions, or unique shapes and sizes, you can design your project around your individual needs. This adaptability ensures that your light box meets the requirements of your photography or online selling endeavors.
Portability is also an essential consideration when it comes to DIY light boxes. By designing a foldable or easily disassembled structure, you’ll be able to transport your lighting solution with ease, making it perfect for photographers and sellers on the move.
Of course, the primary purpose of a light box is to diffuse light evenly, reducing harsh shadows and highlights. This results in clear, high-quality photos that are essential for showcasing products or capturing detailed shots. By building a DIY light box, you’ll be able to improve the overall quality of your photographs without breaking the bank.
The best part? Building a DIY light box is relatively easy and can be completed over a weekend. With the right guide, even those with limited experience in woodworking or crafting can successfully create their own lighting solution. In the end, investing time and effort into making a DIY light box will pay dividends in the quality of your work, whether you’re a professional photographer or an online seller looking to elevate your brand.
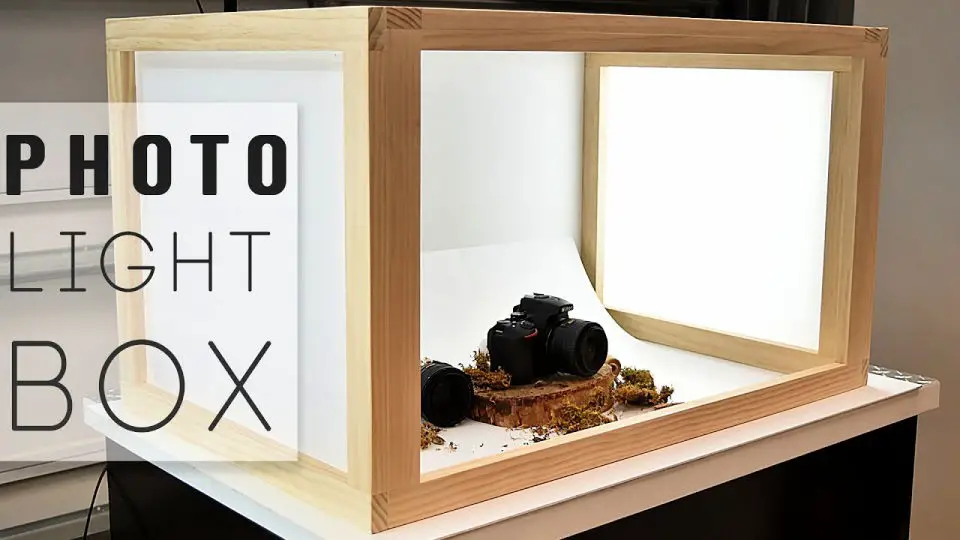
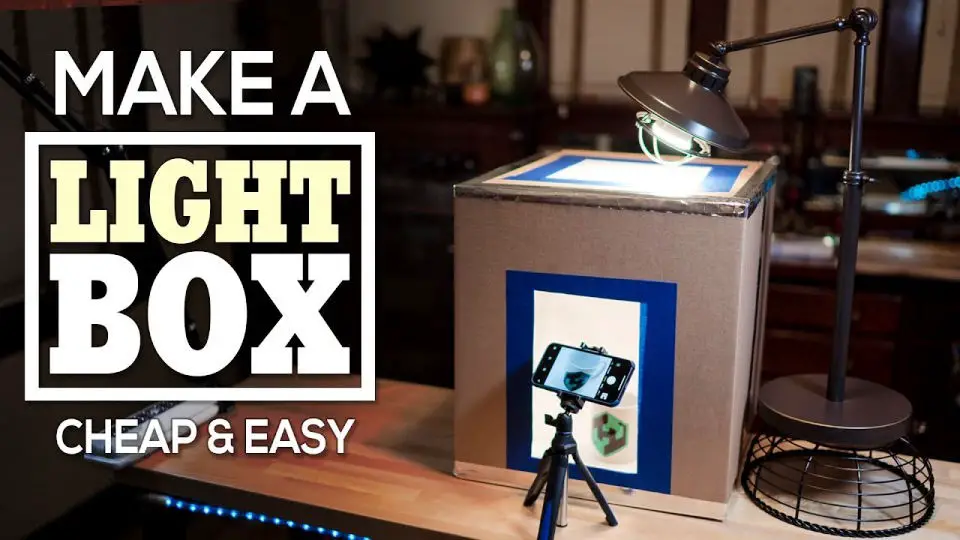
How To Build A Photo Light Box
Constructing a photo light box at home can be a game-changer for enhancing the quality of product photography, particularly when selling goods online. By investing less than $10 in basic materials and tools, you can create a functional DIY light box that provides even illumination, making your products appear professional and attractive to potential buyers. This straightforward guide will walk you through the process of building your own light box using common materials and simple techniques.
Materials You’ll Need:
To create a versatile and adjustable lighting system for your workspace, you’ll need the following components: a large box measuring 18x18x24 inches, a roll of diffusing fabric or sheer fabric that’s at least 1.5 yards long, and a sheet of bright white poster board without any creases. You’ll also require some basic crafting tools like scissors and a box cutter. Additionally, you’ll need some adhesive tape – duct tape or packing tape works well for this purpose. Finally, you’ll need 2-3 clip lamps that can be adjusted to meet your specific lighting needs, each equipped with a 100-watt fluorescent light bulb.
Step 1: Prepare the Box
Before you begin constructing your packaging solution, take a moment to ensure your box is properly assembled. Start by securing the base of the box with clear tape, ensuring it remains sturdy throughout the process. If your box isn’t pre-folded, simply fold the flaps inward and secure them in place using a length of adhesive tape, guaranteeing a tight seal.
Step 2: Mark and Cut the Box
To begin, place the diffusing fabric over the box and assess its size to determine the optimal dimensions for the cutouts. Mark the edges of the box beneath the fabric, ensuring there’s enough room to cover it entirely. Next, employ a box cutter to carefully remove the sides of the box, leaving the back and bottom intact. If desired, you can also excise a section from the top of the box to accommodate an additional light source.
Step 3: Prepare the Backdrop
Measure the interior dimensions of the box by laying a white poster board over it. Mark and cut the board to fit snugly within the box, eliminating any wrinkles or creases in the process. Secure one end of the poster board at the top of the box’s inner back with tape, allowing it to subtly curve towards the bottom for an infinite background effect that seamlessly wraps around the space.
Step 4: Attach the Diffusing Fabric
Secure the diffusing fabric over the cut-out sides and top (if applicable), ensuring a snug yet relaxed fit by stretching it tautly, but not so tight that it strains against the surrounding tape.
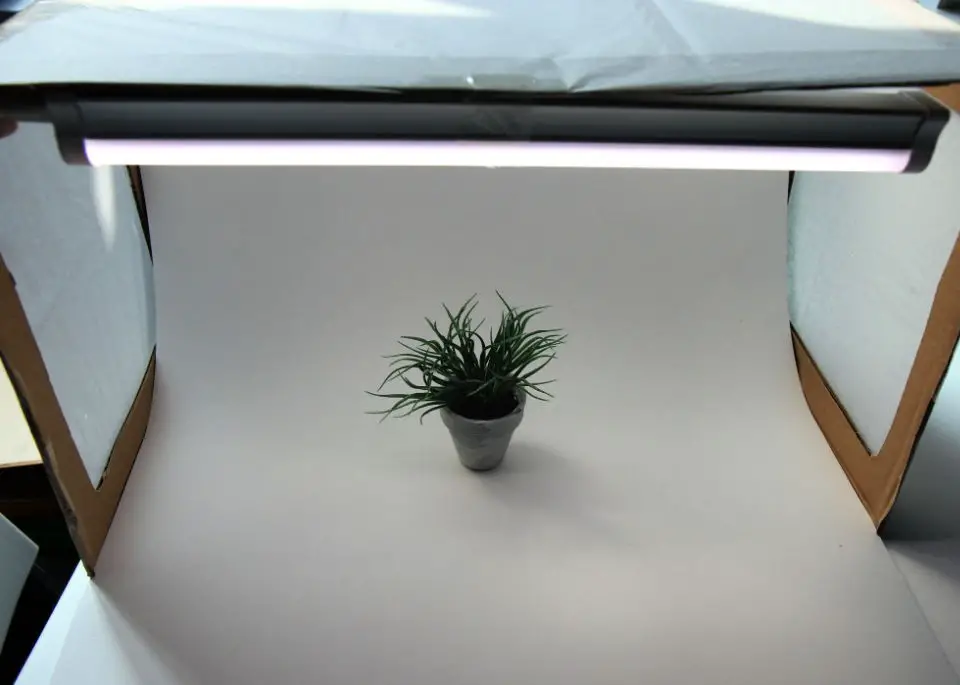
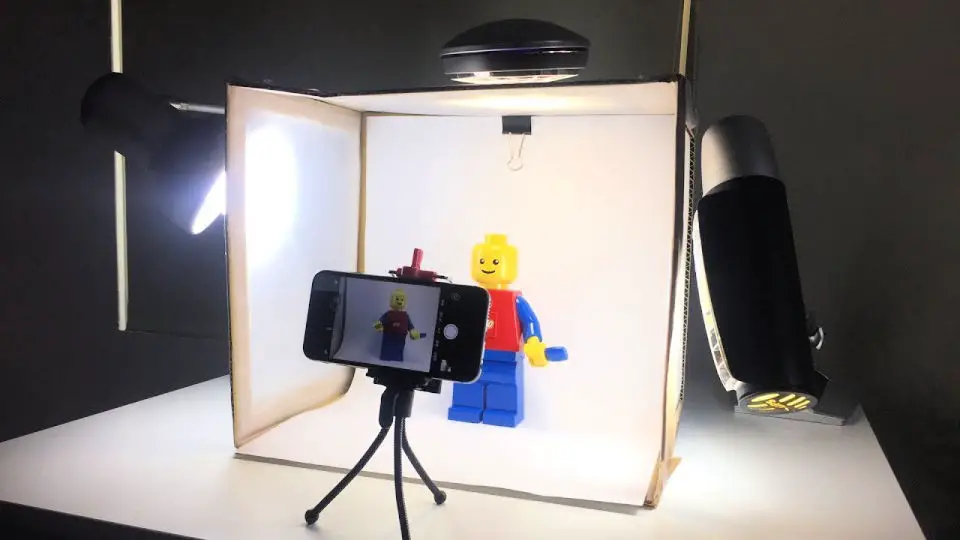
Step 5: Set Up the Lighting
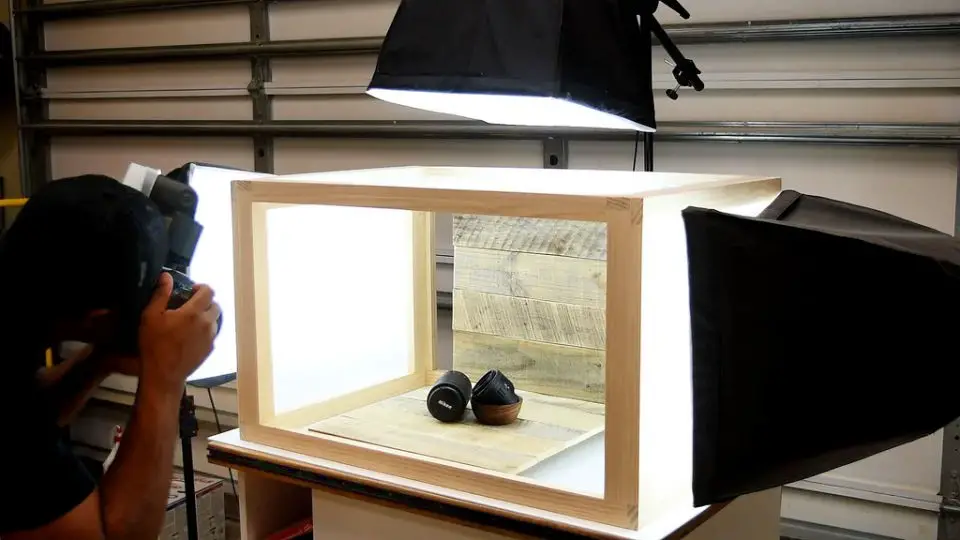
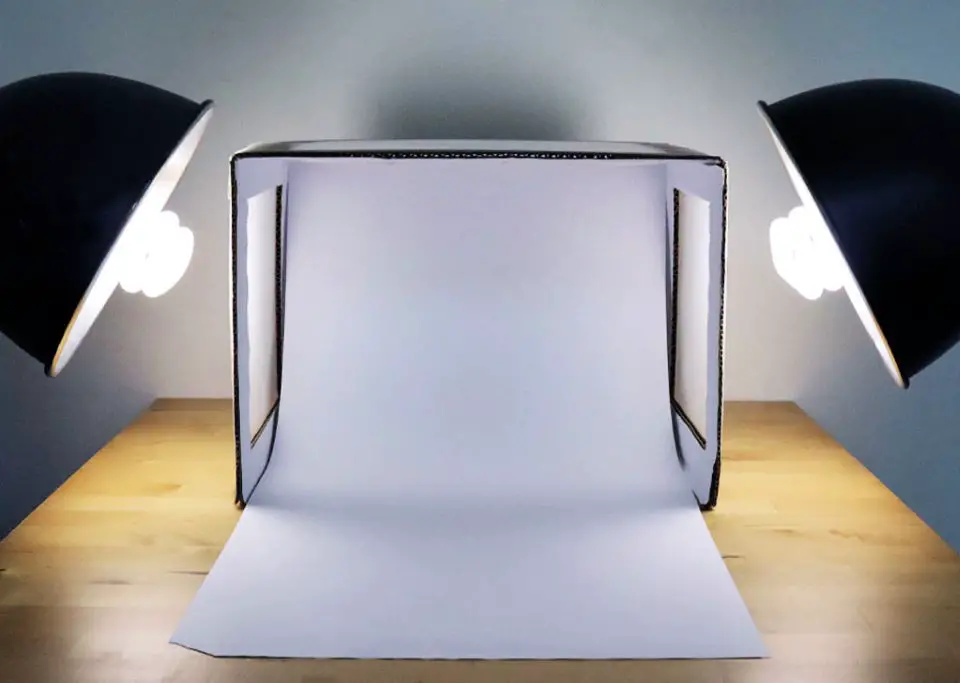
To achieve optimal illumination within your wooden storage box, consider strategically placing clip lamps along its sides. Each lamp should be equipped with fluorescent bulbs to provide an even and bright lighting effect. If you’ve opted for a top cut-out in your design, consider adding a third lamp positioned above it to further enhance the overall lighting scheme. Adjust each light source to ensure that the interior of the box is evenly illuminated, creating a well-lit space that makes it easy to locate and retrieve stored items.
Step 6: Product Photography Tips
To ensure optimal results, it’s crucial to maintain a well-designed light box. This involves keeping the side flaps open to prevent any unwanted light leakages that could lead to lens flare. Additionally, dressing in solid-colored, long-sleeved clothing can significantly minimize reflections, particularly when photographing products with reflective surfaces. By taking these precautions, you’ll be able to capture professional-quality product photos that can ultimately drive up online sales.
Video Tutorial
If you’re looking for a detailed walkthrough on how to construct a photo light box without breaking the bank, I recommend checking out our YouTube video tutorial on ‘How To Build A Photo Light Box For Less Than $10’. The accompanying visual guide serves as an excellent companion piece to the written instructions, offering step-by-step insight into the construction process. By following this comprehensive guide, you’ll be able to create a fully functional photo light box with ease and affordability. Get ready to capture stunning photographs!
DIY Light Box FAQs
Transforming your photography with a homemade light box requires careful planning and execution. To kick-start your creative journey, here’s a comprehensive overview of the most frequently posed queries that’ll guide you in crafting a masterpiece.
What is a DIY light box used for?
In the world of photography, a DIY light box is a game-changer for capturing stunning, professionally-lit images. Its primary function is to eliminate harsh shadows and glare, making it an indispensable tool for product photography, as well as a go-to solution for photographers, artists, and online sellers looking to elevate their visual content.
What materials do I need to make a DIY light box?
When it comes to crafting your own DIY photo studio, you’ll typically need a few basic materials. These may include a sturdy cardboard box or a more customizable frame made from PVC pipes. To soften the light and create a subtle ambiance, you can use white fabric or tissue paper to diffuse the illumination. A piece of poster board can serve as a simple backdrop for your interior design. To keep everything in place, you’ll need some adhesive tape or glue. Finally, a reliable lighting source such as lamps or LED strips will help illuminate your subject and create the desired mood.
How do I size my DIY light box?
When designing your DIY light box, it’s essential to consider the scale of the objects you intend to capture. A box measuring approximately 24 inches square should suffice for smaller to medium-sized products. However, if you’re working with larger items, think about building a frame or enclosure that can accommodate their size. This will ensure optimal results and minimize any potential distortion.
Can I make a portable DIY light box?
Innovative DIY light box designs often incorporate portability as a key feature. By employing lightweight materials and clever design elements, such as foldable or rollable constructions, it’s possible to create a compact and easy-to-transport lighting solution that can be taken on the go.
How can I improve the lighting in my DIY light box?
To enhance the ambiance and functionality of your DIY light box, consider implementing a multi-faceted approach that incorporates various lighting strategies. This can involve employing a combination of light sources to ensure an even distribution of illumination, carefully adjusting their positions to minimize shadows and maximize brightness. Additionally, you may want to explore different types of bulbs, such as LED or fluorescent options, to find the optimal color temperature for your specific needs. Furthermore, incorporating reflective materials like aluminum foil can help bounce light around the space, creating a more dynamic and well-lit environment.
Can I use a DIY light box for photographing large items?
To create a larger DIY light box, adapt the same fundamental principles used for smaller projects. One approach is to construct a frame using PVC pipes, providing ample space and illumination for larger items. To achieve even coverage, drape diffuse fabric over the frame, ensuring it accommodates the size of your item while delivering consistent lighting.
How do I maintain a DIY light box?
To keep your DIY light box in top condition, it’s essential to follow these simple maintenance steps. Start by regularly cleaning the fabric or paper diffusers to remove any dust that may have accumulated over time. This will help ensure optimal lighting performance and prevent the buildup of dirt and debris. Additionally, be sure to inspect the materials for any signs of wear and tear, replacing any torn or damaged sections as needed. Furthermore, check that all lights are functioning properly and replace bulbs when necessary to maintain consistent illumination. Finally, store your DIY light box in a dry, safe location when not in use to prevent damage from moisture, extreme temperatures, or other environmental factors.
Are there alternatives to making a DIY light box?
While purchasing a ready-made light box is always an option, the DIY approach offers unparalleled customization and cost-effectiveness. By crafting your own light box, you can tailor it to your unique needs and specifications, ultimately yielding a more effective tool for elevating your photography game.
25 DIY Light Box Ideas (How to Make a Photo Light Box)
For photography enthusiasts, creating a unique and customized light box can be a game-changer. And the best part is that you don’t need any professional expertise or expensive equipment to do so. With 25 DIY light box ideas to draw inspiration from, you can learn how to make a photo light box at home and elevate your photography skills to the next level.
How to Make a Photo Light Box
Transform your photography skills by creating a DIY photo light box, an ideal project for both amateur and professional photographers alike. By crafting this simple yet effective tool, you can significantly enhance the quality of your photos, highlighting subtle details and eliminating harsh shadows that often mar the image. For a comprehensive guide on how to make one without incurring significant expenses, head over to Instructables. This meticulously detailed tutorial ensures a seamless crafting process, making it accessible and engaging for anyone with an interest in photography. Start capturing breathtaking, well-lit images today!
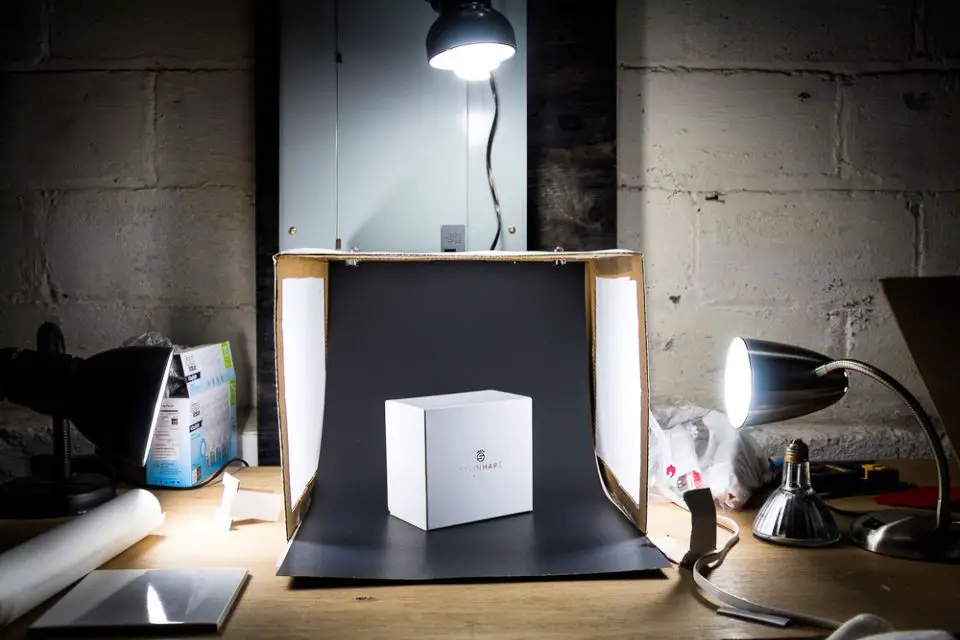
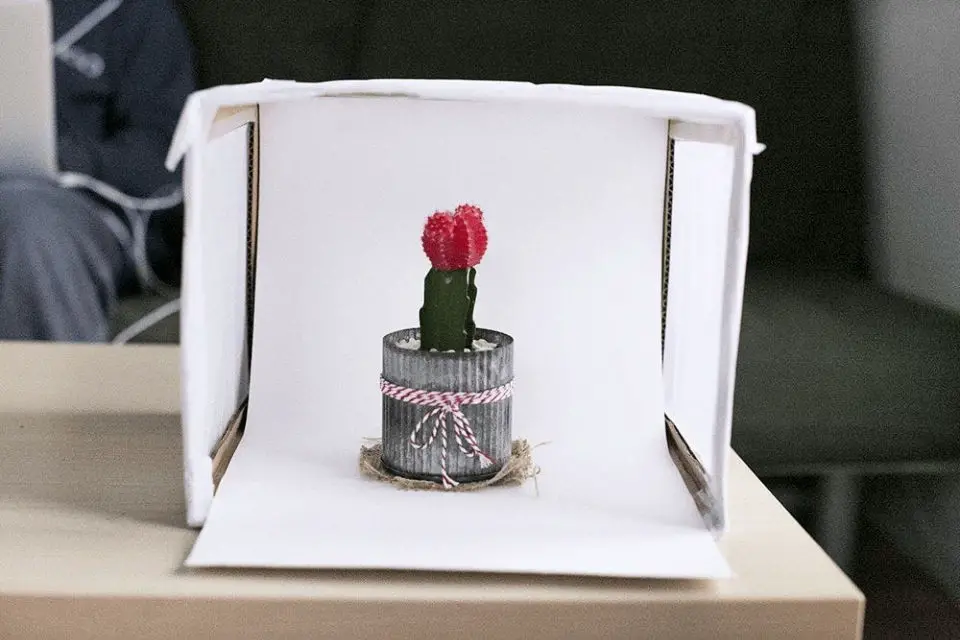
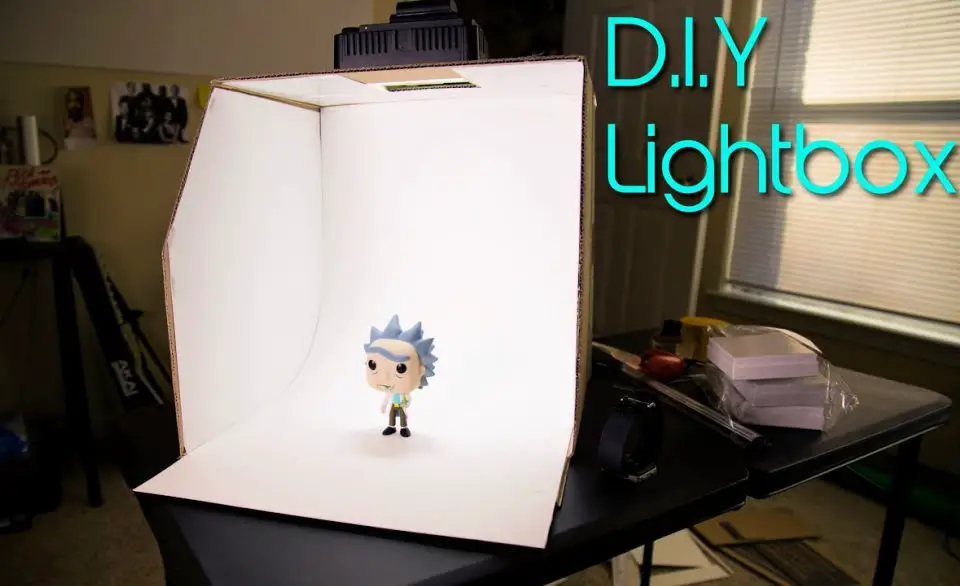
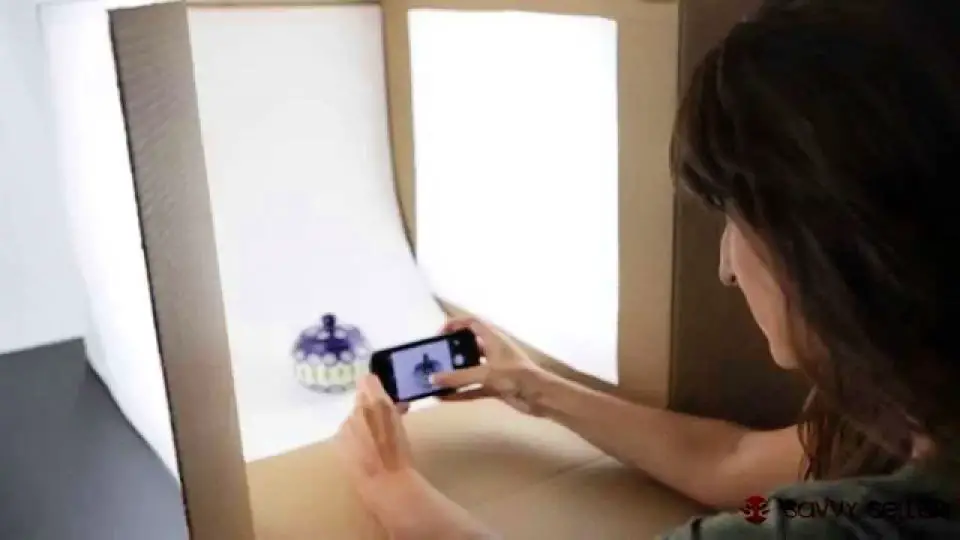
Make Your Own Light Box With Cardboard
Take your photography skills to the next level with a cost-effective DIY portable photo studio that can be built using basic materials like cardboard and white fabric. This clever light box is perfect for enhancing product shots for blogs, Instagram, or online stores, without breaking the bank. With only a few simple items required, this budget-friendly project can be assembled quickly and easily. Whether you’re looking to upgrade your photography skills or want to improve your online presence, this DIY studio is an ideal solution.
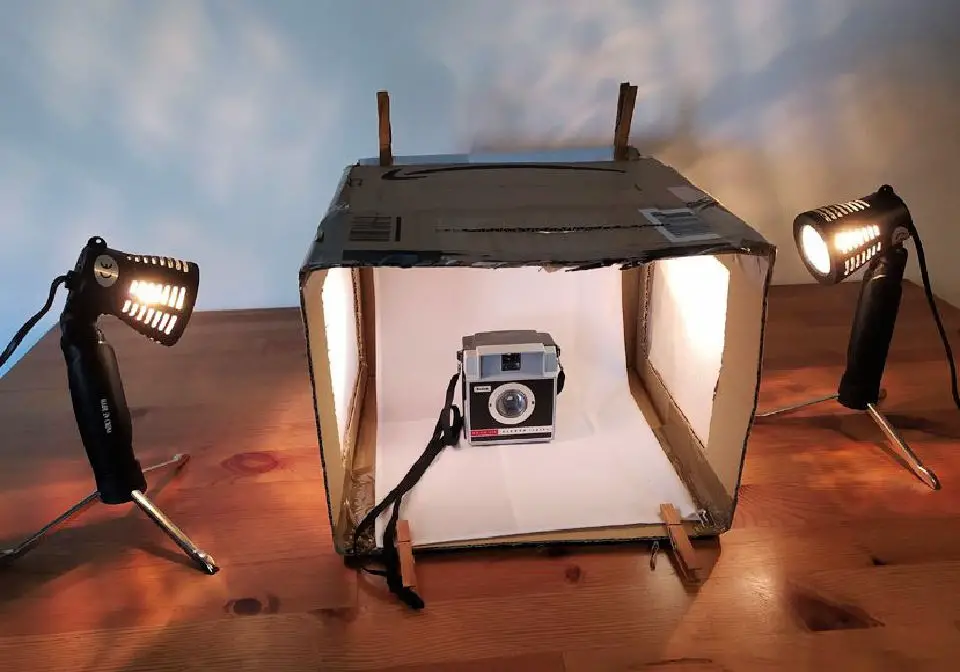
DIY Light Box in 6 Easy Steps
Crafting a professional-grade DIY light box has never been easier with FixThePhoto’s step-by-step guide. By leveraging readily available materials such as cardboard boxes, fabric, and household lamps, photographers can create an affordable yet effective lighting solution that rivals studio-quality setups. This straightforward approach makes it accessible to even the most novice of photographers, allowing them to achieve stunning product photography results at home.
How to Make a Lightbox at Home
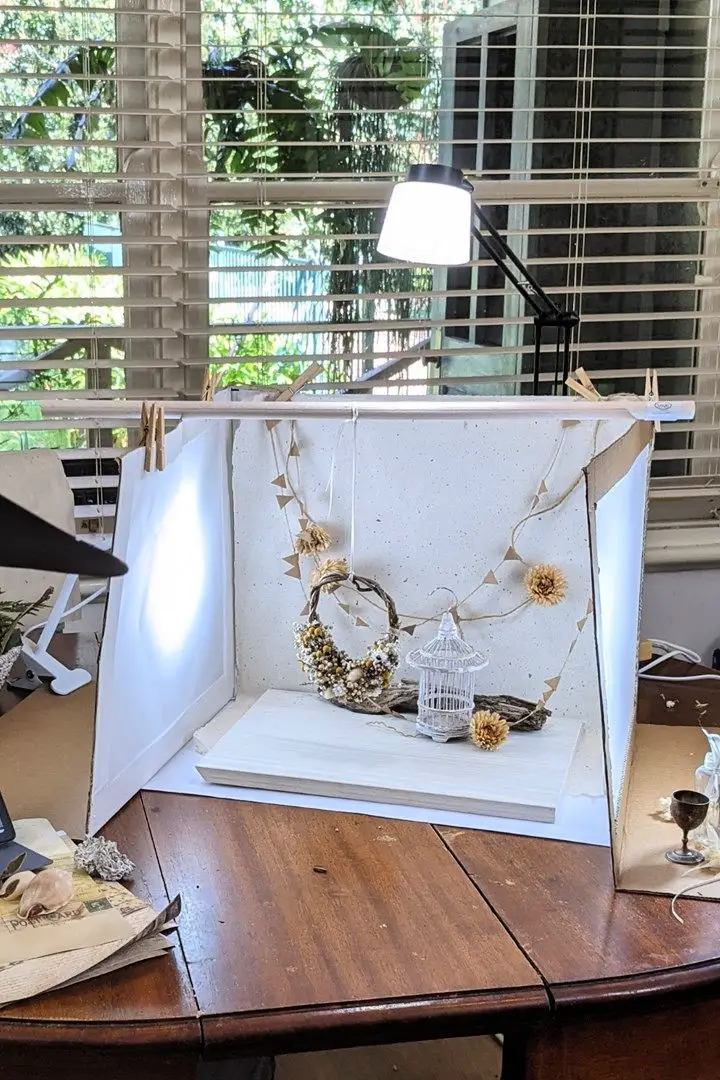
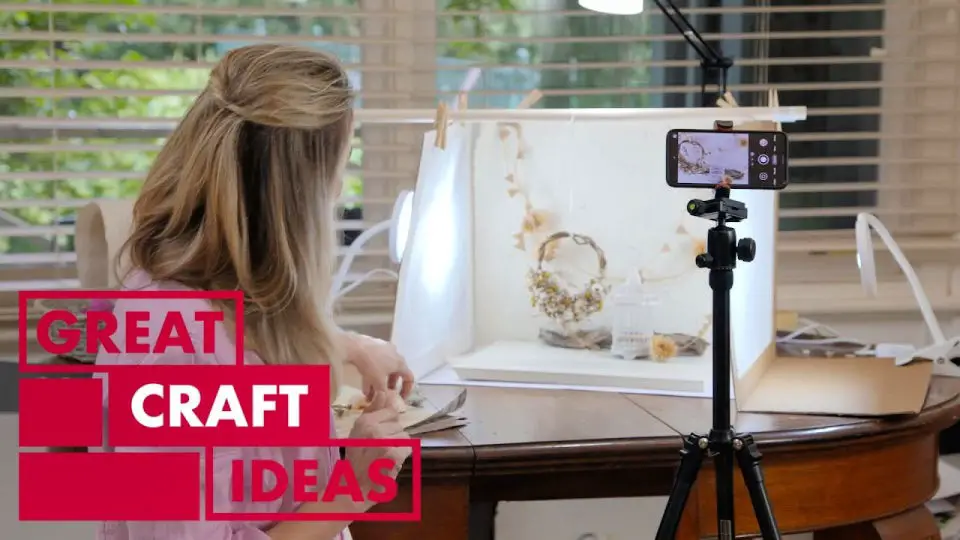
Elevate your photography skills without breaking the bank by transforming your creative vision into breathtaking images with a DIY lightbox and hanging window art. Whether you’re an artist, online seller, or simply someone who wants to showcase their treasured possessions, this innovative mini studio allows you to capture professional-quality photographs from the comfort of your own home. With just a few simple materials, including a cardboard box, tracing paper, and your smartphone, you can unlock the secret to perfect lighting and take your photography game to new heights.
Making a Lightbox for Expert Photos

Transforming your photography just got a whole lot easier with a homemade DIY lightbox, courtesy of Jennifer Maker’s comprehensive tutorial. The beauty of this project lies in its affordability and simplicity. With just $9 worth of materials from the local dollar store, you can create professional-quality photos that boast soft shadows and bright, diffused light. Whether you’re looking to improve your product photography or unleash your creative side, this DIY lightbox is the perfect solution. By following the straightforward, step-by-step guide, complete with a detailed list of materials and measurements, you’ll be able to elevate your photography game in no time. Start creating stunning images today by learning how to make a DIY Lightbox.
Easy DIY Photo Light Box
Transform your product photography with a DIY photo lightbox that rivals professional studios! With our step-by-step guide, you’ll learn how to craft a custom lightbox that evenly diffuses light, minimizing shadows and showcasing your products in the best possible way.
This project is perfect for photography enthusiasts looking to elevate their game without breaking the bank. From selecting the right materials to assembling the lightbox, we’ll walk you through every step of the process.
Whether you’re capturing jewelry, food, or other small products, a homemade lightbox is an affordable and rewarding venture that’s sure to impress. So why wait? Dive into our comprehensive guide and start taking your product photography to new heights!
Inexpensive DIY Light Box From the Scratch
Elevate your product photography game without breaking the bank – a clever DIY light box is just what you need. By repurposing common household items like cardboard boxes, tapes, and paper, you can create a surprisingly effective photography tool that yields studio-quality results. The secret lies in strategically placing diffusers and light sources to achieve a seamless white background. If you’re intrigued by this cost-conscious approach, follow the step-by-step guide on Canon Asia to learn how to craft your own light box and unlock professional-looking product photos.
Homemade Light Box
Transform your online business with professional-looking product photographs using our easy-to-follow DIY light box guide. The secret to capturing high-quality images lies in constructing a simple yet effective homemade lighting setup. Not only is this project budget-friendly, but it’s also quick and effortless to assemble. By utilizing everyday materials like cardboard boxes, tissue paper, and poster board, you’ll be able to create a versatile photo studio right from the comfort of your own home. Bid farewell to unflattering shadows and hello to stunningly lit product visuals that will captivate your audience. Start capturing captivating product photos today by exploring Jimdo for more valuable tips and step-by-step instructions.
Handmade Photography Light Tent
Transform your photography with a simple, DIY foldable light tent, ideal for capturing high-quality product shots and intricate close-ups. This straightforward guide utilizes everyday household items to create a consistent background and soft lighting solution that folds flat for easy storage. Whether you’re a beginner or looking to upgrade your skills, constructing your own light tent is an accessible way to take your photography to the next level, ensuring every shot is professionally lit and visually stunning.
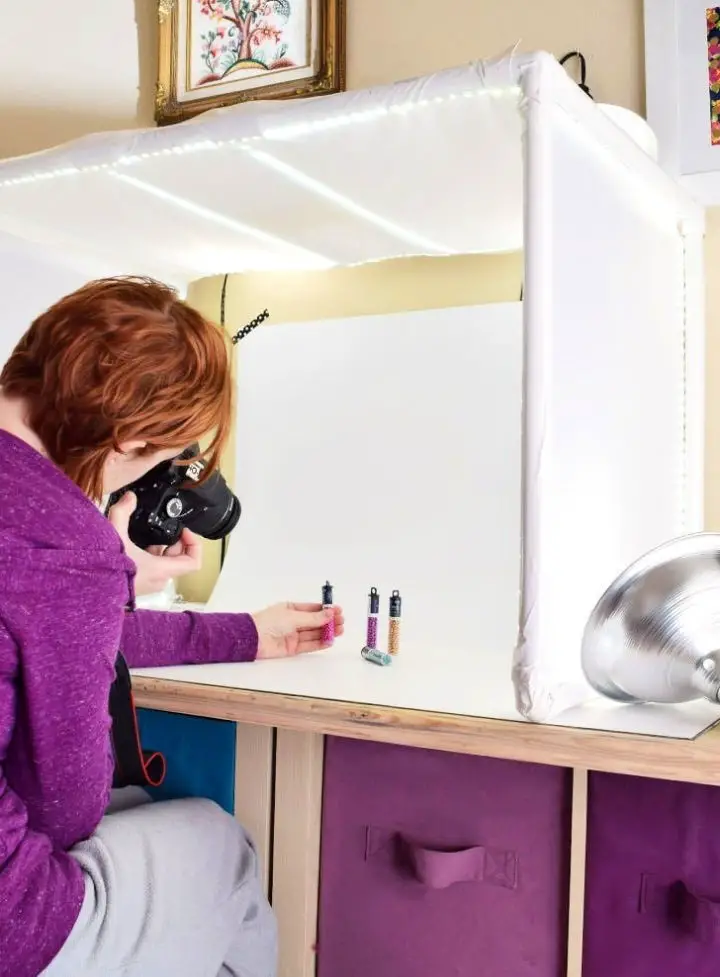
Making a Folding Light Box
Transform your photography experience with a clever and space-saving DIY Folding Light Box, perfect for creatives and bloggers with limited room to work. This innovative project from 4 You With Love presents a cost-effective, foldable solution that effectively diffuses light, eliminating harsh glare and yielding softer, more radiant images. By designing the light box to conveniently fold away when not in use, this tutorial addresses the common challenges of compact workspaces and storage constraints, making it an indispensable resource for photographers on a budget.
How to Make a Photo Light Box
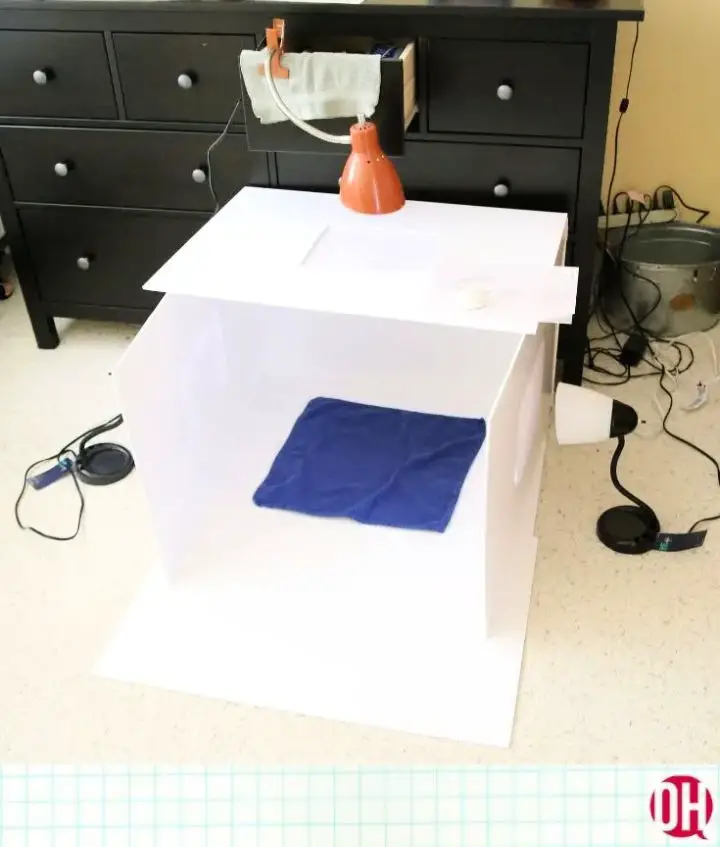
Transform your photography experience with a portable photo light box that won’t break the bank. For just under $20, you can create a professional-grade lighting solution perfect for product photography, food shots, or any scenario where natural light falls short. With this DIY project, you’ll enjoy consistent and soft lighting that brings out the best in your images. Say goodbye to unpredictable lighting and hello to clarity and precision in every shot. The best part? This guide is quick to assemble, making it a great option for photographers who crave control over their lighting without sacrificing time or budget. Start building today with this step-by-step guide at ohmrstucker.com and take your photography game to the next level.
Simple DIY Lightbox
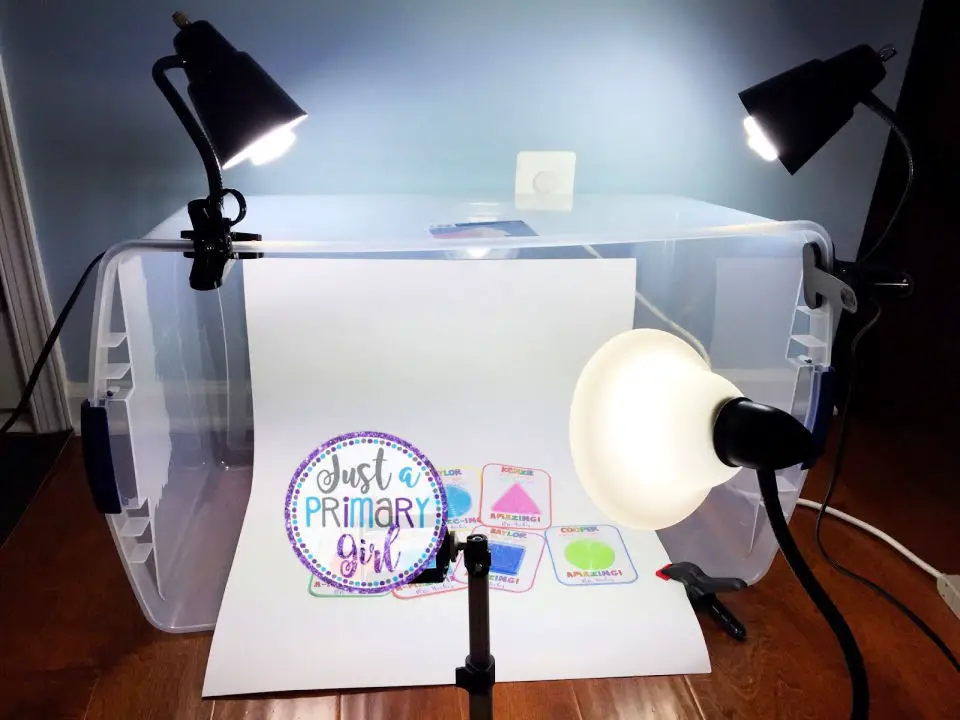
Transform your photography with a budget-friendly DIY lightbox! By following a straightforward guide on Just a Primary Girl, you can create a professional-looking lightbox using everyday items from home or a dollar store, without breaking the bank. The tutorial is surprisingly simple and only requires foam boards, parchment paper, and a few basic materials. Perfect for elevating the quality of your photos, this DIY lightbox is a must-try for anyone seeking an affordable solution to produce stunning visual content that rivals professional studios.
Build a Pvc Light Tent
Elevate your photography skills without breaking the bank by crafting a DIY PVC light tent that’s both customizable and budget-friendly. Whether you’re an online entrepreneur looking to showcase handmade items or a budding YouTuber seeking to upgrade their video quality, mastering lighting can make all the difference in producing stunning visuals. This comprehensive guide will walk you through the process of building a versatile light tent, sharing valuable insights on selecting the ideal PVC pipe and optimizing LED lighting to achieve professional-grade results from the comfort of your own desk.
How to Make a Light Box
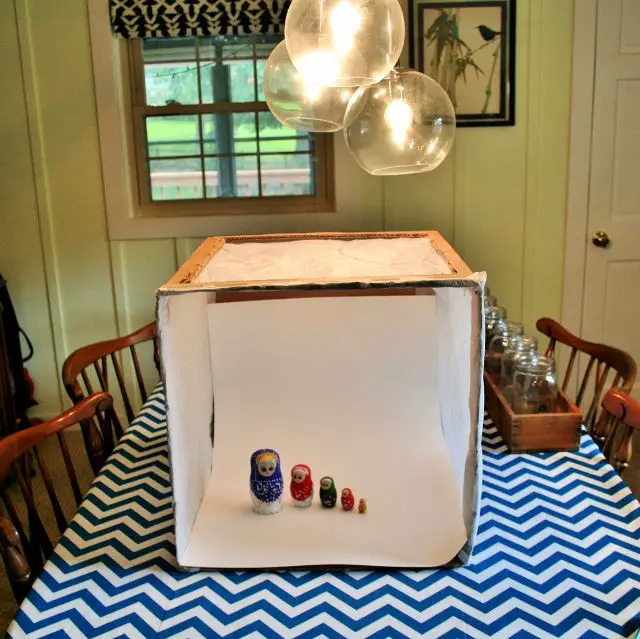
Elevate your photography game without breaking the bank by crafting a homemade DIY light box, inspired by Rhapsody in Rooms’ effortless tutorial. This ingenious project demands only basic materials like a cardboard box, white tissue paper, poster board, a box cutter, and some adhesive. To get started, modify the box to create a seamless enclosure, then add a layer of light diffusion using tissue paper for a soft, even glow. Finally, set up your DIY light box in a well-lit area, ensuring ample lighting for distraction-free shots of small objects. Perfect for photography enthusiasts on a budget looking to capture stunning images without compromising quality!
DIY Light Box on Budget
Transform your photography with a DIY light box, courtesy of Oh She Glows’ innovative guide. By combining basic materials such as cardboard, duct tape, and white fabric, you can create a studio setup that mimics natural light, producing crisp, shadow-free images. This accessible tutorial is perfect for photographers looking to elevate their product photography or capture playful moments with pets like cat portraits. With this straightforward guide, you’ll be able to enhance your shots without incurring significant costs.
Make Your Own Photo Light Box
Take your photography skills to new heights without overspending! Create a DIY Photo Light Box using readily available materials like cardboard boxes, tissue paper, and white construction paper. This budget-friendly solution can significantly enhance the quality of your photos, particularly in low-light conditions.
To get started, simply follow a series of easy steps from cutting the box to attaching the paper. With this DIY project, you’ll be able to achieve professional-looking results without breaking the bank. Whether you’re a blogger, online seller, or photography enthusiast, this solution is perfect for anyone looking to elevate their photo game.
For a comprehensive guide on how to construct your own DIY Photo Light Box, head over to Print For Fun Blog. Let your creativity shine and start capturing stunning images with ease!
Easy Photo Light Box Tutorial
Unlock the secret to capturing professionally lit images with minimal effort by crafting a DIY light box using this straightforward guide from DIY Creators. This game-changing tool is perfect for product photographers, food enthusiasts, or anyone looking to elevate their visual storytelling. With a light box, you’ll be able to achieve evenly lit shots that make your subjects stand out. Whether you’re a seasoned photographer or a DIY enthusiast, this project is designed to help you showcase your work in the best possible light.
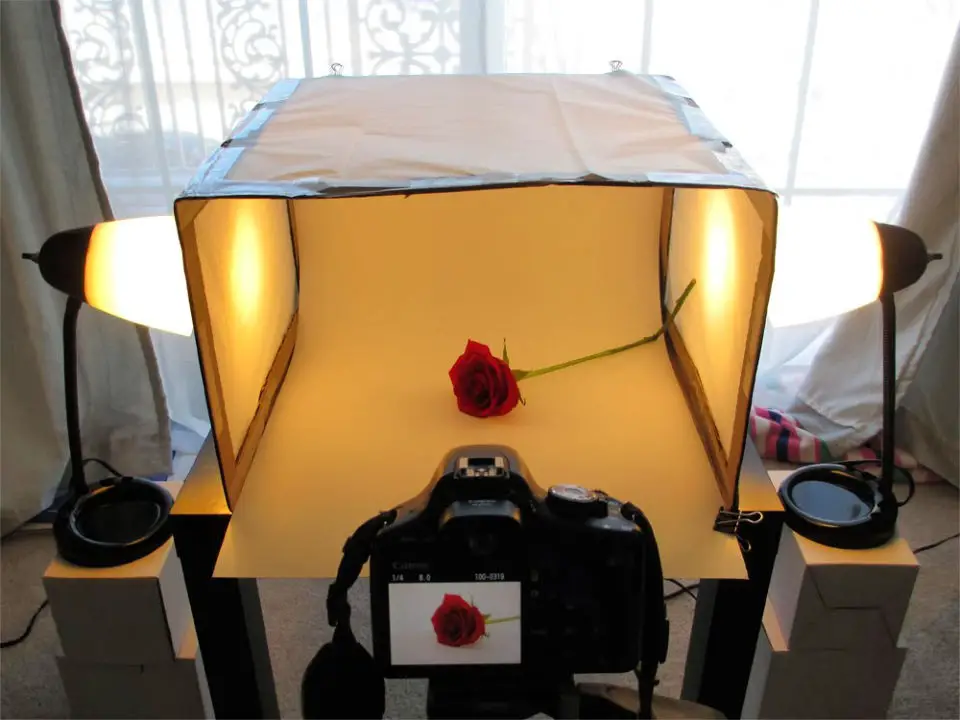
Lightbox for Product Photography for Under $20
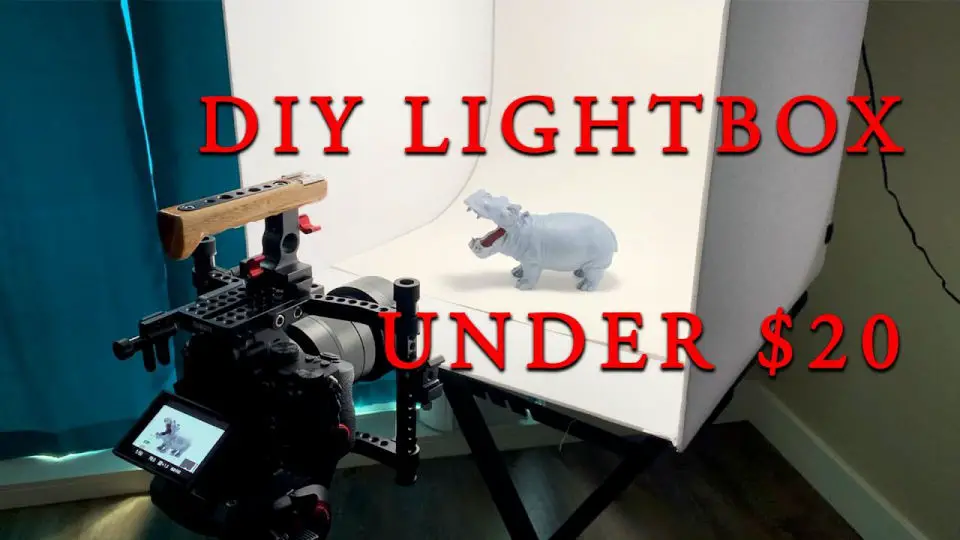
Transform your product photography with a budget-friendly DIY lightbox, all within the realm of $20. This innovative solution is crafted by Tim Townley, providing a portable 20×20 inch lightbox that can elevate your photos to new heights. You’ll only need basic supplies, many of which you may already have at home or readily available at a dollar store. Not only does this DIY project offer a cost-effective approach but also boasts the added convenience of being foldable, making it an ideal companion for capturing professional-looking product images on-the-go. For a comprehensive guide, refer to Tim’s video tutorial, specifically designed for photographers and videographers seeking practical solutions to produce captivating product visuals.
Make a Lightbox Under $10 Dollars
Want to boost your photography skills without overspending? You can create a DIY lightbox for under $10 in under an hour, perfect for beginners looking to take their photography game to the next level. With minimal investment, you’ll be able to enhance your photos and produce stunning results. To follow along with ease, check out the step-by-step video guide here.
DIY Lightbox – Step by Step Instructions
Transform your photography by creating a DIY lightbox that delivers professional-grade results without breaking the bank. With basic materials, you can craft a device that produces beautifully diffused lighting, perfect for showcasing your work with crisp clarity. Whether you’re an online seller, artist, or hobbyist looking to elevate your styling and photography skills, this easy-to-follow guide will walk you through the process of building a lightbox from scratch. Start capturing stunning shots today, using just a cardboard box as the foundation for your creative masterpiece.
Photo Light Box Making Ideas
Take your photography to the next level by crafting a professional-looking light box with minimal investment. This step-by-step guide shows you how to create an effective light box using everyday items, ideal for enhancing online listings or snapping stunning food images. You’ll need a simple box, some white poster board, aluminum foil, and tape – nothing too extraordinary! Once you’ve gathered the essentials, follow our straightforward instructions to set up a seamless backdrop and optimal lighting using basic LED lights or a flashlight. With this DIY light box project, you can say goodbye to mediocre photos and hello to stunning visuals that make your audience take notice.
DIY Photo Light Box for Under $10
Take your product photography to new heights without overspending. With a DIY photo light box that can be built for under $10, you’ll be able to create professional-looking results without breaking the bank. This comprehensive guide will walk you through every step of the process, from gathering essential materials like a cardboard box and diffusing fabric to assembling the final product. By following these simple instructions, you’ll be able to achieve perfect lighting for your online items, showcasing them in the best possible way. No prior experience or advanced skills are required – just a keen eye for detail and a passion for photography. And the best part? You can start capturing stunning images today by clicking here to access the full tutorial.
Portable Folding Lightbox Design
Transform your photography game without breaking the bank by creating your own DIY Portable Folding Lightbox. This innovative tool is perfect for professional results on a budget. With a step-by-step video guide from the Corel Discovery Center, you’ll be able to craft this ingenious device with ease. Whether you’re looking to enhance your photo quality or simply want to try something new, this project is an excellent starting point. For a comprehensive materials list and to get started, visit the project page.
Easy DIY Jewelry Lightbox
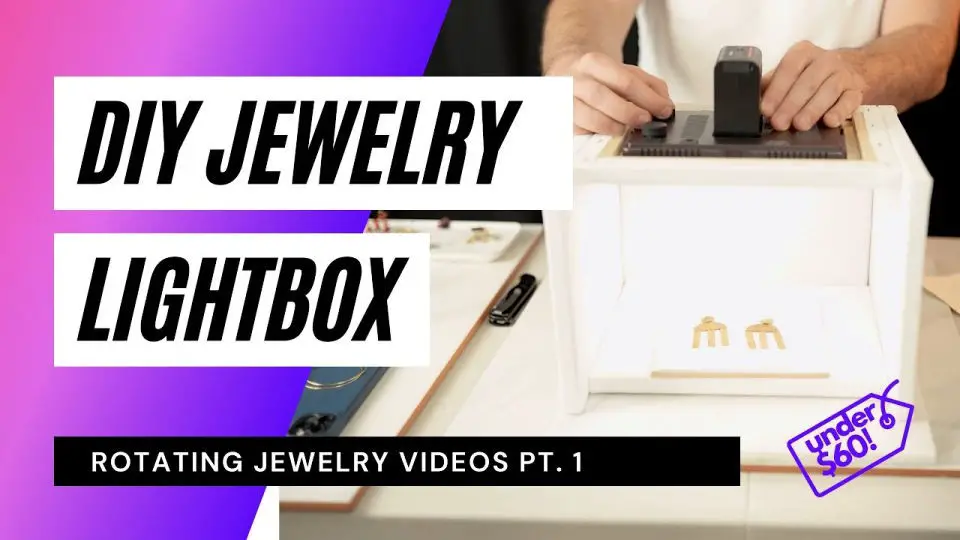
Transform your DIY skills by crafting a bespoke jewelry lightbox that yields professional-grade photos and videos of your handmade pieces. By following Robbie Haddad’s straightforward guide, you’ll unlock the secrets to building a high-quality lightbox with adjustable lighting options for under $40 – a fraction of the cost of commercial alternatives. With this tutorial, you’ll gain the skills to elevate your product photography without sacrificing quality or breaking the bank, making it an ideal resource for anyone seeking to take their DIY endeavors to the next level.
How to Make a Photography Light Box
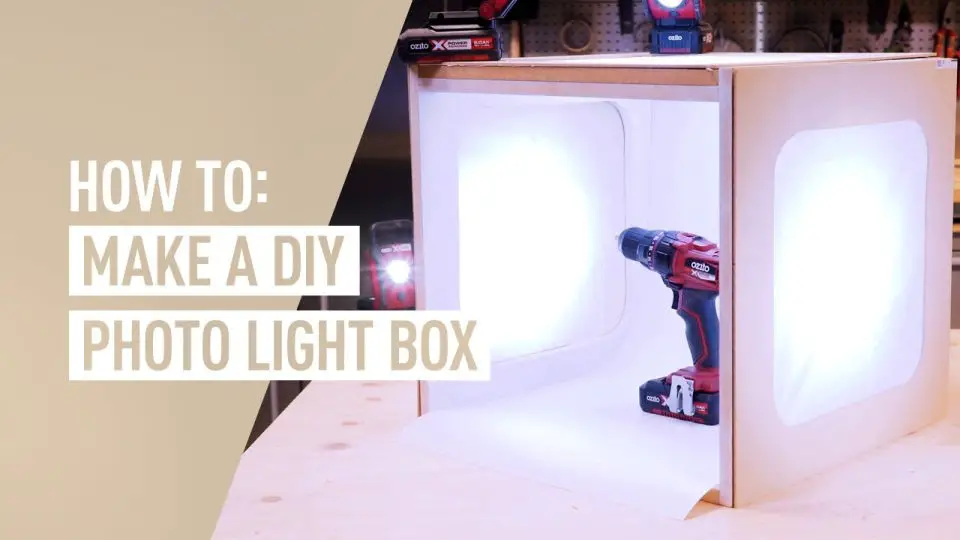
Transform your photography experience with this uncomplicated DIY guide to building a versatile light box. Perfect for product photographers or online sellers, this tutorial provides a straightforward approach to creating a professional-grade light box using everyday tools and materials. Ditch the complexity and hello stunning, well-lit images with ease! For a detailed walkthrough, visit Ozito DIY’s video tutorial. Take your photographic journey to new heights today!
Conclusion:
By now, you’re well-equipped to embark on a creative and budget-friendly adventure in crafting your own DIY light box. As we’ve seen, the process involves selecting the right materials and following a straightforward guide to build a photo light box. This newfound expertise will serve as a solid foundation for enhancing your product photography or artistic pursuits. Whether you’re aiming to capture detailed images for an online store or exploring new creative avenues, a DIY light box is an invaluable tool that can significantly elevate the quality of your photographs. Now, seize the opportunity to take your photography skills to the next level and bring your imaginative ideas to life with these 25 innovative DIY light box ideas.
