Unleash your creative expression by crafting your own DIY headbands. This versatile accessory allows you to add a personal touch to any outfit, transforming it from ordinary to extraordinary. With over 25 innovative ideas at your fingertips, you’ll be empowered to create stylish accessories that reflect your unique style and flair, regardless of your level of crafting experience.
How to Make a Headband – Step by Step Guide
Transform scraps of fabric into a chic and environmentally conscious headband that can be worn as is or used as a thoughtful gift for friends and loved ones. This beginner-friendly guide provides a step-by-step process to create a stylish headband from the comfort of your own home, perfect for upcycling old fabrics and reducing waste.
Supplies Needed
When it comes to upcycling an old t-shirt, you’ll need a few essential tools to get started. A good quality scrap fabric – cotton is a popular choice, but any soft, non-stretch material will do – is crucial for creating a sturdy and long-lasting end product. You’ll also require a measuring tape to accurately measure out your fabric, ensuring a perfect fit every time. Of course, no sewing project would be complete without a trusty pair of scissors, whether you’re using them to cut through fabric or thread. If you’re looking to streamline the process, consider investing in a sewing machine, but for those who prefer a more traditional approach, a needle and thread will suffice. Finally, don’t forget to have some pins on hand to secure your fabric in place as you work, and an iron with ironing board for making any necessary adjustments or pressing seams.
Step by Step Instructions
Step 1: Measure and Cut the Fabric
To get started, take out your trusty measuring tape and wrap it around your head at the spot where you’d like the headband to sit comfortably. Make sure to note down this measurement. Next, add an extra inch to account for any seam allowances or wiggle room when stitching together.
With your measured circumference in hand, cut a long, thin strip of fabric that matches this length plus one inch. For a standard headband, the width should be around 6 inches. Since you’ll be folding this fabric in half later on, the final width will actually end up being roughly 3 inches.
Step 2: Folding and Ironing
To create a crisp fold in your fabric, begin by folding the strip lengthwise, ensuring the right sides are aligned and facing each other. As you fold, take care to maintain a precise 90-degree angle, as this will help you achieve a smooth and even seam when sewing. Next, employ the use of an iron to press down on the folded edge, smoothing out any wrinkles or creases that may have formed during the folding process. This step is crucial in ensuring your finished headband boasts a clean and professional finish.
Step 3: Sewing the Headband
To begin the process of constructing a sewn item, it’s essential to first pin the open edges together, keeping them secure while you sew. Leave a small gap of approximately two inches unsewn – this will serve as an entry point for turning the fabric right-side out later on. Once pinned, proceed with sewing along the edge using either a machine or manual needle and thread. Be mindful to remove pins as you go and take care to secure your stitches by backstitching at both the beginning and end of your seam. Following the completion of sewing, make your way to the two-inch gap and carefully turn the fabric right-side out, ensuring that the seam remains on the interior.
Step 4: Finishing Touches
To refine the headband’s appearance, start by ironing it flat to ensure the seams are aligned at the edges and the opening for turning is neatly tucked inward. Next, close any gaps that may have formed during construction by hand-sewing small, unobtrusive stitches with a needle and thread. If desired, further personalize the headband by adding embellishments such as buttons, embroidery, or fabric flowers to the exterior.
What You’ve Achieved
With the satisfaction of completing a creative endeavor, you’ve successfully transformed scraps of fabric into a chic headband, showcasing your unique flair while reducing waste. The process of repurposing unwanted materials not only yields a functional accessory but also demonstrates your resourcefulness and commitment to sustainability.
Video Tutorial
If you’re looking for a step-by-step tutorial on creating your own DIY headband using scrap fabric, be sure to check out the YouTube video ‘simple headband for beginners – DIY headband from scrap fabric’. This visual guide pairs perfectly with this written piece, providing an alternative perspective that enhances the overall learning experience. The combination of both formats allows crafters of all levels to follow along and create their own unique headbands.
Styling Tips for DIY Headbands
Elevate your style with the versatility of headbands, which effortlessly blend fashion and function. Whether you’re opting for a laid-back everyday look or dressing up for a special occasion, the perfect headband can inject a touch of sophistication and individuality to your overall aesthetic. By incorporating these simple styling tips into your wardrobe, you’ll be well on your way to mastering the art of headband chic.
Choosing the Right Headband
When selecting a headband, consider the occasion and dress code. For formal events, opt for understated embellishments like pearls or crystals. In contrast, everyday wear lends itself to simple fabric headbands or minimalist designs that won’t compete with other statement pieces in your outfit.
Next, harmonize your headband with your attire. A matching headband can create a cohesive look, while a contrasting one can serve as a bold accent. The key is finding a balance that enhances your overall appearance without overpowering it.
Lastly, prioritize comfort. Ensure the headband fits well and doesn’t dig uncomfortably behind your ears or across your forehead. After all, you want to feel confident and relaxed throughout the day, not distracted by an ill-fitting accessory.
Incorporating Headbands into Various Hairstyles
When it comes to styling your locks, there’s no denying the versatility of a well-placed headband. Not only can it keep stray hairs at bay and add a touch of polish to your overall look, but it can also be used to enhance and elevate various hairstyles. For instance, open hair benefits from the added security and neatness that a headband provides, while curly or straight locks alike can be beautifully framed by this simple yet effective styling tool. Updos, too, can be given an extra layer of sophistication with the addition of a headband – perfect for weddings, formal events, or any occasion where you want to make a statement. And let’s not forget about short hairstyles like pixie cuts or bobs, which can gain volume and style through the strategic placement of a headband. Meanwhile, braids can be taken to new heights by incorporating a thin headband into the design, resulting in a truly bohemian-inspired look.
Trends and Inspiration
In recent times, certain headband styles have gained significant popularity. Among these are the timeless padded headbands, which can be designed in a variety of ways from understated simplicity to elaborate embellishments. For those looking to add some sparkle to their overall look, embellished headbands are an excellent choice, particularly for evening events. Meanwhile, bouclé headbands offer a textured fabric that can add a one-of-a-kind touch to any hairstyle.
Troubleshooting Common Issues in DIY Headbands
Embarking on a DIY headband-making adventure can be an incredibly fulfilling experience, but it’s not without its challenges. Despite the excitement of creating something unique and personalized, common problems can arise. But fear not! With some expert advice, you’ll be equipped to overcome these obstacles and craft your dream headband.
Sizing Problems
When it comes to achieving the perfect headband fit, the key is finding that sweet spot between too tight and too loose. If your headband is feeling uncomfortably constricting, consider switching to a more stretchy material or adjusting the length before sewing to create a more comfortable fit. On the other hand, if the headband is slipping off due to being too loose, try reducing the fabric length or adding a small piece of elastic to provide a snug and secure fit.
Material Fraying
To minimize the likelihood of fraying, opt for fabrics that naturally resist this issue, like felt or fleece. For added security, apply a fray-preventing product, such as a liquid or a basic zigzag stitch along the edges. This will effectively prevent them from unraveling and maintain their integrity.
Embellishment Issues
To achieve a professional-looking finish, it’s crucial to secure embellishments properly. Use strong adhesives or sew them on tightly to prevent any loose ends. Furthermore, ensure an unbalanced design by placing embellishments while the headband is fitted onto a mannequin head. This simple trick will guarantee an even distribution of embellishments, resulting in a comfortable and stylish DIY headband.
Advanced Techniques for Experienced Crafters
If you’ve already grasped the fundamentals of DIY headband crafting, it’s time to elevate your skills with these sophisticated techniques. By incorporating these advanced methods, you’ll be able to create complex and unique designs that will set your headbands apart from the rest. Whether you’re looking to add texture, depth, or visual interest to your creations, these techniques will help you take your DIY projects to new heights.
Using Unique Materials
Elevate your craft with the rich texture and luxurious feel of leather strips, carefully selecting special leather needles to ensure a seamless sewing experience. Alternatively, explore the realm of sustainability by incorporating upcycled fabrics or accessories into your project, embracing eco-friendly practices that minimize waste and maximize creativity.
Intricate Designs
To add some extra flair to your DIY headbands, consider incorporating creative embellishments like braiding or beading. For a unique and eclectic aesthetic, experiment with different braiding techniques using multiple fabric strips. Alternatively, incorporate beadwork into your designs for intricate and eye-catching details that catch the light.
Structural Enhancements
To elevate the design of your headbands, consider incorporating two key features: wire inserts and layering. Wire inserts involve embedding flexible wire within the fabric to create adjustable and moldable designs that can be shaped to suit individual preferences. This feature adds a level of customization not typically found in traditional headbands. In addition to wire inserts, layering multiple fabrics and textures together creates a dimensional appearance that is truly unique. By combining different materials and textures, you can achieve a visually striking design that showcases your creativity.
Maintenance and Care for DIY Headbands
To extend the lifespan of your handmade headbands and preserve their aesthetic appeal, it’s crucial to adopt a routine that prioritizes maintenance and care. By following these simple steps, you can enjoy your headbands for a longer period without compromising on their appearance.
Washing Your Headbands
When it comes to cleaning your DIY headbands, there are a few methods you can use depending on the material and design. One of the safest ways is handwashing with cool or lukewarm water and a mild detergent. Gently scrub the headband to remove any dirt or debris, then rinse thoroughly to prevent soap residue from building up. To avoid damaging the shape, press out excess water without wringing it out.If your headband is made of sturdy material without delicate embellishments, you can machine wash it inside a mesh bag on a gentle cycle. Use a mild detergent and avoid fabric softeners or bleach, which can damage certain materials. Just be sure to air dry the headband by laying it flat on a towel or hanging it up – heat from a dryer can cause the fabric to shrink or warp.
Storing Your Headbands
When storing your headbands, it’s essential to prioritize maintaining their shape and preventing creases. To achieve this, consider keeping them flat in a drawer or storage box, taking care not to bunch them together. If you’re short on space, rolling them gently can also help keep them smooth. Additionally, avoid stacking heavy items on top of your headbands, as this can cause them to deform over time.
To further prevent deformation, consider using a hanger or hook to suspend particularly fragile or shape-sensitive headbands. This simple trick can make all the difference in keeping your accessories looking their best.
FAQs About DIY Headbands
Embarking on a DIY headband adventure allows for endless self-expression and creativity. For those new to this craft, understanding the basics is crucial to creating unique pieces that reflect one’s personal style. To kick-start the process, it’s essential to address common queries and concerns, thereby empowering individuals to take their first steps in this exciting journey.
What materials do I need to make a DIY headband?
To create a one-of-a-kind DIY headband, gather the essential materials: a piece of fabric or a scarf, a basic headband base, a hot glue gun equipped with glue sticks, a pair of sharp scissors, and any desired embellishments such as embroidery floss or beads. With these items in hand, you’re ready to start crafting your unique headpiece.
Can I use any fabric for my headband?
When selecting fabrics for your headband, opt for materials that possess a moderate level of thickness and flexibility. Avoid choosing overly dense or rigid fabrics, as they may struggle to conform to the natural shape of the headband. Instead, consider stretch knit fabric, which is known for its comfort-enhancing properties and ability to mold smoothly to the wearer’s head.
How do I ensure my headband fits properly?
To ensure a proper fit, begin by measuring your head circumference. From this measurement, calculate how much fabric you’ll need to accommodate the band’s intended width. When cutting out the fabric pieces, double-check that both the headband and elastic sections are lying flat without any twists or turns in the middle.
How can I prevent my headband from slipping off?
To ensure a smooth finish, ensure that the fabric lies evenly along the underside of the headband. If it continues to shift or slip, employ small bobby pins to discreetly anchor it in position, preventing any unwanted bunching or creasing.
What are some easy DIY headband ideas?
Crafting a unique and eco-friendly headpiece is easier than you think. Consider upcycling old T-shirts into braided headbands that exude a bohemian charm. Alternatively, create a tie-dye masterpiece by dyeing fabric scraps and weaving them together to form a one-of-a-kind accessory. For a more edgy look, try your hand at making a no-sew wire headband that channels the rebellious spirit of rockabilly culture.
How do I attach embellishments to my headband?
To ensure your embellishments remain firmly attached, consider using a reliable adhesive that can withstand wear and tear. Alternatively, opt for a sewing method that creates a sturdy bond between the embellishment and the fabric, eliminating the risk of them coming loose over time.
Can I make a headband without sewing?
Creating a no-sew wire headband requires a clever combination of hidden wire and fabric manipulation. By leveraging these simple materials, you can craft a stylish accessory without ever needing to sew a single stitch.
How do I care for my DIY headband?
When it comes to cleaning and storing your headband, simplicity is key. To keep your headband in top condition, start by washing it with a gentle detergent and allowing it to air dry completely. This will prevent any damage or distortion that harsh chemicals or rough drying methods might cause. Once it’s dry, lay it flat on a surface or hang it from a hook to maintain its shape and ensure it retains its original form.
Are there any eco-friendly options for DIY headbands?
For a sustainable and environmentally conscious approach to creating a headband, consider repurposing upcycled fabrics or accessories. This innovative approach not only reduces waste but also allows you to add a unique touch to your fashion statement.
How can I make my headband stand out?
Embark on an exciting journey by experimenting with diverse textures, colors, and patterns to craft headbands that truly reflect your personality. Take it a step further by incorporating one-of-a-kind embellishments like beads or flowers to give your creation an extra layer of sophistication and visual appeal. As you navigate these FAQs, you’ll unlock the secrets to crafting headbands that not only turn heads but also serve as a testament to your creativity and individuality.
25 Unique DIY Headband Ideas
Get ready to take your accessory game to the next level with 25 exquisite DIY headband designs that will transform your look for the spring and summer seasons. Whether you’re drawn to delicate florals or bold bohemian statements, this collection has something for everyone.
Easy DIY No Sew Wire Headband
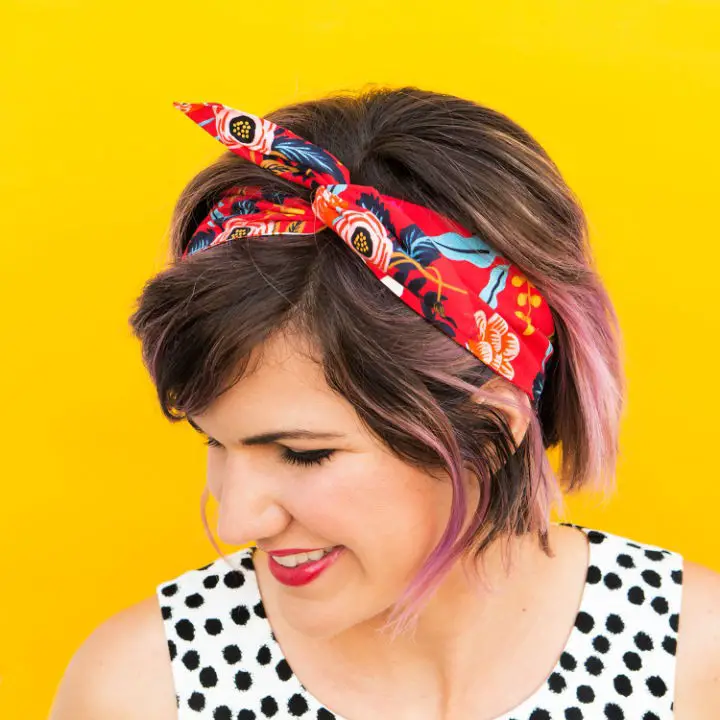
For those seeking a chic and effortless way to tame unruly hair days, Sarah Hearts’ DIY No-Sew Wire Headband tutorial is an absolute must-have! This comprehensive guide provides a straightforward step-by-step process for creating a one-of-a-kind wire headband without requiring any sewing skills. The best part? It’s a project that’s perfect for fashion enthusiasts and DIY lovers alike, offering endless possibilities for personalizing your accessory using fabric scraps and fabric glue.
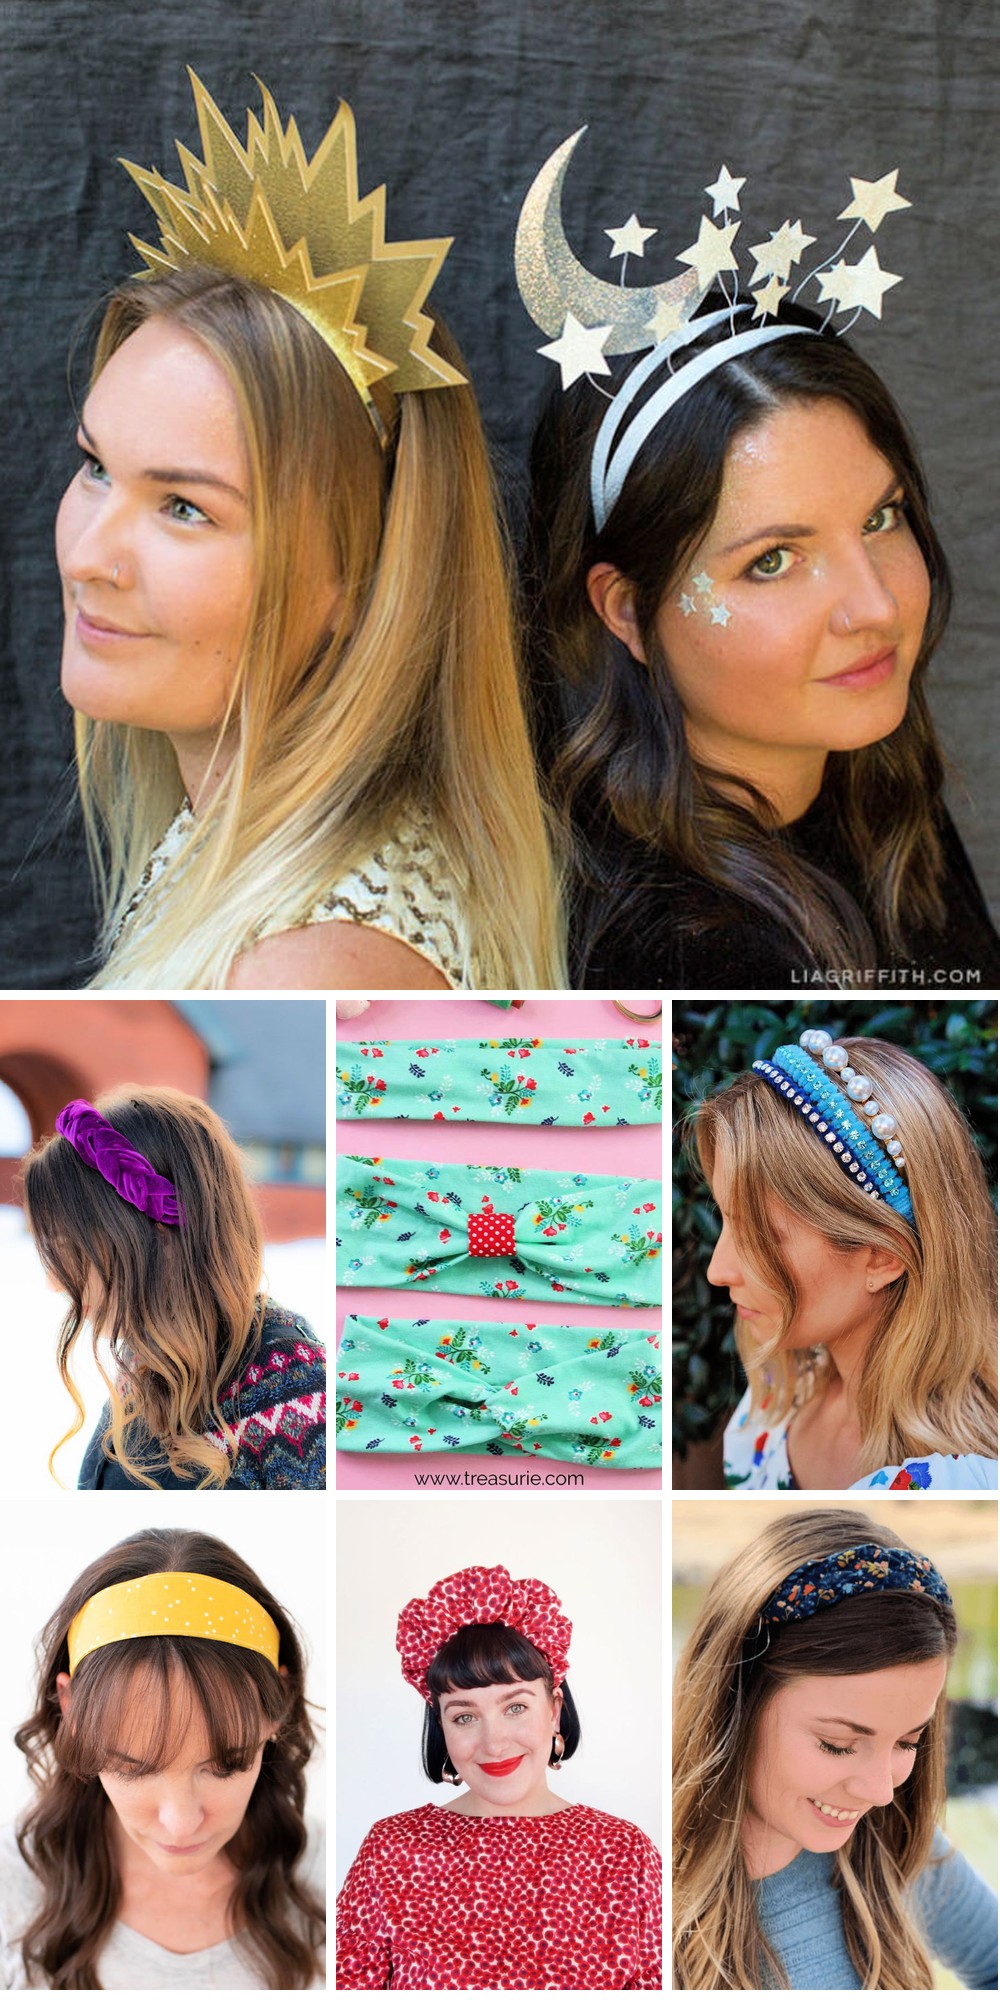
Make a Braided Velvet Headband
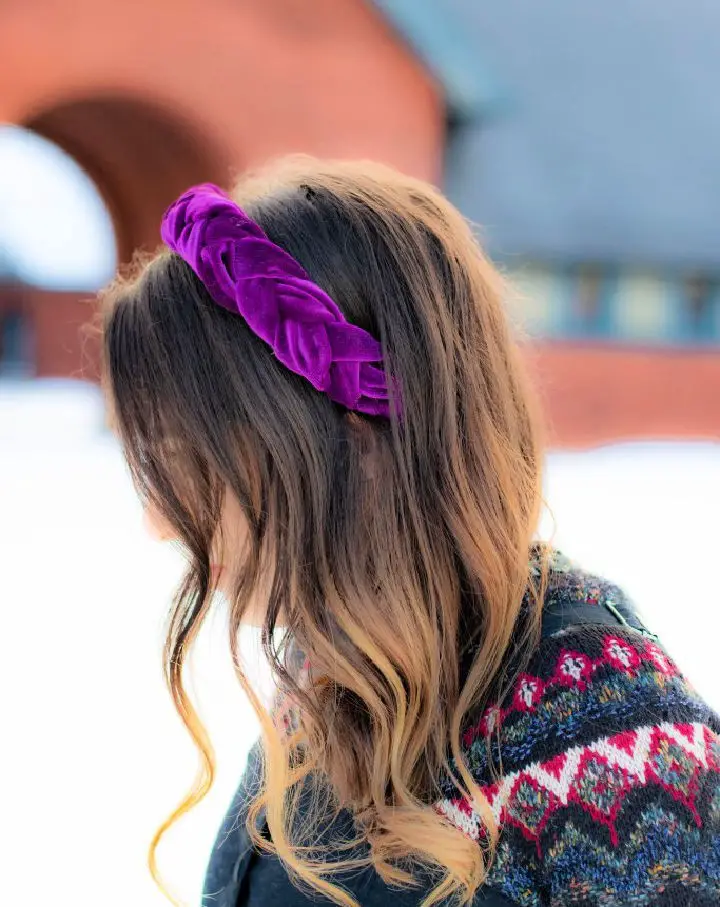
Take your accessories to the next level with a sophisticated velvet braided headband, a DIY project that’s both easy on the wallet and surprisingly simple to create. By combining luxurious velvet strips, grosgrain ribbon, and a plain plastic headband, you can transform these humble materials into a stunning statement piece. To get started, wrap the headband with ribbon for a seamless finish, then braid your velvet strips together before attaching them securely in place. With clear, step-by-step instructions guiding the way, you’ll be amazed at just how professional-looking the finished product turns out. Whether you’re looking to add a touch of elegance to your everyday look or create a show-stopping accessory for a special occasion, making your own velvet braided headband is an engaging and rewarding DIY experience that’s sure to leave you feeling proud of your handiwork.
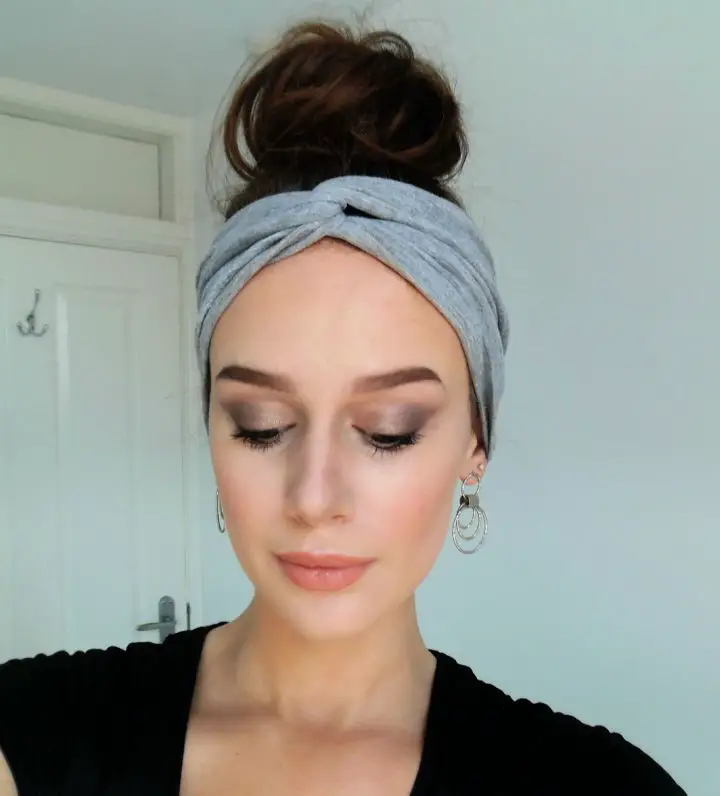
How to Sew a Turban Headband
For those who relish adding a touch of handmade charm to their wardrobe, Heather Handmade’s DIY turban headband tutorial offers a straightforward guide to creating a stylish accessory using knit fabric. This sewing project is perfect for utilizing leftover fabric scraps and makes for a thoughtful gift for loved ones. The step-by-step instructions are designed to be approachable even for those new to sewing. By combining simple cutting, pinning, and sewing techniques with the use of a machine, you can craft a functional and fashionable headband that elevates any outfit with its comfortable and chic design.
Making Your Own Headband
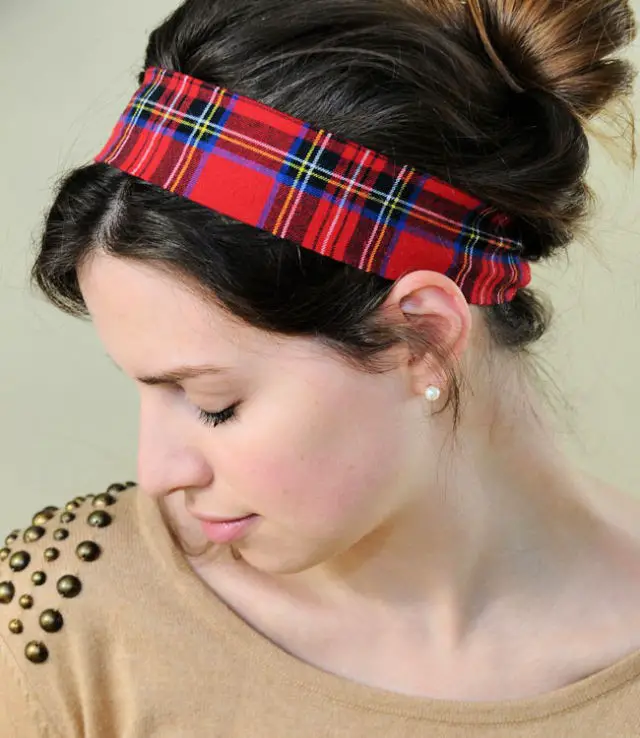
Turn an old flannel shirt into a chic DIY headband with ease, courtesy of The Miniature Moose’s straightforward tutorial. Even without sewing expertise, you can master the process of cutting, sewing, and flipping fabric to create a trendy accessory in no time. Simply gather your trusty hair tie, iron, and basic sewing tools, and transform that ripped shirt into a stylish headband. This eco-friendly crafting project is perfect for a quick fashion fix or a thoughtful gift – adding a personal touch to your wardrobe has never been simpler.
How to Make a Statement Headband
Embrace your creative side and elevate your look with our DIY Amanda Gorman-inspired headband tutorials. The House That Lars Built offers a comprehensive guide to crafting three striking designs: puffy, braided, and knotted. Each piece exudes refinement and poise, making them the perfect accessory for adding a touch of sophistication to any outfit. By leveraging simple materials like fabric, upholstery foam, and ribbon, these headbands not only showcase your personal style but also serve as a fun and engaging DIY project. With our step-by-step instructions, you’ll be empowered to unleash your creativity and craft a one-of-a-kind accessory that reflects your unique inspiration.
Simple DIY Pom Pom Headband
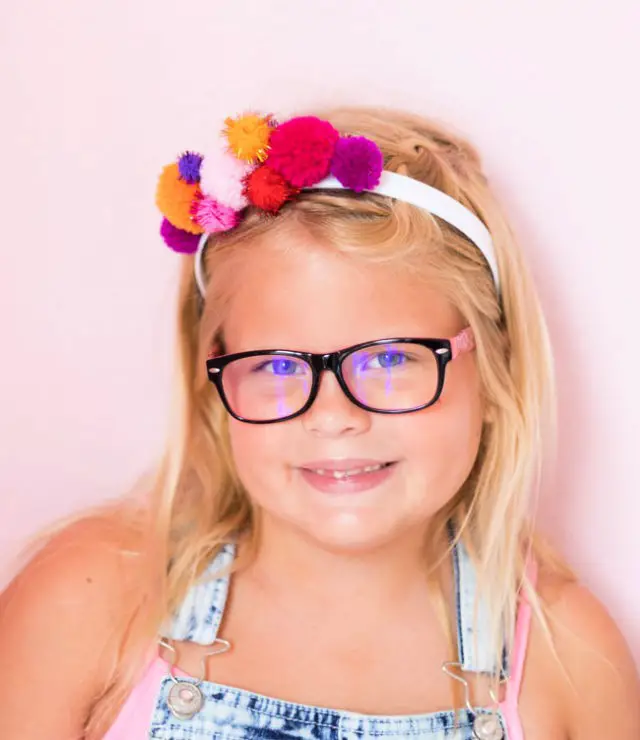
Unleash your inner crafter with Design Improvised’s fun and easy DIY pom-pom headbands. This project is perfect for adding a pop of color and whimsy to any outfit. With just a few simple supplies – pre-made yarn pom-poms, glitter pom-poms, plastic headbands, and hot glue – you can create one-of-a-kind accessories that reflect your personal style. Whether you’re looking to add some festive flair to a party or simply want to express yourself through art, this project is ideal for people of all ages. Follow the straightforward and engaging instructions to make your own unique pom-pom filled headband, floral design, or even a regal pom-pom crown. Let your creativity shine and design headbands that truly reflect you!
DIY Braided Headband at Home
Transform fabric scraps into a chic and sustainable accessory with Seamlined Living’s comprehensive DIY braided headband tutorial. This eco-friendly project not only adds a pop of color and style to any outfit but also reduces waste by repurposing leftover materials. The step-by-step guide is designed to be easy to follow, ensuring a fun and rewarding crafting experience that yields a unique and handmade hair accessory perfect for personal use or gifting.
DIY Headband – Step by Step Instructions
Creating a personalized headpiece is an exciting and creative endeavor that can elevate your accessory game. By following a straightforward tutorial from Mary Martha Mama, you can craft a one-of-a-kind headband using affordable materials like leftover fabric, elastic, and fundamental sewing supplies. This DIY project is perfect for those looking to tame their locks or make a bold fashion statement. With just a few simple steps and the aid of visual guides, you’ll be well on your way to creating a unique headpiece that’s both aesthetically pleasing and functional.
Handmade Sun and Moon Headband
Create mesmerizing sun and moon headbands by following Lia Griffith’s DIY guide. These radiant accessories are perfect not only for Halloween but also for adding a touch of magic to your New Year’s Eve celebrations. Begin by collecting the necessary materials, including glitter cardstock, paper, and headbands. Then, use a cutting machine or scissors to shape your sun and moon designs according to the provided template. To add stability, secure a wire between two stars using an adhesive roller. Give your moon shape some depth by bending it along the scored line for a three-dimensional effect. For a comprehensive guide on how to craft these celestial headbands, become a member and access Lia Griffith’s step-by-step tutorial. With these handmade accessories, you’ll be sure to light up any party with your unique and enchanting sun and moon headbands.
How to Make Your Own Padded Headband
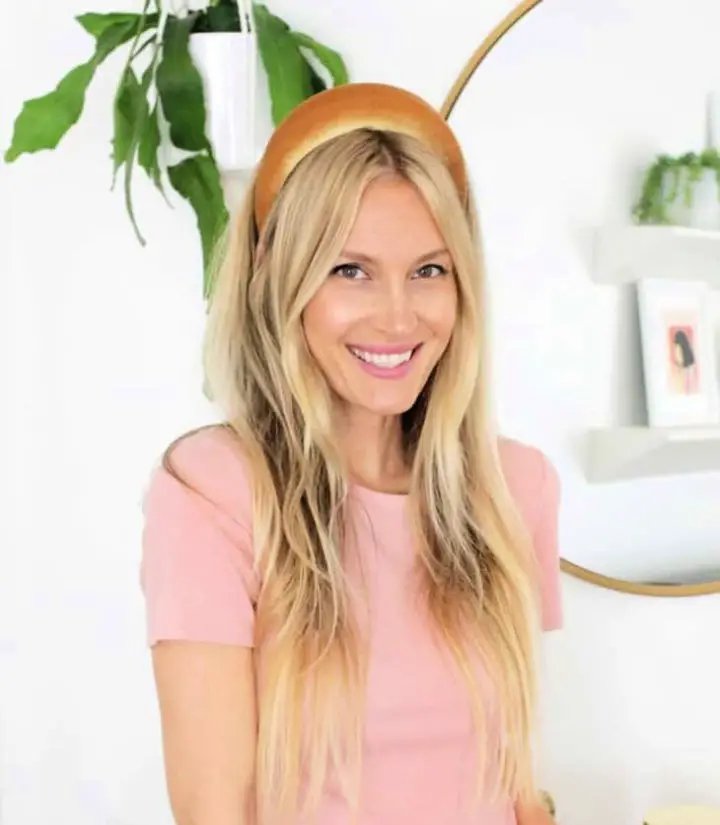
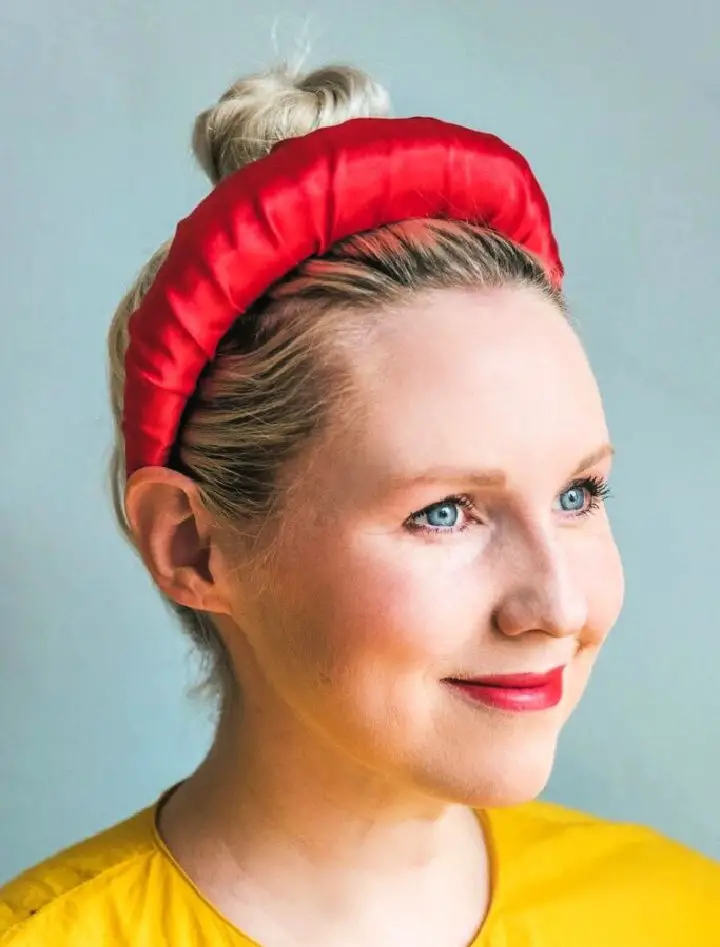
Elevate your style with a chic and customizable padded headband, easily crafted with just a few simple materials. According to A Beautiful Mess’ DIY guide, all you need is a quarter yard of stretchy fabric, some upholstery foam, a plastic headband, and basic crafting supplies. Begin by tracing and trimming the foam to fit comfortably on your head, then attach it to the headband using the provided measurements. Next, create a fabric cover that perfectly complements your outfit – from casual to elegant – and make any necessary adjustments for a snug fit. Finally, add the finishing touches with some sewing magic, and voilà! You’ve created a unique, one-of-a-kind accessory that’s sure to turn heads and enhance your personal style.
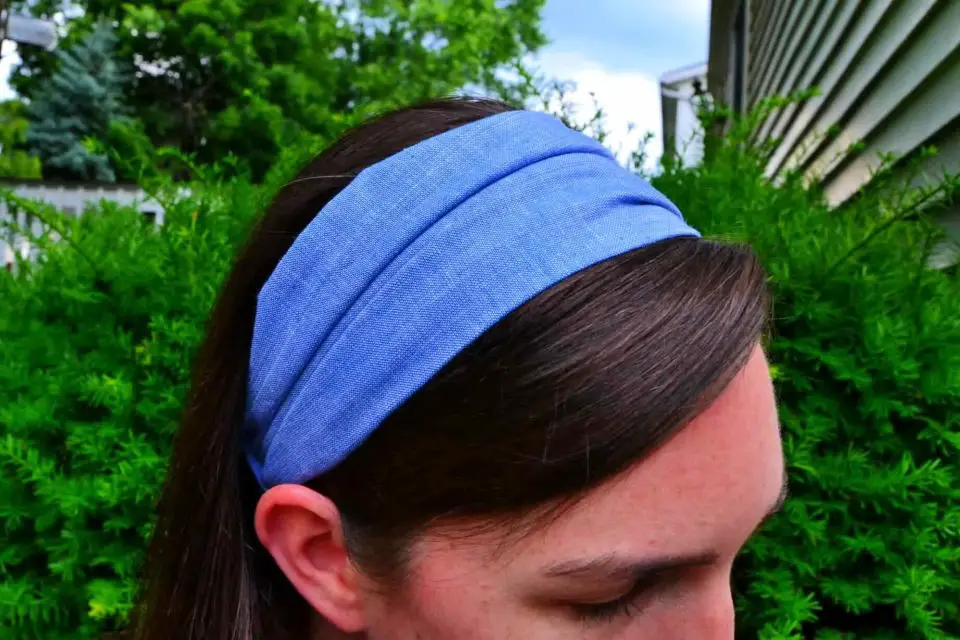
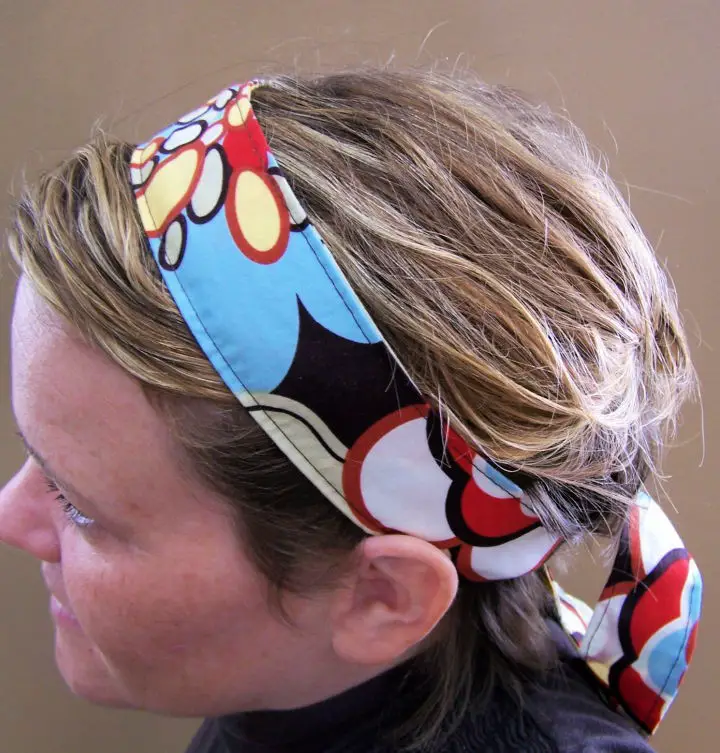
Making a Headband Out of Fabric

Create unique and practical accessories with The Polka Dot Chair’s free DIY guide on making fabric headbands without elastic. Perfect for managing hair during vacations, hot summer days, or everyday wear, these headbands seamlessly blend functionality with style. By following a simple step-by-step process that involves sewing, turning fabric, and applying hot glue, you can craft your own custom headbands using your favorite lightweight cotton fabrics. This comprehensive tutorial is designed to help you create a comfortable and secure accessory that not only adds a personal touch to your wardrobe but also makes for thoughtful gifts. With its engaging and easy-to-follow instructions, this guide provides an enjoyable experience in making charming fabric headbands that reflect your individuality.
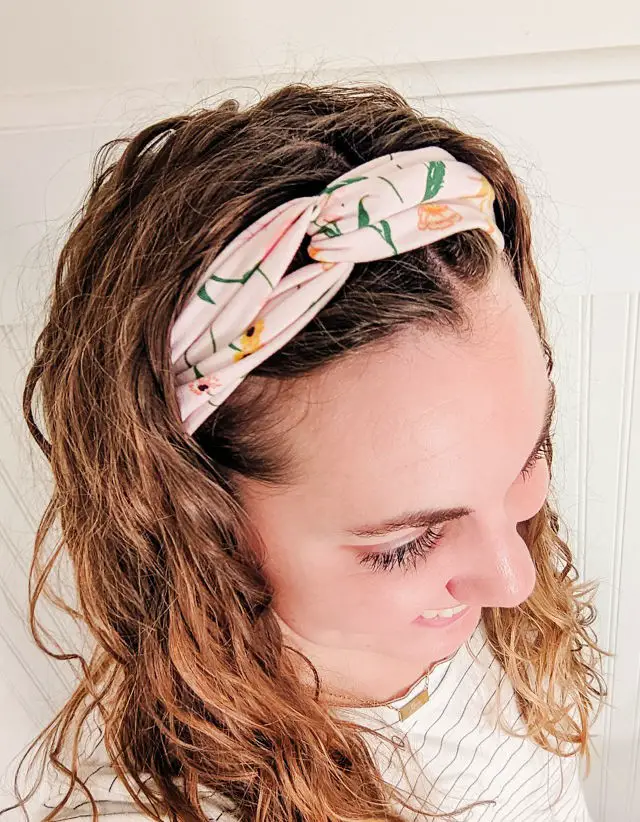
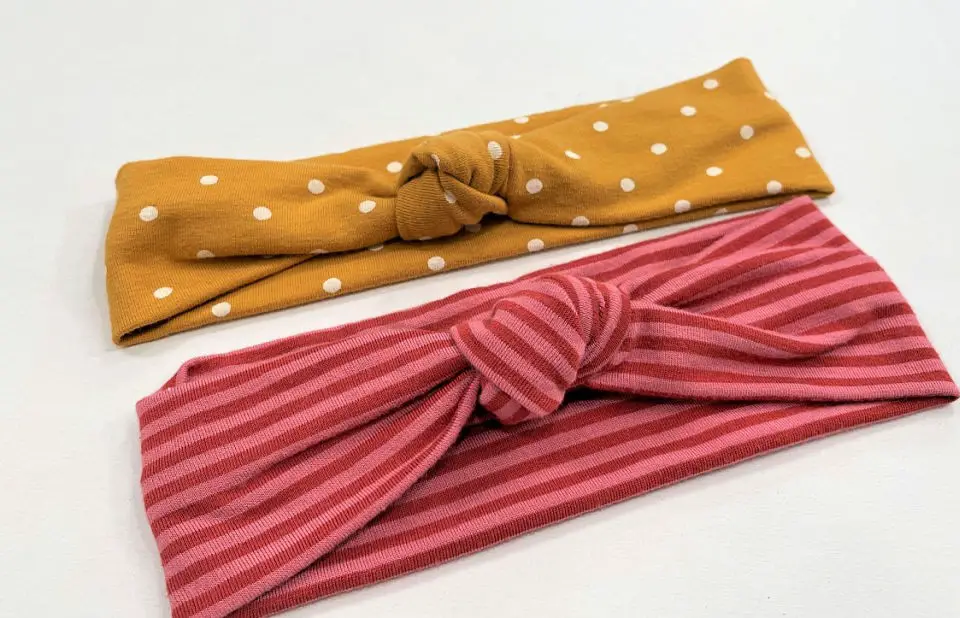
Super Simple Knotted Headband
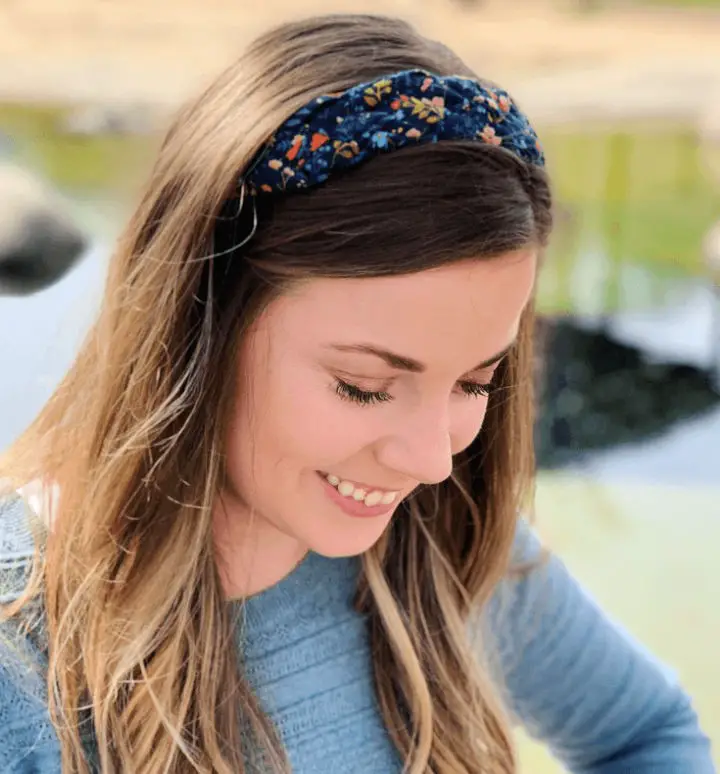
Looking to elevate your sewing skills? The Simple Knotted Headband Tutorial at Scattered Thoughts of a Crafty Mom is an excellent starting point, regardless of your skill level. Jamie Sanders has carefully crafted this tutorial to guide you through the process of creating a stylish and functional headband that’s perfect for taming stray hairs. With step-by-step instructions, you’ll discover how to sew a versatile piece that can be easily replicated in different colors and patterns, making it a great way to add a personal touch to your everyday look or as a thoughtful gift for friends.
Free Headband Sewing Pattern
Elevate your accessory game by infusing a personal touch into your collection! At Treasurie, we’re excited to share a step-by-step guide on crafting three distinct fabric headband styles that are easy to make with stretch fabric scraps. These DIY creations are perfect for keeping hair tidy or adding a stylish flair to your outfit. By following our straightforward instructions, you’ll learn how to measure, cut, and sew your way to a snug and comfortable fit. Whether it’s as a gift or a creative outlet, your handmade headband will be a one-of-a-kind addition to any wardrobe.
Make a No Sew Headband
Transform an old t-shirt into a stylish no-sew headband without breaking out the scissors or glue. The team at ‘Getting to Nomi’ has created a simple, step-by-step guide that breathes new life into your old tees. Simply cut the bottom of a shirt, twist it into an infinite shape, and fold it to reveal a trendy accessory perfect for adding a personal touch to your wardrobe. To take your look to the next level, be sure to check out the featured makeup of the day for inspiration. This sustainable fashion hack is ideal for those who love DIY projects and staying ahead of the curve in terms of creative and environmentally-friendly style ideas.
DIY Velour and Crystal Headband
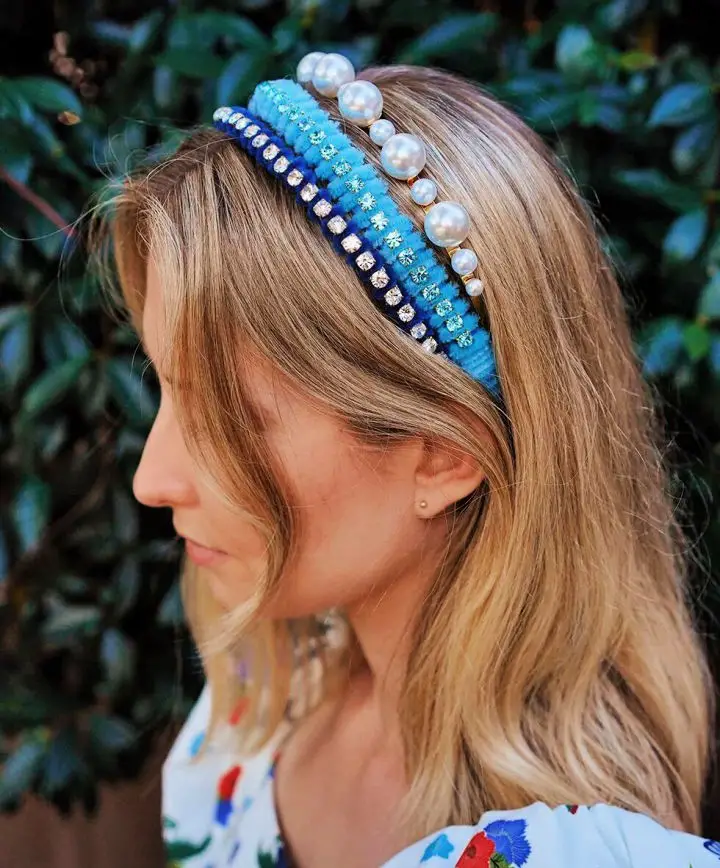
Transforming everyday craft supplies into a luxurious-looking velour and crystal headband is an accessible yet satisfying project that can instantly elevate your accessory game. This DIY guide from Honestly WTF breaks down the process into manageable steps, ensuring you can create a stunning headpiece using just a few simple materials. Start by attaching pipe cleaners to your chosen headband with hot glue, wrapping them tightly as you go and incorporating rhinestone chain for an added touch of glamour. With each step carefully outlined, you’ll find yourself crafting a stylish statement piece that rivals high-end designs. Perfect for adding a dash of sophistication to any outfit, your handmade headband will be a chic addition to your wardrobe.
Easy Baby Girl Headband Using Nylons
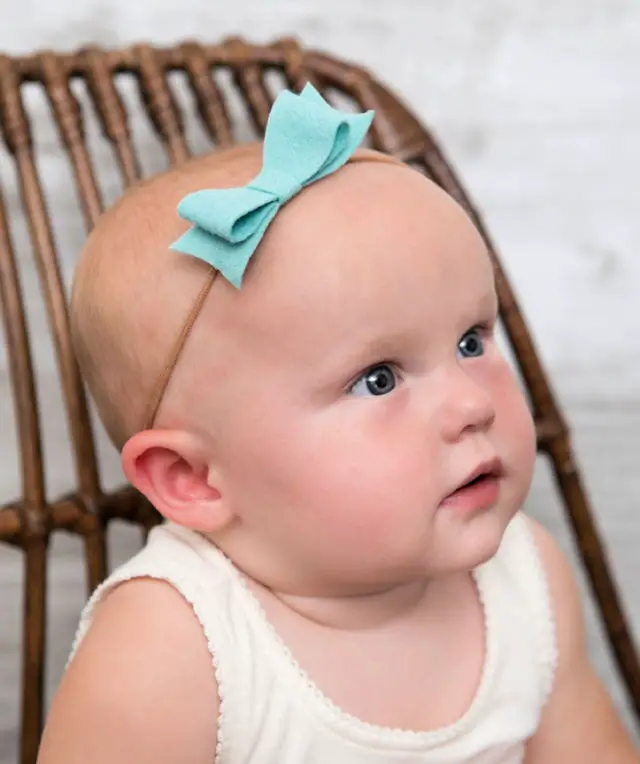
With this DIY method from Something Turquoise, creating adorable baby girl headbands has never been more accessible or budget-friendly. The key is using nylons, which provide a soft, stretchy, and gentle fit for delicate baby heads. By combining these with readily available supplies like ribbons, hot glue, and scissors, you can customize the headbands to match any outfit and add a personal touch to your little one’s wardrobe. This step-by-step guide is designed to ensure a fun and stress-free crafting experience, complete with a clever clear nail polish trick that keeps those bows looking pristine. Whether you’re creating them for gifting or personal use, these nylon headbands offer a quick, easy, and delightful way to add some extra charm to your baby’s look.
Make a No Elastic Headband
Discover the ease of creating your own no-elastic headbands with our straightforward tutorial. Begin with a 36-inch piece of fabric and follow the simplified instructions to cut, iron, and sew your way to a comfortable and stylish accessory that complements any outfit or occasion. By mastering just a few basic stitches and ensuring a crisp finish through ironing, you’ll be able to produce a personalized headband that suits your unique taste. Visit our page for a fun and functional DIY experience that yields a versatile and chic addition to your wardrobe.
How to Do You Make a Scrunchie Headband

Step into the world of DIY fashion with Daisy’s comprehensive scrunchie headband tutorial. This engaging craft session is ideal for those who delight in creating their own accessories, and promises a stress-free experience with clear, step-by-step guidance. Using just a few simple materials – including woven fabric, thread, and a fabric-covered headband – you’ll be able to transform them into a stylish addition to your wardrobe. The tutorial’s informative approach and helpful tips on sewing and customization will ensure that your DIY endeavour is a smooth and enjoyable one, resulting in a unique piece that’s sure to grab attention.
Rainbow Ribbon Flower Headband
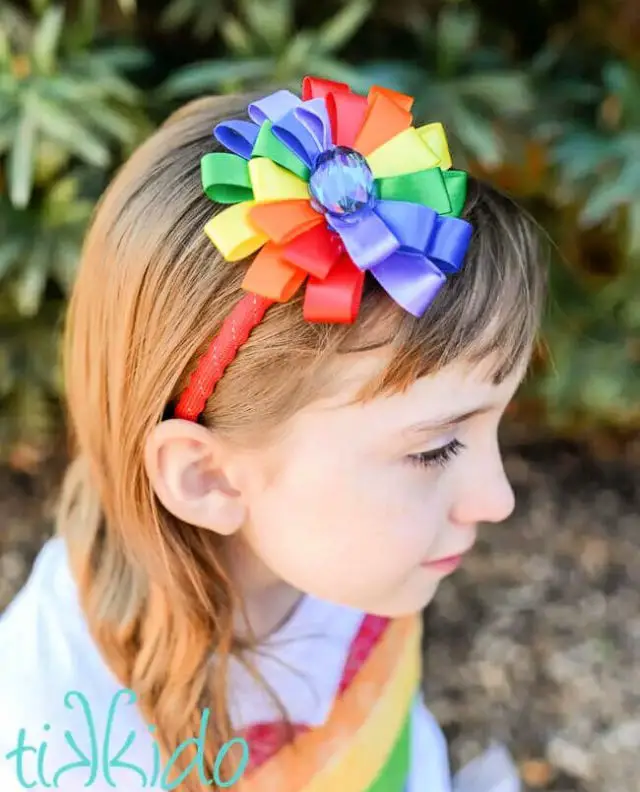
Unleash your creativity and add a splash of color to your wardrobe with a vibrant DIY headband featuring a charming rainbow ribbon flower. This delightful accessory is perfect for making a stylish statement, and the best part? It’s incredibly easy to make. With just a few simple materials like colorful ribbons, a crystal bead, felt, and a glue gun, you can craft a one-of-a-kind piece that reflects your personal style. The step-by-step tutorial ensures an enjoyable and engaging experience for crafters of all levels, making it the perfect way to brighten up your crafting time.
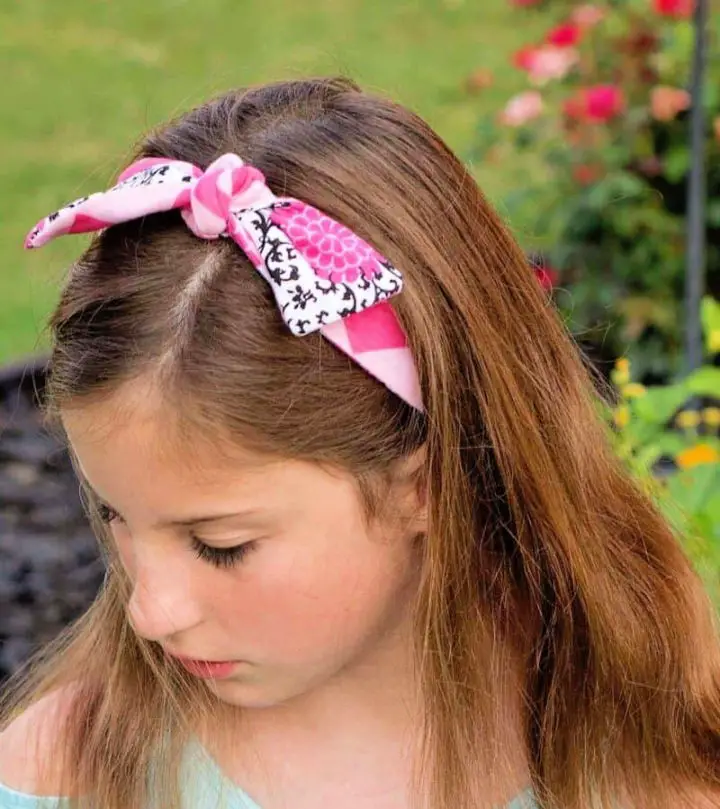
Knot Headband With Details Instructions
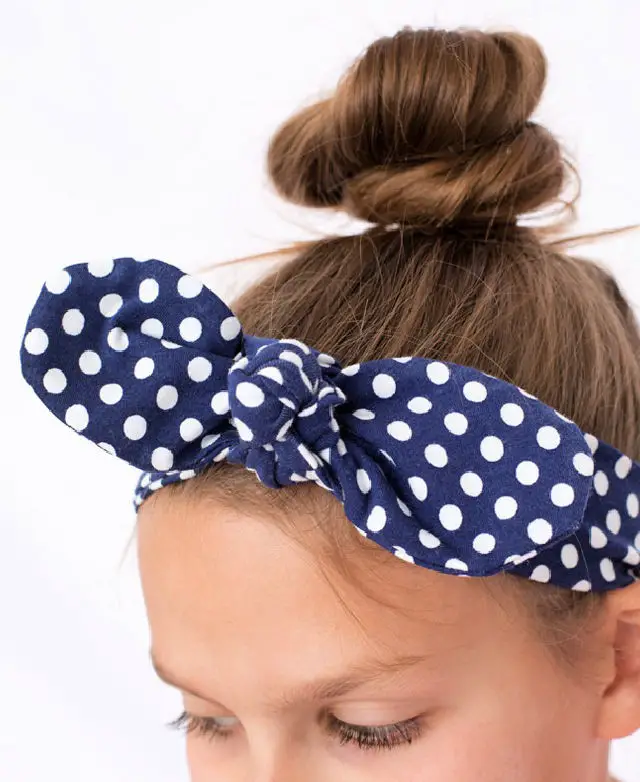
Crafting a stylish knot headband can be a fun and rewarding DIY project, thanks to Simple Simon and Company’s clear and easy-to-follow tutorial. The process involves transforming simple materials into a trendy accessory featuring a ‘fake knot’ design. To get started, you’ll need a strip of fabric, two end pieces, and a middle tie piece. Once you’ve gathered your materials, the method involves sewing, turning the pieces inside out, and assembling the headband with a secure and decorative knot. This engaging project is perfect for adding a personal touch to your wardrobe or making thoughtful handmade gifts. With a little creativity and experimentation, you can customize your headband with different colors and prints to create a unique look that’s all your own.
Sew a Headband From Fabric

Transform an ordinary fabric scrap into an extraordinary headband using Melly Sews’ comprehensive tutorial. This beginner-friendly project is perfect for sewing newcomers, allowing them to repurpose their leftover fabrics while crafting a chic hair accessory that’s both functional and stylish. By incorporating elastic, the guide ensures a comfortable fit for various sizes, thanks to the downloadable pattern available for free. Visual learners can also benefit from the accompanying video tutorial, making it easy to follow along and achieve professional-looking results. With this project, you’ll be empowered to take on your next creative adventure with confidence, adding a personal touch to your wardrobe or gifting something truly special.
Red, White, and Blue Bandana Headband
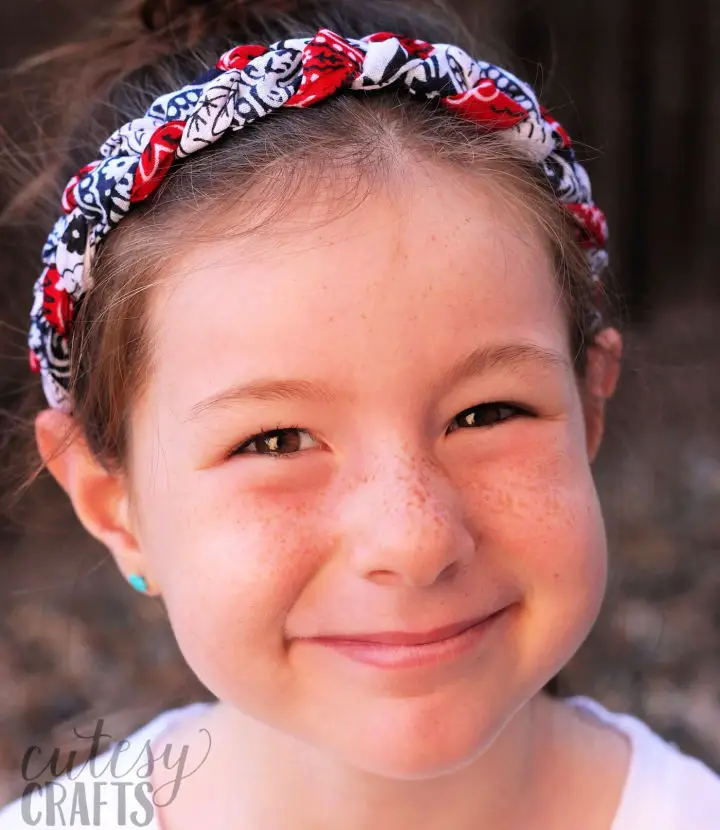
Transforming a simple bandana into a charming headband is an achievable DIY project that requires minimal skills and creative freedom. On the DIY Candy blog, you’ll discover a step-by-step guide on how to craft these colorful accessories using just bandanas and elastic. This project is perfect for adding a festive touch to your wardrobe, whether it’s for a 4th of July celebration or any other occasion where you want to make a statement.
By offering the option to sew or use a no-sew method with hot glue, this DIY endeavor caters to a range of crafting preferences. With a little creativity and some basic materials, you’ll be able to enhance your DIY repertoire and create a unique headband that reflects your personal style.
Homemade Fall Headband Using Felt
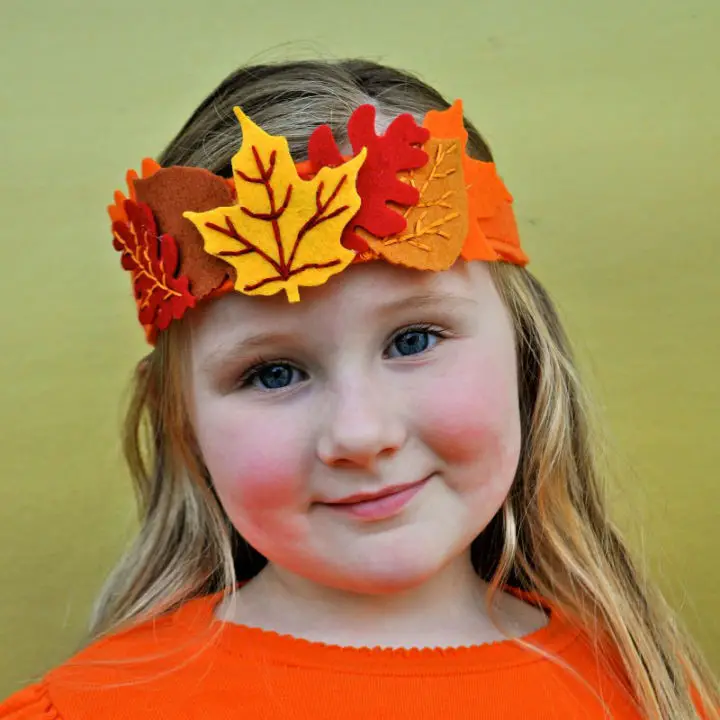
Embrace the charm of DIY crafting by creating a delightful fall headband with Make Life Lovely’s guidance. This straightforward tutorial breaks down the process into clear, easy-to-follow steps, making it perfect for crafting a festive accessory for kids that will be a hit at Thanksgiving gatherings. By combining pre-cut felt leaves, embroidery floss, and a few other materials, you’ll learn to assemble a headband that not only showcases your child’s personal style but also sparks their creativity. This engaging project is ideal for infusing a homemade touch into holiday celebrations, providing a satisfying crafting experience with a beautiful outcome. As you dive into this fun activity, you’ll be creating a unique piece for your child to treasure during the fall festivities.
Best DIY Top Knot Headband
With this DIY sewing tutorial by Jan Howell, creating a charming top knot headband has never been more accessible. This project is perfect for a heartfelt baby gift or a fashionable accessory for all ages, requiring only a small amount of stretchy knit fabric that can be repurposed from an old t-shirt. The seamless design at the back ensures a comfortable fit, making it ideal for everyday wear. For more creative and easy-to-follow projects, visit You Make It Simple, where you’ll find a variety of crafting ideas to suit your needs and guarantee a delightful making experience.
Make Fancy Headbands for Loved Ones

For those who take pride in crafting one-of-a-kind presents, creating bespoke headbands offers a thoughtful way to express appreciation for loved ones. By following the straightforward tutorial from A Beautiful Mess, it’s possible to transform ordinary materials like lustrous fabric and fundamental sewing supplies into a meaningful token of friendship or affection.
Conclusion:
As a finishing touch to your outfit, DIY headbands offer an unparalleled opportunity for self-expression. With 25 straightforward DIY headband designs perfect for the spring and summer seasons, you’re just a few simple steps away from creating unique accessories that mirror your personal flair.
By mastering styling techniques, addressing common pitfalls, and delving into advanced methods, you can craft headbands that not only reflect your individual style but also serve as a testament to your creativity. Let the possibilities guide you in this journey of self-creation.
