Why Build Your Own Electric Skateboard?
When it comes to electric skateboards, many people opt for pre-built models, but for those who enjoy DIY projects, building your own electric skateboard can be an incredibly rewarding experience. By taking on this project, you’ll not only have a customized ride that meets your specific needs and preferences, but you’ll also gain valuable skills in electronics, mechanics, and software programming.One of the primary benefits of building your own electric skateboard is customization. With the ability to choose every component, from speed and range to design and features, you can create a board that perfectly suits your lifestyle and riding style. This level of control allows you to optimize your ride for maximum performance, comfort, and fun.In addition to customization, building your own electric skateboard can also be a cost-effective option. By sourcing your own parts and assembling them yourself, you can avoid the markup associated with pre-built models and invest in only the components that matter most to you. This approach not only saves you money but also gives you a deeper understanding of which components are worth investing in and where you can cut costs.The learning experience is another significant advantage of building your own electric skateboard. As you work through the project, you’ll gain valuable knowledge in areas such as electronics, mechanics, and software programming. This hands-on learning experience not only expands your skillset but also provides a sense of accomplishment and pride in your creation.Finally, building your own electric skateboard is an environmentally friendly choice. By choosing parts carefully and constructing a board that’s designed to last, you’re making a decision that’s better for the planet. Repairing and upgrading your board is also easier, which means less waste over time.Ultimately, building your own electric skateboard offers a unique combination of customization, cost-effectiveness, learning, and sustainability. It’s an experience that goes beyond just saving money or having a custom ride – it’s about the pride of creation and the joy of learning.
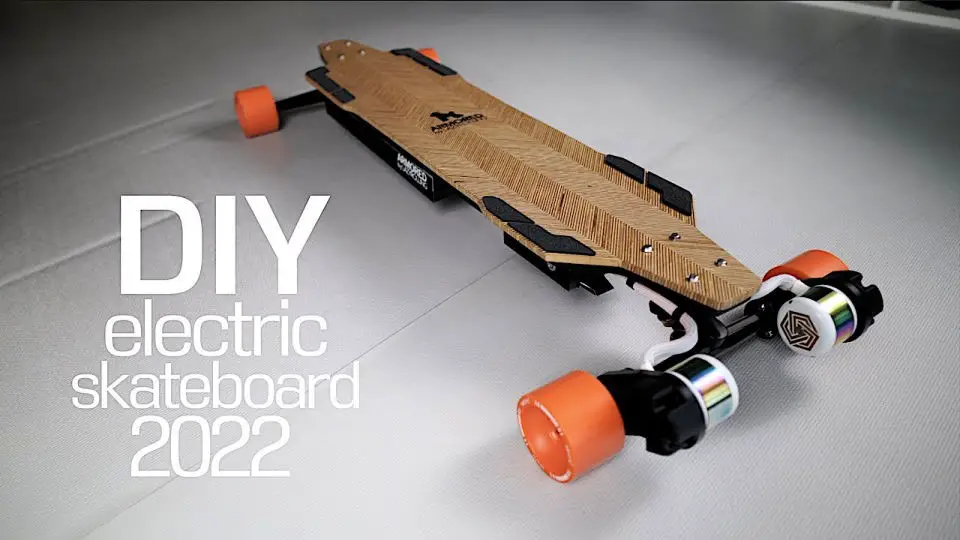
DIY Electric Skateboard Cheap & Easy
Building a custom electric skateboard doesn’t have to be a pricey or overly complex endeavor. By being mindful of your parts selection and embracing your inner DIY enthusiast, you can cruise the streets on a unique e-board without breaking the bank. Drawing inspiration from Sean’s Crafts YouTube tutorial, this guide will walk you through the budget-friendly process of building an electric skateboard, making it accessible to both seasoned DIYers and newcomers alike.
Materials and Tools Needed
To convert a skateboard deck into an electric board, you’ll require several key components. These include a used or pre-existing skateboard deck itself, as well as various electronic and mechanical parts. Specifically, you’ll need a 36V 2.2A battery to power your new ride, along with trucks and wheels that are equipped with an integrated single hub motor. Additionally, you’ll require riser pads to ensure the necessary clearance for the new motor. Furthermore, you’ll need an electronic speed controller (ESC) with a remote control, as well as a micro USB charger for powering up the remote. To protect your electrical components from external damage, consider using grip tape and quarter-inch foam or craft foam. For assembling the board itself, you’ll need skateboard hardware like screws and nuts, as well as a skate tool to make any necessary adjustments. If you’re looking to add some extra protection and durability, consider using an enclosure for your electronics, either by purchasing one or creating it yourself. Finally, be prepared with various tools, including a jigsaw, hand drill, box cutter, hot glue gun, super glue, sandpaper, velcro, belt, electrical tape, clear coat, and basic drawing and cutting utensils.
Steps to Build Your Electric Skateboard
When it comes to building an electric skateboard on a budget, there are a few key components to focus on. First, finding the right deck is crucial. You can start with an old or used board and shape it into your desired style using a jigsaw and sandpaper. Not only will this save you money, but it’ll also give you the opportunity to create a unique design. Sanding down the deck for smoothness and applying a few layers of clear coat will help it look like new again.Sourcing affordable electronics is another important step. Instead of buying brand new parts, consider acquiring broken or used components from online marketplaces like Craigslist or Facebook Marketplace. This can be a huge cost-saver, especially when it comes to the most expensive parts like batteries and motors.Once you have your deck and electronics, it’s time to start assembling your skateboard. Begin by attaching your trucks and integrated hub motor to the deck, making sure everything fits properly and is securely attached. Then, set up your electronics by connecting your battery to the ESC, followed by the ESC to the motor. Make sure to match the specifications of your ESC, motor, and battery (for example, a 36V motor needs a 36V ESC).Next, install the electronic components into the enclosure. Drill holes in the deck for cables and the enclosure, then place the battery and ESC inside and secure them with foam for a snug fit. Connect all wires according to the instructions or labels, including the power switch, charging port, and LED indicators.Finally, attach the enclosure to the deck and make any necessary cutouts for LED battery indicators, charging ports, and power switches. If you live in a wet climate, consider taking measures to waterproof your electronics to keep them safe from the elements.
Testing and Adjustments
Before hitting the streets, it’s essential to thoroughly inspect and test your newly assembled skateboard in a secure environment. Start by verifying that all systems are go – check the speed, brakes, and overall performance of each component. If needed, fine-tune the ESC settings to perfectly align with your riding style and preferences.
Maintenance
Regular upkeep is vital to ensure the safe and prolonged use of a skateboard. A thorough examination should be conducted regularly to verify that all screws, bolts, and electronic components are secure and functioning properly.
Video Tutorial
For those looking for a hands-on approach, I recommend checking out Sean’s Crafts’ YouTube video tutorial on how to build an affordable and easy-to-assemble electric skateboard. The visual guide provides a clear and concise walkthrough of the techniques involved, supplementing our written guide nicely.
Not only is building an electric skateboard a fulfilling project, but it also offers insight into the mechanics behind your ride. By following these steps and utilizing resources like Sean’s Crafts’ video tutorial, you’ll be carving up the road on your very own electric skateboard in no time.
The added benefit of having built it yourself and saved money in the process is a definite perk. With the skills and confidence gained from this project, you’ll be eager to tackle more DIY endeavors. So, get building and enjoy the ride!
FAQS: Everything You Need to Know About DIY Electric Skateboards
Embarking on a DIY adventure with electric skateboards can be an exhilarating experience, comparable to the thrill of riding one. To facilitate your exploration, this section addresses some of the most frequently asked questions, providing valuable insights and guidance for a more enjoyable journey.
What materials do I need to build an electric skateboard?
To bring your DIY e-skate to life, you’ll need a solid foundation of essential components. These include: a skateboard deck that provides the structural base, trucks with wheels equipped with an integrated hub motor for seamless power delivery. A rechargeable 36V 2.2A battery and an Electronic Speed Controller (ESC) with a remote control unit will enable you to command your e-skate’s speed. Additionally, you’ll require riser pads to elevate the electronics and grip tape to ensure a secure hold. An enclosure or housing for the electrical components is also crucial for protection and organization. Finally, a set of versatile tools such as a jigsaw, hand drill, box cutter, and sandpaper will be necessary to shape and refine your e-skate’s design.
How much does it cost to build an electric skateboard?
When it comes to assembling a gaming PC, the cost can be quite variable, depending on the specific components you select and whether you opt for brand-new or pre-owned parts. At the lower end of the spectrum, a no-frills build with budget-friendly components might start around $200-$300. On the other hand, if you’re looking to create a high-performance gaming powerhouse with all the bells and whistles, be prepared to spend upwards of $1000.
How long does it take to build a DIY electric skateboard?
The timeframe for completing a DIY project can be unpredictable, spanning anywhere from a few hours to several days. Factors influencing the duration include one’s level of expertise, the intricacy of the design, and having all necessary components at hand.
Can I use any skateboard deck for an electric skateboard?
While it’s technically possible to use a regular skateboard deck for an electric skateboard or longboard, it’s highly recommended to opt for one designed specifically for these types of boards. Decks engineered with these specific applications in mind provide greater stability and more room for securely mounting the electronics, ultimately leading to a smoother and safer riding experience.
Is it legal to ride an electric skateboard on public roads?
When it comes to using electric skateboards, it’s essential to familiarize yourself with the laws governing their use in your area. The rules can differ significantly depending on where you live, with some places treating them similarly to bicycles while others impose stricter regulations or safety requirements. As a responsible user, it’s crucial to research and comply with local ordinances before hitting the streets.
Can I make my electric skateboard waterproof?
While some degree of water resistance can be achieved through the use of silicone sealant around key components and enclosures, transforming a skateboard into a fully waterproof entity proves to be a significant challenge. Not only does this endeavor present technical hurdles, but it also raises concerns about potential compromises to the board’s overall performance.
How fast can a DIY electric skateboard go?
While speed is influenced by several factors in a skateboard, including the motor, battery, and design, it’s not uncommon for DIY boards to achieve velocities ranging from 20 to 30 miles per hour. However, with more advanced and high-performance builds, speeds can even surpass this range.
What safety precautions should I take?
When engaging in the activity, prioritize safety above all else. Make sure to don essential protective gear such as helmets, knee pads, elbow pads, and gloves to minimize potential harm. Before venturing onto public roads, take the time to thoroughly familiarize yourself with the board’s operation in a safe and controlled environment.
Can I upgrade my DIY electric skateboard later?
One of the most significant advantages of crafting your own skateboard is the seamless ability to enhance specific components such as the power source, propulsion mechanism, or speed controller to boost overall performance or extend battery lifespan.
What maintenance does an electric skateboard require?
When it comes to maintaining your electric skateboard, there are several key tasks to perform on a regular basis. These include checking the tightness of screws and bolts, inspecting the deck, wheels, and trucks for any signs of damage, ensuring that the battery and electronics are functioning properly, and giving the board a good cleaning to remove dirt and debris that can affect its performance. By taking the time to perform these routine maintenance tasks, you’ll be able to identify and address any potential issues before they become major problems. And with your electric skateboard running smoothly and efficiently, you’ll be free to focus on the fun aspects of building and riding your own custom board.
10 DIY Electric Skateboard Ideas To Build Your Own
Unleash your inner inventor by crafting 10 unique DIY electric skateboard projects that can be built from the comfort of your own home. Whether you’re a novice or an experienced builder, this diverse collection of designs will challenge your skills and inspire you to create something truly one-of-a-kind.
Make 3 Wheeled Electric Skateboard With a Hub Motor
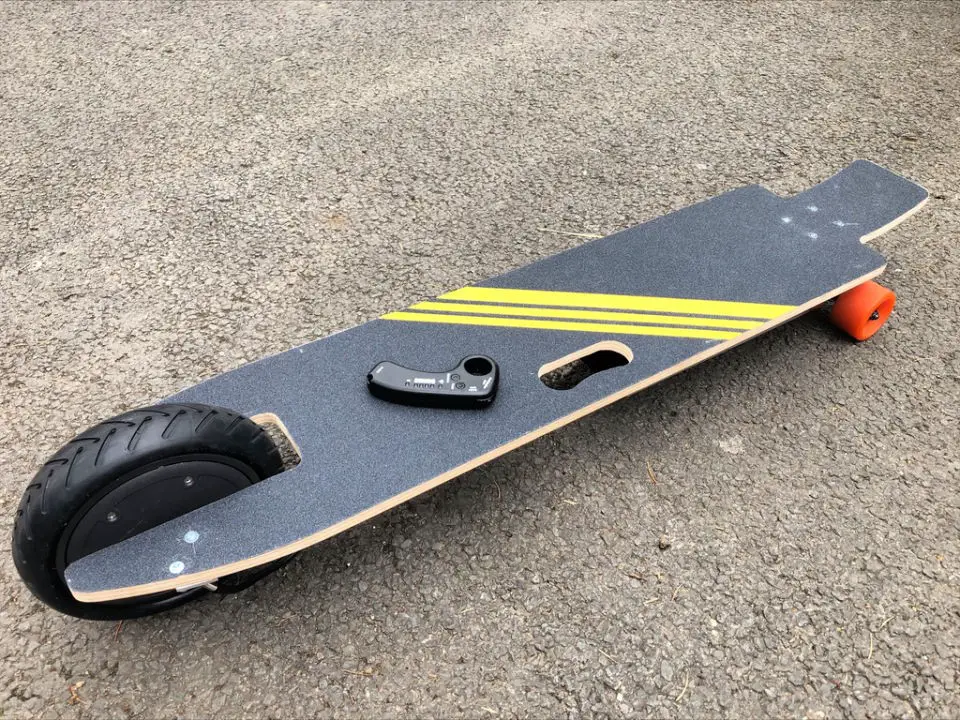
Take your daily commute to the next level by crafting a custom 3-wheeled electric skateboard that seamlessly combines eco-friendliness and DIY ingenuity. The comprehensive guide on Instructables provides an accessible route to building this unique ride, merging cost-effective solutions with innovative design. For urban dwellers seeking a reliable alternative to traditional transportation, this project is the perfect fusion of functionality and fun.
Discover the secrets to crafting your deck, selecting the ideal wheels, and assembling the electronics for a silky-smooth ride that’s as powerful as it is agile. Delve into the nuances of the tri- wheel design, which masterfully balances speed and natural handling. Whether you’re eager to tackle a new DIY challenge or simply want to make a statement with one-of-a-kind ride, follow this guide to hit the streets with your very own electric skateboard that’s uniquely yours.
Building an Electric Skateboard Powered by Drill Batteries
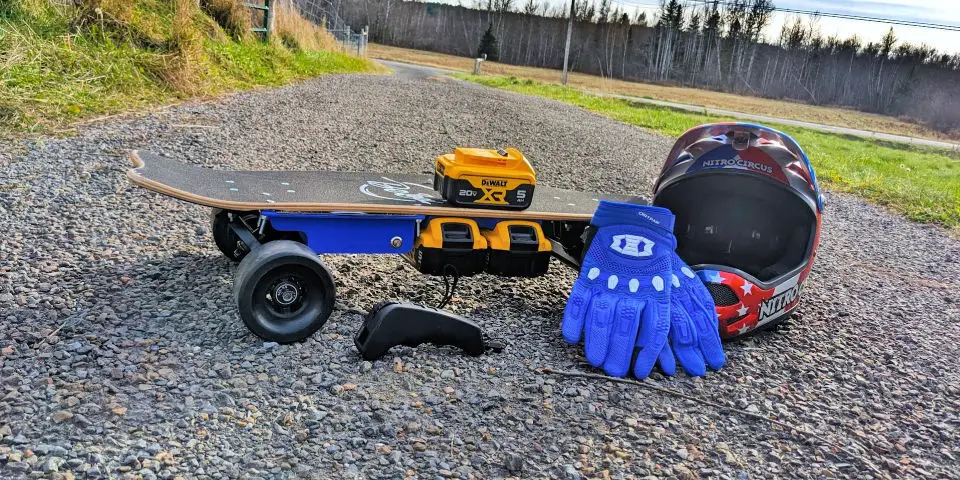
For those who crave personalization on their daily commute, Jayd’s Projects offers an enlightening guide to constructing an electric skateboard fueled by drill batteries. By transforming Li-Ion packs from common power tools and combining them with readily available components, you can create a fully functional and portable e-board that defies the ordinary. The step-by-step walkthrough provides clear explanations on assembly, programming, and testing your project, making it accessible to anyone eager to combine the thrill of skateboarding with the fulfillment of building something from scratch.
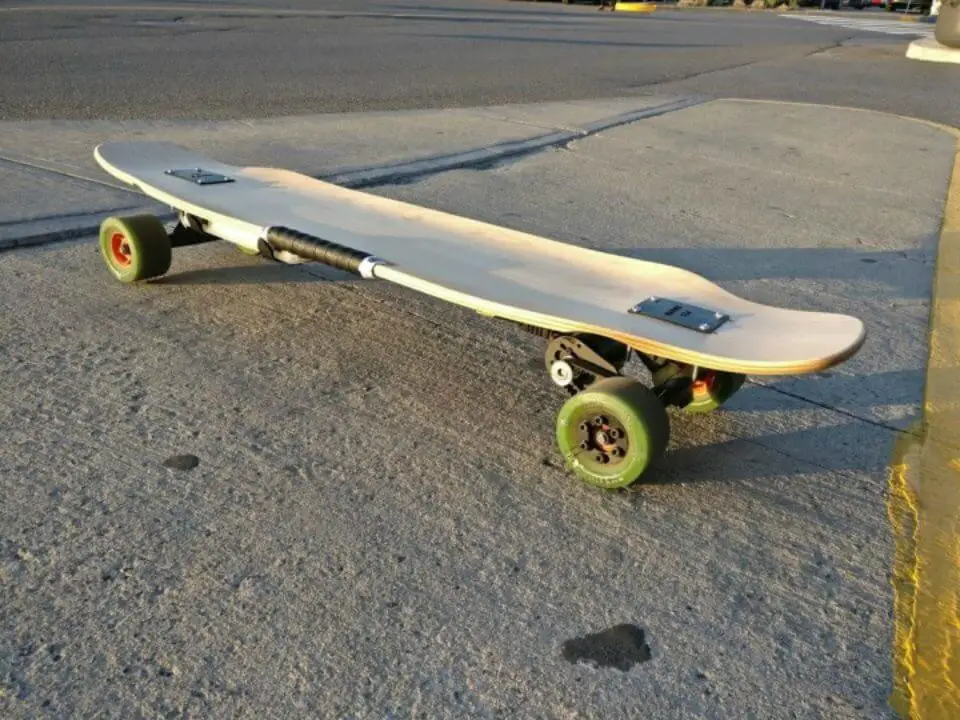
How to Make an Electric Skateboard
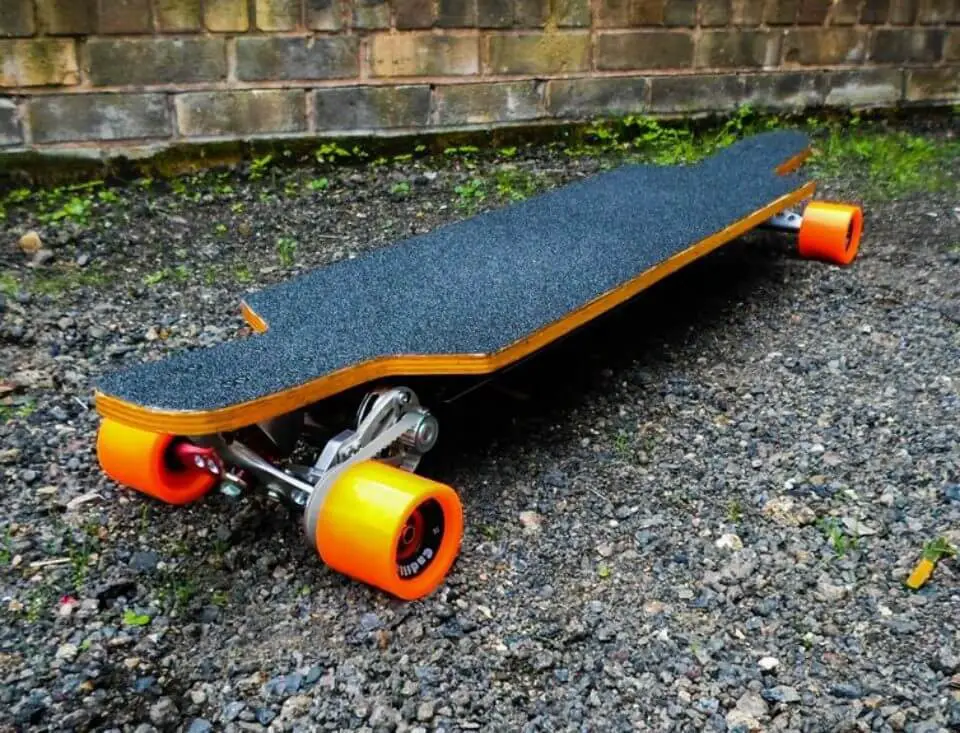
Embarking on a homemade electric skateboard project can be an exhilarating DIY endeavor, allowing you to create a custom board that rivals high-end brands without sacrificing your wallet’s well-being. With the guidance of Instructables, you’ll navigate the process of selecting components, assembling the board, and achieving impressive speeds of up to 26mph. This hands-on adventure invites you to craft an electric skateboard tailored to your budget and performance expectations, empowering you to hit the pavement with a unique ride that’s all yours.
DIY Arduino-based Electric Skateboard
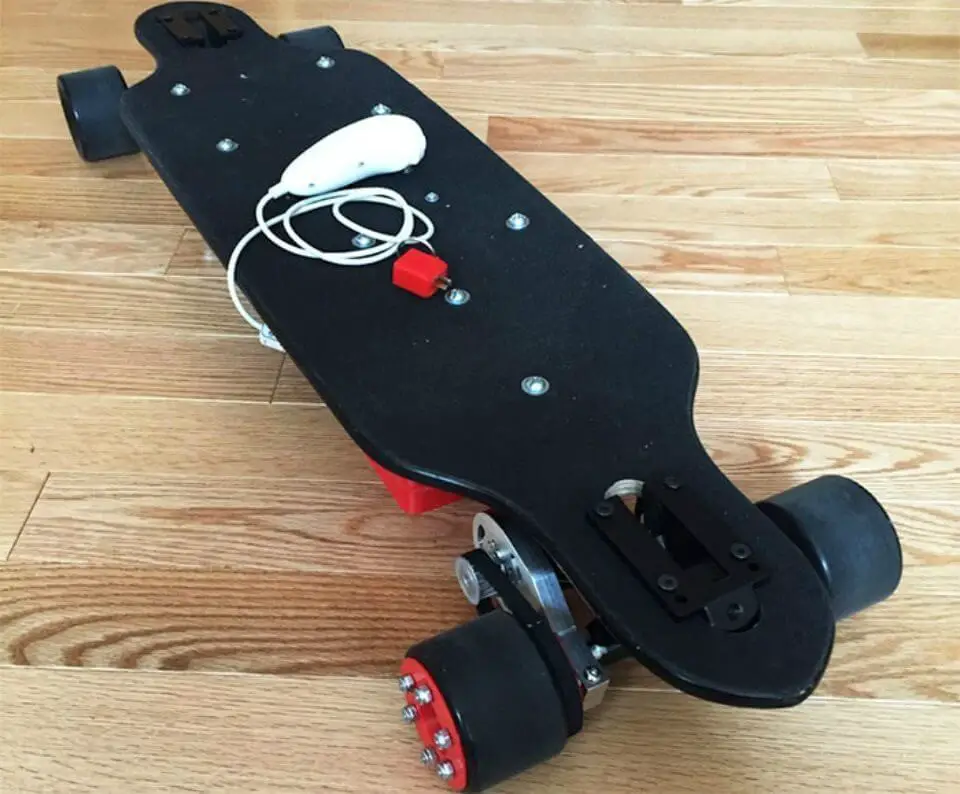
Get ready to revolutionize your daily commute with a custom-built DIY electric skateboard from Device Plus. Our comprehensive guide walks you through the process of assembling and programming an Arduino-powered board, providing a fun and environmentally friendly way to navigate through town. Designed specifically for enthusiastic DIYers looking to challenge themselves and improve their electronics skills, this tutorial is the perfect starting point for anyone eager to embark on a new project. With our step-by-step instructions, you’ll be carving up the road in no time.
Making a Carbon-fiber Electric Skateboard Deck
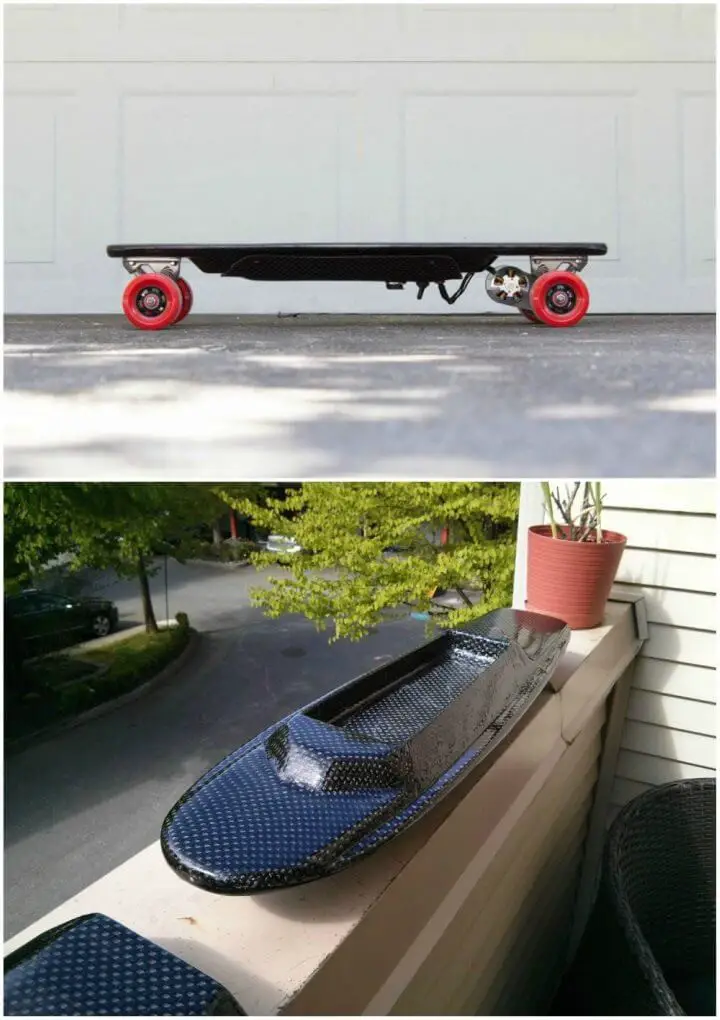
Transforming your longboard or skateboard into an agile electric ride requires careful attention to detail, particularly when it comes to the deck itself. By incorporating carbon fiber, as outlined in Instructables, you can achieve a remarkable balance between strength and weight reduction – essential for handling the added mass of electric components. This DIY guide takes you on a step-by-step journey from selecting a PVC foam core and plywood supports to applying carbon fiber and epoxy, culminating in the creation of a lightweight yet durable deck. The project also covers the crucial process of integrating an electronics compartment, allowing you to customize your electric skateboard to suit your unique needs. Whether opting for carbon fiber or fiberglass – a budget-friendly alternative that still yields impressive results – this meticulous DIY endeavor promises a sleek and rugged finish.
DIY Oren’s Third Electric Skateboard

Oren’s latest DIY electric skateboard build is a testament to innovative thinking, as he redefines the conventional battery housing approach by utilizing sandwich containers. This clever design enables swift and effortless battery swaps, ensuring an uninterrupted ride for enthusiasts. To further facilitate creativity, Oren shares a video that delves into the mathematical aspects of battery performance, making it an invaluable resource for DIY aficionados. The accompanying content from Mike Cane’s Atomic Supermen provides a captivating glimpse into Oren’s remarkable journey in crafting a high-performance and one-of-a-kind ride, making it a must-see for anyone fascinated by skateboarding technology or considering embarking on a similar project.
Electric Skateboard with Optional 3D Printed Parts
Instructables offers a detailed blueprint for crafting a DIY electric skateboard, catering to those eager to personalize their ride through hands-on tinkering. The tutorial is carefully structured to ensure a seamless learning experience, breaking down each step into an accessible and engaging process. To further customize your creation, optional 3D-printed components are available, allowing you to breathe new life into a standard longboard. With a budget-friendly approach, the project combines practicality with the excitement of building something distinct, making it an ideal pursuit for hobbyists and tech enthusiasts alike, as they merge their creative energies with the thrill of hands-on fabrication.
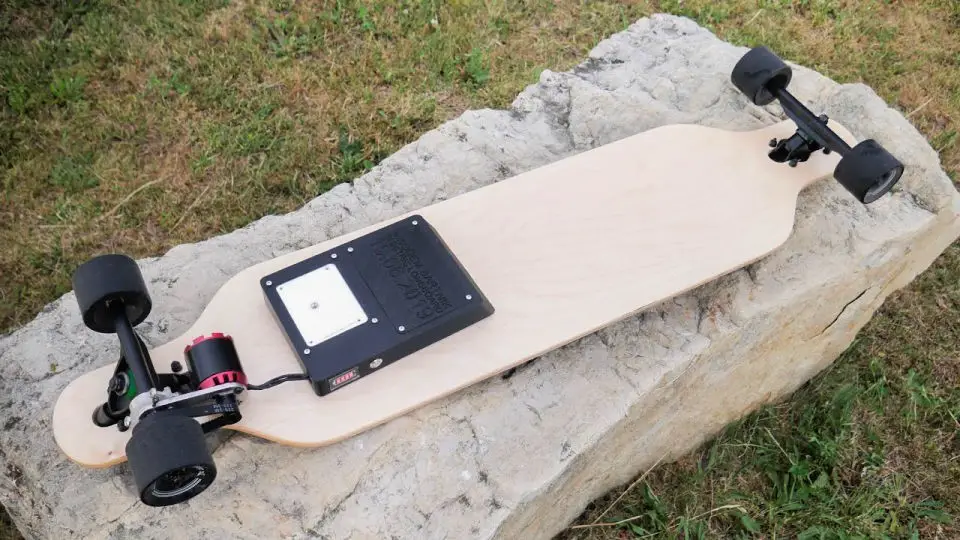
How to Build an Electric Skateboard

Get ready to revolutionize your daily commute or weekend adventure by building your own high-performance electric skateboard. Capable of reaching exhilarating speeds of up to 38MPH and boasting an impressive range of over 30 miles, this DIY project is perfect for thrill-seekers and tech enthusiasts alike. With this comprehensive guide, you’ll learn how to select top-quality components like Ownboard trucks, Flipsky motors, and the rugged Santa Cruz Rasta Lion deck, as well as assemble a powerful system featuring a 12s4p Samsung 30Q battery. From mastering motor mounts and wheel pulleys to configuring electronic systems for unparalleled performance, this project is ideal for DIY enthusiasts looking to create a custom ride that combines power, range, and style. By embarking on this electrifying journey, you’ll be setting a new standard in electric skateboarding and transforming your travel experience forever.
Easy DIY Electric Skateboard
Embark on an electrifying adventure by bringing your own DIY electric skateboard to life! This guide demystifies the process of combining accessible components like lipo batteries, brushless motors, and ESC substitutes, making it an affordable and achievable project for tech enthusiasts and skateboarding fans alike. Start by crafting a durable motor clamp with 3D printing expertise, followed by precision machining for a seamless fit. Next, master the art of assembling gears, belts, and designing a protective case for the electronics, ensuring a sleek look and reliable performance. By embracing creativity and innovation, you’ll transform your skateboarding experience into an unforgettable thrill ride that’s uniquely yours.
DIY Electric Skateboard with Massive Stator
Immerse yourself in the excitement of building your own electric skateboard with the massive stator project! This hands-on experience requires essential components, including a truck kit offering flexibility, an intuitive remote for seamless control, a durable wheel and pulley kit for a smooth ride, a powerful M24 Pro battery pack fueling your adventures, and reliable 10 x 22 bearings ensuring a consistent performance. By following our step-by-step guide, you’ll effortlessly assemble these parts into a high-performance electric skateboard tailored to your needs. Not only will this DIY project hone your technical skills, but it also provides the satisfaction of cruising on a board that reflects your unique preferences. Join the electrifying build and ride the wave of personal achievement and innovation.
Conclusion:
As you conclude your DIY electric skateboard project, remember that it’s not just about the rush of cruising down the road – it’s about the journey itself. You’ve taken creative liberties, honed technical skills, and relished in the pride of riding a board you built with your own hands. This comprehensive guide has been designed to serve as a trusted companion throughout your project, offering expert advice on every aspect from selecting materials to final assembly. Our goal is to make each step easy to follow, affordable, and empowering, so you can embark on this electrifying DIY adventure with confidence. As you look back on the experience, remember that it’s the journey – not just the destination – that holds the most value.
