Say goodbye to the frustration of tangled earbuds or lost ones when you need them most. Our comprehensive guide to crafting DIY earbud holders and cases presents a creative solution to keep your earbuds organized and safe. With 20 unique designs to choose from, you’ll find the perfect one that matches your style and meets your needs. By following our easy-to-follow tutorials, which require minimal materials and effort, you can create these handy accessories in no time. Not only is making your own earbud holder a practical project that saves time and reduces frustration, but it’s also an opportunity to add a personal touch to your accessories. Whether it’s for personal use or as a thoughtful handmade gift, our guide ensures that creating a DIY earbud case is an enjoyable and rewarding experience. Let’s dive into the next section, where we’ll provide a step-by-step tutorial on sewing your very own earbud holder. Get ready to embark on this crafty adventure and keep your earbuds protected and easily accessible.
Why Make Your Own Earbud Holder?
When it comes to DIY projects, creating an earbud holder might seem like a small task, but the rewards are substantial. By taking on this crafty challenge, you’ll reap numerous benefits that make the effort worthwhile.
One of the primary advantages is the ability to reduce tangles and keep your earbuds organized. This simple solution can save you from the frustration of dealing with knotted cords.
Another benefit is the opportunity to express your personal style through customization. Whether you prefer bold colors or understated designs, you can create an earbud holder that reflects your unique taste.
Not only will making your own earbud holder save you money compared to purchasing one, but it’s also a cost-effective way to reuse materials you already have at home or upcycle items you might otherwise throw away. This eco-friendly approach is not only good for the environment but also great for your wallet.
Handmade earbud holders also make thoughtful gifts for friends and family, showing that you’ve taken the time to create something special just for them. It’s a meaningful way to show you care.
Lastly, DIY projects like this one are not only practical but also enjoyable and fulfilling. Engaging in craft activities can be a great stress-reliever and a way to tap into your creative side.
In short, making an earbud holder is a project that offers a range of benefits, from keeping your earbuds tidy to expressing your personal style, saving money, and having fun while doing it.
DIY Earbud Holder: Easy Sewing Tutorial
Creating an earphone holder is a delightful and practical project, ideal for individuals who constantly struggle with tangled earphones. This beginner-friendly sewing tutorial will walk you through the process of crafting your own earphone pouch using fundamental materials and a straightforward approach. Not only is this DIY perfect for novices and experienced crafters alike, but it also makes for a thoughtful, personalized gift.
What You’ll Need:
When crafting your own garment, you’ll need to work with three primary types of materials: the outer fabric that will be visible, the interfacing which provides structure and support, and the lining fabric that adds an extra layer of comfort. Alongside these fabrics, a few essential tools are necessary for bringing your design to life. A CD or stencil can help you achieve precise cuts and shapes, while a zipper allows for easy opening and closing. Scissors, sewing clips or pins, and a trusty sewing machine will aid in the actual construction process. Finally, having a good supply of thread on hand ensures that everything comes together seamlessly.
Step 1: Trace and Cut
To begin with, take your CD and utilize its circular shape to create templates on the reverse side of each material – outer fabric, interfacing, and lining fabric. Repeat this process for each material type, creating a total of six circular templates. Once you have these templates ready, cut them out carefully to prepare them for the next step in the process.
Step 2: Preparing the Halves
Begin by selecting a single circle from each of the materials you’re working with. Next, fold each circle in half and carefully cut along the crease. This process will yield a complete circle from one material and two semi-circles from the other. The resulting pieces can be used as is or further manipulated to suit your creative vision.
Step 3: Assembling the Zipper
To begin, position one half-circle of your outer fabric face up. Next, place the zipper facing downwards, ensuring its teeth align perfectly with the edge of the fabric. Subsequently, layer a corresponding half-circle of interfacing and lining fabric on top, carefully overlapping them to create a seamless union. Secure these layers together by clipping and sewing using a precise quarter-inch seam allowance. Repeat this process on the opposite side, utilizing the remaining semicircles.
Step 4: Top Stitching
After securing both zipper ends to the fabric, carefully unfold the material to create a smooth surface. To complete this process, use a consistent stitching pattern along the entire length of the zipper’s edges. As you prepare for the next stage, make sure the zipper is positioned at its halfway point.
Step 5: Closing the Zipper
To securely fasten the zipper, slightly overlap the ends and sew them together. This crucial step ensures that the zipper pull remains in place even when the pouch is being used.
Step 6: Completing the Pouch
To complete the pouch’s upper section, create a ‘fabric sandwich’ by layering the remaining whole circles in the following order: first, place the outer fabric on the bottom (right side up), followed by the interfacing, and finally the lining fabric on top. Position this stack atop the assembled half-circles, ensuring that the right sides of the outer fabrics are aligned with each other. If desired, now is a good time to add a pull tab for easy access. Next, secure the layers together by clipping them in place and then sewing along the perimeter.
Step 7: Finishing Touches
To complete your earphone pouch, carefully trim away any excess zipper and tidy up the fabric edges. Next, grasp the pouch by the zipper opening and flip it right side out. As you successfully turn the pouch inside out, you’ll have achieved a functional and stylish DIY project. The versatility of this design lies in its ability to be easily customized with different fabrics, allowing you to tailor the look to your personal style or match any outfit.
Video Tutorial
For a more immersive understanding of the DIY Earphone Holder process, I recommend watching the accompanying video tutorial alongside this written guide. The synergy between the two provides an unparalleled learning experience, allowing you to tackle each step with confidence and precision. By combining visual and textual instructions, you’ll gain a deeper comprehension of the project, ensuring a seamless and enjoyable crafting journey.
Frequently Asked Questions on DIY Earbud Holders
Embarking on a DIY earbud holder project is an exciting adventure that combines creativity with functionality. To guide you through this process, here’s a comprehensive overview of the most frequently asked queries, providing the necessary insights to kick-start your creative journey and turn your idea into a reality.
What materials do I need to make a DIY earbud holder?
To embark on a DIY earbud holder project, you’ll typically require a few essential components. First and foremost, you’ll need a suitable material for the holder’s body, such as fabric or felt. Additionally, you’ll need a means of assembly, which could be a sewing kit or a hot glue gun, depending on your preferred approach. If you want to add a closure mechanism, you may also require optional materials like zippers, buttons, or snaps. Finally, if you’re looking to personalize your earbud holder with some flair, consider incorporating decorative elements such as embroidery thread, beads, or fabric paint.
Can I make an earbud holder without sewing?
You can craft a no-sew earbud holder by combining materials like felt or leather, then securing them together using a hot glue gun or strong adhesive. Some creative designs might employ snap fasteners or velcro as alternative closures, effectively rendering sewing unnecessary.
How long does it take to make a DIY earbud holder?
The timeframe for crafting a DIY earbud holder depends heavily on the intricacy of the design chosen. On the simpler end, no-sew projects can be completed in a mere 15 minutes, whereas more complex sewing endeavors may require an hour or more to complete, allowing for flexibility and creativity in the project’s pace.
Are DIY earbud holders suitable for beginners?
For those new to DIY projects, rest assured that many earbud holders are specifically designed with beginners in mind. These tutorials typically utilize straightforward materials and uncomplicated techniques, making them perfect for novices. When searching for a project, look for labels such as ‘beginner-friendly’ or ‘easy’ to ensure you’re tackling something suitable for your skill level.
Can I make a DIY earbud holder as a gift?
When it comes to gift-giving, DIY earbud holders stand out as an exceptional choice due to their thoughtful and functional nature. One of the greatest advantages is the ability to tailor the design to the recipient’s personal style, resulting in a truly one-of-a-kind present that will be cherished for years to come.
How do I ensure my earbuds fit in the holder?
When preparing to design an earbud holder, it’s crucial to take measurements of the earbuds themselves, factoring in the necessary space required for the cord and earpieces. To guarantee a snug and comfortable fit, incorporate a slight margin into your design calculations.
What’s the best way to decorate a DIY earbud holder?
When it comes to decorating your earbud holder, the possibilities are endless. For a playful touch, try using fabric paint or markers to add colorful designs or whimsical writings. If you’re looking to add some texture, consider incorporating embroidery or cross-stitch techniques. Alternatively, appliqués or fabric patches can bring a burst of color and personality to your earbud holder. Finally, for an added layer of sparkle and fun, don’t be afraid to incorporate beads, sequins, or buttons into your design.
Can I upcycle materials to make an earbud holder?
Transforming discarded items into functional creations is the essence of upcycling. In the context of earbud holders, this approach not only produces one-of-a-kind designs but also helps reduce waste and promote sustainability. Repurpose materials like repurposed clothing, plastic containers, or leather scraps to breathe new life into them and create a unique earbud holder that not only serves its purpose but also tells a story of creativity and environmental responsibility.
How do I care for my DIY earbud holder?
When it comes to caring for your DIY earbud holder, the approach will largely depend on the materials you used in its construction. For fabric-based holders, a gentle hand-wash followed by air-drying is usually sufficient. On the other hand, plastic or metal components typically require only a damp cloth wipe to keep them clean. While crafting a functional item like an earbud holder can be a rewarding experience, it’s equally important to remember that DIY projects offer a unique opportunity to flex your creative muscles and infuse your personal style into your work. So, don’t be afraid to get creative with different materials and designs – the process is just as enjoyable as the end result!
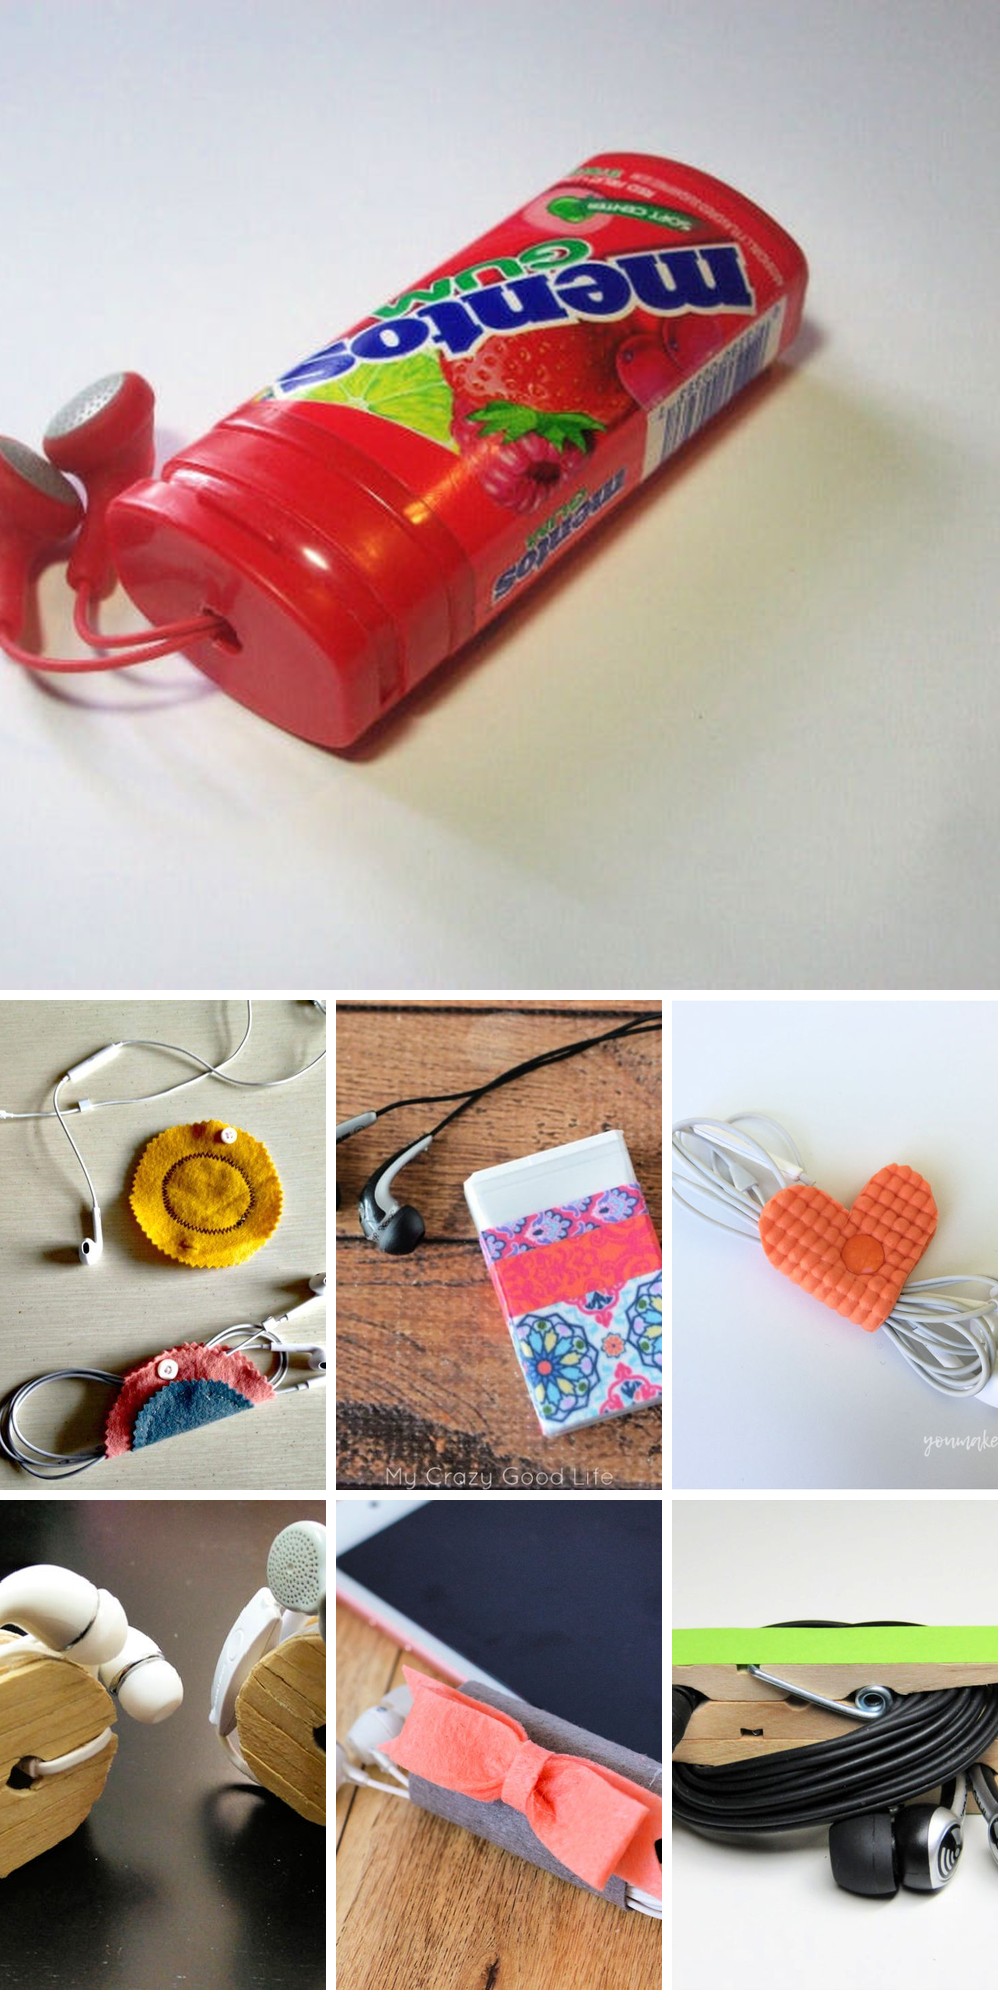
20 DIY Earbud Holder Ideas | DIY Earbud Case
Get inspired by these 20 innovative DIY solutions for earbud holders and cases that will revolutionize the way you store and manage your earbuds. Say goodbye to tangled cords and hello to a clutter-free audio experience.
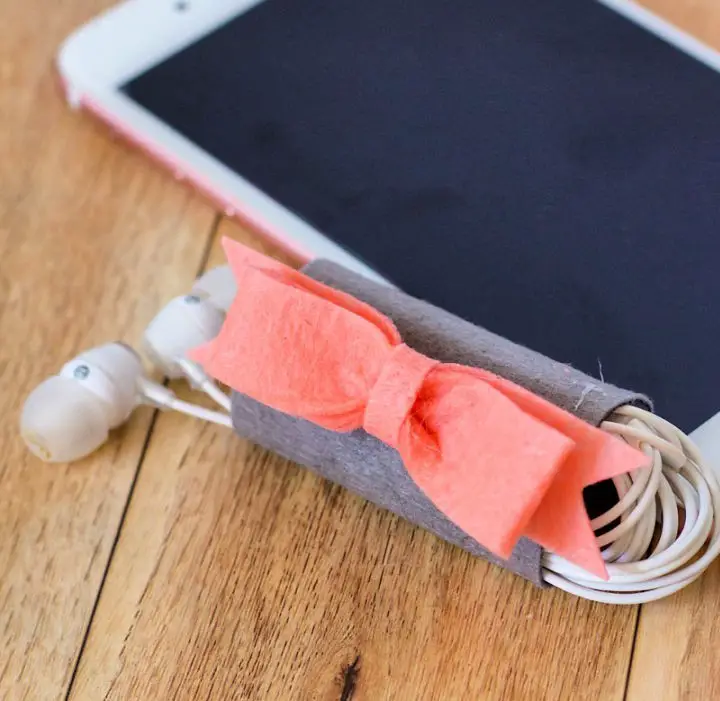
DIY Felt Taco Earbud Holder
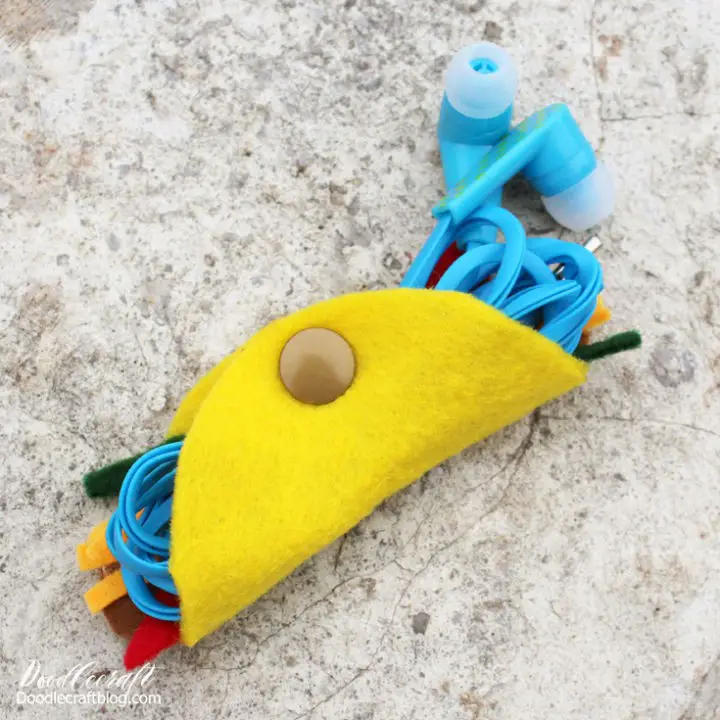
Transform the frustration of tangled earbuds into a delightful DIY experience with the Felt Taco Earbud Holder! This ingenious solution requires only a handful of basic supplies, including felt, hot glue, and scissors, to create a whimsical taco-shaped holder in mere minutes. Perfect for personal use or as a thoughtful gift or party favor, this charming craft is not only engaging but also remarkably practical. With the Felt Taco Earbud Holder DIY, you can bid farewell to earbud chaos and hello to organized bliss.
How to Make Earphone Holder
Transforming the frustration of knotted earphone cords into a stylish and eco-friendly solution is just a few minutes away with a DIY earphone holder. This innovative project utilizes upcycled materials, eliminating waste while adding a touch of creativity to your daily routine. By embracing the Kam snap system’s colorful snaps, you’ll enjoy a seamless crafting experience that requires no sewing expertise. Simply choose from durable materials like recycled yoga mats or wool sweater fabric, and select between rectangular or heart-shaped designs to create a one-of-a-kind earphone cord holder. Follow the step-by-step instructions and grab the free pattern to bring your design to life. This game-changing project will revolutionize the way you keep your cords organized on-the-go, freeing up more time for what truly matters.
Mickey Mouse Earbud Pouch Sewing Pattern
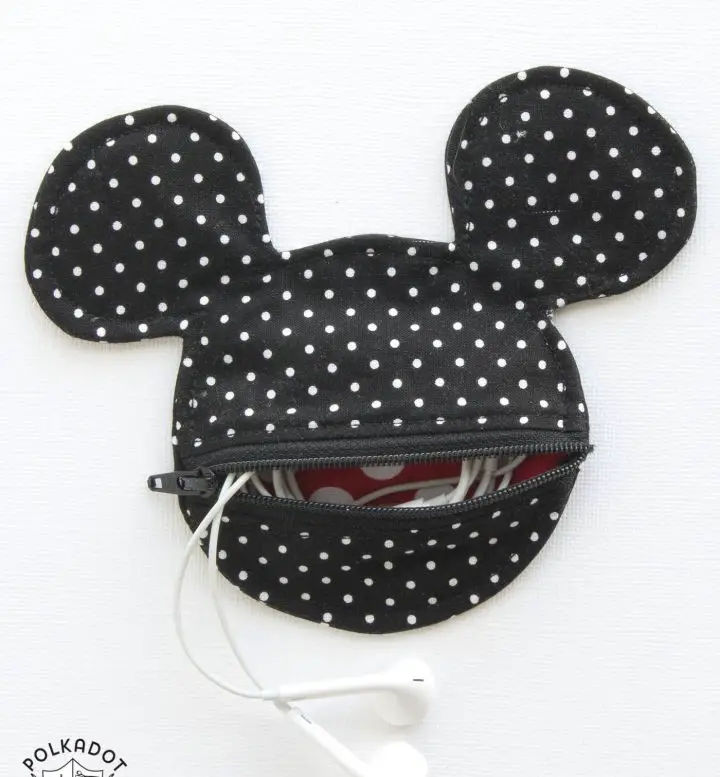
Indulge your inner child and spark some creativity with this whimsical Mickey Mouse Earbuds Pouch Sewing Pattern. Designed specifically with Disney fans in mind, this easy-to-sew project allows you to craft a practical pouch or coin purse that’s perfect for storing earbuds, coins, or tiny treasures. Whether you’re looking to create a thoughtful gift or simply add some magic to your everyday accessories, this pattern is sure to bring a smile and a touch of nostalgia to your sewing experience.
Earbud Holder From Tic Tac Containers
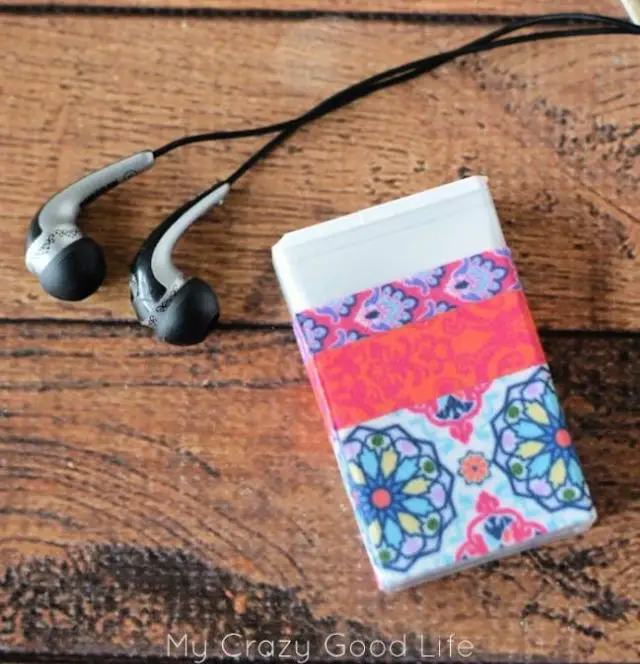
In today’s fast-paced digital age, maintaining tidy earbud storage is a top priority. One innovative solution to this common problem is crafting an Earbud Holder using a Tic Tac container. This clever and space-efficient design ensures your earbuds remain organized and easily accessible, eliminating the frustration of dealing with tangled cords. By transforming the Tic Tac container into a bespoke holder, you’ll enjoy the added benefit of being able to carry it in your pocket or bag without any bulk. Simply empty the container, add some fabric tape for a personalized touch, and follow the easy tutorial at mycrazygoodlife.com. This ingenious tech organization solution is perfect for anyone on-the-go who values simplicity and efficiency.
Make a Clothespin Earbud Holder
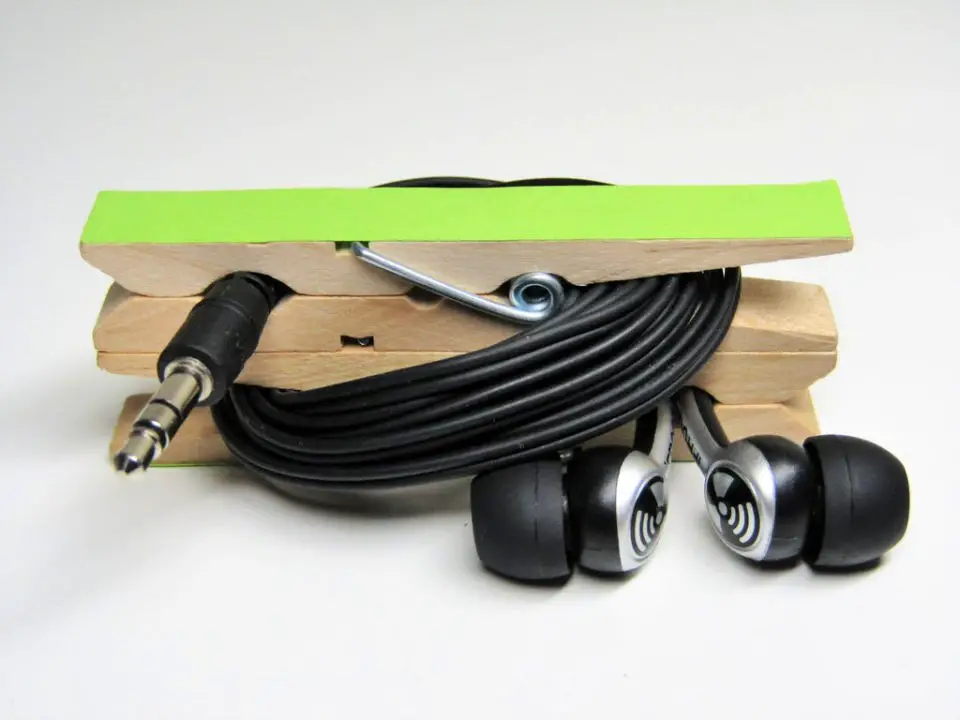
Ditch the frustration of knotted earbud cords with the ingenious Clothespin Earbud Holder. This clever DIY project not only keeps your audio accessories tidy but also upcycles a humble household item into a quirky accessory. Whether you’re a music aficionado or a crafty enthusiast, this simple solution is sure to delight. By repurposing a clothespin in a few easy steps, you’ll be enjoying tangle-free listening experiences in no time. No more rummaging through your bag or purse for that one pesky earbud – the Clothespin Earbud Holder has got you covered.
Make Your Own Earbud Holder
Tired of dealing with knotty earbud cords? Revolutionize your audio experience with a clever and effortless DIY project that’s perfect for crafters of all ages! With just two simple materials – clothespins and Washi tape – you can create a personalized earbud holder that keeps your favorite tunes organized. This fun and easy-to-make accessory is also an excellent gift idea, allowing you to showcase your creativity while keeping cords under control. To add some extra flair, simply use paint or glue to customize your design. For more innovative DIY solutions, check out our clothespin iPhone stand tutorial, exclusively on Craft Your Happiness!
Portable Container for Earbud

Discover the freedom of a tangle-free life with a DIY portable container for your earbuds. This simple yet effective guide empowers you to create a compact, stylish case that keeps your earbuds safe from damage and within easy reach. Perfect for music enthusiasts who are always on-the-move, this project seamlessly combines protection and convenience. By embracing this clever solution, you’ll be able to keep your tunes close at hand while keeping your earbuds untangled and in pristine condition.
Homemade Leather Earbud Holder
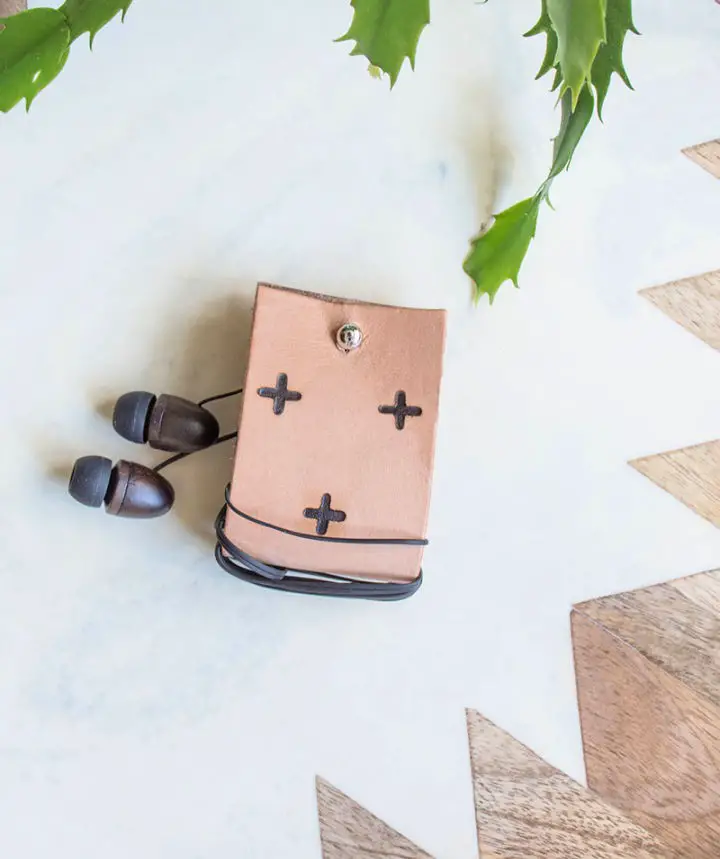
Are you tired of the frustration that comes with dealing with tangled earbuds? It’s time to say goodbye to that hassle and hello to a stylish solution. By creating a simple Leather DIY Earbud Holder, you’ll not only keep your cords neatly organized, but also add a touch of personal flair. The holder can be customized with various techniques like wood burning, painting, dyeing, or metal stamping, allowing you to put your own unique spin on the design. Whether you’re heading out for a trip or just want to keep your earphones tidy, this cord organizer is the perfect solution. And if you need some guidance on how to make your own holder, DIY in PDX has got you covered.
DIY 15 Minute Felt Earbud Holder
In just 15 minutes, you can transform your earbud woes into a stylish and functional DIY masterpiece. This effortless felt earbud holder project requires only basic materials like felt, hook and loop tape, a hot glue gun, and fabric scissors. No sewing machine needed, as this straightforward tutorial guides you through every step to achieve a tangle-free solution for your earbuds. For the full instructions and to keep your earbuds neatly organized, visit The Simply Crafted Life.
Perler Bead Pokemon Earbud Holder
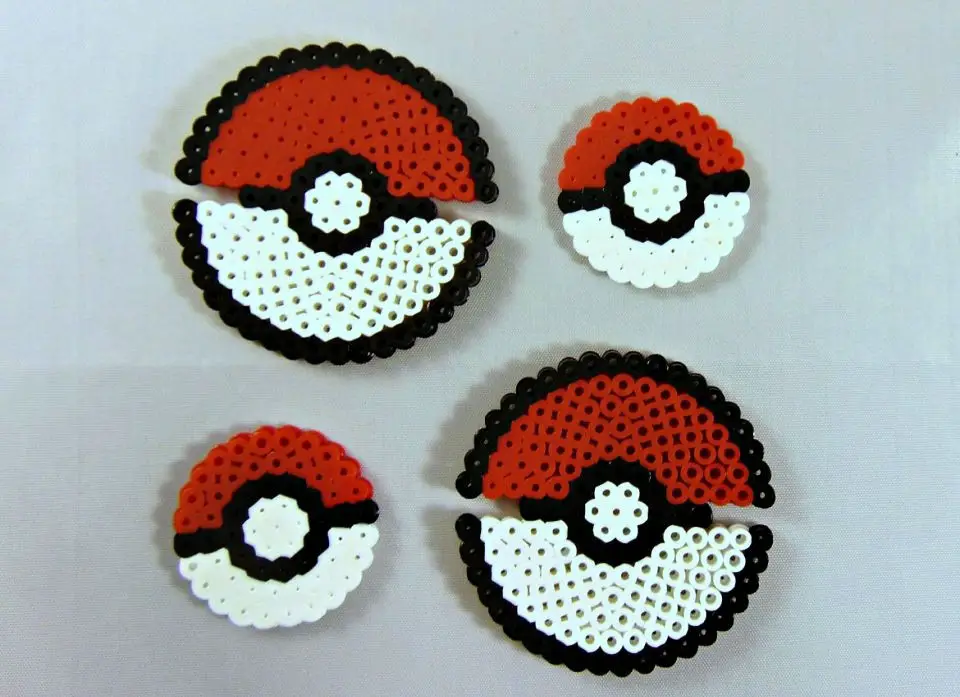
Transform your passion for Pokémon into a creative outlet with an endearing Perler Bead Pokémon Earbud Holder. This charming DIY project combines the joy of Pokémon with the satisfaction of crafting, using just red, white, and black Perler Beads, a round pegboard, and a hot glue gun. By meticulously assembling four distinct shapes, you’ll create a Pokeball-featured holder that will keep your earbuds neatly organized. Perfect for any Pokémon enthusiast seeking to express their fandom through a unique craft. For step-by-step guidance on this delightful project, visit Krysanthe.
How to Make Your Own Felt Earbud Case
Get creative with this quick and easy DIY Felt Earbud Case tutorial, perfect for keeping your earbuds and charger cables tidy. With minimal supplies required and a completion time of just 15 minutes, you’ll be able to whip up your own personalized felt case in no time. Plus, as part of our Craft Lightning Week series, this project offers a daily dose of fun and creativity, with each design taking just 15 minutes to complete. To start crafting your unique earbud case, simply gather a square of felt, a glass, a fabric marker pen, scissors, some coordinating embroidery floss, and an embroidery needle – and let the creative process begin!
Easy DIY Fabric Earbud Holder
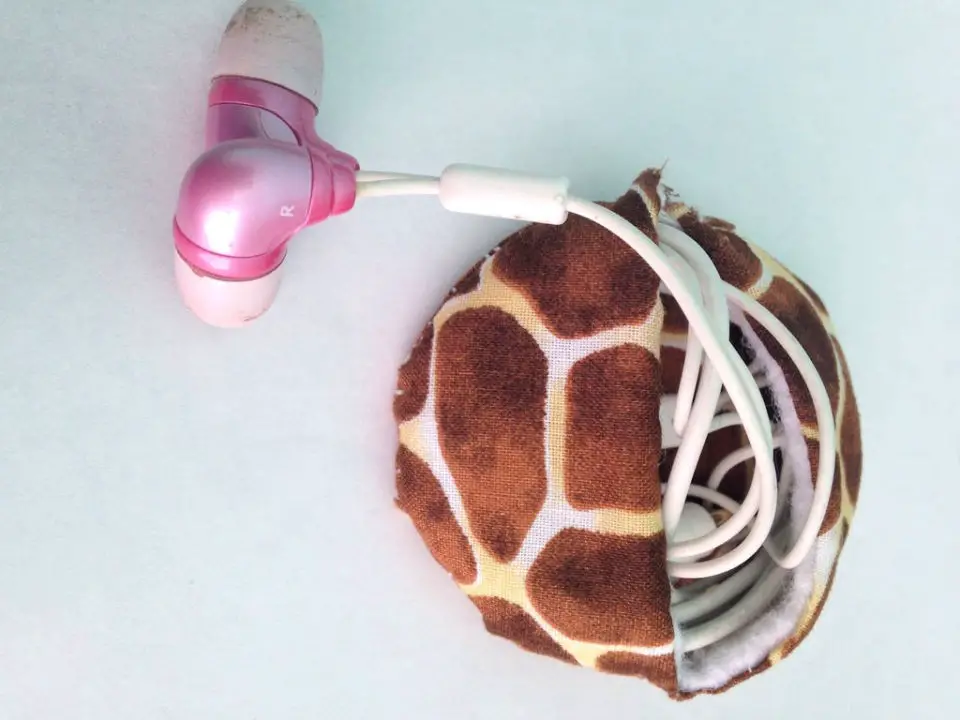
Say goodbye to the frustration of tangled earbuds with this straightforward DIY fabric earbud holder guide. Designed for both functionality and style, this project is perfect for anyone seeking a simple yet effective solution to keep their earbuds secure and untangled. The step-by-step tutorial on Instructables provides a clear path to creating a functional and aesthetically pleasing accessory that will revolutionize your daily routine, eliminating the annoyance of knotted cables and bringing you one step closer to organized bliss.
Cable Drum Earphone Holder Ideas
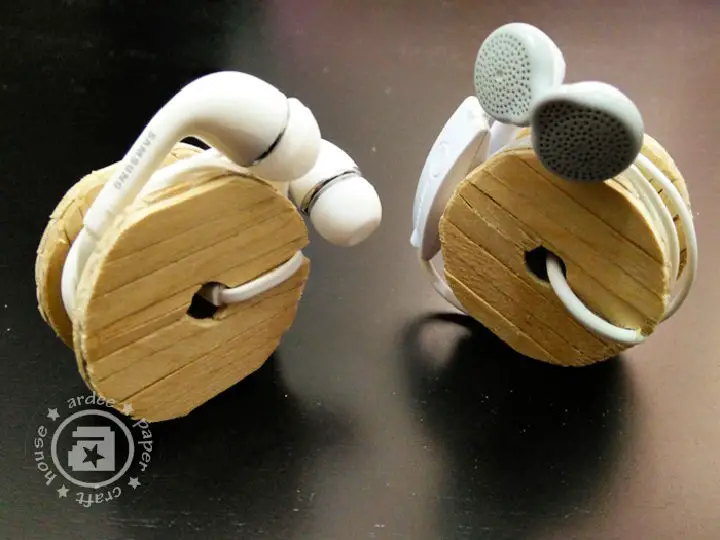
Say goodbye to the frustration of dealing with tangled earphones. Inspired by the wooden earphone holders found on Etsy, this DIY project transforms craft sticks into a miniature cable drum that keeps your earphones neatly wrapped. The clever design ensures both functionality and aesthetic appeal, mimicking the look of actual construction cable drums. To create this rustic yet durable holder, simply cut, shape, and glue the sticks together. With this simple solution, you’ll never have to deal with knotted earphones again. For a step-by-step guide on how to make your own DIY Cable Drum Earphone Holder, visit Ardee Paper Craft House.
Plushie Animal Earphone Holder
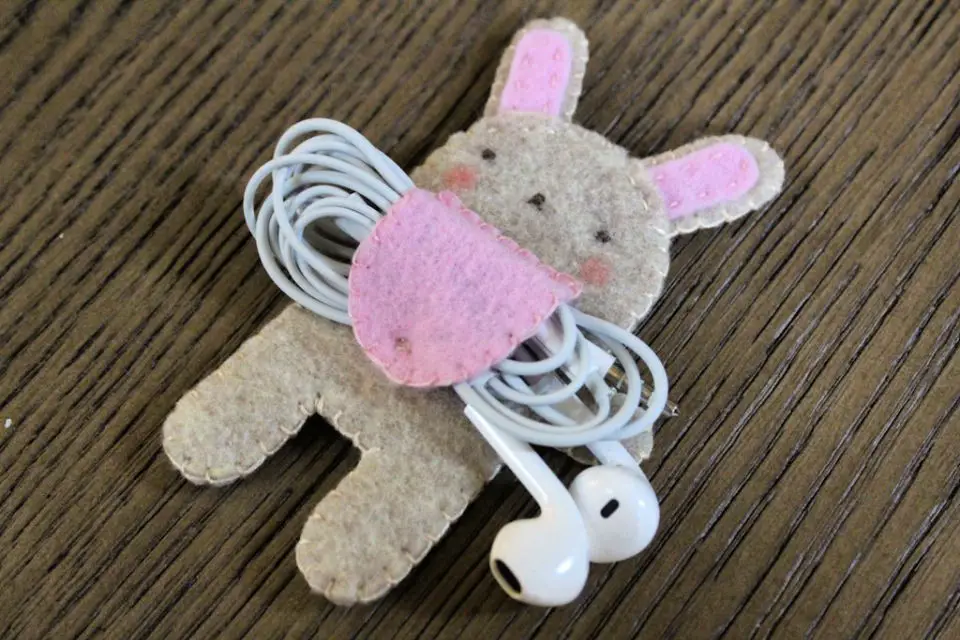
Unleash the whimsy in organizing your earphones with Plushie Animal Earphone Holders! Discover the simple yet effective way to craft a charming felt bunny holder that not only keeps your earphones tangle-free but also injects personality into your accessories. This unique accessory is perfect for gifting or personal use, combining functionality with an undeniable charm. By following easy-to-follow steps at Instructables, you can bring a touch of joy and organization to your daily essentials in no time.
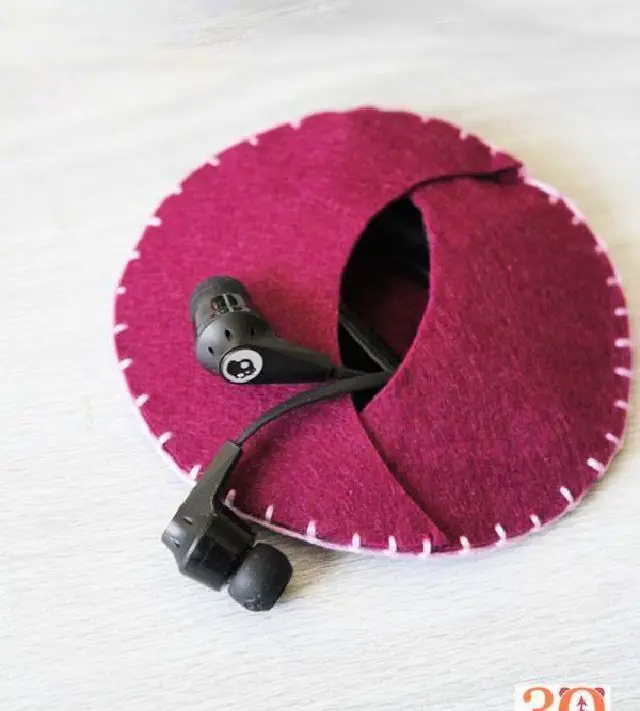
DIY Felt Earbud Holder at Home
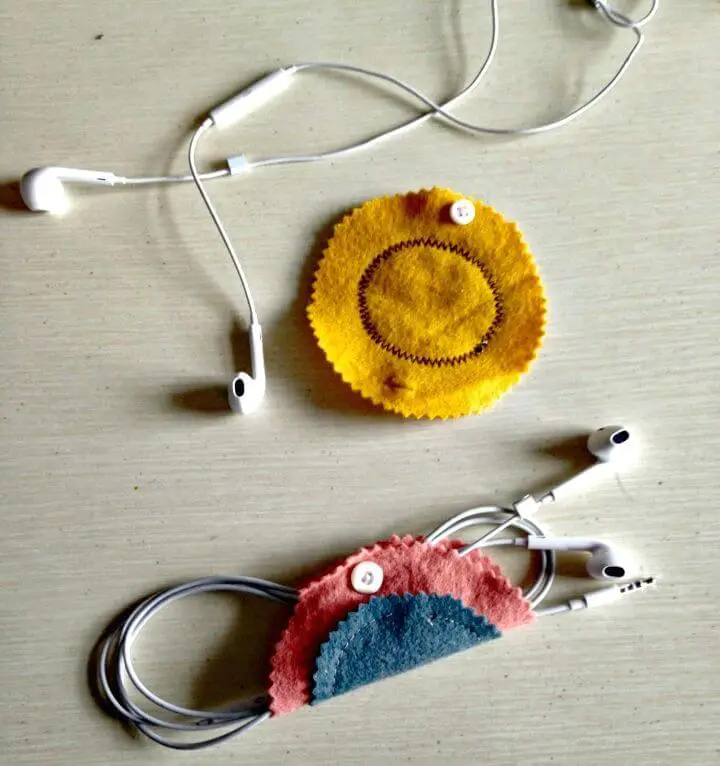
Discover the satisfaction of crafting a DIY Felt Earbud Holder with an approachable, step-by-step guide. Wave goodbye to earbud chaos and hello to stylish organization. To get started, gather basic materials: felt, scissors, a needle and thread, chalk, and a button. Then, follow a straightforward process: draw and cut out felt circles, sew them together seamlessly, and secure the closure with a button. This charming project is perfect for personal use or as a thoughtful gift, offering both fun and functionality. For a more detailed tutorial, visit Tweeterfly.
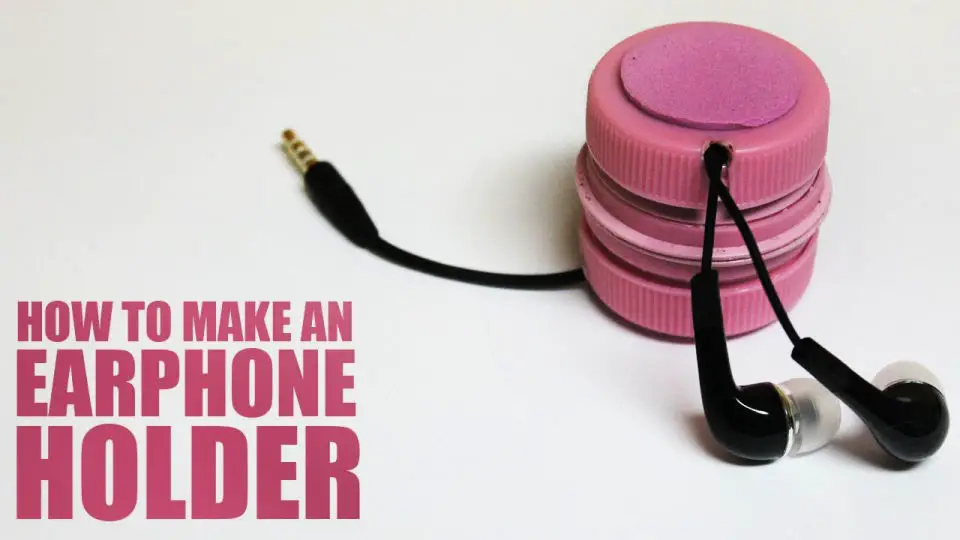
Earphones Holder Using Plastic Bottle Caps
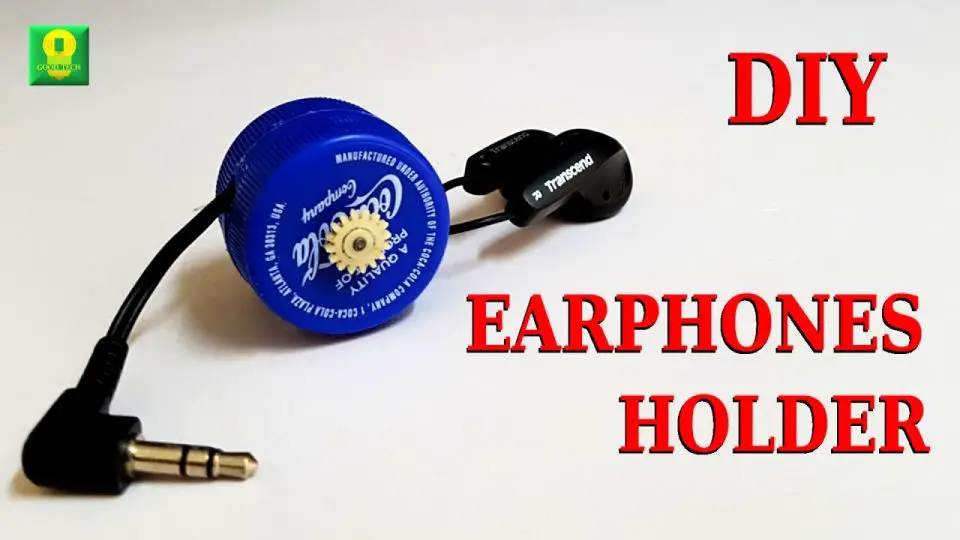
Transforming tangled earphone wires into a distant memory is now achievable with a clever DIY solution. By repurposing plastic bottle caps, create your own functional and environmentally friendly earphone holder with our concise and straightforward tutorial on Goodtech – Creativity and Science. This ingenious hack eliminates the frustration of dealing with wire tangles, offering a practical and eco-conscious alternative to keep your audio accessories in check.
Making Earbud Holder Out of Wood
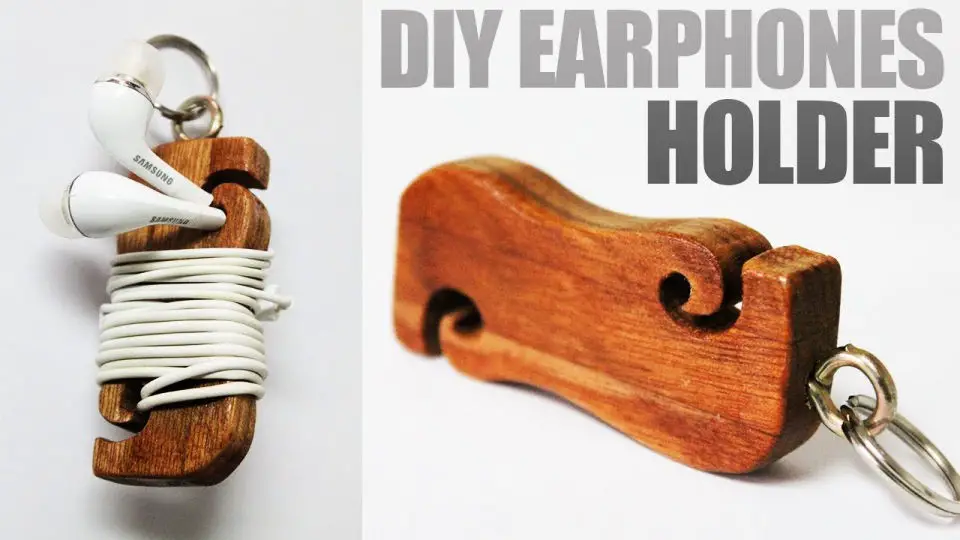
With this simple DIY project, you can bid farewell to the frustration of tangled earbuds. By crafting your own wooden earbud holder with a built-in keychain, you’ll be able to keep your headphones organized and within easy reach. This versatile accessory is designed to make your life easier by providing a convenient place to store your earphones when not in use. In just a few straightforward steps, you can create this practical solution that’s perfect for anyone who values organization and convenience.
Handmade Leather Earbud Holder
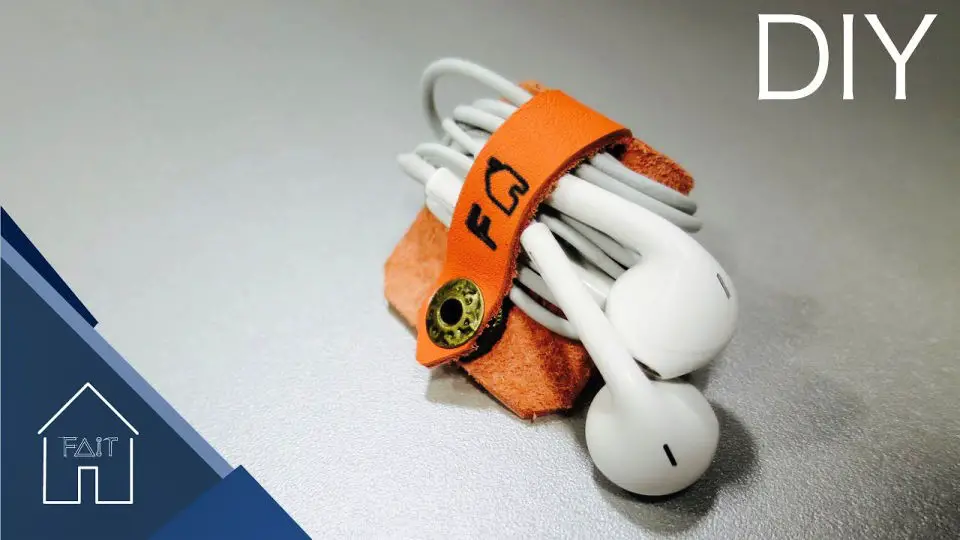
Say goodbye to earbud chaos with a simple leather earbud holder. This DIY project is a game-changer for anyone tired of dealing with knotted cords. By following the easy-to-follow tutorial on Fait Maison – Bricolage, you’ll be able to create a customized solution that keeps your earbuds organized and tangle-free. The best part? It’s incredibly quick and effective, making it a must-try for anyone looking to streamline their daily routine.
Earphone Holder Using Plastic Milk Bottles
If you’re tired of dealing with tangled earphone cords, there’s a clever DIY solution that can keep your audio accessories organized. By repurposing two plastic milk bottles, some craft foam, and a small amount of hot glue, you can create a functional and easy-to-use earphone holder. This project is perfect for those who value simplicity and efficiency, as it requires minimal materials and no advanced crafting skills. With this straightforward guide, you’ll be able to effortlessly keep your earphones tidy and ready for use whenever you need them.
Simple DIY Watermelon Earphone Holder
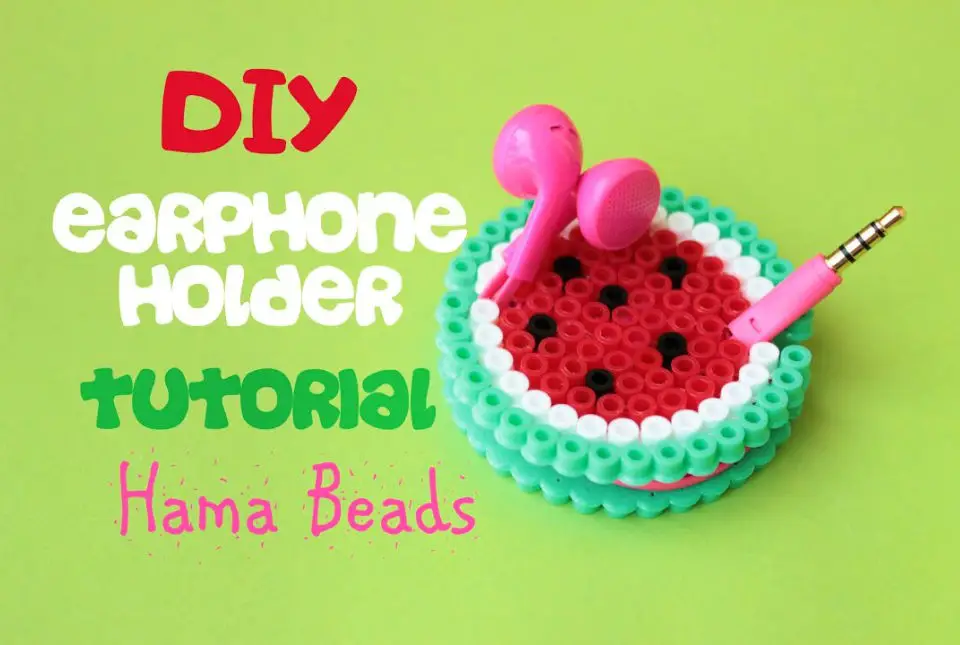
Indulge in the Watermelon Earphone Holder Tutorial by Sissy’s Creations, a delightful adventure that combines DIY prowess with creative flair. This comprehensive guide shows you how to craft a unique and functional watermelon earphone holder, an ideal project for anyone seeking to merge functionality with whimsy. Whether you’re looking to gift or keep this charming creation for yourself, the straightforward and engaging tutorial ensures a fun-filled experience.
Conclusion
As we wrap up our exploration of crafting 20 unique DIY earbud holder ideas and DIY earbud cases, it’s clear that the creative process has been not only enjoyable but also surprisingly empowering. By taking on these projects, you’re not just keeping your earbuds organized and protected – you’re also given a chance to showcase your personal flair and create thoughtful gifts for loved ones. The sense of accomplishment that comes from bringing an idea to life is undeniable, and we hope this guide has sparked your imagination to take on your own DIY adventure. With your new handmade holders and cases, you’ll not only be keeping your earbuds secure but also making a statement with your unique style.
