Why Make Your Own Dress Form?
Creating your own dress form offers a wealth of benefits tailored to your unique sewing needs. Not only does it provide an accurate representation of your body shape, but it also fosters creativity, problem-solving skills, and cost-effectiveness.One of the most significant advantages is the precise fit it provides. Unlike store-bought mannequins, a DIY dress form is designed specifically to match your measurements, eliminating the need for constant adjustments and guesswork. This level of customization ensures that garments fit flawlessly, giving you the confidence to focus on other aspects of your sewing practice.Another significant perk is the cost-effectiveness of creating your own dress form. By using basic materials and a bit of creativity, you can craft a high-quality form without breaking the bank. In fact, making your own dress form can be significantly cheaper than purchasing a professional one.Beyond these practical benefits, creating your own dress form also presents an opportunity for learning and growth. The process requires accurate measuring, working with different materials, and problem-solving – skills that are transferable to other sewing projects.Customization is another significant advantage of making your own dress form. You can tailor the design to suit your specific needs, whether it’s adjusting for posture, adding specific body features, or choosing the aesthetics. The result is a truly personalized product that reflects your unique style and preferences.In addition to these benefits, having a dress form that mirrors your body shape makes sewing, fitting, and draping far more convenient and enjoyable. It acts as a constant, reliable fitting companion, allowing you to focus on other aspects of your craft.Perhaps most importantly, creating your own dress form can be a catalyst for creativity and inspiration in your sewing practice. By having a custom-made form that reflects your body shape, you’re empowered to take on projects you might have previously avoided due to fitting concerns. It opens up new avenues for creative expression and allows you to bring your unique vision to life.
How to Make a Dress Form
Creating a custom-fit pinnable dress form doesn’t have to break the bank or require extensive expertise. By following a methodical approach and utilizing affordable materials, you can craft a tailor-made solution for approximately $40. This comprehensive guide will lead you through each stage of the process, guaranteeing a functional and budget-friendly outcome that will elevate your sewing projects.
Getting Started
To begin with, invest in a customized dress form pattern tailored to your precise measurements. Online resources like Boot Strap Fashion provide an array of patterns from which you can choose. Enter your measurements accurately, whether in centimeters or inches, and select the preferred file format for the pattern (PDF or AutoCAD). Once you’ve received your pattern, print it out, carefully trim the borders between pages, and tape them together to create a cohesive whole. Then, take the time to meticulously cut out each pattern piece.
Selecting Your Materials
To create a well-structured corset, you’ll need to work with three distinct types of fabric. First, select a medium-weight, woven, non-stretch outer fashion fabric – muslin is an excellent choice. This will provide the foundation for your corset’s aesthetic. Next, choose fusible interfacing, which will be placed underneath the fashion fabric to add reinforcement and stability. Finally, opt for a rigid and heavyweight inner support fabric, such as starched linen, to provide internal support and structure. To take it to the next level, also prepare some sturdy cardboard pieces to insert around the armholes and base of the corset, offering additional support where you need it most.
Assembling the Dress Form
As you begin constructing your garment, start by preparing the fabric. Begin by ironing fusible interfacing onto your fashion fabric, then fold the fabric in half to ensure accurate tracing of pattern pieces. Don’t forget to include seam allowances if they’re not part of your pattern, as this will affect the overall fit and finish.Next, cut out all fabric pieces, including interfacing and inner support components. Pin and stitch the fabric pieces according to the pattern’s instructions, taking care to align curves and notches precisely. For added structure, utilize cardboard cutouts in areas like armholes and bases, fitting them within fabric layers and sewing into place.As you assemble the main body, sew together all relevant pieces, leaving the back open for now. This includes attaching cups, fronts, and reinforcing seams with additional stitching or zigzag stitches for enhanced durability. Finally, construct the inner support structure from heavyweight fabric, following the pattern’s guidance. This involves creating a sleeve for a central support tube and attaching front and back pieces to prevent warping during stuffing.
Final Steps
To begin, turn the dress form cover inside out and insert a neck filling made from sponge or similar material, positioning it at the desired height. Next, prepare the form for stuffing by starting at the bottom and gradually adding batting or fiberfill in an upward direction. Use a tube to evenly distribute the material as you fill the form. Throughout the process, regularly compare the dress form’s measurements to your own to ensure accuracy. Once the filling is complete, secure the base with a cardboard support and attach the fringe of the pipe sleeve to the cardboard using glue to keep everything in place. Afterward, mount your finished dress form on a sturdy stand, such as a coat rack or tripod, and consider adding a C clamp for adjustable height. With these simple steps, you’ve successfully created a custom-fit dress form at a fraction of the cost of a professional model, ideal for custom sewing projects.
Video Tutorial
As you bring the process of creating a custom-fit pinnable dress form to life, I recommend supplementing this written guide with a step-by-step video tutorial, specifically the ‘Custom-Fit Dress Form Tutorial’ on YouTube. The visual examples and demonstrations in the video serve as an excellent accompaniment to the written guide, making it easier for you to grasp the techniques involved. Whether you’re embarking on a historical costume reconstruction project or seeking a precise fit for your sewing endeavors, crafting your own custom dress form is a practical and rewarding solution that will undoubtedly yield satisfying results.
Fitting and Customization
Once you’ve built the foundation of your DIY dress form, the next step is to fine-tune its accuracy by making minor adjustments to reflect your unique body shape. This may involve tweaking the shoulders, bustline, or hip proportions to ensure a precise fit for your garments. To achieve this level of customization, start by examining the areas where you need more definition and make targeted alterations using fabric, wire, or other materials. Additionally, consider creating different poses for your dress form to accommodate various body angles and postures that are common in everyday life. This will enable you to drape fabrics and accessories with greater realism, making it easier to visualize how garments will look on a person. Finally, to protect your DIY dress form from dust and damage, cover it with a practical and easy-to-clean fabric cover that allows for airflow and flexibility.
Adding a Neck and Arms
To complete the appearance of your dress form, you may want to consider adding a neck and arms for certain garments. One simple approach is to employ foam or a flexible material that can be easily molded into shape. For the neck, measure the circumference of the area where it will sit on your dress form, then cut the foam to match these dimensions. Secure it in place using strong adhesive or pins if you prefer a detachable option. For added realism, you can mold and stitch fabric to create a more detailed neck that captures the texture and shape of a human’s.
Adjusting for Specific Postures
To ensure optimal fitting, it’s crucial to adjust your dress form to accurately mimic common postural issues. This can be achieved by adding padding or altering the shape of the form to replicate specific curvatures. For instance, kyphosis, a curvature of the upper back, can be simulated by attaching foam or batting to the upper back area and securing it with pins or adhesive. In contrast, scoliosis, a lateral spinal curvature, requires more precise adjustments. Carefully observe the unique curve pattern and replicate it by adding or removing material along the spine of the dress form. Secure the adjustments and cover with a tight fabric to maintain the shape. By taking these steps, you can ensure that your custom-made garments fit accurately and comfortably.
Making a Cover
To elevate your sewing experience, consider adding a cover to your dress form. This simple process can be achieved by selecting the right fabric, measuring and cutting it, sewing the cover, and finishing the edges.
When choosing fabric, opt for muslin for a non-stretch cover or spandex for a snug fit. Measure the areas that need coverage on your dress form, leaving room for seam allowances. Cut out the fabric accordingly.
Begin sewing from larger sections to smaller ones, adjusting the fit as you work. Ensure the cover is neither too tight nor too loose. Once the fit is perfect, trim any excess fabric and finish the edges to prevent fraying. Add closures like zippers or Velcro at the back for easy removal.
By following these straightforward steps, you can add a neck and arms to your dress form, adjust for specific postural issues, and create a custom cover that will greatly enhance its functionality, making it an indispensable tool for all your sewing projects.
Advanced Techniques
To take your DIY game to the next level, master advanced techniques for creating custom dress forms that cater to your unique needs. One such innovation is designing a collapsible form for effortless storage, ensuring you can easily stow it away when not in use. Alternatively, you can create a dress form tailored to someone else’s measurements, making it an excellent option for fashion designers and sewing enthusiasts who work with clients. Additionally, explore the creative combination of papier-mâché over duct tape, which yields a remarkably smooth finish that will elevate your overall DIY experience.
Making a Collapsible Dress Form for Easy Storage
When it comes to DIY dress forms, one of the most significant drawbacks is their cumbersome nature, making storage a real challenge. However, with a collapsible design, you can enjoy the benefits of a custom-fit form while also having the flexibility to store it easily. This innovative solution offers the perfect balance between practicality and convenience.To create your own collapsible dress form, start by constructing a lightweight PVC pipe skeleton that matches your measurements. The key to success is designing joints that can be easily assembled and disassembled, allowing you to quickly take apart and put together the frame as needed.Next, cover the frame with a flexible material such as foam or a thick fabric. Attach it in a way that allows you to remove or fold the material when collapsing the form. This will not only make storage easier but also enable you to clean your dress form more effectively.Finally, ensure that all parts of your design are easily detachable. Use screws or detachable joints for the PVC frame, allowing you to quickly take apart and put together each component as needed.
Making a Dress Form from Someone Else’s Measurements
When creating a dress form based on someone else’s measurements, accuracy is paramount. This technique is particularly valuable for tailors or those making garments for others, as it ensures a precise fit. To achieve this level of accuracy, follow these steps: First, collect accurate measurements by using a measurement chart to guide you. Specifically, record the individual’s bust, waist, hip, shoulder width, and torso length. Once you have these crucial dimensions, adjust your dress form accordingly. If using an adjustable form, set it to these precise measurements. For a DIY form, tailor the materials to fit these dimensions exactly. Finally, use padding in areas that require more volume to accurately replicate the person’s body shape.
Using Papier-Mâché Techniques for a Smoother Look
Embracing the nostalgic charm of traditional dress forms without breaking the bank, papier-mâché provides an innovative solution. This eco-friendly approach combines affordability with a smooth, pinable surface that rivals its high-end counterparts.
To bring this creative vision to life, start by preparing the base – either utilize a duct tape dummy or craft one using wire mesh. Next, apply layers of papier-mâché, tearing newspaper or employing tissue paper and securing it with a mixture of glue and water. Repeat this process until you’ve achieved the desired thickness.
Once dry, refine the surface by sanding for a silky smooth finish. Seal your masterpiece with an additional layer of glue or opt for a fabric cover to give it a polished appearance. By adopting these methods, you’ll be able to create a functional, storage-friendly, and visually appealing dress form tailored to your unique needs.
Long-Term Use and Maintenance of Your DIY Dress Form
To extend the life of your DIY dress form and ensure it remains a valuable sewing companion, it’s essential to prioritize its maintenance and care. This involves not only patching and re-stuffing it when necessary but also adopting a thoughtful approach to storing the form. By doing so, you’ll be able to enjoy the benefits of having a custom-made dress form for years without incurring additional costs or replacing it with a new one.
Patching Holes and Worn Areas on the Duct Tape
To extend the lifespan of your dress form, start by regularly inspecting it for early signs of wear and tear. This proactive approach enables you to address minor issues before they become major problems, making repairs more straightforward and reducing the risk of further damage. When you do need to make a patch, ensure that you have a supply of high-quality duct tape that matches the original material used in the construction of your dress form. This will enable you to create a seamless repair that blends in with the surrounding area. Before applying the patch, take a moment to gently clean the surface around the hole with a slightly damp cloth. This simple step is crucial in ensuring that the tape adheres properly and remains effective. To complete the process, cut a piece of duct tape that’s slightly larger than the affected area, then smooth it over the defect carefully to avoid any wrinkles or bubbles. By following these steps, you’ll be able to efficiently repair your dress form and keep it looking its best.
Re-stuffing If the Form Loses Its Shape Over Time
When addressing shape issues with forms that have been compressed or had their materials shifted, it’s crucial to first assess the damage. This will inform your re-stuffing approach and ensure you’re taking the right steps to restore the form’s original shape. To do this, determine whether the compression is due to external forces or internal material shifting. Understanding the root cause of the issue will guide your next moves.To successfully re-stuff the form, choose a material that matches what was originally used (think polyester filling or foam). Consistency in firmness and shape is key. If the form has an opening or removable section, take advantage of these access points to add or adjust the stuffing. However, if no such openings exist, you may need to create a small incision in an inconspicuous area.As you re-stuff the form, use tools like dowels or long spoons to evenly distribute the material, especially in hard-to-reach areas. This will help prevent lumps and ensure a smooth surface.
Proper Storage of Your Dress Form to Prevent Damage
When storing your DIY dress form, avoid placing it directly in the path of direct sunlight, as this can cause degradation over time. Furthermore, ensure the storage area is dry to prevent mold or mildew from forming on the surface, especially if it’s stuffed with materials that can absorb moisture. To add an extra layer of protection, consider positioning your dress form on a sturdy stand or base to prevent it from toppling over and getting damaged. Additionally, cover your dress form with a clean cloth or garment bag to shield it from dust and accidental spills. By following these simple maintenance tips, you’ll be able to extend the life of your DIY dress form and keep it accurate for fitting and displaying your creations.
FAQs on DIY Dress Form
The thrill of crafting a DIY dress form is a fulfilling endeavor that takes your sewing skills to the next level. As a helpful companion on this journey, we’ve gathered a collection of commonly encountered queries to provide insight and guidance as you navigate the process.
What materials do I need to make a DIY dress form?
While the specific materials you’ll need may vary depending on your chosen method, there are some fundamental components that will remain consistent across most approaches. You’ll typically require a combination of supplies to create a comprehensive and effective body casting setup. These essentials include duct tape or papier-mâché for forming the primary structure, an old t-shirt or plastic wrap to provide protection for your skin during the process, cardboard for fabricating the base and neck cap, batting or fiberfill for stuffing the final product with a lifelike shape, and finally, a sturdy stand like a wooden dowel and base or an adjustable tripod to ensure stability and prevent any accidents.
Can I make a dress form that fits my exact measurements?
One of the significant benefits of crafting your own dress form is the unparalleled ability to tailor it specifically to your unique body shape, resulting in a precise fit for your sewing creations. By doing so, you can guarantee that your garments will not only look great but also feel comfortable and flattering, as they are designed to conform to your exact measurements.
How do I adjust my DIY dress form for weight changes?
While forms crafted with unconventional materials like duct tape or papier-mâché may pose challenges when dealing with significant weight fluctuations, there are still ways to make minor adjustments. For instance, adding padding such as batting or foam can help increase the size of your dress form, allowing for a more accurate fit. Alternatively, you can use tight garments on the form to achieve a slightly reduced dimension.
Is it possible to build a pinnable dress form DIY?
To ensure your dress form is suitable for pinning, consider inserting a thin layer of batting between the outer fabric and the form itself. This clever hack enables you to secure your pins firmly without compromising the integrity of the form, making it easier to create precise alterations or add embellishments to your garment designs.
How long does it take to make a DIY dress form?
The timeframe for completion largely depends on the intricacy of your chosen approach. For instance, a straightforward duct tape dress form can be finished within a few hours, whereas a more elaborate papier-mâché form may necessitate several days’ worth of work, including the drying process that’s inherent to this method.
Can I make a dress form if I have no experience with DIY projects?
While a dress form project may seem daunting at first, it’s actually quite adaptable to various skill levels. In fact, some approaches, such as the duct tape method, cater specifically to beginners, requiring only basic materials and minimal technical expertise. This adaptability makes the process accessible to crafters of all experience levels, allowing them to create a custom form that suits their needs.
What is the most cost-effective way to build a DIY dress form?
One of the most economical approaches to fixing a worn-out couch is the duct tape method. This DIY solution leverages everyday materials like duct tape and insulating material, which are likely already stocked in your household storage. Without requiring specialized equipment, this approach makes it accessible to anyone looking to breathe new life into their furniture without breaking the bank.
How accurate are DIY dress forms compared to professional ones?
A professionally crafted dress form may be designed for precision and durability, but creating a customized DIY version tailored to your measurements can provide an unparalleled level of accuracy for personal sewing projects. The secret lies in meticulous measurement-taking and construction techniques. By adopting this approach, you’ll not only acquire a practical tool for your sewing endeavors but also experience the joy and fulfillment that comes with completing a satisfying DIY project. Moreover, with the right materials and mindset, you can construct a custom-fit companion that perfectly mirrors your unique measurements.
20 DIY Dress Form Patterns: Make a Custom Dress Form
Transform your sewing experience with the flexibility of a custom-fit dress form. By creating your own, you can ensure a precise fit for any garment. With 20 DIY dress form patterns to choose from, our step-by-step guide will walk you through the process of building a tailor-made dress form in the comfort of your own home.
Custom DIY Decoupaged Dress Form
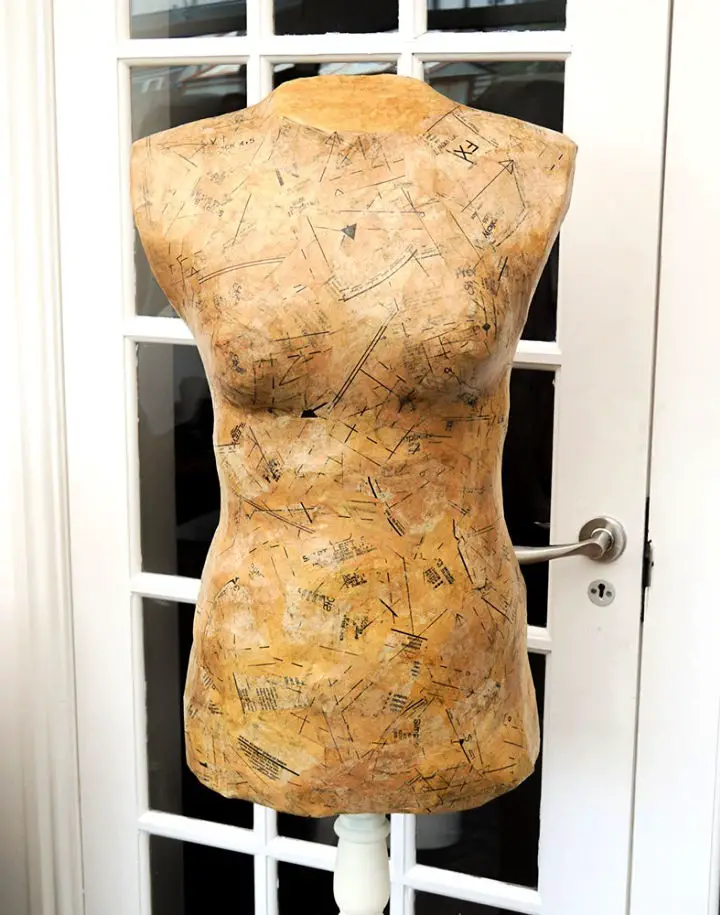
Creating a custom dress form can be a game-changer for dressmakers, allowing for precise fittings and improved garment construction. By crafting your own decoupaged dress form using readily available materials like duct tape, cardboard, an old t-shirt, stuffing, and a stand, you’ll gain hands-on experience that will elevate your skills and simplify the fitting process. With step-by-step instructions, you can learn to shape your body, reinforce the structure, firmly stuff the form, and finally decoupage for a durable finish that’s uniquely yours. This DIY approach is perfect for sewing enthusiasts who want to achieve professional-level results without breaking the bank.
Make Your Own Dress Form
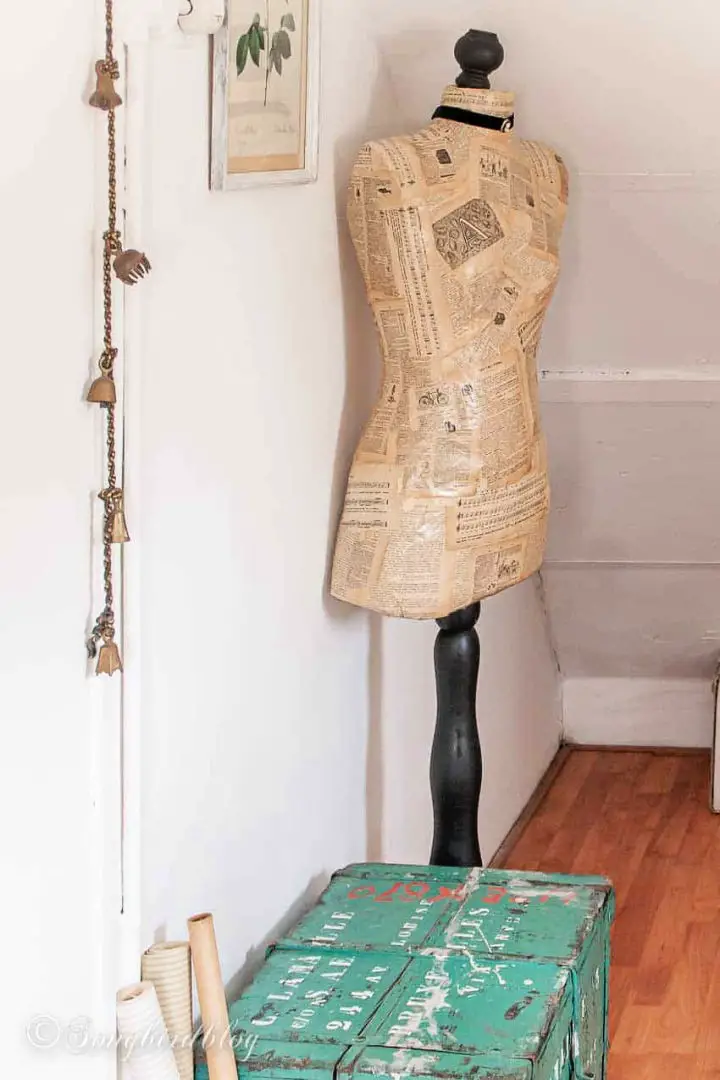
For sewing enthusiasts, creating a dress form is a DIY project that’s both practical and rewarding. By following Marianne Songbird’s comprehensive tutorial at Songbird, you can craft a personalized mannequin in just five steps. This approach uses unconventional materials like duct tape and a lamp stand to construct a sturdy and custom-fit form that perfectly captures your unique body shape. What’s more, the decoupage process with vintage paper adds a creative and stylish touch to your new sewing companion. With clear and engaging instructions, you’ll be able to tailor garments to fit your measurements and aesthetic preferences like never before.
Make Your Own Fit Dress Form
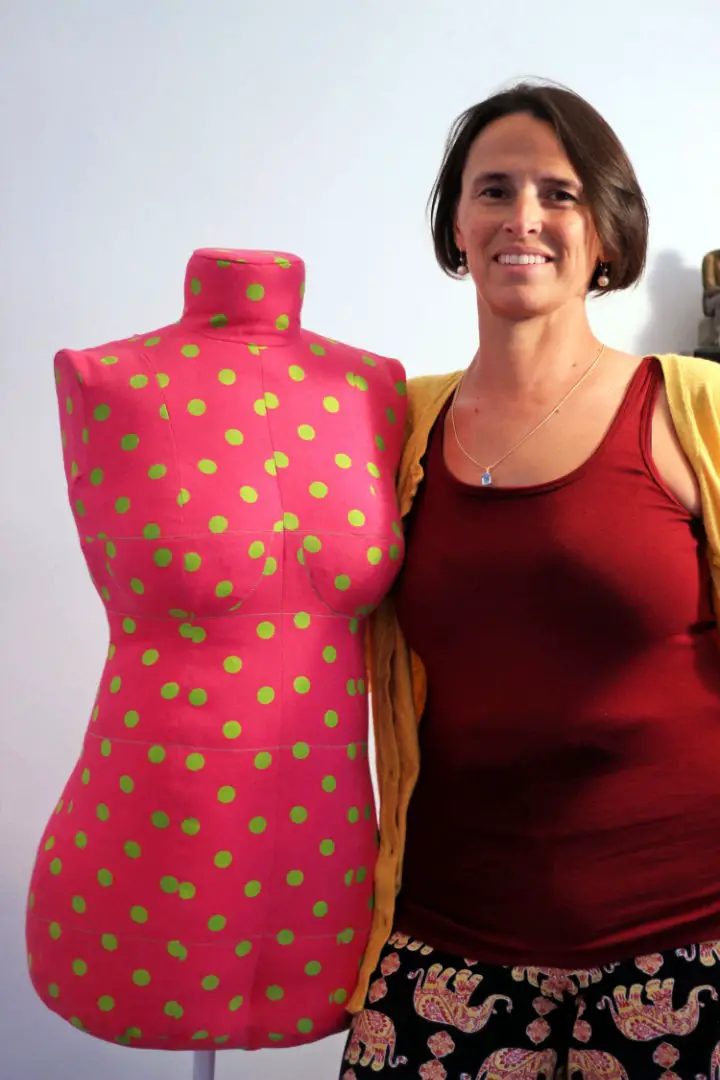
Bootstrap Fashion’s DIY solution has revolutionized the process of creating a custom dressform that mirrors one’s exact measurements, as highlighted by Pattern Revolution. The innovative approach is specifically designed for sewers dealing with non-average body types, providing a personal dressform that takes into account their unique shape and measurements. By answering detailed questions about one’s body and utilizing a pattern crafted using cutting-edge technology, individuals can create a practical sewing companion that streamlines the fitting process and simplifies pattern adjustments. This custom dressform can be a game-changer for those seeking to avoid common frustrations associated with sewing and ensure a perfect fit.
DIY Fabric Covered Dress Form
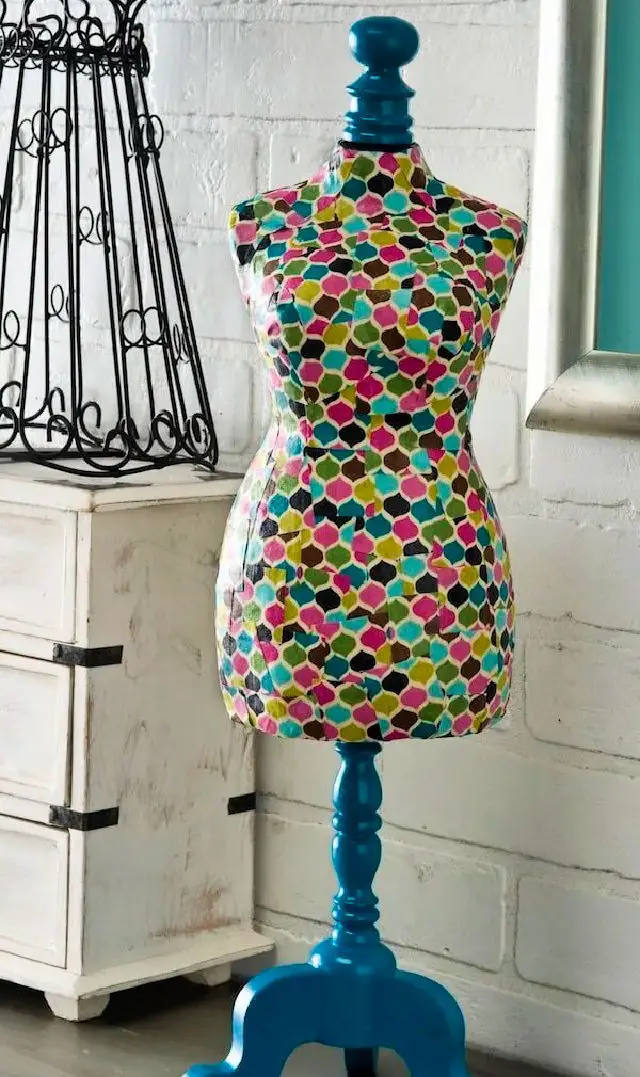
Elevate your home decor with a one-of-a-kind, fabric-wrapped DIY dress form that also serves as a captivating display piece. This project from Mod Podge Rocks is an excellent opportunity for creative expression and a fun crafting experience. To get started, select a dress form, a vibrant fabric pattern, Mod Podge Satin, and the essential crafting tools. Begin by giving the base of the form a sleek finish with a coat of spray paint. Next, prepare your fabric by applying a thin layer of Mod Podge to wax paper to prevent fraying, then cut it into numerous pieces. Adhere the pieces to the dress form using Mod Podge, smoothing out any wrinkles as you go, and create darts for a snug fit around curves. Allow the fabric to dry completely before adding a top coat for a durable finish. With these straightforward steps, you’ll be able to create a show-stopping piece that’s sure to spark conversations and inspire your next crafting adventure.
DIY Dress Form for Sewing
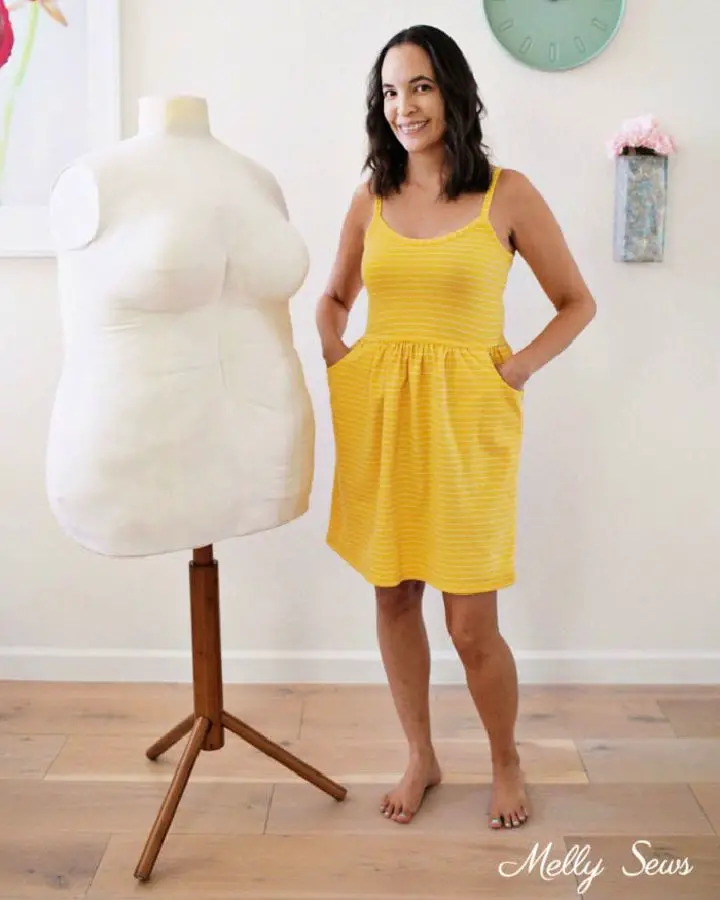
For sewers seeking precision in their garments, a custom-fit dress form is a vital tool. Melly Sews’ comprehensive guide delves into the significance of dress forms, selection criteria, and DIY plus-size dress form construction. As body types deviate from standard measurements, creating one’s own form can revolutionize garment fitting. By crafting a model that mirrors your unique dimensions, you’ll gain a precise reference point for draping, pinning, and refining designs. With expert guidance on recommended materials and cost estimates, this DIY project empowers sewers to elevate their experience with a form that accurately reflects their measurements, leading to stunningly tailored creations.
DIY Baby Toddler Mannequin
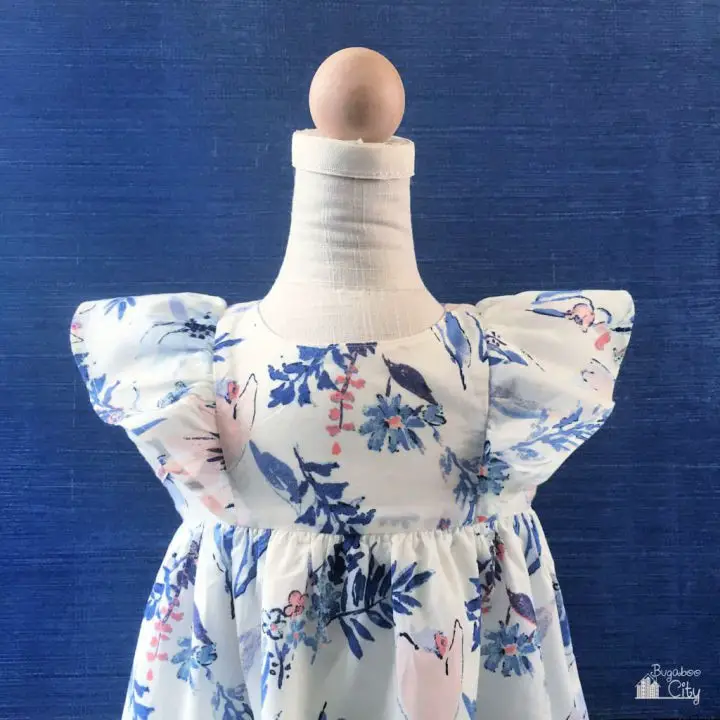
Crafting a custom baby or toddler mannequin can be a fulfilling DIY endeavor, and with the right guidance, you can create a precise replica that meets your specific needs. By following Crafting Cheerfully’s comprehensive tutorial, you’ll gain insight into selecting the perfect onesie size, meticulous stuffing techniques, and finishing touches to ensure a top-notch result. This hands-on project allows crafters to develop their skills while producing a cost-effective solution for photographing children’s clothing or personal sewing projects. With patience and dedication, you can create your own bespoke mannequin that surpasses store-bought options in terms of customization and affordability.
How to Make a Dress Form
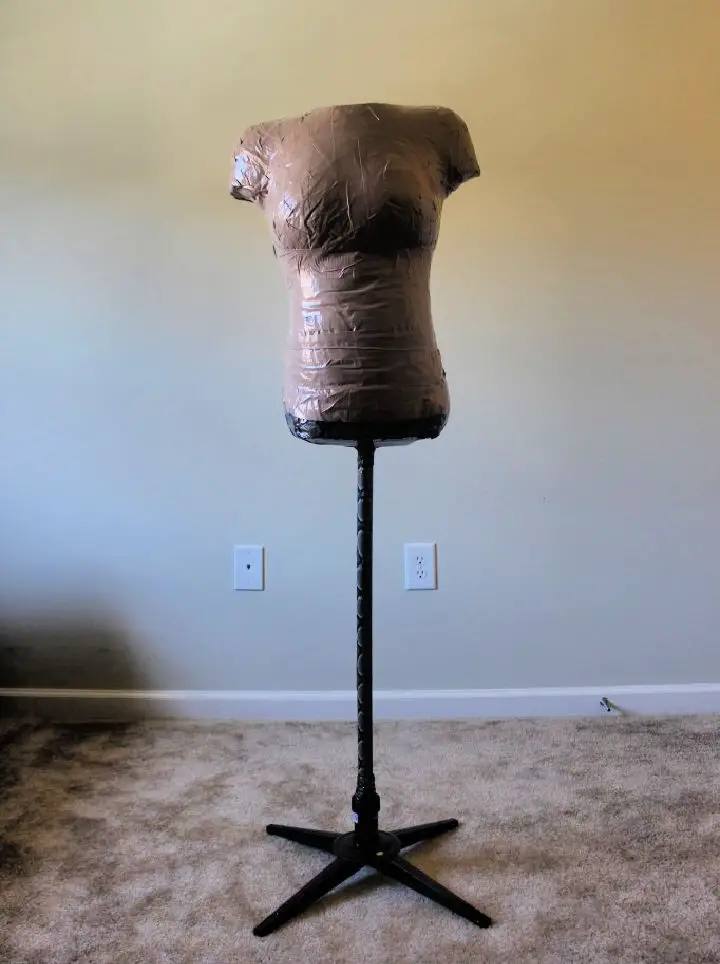
Creating a custom-made dress form can be a game-changer for sewers on a budget, offering a cost-effective way to achieve a precise fit without breaking the bank. By leveraging inexpensive materials like duct tape, batting, and PVC pipe, you can craft a one-of-a-kind mannequin that accurately mirrors your measurements. This innovative DIY project, courtesy of Maria Antoinette’s comprehensive guide, requires minimal investment – just around $50 – yet yields a personalized form that will revolutionize the way you approach garment-making. The step-by-step process is remarkably straightforward, relying on an extra pair of hands and a willingness to be patient. With each stage carefully broken down, from selecting the perfect T-shirt to incorporating expanding foam for added stability, you’ll be able to replicate the project with ease. Upon completion, you’ll be rewarded with a bespoke dress form that will elevate your sewing skills and provide unparalleled tailoring results. For a more in-depth look at this creative endeavor, visit Maria Antoinette’s website and discover how making your own dress form can take your garment-making to new heights.
How to Sew a Dress Form
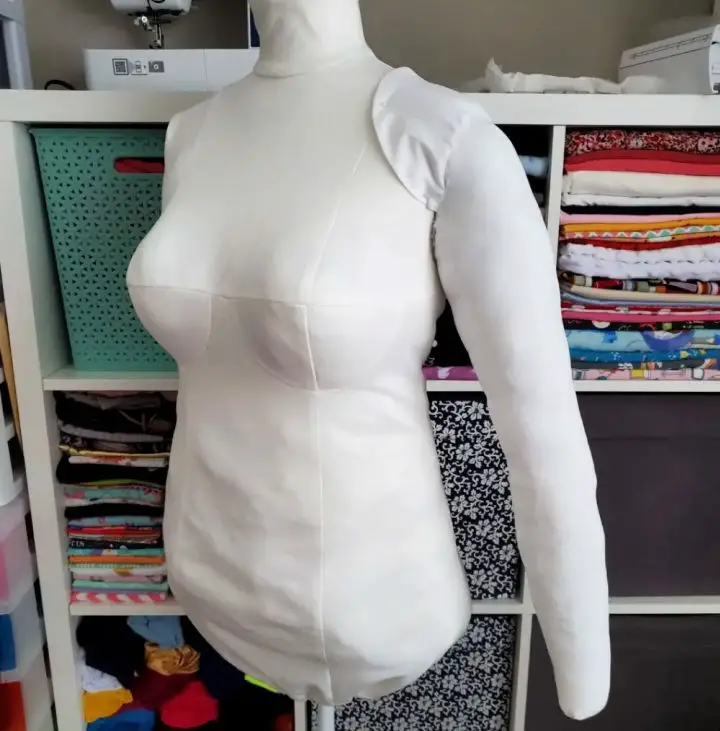
Creating a custom DIY dress form can be a game-changer for sewers struggling with ill-fitting dresses due to a mismatched form. By following Sewing Machine Fun’s comprehensive tutorial and using Bootstrap Fashion’s custom patterns, you’ll gain the skills to take accurate measurements, select the right materials, and assemble a form tailored to your unique body dimensions. This DIY approach not only simplifies the process but also empowers you to design and alter sewing projects with confidence. By crafting a dress form at home, you’ll bypass the hassle of commercial products and add a practical touch to your sewing space. With a custom-made form that accurately represents your body, you’ll be able to achieve professional-level tailoring on your handmade garments.
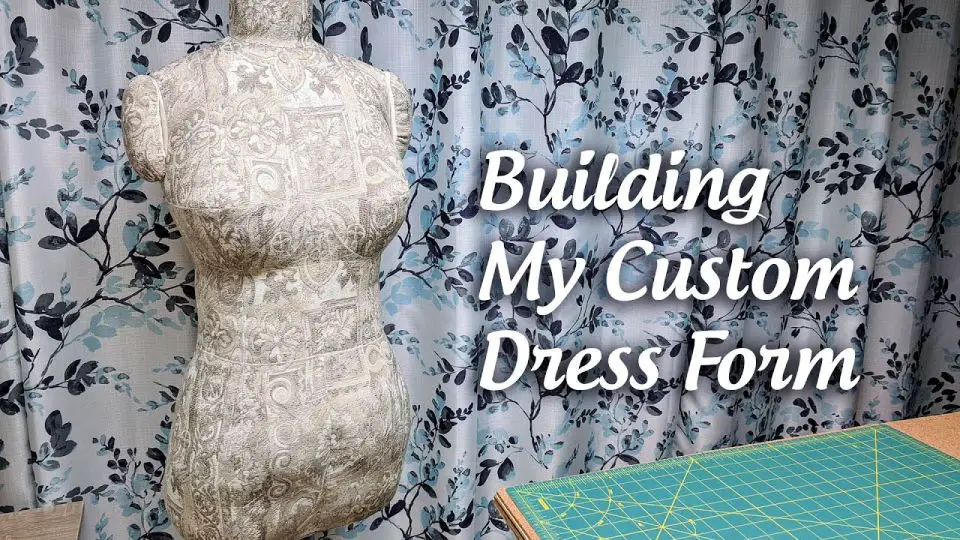
DIY Dress Form With a Linen Curtain
Imagining a dress form that reflects your personality? The Sewing Room’s step-by-step guide makes it possible by re-imagining a Uniquely You Dress Form using a thrifted linen curtain. This approach not only enhances the form’s functionality but also lends a touch of uniqueness to your sewing space. With this method, you’ll learn how to tailor the cover for a custom fit and explore the differences between hand basting and machine basting. By the end of the process, your dress form will not only fit better but also become a stylish addition to your workspace, perfect for refining your sewing setup or taking on new creative projects.
Easy DIY Personal Dress Form
Transforming your wardrobe through precise pattern making and draping requires an essential foundation: a customized DIY personal dress form. This innovative approach empowers fashion enthusiasts to create garments that fit their unique body shape with ease. By following the Instructables guide, you’ll embark on a step-by-step journey to craft a tool tailored to your sewing needs using duct tape, fabric, and stuffing. With moderate familiarity with sewing and patience, you’ll be well-equipped to tackle homemade fashion projects with confidence. This cost-effective solution ensures that your DIY creations are both accurate and enjoyable.
How to Make Dress Form Out of Duct Tape
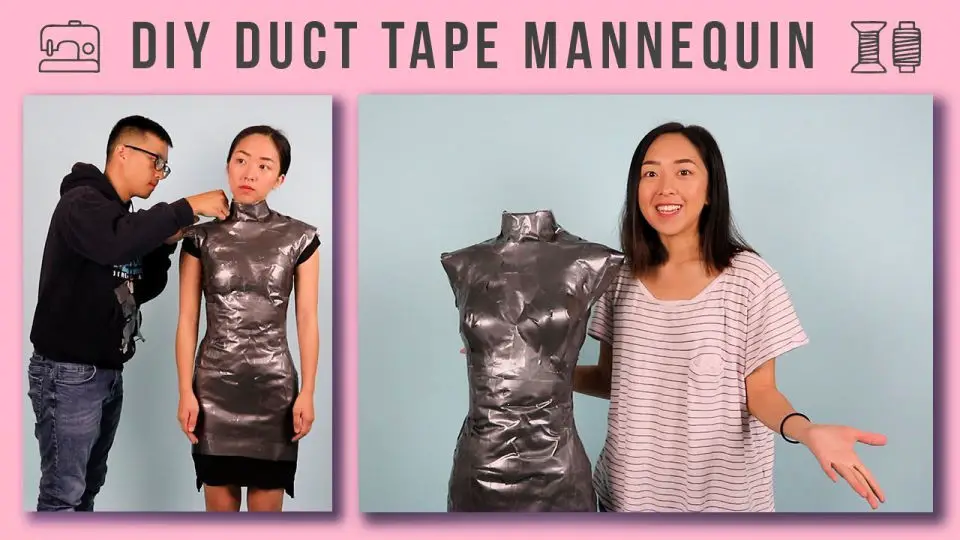
While creating a custom dress form may seem like an expensive endeavor, there’s a DIY approach that can be achieved for under $20 using easily accessible materials like duct tape, lamp stand, cardboard, and some assistance from friends or family members. A YouTube video provides a step-by-step guide on how to craft your own mannequin, from wrapping the duct tape to stuffing and finalizing the form. This cost-effective solution is ideal for sewing and fashion design enthusiasts who value having a personalized mannequin tailored to their measurements. With this tutorial, you can visualize designs and fit garments with greater precision without breaking the bank. The process is engaging and informative, allowing you to dive into your creative endeavors and fashion your own bespoke dress form.
Ultimate DIY Dress Form
Crafting a dress form that mirrors your unique body shape can be a daunting task. However, innovative solutions like 3D scanning technology and specialized software can simplify the process. A video tutorial by Atheeni Makes Stuff on YouTube demonstrates how to create a DIY dress form tailored to your measurements using tools such as Polycam, MeshMixer, and Blender. This approach outshines traditional methods like duct tape forms by leveraging advanced 3D modeling to provide an accurate representation of your physique. The result is a custom-fit dress form ideal for draping and pattern drafting, empowering you to create garments with a flawless fit. If you’ve been searching for a dress form that accurately conforms to your contours, this resourceful guide might be the solution you need.
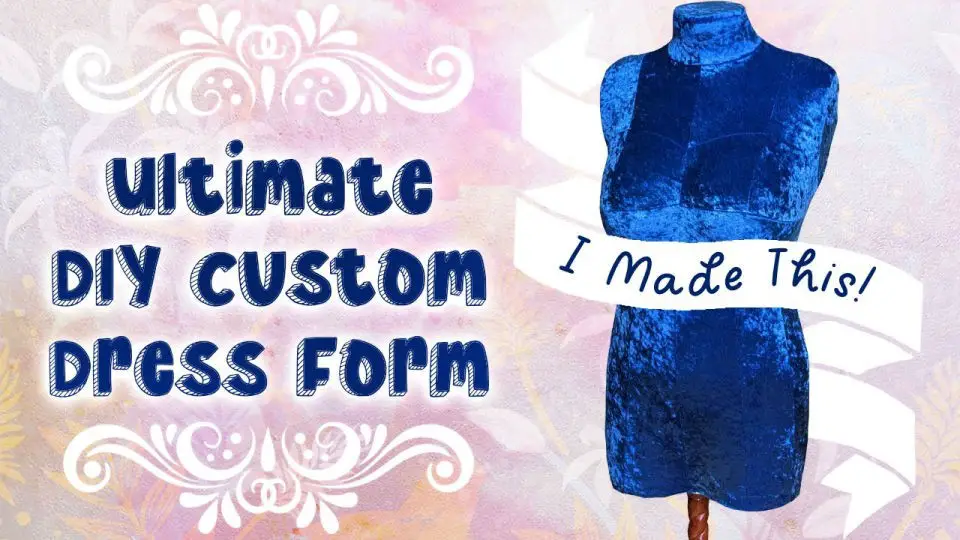
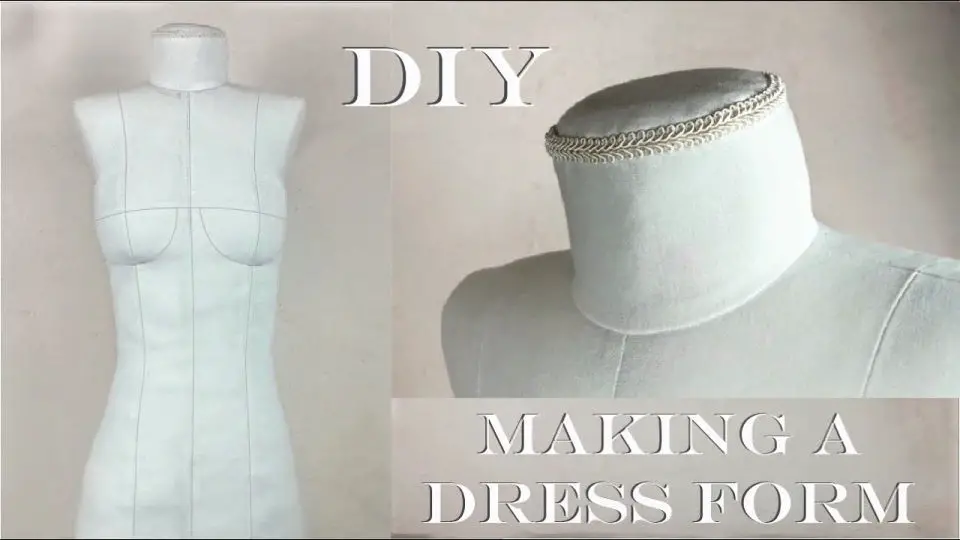
Custom DIY Dress Form
Creating a custom dress form tailored to one’s exact measurements can be a game-changer for personal tailoring and fashion design enthusiasts. A popular YouTube tutorial, ‘Making a Custom Dress Form,’ condenses a labor-intensive process into an engaging 20-minute video that demystifies the art of building a professional-grade mannequin on a budget. The instructional video walks viewers through every step, from casting the torso to applying a durable rubber exterior, providing a comprehensive guide to crafting the batting and outer cover necessary for a fully pinnable and practical dress form. With clear instructions and expert tips, this video is an ideal resource for anyone looking to build their own bespoke dress form at home. Whether for costume design, alterations, or garment construction, the insights offered can significantly enhance one’s crafting capabilities.
Make a Dress Form Using Your Measurement
In Style by Viv’s enlightening YouTube video, viewers are walked through a meticulous process of creating a custom dress form tailored to their unique measurements. The tutorial takes a step-by-step approach to drafting a pattern that can be used to construct a personalized mannequin, catering specifically to sewing enthusiasts seeking a dress form that mirrors their body shape for more accurate garment fitting. With crystal-clear instructions and practical advice, the video empowers sewists to craft a valuable tool that elevates the garment-making experience. Whether sewing for personal or professional projects, mastering the skill of DIY pattern making for a custom dress form is a transformative game-changer for achieving the perfect fit.
How to Make Your Own Dress Form
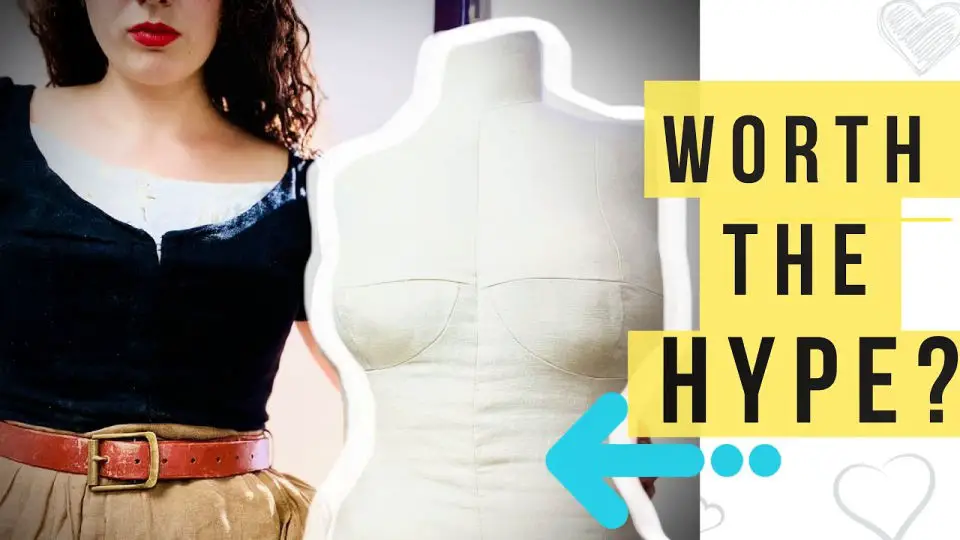
For those considering creating their own dress form, a thought-provoking video on YouTube sheds light on the process of making a personalized dress form using the Bootstrap Fashion DIY pattern. Titled ‘I Made the Bootstrap Fashion DIY Dress Form: Is it Worth the Hype?’, the presentation offers a first-hand account of the experience, covering every step from obtaining the pattern to the final touches. With the added benefit of time stamps for each step, this video serves as a practical guide for those looking to embark on a custom dress form creation journey. The video’s comprehensive nature covers common issues like pattern hiccups, fabric selection, and assembly, providing valuable insights into whether the Bootstrap Fashion DIY dress form truly lives up to its reputation. For a thorough exploration of this DIY sewing project, check out the video on YouTube.
DIY Mini Dress Form
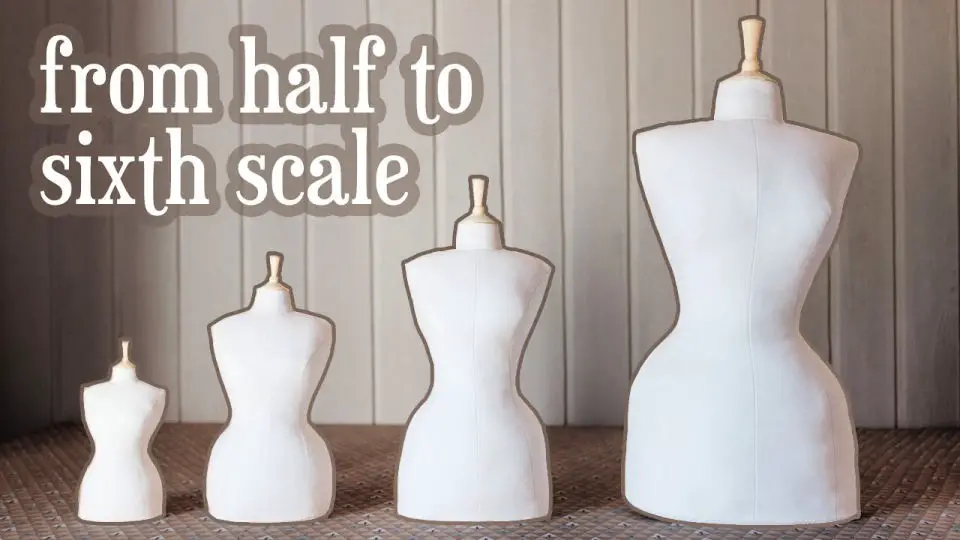
Crafting a miniature dress form can be a fulfilling DIY endeavor, particularly for those enthusiastic about fashion design or sewing. By following Ninonella’s comprehensive YouTube tutorial, individuals can create their own mini dress forms at various scales, including half-size, quarter-size, and even smaller iterations. This allows designers to test patterns and designs without the need for excessive fabric usage.The process involves downloading a pattern, cutting and sewing fabric pieces, and constructing a stand if necessary. For those working with limited materials or seeking to experiment with new ideas, creating a mini dress form is an innovative solution that balances functionality with creative expression. With Ninonella’s clear instructions and helpful tips, you’ll be able to construct a beautiful and practical dress form tailored to your unique needs.
Building a Dress Form
For any dressmaker, creating a custom dress form tailored to one’s unique measurements can be a fascinating project. Valerie Meachum’s comprehensive YouTube video guide on constructing a Bootstrap Fashion DIY Dress Form is an excellent resource for those interested in personalized dressmaking. Her engaging and informative approach shares the step-by-step process of building her own dress form, complete with bespoke adjustments that make it a valuable watch. As she narrates her journey, viewers can gain valuable insights into the construction process and pick up practical tips to navigate the complexities of this DIY project. For those looking to upgrade their sewing skills or explore tailoring, this video offers an enriching learning experience, empowering you to craft a dress form that accurately reflects your body’s dimensions and contours.
How to Sew a Dress Form
For sewing enthusiasts, crafting their own dress form is an excellent opportunity to enhance their precision and customization capabilities. While store-bought mannequins may provide a decent approximation of human shape, they often lack the precise fitting that a DIY dress form can offer. A video tutorial from Melli’s Art + Crafts on YouTube provides a straightforward and budget-friendly approach to creating a personalized dress form that accurately mirrors one’s body shape. By utilizing Bootstrap patterns, the tutorial walks viewers through each step of the process, from selecting the right materials to assembling the final product. This informative content is particularly valuable for those seeking to optimize their sewing setup with a tailor-made dress form. Melli’s guidance is presented in an easy-to-follow manner, making the complex task of creating a personalized mannequin accessible and achievable. By following the provided link, individuals can embark on this rewarding sewing project, ensuring that their garments fit perfectly every time.
Missy Fit DIY Stuffed Dress Form
Christin Grace’s YouTube tutorial offers an engaging and instructive guide for sewing enthusiasts seeking to create a custom-fit dress form. The video utilizes a pattern from BootstrapFashion, enabling viewers to craft a dress form tailored to their exact measurements. Broken down into manageable steps, the process is detailed and easy to follow. What sets this tutorial apart is its focus on providing practical tips and helpful advice, empowering viewers with the tools they need for a successful outcome. This content is ideal for those looking to elevate their sewing projects by incorporating a personalized dress form, thereby honing their sewing skills. For those interested in starting this useful sewing project, simply visit YouTube and search for Christin Grace’s DIY Dress Form tutorial.
Make a Dress Form Without Duct Tape
Crafting a custom dress form can be a game-changer for personalized garment making, and Marabelle Designs’ YouTube tutorial provides a clear and creative approach to achieve this without relying on duct tape. The tutorial utilizes easily accessible materials like a vintage metal dress stand, plaster, fleece, and stuffing, resulting in an affordable and durable final product. By following the step-by-step guide, you’ll learn how to tailor the dress form to your unique measurements, apply a plaster layer for stability, add padding for an accurate body shape, and finish it off with a tailored fabric cover, giving your dress form a professional look. The detailed guidance provided in the video ensures that you can build a high-quality, custom-fit dress form that will take your sewing projects to the next level.
Conclusion:
Crafting a bespoke dress form using 20 straightforward DIY patterns can be an immensely fulfilling experience. This comprehensive guide has walked you through the process of creating a custom dress form, from inception to completion, covering essential steps such as material selection and assembly. As you embark on this project, the insights provided will empower you to adapt your dress form to your unique measurements, accommodate weight fluctuations, or ensure it remains pin-friendly. By combining dedication with the right resources, you can achieve a professional-grade dress form without incurring excessive costs. Take the first step towards tailoring your creations to perfection by creating your own custom dress form today.
