
Crafting the perfect DIY dog collar demands a combination of patience, attention to detail, and a passion for personalizing your pup’s style. To help you achieve this goal, we’ve compiled 25 creative DIY dog collar ideas that cater to various tastes and preferences. This comprehensive guide covers the essential steps involved in making the ideal collar, from selecting durable materials to ensuring a precise fit. Our instructions are designed to be straightforward and easy to follow, making the process accessible to anyone looking to add a personal touch to their dog’s gear. In each section, we’ll delve into valuable expert insights on choosing materials, balancing functionality with fashion, and providing customization tips to make your dog’s collar truly stand out. Whether you’re looking for a step-by-step guide to assembling the collar or advice on maintenance, this article is packed with information to guide you through making a collar that’s both stylish and practical. As you embark on this creative journey, be prepared to transform your ideas into reality and craft a collar that reflects your dog’s unique personality and your personal style.
Expert Insights on DIY Dog Collars
To craft a secure and comfortable DIY dog collar, it’s crucial to heed the expertise of professionals who have studied canine behavior and physiology. By incorporating their valuable insights into your project, you can create a collar that not only looks great but also prioritizes your pet’s well-being. For instance, experts suggest considering factors such as the material selection, collar width, and hardware choices to guarantee a safe and comfortable fit for your furry friend.
Choosing the Right Materials
When it comes to crafting a high-quality dog collar, experts suggest starting with a sturdy foundation. Nylon webbing is often recommended as the base material due to its exceptional durability and resistance to wear and tear. For the outer layer, cotton fabric is a favored choice owing to its ease of cleaning and maintenance. This combination provides a reliable and long-lasting solution for your furry friend.
Ensuring Safety and Comfort
When it comes to ensuring your dog’s safety, conducting thorough inspections is essential. As you assemble the collar, take the time to carefully examine each component to guarantee that none of them pose a risk to your furry friend. The ideal fit for the collar should be snug but not constricting, leaving just enough room to comfortably slide two fingers between the collar and your dog’s neck.
Functionality Over Fashion
When crafting a dog collar, it’s crucial not to sacrifice functionality for the sake of style. A well-designed collar should prioritize safety and control above all else. Ensure the design allows for effortless attachment of tags and leashes, ensuring your furry friend remains secure and under your supervision.
How to Make a Dog Collar – Step by Step Guide
Crafting a custom dog collar for your beloved pet is an exciting project that not only showcases your creativity but also provides an opportunity to select designs and materials that perfectly capture your dog’s unique personality. In this comprehensive guide, we’ll take you through the process of creating a one-of-a-kind canine accessory that’s sure to turn heads at the park or on a casual stroll. Let’s dive in and bring your vision to life!
Supplies You’ll Need:
To create a custom dog collar, you’ll need a few essential materials. First, obtain a nylon webbing strap that’s double the length of your dog’s current collar. A medium-sized dog requires a 1-inch wide strap, but adjust accordingly based on your pet’s size. Additionally, gather a side release buckle and one tri-glide. You’ll also require a D-ring to secure any additional attachments. For the lining, select a cotton fabric that measures about 3.75 inches in width and the same length as your nylon strap. To assemble the collar, you’ll need basic sewing tools like scissors, a lighter, a sewing machine, and thread (either regular or heavy-duty). Finally, have an iron and some binder clips or pins on hand to aid in the process.
Step by Step Instructions
Discover the simplicity of crafting a one-of-a-kind dog collar with our comprehensive, easy-to-follow instructions. Elevate your pet’s style without breaking a sweat as you create a custom accessory that perfectly suits their personality.
Step 1: Prepare the Nylon Strap
To create your custom nylon webbing collar, start by measuring and cutting the strap to the required length – approximately twice the length of your dog’s existing collar. Next, use a flame from a lighter to carefully singe the cut ends, ensuring they don’t fray over time.
Step 2: Cut and Press the Fabric
To ensure a professional finish, begin by cutting your fabric to the precise width and length required to cover the nylon strap. Next, fold one end of the fabric over 1 inch, pressing the fold flat with an iron to create a crisp edge. For added precision, sew a temporary basting stitch approximately 2 inches from the folded end, using this as a guide for the subsequent fold. Flip the fabric, pressing along the temporary stitch line towards the initial fold before removing the stitch. This careful preparation will facilitate a smooth and consistent application of the fabric to the strap.
Step 3: Sew the Fabric onto the Strap
Secure the nylon strap by sliding it underneath the folded fabric edge, ensuring a smooth fit. Next, fold the fabric over the strap, covering it completely. Utilize binder clips to keep the fabric in place as you work. To create a neat and tidy rectangle, sew around the strap, maintaining a consistent seam width close to the edges. Don’t forget to neatly fold and tuck the fabric at both ends.
Step 4: Assembling the Collar
To secure the adjustable collar, begin by attaching the tri-glide and buckle. First, pass the strap through the tri-glide, followed by threading it through the pronged side of the buckle. Ensure that the fabric’s right side is facing outwards throughout the process. Next, double-back the strap through the tri-glide to create an adjustable collar design. For added durability, proceed to sew the end of the strap back onto itself using a combination of rectangle and ‘X’ pattern stitches.
Step 5: Add the D-Ring and Buckle
To secure the strap, begin by attaching the D-ring and then threading it through the remaining side of the buckle. Leave a length of approximately 3.5 to 4 inches of strap for working with. Next, reinforce the D-ring’s position by sewing the strap onto itself on both sides, utilizing the rectangle and ‘X’ pattern stitch, ensuring a sturdy and secure attachment.
Step 6: Adjusting the Collar
To ensure a comfortable and secure fit, begin by placing the collar around your dog’s neck and utilize the tri-glide feature to make any necessary adjustments.
Tips for Success:
When it comes to crafting a durable and long-lasting bag, attention to detail is crucial. Start by selecting a heavy-duty thread that can withstand the rigors of daily use. Take your time to ensure all seams are secure, double-checking stitches if needed to guarantee a solid foundation. Meanwhile, don’t be afraid to think outside the box when it comes to fabric choice – opting for something unique and personalized will give your bag a distinctive flair.
Video Tutorial
For viewers who prefer a visual learning experience, a step-by-step video tutorial is available to accompany this DIY dog collar guide. By watching the video, readers can follow along as the process of creating a custom dog collar is demonstrated in detail.
Customization Ideas for DIY Dog Collars
Transforming your dog’s collar into a one-of-a-kind masterpiece is an exciting adventure that allows you to express your creativity while also showcasing your pet’s unique personality. To get started, consider the following innovative approaches for making your DIY dog collar truly unforgettable.
Adding Personal Touches
When it comes to customizing your dog’s collar, the possibilities are endless! You can stitch a personalized message, such as their name, onto the collar for a touch of uniqueness. Alternatively, you could add some visual flair with beads or charms that reflect your furry friend’s personality. For an extra layer of customization, consider using unique patterns or colors of fabric that match your dog’s coat or your personal style. This will not only make the collar stand out but also give you an opportunity to showcase your creativity.
Making the Collar Stand Out
To elevate the aesthetic appeal of your handcrafted accessories, consider incorporating three innovative techniques: Colorful Threads, Painted Designs, and Interchangeable Accessories. Firstly, use bright and contrasting thread colors for stitching, which will add a vibrant pop of color to your creations. For leather collars, think outside the box by using special leather paint to create custom patterns that are truly one-of-a-kind. Finally, design removable bow ties or flowers that can be easily swapped out depending on the occasion or mood you want to convey. By incorporating these techniques into your work, you’ll not only add visual interest but also provide customers with a range of options and possibilities for personalization.
Size and Fit Advice for DIY Dog Collars
When it comes to outfitting your furry friend, selecting the ideal collar size is paramount for both comfort and safety. To ensure a snug yet comfortable fit, follow this straightforward guide on how to accurately measure and select the perfect collar size for your dog.
Measuring Your Dog’s Neck
To determine the ideal collar size for your dog, start by using a cloth measuring tape to wrap around the thickest part of their neck – where a traditional collar would naturally sit. This will give you an accurate measurement of your dog’s neck circumference. Next, apply the two-finger rule: simply add the width of two fingers on top of this initial measurement to ensure the collar isn’t too constricting. Finally, cross-reference your measurement with the manufacturer’s sizing chart to find the perfect fit for your furry friend.
Selecting the Right Collar Size
When it comes to selecting a collar for your furry friend, one crucial factor to consider is the size of the collar itself. In general, small dogs require collars that fall within the 10-14 inch range, while medium-sized dogs typically need ones between 14 and 20 inches in length. Large breeds, on the other hand, often benefit from collars measuring 18-28 inches long. It’s essential to strike a balance when choosing the perfect collar – it should be snug enough to ensure your dog feels secure, yet not so tight that you can’t fit two fingers between the collar and their neck with ease.
Adjusting for Growth and Comfort
When selecting a collar for your canine companion, it’s essential to consider their growth and development, particularly if you’re purchasing for a puppy. Opt for a collar that features adjustable straps or removable parts, allowing for easy expansions as they mature. For adult dogs, look for collars with multiple buckle holes or sliding mechanisms that enable subtle adjustments to accommodate any changes in size.
Maintenance Tips for DIY Dog Collars
To ensure the longevity and effectiveness of your DIY dog collar, it’s crucial to properly maintain it. This not only preserves its visual appeal but also safeguards your furry friend’s well-being. Whether you’re dealing with a leather, nylon, or fabric-based collar, follow these guidelines to keep yours in top shape.
Leather Collars
To keep your leather collar in top condition, it’s essential to follow some simple care tips. Firstly, make sure you clean it regularly by gently wiping it with a damp cloth to remove any dirt or debris that may have accumulated. This will help prevent the buildup of grime and stains. Next, consider conditioning the leather periodically to keep it soft and supple, which can help prevent cracking and wear. It’s also crucial to avoid exposing your leather collar to water, as this can cause it to dry out and lose its natural flexibility. By following these simple steps, you can help maintain the integrity of your leather collar and ensure it remains a stylish and comfortable accessory for years to come.
Nylon and Fabric Collars
When it comes to caring for your delicate fabrics, there are a few key steps you can follow to keep them looking their best. First, most machine washable fabrics can be safely washed in a gentle cycle on your washing machine. It’s important to note that even if the fabric is labeled as machine washable, you should still take care when handling it to avoid causing any damage.Once washed, it’s also important to air dry your fabrics rather than exposing them to high heat from a dryer. You can lay your fabrics flat or hang them up to air dry, taking care not to bunch or wrinkle them in the process.Finally, make it a habit to regularly inspect your fabrics for any signs of wear and tear. Check for fraying or weakened areas frequently, and take steps to address any issues you find before they become major problems.
Safety Considerations for DIY Dog Collars
When it comes to collars, a proper fit is not just about aesthetics – it’s also crucial for your pet’s comfort and safety. A well-fitted collar can help prevent accidents, such as slipping out of the house or getting stuck in tight spaces. Here are some key tips to ensure your pet’s collar is both comfortable and safe:
Proper Fit is Essential
When determining the proper fit for a collar, it’s essential to strike a balance between snugness and roominess. A good rule of thumb is that two fingers should be able to slide comfortably between the collar and your dog’s neck, ensuring it’s not too tight. On the other hand, the collar shouldn’t be so loose that it can easily slip over your dog’s head or become dislodged during everyday activities.
Reflective Elements for Visibility
To enhance the visibility and safety of your nighttime strolls with your furry companion, consider incorporating reflective materials into your walking routine. These can be in the form of vests, armbands, or even glow sticks attached to your dog’s collar. Not only will this make it easier for others to spot you both, but it will also provide an added layer of security and peace of mind during those evening adventures.
Breakaway Features for Escape Artists
When it comes to outfitting your furry friend with the best possible gear, don’t overlook one crucial consideration: a breakaway collar. Designed specifically for dogs that have a knack for getting stuck or tangled, these collars are a game-changer for pet owners who want to ensure their companion’s safety and well-being.
FAQs About DIY Dog Collars
As you embark on creating your own DIY dog collar, several questions may emerge. To address these concerns, let’s dive into some of the most frequently asked queries: What materials should I use? How do I ensure a comfortable fit for my furry friend? These and more are explored below.
What materials do I need to make a DIY dog collar?
For a homemade dog collar, gather the essential materials including nylon webbing, a buckle, a D-ring, and decorative fabric of your preference. Depending on your desired level of stability, consider adding an interfacing layer to enhance the overall structure.
How do I measure my dog for a DIY collar?
When determining the ideal collar size for your furry friend, start by wrapping a cloth tape measure around their neck. Make sure to add a comfortable buffer zone – about the width of two fingers – to ensure a snug yet not constricting fit. Next, refer to a sizing chart and match your measurement against the corresponding collar size.
Can I make a collar from an old one?
While it’s possible to breathe new life into old collars by reusing their hardware components, this approach requires some creative problem-solving. Start by disassembling the collar, removing any fixtures such as buckles or D-rings. Then, pair these salvaged fittings with fresh fabric and webbing to create a unique, eco-friendly design that not only reduces waste but also showcases your resourcefulness.
What is the best fabric for a DIY dog collar?
When it comes to choosing the right fabric for your pet’s bedding, cotton stands out as a top contender. Not only does it provide unparalleled comfort for your furry friend, but its softness and breathability make it an ideal choice for easy cleaning. Additionally, cotton is gentle on your dog’s sensitive skin, making it a practical and compassionate option.
How can I ensure the collar is durable?
When it comes to crafting a durable outdoor gear, it’s essential to start with a solid foundation. For this reason, begin by using heavy-duty nylon webbing as your base material. To ensure that this fabric can withstand the rigors of outdoor use, make sure to secure all seams with strong polyester thread. But don’t stop there – reinforce any stress points you identify with additional stitching to prevent potential weak spots from developing.
Is it possible to make an adjustable collar?
To ensure a comfortable and tailored fit, consider adding a tri-gliding mechanism or slider to the collar. This will enable users to easily adjust the length of the garment to suit their individual needs.
How do I attach a leash to the DIY collar?
When securing your pet’s harness, take a moment to ensure the D-ring is properly attached to the buckle. To add an extra layer of security, consider stitching the ring in place to withstand any tugging or pulling that may occur when attaching a leash. This small step can make all the difference in keeping both you and your furry friend safe and comfortable during walks.
Can I add decorative elements to the collar?
When it comes to personalizing your collar, you’re encouraged to get creative. Add beads, embroider designs, or incorporate other decorative elements – just ensure that any embellishments you add don’t compromise the collar’s usability. A thoughtful balance between form and function is key.
How do I clean a DIY dog collar?
When it comes to cleaning your pet’s accessories, a little care goes a long way in keeping them looking their best. For fabric collars, a gentle machine wash cycle followed by air drying is the recommended approach. If you’re dealing with leather collars, however, a slightly different tack is required. A damp cloth should be used to wipe away any dirt or debris, and regular conditioning will help maintain the material’s natural shine and supple feel.
What safety precautions should I take?
To guarantee optimal performance, verify that the collar snugly encircles your pet’s neck, taking care to periodically inspect it for signs of wear or damage. For an extra layer of protection, consider opting for a breakaway design, which can help prevent accidents by releasing under excessive force.
25 Personalized DIY Dog Collar Ideas
Transform your canine companion’s style with 25 innovative, customizable DIY dog collar ideas that blend creativity with practicality. Whether you’re seeking a one-of-a-kind accessory or a thoughtful gift, this diverse collection of designs offers endless possibilities to make a statement.
Easy DIY Adjustable Dog Collar Tutorial
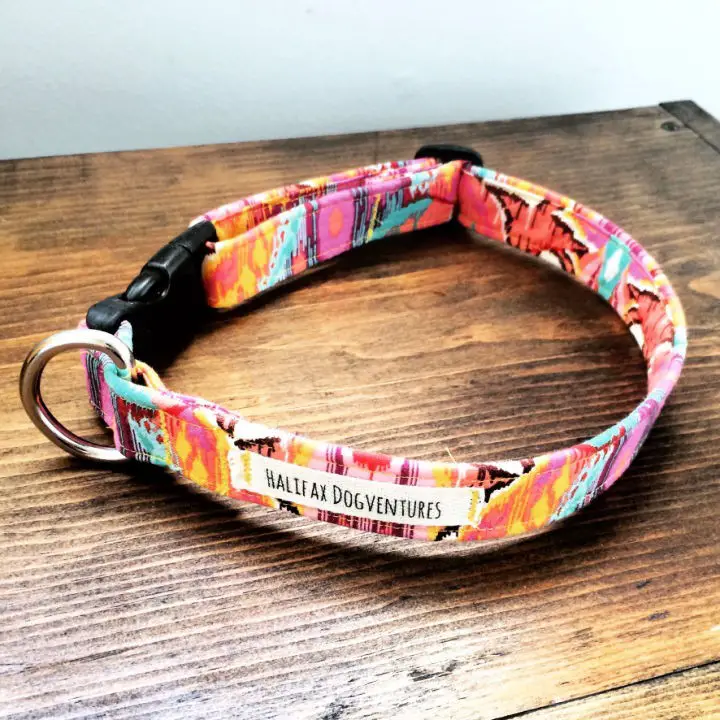
Are you prepared to create a one-of-a-kind, adjustable dog collar for your beloved pet? Halifax Dogventures’ DIY tutorial provides a comprehensive guide to making a stylish and practical accessory that showcases your sewing skills and love for animals. With clear, step-by-step instructions, this DIY project is ideal for crafty individuals who want to combine their passion for pets with their creative pursuits.
By following the simple steps, you’ll learn how to measure, cut, and stitch together a custom collar using basic materials like fabric, webbing, and hardware. The tutorial ensures that you have all the support you need to produce a truly unique collar that reflects your dog’s personality. With ease and style, transform your favorite fabric into your pet’s new go-to accessory.
How to Make a Dog Collar at Home
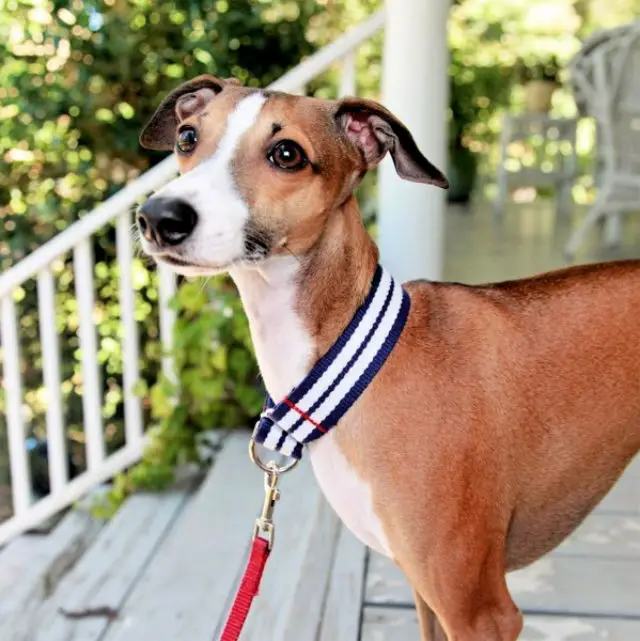
Are you ready to unleash your creative side and create a custom martingale collar for your dog? With My So Called Crafty Life’s DIY guide, you can easily combine functionality with style. The process is straightforward: simply measure your dog’s neck, cut the necessary webbing, and sew the pieces together with optional decorative ribbon. As you work through the steps, you’ll have the opportunity to choose from a variety of ribbon designs that reflect your pet’s unique personality. Not only will you end up with a secure collar tailored to your dog’s size, but you’ll also enjoy the satisfaction of creating something truly one-of-a-kind. With clear, engaging instructions and a fun crafting experience, this DIY project is perfect for dog owners who want to add a personal touch to their pet’s accessories.
Make a Flower Dog Collar for a Wedding

Crafting a flower dog collar is an excellent way to add a touch of personalization and whimsy to your pup’s appearance, especially for special occasions like weddings or outdoor gatherings. Following Stars for Streetlights’ guide on making a festive puppy flower collar is an enjoyable and creative experience that requires minimal expertise. With step-by-step instructions covering everything from cutting a flower crown to adding lace, beads, and faux flowers, you’ll be able to design an adorable accessory for your dog. Whether it’s for a backyard reception or a memorable photoshoot, this DIY project ensures your furry companion looks their absolute best, making them the highlight of any celebration.
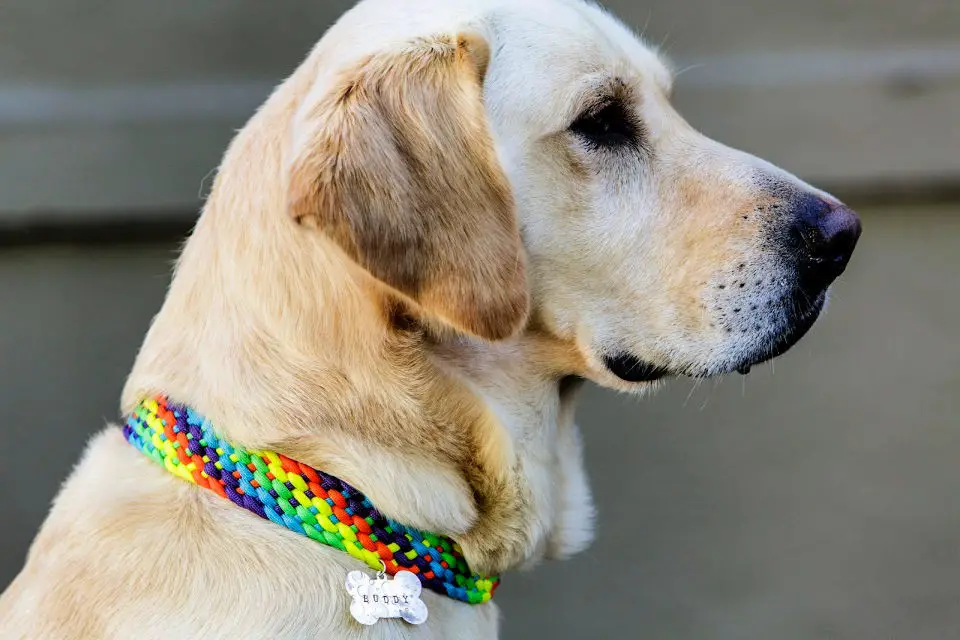
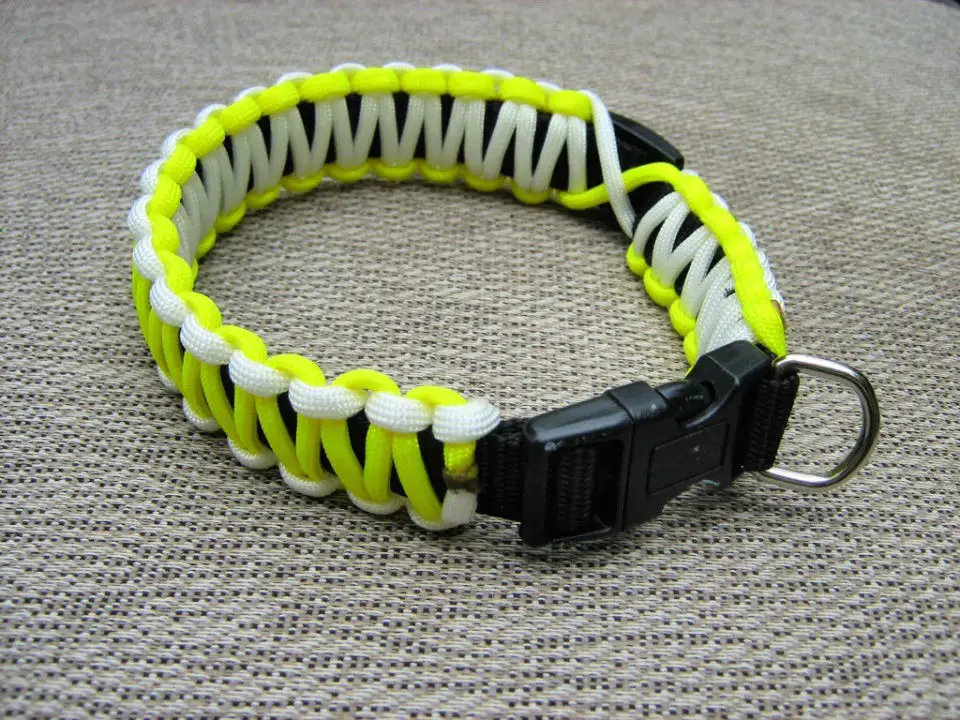
DIY Rainbow Paracord Dog Collar
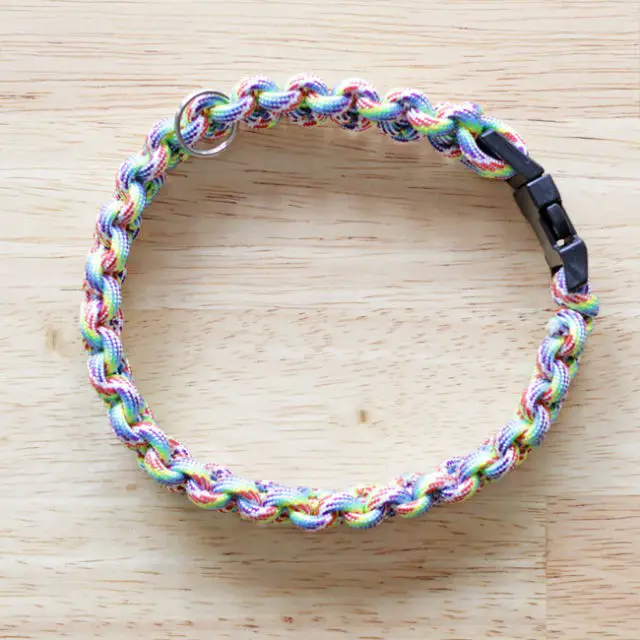
Crafting a vibrant rainbow paracord dog collar is an engaging DIY project that can be enjoyed by older children and teens who appreciate hands-on activities. With basic materials like rainbow 550 paracord, a side release buckle, a lighter, scissors, and a small key ring, you can create a durable and stylish accessory for your furry friend. The process is straightforward: start by folding the paracord, then attach the buckle, measure the length, and begin knotting. It’s essential to secure each knot properly and add a key ring for your dog’s tags. Once complete, trim any excess cord and carefully burn the ends to prevent fraying. As you work through this project, you’ll enjoy the creative satisfaction of crafting a personalized accessory that your dog will wear with pride. For added guidance, consider checking out a tutorial for additional visuals and tips.
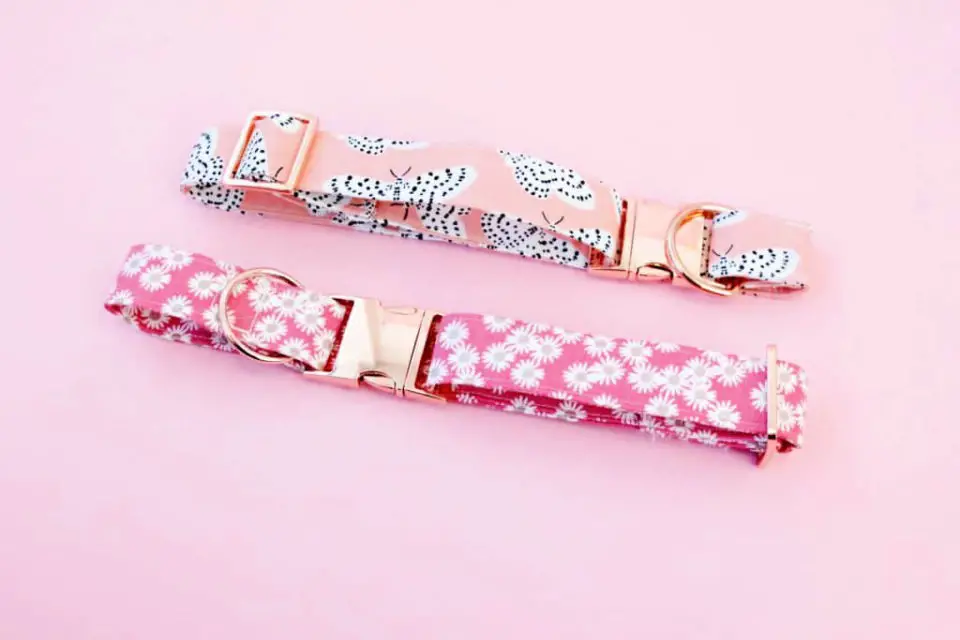
Homemade Fabric Dog Collars
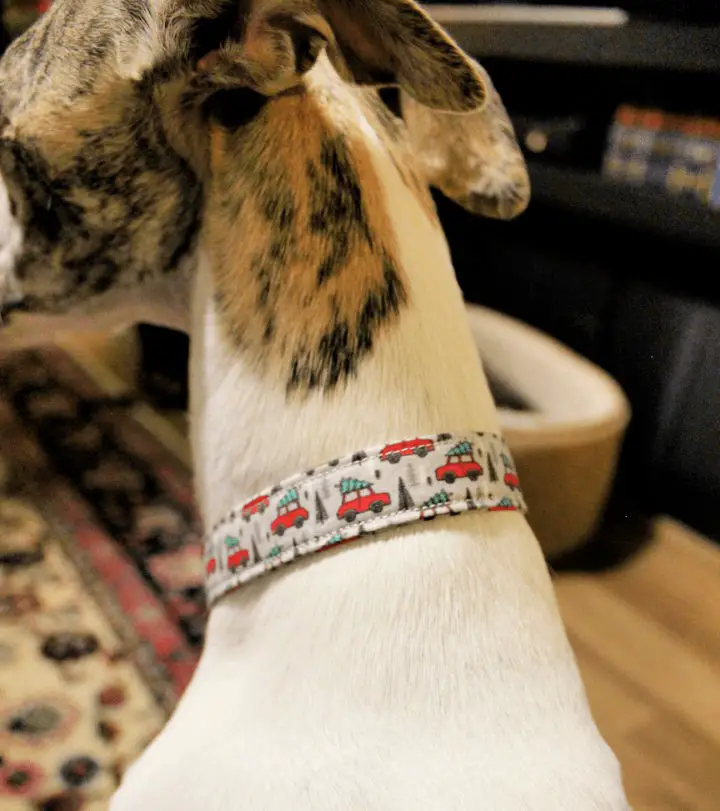
Crafting a personalized dog collar is a wonderful way to create a customized piece that prioritizes both comfort and style for your pet. At The Pointy Snoot, we’re excited to guide you through the process of making a handmade dog collar using just a few simple materials: a non-stretch fabric quarter, iron-on interfacing, and sturdy hardware such as a buckle and D-ring. Our step-by-step instructions cover everything from measuring and cutting your fabric to sewing and attaching the hardware, ensuring a snug and fashionable fit for your furry companion.
In addition to providing clear guidance, our guide also shares valuable insights on selecting the perfect fabric for your creation. We’ll even introduce you to some of our favorite Portland fabric resources, where you can find high-quality materials that will elevate your project. Whether you’re looking to accessorize your pet or create a collar to hold their identification tags, these handcrafted collars are the perfect way to show your furry friend some love.
Making a Leather Dog Collar and Leash
Transform your four-legged friend’s style with a unique DIY leather dog collar and leash, courtesy of Lia Griffith. This step-by-step guide simplifies the process by outlining the necessary tools and materials, ensuring that even beginners can create a customized accessory for their furry companion. Not only does leather provide durability, but it also develops a beautiful patina over time, guaranteeing that your pup’s gear will remain stylish and functional with age.
With paint and masking tape, you can personalize the design to reflect your dog’s personality, making each piece truly one-of-a-kind. As you craft this special accessory, remember to measure your dog’s neck for a precise fit and always supervise their use to prioritize safety.
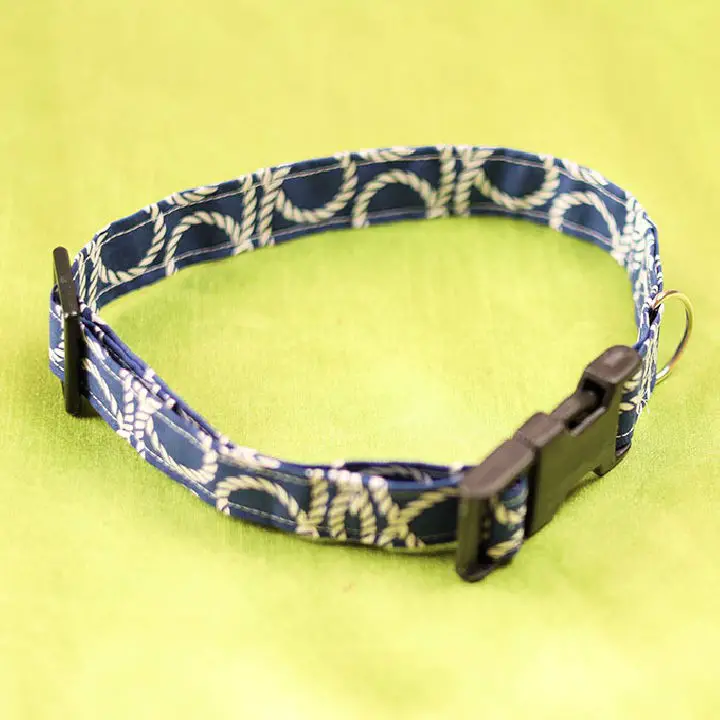
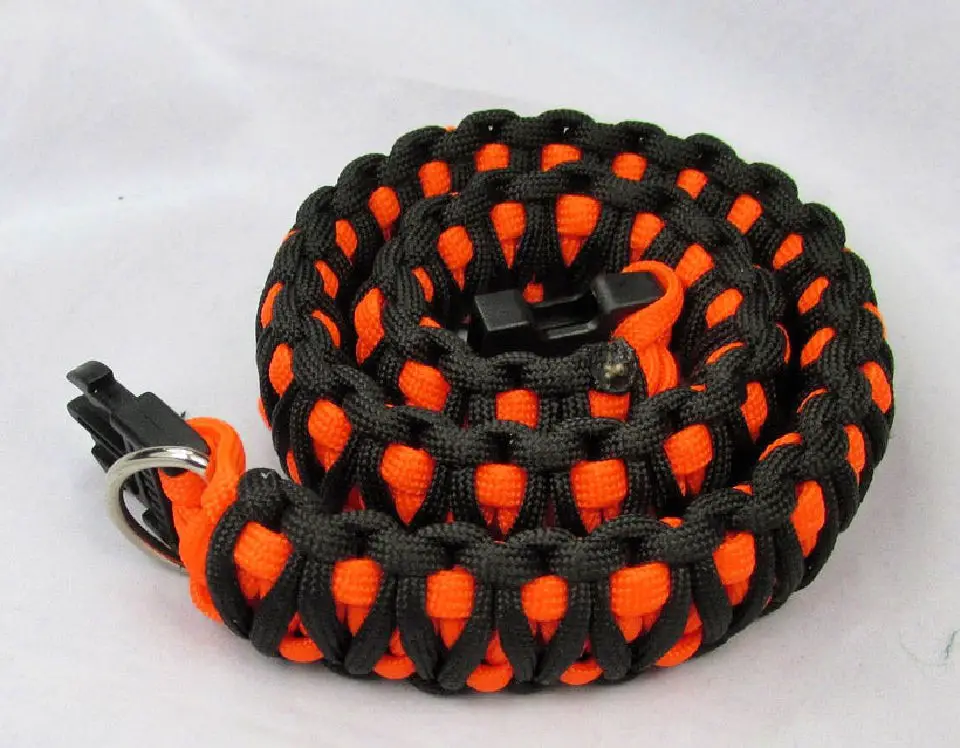
Free Paracord Dog Collar Pattern

To give your furry friend a stylish and durable paracord dog collar, follow this easy DIY tutorial. Perfect for spring, you’ll need a few basic materials: a buckle, D-ring, paracord from stores like Michaels or Walmart, scissors, and a lighter. Begin by measuring your dog’s neck to determine the length of paracord required, adding some extra for comfort. This guide takes you through the process of weaving the paracord into a collar, from securing it to the buckle to integrating the D-ring for leash attachment. Finish by trimming and melting the ends for a neat appearance. Remember to regularly inspect the collar for wear and tear to ensure your dog’s safety.
Cool DIY Personalized Dog Collar
At Craft Warehouse Blog, we’re excited to share our comprehensive guide on how to handcraft a sturdy and fashionable dog collar using the Kumihimo braiding technique. This tutorial is ideal for crafty individuals who appreciate blending form with function. With our meticulous step-by-step instructions, you’ll be able to create a one-of-a-kind accessory for your beloved pet, complete with a personalized metal dog tag that reflects their unique personality.
To help you get started, we’ve assembled a detailed supply list featuring vibrant Para Cord, a reflective buckle with a D-ring, and a Kumihimo Flat Plate, along with other essential tools. Our clear instructions are designed to ensure a seamless crafting experience, allowing you to confidently construct a collar that not only keeps your pet safe but also showcases their character.
How to Make a Yarn Appliqued Dog Collar
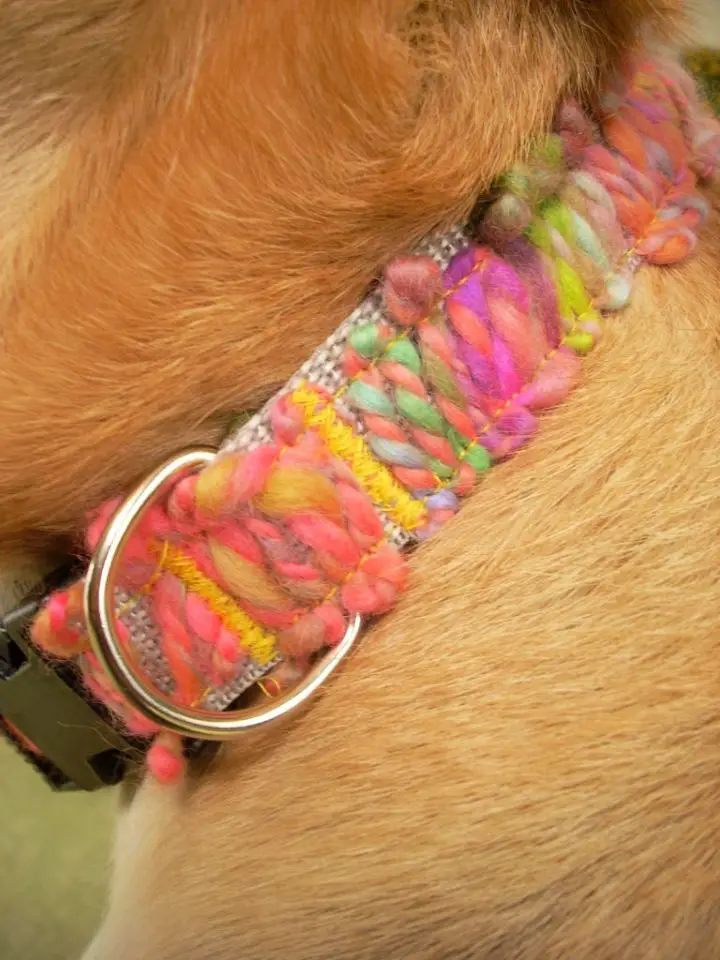
Transform your furry companion’s style with a one-of-a-kind yarn appliqued dog collar. Instructables offers a comprehensive guide to creating a vibrant and durable collar that can withstand the energetic play of larger dogs. This DIY endeavour allows you to add a touch of flair to your pet’s daily attire, without the hassle of keeping a sweater clean. By pursuing this project, you’ll not only showcase your crafting skills but also celebrate your pet’s personality. With clear and detailed instructions, you’ll embark on a rewarding experience that results in a unique accessory for your beloved companion.
Unique DIY Dog Collar With the Name
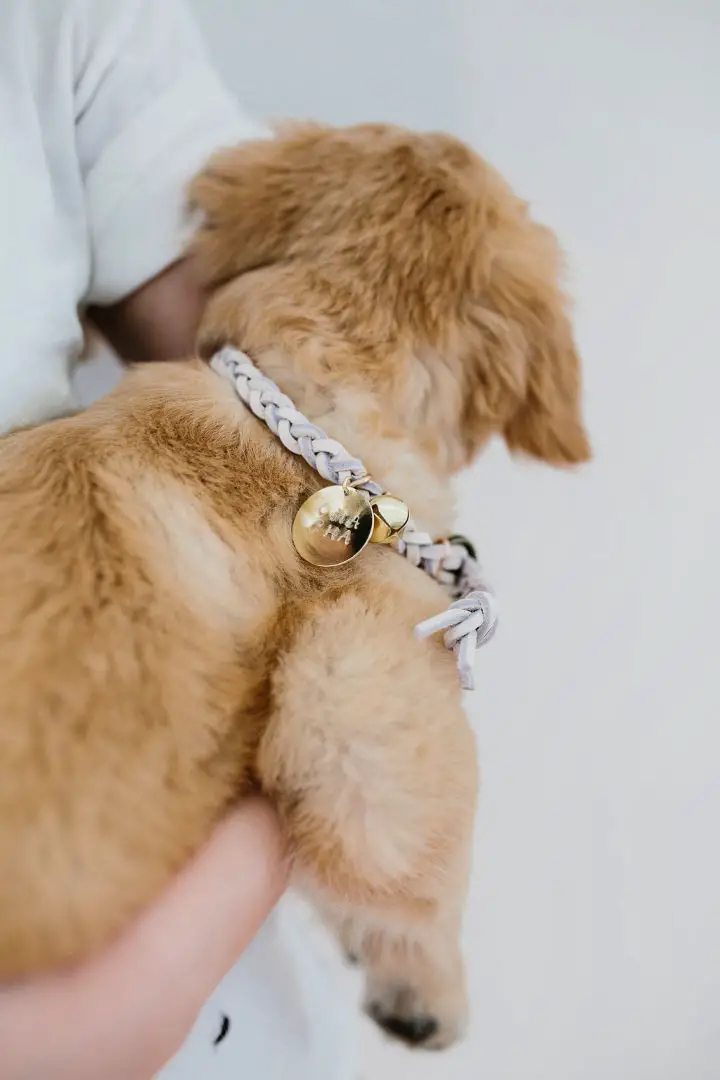
Crafting a braided dog collar is an excellent way to personalize your pet’s accessories while showcasing your creativity. If you’re interested in creating a unique and charming collar for your furry companion, The Effortless Chic offers a detailed guide to help you achieve this. To get started, you’ll need flat suede cord, a jingle bell, jump rings, pliers, scissors, a letter metal stamp set, a round metal tag, tape, and a small buckle. Begin by measuring the cord and attaching it to the buckle, then move on to customizing the tag with your pet’s name using the metal stamp set. Next, add jump rings to the tag and bell, thread them onto the cords, braid the design to your desired length, and finally secure everything in place. With a clear understanding of each step and a touch of imagination, you’ll be able to create a stylish, handmade collar that’s sure to make your pup stand out.
Making Your Own Dog Collar – Step by Step
To create a one-of-a-kind custom dog collar, follow Patchwork and Poodles’ step-by-step guide. This comprehensive tutorial helps you craft a comfortable and durable accessory for your pet, accommodating dogs of all sizes with collars in X-Small, Small, Medium, and Large options. The guide emphasizes the importance of using soft cotton for comfort and nylon for durability. To make the collar, you’ll need basic sewing skills to encase webbing in fabric, attach hardware, and secure stitching. By making your own dog collar, you can add a personal touch to your pet’s style while also upcycling old materials from an existing collar. This tutorial is both practical and enjoyable, perfect for pet owners seeking a unique way to show off their furry friend’s personality.
Easy Steps to Make a Paracord Dog Collar
Crafting a paracord dog collar is an accessible and engaging project that yields a functional and stylish accessory for pet owners. This tutorial at Four Oaks Crafts walks you through the process of creating a sturdy, adjustable collar using 550lb Type III Paracord as the foundation. The comprehensive guide also teaches the Cobra Weave technique, ensuring a durable and long-lasting end product. With minimal tools like scissors, a lighter, and duct tape, you can personalize your pet’s accessory in approximately half an hour. The tutorial is designed to be both easy to follow and enjoyable, making it a rewarding experience for crafters of all levels.
How to Sew a Fabric Dog Collar

Create a customized pet collar with minimal effort by following SewCanShe’s beginner-friendly sewing tutorial. This DIY project is perfect for dogs, cats, and other pets, requiring only basic supplies like fabric, a D-ring, and velcro. With this adjustable and comfortable design, you can ensure your furry friend stays stylish as they grow. The step-by-step guide provides clear instructions and helpful tips to guarantee a successful sewing experience. As an added bonus, this pet accessory can be easily adjusted or remade using scrap fabric, making it a practical and enjoyable craft for adding a personal touch to your pet’s wardrobe.
Amazing DIY Dog Collar and Leash
Crafting a custom dog collar and leash set is a project that combines practicality with personal style. With WeAllSew’s comprehensive guide, you can create a durable and reflective set tailored to your dog’s size and your design preferences. This DIY endeavor requires only basic tools and materials, including nylon webbing, fabric, and hardware. By following the step-by-step instructions from cutting and sewing the fabric to attaching buckles and D-rings, you’ll be able to enhance your pup’s safety and make a statement with a unique collar and leash that’s sure to turn heads at the dog park.
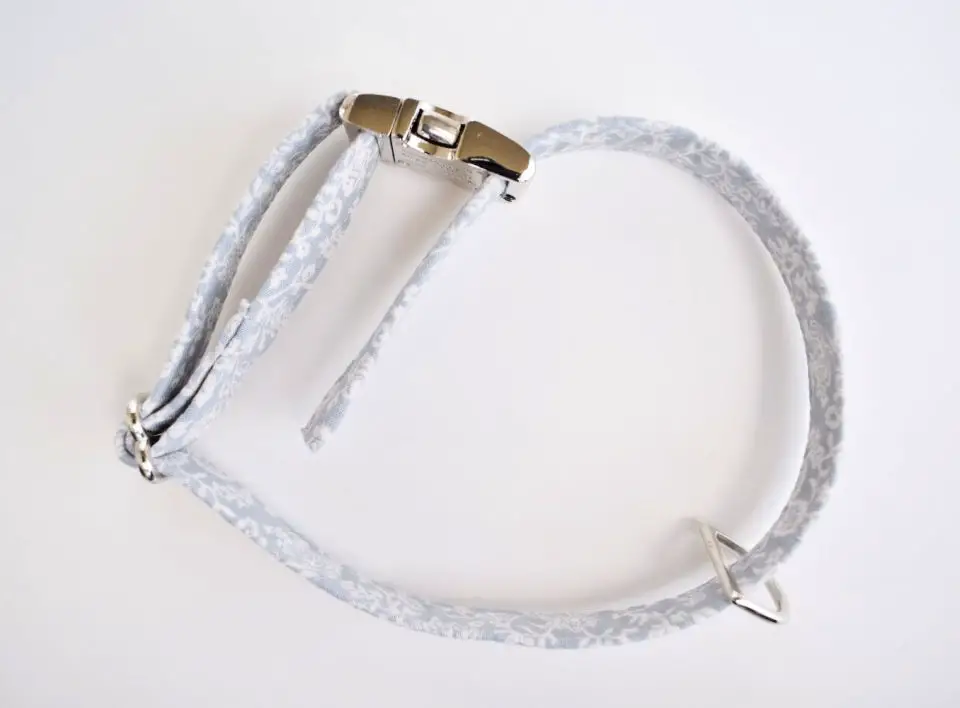
Make a Dog Collar – Free Sewing Pattern
For pet enthusiasts seeking a unique accessory for their furry companions, the See Kate Sew guide on crafting a dog collar is an excellent starting point. By providing a free sewing pattern and straightforward steps, this comprehensive resource empowers individuals to create a customized collar tailored to dogs of any size. This tutorial is ideal for those who desire to infuse personality into their pet’s attire.The instructions offer valuable insights into selecting the optimal fabric, cutting it to precise measurements, and securely attaching hardware elements like buckles and D-rings. By following this engaging guide, DIY enthusiasts can confidently expect a sturdy and stylish collar that will have their canine companion strutting with confidence.
Homemade Dress Shirt Dog Collars
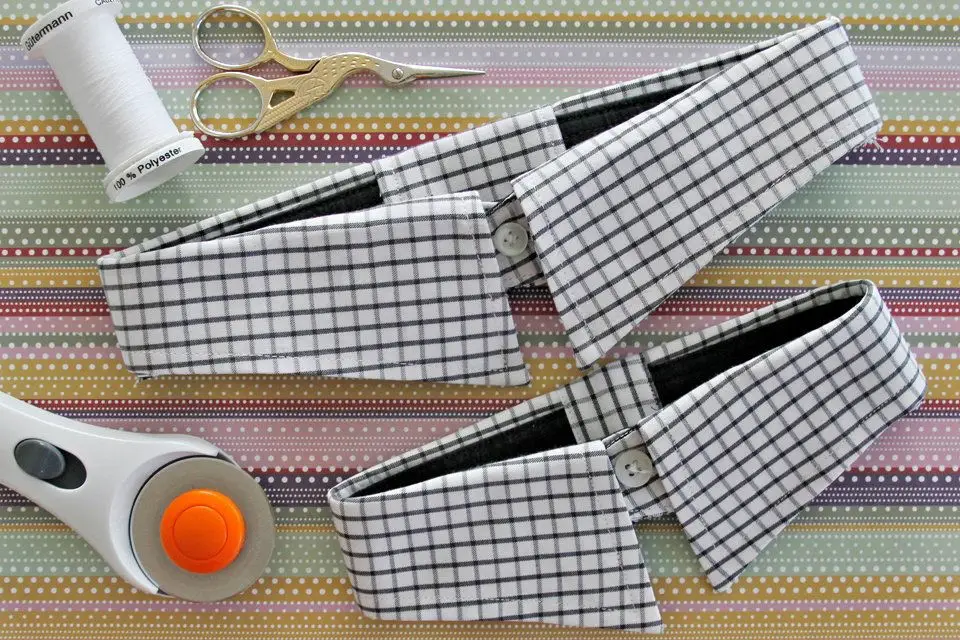
Transforming old dress shirts into stylish DIY dog collars is not only eco-friendly but also a thoughtful way to give new life to a sentimental piece of clothing. With Dalmatian DIY’s comprehensive guide, you’ll learn how to repurpose your old shirt into a comfortable and safe collar for your furry friend. The tutorial provides step-by-step instructions on adjusting the collar size to fit your pet perfectly, whether they require a smaller or larger size. Moreover, it includes valuable tips on maintaining the collar’s safety and comfort throughout its use.
Beginner-Friendly DIY Dog Collar
Crafting a customized DIY dog collar is an effortless way to infuse a personalized touch into your furry companion’s attire. For a seamless experience, Hello Sewing offers a comprehensive guide, featuring a step-by-step tutorial and accompanying video, to create a sturdy and stylish collar that caters to your dog’s size and personality. The tutorial spans from measuring your dog’s neck to selecting the ideal materials for the fittings, ensuring a tailored fit that suits their lifestyle. Whether your pup is a beach-loving enthusiast or a land-dwelling companion, you can effortlessly modify the collar to accommodate their preferences. By employing basic sewing techniques and utilizing your existing fabric stash, you can craft a comfortable and robust collar suitable for everyday wear or as a thoughtful gift for fellow pet enthusiasts. Follow the clear instructions and add a unique twist to your dog’s accessories today.
How to Make a Paracord Dog Collar
For pet owners with a creative streak, crafting a paracord dog collar is an engaging project that combines functionality with personalized flair. By following the detailed tutorial on Instructables, you can create a sturdy and stylish collar for your furry companion using the double cobra knot technique. This hands-on guide is ideal for those who value bespoke pet accessories and are eager to acquire a new skill. The step-by-step instructions are designed to be intuitive and reassuring, ensuring a successful outcome for a one-of-a-kind collar that perfectly reflects your pet’s unique character.
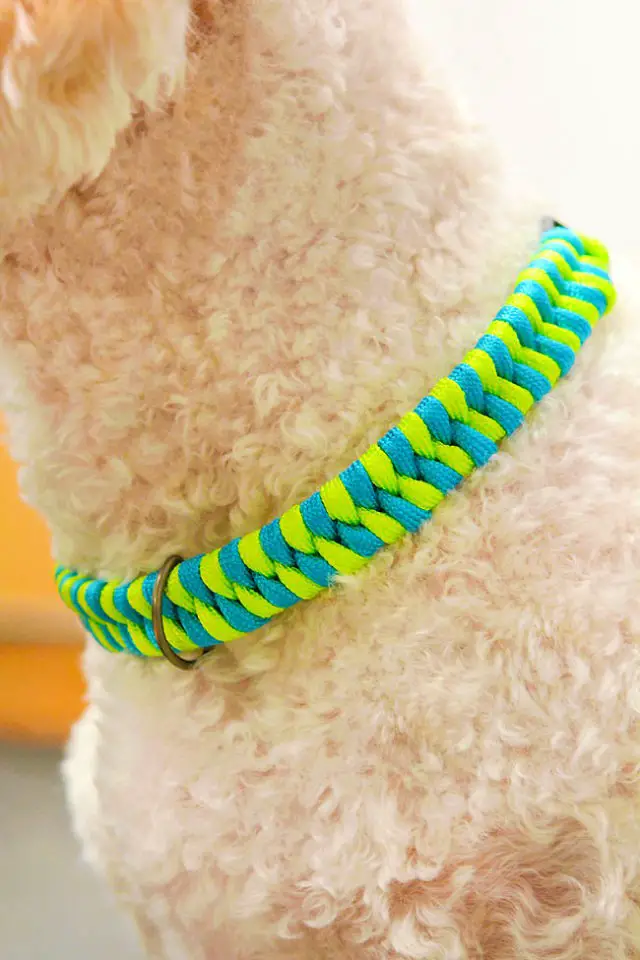
Handmade Funky Woven Dog Collar
Create a one-of-a-kind woven collar for your beloved pet with our straightforward tutorial from Golden Age Beads Blog. This DIY project is an excellent way for pet owners to add a dash of personality to their furry friend’s attire without overwhelming them with elaborate outfits. With just basic tools like scissors, a buckle clip, paracord, a D-ring, and a tape measure, you’ll be able to craft a stylish and comfortable collar that perfectly complements your cat or dog’s unique features. As you follow the step-by-step instructions, you’ll master measuring, knotting, and finishing techniques to create a durable and eye-catching accessory that reflects your pet’s personality. Not only is this project a fun and creative outlet, but it also gives you the opportunity to personalize your pet’s look and make them stand out from the crowd.
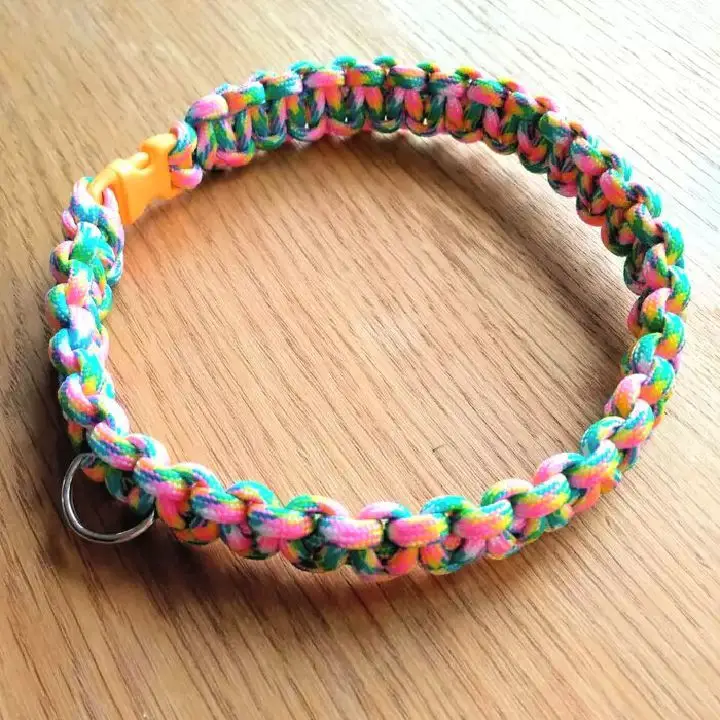
Inexpensive DIY Paracord Dog Collar
Crafting a paracord dog collar is a fun and rewarding DIY experience that yields a durable, weather-resistant accessory for your pet. With a simple step-by-step guide from One Little Project, you can create a stylish fishtail knot collar using just 12 feet of paracord in two colors and basic supplies like a bracelet buckle and D-ring. The end result is not only an adorable custom accessory but also a sense of accomplishment that comes with making it yourself. Additionally, these collars are easy to clean and maintain, ensuring your dog can enjoy their new gear for a long time. With the freedom to choose from a wide range of colors, you can give your furry friend a unique and personalized collar that reflects your pet’s personality.
Sew a Dog Collar With Written Instructions
Creating a customized dog collar through DIY sewing is an enjoyable and cost-effective endeavor, especially for dog owners with a flair for crafting. With basic sewing skills, you can design a sturdy and stylish accessory for your pet using a simple step-by-step process. This involves measuring your dog’s neck, cutting the fabric and webbing to size, and then assembling the pieces with a sewing machine. To complete this project, you’ll need a few essential materials such as cotton fabric, a dog collar buckle kit, thread, and standard sewing tools. By following the clear instructions, you can create a one-of-a-kind collar that not only serves its functional purpose but also adds a touch of personality to your pet’s accessories. For crafty dog owners looking to add a personal touch to their pet’s wardrobe, this DIY project is an ideal starting point.
Make a Custom Dog Collar Tutorial

Bring out your pet’s personality by crafting a custom dog collar right in the comfort of your own home. Great Dane Care’s DIY Dog Collar video provides a comprehensive, step-by-step guide on creating one-of-a-kind and budget-friendly collars for your furry companion. With the ability to tailor each collar to match any season or special occasion, you’ll be able to make your dog stand out in style. The tutorial will walk you through selecting the perfect materials, taking precise measurements, and sewing with care. To make things even easier, the video includes links to necessary products, giving you everything you need to get started. By embracing the joy of making a personalized collar that’s as unique as your pup, you’ll be able to showcase your pet’s personality in a way that’s truly special.
Easy DIY Dog Collar and Leash
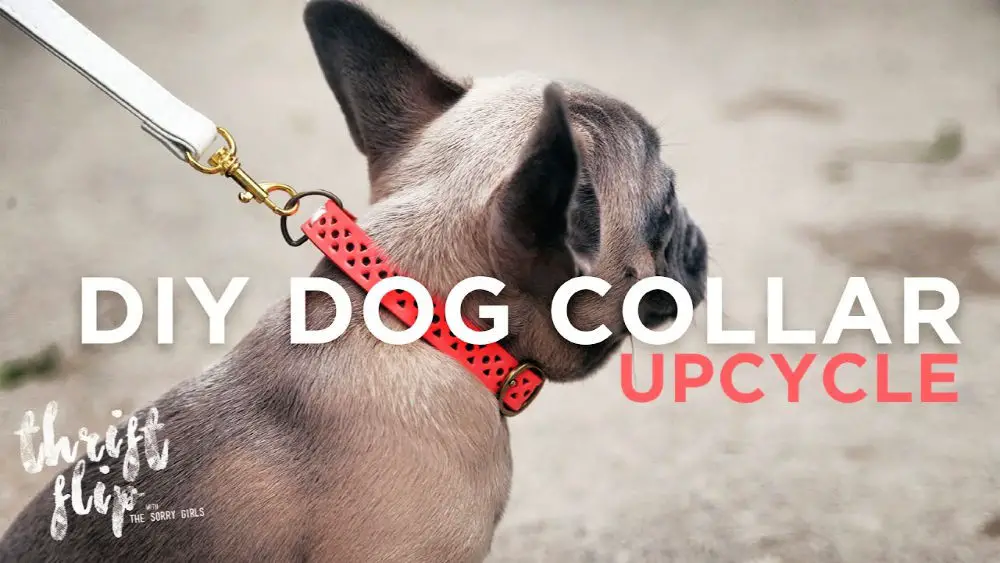
If you’re looking to add some personal flair to your furry friend’s accessories without breaking the bank, The Sorry Girls on YouTube have got you covered. Their creative DIY project takes thrifted items like belts and purse straps and transforms them into one-of-a-kind dog collars and leashes. Not only is this budget-friendly approach a great way to breathe new life into pre-loved treasures, but it’s also a fantastic opportunity for crafty pet owners to unleash their creativity and make their pup stand out in the crowd. Head over to The Sorry Girls’ channel to check out their full DIY guide and let your imagination run wild!
How to Make a Serenity Dog Collar
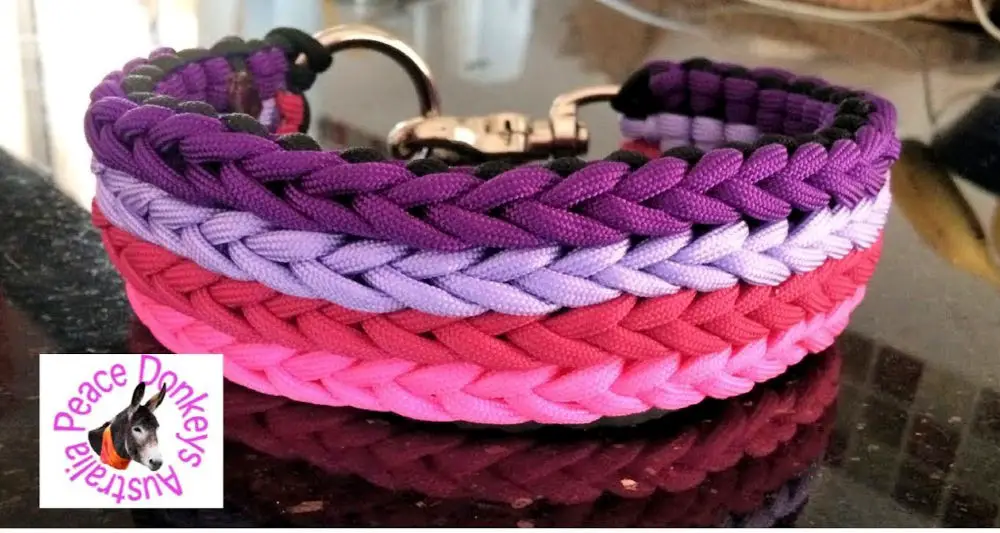
For those looking to create a serene and stylish canine companion accessory, the DIY video tutorial on Peace Donkeys’ YouTube channel is an excellent starting point. This comprehensive guide takes viewers through the process of crafting both adjustable and non-adjustable versions of the serenity dog collar, allowing for customization to suit individual dogs’ needs.
While requiring some paracord, a few clips, and a bit of patience, the end result is a sturdy and eye-catching collar that your pet will wear with pride. Additionally, visitors can find more detailed information and links to required materials on Peace Donkeys’ blog at peacedonkeys1.wordpress.com.
Get ready to create a one-of-a-kind accessory that exudes serenity and reflects the special bond between you and your furry friend.
Outstanding DIY Dog Collar
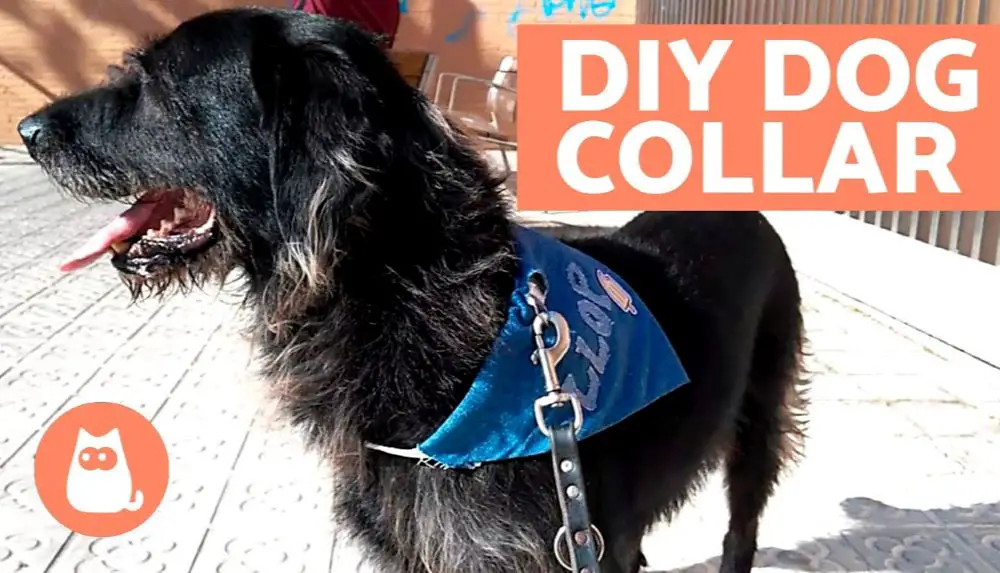
Immerse yourself in the world of DIY crafting and create a bespoke dog collar for your beloved companion. The AnimalWised channel on YouTube offers an engaging and easy-to-follow video tutorial that demystifies the process, making it accessible to anyone looking to get crafty. By following this comprehensive guide, you’ll learn how to accurately measure your dog’s neck, select the perfect materials, and add a personal touch with decorative embellishments. Not only will you gain the satisfaction of creating something unique for your furry friend, but you’ll also enjoy the process itself, which is sure to be a fun and creative outlet. This tutorial serves as a valuable resource for pet owners who share a passion for DIY projects, offering practical advice and inspiration to get started.
Conclusion:
As we bring this extensive guide on 25 personalized DIY dog collar ideas to a close, we’ve thoroughly explored the realm of crafting bespoke collars that not only showcase your dog’s individuality but also prioritize their comfort, safety, and practical needs. These innovative ideas aim to spark your creativity, empowering you to craft a one-of-a-kind collar that perfectly captures your furry companion’s unique essence. By delving into the nuances of material selection, proper fitting, and thoughtful embellishments while adhering to essential safety guidelines, you’ll be well-equipped to create a truly show-stopping accessory for your beloved pup.
