Want to breathe new life into your living room without emptying your wallet? One simple way to achieve this is by crafting a DIY couch cover. Not only are these projects budget-friendly, but they also offer endless opportunities for personalization to match your unique home décor. In the following section, we’ll walk you through a step-by-step guide on how to create your very own couch cover from scratch. We’ll cover everything from the essential tools and materials needed to measuring, cutting, and sewing techniques that ensure a snug fit. By following these straightforward instructions, you can produce a professional-looking result that’s both stylish and functional. With this comprehensive guide, you’ll be empowered to transform your couch and living space with ease.
How to Make a Couch Cover – Step by Step
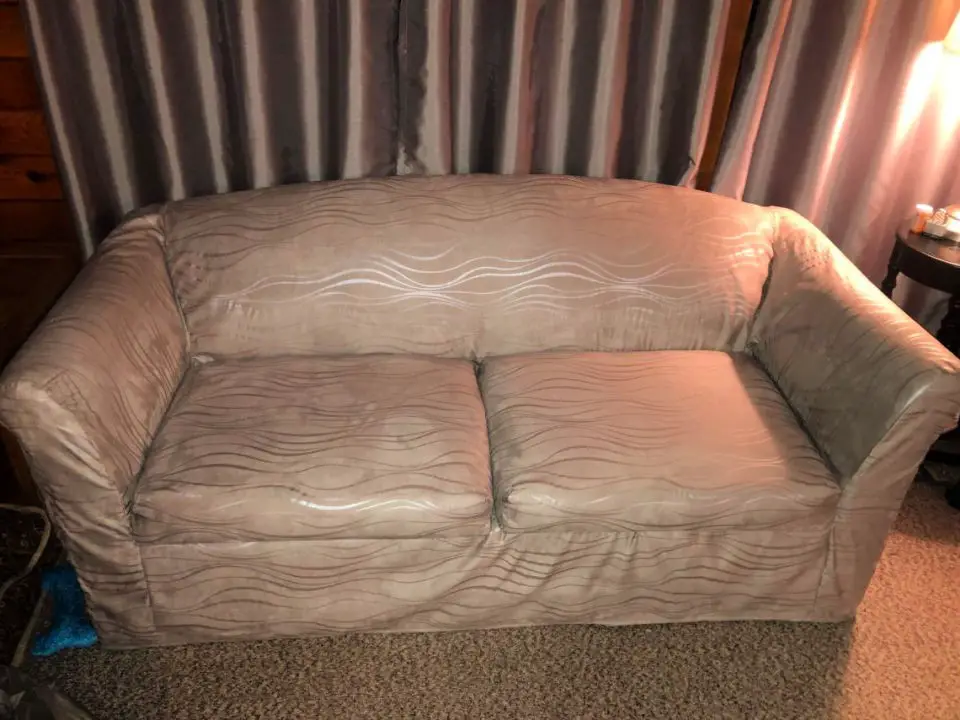
Transforming the look of your couch without breaking the bank or requiring sewing expertise is absolutely possible. We’ll be exploring a straightforward, no-sew approach to reupholster your couch using a drop cloth, a creative and budget-friendly solution to revamp your living room’s ambiance.
What You’ll Need:
To embark on the task of reupholstering your couch, you’ll need to gather a few essential tools and supplies. Start by obtaining a drop cloth that’s slightly larger than your couch dimensions, allowing for an extra two feet of coverage around each measurement to prevent any accidental stains or spills. Next, you’ll require some upholstery pins with clear tops, which can be screwed into the fabric using a corkscrew motion. If you need to trim any excess material, scissors will come in handy. A measuring tape is also crucial for taking precise measurements and ensuring a smooth fit. Finally, having an iron and ironing board on hand can be useful for removing any wrinkles that may appear during the reupholstering process.
Step 1: Measure Your Couch
To start, take precise measurements of your couch to determine the ideal size of the drop cloth. Begin by measuring the distance from the floor up to the armrest on one side, followed by the measurement across the top of the couch. Then, move down to the opposite side and record this distance as well. Next, measure the length of the couch from the back to the front, ensuring you capture all relevant dimensions. To be safe, add roughly two feet to both the width and length measurements to account for any potential slippage or overlapping during the painting process.
Step 2: Prepare the Drop Cloth
Before commencing the project, take the time to thoroughly prepare your drop cloth by washing, drying, and ironing it. This initial step is crucial in preventing potential shrinkage issues and ensuring a smooth working experience.
Step 3: Cover Your Couch
To safeguard your furniture, begin by spreading the drop cloth over the length and width of your couch. Ensure the material is evenly distributed from one end to the other, reaching the floor on all sides. For a neat appearance, gently pull the cloth towards the rear of the sofa, creating a clean panel that spans the front.
Step 4: Tuck and Adjust
To ensure a professional-looking outcome, begin by carefully tucking the cloth into the crevices of the couch, working your way around its contours. Next, smooth out any large wrinkles or folds that may have developed during transportation or storage. Make sure to adjust the drop cloth to fit snugly around the couch cushions and arms, taking care not to bunch it up or leave any sagging areas. Finally, double-check that the front panel remains neatly draped, creating a seamless transition from the rest of the fabric.
Step 5: Secure with Upholstery Pins
To begin, utilize the upholstery pins to securely fasten the drop cloth in place, commencing from the sides where you’ll make a tidy fold by pulling the fabric snug against the couch arm. Then, pin it in place with one of the upholstery pins. Repeat this process around the entire couch, prioritizing areas that are likely to shift or rub during use, such as corners and crevices. When securing the cloth underneath and along seams, take care to do so discreetly to preserve the aesthetic appeal.
Step 6: Final Adjustments
As you complete the process, take a moment to circle back around to the couch, fine-tuning any lingering creases or folds in the fabric. A quick pinch with the pins will secure everything in place, and while you’re at it, take a few seconds to snip off any stray threads or excess material that may be visible. With a smooth edge, your work is almost done.
Step 7: Add Finishing Touches
Transforming your couch’s aesthetic is as simple as rearranging its cushions, throw pillows, and any additional embellishments. By strategically placing blankets or decorative pillows, you can infuse your sofa with a pop of color and texture, further accentuating the revitalized look of your new cover.
Video Tutorial
For those who prefer a visual approach, a step-by-step video tutorial on making a couch cover using a drop cloth without sewing is available on YouTube. This instructional guide pairs perfectly with our written guide, providing a comprehensive overview of the process that’s easy to follow along. With this DIY project, you can transform your living space into a comfortable and stylish area that reflects your personal style, all while being budget-friendly and customizable to fit any couch size or decor. Simply put, patience and creativity are all it takes to achieve a successful outcome.
Customization Tips for Your DIY Couch Cover
When it comes to making a DIY couch cover, the possibilities are endless. Not only does it provide protection for your furniture, but it’s also an opportunity to showcase your personal style and add a touch of uniqueness to your living space. Here’s how you can customize your couch cover:Start by selecting a fabric that reflects your personality and complements your room’s decor. Soft fabrics like microfiber or velvet can create a cozy atmosphere, while durable options like canvas or denim are great for high-traffic areas. Consider the texture, pattern, and color to ensure it fits your desired aesthetic.Next, don’t be afraid to experiment with colors. A bold hue can make a statement, while a pastel shade can add warmth and coziness to the room. If you’re unsure, neutral colors like beige, gray, or navy are always in style and easy to accessorize. You can also incorporate patterns to add depth and visual interest.When it comes to details, small changes can have a big impact. Consider adding piping along the edges for a tailored look, using contrasting thread for a pop of color, or incorporating buttons, zippers, or tassels for added personality.To make your couch cover truly functional, consider making it reversible. This way, you can easily switch up the look to match changing decor trends or seasons. Choose coordinating fabrics for each side to ensure they complement your room’s design.Finally, think about how your couch cover will be used in your daily life. Include features like pockets for remote controls or magazines, and choose a fabric that’s easy to clean and resistant to scratches if you have pets.By involving your family members in the process and considering their input, you can create a couch cover that not only reflects your taste but also meets your needs. With these tips, you’ll be well on your way to crafting a one-of-a-kind couch cover that’s both beautiful and functional.
Troubleshooting Common Problems with DIY Couch Covers
When creating your own DIY couch cover, you may encounter some common challenges. To help you overcome these hurdles, here’s a guide to troubleshooting the most frequent issues: Fabric selection can be crucial, as choosing the wrong material can lead to stretching or sagging. Opt for sturdy fabrics like canvas or upholstery fabric that hold their shape well. If you’re new to sewing, don’t worry – practice on scrap fabric first to develop your skills. Use plenty of pins to keep your fabric in place and consider using a walking foot attachment to manage thick layers. To avoid wrinkles and creases, iron your fabric before cutting and sewing. You can also choose wrinkle-resistant fabrics for low-maintenance results. For stubborn creases, steam ironing is an effective solution. Additionally, be aware of color bleeding – some fabrics may run when washed. To prevent this, pre-wash your fabric in cold water with a cup of vinegar to set the color and reduce the risk of bleeding. Lastly, don’t forget about shrinkage – fabric can lose its shape after washing, affecting the fit of your cover. Always pre-wash and dry your fabric before sewing to account for any shrinkage. By anticipating these issues and knowing how to address them, you’ll be well-prepared to create a beautiful and functional DIY couch cover. Remember, patience and persistence are key – don’t let small setbacks discourage you. With each problem you solve, you’ll gain more confidence and skill, making the process easier and more enjoyable.
Sustainability Focus for Your DIY Couch Cover
When crafting DIY projects, embracing sustainability not only benefits the environment but also adds a meaningful narrative to your creations. To make your DIY couch cover more eco-friendly, consider the following strategies:
Select sustainable materials like organic cotton, linen, or hemp that are renewable and biodegradable. You can also opt for recycled fabrics or upcycle materials like old curtains or bed sheets.
To minimize waste, carefully plan your cuts to reduce fabric scraps. Use leftover pieces for smaller projects, such as cushion covers or patchwork designs.
For dyeing purposes, choose natural or non-toxic dyes that reduce the use of harmful chemicals.
In terms of energy efficiency, consider sewing during daylight hours to save electricity. Alternatively, hand-sew your cover if possible.
Finally, design your couch cover to be durable and timeless, reducing the need for frequent replacement and waste.
By incorporating these sustainable principles, you’ll create a couch cover that’s not only beautiful and functional but also kind to the planet.
Expert Insights on DIY Couch Covers
When it comes to creating a DIY couch cover, gaining insights from experts can make all the difference. By incorporating their expertise, you’ll be able to elevate the quality and aesthetic appeal of your project. For instance, interior designers recommend choosing a fabric that harmonizes with both your couch and room’s decor, ensuring a cohesive space that reflects your lifestyle. Upholsterers emphasize the importance of investing in high-quality thread and needles, as these components directly impact the durability of the cover. Meanwhile, DIY enthusiasts stress the value of patience and attention to detail, urging you to take your time when measuring, cutting, and sewing to achieve a professional-looking result.
Maintenance and Care for Your DIY Couch Cover
To extend the life of your DIY couch cover and keep it looking its best, it’s crucial to follow a few simple maintenance and care guidelines. Here are the essential steps to help you keep your couch cover in top condition:Firstly, regular cleaning is vital to prevent dirt and dust from accumulating. Use a vacuum cleaner or a damp cloth to remove any debris, and for small stains, spot clean with a mild detergent. Avoid using harsh chemicals that could damage the fabric.Next, when it comes to washing your couch cover, be gentle! If it’s machine washable, use cold water and a gentle cycle. For covers that aren’t machine washable, consider hand washing or seeking professional help. Always avoid using bleach, as this can cause irreparable damage.To prevent shrinkage and wrinkles, air dry your couch cover after washing. If you must use a dryer, choose a low heat setting and remove the cover while it’s still slightly damp to minimize creases.If your couch cover is prone to wrinkles, ironing might be necessary. Use the appropriate heat setting for the fabric and iron on the reverse side to protect the color and texture.When not in use, store your couch cover in a cool, dry place. Fold or roll it neatly to prevent creases and avoid storing it in plastic bags, as this can trap moisture and lead to mildew.Finally, be mindful of sharp objects and pet claws, as these can tear or snag the fabric. If you do get a tear, repair it promptly to prevent it from getting bigger.By following these simple steps, you can keep your DIY couch cover looking its best for years to come.
FAQs About DIY Couch Covers
As you prepare to embark on a DIY couch cover adventure, it’s natural to have questions that require clarification. To ensure your project unfolds smoothly, I’ve compiled a comprehensive FAQ section that addresses common concerns and provides valuable insights.
Q: What type of fabric is best for a couch cover?
When selecting the ideal fabric for your project, it’s essential to consider multiple factors. If you’re looking for something that can withstand wear and tear, canvas or upholstery fabric may be the way to go. On the other hand, microfiber or cotton could provide the comfort you need. Ultimately, the best fabric will depend on how well it complements your room’s decor and lifestyle, so be sure to keep these factors in mind as you make your decision.
Q: How much fabric do I need for my couch cover?
When planning your upholstery project, start by taking precise measurements of your couch’s dimensions – length, width, and height. To ensure a proper fit, add some extra inches for seam allowances and tucking in the fabric. A good rule of thumb is to purchase fabric that’s at least double the length of your couch, factoring in any cushion sizes you’ll need to accommodate. This will give you a comfortable margin for error and guarantee a professional-looking finish.
Q: Can I wash my DIY couch cover in a washing machine?
When it comes to washing fabrics, the key is to understand their specific needs. A quick glance at the care label or fabric information will provide crucial guidance. For machine-washable materials, opt for a gentle cycle with cold water and let the garment air dry to prevent shrinkage. This approach ensures that your fabrics remain in top condition.
Q: How do I keep my couch cover from slipping?
To keep your furniture cover firmly in position, consider employing a combination of anchoring methods. For instance, you can utilize upholstery pins to pin down any loose edges, or opt for Velcro strips that allow for easy removal and reattachment. Additionally, placing anti-slip mats underneath the cover can provide an extra layer of stability. Alternatively, you could incorporate ties or elastic bands into the seams of the cover itself, allowing them to snugly fit around your furniture’s frame.
Q: What’s the best way to cut fabric for a couch cover?
When it comes to cutting your fabric, it’s essential to utilize high-quality tools to ensure accurate and precise results. Opt for sharp fabric scissors or a reliable rotary cutter, as these will provide clean cuts that minimize fraying and distortion. To achieve optimal results, place the fabric flat on a stable surface and secure the pattern in position using weights or pins. This straightforward yet crucial step will guarantee your cut edges are smooth, making it easier to proceed with subsequent stages of your project.
Q: How can I make my couch cover look professional?
To ensure a professional-looking finished product, pay close attention to the smallest details during the sewing process. Start by selecting threads that match the fabric’s hue, then sew seams in a straight line to maintain evenness. To add a touch of elegance, consider finishing edges with piping or bias tape. Before placing the cover on the couch, iron it to remove any wrinkles and creases, resulting in a smooth finish.
Q: What if my couch has an unusual shape?
Before starting your DIY couch cover project, it’s crucial to take precise measurements to create an accurate paper pattern if needed. Consider breaking down the fabric into sectional pieces that can be combined for a customized fit. By meticulously planning and preparing for this project, you’ll be well-equipped to tackle any challenges that arise. As with any DIY endeavor, preparation and patience are key to achieving success. If you have lingering doubts or questions, don’t hesitate to seek guidance from online DIY communities or forums for added support.
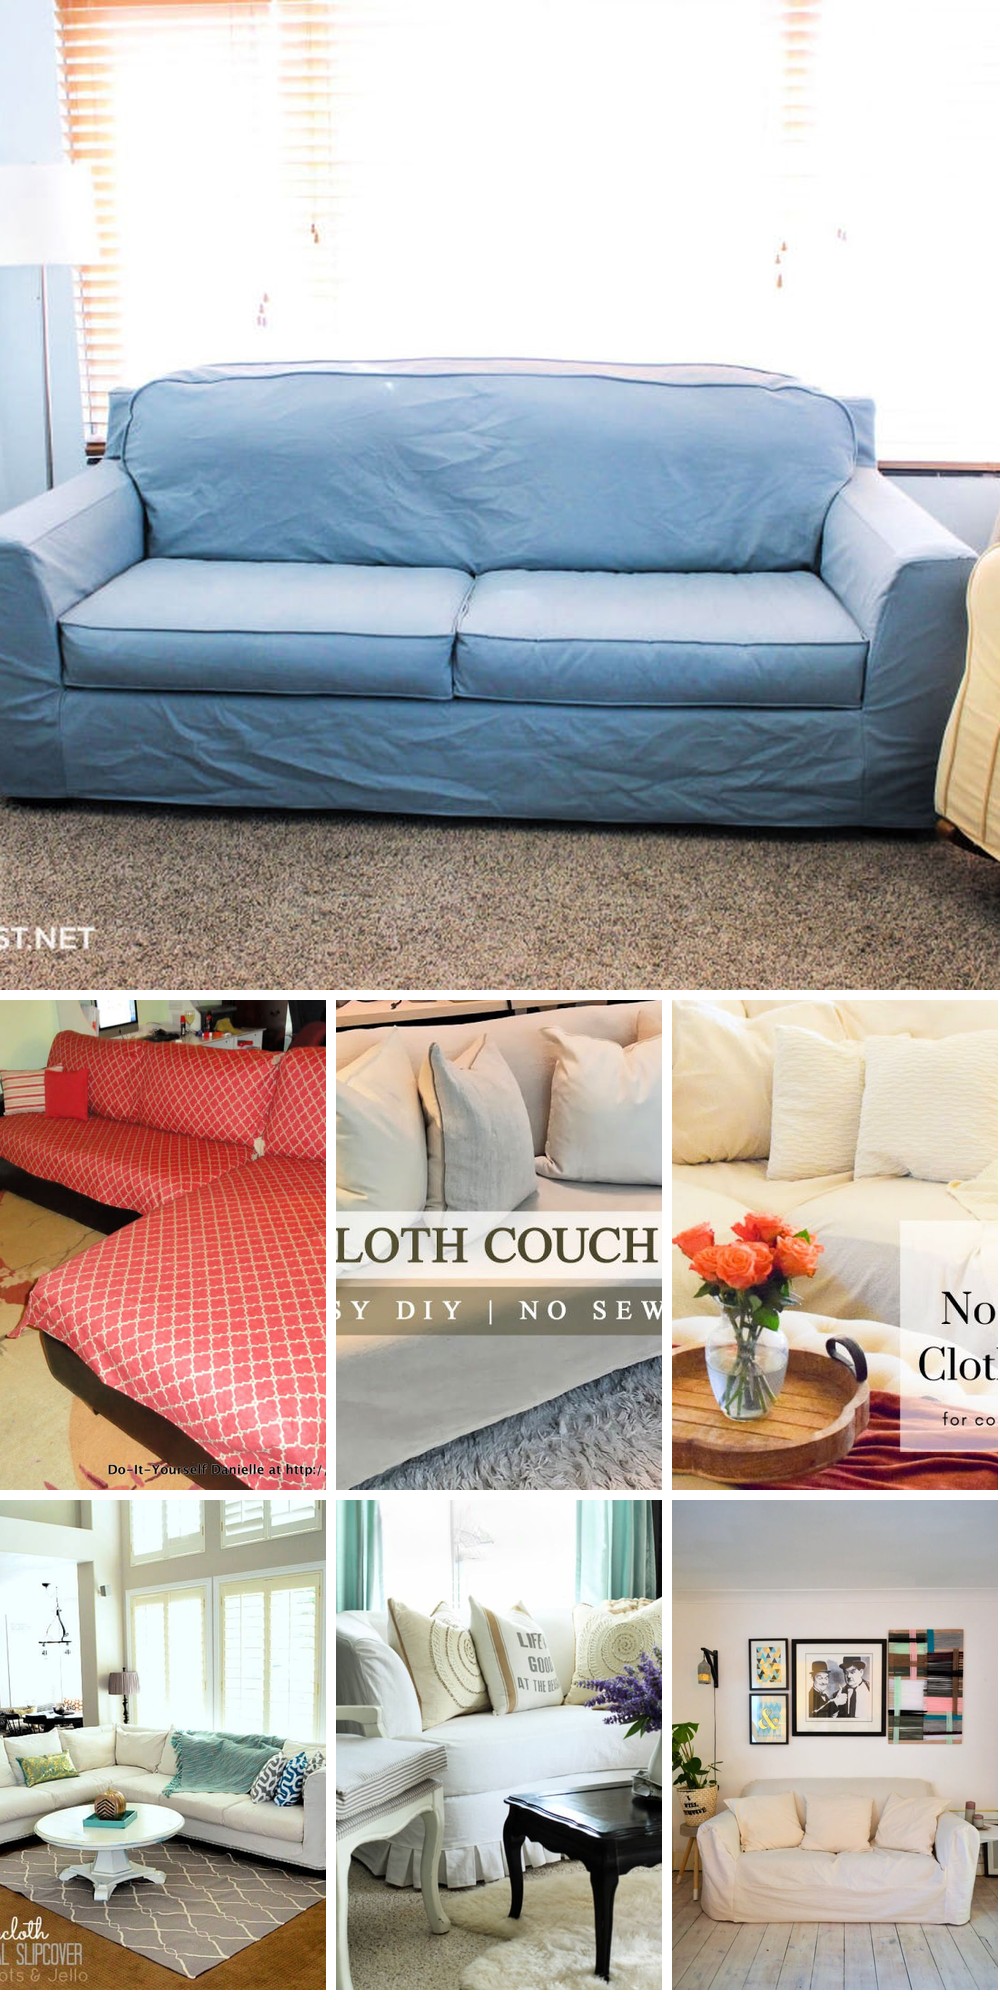
15 Simple DIY Couch Cover Ideas
Give your couch a new lease on life with 15 innovative DIY cover ideas that combine functionality with flair. From simple slipcover solutions to more elaborate makeover methods, these easy-to-execute projects will not only protect your sofa from wear and tear but also breathe fresh style into your living space.
How to Sew a Sofa Slipcover
Give your beloved yet outdated sofa a fresh new look by creating a simple slipcover, inspired by Confessions of a Serial Do-It-Yourselfer. This comprehensive tutorial takes you through the process of crafting a no-pleat, piping-free slipcover that transforms your comfortable yet mismatched furniture into a stunning piece that complements your home’s decor. With clear, step-by-step instructions that make the process easy to follow, you’ll discover how to cut, sew, and fit fabric to give your sofa a stylish makeover that reflects your unique taste and style.
Reupholstering a Couch Cover Without Sewing
Revamp your couch with ease by embracing Jessica Bruno’s straightforward guide on the Four Generations One Roof Blog. This DIY approach breathes new life into your furniture without requiring tedious fabric removal or complex sewing. By following her simple instructions, you can effortlessly reupholster your sofa using just a staple gun and bring a fresh, personalized touch to your living space.
How to Make a Sofa Cover

Give your old sofa a stylish makeover with Nostalgie Cat’s latest DIY tutorial! This comprehensive guide shows you how to create a custom sofa cover without needing expert sewing skills. The post takes a realistic approach, acknowledging that not everyone is a skilled seamstress and provides a helpful YouTube link for visual learners. To get started, gather essential materials such as heavy-duty fabric, pins, scissors, a sewing machine, and thread. Then, follow the step-by-step process of measuring, cutting, pinning, and sewing, with expert tips on handling tricky areas like armrests. With time and creativity, you can transform your sofa into a unique piece that reflects your personal style and adds a touch of elegance to your living room decor.
Dropcloth Sofa Sectional Slipcover
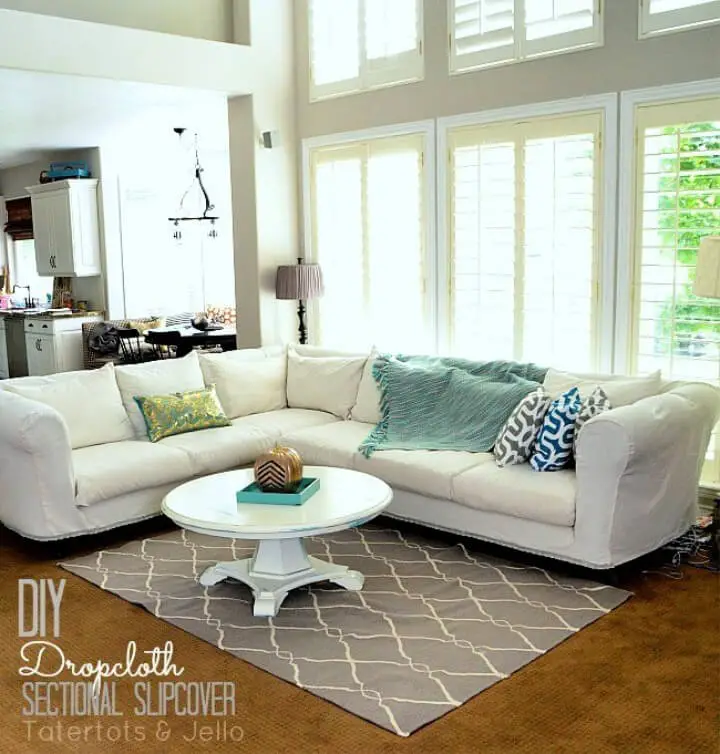
Give your living space a fresh makeover by upcycling dropcloths from the hardware store into a custom-made slipcover for your sectional sofa. Jen from Tatertots and Jello takes you through a straightforward, step-by-step guide to create an affordable and stylish slipcover, perfect for those with limited sewing experience or looking for a fun and rewarding DIY project. By following her instructions, you’ll learn how to bleach and prep the dropcloths, tailor them to fit your couch, and add charming details to complete the look. With Jen’s engaging guide, you’ll be motivated to tackle this project, which yields a durable, chic, and satisfying update to your family room. Get ready to revitalize your sectional sofa with this practical tutorial!
DIY Couch Cover – Step by Step Instructions
Revamping your sofa’s aesthetic without breaking the bank is easier than you think. TwoFeetFirst’s comprehensive guide on creating custom-made slipcovers offers a step-by-step approach to breathe new life into your couch. From selecting the ideal fabric to adding finishing touches like piping and Velcro, this tutorial provides a thorough walkthrough of the process. As you learn to measure, cut, and sew each piece with precision, you’ll be able to achieve a snug and professional-looking fit. The inclusion of helpful images and clear directions will leave you feeling confident in your ability to tackle this project and give your sofa a fresh, updated look. Ultimately, the sense of accomplishment that comes from crafting something beautiful for your home is the perfect reward.
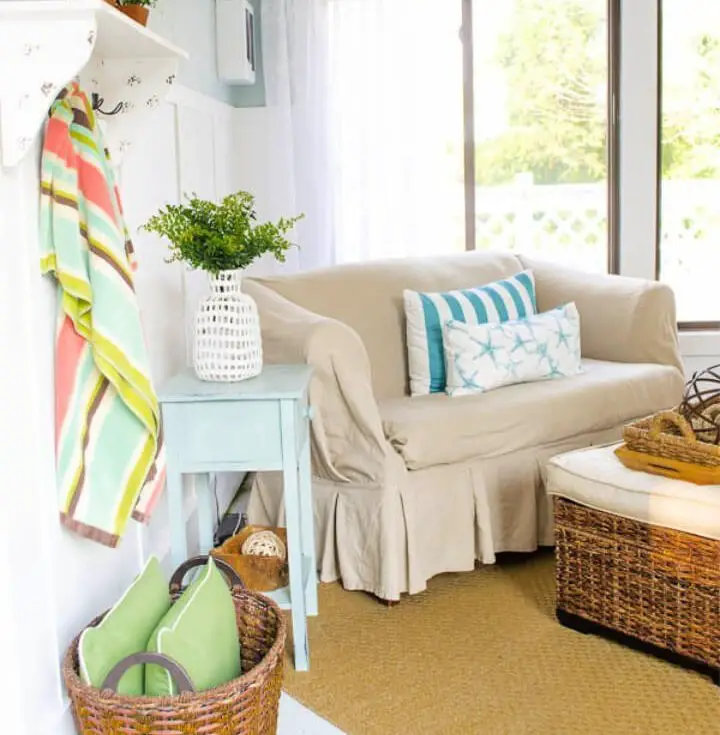
No Sew Drop Cloth Couch Slipcover
When it comes to protecting your furniture from spills and pet mishaps, simplicity is key. A clever solution presented by Town & Country Living involves creating no-sew drop cloth slipcovers that are not only easy on the wallet but also effortless to maintain. This approach utilizes affordable drop cloths that can be quickly washed or replaced when needed.
To achieve this stylish and practical look, start by washing the cloths to give them a soft, linen-like texture. Next, drape the fabric over your sectional sofa, tucking it securely in place as you go. The result is a chic, clean appearance that requires minimal effort and no sewing skills whatsoever.
This economical approach to furniture protection offers the perfect blend of form and function, allowing you to keep your home looking great without breaking a sweat or the bank.
How to Sew a L Shaped Couch Cover
Transforming the look and functionality of your living space is as simple as crafting an L-shaped couch cover. At DIY Danielle, we empower you to take control of your home decor by teaching you how to sew a custom-made cover that meets your unique needs and preferences. This project is perfect for individuals with some sewing experience looking to tackle a creative challenge that adds both style and practicality to their space. By following our step-by-step guide, you’ll learn the secrets to selecting durable fabrics, accurately measuring your couch, and constructing a two-piece design that’s easy to clean and maintain. With expert tips on managing large fabric quantities, you can confidently create a cover that not only complements your decor but also provides a professional finish.
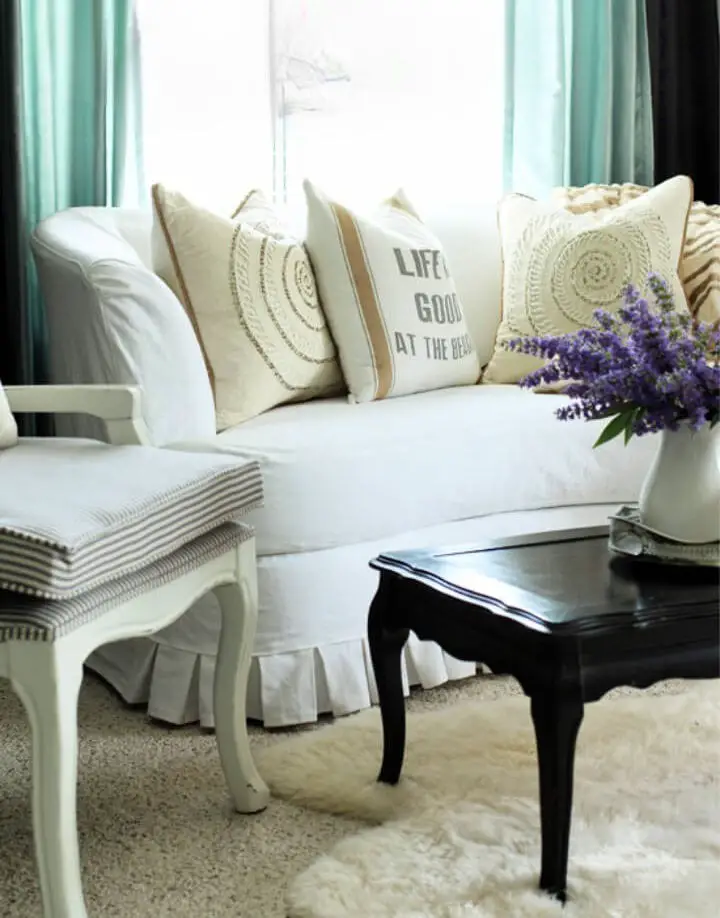
Easy DIY Couch Slipcover
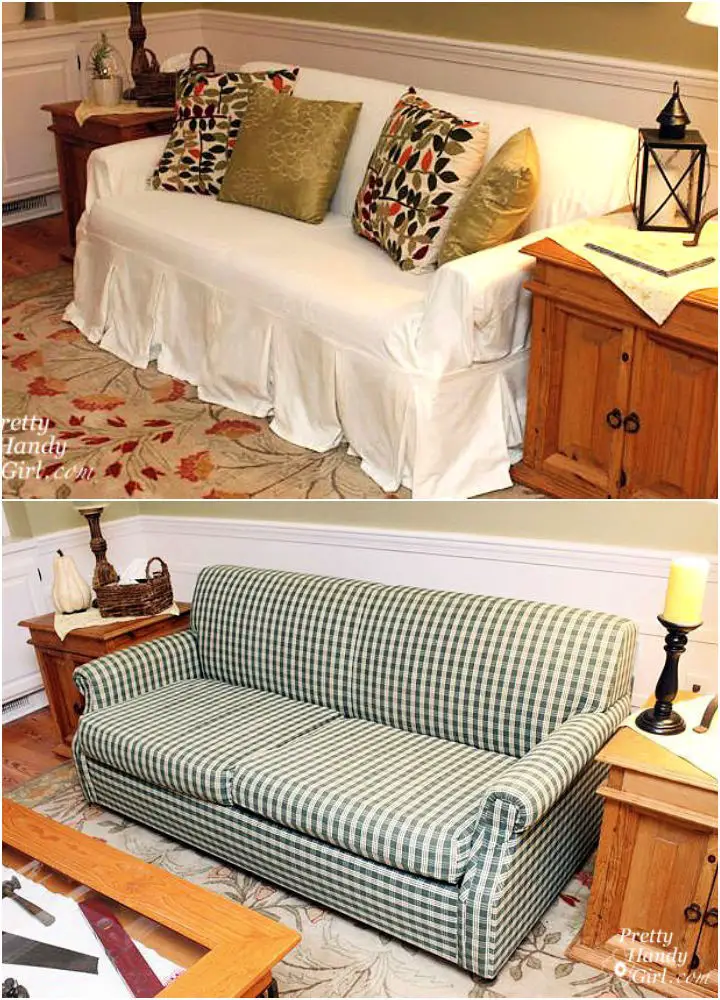
Transforming your old couch into a stylish haven is just a slipcover away! According to the expert guidance of Pretty Handy Girl’s Brittany Bailey, the key to a flawless makeover lies in mastering the art of fitting and securing the perfect slipcover. With her engaging tutorial, you’ll learn how to create a tailored finish that rivals custom upholstery. And the best part? It’s surprisingly easy to achieve a wrinkle-free look using nothing more than common household tools. Whether you’re looking to breathe new life into an outdated piece or simply want to protect your furniture from wear and tear, this comprehensive guide makes slipcovering your couch a straightforward and rewarding experience.
Make Your Own Couch Slipcover
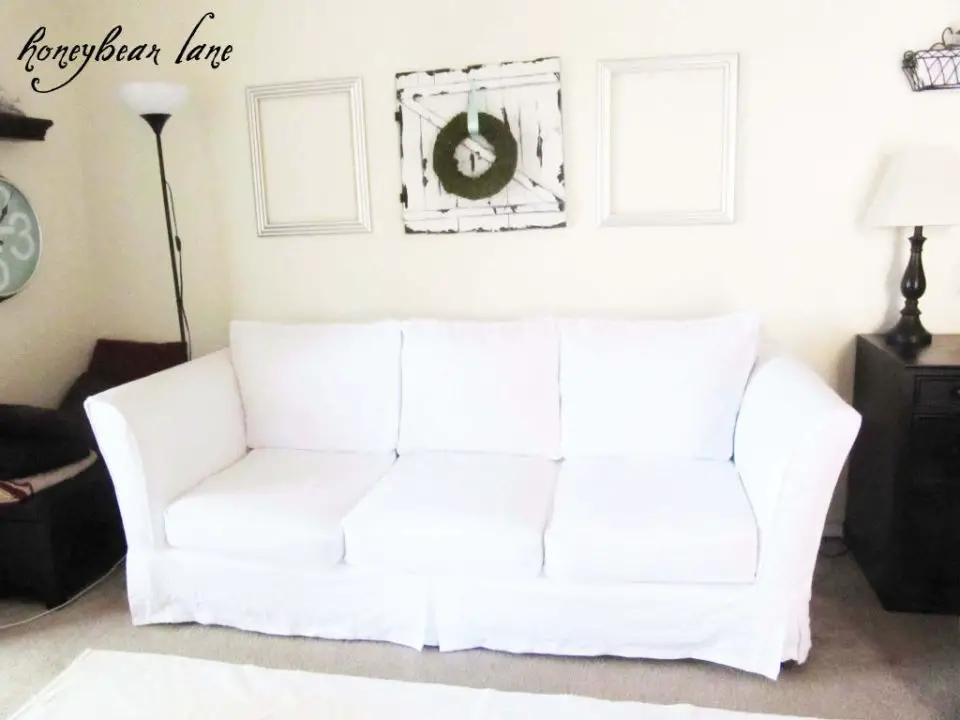
Give your living space a personalized touch by transforming your couch with a handmade slipcover using Heidi’s comprehensive guide from Honeybear Lane. This step-by-step tutorial empowers you to revamp your furniture without breaking the bank, offering an affordable alternative to buying new pieces. With a focus on crafting cushion covers and the body of the slipcover, you’ll discover practical tips for selecting fabric, such as opting for durable white cotton canvas, and techniques like sewing piping and managing fabric cuts. Perfect for those with some sewing experience, the instructions are clear and concise, allowing you to tackle the project with confidence. As you dive into Part 1 of this couch slipcover guide, get ready to breathe new life into your couch with a charming makeover.
How to Make Your Own Sofa Slipcover
Transforming your living space has never been more accessible than with a DIY sofa slipcover project from The Crafting Nook. Led by Camila Rojas, this comprehensive guide will walk you through a budget-friendly approach to revamping your sofa’s look, covering every step from preparation to the final touches. Perfect for those on a tight budget seeking a custom fit that premade covers can’t provide, this tutorial is all about precision, pattern-making, and sewing know-how. With detailed measurements, patterns, and step-by-step instructions, you’ll be able to create a slipcover that not only refreshes your sofa but also elevates the overall aesthetic of your living room. The guide emphasizes attention to detail and offers expert tips for tackling the trickier aspects of sewing, ensuring a sleek and professional finish. By following along with this project, you’ll gain the confidence and creativity to craft a stylish new look for your furniture.
Upcycled Denim Slipcover for Couch
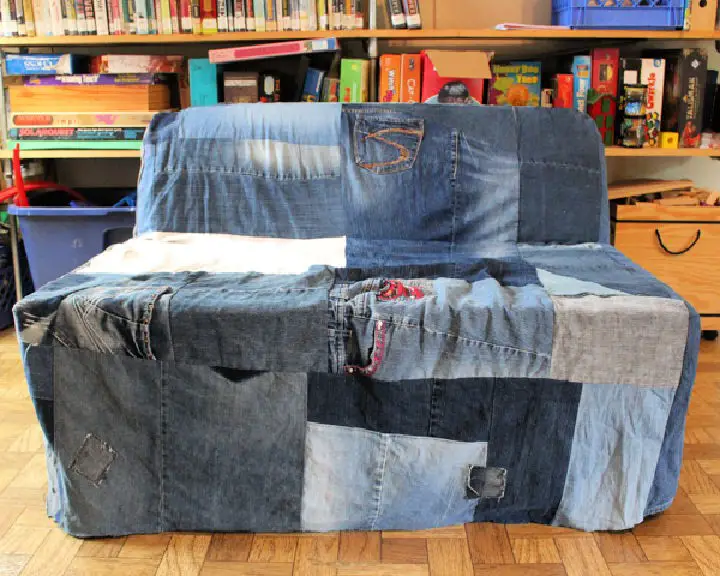
Breathe new life into an old couch by transforming it into a cozy centerpiece with an upcycled denim slipcover. By following Crafting a Green World’s step-by-step guide, you can give your furniture a sustainable makeover using surplus denim. This eco-friendly DIY project not only reduces waste but also adds a touch of creativity to your living space. With the right tools, measurements for a tailored fit, and sewing tips, you’ll be able to create a functional and stylish slipcover that’s perfect for those who enjoy repurposing materials. The result is a charming addition to your home that exudes warmth and comfort.
DIY Couch Cover With Details Instructions
Transform your couch’s look without breaking the bank by crafting a DIY washable cover. Our step-by-step guide takes you through the process of draping and cutting fabric directly onto your sofa to create a custom-fit slipcover, section by section. From the back and seat to the arms and cushions, each area is carefully addressed for a snug and seamless finish that not only protects your furniture but also provides a quick decor change. Follow this engaging tutorial from Little Wallet Big Dreams and add a touch of handmade charm to your living space.
No Sewing Couch Cover Using Drop Cloth

Transforming your couch without breaking out the sewing machine is now possible thanks to a simple no-sew method showcased in Steph Youngren’s popular YouTube tutorial. By following her step-by-step guidance, you can revitalize your sofa’s look without requiring any sewing skills whatsoever. The process begins with measuring your furniture, followed by draping the drop cloth and securing it in place using upholstery pins for a clean finish. This budget-friendly DIY approach offers a fantastic way to give your living space a fresh new update, allowing for personal customization that perfectly matches your unique style. For anyone seeking an easy and stylish solution to updating their sofa cover, Steph’s tutorial provides a practical answer that won’t break the bank. Simply head to YouTube to watch the full guide and breathe new life into your couch today.
How to Do You Make a Couch Cover

Give new life to an old IKEA sofa without breaking the bank or harming the environment. This no-sew DIY couch cover tutorial is a game-changer for anyone looking to refresh their living space. By replacing back cushions with body pillows, you can create a luxurious ‘cloud couch’ effect that’s perfect for cozying up and relaxing. But that’s not all – this hack also shows how to use everyday items like drop cloths and crib sheets to create smart slipcovers. The result is a chic and comfortable centerpiece that’s sure to become the heart of your home. You’ll learn how to reupholster the back and sides with a duvet cover, adding a touch of elegance and comfort to your space. And the best part? This DIY project is incredibly simple and cost-effective – making it an eco-friendly way to revamp your sofa without generating any waste.
DIY Drop Cloth Slipcover for Couch
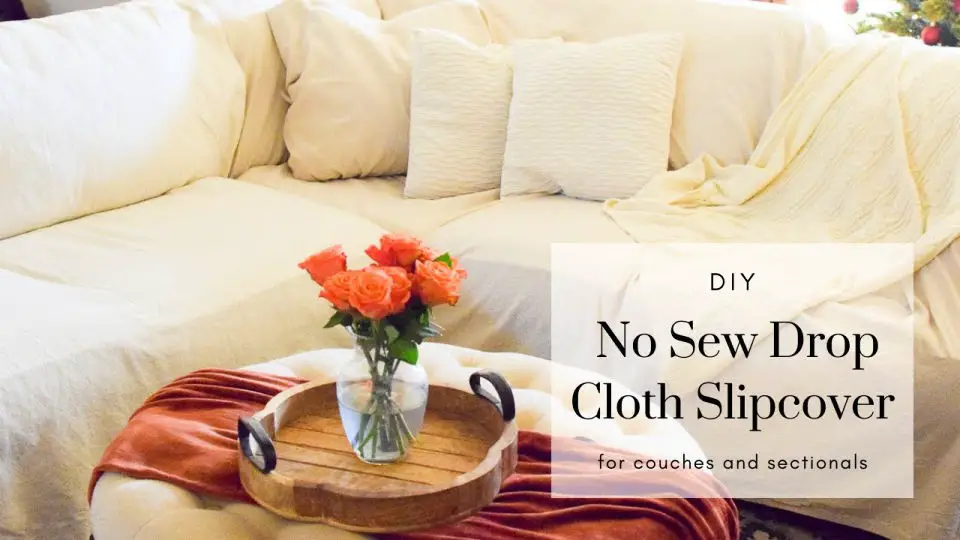
Revamp your living room with a straightforward DIY project that requires no sewing skills: the Drop Cloth No Sew Slipcover. Perfect for couches and sectionals, this versatile solution offers a budget-friendly way to give your furniture a fresh makeover without the hassle of needles and thread. The YouTube video tutorial serves as a comprehensive guide, empowering anyone to achieve professional-looking results with ease. By repurposing drop cloths, you can not only protect your sofa but also add a touch of style to your space, making it an ideal solution for those looking to refresh their living area or make temporary changes.
Conclusion:
In conclusion, crafting a DIY couch cover offers a unique blend of practicality and satisfaction. Not only does it elevate the visual appeal of your living space, but it also safeguards your furniture from spills, stains, and wear. Our comprehensive guide provides a clear step-by-step approach to making a couch cover, covering crucial aspects such as fabric selection, assembly, and finishing touches. Whether you’re looking to breathe new life into an old couch or seeking a budget-friendly way to refresh your decor, our 15 DIY-inspired ideas serve as a valuable resource for tackling this project. It’s essential to maintain and care for your handmade couch cover to ensure its longevity. With a moderate amount of effort and creativity, making your own couch cover proves to be both accessible and deeply rewarding.
