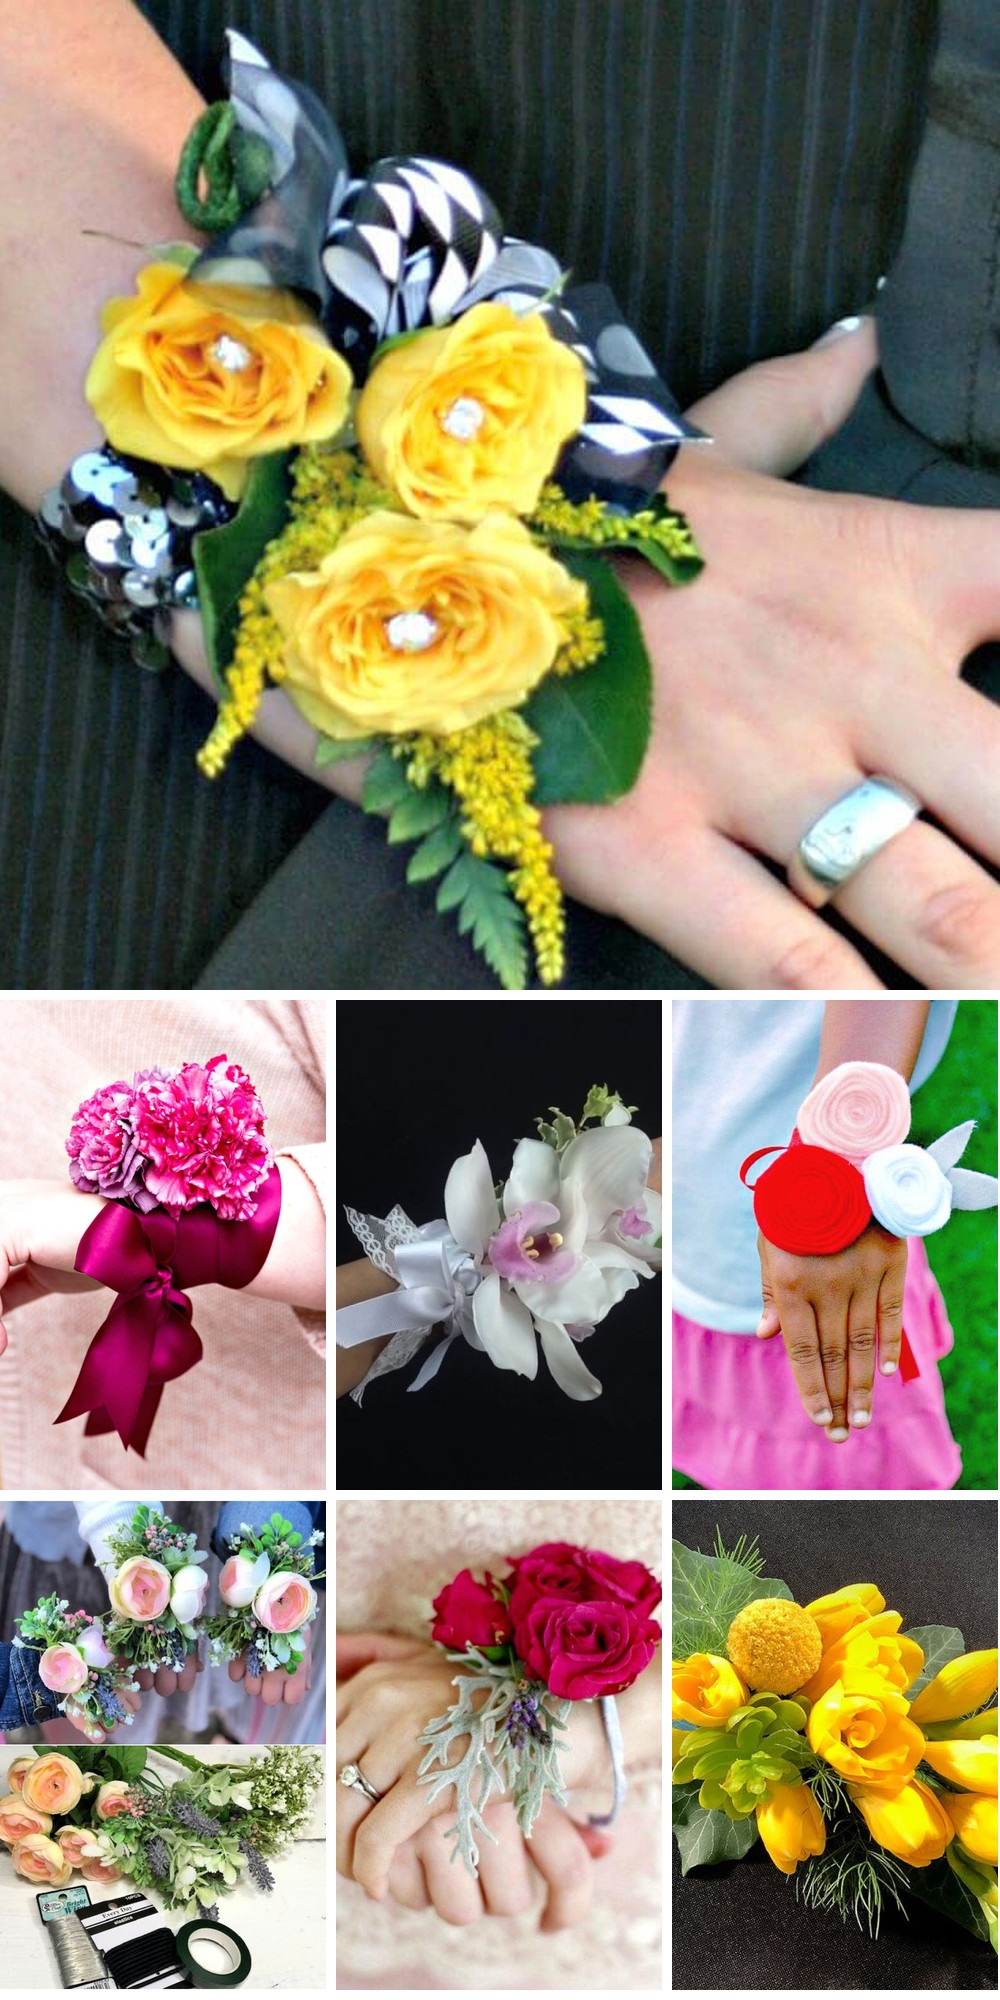
Crafting a DIY corsage is an experience that combines creativity with personal touch. By making your own, you can tailor it to fit your unique style and express yourself through the flowers, embellishments, and overall design. This process offers endless possibilities for customization, allowing you to make a statement piece that reflects your personality. As we guide you through this DIY project, our step-by-step instructions aim to simplify the process, ensuring success with each creation. With expert tips, troubleshooting advice, and innovative ideas, we’ll empower you to produce a corsage that’s truly one-of-a-kind. Join us on this crafting journey, where confidence meets creativity, and let’s bring your vision to life.
Uses and Benefits of DIY Corsage
Creating a DIY corsage is a wonderful way to express yourself and add a personal touch to special occasions. By making your own bouquet of flowers, you can choose the colors, shapes, and materials that reflect your unique style and personality. This not only saves you money but also allows you to have fun experimenting with different designs and techniques. One of the best things about DIY corsages is their versatility – you can wear them on the wrist, lapel, or shoulder, making them perfect for a wide range of occasions such as weddings, proms, homecomings, graduations, or Mother’s Day. The benefits of making your own corsage are numerous. You can personalize it to match your outfit, theme, or mood by choosing flowers that resonate with you. Additionally, you can add sentimental touches like charms, photos, or initials to make the corsage more meaningful and special. Making a DIY corsage is also a great way to learn new skills such as cutting, wiring, taping, gluing, and arranging flowers. You’ll develop your artistic and crafty skills while having fun and being creative. Plus, you can reuse or recycle materials that you already have at home, which not only saves money but also reduces waste.
How to Make a DIY Corsage
To create a beautiful and unique DIY corsage, you’ll need some fundamental supplies and tools. Start by gathering your flowers of choice – fresh or artificial blooms in various sizes and colors will do the trick. You’ll want 3-4 blooms per corsage, depending on their size. For securing the stems and crafting a base for your corsage, use floral wire with a thickness of 18-gauge or 20-gauge.Once you have your flowers and wire in hand, it’s time to think about tidying up those stems. Floral tape is the perfect solution – this self-adhesive tape comes in different colors to match your flowers and can be wrapped around both the wire and flower stems for a polished look.Next, move on to the ribbon. You’ll need a strip that’s approximately 1/4-1/2 inches wide to create a bow and cover the base of your corsage. Choose a ribbon material that suits your style – satin, organza, lace, or burlap are all great options.Finally, consider adding some extra flair with accessories like pearls, rhinestones, beads, charms, pins, or buttons. Hot glue or wire can be used to attach these embellishments to your corsage. With these supplies and tools in place, you’re ready to start crafting your DIY corsage.
1: Dress the Flowers
Trim the stems of the flowers to approximately 1 inch using scissors or pruning shears, preparing them for arrangement. For each bloom, cut two 5-inch lengths of wire and thread one through the base where the stem meets the flower, leaving equal portions protruding on either side. Perpendicular to this initial wire, insert the second length at a 90-degree angle, forming an X shape with the first. By bending both wires downwards, create a new stem for each flower. To secure the stems and maintain their structure, wrap floral tape around them starting from the top and working your way down, carefully spinning the flower with one hand while releasing the tape with the other.
2: Make the Bow
Begin by cutting a 5-6 inch length of wire and laying it flat on a surface. Next, create a loop with the ribbon, approximately two-thirds the width of your corsage, securing it with a twist at the base. Repeat this process to form 4-6 loops in total, each featuring a twisted base. Hold the loops together by pinching them at their midpoints and position them atop the wire’s midpoint. Wrap both ends of the wire around the gathered loops to secure them, twisting the ends for added stability. Finally, fluff out the ribbon loops to achieve a fuller, more symmetrical appearance.
3: Assemble the Corsage
To create a visually appealing corsage, start by arranging the flowers in a harmonious way, considering varying heights and colors. You can also incorporate filler flowers or greenery around the main blooms to add depth and texture. Once you’re satisfied with the arrangement, secure the stems together at their bases using floral tape. Trim the wrapped stem to a length of 1.5 to 2 inches using pruning shears for a neat finish. To attach the bow, wrap the wire around the stem, or use hot glue if preferred. Next, cover the wire and tape with ribbon, securing it in place with hot glue if desired. Finally, personalize your corsage by adding accessories such as gluing or wiring them to the flowers or ribbon. Complete the look by attaching a pin or wristlet to the back of the corsage using hot glue or wire. Your DIY corsage is now ready to wear or gift, perfect for making any special occasion even more memorable.
How to Make a Corsage – Step by Step Guide
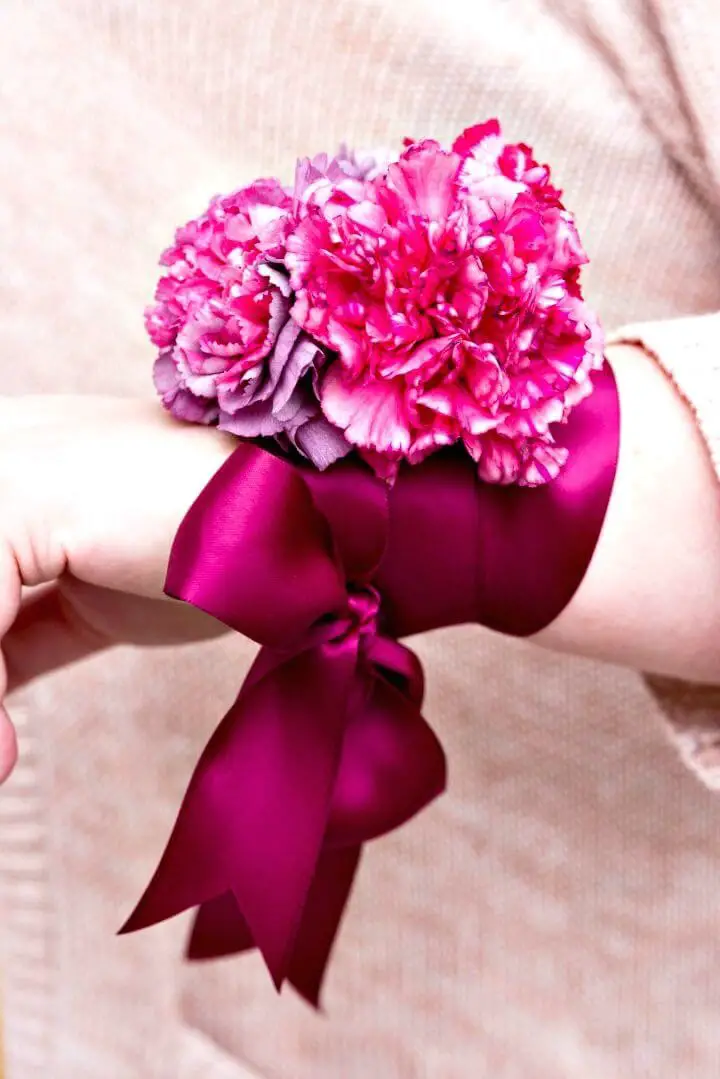
Creating an eye-catching wrist corsage for prom, weddings, or special occasions doesn’t have to be expensive. With just $5 budget, you can craft a beautiful corsage that turns heads. This step-by-step guide will empower anyone to achieve a stunning result without the stress of breaking the bank.
Materials Needed
To craft a beautiful flower arrangement box, you’ll need the following materials. Start with a sturdy base, which can be made from either cardboard or felt. For added durability and versatility, consider using a hot glue gun and glue sticks to secure any decorations in place. A wristlet is also a crucial component of this project, and you can achieve it by using an elastic band. To add some visual flair, incorporate ribbon into your design – two colors will provide a nice contrast and make the finished product even more eye-catching. The pièce de résistance, of course, is the florals themselves. Choose realistic-looking flowers such as roses or carnations to create a lush, lifelike arrangement. If you want to take it up a notch, consider adding some embellishments like rhinestones or baby’s breath for an extra touch of elegance.
Step 1: Prepare the Base
To begin creating your corsage, start by preparing the base material. You can use a piece of cardboard or felt, cutting it into a shape that suits your design – rectangles or ovals are popular options. If you’re working with cardboard, cover it with a layer of felt using hot glue for a smooth and professional finish. This foundation will serve as the starting point for your corsage, providing a sturdy base upon which to build.
Step 2: Make the Wristlet
To create the wearable component, begin by measuring and cutting a length of elastic that will fit comfortably around the wrist. Next, form a loop with the elastic and secure the ends together using hot glue to prevent fraying. Once the wristlet is assembled, attach it to the prepared base using additional hot glue. Although the appearance of the base and wristlet may not be visually appealing, as they will ultimately be concealed by the surrounding fabric or embellishments, a sturdy bond is crucial for ensuring the wearable component remains secure.
Step 3: Add Ribbons
To elevate your corsage, select two hues of ribbon that harmonize with the event’s theme or the wearer’s attire. Form small loops with the ribbon and secure them using either hot glue or floral wire. This step not only adds visual interest but also injects a splash of color into your design. Consider leaving the ribbon ends loose for an air of sophistication.
Step 4: Incorporate Greenery and Flowers
To create a lush and visually appealing corsage, start by adding some greenery to the base as a foundation. This will help provide depth and dimension to your overall design. Next, select your primary floral elements, opting for roses and carnations due to their timeless beauty and widespread availability. Secure these blooms at the center of your corsage using hot glue, taking care to position them in a way that draws attention and serves as the focal point.
Step 5: Final Touches
As you examine your corsage, be sure to identify any areas that could benefit from a touch of flair. This is the perfect opportunity to incorporate optional embellishments, such as rhinestone strips or baby’s breath, to add an extra layer of sophistication and visual interest. To ensure everything remains secure, employ hot glue to fasten each element in place.
Video Tutorial
For an immersive learning experience, check out this step-by-step video tutorial on crafting a charming wrist corsage. The visual guide perfectly complements the written instructions provided here, allowing you to seamlessly transition between watching and doing. By following these easy-to-follow steps, you’ll create a beautiful accessory that will impress with its elegance and sophistication. As you work on your prom or wedding wrist corsage, remember that DIY projects are all about exploring your creativity and enjoying the process – and in this case, the end result is sure to be a stunning reflection of your personal style.
Personalization Ideas for Your DIY Corsage
When crafting a DIY corsage, it’s not just about creating a beautiful accessory – it’s about infusing it with personal touches that make it uniquely yours. Whether you’re designing a corsage for a special occasion or everyday wear, adding elements that reflect your personality or the event’s theme can transform a simple corsage into a treasured keepsake. To make your DIY corsage truly one-of-a-kind, consider incorporating unique details that speak to your individuality. This could include themed elements that match the occasion’s style – think vintage lace and pearls for a retro-themed party or rustic burlap and twine for a country-inspired gathering. Alternatively, you could add charms and trinkets that hold sentimental value, such as a locket with a photo of a loved one or a charm that represents your favorite hobby. The key is to choose elements that resonate with you and tell a story about who you are. By doing so, your DIY corsage becomes more than just an accessory – it’s a reflection of your personality and the significance of the occasion.
Troubleshooting Common Issues with DIY Corsages
As with any DIY project, crafting a corsage can be prone to a few minor setbacks. Fear not, as these issues are easily resolvable with a bit of troubleshooting know-how. To guarantee your handcrafted corsage looks its absolute best and stays intact throughout the celebration, keep these common problems in mind.
Wilting flowers are often a result of dehydration. Revive them by trimming the stems and submerging them in water for several hours. To prevent this issue from arising in the first place, keep your corsage in a cool, shaded area and gently mist it with water as needed. This will help maintain the freshness of the blooms.
Loose decorations can be attributed to inadequate fastening. Double-check that all components are securely attached using floral tape or adhesive. If something does become dislodged, reattach it using a stronger bonding agent or wire.
Direct sunlight can cause colors to fade prematurely. Store your corsage in a shaded area until it’s time to wear it. When working with artificial flowers, opt for high-quality materials boasting colorfast properties to prevent premature fading.
Some individuals may experience allergic reactions to certain flower types. If crafting a corsage for someone else, take the time to research any known allergies and choose hypoallergenic blooms like roses or orchids.
An ill-fitting corsage can be uncomfortable. Ensure that your wristband or pin is adjustable. If not, consider adding extra ribbon or a safety pin to achieve a comfortable fit.
Delicate flower stems can be prone to breakage. Reinforce stems using thin wire and provide additional support by wrapping the wire with floral tape for a seamless finish.
By being mindful of these common issues, you’ll be well-equipped to handle any corsage conundrum that may arise during your event. Remember, patience and creativity are essential in resolving these minor setbacks.
Maintenance and Care for Your DIY Corsage
To keep your DIY corsage looking its best throughout the event, it’s crucial to prioritize maintenance and care, especially when using fresh flowers. Here are some practical tips to ensure your corsage remains vibrant and intact: Proper hydration is vital; store the corsage in a refrigerator or cool place to slow down wilting, and give the flowers an occasional spritz of water to maintain freshness. Avoid exposing the corsage to heat and direct sunlight, which can cause rapid wilting. Instead, keep it in a shaded area when not wearing it.Handle your corsage with care, as delicate petals and embellishments can be easily damaged. Prepare for emergencies by having a small repair kit on hand, stocked with extra pins, floral adhesive, and spare ribbons or petals.If you’d like to preserve the corsage as a keepsake, consider drying the flowers after the event. Hang the corsage upside down in a dry, warm area, or press the flowers between the pages of a heavy book for several weeks. By following these simple yet effective care tips, you can enjoy your DIY corsage’s beauty and create a lasting memento of your special day.
Embracing Sustainability in DIY Corsage Creation
As we strive for a more sustainable future, our creative pursuits can play a significant role in protecting the environment. Crafting a DIY corsage is an excellent opportunity to integrate eco-friendly practices into your project. By adopting these simple yet effective tips, you’ll not only create a beautiful accessory but also contribute to a healthier planet.Firstly, opt for locally grown and seasonal flowers, which reduces transportation-related carbon emissions and supports local businesses. Next, choose materials that are biodegradable or recyclable, such as moss instead of floral foam. Additionally, think about how you can repurpose your corsage after the event – dried flowers can be used in home decor, while ribbons and embellishments can be reused in future craft projects.When it comes to adhesives, select non-toxic and environmentally friendly options to minimize harm caused by chemicals. Finally, don’t forget to share your sustainable approach with others on social media or through personal connections – inspiring others to adopt eco-friendly practices can have a significant impact.By incorporating these sustainable practices into your DIY corsage project, you’ll not only be creating something beautiful but also making a positive difference in the world.
FAQs About DIY Corsages
As many people take on the challenge of creating their own DIY corsages, several questions inevitably arise. To alleviate any uncertainty, I’ve compiled a list of commonly asked queries that will guide you through the process with clarity and assurance, allowing you to approach your DIY project with renewed confidence.
What flowers are best for a DIY corsage?
When crafting a DIY corsage, it’s essential to select flowers that are robust enough to thrive outside of water. A few top options include roses, carnations, and orchids, which boast both durability and an array of vibrant hues. These flowers’ ability to withstand dry conditions makes them perfect for creating beautiful, long-lasting corsages that can be worn with confidence.
How long before the event should I make my corsage?
When preparing for an event that requires a corsage, it’s generally recommended to craft one to two days prior to the occasion. For corsages featuring fresh flowers, storing them in a refrigerator can be particularly effective in maintaining their freshness. This simple step can help ensure your arrangement looks its best when you’re ready to wear or give it away.
Can I use artificial flowers for a corsage?
Artificial blooms offer a versatile and enduring solution for corsages, boasting an impressive array of styles and types. Their long-lasting nature makes them an appealing alternative to their fresh counterparts, providing a practical and low-maintenance option for corsage enthusiasts.
How do I attach a corsage to a dress without damaging it?
Secure the corsage to the dress using a discreet pin, carefully positioning it horizontally to ensure a sturdy hold while protecting the fabric from potential damage. This subtle yet effective attachment method allows you to showcase your beautiful corsage without compromising the integrity of the garment.
What materials do I need to make a corsage?
To create a beautiful corsage, gather the essential materials: an assortment of flowers, lush greenery, floral tape, floral wire, a decorative ribbon, and either pins or a wristlet – whichever suits your desired design, whether it’s a classic pin-on corsage or a trendy wristpiece.
How can I make my corsage stand out?
Transform your corsage into a one-of-a-kind masterpiece by incorporating distinctive elements such as beads, charms, or customized decorations that authentically represent your individuality or the occasion’s theme. This thoughtful touch can make your corsage truly unforgettable.
How do I keep my corsage from wilting?
To ensure your corsage remains stylishly chilled, keep its temperature under control by misting it lightly with water. When working with fresh blooms, take an extra step and store the arrangement in a refrigerator until you’re ready to adorn yourself with it.
What’s the difference between a corsage and a boutonniere?
While corsages are often associated with grandeur, being typically larger in size and donned by women, their counterpart, the boutonniere, takes a more understated approach. This smaller adornment is commonly worn by men on their lapels, making for a stylish yet subtle statement.
Can I make a corsage for a wrist or does it have to be pinned?
A corsage can be worn on the wrist by attaching it to a wristlet or ribbon, offering a stylish and modern alternative to traditional pinning methods. This flexible approach allows you to customize the look of your corsage to suit your personal style and the occasion.
How do I choose the right ribbon for my corsage?
When crafting a DIY corsage, it’s crucial to choose a ribbon that harmonizes with the flowers’ colors and your attire. The width and fabric of the ribbon also play a significant role in achieving a visually appealing outcome. By considering these factors, you’ll be able to create a bespoke corsage that adds a personal touch to any celebration.
20 Homemade DIY Corsage Ideas Anyone Can Make
Unleash your creativity and create breathtaking homemade corsages with ease, perfect for any special event or everyday wear. With 20 unique and simple DIY ideas, you’ll be amazed at how effortlessly you can transform everyday materials into stunning floral masterpieces.
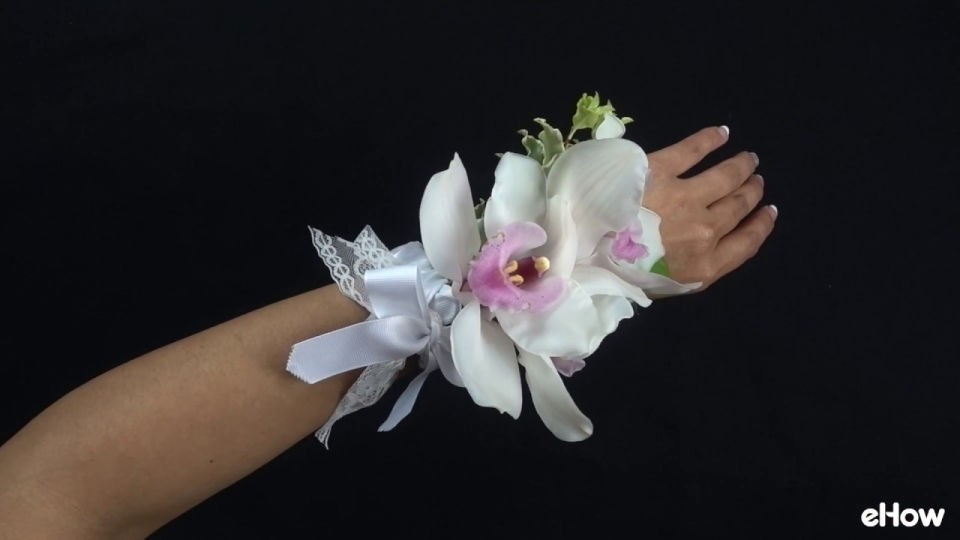
DIY Wrist Corsage for Mother’s Day
This Mother’s Day, surprise your mom, spouse, or yourself with a stunning DIY wrist corsage that exudes elegance and thoughtfulness. With just 4-5 medium-sized fresh flowers and basic supplies like 2″ double-faced satin ribbon, card stock/lightweight cardboard, and a hot glue gun, you can create an inexpensive yet heartfelt homemade gift that showcases your creativity and love.
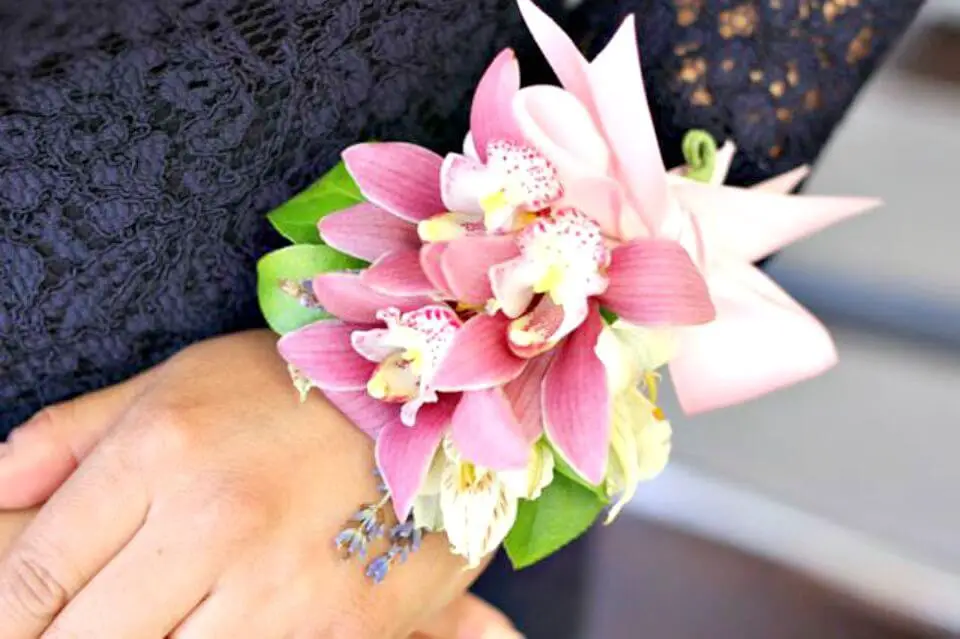
How to Make a Floral Wrist Corsage
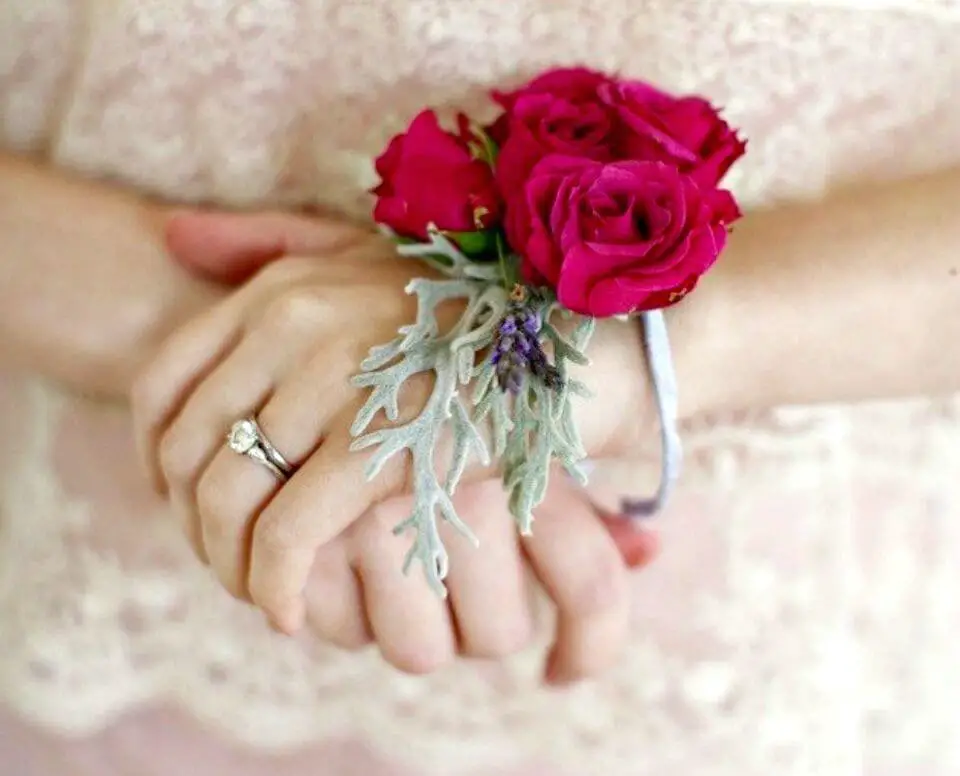
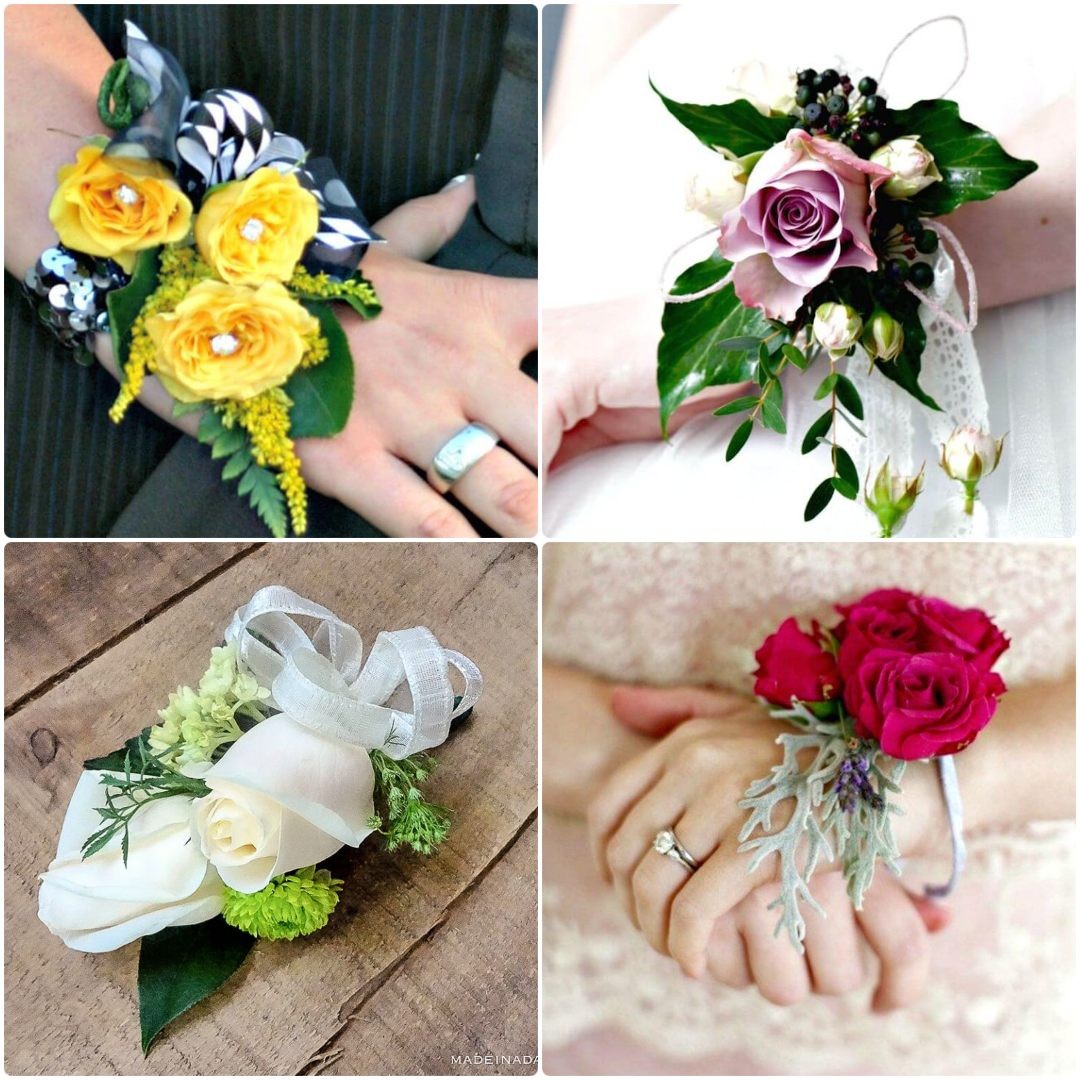
Bring a touch of elegance and whimsy to any wedding party with this DIY floral wrist corsage tutorial! This budget-friendly alternative to traditional bouquets is perfect for bridesmaids, flower girls, or proud mothers-to-be. With just a few simple supplies – including aluminum floral wire, ribbon, spray roses, dusty miller, floral adhesive, card stock, and a glue gun – you can create one-of-a-kind accessories that will make any special occasion unforgettable. Let your creativity flourish as you follow this easy-to-follow guide to crafting custom floral wrist corsages that are sure to delight.
Beautiful Flower Wrist Corsage Tutorial
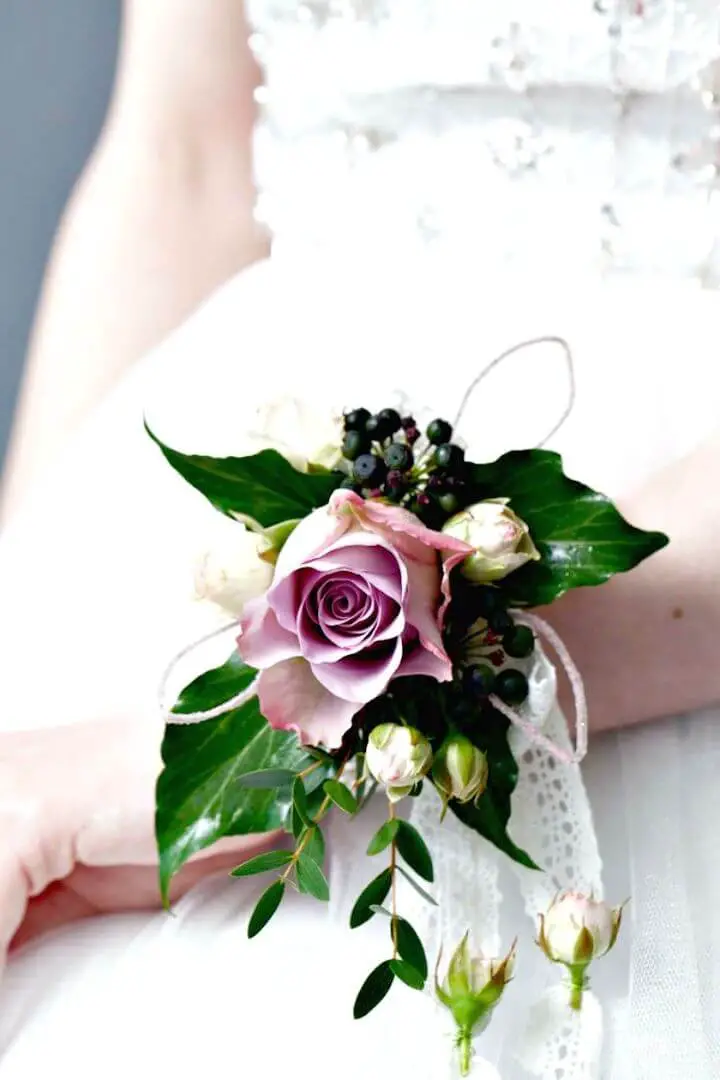
Craft a stunning statement piece with this DIY flower wrist corsage tutorial. Elevate your style for special occasions like weddings or bridesmaid gatherings by creating unique, personalized corsages that complement their outfits. Opt out of traditional handheld bouquets and let your creativity shine! To get started, gather lilac roses, pink spray roses, eucalyptus, ivy leaves, tree ivy berries, florist wires, green florist tape, vintage lace ribbon, and crystal-covered wire – the essential ingredients for this stylish DIY project. Embark on a floral adventure today!
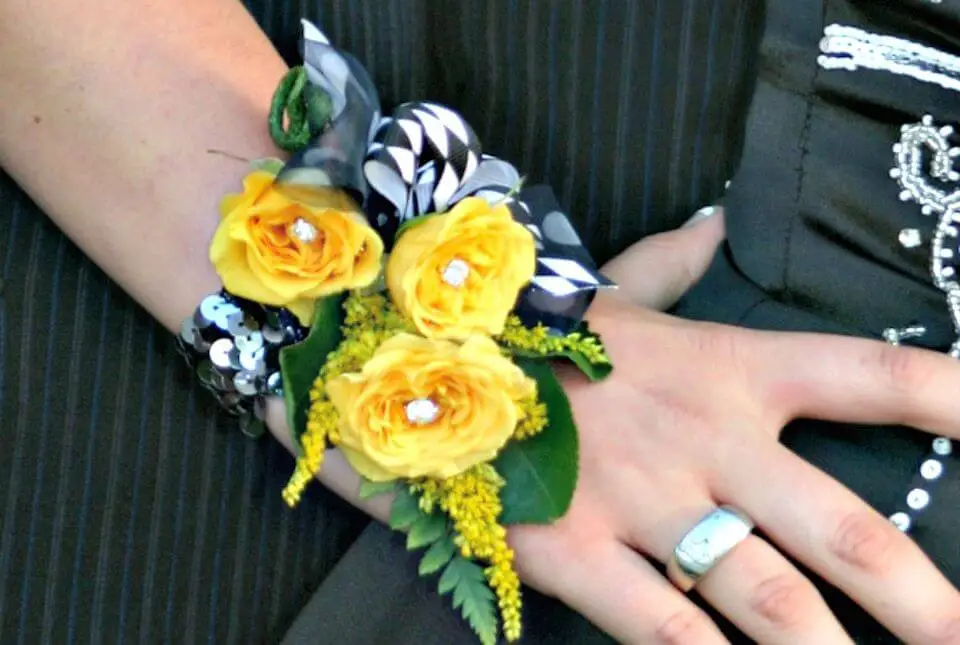
DIY Wrist Corsage for Homecoming Or Prom
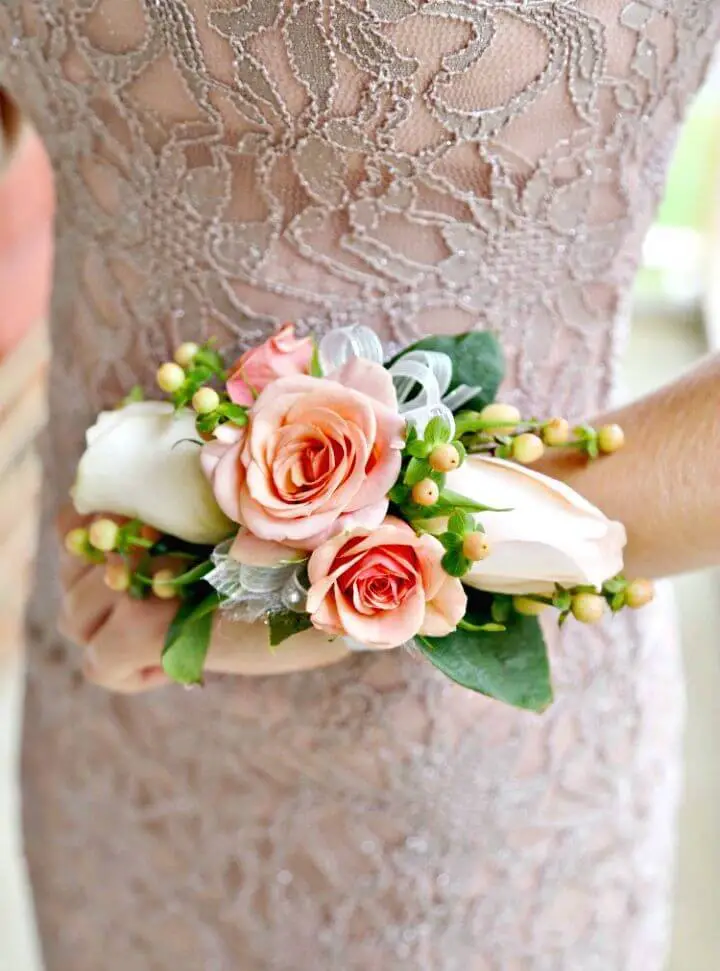
Transform your wrist into a stunning work of art with this effortless DIY project. Combine velcro corsage wristlets, blush tea roses, blush spray roses, hypericum berries, ribbon, floral tape, and wire to create a breathtaking accessory that effortlessly complements any dress color. The best part? This budget-friendly masterpiece can be achieved using bouquets from your local grocery store for just $18! Let your creativity shine as you craft a one-of-a-kind DIY wrist corsage from the comfort of your own home.
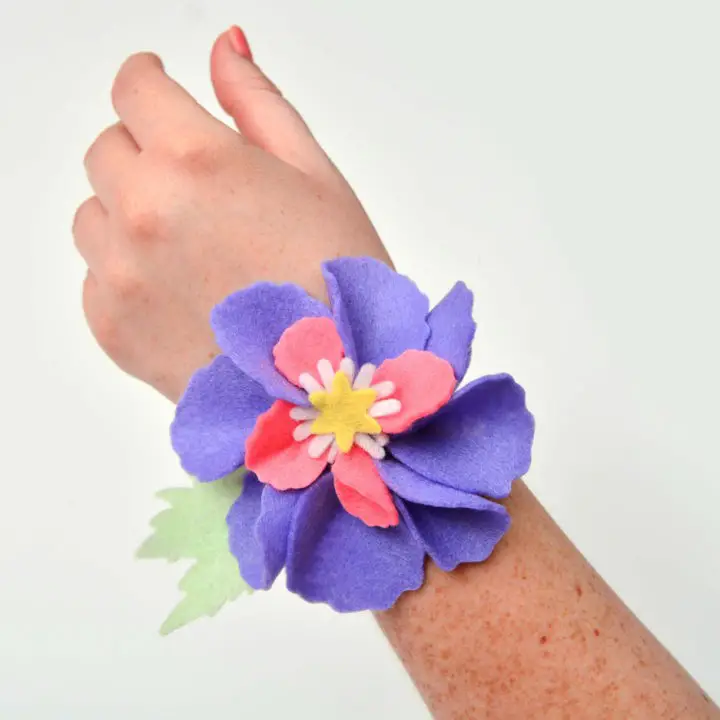
DIY Felt Flowers Wrist Corsage Tutorial
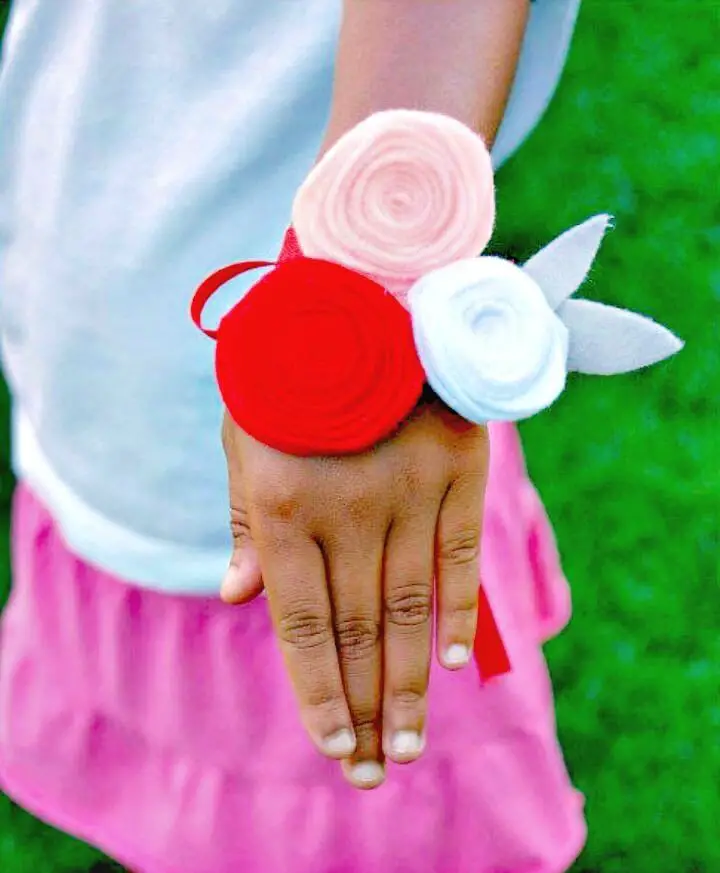
Transform plain felt into stunning flowers with this straightforward DIY guide! With just a few basic materials like felt, a hot glue gun, and ribbon, you can create exquisite corsages for any occasion. Follow the simple, step-by-step process to craft your own unique fabric flower creations, unleashing your creativity and finding joy in the process of crafting these delightful handmade accessories that add a touch of elegance to any event or setting.
Make Your Own DIY Prom Corsage
Transform a stunning wrist corsage with this straightforward DIY tutorial. Begin by collecting materials such as lavish flowers like chrysanthemums, gerbera daisies, or roses, alongside complementary foliage, floral wire, tape, wide and narrow ribbon, an elastic wristlet, and a hot glue gun. When selecting the main flower for your corsage, consider up to three buds for the most impressive results. To add depth and texture, incorporate filler foliage carefully – remember, you want it manageable! This DIY project is perfect for special events like proms, weddings, homecomings, or even everyday wear – unleash your creativity and craft something breathtaking today!
Make Oasis Floral Wrist Corsage
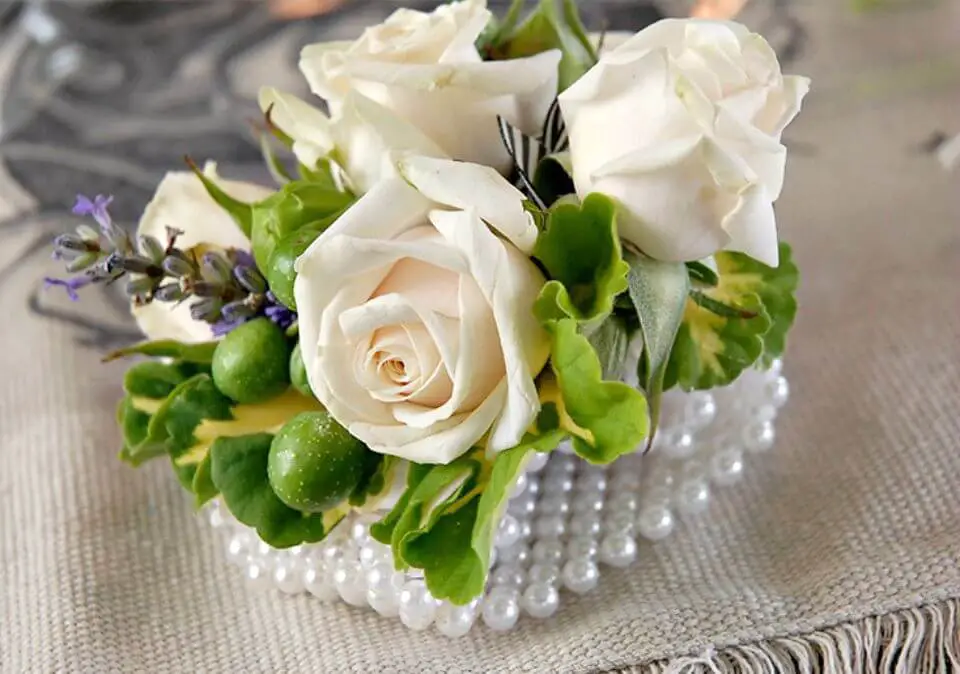
Transform a stunning corsage with this DIY guide! Begin by collecting the necessary materials: 26 gauge wire, oasis floral adhesive, a cream-white pearl wristlet, floral tape, ribbon (7/8″ or 1″ width), and your preferred flowers and foliage. When selecting roses for the corsage, inspect their firmness by gently squeezing the heads. Alternatively, use freshly picked components from your garden, but first test their longevity to ensure they’ll last throughout the event. Perfect for proms, weddings, or any special occasion – follow these easy steps to create an eye-catching corsage that will leave everyone in awe!
DIY Baby Roses Wrist Corsage
When it comes to creating prom corsages that exude elegance without breaking the bank, a DIY approach is the way to go. Say goodbye to tacky plastic designs of yesteryear and hello to delicate, floral masterpieces that are sure to turn heads. The process begins by selecting three baby roses, each of which will be adorned with 10-inch pieces of 22-gauge wire. Wrap these wire-wrapped flowers in floral tape for added texture and dimension, then incorporate foliage and a ribbon bow to complete the look. By opting for this do-it-yourself approach, you’ll not only save money but also ensure that your prom corsage is one-of-a-kind and reflective of your personal style.
Easy DIY Corsage – Step-by-Step Instructions
This Mother’s Day or any special occasion, create a heartfelt and beautiful corsage for your mother or grandmother. With just a few simple supplies, including 2-3 fresh or silk flowers, some greenery, floral tape, 22-24 gauge wire, ribbon, and pins, you can craft a stunning corsage that expresses your love and appreciation. By following our easy step-by-step guide, you’ll be able to create a gorgeous piece of jewelry that will bring joy to the special women in your life. Consider making this DIY project an annual tradition, allowing it to become a meaningful way to celebrate these special individuals each year.
Making a Galentine’s Felt Corsage
Add a touch of handmade elegance to your Galentine’s Day celebrations by crafting a stunning felt corsage. With just a few simple supplies, including a Sizzix Big Shot machine, Bigz Poppy die, glue gun, and assorted accessories, you’ll be well on your way to creating an exquisite fabric flower that’s perfect for gifting to your closest friends. Assemble the delicate blooms with precision-cut felt sheets, a white elastic band, and hook-and-loop oval, then present them as a heartfelt gesture to show your appreciation for their friendship. This thoughtful DIY project is sure to delight on this special day dedicated to celebrating female friendships.
Handmade Silk Flower and Ribbon Wrist Corsage
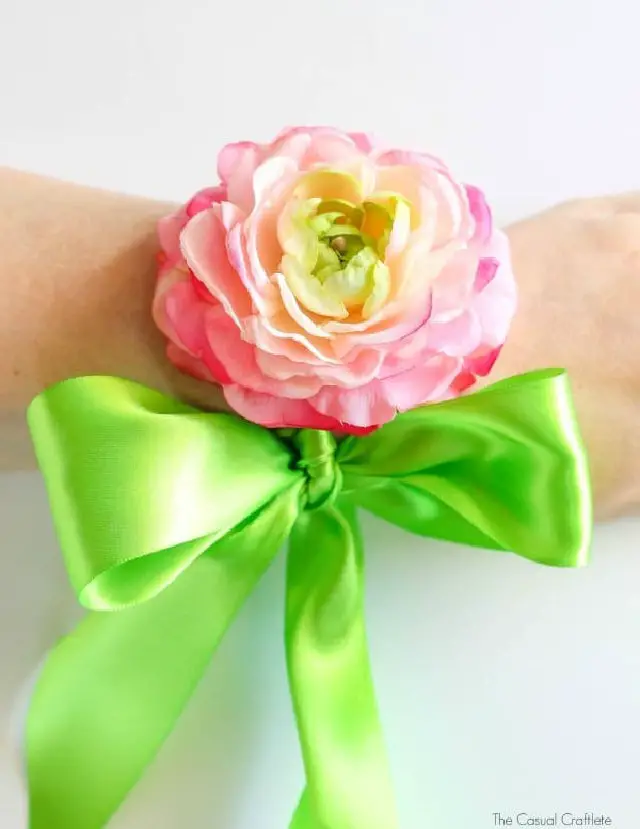
Create a stunning DIY floral wrist corsage using silk flowers and satin ribbon, perfect for special occasions like Mother’s Day, proms, graduations, or weddings. To get started, gather a large floral bloom, apple green polyester satin ribbon, a hot glue gun, wire cutters to trim the stem, a large sewing needle, and some green yarn to secure the ends of the ribbon. For an added touch, have a lighter handy to finish off the design. Follow along for step-by-step instructions that will guide you in crafting a beautiful piece of wearable art that can be treasured for years.
Make Your Own Bride Corsage
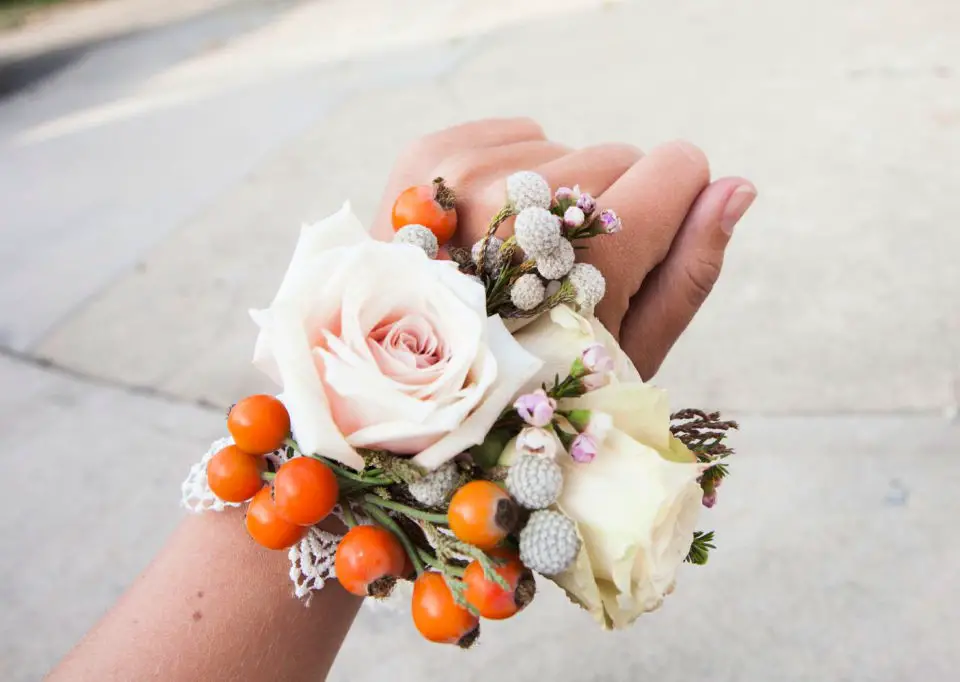
Surprise the mother of the bride with a one-of-a-kind handmade corsage on your wedding day! The process is surprisingly straightforward, requiring only roses, berries, filler flowers, lace edging, floral tape, and corsage stems. Alternatively, opt for baby’s breath or wildflowers for a simpler yet still charming look. By following this easy-to-follow guide, you can craft a stunning corsage that will leave her beaming with pride at your special day.
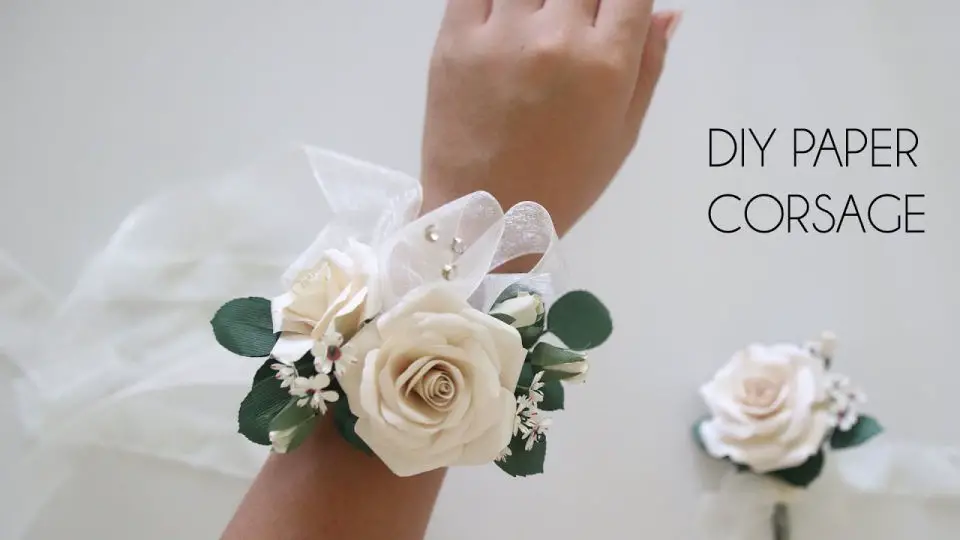
Simple DIY Paper Flower Corsage for Prom
Transform any outfit into a showstopper with this radiant DIY paper flower corsage! Perfect for special occasions, it’s a delicate accessory that effortlessly complements jeans, a crisp white shirt, or even hair-adorned finery. With minimal yet versatile materials like velvet ribbon, paper flowers, leaves, and a hot glue gun, unleash your creativity to craft a one-of-a-kind masterpiece. Customize the design to your taste by adding an array of blooms, then follow simple steps to assemble the corsage and achieve a polished finish. Get ready to make a stunning impression with this prom-perfect DIY paper flower corsage!
Homemade Prom Wrist Corsage
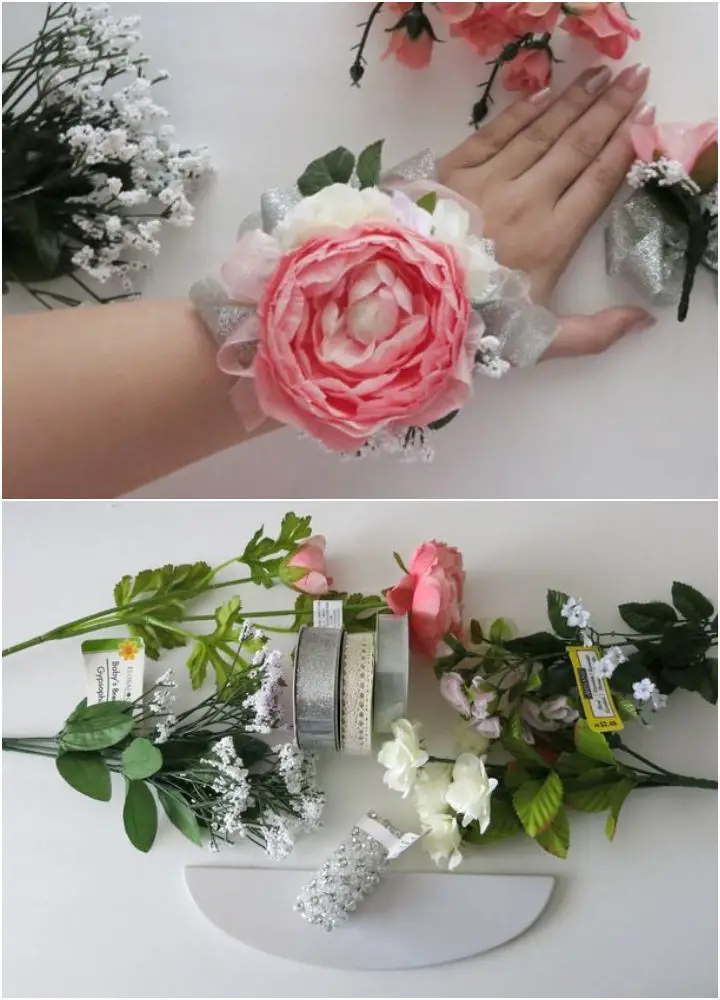
Transform your prom attire into a masterpiece of elegance by crafting your own bespoke wrist corsage and boutonnière. This step-by-step guide will empower you to curate the perfect color palette and floral arrangement, featuring roses, orchids, hydrangeas, lilies, or peonies as the focal point. Supplement these blooms with smaller flowers or neutral-toned filler elements for added visual interest. To further elevate your design, incorporate leaves, baby’s breath, or succulents, creating a one-of-a-kind masterpiece. Gather essential materials like hard plastic, felt pieces, silk flowers, glitter ribbon, and sheer ribbon, then secure everything together using hot glue. Unleash your creativity and turn your prom look into an unforgettable experience.
DIY Corsage With Faux Flowers
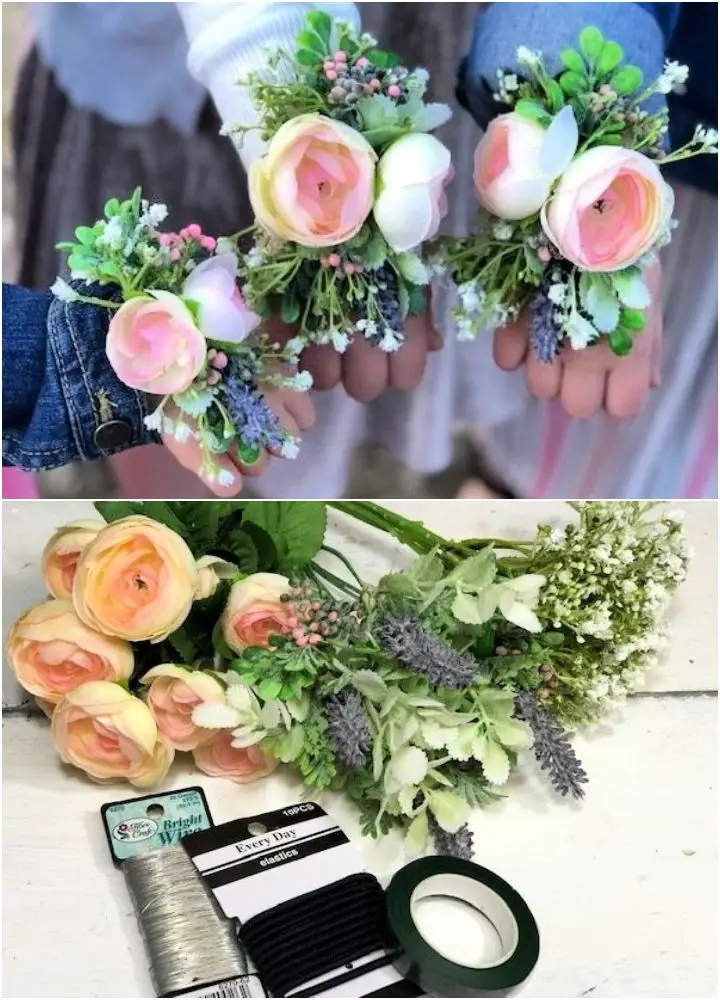
Transform your wrist into a stylish focal point by crafting your very own wrist corsage using artificial flowers, a creative and cost-effective solution for self-expression. With minimal investment in materials such as fake roses, baby’s breath, spring flowers, floral tape, a hair tie, hot glue sticks, and felt, you can create a personalized accessory that sets you apart from the rest. Follow our step-by-step guide to craft the perfect DIY faux corsage that will undoubtedly turn heads, and get ready to rock an eye-catching piece of jewelry all your own.
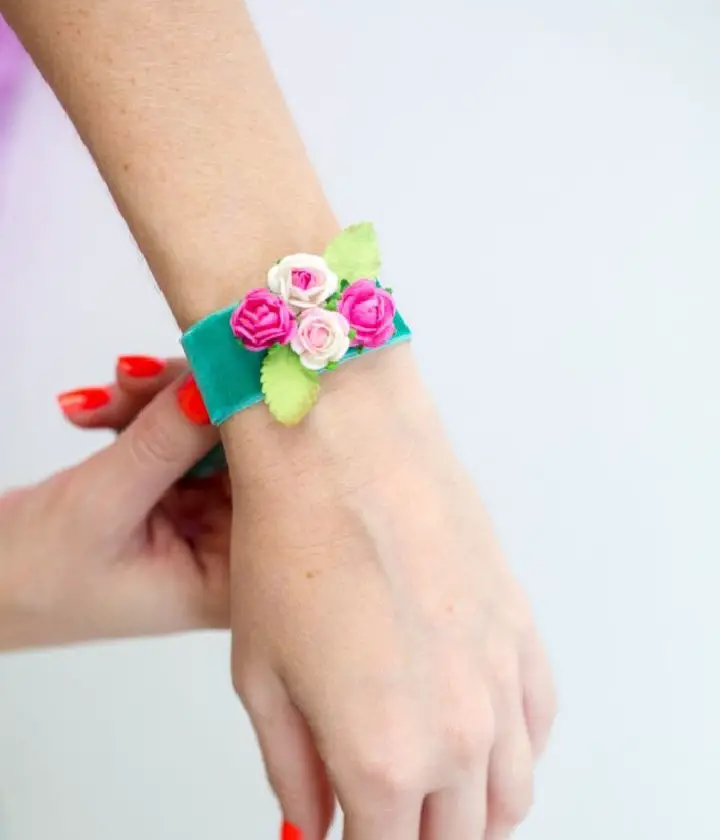
DIY Ribbon Wrist Corsage
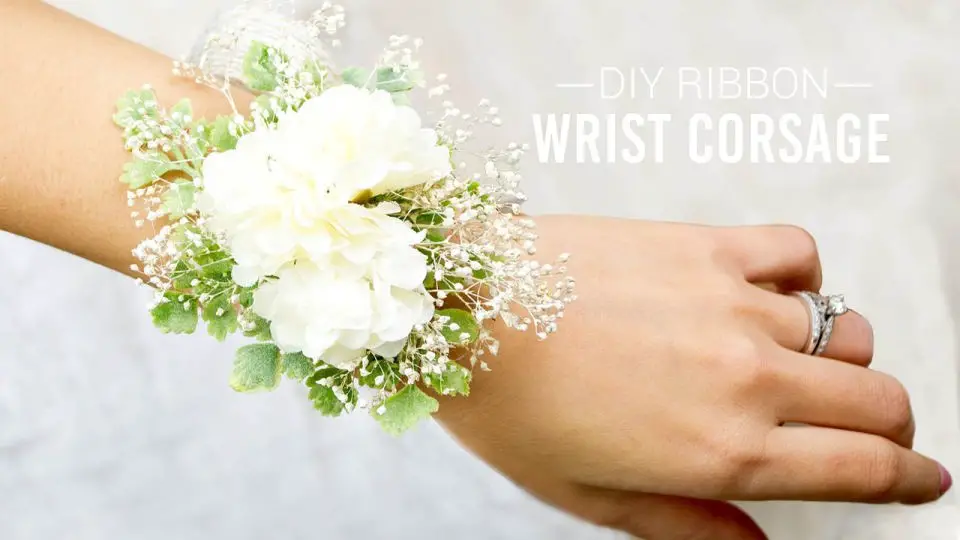
Transform your special day with a charming, budget-friendly corsage that exudes rustic charm. This DIY masterpiece can be crafted using accessible materials like stiffened felt, floral tape, dried baby’s breath, leafy greens, white flowers, and jute ribbon. By following these straightforward steps, you’ll create a one-of-a-kind accessory that perfectly complements your rustic-themed celebration. Ditch the pricey wrist bracelets and opt for this elegant yet handmade corsage instead – it’s an affordable way to add a touch of sophistication to any event.
How to Make a Corsage
This captivating video tutorial offers a straightforward guide to crafting an exquisite corsage, perfect for formal events like proms and weddings. Not only is it a thoughtful, personalized gift, but it’s also an affordable way to add a touch of elegance to any occasion. As you follow the step-by-step instructions, you’ll create a stunning accessory that’s sure to turn heads. Whether you’re looking for a unique Mother’s Day gift or simply want to surprise someone special, this DIY corsage is sure to impress.
DIY Paper Flower Corsage
Elevate your style without breaking the bank by creating a stunning paper flower corsage using our easy-to-follow video tutorial. This DIY project is perfect for special occasions like homecoming, prom, or bridal parties, and will allow you to express your creativity while saving money. To get started, gather your materials – including paper flowers, green floral wire, floral tape, ribbon, and elastic. Then, simply follow the step-by-step instructions in the video to assemble a beautiful corsage that’s sure to turn heads. With this customizable accessory, you can create a unique look that reflects your personality without breaking the bank.
Make a Ladies Freesia Corsage
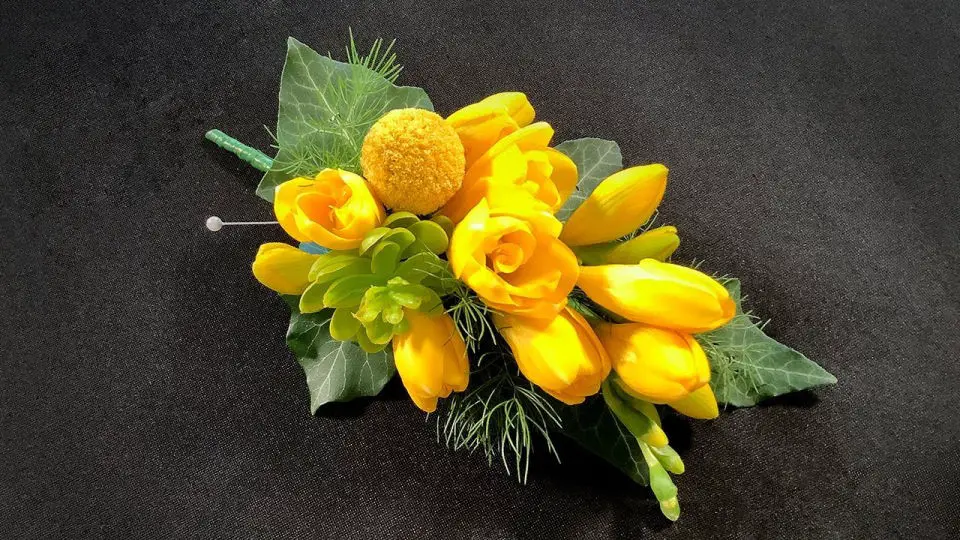
To create a stunning ladies’ freesia corsage, follow this video tutorial that demystifies the process. Begin by gathering your essential materials: double freesia, ivy leaves, craspedia flowers, faux succulent, 0.26 rose wire, pearl-headed pins, and parafilm tape. As you weave the foliage together using the wire, you’ll master the art of crafting a delicate, precision-engineered arrangement that exudes traditional elegance, perfect for special occasions like weddings, proms, or galas.
Quick and Simple Elastic Wrist Corsage
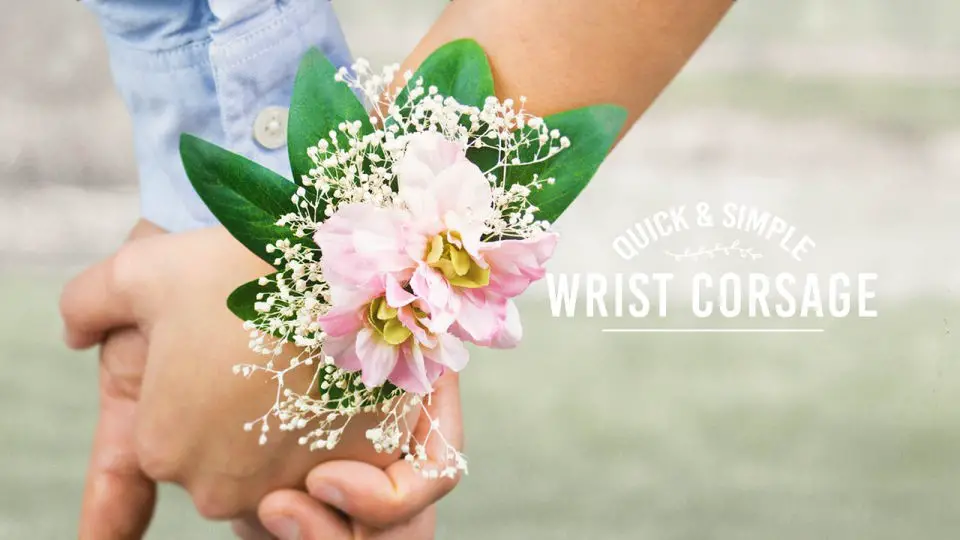
Transform your special day with an elegant and affordable DIY elastic wrist corsage that exudes luxury without the hefty price tag. This simple yet stylish creation requires just a few readily available materials, including stiffened felt, floral tape, dried baby’s breath, leafy greens, pink flowers, and a hair tie. Ditch expensive bracelets and make any event feel truly extraordinary with this budget-friendly alternative.
Conclusion:
Mastering the art of creating homemade DIY corsages is a creative journey that adds a thoughtful dimension to any celebration. As you explore the process from selecting flowers to adding personalized touches, this guide has provided you with the essential tools to craft exquisite, eco-friendly corsages in the comfort of your own space. By dedicating time to maintenance and care, you can ensure your DIY corsage stays radiant throughout the event. Whether gifting it to someone special or adorning your own attire, the art of DIY corsage making is a skill that effortlessly infuses elegance and personal flair into any occasion.
