Looking for creative ways to keep your flock hydrated? Look no further! Building a DIY chicken waterer is not only an affordable solution, but also a fun and rewarding project that offers practical benefits. With our comprehensive guide, you’ll be able to construct a waterer that’s easy to fill, clean, and perfect for your feathered friends. Our step-by-step instructions make it simple for anyone to create a reliable water source that keeps your chickens happy and healthy. We’ve compiled 20 innovative DIY chicken waterer ideas to suit different needs and setups, from straightforward models to more complex versions that offer additional benefits like cleaner water. As we explore the advantages of DIY chicken waterers, we’ll also cover essential materials and easy cleaning tips. By reading on, you’ll be equipped to enhance your chickens’ living environment and discover the perfect DIY waterer to suit your coop and your birds’ needs.
Why DIY Chicken Waterers?
Creating a homemade chicken waterer is a rewarding experience that offers numerous benefits for both you and your feathered friends. At its core, this DIY endeavor is a smart way to ensure your chickens stay hydrated and healthy while also being kind to the environment.One of the primary advantages of building your own waterer is its cost-effectiveness. By using materials you likely already have on hand or scavenging for affordable alternatives, you can create a functional system that’s a fraction of the cost of commercial options. This not only saves you money but also reduces waste and minimizes your environmental footprint.Customization is another significant perk of DIY chicken waterers. Every flock and coop is unique, with its own set of requirements and constraints. By designing and building your own waterer, you can tailor it to perfectly suit your chickens’ needs and your space constraints. This means you can create a system that’s optimized for your specific situation, ensuring your birds always have access to fresh water.In addition to the environmental benefits, a homemade chicken waterer can also promote healthier chickens. By designing a system that reduces spillage and keeps the water clean, you’re decreasing the risk of diseases spreading through dirty water. This leads to happier, healthier birds that are better equipped to thrive in their environment.The convenience factor is also worth considering. With automatic or gravity-fed systems, you’ll spend less time refilling and maintaining your chickens’ water supply. Once set up, these DIY waterers ensure your birds always have access to fresh water without constant intervention.Finally, there’s a sense of fulfillment that comes from creating something with your own hands. Building a homemade chicken waterer is a fun and rewarding project that not only benefits your animals but also provides a sense of pride and accomplishment.
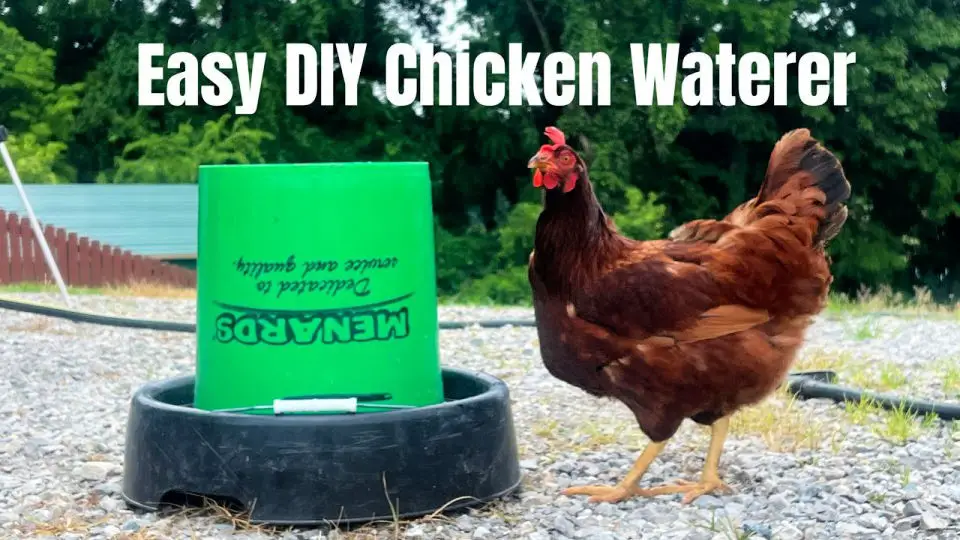
Easy DIY Chicken Waterer That Stays Clean!
In backyard poultry care, providing chickens with a consistent supply of fresh water can be a daunting task. The struggle is real when dealing with dirty water troughs or unreliable dispensers. Fortunately, crafting a DIY chicken waterer is a simple and cost-effective solution that ensures your flock always has access to clean drinking water. With this step-by-step guide, you’ll learn how to create an indispensable tool for your feathered friends.
Materials Needed:
To construct a DIY chicken watering system, you’ll need some basic materials. First, gather a 5-gallon bucket with a secure lid to prevent spillage and contamination. For providing drinking cups to your poultry, you’ll require multiple poultry drinking cups – the exact number depends on the size of your flock. Next, you’ll need a drill equipped with a 3/8 inch drill bit for creating holes in the bucket’s lid or elsewhere in the system. To ensure smooth edges and prevent any rough spots, consider using pliers or sandpaper to finish off the drilled areas. Finally, don’t forget a wrench or the appropriate tool for tightening the nuts on your poultry cups. With these components in hand, you’re ready to start building your homemade chicken watering solution.
Instructions:
Before setting up your 5-gallon bucket as a poultry drinking station, take the time to carefully prepare the bucket for use. Start by marking three inches from the bottom of the bucket and drilling evenly spaced holes around it using a 3/8 drill bit. The number of holes will depend on how many drinking cups you plan to install. Once the holes are drilled, remove any excess plastic debris using pliers or gentle sanding to ensure a smooth surface that won’t interfere with the sealing of the poultry cups.Next, insert the drinking cups through the holes from the outside of the bucket, applying gentle pressure as needed. Then, secure each cup by screwing on the provided nuts from the inside of the bucket, tightening them firmly to prevent leaks. Once all the cups are in place and secured, fill the bucket with clean water, taking care not to exceed the level of the lowest drinking cup.Finally, seal the top of the bucket with its lid to prevent contamination and reduce water evaporation. Place your new chicken waterer in your coop or run, making sure it’s on a stable surface to maintain even water levels in each cup.
Training Your Chickens
When transitioning your flock to a new waterer, it’s essential to remove any existing water sources from their enclosure. This will encourage your chickens to use the new system. Additionally, you may need to demonstrate how the water flows by gently tapping the valves of the poultry cups. Once installed, closely monitor your flock to ensure they’re comfortably using the new waterer and make any necessary adjustments.
Video Tutorial
To take your DIY skills to the next level, I recommend supplementing this written guide with a step-by-step video tutorial on making this easy chicken waterer. The visual cues provided in the YouTube video will not only enhance your understanding of the project but also give you the confidence to complete it quickly and successfully. By following this DIY project, you’ll not only simplify your poultry care routine but also ensure that your chickens always have access to clean water, which is essential for their health and wellbeing.
FAQs On DIY Chicken Waterer
Embarking on a DIY chicken waterer project can be an engaging and fulfilling experience. To guide you through this process, we’ve compiled answers to frequently asked questions, ensuring you establish and sustain an optimal hydration system for your flock with ease.
What materials do I need to build a DIY chicken waterer?
To create a functional and hygienic water system for your backyard chickens, you’ll need to gather some essential materials. A 5-gallon bucket with lid will serve as the primary water reservoir, providing ample space for your flock to drink and splash around. Poultry drinking cups or nipples are crucial components that allow your hens to access the water comfortably. To install these, you’ll require a drill and suitable drill bits to create holes in the bucket. Once you’ve made the necessary openings, use pliers or sandpaper to smooth out any sharp edges that may have formed during the drilling process. Finally, don’t forget to secure the nuts on the poultry drinking cups with a wrench or appropriate tool to prevent them from coming loose over time.
How do I clean my DIY chicken waterer?
To thoroughly clean your water bucket, start by emptying any remaining water. This will give you a clear slate to work with. If your bucket has removable parts like drinking cups or nipples, now is the time to disassemble it and set them aside. Next, use a brush to scrub away any dirt or debris that’s accumulated inside the bucket. Be sure to clean all surfaces thoroughly, including any parts you’ve removed. Once you’ve removed all soap residue with a thorough rinse, it’s time to sanitize your bucket. Mix one part mild bleach with 10 parts water and use it to sanitise the entire bucket, paying extra attention to any crevices or hard-to-reach areas. After sanitizing, give everything another good rinse to remove any lingering bleach taste. Finally, dry all the parts completely before reassembling your bucket. This will prevent any moisture from stagnating and making its way back into the water.
Can I leave my DIY chicken waterer outside?
When setting up a water source for your outdoor pets, remember to take these factors into account: location and elevation. Positioning the water in a shaded area will help keep the water cool and slow down algae growth. Elevating the water above ground level can prevent dirt and debris from getting stirred up and contaminating the water. Additionally, be prepared for changing weather conditions by having a plan in place to protect your pets’ water source from freezing temperatures. This might involve using a heating mechanism or bringing the waterer inside during extremely cold snaps.
How often should I refill the waterer?
When it comes to determining the optimal refill frequency for your chicken’s water supply, several factors come into play. The number of birds you’re caring for is one key consideration – a larger flock will naturally require more frequent refills. Weather conditions also play a significant role, as hot temperatures can increase water consumption. Additionally, the size of your waterer has an impact – a larger vessel requires less frequent refilling than a smaller one. Ultimately, it’s essential to develop a routine that involves checking the water level daily and making adjustments as needed to ensure your chickens always have access to fresh, clean H2O.
How do I train my chickens to use the new waterer?
To ensure a seamless transition to the new watering system, follow these steps. Firstly, eliminate any other water sources available to your flock. This will encourage them to focus on the new waterer. Next, demonstrate how the new system works by gently manipulating the valves or nipples to simulate water flow. As your chickens become more curious about this new development, be patient and let them discover the new watering source at their own pace. It may take some time for them to fully grasp the concept, but with persistence and gentle guidance, they will eventually learn to use the new system.
Is it necessary to have a lid on my DIY chicken waterer?
A lid is essential for several reasons. Firstly, it serves as a barrier against contamination by keeping dirt, debris, and other unwanted elements out of the water. This is particularly important in maintaining a clean environment for your flock. Secondly, a lid helps regulate evaporation, ensuring the water level remains consistent even on scorching days. Finally, from a safety perspective, a lid prevents chickens from potentially drowning or sitting in the water, which can be hazardous to their health.
Can I use something other than a 5-gallon bucket?
When it comes to creating a DIY chicken feeder, the possibilities are endless! Don’t be afraid to think outside the box and repurpose materials you already have lying around. For smaller flocks, old water jugs can be an excellent choice. If you’re dealing with a larger flock, large food-grade containers would be a better fit. And for those who want to take their feeder game to the next level, PVC pipes are an excellent option for creating a gravity-fed system that’s both efficient and easy to use.
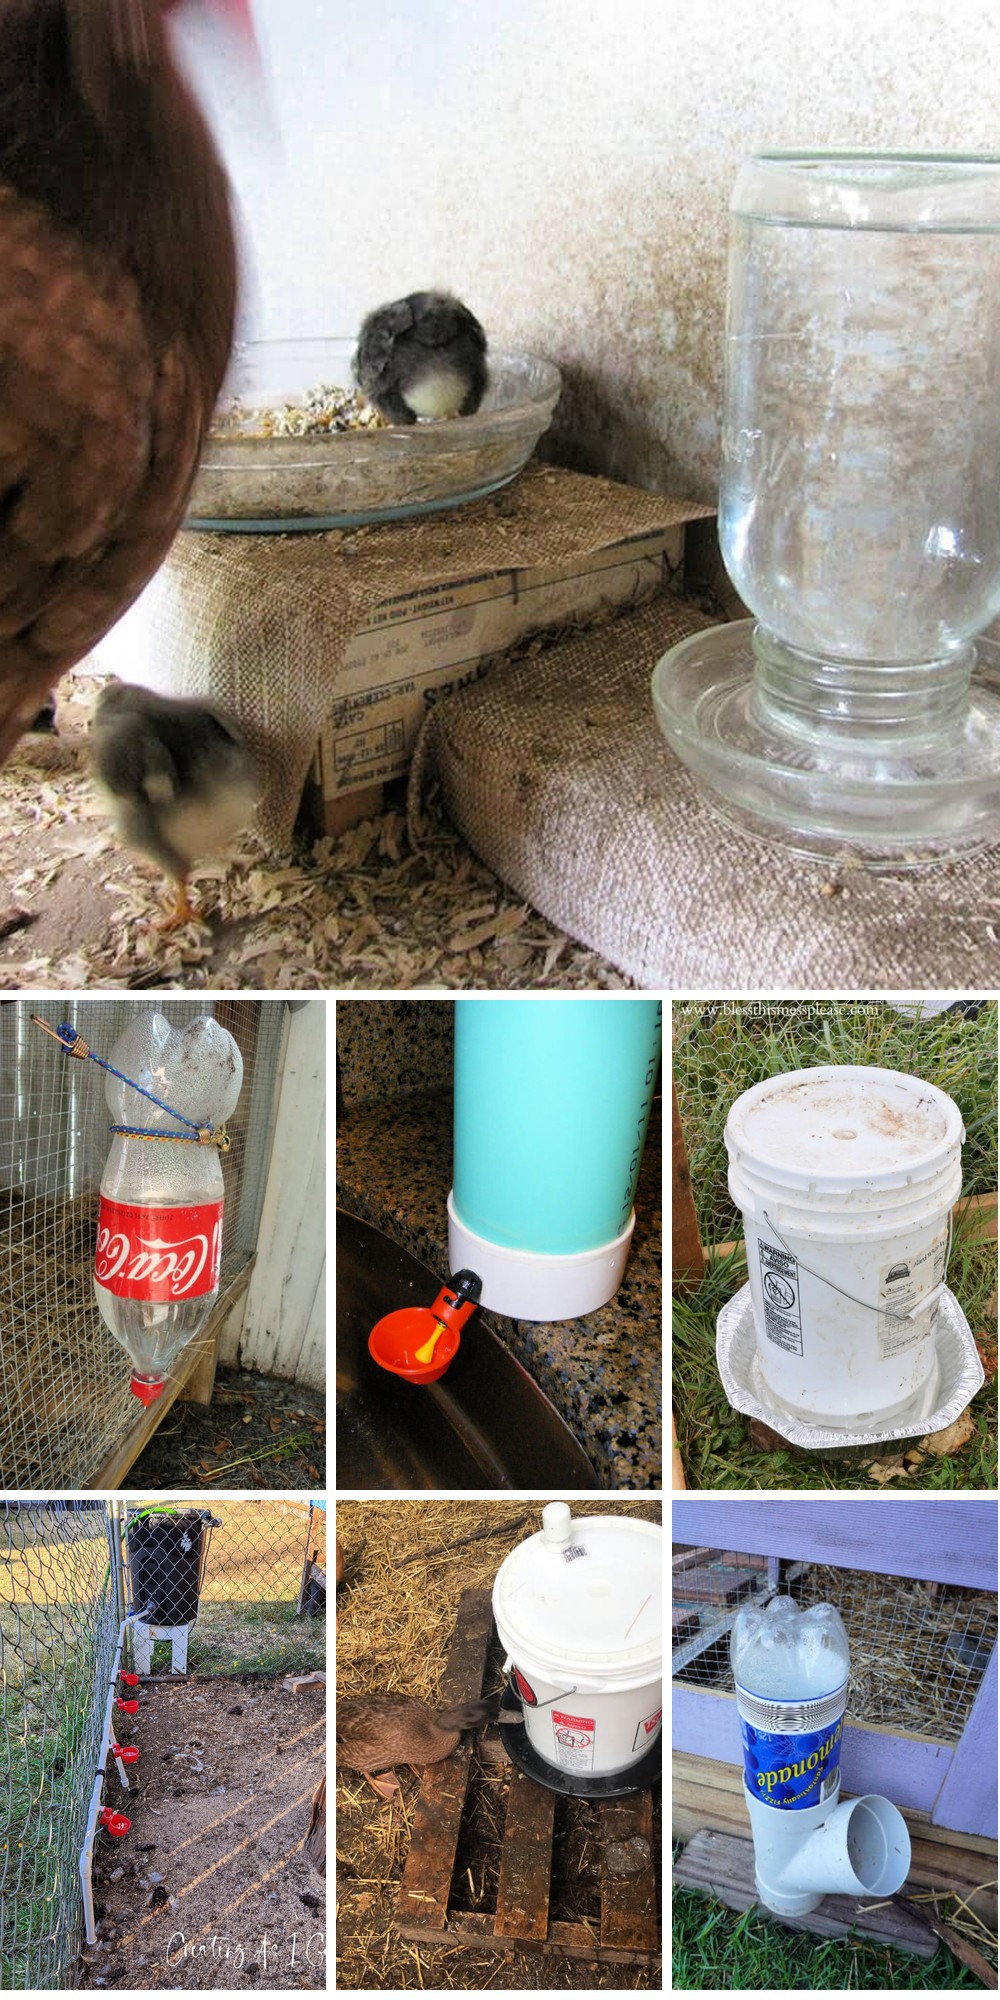
20 DIY Chicken Waterer Ideas
Elevate your backyard flock’s hydration experience by transforming ordinary PVC materials into unique and functional chicken waterers. This collection of 20 creative DIY projects offers a perfect blend of innovation, ease, and functionality, enabling you to upgrade your coop and provide a refreshing oasis for your feathered friends.
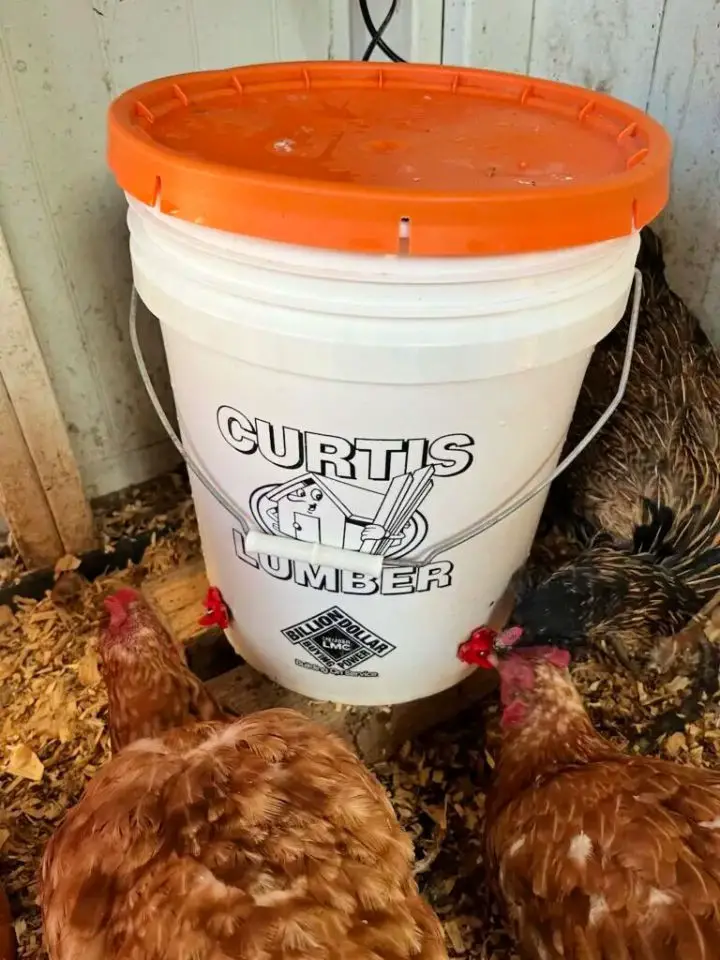
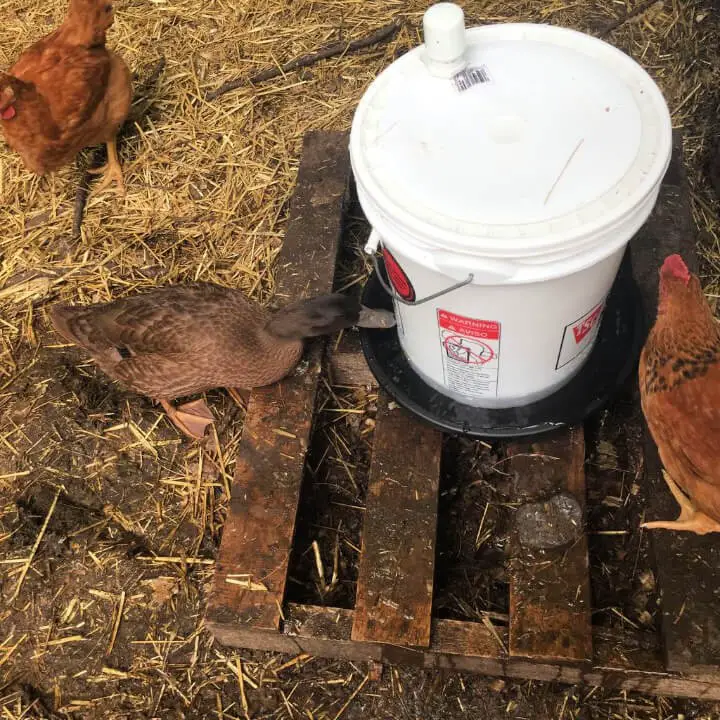
DIY Chicken Waterer from 5-gallon Buckets
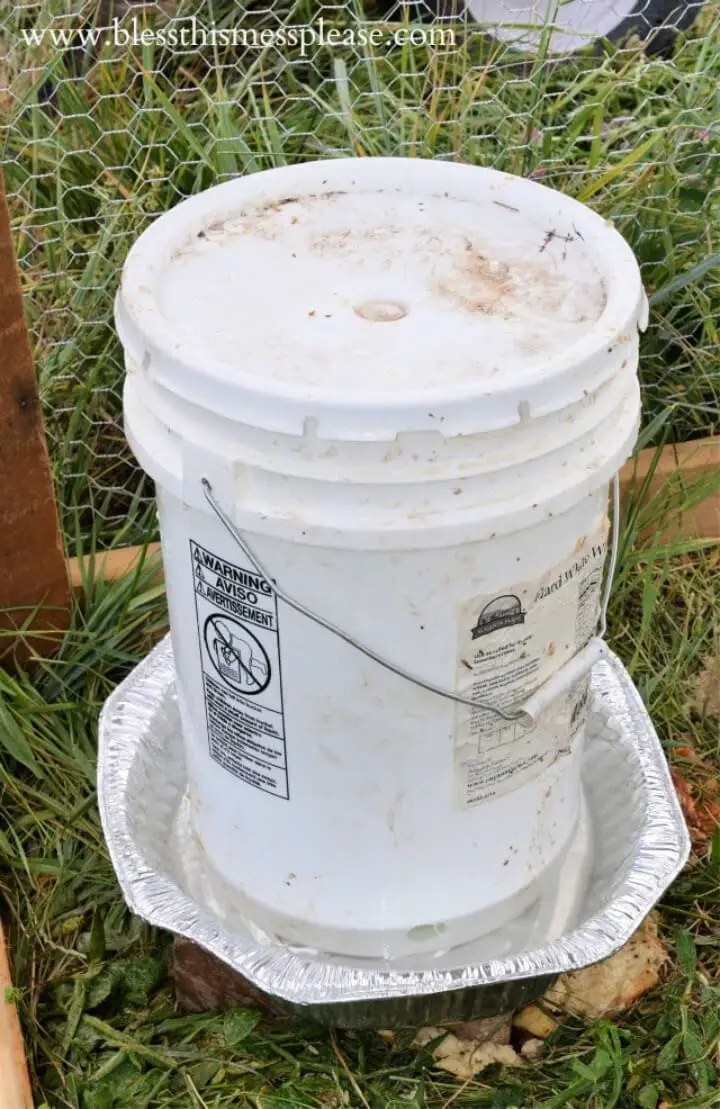
Take your backyard chicken care to the next level with a clever DIY project that’s not only budget-friendly but also effective in providing your flock with a constant supply of fresh water and feed. By repurposing 5-gallon buckets, you can create a durable feeder and waterer that will keep your chickens happy and healthy, ultimately boosting their egg production and overall well-being. With easy-to-follow instructions from BlessThisMessPlease, you’ll be able to give your poultry the care they deserve without breaking the bank.
Making a PVC Chicken Waterer
Stay ahead of the game with a low-maintenance solution to keep your flock hydrated! By following a simple DIY guide at Instructables, you can create a sturdy and intuitive PVC chicken waterer that’s perfect for backyard enthusiasts. This efficient design not only saves time but also reduces water waste, ensuring your feathered friends always have access to fresh H2O.
How to Make Glass Chicken & Poultry Waterer
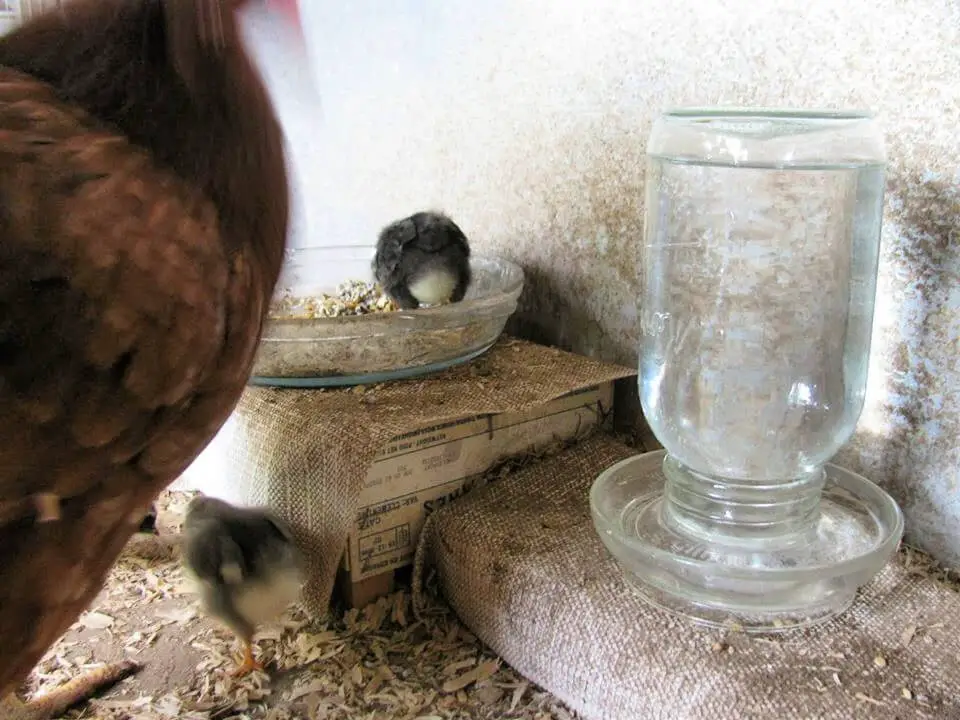
Improve the health and safety of your poultry’s hydration with a creative, plastic-free solution. A DIY Glass Chicken & Poultry Waterer offers a refreshing alternative for all climates, suitable for year-round use. By using this innovative glass waterer, you can eliminate contamination risks and prevent frostbite issues. The refill and cleaning process is straightforward, ensuring a compact drinking opening that keeps your chickens safe. With Sue’s step-by-step guide, making this eco-friendly waterer is within reach of anyone seeking to create a healthy environment for their poultry.
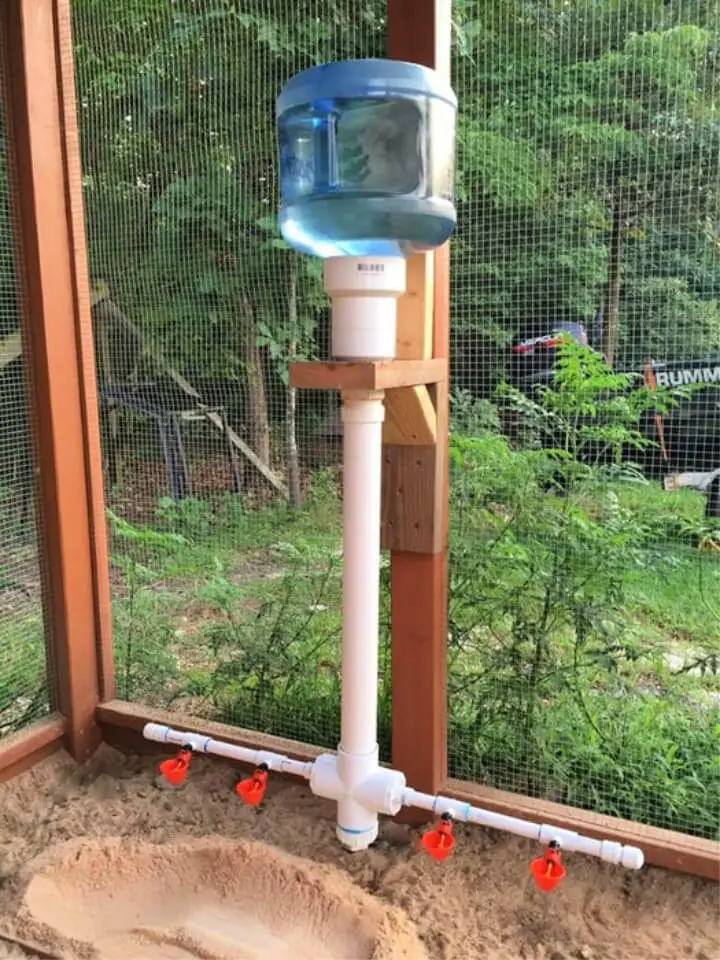
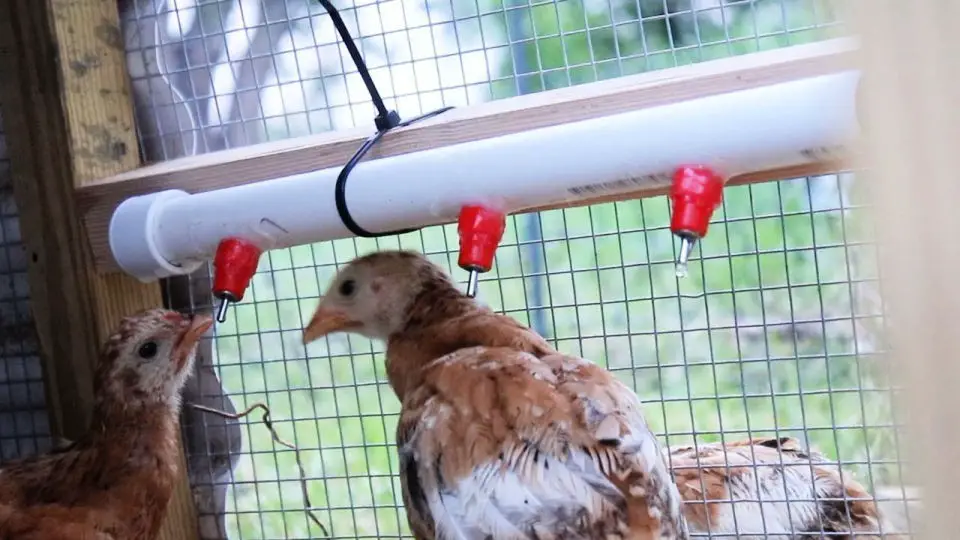
Build an Automatic Chicken Waterer
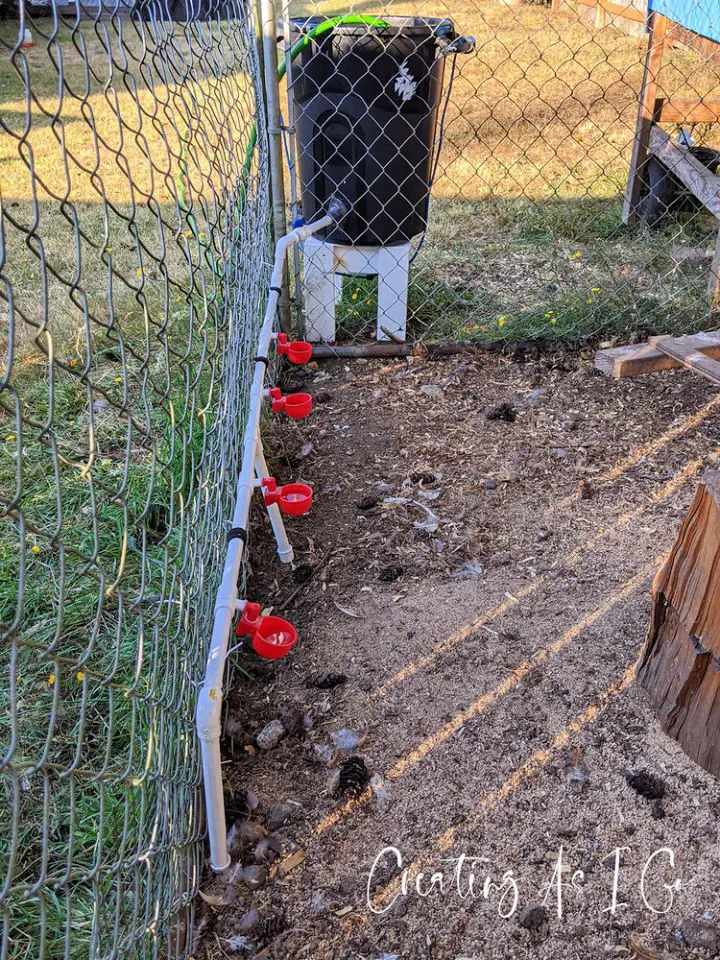
Say goodbye to tedious backyard chicken care with an innovative automatic waterer! A reliable and low-maintenance solution that keeps your flock hydrated without the hassle of daily water dish refills. With a straightforward guide on crafting a DIY automatic chicken waterer using PVC pipes, you’ll be empowered to create a seamless system that ensures your chickens always have access to clean drinking water. Perfect for busy pet owners, this game-changing approach revolutionizes your poultry care routine.
Make Your Own Chicken Waterer
Create a hassle-free DIY chicken waterer at TLB Acres, tailored specifically for poultry enthusiasts seeking effective hydration solutions for their flocks. This comprehensive guide simplifies the process of crafting a user-friendly watering system using basic tools and materials. With this tutorial, anyone can construct a system that caters to both adult chickens and chicks alike.
By following these straightforward steps, you’ll be able to design a chicken nipple watering system that prioritizes cleanliness, minimizes maintenance, and boosts farm efficiency for flocks of any size.
How to Make a Chicken Waterer
Discover the simplicity of elevated backyard chicken care with our DIY Chicken Waterer guide at The Silver Fox Farm. By following a straightforward 5-step process, you can create a reliable and cost-effective solution for keeping your feathered friends hydrated with clean water. All it takes is a few basic tools, a bucket, and poultry nipples. This innovative approach not only saves you money but also guarantees your flock’s daily access to fresh water, promoting their overall well-being.
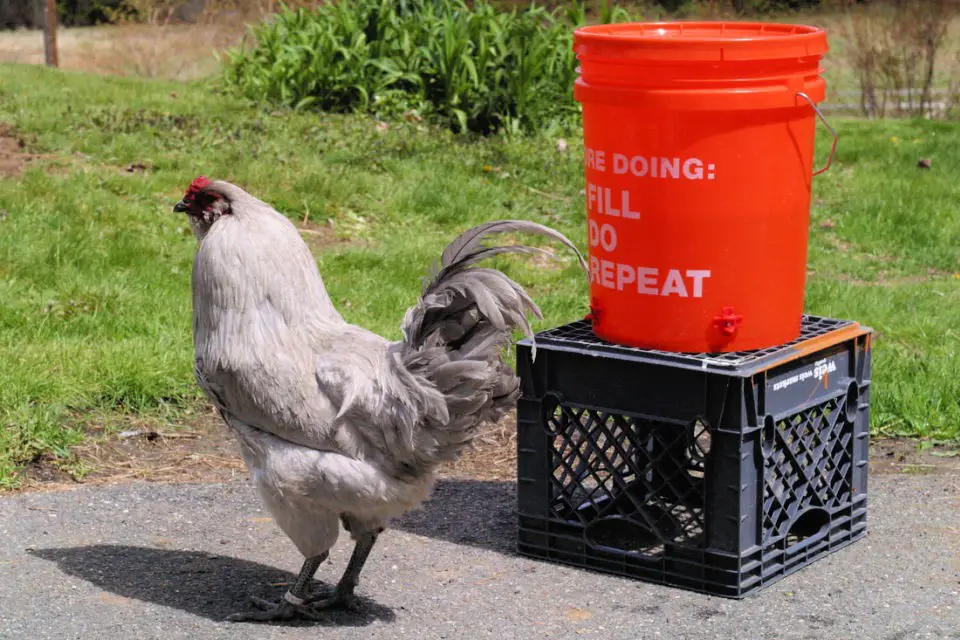
Easy and Cost-Effective DIY Chicken Waterer
With Fresh Exchange’s easy-to-follow guide, you can create a DIY Chicken Waterer in under 40 minutes using just a 5-gallon bucket and some basic supplies. This budget-friendly solution ensures your flock always has access to fresh water, keeping them hydrated and healthy. By following our step-by-step process, from preparing the bucket to installing chicken water nipples, you’ll be able to keep up with your feathered friends’ hydration needs without breaking the bank.
Handmade Heated Chicken Waterer
In Upstate NY’s harsh winters, keeping chicken water from freezing is a daunting task. Our solution was to create a low-maintenance, DIY heated chicken waterer using an aquarium heater, bubbler, Thermo Cube, and a 5-gallon bucket. The key to success lies in the strategic placement of horizontal chicken nipples and ensuring that the heater and bubbler remain submerged at all times. This innovative system has the potential to become the ultimate answer to providing consistent, unfrozen water for your flock throughout the winter months. For a detailed guide on how to set it up, visit Tree Farm Design Co.
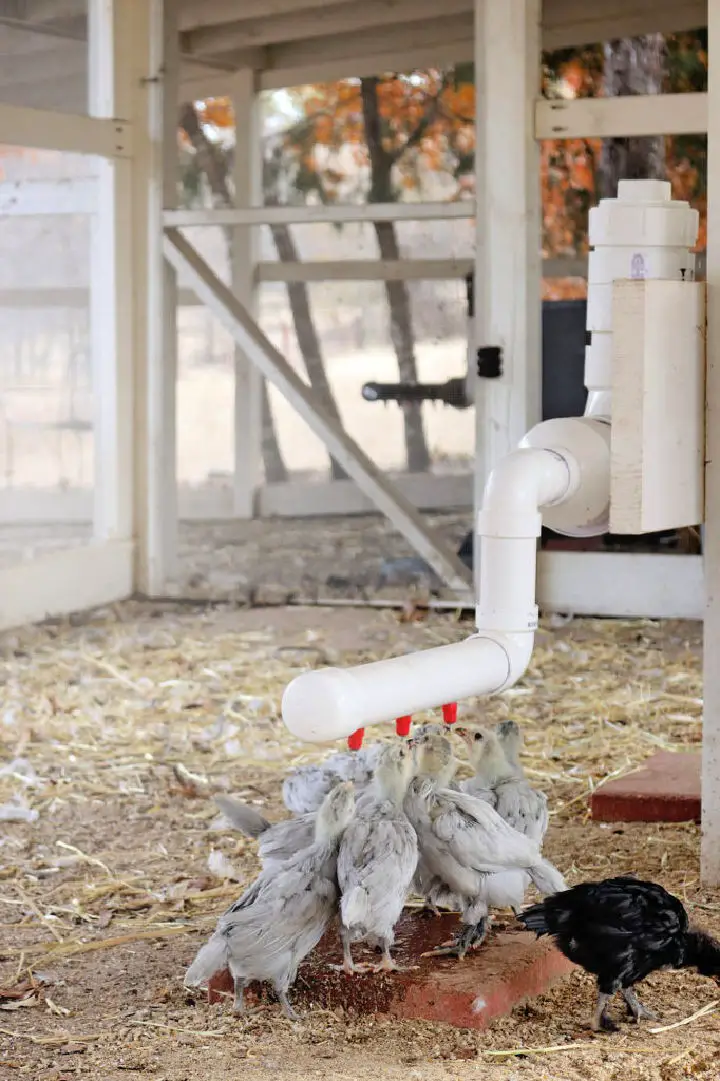
How to Make PVC True Auto Waterer
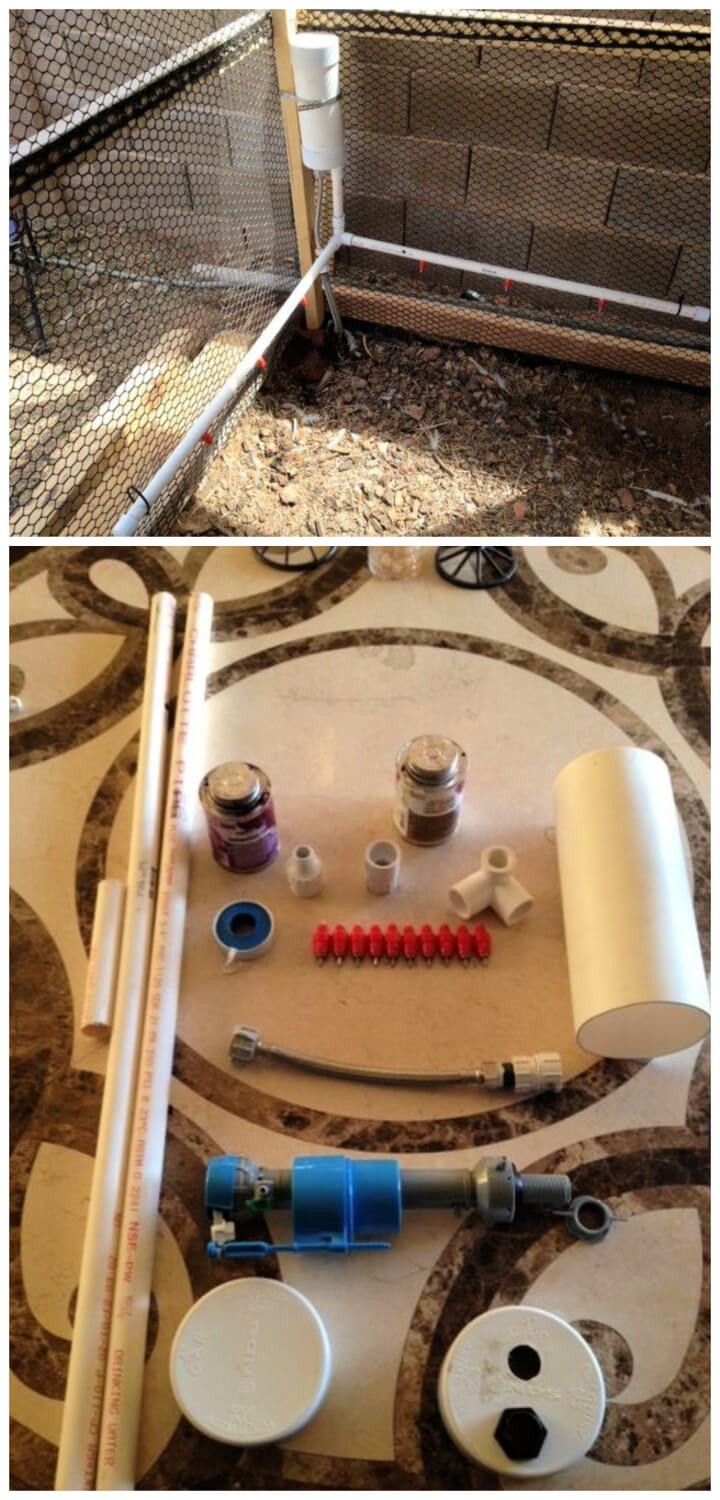
Revolutionize the way you keep your chickens hydrated with the My PVC ‘True Auto’ Waterer – a game-changing DIY solution that makes daily water refilling and cleaning a thing of the past. By repurposing everyday materials like PVC pipes, toilet fill valves, and nipple drinkers, this auto-watering system ensures a constant supply of fresh water for your feathered friends, eliminating the need for frequent manual intervention. Perfect for busy backyard chicken enthusiasts, this innovative waterer is not only easy to assemble but also cost-effective and adaptable to the size of your flock. For a step-by-step guide on building this efficient waterer, visit Backyard Chickens. Simplify your poultry care routine with this clever DIY project.
Chicken Waterer from Beverage Cooler
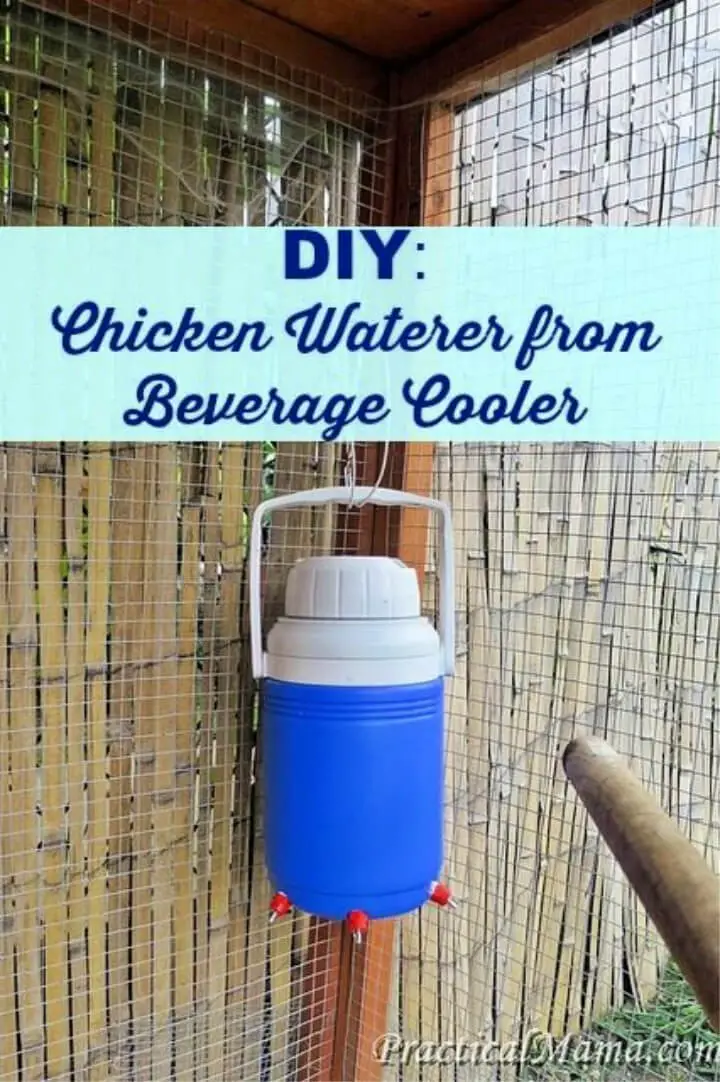
If you’re concerned about providing fresh water for your backyard chickens while minimizing the risk of spreading illness, consider upcycling a beverage cooler into a DIY chicken waterer. This ingenious solution is not only easy to assemble but also perfect for small flocks. As an added benefit, it keeps the water cool in summer and allows for effortless replacement when winter sets in. For a step-by-step guide on how to create this practical addition to your coop, complete with helpful tips and straightforward instructions, head over to Practical Mama. This clever contraption ensures that your hens stay hydrated without causing unnecessary stress.
DIY Fang Dangled Automatic Waterer

Elevate your poultry care routine with the Fang Dangled Automatic Chicken Waterer, a game-changing DIY solution that simplifies hydration without compromising quality. Assembled from everyday materials at minimal cost and effort, this innovative system ensures a constant supply of fresh water for your flock. To learn how to construct this waterer, visit BackyardChickens.com. This engaging project promises a cleaner, happier, and healthier environment for your birds. Meanwhile, explore affordable pallet chicken coop plans on our website to build a cozy home for your feathered friends without breaking the bank.
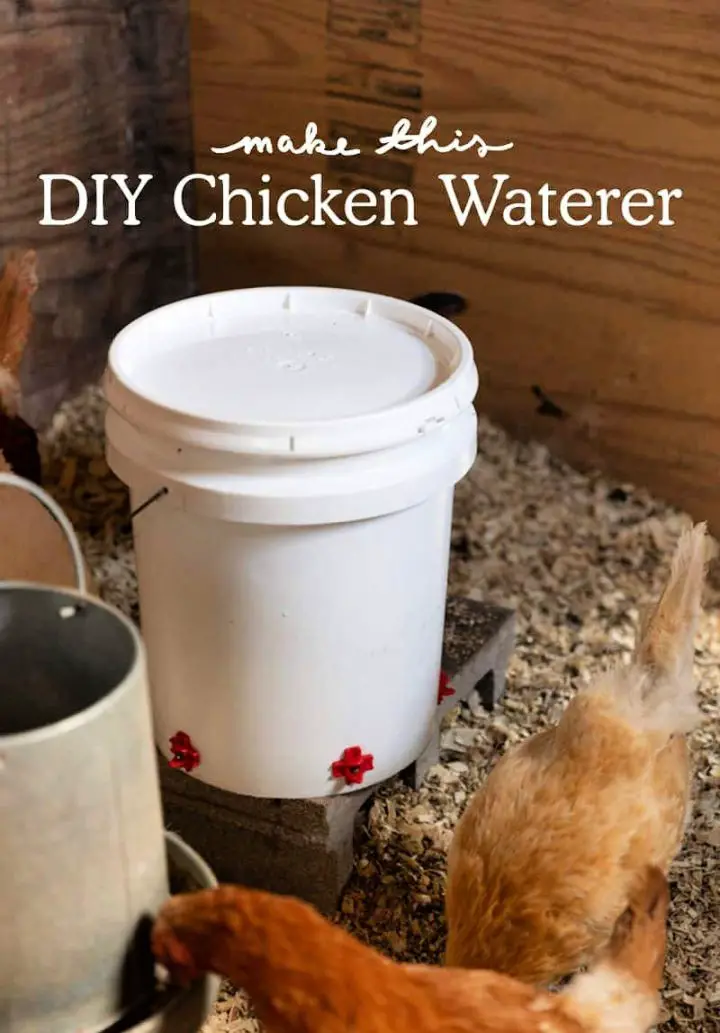
Chicken Nipple Waterer using a Plastic Bucket
Say goodbye to hassle and hello to hydration with a DIY Chicken Nipple Waterer that’s as clever as it is easy to set up. By repurposing a simple plastic bucket and nipple system, you’ll enjoy a self-sustaining water source for your flock without the need for constant refills or tedious cleaning. With this innovative solution, busy chicken keepers can rest assured their birds are getting clean drinking water while they enjoy some well-deserved downtime. Perfect for smaller flocks of up to 20 chickens, this DIY project offers a healthier and more straightforward way to maintain a simple watering system.
Inexpensive DIY PVC Chicken Waterer
To ensure your chickens stay properly hydrated without breaking the bank, consider crafting a DIY PVC Chicken Waterer following a straightforward guide on Instructables. This uncomplicated solution provides a dependable source of clean drinking water for your poultry, making it an ideal option for time-pressed farmers and homesteaders alike. By implementing this system, you’ll guarantee your flock’s access to a consistent supply of fresh water, streamlining your poultry care practices.
Make a 5-Gallon Chicken Waterer
Transform your backyard farming experience with a simple yet effective DIY 5-Gallon Chicken Waterer project that guarantees clean water for your feathered friends. By following a straightforward guide at Instructables, you’ll create a reliable and efficient watering system, enhancing the welfare of your chickens and simplifying daily chores. This cost-advantageous solution is perfect for poultry enthusiasts of all skill levels, making it an ideal addition to any home farm. With this engaging and instructive guide, take the first step towards providing a better environment for your chickens today.
Make Your Own Chicken Waterer
At Longbourn Farm, we’re passionate about providing healthy and happy living conditions for our flock of chickens. One way to achieve this is by crafting your own chicken feeder and waterer using simple DIY projects. Not only can it be a cost-effective solution compared to store-bought options, but it also offers the added benefit of being a long-lasting and durable alternative.
Whether you’re looking for a more affordable option or simply enjoy taking on DIY projects, this tutorial will walk you through the process of creating a reliable chicken waterer using just a few basic supplies like a 5-gallon bucket, drill, and feed pan. The best part? It’s a quick and easy setup that promises ease and functionality for your feathered friends.
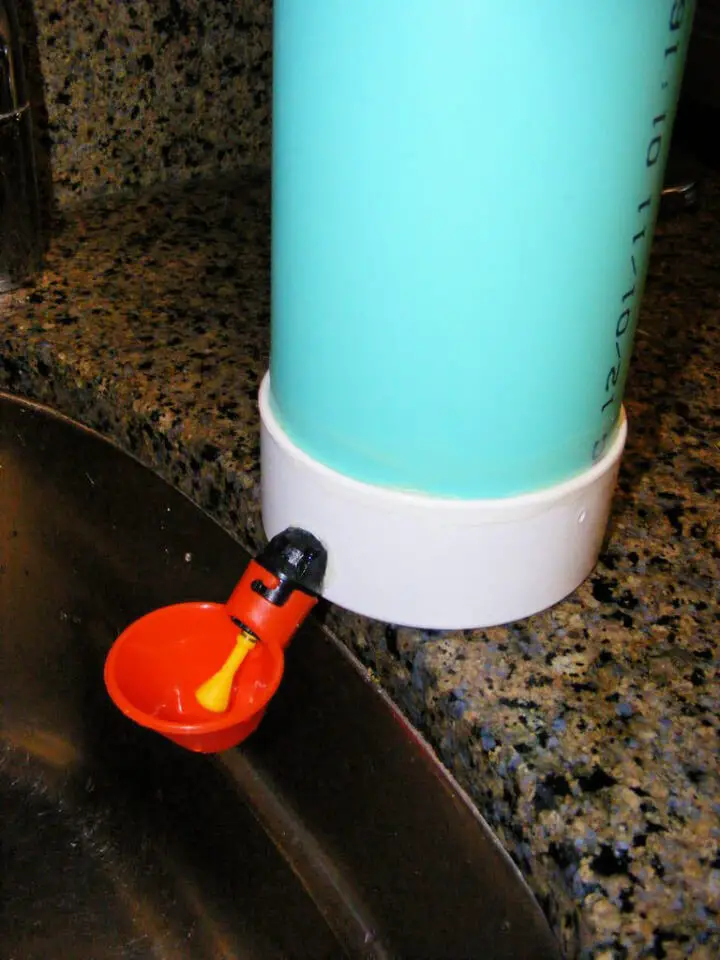
PVC Soda Bottle Chicken Waterer
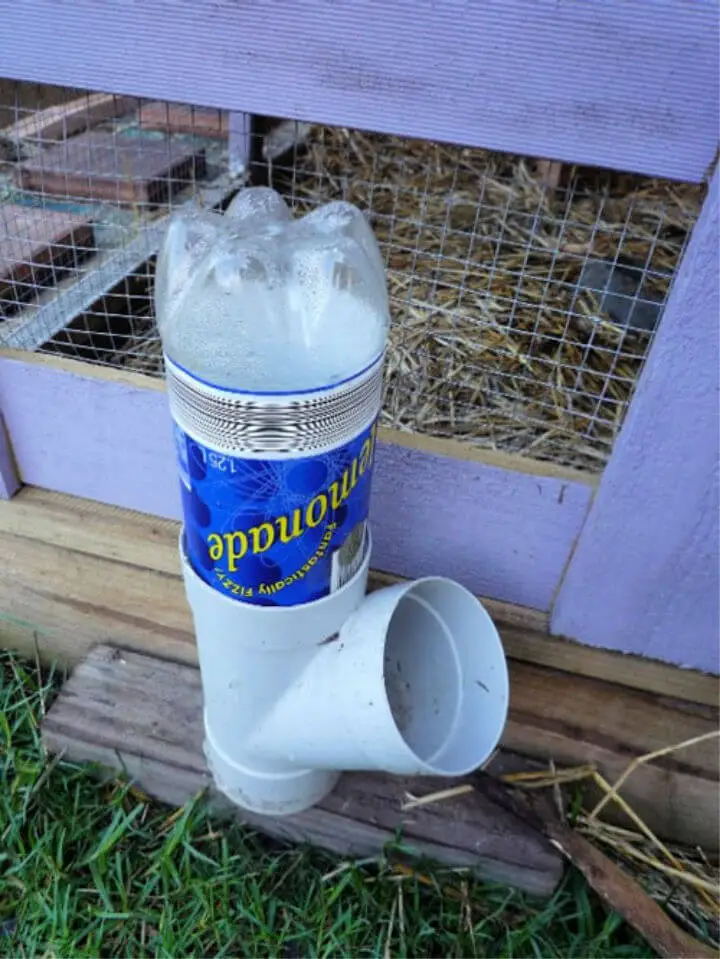
Elevate your chicken-keeping game by utilizing a budget-friendly and straightforward DIY PVC soda bottle chicken waterer. This ingenious contraption requires mere minutes to assemble, comprising only a few essential components: a PVC Y fitting, cap, a soda bottle, a nail, and a trusty hammer. Simply fill the bottle, invert it within the Y fitting, and allow gravity’s gentle pull to deliver a consistent flow of fresh water. Perfect for busy chicken enthusiasts, this DIY solution seamlessly integrates into your daily routine, minimizing the need for frequent refills while guaranteeing your feathered friends always have access to an endless supply of cool, clear H2O.
Handmade Chicken Water Station Idea
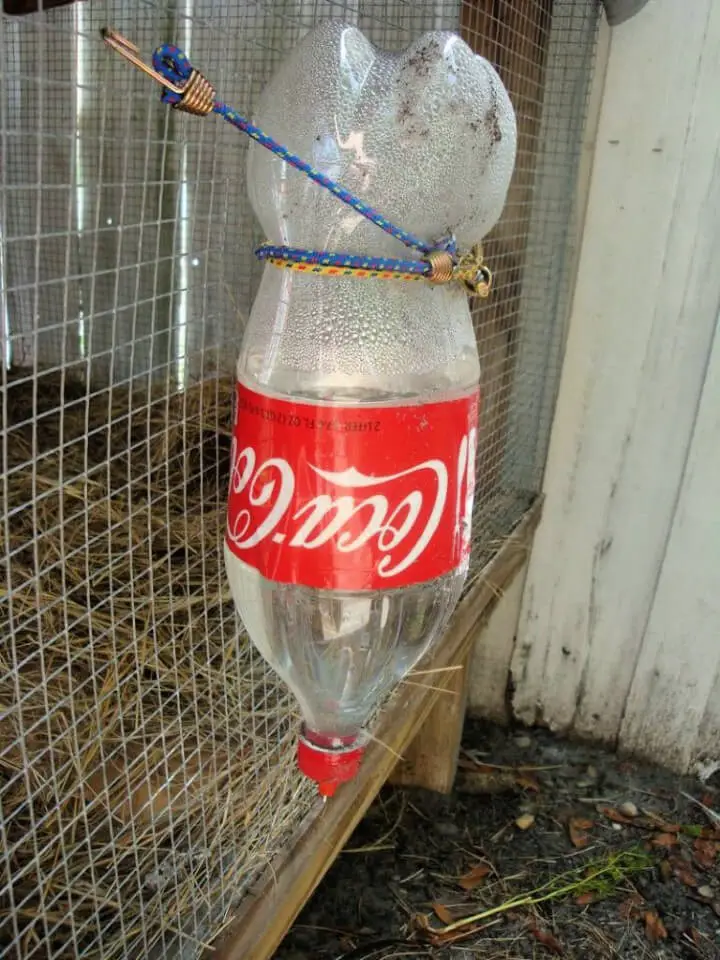
Innovative backyard chicken keepers are often plagued by a common problem: dirty and messy water supplies. Fortunately, a clever and cost-effective solution is available through Georgia’s Cookie Jar, which provides an easy DIY project using everyday household items. The tutorial reveals how to create a clean and efficient watering system using a chicken nipple, an empty 2-liter soda bottle, and some basic tools. Perfect for small flocks, this guide ensures your chickens always have access to fresh water without the usual hassle and mess. With this simple yet brilliant setup, you’ll be able to keep your coop tidy and your feathered friends happy.
DIY PVC Pipe Chicken Waterer
If you’re about to embark on a poultry care project, you might be interested in learning how to create a DIY PVC pipe chicken waterer that’s easy to set up and use. According to Jason from Sow the Land, constructing an efficient watering system is as simple as gathering some basic materials like PVC pipes, a bucket, and nipple waterers. With this homemade solution, you can ensure your chickens stay properly hydrated without breaking the bank or investing too much time. In fact, the installation process is so straightforward that even beginners can get in on the action. For a comprehensive guide on how to build your own DIY waterer, check out Sow the Land’s step-by-step tutorial.
Easy DIY Chicken Waterer
Say goodbye to the hassle of constantly refilling and cleaning chicken waterers with this simple, cost-effective DIY solution. Our Easy DIY Chicken Waterer tutorial is designed to provide a reliable and efficient way to keep your flock hydrated, even on hot days when they need it most. By using a straightforward three-part system centered around a five-gallon bucket, you’ll be able to minimize maintenance while maximizing water availability for any size flock.
Automatic Chicken Watering System Gravity Fed from A Rain Barrel
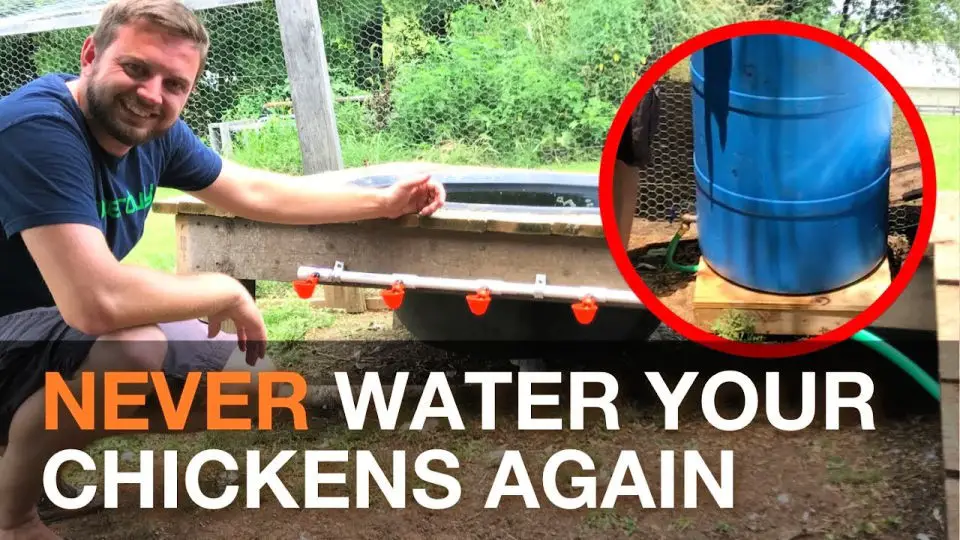
Discover a revolutionary approach to sustainable poultry care with our gravity-powered, rain barrel-fed automatic chicken watering system. This eco-friendly innovation ensures a constant supply of fresh water for your flock, while also being easy to set up and maintain. Whether you’re a backyard enthusiast or small-scale farmer, this DIY project is the perfect solution for streamlining your poultry care routine. Simply follow our step-by-step tutorial to unlock its benefits and take your bird-keeping game to the next level.
Conclusion:
Crafting a DIY chicken waterer, particularly one made from PVC, presents a budget-friendly and effective way to ensure your poultry stays properly hydrated. This comprehensive guide provides everything you need to create a practical water station for your flock, including straightforward assembly instructions and guidelines for maintaining cleanliness. With the 20 DIY chicken waterer ideas, you can confidently provide consistent access to fresh water for your chickens, significantly impacting their overall health and well-being. As the saying goes, a happy chicken is one that has access to clean water – so take this opportunity to elevate your poultry care routine with a homemade waterer tailored to meet the needs of both you and your feathered friends.
