
If you’re on the hunt for unique DIY chandelier ideas, crafting your own is an excellent way to infuse your home with personality. With 25 innovative designs to draw inspiration from, you’ll find the perfect starting point for creating a one-of-a-kind masterpiece that will be the crowning glory of any room. This comprehensive guide aims to empower crafters of all skill levels by providing detailed instructions and expert advice on every aspect of the process, from sourcing materials to bringing your vision to life. So, let’s get started! With this step-by-step approach, you’ll be well-equipped to turn your creative ideas into a breathtaking reality that will leave your guests in awe.
Why Make Your Own Chandelier?
When tackling a DIY chandelier project, it’s not just about adding a decorative piece to your space – it’s an opportunity to infuse your unique style, creativity, and values into your home. Here’s why making your own chandelier is a highly rewarding endeavor:
Authenticity: By crafting your own chandelier, you can tailor the design to perfectly match your personal aesthetic and the atmosphere of your space. Whether it’s rustic, modern, or whimsical, your creation will reflect your individual taste and style.
Financial Flexibility: Store-bought chandeliers often come with a hefty price tag, which can be daunting. However, by making your own, you have complete control over the budget, allowing you to select materials that fit comfortably within your means while still achieving a high-end look.
Sustainability: DIY chandelier projects offer a perfect opportunity to repurpose or upcycle materials, reducing waste and promoting environmental sustainability. You can craft a beautiful chandelier from recycled materials such as bottles, paper, or wood.
Sense of Pride: Completing a DIY project is incredibly fulfilling, and hanging a chandelier that you’ve crafted with your own hands adds a unique story and character to your space that simply can’t be replicated by buying something pre-made.
Quality Time: Building a chandelier can be a fun and collaborative experience to share with family or friends. It’s an opportunity to learn new skills together, create something beautiful as a team, and make memories that will last a lifetime.
By choosing to DIY, you’re not just making a chandelier – you’re creating a personalized space, forging meaningful connections with others, and taking a small step towards a more sustainable lifestyle.
How to Make a Chandelier – Step by Step
Transforming a simple space into an elegant oasis without sacrificing your wallet’s integrity is an achievable feat. By leveraging humble craft supplies and infusing them with innovative flair, you can create a show-stopping gold chandelier that would put high-end boutique alternatives to shame. This comprehensive tutorial will lead you through the process with meticulous attention to detail, ensuring that even the most novice of DIY enthusiasts can replicate this masterpiece.
Materials Needed
To create a unique and engaging interactive display, you’ll need some essential materials. Start by gathering a compass to draw circles on the board, a plastic board that can be purchased from a craft store like Michael’s, an X-Acto knife for precision cuts, and beads in affordable options to stay within budget. For added depth and dimension, consider using gold reflective paper or contact paper, as well as a plastic sheet from a hardware store like Home Depot. A hot glue gun will come in handy when attaching these components together. To add some texture and visual interest, incorporate decorative placemats or foam sheets/hard poster boards into your design. If you want to take things to the next level, consider incorporating remote controlled LED light strips for an immersive experience. Fishing line can be used to create a sense of movement or flow in your display, while book rings from dollar stores can provide a convenient and affordable way to mount components. Finally, a cup hook will allow you to securely fasten everything together, bringing your vision to life.
Steps to Make Your Chandelier
To create your chandelier’s foundation, start by using a compass to draw two circles on your plastic board with diameters of 10 inches and 8 inches. Cut these out using an X-Acto knife. Next, prepare your beads by measuring and cutting them into varying lengths. These will dangle from the circular bases, creating a tiered effect when spaced out carefully. Some beads should be longer than others to achieve this look.To assemble the structure, begin by cutting a plastic sheet into a band that fits around the edges of the circular bases. Cover this band with gold reflective paper, securing it with hot glue if necessary. Then, connect your decorated band to the circular bases, forming the chandelier’s main framework.For added texture and visual interest, use a decorative placemat as the background. Cut it to size and attach it to your structure. Additionally, create decorative squares from foam sheets or poster board covered in gold paper. Attach these to your chandelier for an extra touch of elegance.To complete the lighting aspect, attach remote-controlled LED strips to the bottom part of the chandelier. Place the battery pack on top, securing any wires in the middle with tape for neatness.Finally, create a hanging mechanism by using sturdy fishing lines to make six strings that will mount your chandelier. Attach these strings to the main body of the chandelier and use book rings to collect them, making it easier to mount and remove the whole assembly from a cup hook.
Fine-tuning Your Creation
Upon completing the installation of your chandelier, it’s likely that you’ll need to fine-tune certain elements to achieve the desired aesthetic. This may involve adjusting the length of the beads or selecting a specific lighting type – such as bright white or soft white – depending on your personal preference and the intended ambiance of the room. By taking the time to make these adjustments, you can ensure that your chandelier perfectly complements its surroundings.
Video Tutorial
Crafting a DIY gold chandelier is an exciting project that not only adds a touch of elegance to any room but also allows for personal expression and sophistication. For those who prefer visual learning, a step-by-step video tutorial on YouTube provides an invaluable resource, complementing the written guide perfectly. The combination of both formats enables a deep understanding of crafting techniques in an easily digestible manner. With dedication and imagination, even the most budget-conscious individuals can create a breathtaking result that will leave friends and family impressed.
FAQs On DIY Chandelier
Embarking on the creative journey of crafting your own chandelier can be an incredibly fulfilling experience, allowing you to infuse your home with a unique and personalized touch. As you begin this DIY adventure, it’s natural to have questions. To help guide you, below are answers to some commonly asked queries, providing valuable insights and practical advice to ensure a successful project.
What basic tools do I need to make a chandelier?
To embark on a DIY chandelier project, you’ll require a set of essential tools and materials. A compass or template is necessary for drawing precise circles, while an X-Acto knife ensures clean and accurate cuts. Assembling the various components will necessitate a hot glue gun, which allows for strong and permanent bonds. In addition to these primary tools, you’ll also need basic craft supplies, such as beads, decorative paper, or LED lights, depending on the specific design you envision. With these fundamentals in place, you’re ready to begin crafting your unique chandelier creation.
Can I make a chandelier if I’m not very crafty?
If you’re new to DIY chandelier projects, don’t worry – there are many beginner-friendly designs that come with clear, step-by-step instructions. To build your skills, start with a simple project and gradually move on to more complex ones as your confidence grows.
How can I ensure my DIY chandelier is safe to use?
When crafting custom lighting fixtures, prioritizing safety is crucial. To minimize risks, consider the following essential precautions: Firstly, opt for LED lights as they generate less heat, thereby reducing the likelihood of fires. Next, ensure all components are securely fastened to prevent the fixture from falling or becoming dislodged. If your design involves electrical work, it’s wise to consult with a licensed electrician to guarantee compliance with safety standards and regulations.
What are some ideas for eco-friendly chandeliers?
Eco-friendly chandeliers offer a unique opportunity to repurpose and reuse existing materials, reducing waste and promoting sustainability. This can be achieved by transforming items such as glass bottles, paper, old lampshades, or beads into stunning lighting fixtures. Additionally, natural materials like wood and feathers can also be incorporated into the design. Furthermore, pairing these innovative chandeliers with energy-efficient LED lights can significantly minimize environmental impact.
How much can I expect to spend on a DIY chandelier?
The DIY chandelier’s price tag is quite versatile, influenced by the materials and design chosen. On one end of the spectrum, it’s feasible to craft a stunning piece for under $50 by leveraging affordable resources and creatively repurposing items already at your disposal. Conversely, more intricate designs or the incorporation of high-end materials will naturally drive up the cost.
Can I make a chandelier without using lights?
A popular trend is creating decorative fixtures that resemble chandeliers but lack the functionality of providing light. These ornate pieces can elevate the aesthetic appeal of a room without requiring electrical wiring. One way to achieve this look is by using unconventional materials such as feathers, beads, or flowers to craft a show-stopping visual display.
Where can I find inspiration for my chandelier design?
Discovering inspiration for DIY chandeliers can be a fun and creative journey. One way to spark ideas is by exploring various sources such as home decor blogs and websites, social media platforms like Pinterest and Instagram, craft stores and home improvement stores, and even nature itself for organic and rustic designs. By taking the time to explore different options, you’ll be able to find a design that reflects your personal style and complements the ambiance of your space. What’s more, creating a chandelier is not just about adding light to a room – it’s an opportunity to infuse your home with a piece of yourself. So, take pleasure in the process, and don’t be hesitant to experiment with different materials and designs to bring your unique vision to life.
25 DIY Chandelier Ideas: How to Make a Chandelier
Transform your space into a warm and inviting oasis by crafting your own bespoke chandelier. Explore 25 innovative DIY designs that will guide you in creating a one-of-a-kind lighting fixture that reflects your personal style. As you delve into these creative projects, discover the perfect blend of form and function to set the tone for any room.
How to Make a Wine Glass Chandelier
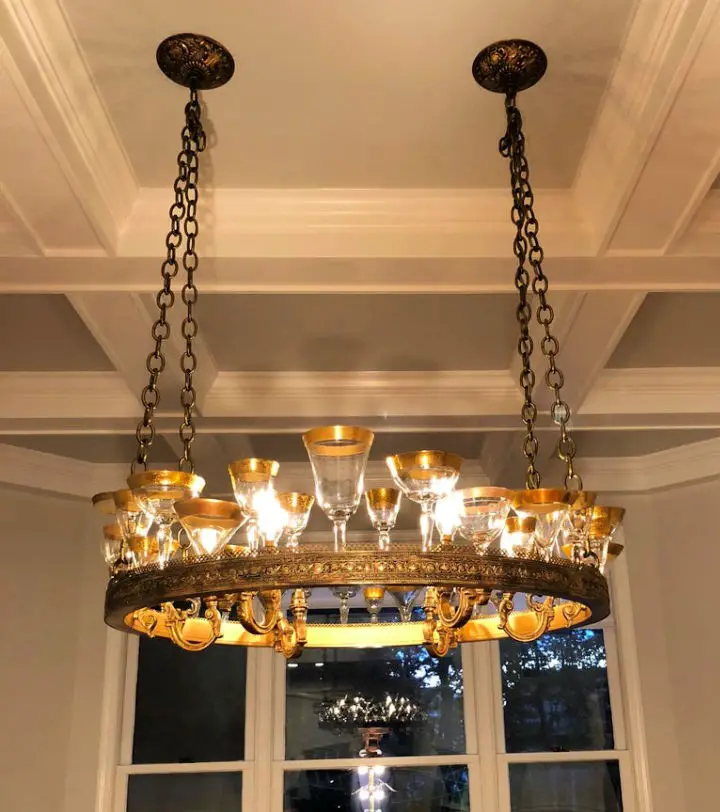
Elevate your space’s ambiance by reimagining lighting with a one-of-a-kind Wine Glass Chandelier project. For those who relish DIY endeavors and sustainable design, this innovative fixture seamlessly blends functionality and flair, instantly transforming any room into an inviting atmosphere. To embark on the step-by-step construction journey of this stunning piece, head to Instructables for expert guidance. By fusing creativity with a personal touch, you’ll craft a show-stopping centerpiece that reflects your unique style and illuminates your home.
DIY Snowflake Chandelier at Home
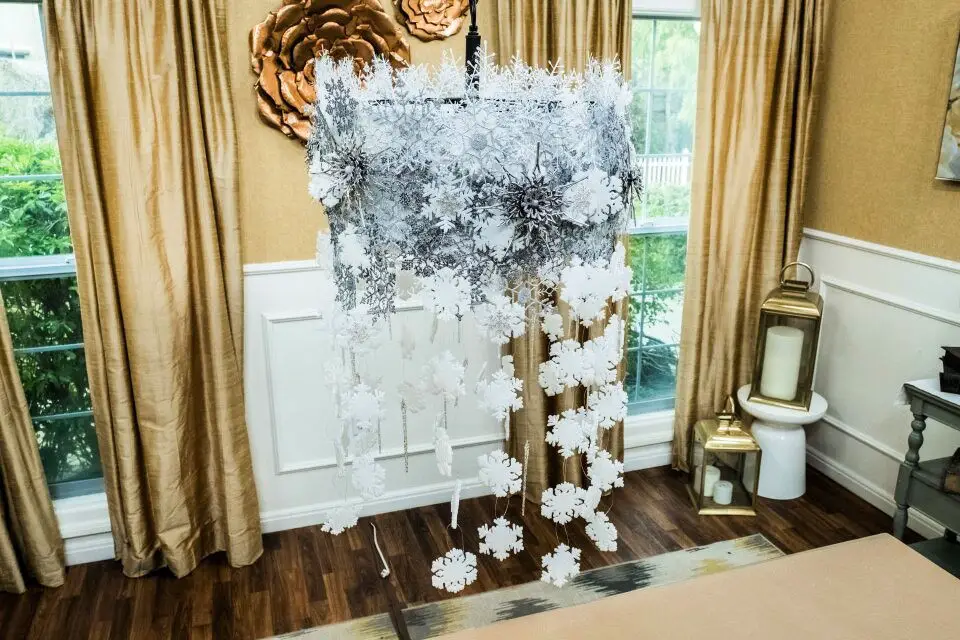
Transform your living space into a winter wonderland by crafting a mesmerizing DIY Snowflake Chandelier! Following Paige Hemmis’ straightforward guide on the Hallmark Channel, you’ll be able to create this enchanting piece in no time. To get started, swap out traditional lighting for energy-efficient LED bulbs for added safety. Next, wrap your chandelier in an elegant ribbon and adorn it with intricately designed snowflakes and icicles that will add a touch of magic to any room. This effortless project is perfect for adding a festive ambiance to your home, making it an ideal centerpiece for Hallmark Channel’s Winterfest celebrations.
Making Your Own Paper Chandelier

Transform your dining room into an enchanting sanctuary with a breathtaking DIY Paper Leaf Chandelier. This versatile masterpiece effortlessly complements fall and Christmas decor, exuding an air of sophistication and coziness. The subtle fusion of gold and pale pink hues creates a captivating ambiance that will leave your guests in awe. Thanks to Aleene’s Instant Tacky Glue Dots, the assembly process is effortless and mess-free, making it an ideal project to share with loved ones. Simply follow a few easy steps – from cutting the intricate leaf pattern to securely attaching each piece with glue dots – and conclude your masterpiece with a heartfelt touch. This creative endeavour not only yields a stunning centerpiece but also serves as a thoughtful gesture for your guests. Discover more about this exquisite project at Lia Griffith and unlock the magic of elevating your dining space into a true work of art.
Rustic Dollhouse Chandelier With Candles
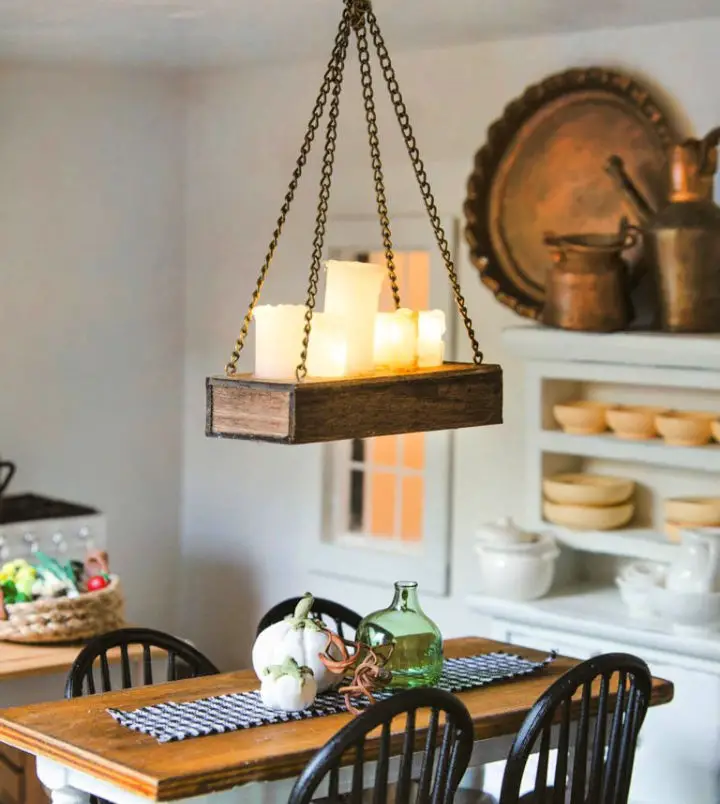
Transform your miniature world into a warm and inviting space by crafting a stunning DIY Rustic Dollhouse Chandelier. This budget-friendly project requires minimal supplies, easily accessible at your local dollar or hardware store. With the help of basswood, nylon spacers, fairy lights, and jewelry elements, you’ll create a mesmerizing centerpiece for your dollhouse that exudes ambiance and aesthetic appeal. Whether you’re aiming to add warmth and functionality or simply seeking a unique decorative piece, this step-by-step guide is designed to inspire creativity and elegance in your miniature space.
Make a Tassel Chandelier
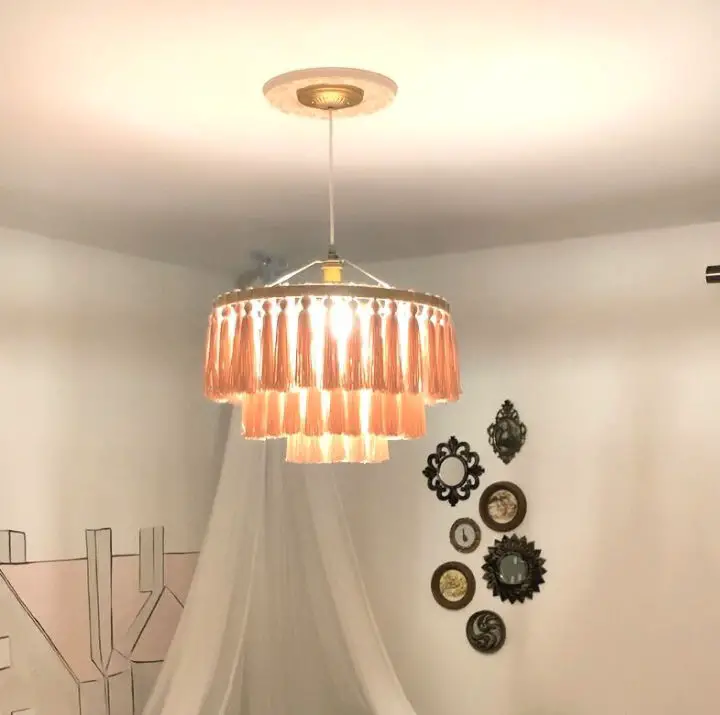
Transform your home decor with a show-stopping DIY Tassel Chandelier that redefines the ordinary into something extraordinary. By upcycling an old lampshade and embroidery hoops, you can create a multi-tiered masterpiece adorned with intricately crafted tassels. While 75 tassels might seem like a daunting task, a little creativity and some readily available yarn are all it takes to achieve this stunning piece at a fraction of the cost of a store-bought alternative. For a detailed guide on crafting this eye-catching addition to any room, visit PositivelySTRONG, the perfect resource for DIY enthusiasts seeking to infuse their space with personal flair.
DIY Floral Chandelier With Fairy Lights

Transform your living space into an enchanting retreat by crafting a DIY Floral Chandelier with Fairy Lights at The Nomad Studio. In under an hour, you can create a captivating hanging piece that exudes warmth and charm thanks to its soft, fairy-lit glow. This versatile project is perfect for bedrooms, dining areas, or even as unique DIY wedding decor, allowing your creativity to flourish. To get started, gather a few essential items: a metal wreath ring, lush greenery, floral accents, fairy lights, and a handful of additional supplies. Follow our easy-to-follow step-by-step guide to assemble a breathtakingly beautiful floral chandelier that effortlessly adds a touch of whimsy to any room.
How to Make Your Own Branch Chandelier

Bring rustic charm into your home by transforming fallen garden branches into a stunning DIY Branch Chandelier. This unique project is perfect for those who adore the elegance of natural decor. Winter’s abundance of broken branches makes it an ideal time to start. Simply gather the branches, secure them with wire, and hang them from your light fixture, adjusting their balance as needed. To add an extra touch of magic, incorporate fairy lights that will not only illuminate but also create a cozy ambiance both indoors and outdoors. For a comprehensive guide on how to bring this rustic masterpiece to life, head over to DesiDIY.
DIY Industrial Wood Beam Chandelier

Embark on an inspiring DIY adventure by creating an Industrial Wood Beam Chandelier that seamlessly blends rustic charm with modern flair. This step-by-step guide takes you on a journey of self-discovery as you craft a one-of-a-kind piece that not only adds warmth and sophistication to any room but also serves as a testament to your creative prowess. Whether you’re looking to elevate the ambiance in your home or office, this chandelier’s unique fusion of reclaimed wood and industrial elements is sure to captivate and delight. So, join us on this transformative journey, where the art of DIY meets the magic of self-expression!
Making a Chandelier Out of Feather
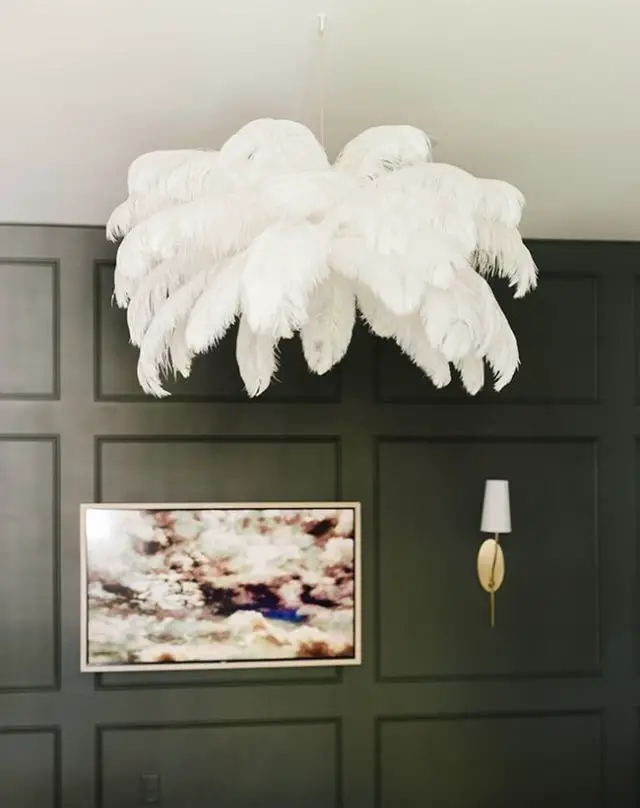
Transform any room into a one-of-a-kind haven with a show-stopping DIY Feather Chandelier, crafted by Jenna Sue Design’s expert hands-on guide. Without straining your wallet, this step-by-step tutorial equips you to turn ordinary spaces into extraordinary ones, infusing rooms with whimsy and sophistication. Using readily available materials like ostrich feathers and foam, you’ll create a breathtaking faux chandelier that effortlessly adds personality to playrooms, offices, or dining areas. Empower yourself to bring your creative vision to life and give your space an unforgettable touch.
DIY Balloon Chandelier for Party Decoration
Transform your party decor into a whimsical masterpiece with an easy-to-create DIY balloon chandelier that will leave your guests in awe. This ingenious project takes simple balloons and turns them into a show-stopping centerpiece, perfect for any celebration. To bring this creative vision to life, you’ll need a few essential supplies: balloons in a range of colors, a styrofoam ball, and some other simple materials. The best part? The process is surprisingly straightforward, allowing you to focus on the excitement of your event rather than getting bogged down in complexity. When you’re ready to take your party planning to the next level, head over to The House That Lars Built for a comprehensive tutorial that will guide you every step of the way.
Homemade Wagon Wheel Chandelier

Bring the warmth and charm of rustic decor into your home with a one-of-a-kind Wagon Wheel Chandelier. This straightforward, easy-to-follow guide empowers you to create a unique lighting fixture that adds character to any room. With its clear instructions, this DIY project is perfect for anyone looking to add a personal touch to their living space. As you craft your chandelier, you’ll discover the joy of transforming your surroundings with a creative and engaging activity. Meanwhile, explore innovative DIY wreath ideas in our step-by-step guide and unlock the secrets to creating beautiful wreaths for any occasion.
Simple DIY Hanging Flower Chandelier
Transform your home’s ambiance with a one-of-a-kind DIY Hanging Flower Chandelier that effortlessly brings nature indoors. This elegant display is perfect for enhancing dining rooms, entryways, or any space in need of a fresh touch. By repurposing long-stemmed flowers and an embroidery hoop, you’ll create a breathtaking piece that’s surprisingly simple to make using basic supplies like washi tape, clear thread, and a few handy tools. This charming craft project is ideal for special occasions like Mother’s Day or Easter brunch, allowing you to enjoy its beauty throughout the day. To recreate this stunning display, follow The Sweetest Occasion’s easy-to-follow steps and get ready to elevate your home decor with a truly unique piece.
How to Do You Make a Beaded Chandelier
Transforming your living space with sophistication and imagination is now within reach through the art of crafting a unique DIY Beaded Chandelier. Drawing inspiration from high-end designs, this innovative project demonstrates that exceptional decor can be achieved without compromising on budget. By utilizing basic materials such as wooden beads and embroidery hoops, you can recreate a designer piece at a fraction of its original cost. This endeavour is perfect for those seeking to infuse their home with personal style without breaking the bank. Rather than being held back by luxury item price tags, embark on this captivating and affordable DIY project. For a comprehensive guide, visit The House That Lars Built. With creative enthusiasm, let your imagination run wild and start crafting today!
Easy DIY Minimal Floral Chandelier
Transform your gathering spaces with Homey Oh My’s innovative DIY Minimal Floral Chandeliers. This creative solution to table decor challenges adds a touch of sophistication and elegance to any setting, making it perfect for both real and artificial flowers. Unlike traditional floral arrangements that only last a season, this DIY project ensures your creativity can be enjoyed for years to come.
With materials like embroidery hoops, floral wire, and your preferred choice of blooms, you can customize the look to suit your personal style. Simply follow the easy steps to craft your own stunning hanging floral masterpiece, without the need for permanent ceiling fixtures or professional installation. This DIY project is ideal for anyone looking to elevate their space with timeless beauty and a unique decorative touch.
How to Make Orb Chandelier
Transform your home décor with ease by creating a stunning DIY Orb Chandelier using ordinary items at an affordable $40. This budget-friendly project, featured on What’s Ur Home Story, combines creativity and sophistication to produce a luxurious lighting fixture that rivals high-end designs. Perfect for DIY enthusiasts looking to add a personal touch and brighten up any room.
How to Make a Paper Tube Chandelier
Unleash the creative genius within by transforming your space into a vibrant haven with DIY Paper Tube Chandeliers! This ingenious project combines functional lighting with stunning decor, perfect for those who crave bold and eye-catching aesthetics. By utilizing easily sourced materials like paper, embroidery hoops, and twine, you can tailor the hues to harmonize with your space’s unique charm. Whether you choose to suspend a bulb for soft ambient light or appreciate its beauty as is, this DIY endeavor guarantees a one-of-a-kind addition that will captivate your senses. For an in-depth tutorial on crafting these dazzling chandeliers, visit The House That Lars Built and get ready to unleash your inner creativity!
How to Build a Fringe Chandelier
Transform your space with a one-of-a-kind fringe chandelier that won’t dent your wallet. This creative project, inspired by high-end vintage finds, allows you to craft a show-stopping piece for just $150. To get started, gather lamp shade rings, brass lamp banding, fringe trim, a brass pendant cord kit, and some common tools. The process involves meticulous attention to detail as you attach the fringe and banding to the lampshade rings, requiring patience but yielding a truly stunning decor piece. For a step-by-step guide on how to bring this eye-catching chandelier to life, head over to Studio DIY. This fun, engaging, and budget-friendly project is sure to infuse any room with personality and warmth.
Indoor Polish Chandelier Planter Ideas
Transforming a garden into an enchanting oasis is achievable through this step-by-step Polish Chandelier Planter tutorial. As the seasons transition, this project harmoniously merges aesthetics with functionality, making it an ideal springtime endeavor. Partnering with Ecoscraps, a pioneer in converting food waste into organic gardening products, this guide seamlessly integrates eco-friendliness and creativity. Whether you’re nurturing a small urban garden or designing a showstopping hanging planter, the easy-to-follow instructions and minimal materials required make this project accessible to all. For further inspiration, visit The House That Lars Built for expert guidance on crafting this eco-conscious masterpiece.
Macrame Boho Chandelier With Fairy Lights
Transform the ambiance of any indoor or outdoor space with an enchanting bohemian-inspired DIY Macrame Boho Chandelier, featuring fairy lights and a warm, whimsical glow. This accessible project requires no complex wiring and is perfect for those new to macrame, involving simple knots that yield a stunning result. By upcycling an embroidery hoop, macrame cord, chandelier chain, and fairy lights, you can create your very own chic lighting fixture that effortlessly elevates your décor. For a comprehensive guide on making this mesmerizing chandelier, visit The DIY Mommy, where you’ll find the perfect blend of creativity and practicality.
Upcycled Paper Flower Chandelier
Elevate your living space with an eco-conscious makeover by crafting a breathtaking DIY upcycled paper flower chandelier. This innovative project combines simplicity and impact to bring the outdoors in. Begin by revitalizing a thrifted chandelier with a thorough cleaning, restoring it to its former glory. Then, infuse it with handmade paper flowers and leaves for a unique, personalized touch. As you create this stunning piece, remember that it’s not just about adding beauty to your home – it’s also about embracing sustainability through the use of biodegradable and recycled materials. For a comprehensive guide on crafting your own garden-inspired masterpiece, visit The House That Lars Built.
DIY Hanging Flower Chandelier for Party
Transform your party atmosphere effortlessly with a show-stopping DIY hanging flower chandelier, perfect for any celebration. This stunning centerpiece is surprisingly simple to create and packs a big punch in terms of ambiance. By combining the natural beauty of seasonal flowers with a unique hoop structure, you’ll create a memorable scene that will leave your guests in awe. For a step-by-step guide on how to bring this vision to life, head over to We Are Scout for a comprehensive tutorial and materials list.
Handmade Light Up Boho Chandelier
Transform your outdoor space into a whimsical oasis by crafting your own Light-Up Boho Chandelier. Perfect for adding a touch of magic to outdoor weddings or intimate gatherings, this DIY project requires just a few simple materials and some creativity. The foundation of the chandelier is a tomato cage, which provides a sturdy base for draping sheer and lace fabric in a beautiful, flowing pattern that embodies the bohemian aesthetic. What truly sets this piece apart, however, is its ability to change colors at the touch of a button on your smartphone, thanks to the Osram Lightify Gardenspot Mini Lights. This feature allows you to customize the chandelier’s color scheme to fit any mood or atmosphere, making it an ideal addition to any outdoor décor. With easy assembly and a range of color options available, this enchanting creation is sure to become a focal point in your outdoor space. For step-by-step instructions and a list of required materials, visit Mark Montano’s blog for inspiration and guidance.
DIY Outdoor Chandelier Without Electricity
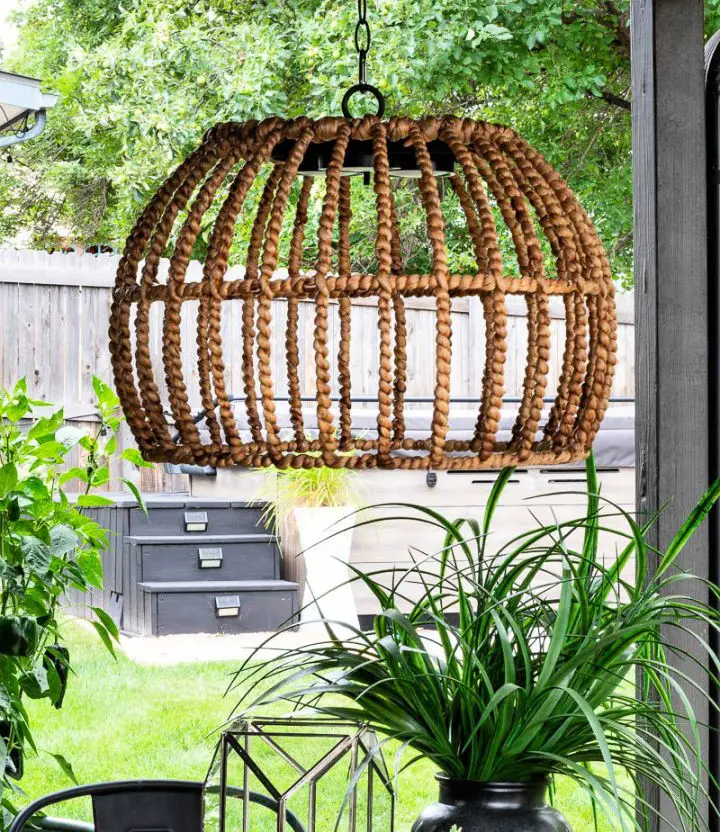
Transform your outdoor dining area into a warm and inviting oasis by creating a unique DIY chandelier that requires no electricity. Garrison Street Design Studio’s 6-step guide will walk you through the process of selecting the perfect basket, assembling with battery-powered lights, and more. This effortless tutorial is ideal for those seeking a simple yet stunning addition to their outdoor space, without the hassle of wiring. Let your patio dining experience be elevated by this enchanting and magical ambiance.
Make Your Own Floral Chandelier
Transform any celebration into a visually stunning event by crafting a breathtaking DIY floral chandelier garland. Whether you’re hosting a dinner party or a summer soiree, this show-stopping piece of art brings an explosion of color and freshness to your decor. By combining the softness of silk flowers with the vibrancy of fresh blooms, you’ll create an eye-catching display that’s equal parts elegant and effortless. With a step-by-step guide from Sugar & Cloth, you can bring this beautiful and budget-friendly project to life, impressing your guests and adding a touch of whimsy to your home decor.
Upcycle Beer Chandelier Craft
Discover the art of upcycling with a creative twist on recycling your living space. By transforming discarded craft beer packaging into a one-of-a-kind chandelier, you’ll not only reduce waste but also add a touch of warmth and originality to any room. Our step-by-step guide at Refab Diaries takes you through the process of crafting an eco-friendly light fixture that’s both functional and visually striking. From sourcing materials to adding the finishing touches, this tutorial is designed to make your DIY project not only fun but also rewarding, while avoiding common mistakes along the way.
Conclusion
As you complete the journey of creating a custom chandelier, you’ll be rewarded with a truly personalized touch to your home decor. The process involves selecting the right materials, following precise step-by-step guides, and ensuring your DIY project is both visually stunning and safe. This transformative experience will revolutionize your space with a one-of-a-kind light fixture that perfectly captures your unique personality. By diving into 25 inspiring DIY chandelier ideas, you’ll not only spark your creativity but also gain valuable knowledge on bringing your vision to life. So, take the leap, unleash your imagination, and illuminate your home with a breathtaking, handcrafted chandelier that tells its own captivating story.
