Crafting a personalized chaise lounge is an engaging DIY venture that harmonizes manual dexterity with the pleasure of owning bespoke furniture for both indoor and outdoor settings. With 16 complimentary plans available, discovering a design that aligns with your proficiency level and aesthetic inclinations has never been more accessible. These blueprints provide a clear, sequential guide, encompassing tool selection, material procurement, and finishing touches, allowing you to bring your vision to life. By understanding the fundamentals of building a chaise lounge, you’ll unlock new possibilities for home décor and functionality. Whether it’s creating an alfresco oasis or a cozy reading nook indoors, a DIY chaise lounge is a versatile addition that can elevate any space. The process involves strategic planning, precise cutting, frame construction, and more, but the end result is a custom piece that embodies your unique style and expertise. With this foundation established, you’re ready to embark on the journey of crafting your own chaise lounge, starting with the essential tools, materials, and steps required to bring your project to fruition.
Why Build Your Own Chaise Lounge?
Considering building your own chaise lounge is a savvy decision for DIY enthusiasts and furniture aficionados alike, thanks to the numerous benefits it offers. By taking on this project, you’ll not only save money but also gain unparalleled control over design elements, techniques, and materials. Here’s why it’s an attractive prospect:
For starters, building your own chaise lounge is a cost-effective way to furnish your outdoor space. The cost of purchasing a single piece can be prohibitively expensive, with prices reaching upwards of $600 or more. By taking matters into your own hands, you’ll be able to allocate those funds elsewhere or pocket the savings.
Customization is another significant perk. With a DIY approach, you’re free to select materials, colors, and sizes that perfectly align with your personal style and existing outdoor decor. Whether you’re aiming for a cohesive look or want to create something truly unique, the power of choice is firmly in your grasp.
Tackling this project also presents an opportunity to hone your woodworking skills. By working with different materials and techniques, you’ll be able to refine your abilities and gain confidence in your capacity to build.
Moreover, there’s a certain satisfaction that comes from crafting something with your own hands. Using your DIY chaise lounge, knowing you built it, adds a layer of personal pride and satisfaction that store-bought furniture simply can’t replicate.
For those concerned with sustainability, building your own furniture offers an eco-friendly option. By choosing recycled or sustainably sourced materials, you’ll be reducing the environmental impact associated with mass-produced items.
Ultimately, building your own chaise lounge is a decision that will yield numerous benefits, from cost savings to customization opportunities and personal satisfaction. With a little creativity and effort, you can create a beautiful and functional piece that enhances your outdoor space.
How to Build a Chaise Lounge
If you’re craving a charming and elegant outdoor seating area but don’t want to break the bank on store-bought options, we’ve got good news for you! With this DIY guide, you’ll learn how to create your own stylish and cozy lounger, inspired by Home Pro Hero’s popular YouTube tutorial. By following our easy-to-follow steps, you’ll be lounging in comfort in no time, all without sacrificing your budget.
What You’ll Need:
To undertake the project, you will need to gather a few essential tools. First and foremost, you’ll require a tape measure for taking precise measurements. Additionally, a compact chop saw or circular saw is necessary for making accurate cuts in your cedar boards. A drill will also come in handy for driving screws and other fasteners. With these tools at the ready, you can begin gathering the materials needed to complete the project.
The list of required materials includes nine 2x6x8 cedar boards, two 2x2x8 cedar boards, and a variety of fasteners. You’ll need two and a half inch deck screws for assembling the frame, as well as trim screws for securing any exterior trim pieces. For attaching the lid hinges, you’ll require four-inch black hinges. Finally, don’t forget to grab some Liquid Nails (adhesive) for bonding any critical joints together.
Step-by-Step Guide:
To bring your outdoor lounger to life, start by planning and designing it using software like SketchUp to ensure a perfect fit in your desired space. You can also optimize your lumber cut list with AI-powered tools like ChatGPT to minimize waste. Once you have a clear design, move on to cutting all the necessary pieces according to your cut list. It’s most efficient to make all your cuts at once.Next, focus on building the frame of your lounger using 2×6 cedar boards. Apply Liquid Nails to all joints before securing with screws for added durability. For outer sections, use trim head screws for a cleaner look.The stringers will support the slats that hold the cushion in place. Attach these to the frame using screws and Liquid Nails. Make sure to keep them flush to the ground for stability.For the slats themselves, space each 2×6 piece evenly across the stringers using deck screws since they won’t be visible. Apply an inch and three-quarter gap between each plank to ensure even placement.The legs of your lounger require a slight notch cut for added stability. Cut them carefully and secure them to the frame with adhesive and screws for robust support.The backrest is another crucial component. Use 2×2 boards for the frame and 2×6 slats, cutting the latter a half-inch shorter to fit snugly. Attach the backrest with hinges to allow for adjustable positions.Finally, add some finishing touches by considering armrests for extra comfort and utility. Apply a final trim piece across the back with Liquid Nails and trim head screws for a polished look. You can also add an optional brace at the bottom back for added structural integrity.
Time and Cost:
This project’s duration is approximately 6 hours, distributed across several days to finish. The total expenditure may exceed $200, contingent upon the materials selected and any additional features, such as armrests, that are incorporated.
Maintenance Tips:
Regularly inspect your wooden structures and take proactive measures to maintain their integrity. This includes checking and securing loose screws, as needed. Additionally, consider applying a high-quality wood sealant once a year to provide an extra layer of protection against the elements. By staying on top of these maintenance tasks, you can help extend the lifespan of your wooden features and keep them looking their best.
Video Tutorial
To further enhance your DIY experience and take your building skills to the next level, I recommend watching Home Pro Hero’s video tutorial on building this lounger. The step-by-step visual guide perfectly complements this guide, making it easy to follow along and understand each technique. By following these steps, you’ll not only save money by creating your own furniture but also end up with a custom piece that perfectly fits your personal style and outdoor space. With every piece in place, you’ll be enjoying your handcrafted lounger in no time, feeling proud of your DIY accomplishments.
FAQS on DIY Chaise Lounge Building
To facilitate the construction of your own chaise lounge, we’ve compiled a list of commonly asked questions that provide valuable insights and expert guidance, empowering you to tackle this DIY project with confidence.
What materials do I need to build a DIY chaise lounge?
To construct a chaise lounge, several essential components are typically required. These include cedar boards of varying sizes, dependent on the desired design. Additionally, deck screws and trim screws serve as crucial fasteners. Black hinges provide a sleek and sturdy means of connecting the lounge’s various parts. A reliable adhesive like Liquid Nails helps secure these elements in place. Furthermore, a well-stocked toolbox should contain items such as tape measures, saws, and drills to facilitate the construction process. It’s worth noting that the specific materials needed may differ depending on the chosen plan or design.
How long does it take to build a chaise lounge?
The time required to construct a chaise lounge is typically around six hours, although the process may unfold over several days as it allows for adequate drying periods for adhesives and finish applications.
How can I customize my DIY chaise lounge?
Enhance the comfort and aesthetic of your chaise lounge by experimenting with various customization options. Start by selecting from a range of materials or wood types, allowing you to seamlessly integrate the piece into your existing décor. For added personality, apply a stain or paint in a color that complements your surroundings. Alternatively, modify the dimensions to create a perfect fit for your space, ensuring a sense of harmony and balance. Finally, consider adding features like armrests or adjustable backrests to further optimize the lounging experience.
Is it cheaper to build my own chaise lounge?
Constructing a chaise lounge from scratch can yield significant cost savings compared to purchasing one from a store. Traditional retail prices for such lounges often exceed $600, while DIY projects using affordable materials could potentially shave off over half of that total, with costs ranging from around $100 to $200 depending on the specific components chosen.
What woodworking skills do I need to build a chaise lounge?
While beginners can create a chaise lounge with basic to intermediate woodworking skills, having proficiency in fundamental techniques such as measuring, cutting, drilling, and adhering to a design plan is crucial for success. However, it’s essential to note that some projects may necessitate more complex methods, prompting the need for a review of the chosen plan before commencing construction.
Can I use recycled materials to build a chaise lounge?
When it comes to building with sustainability in mind, incorporating recycled materials into your project can be a game-changer. Wooden pallets or reclaimed wood, in particular, offer an attractive combination of cost-effectiveness and eco-friendliness. However, it’s crucial to verify the safety, sturdiness, and outdoor suitability of these materials to ensure a structurally sound and environmentally responsible outcome.
How do I maintain my DIY chaise lounge?
To keep your chaise lounge in top condition, consider the following essential maintenance tasks: Ensuring all screws are tightened to prevent any wobbling or structural compromise, applying a wood sealant annually to shield it from the elements and weathering, and storing or covering it during harsh weather conditions to prolong its lifespan. By addressing these fundamental concerns, you’ll feel more empowered and confident in tackling your DIY chaise lounge project, ultimately creating a customized piece that serves your outdoor space effectively.
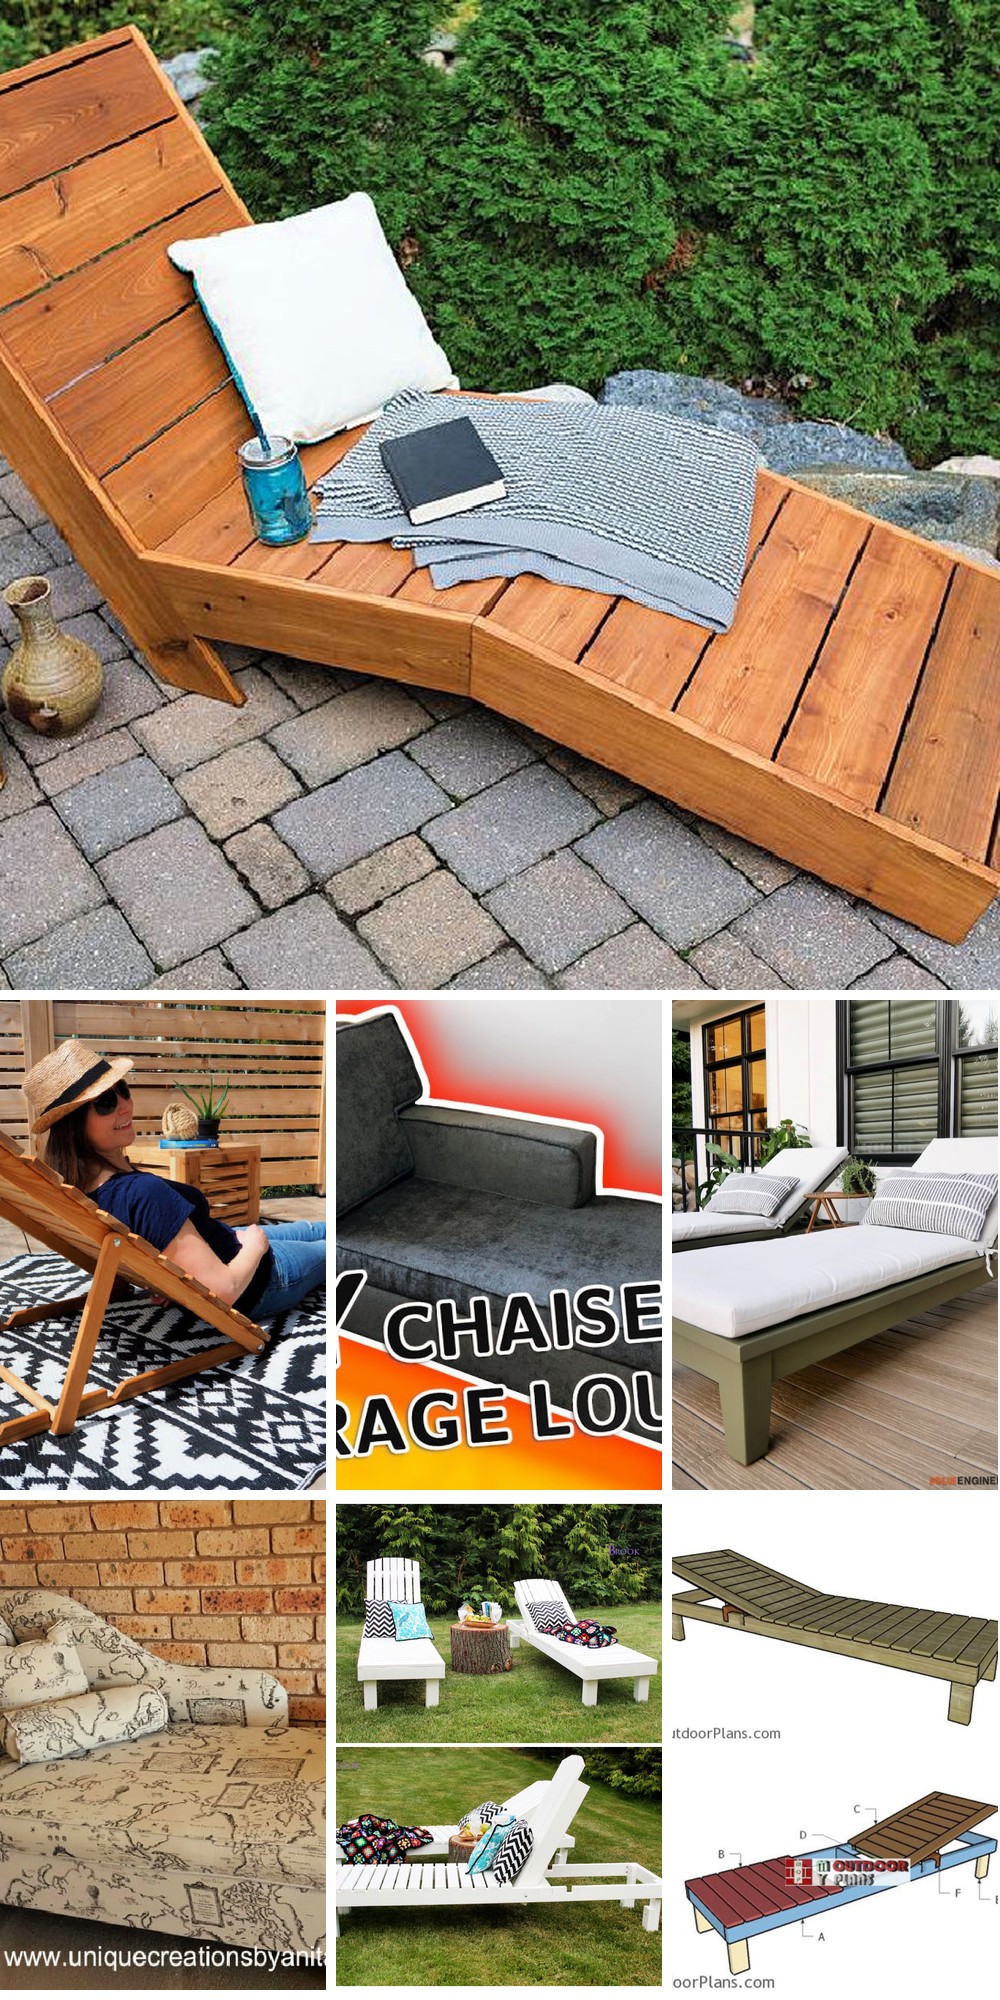
16 Free DIY Chaise Lounge Plans (How to Build)
Transform your outdoor space with the comfort and style of a DIY chaise lounge. With 16 free and easy-to-follow plans, you can create a unique lounging area that reflects your personal taste. From simple to complex designs, these step-by-step instructions will guide you through the process of building your perfect outdoor seating solution.
How to Make a Chaise Lounge
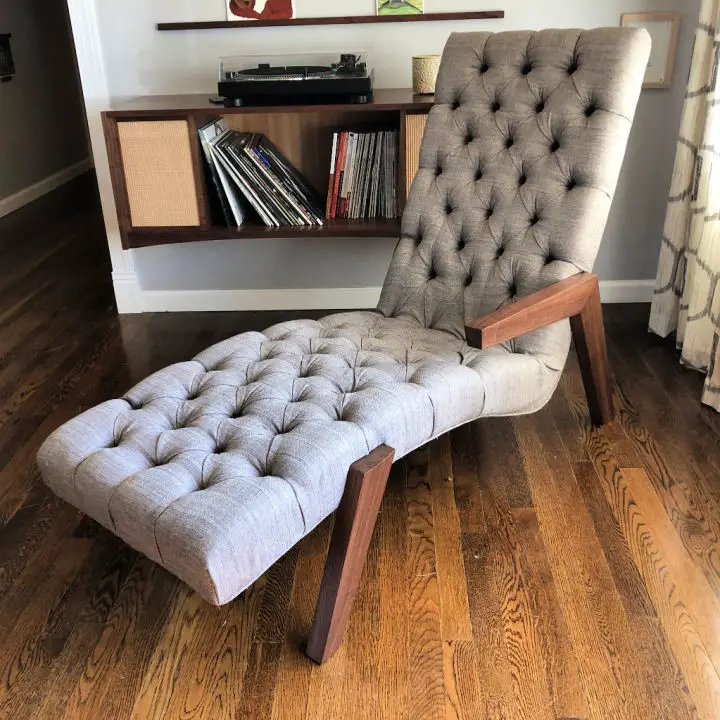
Step into a world of exquisite craftsmanship and design with this breathtaking chaise longue. The intricate details and personal journey behind its creation unfold like a story, from the meticulous blocking for dowels and legs to the delicate tufting that adds an air of sophistication and comfort. For those who cherish fine furniture with a rich history, this masterpiece is more than just a place to relax – it’s a testament to the artistry involved in its making. Dive deeper into the story behind this project on Imgur.
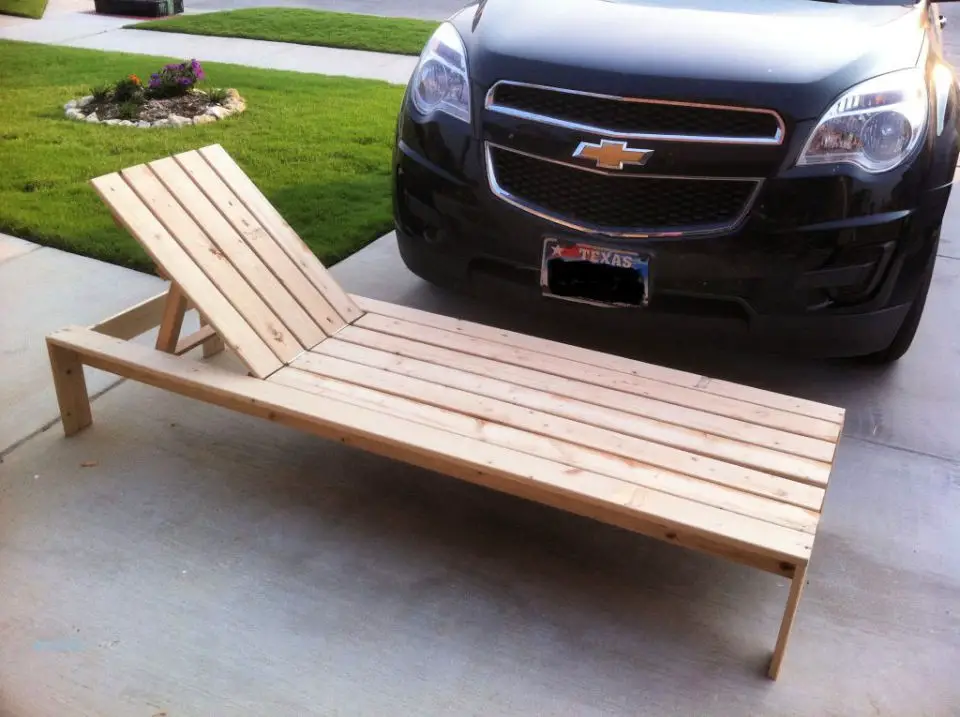
Building a Chaise Lounge Using 2x4s
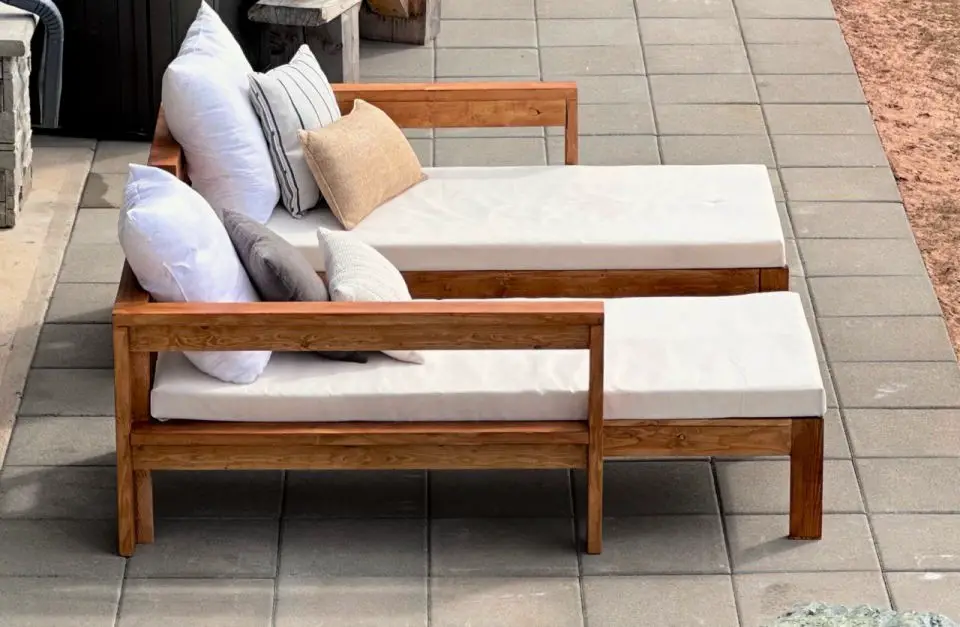
Indulge in the satisfaction of crafting your own long-lasting and adaptable outdoor furniture with Ana White’s ingenious 2×4 Outdoor Chaise Lounge plans. This DIY guide is a treasure trove for anyone passionate about hands-on projects, offering straightforward and simple-to-follow instructions to build a chaise lounge that effortlessly converts into an outdoor sofa or sectional. Designed with simplicity and longevity in mind, this design eliminates the need for folding mechanisms, ensuring a sturdy and reliable piece of furniture. With the freedom to customize the size, select your desired cushions, and choose a finish that reflects your unique style, you can create an outdoor oasis tailored to your preferences. The overall cost of this project falls within a budget-friendly range of $150-$200 per lounge, making it an accessible addition to any outdoor living space.
How to Build an Outdoor Chaise Lounge
Unleash the potential of your outdoor space by creating a bespoke DIY Chaise Lounge that embodies relaxation and sunshine. This comprehensive guide at Instructables provides a step-by-step blueprint for constructing a sturdy and stylish chaise lounge, catering to individuals up to 6’5” in height. Designed specifically for intermediate to advanced woodworkers, the tutorial showcases the unique benefits of using cypress, renowned for its exceptional outdoor durability. With an estimated cost of $225, this project is not only a fulfilling DIY endeavour but also a decorative addition to your garden or patio. As you embark on crafting this elegant piece, you’ll infuse it with personal touches that transform your outdoor haven into a tranquil retreat.
DIY Chaise Lounge From Recycled Materials
Transform your home into an eco-friendly oasis by turning discarded materials into a one-of-a-kind chaise lounge with this innovative DIY project from Unique Creations By Anita. Without requiring advanced woodworking skills or precise blueprints, you can upcycle everyday items into a stunning piece of furniture that not only reflects your personal style but also reduces waste and promotes sustainability. This guide will walk you through the creative process of breathing new life into discarded materials, resulting in a custom chaise lounge that’s as unique as it is environmentally friendly.
Make a Cardboard Chaise Lounge
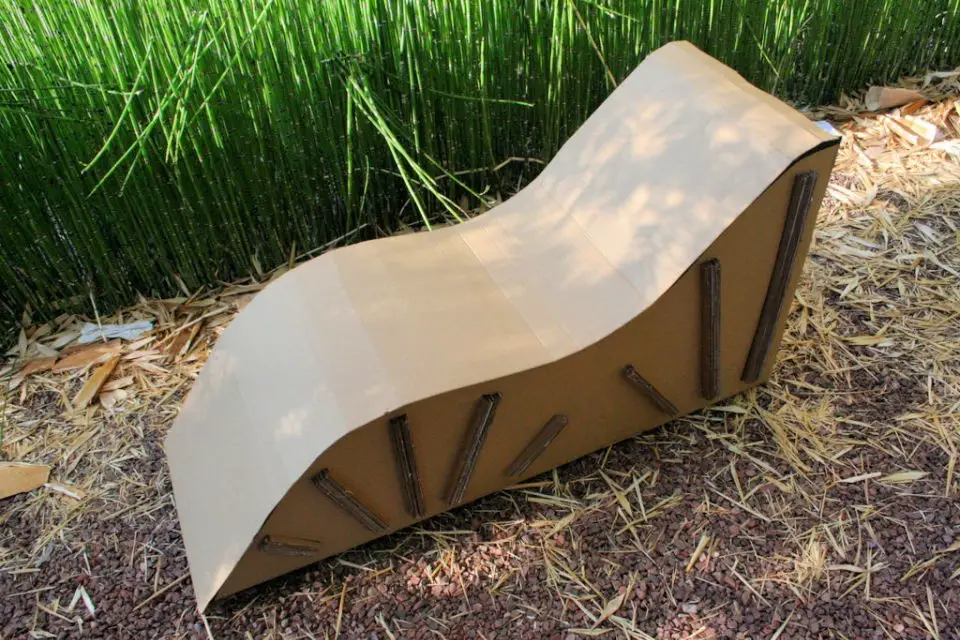
Transform your creativity and commitment to sustainability by upcycling cardboard into a sturdy and eco-friendly chaise lounge. This innovative DIY project not only yields a unique piece of furniture for your home but also breathes new life into discarded boxes, making it an excellent example of creative repurposing. The Instructables guide takes you through the process of crafting a comfortable and durable cardboard couch, perfect for relaxation after a fulfilling DIY session. As you navigate each step from material gathering to finishing touches, you’ll appreciate the simplicity and usability designed into this project, proving that remarkable furniture can emerge from humble beginnings.
Make Your Own Outdoor Chaise Lounge
Transform your creativity and commitment to sustainability by crafting an eco-friendly cardboard chaise lounge that’s both unique and functional. This DIY project from Instructables is perfect for repurposing old boxes and creating a one-of-a-kind piece of furniture for your home. With its sturdy construction and comfortable design, this cardboard couch is ideal for relaxing after a fulfilling DIY session or as a conversation starter in any room.The beauty of this project lies in its simplicity and usability – every step is designed to be easy to follow, making it accessible to crafters of all skill levels. From gathering materials to the final touches, this DIY endeavor proves that great furniture can indeed come from modest beginnings. And, as a bonus, you’ll be reducing waste and promoting sustainability while doing so.For those looking to take their frugality to the next level, consider repurposing wooden pallets to build an inexpensive chair. With some creativity and elbow grease, you can turn these discarded pallets into a unique and affordable seating solution that’s as functional as it is eco-friendly.
Homemade Chaise Lounger From 2x4s
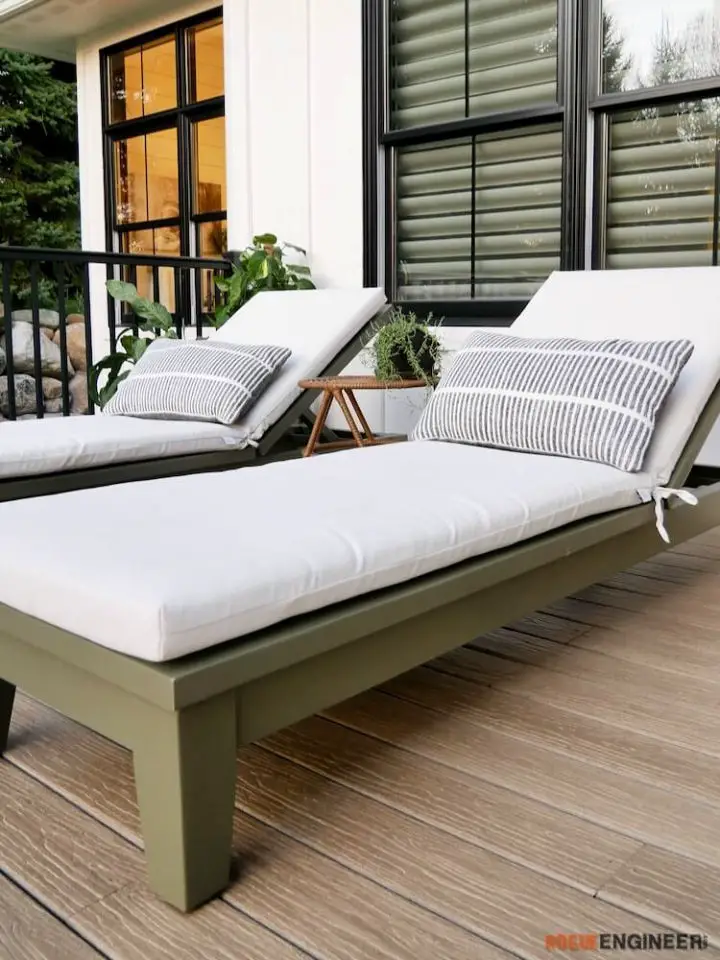
Elevate your outdoor oasis by creating a custom-built chaise lounger that seamlessly accommodates Target cushions, courtesy of Rogue Engineer’s ingenious DIY project. This ergonomic masterpiece boasts three adjustable reclining positions, guaranteeing unparalleled comfort and style. Even for those without extensive woodworking experience, the straightforward guide provides a comprehensive list of required tools and materials to ensure a stress-free build. With this engaging and easy-to-follow tutorial, you can effortlessly bring relaxation and design to your deck or patio, transforming it into an inviting haven that’s sure to impress.
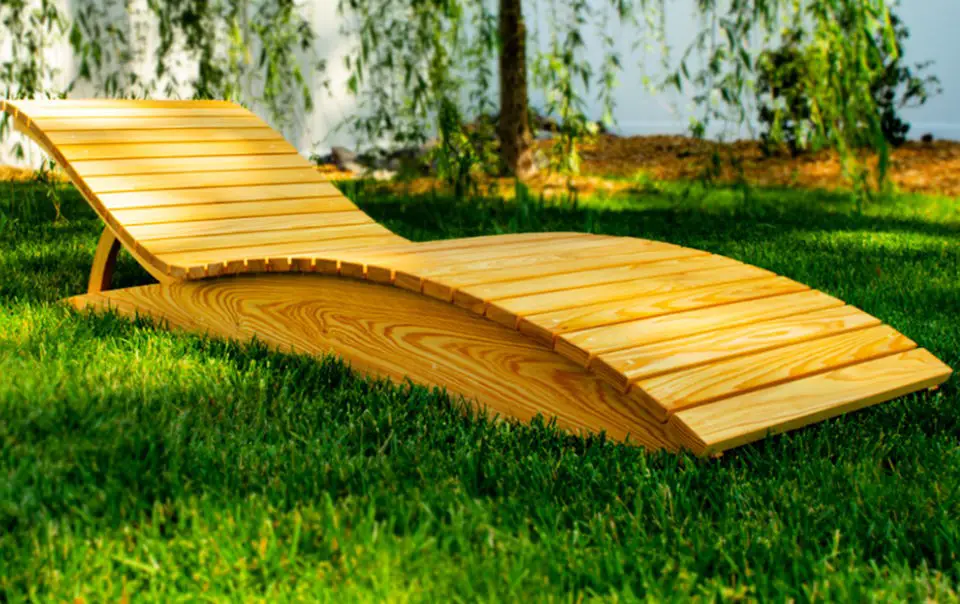
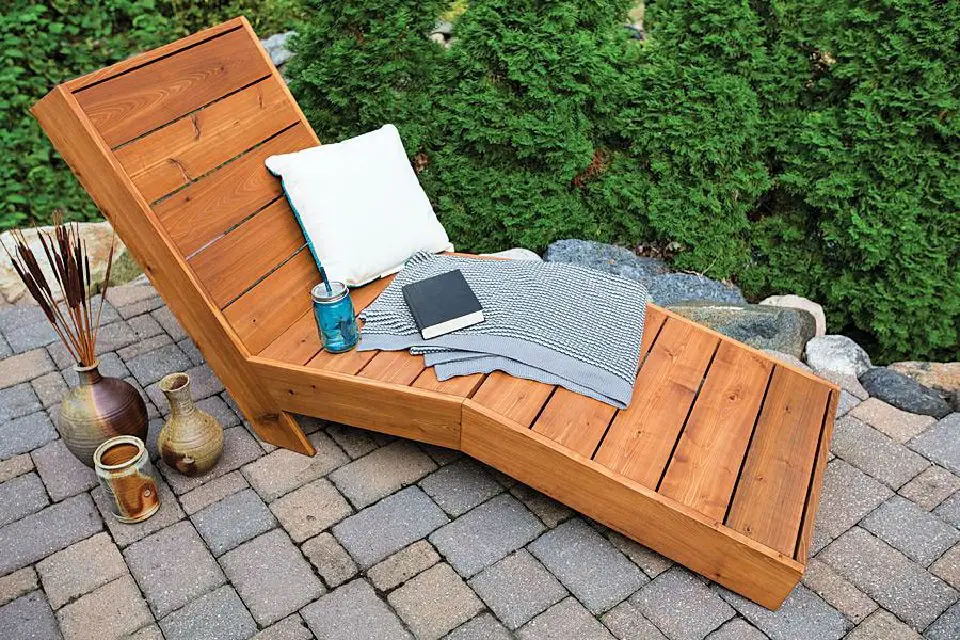
DIY Semi Chaise Lounge at Home
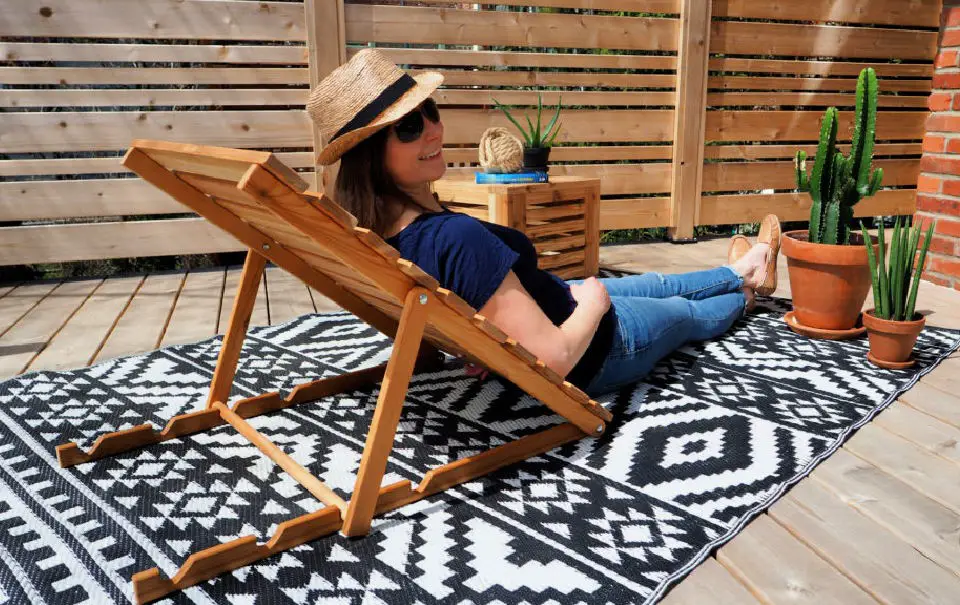
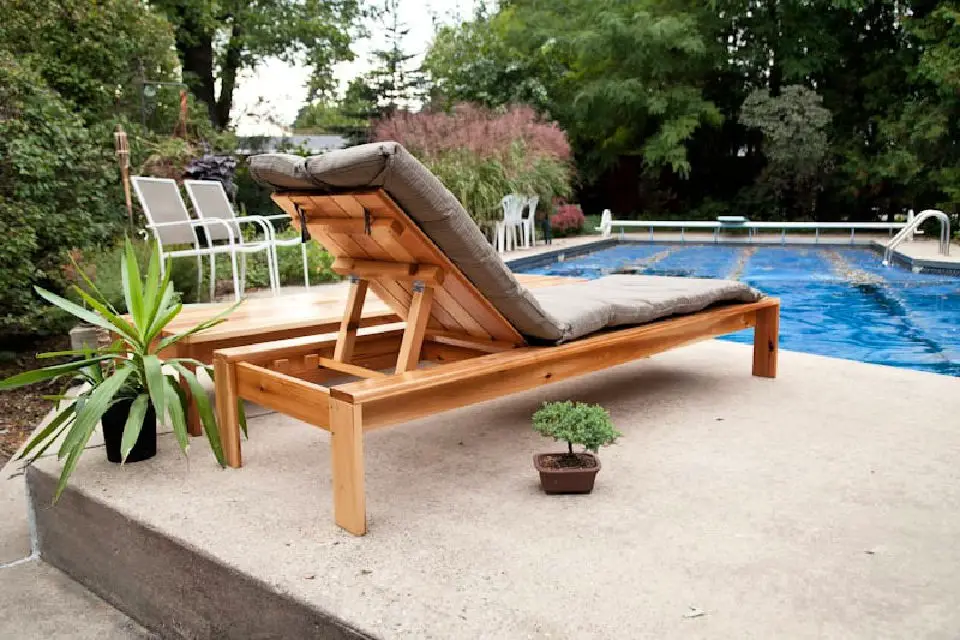
Transform your outdoor oasis with a practical and stylish DIY Foldable Outdoor Chaise Lounge. This versatile sun wedge seamlessly integrates with decks and patios, offering a comfortable retreat for relaxation and leisure activities. The thoughtful design allows for effortless storage when not in use, while the sturdy cedar wood construction and teak oil finish ensure long-lasting durability. Whether you’re basking in the sun or immersed in your favorite book, this semi-chaire lounge is the perfect haven for embracing the joys of outdoor living.
Build Your Own Chaise Lounge
Transform your outdoor living space into a stylish oasis by building a modern single chaise lounge from scratch! This clever DIY project, available on Ana-White.com, provides straightforward plans that even novice woodworkers can follow. The result is a comfortable and durable piece of furniture that accommodates standard cushions and can be tailored to suit your specific needs. For added versatility, you’ll also discover accompanying plans for a matching double chaise lounge and a resourceful side table that utilizes leftover materials. Whether you’re looking to elevate your patio or backyard retreat, this project serves as a comprehensive guide to crafting beautiful and long-lasting outdoor furniture. As the mercury rises, stay cool and informed with DIY air conditioner ideas that won’t break the bank.
How to Make Your Own Chaise Lounge
Transform your outdoor oasis without stretching your wallet thin. By embracing a DIY approach, you can create a comfortable and stylish relaxation haven that rivals high-end designs like Pottery Barn’s. With step-by-step guidance from Shanty-2-Chic, you’ll be well on your way to crafting a durable and inviting chaise lounge. Whether you’re embarking on a weekend project or seeking to elevate your patio’s ambiance without breaking the bank, this guide serves as your ultimate resource for building a one-of-a-kind outdoor retreat that exudes warmth and welcomes relaxation. As you get creative with pallet-based outdoor furniture ideas, discover fresh inspiration for transforming your patio into an extension of your home.
Ana White Wooden Chaise Lounge Plan
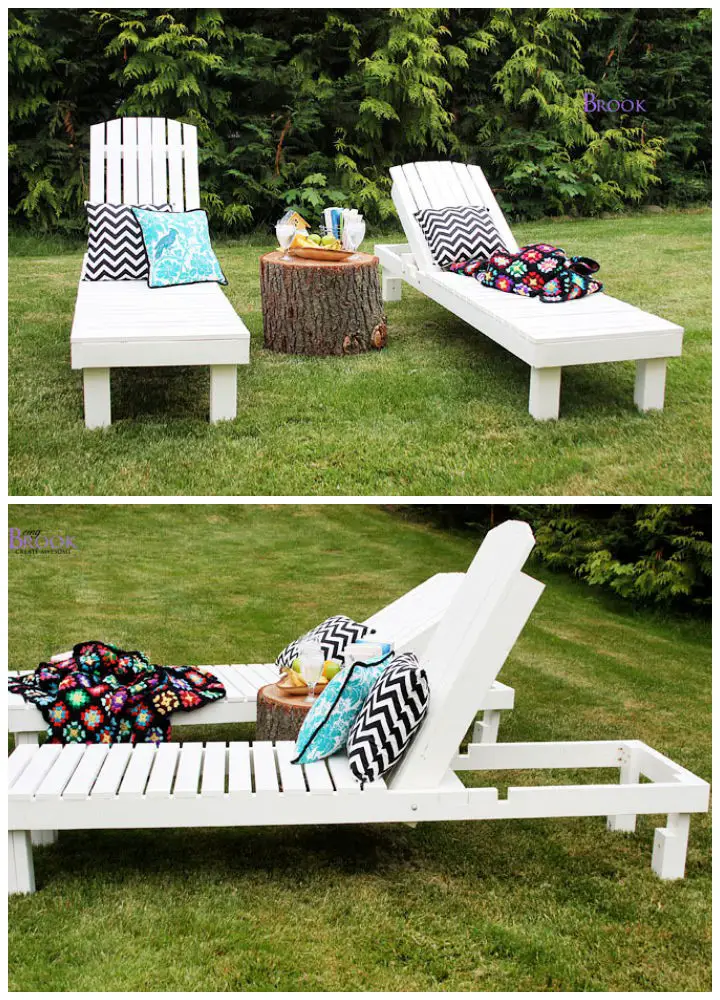
Transform your backyard oasis with Ana White’s DIY Wood Chaise Lounge Chairs, expertly crafted by Brook from Being Brook. This budget-friendly project offers a serene retreat for sunbathing or evening relaxation. The chairs’ sturdy frames are constructed using cost-effective 1x3s and robust 2x6s, ensuring durability without sacrificing style. Adjustable back angles and full recline capabilities combine comfort with convenience, making this build an exemplary blend of functionality and aesthetic appeal. Follow the detailed guide and plans to create your own cozy outdoor haven.
Easy DIY Storage Chaise Lounge
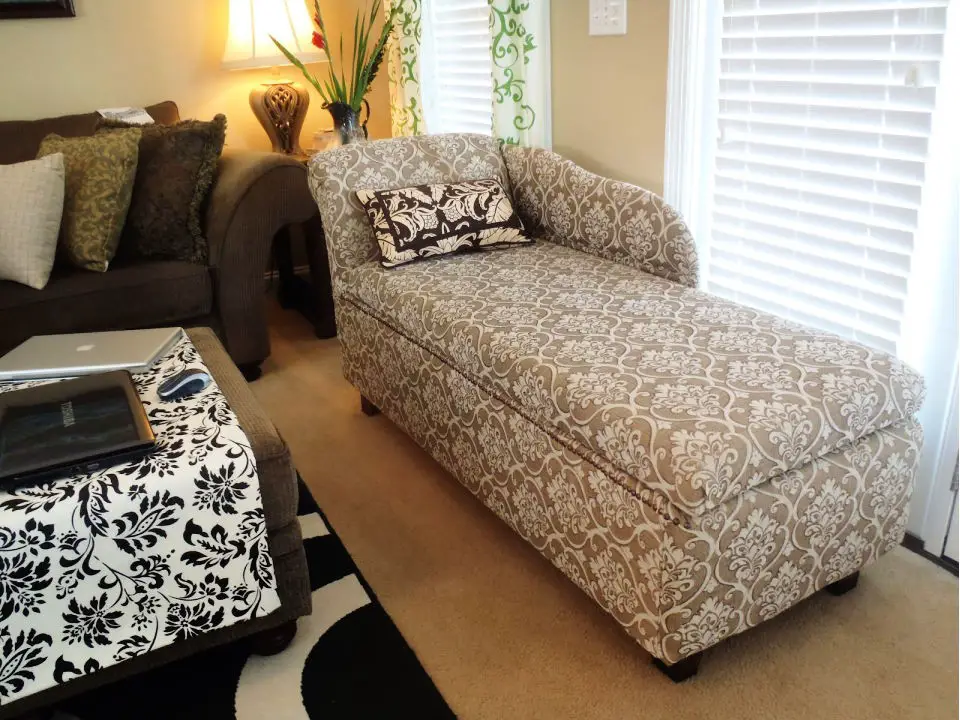
Crafting a custom storage chaise lounge is an art that combines aesthetics with functionality. To bring your vision to life, you’ll need to carefully select high-quality materials such as red oak and premium plywood. The assembly process requires attention to detail, but the end result is well worth the effort. This innovative piece of furniture not only provides plush seating but also clever storage for blankets, sewing fabrics, or any other items you want to keep within easy reach. By following our step-by-step guide, you’ll be able to seamlessly integrate your new chaise lounge into your existing decor while adding a practical touch to your living space.
Free Chaise Lounge Plan
Transform your outdoor space with ease by creating your own chaise lounges using these straightforward plans. By choosing the right materials and following simple steps, you can create a functional and stylish addition to your pool, patio, or beach area without breaking the bank – all for under $25. For added convenience, consider adding wheels to make it easily movable. Our collection of woodworking inspiration is also waiting to be explored. To ensure your project lasts for years to come, select high-quality lumber and take the time to carefully level each component before assembly. Start bringing your outdoor vision to life today.
Handmade Chaise Storage Lounge Tutorial

Transform your living space by creating a bespoke chaise lounge with built-in storage, perfect for cozying up on lazy days or adding an extra storage solution to your home. This DIY project is not only about crafting furniture, but also providing a canvas for creativity. By following our step-by-step guide, you’ll be able to personalize your furniture and save money, resulting in a unique piece that reflects your style and space. With this tutorial, DIY enthusiasts can enhance their skills while elevating the comfort level of their home. Whether you’re looking to add a touch of elegance or a dash of whimsy, this chaise lounge with storage is an ideal solution for any living space. Plus, discover our collection of budget-friendly DIY swimming pool tutorials and start planning your own backyard oasis.
Building a Chaise Lounge

Create a statement piece in your living space by building a chaise lounge with our comprehensive DIY guide. This hands-on project is perfect for homeowners looking to add a personal touch and make their outdoor or indoor areas more inviting. By following our step-by-step tutorial, you’ll learn the skills needed to craft comfortable and stylish furniture that reflects your unique style.
Simple DIY Cedar Outdoor Lounger
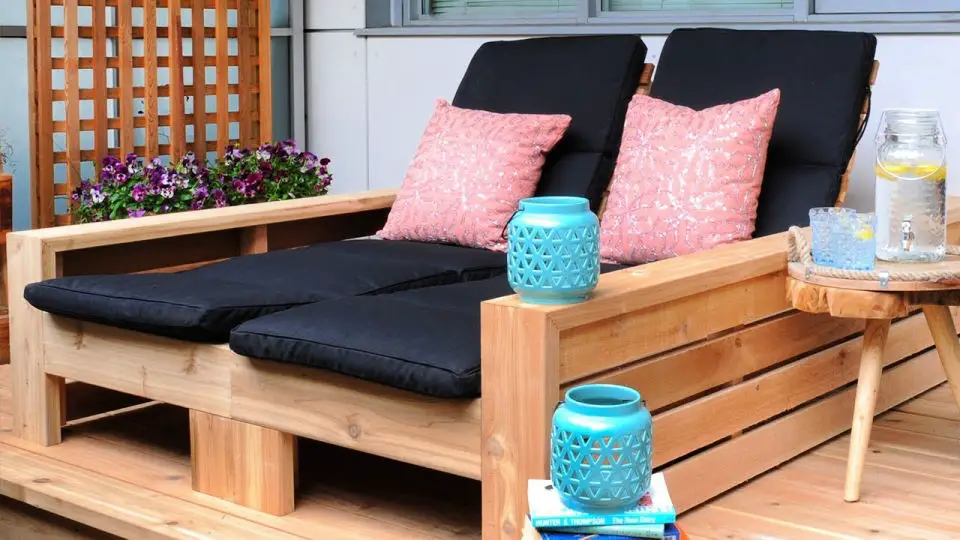
Transform your outdoor space with a stunning DIY cedar lounger project. Our comprehensive guide offers free plans, real design inspiration, and a seamless creation process. Made from resilient western red cedar, this adjustable lounger is designed for both durability and relaxation. Whether you’re looking to create a standalone piece or pair it as a daybed, our tutorial provides everything you need to bring your outdoor oasis to life.
Conclusion:
In essence, the 16 free DIY chaise lounge plans serve as a comprehensive foundation for anyone eager to build their own chaise lounge. As we’ve delved into the advantages, the fundamental processes from conceptualization and design to the finishing touches, and upkeep tips, it’s evident that crafting your own chaise lounge is not only a fulfilling DIY endeavor but also a means of infusing a personal touch into your outdoor or indoor spaces. With these free plans as guidance, even individuals with limited woodworking experience can embark on this project, reduce costs, and savor the satisfaction of achievement. It’s crucial to remember that customization is paramount in making your chaise lounge truly unique, so don’t hesitate to put your personal stamp on the project. As you begin building, keep in mind that the outcome will be a reflection of your creativity and attention to detail.
