Crafting a unique DIY bow holder is an engaging and practical endeavor, allowing individuals to organize and showcase their collection of bows in a visually appealing manner. This project requires minimal expertise, making it accessible to anyone seeking to add a personal touch to their living space. By following this comprehensive guide, you’ll gain insight into the materials needed, attachment methods, customization options, and maintenance tips, ensuring your creation turns out exactly as envisioned. The detailed instructions will walk you through every step of the process, from selecting materials to attaching yarn to the dowel, and even provide guidance on customizing your design to make it truly one-of-a-kind. Whether aiming for simplicity or a more personalized approach, this guide is designed to cater to all skill levels and preferences. As you continue reading, you’ll uncover the secrets to crafting your ideal DIY bow holder, a project that not only serves a functional purpose but also injects creativity into your surroundings.
How to Make a Bow Holder- Step by Step Guide
Transforming a space with a unique DIY wall hanging that also functions as a bow holder is an accessible and stylish endeavor. This bohemian-inspired project not only elevates the aesthetic of any room but also allows for personalization, making it a perfect addition to a child’s bedroom where bows can be proudly displayed. By following this straightforward guide based on a helpful video tutorial, you can customize your piece to reflect your individual style and color palette.
Materials You Will Need:
Step 1: Prepare Your Yarn
When it comes to selecting yarn colors, consider the overall visual atmosphere you want to achieve. Divide your chosen hues into manageable groups, referred to as ‘color bundles.’ To prepare these colors for use, cut each strand into lengths of approximately 40 inches. You’ll need roughly ten strips per bundle. Next, fold each strip in half, creating a loop at one end that will facilitate the weaving process.
Step 2: Attaching the Yarn to the Dowel
To create a visually appealing centerpiece, begin by positioning yourself in the middle of the dowel. From this central point, carefully place each looped yarn strip over the top of the dowel, taking care to maintain an even distribution on both sides. As you work your way along the dowel, secure each bundle with a simple knot. To complete the arrangement, repeat the process for all your yarn bundles, spacing them out as desired to achieve the perfect balance.
Step 3: Customize Your Design
When it comes to customizing your braided hairstyle, one key aspect to play with is the thickness and texture of the individual strands. You can experiment with varying the number of strands in each bundle to achieve a chunkier or more refined look. Furthermore, feel free to introduce contrasting colors within bundles, or seamlessly integrate braided sections for a visually appealing mix of textures.
Step 4: Trimming the Ends
With all yarn securely attached, it’s time to refine the finishing touches. Hang the dowel or place it on a flat surface to maintain stability. Gently comb out the yarn strands and envision your desired finish – whether it’s a sleek, even line, a peaked crest, or an inverted V shape. Utilizing a ruler as a guide, carefully trim the ends with scissors or a rotary cutter to achieve the precise shape you’ve envisioned.
Step 5: Hanging Your Wall Hanging
When it comes to displaying your wall hanging, the possibilities are endless. To add a personal touch, you could create a unique hanging system by braiding together additional yarn strands, employing twine or any other material that complements your home’s aesthetic. Secure this chosen material to both ends of the dowel, ensuring a sturdy and visually appealing display.
Video Tutorial
To enhance the learning experience, we’ve created a comprehensive step-by-step video tutorial that complements this written guide perfectly. This visual guide provides a detailed walkthrough of each step, ensuring that you can easily follow along and create your boho wall hanging with confidence. By following these straightforward steps, you’ll be able to craft a stunning piece of decor that not only adds character to your space but also offers a unique way to display bows or other small items.
Customization Ideas for Your DIY Bow Holder
When crafting a DIY bow holder, remember that it’s not just about functionality – it’s also an opportunity to infuse your personal style and add a decorative touch to your space. To make yours truly one-of-a-kind, consider the following creative ideas:Start by choosing a theme that resonates with your personality or reflects the decor of the room where the bow holder will reside. This can guide your material selection and design. For instance, you might opt for a floral theme for a cozy living room or a nautical theme for a beach-inspired bedroom.Next, think about incorporating color into your design. Paint the base of the holder, use colored ribbons, or add vibrant beads to give it a pop of personality. If the bow holder is destined for a child’s room, consider bright and playful colors that match their unique energy.Patterns can also be a great way to make your DIY project stand out. Use patterned fabric or washi tape to cover parts of the holder or stencil designs onto the wood for a customized look.For a truly personalized touch, add names or initials to the bow holder. You can use letter beads, paint, or vinyl stickers to spell out special messages or family member’s names.Embellish your creation with charms or pendants that hold sentimental value or represent your favorite hobbies or interests. This adds an extra layer of meaning and storytelling to your DIY project.If you’re a nature lover, consider incorporating elements like small branches, shells, or dried flowers into your design. These natural accents can add warmth and texture to the finished piece.Make it interactive by adding a small chalkboard or whiteboard where you can jot down notes or reminders. This is especially useful if the bow holder will be placed near an entryway or in a high-traffic area.Finally, think seasonally when decorating your DIY bow holder. Add holiday-themed decorations or seasonal colors to give it a fresh look throughout the year.Remember to have fun and be creative with your project. Make it unique and reflective of yourself, and you’ll end up with a one-of-a-kind piece that’s sure to spark conversations and inspire joy.
Safety Precautions for Crafting Your DIY Bow Holder
As you embark on your DIY bow holder project, prioritizing safety is crucial. To ensure a safe and enjoyable experience, consider the following essential guidelines:Your workspace should be well-lit, organized, and free from clutter to prevent accidents and allow for focused work. This includes using suitable tools that are in good condition, and handling potentially hazardous materials like scissors or glue guns with care.Protect yourself and others involved in the project by wearing appropriate protective gear, such as safety glasses, gloves, or masks, depending on the materials being used. This may include shielding yourself from dust or fumes.For projects involving children, adult supervision is vital to teach them about tool and material usage and ensure their activities are monitored at all times.In case of minor injuries, keep a first aid kit nearby and be familiar with basic first aid procedures to manage any unexpected situations that may arise.When working with products emitting fumes, such as certain adhesives or paints, prioritize ventilation by working in a well-ventilated area or outdoors if possible. This is especially important for individuals with allergies or sensitivities to certain materials. Always read labels and choose non-toxic options when available.Finally, exercise caution when dealing with electrical components, avoiding work near water and seeking professional advice if unsure about safely handling electricity. By following these safety guidelines, you can create a DIY bow holder while minimizing the risk of accidents.
Troubleshooting Common Issues with DIY Bow Holders
When crafting a DIY bow holder, it’s not uncommon to encounter some bumps along the way. Fortunately, being prepared for common issues can make all the difference. Here are some tips to help you troubleshoot and overcome obstacles:One of the most frustrating problems is when the ribbon keeps slipping off the holder. To resolve this, simply ensure that the ribbon is securely fastened to the holder using a stronger adhesive or additional staples if needed.Another issue you might face is an unstable holder that’s prone to tipping over. To address this, consider using thicker wood or adding a backing to reinforce the structure. Additionally, make sure all joints are properly glued or screwed together for added stability.If you’re having trouble attaching embellishments, it may be due to using the wrong type of glue. Make sure to select a glue that’s suitable for the material you’re working with. For heavier items, consider sewing them on or using a hot glue gun for a stronger bond.When dealing with paint or stain not adhering properly, it’s often due to a smooth surface. To overcome this, sand the surface before applying paint or stain to create a rougher surface for better adhesion. It’s also essential to ensure that the wood is clean and dry before applying any finishes.Finally, if your bow holder looks uneven or crooked, it may be due to measurement errors or improper assembly. To avoid this, measure twice before cutting or attaching components, and use a level to ensure everything is straight during assembly.By being prepared for these common issues and understanding how to solve them, you’ll be well-equipped to create a great DIY bow holder. Remember to stay patient and persistent – minor setbacks are a normal part of the DIY process!
Maintenance Tips for Your DIY Bow Holder
To keep your DIY bow holder in pristine condition and ensure it remains a stunning centerpiece in your home, follow these essential maintenance tips:
Firstly, commit to regular cleaning by dusting the holder with a soft cloth to prevent dust buildup. If you’ve incorporated fabric elements, use an appropriate vacuum attachment to gently remove any debris.
Next, take precautions against moisture by keeping the holder away from damp areas that could cause warping or mold growth. In the unlikely event it does get wet, dry it thoroughly as soon as possible.
To maintain its original appearance, perform touch-ups as needed to repair any chipped paint or faded stain. A small brush will suffice for this task.
Regularly inspect your bow holder for loose parts such as ribbons, hooks, or embellishments and securely reattach them if necessary.
Finally, when adding or removing bows, exercise gentle care to avoid straining the holder. This simple precaution will help preserve its integrity and appearance.
By following these straightforward maintenance tips, you’ll be able to enjoy your DIY bow holder for years to come.
Environmental Considerations for Your DIY Bow Holder
To craft an eco-friendly DIY bow holder, it’s crucial to think about the environmental implications of your materials and methods. By adopting these environmentally conscious approaches, you can create a stunning piece that not only serves its purpose but also minimizes its impact on the planet.
Opt for sustainable materials whenever possible, such as bamboo or reclaimed wood instead of new lumber. When it comes to textiles, look for organic or recycled fabric options. This small change can make a significant difference in reducing waste and conserving natural resources.
Plan your project carefully to minimize excess material and offcuts. Use these scraps creatively within your design or set them aside for future projects. Not only will this reduce waste, but it’ll also encourage you to think outside the box and get creative with repurposing materials.
When selecting paints, stains, and adhesives, prioritize non-toxic options labeled as low-VOC (volatile organic compounds). These eco-friendly choices not only benefit the environment but also promote a healthier workspace for you.
Before purchasing new materials, take stock of what you already have at home. Old picture frames, fabric scraps, and unused jewelry can be repurposed into unique components for your bow holder. This upcycling approach reduces waste, saves resources, and fosters a sense of creative reuse.
When using power tools, choose energy-efficient or battery-powered options with rechargeable batteries to minimize energy consumption and reduce your carbon footprint.
Finally, ensure proper disposal of leftover materials and chemicals. Check with your local waste management facility for guidance on recycling or hazardous waste disposal to guarantee a responsible conclusion to your project.
By adopting these eco-friendly strategies, you can create a beautiful bow holder that not only serves its purpose but also contributes to a more sustainable future.
FAQs About DIY Bow Holders
Explore the world of DIY bow holders, where creativity and practicality converge. Learn the essential materials required to bring your project to life, and follow a straightforward, step-by-step guide to ensure a successful outcome. Let your imagination run wild and start crafting with confidence!
What materials do I need to make a DIY bow holder?
To create a custom bow holder, start by selecting a foundation piece, such as a wooden board or frame. Next, gather the necessary components to support your bows, including ribbons or hooks designed specifically for hanging bows. For added visual appeal, consider incorporating decorative elements like paint, stain, or embellishments like beads or fabric. These materials will help bring your DIY bow holder to life.
How can I attach the ribbons to the holder securely?
To secure the ribbons to the holder, you have three reliable options: using a staple gun, applying hot glue, or relying on strong adhesives. As you attach the ribbons, ensure they’re evenly spaced and taut, creating a visually appealing display.
Can I make a bow holder without using wood?
When it comes to crafting a unique and functional bow holder, you’re not limited to traditional materials. Consider using unconventional options like foam board, corkboard, or even upcycling an old picture frame to create a one-of-a-kind solution that meets your needs.
What kind of paint should I use for my bow holder?
When choosing a paint for your wooden surface, opt for non-toxic acrylic paint as the safest and most effective option. To further enhance its longevity, consider applying a clear acrylic sealer once the painting process is complete.
How do I ensure my bow holder is safe for a child’s room?
When it comes to crafting toys for children, safety should always be the top priority. To avoid any potential risks, make sure to opt for non-toxic materials that won’t pose a threat if ingested. Additionally, pay close attention to the edges and surfaces of your creations to ensure they’re smooth and free from splinters or sharp points that could cause discomfort or injury.
Can I make a bow holder that doesn’t damage the wall?
When it comes to securing items to walls without causing damage, there are clever alternatives to traditional fasteners. For instance, removable adhesive strips and specialized hooks designed specifically for hanging pictures can be used to achieve this goal. These innovative solutions ensure that your walls remain intact, while still allowing you to display your favorite pieces or important documents.
How can I personalize my bow holder?
Transform your bow holder into a one-of-a-kind keepsake by incorporating personalized elements. Consider using paint to add names, as well as vinyl stickers and letter beads for a unique touch. Alternatively, opt for a theme that resonates with the user’s passions, making it an even more meaningful piece.
What should I do if the ribbons start to sag?
When it comes to addressing loose ribbons on your gift wrapping materials, there are a few solutions you can try. First, if the ribbons themselves appear worn out, consider replacing them with new ones altogether. If the problem lies elsewhere, however, you may be able to tighten any slackened staples or apply additional adhesive to ensure a more secure hold.
How can I make my bow holder eco-friendly?
To make a positive impact on the environment, it’s essential to adopt eco-friendly design choices. When selecting materials, prioritize sustainable options such as bamboo, which is renowned for its rapid regrowth rate and minimal water requirements. Alternatively, opt for reclaimed wood that has been salvaged from old buildings or trees harvested in a responsible manner. Furthermore, when it comes to textile elements, choose natural or recycled fabrics to minimize the environmental footprint of your design.
How do I clean my bow holder?
When cleaning your DIY bow holder, start by gently dusting it with a soft cloth to remove any loose debris. For fabric parts, use a low-suction vacuum cleaner or a dry brush to prevent damaging the material. For more thorough cleaning, dampen a cloth with mild soap and wring it out thoroughly before wiping down the holder. Be sure to dry the holder completely after cleaning to prevent water spots or damage. By following these simple cleaning steps, you’ll be able to keep your DIY bow holder looking its best and ensure it continues to function smoothly.
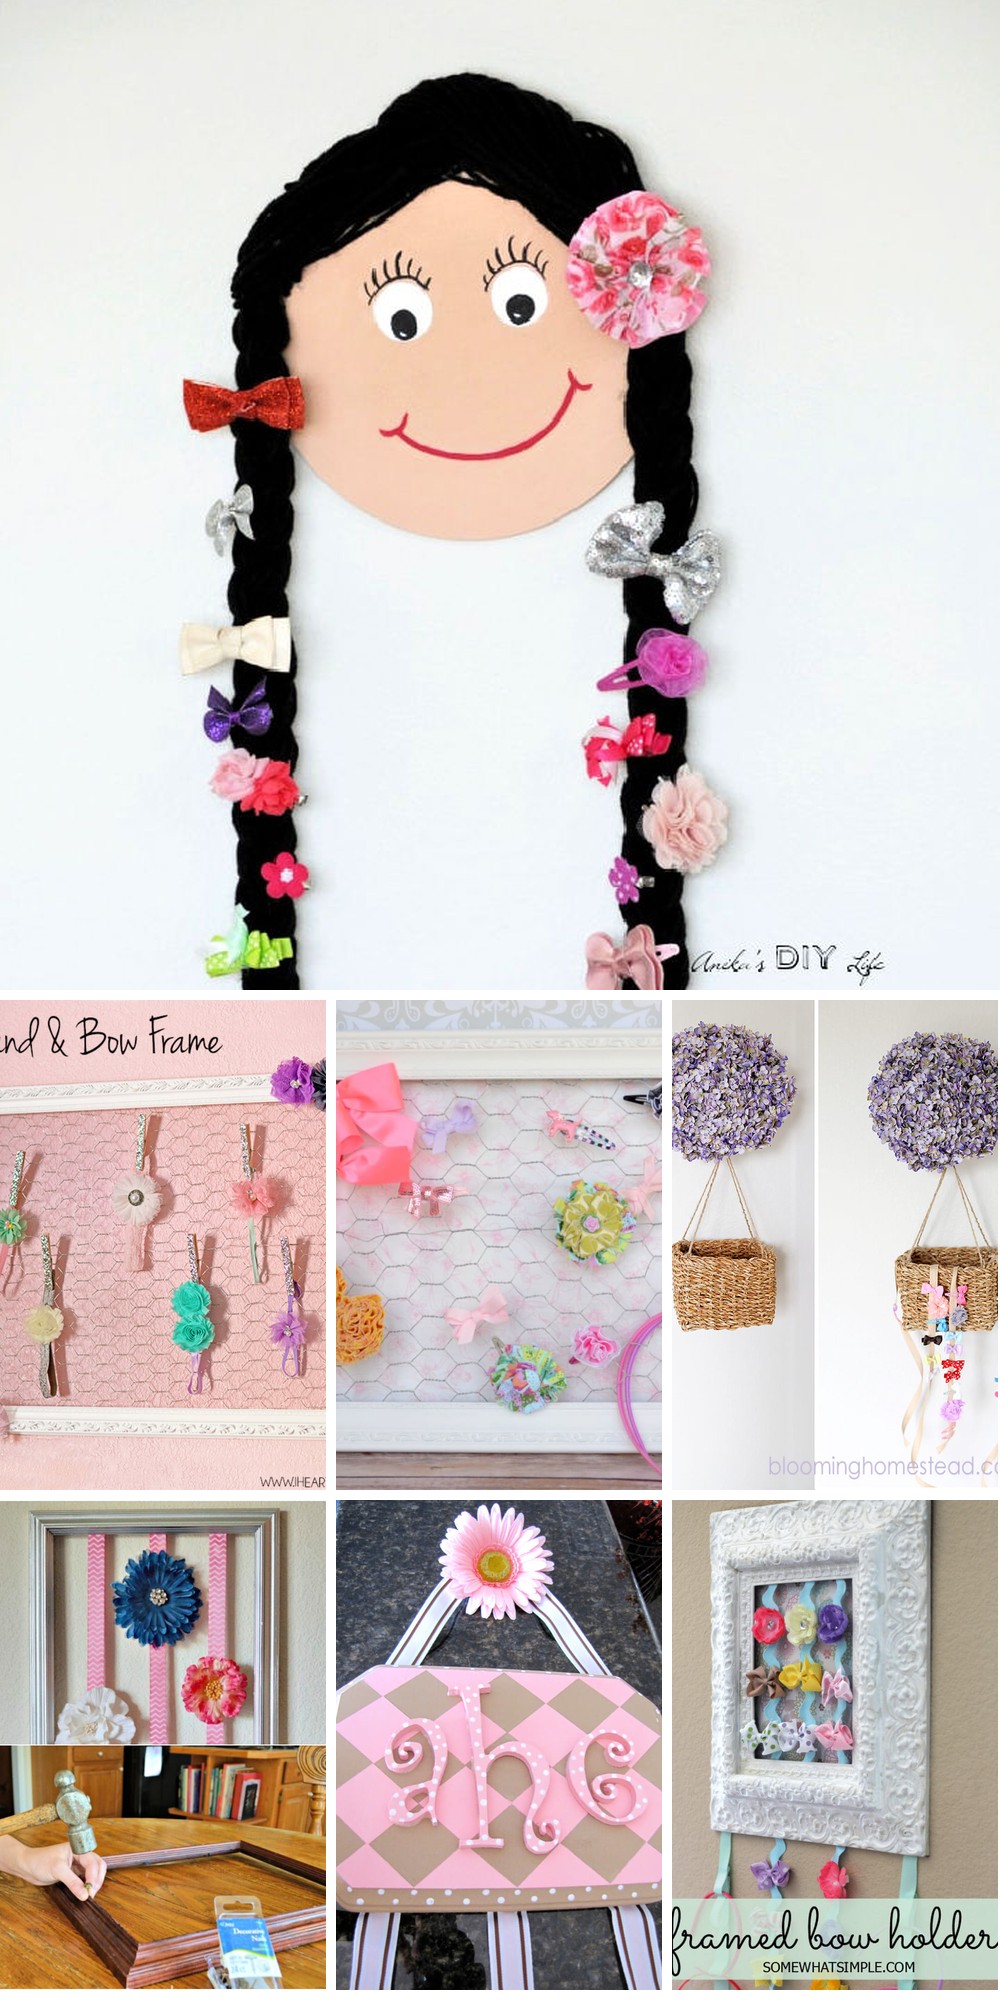
20 Easy DIY Bow Holder Ideas
Transform your space with effortless elegance by embracing a multitude of clever DIY bow holder ideas that effortlessly organize your collection of bows. Ranging from understated simplicity to innovative creativity, uncover a diverse array of solutions to suit your unique taste and aesthetic.
How to Make a Bow Holder
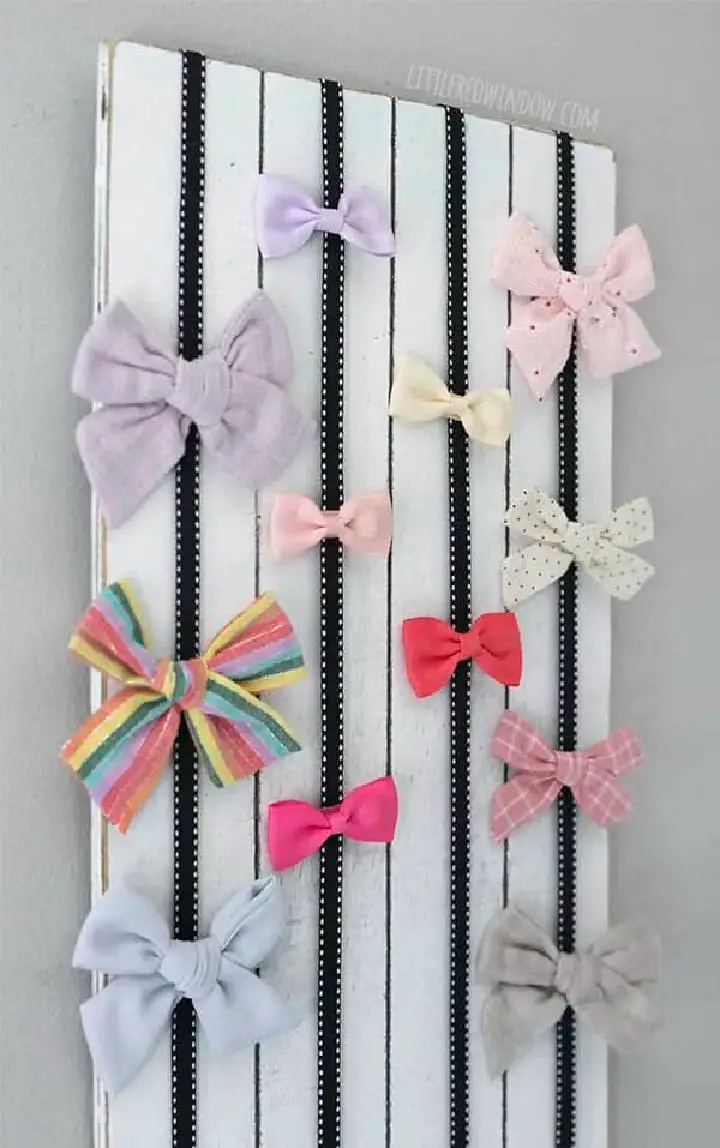
Transform a plain wood sign into a functional and aesthetically pleasing bow holder by combining it with a grosgrain ribbon and a staple gun. If you’re working with a non-white wooden blank, simply give it a coat of white paint to achieve the desired look. This DIY project is an excellent way to repurpose a basic wood sign and add a touch of elegance to your home’s decor.
Easy DIY Hair Bow Holder
Storing hair accessories like bows and headbands in a drawer can lead to a tangled mess, making it frustrating to find matching pieces each morning. To add a charming farmhouse flair to your daughter’s bedroom, consider crafting a simple DIY bow holder. This clever solution keeps her favorite hair adornments organized and within reach, ensuring a stylish start to every day.
Homemade Hair Bow Holder
Transforming the chaotic process of finding matching bows for your little one into an effortless experience is now possible with a thoughtfully designed DIY bow holder. This minimalist masterpiece can be created in mere 20 minutes, freeing you from the stress of last-minute scrambles. With its simple and organized design, you’ll never have to worry about losing that perfect accessory again.
Picture Frame to Bow Holder
For an effortless yet stylish solution, we recommend opting for a minimalist and user-friendly picture frame DIY bow holder. By combining a rustic frame with a charming grained pink ribbon, you can effortlessly add a touch of vintage flair to your room’s décor.
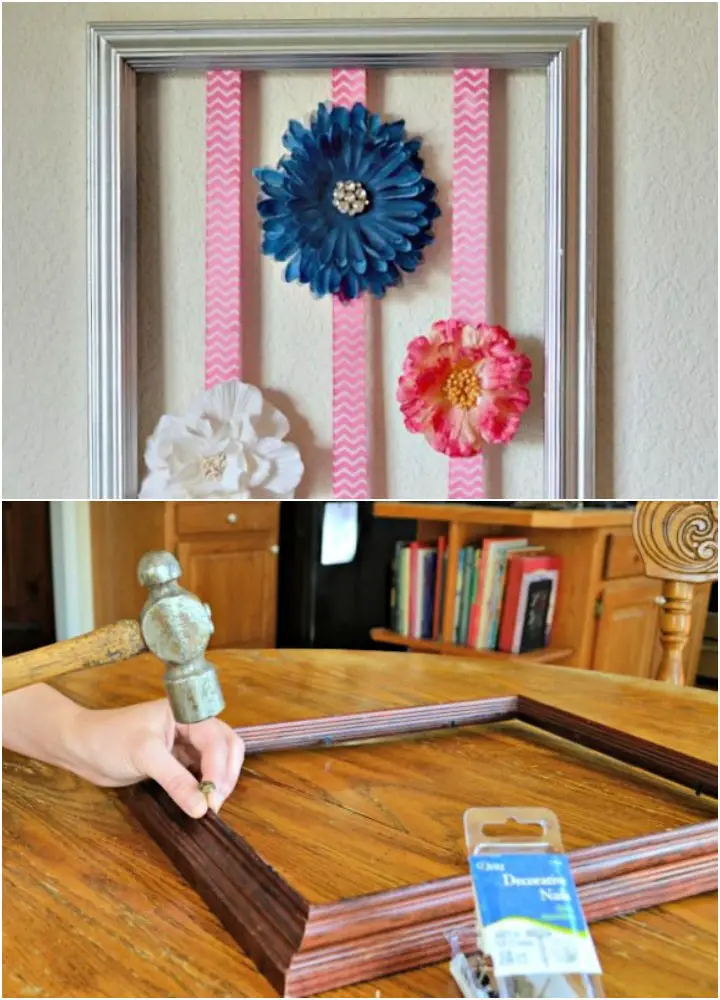
Pretty DIY Picture Frame Bow Holder
Transform a humble picture frame into an affordable DIY bow holder that will delight your daughter as she builds her collection of adorable bows. To create this project, you’ll need a picture frame of any size, a staple gun or glue gun, some ribbon, a decorative accent to adorn the frame, and a pair of scissors. With these simple materials, you can craft a functional and charming storage solution for your daughter’s bows that won’t break the bank.
Make Headband and Hairbow Holder Frame
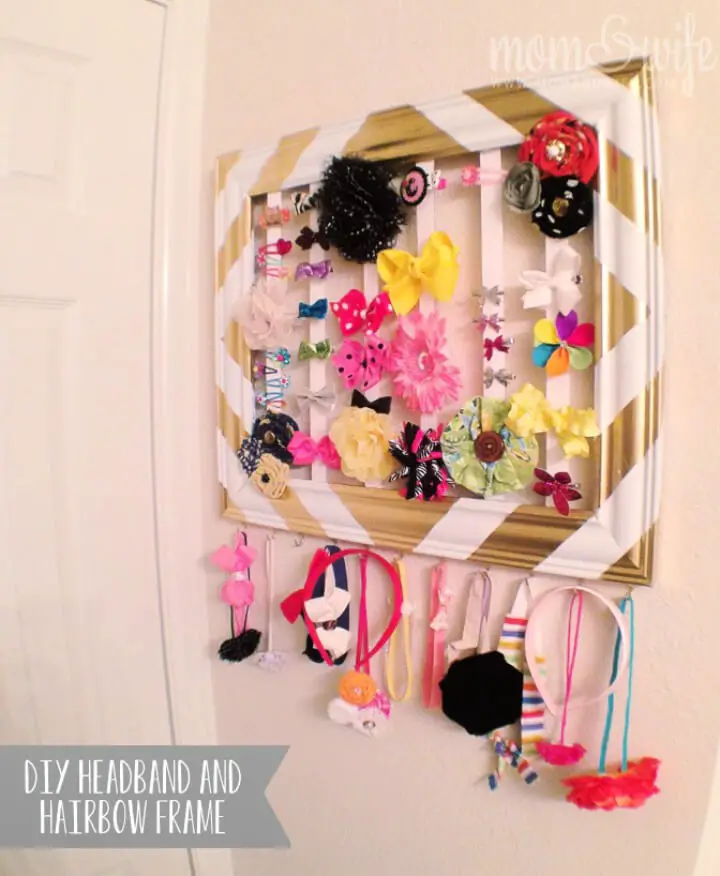
Imagine the chaos that ensues when your little girl shares a room with an older sibling. The daily battle over whose turn it is to use her hair accessories – from scrappy headbands to delicate bows – can be overwhelming. But fear not, dear parent! This DIY Bow and Headband Holder is here to save the day, keeping both girls’ favorite styling tools neatly organized and within reach.
Handmade Doll Face Hair Bow Holder
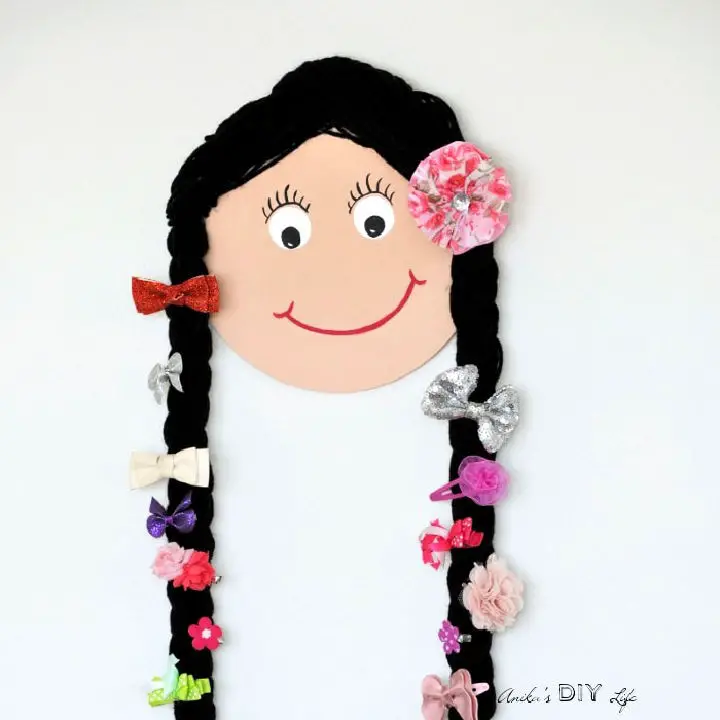
When it comes to dolls, young girls have a special affinity for ones that mirror their own interests. For many, a fashion-forward doll that loves hairstyling as much as they do is the ultimate dream come true. Imagine setting up this delightfully adorable doll in your little one’s room, surrounded by all her favorite hair accessories and accessories. The possibilities are endless – from creating elaborate hairstyles to styling mini-versions of their own favorite headbands and hair bows. With this interactive doll, your daughter will be thrilled to engage in imaginative play, learning important skills like creativity, problem-solving, and self-expression.
DIY Arrow Hair Bow Holder
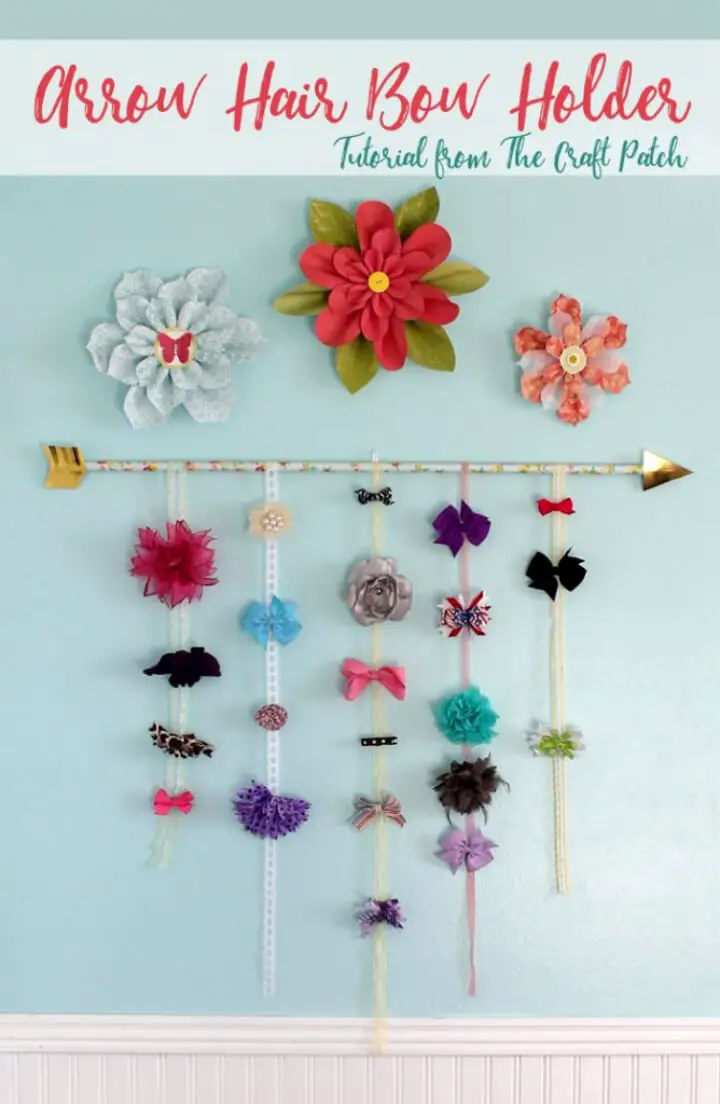
To create a stylish and functional DIY bow holder for your little girl’s room, gather the following materials: a sleek wooden dowel, scrapbook paper, a hot glue gun, a glue stick, and some lace or ribbon. This project is easy to manage and can be tailored to match the color scheme of her room’s décor. You’ll need to synchronize the arrows’ colors with the overall aesthetic you want to achieve.
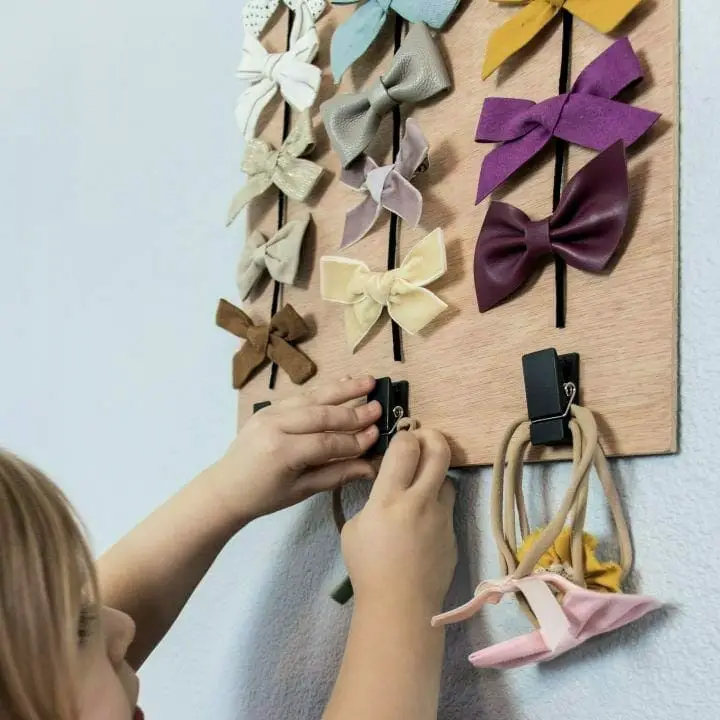
Make Your Own Leather Cord Bow Holder
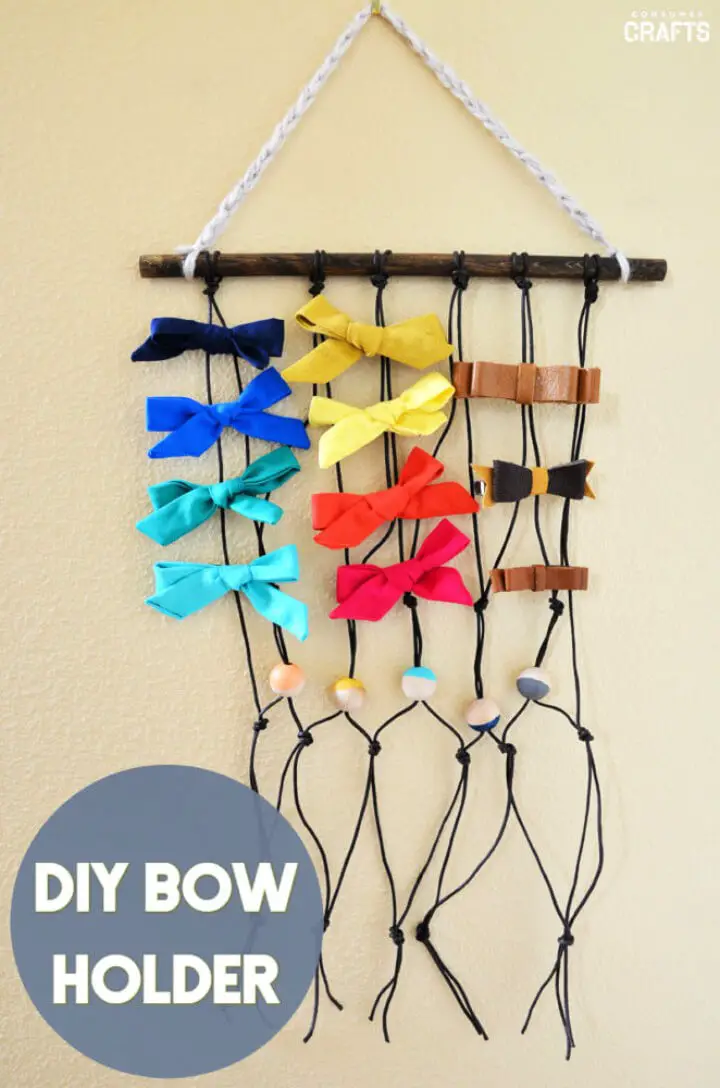
If you’re tired of constantly digging through your bow drawer, searching for the perfect accessory, it’s time to create a DIY bow holder that’s both functional and stylish. With just a few simple materials, including a wooden dowel, leathercraft cord, wood beads, craft paint, and wood stain, you can whip up this clever storage solution in no time. Simply gather your supplies and follow the steps to bring your vision to life.
Turn a Frame Into Bow Holder
Transforming your workspace with a touch of elegance is simpler than you think. Invest just five to ten minutes of your day to create a stunning bow holder that doubles as a chic decorative piece. To get started, gather a few essential items: a picture frame, a trendy ribbon, a hot glue gun, and some scrapbook paper. The ribbon’s stylish flair will elevate the overall design, adding a sophisticated touch to your workspace.
DIY Shadow Box Bow Holder
Take an old shadow box and breathe new life into it by transforming it into a unique and practical DIY bow holder. This project makes for an excellent gift idea, especially for little girls who love all things sparkly. To make it extra special, add a personalized name tag that matches the color scheme of the shadow box, making it a one-of-a-kind present.
Bow Holder Using Embroidery Hoop and Baker’s Twine
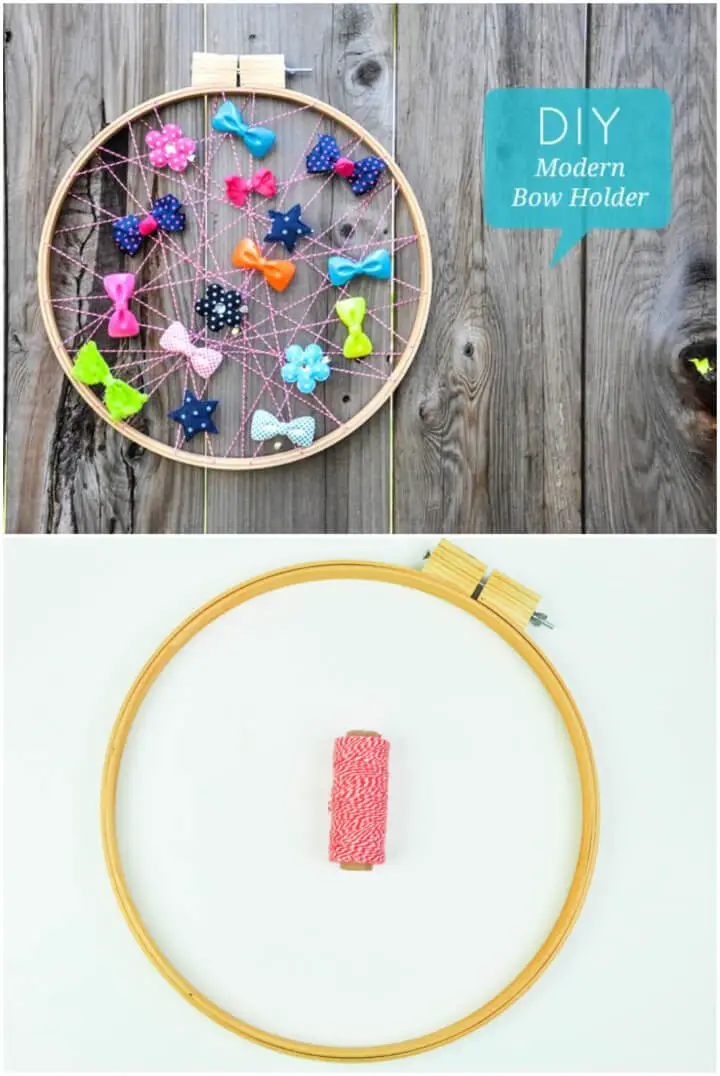
There’s no thrill quite like sparking creativity for the true DIY enthusiast. Take, for instance, the effortlessly chic DIY bow holder that can be crafted using an embroidery hoop and baker’s twine. This ingenious solution transforms a mundane space into a visually appealing area that showcases your personal style. By repurposing everyday items, you’re not only exercising your creative muscles but also adding a touch of elegance to your surroundings.
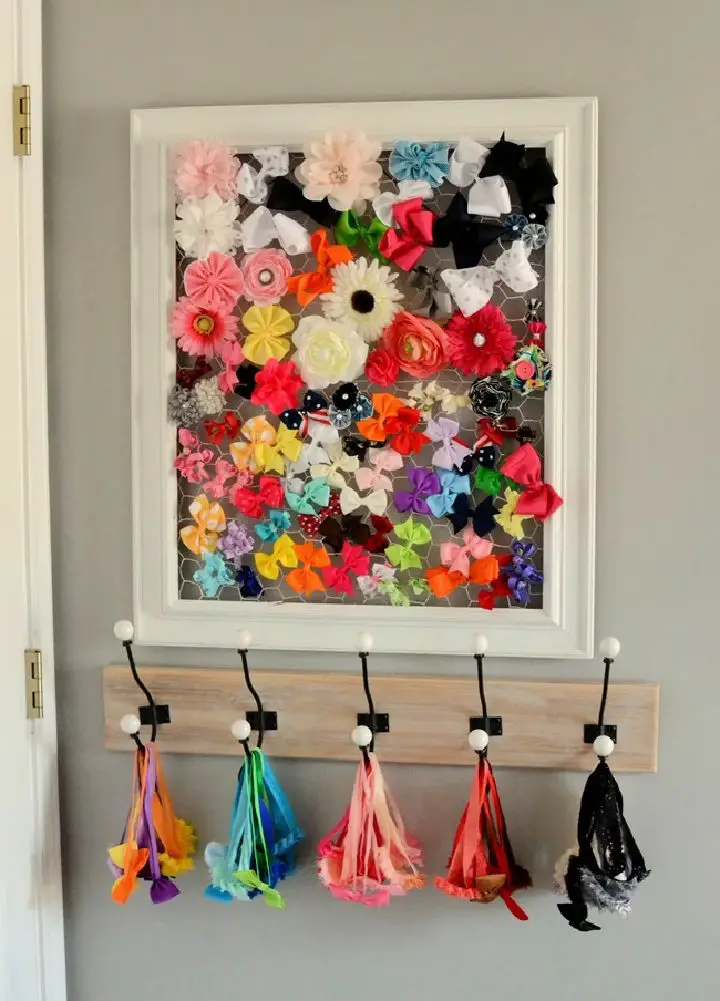
How to Make a Bow Holder Frame
For art and craft enthusiasts like Jackie, creating something beautiful is a labor of love. That’s why we’re thrilled to share this simple yet clever DIY bow holder project with you. To get started, head to your local hardware store or online retailer and pick up the following materials: a large ornate frame, spray paint, chicken wire, wire cutters, staple gun, glue gun, and an assortment of hair accessories. With these basic tools, you’ll be well on your way to creating a stunning piece that will showcase your favorite bows with ease.
DIY Rainbow Unicorn Bow Holder
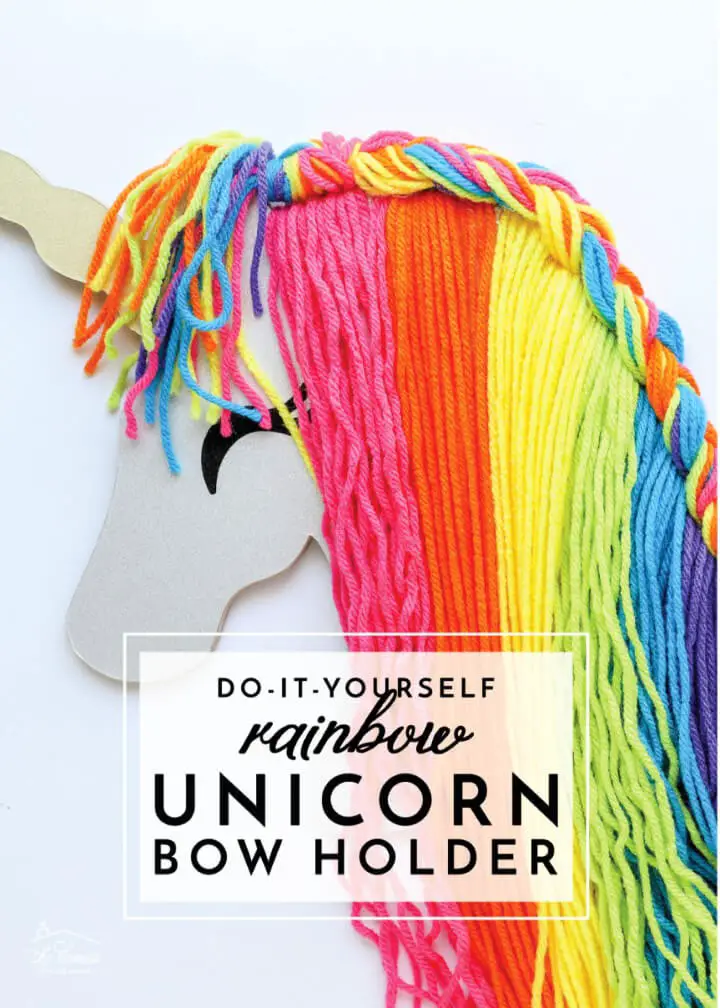
Meet the whimsical rainbow unicorn DIY bow holder that’s sure to capture everyone’s attention. To create this delightful piece, you’ll need a sturdy chipboard base and a vibrant yarn for added color. With its irresistible charm, this DIY project is sure to become an instant hit with your little ones – and put an end to any bow management woes!
Elsa Tutu Bow Holder
Since the release of The Frozen movie, Elsa has become a beloved character for many young girls. To help them develop organizational skills and independence, we’ve created a simple yet effective DIY bow holder that can be easily replicated at home. This fun project not only encourages children to manage their belongings but also fosters a sense of pride and accomplishment as they learn to take care of their own things. By creating this holder together, you’ll be empowering your little princesses to become more responsible and self-sufficient in their daily lives.
Simple DIY Hot Air Balloon Bow Holder
Dispel the notion that organizing your space has to be tedious and uninspiring. We’re here to challenge that idea with an innovative and visually stunning hot air balloon DIY bow holder. This unique piece will not only add a touch of elegance to any room, but also captivate your heart with its serene beauty.
How to Make Hair Bow Holder
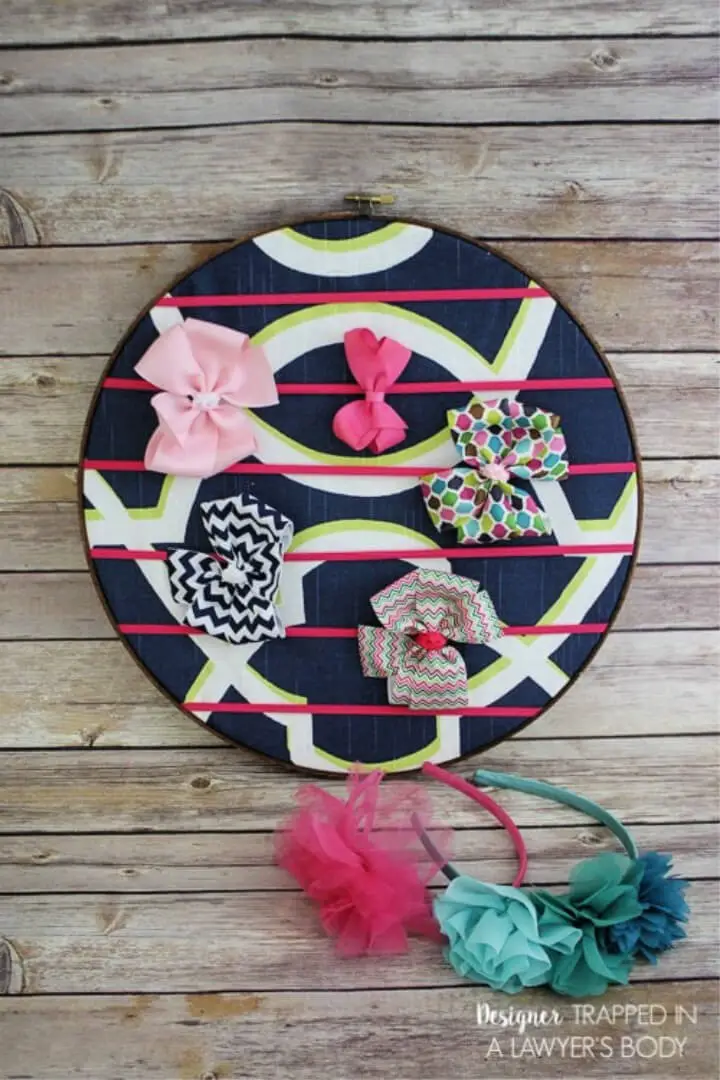
Embrace the art of upcycling by turning a simple DIY project into a masterpiece that adds significant value and meaning. A perfect example is this ingenious circular DIY bow holder, which can be customized with varying color schemes to impress even the most discerning individuals who appreciate your collection of hair bows.
Tutu Bow Holder with a Bodice Template
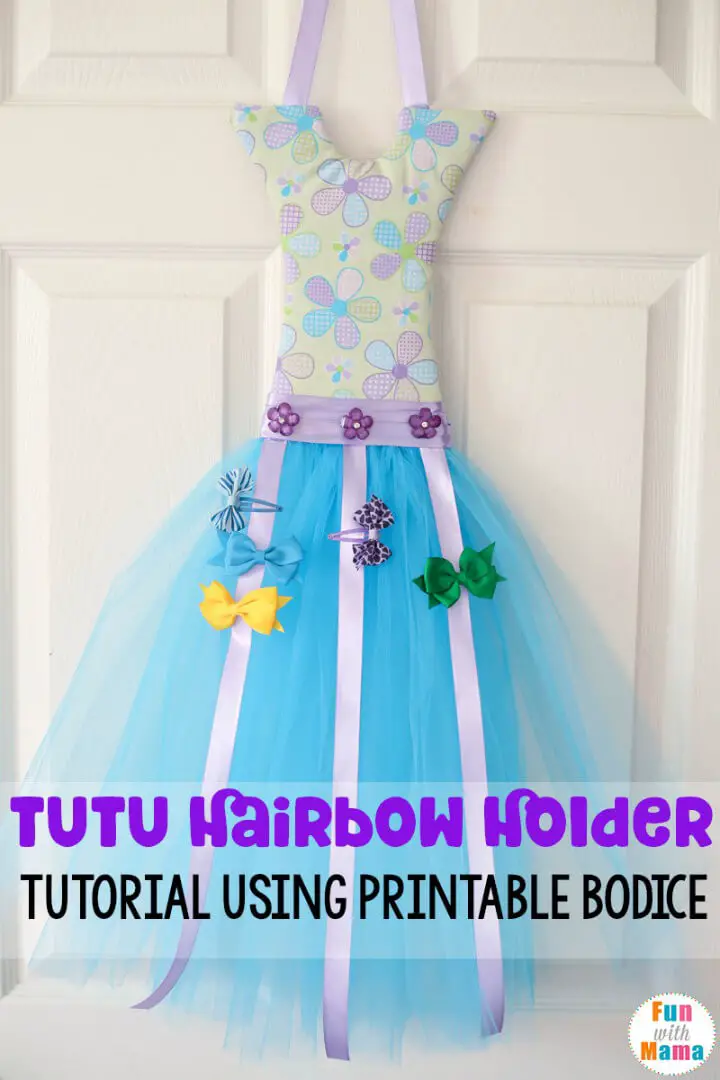
Transforming a tutu-inspired bodice into a DIY bow holder brings a touch of whimsy and charm to your little girl’s bedroom. But that’s not all – this creative project also allows her to have a blast organizing her hair accessories in a way that’s both aesthetically pleasing and functional. It’s the perfect blend of playfulness and practicality, making it an ideal activity for kids who love getting creative with their mom.
Personalized Hanging Bow Holder
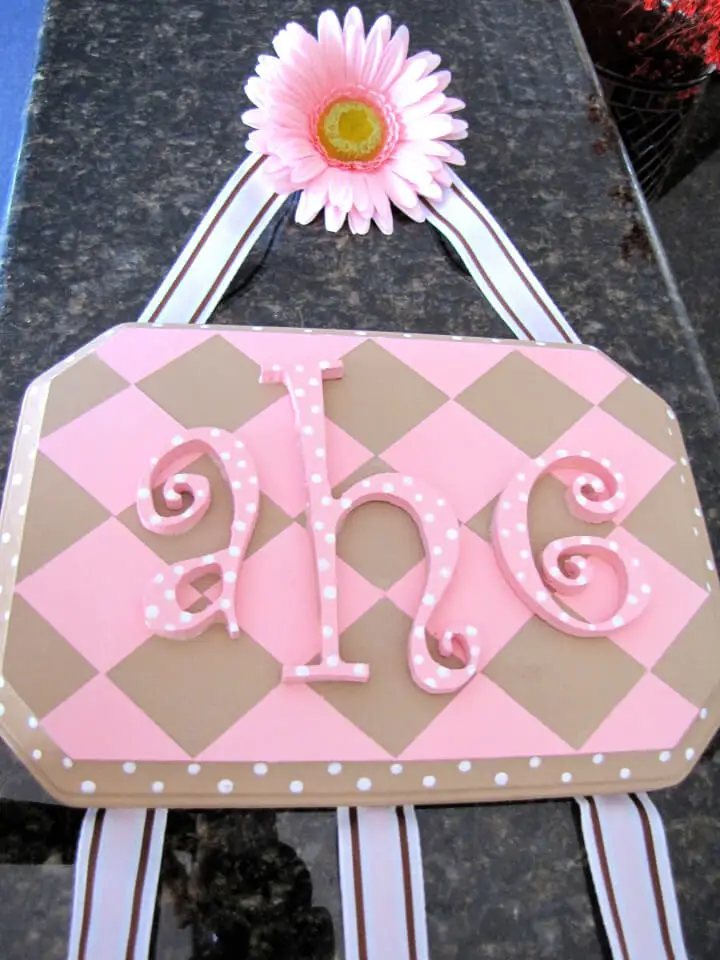
Incorporating personal touches into your DIY projects can elevate them to new heights. One such instance is creating a charming DIY bow holder, which can be made more appealing by incorporating long, flowing ribbons. The journey begins with a humble piece of wood, setting the stage for a unique and functional piece that reflects your personality.
Cheap DIY Chicken Wire Hair Bow Holder
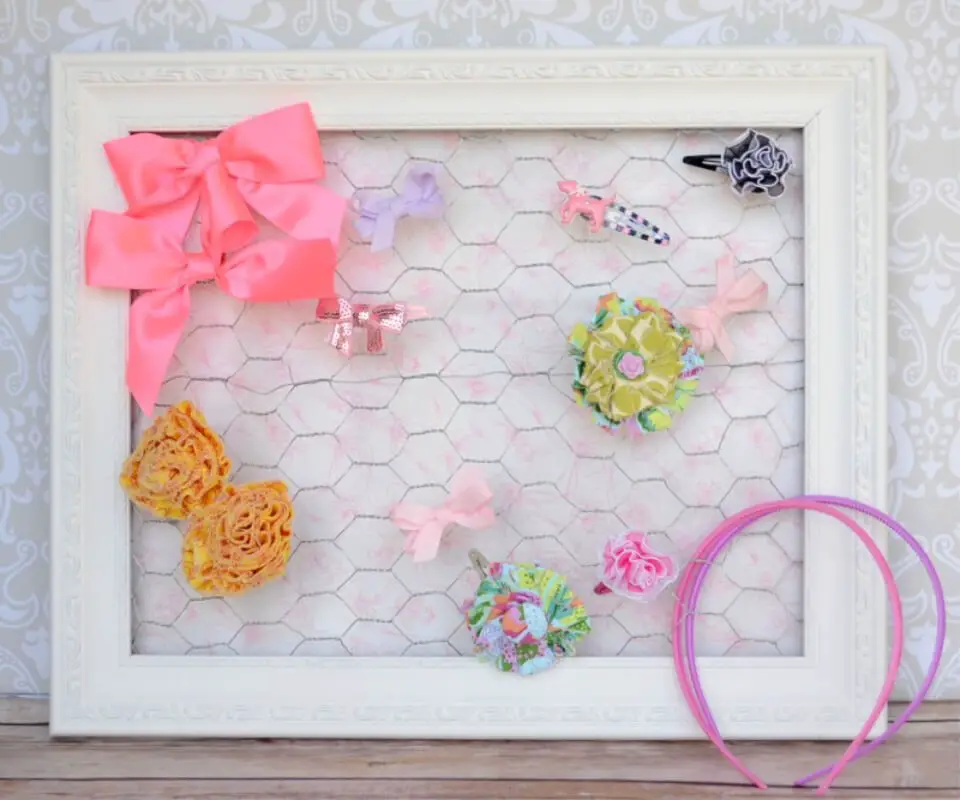
Transforming your hair styling routine has never been easier or more budget-friendly. Create a unique and functional DIY hair bow holder by incorporating chicken wire and a frame, all in under 15 minutes. The versatility of this project lies in its ability to be customized with fabric, added behind the chicken wire for a soft, subtle background. This simple yet clever idea will have you styling like a pro in no time.
Conclusion:
In conclusion, our 20 DIY bow holder ideas offer craft enthusiasts a unique opportunity to showcase their collections in a beautiful and organized manner. By following each step from material selection to customization, crafters can unleash their creativity and showcase their personal style. Additionally, prioritizing safety and environmental sustainability ensures not only a successful project but also a responsible one. As you navigate this comprehensive guide, you’ll find valuable troubleshooting tips and innovative ideas for customization, empowering you to create a functional and stylish bow holder that reflects your unique perspective.
