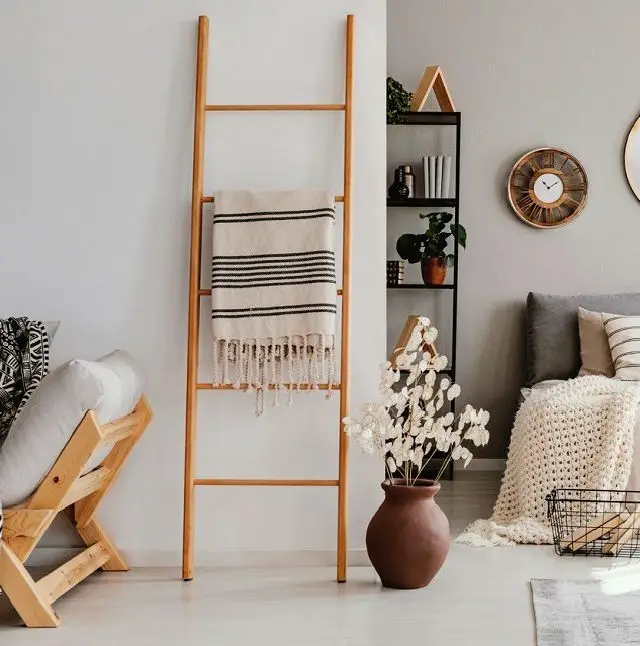
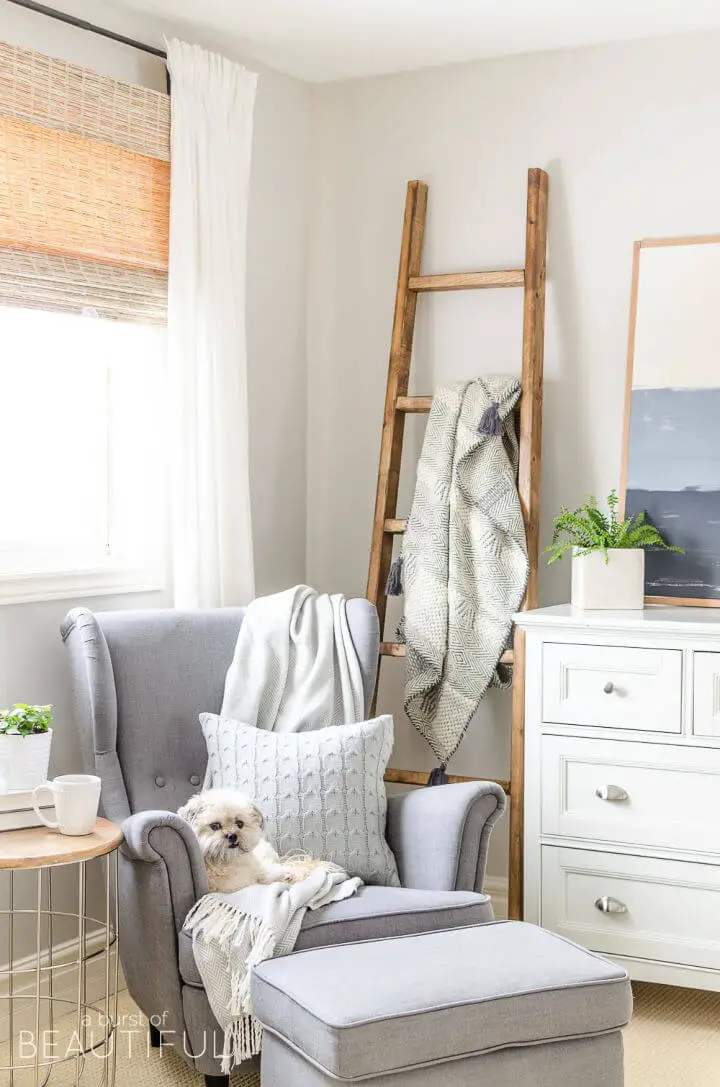
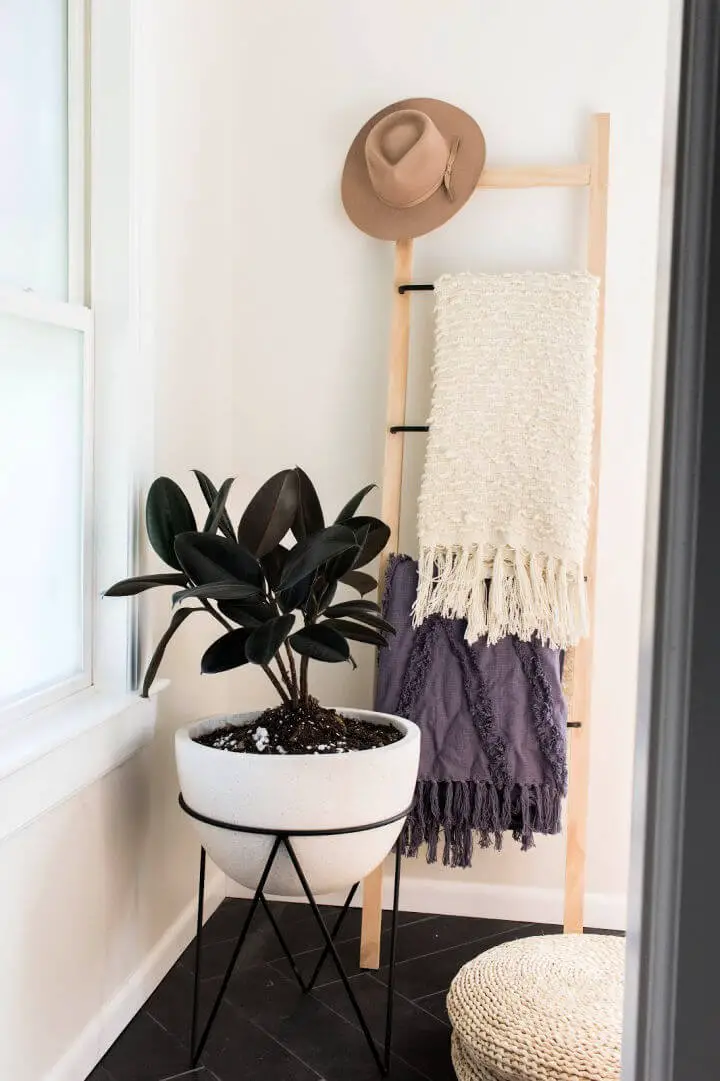
Transform the way you store your blankets and quilts with a stylish DIY blanket ladder. With over 50 free plans at your disposal, you can create a unique storage solution that suits your home’s aesthetic. This comprehensive guide covers everything from customization ideas to safety tips, troubleshooting common issues, and advanced techniques to ensure your project turns out flawlessly. Learn how to balance style and functionality as you choose the perfect design, select materials, add decorative elements, and ensure your ladder is both beautiful and practical. Additionally, discover valuable insights on safety practices, sustainable materials, maintenance, and care to keep your blanket ladder looking great for years to come. For experienced DIY enthusiasts, this guide also explores advanced techniques like incorporating metal accents, joinery techniques, and decorative carving to give your project a personalized touch. Whether you’re a seasoned crafter or just starting out, get ready to embark on a creative journey that will leave you with a functional piece of art for your home.
How to Make a Blanket Ladder – Step by Step Instructions
To create a functional and stylish home decor piece, we’re delighted to share our comprehensive instructions for building a blanket ladder. Follow along as we take you through each step, from preparing materials to assembly and finishing touches.
Materials You’ll Need:
For a comprehensive DIY project, you’ll need to gather the right materials and tools. Here’s what you’ll require: three large furring strips measuring 1.5 inches by 1.5 inches in size. You’ll also need 2.5-inch nails for securing the wood pieces together. To add some color and character, consider using a wood stain of your choice – Dark Walnut or Classic Gray by Minwax are popular options. Alternatively, you could opt for chalk paint to give your project a unique finish. Don’t forget to include sandpaper in your toolkit as well. Finally, make sure you have the necessary tools: a saw if you plan on cutting wood yourself, a drill for drilling holes and driving screws, a screwdriver for tightening loose fasteners, and a hammer or mallet for tapping pieces into place.
Step by Step Instructions
Preparing the Wood
To construct your ladder, begin by acquiring three substantial furring strips. Divide two strips into five-foot lengths for the sides, and cut the remaining strip into four 17-inch pieces for the rungs. If you’d rather not wield a saw yourself, many hardware stores offer free cutting services – a convenient option to consider.
When it comes to selecting wood, keep in mind that opting for lumber from retailers like Home Depot can be a cost-effective approach. Their offerings tend to have a slightly rounded profile and absorb stain more effectively, which can only add to the rustic charm of your ladder’s finished appearance.
Sanding
When the cutting process is complete, it’s essential to refine your pieces by smoothing out any rough edges that may have developed during the cut. This step is crucial for both safety and aesthetic considerations. While you could invest in a sanding block, a simpler approach involves wrapping a piece of sandpaper around a wooden block, which proves just as effective.
Adding Character
To achieve an authentic farmhouse aesthetic, incorporate deliberate imperfections into your woodwork using a combination of manual techniques. With a flathead screwdriver, mallet, and hammer, carefully create dents and nicks that will absorb subsequent stains, imbuing the final product with a charming rustic quality.
Assembly Time
To construct the ladder, start by creating pilot holes at three-inch intervals from the top of the five-foot long pieces that will serve as the foundation for the first rung. Subsequently, secure these pieces with 2.5-inch nails, guaranteeing they are tightened to perfection. As you continue attaching subsequent rungs, maintain a consistent 12-inch gap between each to achieve a harmonious and balanced appearance.
In order to ensure the structural integrity of your ladder, it is crucial to tighten each screw as much as possible. This meticulous attention to detail will result in a sturdy and long-lasting construction that can withstand various applications.
Staining or Painting
To give your ladder a unique touch, apply your chosen stain or chalk paint to all surfaces, allowing yourself to get creative with different techniques to achieve various rustic looks. You can play around with applying the stain or paint in distinct ways to produce distinctive effects. Once the stain has dried, you may choose to add an additional layer of polyurethane for a glossy finish and enhanced protection, much like we saw in one of our previous project examples.
Final Touches
With the ladder transformed from its plain state, it’s now time to give it a decorative boost. Simply position it against a wall and wrap it with your treasured blankets or throws, effortlessly elevating the structure into a cozy and charming focal point that brings warmth and personality to your living space.
Video Tutorial
To enhance your understanding of the DIY process, I recommend supplementing this written guide with our accompanying YouTube video. The visual tutorial provides a step-by-step demonstration of the techniques outlined in this guide, allowing you to see each stage come together and making it even simpler to replicate the project at home.
Customization Ideas for Your DIY Blanket Ladder
Transforming a blank wall or floor into a cozy haven isn’t just about functionality, but also a chance to unleash your creative flair and make your living space uniquely yours. By crafting a DIY blanket ladder, you’re not only gaining a practical storage solution, but also an opportunity to inject personality into every room. Here’s how:
Choose Your Style
As you envision your ideal space, consider the overarching aesthetic you’re striving to achieve. Will it be a cozy, rustic retreat or a sleek, contemporary haven? The answer will shape not only the materials you choose but also the overall finish and tone of the room.
Selecting Materials
When it comes to choosing the perfect material for your home’s interior design, several options stand out. For a classic feel that exudes warmth and natural charm, wood is an excellent choice, with popular varieties including pine, cedar, and oak. Those looking for a more industrial aesthetic may opt for metal, specifically copper or iron pipes, which add a touch of edginess to any room. Meanwhile, eco-conscious homeowners can’t go wrong with bamboo, a lightweight yet sustainable material that brings a unique charm to any space.
Finishing Touches
When it comes to enhancing the appearance of your ladder, you have three primary options: stain, paint, and varnish. The choice ultimately depends on the aesthetic you’re aiming for and the current state of the ladder’s wood. If you want to add warmth and depth to your ladder’s wood tone, consider a stain in a shade that complements your surrounding decor. Alternatively, if you’re looking to make a bold statement, a coat of paint can completely transform your ladder’s appearance. You can opt for vibrant colors or softer pastel hues, depending on your personal preference. For a more subtle approach, clear varnish can not only protect the wood from damage but also bring out its natural beauty, highlighting the intricate grain patterns and textures.
Decorative Elements
To give your ladder a unique and inviting appearance, consider adding some visual interest through creative embellishments. For instance, you can wrap rope around the rungs to add texture and visual appeal. Alternatively, string fairy lights over the ladder’s frame to create a warm and cozy ambiance. If you prefer a softer look, try tying fabric strips to the sides of the ladder, which will not only add color but also create a sense of depth and dimension.
Functionality with Flair
To take your DIY project to the next level, consider implementing adjustable rungs that can accommodate various blanket sizes. This thoughtful addition will ensure your ladder remains functional regardless of the throw blankets you choose to display. Furthermore, a folding mechanism will allow you to store your ladder away when not in use, freeing up valuable space in your home. Additionally, incorporating hooks on the sides will provide ample opportunity to hang additional items, such as bags or accessories, keeping them organized and within reach. Ultimately, it’s the creative freedom that DIY projects offer that makes them so rewarding. By infusing your project with personal style and flair, you’ll end up with a one-of-a-kind piece that truly reflects your unique perspective.
Safety Tips and Best Practices for Building a DIY Blanket Ladder
As you begin working on a DIY project such as constructing a blanket ladder, it’s crucial to prioritize safety above all else. To guarantee a safe and enjoyable crafting experience, consider the following vital guidelines: first, ensure you’re wearing appropriate personal protective equipment, including gloves, goggles, and a dust mask if necessary; next, maintain a well-ventilated workspace free from any hazards or obstacles that could obstruct your work flow; finally, take regular breaks to stretch and rest your eyes, minimizing the risk of fatigue-related accidents. By adhering to these fundamental safety precautions, you’ll be able to focus on the creative process without compromising your well-being.
Personal Protective Equipment (PPE)
When engaging in DIY projects, it’s crucial to prioritize personal protective equipment (PPE) to safeguard against potential hazards. A trio of essential PPE components include eye protection, hearing protection, and gloves.
Firstly, eye protection is vital to shield your eyes from dust, debris, and other hazardous particles that can cause serious injury or even long-term vision damage. Safety goggles or glasses with shatter-resistant lenses are effective in preventing such accidents.
Secondly, hearing protection is equally important when operating loud power tools or machinery. Earplugs or earmuffs designed for industrial use can significantly reduce noise exposure and prevent permanent hearing loss.
Lastly, gloves play a vital role in protecting your hands from splinters, sharp edges, and other potential injuries. A good pair of work gloves should provide excellent grip, flexibility, and resistance to abrasion.
Tool Safety
Before starting any project, it’s essential to lay a solid foundation by taking care of the basics. First, familiarize yourself with the manuals that come with your tools – this will help you understand their capabilities and limitations. Next, inspect each tool carefully for any signs of damage or wear and tear. If anything is damaged or worn out, take the necessary steps to repair or replace it before proceeding. Finally, make sure you’re using each tool in accordance with its intended purpose. This might seem obvious, but proper usage can help prevent accidents and ensure that your projects turn out as planned.
Workspace Setup
To create an ideal workspace, it’s crucial to establish a foundation of organization and comfort. Start by ensuring your clutter-free area is free from tripping hazards, allowing you to move around safely and focus on the task at hand. A stable surface is also essential, providing a level and consistent platform for your work. Furthermore, good lighting is vital to prevent eye strain and ensure that every detail is clearly visible. By combining these elements, you’ll be able to work efficiently and effectively without distractions or discomfort.
Ladder Stability
To ensure stability and safety while using ladders, consider implementing the following measures. Firstly, attach rubber pads to the feet of your ladder to prevent it from slipping on smooth surfaces or floors. This simple modification can significantly reduce the risk of accidents. Next, cut the bottom of the ladder legs at a slight angle, allowing for better floor contact and minimizing the likelihood of the ladder tipping over. Additionally, if you’ll be placing the ladder in a high-traffic area, consider securing it to the wall using furniture straps. This will prevent any unwanted movements or dislodgments, providing an added layer of security.
Handling Materials
When engaging in physical labor, it’s essential to prioritize proper lifting techniques to avoid straining your back. To do this effectively, bend at the knees and maintain a straight back as you lift heavy objects. This posture will help distribute the weight more evenly and reduce the risk of injury. Additionally, be mindful of any sharp edges on materials such as wood or metal. To prevent accidental cuts, take the time to sand down these edges, ensuring your workspace is safe and hazard-free.
Mindful Crafting
To achieve a seamless DIY experience, it’s essential to cultivate focus and discipline. This means setting aside distractions and dedicating yourself to the task at hand. However, it’s equally important to take regular breaks to recharge, reflect on your progress, and reassess your approach. By doing so, you’ll be able to work efficiently and effectively while minimizing the risk of injury or frustration. As you embark on a DIY project like building a blanket ladder, remember to prioritize safety by following established guidelines and best practices. With careful preparation and execution, you’ll not only create something beautiful but also enjoy the process and feel a sense of accomplishment.
Sustainability and Eco-Friendly Materials for Your DIY Blanket Ladder
Integrating sustainability into your DIY endeavors not only yields environmental benefits, but also infuses a personal narrative into each project. For instance, when selecting materials for your blanket ladder, consider incorporating eco-friendly options that harmonize with your creative vision.
Understanding Sustainable Materials
When crafting a DIY blanket ladder, it’s essential to prioritize sustainable materials that minimize their environmental footprint from production to disposal. To achieve this, consider the following options:
Reclaim and repurpose existing materials by using reclaimed wood or metal, giving old materials a new life.
Alternatively, opt for renewable resources like bamboo, which is not only sturdy but also fast-growing and stylish.
Lastly, choose locally-sourced materials to reduce transportation emissions and support local communities.
Eco-Friendly Wood Options
When it comes to choosing the right wood for your project, there are several factors to consider. One important consideration is whether the wood is certified by organizations like the Forest Stewardship Council (FSC), which ensures that the wood has been harvested in a responsible and sustainable way. Another option is to opt for reclaimed wood, which can add character and history to your final product. Reclaimed wood is salvaged from old furniture or buildings, making it a unique and eco-friendly choice. Additionally, bamboo is also worth considering. As a grass, bamboo regenerates quickly, making it a highly sustainable option that’s gentle on the environment.
Non-Toxic Finishes
When it comes to finishing your ladder, consider opting for eco-friendly options that not only protect the environment but also your product itself. Water-based finishes are a great choice as they have significantly lower volatile organic compounds (VOCs) compared to traditional finishes. Alternatively, you can choose from natural oil-based finishes like linseed or tung oil, which provide a chemical-free alternative. For a food-safe option, consider a beeswax finish that gives your ladder a soft, natural sheen.
Creative Reuse Ideas
Embrace unconventional materials to give your DIY ladder a one-of-a-kind personality. Consider repurposing fabric scraps to add vibrant hues or transforming old T-shirts into soft padding for the rungs. Even wine corks can be put to good use as end caps, infusing your project with a touch of whimsy. By opting for eco-friendly materials, you’re not only creating a unique piece but also contributing to a more sustainable future.
Troubleshooting Common Issues in DIY Blanket Ladder Projects
As you embark on creating your DIY blanket ladder, be prepared for minor setbacks. They’re an inevitable part of the DIY process! To help you overcome these obstacles, we’ve compiled a list of common issues and their corresponding solutions.
Problem: Wobbly Ladder
To guarantee a safe and secure setup, it’s crucial to ensure that every joint in your ladder is properly secured. If needed, apply wood glue to reinforce the stability of the structure. Additionally, verify that the floor or surface where you’re positioning the ladder is level and even, as an uneven surface can compromise the overall stability of the ladder.
Problem: Uneven Rungs
When tackling a DIY project that involves building or installing stairs, it’s crucial to get the job done right the first time. A simple yet effective way to achieve this is by adopting the ‘measure twice, cut once’ mantra. This approach involves double-checking your measurements before making any cuts or adjustments. Additionally, using a level to ensure each rung is perfectly horizontal will guarantee a sturdy and safe staircase. By taking these extra precautions, you’ll save yourself time and potential headaches in the long run.
Problem: Splintered Wood
To ensure a seamless and splinter-free build, take the time to meticulously sand the wood before assembly. Opt for high-quality wood that has been treated to withstand wear and tear, significantly minimizing the risk of imperfections and making the overall construction process smoother.
Problem: Difficulty in Staining
To achieve a consistent and high-quality finish, it’s essential to apply a pre-stain wood conditioner prior to staining your wood project. This crucial step helps to create an even surface for the stain to adhere to, ultimately resulting in a professional-looking finish. Before proceeding with the actual staining process, take some time to test the stain on a scrap piece of wood. This allows you to gauge the color and consistency of the stain, making any necessary adjustments before moving forward with your project.
Problem: Paint Not Adhering
Before applying your chosen paint, ensure the wood surface is properly prepared to promote optimal adhesion and longevity. Begin by thoroughly cleaning the area to remove any dirt, grime, or debris that may be present. Next, lightly sand the surface to create a smooth, even texture that will allow the primer to bond effectively. Finally, select a primer specifically designed for use with your chosen paint type, following the manufacturer’s instructions for application and drying times.
Problem: Ladder Not Leaning at the Right Angle
To ensure a stable and secure ladder setup, consider adjusting the lower rungs’ angle of attack. Aim for a subtle incline, roughly between 10 to 15 degrees, as this can provide the necessary stability to prevent wobbling or toppling.
Problem: Rungs Slipping During Assembly
To ensure your rungs remain securely in place, utilize clamps to hold them steady as you attach them. To further prevent wood shifting, consider drilling pilot holes first. By proactively anticipating potential issues and addressing them accordingly, you’ll be well on the way to constructing a robust blanket ladder that meets your expectations.
Advanced Techniques for Experienced DIYers
For those who have already grasped the fundamentals of constructing a DIY blanket ladder, taking their skills to the next level can be an exciting and rewarding experience. To help you achieve this, I’ll share some advanced techniques that will elevate your project beyond the basics, resulting in a truly unique piece that can be proudly displayed in your home.
Incorporating Metal Accents
Transforming the rustic charm of a blanket ladder into a modern or industrial masterpiece is as simple as incorporating metal elements. One way to achieve this look is by swapping out traditional wooden rungs for galvanized metal pipes, adding a sturdy and rugged aesthetic to your design. For an extra touch of sophistication, consider finishing the ends of your metal rungs with polished metal caps, instantly elevating the overall appearance of your blanket ladder.
Joinery Techniques
When it comes to joining wood, there’s more to it than just relying on screws and nails. By mastering various joinery methods, you can create strong and visually appealing joints that elevate the overall quality of your projects. Two such methods worth exploring are dowlings and mortise and tenon joinery.
Dowels offer a way to create screw-free joints that provide exceptional strength while maintaining a clean, unobtrusive appearance. This method is particularly useful when building structures like ladders or cabinets where aesthetics are crucial.
Mortise and tenon joinery, on the other hand, is a classic woodworking technique that combines strength with visual appeal. By carefully cutting mortise and tenon joints, you can create a strong and lasting bond between two pieces of wood that also looks great.
Adjustable and Extendable Designs
Transform your blanket ladder into a multi-functional masterpiece by incorporating these clever modifications:
Adaptable Rungs: Replace traditional rungs with hinged ones that fold out, granting you more room to hang blankets of various sizes.
Adjustable Height: Elevate the functionality of your ladder with telescopic legs that allow for effortless height adjustments. With this simple modification, you can effortlessly adapt your ladder to suit any cozy corner or snug nook.
Decorative Carving
Elevate your ladder’s aesthetic by incorporating decorative carvings that mirror your unique style. This can be achieved through several techniques, including relief carving and intricate pattern routing. Relief carving allows you to add three-dimensional designs or patterns along the sides of your ladder, giving it a distinctive look. Alternatively, you can use a router to create detailed and complex patterns on the rungs or side rails, further emphasizing your personal touch.
Finishing Techniques
Transform your DIY blanket ladder project into a one-of-a-kind masterpiece by experimenting with innovative finishing techniques. To achieve a distinctive look, try combining the charred wood effect with epoxy resin to create an intriguing contrast.
For a dramatic appearance, use a torch to lightly scorch the wood surface and then seal it. Alternatively, fill knots or imperfections in the wood with colored epoxy resin, injecting an artistic touch into your design.
By mastering these techniques, you’ll not only elevate your DIY skills but also produce a functional piece of art that adds personality to your home.
Maintenance and Care for Your DIY Blanket Ladder
To keep your DIY blanket ladder in pristine condition and continue to be a stunning and practical addition to your home, follow these easy-to-implement maintenance tips. By doing so, you’ll ensure it remains a treasured piece for years to come.
Regular Cleaning
To maintain your ladder’s cleanliness and longevity, it’s essential to perform regular maintenance tasks. Begin by removing any loose dust using a soft cloth or duster. This simple step can help prevent particles from accumulating and making the surface more difficult to clean in the future.For more thorough cleaning, you’ll want to use a damp cloth with mild soap. Gently wipe down the ladder’s wood surfaces, taking care not to soak the material. Once you’ve finished cleaning, be sure to dry the area immediately to prevent any moisture from seeping into the wood and causing damage.
Protecting the Wood
To preserve the integrity and longevity of your ladder, it’s essential to maintain a dry environment. Ensure that any accumulated moisture is thoroughly dried, as prolonged exposure to water can cause significant damage to the wooden structure. Furthermore, it’s crucial to keep your ladder at a safe distance from direct heat sources, as extreme temperatures can warp or distort the wood, compromising its stability and overall performance.
Periodic Inspections
Before delving into the more creative aspects of your woodworking project, it’s essential to ensure the foundation is solid and secure. Start by meticulously checking all screws, bolts, and fasteners for signs of wear or loosening over time. Make any necessary adjustments to tighten these components and prevent any potential issues from arising during the project. Additionally, inspect the wood itself for any visible damage such as cracks or splinters. If you find any imperfections, take the time to sand them down or effect repairs to maintain a smooth and even surface.
Refreshing the Finish
When the initial finish starts to wear off, consider reapplying a coat of paint, stain, or varnish to restore the surface’s original appearance. Additionally, for oil-based finishes, conditioning the wood by re-oiling it can help maintain its natural sheen and prevent drying out over time.
Safe Use
When constructing a DIY blanket ladder, it’s essential to handle the ladders properly to avoid damaging them. This involves moving the ladders with caution and care to prevent any scratches or dents. Additionally, it is crucial not to overload the ladders with too many blankets or heavy items as this can cause them to become unstable and potentially collapse. By adhering to these steps, you can ensure that your DIY blanket ladder remains charming, functional, and safe for use.
FAQs About DIY Blanket Ladders
Curious about the ins and outs of DIY blanket ladders? This in-depth FAQ answers your most pressing queries, providing valuable insights and practical advice to inform your next creative venture.
What is the best wood to use for a DIY blanket ladder?
Pine wood’s popularity stems from its cost-effectiveness and user-friendliness. Additionally, it has the advantage of taking on stain exceptionally well, resulting in a visually appealing grain pattern.
How can I prevent my blanket ladder from sliding on the floor?
To enhance the overall stability of your ladder, consider cutting the bottom of the legs at a subtle angle or employing small rubber pads. This simple modification can significantly reduce the risk of accidents by minimizing the likelihood of slipping or tipping.
What is the ideal way to secure a blanket ladder to the wall?
When it comes to keeping ladders stable and out of harm’s way, utilizing furniture wall straps can be a game-changer. This simple yet effective solution is particularly useful in busy households where there may be an increased risk of accidental knocks or tumbles – think high-traffic areas or homes with young children. By securing your ladder with furniture wall straps, you can rest assured that it will remain firmly in place, even when the household is in full swing.
How tall should a DIY blanket ladder be?
While the typical average height for a piece of furniture is around 6 feet and 6 inches, it’s entirely possible to tailor the dimensions to suit your specific ceiling height and individual style preferences.
What is the recommended space between the rungs of a blanket ladder?
When it comes to spacing out your blanket hangers, a common interval is between 12 and 15 inches. However, feel free to experiment with different spacings depending on the size of the blankets you want to display.
Can I use screws instead of dowels for the steps?
When considering alternatives to traditional doweling methods, it’s worth noting that using 2×2 lumber in conjunction with screws and adhesive can provide a robust solution for joining materials together.
How many rungs do I need for my blanket ladder?
Typically, five rungs are enough for most ladder users. However, if you’re dealing with longer ladders or want to maximize storage capacity by hanging multiple items, feel free to add more rungs as needed.
What tools are required to build a DIY blanket ladder?
The essentials for any DIY enthusiast or woodworking professional typically include fundamental power tools such as a miter saw, which excels at making precise crosscuts and angled cuts in lumber; a drill, ideal for driving screws and making pilot holes; a sander, useful for smoothing out wood surfaces; and clamps, necessary for holding materials together securely while gluing or joining them.
How do I ensure even distribution of rungs on the ladder?
Before commencing the project, it’s crucial to meticulously lay out the framework, meticulously measuring the distances between each beam and rung to ensure a harmonious distribution of space. This careful planning is vital to guarantee that every component is perfectly aligned, allowing for seamless drilling operations once the preparation stage is complete.
What kind of finish can I apply to my blanket ladder?
To achieve a desirable finish, you can opt for stain, paint, or varnish. For a more authentic appearance that also offers protection, consider Danish oil – it combines the benefits of staining and varnishing wood. Meanwhile, by addressing these FAQs and taking your time to plan, measure, and execute your blanket ladder project with care, you’ll be well-prepared for a successful outcome.
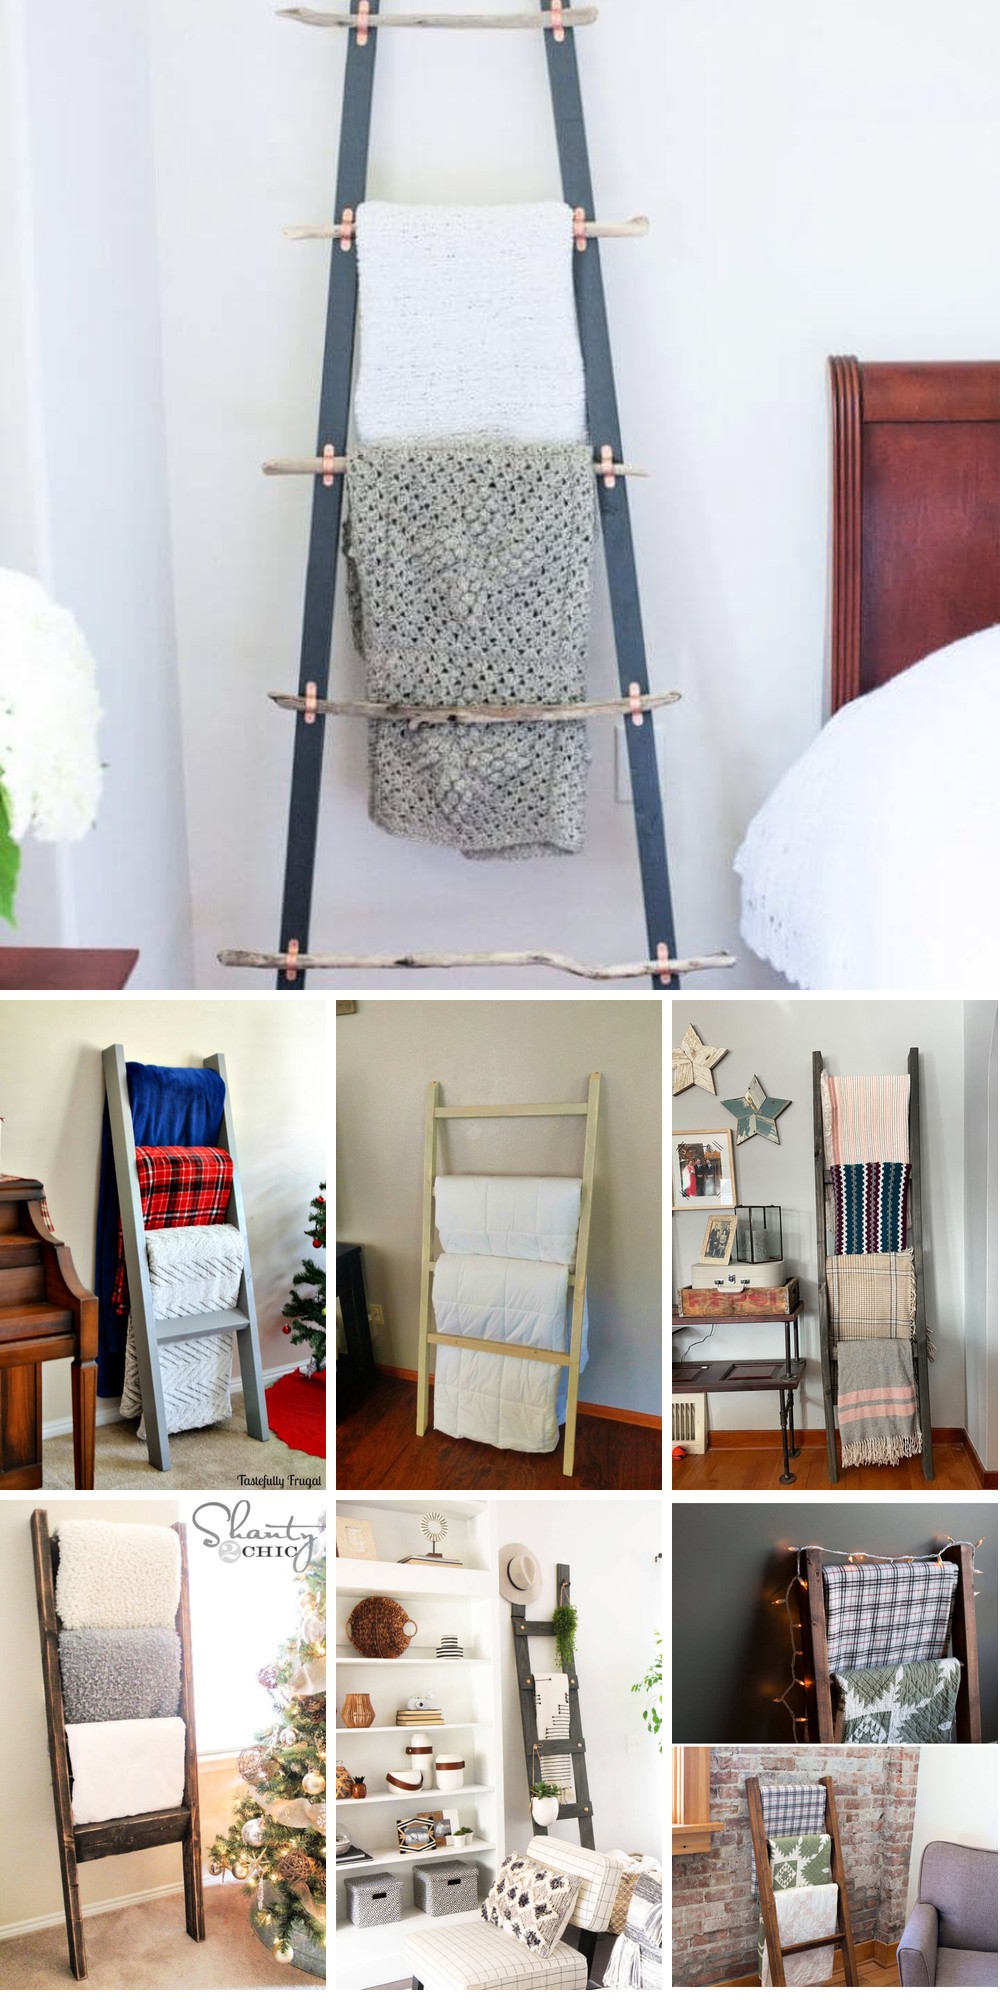
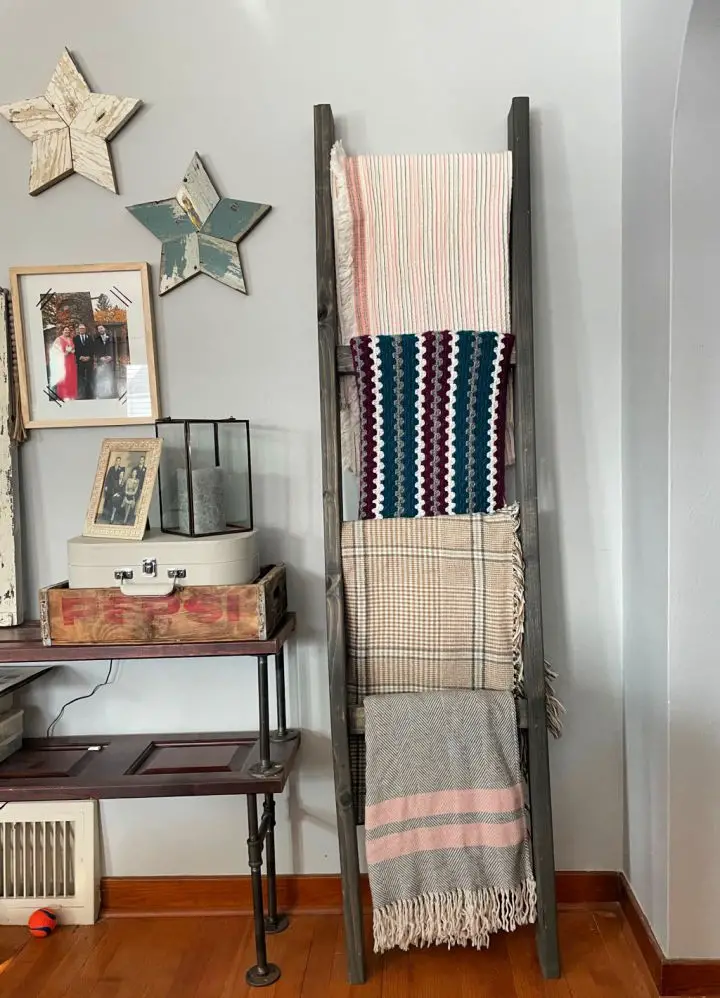
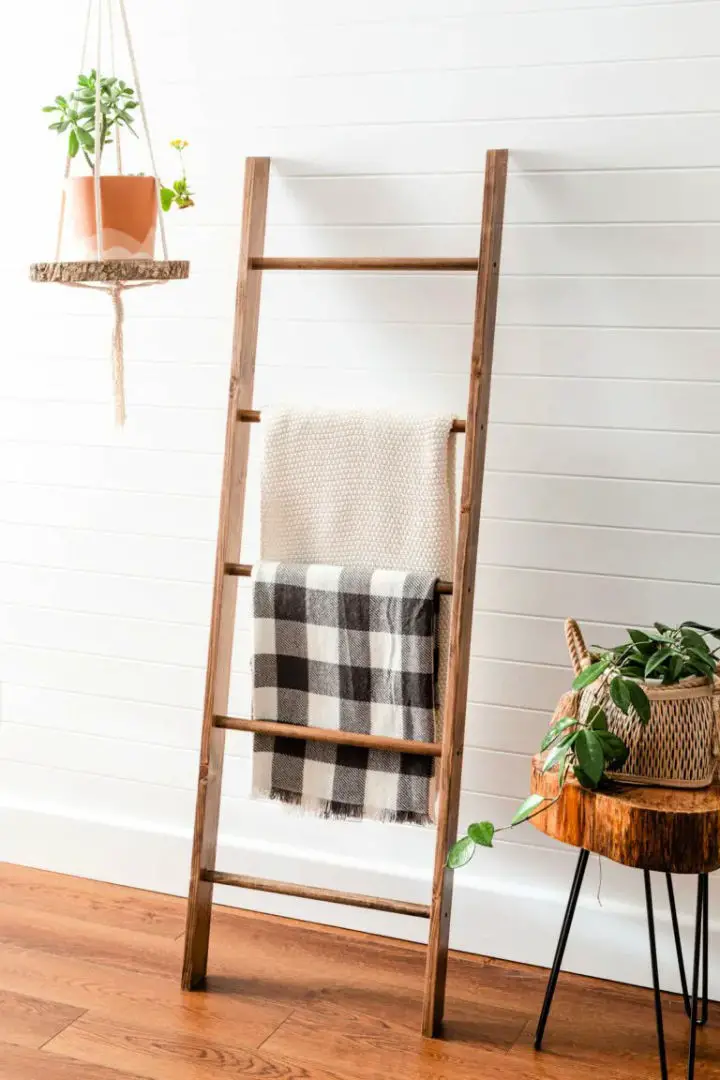
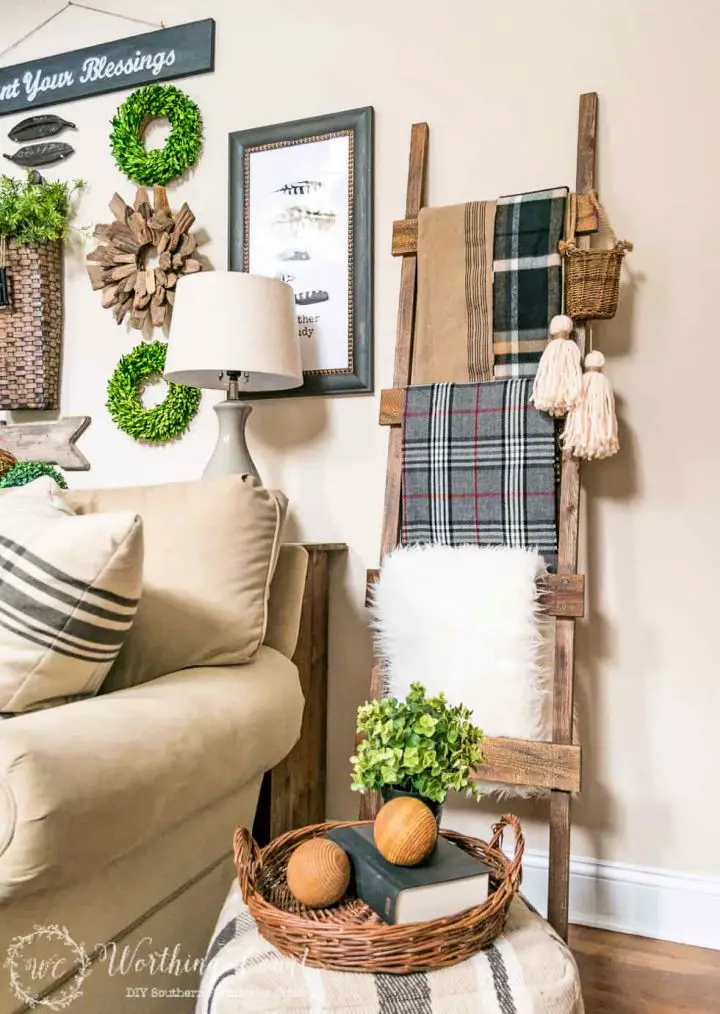
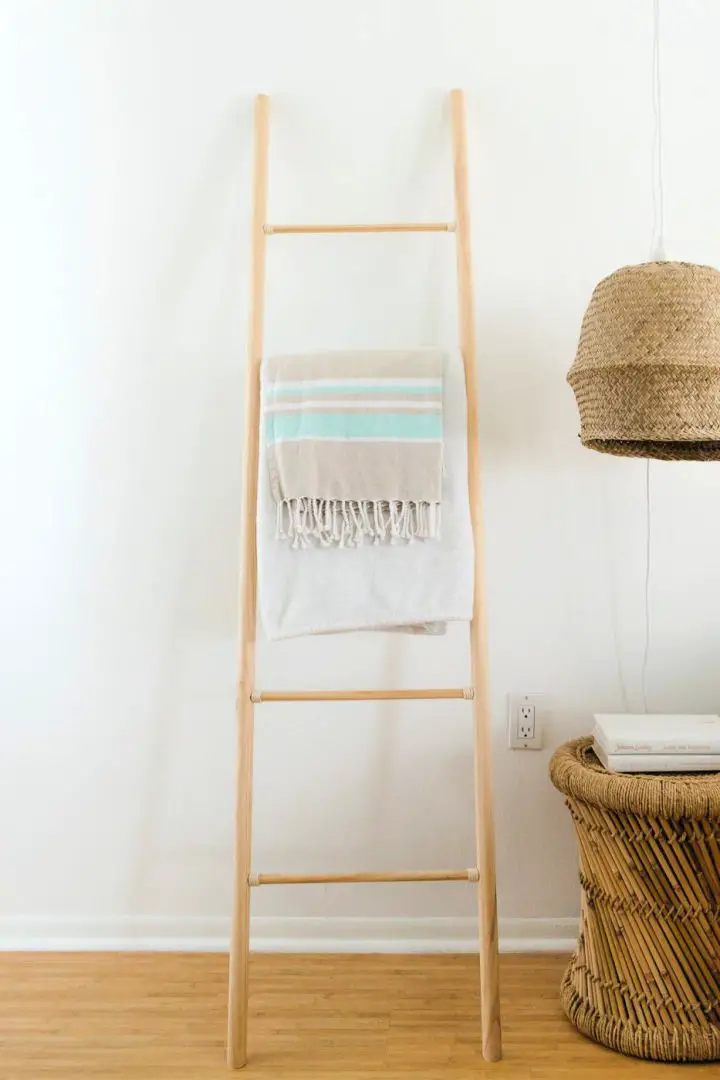
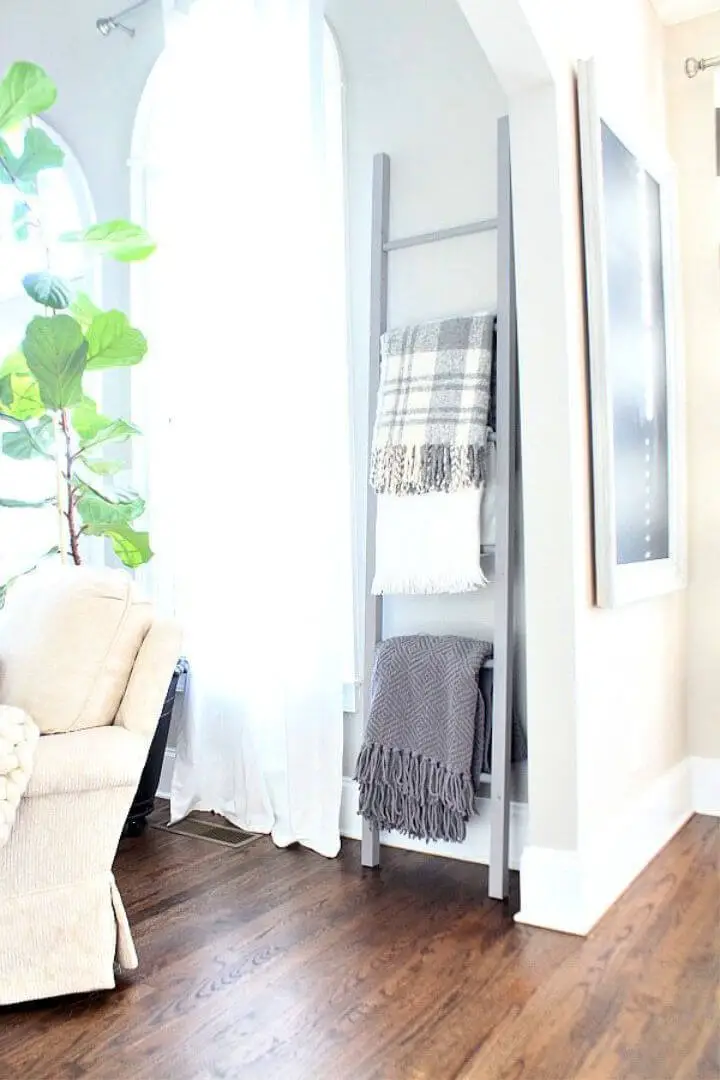
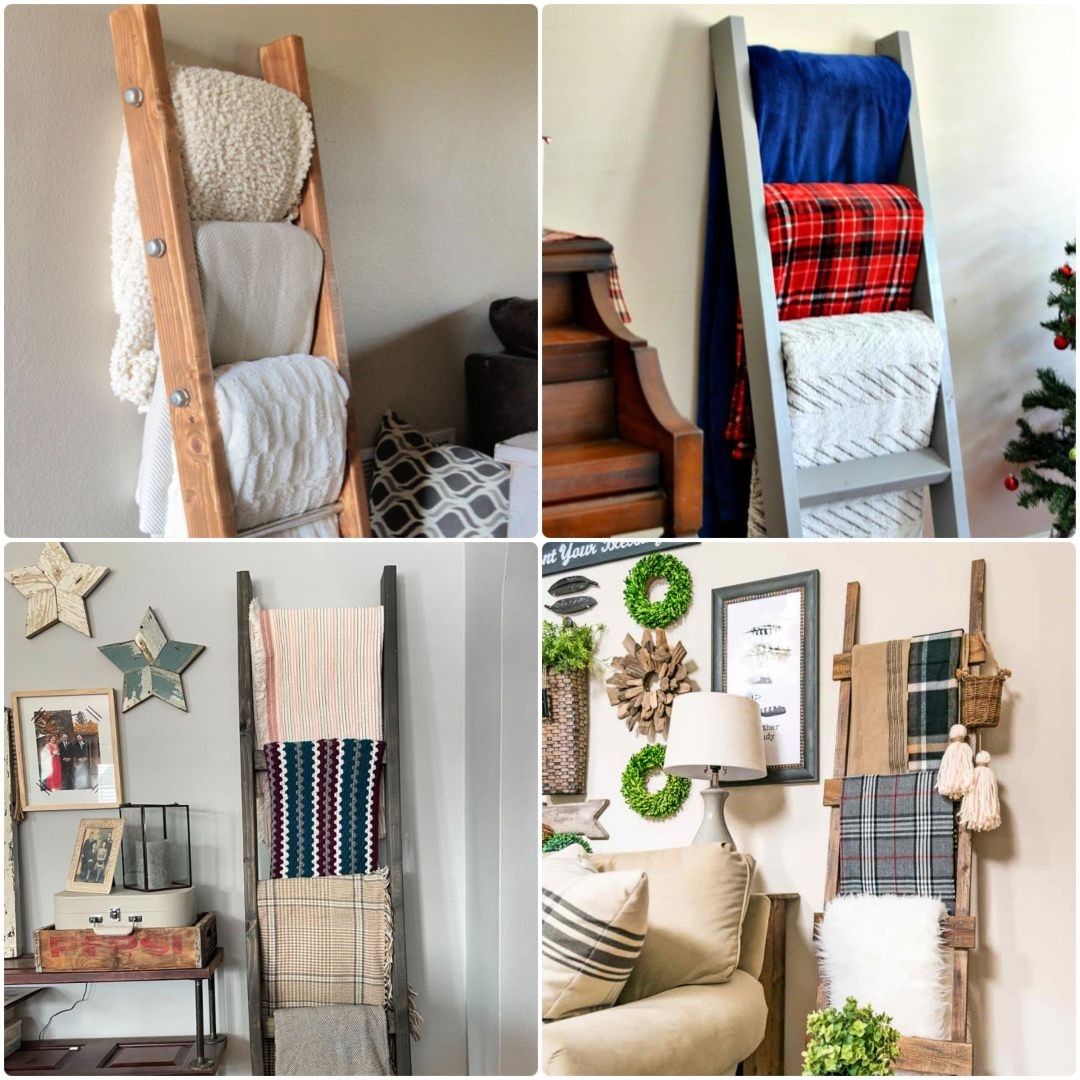
50 Free DIY Blanket Ladder Plans
Transform your home decor with a touch of creativity and functionality by exploring 50 free do-it-yourself (DIY) blanket ladder plans. Ranging from cozy rustic designs to sleek modern styles, these projects cater to diverse tastes and spaces. Whether you’re looking to add a touch of warmth or a dash of sophistication, discover the perfect DIY blanket ladder plan to elevate your interior design.
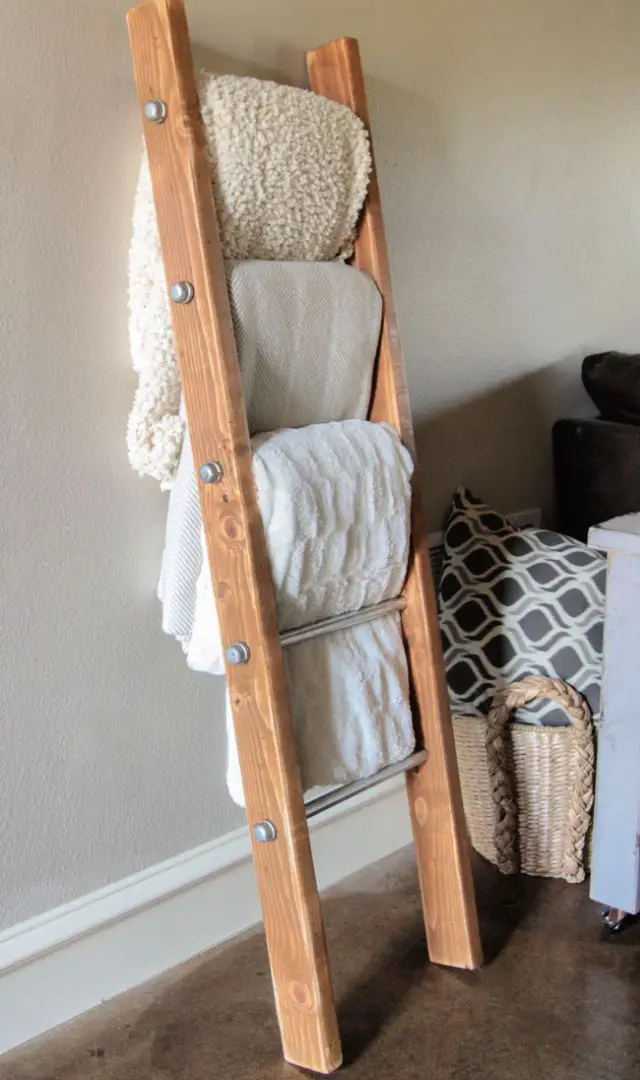
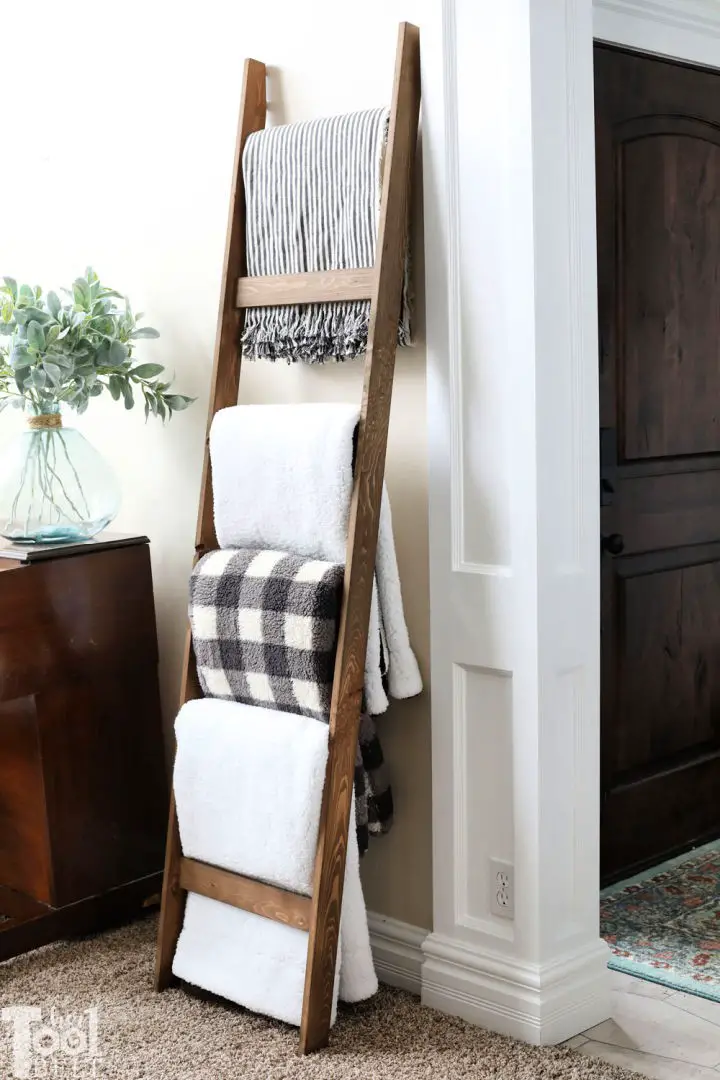
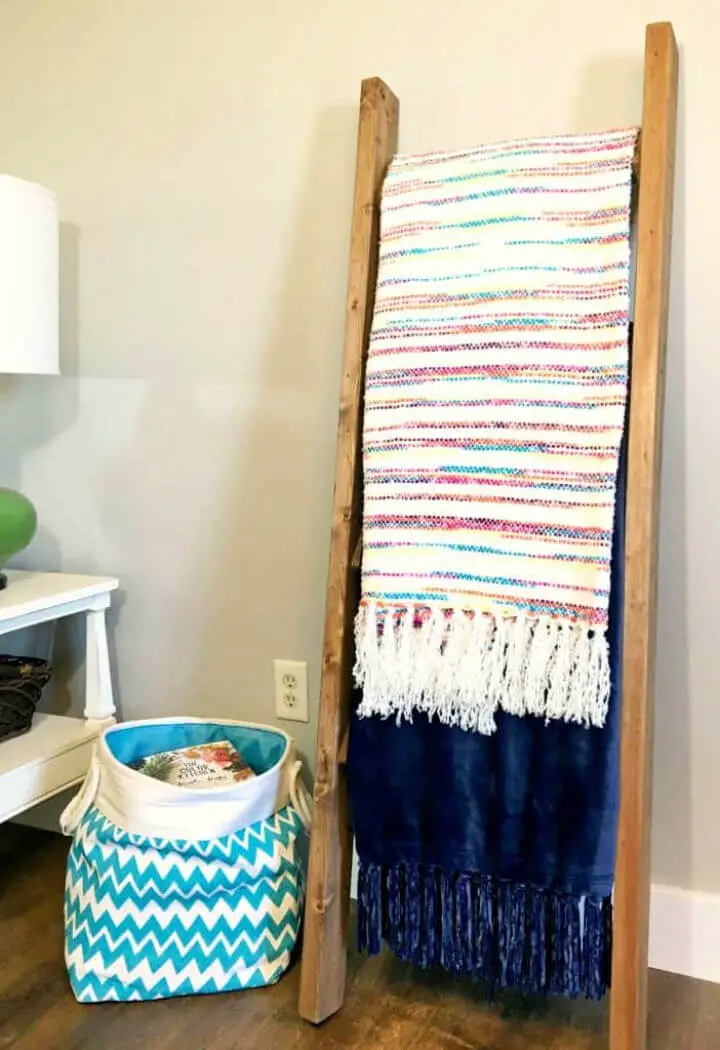
Easy DIY Blanket Ladder Under $15
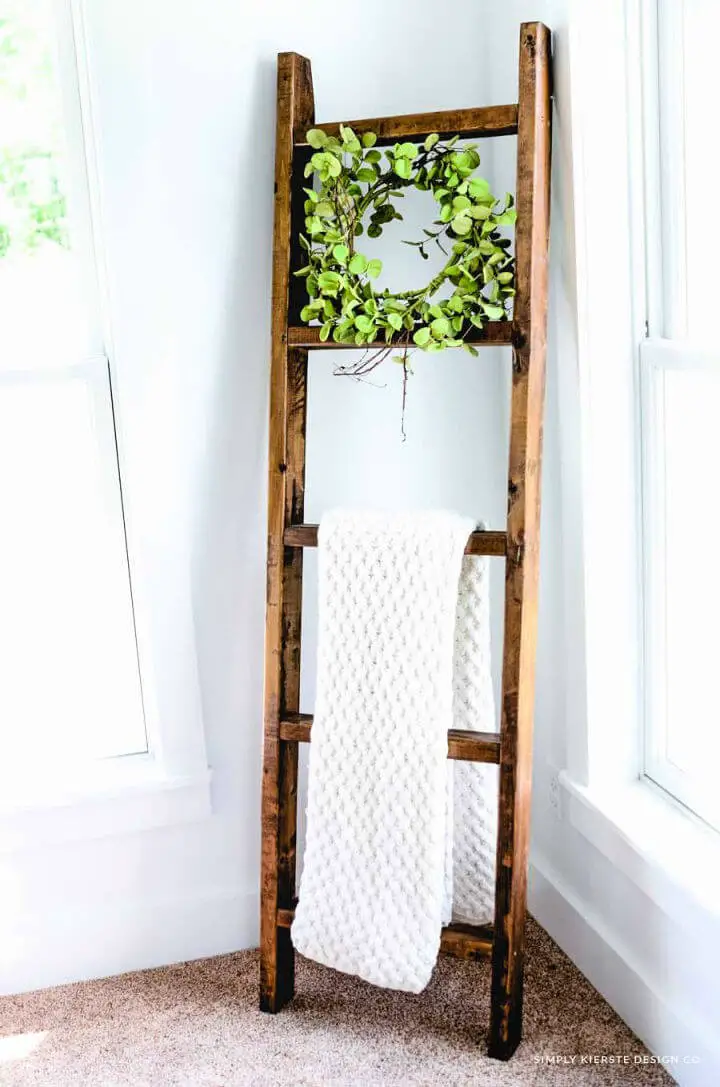
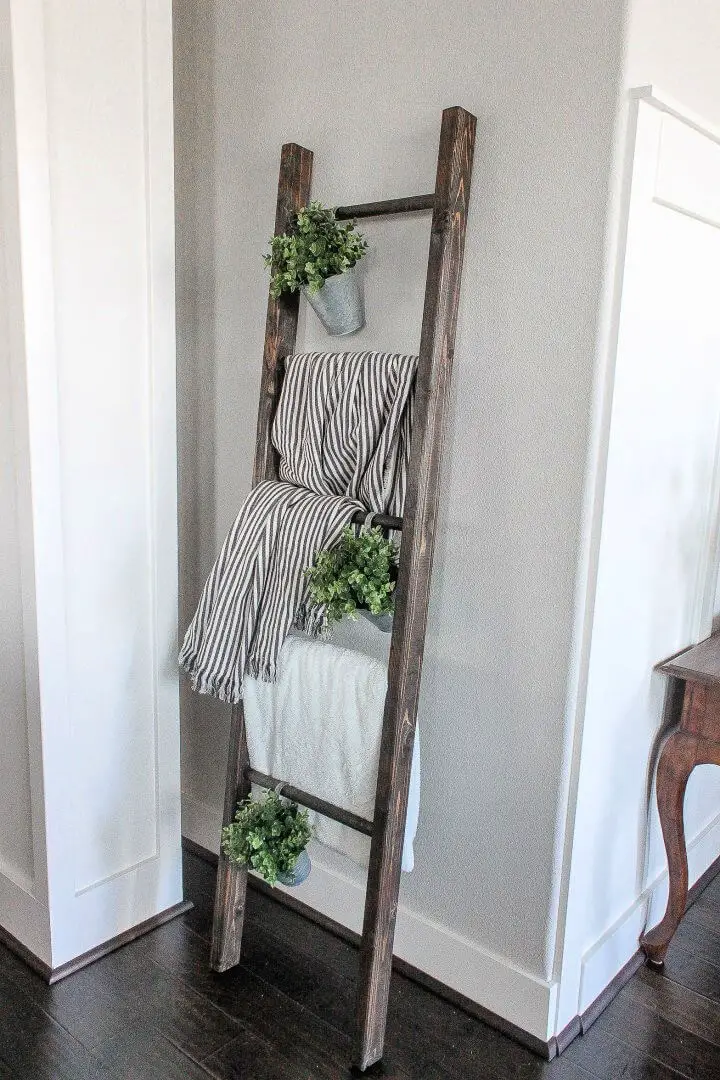
Embark on a delightful weekend project with this comprehensive DIY blanket ladder tutorial. This charming, rustic accessory not only provides a creative storage solution for your favorite throw blankets but also serves as an elegant piece of functional decor, adding warmth and character to any room. Best of all, you can create it without breaking the bank, as the entire project can be completed in under an hour with just $15 worth of materials. This practical guide offers crystal-clear instructions, walking you through every step of the process from assembling the ladder to styling it for the holiday season. With customizable options like distressing and wood staining, you’ll have a truly unique piece that reflects your personal style.
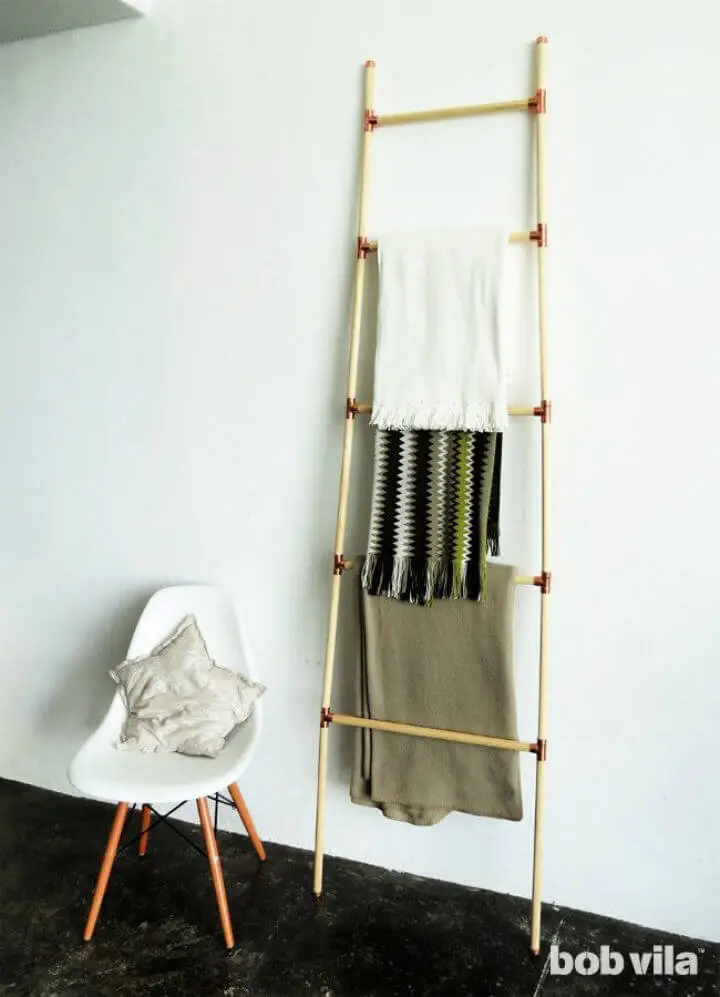
Make a Blanket Ladder Using Wood and Copper
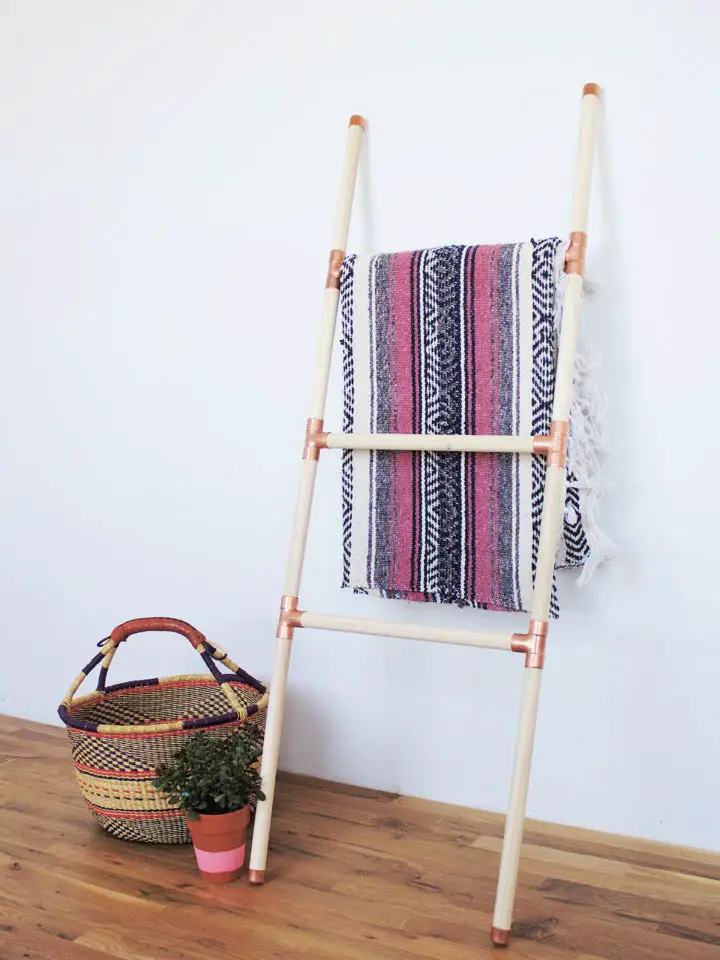
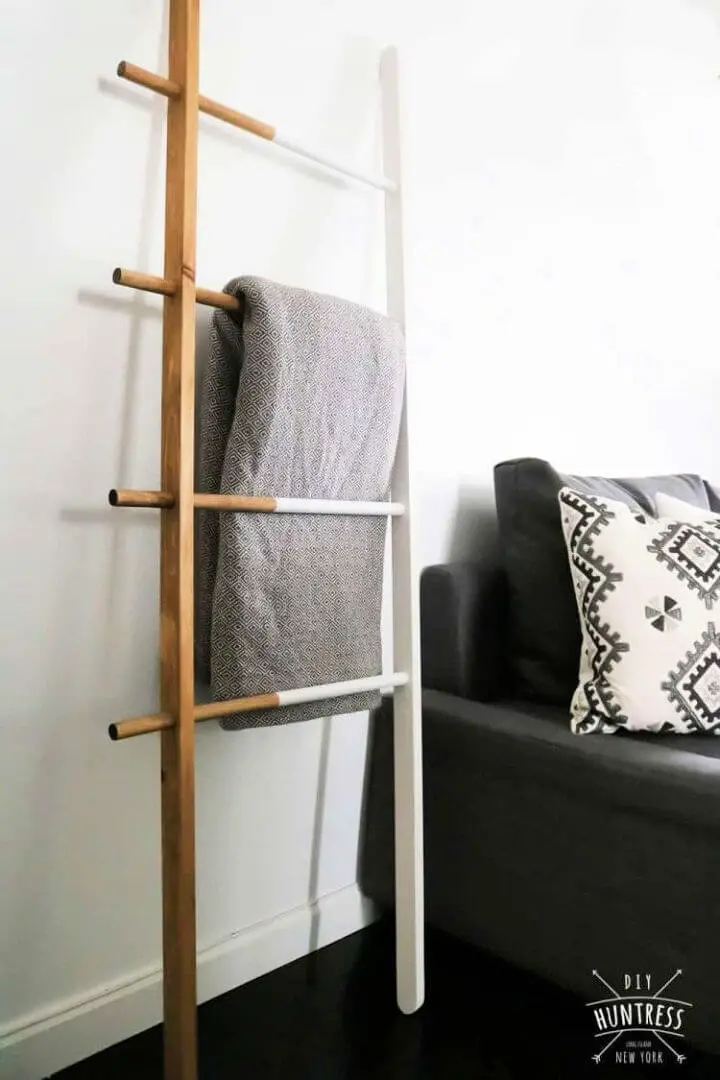
Transform your home decor by creating a stylish DIY blanket ladder that also keeps clutter at bay. This innovative project allows you to showcase your love for textiles in a unique and chic way. With just four round wood dowels, six copper pressure tees, and other readily available supplies, you can build a functional and sturdy ladder that doubles as an aesthetic holder for your favorite blankets. To get started, simply measure and cut the dowels, apply glue to both the dowels and copper tees, and attach the copper tube caps. As you work on this project, you’ll be adding a touch of elegance to your living space while keeping your blankets neatly organized.
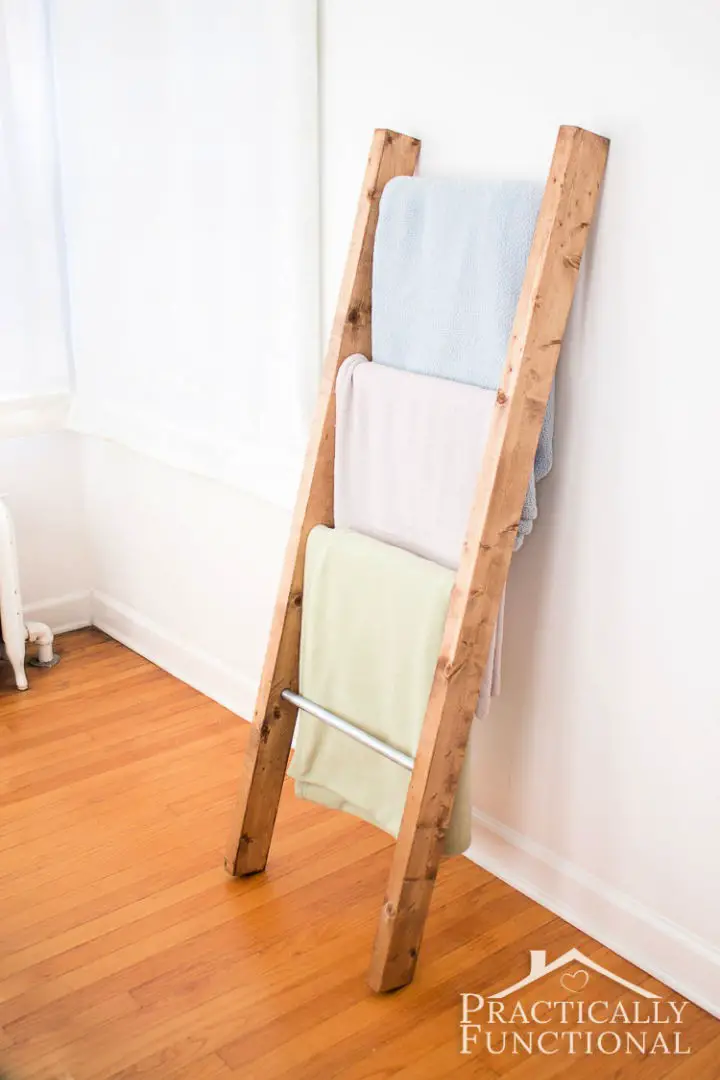
DIY Blanket Ladder for Home Decor
Immerse yourself in the thrill of crafting a bespoke blanket ladder that transforms any room’s ambiance. This straightforward and cost-effective DIY project will elevate your space without breaking the bank, using humble materials like 2-6 foot 2x2s and 1-inch dowel rods. As you embark on this creative journey, discover how careful attention to detail, from drilling to hammering and applying wood glue, can result in a sturdy and rustic ladder that becomes a treasured keepsake. Not only will it spark intriguing conversations, but also serve as a testament to your DIY skill and creativity. With these easy-to-follow instructions, you’ll be inspired to start building today and infuse your home with a fresh and stylish touch.
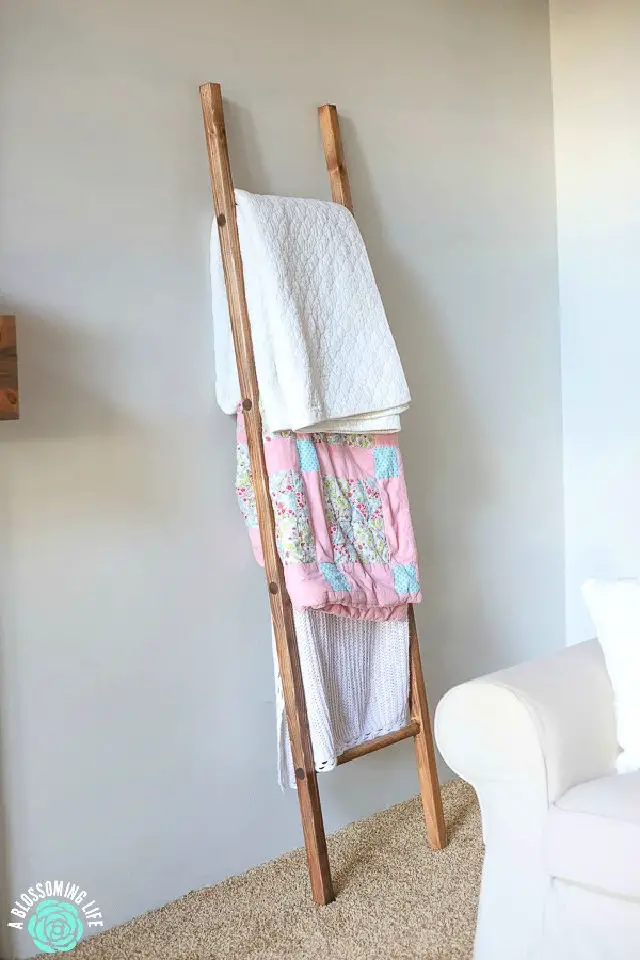
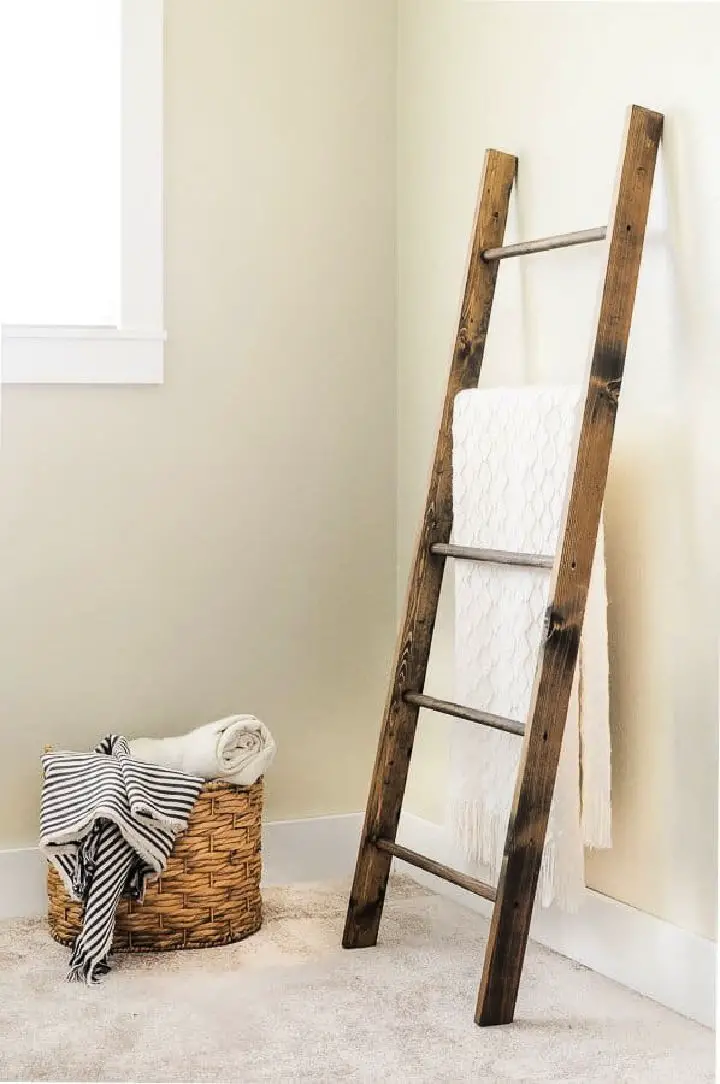
Making a Rustic Blanket Ladder Under $15
Transform your living space into a cozy retreat by creating a rustic blanket ladder in just under a day. This ingenious DIY project not only keeps your blankets organized but also adds a touch of warmth and charm to any room, all within a budget of under $15. The ladder’s 47-inch height is achieved through the clever combination of two wooden planks and four rounded sticks, carefully crafted with a walnut wood stain and subtle white latex paint highlights. This straightforward guide takes you step-by-step from preparation to assembly, making it accessible even for those without extensive carpentry experience. Simply gather your materials – wood, wood glue, paintbrush, sandpaper, and wood screws – and get ready to build this delightful home decor piece that will become the focal point of your cozy farmhouse-inspired living space.
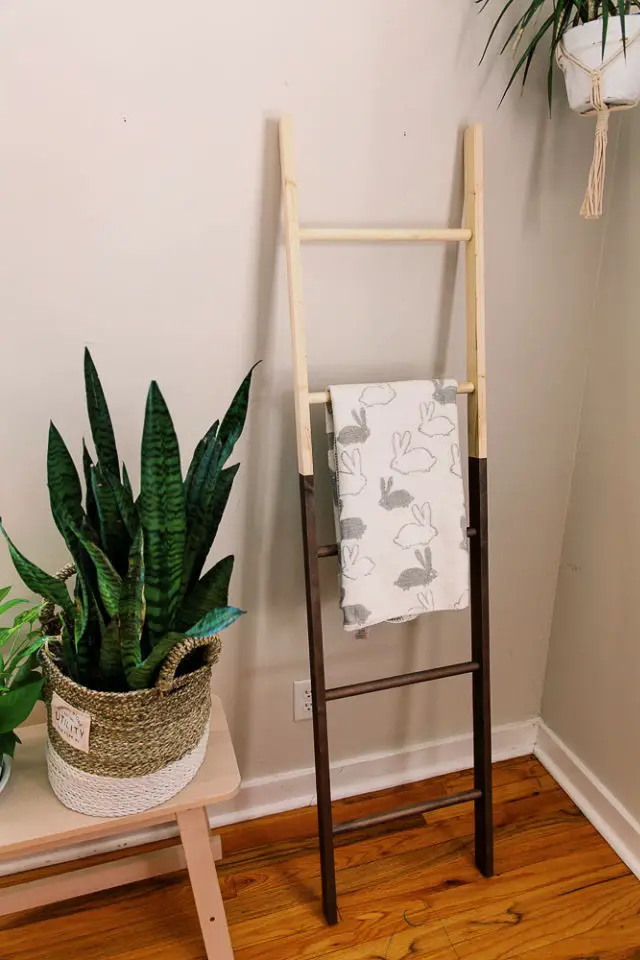
Cool Wood and Metal Pipe Blanket Ladder
Transform your home decor with these DIY blanket ladder plans, combining rustic charm and functional flair. By merging 2×4 studs, galvanized metal pipes, metal caps, and some hands-on craftsmanship, you can create an inviting accent piece that showcases cozy throws in style. The ladder’s distressed finish, achieved through strategic rust-oleum staining and deliberate distressing, imbues it with a vintage aura that’s sure to draw the eye. Whether you’re looking for a statement focal point or a practical blanket holder, this DIY project is the perfect way to spend a quiet afternoon or fill your nap time. With precise measurements and careful assembly, you’ll be able to create an eye-catching piece that adds a touch of rustic elegance to any room.
How to Make a Wooden Blanket Ladder
Transform your living room with a DIY blanket ladder that not only tidies up the space but also brings in a touch of elegance. This simple yet effective project requires just a few basic materials: 2x3s, wooden dowels, wood screws, and your preferred paint or stain color. With these essentials, you can create a one-of-a-kind home accessory that keeps blankets neatly organized while adding a stylish focal point to the room. To ensure the safety of little ones, be sure to securely fasten the ladder to the wall. This elevated design is especially eye-catching when paired with vaulted ceilings, and with its functional appeal, it’s an easy DIY project to tackle today.
Building a Wooden Blanket Ladder
Bring warmth and rustic charm to your home by crafting a DIY blanket ladder that showcases your cozy collection. This farmhouse-inspired design features 2x4s and is perfect for the fall season. With straightforward construction requiring standard materials like a miter saw, nail gun, wood stain, and wood glue, you can create this attractive and functional accessory in no time. Unlike traditional ladders, this one isn’t designed for climbing – instead, it’s meant to hold blankets or display your favorite fall decorations. Craft this charming blanket ladder today and add a warm, homely touch to your space.
Do It Your Self Blanket Ladder at Home
Transform your living space with a charming DIY blanket ladder, crafted from leftover materials. This practical solution to blanket storage or movie night convenience turns scraps of wood into attractive home decor. With a small collection of essential tools – including scrap wood, miter or circular saw, sandpaper, wood screws, carpenter’s square, drill, and wood stain or antiquing glaze – you’ll be ready to get creative.
Start by preparing the wood with a thorough sanding, washing, and antiquing process. This uniform, rustic finish will give your ladder a unique charm. Next, assemble the ladder by arranging the long pieces on a flat surface, then eyeballing where the braces or rungs should go. Use a carpenter’s square to ensure the rungs are perfectly level.
Once dry, position your ladder anywhere in your home as both a decorative piece and convenient blanket holder. This beginner-friendly project requires less than two hours to complete, making it an ideal activity for you and your family to enjoy together. Say goodbye to blanket clutter and hello to stylish storage!
How to Build a Rustic Blanket Ladder
Transform your living space with a DIY rustic blanket ladder, the perfect solution for a clutter-free room and a stylish corner update. With just 30 minutes of effort and under $5 in budget, this beginner-friendly woodworking project will keep your blankets organized while effortlessly adding to your room decor. To get started, you’ll need basic tools like a handsaw, hammer, nails, as well as essential supplies such as wood glue, sander, stain, and 1×2 and 1×3 wooden pieces. Once assembled, this ladder not only stores blankets but also cleverly conceals unsightly cable wires. Whether you’re looking to stay cozy on chilly Pacific Northwest days or simply spruce up your room, this blanket ladder is the perfect project for you! Build one today and turn your cozy corner into an organized, rustic retreat that exudes warmth and charm.
Smart DIY Blanket Ladder
Transform your home’s aesthetic while incorporating functional storage with a creative do-it-yourself blanket ladder! Construct this beautiful piece using readily available materials like 2×2 furring strips, wood screws, and your preferred wood stain. To bring your vision to life, you’ll need a saw, drill, and measuring tape to precision-cut the strips to your desired length, along with some wood glue to securely attach the rungs. This homemade ladder serves as both an innovative storage solution and a thoughtful housewarming gift idea. As a budget-friendly and straightforward project, it’s an excellent way to elevate your living space’s ambiance and functionality. So, embark on your DIY journey today and infuse a personalized touch into your decor.
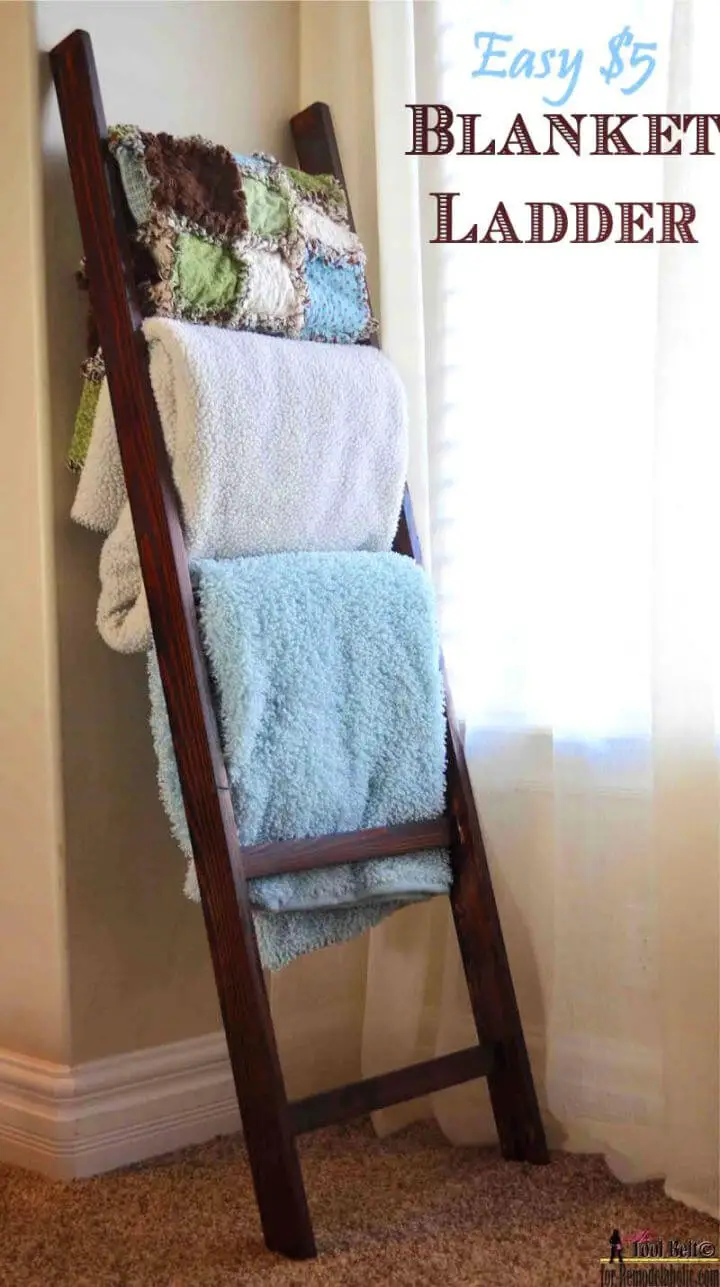
Build a Blanket Ladder With Step by Step Instructions
Unleash your creativity with the DIY $5 blanket ladder, a budget-friendly masterpiece that combines functionality and charm. This ingenious project requires only basic materials – a 1x3x8′ board, pocket hole screws, wood glue, and sandpaper. The process is straightforward: measure, cut, arrange, and assemble. A comprehensive toolkit including the Ryobi Combo Kit, pocket hole jig, sander, and tape measure will guide you through this DIY adventure. Optional features like angled ladder legs and felt pads for wall protection showcase your attention to detail. Beyond its aesthetic appeal, this blanket ladder revolutionizes storage solutions, offering an effortless way to keep your blankets organized. Follow this easy-to-follow guide to build a stylish and practical $5 blanket ladder.
How to Build a Blanket Ladder With Wood
Transform your cozy routine by creating a DIY blanket ladder that not only keeps your favorite blankets within reach but also cleverly stores them when not in use. This ingenious project combines the rustic charm of wooden components with the durability of metal plumbing pipes, resulting in a sturdy four-rung ladder that doubles as both practical storage and charming decor.
To bring this idea to life, you’ll need two 5-foot long 2×4 boards and four 18-inch long 1/2-inch metal plumbing pipes. The secret to a secure bond between these disparate materials lies in Elmer’s ProBond Advanced glue. Once assembled, the ladder is finished with a touch of wood stain for a polished, rustic look.
This creative solution not only keeps your blankets organized and free from shedding cats but also adds a touch of rustic charm to your living space. By following the instructions carefully, you’ll be rewarded with a beautiful and functional piece that will elevate your cozy routine.
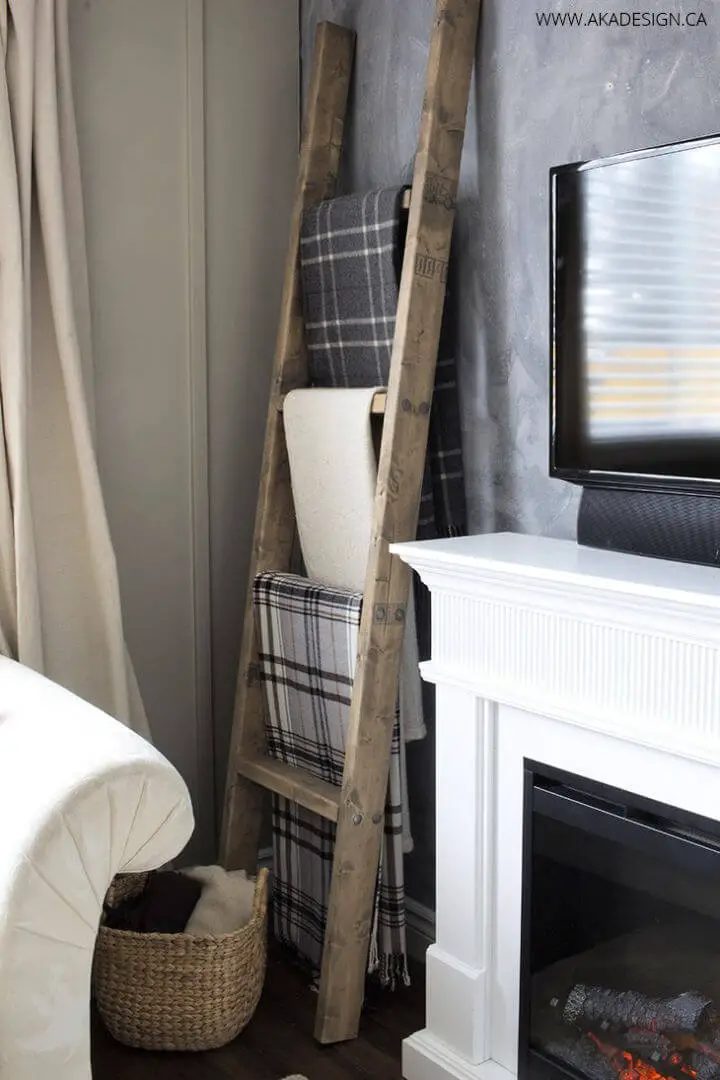
Inexpensive Pallet Wood Blanket Ladder
Transforming your living space with a touch of rustic elegance has never been easier. By repurposing scrap pallet wood and some basic tools, you can create a charming DIY blanket ladder that not only keeps your blankets organized but also adds a unique decorative element to the room. With the flexibility to adjust lengths and widths to suit your personal style, this project is perfect for those who appreciate the beauty of upcycling. By bringing together simple materials like rough-cut pine and pallet wood, you can create a visually appealing piece that will be the envy of your friends and family. So why not get creative and turn your cozy blankets into a stunning focal point in your home? With this easy DIY tutorial, you’ll be able to achieve a beautiful and functional result with minimal effort.
Simple Blanket Ladder for Quilt Display
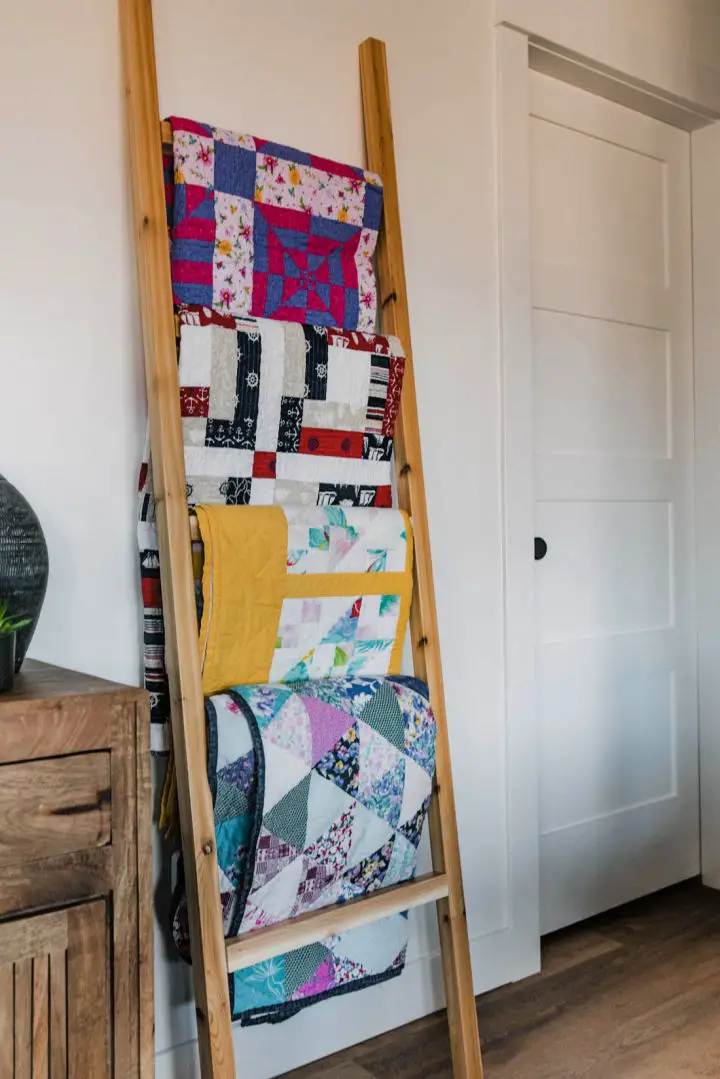
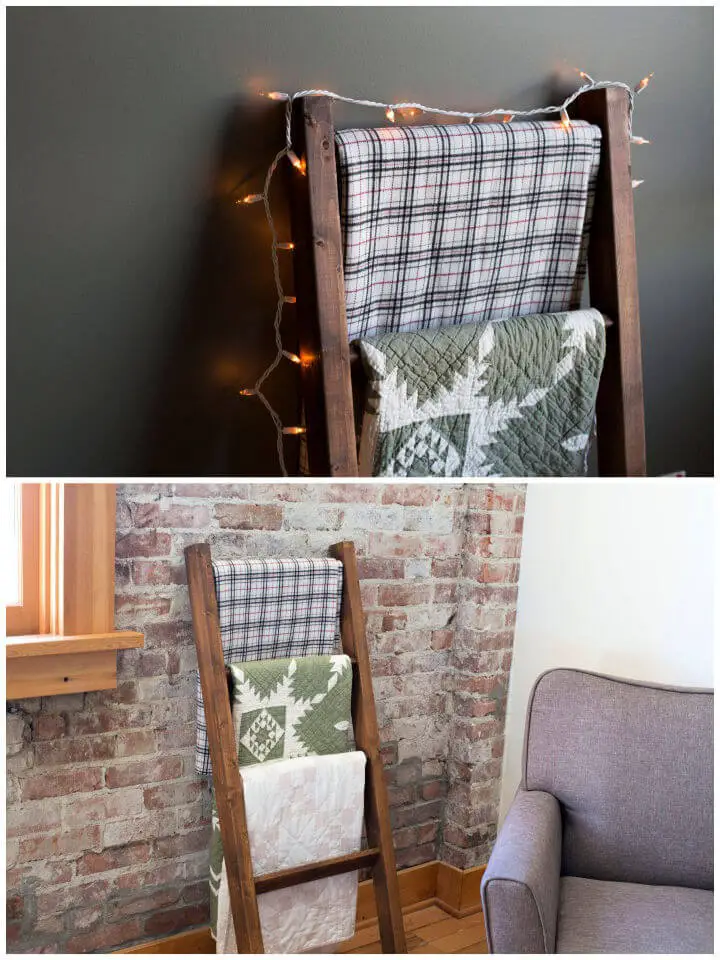
Transform the look of your home decor with this DIY blanket ladder project, a clever way to showcase your cherished quilts. This gift-worthy creation requires just three pieces of wood and a few hours of effort, making it an accessible and budget-friendly undertaking. By adding a touch of elegance to your living space, the blanket ladder also ensures that your blankets are stored efficiently when not in use.For this project, cedar is the material of choice due to its visually appealing and sturdy nature. To bring your vision to life, gather supplies such as a miter saw, sandpaper, drill, Kreg Jig, and clear sealer. The construction process involves straightforward steps, including cutting boards to length, drilling pocket holes, sanding, and assembling.The final touch is a clear satin sealer that adds a luxurious finish, turning your DIY ladder into a stylish showstopper ready to display your treasured quilts. By following this detailed guide, you’ll create a functional, unique, and attractive piece that showcases your creativity.
Free Blanket Ladder Woodworking Plan
Unlock the creative potential within you by constructing a remarkable blanket ladder using this straightforward DIY guide. This clever storage solution not only adds a touch of rustic charm to any room but also keeps your favorite throws neatly organized and easily accessible. With just a few basic materials, including two 2×4 boards, one 2/3 board, nails or screws, wood glue, and stain, you can bring this project to life within a budget-friendly range of $10. The ladder’s length is fully customizable, allowing you to tailor it to your unique space while a simple miter saw enables the construction of a stable 10-degree angle. By investing a little time and effort, you’ll not only reduce clutter but also add a delightful decorative element to your home. So, gather your tools, rally an extra set of hands if needed, and get ready to unleash your creativity as you build this charming blanket ladder.
Adorable DIY Wooden Blanket Ladder
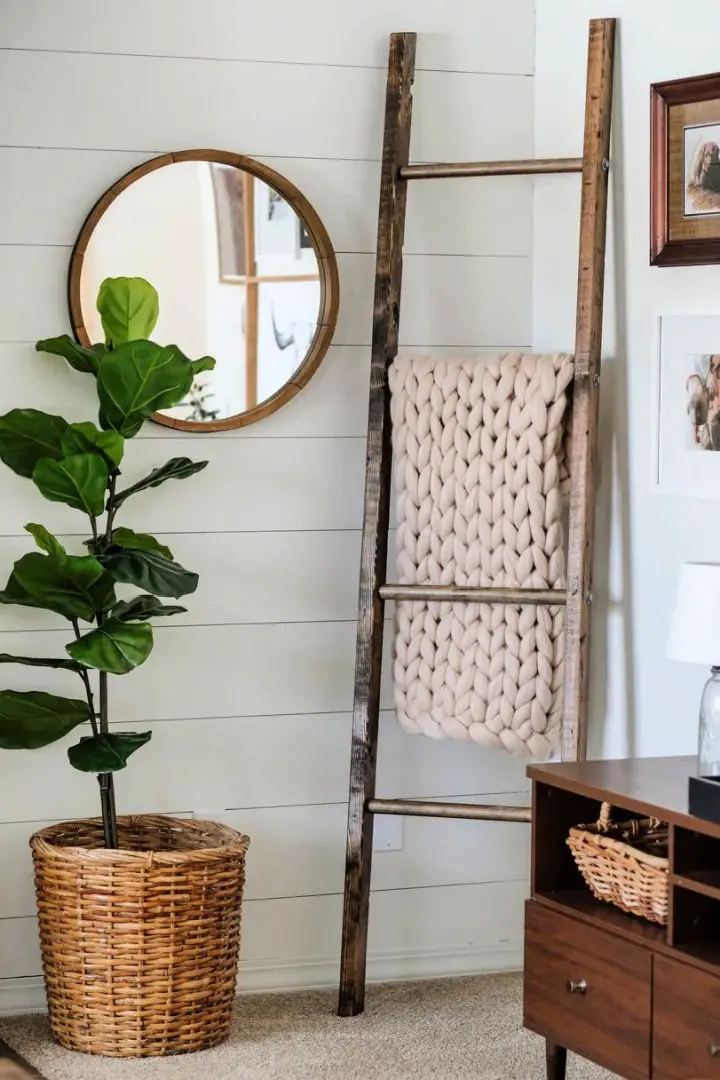
Elevate your home’s décor with a versatile DIY blanket ladder that doubles as a display piece. Perfect for showcasing throw blankets, quilts, or even Christmas stockings, this ladder brings a touch of uniqueness to any room. Crafted from pine boards, wooden dowels, and screws, you can tailor its appearance to fit your personal style by selecting the perfect stain. Not only does it serve a functional purpose, but it also adds a rustic charm that enhances your home’s ambiance. With its spacious dimensions of 60 inches by 19 inches, this ladder provides ample room for showcasing your favorite decorative items. The process of creating this DIY masterpiece is surprisingly enjoyable, from sanding the individual parts to assembling the finished product. Start building your blanket ladder today and introduce a charming element to your interior design!
Building a Rustic Blanket Ladder
Transform your living space into a cozy retreat by crafting a one-of-a-kind rustic ladder to display your favorite throw blankets. This budget-friendly DIY project requires minimal materials and expertise, making it accessible to anyone looking to add a touch of farmhouse charm to their home.
With just a few simple supplies like cedar boards, wood screws, a saw, black paint, gray stain, and three paintbrushes, you can create a 6ft tall, 18″ wide ladder in no time. The key to achieving the rustic look is by applying layers of texture and color through strategic painting and staining techniques.
By embracing the imperfections and natural beauty of wood, this DIY project allows you to add a unique touch to your decor while also showcasing your creative skills. So why not give it a try? With this easy-to-follow tutorial, you can create a beautiful and functional piece that adds warmth and character to any room.
Handmade Blanket Ladder Under $20
Transform your cozy corner into a stylish sanctuary by crafting a budget-friendly DIY blanket ladder. This 30-minute project requires minimal tools – a miter saw, nail gun, tape measure, and drill – and a few basic materials: wooden dowels in 5/8″ and 1-1/4″ sizes, plus macrame cord and hot glue for added flair. Follow a straightforward series of steps to cut, drill, and assemble the ladder’s components. Take it up a notch by staining or painting your creation for a unique pop of color, or leave it au naturel for a rustic charm. With this versatile DIY blanket ladder, you’ll be able to corral your blankets in style while adding an inviting ambiance to any room.
Trendy DIY Wooden Blanket Ladder
Transform your space with a charming DIY blanket ladder, inspired by Anthropologie’s chic designs, all for under $12 and just one hour of your time! This versatile piece can be placed in the bathroom or living room, showcasing towels or throw blankets with elegance. With only basic materials like 1×2 planks, dowels, paint, glue, and simple tools, this project is surprisingly accessible. The ladder’s compact design accommodates five dowels, measuring a total width of 16.5 inches. Adding a metallic finish to the bottom adds a striking contrast, completing the look. This uncomplicated yet rewarding DIY endeavor will effortlessly elevate your home decor.
How to Build a Blanket Ladder
Discover the allure of DIY blanket ladders that seamlessly blend coziness, functionality, and style in your space. With a straightforward construction process and an affordable price tag – you can build one for under $15 in lumber! Simply gather basic tools and materials like 2×3 lumber, round wooden dowels, wood glue, and a drill, and get ready to unleash your creativity. The comprehensive guide takes you through every step, from precise lumber cuts to achieving a stunning weathered barnwood or gray finish. What’s more? This ladder isn’t just limited to holding blankets – it can also proudly display your cherished quilts. So, don’t be afraid to get creative and elevate the aesthetic of your room with this versatile DIY blanket ladder.
DIY Wooden Blanket Ladder
Transform any space into a cozy retreat with this clever DIY blanket ladder. This versatile storage solution not only holds your favorite blankets but also adds a touch of rustic charm to your room. With a budget-friendly price tag of around $15 in lumber and just three basic tools – a miter saw (or hand saw or circular saw), a drill, and a Kreg Jig – you can create this sturdy ladder with ease. The chunky 2×6 boards provide a solid foundation, while the pocket hole screws ensure durability. Finish it off with your favorite stain and a distressed look using a sander for a truly unique piece. But that’s not all – this ladder is also perfect for storing towels in your bathroom or pool area, making it a practical addition to any home. With this step-by-step guide, you can breathe new life into your space and enjoy the benefits of improved organization and aesthetic appeal.
How to Make a Wooden Blanket Ladder
Elevate your home’s décor this winter with a functional and stylish DIY blanket ladder. By crafting this unique wooden accessory, you can effortlessly store and showcase plush quilts and throws. The versatility of this project lies in its customizability – simply tailor the design to accommodate as many blankets as you desire.Built from high-quality boards and dowels, this 80-inch tall ladder boasts four evenly spaced rungs, each carefully crafted through precise measurements and drilling techniques. To ensure a sturdy base, trim the ladder’s feet for a secure stance and apply a thin layer of wood glue during assembly. Complete the project by adding a smooth finish with sanding and staining, and top it off by attaching small rubber pads to the bottom of each foot. This handmade blanket ladder will not only satisfy your organizational needs but also enhance your home’s aesthetic appeal, offering a charming display that showcases your cozy blankets.
Make Your Own Blanket Ladder
Transform your living room with a stylish and functional DIY blanket ladder! This clever creation can be made from readily available materials like two-by-fours and one-by-threes, requiring only basic tools and easy-to-follow steps. The process involves cutting and sanding the legs and rungs, pre-drilling holes, and attaching parts to bring your design to life. To give it a rich, warm tone, apply a dark walnut stain that will instantly add coziness to any interior decor. But its uses extend beyond blanket organization – this unique piece can also serve as an original handmade gift for friends and family. With your saw, stain, and wood at the ready, start crafting your own blanket ladder that beautifully solves storage issues and becomes a conversation starter.
Simple DIY Angled Blanket Ladder
Transform your living space into a cozy retreat by combining modern flair with vintage charm through this creative DIY project. By constructing an angled blanket ladder, you can seamlessly merge fresh and youthful design elements with timeless farmhouse details in any room of your home.
This innovative project utilizes fundamental materials like framing lumber and wood screws to create a visually striking and textured ladder perfect for draping blankets or displaying festive decorations. More than just adding depth and visual interest, this blanket ladder fosters a warm and inviting atmosphere, making it an ideal addition to your modern farmhouse decor.
Build Your Own Blanket Ladder
Transform your living space into a cozy haven with a DIY blanket ladder that’s both functional and aesthetically pleasing. This straightforward project requires minimal materials: 2 pieces of 2×2 pine, two dowels, a saw, a drill, clamps, glue, nails or screws, and your preferred stain or paint. The construction process involves several steps:Cutting the dowels and pine to precise lengths.Drilling holes for secure attachment.Securing the dowels to the pine pieces with nails or screws, ensuring a sturdy assembly.To guarantee durability, apply generous amounts of glue and use clamps to hold the structure in place while it sets. Finally, finish your ladder with a coat of stain or paint to match your home’s décor.This charming DIY project not only adds a unique decorative element but also solves the problem of throw storage. With its beginner-friendly approach to power tools, this blanket ladder is an ideal way to elevate your interior design skills and create a warm, inviting atmosphere in your home.
DIY 2×4 Wooden Blanket Ladder
Transform your home decor with our DIY blanket ladder plans, which will guide you in creating a functional and stylish storage solution for under $25. By using inexpensive materials such as 2x4s, carriage bolts, and stains, you’ll bring a touch of rustic charm to your space. The step-by-step instructions make it easy to follow along, from cutting the wood to sanding and assembling the ladder. With basic tools like a compound miter saw, drill, sandpaper, and measuring tape, you’ll be able to create this simple yet elegant piece that showcases your beloved throw blankets. This DIY project is not just about building a piece of furniture – it’s an opportunity to express your personal style and taste, redefining the aesthetic of your space.
Make a Blanket Ladder Under $25
Transform your home’s aesthetic and functionality with this ingenious DIY rustic blanket ladder project. This budget-friendly creation serves as both a storage solution for blankets and a stylish decor addition, rivaling designer pieces at a fraction of the cost. Crafted from humble materials like pine boards and dowels, then stained to a warm, rustic finish, this project is accessible to DIY enthusiasts of all skill levels. A comprehensive guide provides clear, step-by-step instructions, making it easy to bring this unique piece of home storage to life. Not only will it keep your blankets organized, but it’ll also add a touch of elegance to any room. Create a cozy and inviting space with this handmade rustic blanket ladder today!
Build a Blanket Ladder Without Any Nails
Transforming your living space into a cozy retreat has never been easier with a DIY blanket ladder that requires no nails! This versatile storage solution doubles as a decorative piece and organizer, perfect for corralling bulky blankets and freeing up valuable closet space. With a minimal set of supplies including wooden dowels, copper fittings, a handsaw, and glue, you can craft a functional and stylish rack in just a few easy steps. The simplicity and speed of this project ensure an enjoyable and rewarding DIY experience. By emphasizing both practicality and aesthetics, this project is ideal for those seeking to maximize their space without sacrificing style. So why wait? Start building today!
DIY Blanket Ladder Under $10
Elevate your interior design with a functional and charming DIY project – a homemade blanket ladder. This rustic accessory can be built in under $10, making it an affordable solution for storing blankets while adding a unique touch to your living room.
To create this space-saving display, you’ll need three 1x3x6 pine boards, a miter saw, a nailer, and a weathered gray stain. The construction process involves precise measurements, cutting, assembling, and staining the ladder for a distressed look.
The result is a one-of-a-kind piece of decor that not only saves space but also adds to the coziness of your living room. With this blanket ladder, you can easily store your favorite throws and blankets while showcasing them in a stylish way. Build this DIY project today and give your home a charming new addition.
Rustic Wooden Blanket Ladder
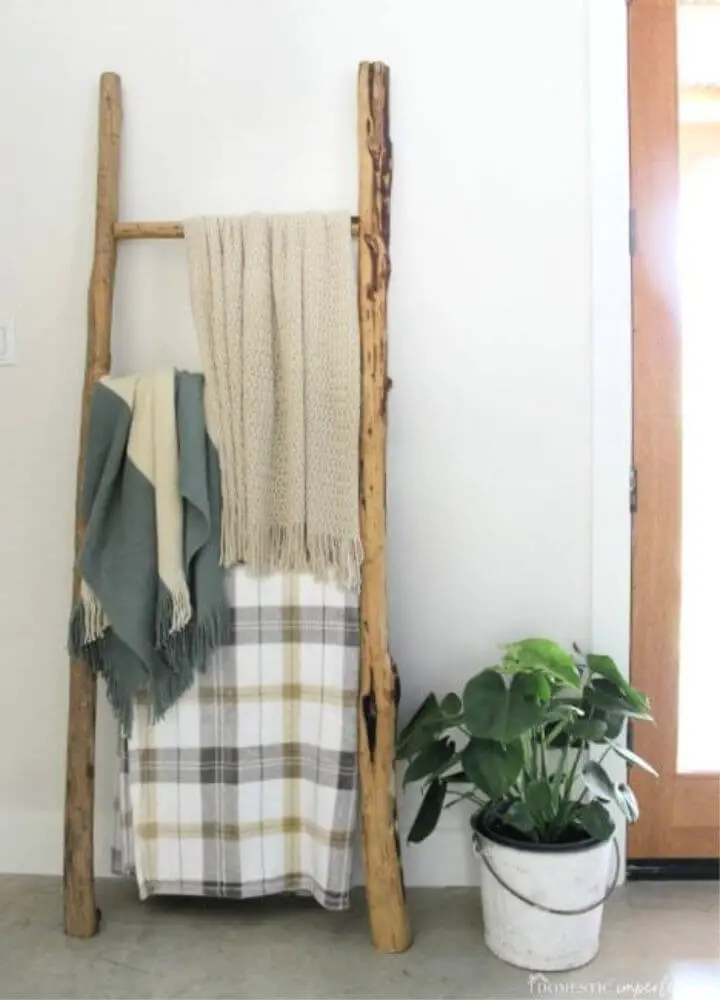
Transform your living room’s blank wall into a cozy haven with a rustic DIY wooden blanket ladder. By repurposing organic materials from your yard, you can create a functional storage solution that doubles as a charming design element. Envision a sturdy branch frame supporting smaller rungs, forming a unique structure that adds warmth and character to the space.
To bring this project to life, you’ll need basic tools like a chop saw, sandpaper, wood conditioner, screws, drill, and clamps. Once assembled, your ladder will provide ample storage for throws and blankets, elevating both style and practicality in your interior design.
Despite its seeming complexity, this DIY project is surprisingly straightforward and adaptable to your space’s unique needs. So gather your branches, unleash your creativity, and embark on this fun and rewarding project to craft your ideal blanket ladder today.
How to Make a Blanket Ladder

Transform your living space with a one-of-a-kind DIY project that harmonizes form and function: a minimalist blanket ladder. This straightforward guide will lead you through the creation of a stunning piece for your home, requiring minimal materials and effort. Within an hour, you can assemble a sturdy ladder using 1-inch wood dowels, a hot glue gun, and a right-angled ruler – no power tools or hammering needed. This versatile design can support the weight of heavy blankets and injects a touch of sophistication into your room. As both a decorative element and practical storage solution, this blanket ladder is poised to elevate the ambiance of any space.
Handmade Wooden Blanket Ladder Under $15
Transform your home’s ambiance with the effortless charm of a DIY wooden blanket ladder! This straightforward DIY endeavor offers both visual allure and functionality, providing a clever solution for blanket storage that seamlessly integrates into any room, whether it’s the family den or office. Inspired by rustic farmhouses, this ladder injects warmth and character into the space.With an arsenal of basic materials like 2×4 posts, stain, deck screws, and a miter saw, you can craft your ladder for approximately $10. Tailor the design to suit your space, determining the height and width that best suits your needs. Within an hour, you’ll have a personalized storage solution that reflects your unique style.To put your personal stamp on the project, choose from a palette of stains or paints and even distress the finish for a more rustic appearance. This DIY endeavor provides an affordable alternative to pricey store-bought blanket ladders, allowing you to tap into your creative spirit and infuse your space with a dash of farmhouse charm.
Building a Wooden Blanket Ladder
Transform your home’s farmhouse charm with a simple DIY project that combines functionality and rustic flair. This 30-minute endeavor requires just under $10 in materials, including two 1x2x72 boards for the sides, one 1x4x96 board for the rungs, a drill, saw, wood screws, ruler or tape measure, wood glue, and your preferred stain or paint. With these basic supplies, you can create a unique and practical storage solution for your blankets. The carefully crafted rungs prevent snagging, while a personalized finish adds a touch of style. This DIY blanket ladder is perfect for adding an affordable decorative element to any room, whether it’s a cozy nook or a corner of your living space.
DIY Contemporary Blanket Ladder
Get ready to cozy up with a DIY contemporary blanket ladder that brings both functionality and sophistication to your living space. Inspired by the stylish designs of West Elm, this project lets you create an elegant storage solution for your favorite blankets without breaking the bank – all for under $17 in materials! With basic tools like a miter saw, drill press, and jig saw, along with supplies such as round dowels and painter’s tape, you’ll have your blanket ladder up and running in no time. The result is a stunning fusion of white spray paint and golden oak wood stain that adds a modern and radiant touch to any room. This simple yet cost-effective DIY project lets you add a personalized flair to your home, making it easy to grab those cozy throws during Netflix and hot cocoa sessions.
Rustic Coastal Blanket Ladder
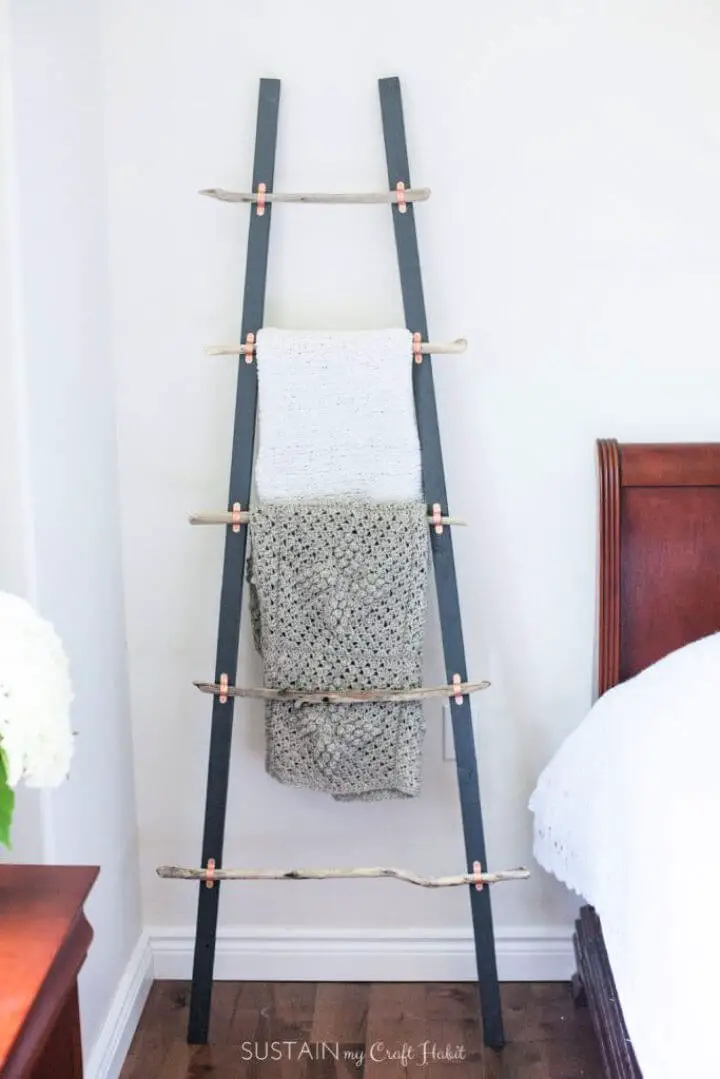
Transform your living space into a cozy retreat with an elegant DIY blanket ladder that effortlessly keeps your favorite throws organized. Drawing inspiration from the simplicity and charm of coastal living, this project incorporates unique driftwood pieces collected during scenic beach visits, serving as a sentimental reminder of cherished family moments. The ladder’s structure combines sturdy 2×2 wooden rails and eclectic driftwood rungs, securely fastened with copper tube clamps for a rustic aesthetic that exudes warmth and character. This budget-friendly DIY project requires inexpensive materials easily found at hardware stores, making it an accessible and creative outlet for crafting enthusiasts. Whether you’re showcasing a handmade crochet afghan or keeping your couch clutter-free, this DIY blanket ladder offers both practicality and style to your home. Build one today and relive summer memories with every glance at your handcrafted piece, carefully crafted to withstand the test of time.
Make a 2×4 Blanket Ladder
Transforming old studs into a rustic DIY blanket ladder is a simple yet impactful way to breathe new life into your living space. With just one hour of your time, you can create an aesthetic and practical piece of home decor that serves as a stunning showcase for your blankets and fills bare walls. Unlike traditional flat picture decor, this ladder adds depth and visual interest to any room.
The key to this project’s success lies in its ease of construction. A clear guide with step-by-step instructions makes it simple to build a decorative ladder with angled rungs, adding a touch of sophistication to the overall design. Best of all, this DIY blanket ladder is an affordable way to add a stylish home accessory to your space for under $10.
This project is the perfect solution for repurposing spare wood and making it useful again. With just two 2x4s and some creativity, you can create a charming accent piece that adds warmth and personality to any room.
Quick and Easy DIY Blanket Ladder
Transform your home’s aesthetic and functionality by crafting a one-of-a-kind DIY blanket ladder this winter. With just a few simple materials like 1×3 and 2×2 boards, a saw, drill, and wood screws, you can create a rustic storage solution that doubles as a decorative piece. The process involves four straightforward steps: first, cutting the boards to size; second, screwing the ladder rungs into place; third, sanding the corners and edges for a distressed look; and fourth, applying a wood stain to give it an aged touch. To add an extra layer of functionality, you can also attach picture hanging brackets to securely fasten the ladder to your wall, keeping it out of reach from curious kids or pets. This easy-to-follow guide will walk you through the process of creating your very own blanket ladder, bringing both organization and style to your living room.
Wooden Blanket Ladder for Your Bathroom

Elevate the ambiance of your living space with a DIY blanket ladder that effortlessly blends functionality with charm. This six-foot-tall masterpiece, crafted from 2×2 rungs and 2×3 sides, brings a rustic touch to your decor. The versatility of this design allows you to customize it with a finish of your choice – driftwood for a weathered look or leaving it natural for a sleek, minimalist aesthetic.
A thoughtful addition are the decorative L-shaped corner guards that not only cover pocket holes but also infuse a playful touch to the ladder. With an estimated cost of just $6 in wood, this budget-friendly project is a testament to the power of DIY craftsmanship. By building your own blanket ladder, you’re not only creating a functional piece for your home but also embracing the warmth and character that comes with handmade luxury.
Chic and Versatile Blanket Ladder
Transform your loved ones’ homes with a thoughtful and adaptable blanket holder that’s as practical as it is elegant. This DIY project is budget-friendly and requires minimal effort, making it perfect for any skill level. To create this stunning piece, you’ll need just a few basic materials: 2x4x10 and 2x4x8 woods, some paint, a drill, and a Kreg Jig. The result is a multi-blanket holder that’s sure to become a go-to spot on chilly winter nights. To make it your own, simply choose a paint color that complements the recipient’s home decor. This thoughtful gift not only keeps their living space cozy but also adds a touch of personality and whimsy. It’s a creative way to display soft blankets and inject some festive flair into any room, making it an exceptional present for anyone who appreciates unique, handmade treasures.
DIY Farmhouse Style Blanket Ladder
Transform your living space into a cozy winter haven with a stunning DIY blanket ladder, all for under $15. This budget-friendly project requires minimal tools and materials, easily sourced at your local hardware store. The simple steps to create this rustic beauty are straightforward: first, cut the centerpieces; then, assemble the structure; finally, add an attractive finish using Americana Decor Satin Enamels in Pure White and Rich Chestnut. The result is a functional, affordable, and stylish blanket ladder perfect for your home or as a thoughtful housewarming gift. Elevate your home decor today with this elegant DIY creation.
Building a Wooden Blanket Ladder Under $5
Add a warm and inviting touch to your home with these simple DIY blanket ladder plans. By investing just under $5 in materials, you can create a functional storage solution that doubles as a cozy addition to any room. This adaptable project allows you to customize the dimensions or incorporate reclaimed wood for added character. Perfect for beginners, the assembly process involves precision cuts and pocket hole joints to ensure sturdiness and support for your quilts and blankets. Once built, finish the piece with a wood filler to cover any imperfections, followed by a smooth sanding and your chosen paint or stain to achieve the desired aesthetic. The result is a beautiful blanket ladder that not only provides decorative flair but also offers practical storage for your cozy blankets.
Making a Blanket Ladder for Multi-purpose
Transform any space with a DIY blanket ladder that’s as functional as it is stylish. Using salvaged pine lumber, this rustic display piece is the perfect blend of practicality and personality. With this easy-to-follow guide, you can take low-cost materials and turn them into a beautiful focal point that enhances your home’s decor.While this ladder isn’t designed to bear weight, its charming aesthetic makes it ideal for showcasing items like blankets, quilts, or decorative lights. To get started, you’ll need two sizes of pine lumber, nails, painting supplies, and basic hand tools. The guide takes you through a nine-step process that celebrates the wood’s imperfections, creating an authentic rustic look.The end result is not only a stunning decor piece but also a valuable addition to your home.
Wooden Blanket Ladder Under $4
Elevate your home decor with a rustic wooden blanket ladder crafted from 1×3 furring strips in under 30 minutes for just $4. This quick and affordable DIY project not only adds a touch of charm but also serves as a stylish display for your favorite blankets or other decorative elements like wire baskets and faux plants. Its farmhouse-inspired aesthetic pairs seamlessly with warm and inviting living spaces, making it an ideal addition to any cozy room. With its simplicity and ease of construction, this project is perfect for those seeking a hassle-free yet impactful DIY endeavor. So, take the time to gather your materials and bring this charming blanket ladder to life today.
Build a Blanket Ladder Under $50
Transform your living space with a unique American colonial-style blanket ladder, crafted with minimal materials and effort. By combining select pine and pine boards, pocket screws, and Valspar Chalky Finish Paint, you’ll create a functional and stylish storage solution for your blankets on weekends. The DIY process involves cutting the boards to size, drilling pocket holes, attaching rungs, and applying paint. This rustic ladder adds warmth and charm to your decor, while offering an innovative approach to blanket storage. With its blend of colonial simplicity and modern flair, this homemade blanket ladder is sure to impress.
DIY Blanket Ladder for Storage Unit
Transform your living space with a rustic charm by upcycling DIY blanket ladder plans. This project combines functionality with style, utilizing hanging buckets for additional storage. The five-rung design provides ample space for storing blankets, accessories, or even decorative items. The best part? It’s remarkably easy to build using basic woodworking tools and supplies. All you need is two 2x3x8 wood pieces, two 1-inch dowels, a miter saw, measuring tape, pencil, angle square, 1-inch Forstner drill bit, electric drill, wood glue, and hammer. Not only will this project save you money, but it’s also an excellent way to give your old ladder a modern makeover. Plus, the design allows for creative freedom – simply add an extra rung if you desire. With these simple steps, you’ll be on your way to creating a stunning and functional piece that will elevate your home’s aesthetic.
Rustic Blanket Ladder from Tree Branches
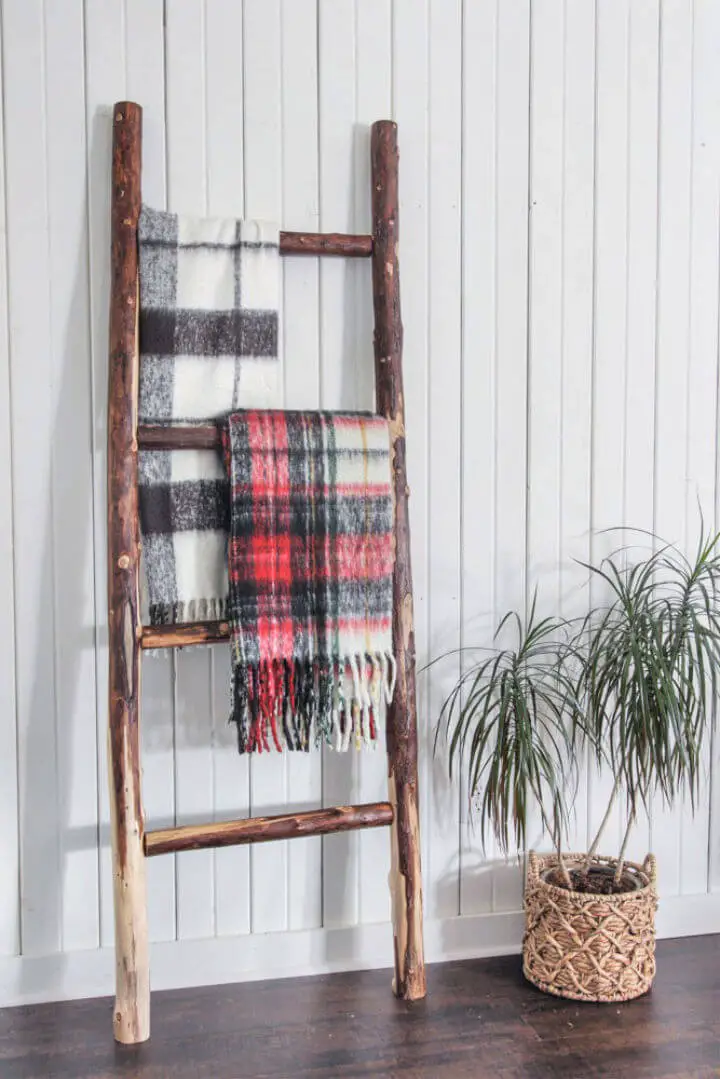
Transforming a natural forest find into a cozy home accent, this DIY rustic ladder from tree branches brings the outdoors in, adding warmth and character to any room. As a storage solution for blankets and a unique piece of art, this charming ladder perfectly captures the beauty of nature. Made primarily from preserved Leland cypress branches or readily available 6ft birch poles, this budget-friendly project offers an affordable alternative to commercial ladders. This detailed guide will walk you through each step of the process, allowing you to adapt and customize your ladder based on the size and shape of the wood you have available. Expect practical tips and tricks along the way, and get ready to create your own personalized, nature-inspired masterpiece.
Modern Farmhouse Nursery Baby Blanket Ladder

Transform your home or nursery into a cozy haven by crafting a unique do-it-yourself blanket ladder, blending modern farmhouse charm with rustic elegance. This versatile piece not only provides practical storage for blankets but also serves as a conversation-starting decor accent. With a straightforward step-by-step process and minimal materials like wood and sandpaper, you can create this handmade masterpiece for under $40. Enjoy the satisfaction of building something yourself, while adding warmth and character to your living space.
DIY Gold Bolt Blanket Ladder
Transform your living space by crafting a one-of-a-kind DIY gold bolt blanket ladder that exudes rustic charm with modern flair! Using reclaimed wood as the foundation, this functional piece becomes an integral part of your decor, keeping blankets at arm’s length while adding a touch of sophistication. Perfect for cozying up during Wisconsin’s chilly winters, this ladder is a perfect blend of functionality and style.
The creative combination of materials like reclaimed wood, Krylon ColorMaster Paint + Primer in Satin Italian Olive, Krylon ColorMaster Metallic in Gold, and stainless steel carriage bolts gives the ladder a unique visual appeal. The addition of green-painted accents and exposed gold bolts injects a pop of vibrancy, while the extra hooks for hanging plants provide an added layer of versatility.
This easy-to-make blanket ladder is more than just a practical solution – it’s a statement piece that adds warmth and fashion to your home. With its blend of rustic and modern elements, it’s the perfect DIY project for those looking to add a touch of personality to their living space.
Reclaimed Wood Blanket Ladder
Transform your living space with a cozy ambiance by crafting a rustic blanket ladder using reclaimed wood. This DIY guide skips expensive store prices and provides you with all the necessary information to design a unique piece from scratch, perfect for showcasing your favorite blankets. You can repurpose 1×1 wood, or opt for 1×2 or pallet boards for added sustainability.
With a miter saw, screws, and sixty-grit sandpaper, bring your vision to life and create a five-foot-tall ladder that adds warmth and character to your room. Take control of the dimensions and customize the steps according to your needs. Add personal touches by painting or staining the wood for a truly one-of-a-kind piece.
This eco-friendly project not only allows you to reclaim and recycle materials, but also provides a cozy feel to your home in under thirty minutes, making it the perfect addition to any room.
Ikea Iron and Wood Blanket Ladder Hack
Transform your home decor with a rustic-chic iron & wood blanket ladder, crafted with ease using pine boards, Ikea BORGHAMN handles, and basic tools like a drill and measuring tape. This DIY tutorial guides you through the process of cutting, sanding, and attaching handles to form sturdy ladder rungs, resulting in a minimalistic yet charming piece that doubles as functional storage for your blankets. With only about an hour of your time required, this Ikea hack allows for personalization based on your unique interior design style, making it perfect for elevating the ambiance of any room.
Conclusion:
With the 50 free DIY Blanket Ladder Plans at your disposal, you’re equipped to craft a one-of-a-kind project that reflects your personal style. This extensive guide offers a wealth of information on selecting materials, overcoming common obstacles, and fine-tuning your skills through advanced techniques. By embracing eco-friendly options and prioritizing maintenance, you’ll be able to preserve the integrity of your handiwork. For added assurance, draw upon expert advice found in frequently asked questions sections, and get started on building your dream blanket ladder today.
