Creating a customized DIY birthday banner is an excellent way to add a personal touch to celebrations. To inspire you, we’ve compiled 25 fun and creative DIY birthday banner ideas that will elevate your party decorations and make them truly memorable. By making your own banner, you’ll have the opportunity to infuse it with creativity, personality, and meaning. Every step of the process – from selecting materials to adding final details – allows for self-expression and a unique touch. This guide aims to simplify the DIY process by providing a detailed, step-by-step approach, demonstrating how easily you can transform ordinary materials like paper or fabric into an extraordinary celebratory piece. Whether you prefer classic elegance or something more unconventional, there’s a birthday banner idea out there to suit every style. Keep reading to learn how to make your celebration truly one-of-a-kind with a banner that reflects the personality of the birthday person.
How to Make a Birthday Banner – Step by Step Guide
Create a unique and personalized touch for your party decorations with a DIY birthday banner that’s as fun to make as it is to display. With just a few basic supplies and some colorful paper, you can craft an eye-catching message that says ‘Happy Birthday’ in style. This project is perfect for anyone looking to add a homemade twist to their celebration, and it’s ideal for those who appreciate the value of creating something with their own hands. To make your own birthday banner, simply follow these easy steps:
Materials Needed:
To create an eye-catching visual display, you’ll need a few essential materials. Start by gathering colored paper in five distinct hues: red, orange, yellow, green, and blue. For added flair, select a ribbon that harmonizes with your chosen paper colors. You’ll also require glue to bring everything together, scissors for trimming, and white paper as the foundation for your letters. Use markers or printed letters to add personalized messages, and secure them in place with tape.
Step-by-Step Guide:
To elevate your birthday celebration, create a unique DIY banner with 25 creative ideas to make it truly special. To start, cut colored paper into small rectangles measuring 14 by 10 centimeters. For a standard ‘Happy Birthday’ banner, you’ll need 13 pieces: 5 for ‘Happy’ and 8 for ‘Birthday.’ Distribute the colors evenly or design them as desired.Next, fold each rectangle in half lengthwise and mark points at 5 centimeters from the fold on the bottom edge and 3 centimeters from the fold on the top edge. Draw and cut lines from these marks to the folded edge, creating triangular notches that give each flag a distinctive pennant shape.Write out ‘Happy Birthday’ on white paper using a marker or printer for uniformity. Cut out each letter individually. Then, apply glue to the back of each letter and attach them to the center of the flags, spreading the colors evenly to create a vibrant and cheerful appearance.Cut a length of ribbon that’s long enough to hold all the flags with some extra space for hanging. Attach the flags to the ribbon by placing tape over the top backside of each flag, securing it to the ribbon. Make sure all the flags face the same direction and are evenly spaced.Repeat this process for the second word if you’re using separate strings for ‘Happy’ and ‘Birthday.’ Leave enough ribbon on both ends for easy hanging. Finally, choose a visible spot and ensure the banner is securely hung, allowing for a flat or slightly draped display.
Video Tutorial
For a more comprehensive understanding, I recommend pairing this written guide with Sirozy’s YouTube video tutorial on making DIY birthday banners. The visual and textual approach provides an all-encompassing look at the crafting techniques involved, ensuring you have everything you need to create a successful decoration. By taking the step-by-step approach, you’ll not only be able to add a personal touch to your celebrations but also experience the satisfaction that comes with creating something yourself.
Personalization Ideas for DIY Birthday Banners
Designing a personalized birthday banner is an excellent way to make the celebrant feel truly special. To create a one-of-a-kind design, consider incorporating elements that reflect the birthday person’s personality, interests, and milestones. This can include using symbols, colors, or images related to their hobbies or passions, such as sports, books, or gardening. You can also add memorable quotes or phrases that hold special meaning for the celebrant, whether it’s a favorite saying, a line from a beloved movie, or an inside joke. To make the banner even more engaging, consider adding photos of memorable moments or milestones, which can be used to create a timeline of the celebrant’s life or highlight recent achievements. Additionally, choose a theme that aligns with the party’s overall aesthetic, such as a color scheme, historical era, or fictional world. To make the banner interactive, you could include blank spaces for guests to sign or write birthday messages, which can become a treasured keepsake for the celebrant. Finally, emphasize the celebrant’s name using bold letters, different fonts, or even an acronym puzzle to show your effort in making their day special. By incorporating these elements, you’ll create a unique and fun DIY birthday banner that will make the celebration truly unforgettable.
Eco-Friendly Options for DIY Birthday Banners
As you craft your DIY birthday banner, it’s crucial to consider the environmental footprint of the materials you select. Here are some sustainable options that will enable you to create a stunning and eco-conscious banner: Start by using recycled paper or cardboard as the foundation for your design. These readily available materials can be easily customized with paint, markers, or other embellishments. Alternatively, repurpose fabric scraps from old clothing or linens to create a durable and reusable banner. Simply sew or glue the pieces together to form letters or shapes. To add some organic flair, incorporate natural elements like leaves, flowers, or twigs into your design – these can be composted after the party, minimizing waste. For an added touch of sparkle, opt for biodegradable glitter derived from plant-based materials instead of traditional plastic glitter. If you prefer a digital approach, consider designing a virtual banner that can be displayed on a screen during the celebration, eliminating the need for physical materials altogether. By selecting eco-friendly materials, you’re not only creating a visually appealing banner but also contributing to a healthier planet.
Troubleshooting Common Issues in DIY Birthday Banner Creation
When crafting a DIY birthday banner, things don’t always go as planned. However, by being aware of common pitfalls, you can easily overcome them and produce a stunning final product. One issue that can arise is wrinkled paper or fabric, which can be ironed out on a low setting before decoration begins. Additionally, fading colors can be prevented by using UV-resistant materials or keeping the banner out of direct sunlight. Weak construction can be addressed by employing strong adhesives or sewing the pieces together and reinforcing any holes with eyelets or tape to prevent tearing. Spelling mistakes are another common problem that can be mitigated by double-checking your work before finalization, and if a mistake is made, it can often be covered up with additional decoration or design adjustments. Finally, uneven lettering can be resolved by using stencils or printed templates to ensure uniform spacing and letter size. By being prepared for these common issues, you’ll be able to create a flawless birthday banner that will impress your guests.
Photography Tips for Capturing Your DIY Birthday Banner
To preserve the memories of a DIY birthday banner’s special day, capturing great photos is crucial. Here are some key tips to help you achieve this:
Lighting plays a vital role in photography, with natural light being the most flattering. Opt for daytime shots when the light is soft and even, avoiding harsh sunlight that can cause unflattering shadows and glare.
Stability is essential to avoid blurry images. Utilize a tripod or steady surface, or if using your phone, prop it against something stable to ensure a sharp focus.
The banner should be the main focal point of your photo. Position it centrally in the frame or employ the ‘rule of thirds’ to create a balanced composition that highlights your design’s creativity.
When selecting a background, prioritize one that complements the banner without overpowering it. A plain wall or simple pattern can provide an effective contrast.
Lastly, don’t forget to capture the details – take close-up shots to showcase the textures and colors you’ve incorporated into your design. With these tips, you’ll be able to produce stunning photos that accurately represent your hard work and creativity.
Interactive Elements for DIY Birthday Banners
To take your DIY birthday banner to the next level, incorporate interactive elements that will leave a lasting impression on your guests. One approach is to create a message space where attendees can jot down personalized notes and well-wishes for the birthday person. Provide an assortment of writing utensils or stickers to make it a fun and creative experience.Alternatively, transform your banner into a DIY photo booth by adding props that tie in with the party’s theme. This will not only provide a unique backdrop for capturing memories but also encourage guests to get creative and playful.For a more immersive experience, consider hiding clues or items related to the birthday person’s interests within the banner. This can turn the decoration into an engaging game that keeps guests entertained throughout the celebration.Lastly, for a child’s party, why not create a ‘pin the tail’ game directly onto the banner? Include detachable pieces that kids can try to place in the right spot, adding an element of friendly competition and laughter to the proceedings. By incorporating these interactive elements, you’ll not only decorate your space but also foster a sense of community and enjoyment among your guests.
FAQs About DIY Birthday Banners
For those venturing into the world of DIY birthday banners, uncertainty can creep in. To alleviate this and ensure your creation is truly unique, here’s a collection of answers to common questions that’ll empower you to craft a show-stopping banner.
What materials do I need to make a DIY birthday banner?
To create a personalized DIY birthday banner, you’ll need a few essential materials. These include paper or cardstock for crafting the letters, string or ribbon to hang your masterpiece, and scissors or a craft knife for cutting out the design. Additionally, you’ll require an adhesive such as glue or double-sided tape to secure everything in place. Finally, feel free to add some decorative flair with markers, stickers, or glitter to make your banner truly special.
How can I make my banner stand out?
Elevate your banner’s visual appeal by incorporating a palette of vibrant hues, unconventional embellishments, and three-dimensional features such as pompoms or intricately crafted paper flowers. To add an extra layer of customization, incorporate the birthday individual’s name and age, making the banner a truly one-of-a-kind celebration of their special day.
Can I make a reusable birthday banner?
When it comes to creating a reusable banner, durability is key. A great option is to use high-quality materials such as fabric or laminated paper, which can withstand repeated use and handling. To make the banner even more versatile, consider using Velcro strips to attach letters or numbers. This will enable you to easily swap out the text for future events, making your reusable banner a valuable investment that can be used time and again.
How do I attach the banner to the wall without damaging it?
To hang your banner securely and avoid damaging your walls, consider utilizing removable adhesive hooks or poster putty. Prior to application, carefully read and follow the manufacturer’s guidelines for optimal performance. By taking these simple precautions, you can ensure a damage-free installation that showcases your banner with ease.
What are some eco-friendly alternatives for banner materials?
To create an eco-friendly DIY birthday banner, consider using recycled materials such as paper, twine made from natural fibers like cotton or hemp, and decorations derived from nature itself. Repurposing old banners or fabric scraps can also significantly reduce waste. By keeping these considerations in mind, you’ll be able to craft a unique and personalized banner that’s sure to make a memorable impression.
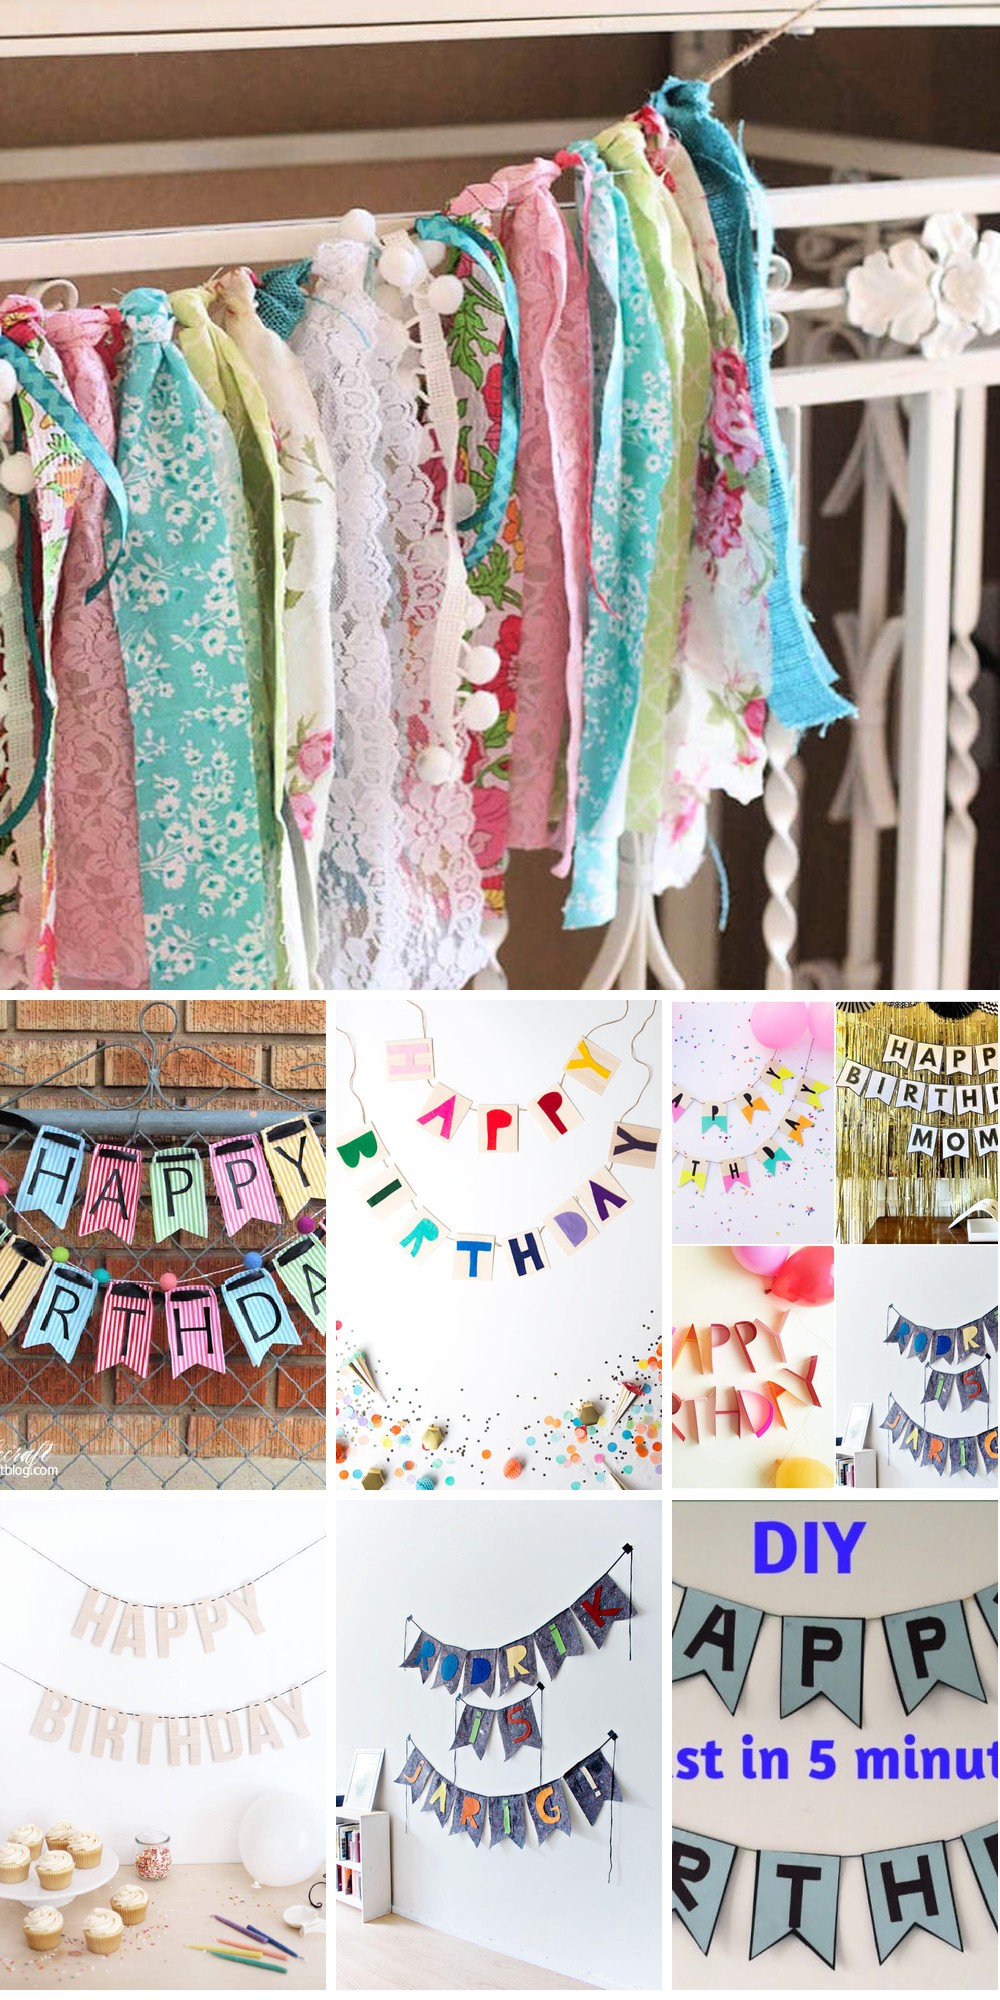
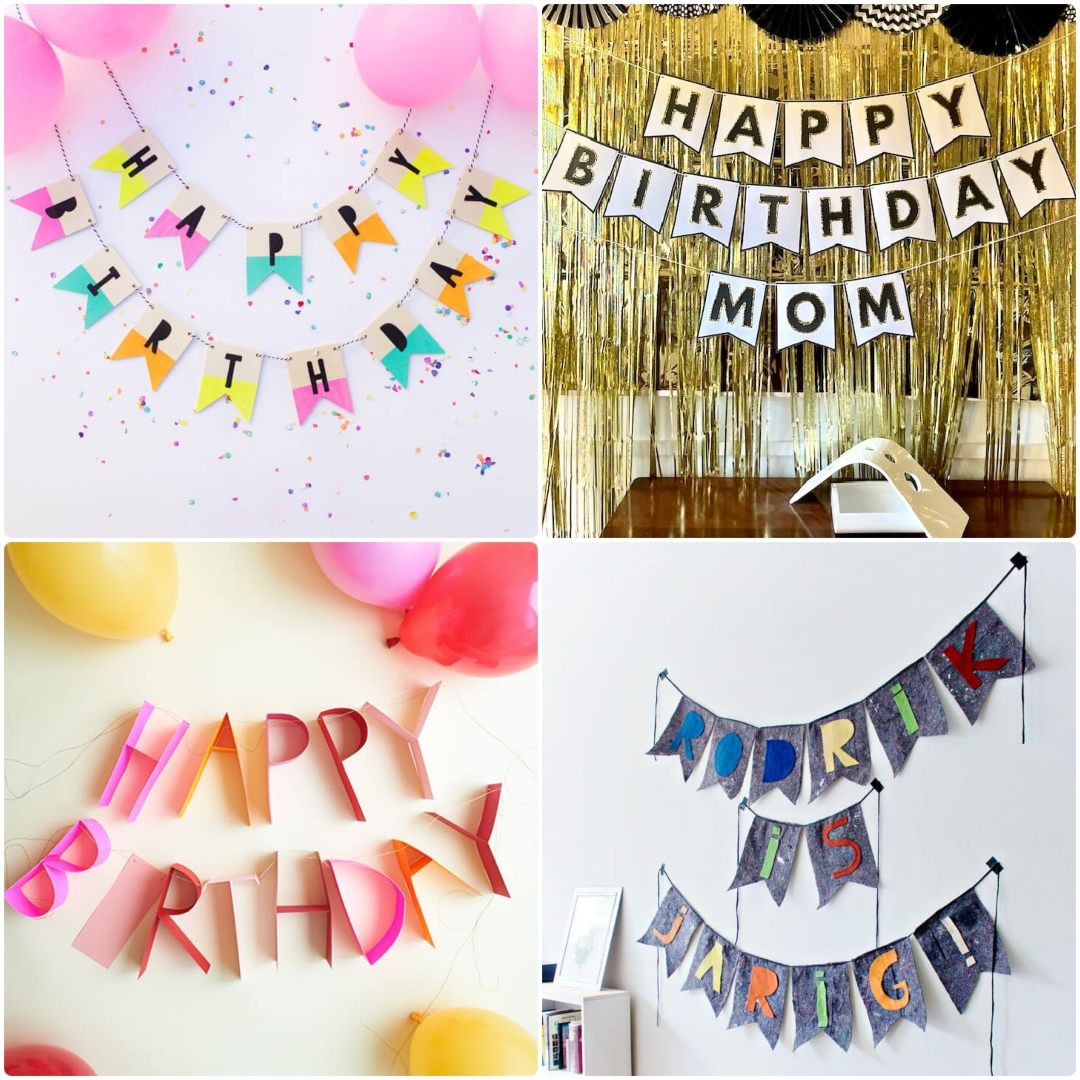
25 Fun DIY Birthday Banner Ideas to Make
Elevate your birthday celebration with unique and personalized DIY banners that reflect your personality or theme. With a wide range of materials and designs at your disposal, you can create one-of-a-kind signs that will make your special day truly unforgettable.
Easy DIY Happy Birthday Pennant Banner
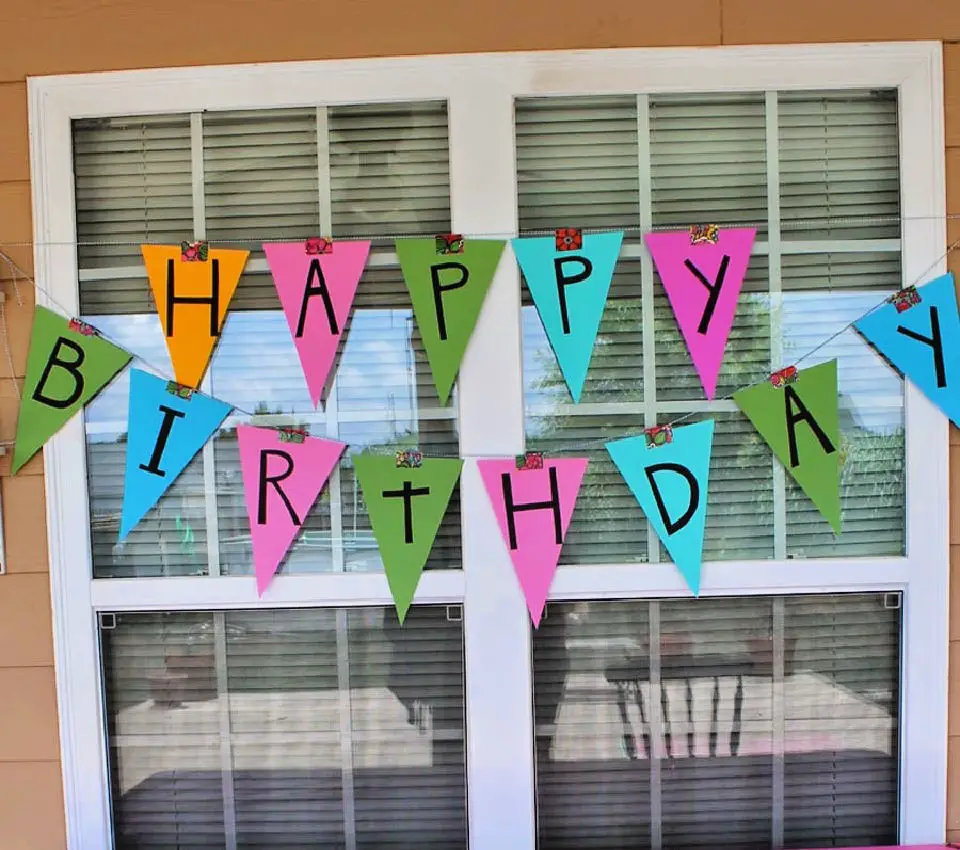
Infuse your next celebration with a unique touch by crafting a bespoke DIY pennant banner. This accessible project transforms simple scrapbook paper into a stunning, pennant-shaped masterpiece perfect for birthdays, parties, or any special occasion.
Using a straightforward combination of supplies – including 12-by-12 sheets of scrapbook paper, a rotary cutter, ruler, and cutting mat – you’ll create a beautiful piece that’s as functional as it is decorative. The addition of freehand-cut letters adds a personal flair, while duct tape ensures seamless assembly and durability.
With minimal expense and easy-to-follow steps, you can effortlessly craft a festive atmosphere, making any celebration truly unforgettable. So why not get creative and craft your own pennant banner today? With its unique charm, it’s sure to elevate your party to new heights.
Homemade Wood Birthday Banner
Transform your spontaneous celebrations into unforgettable moments with a handmade wooden banner. This DIY project combines artistry and practicality, requiring minimal materials: ArtMinds wooden banner pieces, acrylic paint, black pen, baker’s twine, X-acto knife, and blue painter’s tape. Start by designing letter stencils on your computer, cut them out, and then alternate paint colors on the wooden pieces. Once dry, string the painted letters onto the twine to create a personalized, reusable banner that brings joy to any occasion. This celebration staple is as functional as it is playful, making it an ideal addition to your party arsenal.
DIY Black and Gold Birthday Banner
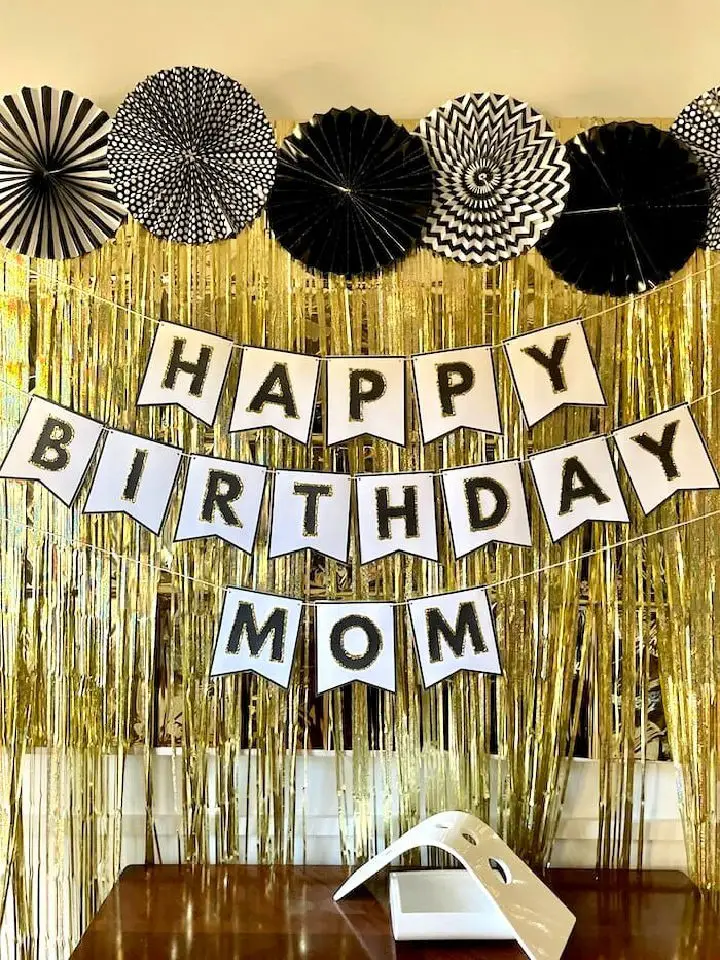
Transform your next celebration with a bespoke black and gold happy birthday banner that exudes sophistication and festive charm. This comprehensive guide takes you through the creative process, requiring just a few essential materials: a printer, white card stock, scissors, a hole punch, yarn or ribbon, and a pinch of sparkle courtesy of glitter. The step-by-step approach involves printing a free template, cutting out the banner pennants with precision, and adding a dash of whimsy with glitter before bringing the design to life by stringing the pennants together. The end result is a one-of-a-kind, elegant, and budget-friendly decoration that can be effortlessly customized to match your party’s theme. With this DIY happy birthday banner, you’ll be able to elevate any celebration into an unforgettable moment.
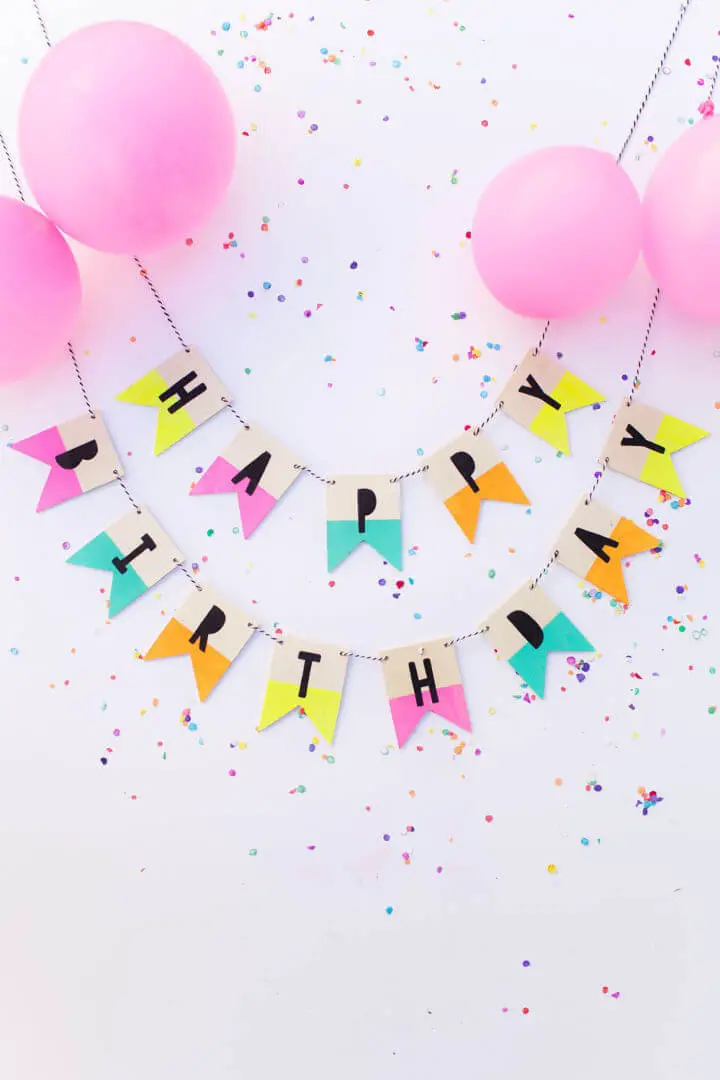
Make Your Birthday Banner
Transform any birthday celebration into an unforgettable experience by crafting a unique DIY banner. With just a few simple materials like Tombow dual brush pens, scissors, card-cut pennant shapes, string, a pencil, a MONO drawing pen (size 5), and a hole punch, you can create a personalized decor piece that reflects the personality of the birthday person. Start by adding color to your pennants with vibrant markers, then sketch out your letters with precision using the dual-brush pens. Outline them for added depth before filling in the details with black ink. Once the ink is dry, use the hole punch to create holes and thread the pennants onto a length of string, ready to be hung. This DIY banner will not only add a touch of whimsy to your celebration but also make it an even more special and heartwarming occasion.
DIY Happy Birthday Banners
Transform your birthday celebration into an unforgettable experience by crafting unique DIY happy birthday banners. Infuse vibrant colors, sparkles, and personalized messages to create a one-of-a-kind tribute. These creative DIY projects not only elevate the party atmosphere but also make for thoughtful gifts or surprise decorations. With customizable color palettes, you can seamlessly integrate them into your party’s theme or match them to the birthday person’s favorite hues. All it takes is a printer, cardstock, hole puncher, and ribbon to bring these cheerful banners to life, filling the celebration with joy and making memories that will last a lifetime.
Printable Baby Yoda Birthday Banner
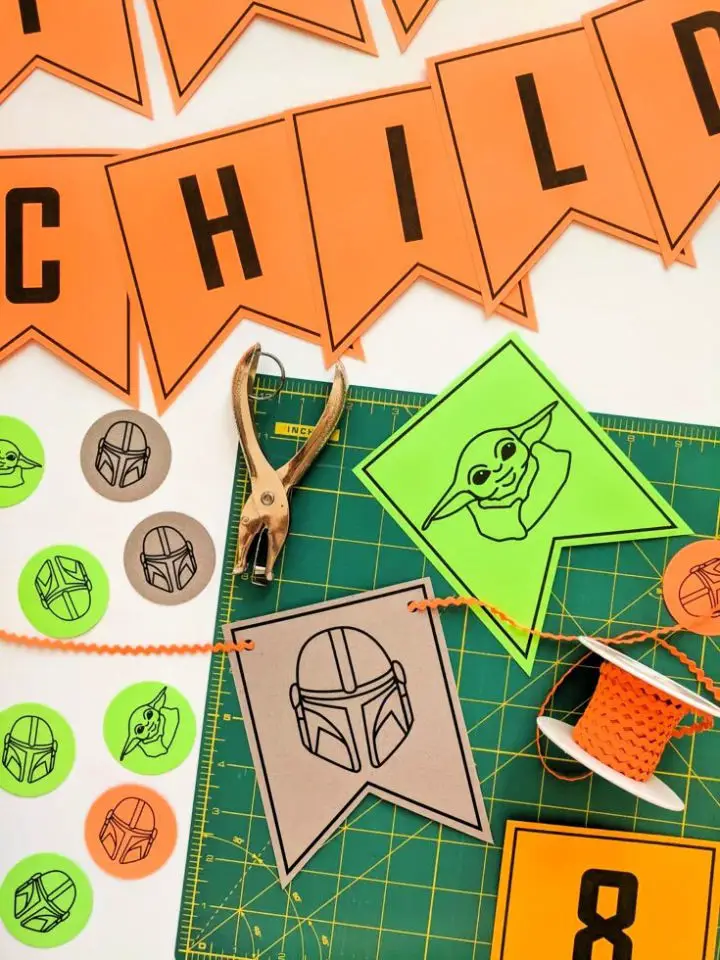
Make your child’s special day a galactic celebration with a fun and engaging Mandalorian-themed party! Create a customized DIY Baby Yoda birthday banner using this free printable template, perfectly capturing the essence of Tatooine’s sunset hues and Grogu’s iconic green. To complete the party package, pair this banner with matching cupcake toppers, a Baby Yoda cake, and thank you cards for a cohesive look. The banners are easy to make: simply print them on colored cardstock, cut out the shapes, punch holes, and hang using ribbon – and don’t forget to get creative by making garlands from the banner’s circles! And the best part? These printables are absolutely free, so you won’t need to break out your Beskar Steel wallet. Bring the Star Wars universe to life for your child’s birthday and fill it with merriment!
Cricut Maker Rotary Blade Happy Birthday Fabric Banner
Bring an extra layer of excitement to your birthday celebrations by creating a show-stopping DIY fabric bunting with the Cricut Maker and its advanced tools. By combining the precision of the Rotary Blade, the flexibility of iron-on vinyl, and the ease of use provided by the EasyPress 2, you’ll craft a unique and personalized banner that adds an extra touch of joy to your party atmosphere.
With just a few simple steps, you can create custom banners in various colors and patterns, perfect for hanging over the mantel, wall, or any backdrop. This versatile accessory can be tailored to match any holiday or celebration, making it a fantastic addition to your DIY arsenal.
The Cricut Maker’s capabilities extend far beyond this project, allowing you to explore a wide range of crafting possibilities, from home decor and school projects to party accessories and more. So why not grab your supplies and start creating a tradition that will brighten every birthday?
How to Make Fabric Birthday Banner
Transform any celebration into a truly special occasion by crafting a DIY fabric birthday banner that reflects the personality or favorite characters of the guest of honor. With just an old painter’s cloth, fabric scraps, and yarn, you can create a charming and meaningful decoration in under an hour. The beauty of this project lies in its customizability – choose colors, fabrics, and messages that perfectly capture the essence of the occasion. And the best part? You’re likely to have all the necessary materials right at home, eliminating the need for expensive or hard-to-find supplies. This eco-friendly alternative to store-bought plastic banners is a thoughtful way to make every celebration truly unforgettable.
Wood Letter Birthday Banner
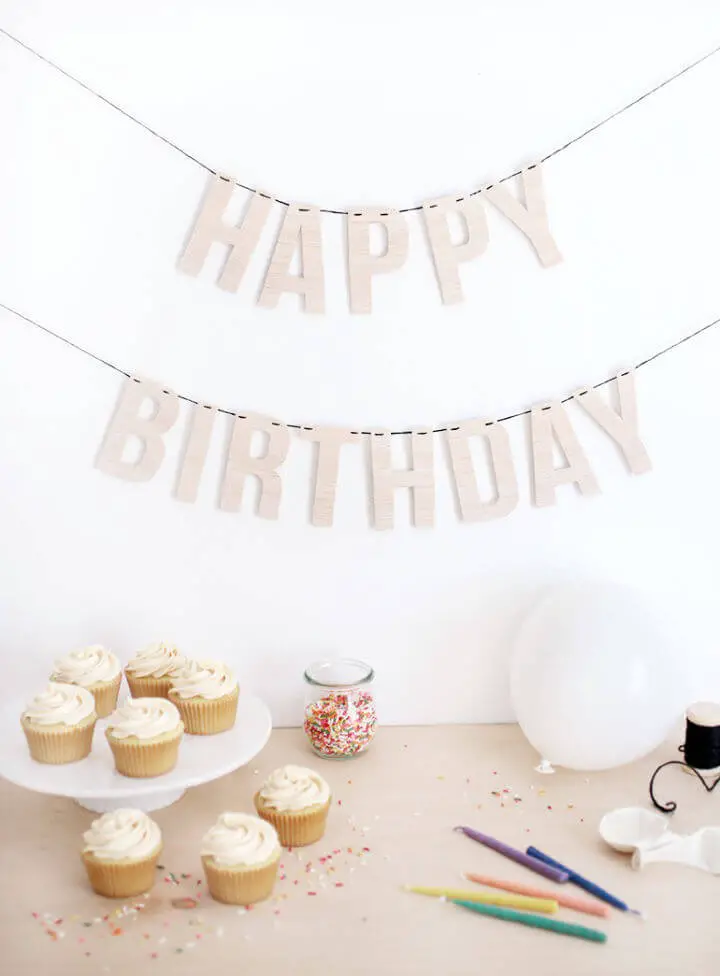
Elevate any birthday celebration to a whole new level by creating a unique DIY wood letter banner that adds a personalized touch. This charming project combines simplicity with elegance, requiring just balsa wood, stencils, a pencil, X-acto knife or scissors, thread or twine, and a needle. By following a few easy steps, you’ll be able to craft a delicate garland that will become a treasured keepsake for years to come. With its soft texture and intricate design, this handmade banner is the perfect way to commemorate special birthdays, especially during those busy May and June months when every celebration feels like a special occasion.
DIY Pink Shibori Birthday Banner
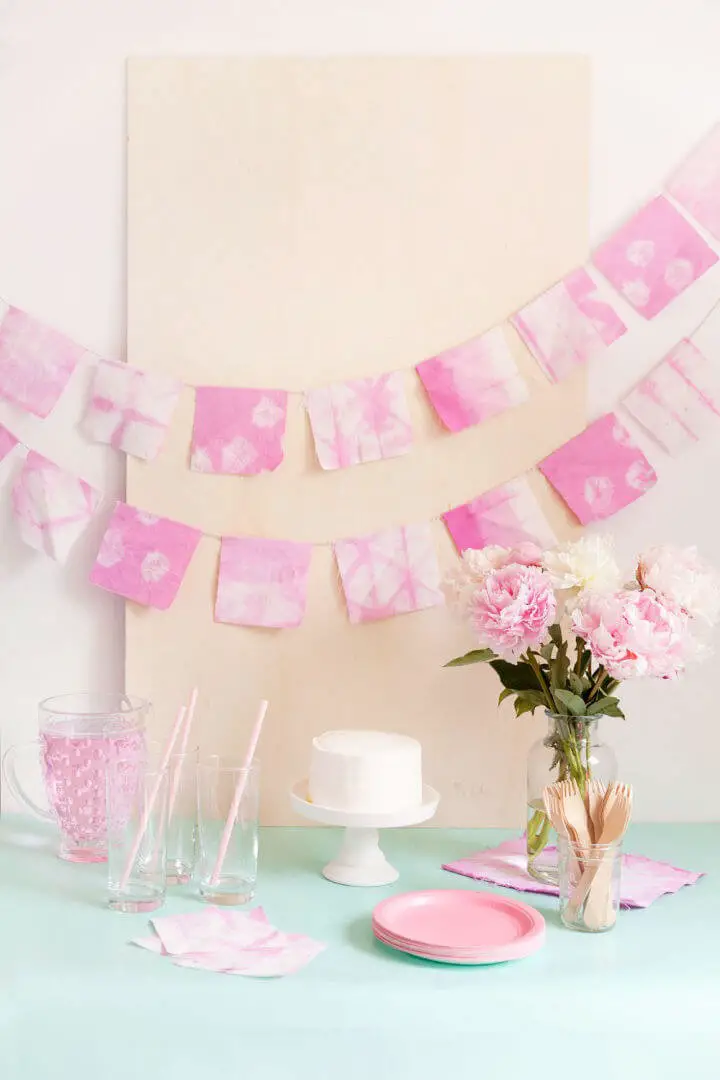
Elevate your DIY birthday banner ideas by incorporating unique materials like fabric, burlap, or felt. One such creative and reusable decoration idea is a charming pink Shibori banner that adds an air of elegance to any celebration – whether it’s a bridal shower, baby shower, birthday party, or a fun girls’ weekend. To create this beautiful banner, start by crafting it from white cotton fabric and dyeing it in soft pink hues. The result is a stunning piece that will make your next event truly unforgettable.
The Shibori dyeing process is not only rewarding but also an enjoyable creative journey, inspired by renowned tie-dye techniques. To assemble the banner, you’ll need a few basic tools: a rotary cutter, a mat, an acrylic ruler, baker’s twine, and a hot glue gun. Once the fabric is dyed and cut to size, neatly glue it onto the twine for a polished finish.
The best part? This DIY banner is incredibly easy to store, making it a versatile decoration that’s ready to be used again and again. Start planning your next celebration today with this unique pink Shibori banner!
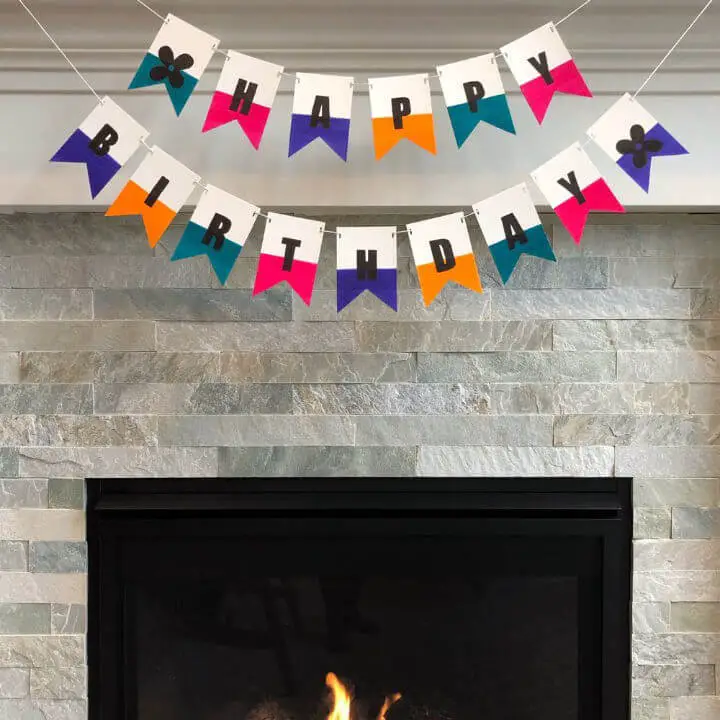
Balsa Wood Happy Birthday Banner
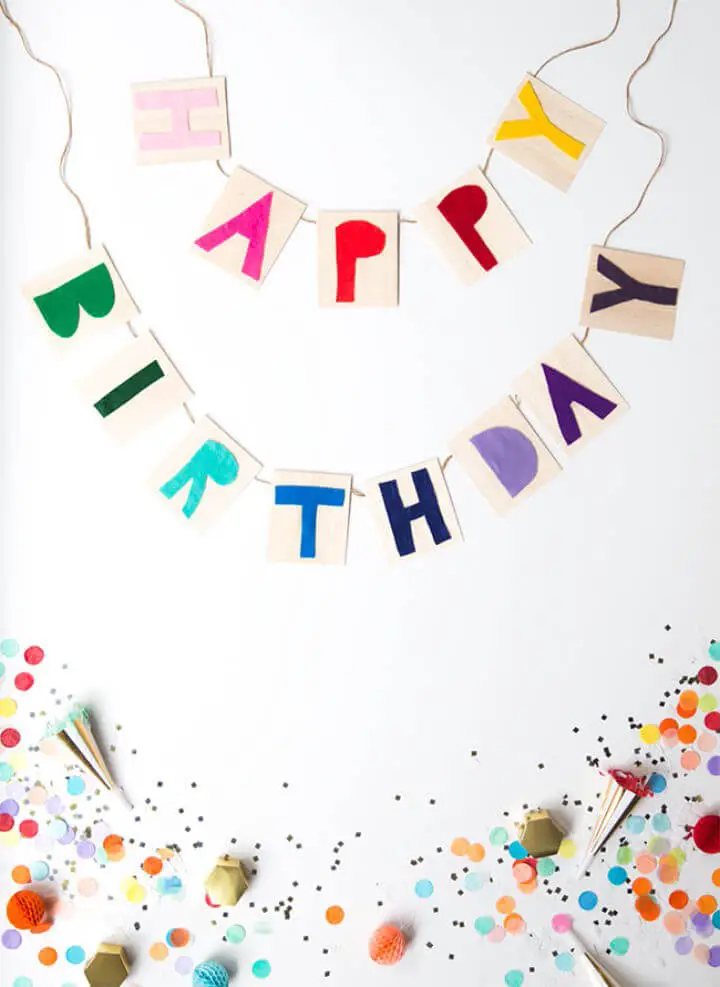
Elevate your birthday celebrations by trading in mass-produced decorations for a unique and personalized DIY balsa wood happy birthday banner. With just a few simple materials – including balsa wood strips, colored felt, Fabri-Tac glue, string, and scissors – you can craft a one-of-a-kind piece that adds a touch of modern sophistication to your festivities.
To get started, choose a cohesive color palette and cut out letters from the felt. Then, attach these to balsa wood rectangles before joining them with string and glue to form a sleek and stylish banner. Hang individual elements or pair them up for a visually striking display that’s sure to be the focal point of your celebration.
How to Make a 3D Birthday Banner
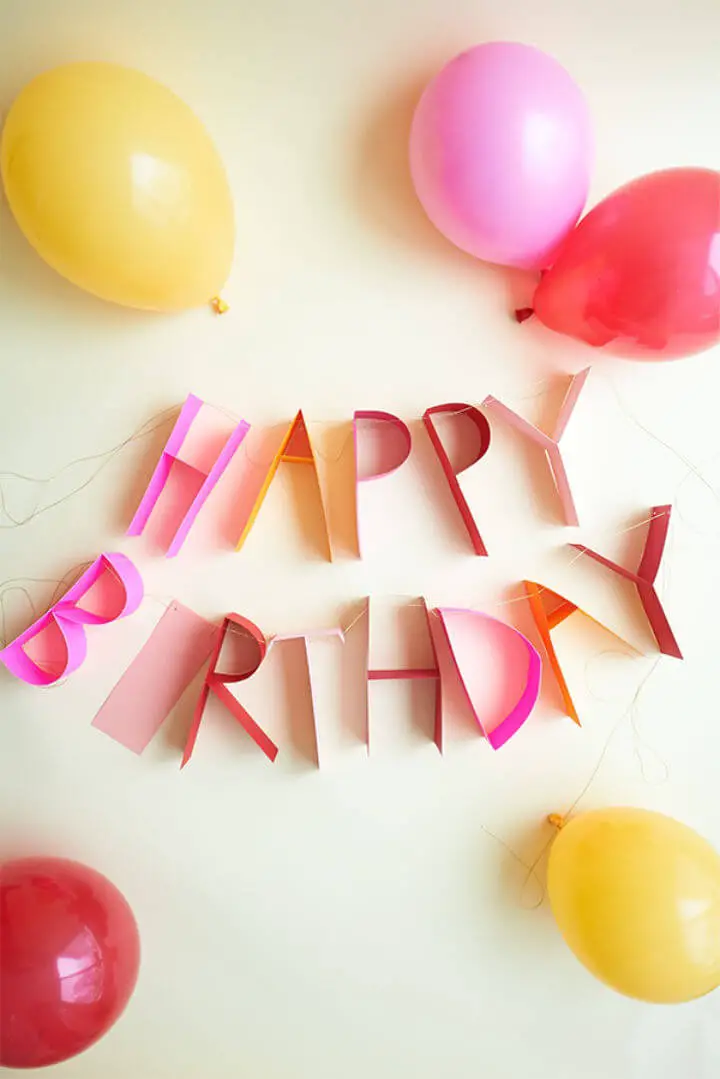
Transform your celebration with this imaginative DIY paper banner project, inspired by the elegance of a beautifully crafted cake. To create this unique decor piece, gather basic materials like card stock or heavyweight paper, a ruler, X-acto knife, bone folder, scissors, glue, string, and mini hole punch. Following a straightforward process, you’ll craft individual letters by cutting, bending, and gluing them together. Don’t worry about mistakes – simply cut another piece and move forward. This innovative project offers the joy of hands-on crafting while being cost-effective and visually stunning. As you bring your design to life, you’ll experience the satisfaction of creating something truly yours.
Making a Happy Birthday Banner
Celebrate someone’s special day with a DIY birthday banner that reflects their unique style and personality. By using a Cricut Maker and a versatile knife blade, you can create a durable and reusable chipboard banner that will become a treasured family tradition for years to come. With basic tools like a strong grip mat, scissors, a scraper tool, masking or painter’s tape, and your choice of permanent vinyl, the process is surprisingly straightforward. The key to achieving a polished finish is to apply the vinyl before cutting out your letters – this eliminates the need for time-consuming painting and ensures a professional-looking result. While cutting may take some time, the end product is well worth the effort. With a little creativity and a lot of love, you can turn birthdays into truly extraordinary events with a personalized banner that will be treasured for years to come.
No Sew DIY Felt Birthday Banner
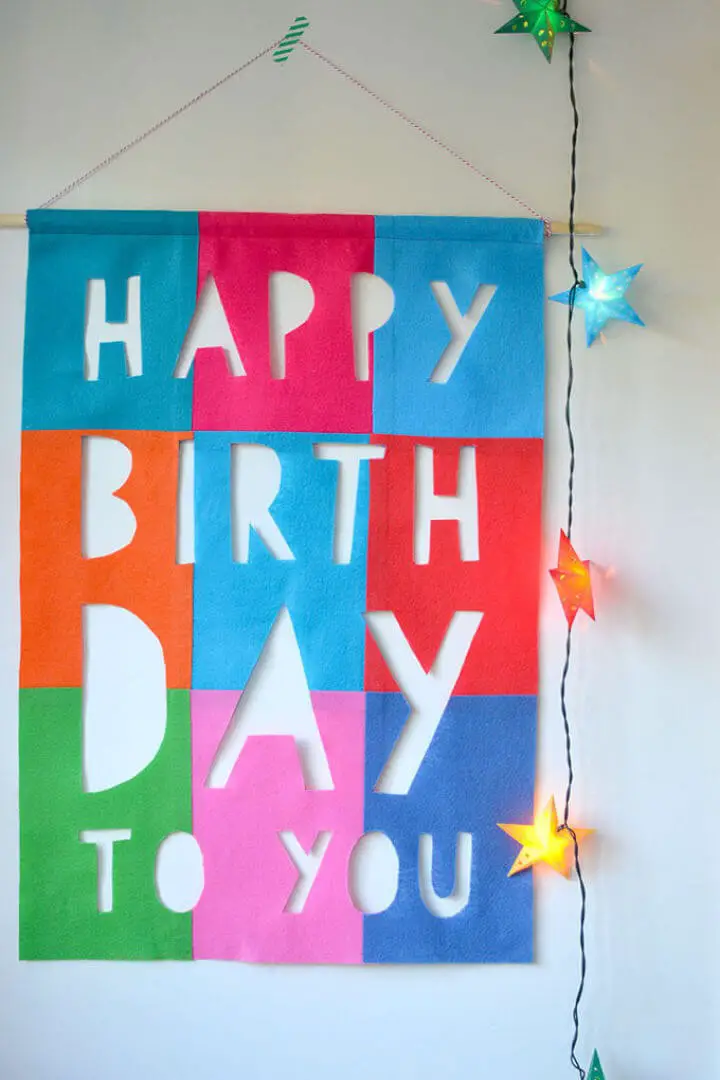
As you plan a DIY birthday banner for a child’s party, draw inspiration from popular themes like superheroes, princesses, or animals. The process of creating a unique, no-sew-felt banner is an enjoyable and immersive experience that adds a pop of color to any celebration. All you need are a few simple materials: colorful felt, sharp scissors, and twine. By cutting shapes from the felt and stringing them together, you’ll craft a durable and attractive piece that can be displayed at future parties, making each celebration feel extra special. This project is perfect for craft enthusiasts seeking a long-lasting and charming decoration. As you work on it, you’ll experience a sense of fulfillment that will last long after the party’s over. Once complete, your no-sese-felt birthday banner will become a treasured keepsake to be enjoyed for years to come.
Birthday Cake Banner With Pom-poms
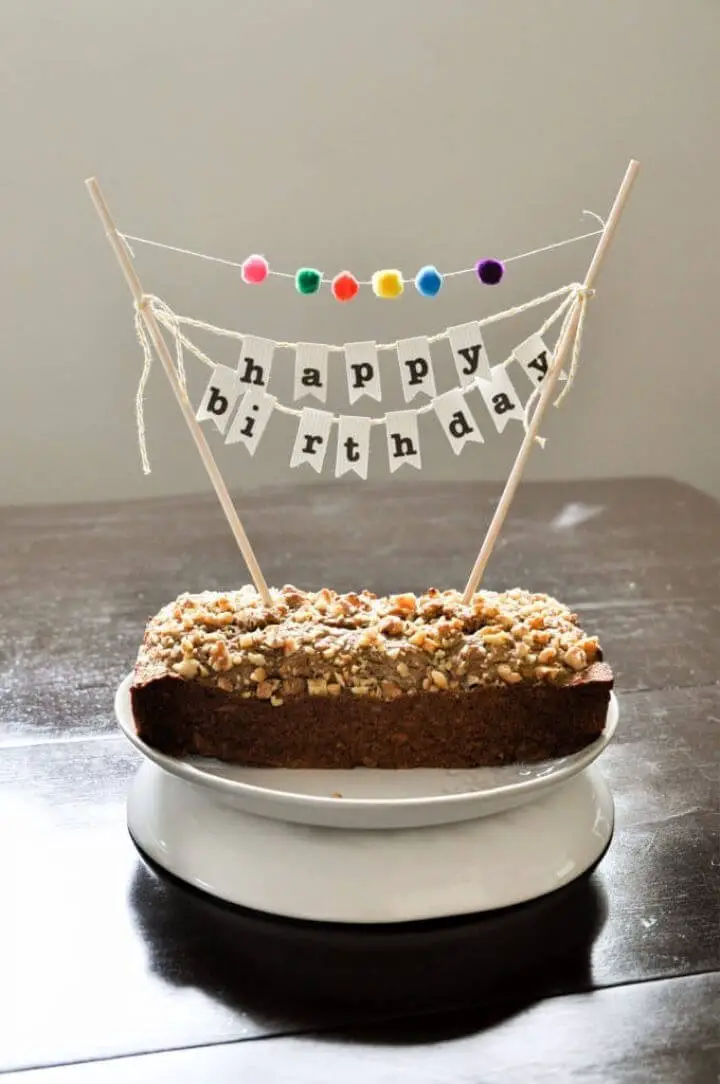
Transform any birthday celebration into a memorable affair with a creative DIY banner! With minimal investment, craft a vibrant display using everyday items like paper, glue, string, scissors, or a silhouette cutter. You’ll be delighted to discover that most of these supplies are likely already at your disposal.
Unleash your creativity by designing a colorful palette of papers for a festive touch, and repurpose leftover banner pieces for future craft projects. With step-by-step guidance, you can create a one-of-a-kind banner that reflects your unique style. Simply glue your letters to the paper, string together the banner pieces, add a playful pom-pom flair, and voila! You’ll have a stunning birthday decor piece.
The beauty of this project lies in its simplicity – it’s all about embracing the process and having fun. Craft a thoughtful surprise for a loved one or treat yourself to a self-care project that yields a truly special outcome.
Easy DIY Felt Birthday Banner
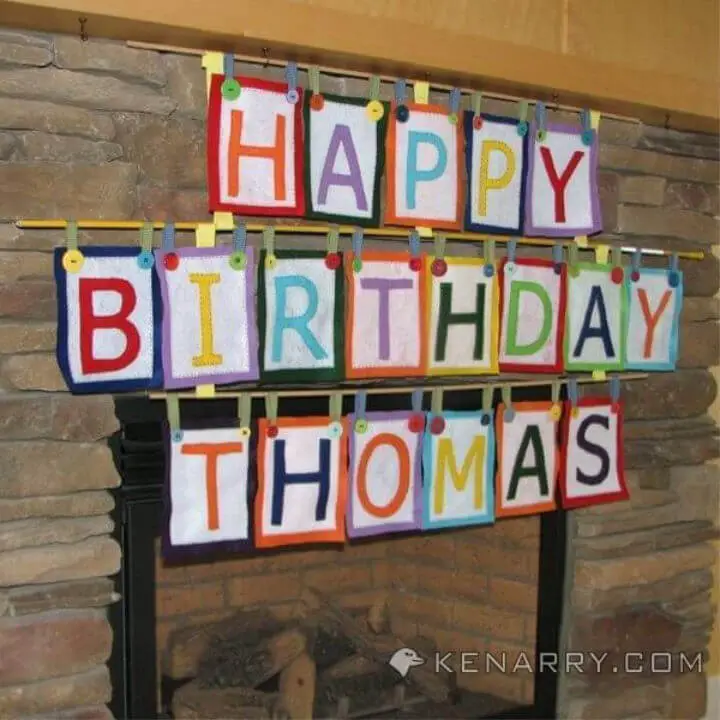
Bring unique celebrations to life with DIY birthday banners crafted from eco-friendly materials and personalized designs. Showcasing creativity and affection for the honoree, these handmade decorations combine vibrant colors, intricate stitching, and playful embellishments. By layering felt pieces, embroidering letters by hand, and attaching decorative elements with ribbon, you’ll create a reusable and adaptable banner that seamlessly integrates into any color scheme. This nighttime crafting project offers a delightful visual appeal, adds a personal touch to your celebration, and provides the satisfaction of creating a one-of-a-kind decoration piece that makes birthdays in your home even more unforgettable.
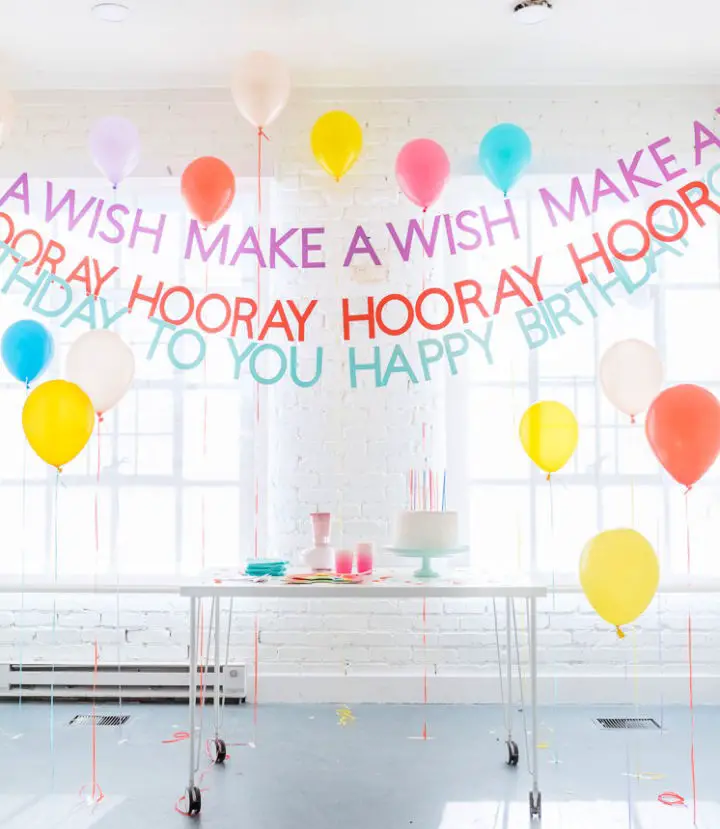
How to Make a Happy Bday Banner
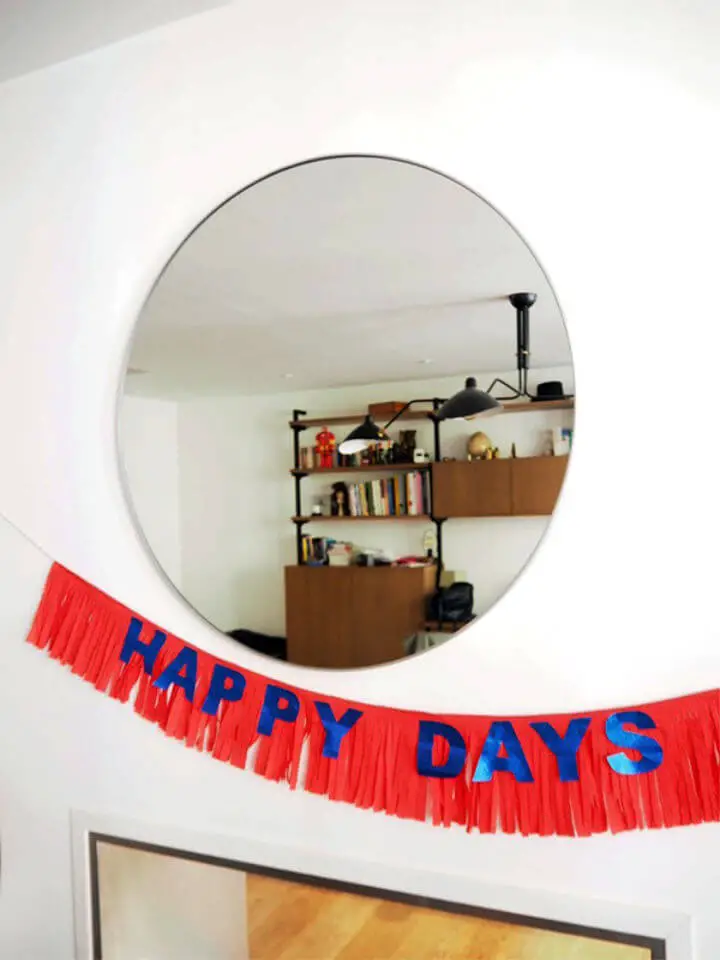
Transform your next celebration into a truly unforgettable experience by crafting a one-of-a-kind DIY banner that exudes warmth and personality. This fun and accessible activity is ideal for birthdays, baby showers, or any other special occasion. To get started, you’ll need crepe paper in various colors, glitter crepe paper or rigid paper, a glue stick, string, scissors, a pen, and printable letters. The process begins with printing and cutting out the letters, followed by folding and fringing the crepe paper to create a unique texture. Next, secure the letters to the fringe using your glue stick, and finally, hang your masterpiece for all to admire. By incorporating contrasting colors of crepe paper, you’ll add an extra layer of visual appeal to your design. The end result is a show-stopping decoration that not only adds a personal touch to your celebration but also creates a cozy atmosphere that invites everyone to join in on the fun.
Sprinkle Birthday Banner Tutorial
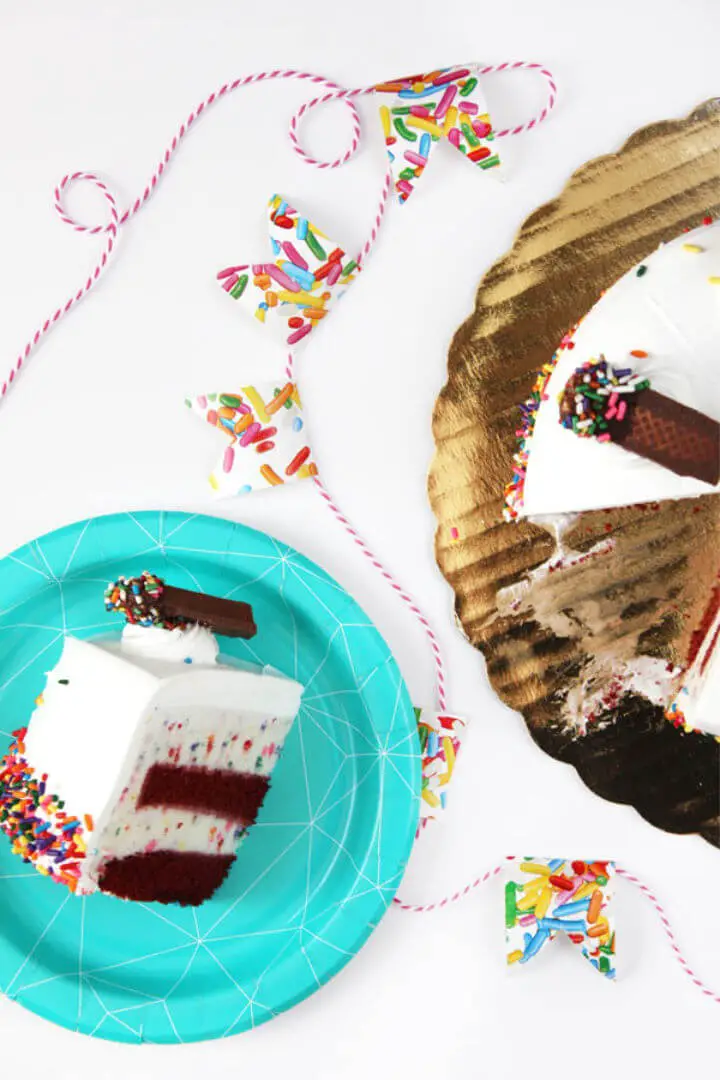
Combine vibrant colors and creative crafting to elevate your festive celebrations with a DIY sprinkle birthday banner. This project combines the fun of sprinkles with the personal touch of handmade decorations, making it easy to assemble and customize for any birthday party. To create this whimsical decoration, start by transforming wrapping paper into colorful flags using scissors and tape. Then, attach these flags to twine for a playful and eye-catching display that’s sure to delight your guests. This user-friendly craft adds a personalized touch to your party decor, bringing a touch of magic to your special day. Let the joy of sprinkles and crafting enhance your birthday ambiance with this delightful DIY project!
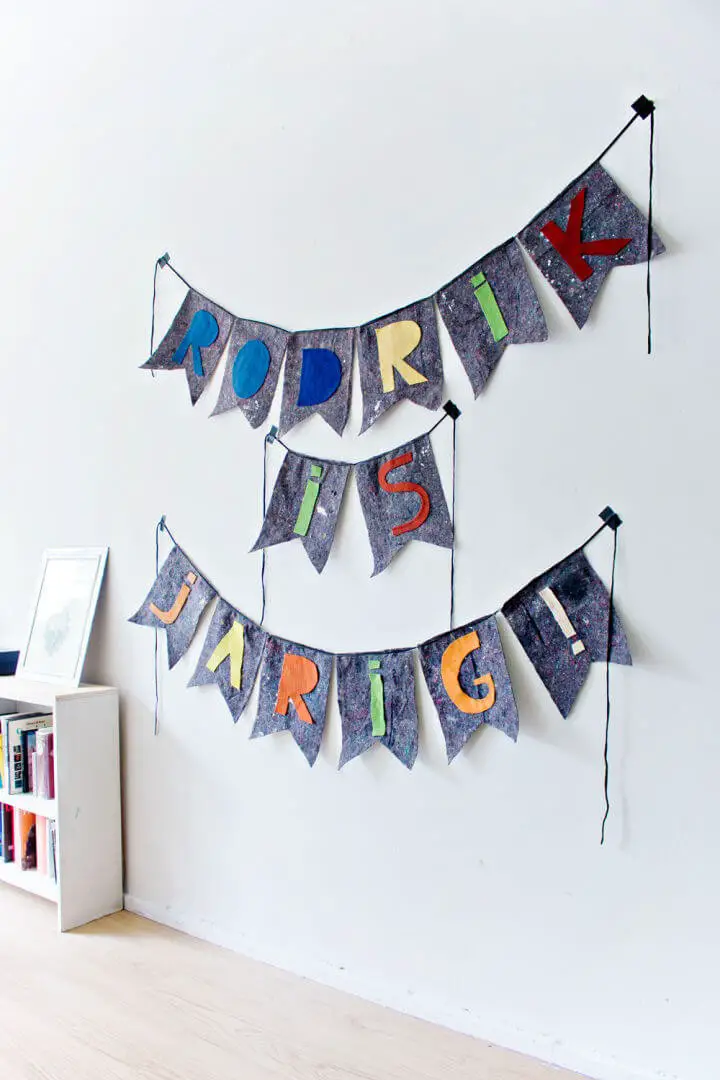
DIY Fabric Scrap Banners
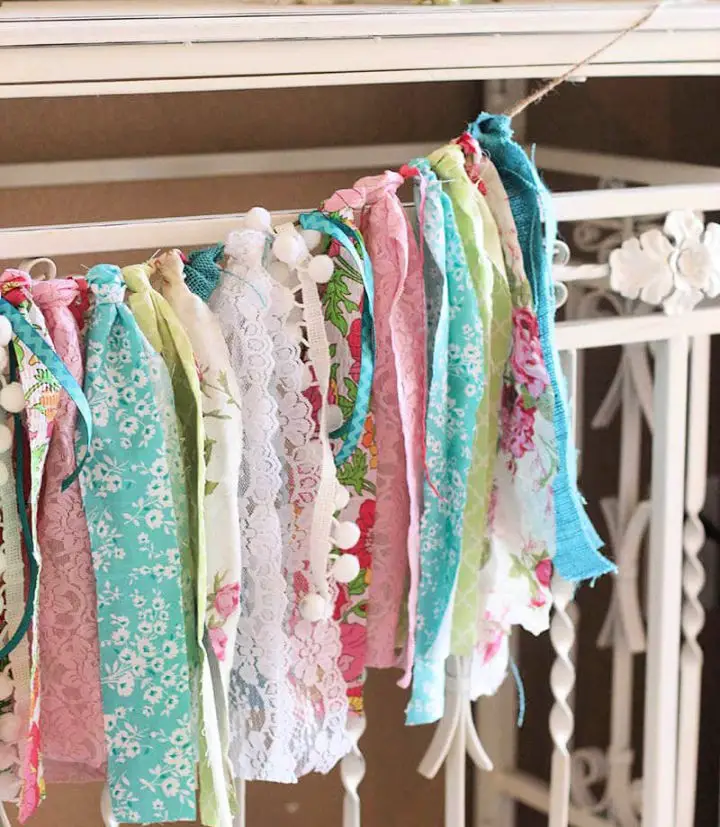
Transform discarded fabric scraps into vibrant DIY banners that infuse your home with a playful touch. This eco-friendly craft not only revives old materials but also fosters creativity, making it an ideal activity for any celebration or daily decor inspiration. By leveraging basic supplies such as jute twine, scissors, and varied fabrics, you can craft a one-of-a-kind banner that reflects your unique style and adds a whimsical charm to your space. And don’t worry about perfection – simply cut your fabric and ribbons into strips, knot them onto the jute twine, and voilà! You’ll have a reusable decoration that’s as colorful as it is versatile. Whether you’re preparing for spring festivities or seeking to refresh your living area, this straightforward guide will walk you through the process of creating a fabric scrap banner. So why not start recycling those leftover fabric bits today and give your space a creative makeover?
Winnie the Pooh Birthday Banner
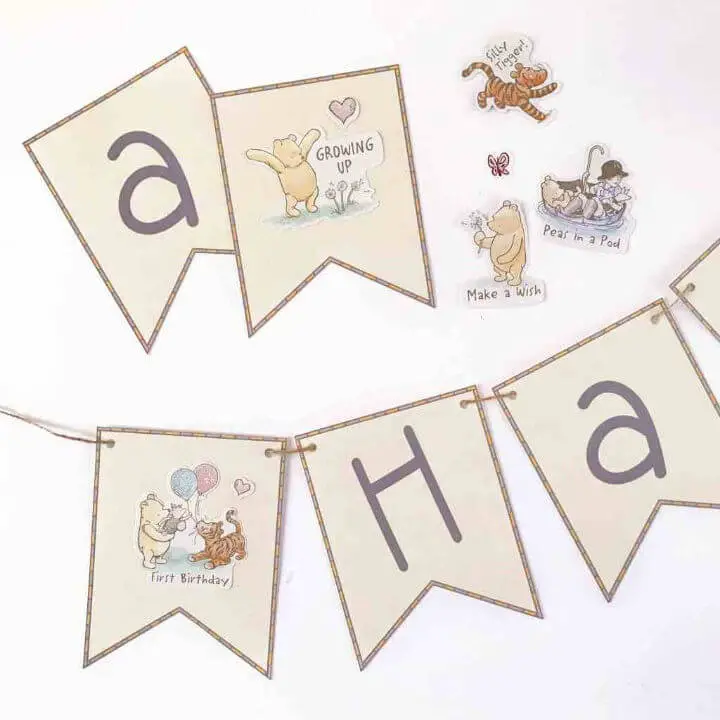
Celebrate National Winnie the Pooh Day by creating a charming DIY birthday banner that captures the whimsy of your childhood favorite. Start by downloading a free printable pennant featuring the complete alphabet. Then, select the letters you need and decorate them with adorable Winnie the Pooh stickers and scrapbook embellishments. This banner not only adds a delightful touch to any Pooh-themed party but also makes for a fun and creative activity in the days leading up to the celebration. To bring your design to life, gather basic crafting supplies like twine, scissors, a hole punch, and your chosen decorations. The result is a personalized and heartwarming banner that’s sure to delight on this special day. There’s no better way to honor Winnie the Pooh’s birthday than with a one-of-a-kind creation that showcases his enduring charm.
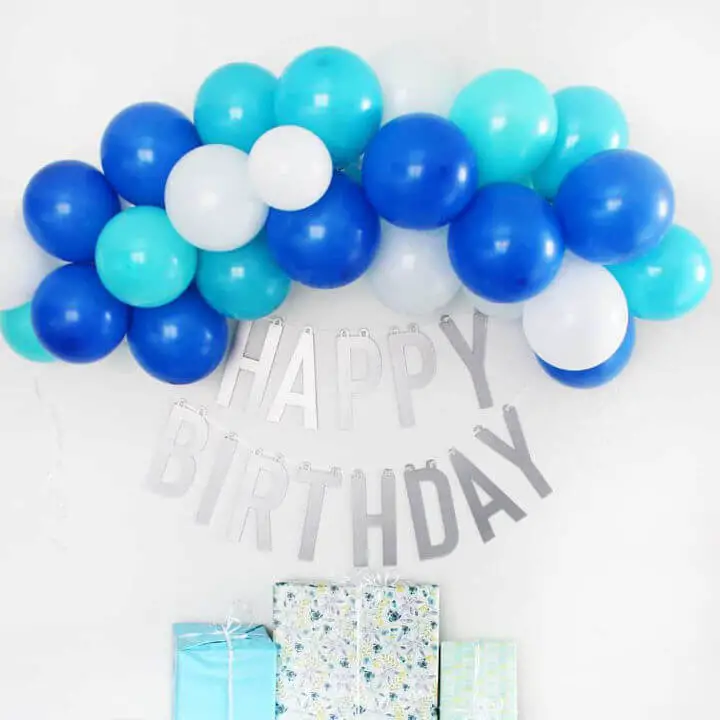
DIY Letter Decal Balloon Banner
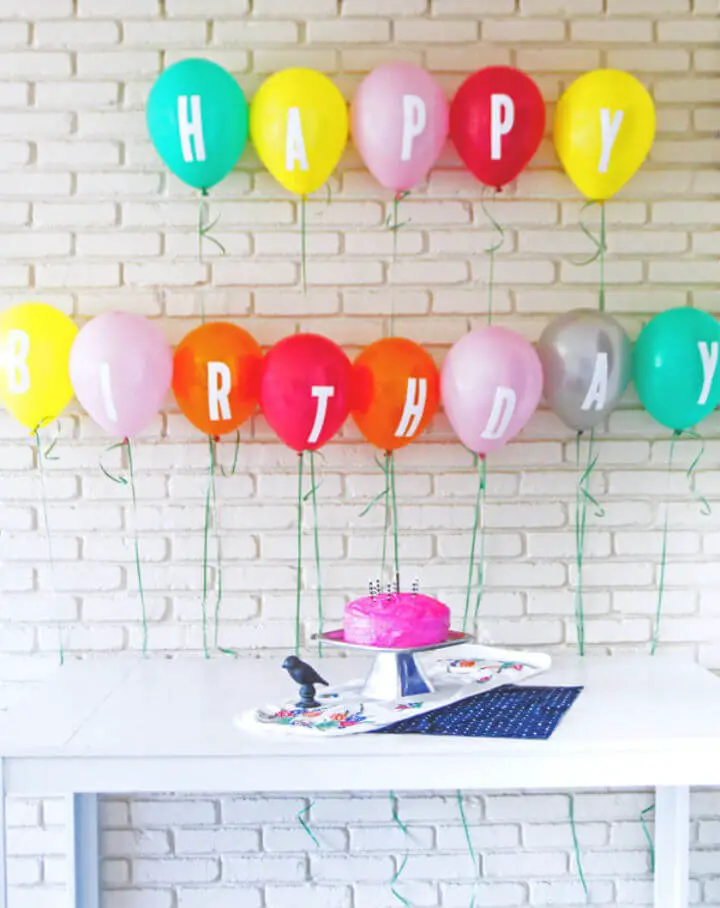
Elevate the ambiance of your parties with a customizable DIY balloon banner that’s sure to impress. By attaching 6-inch boat decals to balloons, you can create personalized messages for any occasion – from birthday celebrations and graduation parties to festive gatherings. Simply inflate your chosen colored balloons, carefully apply the decal, and voila! Your unique banner is ready to take center stage at any celebration. With a touch of creative flair, these DIY banners are surprisingly easy to assemble, requiring minimal effort while still making a big impact. Just be mindful when applying the decals, as they only stick once. Unleash your imagination and let your balloon banner do the talking at your next party!
Customizable Cricut Birthday Banner Ideas
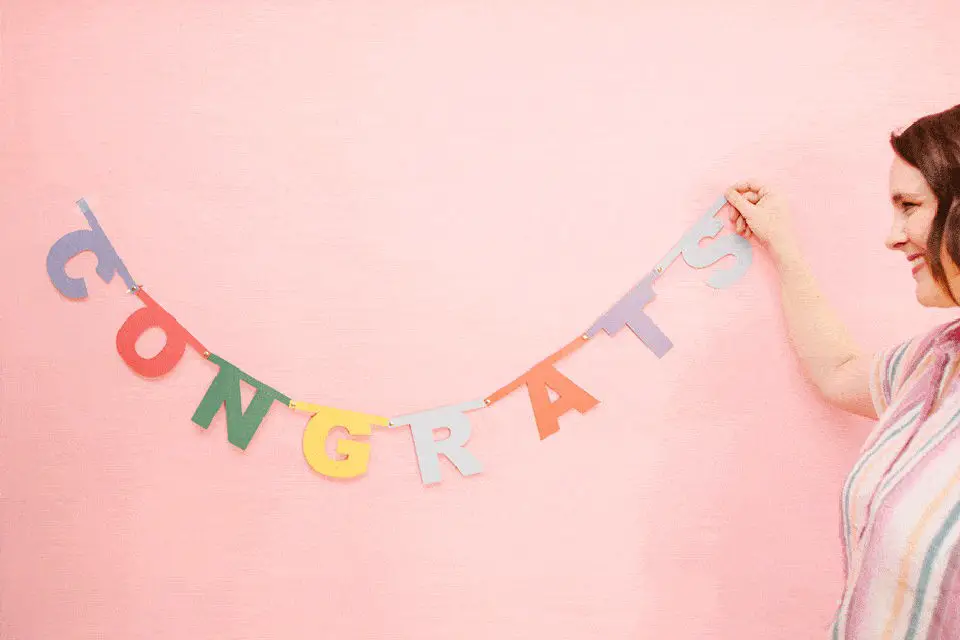
Unleash your creativity and create a one-of-a-kind DIY birthday banner with the help of Cricut! This project is perfect for adding a personalized touch to any celebration, whether it’s a birthday, anniversary, or milestone event. With just a few simple materials – a Cricut machine, medium-weight cardstock, and brads – you can create a charming letter banner that reflects your unique style. The best part? You can customize the letters with different sizes and fonts to make each banner truly exclusive. Simply spend an afternoon watching your Cricut machine skillfully cut out each letter, then assemble them into a vibrant display that’s sure to impress. Every special occasion deserves a personal touch – so why not take the time to create a beautiful DIY birthday banner that reflects your personality? With a little creativity and some basic materials, you can make it happen!
Make Your Own Birthday Banner at Home
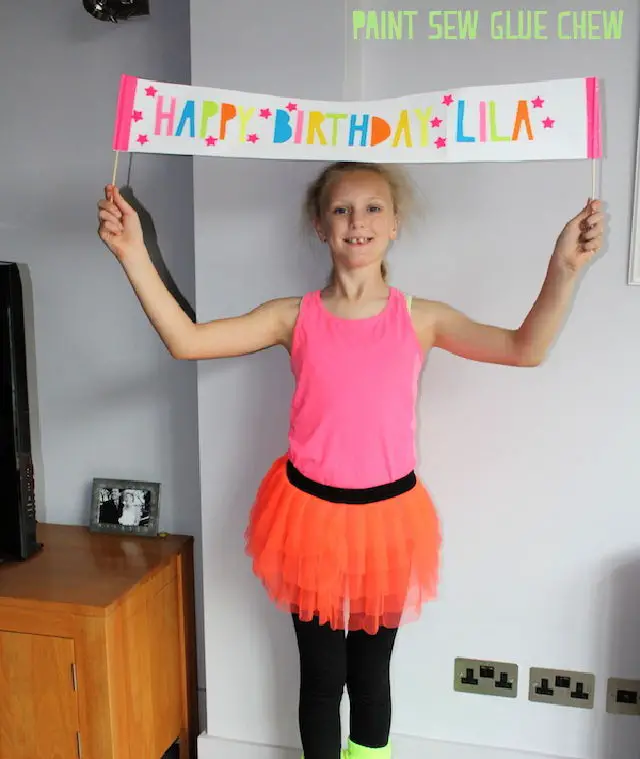
Transform your birthday party into an eco-friendly celebration by repurposing old magazines, newspapers, or leftover gift wrap. This creative DIY project takes approximately 30 minutes to complete and only requires watercolor paper, scissors, tape, and bright- colored paper for letter cutouts. The free-form design adds a charming touch, while printing and cutting letters from a template provides a more detailed look. To add an extra layer of personality, incorporate stars, hearts, or other shapes into the design. For added durability, use BBQ skewers as handles and neon duct tape to secure the banner. To further enhance the theme, consider wrapping presents in DIY neon paper for a personalized touch.
How to Make Birthday Banner
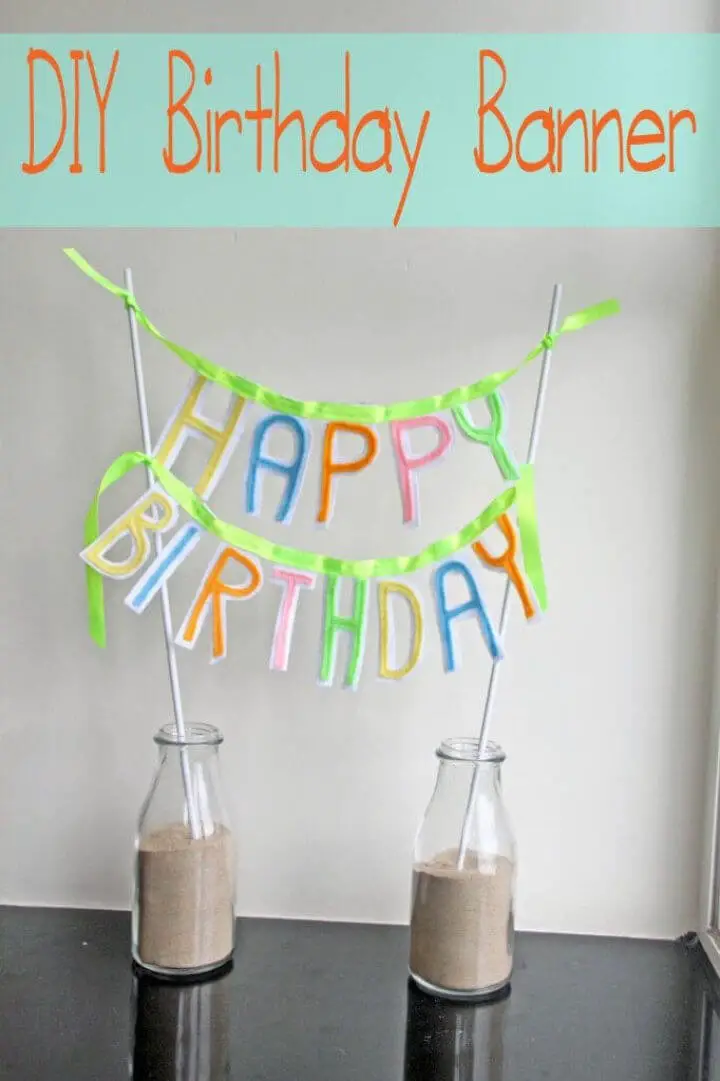
Transform your special day with a vibrant and personalized DIY birthday banner! With just a few simple materials – milk bottles, sand, wooden or plastic rods, ribbon, and felt in bold colors – you can create a stunning table decoration that’s uniquely yours. The process is easy: cut out letters with a tab, then sew or glue them onto the ribbon for a professional finish. Take it to the next level by adding name garlands for each family member. When the celebration is over, your banner will cleverly fold up for storage, making it a thoughtful keepsake. This charming, handmade decoration adds a one-of-a-kind touch to your family’s birthday dinner and becomes a treasured memory.
Make a Birthday Banner in 5 Minute
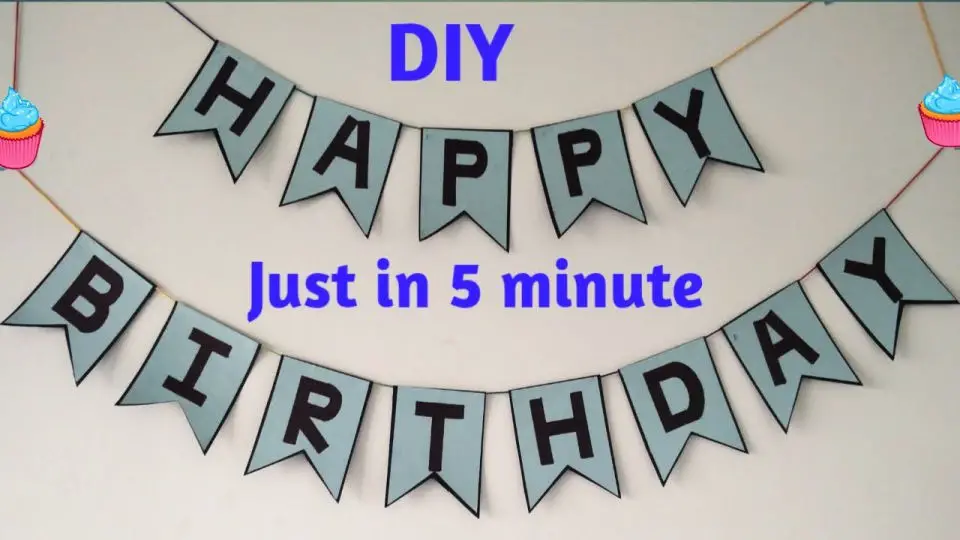
Crafting a bespoke DIY birthday banner is an effortless way to elevate your home celebration’s ambiance. This customizable piece integrates seamlessly into your chosen theme, adding a personal touch that complements the overall aesthetic. With this straightforward guide, you’ll be able to create a unique and affordable decoration that perfectly matches your desired color palette.To bring your vision to life, gather the essential materials: card stock paper, colored paper, ribbon or thread, glue, scissors, a scale, and a pencil. The simplicity of the process belies its versatility, allowing for endless customizations that showcase your creativity. By following these instructions, you’ll be able to produce a birthday banner that truly stands out and adds a pop of vibrancy to any party setup, making it an ideal solution for birthdays or parties of all themes.
Conclusion:
As we bring this guide to a close, it’s clear that creating a DIY birthday banner can be a game-changer for any celebration. By walking you through the process from start to finish, we’ve aimed to empower you with the skills and imagination needed to craft something truly special. From selecting eco-conscious materials to overcoming potential hiccups, our goal has been to provide the tools and motivation required to make your banner an unforgettable part of the party. Ultimately, the beauty of a DIY birthday banner lies in the thoughtfulness and creativity that goes into making it – transforming what would be a generic celebration into one that’s truly unique and meaningful.
