If the thought of constructing a DIY bike rack for your garage has left you feeling uncertain, take heart! With our extensive guide, you’ll gain access to a wealth of creative ideas, each designed to help you create a personalized and efficient storage space for your bicycles. Over the course of this comprehensive tutorial, we’ll lead you through every stage of the process, from selecting the ideal materials to ensuring the structural integrity of your finished product. Along the way, you’ll discover expert advice on customization options, troubleshooting common issues, budget breakdowns, and tips for maintaining your DIY bike rack, all carefully crafted to empower you with the confidence to tackle this project head-on.
How to Make a Bike Rack – Step by Step Guide
Discover the art of fabricating your own bike rack, as we walk you through a meticulous and easy-to-follow process. With our guidance, you’ll be equipped to create a sturdy and functional structure that will keep your bicycles safe and secure.
Materials and Tools Needed
To create the wooden frame, you’ll need several essential tools. First, you’ll require a supply of wood for the centerpiece and sides. Next, use a saw to cut the wood to the desired size. A measuring tape will help you ensure accurate measurements, while a pencil allows you to mark your cuts. For assembling the frame, you’ll need a drill with a half-inch drill bit, as well as some sandpaper to smooth out any rough edges. To add extra support and stability, consider using dowels (with a half-inch diameter) and screws (in one and three-quarter inch sizes). Finally, a level will help you ensure the frame is perfectly horizontal, while an optional hand plane or router can be used to give the wood a professional finish.
Step by Step Guide
Step 1: Measure and Cut the Wood
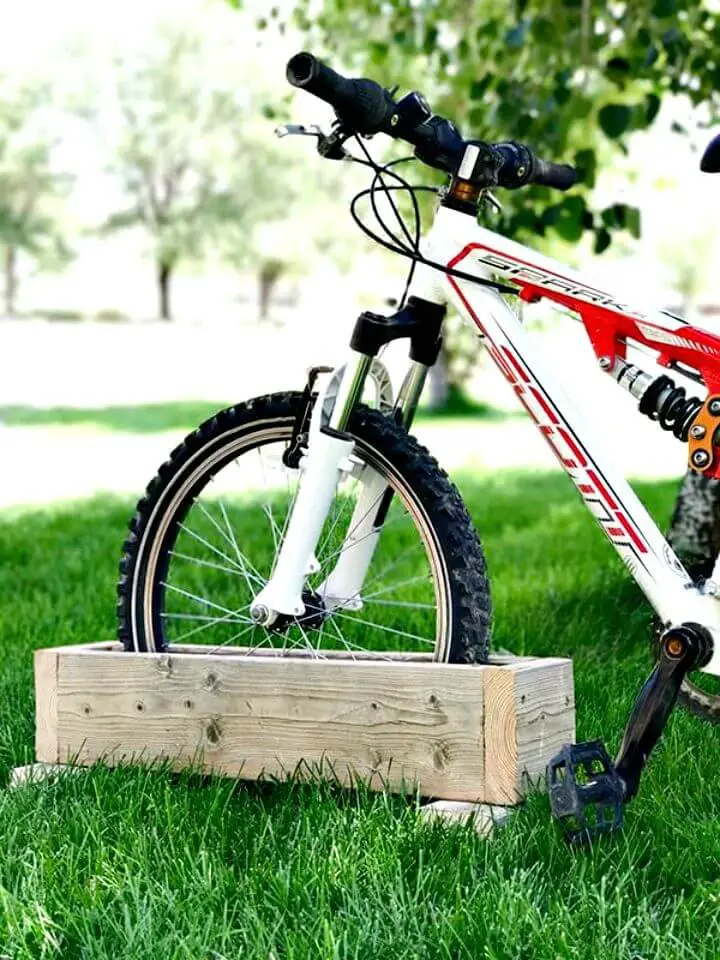
Begin by preparing three wooden components, each measuring precisely 12.5 inches in length. These will form the foundation and lateral supports of your DIY bike rack.
Step 2: Measure the Tire and Cut the Center Piece
When preparing your bike’s front tire, start by measuring its diameter. For a typical 2.8-inch tire, you’ll want to cut the wooden center piece slightly narrower to ensure a secure fit. A good starting point is around 2 and 5/8 inches in width, taking care not to cut it too tightly. This will provide the perfect balance between snugness and ease of installation.
Step 3: Cut the Sides
To create the foundation for your DIY bike hanger, adjust your measuring device to secure a width of six inches on each side. These six-inch wide segments will ultimately become the left and right sides of the finished product.
Step 4: Mark and Drill for Dowel
Begin by identifying a key reference point on each of your side pieces. Specifically, locate a point that is five inches from the back edge. Next, find the center of one side piece and mark it at six and a quarter inches. Once you’ve made these markings, clamp the two sides together to ensure they’re properly aligned. Then, drill a half-inch hole through both pieces at the connection point.
Step 5: Sand the Dowel
To guarantee smooth passage for your dowel, gently abrade any stubborn areas until it glides effortlessly through the freshly drilled holes.
Step 6: Attach the Center Piece to Sides
To begin the assembly process, take a moment to prepare the central component by drilling and countersinking holes for mounting purposes. Next, secure the side panels to this central piece, guaranteeing they align flush, before proceeding to drill and countersink additional holes for attaching the sides using 1 3/4 inch screws.
Step 7: Mount the Hanger
To properly hang your bicycle, begin by sliding the wheel into the hanger and backing the bike up against the wall. Measure the distance from the wall to the bottom of the hanger, taking note of this critical dimension. Next, transfer this measurement to the wall and use it as a guide for installing the hanger. Start by screwing in a fastener at the top of the hanger, ensuring it’s level before driving in a second screw at the bottom. This secure installation will keep your bicycle safely stored on the wall.
Step 8: Secure the Bike
To safely store your bicycle, roll it onto its center stand or hang it from a hook, ensuring the front wheel is properly aligned. A friction-fit hanger will typically keep the bike stable in this position, but for added security, consider inserting a half-inch dowel to prevent any unwanted movement.
Optional Step: Finish the Wood
To inject an extra layer of sophistication and security into your project, consider using either a hand plane or a router to soften the inner edges. While this step is not strictly necessary, it does contribute significantly to the overall aesthetic and functionality of your finished product.
Video Tutorial
To further enhance the understanding of creating a basic bike rack, a step-by-step video tutorial is available for viewing. This visual companion piece to the written instructions provides an alternative approach to grasping the process, allowing for a more comprehensive grasp of the DIY endeavor through a combination of both visual and textual explanations.
Customization Ideas for Your DIY Bike Rack
Crafting a bespoke bike rack that meets your unique requirements can be an incredibly fulfilling endeavor. To elevate the functionality and personality of your DIY creation, consider these innovative approaches to tailor-make your rack.
Choose the Right Materials
When it comes to choosing the right materials for your bike rack, durability and weather resistance are essential considerations. For added strength and rust-resistance, consider opting for galvanized steel or aluminum. Alternatively, PVC pipes provide a lightweight and cost-effective solution that can withstand various environmental conditions. For an eco-friendly choice with a unique, rustic aesthetic, reclaimed wood is a viable option.
Design for Your Space
When planning a bike storage system, it’s essential to consider the layout of the area where you’ll be placing your bike rack. Take measurements and envision how the rack will fit seamlessly into the space, whether it’s a compact design suitable for small apartments, a wall-mounted option that maximizes floor space, or an expandable rack perfect for garages that can accommodate multiple bicycles.
Accommodate Different Bikes
When it comes to bike racks, one-size-fits-all solutions just won’t cut it. With the diverse range of bicycles available, it’s essential to ensure your rack can accommodate different types and sizes of bikes. This includes road bikes with their slim tires, mountain bikes with their wider, knobby tires, and even kids’ bikes with their smaller frames. By considering these varying factors, you can guarantee a secure and efficient ride for any bike that comes your way.
Add Security Features
When storing your bike rack outside, safety and protection are vital considerations. To safeguard your investment, consider implementing measures to prevent theft or tampering. A few strategies include installing sturdy locks or high-security cables that can withstand attempts to remove or damage the rack. Alternatively, designers can incorporate locking mechanisms directly into the rack’s construction, ensuring a secure fit that’s resistant to unauthorized access.
Personalize with Color and Decorations
Transform your bike rack into a one-of-a-kind statement piece by incorporating vibrant hues and bold designs. Go beyond the ordinary and make it truly reflective of your unique persona by adding eye-catching stickers or decals that showcase your individuality.
Make It Portable
When the need arises to relocate your rack frequently, consider implementing design modifications that enhance its portability. This can be achieved by incorporating wheeled components for effortless movement. Alternatively, designing the rack to be foldable or collapsible can also greatly simplify the process of moving it around.
Ensuring Safety While Building Your DIY Bike Rack
When embarking on a DIY adventure, prioritizing safety is crucial. This rings particularly true when constructing a bike rack, as it requires attention to detail and caution to avoid accidents. To guarantee a secure building experience, follow these guidelines throughout the entire process.
Wear Protective Gear
Before commencing any project or task, it is crucial to prioritize safety and take necessary precautions to avoid potential hazards. To ensure a safe working environment, start by equipping yourself with the following essential gear:
Gloves to safeguard your hands from abrasions and cuts.
Eye protection in the form of goggles, shielded glasses, or even welding masks, to shield your eyes from flying debris, sparks, or other hazards that could cause injury.
Ear protection such as earplugs, earmuffs, or noise-cancelling headphones if you will be working with loud power tools or machinery. This will help prevent permanent hearing damage and reduce the risk of noise-induced fatigue.
Work in a Safe Environment
A clutter-free workspace is essential for maximum productivity. Ensure that your working area is organized, well-lit, and free from tripping hazards. Take a few minutes to clear away any unnecessary items, files, or equipment that could be distracting or pose a risk of accidents. By doing so, you’ll create a safe and conducive environment that fosters focus and creativity.
Use Tools Correctly
When it comes to working with tools, safety should always be your top priority. To ensure a safe experience, make sure you’re thoroughly familiar with each tool’s operation, features, and limitations before using it. Don’t overlook the importance of following the manufacturer’s guidelines, as they’ve likely taken into account potential hazards and provided instructions on how to mitigate them. Moreover, never compromise on safety by taking shortcuts or ignoring warning signs. By doing so, you’ll not only protect yourself from harm but also prolong the lifespan of your tools and minimize the risk of damage to surrounding areas.
Secure Materials
To ensure a precise and safe cutting or drilling experience, it’s crucial to establish a stable foundation for your workpieces. This can be achieved by securing them firmly in place, eliminating the risk of slippage that can lead to errors, damage or even accidents.
Be Mindful of Sharp Edges
When working with metal or wood, it’s crucial to ensure a safe workspace by addressing any sharp edges that may have resulted from your cutting process. To prevent unwanted cuts and scrapes, take the time to carefully file down these rough edges, transforming them into smooth surfaces that won’t pose a hazard.
Troubleshooting Common Issues with DIY Bike Racks
While constructing your own bike rack, it’s not uncommon to run into minor setbacks. To aid in the process, here are some frequently encountered challenges and potential solutions.
Stability Concerns
When it comes to ensuring the stability of your bike rack, one key consideration is the Wobbly Rack phenomenon. A rack that’s not securely attached can cause more harm than good, as it may lead to accidents and damage to your vehicle or even your bike. To prevent this from happening, make sure all connections are tightened properly and the base of the rack is level. If you’re still experiencing issues with stability, consider adding a wider base plate or securing the rack to a wall using appropriate hardware. By taking these precautions, you can enjoy the peace of mind that comes with knowing your bike is safely transported.
Material Challenges
When tackling woodworking projects, it’s essential to take preventive measures to minimize the likelihood of wood splitting. One crucial step is to pre-drill holes in the wood before driving screws or nails. This simple technique can significantly reduce the occurrence of unsightly splits and cracks. Additionally, selecting high-quality, seasoned wood for your project can further mitigate the risk of damage. By combining these two strategies, you’ll be well on your way to creating beautiful, long-lasting wooden creations that exude craftsmanship and professionalism.
Space Limitations
When it comes to designing a storage solution, accuracy is key. To avoid frustration and wasted materials, take precise measurements of the intended space before starting your project. This ensures that your design fits comfortably within its new home. If, however, you find that the rack is undersized for your needs, don’t worry – simply consider adding extensions or extra slots to bring it up to size.
Assembly Difficulties
When assembling the final product, it’s crucial to double-check every measurement and ensure a precise cut. Any imperfections can be addressed by sanding down rough edges to achieve a seamless fit, guaranteeing a professional-looking finish.
Rust and Corrosion
When incorporating metal into your outdoor storage rack design, it’s crucial to take measures against corrosion. One effective way to achieve this is by applying a rust-resistant coating to the metal components. This simple step can help extend the lifespan of your metal parts and ensure they remain functional and durable in various environmental conditions.
Cost Analysis for Your DIY Bike Rack
To effectively plan and budget for a DIY bike rack project, it’s essential to understand the various costs involved. This includes not only the initial investment but also ongoing expenses that can impact your overall outlay. Here’s a comprehensive overview of potential expenditures and practical advice on how to minimize costs without compromising the quality of your finished product.
Material Costs
When selecting materials, it’s crucial to consider their potential impact on your project’s overall budget. To achieve a cost-effective outcome, consider the following factors: Recycled materials not only promote sustainability but also can be more budget-friendly. Additionally, local hardware stores may provide discounts for bulk purchases, allowing you to stretch your dollars further. By taking these options into account, you’ll be well on your way to making an informed decision that aligns with your financial goals.
Tool Expenses
Consider alternative options for accessing equipment and tools instead of purchasing them outright. This could include borrowing from friends, family members, or colleagues who may have similar needs, or renting from local shops or online platforms that offer tool rentals. By taking this approach, you can significantly reduce your expenses and free up funds for other important financial priorities.
Labor Costs
When tackling DIY projects, you’ll typically enjoy a reduction in labor costs by doing it yourself. Nevertheless, don’t forget to factor in the value of your own time spent on the project, considering it an integral part of the overall expense.
Additional Features
When it comes to allocating resources for a new home, it’s essential to prioritize needs over wants. The initial focus should be on the necessities that ensure the property is safe, functional, and comfortable. This includes basic amenities such as appliances, lighting, and plumbing. Once these fundamental requirements are met, attention can shift to adding extras that enhance the overall living experience. These may include cosmetic upgrades like paint and decorations, or security features that provide an added layer of protection. By prioritizing needs over wants, homeowners can create a solid foundation for their new property, allowing them to make more informed decisions about how to allocate resources moving forward.
Cost Comparison
When it comes to acquiring a storage solution, it’s essential to weigh the pros and cons of two distinct approaches: constructing a custom rack or purchasing a pre-assembled one. While the allure of do-it-yourself projects can be enticing, it’s crucial to consider the costs involved in both scenarios. A thorough comparison of these options is necessary to ensure that you’re making an informed decision that aligns with your budget and needs.
Maintenance Tips for Your DIY Bike Rack
To guarantee the longevity and safety of your DIY bike rack, regular maintenance is crucial. By following this guide, you’ll be able to keep your rack in top shape, ensuring it continues to serve you well over time. Start by inspecting your rack for any signs of wear or damage, such as rust or corrosion. If you notice any issues, address them promptly to prevent further deterioration.
Regular Inspections
When it comes to maintaining the integrity of your bike rack, regular inspections are crucial. Start by looking out for any telltale signs of wear and tear, including loose fasteners, cracks in the material, and rust or corrosion on metal components. By catching these issues early on, you can prevent minor problems from escalating into major ones, ensuring your rack remains safe and functional for years to come.
Cleaning and Protection
To maintain the integrity of your bike rack, it’s essential to keep it free from dirt and grime that can build up over time. When exposed to the elements, outdoor bike racks are particularly prone to accumulating debris. A simple yet effective approach is to regularly clean the rack using a mild soap and water solution. Be sure to thoroughly dry the surface afterwards to prevent any rust or corrosion from forming.
Weatherproofing
To safeguard your rack from the harsh effects of nature, consider applying a weather-resistant coating to shield it from precipitation, snowfall, and ultraviolet rays that can cause damage over time.
Tightening and Adjustments
To ensure optimal performance and stability, it’s crucial to verify that all connections within your rack are properly secured. Perform a thorough inspection to identify any loose parts, and take immediate action to rectify any issues by tightening loose bolts or replacing worn-out components as needed. A secure rack is not only essential for preventing damage but also for maintaining smooth data transmission and overall system reliability.
Lubrication
To prevent friction and maintain efficient movement, apply an appropriate lubricant to moving parts or joints, thereby eliminating the risk of seizing or jamming.
FAQs About DIY Bike Racks
When considering a DIY bike rack, it’s natural to have numerous queries. To alleviate any uncertainty and empower your building experience, this section addresses frequently asked questions regarding the construction process. From materials to measurements, these answers will equip you with the knowledge necessary to craft a personalized bike rack that meets your unique needs.
What materials do I need for a DIY bike rack?
To construct your DIY shelving unit, you’ll require a selection of components, including pipes (opt for PVC or metal) to form the framework, connectors to secure the pieces together, screws for assembling the structure, and a base material such as wood or metal that will provide a sturdy foundation. The specific choice of materials will depend on the design and intended capacity of your rack.
How can I ensure my bike rack is stable?
When it comes to assembling and using your new storage rack, there are a few key considerations to ensure its safety and effectiveness. First and foremost, you want to establish a solid foundation by selecting a sturdy base that can support the weight of the rack and any items you plan to store on it. This is particularly important for wall-mounted racks, which rely on secure connections to withstand the forces of gravity. To this end, make sure to use strong wall anchors that are designed specifically for your type of wall material (drywall, plaster, etc.). Once you’ve secured the rack in place, give it a thorough test to verify its stability before using it to store any items.
Can I build a bike rack if I have limited space?
When designing your home office, don’t underestimate the importance of maximizing floor space. By opting for a vertical or wall-mounted setup, you can effectively free up valuable real estate and create a more streamlined work environment.
What tools are required to build a bike rack?
When it comes to DIY woodworking projects, having the right tools is essential for achieving professional-looking results. A versatile arsenal typically includes a saw, drill, screwdriver, measuring tape, and wrench. However, the specific tools required often hinge on the type of material you’re working with and the design of your project.
How do I protect my bike rack from rust?
When incorporating metal into your outdoor storage solution, it’s crucial to prioritize durability and resistance to the elements. To achieve this, start by applying a rust-resistant primer and paint combination to the metal surface. Alternatively, for added peace of mind, consider opting for stainless steel or galvanized metal options specifically designed for outdoor use. These materials will provide superior protection against corrosion and weathering, ensuring your storage rack remains sturdy and functional season after season.
Can I customize my bike rack to fit different types of bikes?
When it comes to designing bike storage solutions, it’s essential to ensure versatility by incorporating adjustable features that cater to different bike sizes and styles. This can be achieved through the implementation of removable sections or slots that allow for easy customization.
How can I make my bike rack portable?
Incorporating innovative design elements can significantly enhance the portability and maneuverability of your product. This might involve streamlining its overall shape to minimize weight while maintaining structural integrity. Alternatively, consider adding wheels or casters to enable effortless movement. For added convenience, you could also explore the possibility of making it foldable, allowing users to easily transport it to different locations.
What safety precautions should I take when building my bike rack?
To minimize the risk of injury or accident while working with tools, it’s essential to prioritize safety from the outset. Start by donning appropriate protective gear, such as gloves, goggles, and a dust mask, if necessary. Additionally, ensure you’re working in a well-lit area, free from any hazards that might compromise your visibility. Furthermore, familiarize yourself with the tool’s safety guidelines and follow them scrupulously to avoid any potential mishaps.
How do I maintain my DIY bike rack?
To maintain the integrity of your [insert device/system], it’s crucial to schedule regular inspections to identify any potential issues before they escalate. This includes tightening any loose components, as well as thoroughly cleaning the system to prevent the accumulation of dirt and debris. By taking these proactive measures, you can help extend its lifespan and ensure optimal performance.
Where can I find design ideas for my DIY bike rack?
For a spark of creativity, explore the vast online landscape, where you can discover innovative projects on social media platforms, DIY websites, and community-driven forums. Engage with like-minded individuals by joining online discussions or attending local workshops to witness first-hand how others have transformed their ideas into reality.
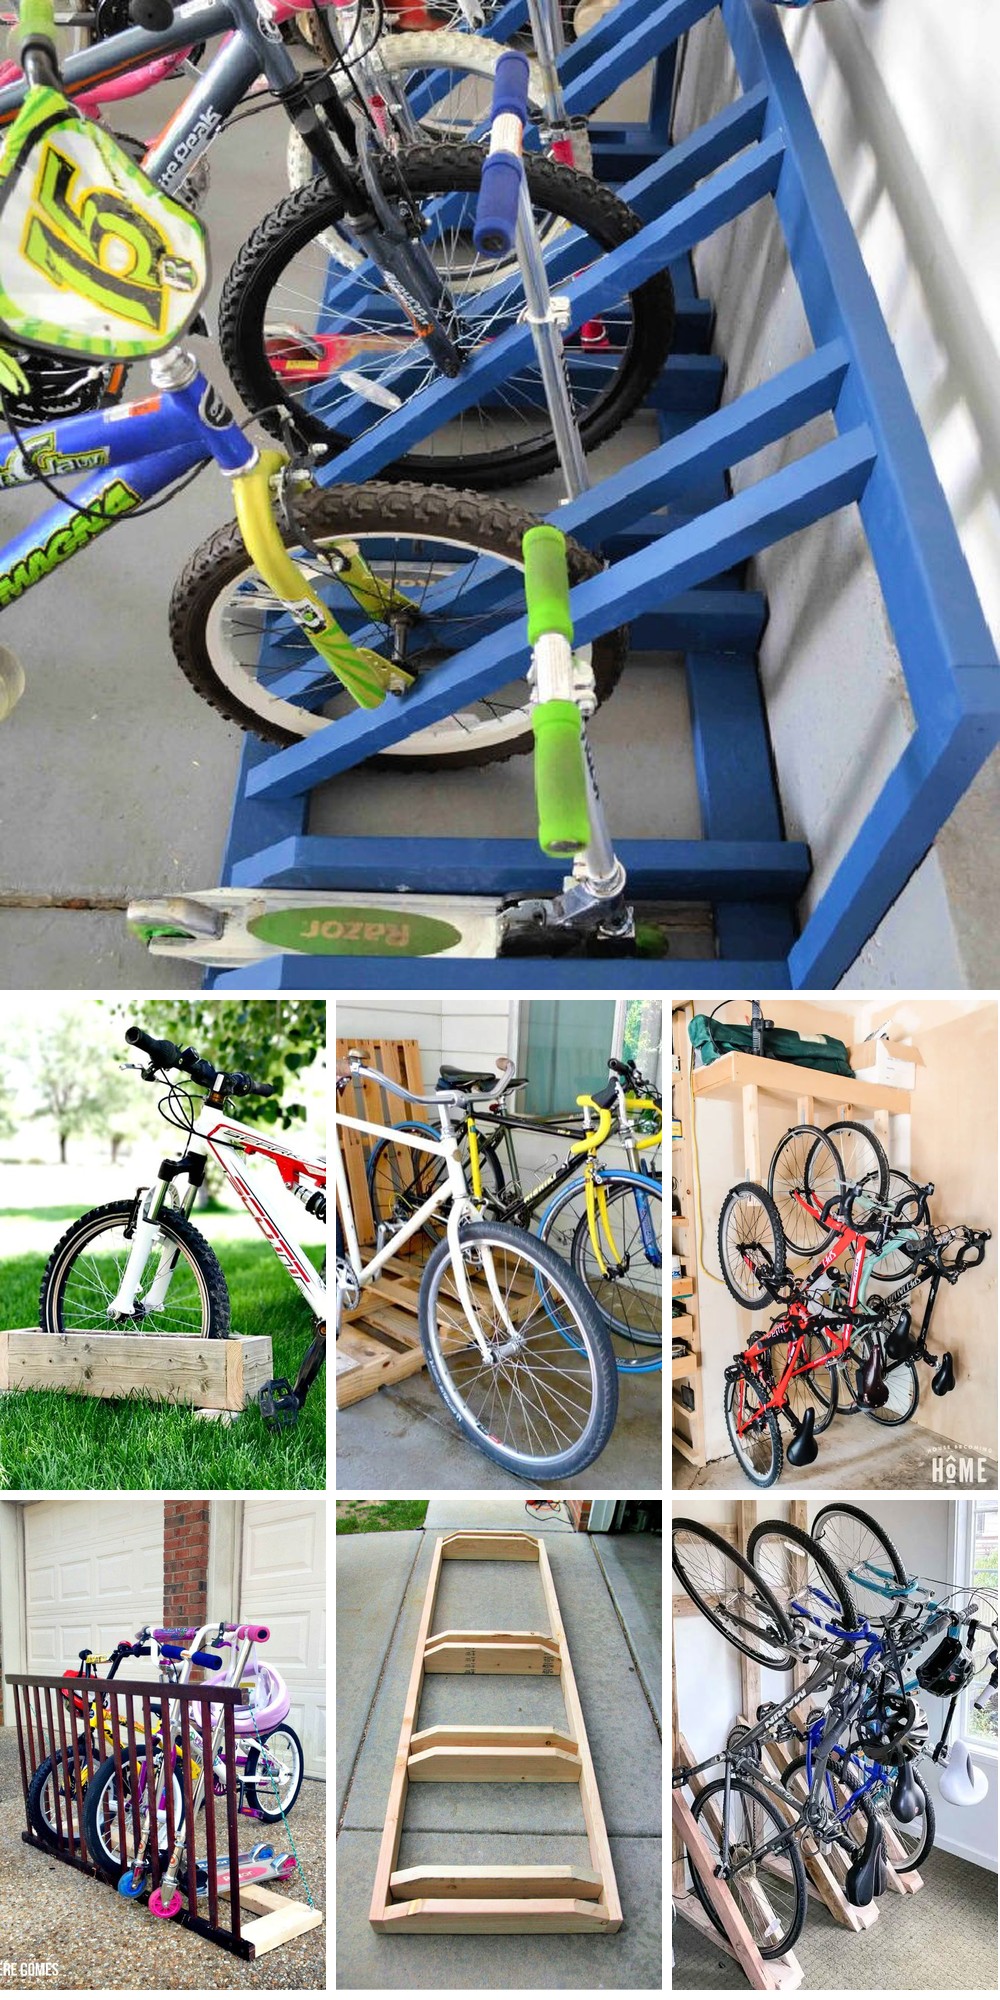
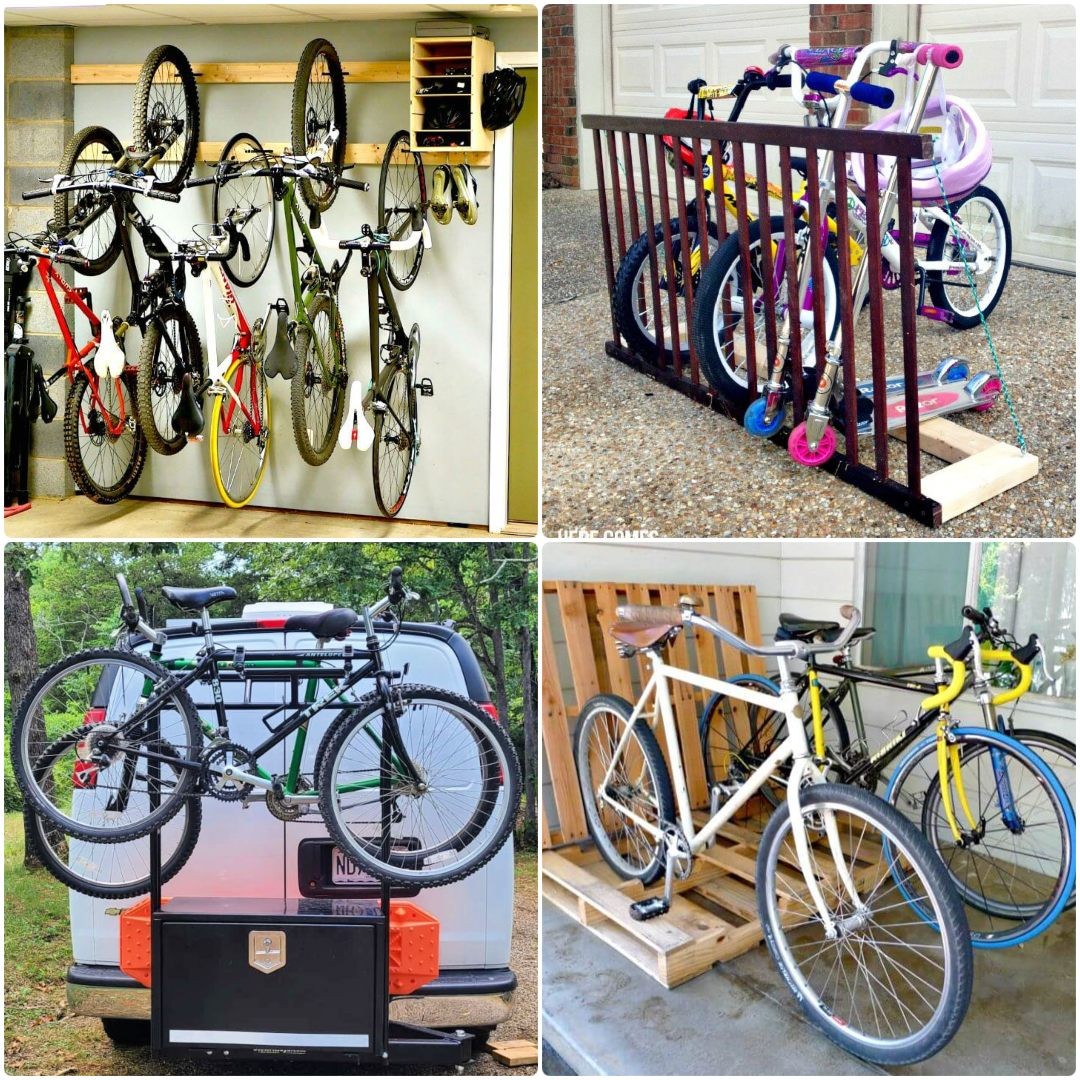
DIY Bike Rack Ideas and Inspirations
Elevate the functionality of your home or garage by implementing clever and budget-friendly DIY bike rack solutions that optimize storage and organization. Whether you’re a cycling enthusiast or simply looking to declutter, these innovative ideas will help you effectively manage your bicycle collection.
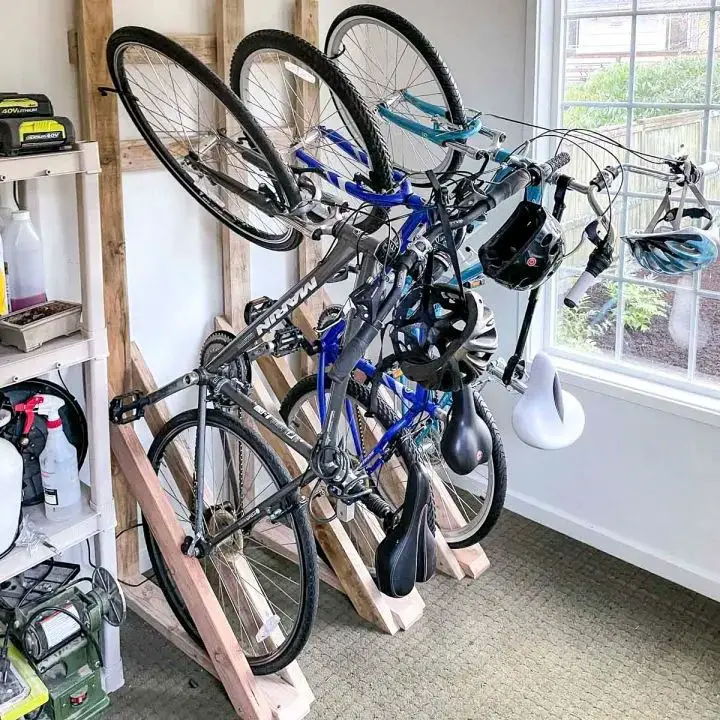
Easy and Cheap DIY Bike Rack

Take your garage organization to the next level without breaking the bank. A simple yet effective bike rack solution can be assembled in no time, keeping your bikes tidy and out of the way.
Modern Bike Rack Building Plan
Transform your storage space into a sleek and efficient hub for your bicycles. By opting for a modern bike rack design, you can achieve a harmonious blend of form and function that not only complements its surroundings but also provides easy access to your vehicles. With a focus on minimizing visual clutter, this contemporary plan prioritizes functionality while maintaining an understated aesthetic that seamlessly integrates into any environment.
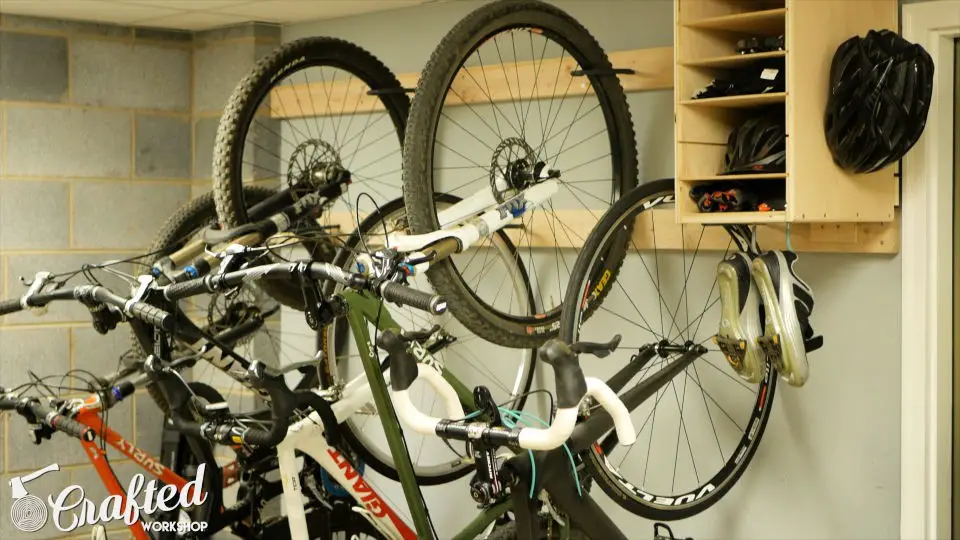
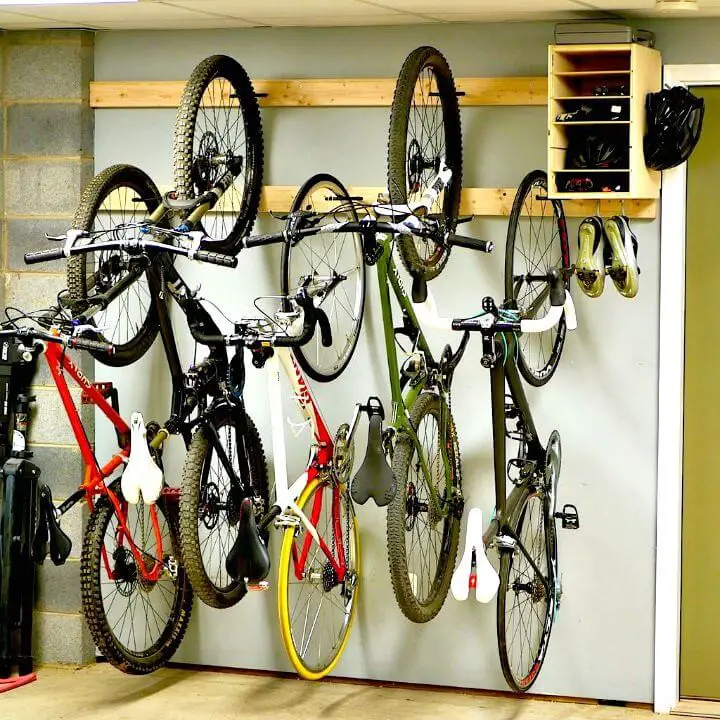
Make a Wall Mounted Bike Rack
Maximize your floor space by opting for a wall-mounted bike rack – an intelligent decision perfect for urban residents and individuals seeking a clutter-free living environment. This practical solution keeps bicycles at arm’s length, ensuring they’re always within easy access while preserving valuable floor area for other essential items.
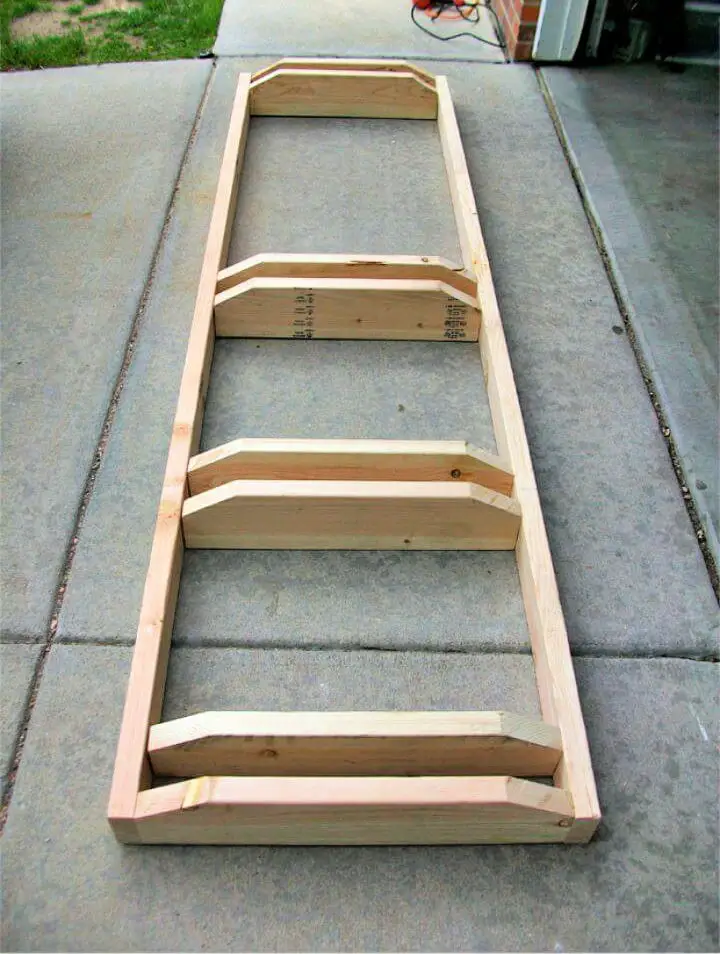
Build a Bike Rack with 1 Sheet of Plywood
Simplicity and sustainability are the keys to unlocking innovative solutions. A prime example is the humble bike rack, which can be constructed from a solitary sheet of plywood, yet remains sturdy and reliable. This unassuming project highlights that effective answers don’t necessarily require complexity or a hefty price tag.
DIY Bicycle Rack Built For Two
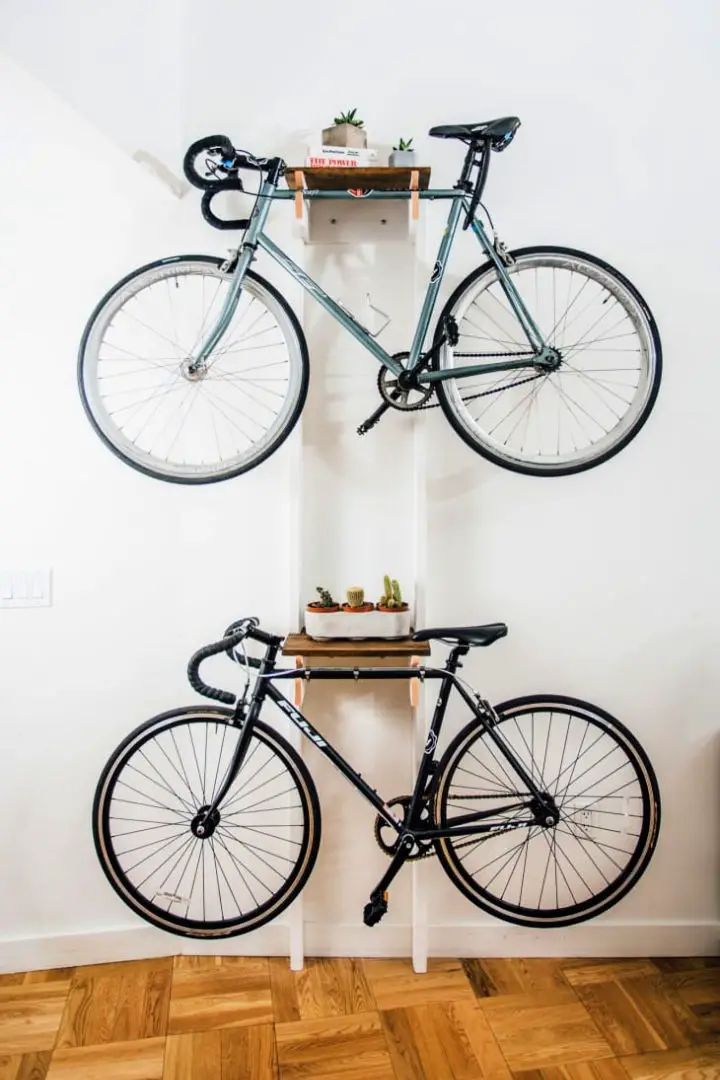
A space-saving solution for bike enthusiasts, this DIY project is ideal for shared living spaces like apartments or homes where limited storage is a concern. By repurposing a few basic materials, you can create a practical and visually appealing solution to keep your bicycles organized and out of the way.
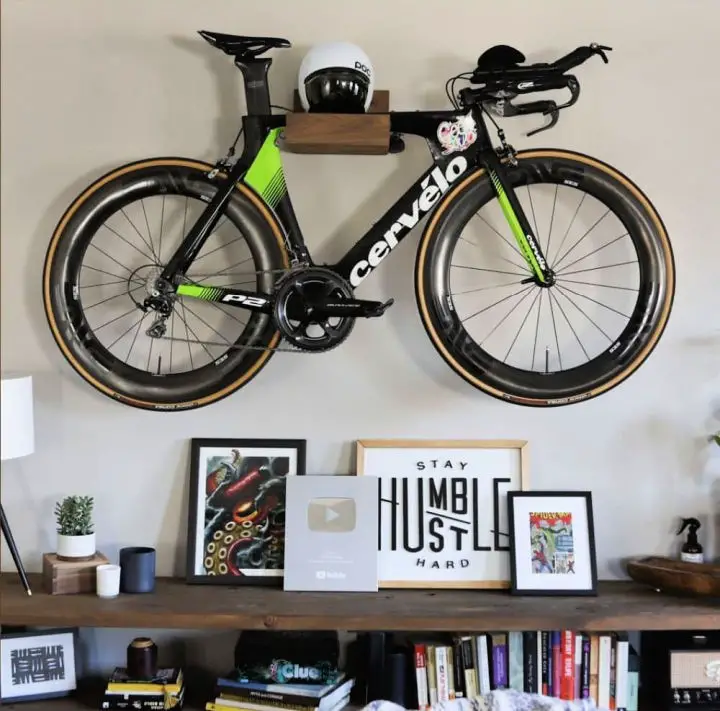
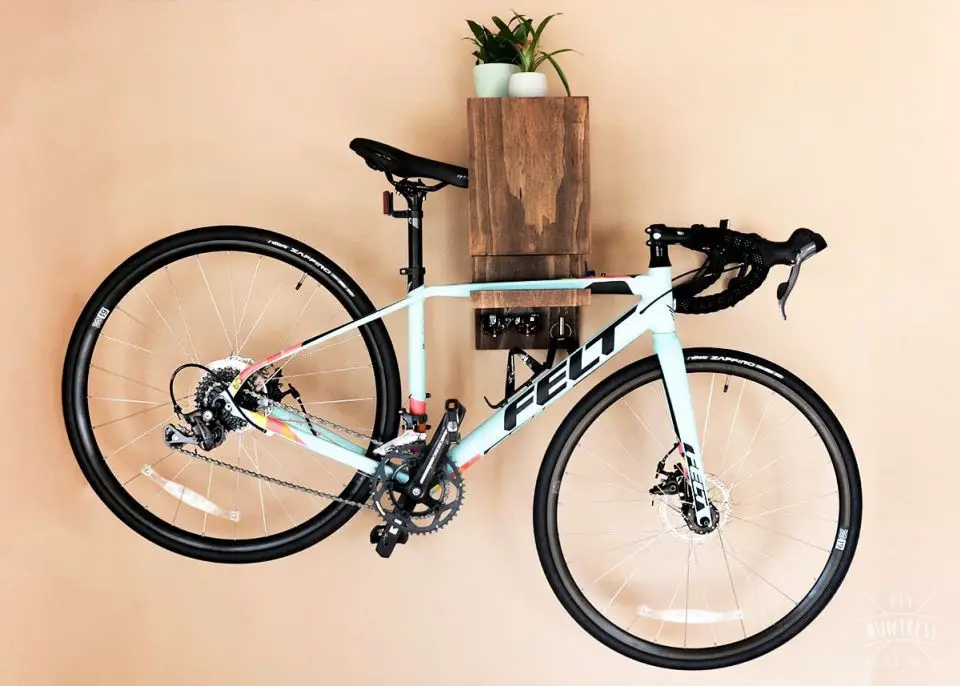
Wooden Wall Mount Bike Rack
By combining the practicality of merge functionality with the visual appeal of a decorative piece, you can create a unique wooden bike rack that not only stores your bicycles but also becomes a stylish addition to your home or office. This approach seamlessly integrates function and form, bringing a touch of natural warmth to your storage solutions.
How to Make a Bike Rack for $20
Transforming your bike storage space doesn’t have to break the bank. With a cleverly designed rack, you can create a functional and organized area for storing your bikes without sacrificing your budget. For just $20, this innovative solution will provide you with a tidy and accessible spot to keep your bicycles, making it easy to find what you need when you need it.
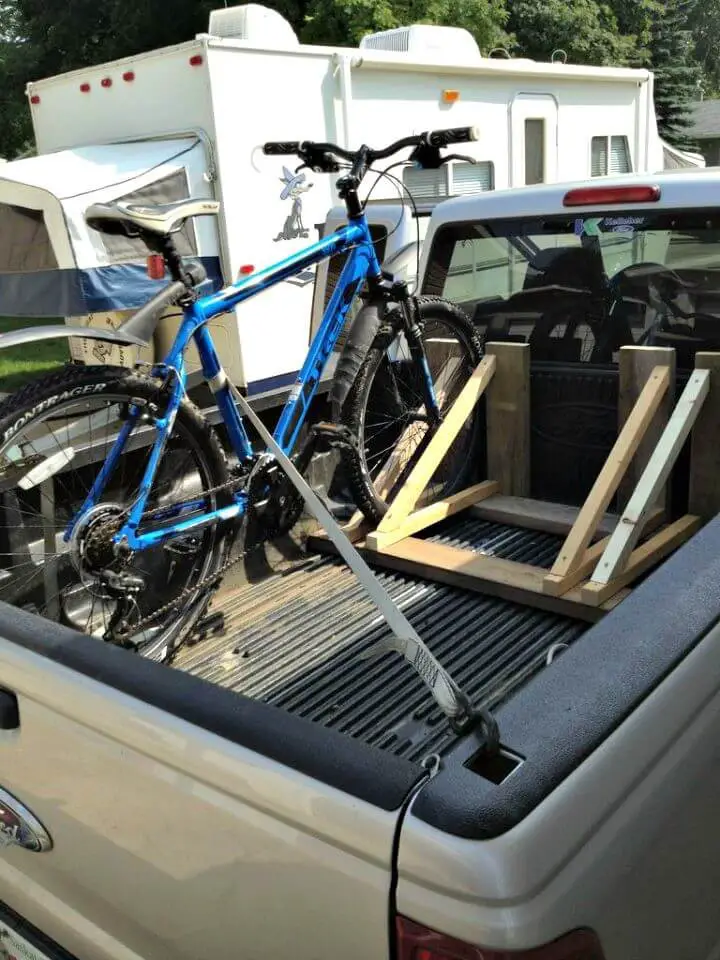
Truckbed PVC Bike Rack Design
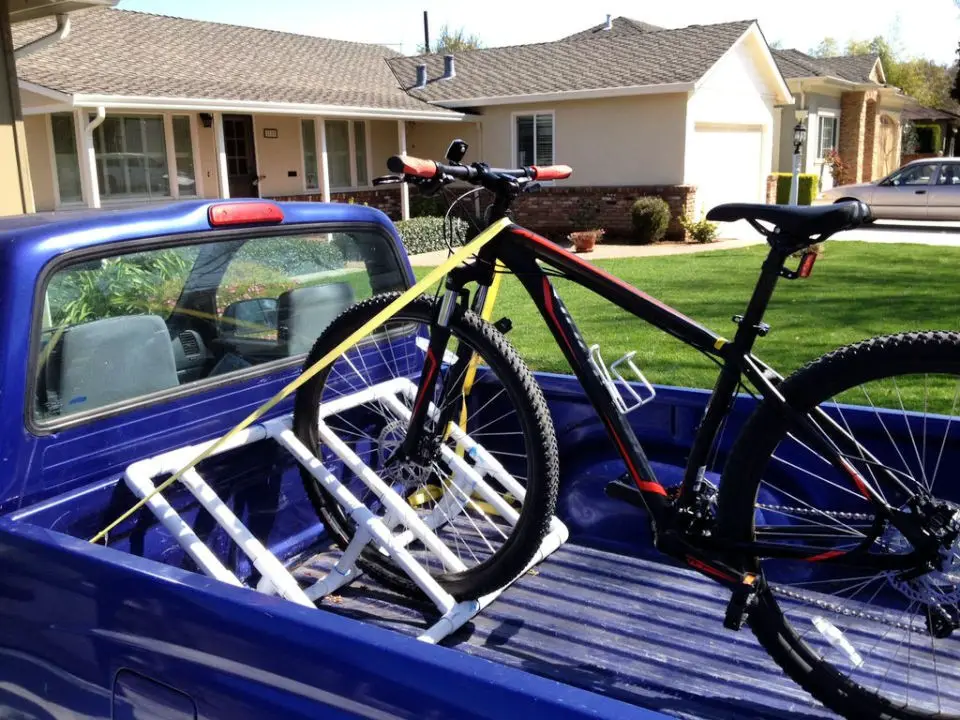
For cyclists who prioritize convenience and portability, a versatile truck bed rack made of durable PVC material stands out as an excellent choice. Weighing in at a remarkably lightweight level, this affordable solution is specifically designed to accommodate the needs of bike enthusiasts on-the-go, providing a sturdy foundation for transporting their trusty steeds to the next exciting adventure.
DIY Bike Rack With Pipes and Fittings
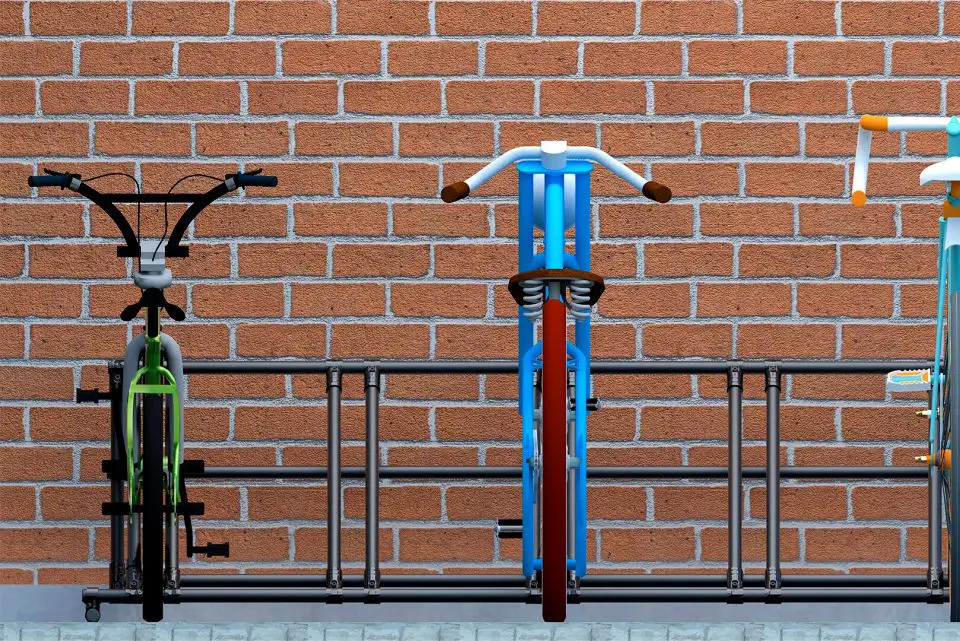
Unleash the rugged charm of industrial design by transforming ordinary pipes and fittings into a sturdy, adaptable storage rack. This creative project empowers you to customize the finished product to fit seamlessly within your unique environment and meet your specific storage demands.
Build a Wall Mounted Bike Rack
For homeowners seeking to maximize their floor space, creating an alternative version of a wall-mounted bike rack offers a unique opportunity to infuse a fresh design and practicality into their living areas or garages.
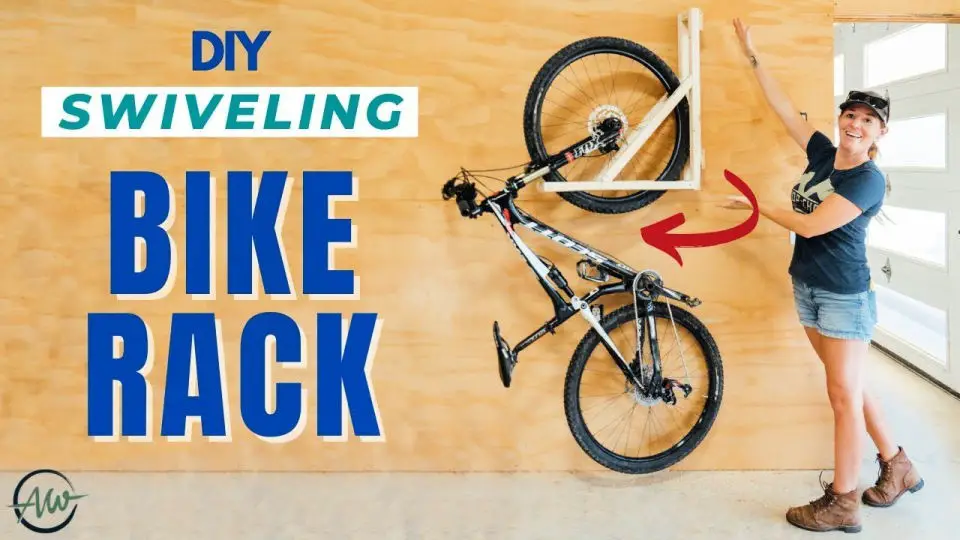
Make Your Own Mobile Bicycle Rack

When it comes to managing bike storage, a mobile bike rack is an excellent option for those who value flexibility and convenience. Ideal for events or families on-the-go, this type of rack allows you to easily move it as needed, providing a versatile storage solution that adapts to your unique needs. Whether you’re looking for a practical way to transport bikes during family outings or need a reliable means of storing them at home, a mobile bike rack is an excellent choice for those who crave adaptability and ease.
How to Build a Wall-Mounted Bike Rack
With a creative spin, transforming a simple DIY project into an artful expression, a wall-mounted bike rack takes center stage as a unique weekend endeavor. Not only does it provide a practical solution for storing your bicycles, but also injects personality into the space, making it an integral part of your home’s aesthetic.
DIY Bike Rack – Step by Step Instructions

Embracing the satisfaction that comes with creating something with your own hands, building a bike rack can be an incredibly rewarding experience. This comprehensive guide provides a clear path to crafting a sturdy, bespoke solution tailored to your specific needs, ensuring your bicycles are stored efficiently and in perfect harmony.
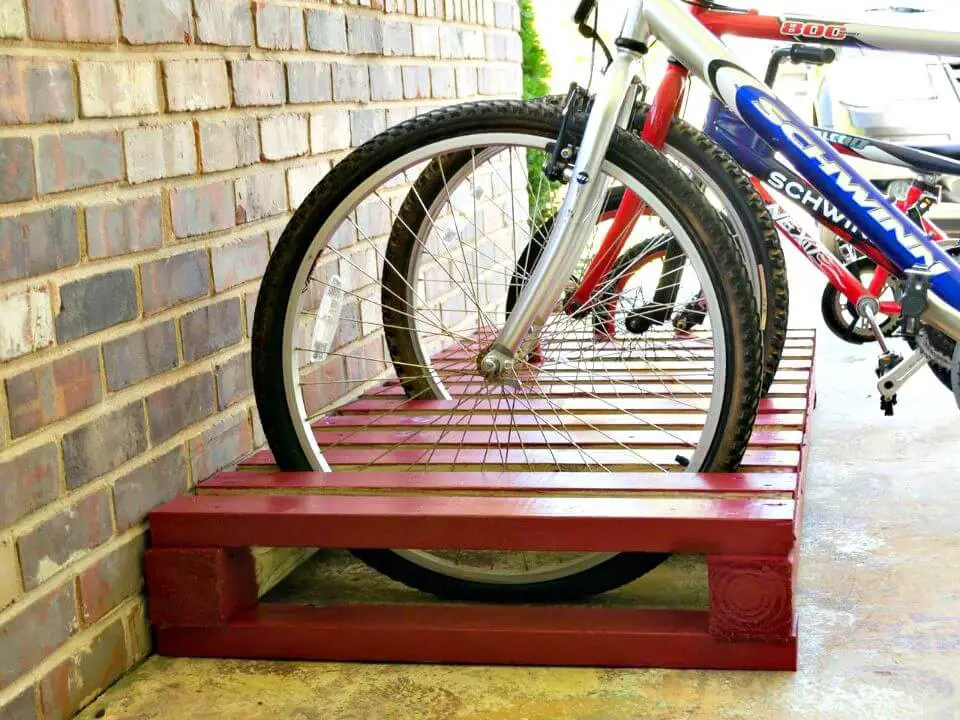
How to Build a Pallet Bike Rack
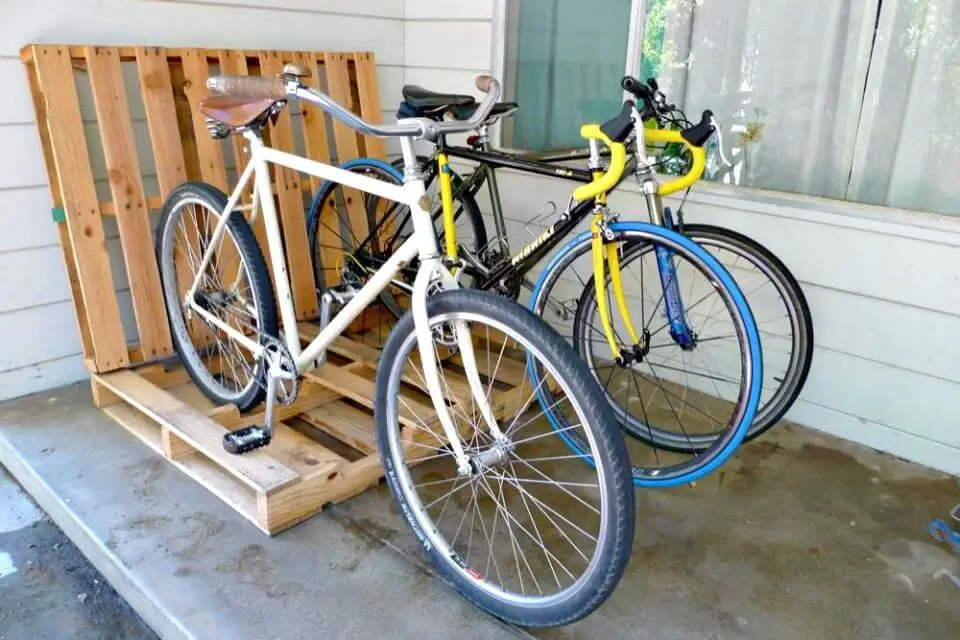
Transforming discarded pallets into a functional bike rack not only embodies sustainability, but also presents a thrifty solution. By upcycling these materials, you’ll create a charming storage solution that can hold multiple bicycles with relative ease, all while minimizing the environmental impact of your project.
Simple DIY Bike Storage Rack
Transforming your garage or yard into a clutter-free haven is as easy as constructing a DIY bike storage rack. By adhering to basic principles, you can create a sleek, minimalist design that seamlessly blends functionality with visual appeal, allowing for effortless bike retrieval.
Quick and Easy DIY Bike Rack
If you’re looking for a stress-free approach to storing your bicycles, creating a simple and effortless DIY bike rack is the ideal solution. Without requiring a lot of materials or expertise, this design provides a reliable method to keep your bikes organized and upright, making it perfect for spontaneous situations where you need a quick fix.
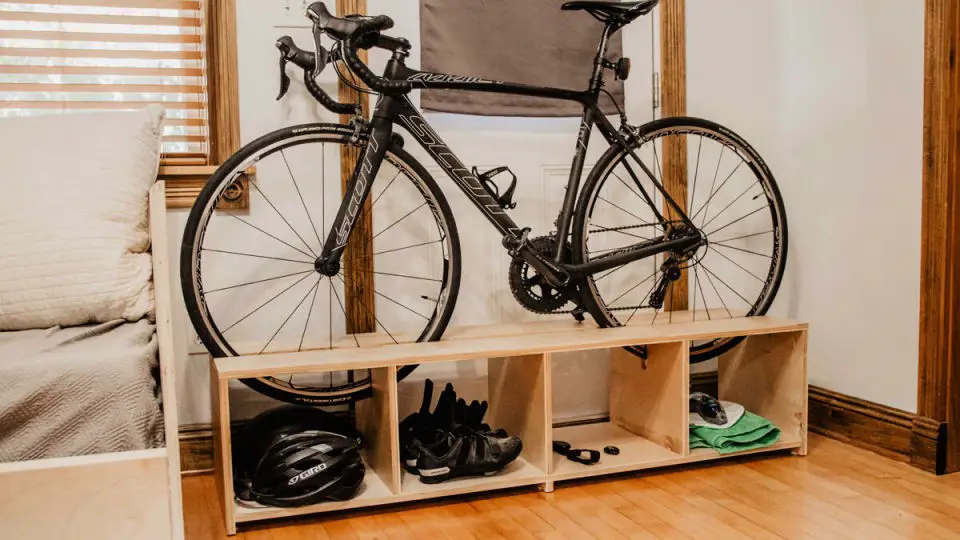
Make a Wall-mounted Bike Rack with a Bench

By merging functionality and aesthetics, the concept of a wall-mounted bike rack incorporating a built-in bench presents a cutting-edge solution for bike storage. This creative approach not only provides a secure and space-efficient means of storing your bicycle but also offers a practical spot to sit and prepare for your next ride.
How to Make Bike Stand

For cycling enthusiasts, building a custom bike stand can be a fulfilling project that addresses their unique bike maintenance requirements, ultimately making the process of tuning up their ride more convenient and enjoyable.
Build Your Own Bike Rack
When it comes to designing your own bike rack, the possibilities are endless. This DIY project allows you to tailor the design to your specific needs, whether you’re looking to store one bike or multiple bikes for an entire family. By doing so, you can ensure a seamless integration into your space and achieve a clutter-free, organized appearance that suits your unique style.
Build a Bike Rack from a Crib Rail
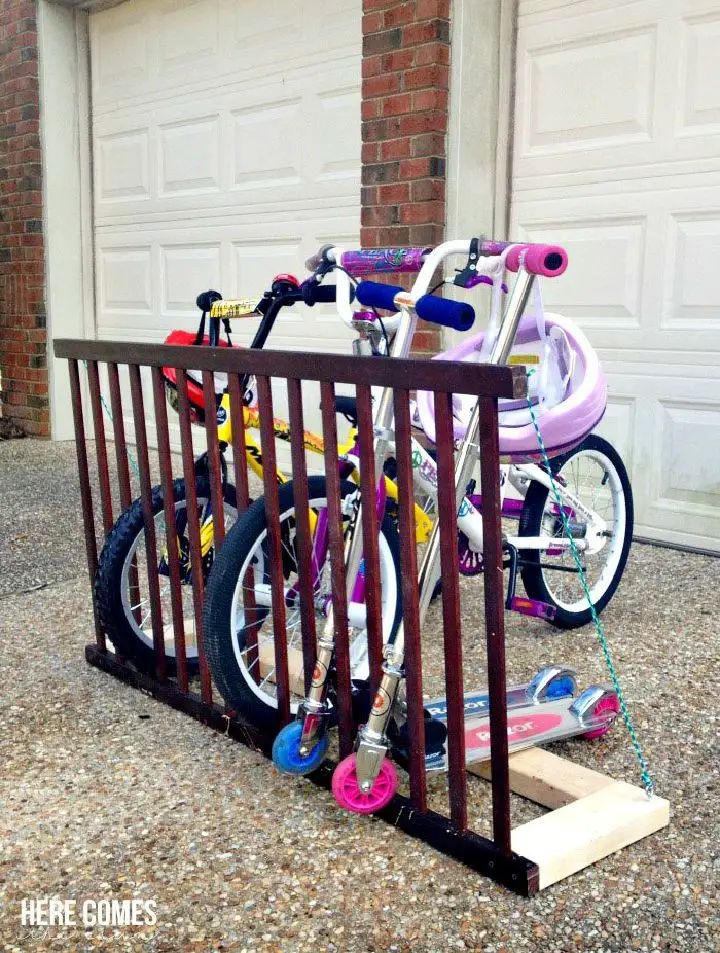
By repurposing a crib rail, individuals can demonstrate their creativity while reducing waste and creating a functional bike rack that stands out in terms of its design. This innovative transformation showcases the value of upcycling, allowing people to breathe new life into discarded items and produce a sturdy, one-of-a-kind solution for storing bicycles.
DIY Bike Rack for $20
Effective storage solutions don’t need to come with a hefty price tag, as evidenced by a DIY bike rack that can be constructed for around $20. By adopting a budget-friendly approach, it’s possible to create a practical and sturdy rack that enhances your space without breaking the bank.
Cheap DIY Van Bike Rack
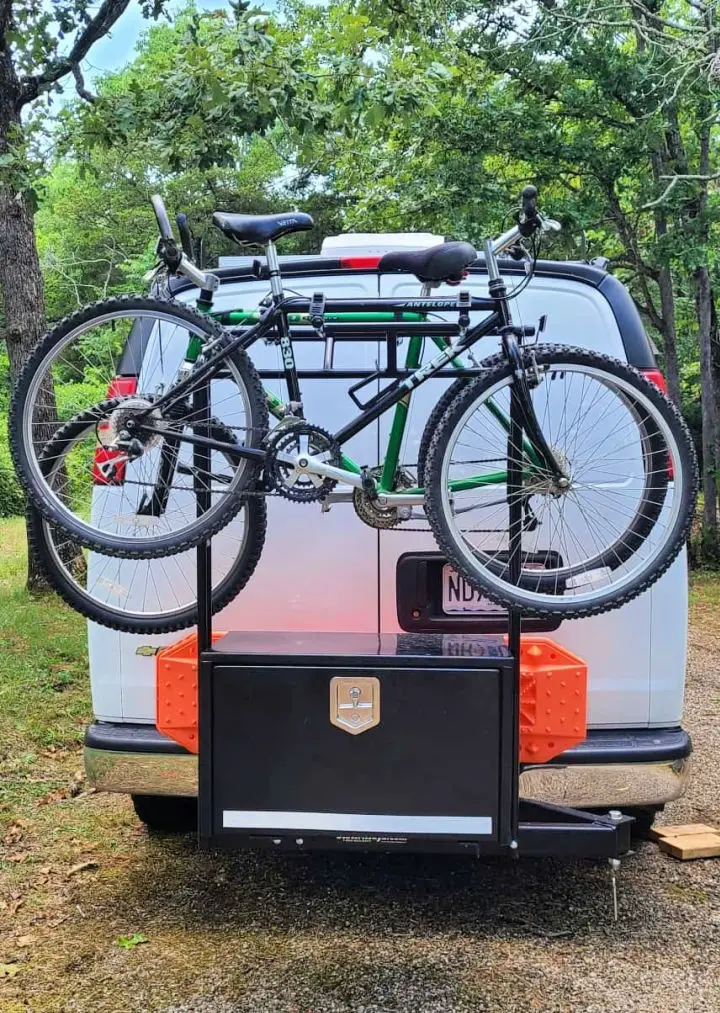
For the adventurous types, a DIY van bike rack that won’t break the bank can be a lifesaver. By creating a customized solution for transporting bikes, you’ll not only save money compared to commercial options but also ensure your trusty steed remains secure and protected while on the move.
How to Build a Bike Rack Of Wood

Embracing the intersection of nature and functionality, crafting a wooden bike rack presents a unique opportunity to combine organic charm with structural integrity. By incorporating personal design elements and sturdy construction methods, this DIY project yields a reliable storage solution that harmoniously integrates into any environment.
Adorable DIY Wood Bike Rack:
Embellish your space with the rustic charm of a DIY wood bike rack, expertly balancing functionality and aesthetics. As a thoughtful blend of artistry and practicality, this handmade wooden creation warms the ambiance of your home or garage, transforming it into a welcoming sanctuary.
DIY Bike and Scooter Rack

Incorporating a DIY bike and scooter rack into your home setup is an excellent way to accommodate families with diverse ride-on needs. By creating a space that caters to various types of vehicles, this project fosters a sense of inclusivity, making it easy for everyone to access their gear while keeping the surrounding area organized.
Conclusion:
As we’ve explored 25 innovative homemade DIY bike rack ideas for garages, it’s become evident that these projects offer a wealth of benefits for cyclists seeking to optimize their storage spaces. From ingenious space-saving designs to budget-friendly builds, each project presents a unique solution for tidying up and enhancing the functionality and aesthetic appeal of one’s garage. By delving into these DIY bike rack ideas and following clear instructions, individuals can create a custom bike rack that seamlessly integrates with their lifestyle.
