Why DIY Your Own Bathroom Vanity?
Discovering the value of DIY bathroom vanities is more than just a cost-effective endeavor. It’s an opportunity to infuse your personal style and creativity into your space, while building new skills and fostering a sense of accomplishment. By taking on this project, you’ll not only save money but also contribute to environmental preservation by choosing sustainable materials or upcycling an existing piece.Through DIY vanities, you gain complete control over the design process, allowing for precise tailoring to your bathroom’s unique aesthetic and spatial requirements. This approach enables you to craft a one-of-a-kind focal point that reflects your individuality and becomes a defining feature of your home.Tackling a DIY project also presents an excellent chance for family bonding and collaboration. Working together towards a common goal can strengthen relationships and create lasting memories.In the end, DIY bathroom vanities represent more than just a practical solution – they embody a sense of pride, creativity, and environmental responsibility. As you complete your project, you’ll be left with a cherished piece that could spark conversations for years to come.
How to Build a Bathroom Vanity For Beginners
With the right guidance and tools, building a bathroom vanity can be an empowering DIY experience. Not only does it allow you to personalize your bathroom’s aesthetic, but it also gives you a sense of accomplishment and pride in your handiwork. Even if you’re new to DIY projects, this step-by-step guide is designed to walk you through the process, making it accessible and achievable for beginners. Whether you’re looking to give your bathroom a fresh makeover or simply update its look, creating a custom vanity can be a fulfilling and rewarding experience.
Materials and Tools Needed
To build a sturdy and attractive DIY project, you’ll need the following tools and materials: A reliable circular saw or table saw will help you make precise cuts in your 3/4 inch sanded plywood. For assembling the pieces, you can’t go wrong with a drill equipped with a pocket hole jig, which simplifies the process of creating strong joints. Holding everything in place are 90-degree clamps that provide the necessary grip to ensure accurate placement. A screwdriver or power drill is also essential for driving screws and nails, while a brad nailer helps to fasten smaller pieces together. Any imperfections can be filled with wood filler before being smoothed out by a sander using 220 grit sandpaper. To add an extra layer of protection and aesthetic appeal, apply latex primer and paint once the project is complete. If you want to get creative with decorative edges or profiles, consider investing in a router and its accompanying table. Other important components include drawer slides for smooth opening and closing, wood glue to reinforce joints, and a trusty measuring tape and pencil for making precise measurements.
Step 1: Planning and Design
Before embarking on the design and construction of your vanity, take a moment to consider the overall dimensions and aesthetic you desire. The available space in your bathroom will play a significant role in shaping this decision, as will the layout of your plumbing fixtures. As you contemplate the number of drawers and cabinets required, think about the types of items you’ll be storing within them, from toiletries to linens. By doing so, you’ll set yourself up for success in creating a vanity that is both functional and visually appealing.
Step 2: Cutting the Plywood
When it comes time to create the carcass of your vanity, it’s essential to work with high-quality materials that can withstand the humid conditions found in bathrooms. For this project, we recommend using 3/4 inch sanded plywood, which offers a higher level of durability compared to other types of wood. To cut the plywood into the required pieces, you’ll need to use either a circular saw or table saw. It’s crucial to measure your cuts twice and only make each cut once, as this will help ensure that your pieces are accurate and fit together seamlessly.
Step 3: Assembly of the Carcass
When constructing a custom vanity, it’s essential to precision-drill pocket holes in all applicable pieces, including dividers, stretchers, the bottom plate, and toe kick components. Once the pocket holes are complete, assemble the core structure using screws, ensuring that each part is properly aligned and square. To maintain the stability of the carcass, employ 90-degree clamps to hold everything in place while you work.
Step 4: Installing Drawer Slides
When it comes time to install the drawer slides on the interior dividers, there’s an important step that often gets overlooked: adding a spacer for face frames. This ensures the slides are precisely positioned, enabling drawers to glide in and out with ease, free from any pesky sticking or jamming. By taking the extra minute to get this detail right, you’ll be rewarded with a smooth-operating storage system that makes your life easier.
Step 5: Building Drawers
To create the drawer components, begin by cutting the required pieces from half-inch sanded plywood. Next, assemble the sides using pocket holes, taking care to position them on the exterior of the unit so that they remain hidden when the drawers are opened. Once the sides are in place, slide the bottom piece into position and secure it with a strong application of wood glue, ensuring a sturdy foundation for your custom drawer.
Step 6: Creating the Face Frame
To create the face frame for the vanity’s drawers and doors, start by stripping down 3/4 inch poplar board into the required pieces. This crucial step enhances the overall appearance of the vanity by providing a sturdy frame that adds depth and visual interest. To streamline the process, use pocket holes to pre-assemble the individual components before securing them to the carcass using wood glue and nails.
Step 7: Sanding and Painting
To complete the makeover, start by filling in any imperfections with wood filler, making sure to cover all gaps or holes. Once the filler is dry, take the time to sand the entire vanity surface down to 220 grit, achieving a silky smooth texture. Next, apply your chosen primer, allowing it to fully dry before painting with your desired color. It’s crucial to sand between coats of primer and paint to guarantee a flawlessly even finish.
Step 8: Final Assembly
Once you’ve reached this stage, it’s time to bring your kitchen cabinets to life by installing the drawer fronts and doors. To achieve a professional-looking finish, use pre-made templates for door hinges and handle hardware to ensure consistent placement. Next, carefully adjust the drawer fronts to guarantee even spacing and alignment, giving your kitchen an air of seamless sophistication.
Video Tutorial
If you’re looking for a more visual approach, I recommend checking out our step-by-step video tutorial on YouTube. It perfectly complements this written guide, providing a clear and easy-to-follow visual representation of the techniques discussed. By combining both formats, you’ll gain a deeper understanding of the process and be better equipped to tackle your own custom bathroom vanity project. With some time and effort invested, you’ll be rewarded with a personalized space that not only looks great but also saves you money in the long run. The sense of accomplishment and pride you’ll feel from creating something unique will make it all the more worthwhile.
FAQS on DIY Bathroom Vanity Ideas and Plans
Embarking on a DIY bathroom vanity project can be an incredibly fulfilling experience. To ensure a successful start, here’s a comprehensive guide to address frequently asked questions and provide the necessary insights for a smooth transition into the world of DIY endeavors.
What materials do I need for a DIY bathroom vanity?
To bring your DIY vanity project to life, you’ll need a variety of materials that may differ depending on the design and aesthetic you have in mind. Some common supplies include wood – either new or reclaimed – as well as essential fasteners like screws and nails. You’ll also want to have some basic tools at your disposal, such as sandpaper for smoothing out rough edges, paint or stain to add a pop of color, and equipment like saws, drills, and screwdrivers to make any necessary cuts or adjustments. Of course, the sink and faucet will be crucial components as well, so be sure to include those in your shopping list.
Can I turn an old piece of furniture into a bathroom vanity?
Transforming an old dresser or table into a functional bathroom vanity is a creative DIY project that requires some planning and execution. To get started, you’ll need to assess whether the chosen piece of furniture meets the necessary height and size requirements for your bathroom. This involves considering factors such as the sink’s dimensions, the plumbing’s positioning, and the overall aesthetic you want to achieve. Once you’re satisfied with the piece’s suitability, you can begin making modifications, including cutting holes for the sink and plumbing fixtures. Additionally, reinforcing the structure may be necessary to ensure it can withstand the added weight and stress of holding a sink and supporting water flow. Finally, give the vanity some TLC by sanding, painting, or staining it to match your bathroom’s decor, creating a cohesive look that adds character to the space.
How do I protect my DIY bathroom vanity from water damage?
When it comes to safeguarding your vanity from water damage, there are several measures you can take. For instance, applying a waterproof sealant to wooden surfaces can be an effective way to prevent moisture from seeping in. Alternatively, opting for materials that have natural resistance to moisture, such as certain types of wood or non-wood materials, can also help minimize the risk of damage. Furthermore, ensuring that the area surrounding your sink is well-sealed and watertight is crucial in preventing water from seeping onto the vanity itself.
What is the best paint to use on a bathroom vanity?
When it comes to bathroom vanities, a coat of semi-gloss or high-gloss paint is highly recommended due to its exceptional moisture-resistance properties and ease of maintenance. To achieve the best possible outcome, it’s crucial to thoroughly prepare the surface before application, as this will help ensure a smooth and even finish.
How do I ensure my DIY bathroom vanity fits the space?
When embarking on a bathroom renovation, it’s essential to meticulously measure the space before commencing work. This includes taking into account the placement of existing plumbing fixtures and the dimensions of the sink you intend to install. To guarantee a seamless installation process, create a detailed plan or utilize design software to visualize how your vanity will fit harmoniously within the designated area.
Is it possible to DIY a bathroom vanity on a tight budget?
To stretch your budget without sacrificing style, consider adopting a resourceful approach to home decor. One effective way is by giving new life to an existing piece of furniture, whether it’s refinishing an old table or upcycling an vintage chair. You can also score great deals on materials at thrift stores, garage sales, and online marketplaces, where you might stumble upon unique finds that add character to your space. When selecting materials, opt for budget-friendly options like reclaimed wood, which not only saves money but also tells a story of its own history. And finally, take control of the labor yourself, whether it’s painting a wall or assembling a piece of furniture. Not only will you save on professional services, but you’ll also gain a sense of accomplishment and pride in your handiwork.
How long does it take to DIY a bathroom vanity?
The timeframe for completing a design project is highly dependent on three key factors: the complexity of the design, your level of expertise, and the amount of time you’re willing to invest. On one end of the spectrum, simple projects can be wrapped up in a matter of days or even just a weekend, while more intricate designs may require several weeks or even months of dedicated effort.
Can I install a sink and faucet in my DIY vanity?
When it comes to installing a sink and faucet in your DIY vanity, the process may seem daunting at first, but with some preparation and attention to detail, you can achieve a professional-looking result. To get started, select a sink that harmonizes with your vanity’s design and size, taking into account any unique features or constraints. Next, prepare the vanity by cutting holes for the sink and faucet, ensuring a snug fit to prevent leaks. Finally, follow the manufacturer’s instructions for installation, double-checking all connections to guarantee a watertight seal. By following these steps, you’ll be able to create a one-of-a-kind DIY bathroom vanity that reflects your personal style while also providing a functional and stylish focal point in your bathroom.
25 DIY Bathroom Vanity Ideas and Plans
Transform your bathroom with 25 innovative and affordable DIY vanity ideas that will refresh your space without breaking the bank. This eclectic collection of repurposed pieces and sleek designs will inspire you to get creative and breathe new life into your bathroom.
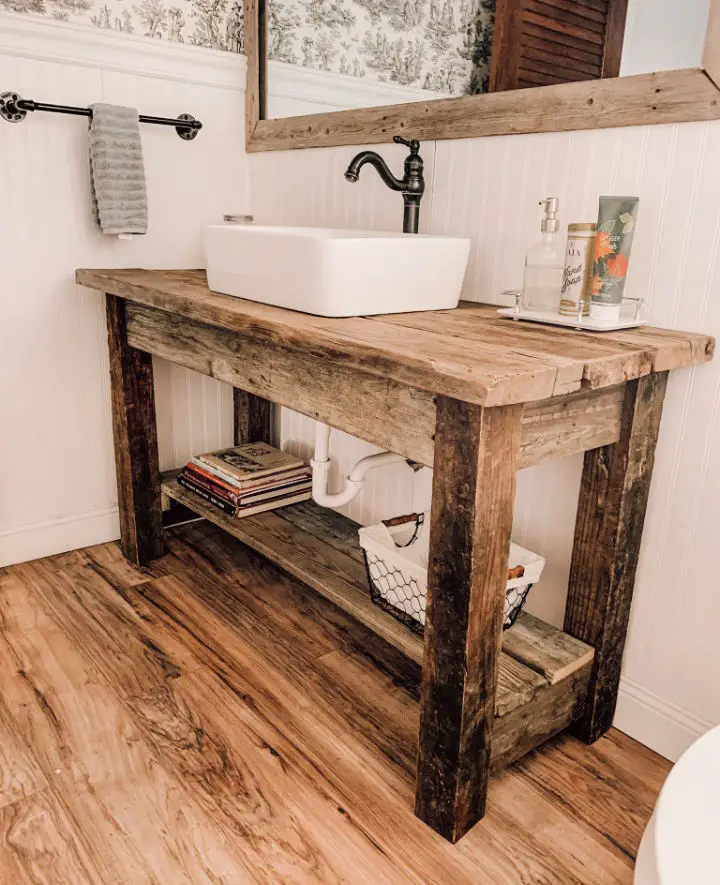
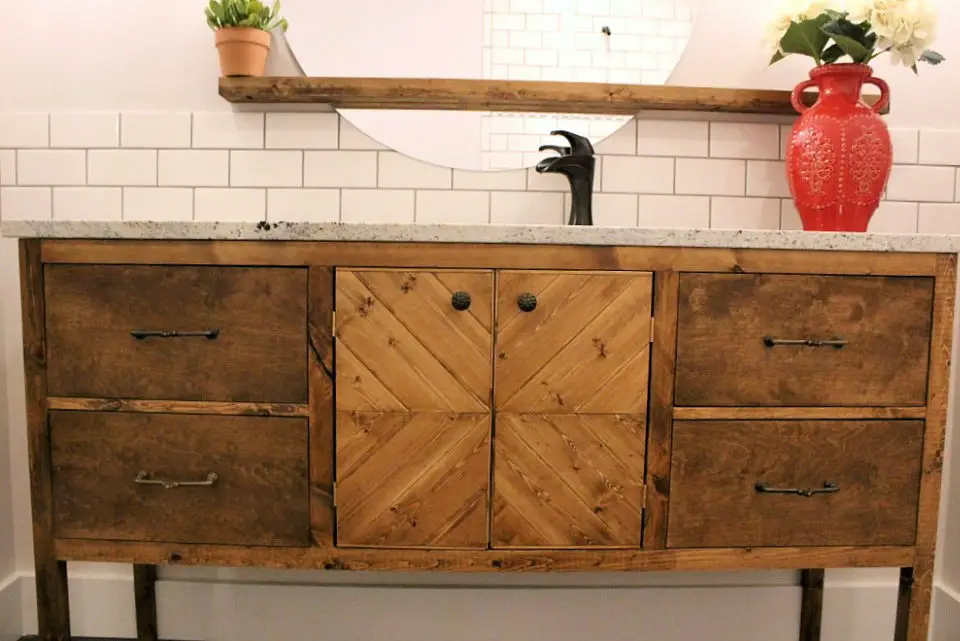
Rustic Bathroom Vanity With Free Plan
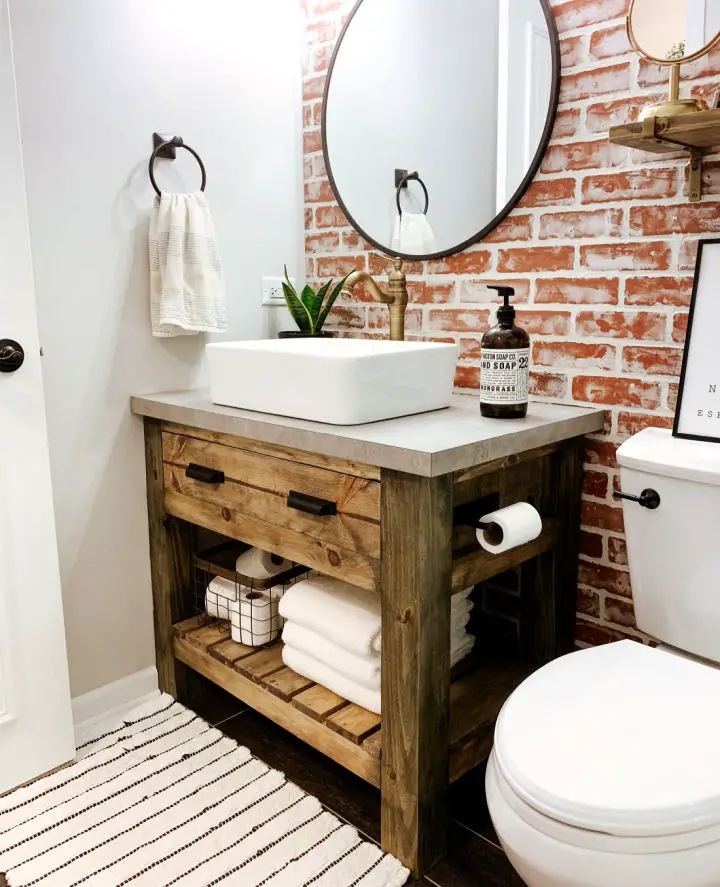
Transforming your bathroom with a one-of-a-kind touch is as simple as embarking on a DIY project. The DIY Rustic Bathroom Vanity project stands out as a shining example of this, providing an easy-to-follow guide for creating a charming vanity from scratch. Even for those new to furniture building, the end result is surprisingly impressive, thanks to the comprehensive plans, measurements, and supply list included in the guide. This hands-on approach to home decor promises not just a functional piece of furniture, but also a meaningful addition to your home that reflects your personal touch.
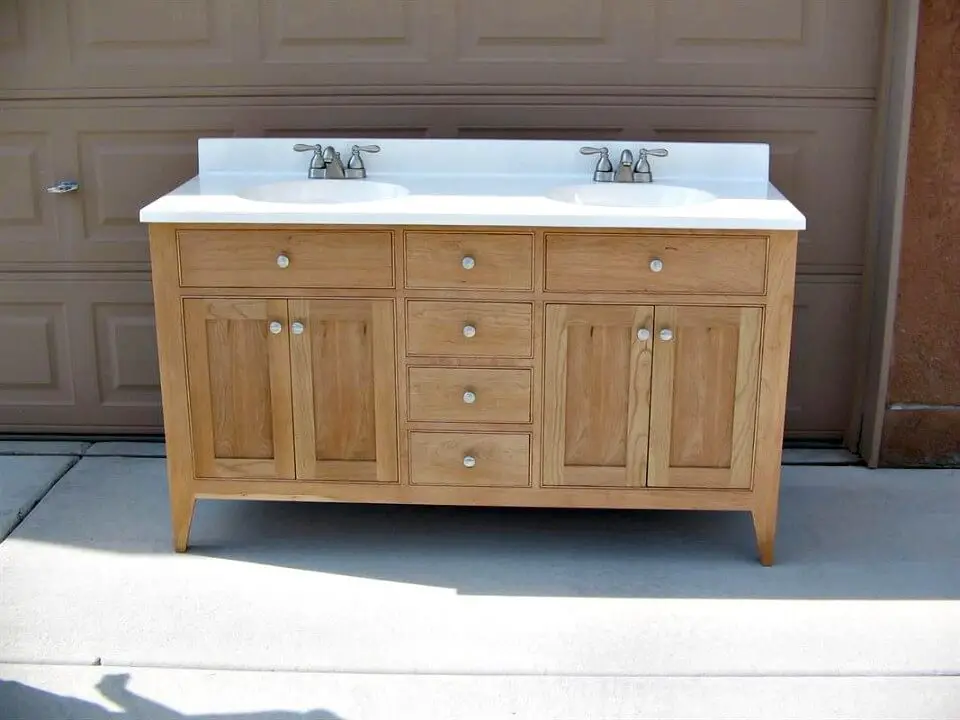
How to Build a Double Bathroom Vanity
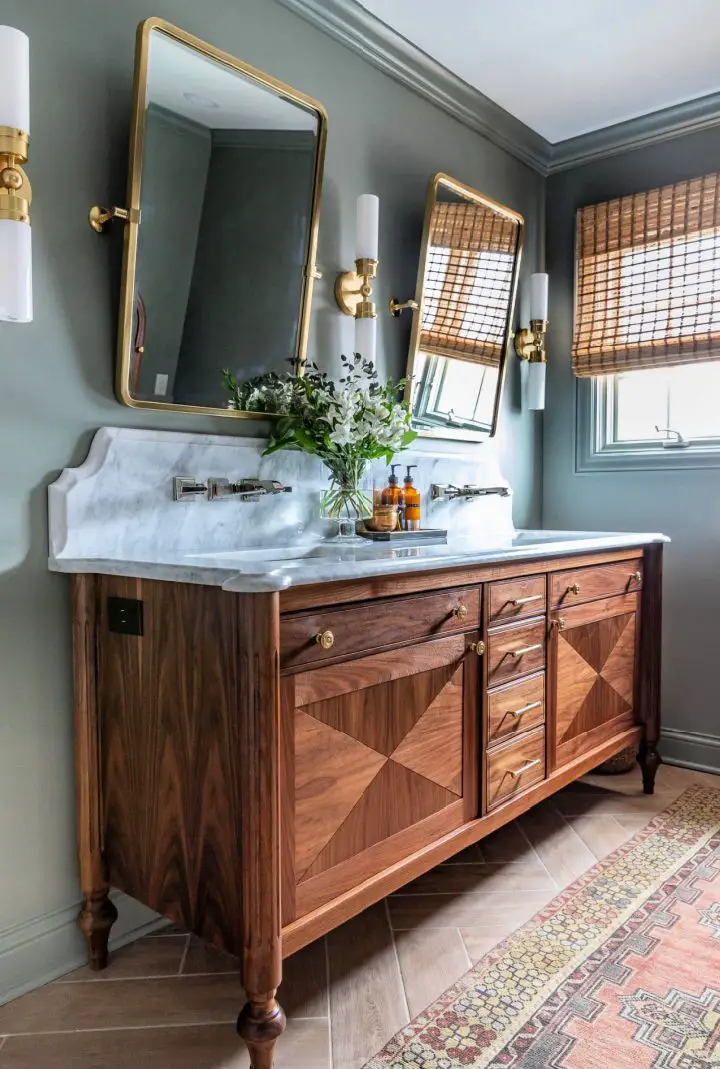
Indulge in a rich woodworking experience by creating a show-stopping DIY bathroom vanity, guided by the expert hands of Jen Woodhouse. This ambitious project not only elevates storage and functionality but also invites you to explore the distinct charm of black walnut wood. As you navigate the design process from crafting bespoke legs to meticulously refining finishing details, this endeavor promises a thrilling balance of challenge and satisfaction. Perfect for DIY enthusiasts and woodworking aficionados, it’s time to revolutionize your bathroom with a one-of-a-kind, handcrafted vanity that exudes individuality and artistry.
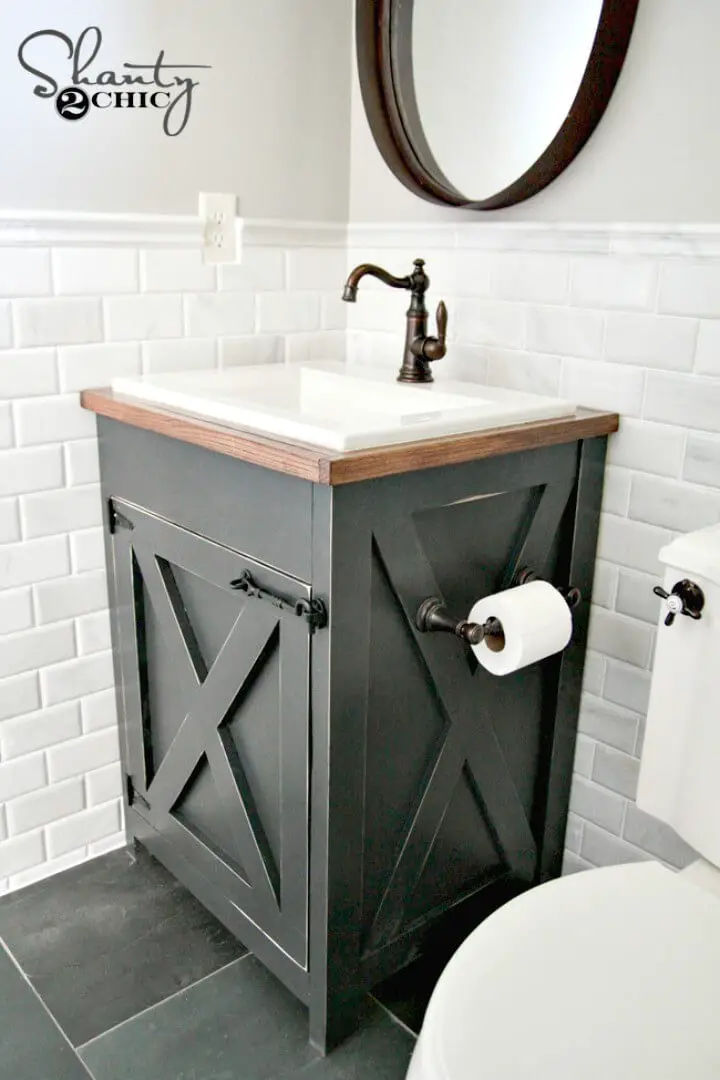
DIY Bathroom Vanity With Basic Tools
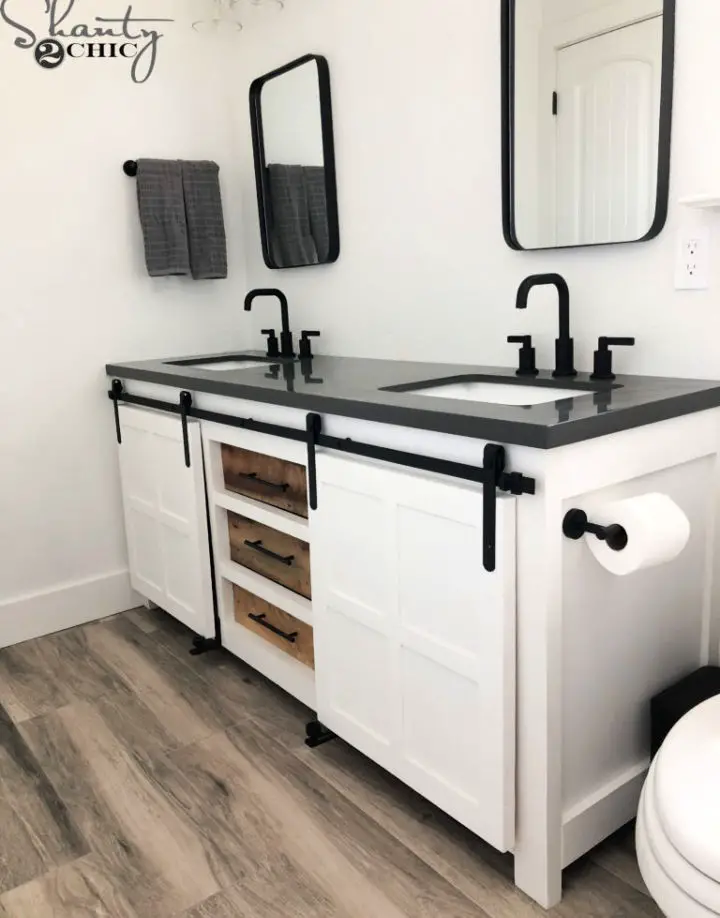
With a custom touch, elevating the look of your bathroom has never been more accessible. By following this straightforward DIY guide to crafting a Bathroom Vanity with sliding barn doors and ample storage, you’ll be able to balance functionality with style. This project not only adds value to your home but also gives you the opportunity to infuse your personal flair into the space. Experience the fulfillment of building something both beautiful and practical for your bathroom by embarking on this rewarding project. Start by consulting the detailed tutorial at Shanty2Chic, where you’ll find a step-by-step approach to bringing your vision to life.
How to Make a Cane Bathroom Vanity
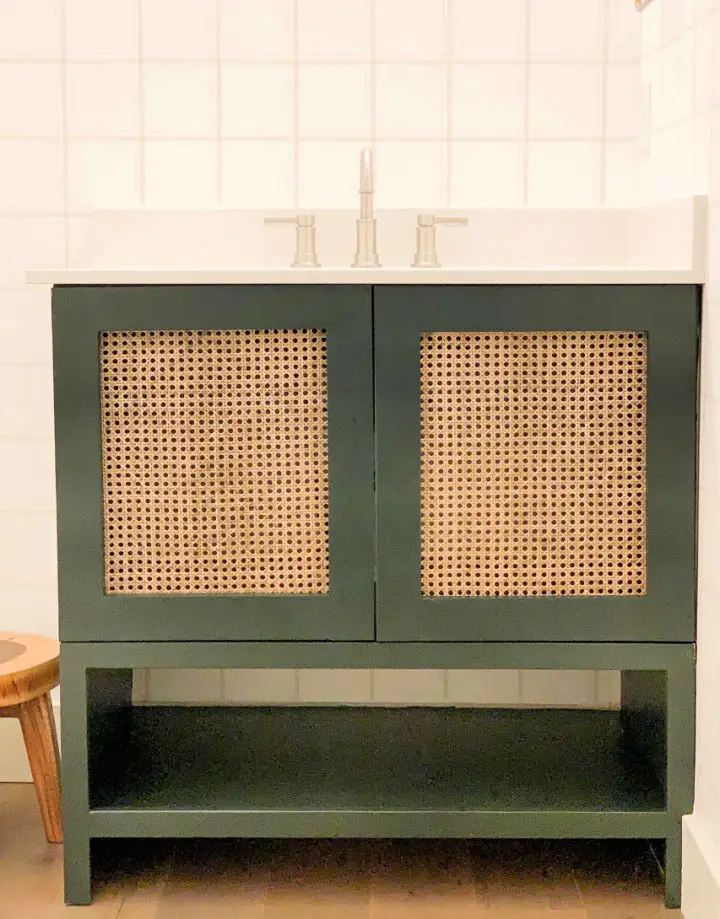
For homeowners looking to add a personal touch to their bathroom space, embarking on a DIY bathroom vanity project can be an incredibly rewarding experience. By taking on this project, you’re not only saving money but also having the opportunity to create something that perfectly fits your room’s unique style and aesthetic. If you’re interested in learning more about how to bring your vision to life, I recommend checking out Honey Built Home for a comprehensive guide covering everything from material selection to final assembly.
With an estimated cost of $100 and a realistic timeline of 6-8 hours, this beginner-friendly tutorial is the perfect opportunity to get creative with tools like circular saws, Kreg jigs, and more. Plus, by incorporating unique elements such as a cane webbing door, you can give your vanity a one-of-a-kind look that truly elevates the space.
Ready to start transforming your bathroom? Begin your DIY journey today!
DIY Wall Mounted Bathroom Vanity
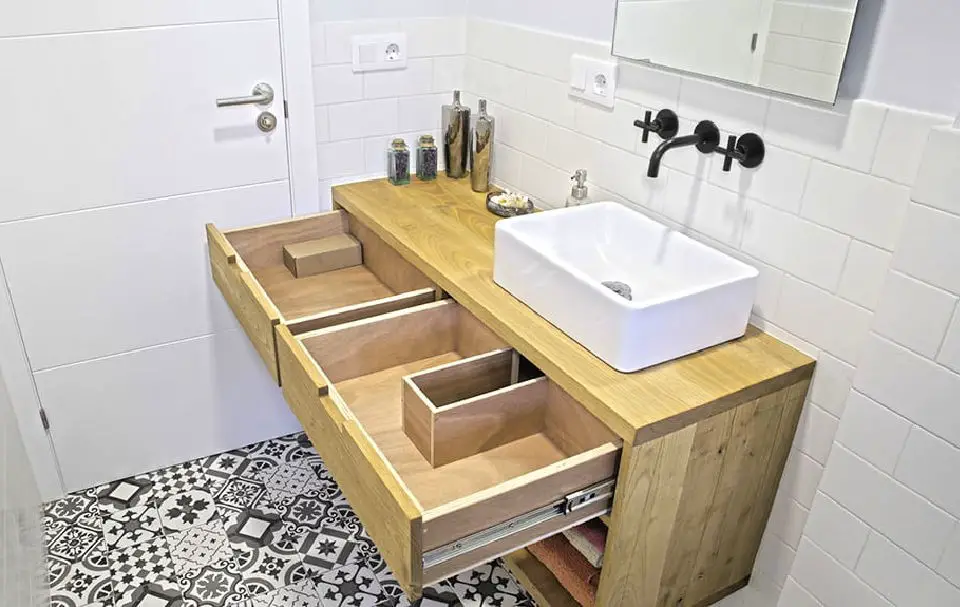
Transform your bathroom into an oasis by crafting a bespoke wall-mounted vanity using lumber or MDF. On Paoson Blog, we’ll walk you through the process of building a functional and visually appealing piece that cleverly maximizes space. From woodworking fundamentals to adding the finishing touches with paint and drawers, this DIY project will guide you in creating a custom vanity that reflects your unique style and meets your specific needs. Additionally, you’ll gain valuable insights on achieving durability and water resistance, making it an ideal endeavor for those who relish hands-on home projects.
Homemade Farmhouse Bathroom Vanity
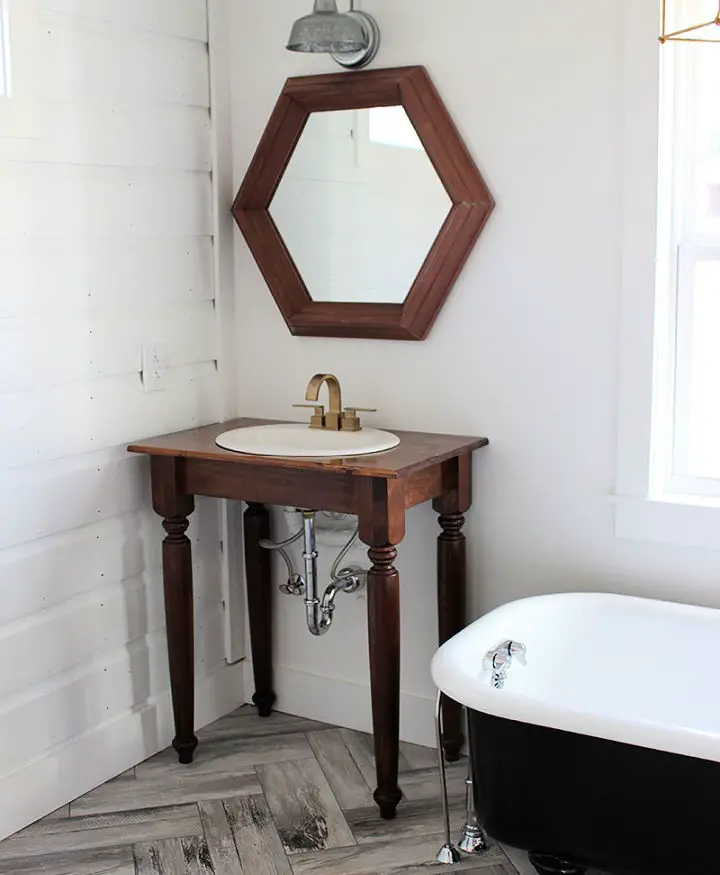
Create a stylish and practical oasis in your washroom by transforming it with creative DIY bathroom vanity ideas. To achieve this cozy retreat, follow our step-by-step guide on crafting a unique Farmhouse Style Bathroom Vanity. Start by selecting pre-made farmhouse table legs to add a rustic touch, then move on to achieving the perfect stain finish for a flawless look. This easy-to-follow tutorial will help you build a stunning centerpiece for your bathroom at an affordable cost. For more detailed instructions and inspiration, visit [www.thewhitebuffalostylingco.com](http://www.thewhitebuffalostylingco.com) to elevate your bathroom decor with a personal touch and handmade vanities.
Modern DIY Floating Bathroom Vanity
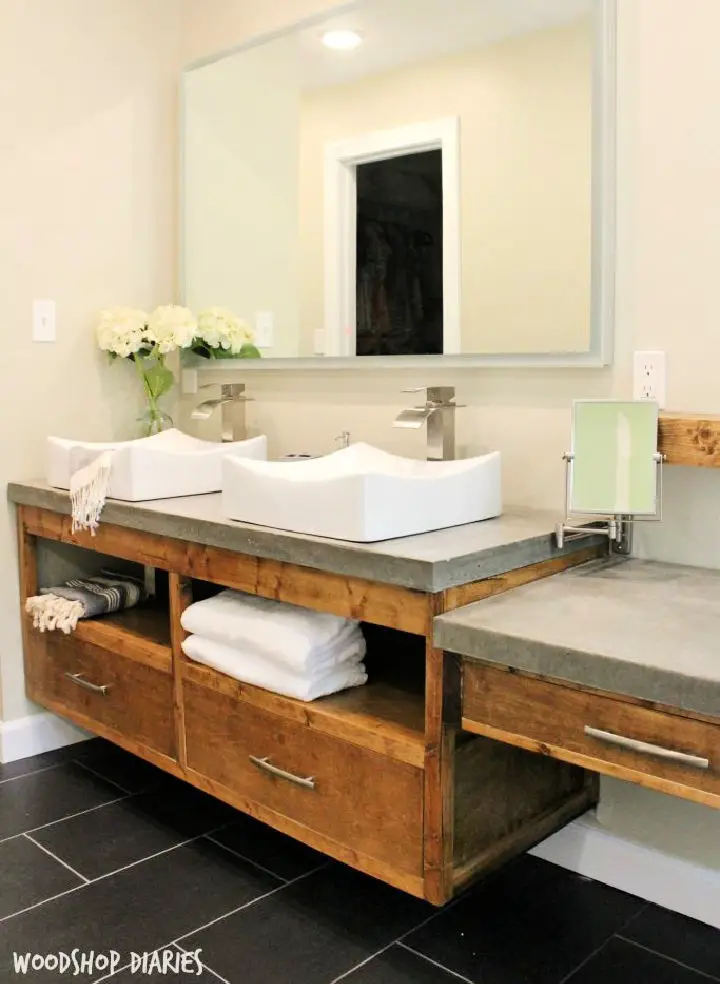
With Woodshop Diaries’ step-by-step tutorial, tackling a DIY project to create a sleek and modern floating vanity or TV console has never been more accessible. This comprehensive guide simplifies the process, guiding you through each stage from material selection to completion, ensuring your project stays on track. The design’s adaptability, capable of serving as both a vanity and TV console, paired with adjustable plans that cater to various modern decor styles, makes it an ideal choice for anyone looking to elevate their space while showcasing their DIY skills.
DIY Bathroom Vanity for Under $65

Transforming your bathroom into a stylish sanctuary doesn’t have to come at a hefty price tag. In fact, with Angela Marie Made’s budget-friendly guide, you can create a stunning rustic bathroom vanity for just $65 in materials. This DIY project is more than just an aesthetic upgrade – it’s a clever design that adds functionality without the hefty price tag. The genius behind this tutorial lies in its faux drawer door front, which brings charm and practicality to your bathroom without breaking the bank. With easy-to-follow steps and Angela’s expert guidance, you’ll be able to create a custom-looking piece of furniture that will make your friends and family green with envy – all while keeping your wallet intact.
Rustic Bathroom Vanity Woodworking Plan
Are you eager to give your bathroom a unique makeover? Building a DIY rustic bathroom vanity can be an incredibly rewarding experience, especially with our step-by-step guide. As a beginner-friendly project, it requires only basic tools like a drill and saw, making it accessible to anyone looking to add a personalized touch to their space. With this Instructable tutorial, you’ll learn the ins and outs of creating a functional and stylish piece that’s truly one-of-a-kind.
DIY Bathroom Vanity Using Reclaimed Cabinet
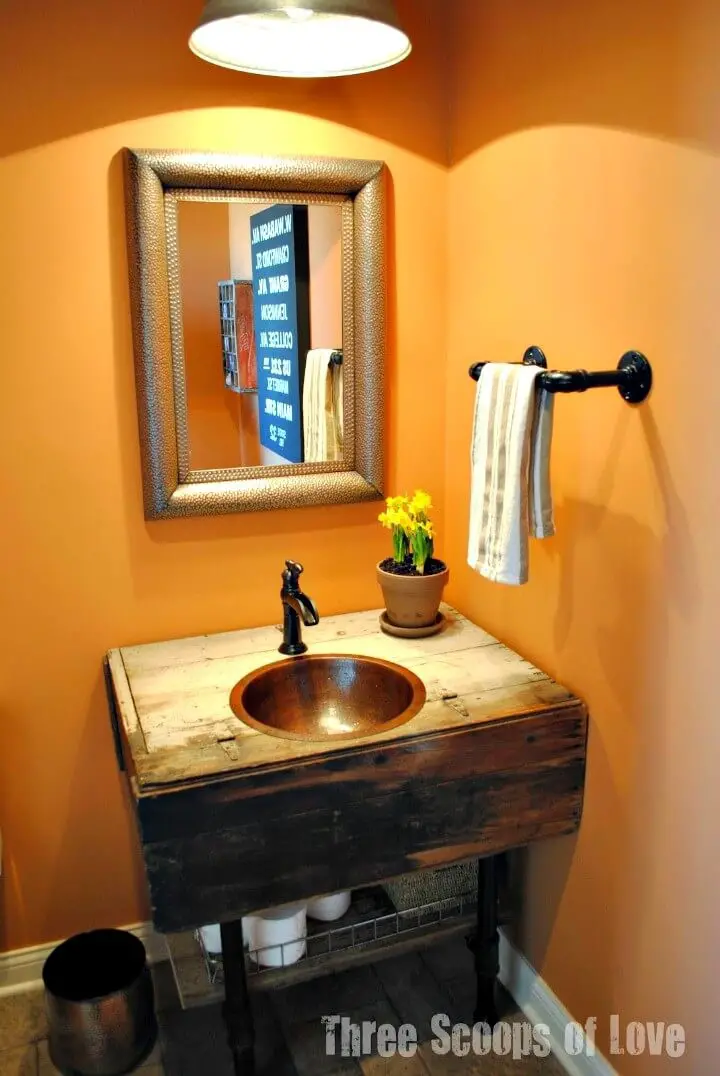
Giving an old weathered cabinet a second chance by transforming it into a chic bathroom vanity can infuse your space with nostalgia and one-of-a-kind charm. The process of repurposing this type of furniture, as demonstrated at Three Scoops of Love, involves a series of simple yet transformative steps: cleaning, cutting, and assembling. By following this guide, you’ll not only breathe new life into an otherwise discarded piece but also create a custom vanity that adds depth and character to your bathroom.
Make a Bathroom Vanity From Scratch
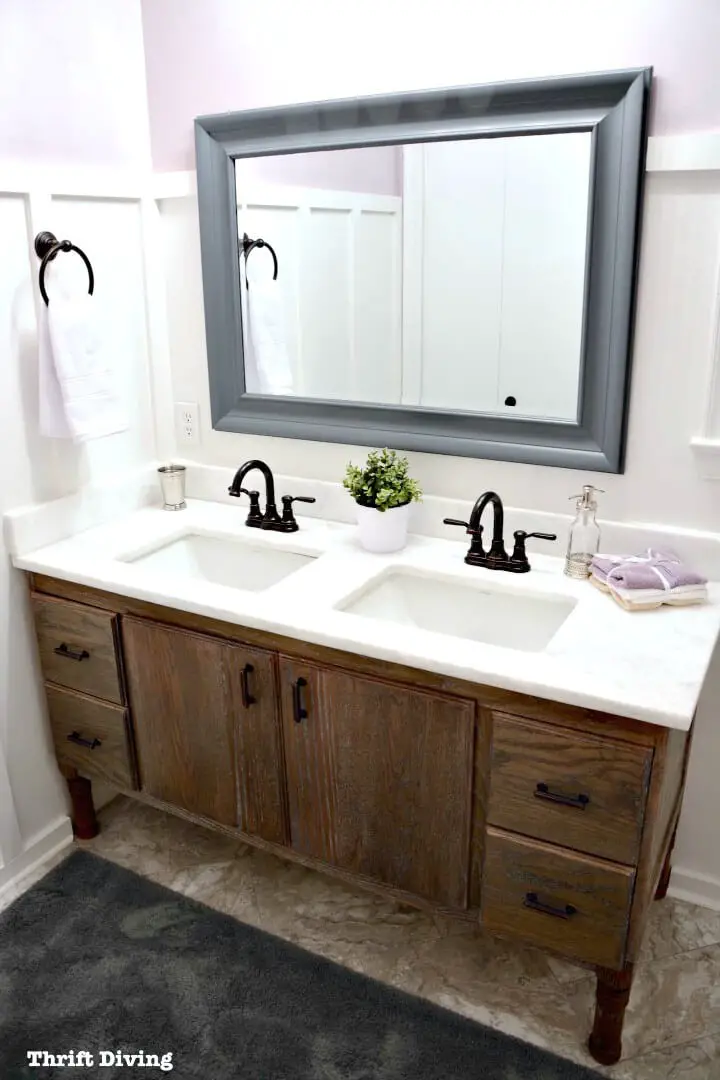
Transforming your bathroom space and honing your DIY skills go hand in hand with embarking on a makeover. To help you tackle the challenge of crafting a 60-inch vanity from scratch, this comprehensive guide will walk you through every step, from selecting the perfect oak to mastering power tools. Along the way, you’ll also learn how to add that final touch of elegance using liming wax. Perfect for DIY enthusiasts looking to take their home improvement projects to the next level, building a bathroom vanity is now within reach and more satisfying than ever. With this tutorial, you can turn your vision into reality and create a unique piece that’s not only functional but also reflects your personal style.
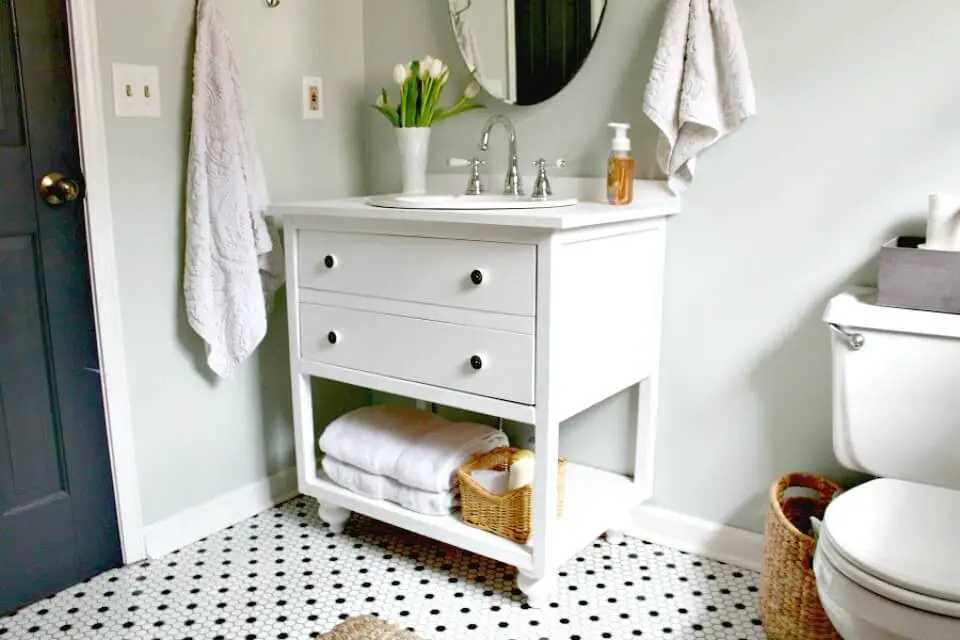
Turn a Dresser Into Bathroom Vanity

Transform your compact bathroom with creative and budget-friendly small bathroom vanity ideas. One innovative approach is to repurpose an old dresser into a bespoke vanity, as demonstrated in this step-by-step guide at An Oregon Cottage. The tutorial provides clear instructions on how to choose the perfect dresser, modify drawers for functional use, and incorporate plumbing, all while creating a one-of-a-kind vanity that reflects your personal style. This DIY project is ideal for those who crave a unique design without breaking the bank.
Easy DIY Floating Wood Bathroom Vanity
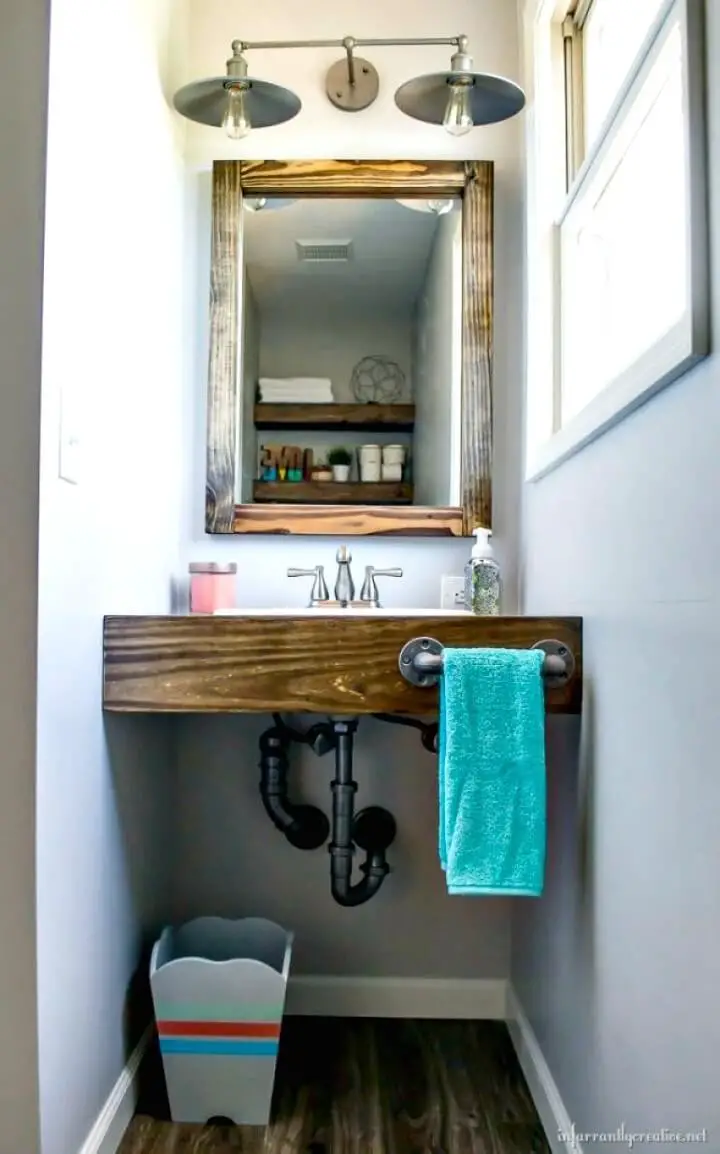
Elevate your bathroom’s functionality without sacrificing style by building a chic Floating Wood Vanity, perfect for tight spaces. With our easy-to-follow DIY guide, you’ll learn to transform simple materials like birch or oak plywood into a high-end hotel-inspired look that can be replicated in the comfort of your own home. From measuring and cutting to staining and sealing, every step is carefully detailed to ensure a successful project. Ready to take your bathroom to the next level? Start crafting your floating wood vanity today with the complete guide at Infarrantly Creative.
Modern DIY Bathroom Vanity
Transform your bathroom into a haven of rustic elegance and modern sophistication by creating a one-of-a-kind DIY bathroom vanity. This comprehensive guide takes you through every stage of the process, from measuring the perfect height to attaching the countertop, installing the sink, and more. With detailed illustrations and step-by-step instructions, you’ll have everything you need to customize your space according to your unique style and needs. Not only will you be left with a functional and stylish vanity, but you’ll also gain a sense of accomplishment and pride in having created something truly yours.
How to Make Your Own Bathroom Vanity
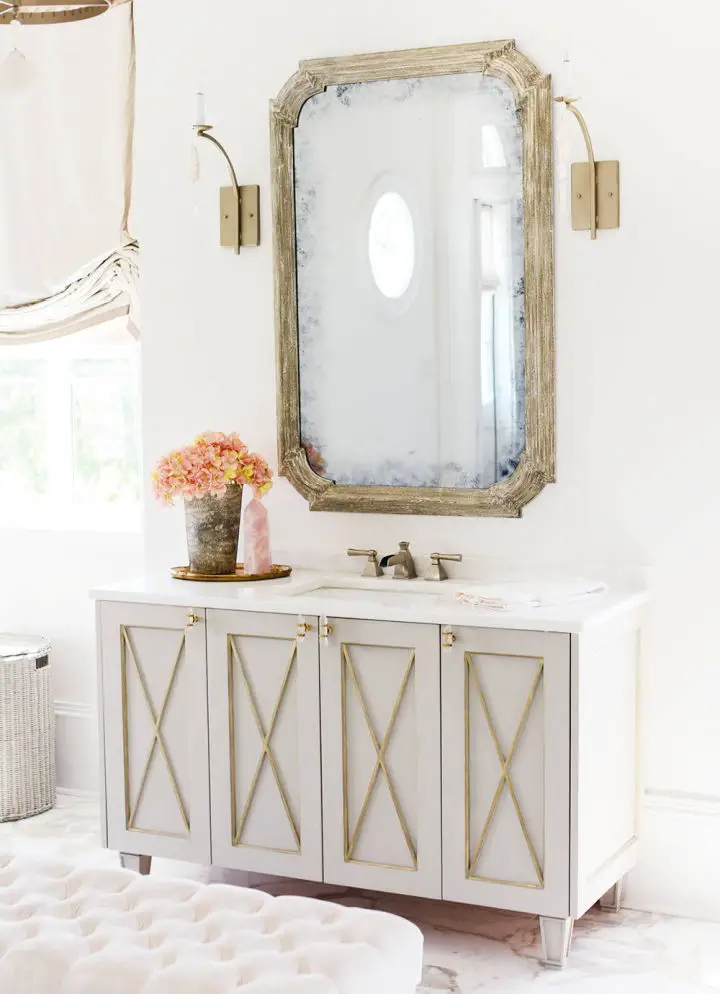
Elevate your bathroom vanity with Lisa Rickert’s masterful makeover, where creativity meets practicality. Inspired by her own coastal retreat, Lisa shares the steps she took to transform her vanities using Jolie products, achieving a bespoke look that harmoniously complements her home’s aesthetic. Delve into the world of paint shades, such as Swedish Grey, and discover how Gold Gilding Wax adds a luxurious touch. Learn the techniques that brought this project to life and get ready to recreate the same elegance and inviting ambiance in your own space by visiting JolieHome for a detailed guide.
DIY Open Shelf Bathroom Vanity
Unleash your creativity and transform your bathroom into a stunning sanctuary with a DIY open shelf vanity project. This comprehensive guide takes you by the hand, breaking down every step to ensure a seamless building experience. From choosing the ideal boards to mastering pocket holes, you’ll gain the confidence to tackle even the most ambitious projects. At H2OBungalow, we’re passionate about empowering DIY enthusiasts like you with easy-to-follow plans and expert tips. Join us on this journey of self-expression and bring your unique vision to life!
Small Master Bathroom Vanity Plan
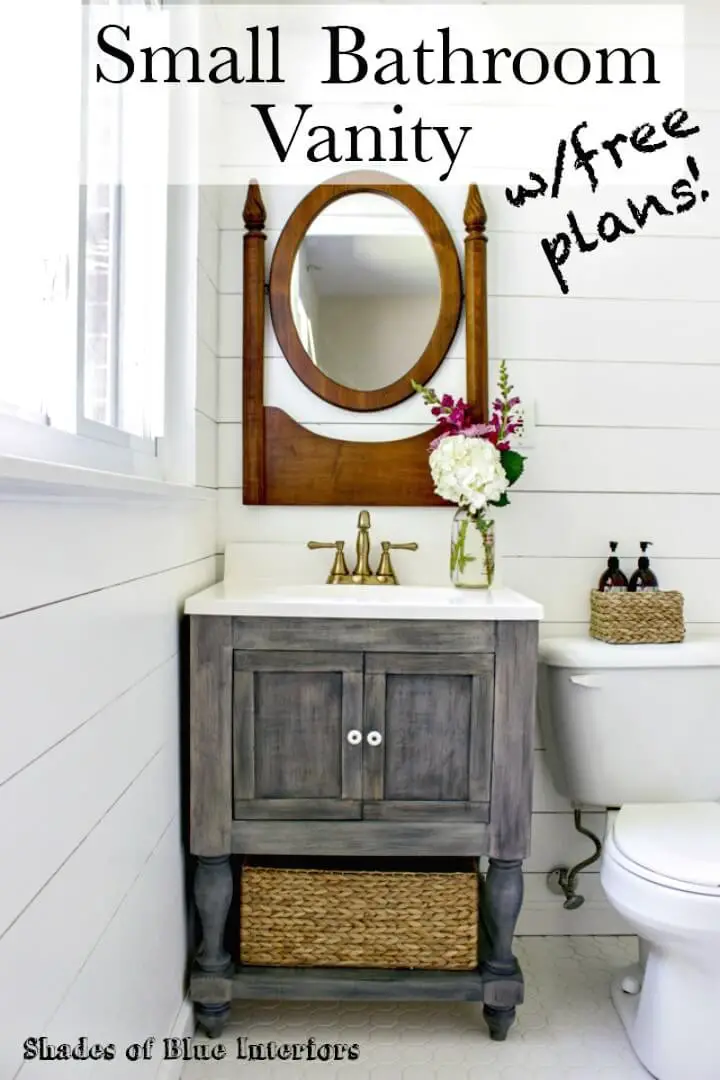
Transform your small master bathroom into a chic retreat by crafting a custom vanity that combines style with ample storage. This DIY project offers a comprehensive approach, including detailed free plans and meticulous instructions. To bring this design to life, you’ll need a solid foundation – Osborne Wood’s turned legs provide the perfect finishing touch. This unique vanity not only optimizes space but also injects a touch of handmade craftsmanship into your bathroom. For the complete guide and shopping list, visit Shades of Blue Interiors for inspiration.
DIY Vintage Style Bathroom Vanity
Transform your small washroom into an oasis of elegance with our innovative DIY small bathroom vanity ideas. Take a trip down memory lane by crafting a Vintage Style Bathroom Vanity, complete with faux drawers masquerading as doors and a lower shelf ideal for stashing towels or must-haves. This project yields a stunning piece measuring 30 inches wide, 20.5 inches deep, and 33 inches tall (excluding the countertop). For a detailed guide on bringing this timeless beauty to life, including essential materials and step-by-step instructions, click here. With this DIY endeavor, you’ll effortlessly merge functionality with vintage charm, elevating your bathroom’s aesthetic to new heights.
Double Bathroom Vanity With Details Instructions
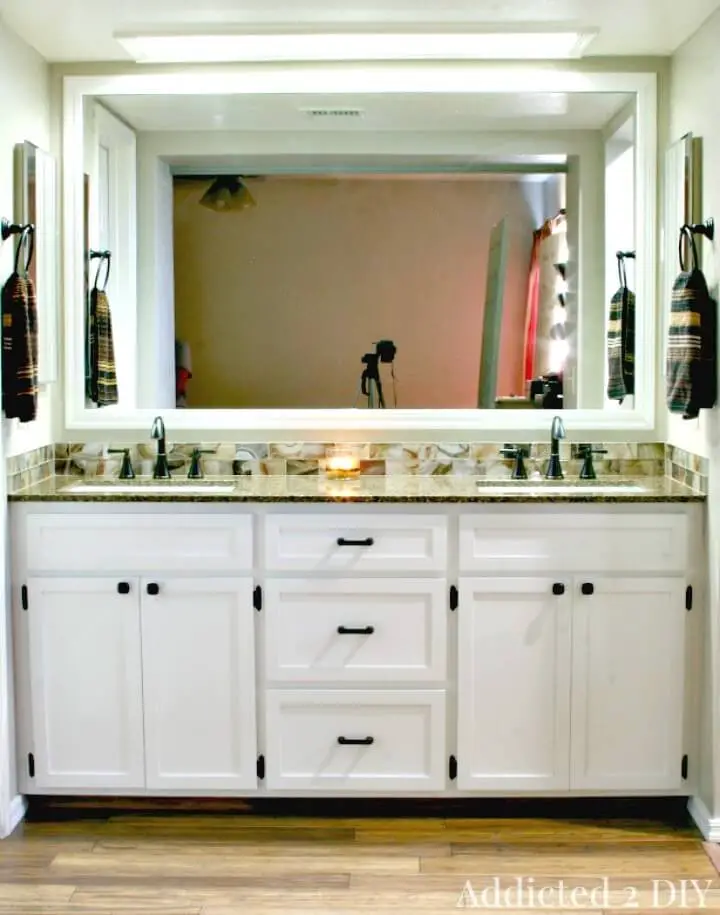
Transform your bathroom renovation by building a one-of-a-kind DIY Double Bathroom Vanity, infused with a personalized touch. Drawing inspiration from the skilled Sawdust Girl, we embarked on a rewarding journey to craft a bespoke vanity that caters to unique height preferences and adds a charming aesthetic appeal. By combining repurposed materials like birch veneer plywood and oak boards with modern construction techniques, this project demonstrates both cost-effectiveness and environmental sustainability. For a comprehensive guide on overcoming challenges, selecting materials, and achieving a stunning finish – including a dazzling glass backsplash – visit Addicted 2 DIY. Ready to revolutionize your bathroom? Dive into this project and bring your vision to life!
Build Your Own Bathroom Vanity
Bring a touch of elegance to your bathroom with a DIY vanity project that’s both stylish and functional. This comprehensive guide takes you through every step of creating your own unique vanity, from gathering tools to applying the final stain. Whether you’re working with a small or spacious bathroom, this project is designed to fit any space. With detailed instructions and newfound inspiration, click on the link: Woodshop Diaries to embark on this exciting journey and transform your bathroom’s charm today!
DIY Farmhouse Bathroom Vanity at Home
Transform your bathroom into a charming oasis by crafting a rustic DIY Farmhouse Bathroom Vanity with the help of Shanty2Chic’s straightforward step-by-step tutorial. This project is surprisingly accessible, requiring only basic tools and materials to bring a touch of rural charm to any space. By following the guide’s instructions, you’ll create a sturdy vanity featuring a stylish wood countertop and striking X trim details that add a dash of farmhouse flair. The result is not only a functional addition to your bathroom but also a beautiful focal point that exudes rustic elegance.
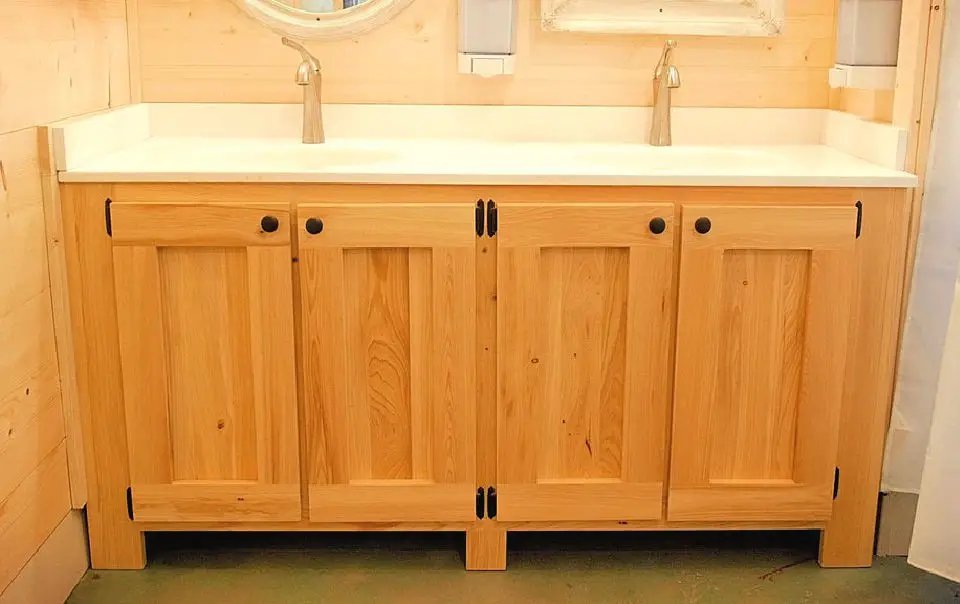
Shaker Style Cherry Tall Bath Vanity
Transform your bathroom into an oasis with a stunning DIY Cherry Bath Vanity from Kreg Tool. This comprehensive 60-inch project is perfect for woodworkers and beginners alike, featuring step-by-step instructions that guide you through the process of creating a premium cherry wood masterpiece. From cutting the main carcass to assembling drawer boxes and installing door hinges, every detail is meticulously covered. The result is a beautiful and functional addition to any bathroom space that exudes elegance and sophistication. For added reassurance, the guide also includes valuable tips on finishing and reinforcing the structure, ensuring your handcrafted vanity withstands the test of time.
Making Your Own Bathroom Vanity
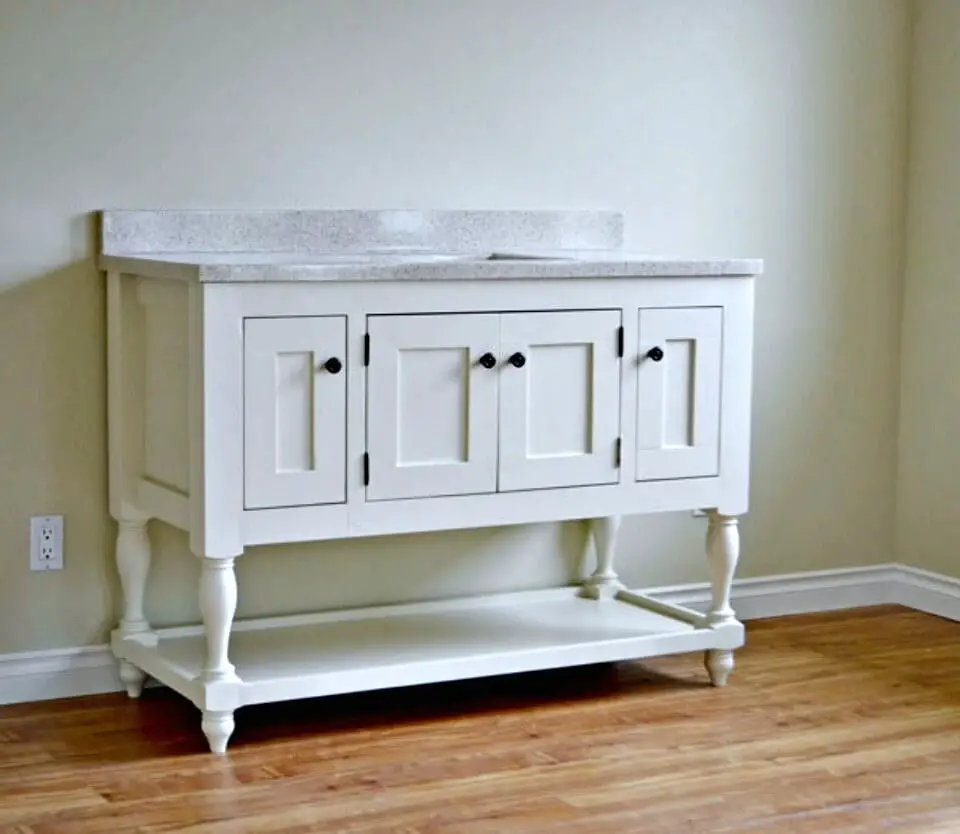
Transform your bathroom into an oasis of elegance with a custom 48-inch turned leg vanity, courtesy of Ana White’s expert guidance. This DIY-friendly project combines practicality with personal style, allowing you to save money while creating a one-of-a-kind piece that reflects your unique taste. The plans are meticulous, taking you through each step to build a sturdy and formaldehyde-free vanity using solid wood and PureBond Plywood. With the option to adapt the design for different sizes and sink configurations, this project is perfect for those seeking a farmhouse-inspired touch in their bathroom. Embrace the challenge and bring your dream vanity to life today.
DIY Butcher Block Vanity – Step by Step Instructions
Transform your bathroom into a one-of-a-kind sanctuary by crafting a bespoke DIY butcher block vanity. This budget-friendly project, featured on Beneath My Heart, demonstrates how repurposing leftover butcher block and basic materials can result in a functional and character-filled space-saver. As you navigate the construction process, learn from the challenges and triumphs that arise, and be inspired to infuse your bathroom with a unique personality. This approach is ideal for those seeking to elevate their bathroom with custom elements without incurring significant costs.
Handmade Small Bath Vanity With Storage
Transform your bathroom into a haven of personal expression by building a custom Simple 24″ Bath Vanity using Ana White’s beginner-friendly guide. This innovative project requires just one sheet of plywood, allowing you to add a unique touch while maximizing functionality. To take it to the next level, select Formaldehyde-Free Plywood for improved air quality and space optimization. With clear, step-by-step instructions, you’ll be able to create a vanity that’s both durable and stylish, complete with your choice of paint for a finished look. As you embark on this creative journey, get ready to be proud of the transformation that awaits.
Conclusion:
As we conclude our journey through 25 simple DIY bathroom vanity ideas on a budget, you now possess the essential toolkit to elevate your bathroom’s aesthetic without sacrificing your wallet’s well-being. This comprehensive guide has walked you through the process of selecting the perfect style, sourcing cost-effective materials, and bringing your vision to life, arming you with the confidence to tackle your DIY project head-on.
In addition to the practical know-how, it’s crucial to prioritize durability by protecting your handiwork from water damage and making informed paint choices. By embracing these budget-friendly approaches, not only will you enjoy significant savings but also bask in the sense of pride that comes with crafting a functional masterpiece tailored to your unique space.
With this wealth of knowledge at your fingertips, are you ready to revolutionize your bathroom? Dive into these DIY bathroom vanity plans and ideas today and unlock the potential for a truly transformed sanctuary!
