Transforming your home into a haven of fun is just a few steps away with our comprehensive guide on creating a DIY ball pit. By following 15 easy-to-implement ideas, you’ll not only be able to bring endless joy and excitement to your little ones but also ensure a safe play environment for them. With step-by-step guidance, we’ll take you through the process of selecting the right materials, prioritizing safety, and maintaining your new ball pit. As you embark on this creative and budget-friendly project, you’ll discover the satisfaction that comes from crafting a personalized space tailored to your family’s unique needs and preferences.
Why Make a DIY Ball Pit?
Building a DIY ball pit at home offers a multitude of benefits, making it an engaging project for families to undertake together. One significant advantage is the cost-effectiveness – opting for a DIY approach allows you to save money by having control over the materials and size, tailoring the project to fit your budget. Additionally, a DIY ball pit provides unparalleled customization options, enabling you to design a play area that perfectly matches your child’s preferences and space requirements.Safety also plays a crucial role in this project – when you build it yourself, you can ensure the materials and design meet your safety standards, selecting non-toxic materials and constructing a sturdy structure that provides a safe environment for your kids to play. Furthermore, building a ball pit can be a fun family project that fosters bonding and teaches valuable skills like planning, measuring, and crafting.The uniqueness of a DIY ball pit is another significant advantage – unlike store-bought options, your creation can stand out with distinctive features, such as a slide or themed design, adding an extra layer of excitement and joy for your kids. Ultimately, building a DIY ball pit is not just about saving money or having a custom play area; it’s also about ensuring safety, enjoying quality family time, and providing your children with a unique source of creative expression in their play.
Safety Guidelines for DIY Ball Pits
When it comes to creating a DIY ball pit, ensuring the safety of children is of utmost importance. To achieve this, consider the following crucial guidelines: Firstly, opt for non-toxic and BPA-free balls that won’t pose any health risks. The structure itself should be sturdy and devoid of sharp edges, providing a secure foundation for the ball pit. Next, guarantee the stability of your frame by ensuring all connections are tight and well-supported, whether you’re using PVC pipes or other materials. Furthermore, maintain the hygienic conditions of the ball pit by regularly cleaning the balls in a gentle, child-safe detergent, followed by thorough drying to prevent any moisture-related issues. Additionally, it’s essential to supervise children while they play in the ball pit, keeping a watchful eye out for any risky behaviors or situations that could lead to injury. When it comes to depth, aim for a level that allows for fun and excitement without posing a risk for smaller children; a good rule of thumb is to have the balls cover the legs but not exceed the waistline of the youngest child using the pit. Finally, consider placing a soft mat or carpet underneath the ball pit to cushion any falls and provide additional safety measures.
DIY Foam Ball Pit Tutorial
Without breaking the bank, families can create an endless source of fun for their kids by making a homemade foam ball pit. This guide is designed to provide a straightforward approach to building your own foam ball pit, focusing on simplicity and reliability. To get started, let’s dive in!
Step 1: Gather Your Materials
To embark on your DIY foam ball pit project, start by assembling the essential materials. A sturdy and large foam pool or playpen serves as the foundation for your creation. For added comfort and padding, consider incorporating soft foam sheets. The star of the show, however, is the high-density foam balls that will bring the fun to life. Additionally, have a measuring tape on hand to ensure accurate cuts, scissors or a foam cutter to shape the materials as needed, and adhesive Velcro strips to secure everything in place.
Step 2: Choose the Right Location
When selecting a designated area for your DIY project, consider a spot with ample space to move around comfortably. Opt for an area that’s safely removed from any hazards or fragile items, such as sharp objects or delicate furniture pieces. A corner in a playroom or living room can be an excellent choice. Make sure the surface is soft and cushioned, like a carpet, to provide extra protection against any accidental mishaps.
Step 3: Prepare the Base
When setting up a playpen as the foundation for your ball pit, follow the manufacturer’s guidelines for assembly. To enhance safety and comfort, consider lining the bottom with soft foam sheets. Cut these to size and secure them using adhesive Velcro strips, taking care to ensure a snug fit. While not essential, this extra step can make a positive impact on the overall experience.
Step 4: Add the Foam Balls
When you’ve secured and padded your base, it’s time to add the foam balls. To create an enjoyable yet safe play experience for your kids, fill the base with high-density foam balls to a depth that allows children to sit comfortably, with the balls reaching approximately mid-torso height.
Step 5: Safety Check
When it’s time for your little ones to enter the foam ball pit, it’s essential to conduct a thorough safety inspection beforehand. Inspect all corners and edges of the pit to ensure that they are adequately padded, and eliminate any potential hazards by removing or covering exposed sharp parts. Additionally, maintaining close supervision over your children as they play in the foam ball pit is vital to prevent accidents and ensure their overall well-being.
Step 6: Maintenance
To ensure a fun and sanitary experience in your foam ball pit, it’s essential to maintain its cleanliness and safety through regular inspections. Start by evaluating the condition of the playpen itself, verifying that it remains sturdy and free from any damage or wear. Next, focus on the foam balls, ensuring they are clean and free from dirt, debris, or any other contaminants. For specific guidance on cleaning and maintenance, consult the manufacturer’s instructions, as recommended practices may vary depending on the product.
For a Visual Guide: Video Tutorial
One of the best ways to bring this guide to life is by watching a step-by-step video tutorial on how to create a foam ball pit. This visual companion piece not only provides an excellent representation of each step, but it also makes the process feel more accessible and enjoyable. By following along with the video and using our detailed guide, you can easily set up a safe and engaging play area for your kids. Not only will this DIY project save you money on store-bought ball pits, but it’ll also give you the satisfaction of knowing that you’ve added a personal touch to your home’s play space. As you build and watch your children revel in their new favorite spot, you’ll be thrilled with the outcome.
Maintenance Tips for Your DIY Ball Pit
To keep your DIY ball pit in pristine condition, it’s essential to implement a regular maintenance routine. This involves more than just aesthetics – a clean and well-maintained ball pit ensures the safety and enjoyment of children who play there. Here are some key takeaways for maintaining your ball pit: First, prioritize cleaning by soaking the plastic balls in soapy water with a dash of white vinegar for disinfection. Allow them to soak for about an hour before rinsing and air drying. This not only removes dirt and grime but also kills any lingering bacteria. Additionally, rotate the balls periodically to prevent compression and maintain their shape. Next, perform regular checks for signs of wear and tear on both the balls and the pit structure itself. Replace damaged balls and address any structural issues before they become hazards. A simple yet crucial rule to enforce is the prohibition of food and drinks within the ball pit – this prevents spills and bacterial growth. Finally, when not in use, store the balls in breathable mesh bags to prevent mold and mildew from developing. By adhering to these straightforward maintenance tips, you can confidently ensure your DIY ball pit remains a fun and safe environment for everyone involved.
Customization Ideas for Your DIY Ball Pit
Transforming your DIY ball pit into a unique haven for kids requires more than just a sea of colorful balls. By incorporating creative elements, you can create an immersive experience that fosters imagination, learning, and active play. Here’s how to do it.
Start by choosing a theme that resonates with your child – perhaps a beloved cartoon character, a jungle adventure, or a fairytale princess castle. Use this as inspiration for the color palette, decorations, and even the balls themselves. You can also add interactive elements like tunnels, slides, or a mini basketball hoop to encourage kids to get moving.
Take it to the next level by incorporating different textures that stimulate sensory play. Soft foam shapes, fabric balls, and rubber toys with varying surfaces can provide a tactile experience that’s hard to resist.
Add some magic to your ball pit by installing LED lights or glow-in-the-dark elements. This creates an enchanting atmosphere, perfect for evening playtime or adding an extra layer of excitement to the overall experience.
And finally, why not turn your ball pit into a learning oasis? By incorporating number or letter balls that kids can find and match, you’re promoting learning through play – a powerful way to develop important skills like problem-solving and critical thinking.
By combining these customization ideas, you’ll create a DIY ball pit that’s truly one-of-a-kind. It’s an experience that will captivate your child’s imagination, inspire physical activity, and provide endless hours of fun.
The Best Materials for Longevity and Safety
When building a DIY ball pit, the right materials are crucial for achieving both longevity and safety. To ensure a successful project, consider the following recommendations:
Plastic Balls: For a safer and more durable option, choose BPA-free, crush-proof plastic balls.
Pit Structure: Construct walls using high-density foam, which provides a sturdy base while being soft on impact. Cover these with easy-to-clean, long-lasting fabric to prevent damage.
Flooring: To provide adequate cushioning for falls and add comfort, consider using thick foam mats or interlocking foam tiles.
Before starting your project, don’t forget to check the materials you plan to use for any recalls or safety warnings.
Fun and Educational Add-Ons for Children
To elevate the learning experience, consider incorporating a few innovative additions that double as fun and functional tools. For instance, introducing alphabet balls with letters can foster literacy skills by making learning a playful affair. Similarly, numbered balls designed for counting and basic math games can help develop essential numeracy skills. Moreover, utilizing balls in primary colors to teach color recognition and sorting can provide a hands-on approach to understanding the concept. These add-ons not only enhance playtime but also serve as effective educational tools, making learning a seamless experience.
DIY Ball Pit for Special Occasions
Elevate your ball pit experience with creative twists for special events. Consider incorporating themed decorations that harmonize with the occasion’s atmosphere. This could include streamers, balloons, and banners in matching hues. Take it a step further by designing interactive games that encourage guests to engage with the space. For instance, you could hide small, safe items among the balls and create a ‘find the hidden treasure’ challenge. Additionally, designate a photo booth area with props for capturing memorable moments. By incorporating these ideas, your ball pit is sure to be the showstopper at any celebration.
How Many Balls for a Ball Pit?
Determining the ideal number of balls for a DIY ball pit requires some calculation, but getting it right is crucial to create an enjoyable, secure, and engaging experience. It’s not just about filling the space with balls; rather, it’s about striking the perfect balance between fun and functionality. To help you achieve this, let’s dive into the factors that influence the number of balls needed.
Understanding Ball Pit Dimensions
When planning a ball pit, one key consideration is the scale of the installation. To determine the quantity of balls needed, measure the length, width, and desired depth in feet or meters. A common approach is to fill the pit so that it reaches mid-body when your child is sitting down. For smaller children, this typically translates to a depth of around 2 feet.
Calculating the Number of Balls
To estimate the number of balls required for your ball pit, start by calculating its volume using the dimensions you’ve chosen. Multiply the length, width, and desired depth to get the total cubic footage. Then, consider the size of each ball – standard ones are approximately 2.5 inches in diameter, taking up around 0.033 cubic feet or 0.000935 cubic meters per unit. Since balls are spherical, there will be air space between them; to simplify things, we’ll use an average packing density of about 0.65 to account for this. Next, divide the volume of your pit by the volume of a single ball and apply the adjustment factor. For instance, if you’re building a ball pit that’s 6 feet long, 4 feet wide, and 2 feet deep, calculate its volume as 6ft x 4ft x 2ft = 48 cubic feet. Then, multiply this by the reciprocal of the volume per ball (0.033) and adjust for packing density (0.65), resulting in approximately 950 balls needed.
Factors to Consider
When setting up a DIY ball pit, consider the age and size of the children who will be using it. Younger or smaller children may not require a deep pit, so adjust the depth accordingly to ensure they can safely and comfortably play. Additionally, think about the quality of the balls you’re using. Higher-quality balls might be more durable, but they could also be larger, which affects the overall experience. Take the time to research and read reviews before making a purchase to ensure you get the right size for your space. When it comes to safety, strike a balance between cushioning falls and avoiding suffocation risks by calculating the optimal ball quantity. By striking this balance, you can create an environment that’s both fun and safe for your family to enjoy.
FAQs On DIY Ball Pit
Transforming your space into an immersive DIY ball pit experience is an exciting venture that caters to both children’s imagination and adults’ nostalgia. As you set out on this creative adventure, consider the following frequently asked queries to guide you through the process.
What materials do I need to build a DIY ball pit?
For those looking to create a DIY ball pit, there are a few essential components to consider. First and foremost, you’ll need a sturdy structure to serve as the foundation. A playpen or foam pool can provide the necessary framework. Next, you’ll require an abundance of high-density foam balls to fill your pit. To ensure the comfort and safety of users, it’s also important to incorporate soft foam sheets or pool noodles for added padding. Finally, when it comes time to assemble your DIY ball pit, you’ll need a few basic tools, including a measuring tape, scissors or a foam cutter, and adhesive Velcro strips.
How many balls do I need for my ball pit?
To determine the optimal number of balls for your ball pit, consider the dimensions and desired depth of the pit. A practical guideline is to fill it to a level that reaches around mid-body when a child is sitting comfortably. To make an informed calculation, use the following formula: volume of pit multiplied by 0.65, divided by the volume of one ball. This will give you an approximate number of balls needed to achieve your desired depth.
How can I ensure my DIY ball pit is safe?
To guarantee a safe and enjoyable experience, consider the following precautions:
Select high-density foam balls that are non-toxic and durable.
Verify the structure’s sturdiness, ensuring it can withstand the weight of players without collapsing.
Protect any sharp edges or corners with soft foam or pool noodles to prevent injuries.
Regularly inspect the structure and padding for damages, making prompt repairs as needed.
Most importantly, always keep a watchful eye on children during play, providing guidance and support when necessary.
Can I build a ball pit for outdoor use?
When it comes to building an outdoor ball pit, it’s essential to prioritize durability by selecting materials that can withstand the elements. This might involve opting for weather-resistant components and taking steps to ensure the pit remains covered or drained when not in use. By doing so, you’ll be able to minimize the risk of water accumulation or damage from rain, sun, or other environmental factors.
How do I clean the ball pit balls?
To effectively clean ball pit balls, start by filling a large container, such as a tub or kiddie pool, with a solution of warm water and a small amount of mild detergent. Next, submerge the balls in batches, gently agitating and scrubbing them as needed to loosen any dirt or debris. Once they’re clean, thoroughly rinse each batch with fresh, cool water to remove any remaining soap residue. To dry the balls completely before returning them to the pit, lay them out on towels or a clean surface, allowing air to circulate around each ball. This multi-step process ensures your ball pit remains hygienic and fun for kids.
Is it cheaper to build a ball pit than to buy one?
When it comes to setting up a DIY ball pit, one of its greatest advantages is the ability to tailor costs to your specific needs and budget. By choosing materials that fit within your means, you’re able to avoid breaking the bank on unnecessary expenses. In contrast, commercial ball pits can be quite pricey, and customizing them often requires additional outlays. This flexibility in DIY projects allows you to scale back or scale up as needed, making it a more cost-effective option for those looking to create an immersive play space.
Can adults use the DIY ball pit?
Reinventing the Ball Pit for Grown-Ups: A Guide to Adaptation
While DIY ball pits are often designed with kids in mind, they can be easily modified to cater to adults as well. The key is to reinforce the structure to support more weight and increase the depth of the pit by adding more balls.
Before you start building, it’s essential to check the weight limit of your materials to ensure the safety of those who’ll be playing. By making a few simple adjustments, you can create a ball pit that’s perfect for adults looking for a fun and unique way to relax.
How do I choose the right location for a ball pit at home?
When it comes to setting up a ball pit, finding the right location is crucial. Look for an area that offers ample space for the pit and prioritizes safety above all else. Steer clear of areas with sharp furniture corners, hard floors, or trip hazards – instead, opt for carpeted spaces or rooms with plenty of room for the pit and supervision. By doing so, you’ll be well on your way to creating a fun, customized ball pit that’s perfect for play. Remember, planning, safety, and creativity are key components to a successful DIY ball pit project.
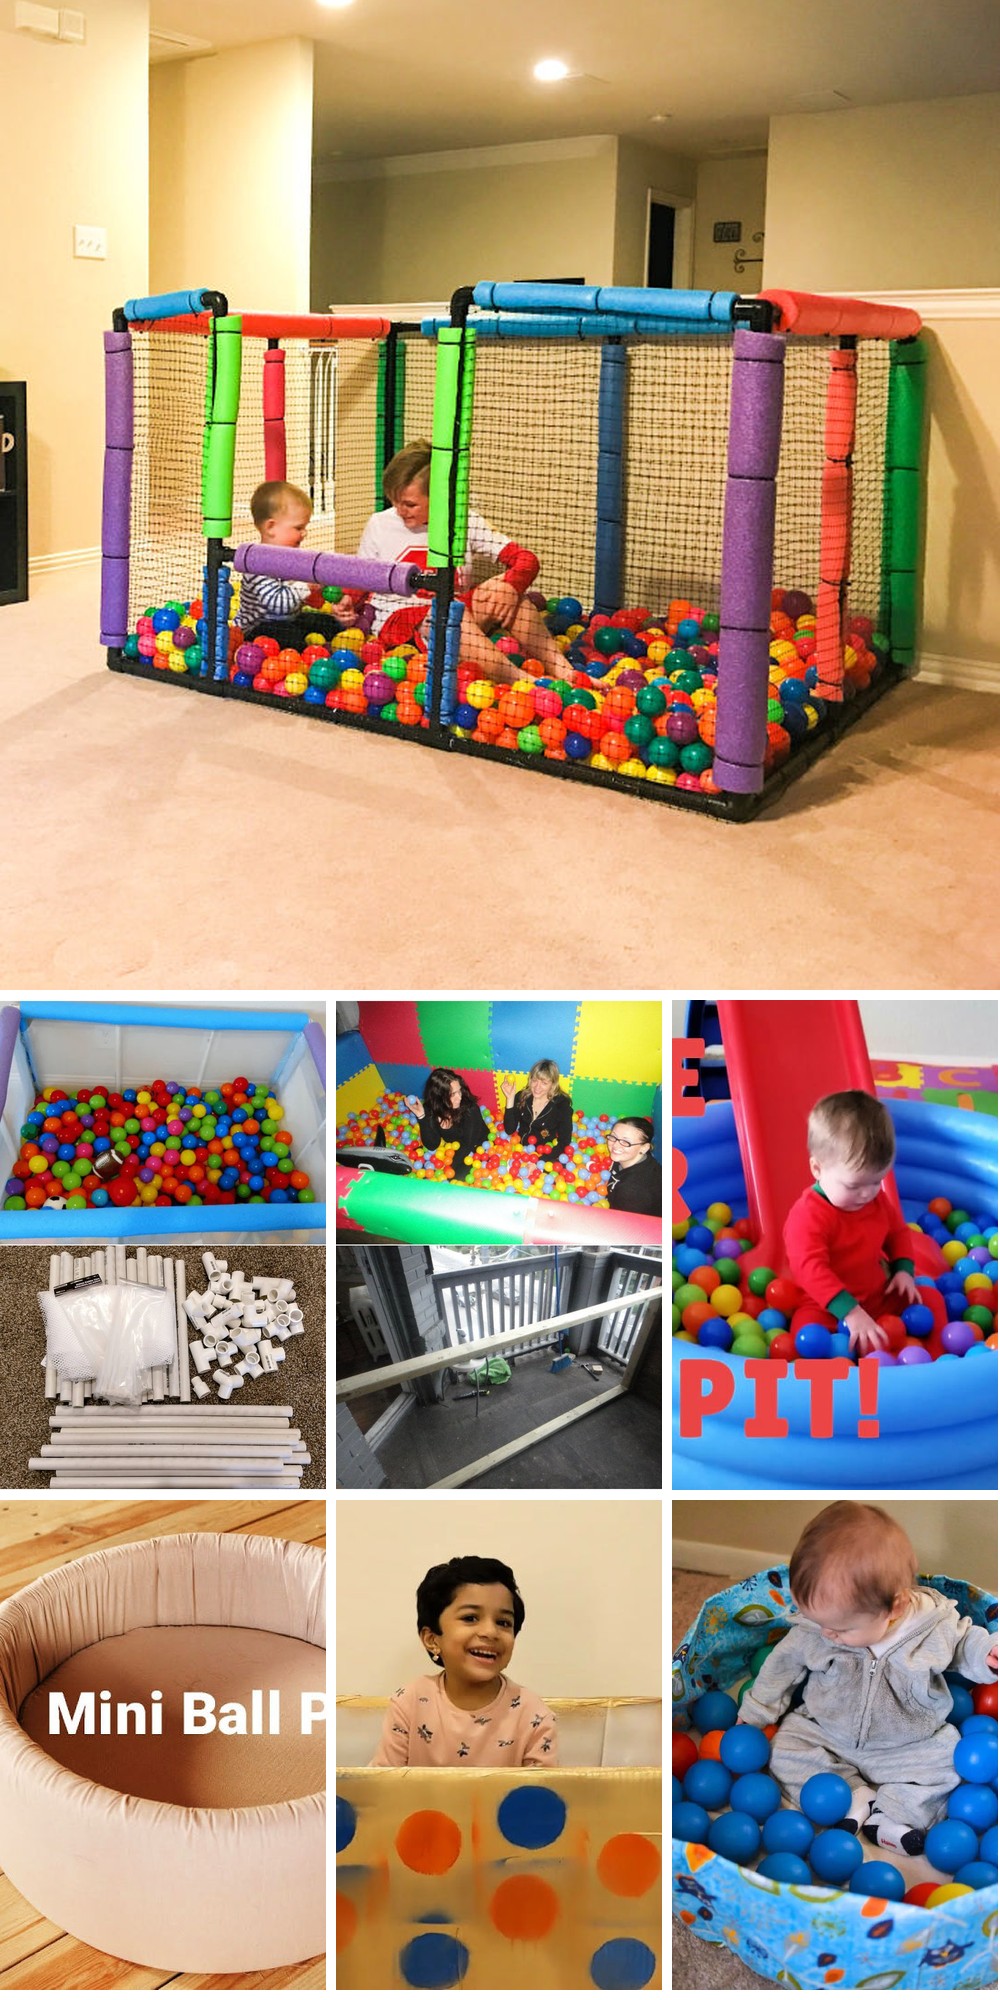
15 DIY Ball Pit Ideas (Learn How to Make a Ball Pit)
Unleash the fun and creativity by transforming your home into an interactive playground with these 15 ingenious DIY ball pit ideas. Whether you’re looking for a simplistic setup or an elaborate installation, we’ll guide you through the process of crafting a one-of-a-kind play area that’s sure to delight both kids and adults alike.
Make a Ball Pit in a Closet at Home
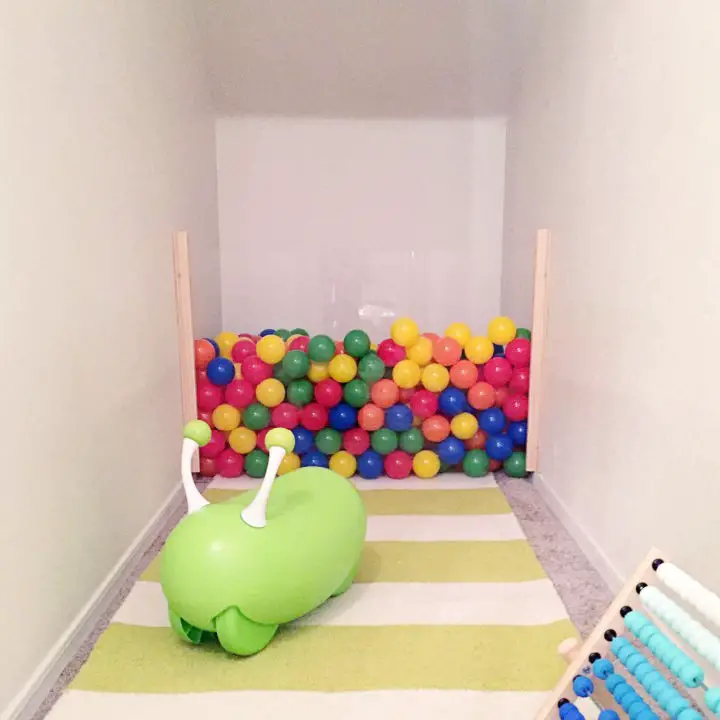
Transforming a tiny closet into a ball pit paradise is easier than you think. With just a few simple materials, including pine corner trim, safe ball pit balls, sandpaper, screws, and a piece of acrylic, you can create a unique play space that maximizes small areas. To get started, measure the area where you’ll be installing the trim, then cut it to size using your preferred method. Next, give the edges a smooth finish with some sandpaper to ensure they’re safe for little hands. Once your trim is ready, secure it to the wall using screws. Then, place the acrylic piece in position and start filling it with balls. To complete the look, make sure all sharp edges are smoothed out and keep an eye on the fun as your little one enjoys their new play spot.
How to Sew a Fabric Ball Pit
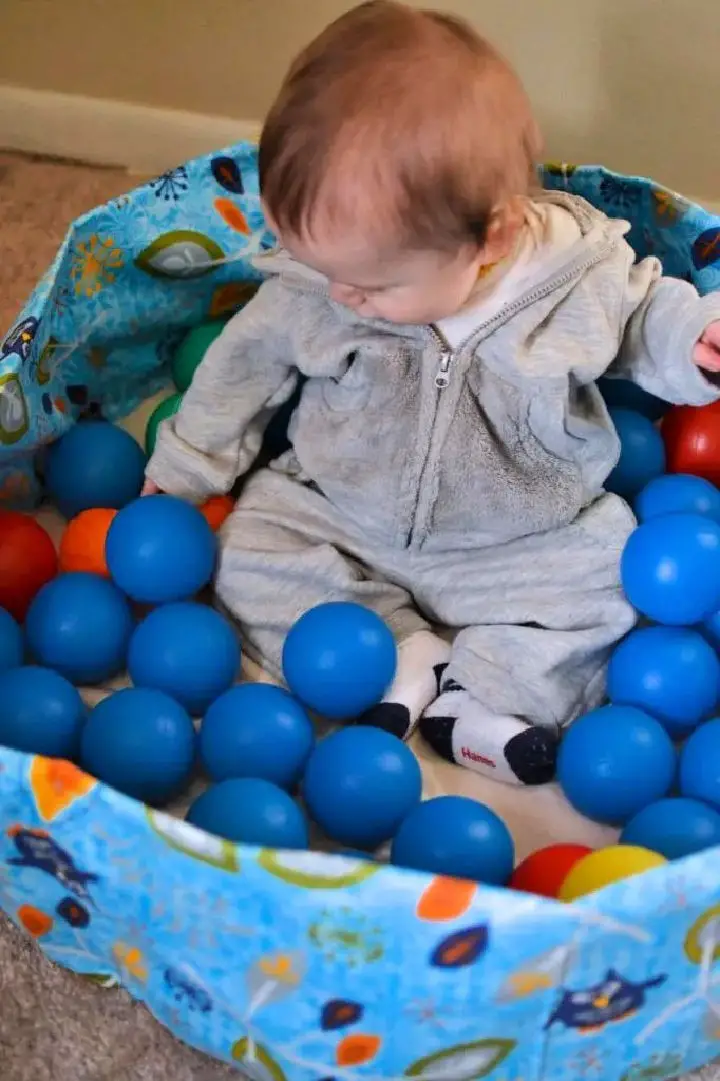
Looking for a thoughtful gift that will bring delight to the little one in your life? Why not try crafting a DIY fabric ball pit together? This easy-to-follow tutorial from Silo & Sage is perfect for creating a special playground for babies who are still discovering the joys of crawling and exploring. With simple steps, you’ll learn how to select the ideal fabrics, add sturdy walls with pipe cleaners, and create a unique space that’s sure to bring laughter and excitement. This project is all about making the most of what you have at home, and it’s a great way to bond with your baby as they discover their new ball pit. Start sewing and fill their world with color, joy, and endless hours of playtime!
Quick and Easy DIY Pvc Pipe Ball Pit
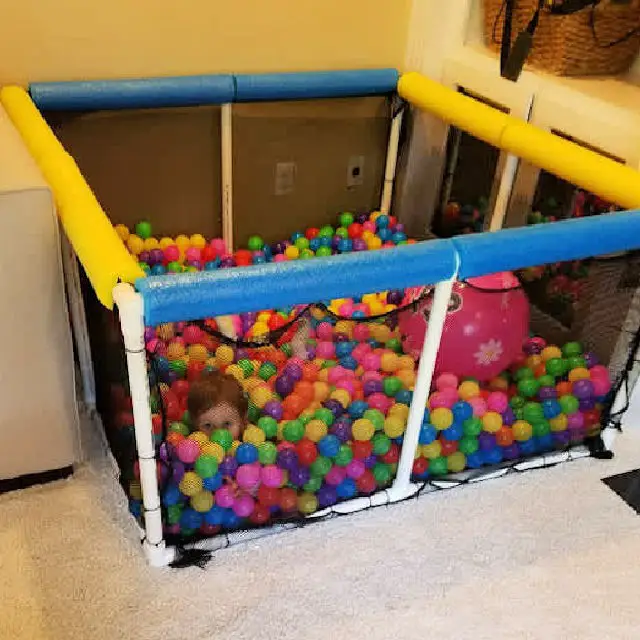
Transform your living space into a vibrant playground by crafting a homemade ball pit that’s both enjoyable and safe. This DIY endeavor is easier than you think. Begin by gathering pool noodles, PVC poles, mesh fabric, and an assortment of colorful balls. Then, follow simple instructions to assemble the structure, secure the mesh, and fill it with a rainbow of orbs. To add an extra layer of comfort and visual appeal, wrap the edges with pool noodles. As you embark on this creative journey, get ready for hours of unadulterated joy and laughter at home. For a comprehensive guide, click here to start having fun.
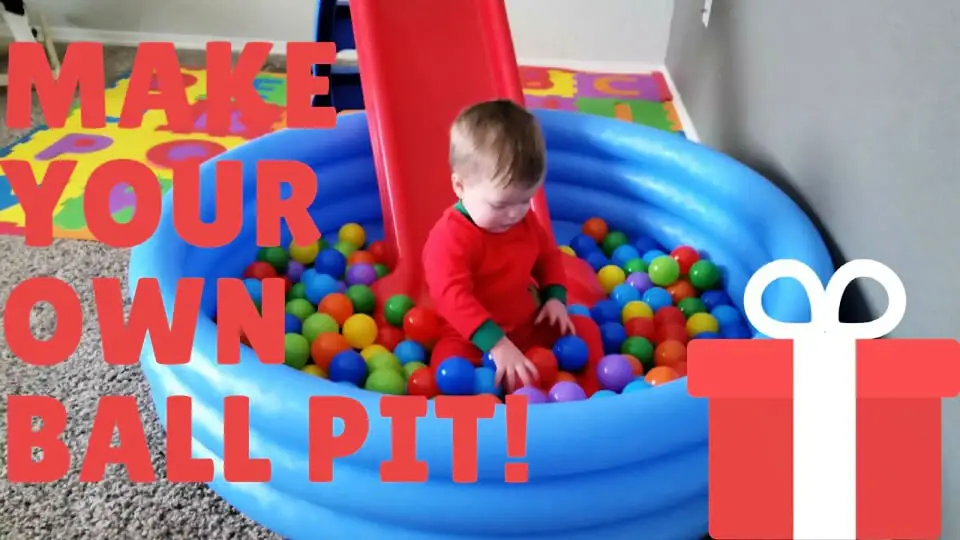
Make Your Own Ball Pit for Kids
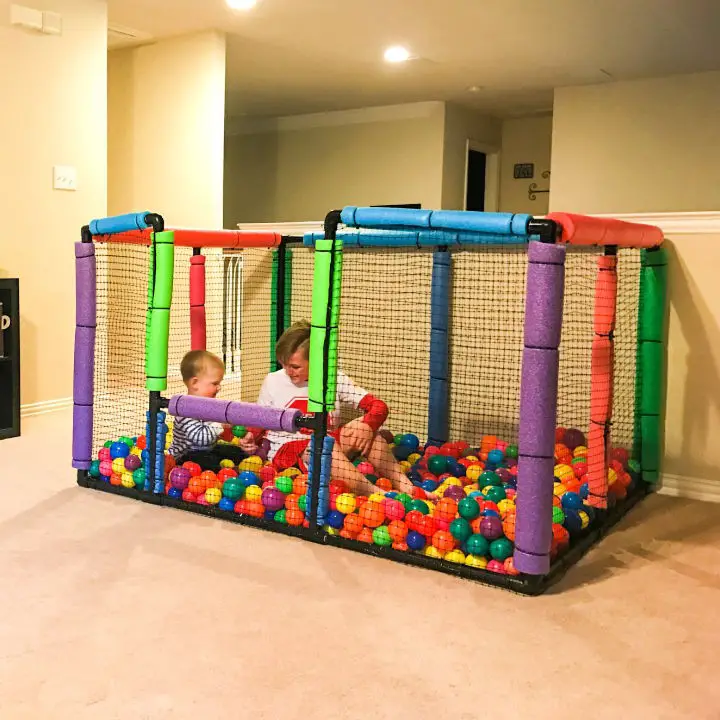
Transforming your living space into an immersive play area has never been easier. By creating your own PVC ball pit, you can ensure a secure and engaging experience for your little ones. This DIY project is remarkably versatile, accommodating any size constraints, and allowing you to tailor the fun zone to perfectly suit your available space and your children’s unique needs. With minimal upkeep required, this DIY masterpiece will become a cherished source of entertainment, providing a sense of serenity as you watch your kids enjoy themselves. Take the first step in crafting an unforgettable playtime experience by diving into this project today.
How to Make a Ball Pit – Step by Step
Transform your backyard into an instant playground with a DIY ball pit, perfect for entertaining kids at home. The process is surprisingly simple: just fill a kiddie pool with colorful balls and you’re ready to roll! To get started, choose the right pool size and number of balls that will create a fun and immersive experience. Consider adding some playful accessories like beach balls or pool noodles to take it to the next level. For a detailed guide on building this ultimate play area, visit lovelyindeed.com and discover why it’s not just kids who love playing in ball pits!
DIY Pvc Pipe Ball Pit for Children’s
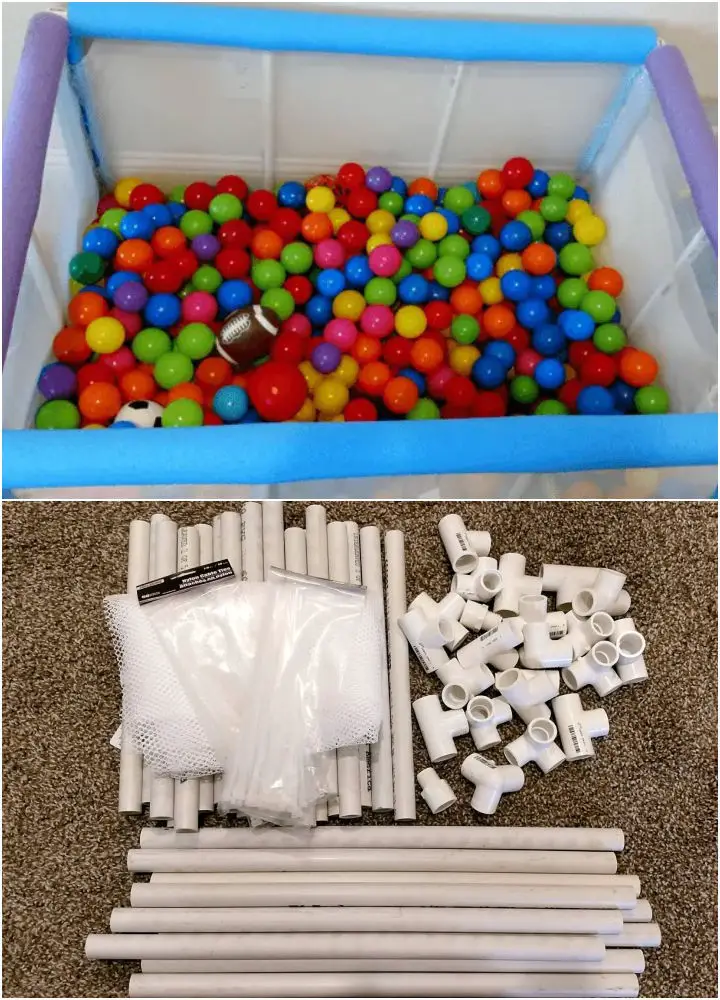
Transform the joy of crafting into a personalized ball pit for your little ones with this straightforward DIY guide. Utilizing readily available PVC pipes and basic materials, you can construct a secure and captivating play area that guarantees an abundance of fun. Perfectly suited for toddlers and infants, this custom-made ball pit not only offers a budget-friendly option but also a long-lasting and durable alternative to store-bought alternatives, ensuring hours of unadulterated playtime happiness. To follow the step-by-step tutorial, visit BRB I’m Crafting. Embark on this creative adventure with me, and let’s bring an ocean of smiles to your children’s faces together.
Cool Homemade Pvc Pipe Ball Pit
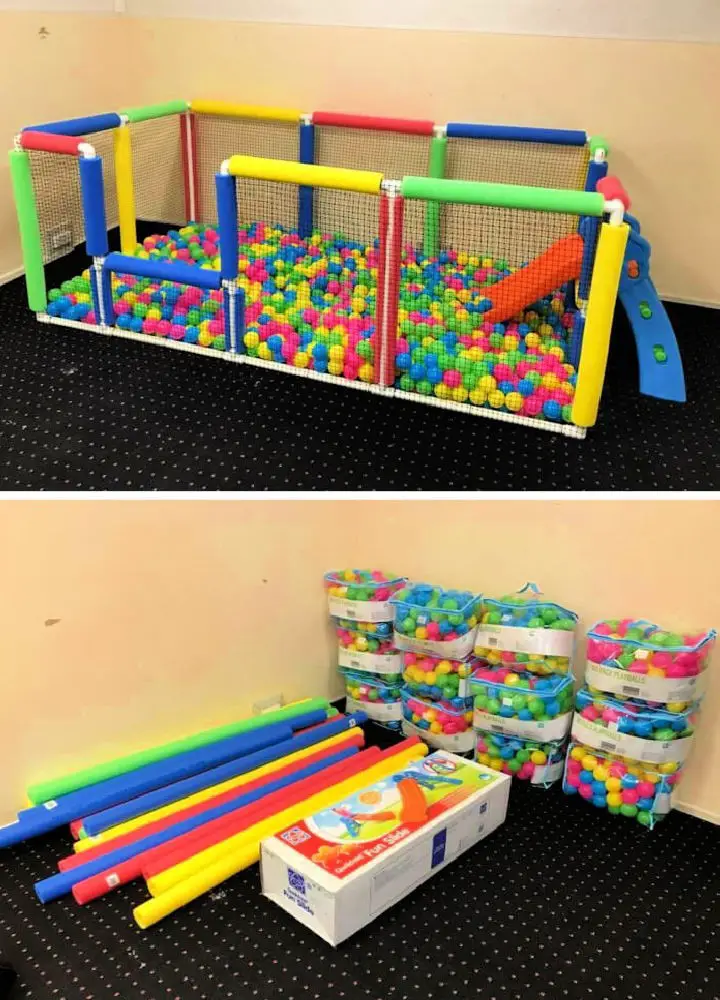
Transform any space into an immersive play experience with a DIY ball pit that’s perfect for kids of all ages. Not only is it a blast for toddlers, but pre-teens will also find endless entertainment within its colorful confines. And the best part? You can create this engaging haven for under $130 using readily available materials like PVC pipes, netting, and pool noodles. As an added bonus, the structure doubles as a cozy fort, providing a versatile toy that’s sure to delight both little ones and parents alike. To get started, simply head over to Boymamarussell for detailed plans and a comprehensive shopping list. With your DIY ball pit underway, you’ll be watching your kids’ imaginations soar in no time!
Make Your Own Ball Pit With Slide
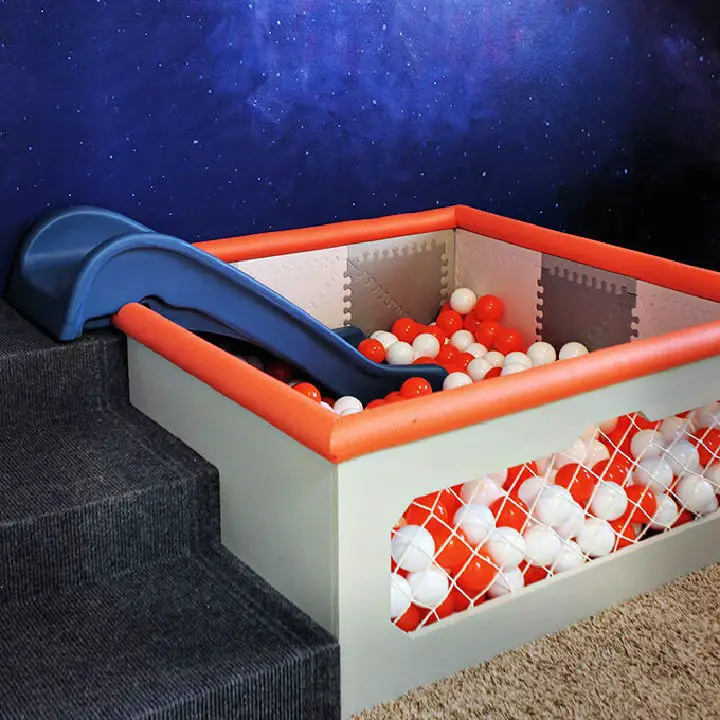
Transform your toddler’s playground into a vibrant hub of excitement by crafting a DIY ball pit with a slide! Our team at Gray House Studio has developed a captivating project that transforms plywood into a stimulating space for playful exploration. This engaging activity not only meets the energetic needs of little ones but also adds an element of adventure with built-in stairs and a slide, making it perfect for active play. This colorful ball pit is an excellent way to add joy and vibrancy to any playroom, creating an exhilarating experience for your child. With this project, you’ll learn how to build a kids’ paradise that’s sure to delight and inspire.
How to Build a Wooden Ball Pit for Balcony
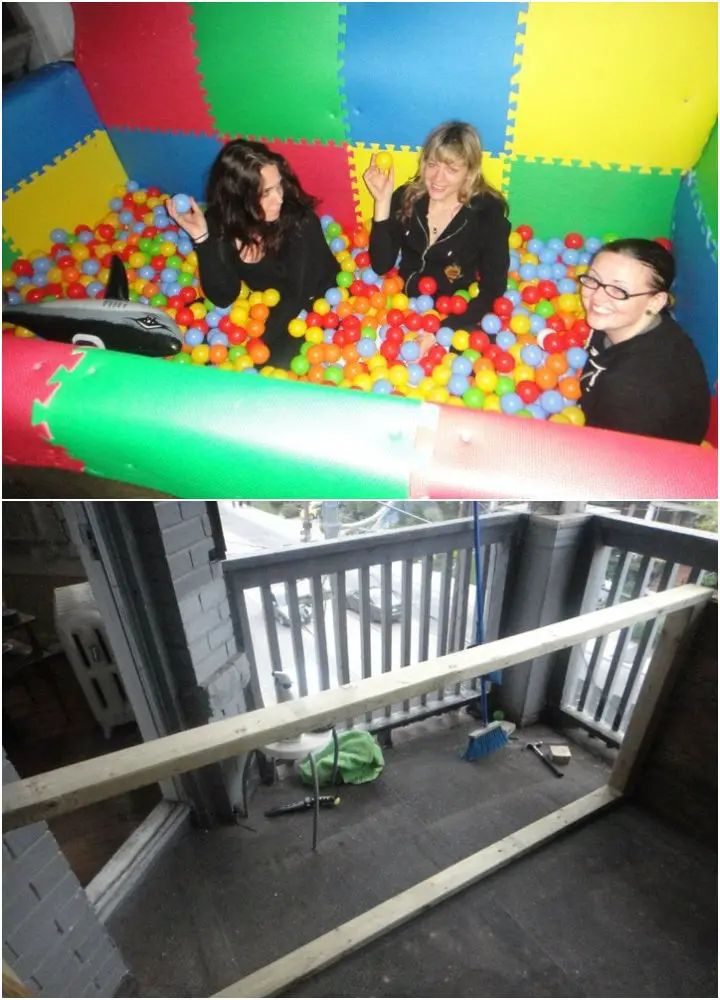
Turn your balcony into a kaleidoscope of delight with a DIY ball pit that’s perfect for kids and adults alike. This innovative playground in a box promises hours of unadulterated fun and stress relief. To get started, gather an assortment of playpen balls, sturdy wood, comfortable foam padding, and other materials to create a safe and vibrant space where laughter and playfulness thrive. Follow a step-by-step guide at Instructables to determine the ideal size for your ball pit, add some playful toys and accessories, and unleash the pure joy of colorful chaos on your balcony.
DIY Ball Pit Under 30 Bucks
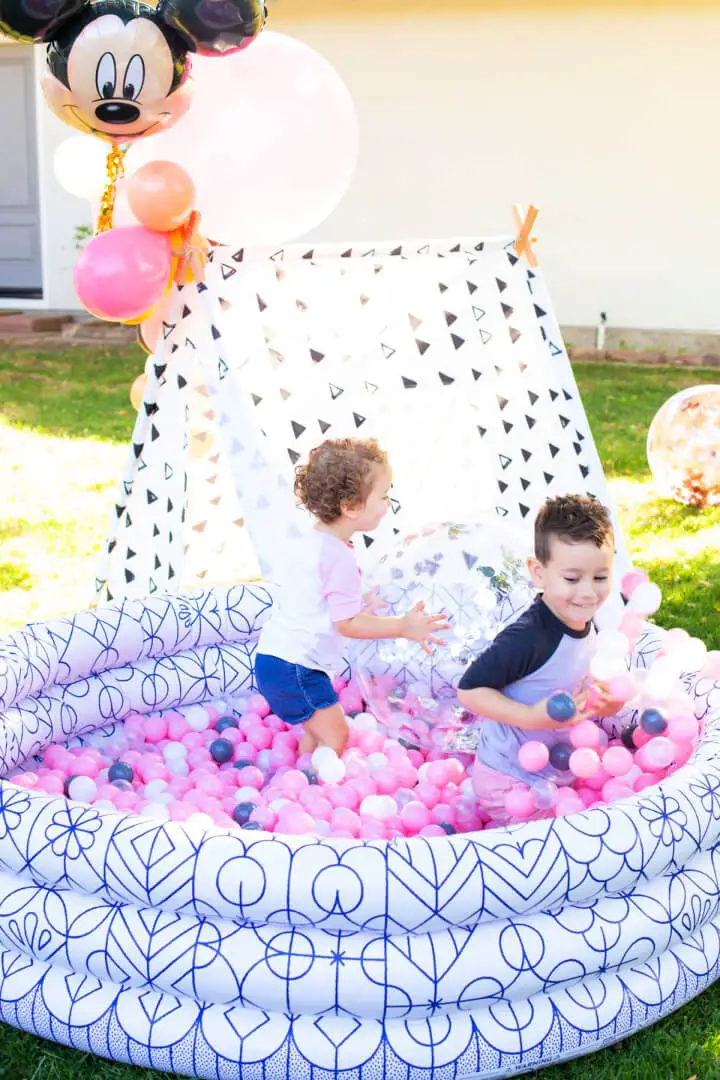
Indulge in the thrill of creating a budget-friendly yet engaging DIY ball pit with this straightforward guide. By combining an Intex crystal blue pool and 200 vibrant balls, you’ll craft an immersive indoor play experience that’s perfect for those snowy or rainy days when outdoor adventures aren’t feasible. With a total cost of approximately $31 (excluding the pump), this project is an accessible way to bring joy to your little ones. Our step-by-step instructions cover essential tips for achieving optimal ball coverage and setup, ensuring a safe and entertaining play area that’s sure to delight.
Handmade Ball Pit for Maymo

Add a dash of excitement to any celebration by creating a unique surprise for your furry friend. Imagine Maymo’s delight as he discovers a custom-made DIY ball pit overflowing with over 1000 vibrant balls. The rainbow-colored spectacle is sure to bring a smile to his face and a spring to his step. It’s an ingenious way to mark a special occasion, providing endless entertainment and joy for the entire family. For a deeper look at Maymo’s unforgettable reaction and some creative inspiration, check out the accompanying video.
How to Make a Foam Ball Pit Tutorial

Transforming a space into a fun zone is just a DIY foam ball pit away. Our comprehensive tutorial takes you by the hand, walking you through every step of creating a cozy and safe haven for kids and adults alike to enjoy. The journey begins with our informative video guide, available here: O.Crafts Video Tutorial. Join us as we dive into this exciting project, breaking it down into an easy-to-follow and engaging process that will have your very own foam ball pit up and running in no time. It’s the perfect solution for any occasion, whenever fun is on the agenda!
Building a Gaga Ball Pit With Wood
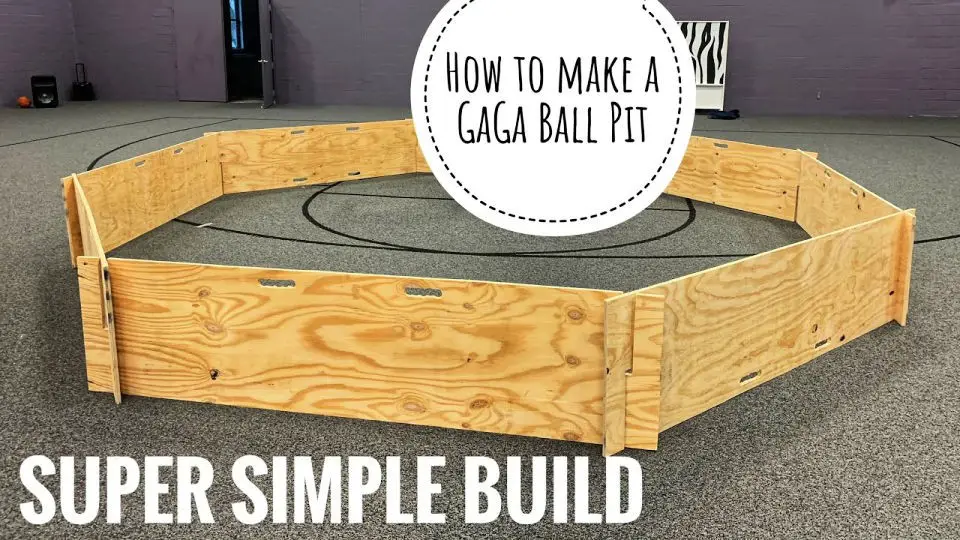
Create a Gaga Ball Pit with ease using our straightforward DIY guide. This comprehensive tutorial breaks down the process into manageable steps, ensuring a fun and safe play area for all to enjoy. Whether you’re building one in your community space or at home, learn how to craft ergonomic handles and safe edges that promote active play and inclusivity. You’ll also discover creative ways to repurpose everyday items like pool noodles to enhance safety and take your project to the next level.
Beginner-Friendly DIY Mini Ball Pit

Add a playful twist to your newborn photography by creating a mini ball pit at home. This DIY project requires minimal effort but yields impressive results. With its whimsical charm, the homemade ball pit is an ideal prop for capturing special moments during photo sessions. Discover how to make this delightful addition with our straightforward guide.
Make a Ball Pit Using Cardboard
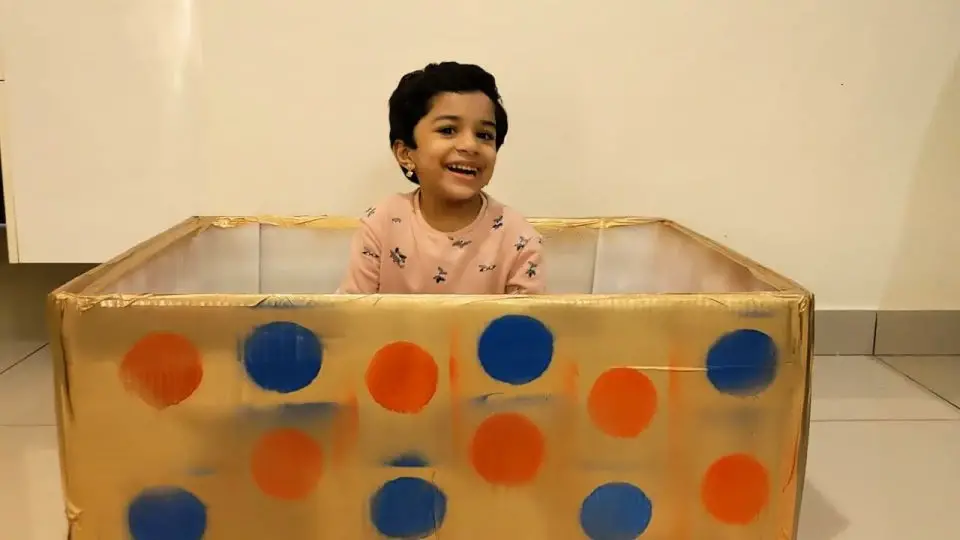
Transform your home into an immersive playground with a creative DIY project: crafting a cardboard ball pit. This accessible guide, inspired by SaraTara’s YouTube tutorial, is designed to empower you to build a safe and enjoyable play space using simple materials. By following these easy-to-follow instructions, you’ll be able to create a unique entertainment area that will captivate kids and adults alike. With its engaging and instructive content, this DIY endeavor becomes an effortless yet rewarding experience for the whole family.
Conclusion:
In conclusion, embarking on a DIY ball pit adventure can be an exhilarating experience that infuses your home with excitement and creativity. Our comprehensive guide takes you through each step of the process, from sourcing materials to conducting a thorough safety assessment, ensuring that your finished project is not only fun but also secure for users. By considering dimensions and calculating the ideal number of balls required, you can create a ball pit tailored to your unique space and needs. Furthermore, the prospect of customization and potential cost savings makes this endeavor both practical and fulfilling. If you’re seeking to bring a touch of playful magic into your home, our collection of 15 DIY ball pit ideas serves as the perfect starting point for your creative journey. Here’s to happy building!
