Why Choose DIY Contact Paper Projects?
Discover the joy of revamping your living space with DIY contact paper projects. These creative endeavors have taken the world by storm, and for good reason.
When it comes to affordability, contact paper projects are the clear winner. Gone are the days of breaking the bank on expensive decor items or materials. With contact paper, you can achieve high-end looks like marble or wood textures for a fraction of the cost.
But what truly sets contact paper apart is its versatility. This magical material comes in a staggering array of designs and textures, making it perfect for updating furniture, crafting decorative items, or adding a pop of color to your space. Whether you’re a seasoned DIY enthusiast or just looking to add some flair to your living room, there’s a pattern or texture out there waiting to be discovered.
And the best part? Applying contact paper is a breeze! With just a few basic supplies like scissors and a smoothing tool, even the most novice DIYer can transform their space with ease. It’s an accessible project that’s perfect for anyone looking to get creative without feeling overwhelmed.
For renters or those who love to switch up their decor frequently, contact paper is also a dream come true. This removable material leaves no residue behind, allowing you to update your space without worrying about permanent damage or risking your security deposit.
But perhaps the most exciting aspect of DIY contact paper projects is the opportunity they provide for creativity and personalization. These projects are an excellent way to put your unique spin on your home decor, reflecting your style and personality in a way that’s both fun and fulfilling. Whether you’re making over furniture, crafting wall art, or updating accessories, contact paper projects offer endless possibilities for self-expression.
In short, embracing DIY contact paper projects is the perfect way to breathe new life into your living space while staying within your means. It’s a creative outlet that’s both accessible and rewarding, offering a thrilling way to personalize your home and make it truly yours.
How to Apply Contact Paper Like a Pro: Quick and Easy Tips for Perfect Corners
If you’ve ever gazed at a piece of furniture in your home, wondering how it could be revitalized with a fresh new look, contact paper is an excellent solution. This budget-friendly option allows you to breathe new life into old furniture, adding texture, color, and patterns to any surface – whether it’s a table, desk, or countertop. In this guide, I’ll walk you through the simple process of applying contact paper in just three minutes, including expert tips for tackling those pesky corners. With my experience in DIY projects and home decor, I’m confident that this transformation will be both effortless and impressive, regardless of your skill level.
Preparation: Laying the Groundwork
Before commencing the application process, it’s essential to gather all the necessary materials and tools to ensure a seamless experience. A well-prepared applicant is better equipped to tackle any challenges that may arise during the process.The following materials are required:* Contact paper of your choice* Cleaning wipes or a damp cloth for surface preparation* A smoothing tool, such as an old credit card or plastic scraper, to achieve a precise fit* Precision cutter or scissors for trimming excess material* Ruler or measuring tape for accurate measurements* Heavy books (optional) to assist in flattening the contact paper if neededBefore applying the contact paper, it’s crucial to perform two essential pre-steps. First, thoroughly clean the surface where you’ll be applying the material to remove any dust, dirt, or grease that may interfere with the adhesive’s bonding properties.Next, measure and cut the contact paper to size, leaving a few extra inches for adjustment and trimming as needed.
Step-By-Step Instructions
To achieve a flawless application of contact paper, start by carefully aligning it with the surface’s edge, taking into account any directional patterns if applicable. Begin peeling back the backing from one end, slowly adhering the paper as you go. Next, use a smoothing tool to press the paper onto the surface, working your way outward from the center to the edges. This method helps eliminate air bubbles and wrinkles.As you apply the contact paper, remember to take it slow and steady. Peel back more of the backing as needed, smoothing out any wrinkles or air pockets that may form. For larger surfaces, having an extra pair of hands can be incredibly helpful in keeping the paper taut and smooth.When it comes to corners and edges, a little extra attention is required. To achieve a neat finish, cut slits in the contact paper at these points and then fold and smooth down one side before moving on to the other. For larger surfaces or more intricate designs, consider using a precision cutter to trim excess material and create clean lines around edges and corners.Finally, take a step back and inspect your work for any remaining air bubbles. If you find any, simply press them gently towards the nearest edge. In the rare event that a stubborn bubble refuses to budge, a small pinprick can release the air before you smooth it over.
Variations: Tailoring to Your Needs
Alternative Methods:
The approach described earlier, known as dry application, is just one part of the process. To take it to the next level, many experts recommend incorporating a wet application method as well. This involves lightly misting the surface with water before applying the contact paper. The benefits are twofold: first, it enables repositioning of the paper if needed; second, it facilitates easy removal of any air bubbles that may form during the application process.
Different Skill Levels:
When it comes to woodworking for beginners, it’s essential to start small. Begin by taking on projects that are manageable and will help you build your skills and confidence. A great place to start is with smaller items like coasters or small tabletops. These types of projects allow you to get a feel for working with wood and the various tools involved without feeling overwhelmed. As your skills improve, you can move on to more complex projects like larger surfaces or furniture pieces. Experienced DIYers may find it helpful to take their skills to the next level by experimenting with different patterns and textures. This will not only keep things interesting but also allow them to showcase their creativity and bring a personal touch to their woodworking projects.
Troubleshooting: Common Hiccups
To tackle air bubbles in your wallpaper, begin by pricking them gently with a pin. This will help release any trapped air, allowing you to smooth out the area and prevent further bubbling. When dealing with misalignment issues, take a more methodical approach. Carefully peel back the affected section of paper, taking care not to damage the surrounding areas. Then, reapply the wallpaper, ensuring it’s properly aligned before smoothing it out. The key is to address these issues as soon as possible, as delaying the adjustment can make it increasingly difficult and may even lead to further complications.
Why This Guide Rocks
Unlike many guides on the topic, this particular resource gains credibility from its foundation in personal experience and tried-and-true methods. The focus extends beyond mere task completion to ensuring a superior outcome that endures, particularly when addressing challenging areas like corners. It’s a comprehensive approach that yields a polished finish.
Video Tutorial
To further enhance your understanding of how to transform furniture and surfaces with contact paper, I recommend watching a helpful YouTube tutorial that provides a step-by-step visual guide. This complements the written instructions in this post, offering a unique perspective on the techniques discussed. By following these detailed steps, you’ll be able to quickly and cost-effectively give any piece of furniture or surface in your home a fresh new look. The process is incredibly satisfying, and you’ll marvel at the transformation. Once you’ve completed your project, feel free to reach out if you have any questions, comments, or want to share your success stories.
How to Get Started with DIY Contact Paper Ideas
Infusing personal style into your living space without breaking the bank is easier than ever thanks to the versatility of DIY contact paper projects. From revamping furniture to crafting custom decor items, this affordable material offers endless possibilities for adding a touch of elegance and personality to your home. With these steps as your guide, you’ll be well on your way to creating unique and budget-friendly masterpieces that reflect your personal taste.
Understand the Basics
Before embarking on your project, it’s essential to grasp the fundamentals of contact paper. This versatile adhesive material is available in a range of designs and textures, offering a multitude of creative possibilities. One of its most significant advantages is its affordability, ease of application, and suitability for temporary transformations – making it an ideal choice for renters or individuals who enjoy frequently updating their decor.
Choose Your Project
When embarking on a DIY journey, it’s essential to select a project that aligns with your skill level and personal interests. For those new to the world of DIY, starting with a simple task like covering a small object or organizing drawers can be a great way to build confidence and develop fundamental skills. On the other hand, more experienced DIY enthusiasts may prefer to tackle larger projects such as updating kitchen countertops or creating a realistic faux wood or marble finish on furniture, allowing them to showcase their expertise and creativity.
Gather Your Supplies
To begin with, after choosing your project, it’s essential to prepare all the necessary materials. You’ll want to have these basic supplies on hand: contact paper in the design of your choice, precision cutting tools like scissors or a craft knife, a tool for eliminating air bubbles such as a credit card or squeegee, and a measuring tape to guarantee accurate measurements. Depending on the specific project you’re working on, you may also need additional items, so be sure to check the requirements beforehand.
Prepare Your Surface
To achieve optimal outcomes when applying contact paper, it’s crucial to start with a surface that meets specific conditions. This means ensuring the area is spotless, completely dry, and exhibits a consistent texture. Any residual dust, dirt, or grease must be thoroughly removed, as these imperfections can hinder the adhesive properties of the contact paper and compromise the overall finish.
Measure and Cut
When preparing to apply contact paper, take the time to accurately measure the area you want to cover. Cutting a slightly oversized piece is generally recommended, as any excess can be trimmed away once the paper is in place. To achieve a smooth and secure application, prioritize precision when taking your measurements.
Apply with Care
Begin by carefully removing the backing from the contact paper, then slowly and smoothly apply it to your surface, starting at one edge. As you work your way along, use a smoothing tool to gently press out any air bubbles or wrinkles, taking care not to rush this process and ensure a smooth, professional finish.
Enjoy Your Handiwork
As you step back from the finished project, take pride in knowing that you’ve not only created something one-of-a-kind but also infused your personal style into your surroundings. The best part? This DIY masterpiece is reversible, allowing you to easily update or change it as your decor preferences evolve. The versatility of contact paper projects lies in their ability to be removed and reconfigured, making them a great option for those who enjoy experimenting with new designs and styles.The beauty of DIY contact paper projects lies in their accessibility and creative potential. By following these straightforward steps, you’ll unlock the power to transform ordinary items into extraordinary pieces of decor that reflect your unique personality.
DIY Contact Paper FAQs
When exploring the world of DIY crafting with contact paper, one may naturally encounter a multitude of queries. To address these concerns, we’ve compiled a comprehensive list of frequently asked questions, carefully crafted for clarity and practicality.
What is contact paper?
Contact paper is a versatile self-adhesive material that has gained popularity for its ease of use and affordability. Its applications extend beyond lining shelves and drawers to various DIY projects. One of the significant advantages of contact paper is its ability to mimic the appearance of more expensive materials, such as wood, marble, or metal, making it an attractive option for those looking to enhance their home decor without breaking the bank.
How do you apply contact paper without bubbles?
To successfully apply contact paper, begin by thoroughly cleaning the surface you’re working with, removing any dust, dirt, or debris that might interfere with adhesion. Next, measure out the correct amount of contact paper, leaving a small margin for adjustments as needed. With your material prepared, start by carefully removing a small portion of the backing and aligning it to your desired starting point. From there, peel and stick the paper in sections, using a tool like a squeegee or credit card to smooth out any air bubbles that form along the way. Should larger bubbles arise, gently lift the paper back and re-smooth the area to ensure a seamless finish.
Can contact paper be removed easily?
One of the significant benefits of using contact paper for decorating is its ease of removal. This feature makes it particularly suitable for renters or individuals seeking temporary decor changes. To effortlessly remove the paper, start by gently peeling it from a corner. If the adhesive proves stubborn, a hairdryer on a low heat setting can be employed to warm the surface, rendering the paper easier to remove without leaving any residue behind.
Is contact paper durable?
While contact paper is surprisingly resilient for daily usage when applied and maintained properly, its durability can be influenced by several factors. The quality of the paper itself, the surface it’s applied to, and the amount of wear and tear it encounters all play a role in determining how long it will last. Areas prone to high moisture or direct heat exposure may see a shorter lifespan compared to other areas. To ensure optimal performance, select a high-quality contact paper and adhere to the manufacturer’s guidelines for use and upkeep.
Can contact paper be used on countertops?
When it comes to giving your kitchen or bathroom a quick makeover, contact paper is an affordable and effective option. This versatile material can be used to temporarily transform countertops, providing a new look without breaking the bank. Despite its water-resistance, it’s essential to remember that contact paper isn’t entirely waterproof or heat-resistant. To ensure the surface remains intact, avoid placing hot items directly on it and promptly clean up any spills to maintain the appearance and longevity of the contact paper.
How do you cut contact paper precisely?
To achieve precise cuts, start by meticulously measuring the area you’re about to cover. Record these measurements directly onto the back of the contact paper using a pencil and a ruler for crisp, straight lines. For more complex shapes, consider creating a template from paper or cardboard before cutting. When executing the cut, employ a sharp craft knife or scissors on a protective cutting mat to safeguard underlying surfaces. Taking your time and double-checking your measurements can lead to a neat, professional-grade finish.
Can contact paper be used on furniture?
When it comes to updating or personalizing furniture, contact paper is an excellent choice. This versatile material can be applied to a wide range of smooth, clean surfaces, from tabletops to drawers to dressers. To achieve a professional-looking finish, start by ensuring the surface is spotlessly clean and dry. Then, use a smoothing tool to carefully apply the contact paper, working out any air bubbles that may form as you go.
15 Unique DIY Contact Paper Ideas
Elevate the aesthetic of your surroundings by repurposing ordinary materials into extraordinary designs. Here, we’ll dive into 15 innovative and easy-to-conceive DIY contact paper projects that will revolutionize your living or working space.
Burl Wood Ikea Dresser Hack Using Contact Paper
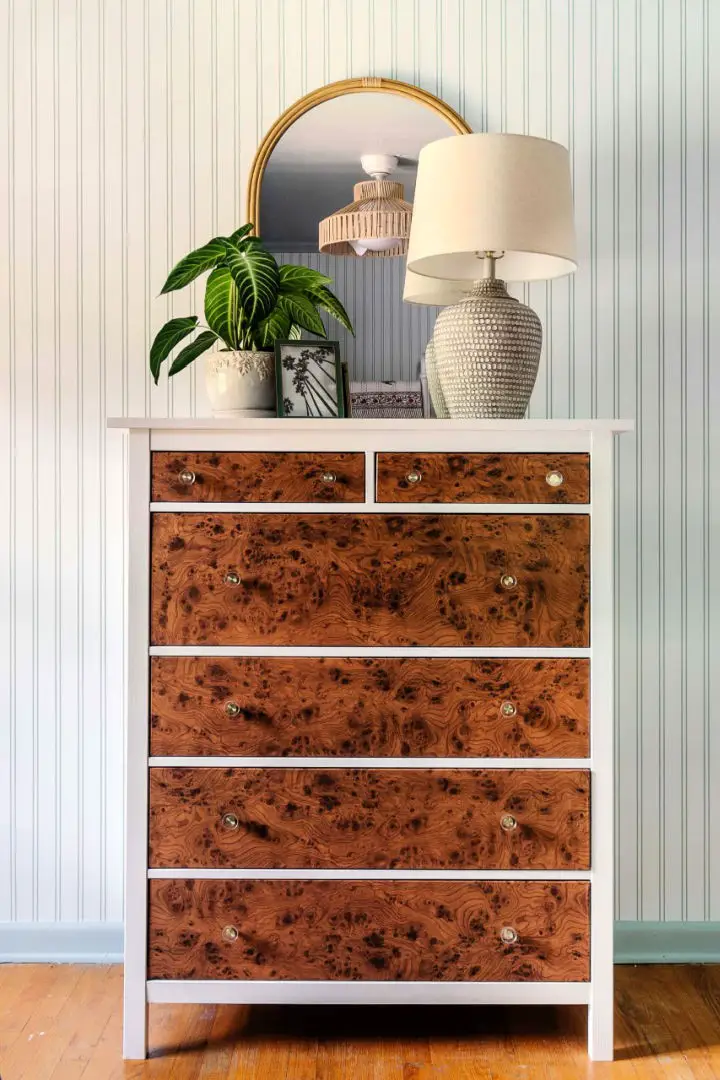
Elevate your IKEA dresser from ordinary to extraordinary by incorporating the rich, luxurious look of burl wood into its design. This budget-friendly DIY hack utilizes burl wood print contact paper, allowing you to achieve a high-end vintage aesthetic for a mere $30 and an hour’s effort. Perfect for those seeking to infuse their home with a touch of refinement and sophistication without sacrificing their wallet’s well-being. Follow our straightforward instructions at Blesser House to discover how to transform your furniture into a one-of-a-kind masterpiece.
Making a Contact Paper Kitchen Counters
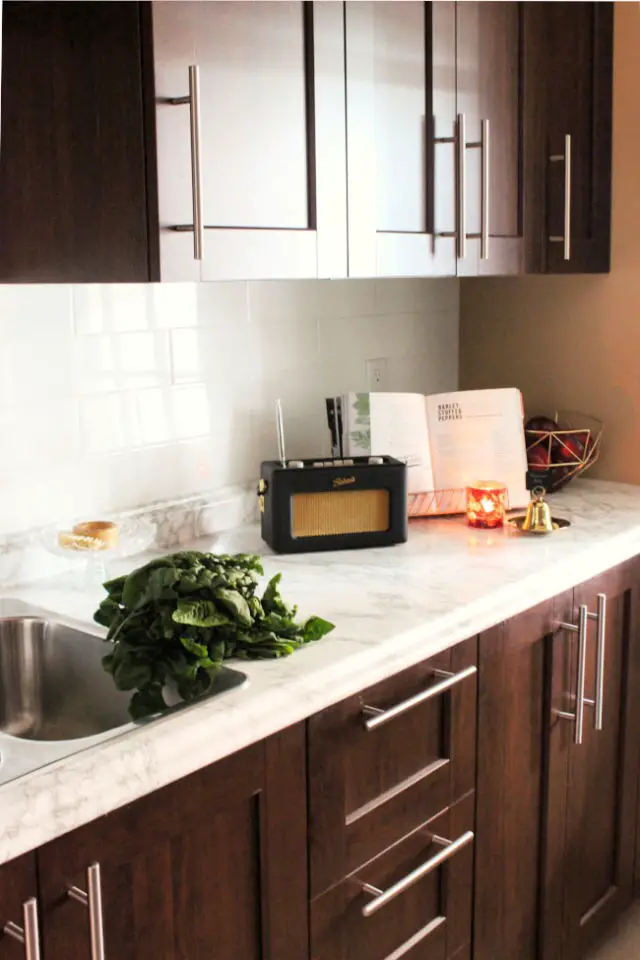
Transform your kitchen’s dark, task-oriented spaces with a renter-friendly update that’s not only budget-friendly but also reversible! Achieve a fresh look without making permanent changes. This DIY project involves applying contact paper to your counters, which provides a touch of elegance while being mindful of tricky areas like sinks. It’s essential to note that contact paper is not heat-resistant, so caution is advised when using it. For a comprehensive tutorial and additional insights, visit The Interior DIYer for step-by-step instructions.
Marble Coaster With Contact Paper
Elevate the look of any room by transforming ordinary coasters into stunning marble masterpieces using this effortless DIY hack. With a mere 10 minutes invested, you can add a touch of sophistication and elegance to your space. The required materials are minimal: square tiles, marble contact paper, felt squares, scissors, and Sikkens contact spray adhesive. Follow our straightforward steps to breathe new life into your coasters. For a comprehensive guide and video tutorial, visit The Whimsical Wife. Experience the thrill of transforming your home décor with this chic and easy-to-follow DIY project today!
Beautiful Contact Paper Privacy Window

Discover the ease of transforming your windows into stunning, private sanctuaries using an innovative DIY approach. This comprehensive guide is perfect for renters seeking non-permanent solutions or anyone looking to enhance their space’s aesthetic without compromising natural light. By harnessing the power of contact paper, you’ll not only achieve improved privacy but also add a touch of elegance to your room. Whether you’re aiming to create a cozy retreat or simply require a little extra seclusion, this engaging project offers step-by-step instructions and valuable tips to ensure success.
How to Make a Drawer Liners

Discover the simplicity of transforming your windows with a Beautiful Contact Paper Privacy Window. This DIY guide is perfect for renters or anyone seeking a non-permanent solution that balances privacy with natural light. By embracing creativity, you can turn ordinary sheets of contact paper into an elegant and functional addition to any room. Ideal for spaces where a touch of seclusion is desired without compromising the flow of natural light.
Easy DIY Marble Planters
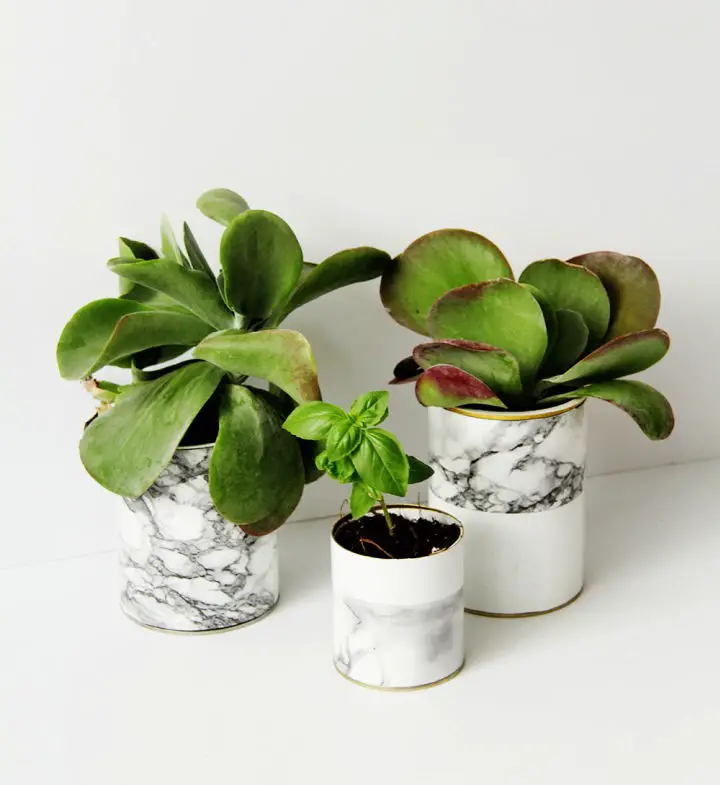
Want to add a touch of elegance to your space without sacrificing your budget? Look no further! By following Fall For DIY’s straightforward instructions, you can create stunning marble planters using ordinary household items. Not only will this project breathe new life into your resilient basil or trendy succulents, but it’ll also help you upcycle and personalize your surroundings with minimal effort required. All you need to get started is cylindrical packaging, glue, a craft knife, and some cleverly designed marble contact paper. With these simple materials, you can give your space the stylish makeover it deserves without breaking the bank.
Make a Wooden Paper Tray
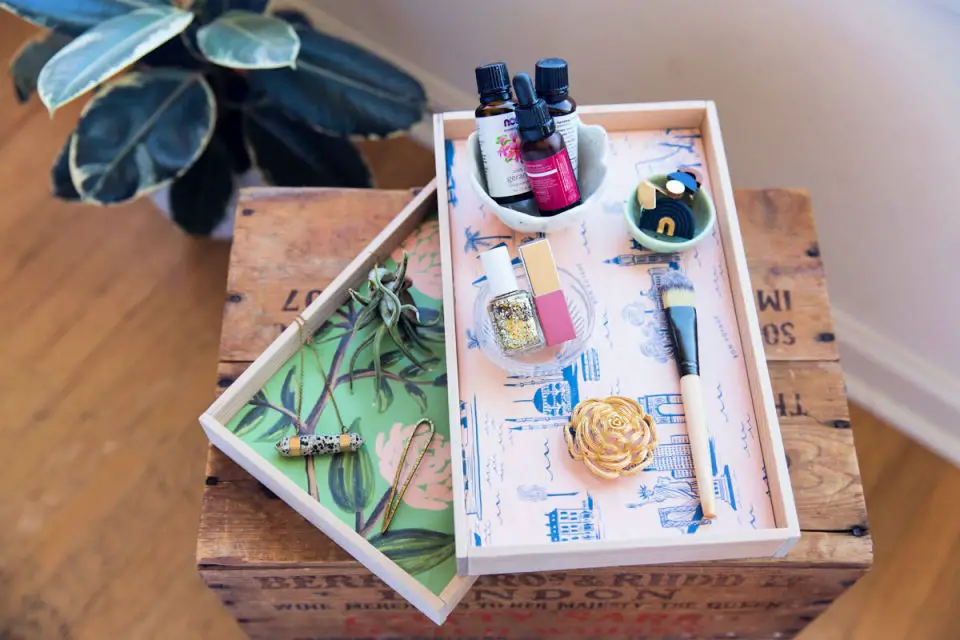
Transform your workspace with a one-of-a-kind wooden paper tray! This practical yet stylish DIY project combines functionality with flair, perfect for organizing letters, displaying trinkets, or adding a touch of personality to any room. With easy-to-follow instructions from DIY.DunnLumber, you’ll learn how to select the ideal wood and complement it with a decorative paper that reflects your unique style. This affordable and accessible DIY endeavor makes for an exceptional gift idea or a thoughtful addition to your home decor.
Making a Jewelry Box
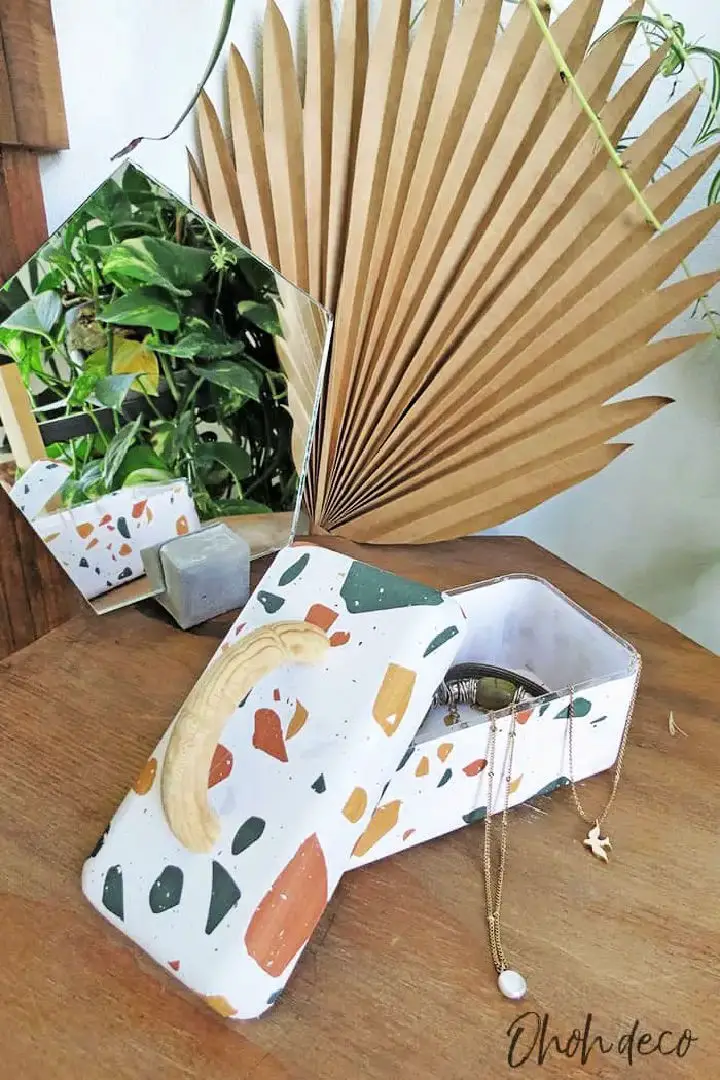
Transform a discarded chocolate box into a unique and eco-friendly jewelry box with Ohoh Deco’s creative DIY project. This upcycled masterpiece not only showcases your crafting skills but also highlights your commitment to sustainability. Perfect for those who value both functionality and style, this personalized storage space allows you to keep your most treasured jewelry pieces organized. By repurposing readily available materials like printable paper, wooden rings, and a chocolate box, you’ll create an affordable and speedy project that can be customized with your choice of designs. Whether storing delicate necklaces or safeguarding small mementos, this handmade jewelry box is sure to add a touch of whimsy to your surroundings.
Make Your Own Brushed Gold Vase
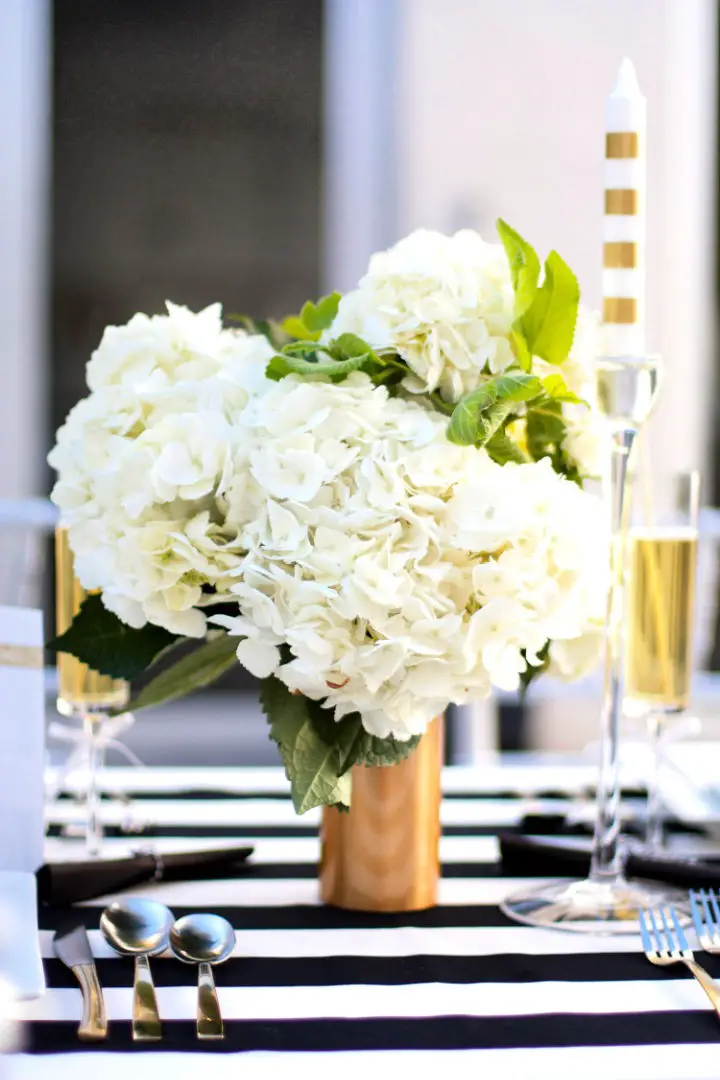
Transforming ordinary vases into stunning works of art is now easier than ever with this DIY Brushed Gold Vase tutorial from the creative genius Kristi Murphy. A self-proclaimed contact paper enthusiast, Kristi shares her expertise by providing a step-by-step guide on how to wrap your vases in elegance, starting with measuring and cutting the brushed gold contact paper to perfectly fit each vase. The result is a flawless and bubble-free finish that adds an extra touch of sophistication to any room, making it perfect for special occasions or simply revamping your home decor. With Kristi’s guidance, you can start creating your own unique brushed gold masterpieces today. For the full tutorial, visit Kristi Murphy’s DIY Blog.
DIY Marble and Copper Stationery
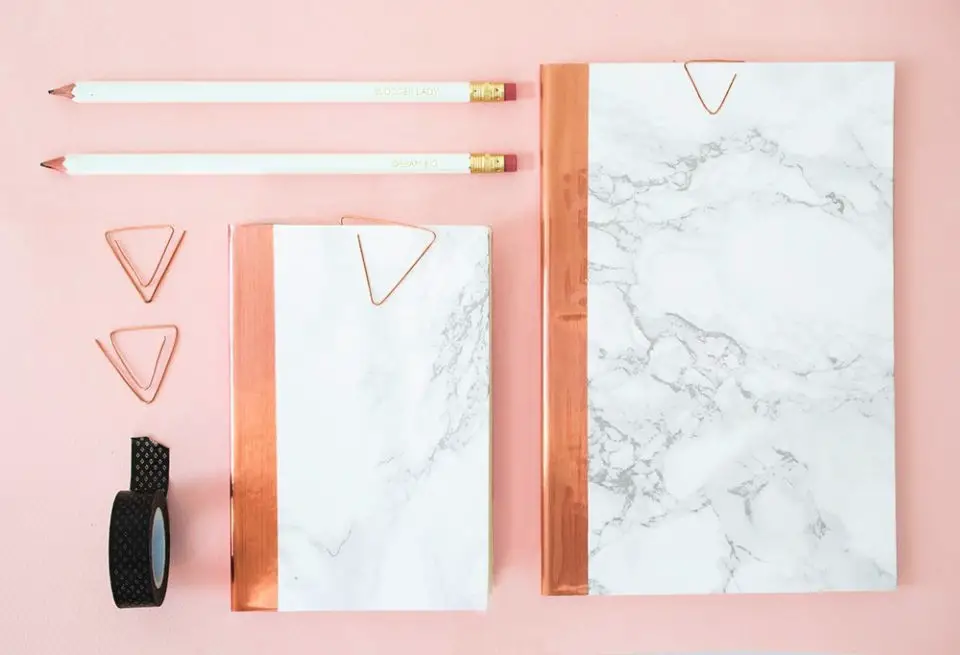
For those who revel in the joy of stationery, The Lovely Drawer has an exclusive treat in store. A delightful DIY project awaits, harmoniously combining the chic essence of marble and copper. This comprehensive guide will guide you through crafting a one-of-a-kind, personalized notebook and geometric paperclips that exude elegance. With straightforward steps and readily available materials, the urge to infuse every stationery item with this luxurious duo might be overwhelming. Nevertheless, these unique treasures are perfect for elevating your workspace or gifting to loved ones. Unleash the magic of transforming ordinary stationery into extraordinary keepsakes today!
DIY Contact Paper Used as Wallpaper
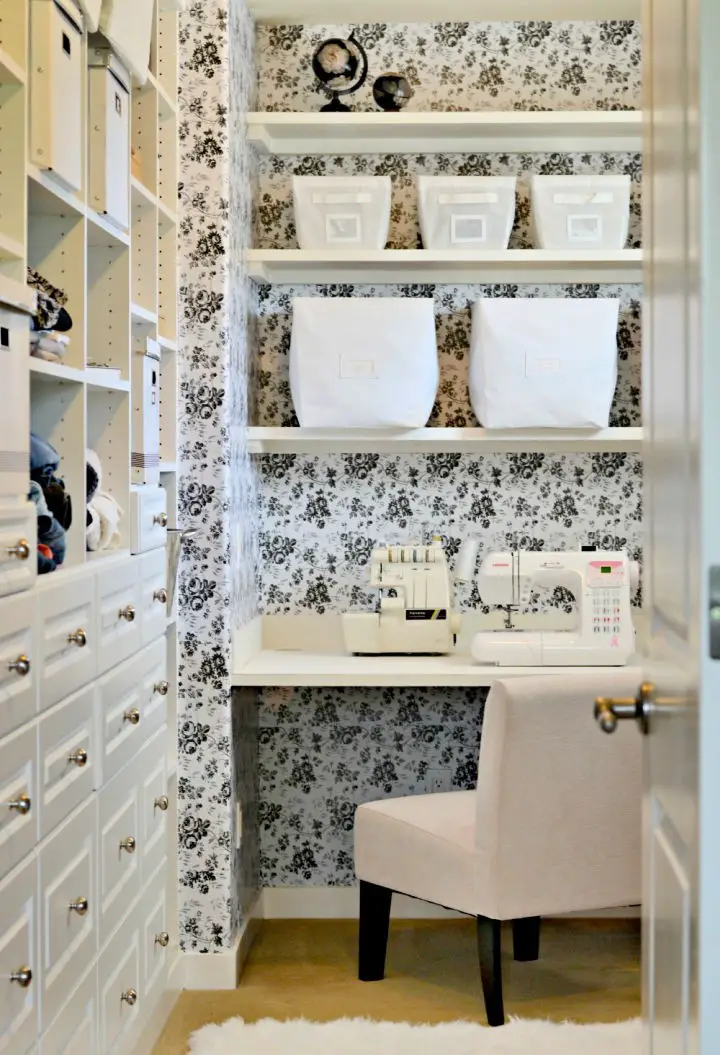
Transforming your space on a budget has never been more accessible with the power of contact paper as an innovative wallpaper alternative. By embracing imperfection, you can give your master bedroom closet a stunning makeover for under $20, just like Rachel Teodoro did at her blog. Her step-by-step guide walks you through the DIY process, highlighting essential tools and offering valuable tips to help you achieve a personalized space that’s both easy to apply and remove. This approach is ideal for renters seeking a temporary décor solution that still packs a visual punch. Discover the limitless possibilities of using contact paper beyond drawer lining and unlock your creative potential today!
Faux Marble Table Lamp Makeover with Contact Paper
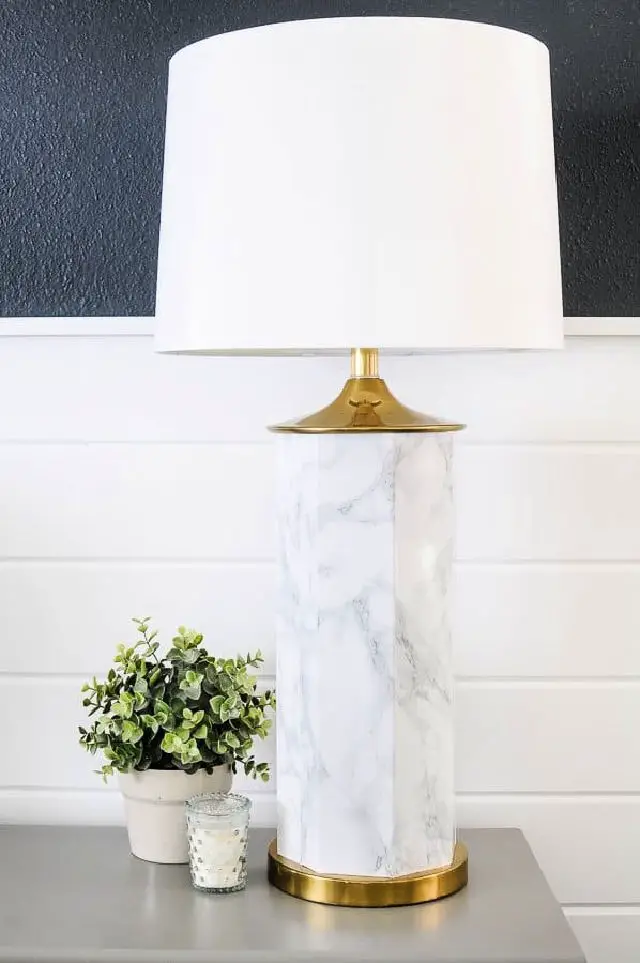
Transform an old lamp into a stunning faux marble table lamp with this simple DIY project. This budget-friendly solution uses contact paper to replicate the high-end look of marble at a fraction of the cost. Perfect for thrift store finds or updating existing lamps, this method requires only basic tools and materials. By following these straightforward steps, you can turn a dated lamp into a chic, designer-inspired piece that adds sophistication to your home.
Make a Decorative Marble Plates
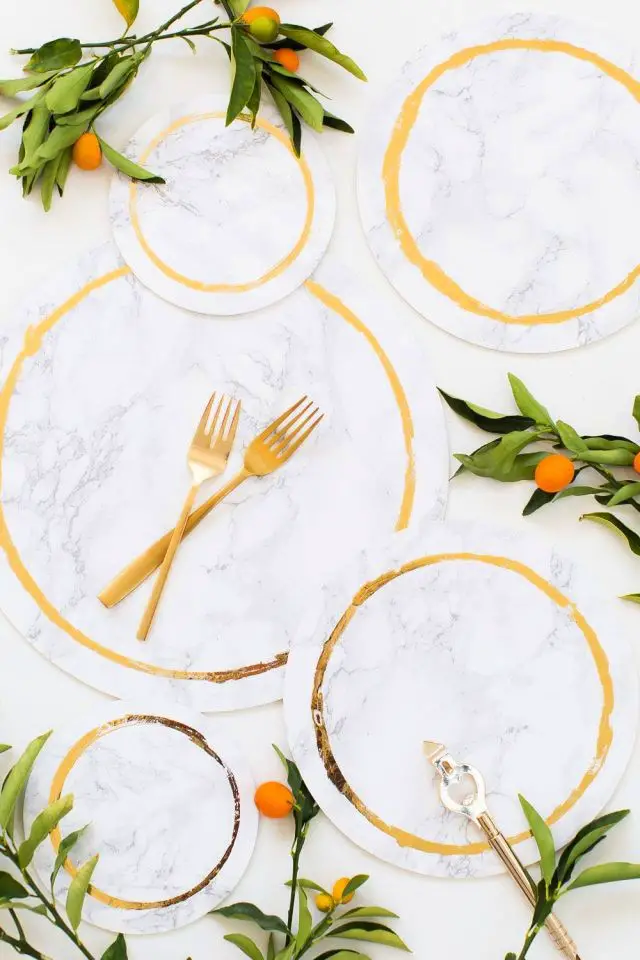
Transform any gathering into a sophisticated soiree with the effortless charm of DIY marble plates from Sugar & Cloth Decor. This straightforward tutorial provides the perfect blend of affordability and elegance, making it an ideal addition to any setting.
To create these chic decorative pieces, you’ll need just a few essential materials: wood or plywood circles, marble contact paper, and gold foil. Not only do these plates exude refinement, but they’re also reusable, making them a practical choice for special events or everyday use.
Embark on this engaging project and showcase your crafty skills and refined taste with a dash of sophistication in every setting.
DIY Table Makeover
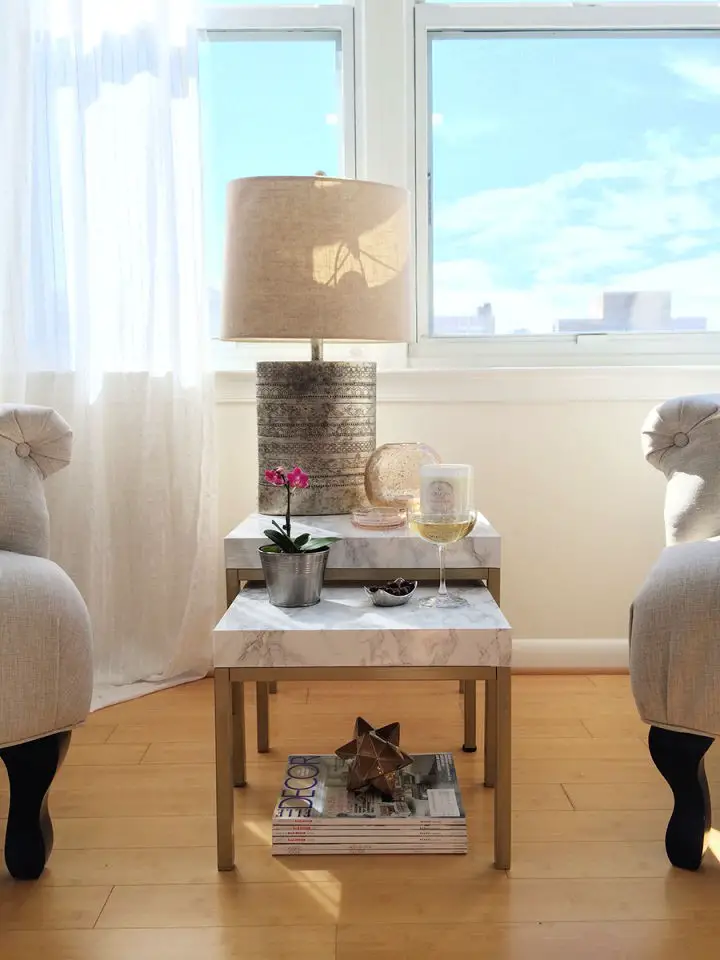
Transform your space with our step-by-step DIY table makeover guide on Splendor Styling. With just gold spray paint and marble-ike contact paper, you can turn old tables into stylish showstoppers without breaking a sweat. Our comprehensive guide takes you through the process, from applying painter’s tape to achieving a sleek finish with minimal effort. No heavy machinery needed – perfect for a weekend DIY project that will elevate your home’s ambiance while staying budget-friendly. Let our expert tips inspire you to get creative and start your transformation today!
Copper Patterned Iphone Case
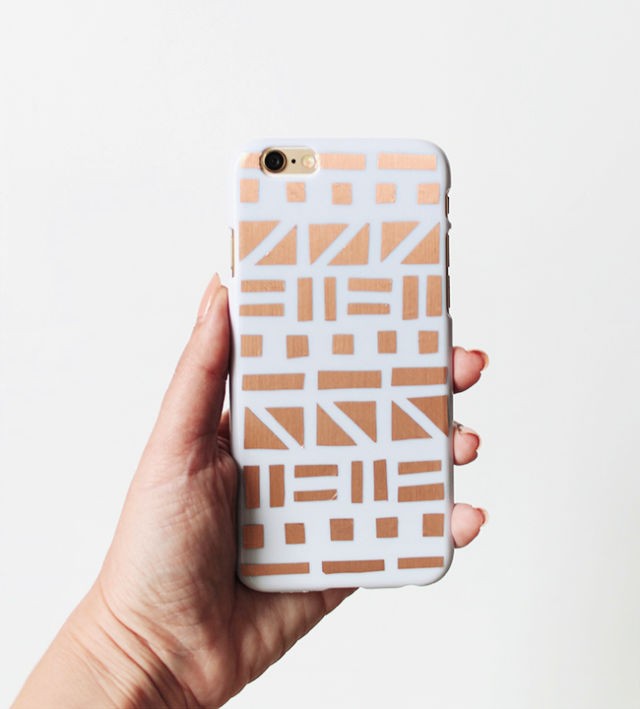
Transform your iPhone’s look with a one-of-a-kind copper patterned case, achieved through a straightforward DIY process. You’ll need just a few basic materials: a plain case, metallic contact paper, small scissors, tweezers, and optionally, Mod Podge to seal the design. Follow a simple step-by-step guide to cut out, arrange, and adhere shapes onto your case, taking care to align the contact paper’s grain for a uniform shine. This project is ideal for a relaxing crafting session, allowing you to unleash your creativity and personalize your device.
Conclusion:
As you conclude this exploration of 15 distinct DIY contact paper ideas, it’s clear that embracing this budget-friendly approach to home decor offers an unparalleled creative outlet. By repurposing countertops, furniture, and other surfaces, the versatility of contact paper shines through, making it a go-to resource for DIY enthusiasts seeking unique ways to personalize their living spaces. With this comprehensive guide serving as your trusted companion, you’ll find the confidence to dive in, apply your skills, and revel in the transformative power of your projects. By doing so, not only will your interior design flourish, but your creative expression will be ignited, demonstrating that even the smallest of changes can have a profound impact.
Author Bio
As a seasoned DIY enthusiast and home decor blogger, I’ve developed a profound appreciation for empowering others to transform their living spaces. Over the years, my expertise has been honed through extensive exploration and sharing of innovative ideas, resulting in practical, detailed, and inclusive guides that cater to all skill levels. This passion is reflected in each guide, where I aim to inspire readers to make meaningful changes in their homes.
