Why Make Your Own DIY Concrete Stool?
Embarking on a DIY concrete stool project offers a trifecta of benefits – it’s cost-effective, allows for personalization, and results in a durable piece that can be sustained. The initial investment is minimal, as materials are often inexpensive. This flexibility enables you to craft a stylish addition to your home without breaking the bank.
Moreover, making your own stool grants you the liberty to tailor it to your distinct taste and decor. From selecting a vibrant color palette to incorporating unique textures or patterns, the possibilities for customization are endless, allowing you to infuse your personal style into the final product.
Concrete is renowned for its strength and longevity, ensuring that your DIY stool will withstand wear and tear, both indoors and outdoors. This quality makes it an ideal addition to any living space.
As you choose eco-friendly materials or repurpose items you already have, you’re not only contributing to a more sustainable future but also adding a story to your piece – one that’s uniquely yours.
Furthermore, engaging in this DIY project fosters skill development. You’ll learn about working with concrete, designing furniture, and even basic construction techniques – valuable skills that can be applied to future projects.
Lastly, the sense of accomplishment you’ll derive from creating something functional and beautiful with your own hands is unparalleled. It adds a personal touch to your space that you can be proud of, making it a truly rewarding experience.
How to Make a Concrete Stool
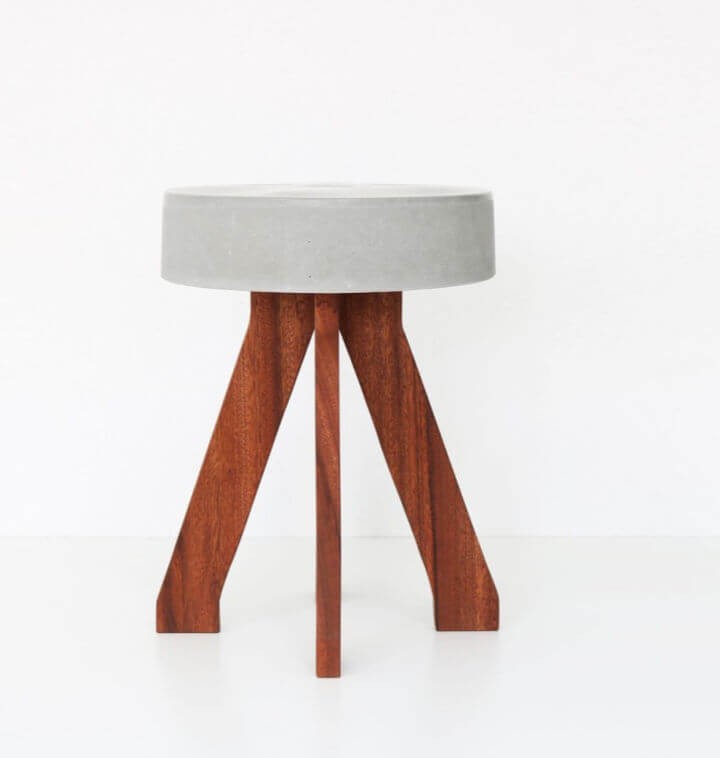
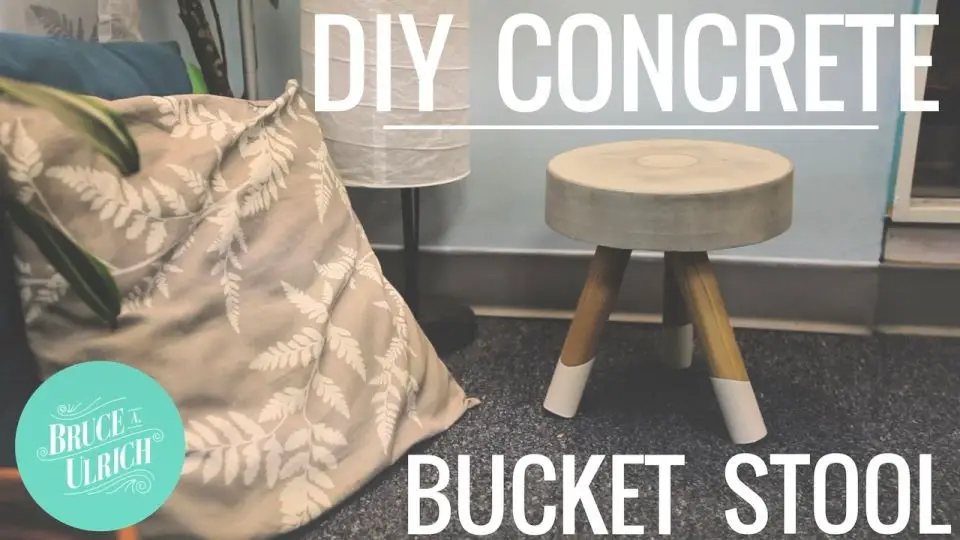
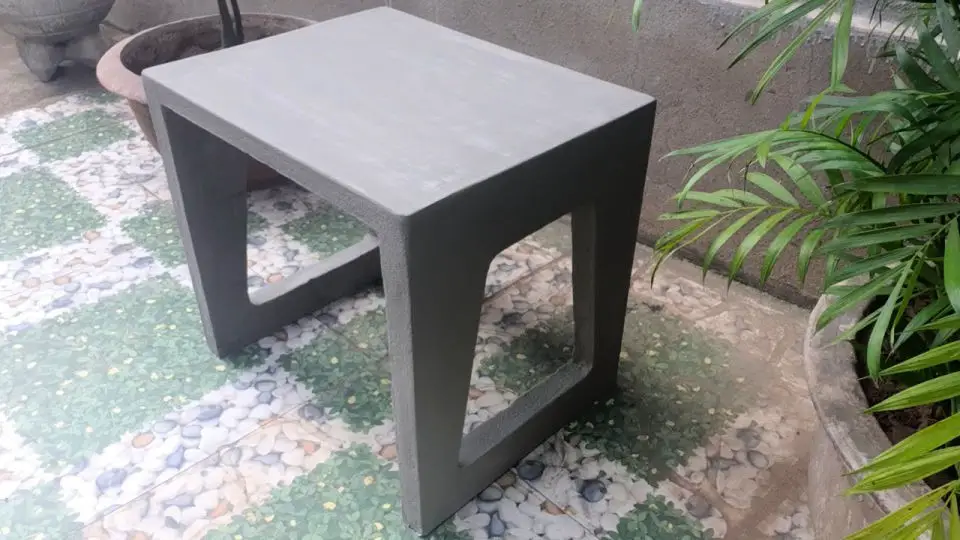
To elevate your home’s aesthetic with a touch of modern simplicity, creating a DIY concrete stool is an excellent project to undertake. This comprehensive guide will lead you through the process with ease, enabling anyone to produce professional-quality results using basic tools and materials. Let’s embark on this journey together and craft our very own unique bucket stool 2.0, infusing your space with a modern twist.
What You’ll Need:
To bring your woodworking project to life, you’ll need a few essential tools and materials. For starters, choose a type of wood that suits your design, such as mahogany or another preferred variety. Once you’ve selected your wood, use a jigsaw to cut it to the desired shape. Create a template using cardboard to guide your cuts and ensure accuracy.Next, turn to your power tools, including a cordless drill for drilling holes and driving screws. A random orbit sander is perfect for smoothing out the wood’s surface, while hand sandpaper can be used for more precise finishing touches. For assembling the project, you’ll need L brackets, wood glue, nuts and bolts.When it comes time to create a concrete base or foundation, have on hand a mix of concrete and a large bucket for mixing. A putty knife is necessary for applying small amounts of adhesive or filler, and sandpaper can be used again for final touches. Finally, finish your project with a coat of Danish Oil, which will protect the wood and enhance its natural beauty.
Step 1: Make the Leg Template
To ensure uniformity and precision while cutting the wood for your stool’s legs, start by creating a template using a piece of cardboard. Cut out the desired shape and size from the cardboard to serve as a guide for your woodworking. This simple step will help you achieve crisp, accurate cuts and a sturdy stool in the end.
Step 2: Cut the Wood
To begin crafting the wooden table, start by tracing the leg pattern onto the mahogany wood using your template as a guide. For precision and control, utilize a jigsaw for cutting out the legs. When navigating tight corners or making intricate cuts, take a proactive approach by drilling holes to serve as guides for the saw blade. This ensures a smooth and accurate cut, ultimately resulting in a well-crafted wooden table.
Step 3: Prepare the Legs for Assembly
To ensure a seamless join, create precise notches on the top of one set of legs and the bottom of another. This will guarantee a snug fit. Utilizing sandpaper, carefully smooth out any rough edges until the pieces interlock flawlessly.
Step 4: Sand and Smooth
To achieve a refined appearance and prevent potential splintering hazards, it’s crucial to meticulously smooth out the wooden legs of your stool. Begin by using a random orbit sander to effortlessly remove any rough edges or imperfections. For areas inaccessible to the sander, rely on hand sandpaper to deliver precise, detailed results.
Step 5: Attach L Brackets
To ensure the stability and longevity of your L-bracket construction, it’s essential to fasten the legs securely using nuts and bolts. Before doing so, apply a small amount of wood glue to the joints where the legs meet, allowing the bond to form a strong foundation for the structure. This step is vital in preventing any unwanted movement or separation that could compromise the overall integrity of your creation.
Step 6: Mix the Concrete
Combine the concrete mixture with water in a substantial container, gradually adding the ingredients to prevent any dry lumps from forming. As the mixture takes shape, eliminate air pockets by gently agitating the liquid or giving the bucket a series of gentle taps along its edges.
Step 7: Molding and Setting
To create a sturdy foundation, pour the concrete into the mold, followed by the insertion of the leg assembly. Verify that the latter is fully submerged and aligned within the former. Permit sufficient time for the concrete to achieve full setting and hardening.
Step 8: Unmolding
Gently stretching the sides of the bucket is an effective way to dislodge the stool and facilitate its removal. As you do so, you may need to use a bit of force to overcome the initial resistance. Once the stool is free, take a putty knife and smooth out any rough edges at the bottom to give the bucket a seamless finish.
Step 9: Finishing Touches
For a refined finish, begin by carefully sanding the bottom edges of the wood until they are silky smooth to the touch. Next, apply a rich coat of Danish Oil to the wooden legs, allowing it to deeply nourish and protect them, while also accentuating their natural beauty.
Video Tutorial
Making a DIY concrete stool is an accessible project for anyone looking to add a touch of modern elegance to their space. To help you achieve this, we’ve created a comprehensive written guide that pairs perfectly with our step-by-step video tutorial on YouTube. By following along, you’ll find the process easier and more enjoyable. As you craft your new piece of furniture, you’ll gain a sense of accomplishment from creating something both beautiful and functional with your own hands.
FAQs on DIY Concrete Stool
Crafting a DIY concrete stool can be an incredibly fulfilling endeavor. As you embark on this project, it’s natural to have questions. To ease your journey, we’ve compiled answers to the most commonly asked queries to set you up for success.
What materials do I need to make a DIY concrete stool?
To craft a DIY concrete stool, you’ll need to gather the following materials:
A reliable supply of concrete mix
A sturdy bucket or container suitable for mixing and molding the concrete
Water for hydration and consistency
Wooden legs, preferably made from mahogany or your preferred type of wood
Power tools such as a jigsaw and cordless drill for cutting and assembling the wooden components
Sandpaper and a random orbit sander for smoothing out any rough edges
L brackets, nuts, and bolts for securing the wooden legs to the concrete base
Danish Oil for finishing and protecting the wood’s natural beauty
Cardboard or cardstock for creating a template to shape your leg design
A putty knife or similar tool for smoothing out imperfections in the freshly poured concrete
How long does it take for the concrete to set?
The time it takes for concrete to set can be influenced by the specific product and environmental factors involved. While it’s possible to remove the mold from your stool after around 24 to 48 hours, it’s generally recommended to wait a full 28 days before considering the concrete fully cured. This allows the mixture to achieve its maximum strength and stability.
Can I customize the look of my concrete stool?
To give your concrete stool a personal touch, you have numerous options. Start by adding some color with pigments, which can produce a bold and vibrant effect or a more subtle tone. For added visual interest, embed objects like stones, glass pieces, or tiles to create a mosaic-like design. You can also experiment with different mold shapes to produce unique silhouettes that set your stool apart. To further customize the look, consider staining or painting the wooden legs for a striking contrast.
How do I prevent my concrete stool from cracking?
To prevent cracking, it’s crucial to optimize the concrete mixture and minimize air pockets. One common mistake is using too much water, which can compromise the structure’s integrity. To avoid this, carefully measure the water-to-cement ratio to achieve a suitable consistency. Once you’ve poured the mix into the mold, gently tap the sides to remove any trapped air, which can exacerbate cracking issues. Next, allow the concrete to cure at a steady pace, shielding it from sudden movements or drastic temperature fluctuations. For added strength and resilience, consider incorporating a concrete fortifier or fiber reinforcement into your mixture. By following these best practices, you’ll be well on your way to creating a sturdy and crack-resistant structure.
Is a DIY concrete stool suitable for outdoor use?
While concrete stools are versatile enough for both indoor and outdoor use, thanks to their inherent durability and resistance to weathering, it’s still important to take some extra precautions to ensure they remain in top condition. For one, applying a sealant to the surface can help protect against moisture damage. Additionally, if the stool has wooden legs that will be exposed to the elements, regular maintenance is crucial to prevent rot or wear from wind, rain, and sunlight.
How can I make my DIY concrete stool more comfortable?
While concrete stools may not be synonymous with comfort, there are ways to improve their usability. To start, consider adding a cushion or seat pad to provide an extra layer of softness and support. Additionally, it’s essential to ensure that the stool height is appropriate for its intended use, whether that’s as a chair, footrest, or functional element in a design. Furthermore, taking the time to thoroughly smooth out any rough edges on the concrete surface can make a significant difference in terms of overall comfort. By implementing these simple yet effective measures, you can transform an uncomfortable concrete stool into a more pleasant and inviting space.
Can I use a different material for the legs?
When crafting DIY bird feeders, you have the freedom to get creative with the leg materials. Options include metal rods, PVC pipes, or even repurposed natural elements like branches. The crucial consideration is ensuring the chosen material is robust enough to bear the weight of the concrete base and can be securely fastened in place.
How do I care for my DIY concrete stool?
To ensure your concrete stool remains in great condition, it’s crucial to implement a few simple care practices. Firstly, regularly wipe down the surface using a damp cloth to remove any dust, dirt, or spills that may have accumulated. This will help maintain its appearance and prevent any stubborn stains from setting in. Additionally, reapply sealant as needed to keep the concrete protected from the elements. If your stool features wooden legs, it’s essential to periodically reapply a finish or oil to preserve the wood and prevent it from drying out or deteriorating over time. By following these straightforward care tips, you’ll be well-prepared to tackle your DIY project with confidence.
10 DIY Concrete Stool Ideas To Make Your Own
Transform your living area by creating unique, functional, and visually appealing seating with the help of ten innovative DIY concrete stool projects. These step-by-step guides will equip you with the skills to craft your own stylish stools that blend form and function, perfect for elevating the ambiance of any room.
How to Make an Industrial Concrete Stool on a Budget
Get ready to revolutionize your space with a one-of-a-kind DIY concrete stool, expertly guided by Jessie Uyeda of HomeMade Modern on Dwell. This striking piece is as functional as it is stylish, effortlessly serving as both chic seating and a modern side table. With only basic tools and an injection of creativity required, this project is surprisingly simple yet undeniably impressive. Whether you’re looking to elevate a room or outdoor area, this industrial-chic concrete stool is the perfect solution, adding a touch of rugged sophistication to your home decor. So, are you ready to unleash your inner DIY guru and bring this innovative piece to life?
Colorful DIY Concrete Stools
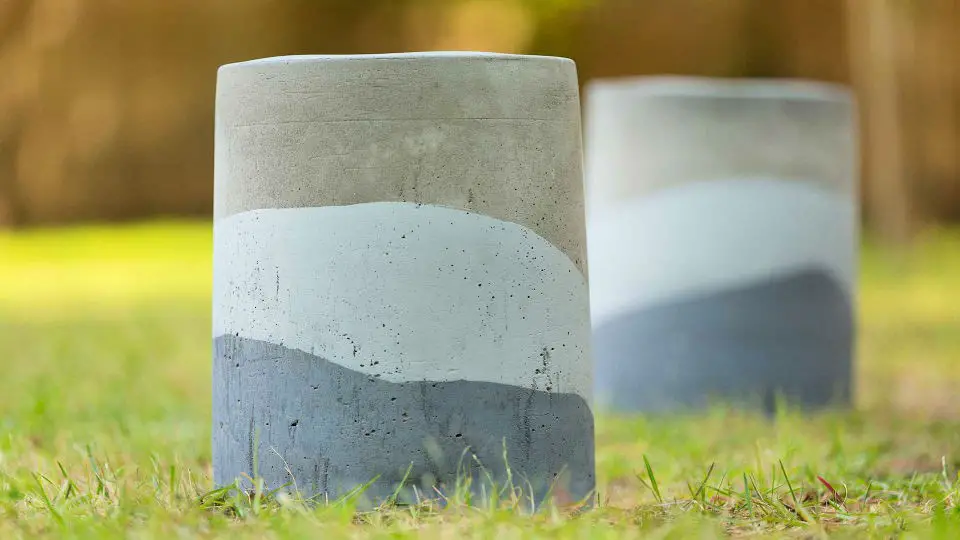
Transforming your backyard patio’s charm into a vibrant haven is achievable through creative home improvement projects. One such endeavor involves crafting DIY concrete stools that not only save you money but also infuse your outdoor space with personality. This budget-friendly yet innovative approach showcases the potential of practical materials like concrete to create unique, handcrafted seating options that are both stylish and long-lasting. For a comprehensive guide on bringing these colorful and durable stools to life, visit Today’s Homeowner.
How to Make a 5-gallon Concrete Stool
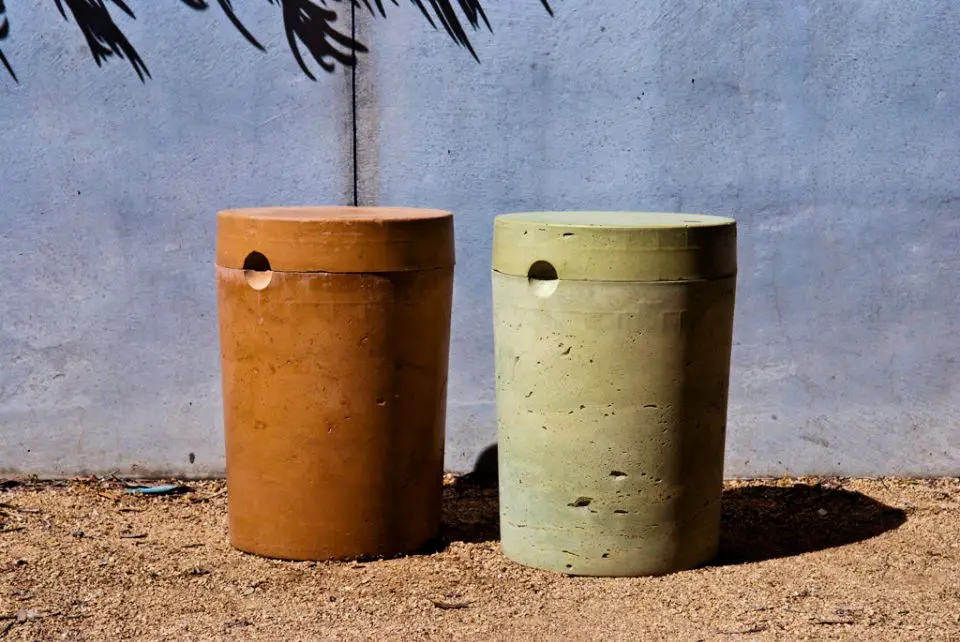
Unleash your creativity and infuse your space with a unique DIY flair! By upcycling a 5-gallon bucket and concrete, you can craft a sturdy stool that exudes modern charm. Whether you’re a seasoned crafter or just starting out, this easy-to-follow guide at Instructables is designed to help you create a functional piece of art that reflects your personal style. With step-by-step instructions, you’ll be able to bring your vision to life and add a touch of sophistication to any room.
Easy Rustic Bucket Stool Tutorial
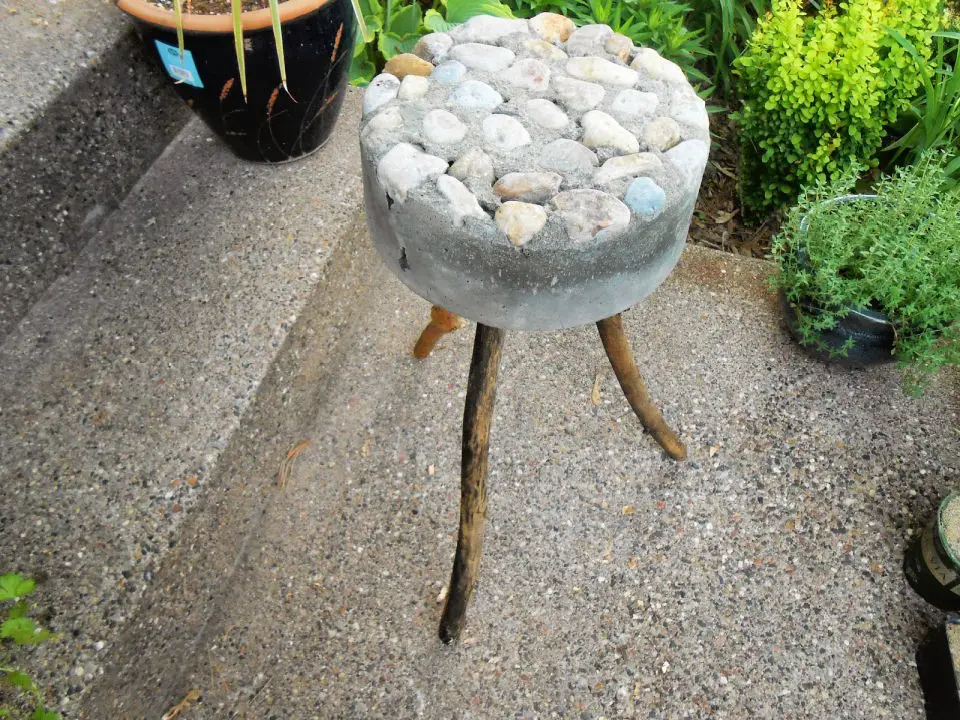
Create a charming rustic bucket stool with minimal expense and effort by combining a 5-gallon bucket, concrete, and sturdy legs made from branches or dowels. This unique piece can be personalized with decorative elements like river rocks, making it perfect for adding a touch to your garden or home. Follow the simple steps outlined below to enjoy a rewarding DIY experience. For further guidance, visit Sprouts and Stuff.
Make Your Own Concrete Stool
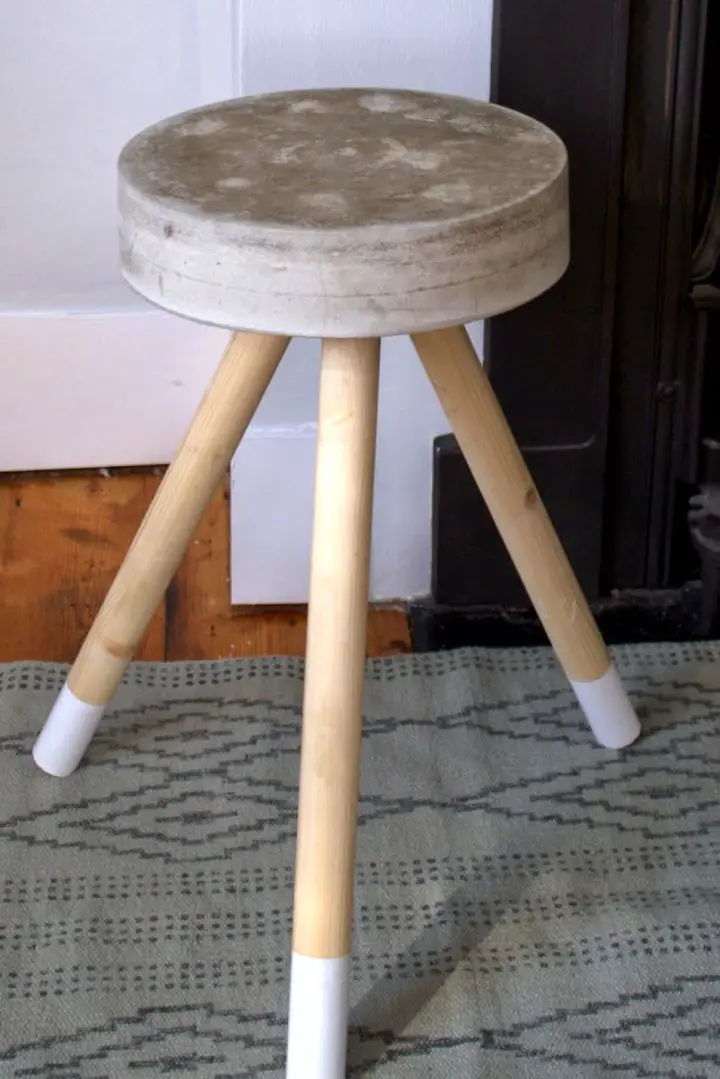
Give your home’s bedroom a unique makeover by crafting DIY concrete stools that seamlessly blend industrial style with handmade charm. By following our step-by-step guide, you’ll be able to create a one-of-a-kind piece of furniture perfect for serving as a bedside table. To get started, gather just a few basic materials: a dowel, concrete mix, and a bucket. Once you’ve mixed the concrete and set the dowel legs in place, you’ll have a bespoke piece that adds a modern touch to your space without breaking the bank. For a detailed walkthrough of this project, head over to Nostalgiecat where you’ll find full instructions.
Fashionable DIY Concrete Stool
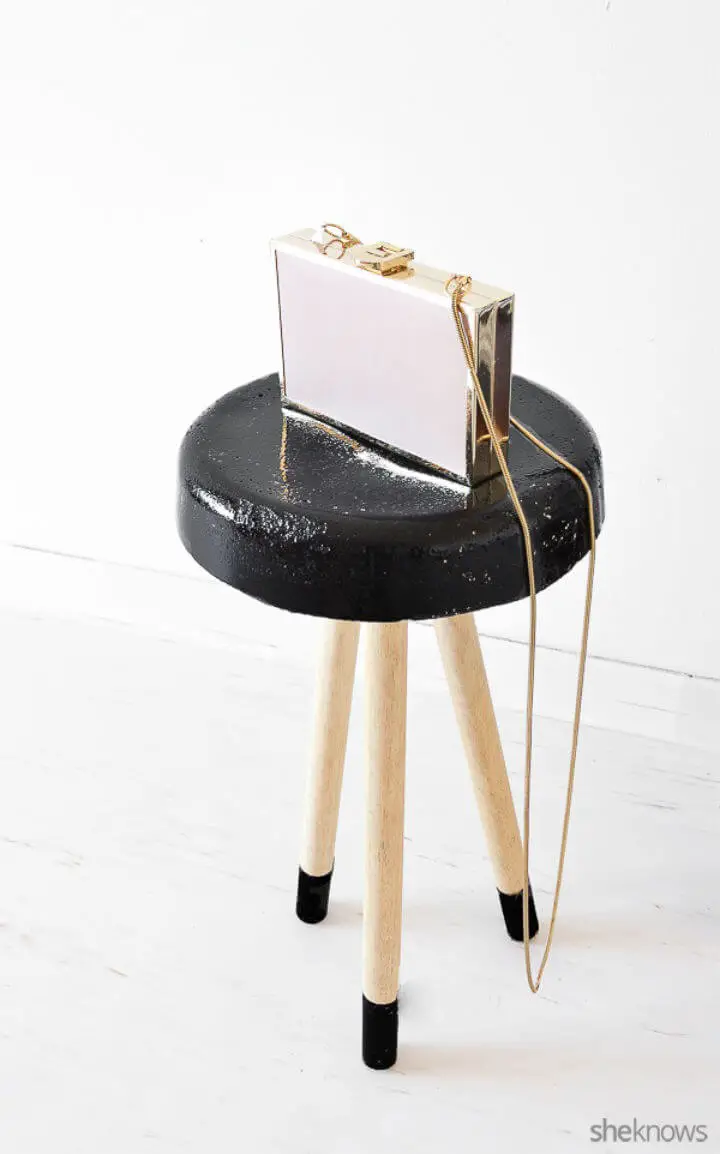
Transform your living space into a chic industrial haven by crafting a one-of-a-kind DIY concrete stool. Not only does it add a unique touch to any room, but its affordability is unparalleled – you can create this stylish piece for under $10! The surge in popularity of concrete décor is no surprise, given its sleek, modern aesthetic. This beginner-friendly project involves combining concrete and wooden poles to produce a durable, trendy seating option that’s sure to impress. For a step-by-step guide on how to bring this fashionable piece to life, visit SheKnows. To make it truly yours, add a personal touch with paint, allowing it to effortlessly blend with your existing décor.
Simple DIY Concrete HRS Stool
Transform your surroundings with an eco-conscious perspective. The Concrete HRS Stools stand out as a prime example of sustainable design, utilizing recycled materials sourced from construction sites. Not only do they prioritize environmental responsibility, but they also infuse any space with a distinctive industrial flair. For a deeper exploration of this groundbreaking approach to furniture creation, explore Designboom’s insightful coverage.
Homemade Concrete Bucket Stool
Transform any space into a cozy retreat or charming outdoor setting by crafting a sturdy and unique stool using upcycled materials. This DIY Concrete Bucket Stool project is an excellent example of creative problem-solving, as it repurposes humble items like shovel handles and a bucket to create functional seating. The process begins with mixing the perfect concrete consistency – akin to peanut butter – before introducing wooden legs into the mixture and allowing it to set. Although some cracking may occur during the curing process, the final product can be beautifully enhanced with linseed oil and white paint, resulting in a charmingly rustic piece of furniture. For a detailed guide on how to bring this project to life, click here. This DIY endeavor is ideal for crafty individuals seeking unique, functional, and stylish furniture projects that also promote sustainability.
Making a Concrete Stool With $3
Step into the world of DIY and unlock the secret to transforming ordinary materials into stunning furniture with a project that’s as budget-friendly as it is stylish. With a simple, step-by-step guide, you can create a modern concrete stool for just $3 – a cost-effective solution that’s perfect for those who crave unique pieces that reflect their personal taste. This tutorial is designed to be engaging and easy to follow, making it accessible to DIY enthusiasts of all skill levels. Whether you’re looking to add a touch of elegance to your living space or simply want to challenge yourself with a new creative project, this modern concrete stool is the perfect place to start. Check out the detailed video guide at Thang TV – Creative Craft Ideas for a comprehensive walkthrough and get ready to unleash your creativity today!
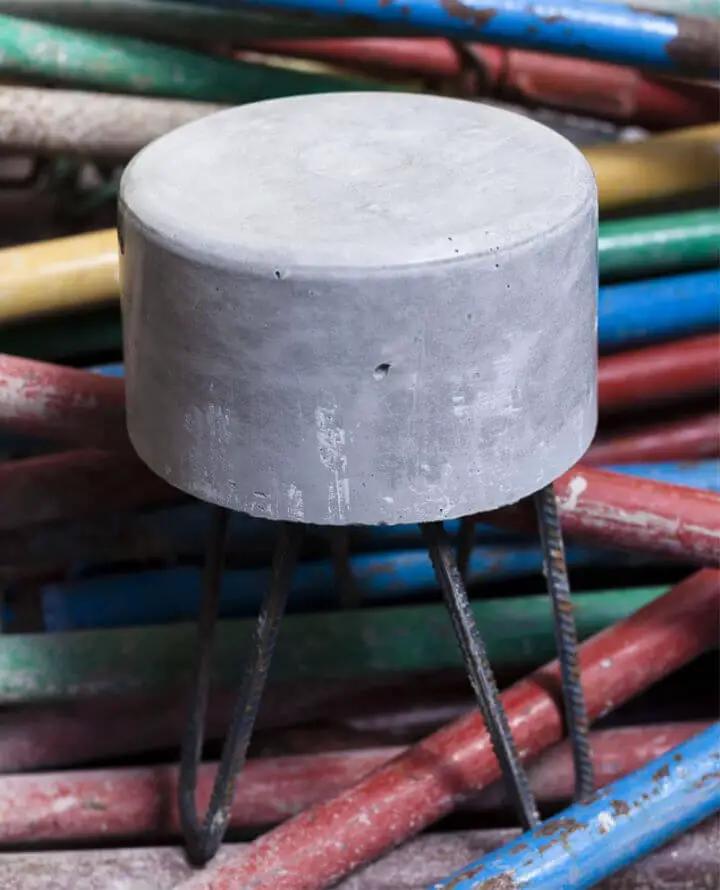
$7 Bucket Concrete Stool With Hair Pin Legs
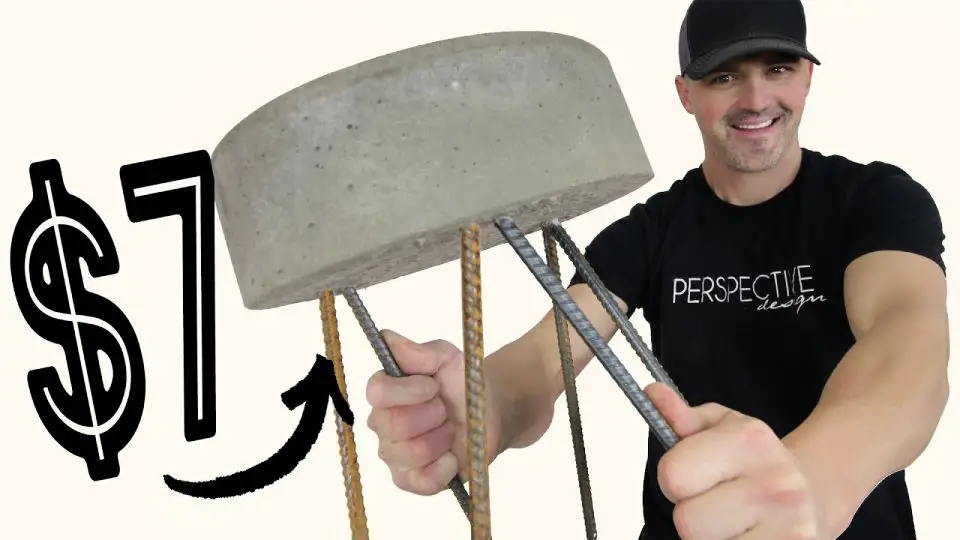
Elevate your space with a one-of-a-kind DIY creation that won’t break the bank! By combining a humble $7 bucket with sleek hair pin rebar legs, you can create a stylish concrete stool that’s equally at home indoors or out. This versatile project is perfect for adding extra seating, serving as a charming side table, or supporting a beautiful plant display. And the best part? It’s an affordable and accessible way to add some personality to your decor. To bring this idea to life, simply follow the easy-to-follow guide provided by Perspective Design Co., which offers a step-by-step tutorial on how to make your very own concrete stool. So why not get creative and give your home decor a unique touch today?
Conclusion:
In conclusion, the journey of creating a DIY concrete stool can be an incredibly fulfilling experience that brings a unique touch to any space. By following the comprehensive guide outlined above, from crafting a leg template to adding the finishing touches, you’ll have everything you need to embark on this creative adventure. What’s more, this project allows for endless possibilities – whether you’re looking to customize the design to match your décor, make modifications for outdoor use, or ensure durability, this guide provides valuable insights into creating a functional and stylish concrete stool that perfectly complements your home. The beauty of DIY concrete stool projects lies in their versatility, allowing you to experiment and personalize your creations to suit your style. So, gather your materials and let the inspiration flow as you bring one of these 10 innovative DIY concrete stool ideas to life, elevating your home décor with a piece that’s both practical and chic.
