Why Choose DIY Candy Jars
Why DIY Candy Jars Stand Out from the Crowd
Crafting your own candy jars offers a unique experience that goes beyond the mere act of filling glass containers with sweets. It’s an opportunity to express yourself creatively, be eco-friendly, and show thoughtfulness towards others.
When it comes to affordability, making your own candy jars is a no-brainer. You likely already have many of the materials you need at home, such as mason jars, spare ribbons, or leftover paint, which minimizes costs. This means you can enjoy the process without breaking the bank.
One of the biggest benefits of DIY candy jars is their ability to be tailored to your personal style and preferences. Whether it’s choosing the colors, themes, or types of candy, these creations can reflect your personality or the interests of the person you’re gifting them to.
A handmade candy jar also conveys a sense of thoughtfulness and care that store-bought items often lack. It shows you’ve invested time and effort into creating something special, making the gift more meaningful.
Making DIY candy jars is an enjoyable and creative activity that can be done solo or with friends and family. It’s a great way to spend quality time together, learn new skills, and have fun while doing it.
And let’s not forget about the eco-friendly aspect – repurposing materials like glass jars into candy jars reduces waste and promotes sustainability in gifting and decorating.
In terms of unique decor, DIY candy jars can add a one-of-a-kind touch to your home or party setup. They can be customized to match any theme or occasion, from Halloween to Valentine’s Day, making your space more vibrant and inviting.
Overall, making your own candy jars is a budget-friendly, enjoyable activity that allows for personalization, thoughtful gifting, and eco-friendliness – what’s not to love?
DIY Candy Jars – Home & Family
Crafting personalized candy jars is an accessible and enjoyable way to infuse your living space with unique charm or share thoughtful gifts with loved ones. This straightforward guide will lead you through the process of creating these charming containers, ideal for storing treats and adding a personal touch. With only basic materials readily available in your home or easily sourced at a local hardware store, anyone can successfully make their own candy jars.
Supplies You’ll Need:
Transform a humble flower pot into a whimsical candy jar with these easy-to-follow steps. Begin by selecting a vessel that suits your style: opt for a terracotta or plastic pot measuring around 10 inches in diameter, but feel free to adjust the size based on your personal preference. Next, gather a few essential materials, including a bubble vase or plastic fishbowl, spray paint and primer (for terracotta pots), a hot glue gun with glue sticks, card stock for making a funnel, candy of your choice, and a small round catch basin to serve as the lid of your jar. To add some flair to the lid, you’ll also need small wooden dowel end caps or drawer pulls. Finally, don’t forget optional decorations such as paint pens, stickers, or other embellishments to make your jar truly one-of-a-kind.
Steps to Make Your Candy Jar:
To create a whimsical candy jar, start by selecting a flower pot as the base. Consider opting for terracotta for a rustic look or plastic for a lighter and more budget-friendly option. Flip the pot upside down to serve as the foundation of your candy container. Next, prepare the pot for painting by applying a primer if using terracotta, allowing the spray paint to adhere well and preventing absorption. Once primed or when using plastic, spray paint the pot in your desired color and let it dry completely.
With the base prepared, take a bubble vase or plastic fishbowl and apply hot glue to the rim of the upside-down pot. Carefully place the vase or bowl on top, ensuring its opening faces upwards, mimicking a gumball machine where treats can be easily accessed.
To fill your candy jar, create a funnel from card stock by rolling it into shape. Pour your selected candy into the vase or bowl, feeling free to be generous with your treat distribution. You can also add a roll-top or other decorative elements to make the jar more visually appealing.
For the lid, paint the small catch basin in the same color as the base and let it dry. This will serve as the lid of your candy jar. To create a handle, glue a wooden dowel end cap or drawer pull onto the center of the catch basin lid.
Finally, personalize your candy jar using paint pens or stickers to add names, messages, or designs. This adds an extra layer of thoughtfulness and makes the jar an even more special gift.
Final Touches:
With the final touches complete and your handiwork safely secured, your DIY candy jar is now primed for display or gift-giving. This engaging endeavor not only offers an enjoyable creative experience, but also yields a delightful and functional piece ideal for various occasions – from everyday use to thoughtful presents.
Video Tutorial
To enhance your DIY experience, I recommend watching our step-by-step video tutorial on making these creative candy jars. The visual instructions will complement the written guide perfectly, empowering you to bring these innovative ideas to life with ease. As you craft your unique candy jar, remember that creativity knows no bounds – make it a reflection of your personal style and enjoy the fun process of creating something truly one-of-a-kind.
FAQs on DIY Candy Jar Ideas
Transforming ordinary spaces into extraordinary ones with a personalized touch is just a jar away! Creating your own candy jars is an engaging and fulfilling project that can be both a meaningful addition to your home decor or a thoughtful present for someone special. To help you embark on this delightful crafting adventure, we’ve gathered some frequently asked questions to get you started.
What materials do I need to make a DIY candy jar?
To begin, gather the following essential items: A suitable container such as a mason jar, terracotta pot, or plastic fishbowl, which will serve as the foundation of your decorative project. To enhance the aesthetic appeal of your terracotta pot, you’ll also need paint and primer. A hot glue gun with an adequate supply of glue sticks is crucial for assembling your design. Furthermore, consider incorporating personalized touches through decorative elements like ribbons, stickers, or paint pens. Finally, don’t forget to fill your jar with a sweet treat – candy will be the crowning glory of your creation.
Can I use any jar to make a candy jar?
When selecting a vessel for preserving your pickled delights, you have a wide range of options available. From traditional Mason jars to glass vases, terracotta pots, or even plastic containers like fishbowls, the choice ultimately depends on personal preference and availability. What’s most important is ensuring that the container is thoroughly cleaned and dried before use to prevent any contamination or spoilage.
How can I personalize my candy jar?
Transforming your candy jar into a personalized masterpiece is a delightful experience. To get started, consider the following creative approaches: First, give your jar a fresh coat of paint in a hue that reflects your personality. Alternatively, adorn it with stickers, vinyl cutouts, or paint pens to add a touch of whimsy and make it truly one-of-a-kind. Think outside the box by choosing a theme that aligns with a special occasion or the recipient’s passions. Finally, elevate the lid by swapping out standard handles for unique figures that add an extra layer of personality.
Are DIY candy jars a good gift idea?
DIY candy jars offer a unique and thoughtful way to celebrate special occasions like birthdays, holidays, or even express gratitude with a personalized gift. By putting in the effort to create something one-of-a-kind, you demonstrate your care and attention to detail, making it an unforgettable present for anyone.
How can I ensure my candy stays fresh in the jar?
When it comes to preserving the freshness of candy, there are a few key steps you can take to ensure your treats remain soft and flavorful. Firstly, make sure to store them in a clean and dry container with a secure lid that seals tightly. This will prevent moisture and contaminants from entering the jar and spoiling the candy. Additionally, keep the jar in a cool, dry place away from direct sunlight, as this can cause the sugar to degrade and the texture to become unpleasant. By following these simple tips, you’ll be able to enjoy your candy for longer without compromising on its quality.
Can I reuse or recycle jars for this project?
Transforming old jam, sauce, and pickle jars into unique containers for candies is an innovative approach to sustainability in crafting projects. By repurposing these vessels, you’re not only reducing waste but also infusing your project with a touch of personality, making it a truly eco-friendly endeavor.
How do I clean my DIY candy jar?
When it comes to cleaning your candy jar, a gentle approach is often the most effective. For jars adorned with hand-painted designs or other delicate embellishments, washing by hand with warm soapy water is usually the safest bet. This method helps prevent damage to the decorations while ensuring the jar remains sparkling clean. Be sure to thoroughly dry the jar before refilling it with your favorite treats.
Can these candy jars be used for events or parties?
Transforming ordinary glass containers into stunning DIY candy jars is an exciting project that yields beautiful decorations or party favors for life’s special moments. Whether you’re planning a wedding, baby shower, or birthday celebration, these customized treats will add a personal touch to your event. Not only do they make wonderful keepsakes, but the creative process itself is a joyous experience. With just a dash of imagination and some basic materials, you can create one-of-a-kind treasures that brighten up your home or bring delight to someone special as a thoughtful gift.
15 Cute and Unique Candy Jar Ideas
Elevate your gatherings with 15 adorable and creative candy jar concepts that will transform any setting into a sweet haven. Whether you’re looking to craft something yourself or simply seek design inspiration for your next celebration, this collection of ideas is sure to satisfy.
Primitive Fall Mason Jar Candy Dish
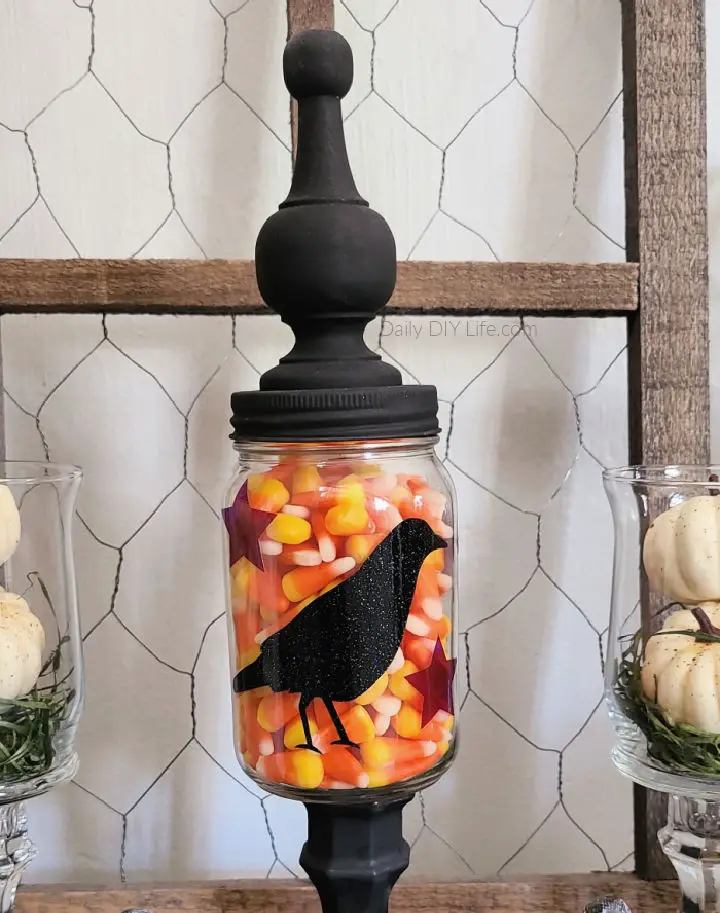
Transform a humble mason jar into a charming primitive fall decor piece with this straightforward DIY guide. As the seasons change, add a touch of autumnal flair to your home with a rustic candy dish or cozy light feature that’s as unique as it is inviting.
To create this delightful display, you’ll need just a few essential supplies, including a candle holder, wooden finial, E6000 glue, chalk paint, and vinyl cutouts. For an added layer of depth and visual interest, use a Cricut machine to craft decorative crows and stars from StyleTech Craft vinyl.
Once assembled and painted, your mason jar will be a true showstopper, boasting a one-of-a-kind charm that’s sure to draw the eye. Whether you’re looking to add a touch of whimsy to your fall decorations or simply want to create something special for friends and family, this DIY project is the perfect way to get started.
Cute Halloween Candy Jar Label
Transform your candy distribution game with an eye-catching DIY candy jar that will make your neighborhood go green with envy this Halloween. By following Moritz Fined Design’s simple and fun tutorial, you’ll create a spooktacular treat dispenser that’s not only quick to make but also effortlessly customizable and removable. To get started, gather just three essentials: a printable candy jar label, a glass jar, and some spray adhesive for a mess-free application. As you follow the easy steps, you’ll be surprised at how quickly and easily you can add a touch of frightful flair to your Halloween decor – and delight trick-or-treaters with a unique treat-dispensing experience.
DIY Apothecary Candy Jar Decoration
Transform ordinary apothecary candy jars into extraordinary works of art using this straightforward DIY guide from eat-pray-create. These charming containers not only elevate the ambiance of any room but also make thoughtful gifts for loved ones. With an array of easily accessible materials including spray paint, ribbon, wooden circles, and a glass jar, you can create a one-of-a-kind piece that seamlessly blends form and function.
Follow the step-by-step instructions to meticulously paint, assemble, and embellish your jars. Don’t be afraid to get creative by filling them with candies or adding personalized touches to make each piece uniquely yours. With these DIY apothecary jars, you’ll be able to add a touch of sophistication and whimsy to any setting.
How to Make a Candy Jar for a Gift
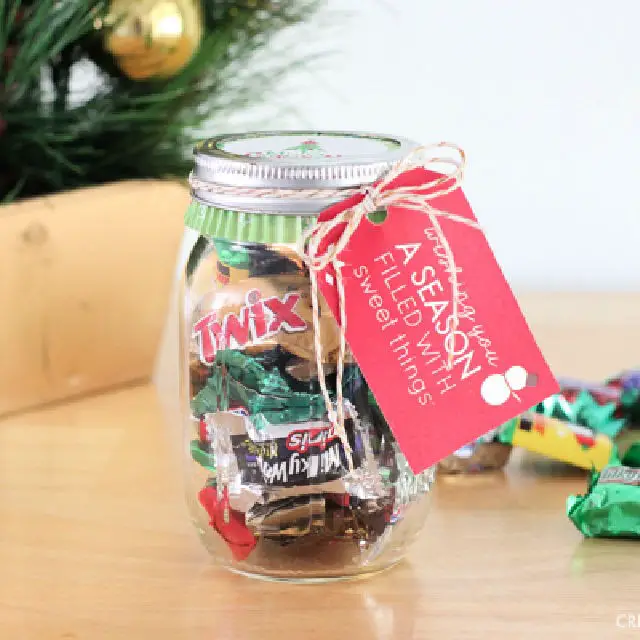
Transform a plain mason jar into a charming DIY candy jar with ease, perfect for personalized gifts or festive decor. With just a few simple supplies – including cupcake liners, a mason jar, your favorite Christmas treats, and baker’s twine or ribbon – you can create a delightful holiday centerpiece. Simply fill the jar with your chosen candies, wrap it in a colorful liner and secure with ribbon, and add a printable tag for a thoughtful touch. This quick and easy craft project is just one of many budget-friendly and time-efficient handmade gift ideas from Kalyn Brooke’s collection of 21 projects that can be completed in under an hour.
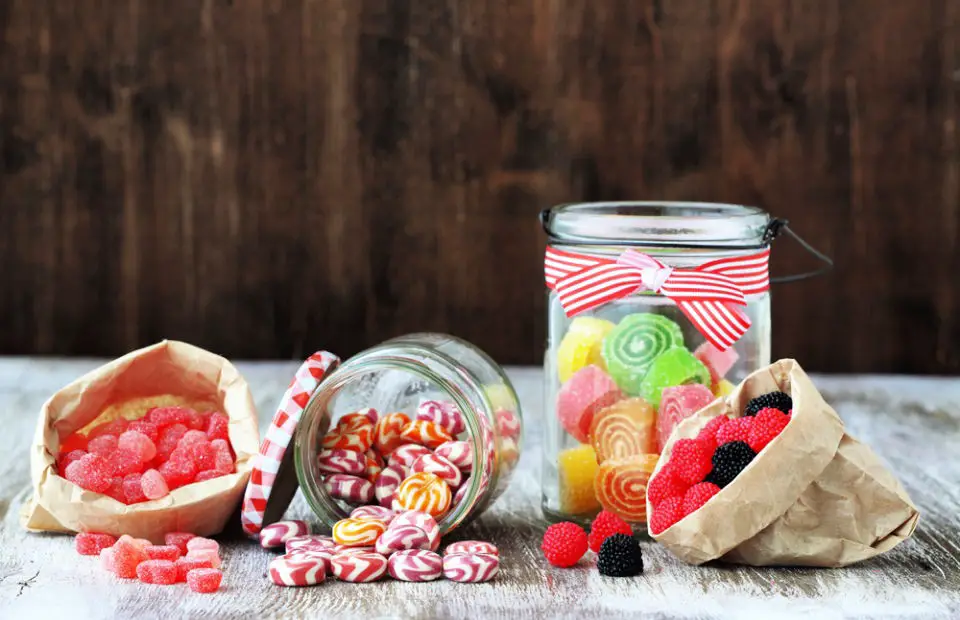
Making Candy Mason Jars With Free Printables
Transform Mason jars into charming DIY treats by infusing them with personal flair. Perfect as wedding favors or sweet indulgences for any celebration, this project is a delightful way to showcase your creativity. The process is straightforward and easy to follow, thanks to the guidance of the cottage market. To take it to the next level, free printable tags are provided, allowing you to add a bespoke touch to each jar.To get started, gather your materials: Mason jars, your favorite candies, paint for the lids, decorative knobs, and some twine. With these simple supplies, you’ll be able to create a batch of candy-filled jars that are sure to impress. Simply follow the steps: paint the lids, attach labels, and adorn with knobs. As you work on each jar, remember to keep your design true to your personal style for a truly unique creation.
Beginner-friendly DIY Candy Jars
Transforming ordinary mason jars into custom candy containers is an excellent way to make personalized gifts for friends and family. At Candy Club, we offer creative ideas to turn these everyday jars into themed vessels that not only serve as beautiful presents but can also function as party favors. One example is the DIY Football Party Favor Jar, which requires just a few craft supplies like acrylic paint and mason jars. For a unique gift for your dad, consider creating a ‘Dad’s Stache’ Candy Jar with a personalized label. Alternatively, DIY Footed Candy Jars can add an elegant boutique touch to any candy display. Once you’ve crafted these creative containers, fill them with a selection of candies that are sure to bring joy to any recipient. These projects are not only engaging and easy to follow but also add a special touch to your thoughtful gestures.
Handmade Peekaboo Heart Mason Candy Jar
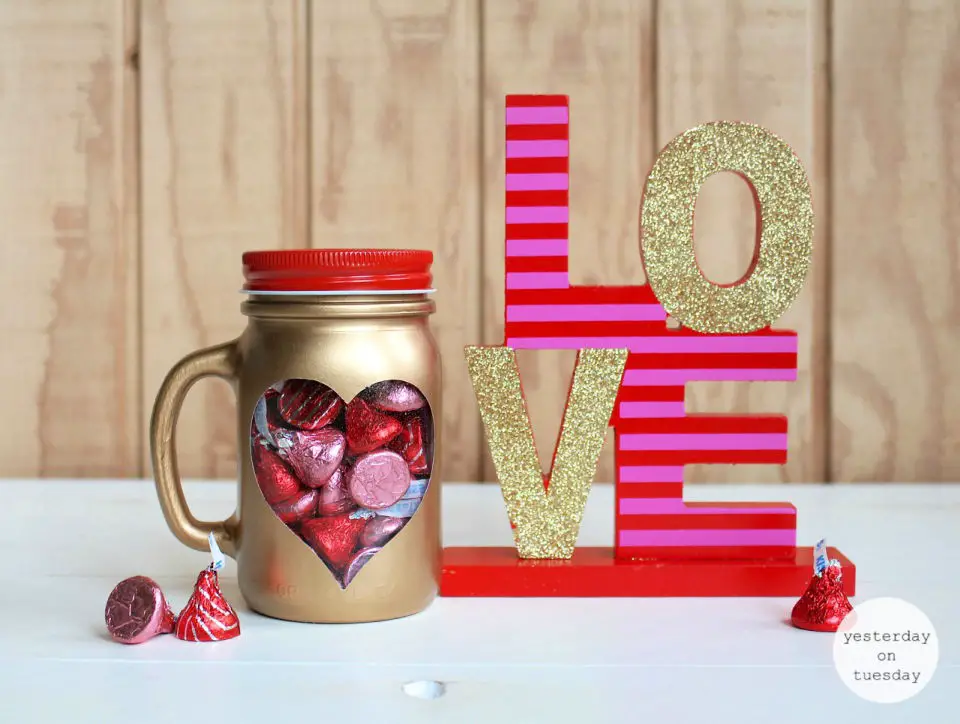
Transform any occasion into a heartfelt celebration with this charming mason jar craft. On Tuesday, we shared the simple steps to create a peekaboo heart mason jar, perfect for Valentine’s Day or any moment you want to shower someone with love. With just a few basic materials – a mason jar, vinyl heart, and some spray paint – you’ll be surprised at how easily you can achieve a stunning effect. The key to a lasting finish is a good primer, which sets the stage for the fun part: filling the jar with sweet treats like Hershey’s Kisses and hugs. This project is more than just a gift – it’s an opportunity to show someone you care in a unique and personalized way that’s sure to leave a lasting impression.
Valentine’s Day Themed Candy Filled Mason Jars
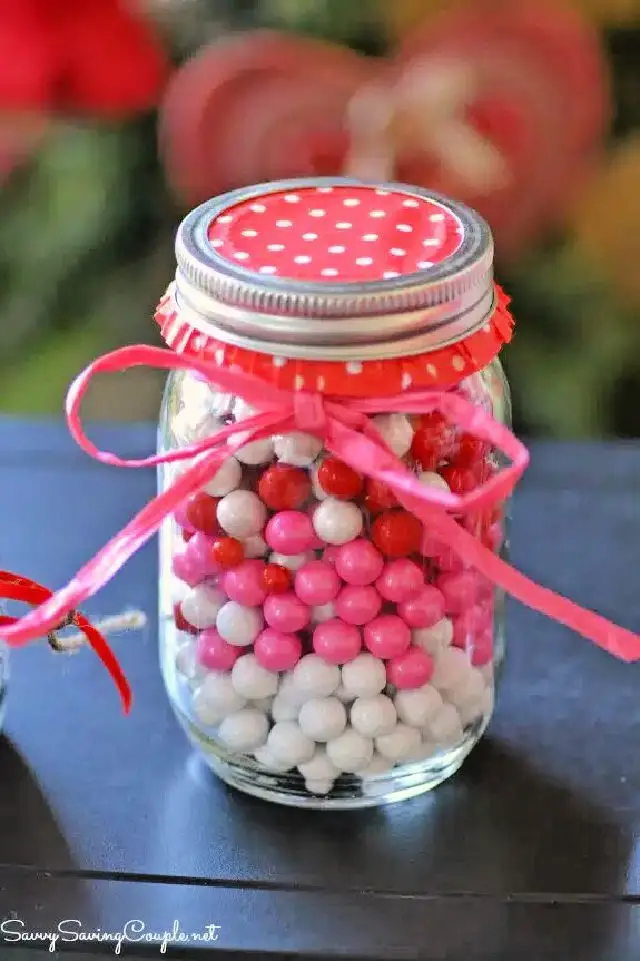
Indulge in the art of DIY gift-giving by transforming ordinary mason jars into extraordinary Valentine’s Day treats or decorations with a few simple craft supplies and some creativity. Perfect for showering loved ones, teachers, or as festive decor, this project is sure to impress. By layering colorful candies, adding a touch of twine or raffia, and topping it off with a charming cupcake wrapper, you’ll create a rustic yet whimsical masterpiece that’s sure to delight. Make it a fun family activity by involving the kids in the process, and enjoy the added bonus of having a thoughtful and budget-friendly gift that’s uniquely yours.
Budget-Friendly DIY Candy Jars

Transform any party or dessert table into a sweet sensation by crafting charming DIY candy jars, inspired by Jo-lynne Shane’s guide. This accessible and affordable project is perfect for all skill levels, with clear instructions that make it easy to follow along.
As you work through the process, you’ll be delighted by the sense of accomplishment as these homemade treasures take shape. Not only will they add a pop of color and whimsy to your gathering, but they’ll also serve as a personalized decoration for holding your favorite treats. With minimal effort required, you can create a one-of-a-kind centerpiece that’s sure to impress your guests and leave them feeling merry and bright.
Double Mason Jar Candy Gift With Card
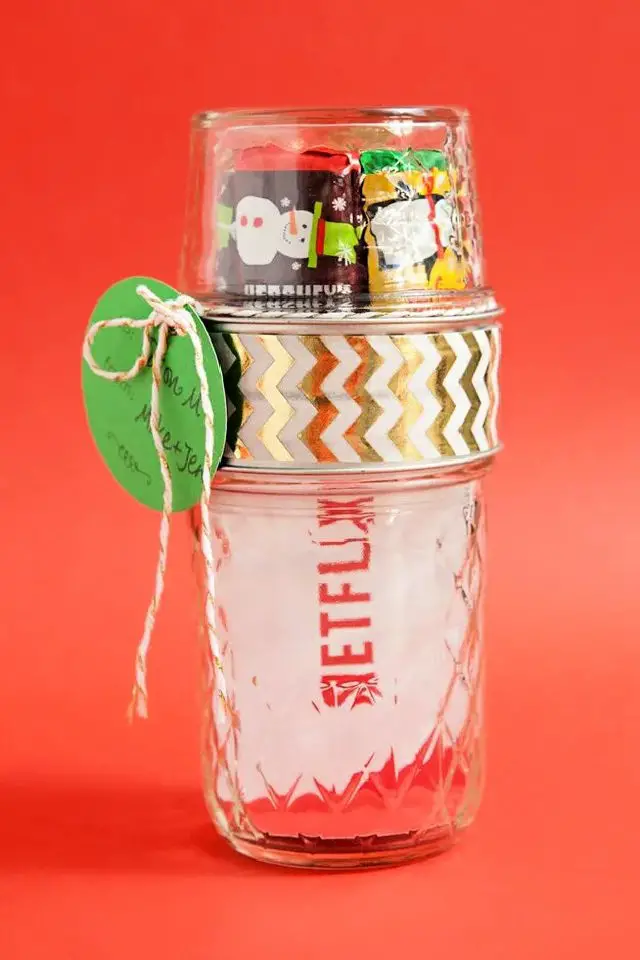
Looking to infuse your gifts with a personal touch? Something turquoise has got you covered with a delightful DIY guide to creating double mason jar gift card holders that also function as sweet treat containers. Whether it’s a birthday, holiday, or just because, these charming holders offer a thoughtful way to present gift cards.
By following the easy-to-follow steps, you’ll be able to glue on mason jar rings, prepare personalized tags, and assemble your jars with a delightful combination of treats and a gift card. To add an extra layer of whimsy, simply wrap decorative foil tape around your creation for a festive finish.
This simple yet sweet craft is the perfect way to show you care about the people on your gift-giving list.
DIY Creepy Candy Specimen Jars
This Halloween, unleash your creativity by transforming ordinary glass jars into hauntingly beautiful specimens. With just a few simple materials – paint, primer (if needed), plastic trinkets, and quick-drying super glue – you can turn empty containers into spine-tingling decorations. Start by embellishing jar lids with tiny pumpkins, spiders, or skulls before giving them a bold coat of paint in a finish that suits your mood, be it glittering, metallic, or even glow-in-the-dark. Fill the jars with treats or use them as part of an eerie display to add a touch of frightful fun to your home. These DIY projects make for perfect party favors or unique additions to your holiday decor, ensuring you have a howling good time this Halloween.
Making a Candy Mason Jar With Cricut
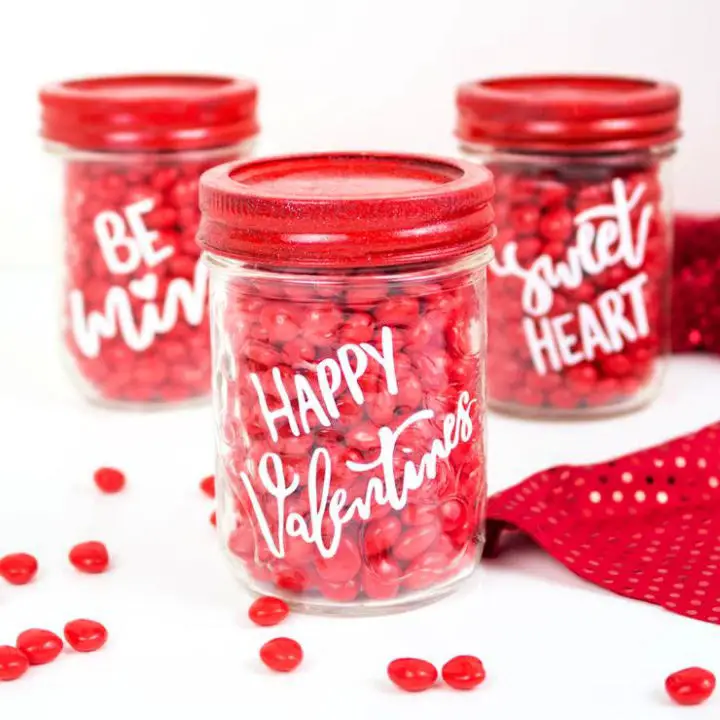
Give Valentine’s Day gifts a personalized twist with this effortless Cricut craft project from Kimspired DIY. Turn ordinary mason jar candy gifts into extraordinary tokens of affection by adorning them with custom vinyl phrases, perfect for showering loved ones or dear friends with thoughtfulness. This step-by-step guide is designed to be both fun and accessible, complete with a complimentary SVG file to ensure your craft turns out professionally polished. From setting up your jars to adding the final flourishes with glitter paint, this tutorial aims to engage and instruct, making crafting an enjoyable experience for all skill levels. Fill your finished creations with sweet treats to present a gift that’s not only heartfelt but also handmade.
Simple DIY Mason Jar Gift With Printable Tags
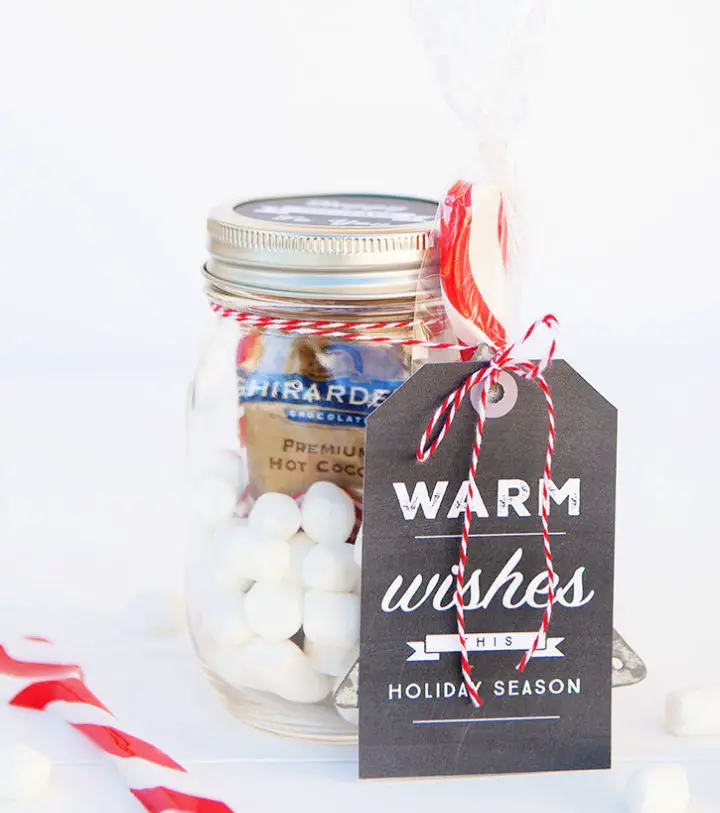
Transforming the art of gift-giving into a thoughtful and budget-friendly experience is as easy as pie with Simple as That’s mason jar gifts. This innovative concept combines the charm of DIY projects with the warmth of printable tags, resulting in presents that exude a personal touch. Whether you’re searching for a unique way to show appreciation for your child’s teacher, a favorite coach, or even your mail carrier, these creative expressions will surely spread cheer this holiday season. With just a few basic supplies such as mason jars, white cardstock, and twine, you can craft one-of-a-kind gifts filled with sweet treats like candies or warm beverages like hot chocolate. The free printable tags and jar toppers add the perfect festive flourish, making it effortless to express your gratitude and bring joy to those around you.
Homemade Grandma’s Candy Jar
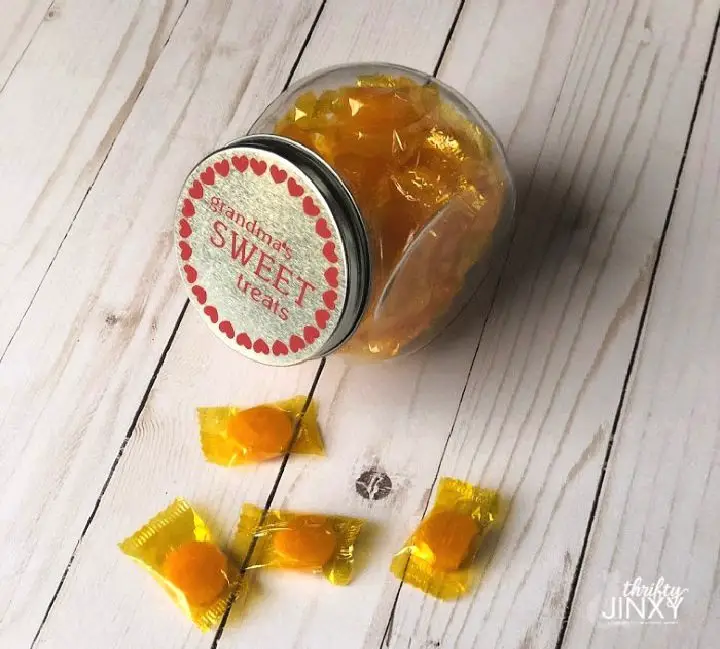
Transforming a grandma’s candy jar into a personalized treasure with a Cricut machine is a delightful and engaging DIY endeavor. At Thrifty Jinxy, we’ll guide you through the process of creating this thoughtful gift, ideal for special occasions like Valentine’s Day, Mother’s Day, or Christmas. Our step-by-step tutorial showcases how to harness the power of vinyl and your Cricut Explore Air 2 to design and embellish a candy jar, filling it with timeless treats that are sure to bring joy to any grandmother. With basic tools like transfer tape, a weeder, and a dash of creativity, this project not only yields a one-of-a-kind present but also offers a fun and rewarding crafting experience.
How to Make a Chill Pills Gag Gift
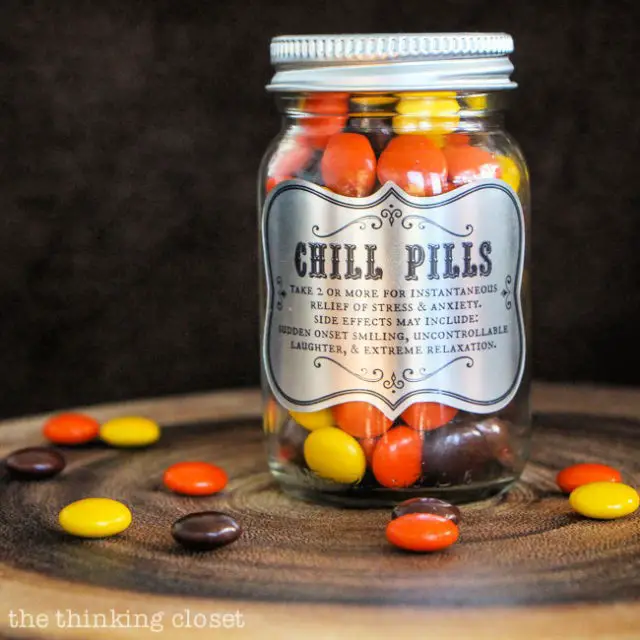
Create a delightful and stress-reducing activity with the ‘Chill Pills’ gag gift tutorial on The Thinking Closet. Lauren demonstrates a creative approach to spreading joy by designing personalized labels for a jar of candy, masquerading as ‘chill pills.’ This unique craft is perfect for a fun Christmas present or an April Fool’s prank. With a downloadable label template and easy-to-follow instructions, you can transform a simple glass jar into a source of instant gratification. As a quick and enjoyable activity, these pretend ‘chill pills’ offer a lighthearted solution to life’s minor stresses.
Conclusion
As we wrap up this journey of creating DIY candy jars, it’s clear that the combination of creativity, personal touch, and practicality is a winning formula. By following along with our series of unique and cute candy jar ideas, you’ve gained a wealth of inspiration for your next project. Whether you’re crafting for your own home, a special occasion, or as a thoughtful gift, the possibilities are truly limitless. With these ideas and your imagination, you’re now poised to create charming and personalized candy jars that are sure to delight. We hope you enjoyed this creative adventure with us.
