With 15 easy and free arm knit blanket patterns designed specifically for beginners, crafting a cozy handcrafted blanket has never been more accessible. Arm knitting is a quick, fun, and rewarding process that allows you to create large, soft blankets without the need for needles. Our collection of creative patterns transforms simple yarn into beautiful, functional art, making it perfect for anyone eager to try their hand at a new crafting adventure. This comprehensive guide provides step-by-step instructions to get you started, offering a seamless transition from novice to expert. Explore our various patterns and customizations that cater to your personal style and home decor, whether you’re tackling your first project or adding to your growing collection. Our patterns and detailed guidance on how to arm knit a blanket ensure a rewarding experience, allowing you to learn, make, and enjoy the warmth of your very own arm-knit blanket.
Variations and Customizations for Arm Knit Blankets
When creating an arm knit blanket, it’s not just about the warmth and comfort it provides, but also about infusing your personal touch to make it uniquely yours. To cater to various skill levels, here are some ideas to customize your arm knit blankets:One of the most significant ways to personalize your blanket is by selecting the right yarn. Experiment with different materials like wool, cotton, or recycled fabric yarns to achieve unique textures and appearances. Super bulky yarn is a popular choice for arm knitting, but you can also try chunky or fingering weight yarns for varying effects.To add visual interest, don’t be afraid to mix and match colors. Try creating stripes, blocks, or gradients by switching between different hues. You can even incorporate multiple colors within a single row for a dynamic pattern.Incorporating different textures is another great way to make your blanket stand out. Use yarns of varying thicknesses or twist multiple strands together to add visual interest. Some people enjoy combining smooth yarn with looped or bouclé yarn for a tactile experience.Adding tassels or fringes can also give your blanket a personalized touch. Simply cut strands of yarn and knot them along the edges of your finished blanket for a playful, whimsical look.For those who want to take their arm knitting skills to the next level, experimenting with stitch patterns is a great way to add some flair. Try out variations like seed stitch or basketweave pattern to give your blanket a unique look. These patterns may require a bit more practice, but the results can be truly rewarding.Once you’ve completed your blanket, consider adding embellishments like patches, embroidery, or buttons to give it an extra personal touch. This is a great way to reflect your personality or interests and make the blanket even more special.Finally, don’t forget that arm knit blankets come in all shapes and sizes! You can easily create a smaller throw or larger bedspread by adjusting the number of stitches you cast on and the length of your rows.The beauty of arm knitting lies in its simplicity and endless possibilities for customization. So have fun with it, and don’t be afraid to try something new. Your blanket will be all the more special for it!
How to Arm Knit a Blanket – Step by Step
With the rise of DIY crafting and cozy home decor, arm knitting has become an increasingly popular activity for those looking to create soft, chunky blankets with ease. This hands-on project requires no needles at all, simply the use of your arms to craft a warm and inviting blanket in under an hour. Inspired by Simply Maggie’s comprehensive tutorial, the following step-by-step guide will walk you through the process of creating your very own arm-knitted masterpiece.
What You Will Need
To embark on this project, you’ll require a substantial amount of yarn, specifically eight skeins of Premier Yarns Couture Jazz or any comparable number 7 jumbo yarn that suits your preference. Additionally, a good pair of scissors will be necessary for trimming the excess yarn once you’ve completed the stitches. While patience and enthusiasm are not traditional crafting tools, they’re essential elements to ensure a successful outcome.
Getting Started
Before diving into your knitting project, take some time to prepare your yarn for a smooth start. Begin by removing all the packaging from your skeins, carefully pulling the yarn from the outside rather than the center to prevent any initial tangles. Next, measure out a 6-foot tail, which will serve as the foundation for the long-tail cast-on method. Once you have your tail in place, create a slipknot by looping the yarn over your hand, twisting it away from you, and then drawing the working yarn through the resulting loop. Place the knot on your wrist and adjust its tightness to your liking.
Casting On
To initiate the long-tail cast on, place the working yarn in position under your ring finger and pinky. Position your index finger and thumb between the two strands, twisting your hand so that your palm faces you. This is the starting point for creating the new stitches. To make a new stitch, insert your thumb under the strand, then bring it over the top of the working yarn on your finger. Next, scoop up the strand behind and place it on your arm. Repeat this process until you have achieved a total of 18 stitches.
Knitting Rows
As you begin knitting, hold the working yarn in your right hand and pull the first stitch over and off your hand while maintaining control of the yarn. This creates a new stitch, which you’ll then move onto your left arm. Continue this process until all stitches have been transferred to your other arm.
For the second row, reverse the process by holding the working yarn in your left hand and repeating the same steps, moving the stitches back to your original right arm. To achieve a neat and tidy look, make sure to keep your stitches evenly tensioned throughout.
Joining New Skeins
When it’s time to introduce a fresh skein of yarn into your project, ensure a seamless transition by creating a secure bond between the two. Begin by tying a double knot at the ends of the old and new skeins, then carefully trim any excess material close to the join, taking care not to cut too closely and compromise the integrity of the stitchwork.
Finishing Your Blanket
To complete the bind-off process, start by knitting two stitches on your final row. Next, use the first stitch to pull over the second one and gently slide it off your arm. Repeat this action across the entire row, gradually releasing stitches until only one remains. Once you’ve bound off all but the last stitch, move on to securing the end. To do so, cut a length of yarn approximately a foot from your completed blanket. Then, use the remaining loop to pull through and create a secure knot, effectively finishing your project.
Weave in Ends
To conclude the yarn manipulation, thread it through the edge of the fabric where you first began and ended. Gently tug on the yarn to secure it and prevent loose strands from showing. Finally, create a knot to keep everything in place and snip off any excess yarn with scissors, ensuring a neat and tidy finish.
Stretching
To complete your handmade blanket, take a moment to carefully smooth out any wrinkles or creases by gently stretching it to an even size. This ensures that the stitches are evenly distributed and the final product lies flat.
Video Tutorial
For an immersive learning experience, watch Simply Maggie’s comprehensive video tutorial on Arm Knit a Blanket in 45 Minutes. This visual guide effortlessly complements the written instructions provided earlier, offering a crystal-clear understanding of the techniques involved. With this DIY project successfully completed, you’ll have created a cozy arm-knitted blanket that’s perfect for snuggling up on a chilly evening or gifting to someone special. As you continue to explore the world of DIY projects, you’ll discover numerous ways to infuse your home and gift list with personal touches.
Troubleshooting Common Issues in Arm Knitting
As with any craft, arm knitting can come with its own set of challenges, but with some simple tips and tricks, you’ll be well on your way to creating beautiful, chunky textiles. One common issue is uneven stitches, which can be easily avoided by maintaining consistent tension throughout your work. If a stitch does slip out of line, gently adjust it by pulling the yarn through the loop until it matches the size of the surrounding stitches.Another challenge many arm knitters face is managing bulky yarn. To make this process easier, try spreading out your project on a flat surface and using super bulky yarns for their ease of use and great stitch definition. If you do find yourself struggling with yarn management, remember that practice makes perfect – with time and patience, you’ll become more comfortable working with these types of yarns.Mistakes can happen to anyone, but don’t worry if you accidentally drop a stitch or two. Simply pick up the loop of the dropped stitch and place it back on your arm. If the stitch has unraveled, use a crochet hook or your fingers to weave it back through the loops above it until you reach the row you’re currently working on.When it comes time to join new yarn, take a deep breath and remember that it’s all part of the process. Simply tie the end of the old yarn to the beginning of the new yarn with a tight knot, then continue arm knitting as usual. Later, you can weave in the ends for a neat finish.Finally, don’t be discouraged by mistakes – they’re a natural part of the learning process. With each project, you’ll improve and find that arm knitting becomes easier and more intuitive. Just remember to cast off carefully when finishing your project, and you’ll be left with a beautiful blanket or other textile.
Maintenance and Care Tips for Arm Knit Blankets
To preserve the coziness and beauty of your arm knit blanket over the years, it’s crucial to follow some simple maintenance and care tips. Here are the essential steps to keep your blanket looking its best:Firstly, give it a good shake-out regularly to dislodge any accumulated dust or debris. This straightforward action can prevent dirt from settling deep into the fibers, ensuring your blanket remains soft and plush.When minor stains occur, use a mild detergent and cold water to spot clean the area. Gently dab the stain without rubbing to avoid damaging the yarn. Be mindful not to scrub too hard, as this can lead to further damage.For more thorough cleaning, hand washing is the safest method. Use cold water and a gentle, wool-safe detergent. Submerge the blanket, let it soak for a few minutes, then rinse thoroughly with cold water.After washing, carefully squeeze out excess water without wringing the blanket. Lay it flat on a clean towel, roll it up to absorb more moisture, then lay it flat to air dry while reshaping it as needed.Finally, store your blanket in a cool, dry place away from direct sunlight and moisture. Avoid using plastic bags, which can trap moisture and lead to mildew. Instead, opt for a cotton bag or storage box with a loose lid to allow for airflow.
Sustainability and Eco-Friendly Choices
When crafting an arm knit blanket, choosing sustainable and eco-friendly yarns not only benefits the environment but also adds a unique touch to your creation. By opting for environmentally responsible yarns, you’re supporting practices that minimize harm to the planet. Consider these options: organic cotton, which is grown without pesticides or fertilizers; bamboo, a fast-growing plant that requires minimal water and no pesticides; hemp, which grows quickly and is naturally resistant to pests, requiring little water or pesticides; and recycled yarn, made from materials like plastic bottles or textile waste, which reduces landfill waste. When selecting yarn, look for certifications that guarantee ethical and sustainable production practices. This way, you can enjoy the process of knitting and the final product, knowing you’ve made a positive impact on the planet.
Advanced Techniques for Arm Knit Blankets
As you become more confident in your arm knitting skills, you may find yourself eager to push the boundaries and create complex, intricate designs. Fortunately, there are several advanced techniques that can help you achieve this level of craftsmanship. One such method is intarsia, which allows you to incorporate multiple colors into your blanket without carrying yarn across the back of the work. This technique is particularly useful for creating large, block-color designs or images within your knitting. Another technique worth exploring is helical stripes, which enables you to create a seamless striped pattern that spirals around your blanket. This visually striking effect adds a unique twist to the traditional striped blanket. For joining two pieces of arm-knit fabric seamlessly, garter stitch grafting is an excellent option. This method is particularly useful when adding panels or combining separate pieces. If you’re looking to start a project with a closed tube, such as a knitted pillow cover, Judy’s Magic Cast On is an excellent choice. It creates a neat, invisible start that’s perfect for circular beginning. To give your blanket a finished look, consider knitting on a border in a contrasting color or texture. Additionally, mastering dominance in Fair Isle Knitting is crucial when using two colors in the same row, as it ensures consistent pattern and prevents one color from overshadowing the other. Finally, Pinhole Cast On is ideal for starting projects from the center out, such as circular blankets or decorative mats. While these techniques may require some practice, they can significantly enhance the complexity and beauty of your arm knit blankets. Don’t hesitate to try them out and see how they can transform your projects into stunning pieces.
Questions & Answers for Arm Knitting Enthusiasts
As you embark on the arm knitting journey, you may encounter some common queries. To help guide you through these concerns, here’s a comprehensive Q&A section: What type of yarn is ideal for arm knitting? Super bulky yarn is the perfect choice, offering a thick and cozy texture in the finished blanket. How much yarn will I need for a blanket? The amount depends on the size of your desired throw, typically ranging from 120 yards for a standard throw. It’s always best to have a little extra yarn on hand, just in case. Can I mix different types of yarn? Absolutely! Mixing yarns can add unique textures and colors to your blanket, as long as they are similar in thickness to maintain even stitches. If you encounter a dropped stitch, don’t worry – simply pick up the loop and place it back on your arm. If the yarn has unraveled, use your fingers to weave it back through the loops above it until you’re back on track. When adding a new skein of yarn, tie the end of the old yarn to the beginning of the new yarn with a tight knot, then continue arm knitting as usual. Later, you can weave in the ends for a cleaner look. To finish your blanket, cast off by knitting two stitches onto your right arm, lifting the first stitch over the second and off your arm, and repeating until you have one stitch left. Cut the yarn, leaving a tail, and pull it through the last loop to secure it. How do I care for my finished arm knit blanket? Gently hand wash the blanket in cold water with a mild detergent, avoiding wringing out the excess water. Instead, press out the water and lay the blanket flat to dry, reshaping as needed. And don’t worry if you’re new to arm knitting – it’s not difficult at all! With some practice, you’ll quickly get the hang of it and be able to create beautiful blankets and other items.
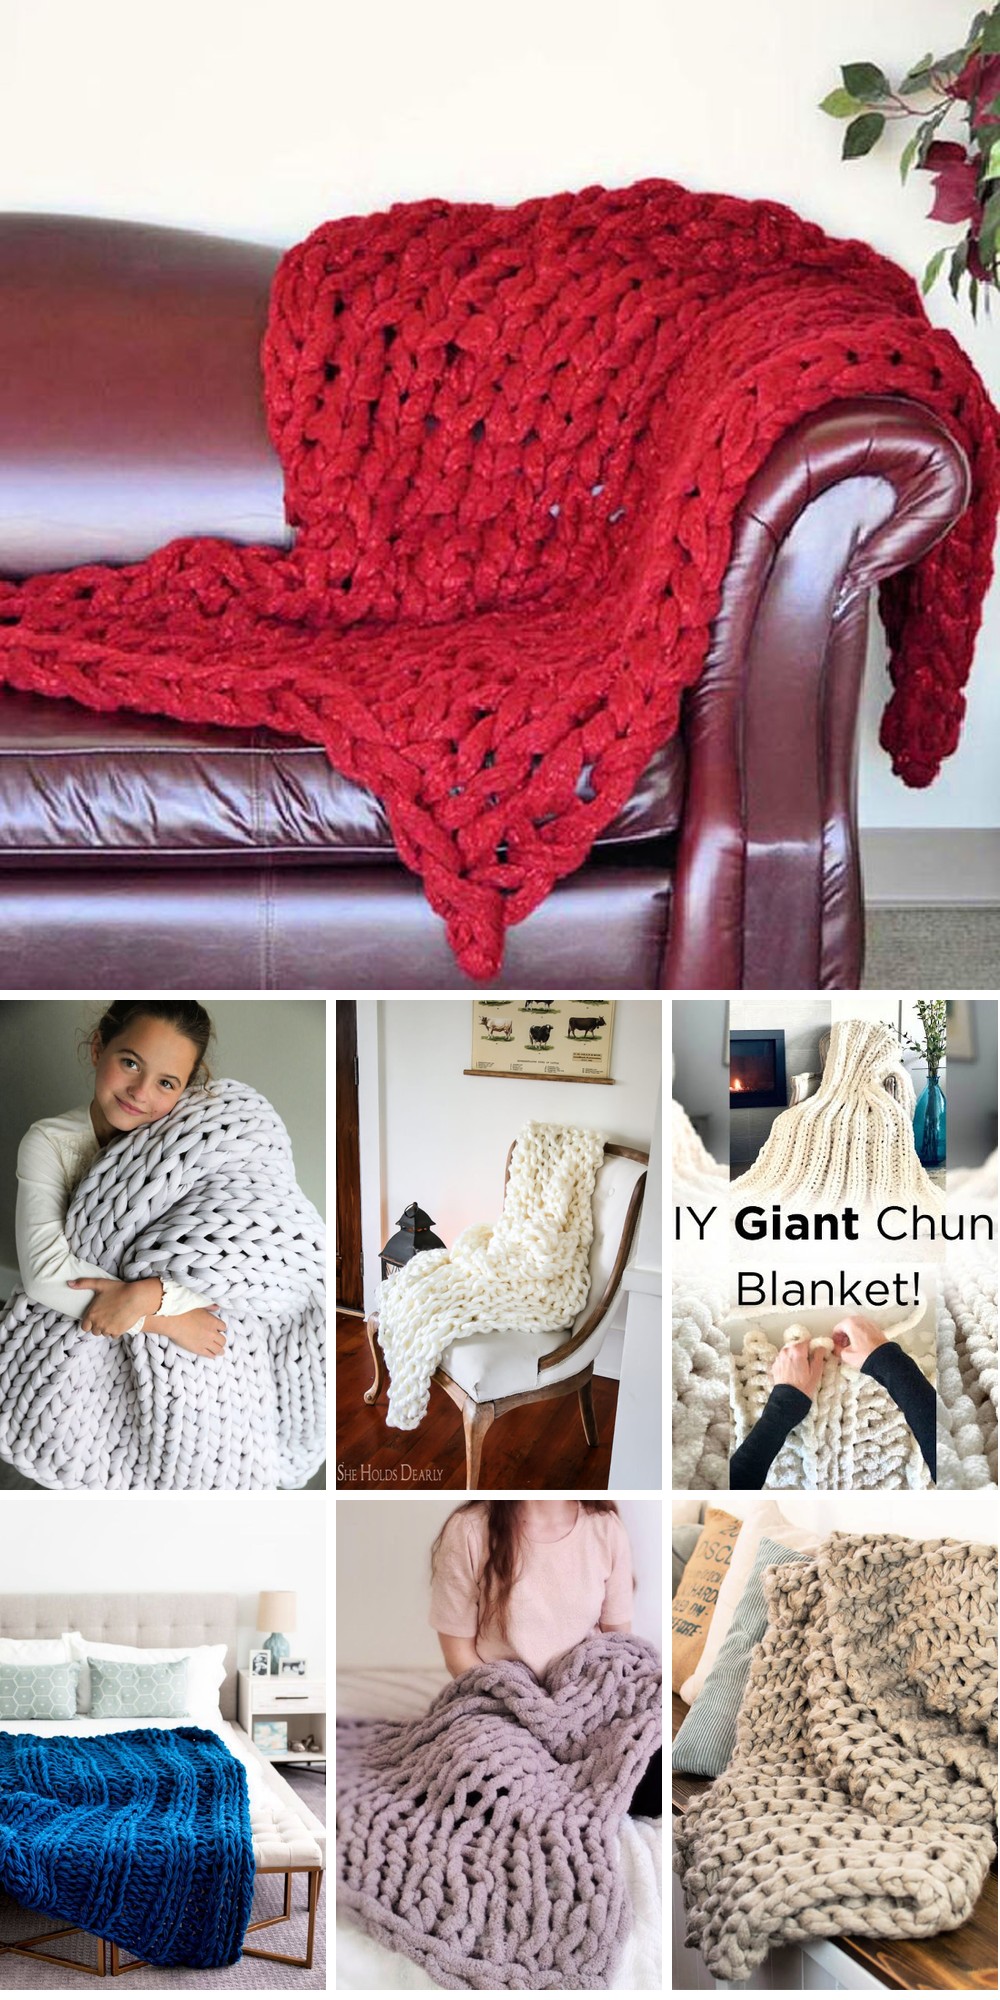
15 Arm Knit Blanket Patterns for Beginners
Indulge in the warmth and comfort of hand-knitted blankets without having to wield knitting needles or worry about complex stitches. Our curated selection of 15 easy arm knit blanket patterns is perfect for beginners, offering a range of simple yet stylish designs that can be completed quickly and effortlessly.
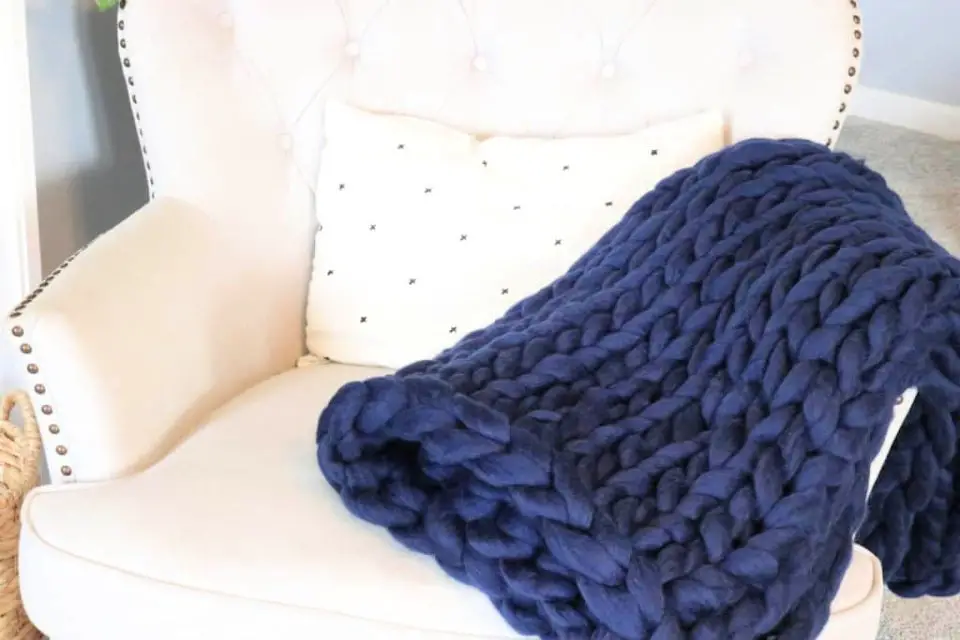
Free Chunky Arm Knit Ribbed Blanket Pattern
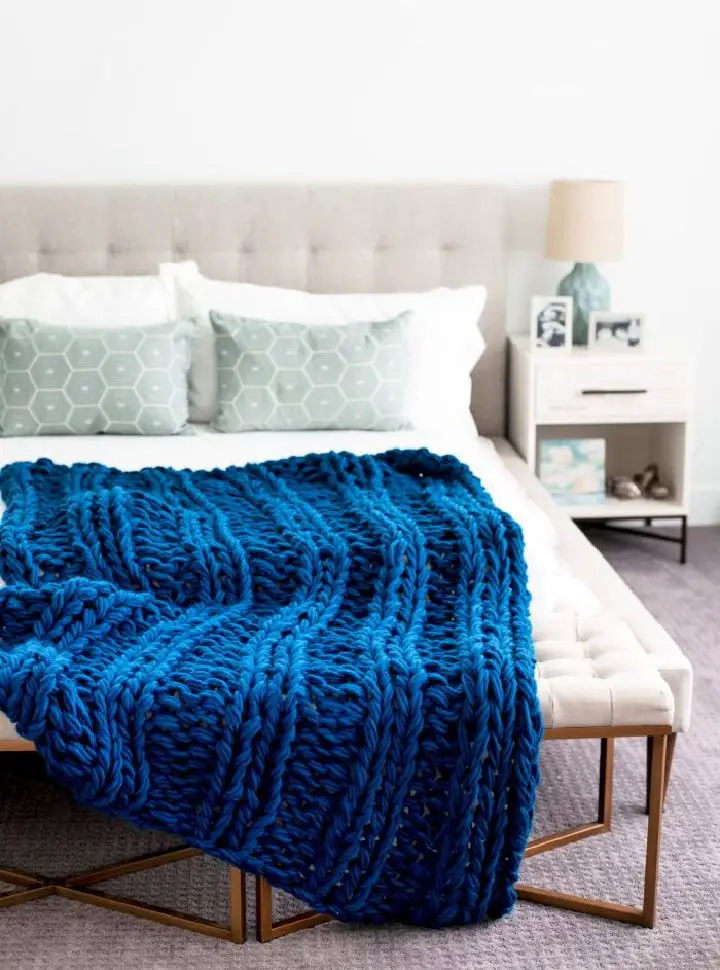
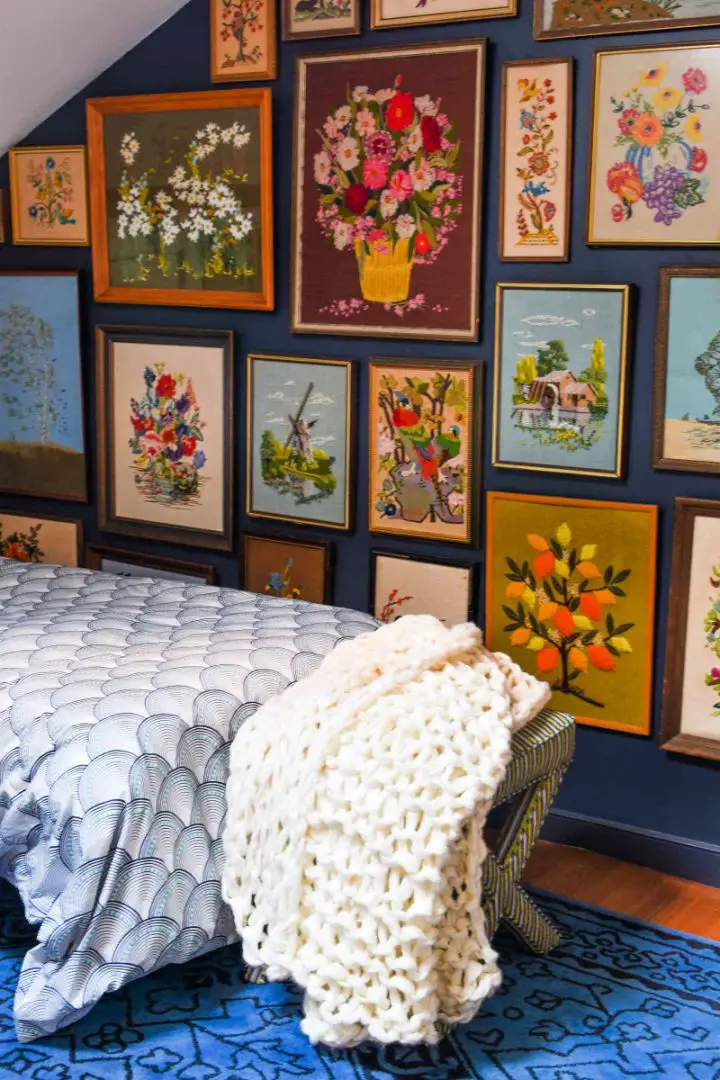
For those seeking a cozy arm knitting project, Flax & Twine’s Chunky Arm Knit Ribbed Blanket pattern is an alluring option. This sumptuous blanket uses rich blue wool to create a plush, luxurious throw that exudes warmth and style. The step-by-step instructions are designed to be accessible to newcomers to arm knitting, guiding you through the process with ease. To further enhance your crafting experience, the full pattern is available for purchase, featuring comprehensive PDF instructions, tips on purling and yarn joining, and expert advice on adapting the blanket’s size and yarn type to suit your preferences. Whether looking to add a touch of elegance to a living space or create a thoughtful gift, this adaptable ribbed blanket pattern has something for everyone.
Gorgeous Chunky Hand Knit Blanket Pattern
Creating a plush hand-knit blanket is an engaging DIY endeavour that effortlessly infuses warmth and sophistication into any living space. It’s Always Autumn’s comprehensive guide empowers even the most novice knitters to craft a stunning and cozy blanket within a few hours of dedicated effort. You’ll gain valuable insights on selecting the most suitable yarns, including luxurious merino wool, modern tube yarn, or affordable chunky chenille yarn, depending on your desired aesthetic. The guide also provides step-by-step instructions for estimating the required yarn quantity based on your chosen blanket size, ensuring a precise calculation. By following along with this carefully crafted tutorial and incorporating practical tips to achieve a seamless finish, you’ll be treated to the satisfaction of wrapping yourself in your very own handcrafted masterpiece.
How to Arm Knit a Blanket
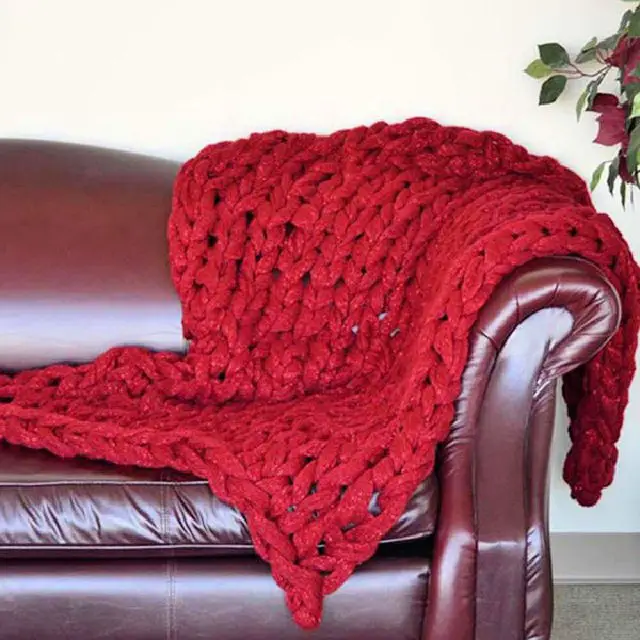
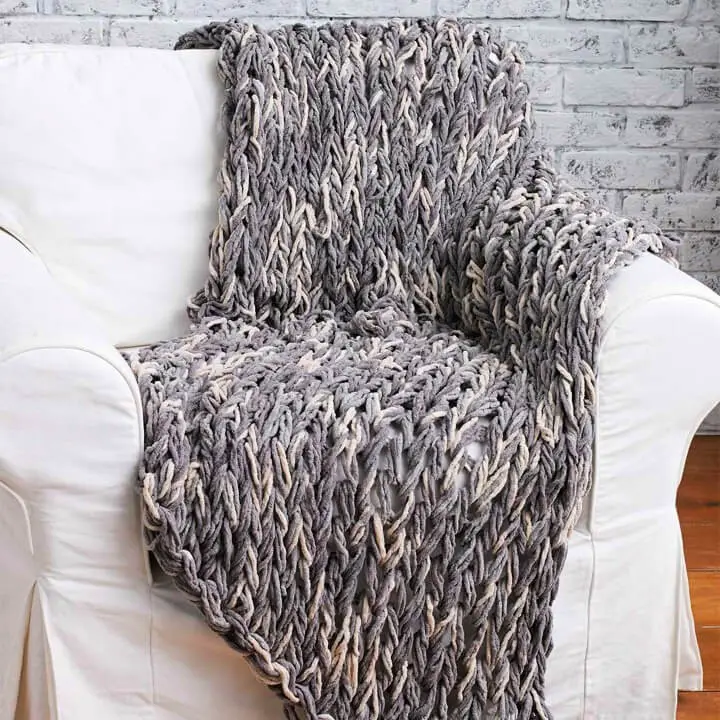
Eager crafters seeking a cozy addition to their home decor can take advantage of Premier Yarns’ free downloadable pattern for an arm knit blanket. Designed with ease of use in mind, this pattern is perfect for anyone looking to try their hand at arm knitting. The finished product measures 36 x 60 inches, providing ample warmth and comfort. To create this stylish piece, you’ll need 11 balls of Premier Yarns’ Couture Jazz yarn in the vibrant Pomegranate shade. Knitters will appreciate the simplicity of this project, which yields a stunning result. Head to Premier Yarns to access the pattern and start working on your arm knit blanket today.
Free Pattern for Arm Knit Blanket
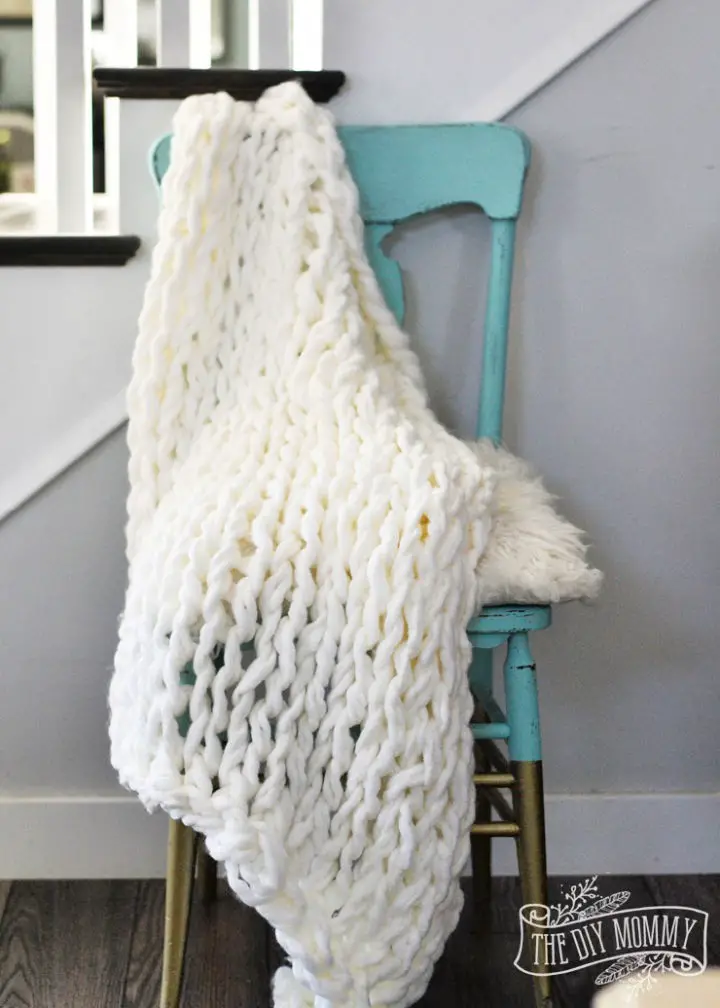
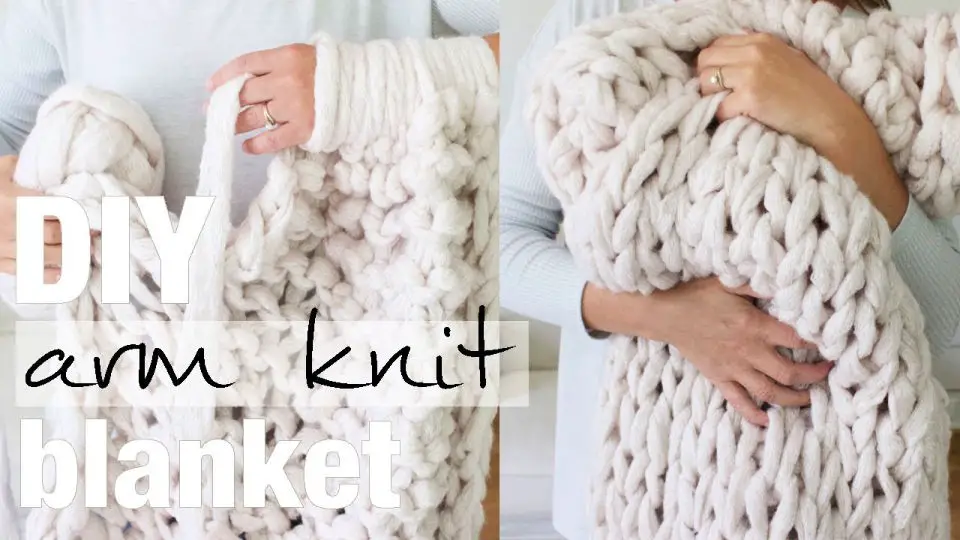
Indulge in the warmth and coziness of a handmade arm knit blanket without breaking a sweat! With The DIY Mommy’s step-by-step guide, you can create a plush and inviting textile masterpiece in under an hour using super bulky yarn. Perfect for those quick crafting fixes or as a relaxing activity on a chilly evening, this tutorial is designed to provide a seamless and enjoyable experience. A video companion piece accompanies the written instructions, ensuring that your DIY journey is both engaging and productive. As you wrap yourself up in the finished product, you’ll appreciate the gratifying sense of accomplishment that comes with creating something truly unique.
Easy Hand Knitted Blanket Pattern
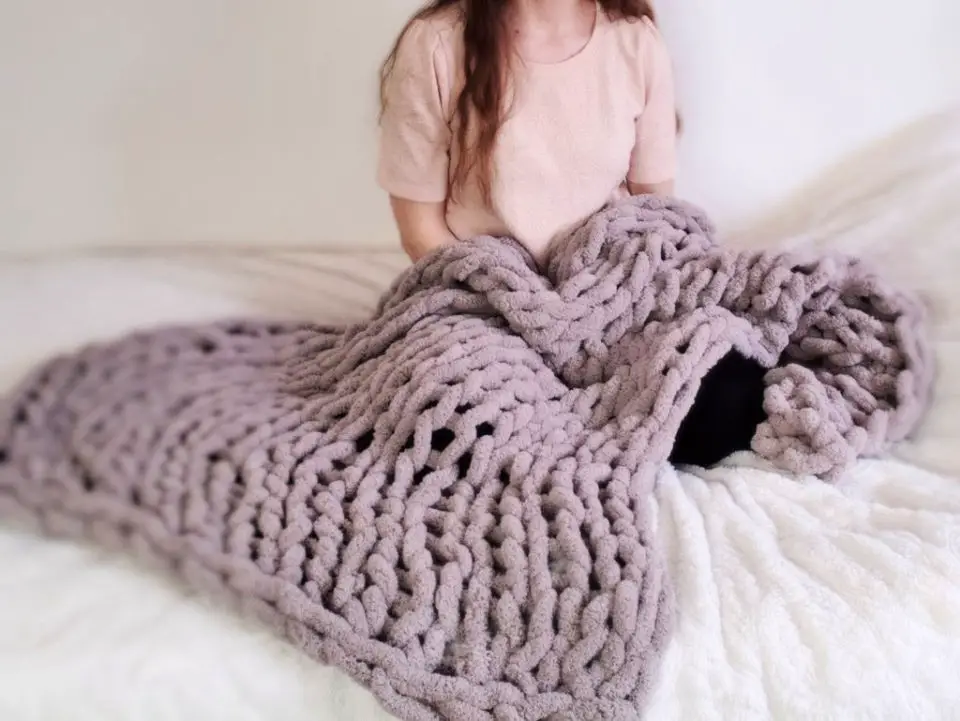
For those eager to create a warm, chunky hand-knitted blanket without dedicating too much time, Instructables provides an approachable guide that makes it achievable. With minimal effort, you can craft a soft and cozy chenille throw in just about an hour using only a few skeins of yarn. This DIY project offers excellent value for its $18 price tag, considering the detailed instructions and accompanying video tutorial. The technique itself is straightforward, requiring no advanced skills, making it an ideal quick craft for adding a personal touch to your home or as a thoughtful gift. To ensure a seamless creation, remember to purchase an extra skein of yarn and keep in mind the simple tips for joining new yarn.
Simple Arm Knit Blanket Pattern
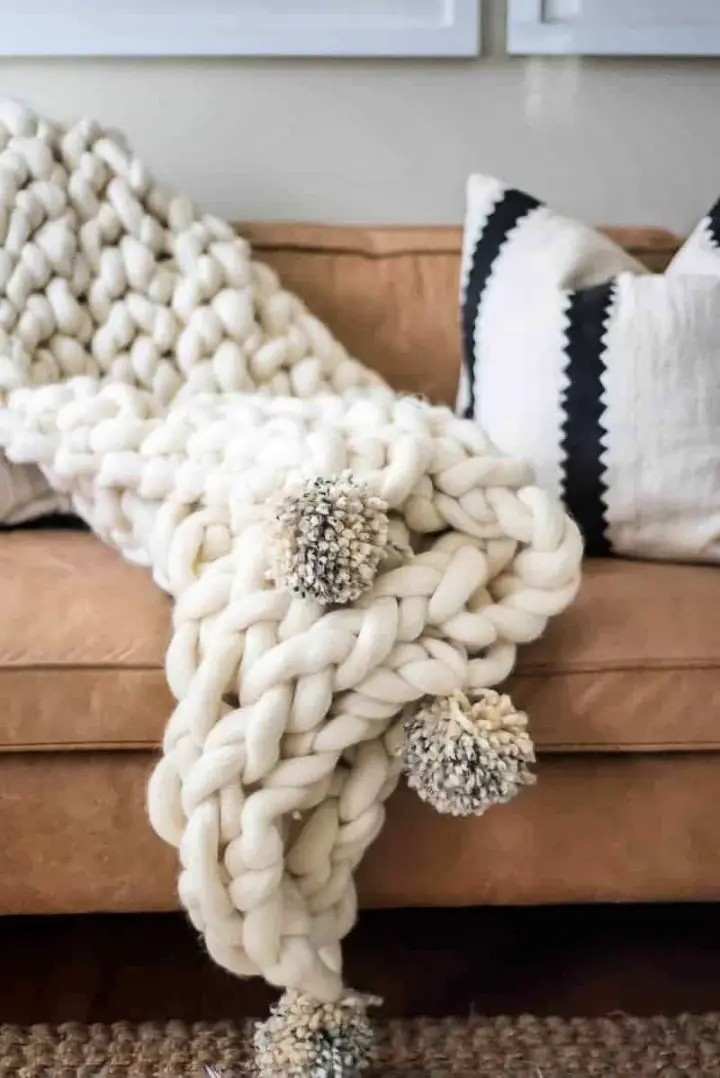
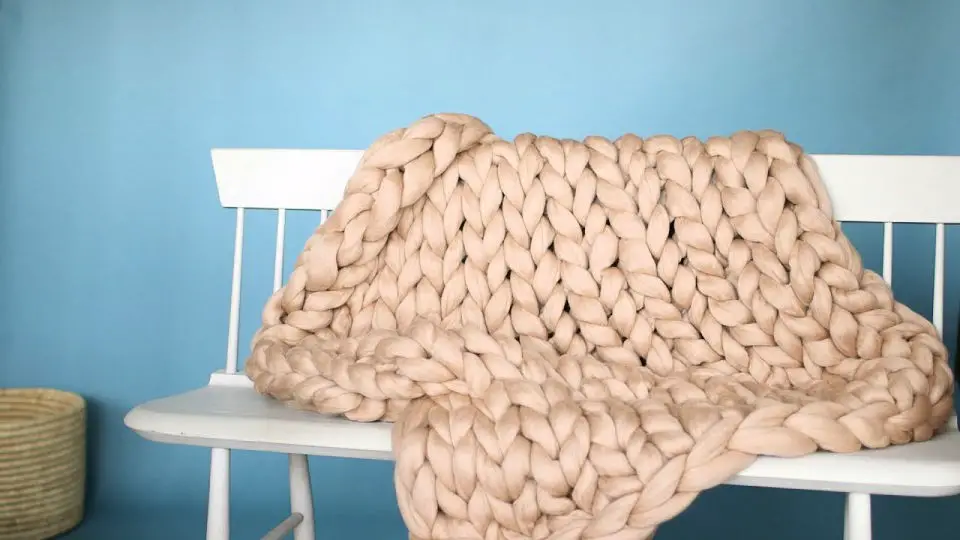
Embark on a cozy crafting journey by creating your very own chunky arm knit blanket, courtesy of Place Of My Taste’s step-by-step tutorial. With a project duration of approximately 40 minutes and accessible materials, the process is remarkably straightforward. The result is a unique, high-quality handmade piece that exudes warmth and charm, making it an ideal gift or personal treasure. Take your creation to the next level by incorporating playful pom-poms, allowing you to infuse your blanket with personal flair. As you master the technique, you’ll be snuggled up in your very own luxurious arm knit blanket in no time.
Chunky Arm Knit Blanket Pattern
Add a warm and inviting touch to your home decor with the DIY Chunky Knit Blanket Tutorial from Raising Nobles, where you can create a cozy throw without needing any specialized knitting tools. The tutorial provides a straightforward guide to help you select the perfect yarn for your project, including options that are low-maintenance and come in a range of attractive colors. With each step carefully explained, from creating the initial slip knot to adding the finishing touches, you’ll be able to master a simple hand-knitting technique that’s perfect for personal use or as a thoughtful gift. Not only will you enjoy the satisfying experience of crafting something with your own hands, but you’ll also receive valuable tips on how to wash and maintain your blanket so it stays looking its best. By following this tutorial, you can create a beautiful and comfortable chunky blanket that’s sure to become a treasured part of your home.
Best Arm Knit Blanket Pattern
A quick and rewarding project, making a chunky arm knit blanket requires minimal time and effort, yet yields a stylish and cozy result that’s perfect for both personal use and gifting. By following Charlotte Smith’s straightforward tutorial on At Charlotte’s House, you’ll be guided through the process with clarity and ease. The key to this project’s success lies in its simplicity, using super chunky yarn like Couture Jazz to create a blanket that exudes warmth and charm. While investing in high-quality yarn may seem daunting at first, the cost savings of crafting your own blanket compared to purchasing one from a store are substantial. With Charlotte’s expert guidance, you’ll be able to complete this project with confidence and enjoy the fruits of your labor – a beautiful handmade blanket that’s sure to become a treasured possession.
Arm Knit Dolphin Sleep Sack Pattern
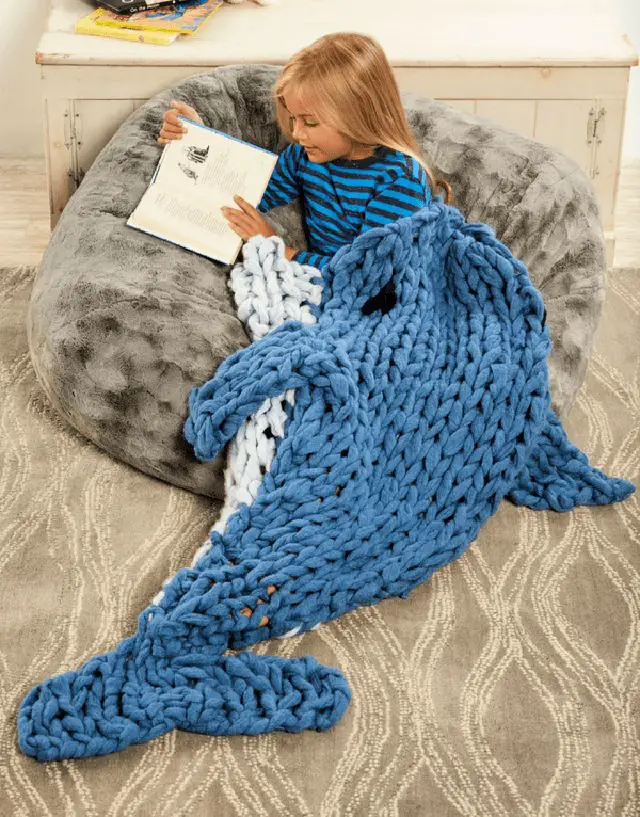
Immerse yourself in the warm, comforting world of knitting with the unique Premier Arm Knit Dolphin Sleep Sack project. This creative endeavor requires approximately 8 balls of Denim, 4 balls of Mist, and 1 ball of Black yarn from Premier Yarns’ Couture Jazz collection. To achieve a snug fit and prevent large holes, maintain even tension while arm knitting, keeping stitches tight for a polished finish. The result is a whimsical sleep sack perfect for cozying up on chilly nights, evoking the soothing feeling of embracing a dolphin’s gentle fin. Get started by downloading the free pattern from Premier Yarns and let your imagination run wild.
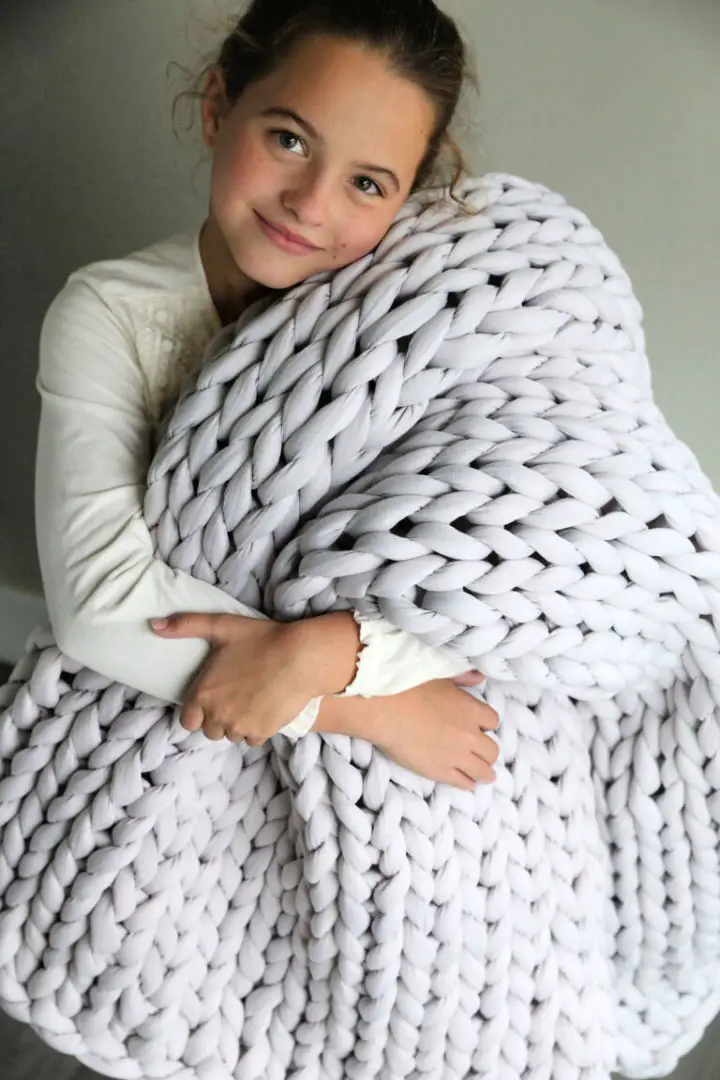
Arm Knit Blanket Pattern for Beginners
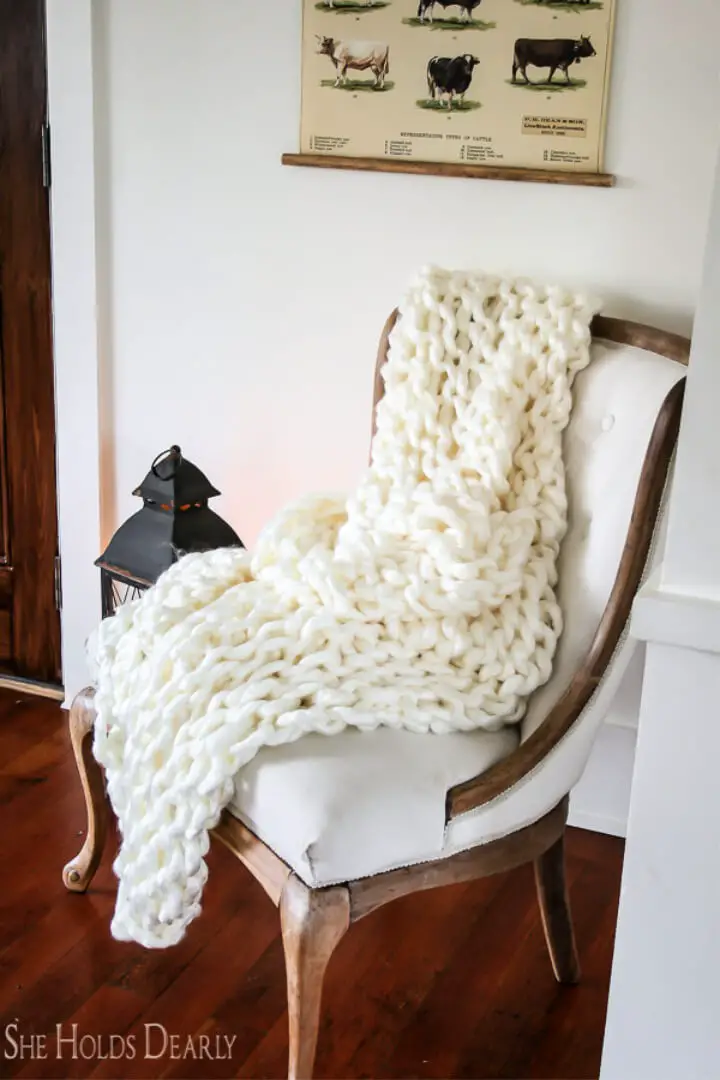
Discover the joy of arm knitting with She Holds Dearly’s comprehensive tutorial, designed specifically for beginners. This innovative project requires no special equipment or skills, just your arms and some chunky yarn. Not only is it an affordable and rewarding way to create a stunning home decor piece, but also a great way to unwind as you watch your blanket take shape before your eyes. The accompanying video makes the process even more accessible, eliminating any confusion that might arise from written instructions alone. With this guide, you’ll be able to add a personal touch to your space with a cozy and inviting blanket that’s sure to impress and provide warmth on chilly days.
How to Chunky Arm Knit Blanket
Embark on a journey of discovery as Little Yellow Wheelbarrow guides you in creating a chunky knit blanket using giant DIY knitting needles. Laura Kennedy’s personal experience, from an initial arm-knitting failure to the completion of a cozy and substantial blanket with handmade needles, serves as a valuable lesson for crafting enthusiasts. Through her clear instructions and insightful commentary, learn how to make the needles and work with thick yarn to produce a truly unique and textured piece that brings warmth and character to any room. With helpful tips and updates on yarn choices, you’ll be equipped to overcome potential obstacles and achieve success in your crafting endeavors.
Arm Knit 3-Hour Blanket Pattern
Indulge in the warmth and coziness of the Bernat Arm Knit 3-Hour Blanket project, expertly guided by Yarnspirations. Perfect for crafting enthusiasts looking to master new techniques, this comprehensive guide simplifies the arm knitting process, allowing you to create a plush and inviting blanket in just three hours. No needles required! With its ease of use and rewarding results, this project is ideal for adding a personal touch to your home decor or gifting a thoughtful present. Yarnspirations serves as a trusted resource for inspiration and patterns, making it the ultimate destination for crafty explorers.
Arm Knit a Blanket in 45 Minutes
With the help of Simply Maggie’s YouTube tutorial, crafting a cozy blanket through arm knitting is a breeze. In just under 45 minutes, you can create a stunning, handmade blanket that exudes warmth and style, perfect for snuggling up at home or gifting to loved ones. The tutorial is tailored to be approachable, even for newcomers to knitting, with crystal-clear instructions that guide you through each step. As you work with chunky yarn and your own arms as the tools of choice, watch in awe as your blanket takes shape before your very eyes. To embark on this creative journey, ensure you have your trusty scissors and yarn at the ready.
Arm Knit Throw Blanket Pattern
Elevate your home decor with a unique, handmade touch by crafting a cozy arm-knit throw blanket. Martha Stewart’s YouTube tutorial is an excellent starting point for knitting enthusiasts and beginners alike. This innovative technique uses only the arms as makeshift knitting needles, allowing you to create a plush, chunky-textured blanket that exudes warmth and character.
The video provides crystal-clear instructions, making it easy to learn this new skill and replicate the results. As you work through the tutorial, you’ll find yourself captivated by the process and thrilled with the end product – a stunning throw blanket perfect for curling up on chilly evenings or adding a pop of color to your living space.
With Martha Stewart’s guidance, a simple skein of yarn transforms into a showstopping centerpiece that showcases your personal touch. Whether you’re looking to add a dash of whimsy or a dose of sophistication to your decor, this arm-knit throw blanket tutorial is the perfect way to get creative and make a statement in your home.
Hand Knit a Blanket Using Bernat Chunky Yarn
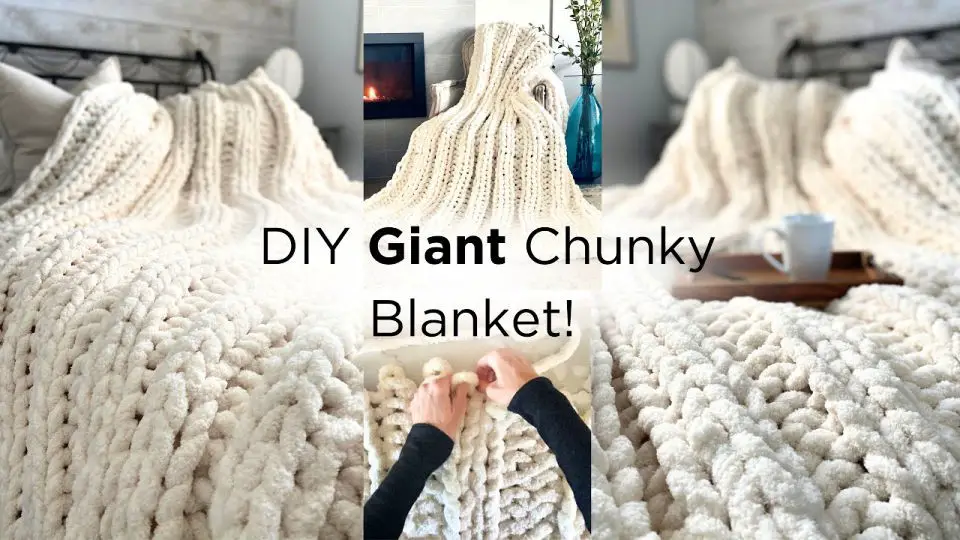
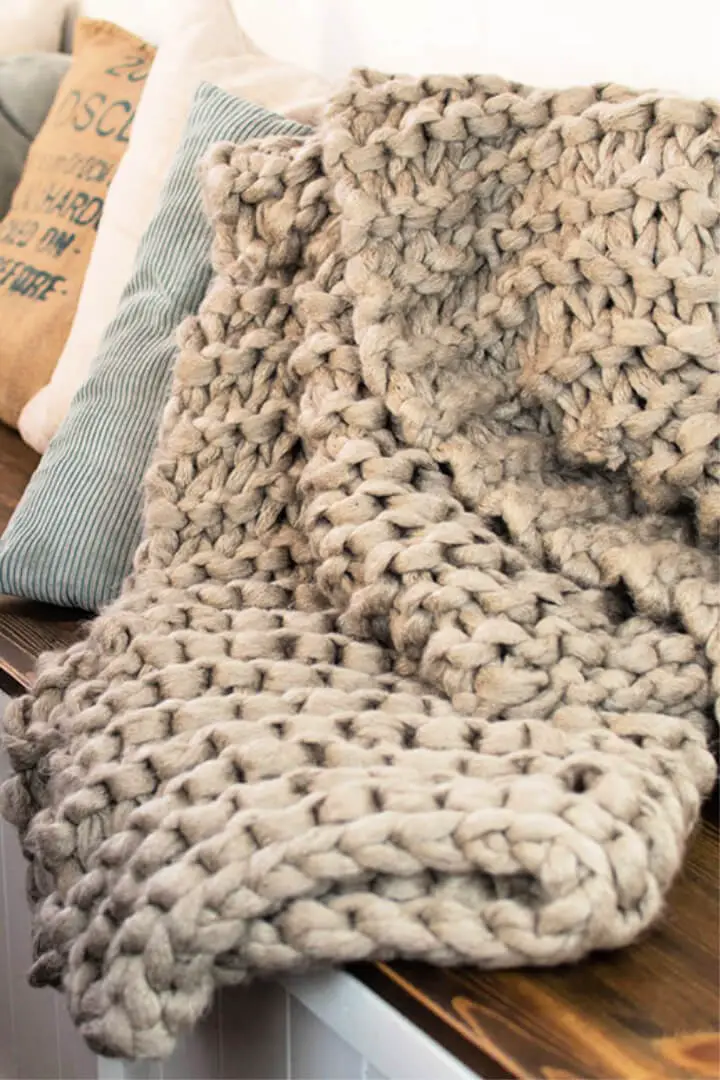
For a warm and inviting hand-knitted chunky blanket, turn to the Easy Chunky Knit Blanket DIY tutorial on YouTube. The Reclaimed Heirloom presents a detailed guide that takes viewers through the process of creating a ribbed pattern chunky blanket with ease. The video covers essential topics like yarn selection, including recommendations for chenille or Merino yarn and guidance on yarn size, to ensure the perfect choice. Additionally, the tutorial provides valuable insights into washing and caring for your finished blanket, particularly useful if you have children or pets at home who may get involved. With clear instructions and a gentle approach, this guide is an excellent resource for those looking to create their own homemade home decor with the added benefit of ASMR satisfaction.
Conclusion:
As we conclude this extensive guide to 15 arm knit blanket patterns for beginners, it’s clear that the journey has taken you from selecting the perfect materials to putting the finishing touches on your handmade masterpiece. Along the way, we’ve demystified the basics of arm knitting, tackled common obstacles, and shared expert advice on how to keep your project on track. With this comprehensive approach, even those new to arm knitting can now confidently take on a project and emerge with a cozy, unique blanket that’s sure to be treasured. Moreover, our exploration of sustainability in crafting has underscored the importance of eco-friendly choices in the creative process. So go ahead, gather your yarn, clear your arms for action, and get ready to craft something truly special – whether it’s for yourself or as a thoughtful gift.
