Why Make Your Own DIY Tripod Floor Lamp?
Crafting a DIY tripod floor lamp offers numerous benefits, making it an engaging project for anyone looking to express their creativity. Here’s why you should consider giving it a try: First and foremost, building a DIY lamp is a cost-effective way to obtain a high-quality lighting solution. By repurposing materials found at home or sourced affordably, you can save money on expensive store-bought options. Additionally, the process of creating something with your own hands allows for personalization – you get to decide every detail, from the color palette to the lampshade design, making it a true reflection of your unique style. Furthermore, completing a DIY project provides a sense of accomplishment and pride in one’s work. This can be especially fulfilling when shared with family or friends, as it encourages teamwork and fosters a sense of community. Moreover, by upcycling materials such as old tripods or reclaimed wood, you’re contributing to a more sustainable lifestyle – reducing waste and giving new life to items that might otherwise end up in landfills. Perhaps most importantly, a DIY tripod floor lamp is sure to be a conversation starter, its one-of-a-kind design adding character and warmth to any room.
How to Make a Floor Lamp – Step by Step
Crafting a bespoke designer wood lamp offers a thrilling combination of hands-on creativity and one-of-a-kind decorative flair. By following this straightforward, step-by-step guide, even those new to woodworking can confidently produce a breathtakingly beautiful piece that reflects their personal style.
Materials and Tools Needed
To craft a stunning wood lamp, you’ll need to gather the following essential tools and materials. First, select your preferred type of wood, such as cherry or walnut, along with some high-quality wood glue. You’ll also require clamps to hold your pieces in place during the assembly process. For precise cuts, rely on a miter saw and a router fitted with a quarter-inch spiral upcut bit. A drill with 3/8 inch and half-inch forstner bits will come in handy when drilling holes. If you’re working without power tools, consider using a bandsaw or handsaw to make your cuts. To smooth out any rough edges, bring sandpaper into the mix. As an added bonus, having a trim router and straight edge on hand can streamline the trimming process. For more intricate details, a chisel will be invaluable. Rounding over sharp edges with a half-inch round-over bit is also a good idea. If you’re looking to add some extra stability, consider attaching rubber feet to your lamp base. Finally, don’t forget about the lamp hardware and shade, as well as your chosen finish – Rubio Monocoat works beautifully, but feel free to experiment with other options. To complete the assembly process, have some screws on hand, along with a trusty screwdriver. And if you want to keep everything in place while it sets, a C-clamp is always a good idea.
Step by Step Guide
To create a visually striking lamp, start by preparing contrasting woods like cherry and walnut for the base and frame. If the cherry piece isn’t thick enough, laminate two pieces together to achieve the desired thickness. Set this aside while you work on the frame. Begin by building the frame using rip-cut walnut wood, about 2 inches thick, cut to the desired length for the sides of the lamp. For the stretchers that connect the frame and the lamp post, you’ll need three pieces: two for the frame and one for the lamp post.Next, route a quarter-inch groove down the center of one leg for the wire, ensuring it starts from the bottom and stops just before the top to remain hidden. Create an L-shaped channel on the stretcher for the wire to run through. After laying the wire in the groove, cover it with a thin strip of wood, glued and hammered into place, leaving excess wire length for easy connection.Assemble the frame using butt joints reinforced with soaked glue and contrasting wood plugs for added strength. Glue and clamp everything to dry. Move on to preparing the base by laminating if necessary, cutting it to size, and routing a mortise for the frame to fit snugly. Drill a hole through the mortise for the wire.Once the glue has dried, sand all parts before applying your chosen finish. Add a round over to the base and frame edges for aesthetic appeal. Route the wire through, glue the frame to the base, and secure it with screws. If desired, install rubber feet to elevate the lamp. Apply your chosen finish and once dry, assemble the lamp hardware according to instructions.Before adding the lampshade, test the lamp to ensure it works properly.
Video Tutorial
Combining a written guide with a step-by-step video tutorial on crafting a designer wood lamp provides a comprehensive learning experience. This multimedia approach enhances comprehension by illustrating each process in a clear and concise manner, making complex tasks more accessible. The fusion of visual aids and detailed instructions empowers individuals to build a beautiful and functional wooden lamp that not only adds a personal touch to their space but also fosters a sense of accomplishment. By investing time and creativity into transforming simple wood pieces into stunning decorative items, anyone can develop a satisfying DIY project that brings warmth and style to any room.
10 DIY Floor Lamp Ideas (How to Make Floor Lamp)
Elevate your home’s ambiance by crafting a one-of-a-kind floor lamp from the comfort of your own space. With 10 innovative DIY projects, you’ll uncover the simplicity of creating unique lighting that reflects your personal style.
DIY West Elm Inspired Tripod Floor Lamp
Transform your living space on a budget by creating a chic DIY project inspired by West Elm’s wood tripod floor lamp. This achievable endeavour requires only a few cuts, some drilling, and a dash of creativity. Our comprehensive guide will walk you through each step, from selecting the perfect wood to the final touches of staining and attaching the lampshade. By following our instructions, you’ll be able to create a stylish piece for under $40, adding a personalized touch to your decor while capturing the essence of a high-end design. This unique lighting solution is perfect for DIY enthusiasts looking to elevate their home’s ambiance with a one-of-a-kind fixture.
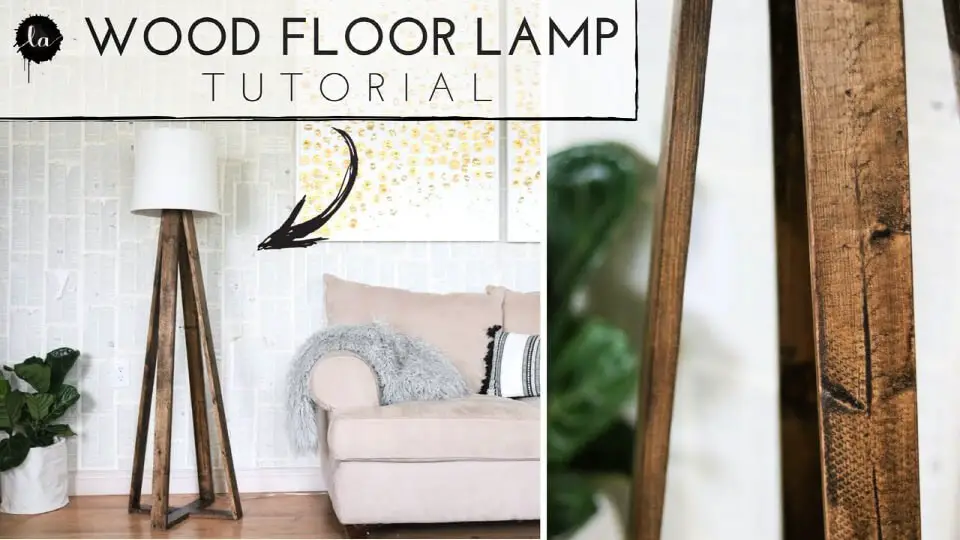
Make a Wooden Tripod Floor Lamp
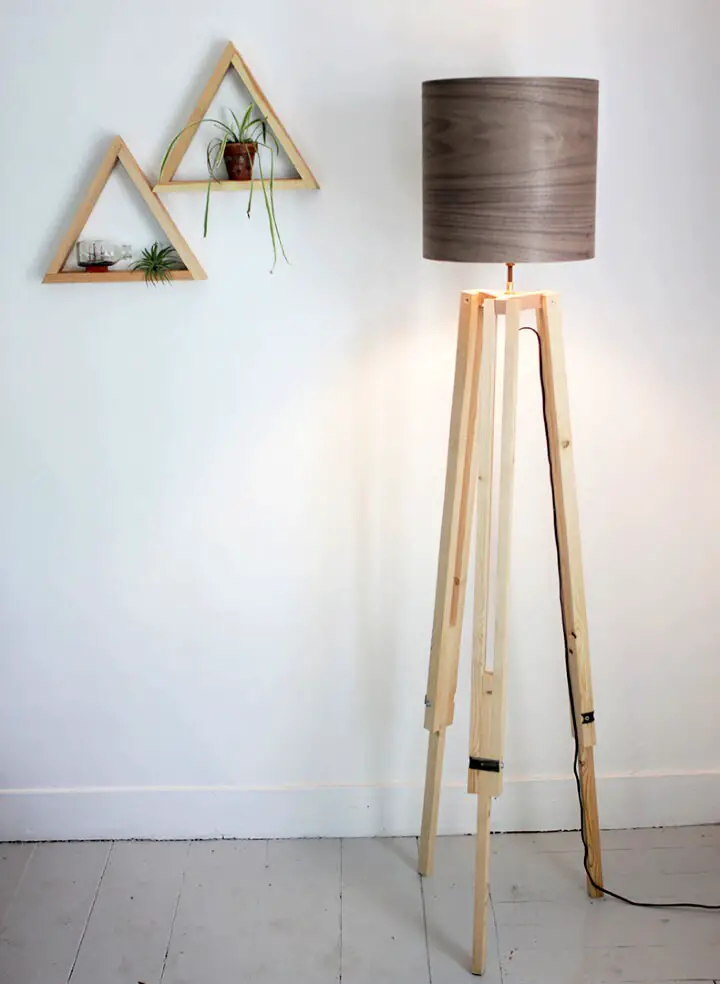
Transform your living space into a unique oasis by creating a one-of-a-kind wood tripod floor lamp. This comprehensive tutorial will walk you through the process, from crafting the wooden tripod base to assembling a stylish veneer lampshade. With this DIY project, you’ll be able to personalize your home decor with a professional touch and a personal flair that reflects your individual style. Whether you’re looking for a fun and fulfilling crafting experience or seeking to elevate the ambiance of your room, this guide is sure to inspire. Plus, consider adding this unique lamp to your list of most profitable woodworking projects to build and sell.
Making Floor Lamps out Of a Tripod
Elevate your decor without breaking the bank by transforming an old thrifted tripod into a stylish and unique floor lamp. This budget-friendly DIY project is perfect for those who crave high-end flair on a shoestring. With a total cost of just $40, it’s an affordable alternative to expensive store-bought options. Whether you’re looking to add some ambiance to your dining room or create a cozy atmosphere in your she-shed, this tripod lamp is sure to be the centerpiece of any space. To get started, simply follow these straightforward steps and watch as your thrifted find becomes a chic designer-worthy statement piece.
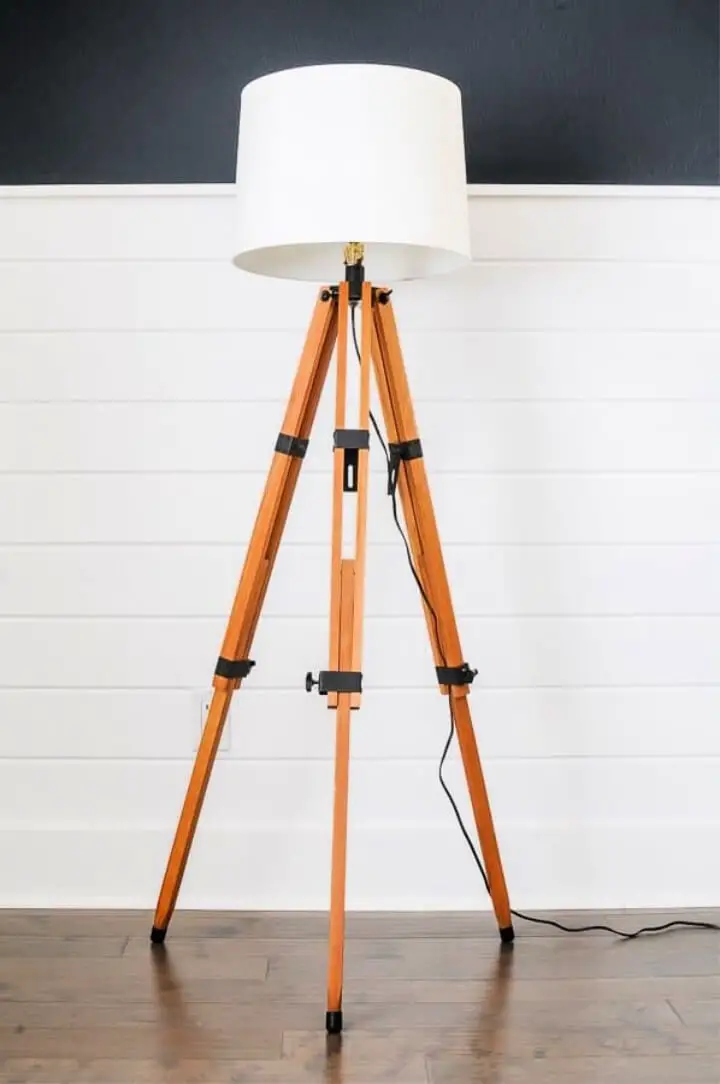
How to Make a Tripod Lamp
Transform your living space with a one-of-a-kind DIY tripod lamp by following the step-by-step guide on Dream Book Design. The project begins with a basic tripod, which then requires staining, drilling, and assembling to create a custom lighting fixture that adds warmth and character to any room. By using a lamp kit, extenders, and a dash of creativity, you can craft a piece that perfectly complements your personal style while offering a cost-effective alternative to expensive retail options. This DIY endeavor not only saves you money but also provides the satisfaction of having created something with your own hands. To ensure a safe and successful project completion, safety reminders are carefully included throughout the guide.
Easy DIY Tripod Floor Lamp
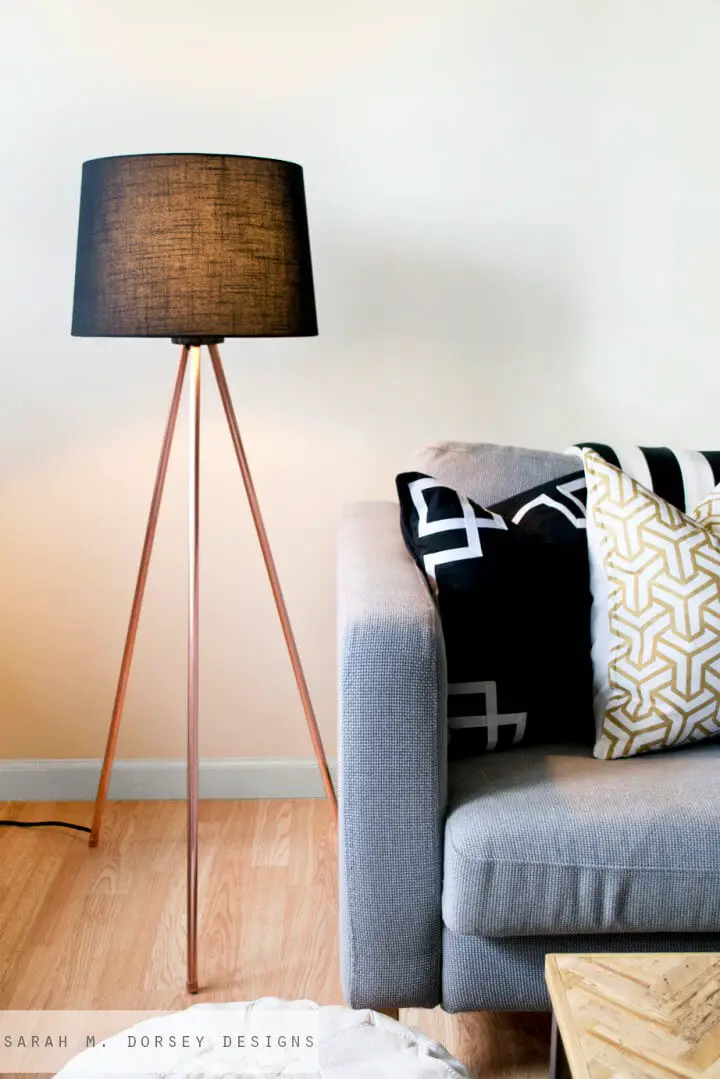
Immerse yourself in the world of DIY creativity with Sarah M. Dorsey Design’s captivating project from Knocktoberfest. This budget-friendly version of a high-end tripod floor lamp exudes elegance and height, effortlessly elevating any room’s ambiance. With a comprehensive guide that’s easy to follow, Dorsey Designs cleverly utilizes simple materials like copper piping and 2×4 lumber to craft something truly breathtaking. For a touch of DIY magic that won’t strain your wallet, explore Dorsey Designs’ inspiring creation. Perfect for enhancing your living space without the hefty price tag!
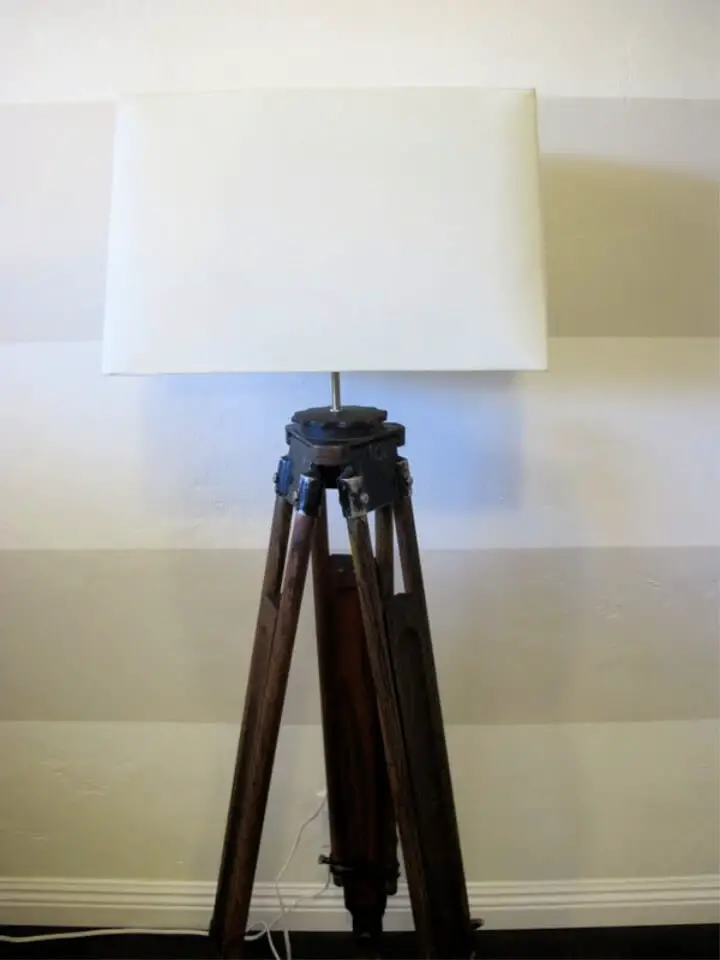
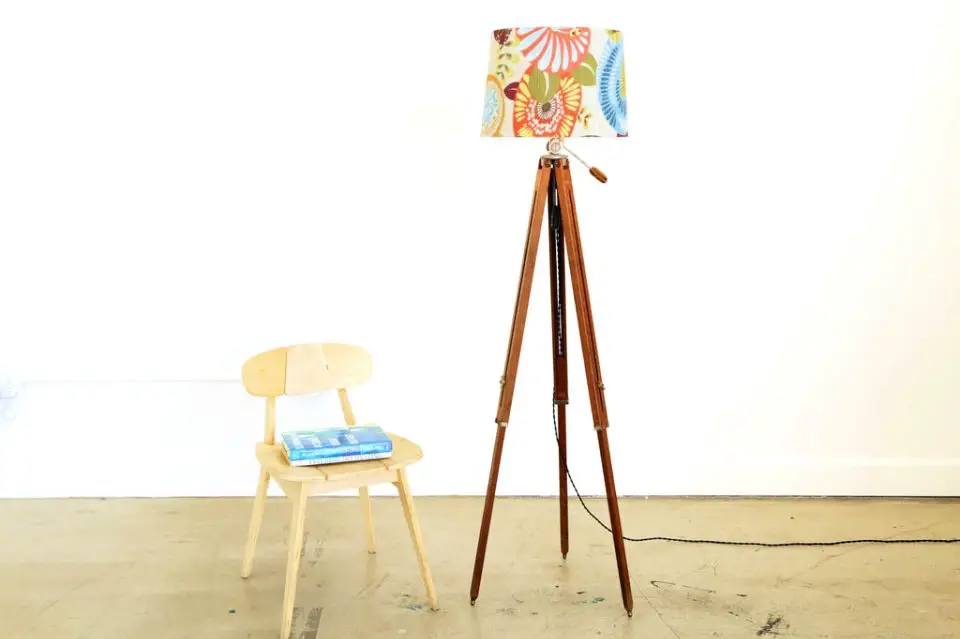
Industrial Floor Lamp from a Surveyors Tripod
Transform an old surveyor’s tripod into a modern industrial floor lamp by combining creative flair and DIY expertise. This project demonstrates that you don’t have to sacrifice style for affordability, as what was once a costly decor piece can be repurposed into a statement light at a fraction of the cost. By embracing upcycling, you can give your home a unique touch of industrial chic without breaking the bank.
Handmade Tripod Floor Lamp
Transform any room with the warm glow of a custom-made Tripod Floor Lamp. Perfect for DIY aficionados, this project allows you to infuse your personal style into every aspect of your lighting design, effortlessly matching it to your home’s unique aesthetic.To bring this elegant addition to life, follow a straightforward and engaging step-by-step guide on Instructables. This comprehensive resource will walk you through the assembly process with clarity and ease, ensuring that your finished piece seamlessly integrates into any setting and turns even the most mundane corner into a inviting retreat.
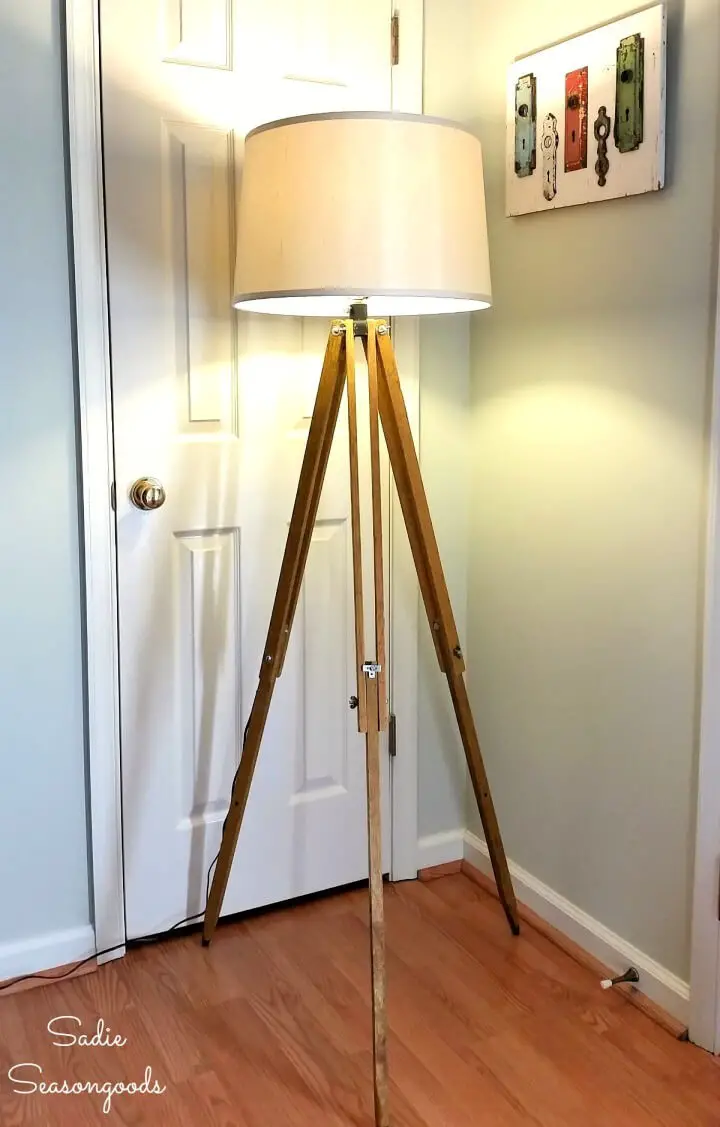
DIY Wood Surveyor’s Tripod Floor Lamp
Imagine transforming an old tripod into a one-of-a-kind floor lamp that’s not only functional but also tells a story of its unique history. At Scavenger Chic, we’re excited to share our Wood Surveyor’s Tripod Floor Lamp project, where a vintage tripod is repurposed into a stunning piece of home decor. This step-by-step guide takes you on a creative journey from sourcing the right parts to wiring, proving that crafting a bespoke floor lamp is more accessible than you might think. Not only will you save costs, but you’ll also end up with a statement piece that rivals high-end designs.
DIY Copper Tripod Lamp
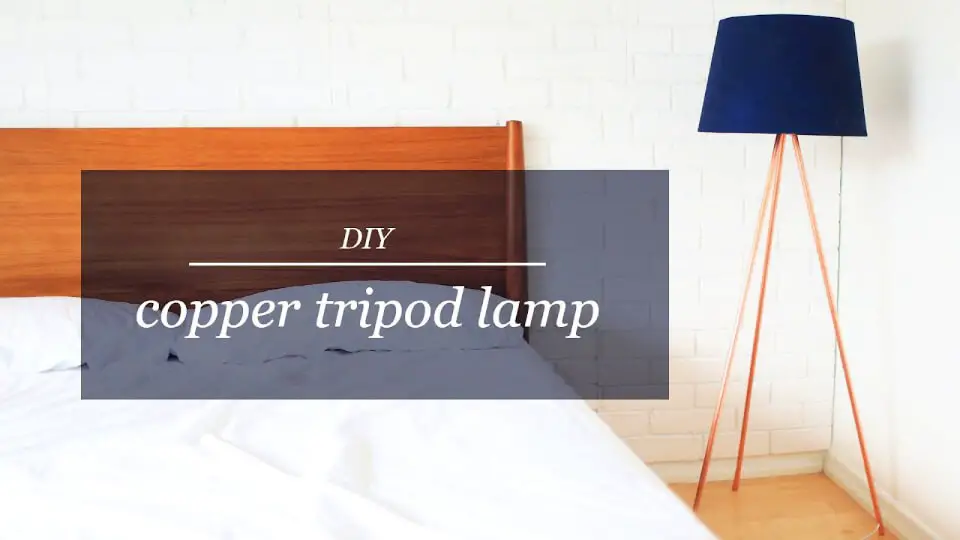
Step into the world of DIY crafting with The Sorry Girls’ comprehensive guide on making a stunning copper tripod lamp. This budget-friendly floor lamp is designed to bring sophistication and elegance to any room. Through their detailed tutorial, you’ll learn how to transform copper pipes into a one-of-a-kind piece of art. From drilling and cutting copper to assembling the electrical components, every step is meticulously explained, ensuring a seamless DIY experience. For a closer look at this creative project and its potential to elevate your home decor, explore The Sorry Girls’ tutorial today.
Awesome Floor Lamp Big Reveal
In just 2 hours, you can create a stunning modern DIY Floor Lamp that exudes elegance and sophistication. This project is perfect for impressing your partner or adding a unique touch to your home decor. With our easy-to-follow tutorial, you’ll be able to craft a piece that looks both expensive and on-trend. Whether you’re looking to transform an old tripod or start from scratch, this DIY lamp kit will guide you through the process. The magic of combining a lamp kit with your chosen colors of lampshades will add a touch of class to any room. So why not give it a try? If you have any questions or need assistance, feel free to drop a comment and let’s tackle it together! Your support means the world to me and fuels my passion for inspiring others.
Conclusion:
By embracing DIY floor lamp projects, you’re not just bringing light into your space; you’re also creating an opportunity to express yourself and showcase your individuality. The journey begins with selecting the perfect materials and tools, which is made even easier with our comprehensive guide. As you bring your vision to life, you’ll find that crafting a unique floor lamp can be a deeply fulfilling experience. With these 10 inspiring DIY floor lamp ideas, you’ll have everything you need to create a beautiful, functional piece that reflects your personal style and adds warmth to your home.
