Why Build Your Own Console Table?
Creating a custom console table is a project that offers more than just building a piece of furniture – it’s about crafting something truly unique to your style and space. Here are some compelling reasons to consider taking on such a venture:
Cost Savings: By selecting materials within your budget, you can save significantly compared to purchasing a pre-made table from a store.
Customization: With DIY, you have the freedom to tailor your table’s size, color, design, and overall aesthetic to perfectly fit your space and personal taste.
Skill Development: Each step of the process – from planning to execution – offers an opportunity to improve or acquire new woodworking skills. This hands-on experience is invaluable for building confidence and expertise in your DIY abilities.
Sense of Accomplishment: There’s no substitute for the satisfaction that comes from creating something with your own two hands. Your finished table serves as a testament to your effort, creativity, and perseverance.
Quality Control: By choosing your materials and paying attention to the construction process, you can ensure your table is sturdy, well-made, and possibly even surpasses the quality of mass-produced alternatives.
Eco-Friendly Option: DIY projects provide an opportunity to repurpose or recycle materials, making it a more sustainable choice that reduces waste and environmental impact. By building your own console table, you’re not only creating something functional but also contributing to a greener future.
How to Build a Console Table
While building a console table from scratch may seem like an intimidating task, it’s actually a rewarding project that can add a unique touch to your home and provide a sense of accomplishment. Whether you’re a seasoned woodworker or just starting out, this straightforward guide will walk you through the process of constructing a stunning console table using basic 2×6 boards, helping you bring your vision to life.
Materials and Tools Needed
To embark on the project of building a wooden coffee table, you’ll need to gather a selection of essential materials. Begin by acquiring six 2×6 boards for the legs, frame, and shelves. Next, gather wood glue to bond the pieces together, as well as screws that are specifically designed for use with wood. Additionally, procure dowel rods to serve as inserts between the table’s top and shelf. For finishing touches, have paint or stain on hand to match your desired aesthetic, along with polyurethane for a protective coating. To tackle the construction process, you’ll also need basic woodworking tools such as a saw, drill, router, and more. Further, invest in sandpaper featuring various grits to smooth out surfaces, clamps to hold pieces together during assembly, a measuring tape to ensure accurate measurements, and a square and pencil for precise marking of cuts.
Step 1: Preparing the Wood
To start building your project, begin by ripping three 2×6 boards along their length to achieve a width of exactly 3 and 3/4 inches on one side. These cut pieces will serve as the legs and foundation of the frame. Once you’ve achieved this width, set aside the wider sections for constructing the legs, reserving the narrower remnants for future steps in the process.
Step 2: Building the Frame
When it comes to building the frame’s foundation, start by utilizing any remaining wood to create the top and bottom supports that will be situated between the legs. To ensure a sturdy base, make sure these pieces are precisely cut and uniform in width. Next, use the original boards to split them down the middle, then cut additional support beams to form the side and rear frames. By doing so, you’ll establish a strong structure that can withstand the weight of your design.
Step 3: Assembling the Frame
When assembling your project, consider forgoing pocket holes in favor of a doweling jig. This approach involves drilling holes two-thirds down on marked spots on each piece, ensuring accurate alignment. To complete the connection, apply glue and then secure the beams and legs together with screws. For added ease, utilize pipe clamps or affix them to a workbench during the assembly process.
Step 4: The Tabletop
To complete the tabletop, you’ll need to cut an additional three 2×6 boards to the required size. Before assembling them, ensure each board has a smooth and flat surface by milling or planing them. This will help guarantee a seamless fit when they’re joined together.
Once prepared, apply a suitable adhesive and use clamps in conjunction with scraps of wood to prevent any unwanted indentations. Allow the glue to dry completely before handling the tabletop.
Step 5: Detailing with X-Braces
When crafting the side X-braces, consider utilizing leftover wood or purchasing new 2x2s. It’s crucial to measure and cut precise angles that allow for seamless integration within the frame. To create a sturdy joint, build a half-lap connection in the center of the X pieces, ensuring they fit together snugly when assembled.
Step 6: Finishing Touches
To complete the shelving unit’s framework, it’s crucial to seal any visible gaps left by drilling with dowel rods. This involves cutting the rods flush with the surrounding material and then sanding them down to a smooth finish.
Next, focus on the slats that will form the middle and bottom shelves. Gather the remaining pieces and ensure they are evenly spaced before securely attaching them to the main structure.
Step 7: Final Assembly and Finishing
When it comes to completing your project, attention to detail is key. For the frame, a clean and professional finish can be achieved with latex paint. Meanwhile, the tabletop demands a more durable approach. Staining followed by multiple coats of polyurethane not only enhances its aesthetic appeal but also guarantees longevity. The final step involves attaching the tabletop to the frame. While specialized attachments like Z-clips are ideal for accommodating wood movement, a simpler yet effective solution can be achieved with screws directly through the frame into the tabletop.
Video Tutorial
For those who prefer a more visual approach, a step-by-step video tutorial is available to accompany the written instructions. This comprehensive guide provides an in-depth look at the techniques involved in building this DIY console table, making it easier for beginners and seasoned woodworkers alike to follow along. By creating your own console table, you’ll not only add a one-of-a-kind piece of furniture to your home but also develop your woodworking skills. With the flexibility to customize the design according to your personal preferences, you can craft a console table that perfectly complements your space and style. Start building today!
DIY Console Table FAQS
As you venture into creating a custom console table, various queries may emerge. To provide clarity and support throughout your DIY endeavor, we’ve compiled responses to some of the most frequently asked questions.
What materials do I need to build a console table?
To bring your DIY wooden coffee table project to life, you’ll need a variety of materials. The specific requirements will depend on the design you have in mind, but here are some common essentials: wood planks or boards for the tabletop and legs provide the foundation for your piece. You’ll also need screws and/or nails for assembling the components together, as well as sandpaper to smooth out any rough edges. To add a touch of color and personality, consider using paint or stain to finish your design. Finally, don’t forget to apply a protective sealant to ensure your coffee table remains durable and long-lasting.
How do I choose the right design for my console table?
When planning a woodworking project, it’s essential to consider several key factors before diving in. First, think about the space where the table will ultimately reside. This includes its size, style, and overall aesthetic appeal. Will the table be placed in a traditional setting or a modern one? How much clearance is available around the table? These considerations will help you determine the ideal dimensions and design for your project.Next, consider the primary purpose of the table. Is it meant to serve as a decorative piece, providing a touch of elegance to a room? Or will it be used for storage, holding items such as books or decorative objects? Your answer to this question will influence the design and construction of the table.Lastly, think about your own skill level and the tools you have at your disposal. If you’re a beginner, you may want to start with a simpler project that doesn’t require advanced joinery techniques or specialized tools. On the other hand, if you’re an experienced woodworker looking to challenge yourself, you can opt for a more complex design that showcases your skills.
How long does it take to build a console table?
Complexity is a significant factor that influences the time required to complete a design. On one end, simple and straightforward designs can be wrapped up in just a few hours, while on the other hand, intricate and multi-faceted designs may require a substantial amount of time – sometimes even spanning several days or weeks. It’s essential to consider your experience level as well, as this too can impact the overall time frame.
Can beginners build a console table?
When starting out, it’s perfectly fine to begin with straightforward designs that necessitate minimal equipment and gradually progress to more intricate projects as your abilities and confidence grow.
How do I ensure my console table is stable?
When it comes to building a stable coffee table, there are several key factors to keep in mind. One of the most important considerations is the materials used for its construction. Opting for sturdy, high-quality materials will help ensure that your table can withstand daily use without compromising on stability. In addition to selecting robust materials, it’s also crucial to verify that all connections are secure and tight-fitting. This will prevent any potential wobbling or shifting of the table during everyday activities. If you’re concerned about the table’s overall stability, consider adding additional support brackets – especially if it’s a longer or heavier piece. Finally, make sure the table is level both during and after assembly to eliminate any unevenness that might affect its stability.
What tools do I need to build a console table?
Essential to any DIY project are the fundamental tools that provide a solid foundation. These basic instruments can be used to shape, cut, and prepare surfaces for further work. Among them are saws of various types, including handheld models like hand saws, as well as power-driven circular saws and miter saws. Next in line are drilling tools, which enable the creation of precise holes or drive screws into place. A reliable screwdriver is also crucial, capable of handling a range of fastening tasks. Measuring up to exacting standards requires a trusty measuring tape, while sanding and smoothing surfaces can be achieved with manual sanding blocks or electric-powered sanders. Finally, finishing touches are added with paintbrushes or rollers, ensuring a professional-looking finish.
How do I finish my console table?
To complete the project, you’ll need to focus on the finishing touches. This includes a series of steps designed to bring out the beauty in the wood and provide a durable surface that can withstand daily use. The process begins by sanding the wood to a smooth finish, starting with a coarse grit and gradually moving to finer grits until you achieve the desired level of polish. Once the wood is prepared, you can apply your chosen stain or paint, carefully following the manufacturer’s instructions to ensure the best possible results. Finally, seal the table with a protective clear coat to provide an added layer of durability and protection against scratches, spills, and other forms of wear and tear.
Can I use reclaimed wood to build a console table?
When it comes to infusing your project with unique charm and eco-friendliness, reclaimed wood is an excellent option. Before getting started, however, it’s crucial to ensure the wood is thoroughly cleaned, completely dry, and pest-free to guarantee a solid foundation for your creative endeavor.
How can I customize my console table?
Transforming a console table into a one-of-a-kind masterpiece requires creativity and imagination. Think outside the box by selecting a distinctive color or stain to give it a personalized flair. For added visual interest, consider incorporating decorative hardware or accents that reflect your personal style. Taking it a step further, you can also incorporate functional elements like shelves or drawers to create a multi-purpose piece. Mixing and matching materials, such as combining metal legs with a wood top, can add an extra layer of complexity and character. By infusing your console table with these creative touches, you’ll be left with a truly unique and rewarding project that reflects your personality and adds a special touch to your home.
25 Simple DIY Console Table Plans (Build an Entry Table)
Elevate the ambiance of your home’s entrance with 25 straightforward DIY console table plans, perfect for crafting a unique and stylish entry table. Ditch conventional designs and unleash your creativity by bringing these simple yet impressive projects to life!
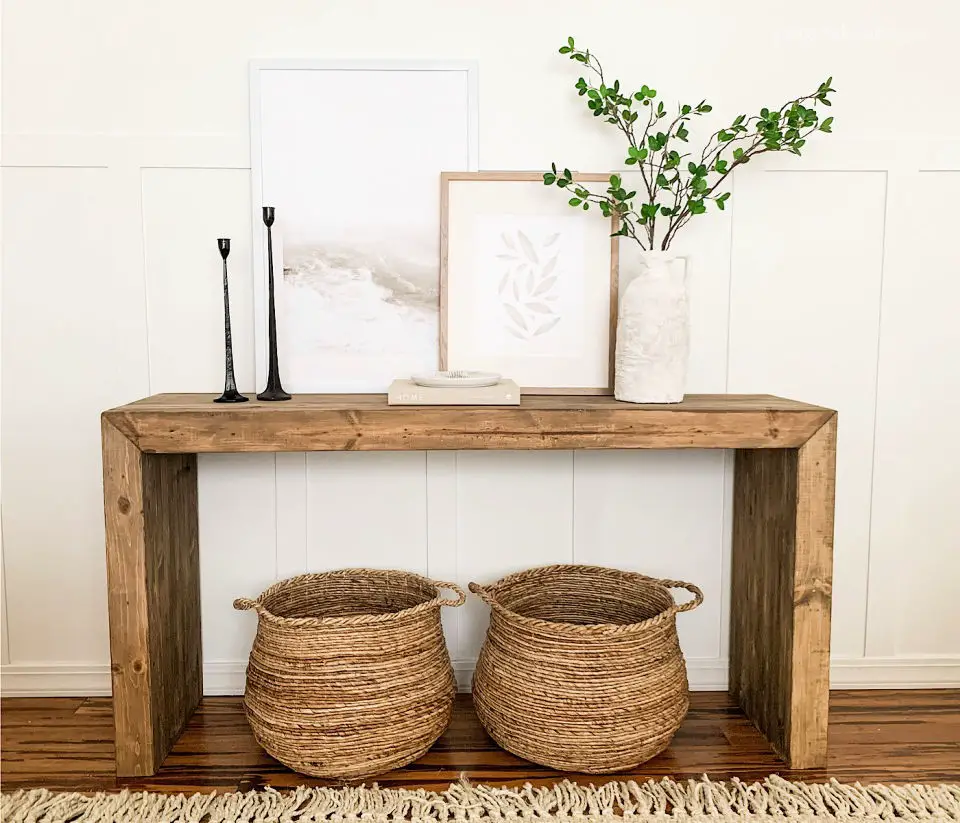
DIY Farmhouse Console Table
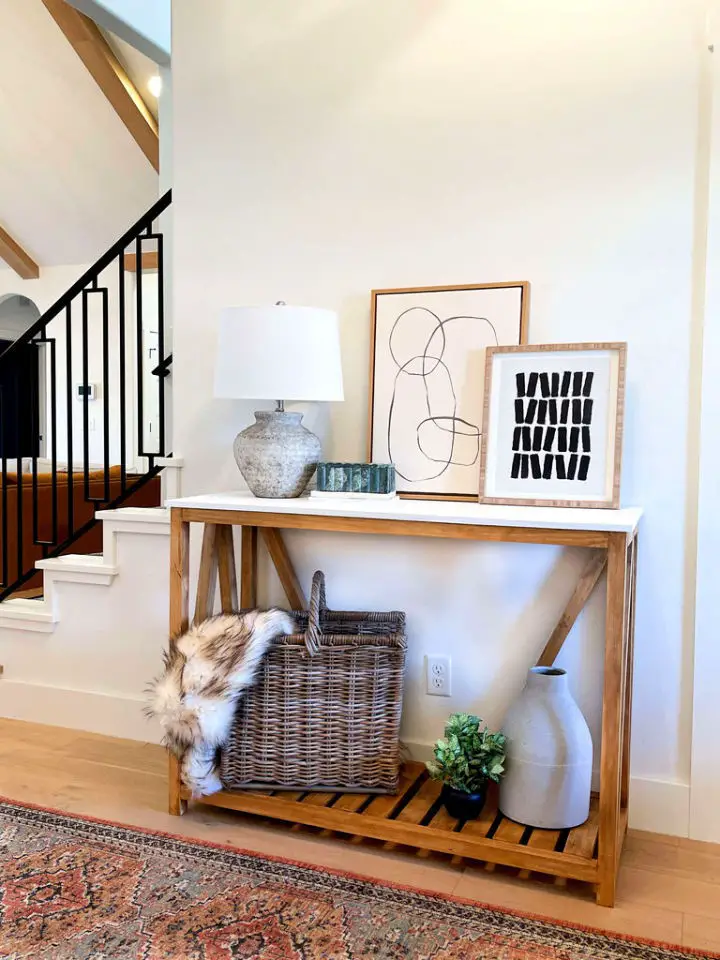
Discover the art of crafting a charming farmhouse console table with Ashley Basnight’s expert guide on Handmade Haven. As she passionately shares her love for console tables, highlighting their enduring appeal and adaptability in home decor, you’ll be inspired to add a touch of rustic elegance to your entryway. This DIY project is carefully broken down into manageable steps, beginning with the construction of the sides using a Kreg Jig, framing, and concluding with the addition of slats and finishing touches. Ashley’s comprehensive tutorial includes an exhaustive list of required materials, essential tools, and valuable tips – such as employing a right-angle clamp for stability during assembly – to ensure a seamless experience. She also walks you through the wood preparation and staining process, providing guidance on achieving a professional finish. The final product is a stunningly crafted table that can be proudly displayed in any home. For those eager to take on this project, detailed printable plans are provided, making it easy to get started. Join Ashley in crafting this farmhouse console table and add a functional, stylish piece to your living space.
How to Make a Wood Console Table
If you’re looking to add a touch of uniqueness to your home decor, From House To Home DIY & Design presents a detailed blueprint for crafting a wooden console table from scratch. This project is designed with the needs of crafty individuals in mind, offering a step-by-step guide that prioritizes customizability and ease of execution. The comprehensive tutorial includes a list of required materials, precise cut dimensions, and necessary tools, making it accessible to DIY enthusiasts of all skill levels. By emphasizing the importance of accurate cuts and proper assembly, the guide ensures a seamless building experience. Additionally, the tutorial delves into staining techniques and clear coat suggestions, allowing homeowners to personalize their finished product according to their aesthetic preferences. With this engaging and instructive guide, your new console table will not only serve as a functional piece but also showcase your creative prowess.
Building a Farmhouse Console Table
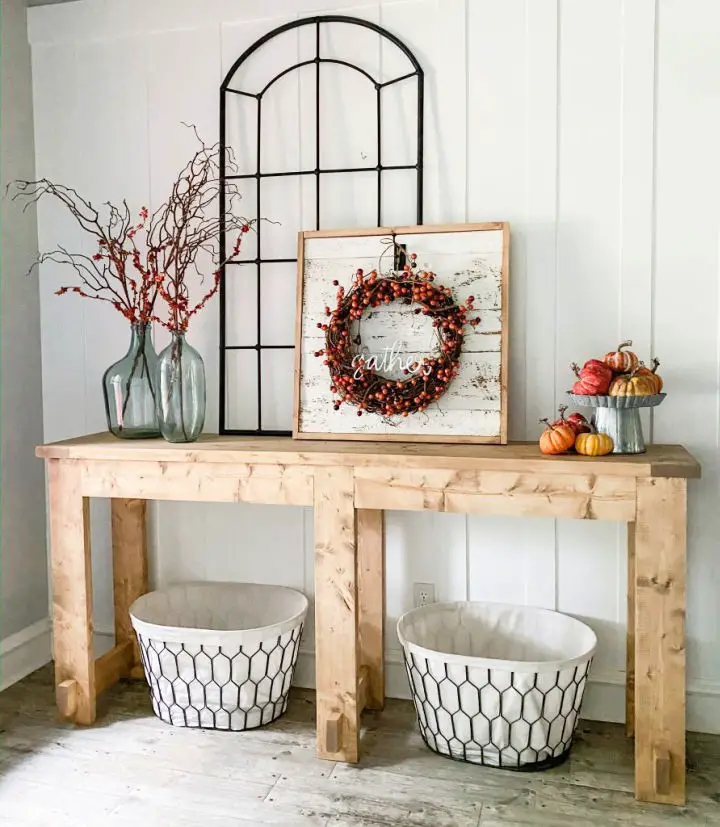
Transform the look of your home with a DIY console table that’s both stylish and budget-friendly. With the DIY Farmhouse Console Table guide from Shanty 2 Chic, you can create a rustic masterpiece perfect for beginners and experts alike. This versatile piece is ideal for the entryway or any room in your home where you want to add a touch of warmth and character.
This tutorial makes it easy to get started with detailed instructions on sawing, assembling, and staining eight 2×6 boards. The result is a simple yet elegant design that’s perfect for decorating and impressing your guests. Whether you’re looking to create a cozy farmhouse vibe or simply add some rustic charm to your home, this DIY project has got you covered.
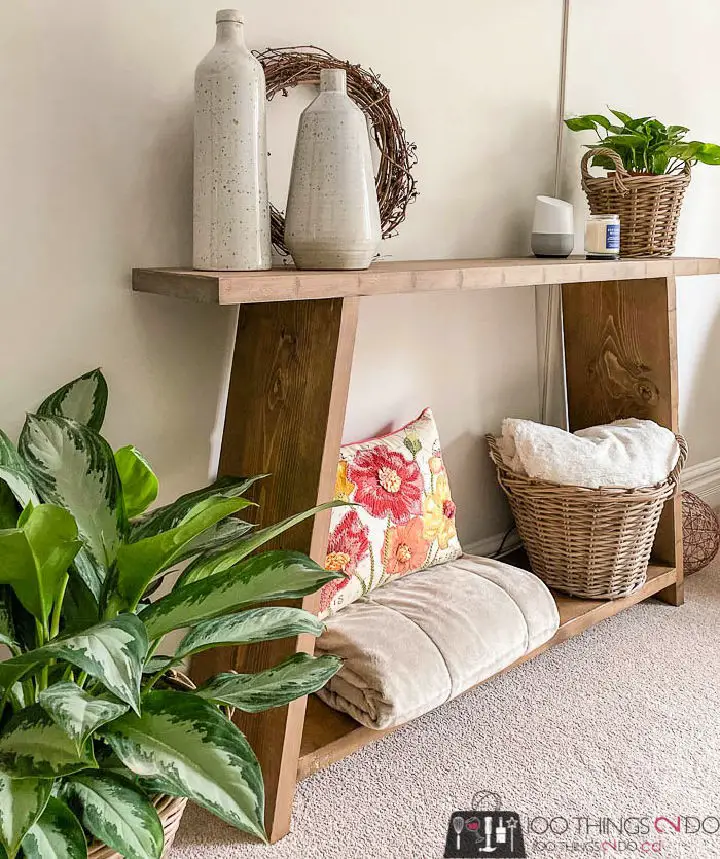
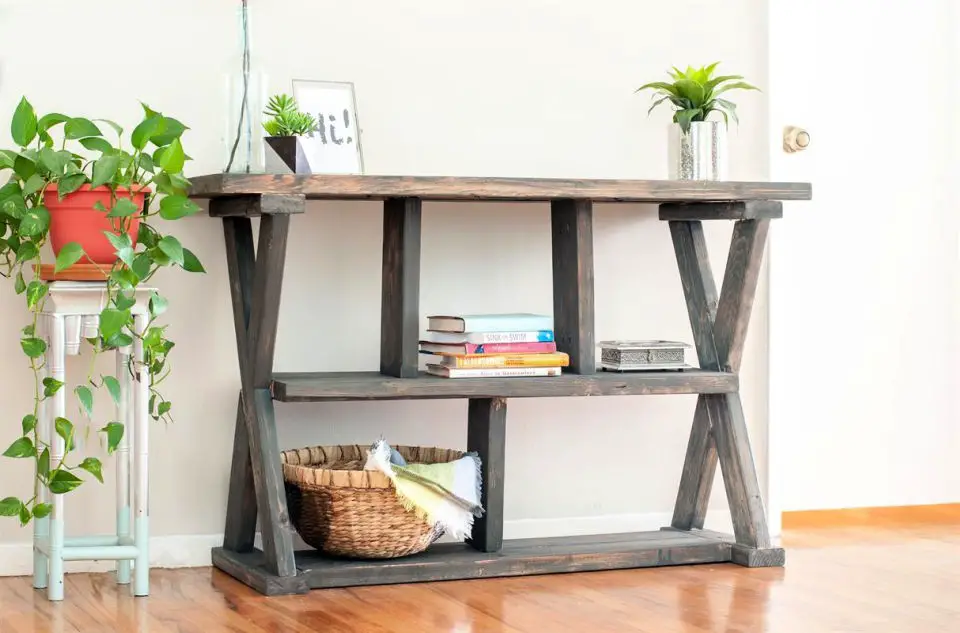
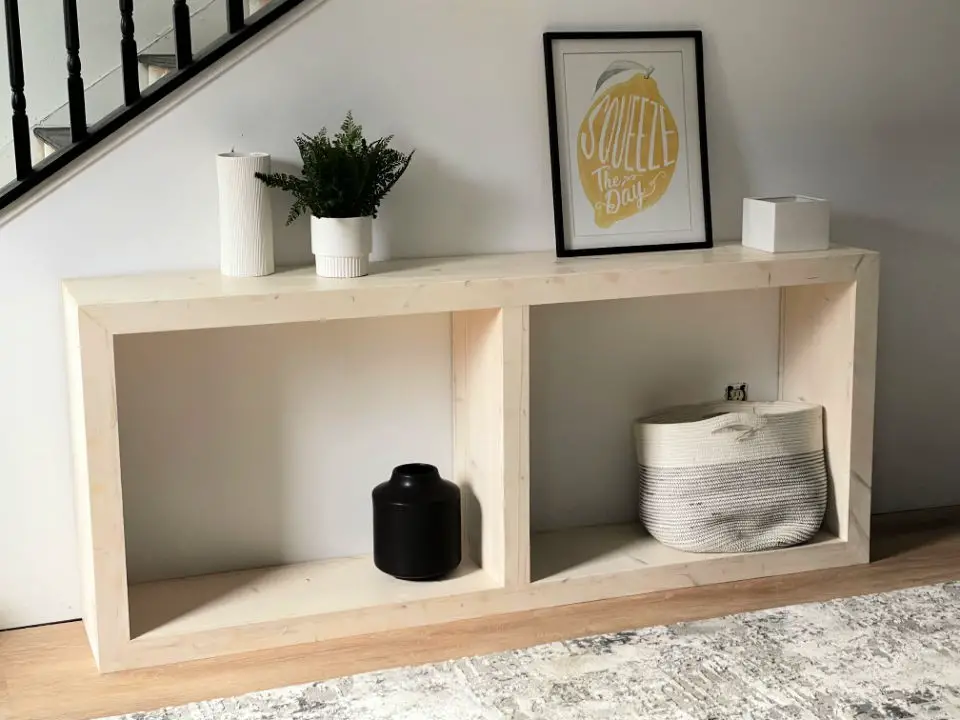
DIY X Base Console Table With Middle Shelf
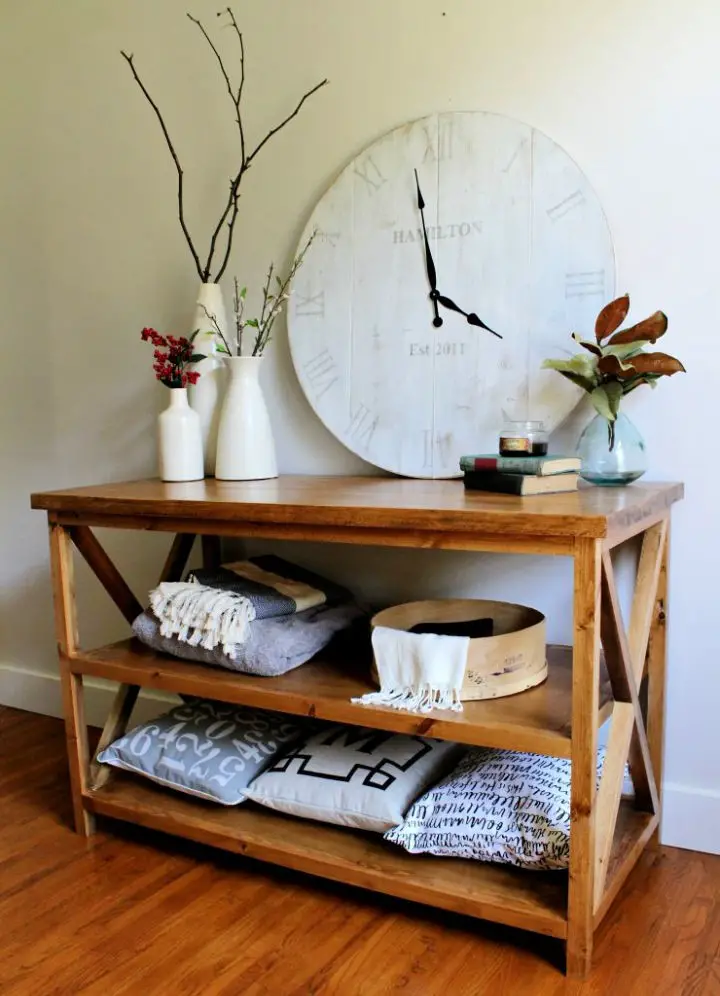
Elevate your living space with a unique and practical DIY X Base Console Table featuring a middle shelf. Our comprehensive guide at Woodshop Diaries takes you through the process of crafting this functional piece of furniture, perfect for storing blankets, books, and decorative items. The X design on the sides adds an aesthetic appeal to the console table, making it a great addition to any room. With basic tools like a miter saw, circular saw, and drill, this project is accessible to DIY enthusiasts of all skill levels. Simply follow our step-by-step instructions to construct the frames, assemble the X base, add the shelves and top, and you’ll have your new favorite piece of furniture in just a few hours. The added middle shelf provides ample storage space for living rooms or bedrooms, making this console table an ideal addition to any home.
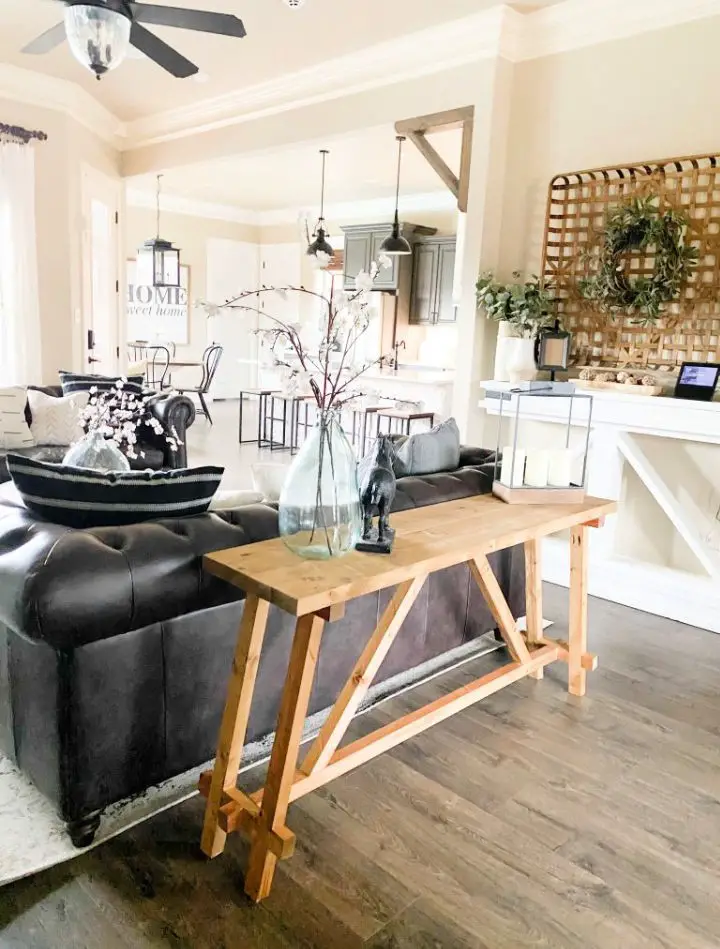
How to Build a 2×4 Console Table
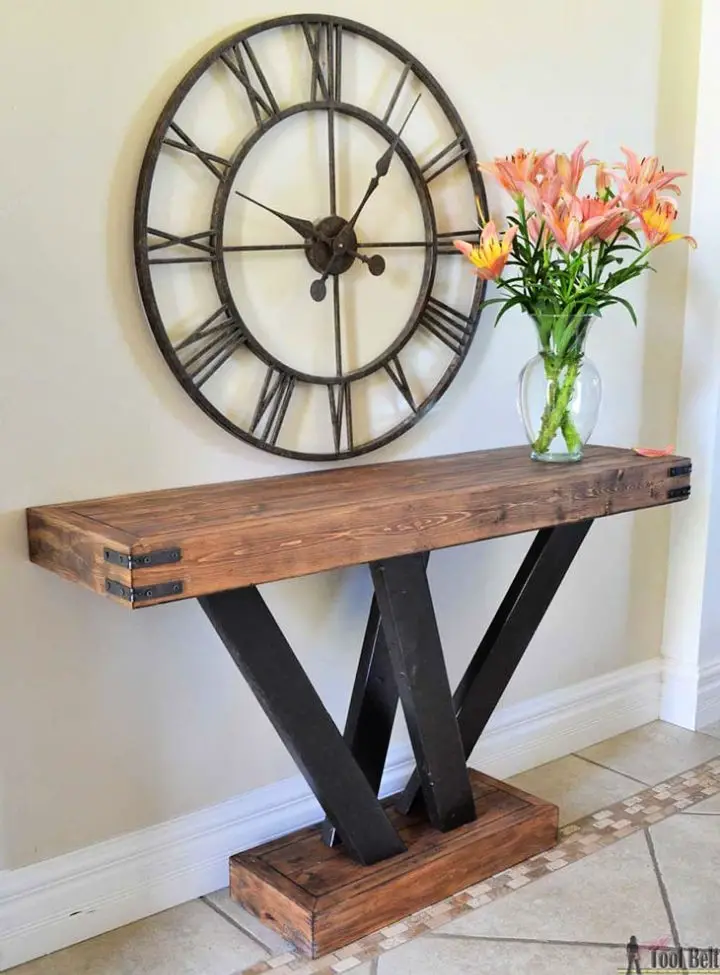
For those seeking to infuse their entryway with rustic charm, Her Tool Belt’s 2×4 Console Table guide provides an approachable DIY project. The comprehensive resource features clear instructions, a detailed materials list, and a helpful build video, making it accessible to anyone looking to create a stylish and functional piece of furniture. By utilizing just six 2×4 lumber boards and basic tools, individuals can craft a one-of-a-kind console table with distinctive angled legs. The step-by-step process covers every aspect, from cutting and assembly to sanding and staining, ensuring a polished finish. Through this hands-on activity, enthusiasts can enjoy the satisfaction of building a custom console table for their home.
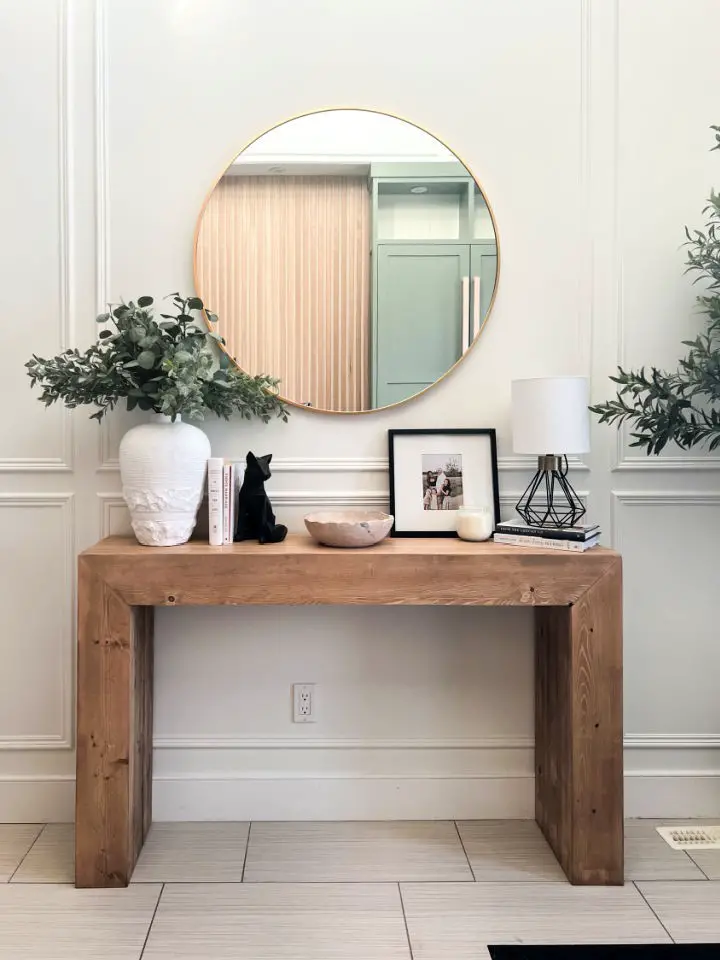
Modern DIY Entry Table
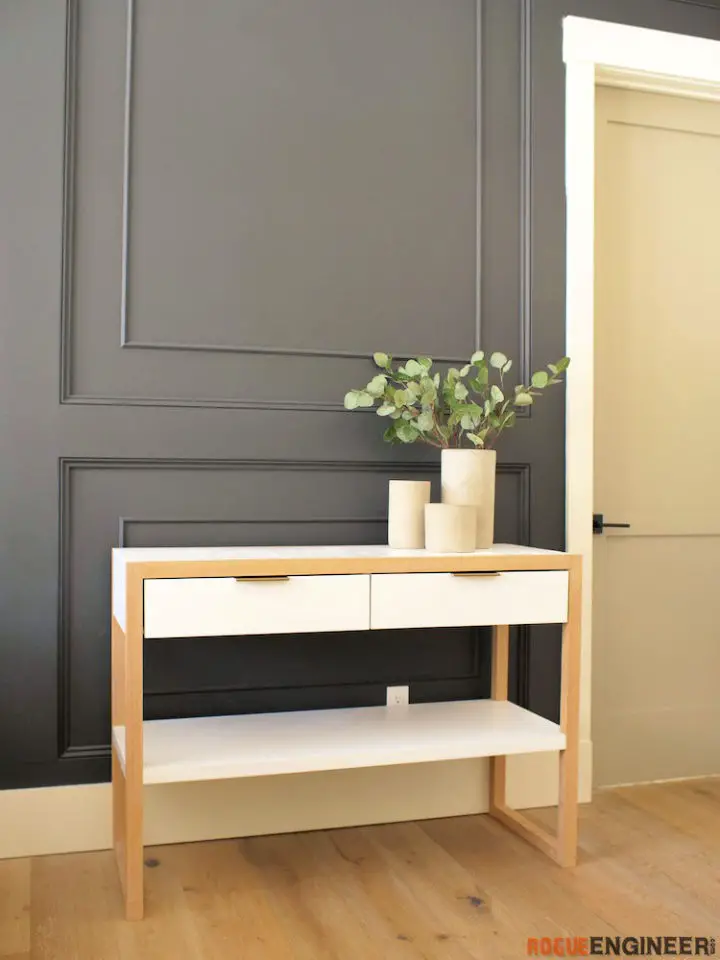
Are you ready to revamp your living space with a touch of modern flair? The Rogue Engineer, Jamison Rantz, shares his expertise by walking you through the process of building your own sleek and modern console table, perfect for any home. This DIY guide is designed for those who appreciate clean lines and minimalistic aesthetics, and are eager to take on a project that yields stunning results. With the provided video tutorial, comprehensive list of materials and tools, and valuable tips, you’ll be well-equipped to create a functional piece that’s sure to spark conversations in your home. The downloadable PDF plans from Rogue Engineer will guide you through every step, ensuring your console table turns out flawless with precise dimensions and cut lists.
Make Your Own Console Table
Unleash your creativity by building a chic DIY console table using Instructables’ comprehensive guide. This beginner-friendly project demystifies advanced joint techniques, making it possible for anyone to create a stylish table that complements their space. The design features faux drawers and allows for the use of store-bought legs, eliminating the need for woodturning expertise. Perfect for those seeking a custom piece that reflects their personal style, this DIY endeavor promises a rewarding experience, resulting in a functional and visually appealing console table that adds a unique touch to any home.
Four Board Console Table Tutorial
With just a few basic materials, you can transform your space into a stunning haven that rivals high-end designs costing over $1,600 US. Shelly’s DIY console table tutorial is an excellent guide for those looking to add a personal touch to their home decor without breaking the bank. By following her easy-to-learn instructions and using only four boards, 12 screws, and a small amount of wood glue, you can create a beautiful piece that will leave your friends and family impressed. Not only will you have a functional console table, but you’ll also gain the satisfaction of crafting it yourself. This DIY creation is perfect for enhancing any room, whether it’s your entryway, living room, or bedroom.
Easy DIY Wood Console Table
Craft a bespoke wood console table to match your unique home decor without breaking the bank. By following this comprehensive guide from Grace Oaks Designs, you can recreate a high-end piece for just $50 – a fraction of the cost of an authentic designer version. This DIY project requires minimal materials and basic tools, including 15 pieces of 2×4 pine wood, screws, a router, and dowel rods. The finishing touches involve sanding, staining, and sealing to give your handcrafted table a showroom-quality finish. As you bring this beautiful piece to life, you’ll experience the pride and satisfaction that comes from creating something truly special for your home.
How to Build a Wood Console Table
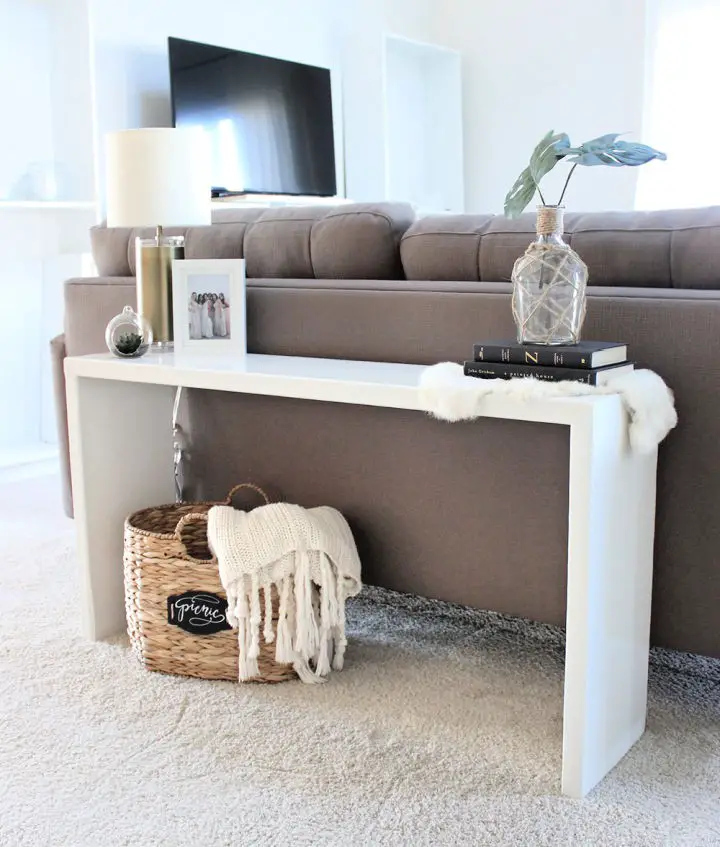
With Saffron Avenue’s DIY guide, creating a sophisticated wood console table behind your sofa becomes an achievable feat. The process begins with two 2×6 wooden planks, which are then thoroughly sanded to prepare them for the next steps. Precise cutting is required to create the legs, followed by careful assembly using wood glue and screws. Any imperfections are subsequently addressed with wood filler, resulting in a seamless finish.
Following this, a couple of coats of primer are applied, giving way to your chosen paint color, which brings the table to life. A final layer of Polyacrylic Clear Gloss is then added for an enduring and durable finish. This accessible project yields a stunning end result that not only elevates your living space’s aesthetic but also provides practicality and stability.
DIY Reclaimed Wood Console Table
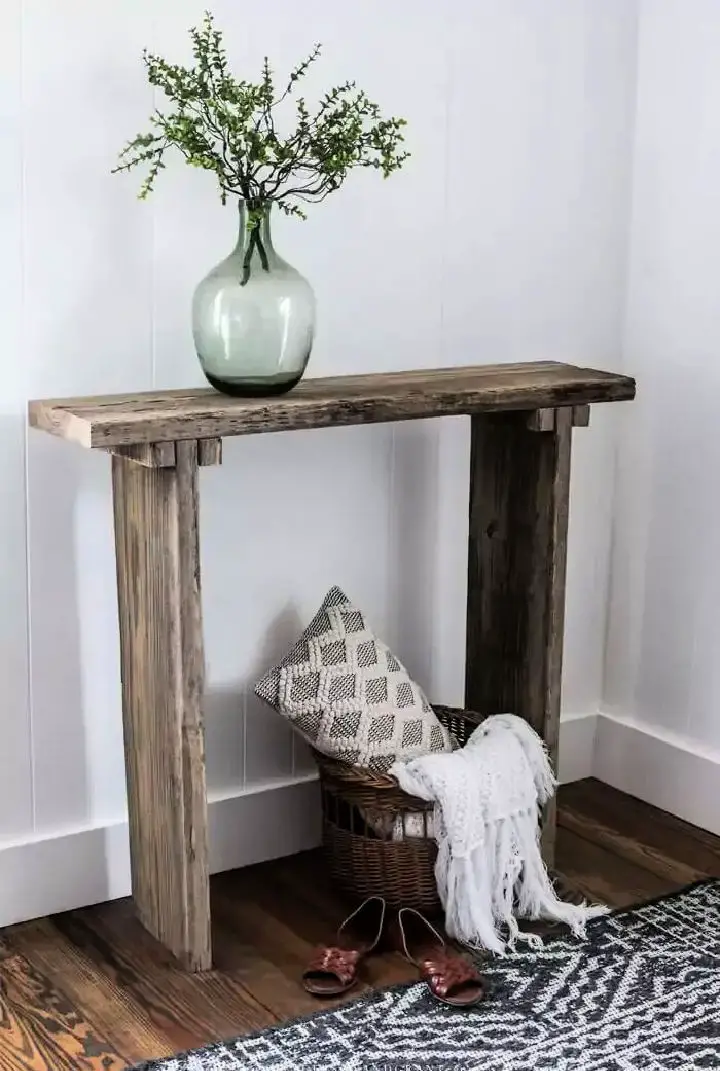
Elevate the entryway of your home by transforming reclaimed wood into a one-of-a-kind DIY console table reminiscent of Restoration Hardware’s high-end aesthetic, all while keeping costs in check. Our comprehensive guide walks you through the step-by-step process of upcycling this unique material into a stunning piece that reflects your personal style. From sourcing materials to customizing the design, we’ll cover it all. Whether you choose to stain, paint, or leave the wood natural, this adaptable project ensures a result that’s not only budget-friendly but also imbued with character and history.
Free Modern Entry Table Plan
Elevate the ambiance of your hallway with a sleek and sophisticated console table, crafted in just one day using Farmhouseish’s step-by-step guide. This DIY project is ideal for those seeking to infuse their space with a touch of modern elegance. By following the simple, yet detailed instructions, you’ll be able to measure, cut, and assemble your table with ease. With helpful tips and a comprehensive list of materials and tools, this creative endeavor is sure to result in a stylish console table that perfectly complements your home’s aesthetic.
Build Your Own Angled Console Table
Elevate the ambiance of your living space by crafting a unique DIY entryway table that makes a lasting first impression. The DIY Angled Console Table, courtesy of Shanty 2 Chic, offers a rustic charm that’s within anyone’s grasp. This project requires minimal expertise and only basic tools like a miter saw, drill, and Kreg Jig, accompanied by essential materials such as wood screws, finish nails, and wood glue. The building process involves constructing the planked top, sturdy legs, and supporting structures with step-by-step clarity. Once complete, simply sand away any imperfections, fill holes if necessary, and apply your preferred stain for a personalized touch. This engaging DIY endeavor will yield a show-stopping piece that’s sure to spark conversations in your home.
Rustic DIY X leg Console Table With Shelves
The X-leg Console Table by Kreg Tool offers a unique combination of style and functionality that can elevate any entryway. Its striking X-shaped legs and built-in shelving create a visually appealing centerpiece that also provides ample storage for displaying decorative items or keeping essentials within easy reach. This versatile table is suitable for a wide range of interior styles, from farmhouse chic to modern minimalism, making it an excellent addition to any home. With detailed assembly instructions available on the Kreg Tool website, building this piece is a manageable DIY project. Once assembled, you can customize the look with your preferred finish and enjoy the harmonious blend of design and practicality it brings to your entryway.
Modern DIY Waterfall Console Table
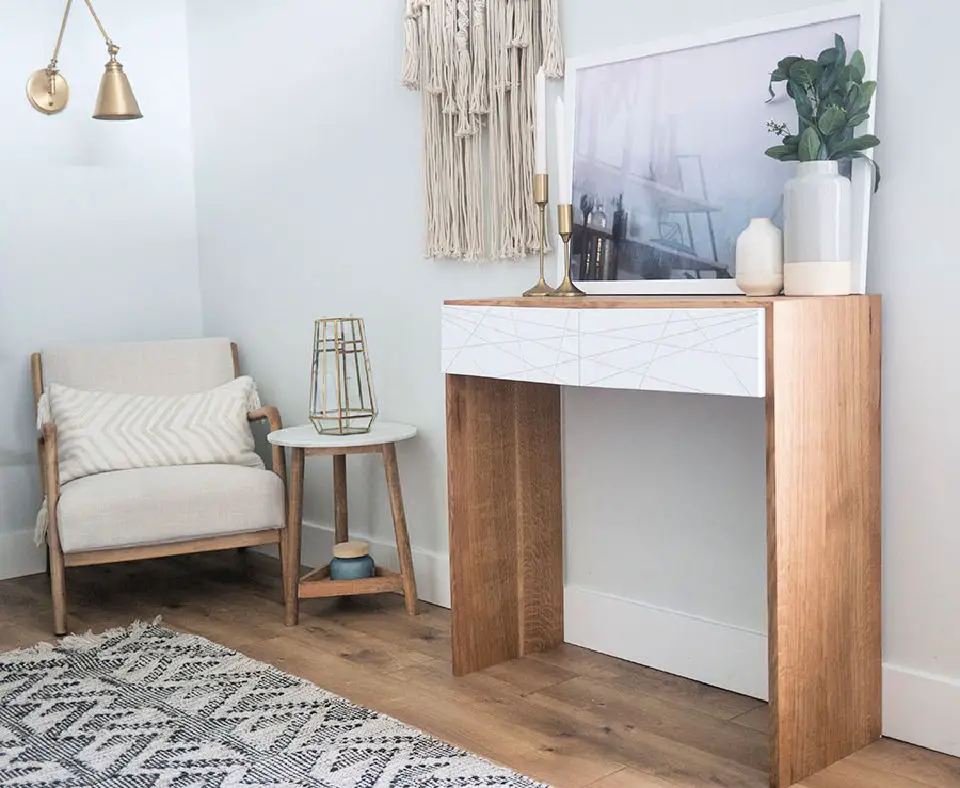
Immerse yourself in the world of DIY furniture building by following Jen Woodhouse’s comprehensive guide on The House of Wood. With Alex Mazhukhin, aka Mr. Build-It, at the helm, you’ll learn how to create a stunning modern Waterfall Console Table using standard lumber from your local store. This project is tailored for DIY enthusiasts of all levels, eliminating the need for advanced tools and emphasizing pocket hole joinery. As you work through the clear instructions, you’ll discover how to incorporate a visually striking geometric pattern into your table, adding a touch of sophistication to your entryway. The end result is a statement piece that’s both functional and aesthetically pleasing.
Rustic DIY Wood Console Table

Create a charming focal point in your living space by crafting a rustic elm wood-style console table with Jenna Sue Design’s comprehensive DIY guide. This six-step tutorial is designed for beginners, utilizing reclaimed lumber to infuse the piece with authenticity and character. The traditional mortise and tenon jointing technique ensures a sturdy and visually appealing table that can be easily replicated at a fraction of the cost of store-bought alternatives. By following this engaging and instructive project, you’ll learn how to select the ideal materials, cut and join the wood, and apply a flawless finish, resulting in a unique and personal addition to your home.
How to Make a Console Table
Transform your hallway with a one-of-a-kind piece of furniture crafted from 5 simple 2×2 boards and 1 2×8 board. Handmade Weekly’s comprehensive DIY console table guide makes it easy to blend functionality and style, resulting in a warm and inviting space. The included free PDF features step-by-step instructions, necessary tools and materials, and helpful tips to ensure a satisfying build experience. With clear visuals and expert guidance, this project is perfect for those looking to add a unique touch to their home.
DIY Hairpin Leg Console Table
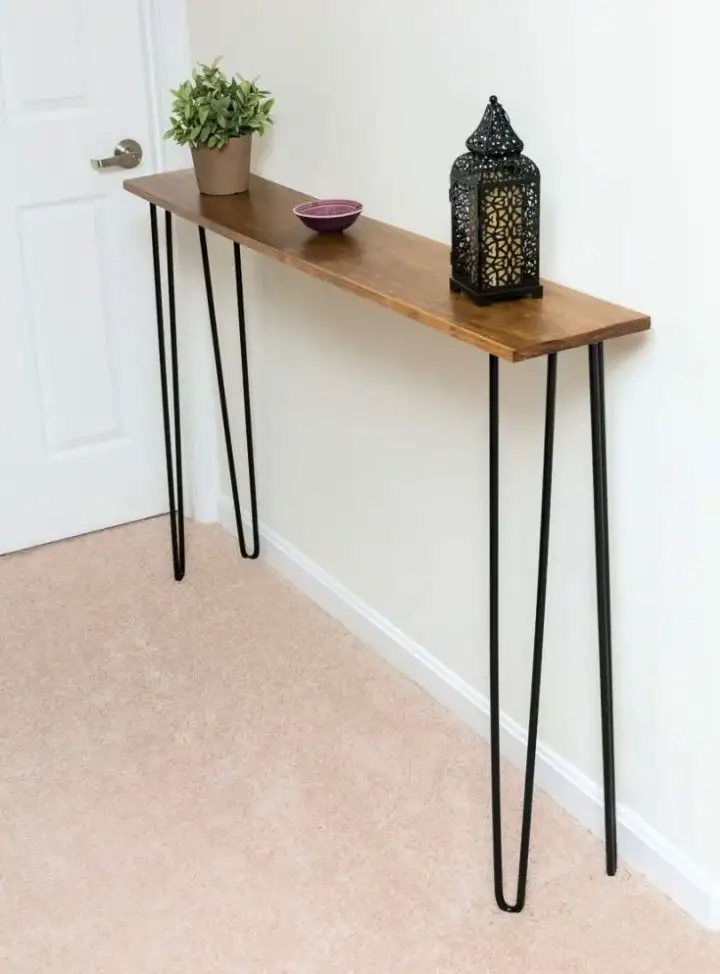
Creating a one-of-a-kind console table using DIY hairpin leg techniques is an excellent way for crafty individuals to put their skills to the test. The comprehensive guide by Brittany Goldwyn provides a clear, step-by-step process that’s accessible to beginners in woodworking. This project’s emphasis on simplicity makes it perfect for those looking to add a personal touch to their space without getting overwhelmed by complex designs or techniques. The tutorial includes a detailed list of required supplies and instructions to help you transform plain wood and hairpin legs into a stylish, functional piece of decor. Moreover, the guide also offers valuable advice on where to find quality hairpin legs that fit your project’s specific needs. By embracing your DIY spirit, you can build a console table that not only reflects your personal style but also enhances the overall aesthetic of your home.
Rustic Modern Console Table Plan
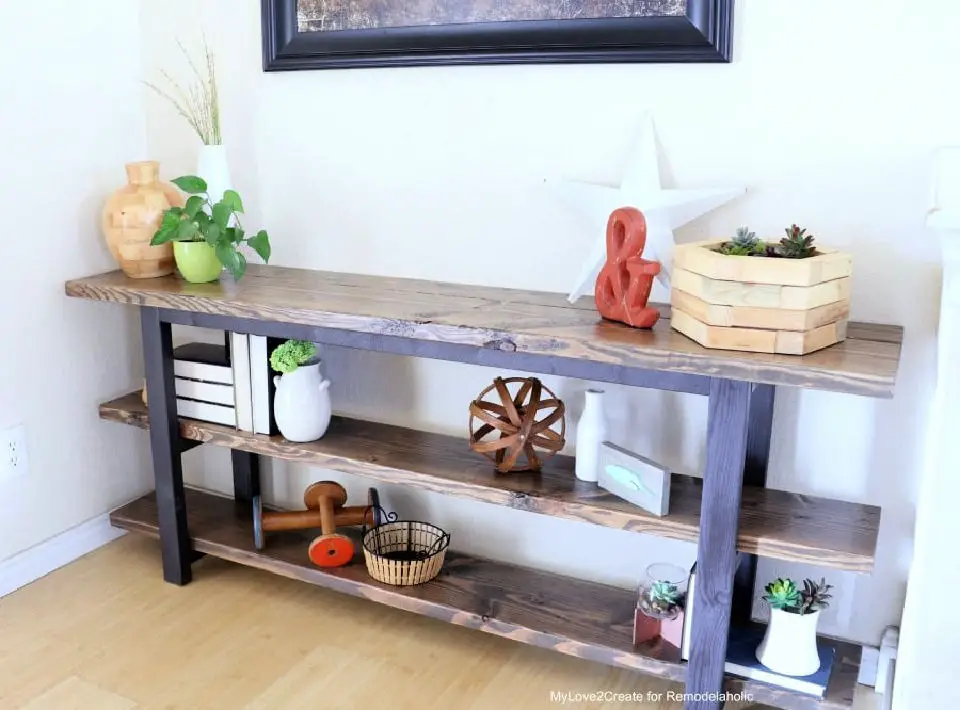
Transform your space with a stunning and functional console table, achievable in just one day! Building on Remodelaholic’s expert guide, even novice builders can create a modern rustic masterpiece that seamlessly integrates storage for books, décor, or toys. Customize the length to suit your room, select a finish that mirrors your style, and take advantage of the comprehensive materials list and assembly tips. With this easy-to-build furniture piece, you’ll be able to replicate the high-end look of Pottery Barn without breaking the bank. This versatile DIY project is perfect for elevating your home’s aesthetic while staying within budget.
Make Your Own Console Table Using Wood
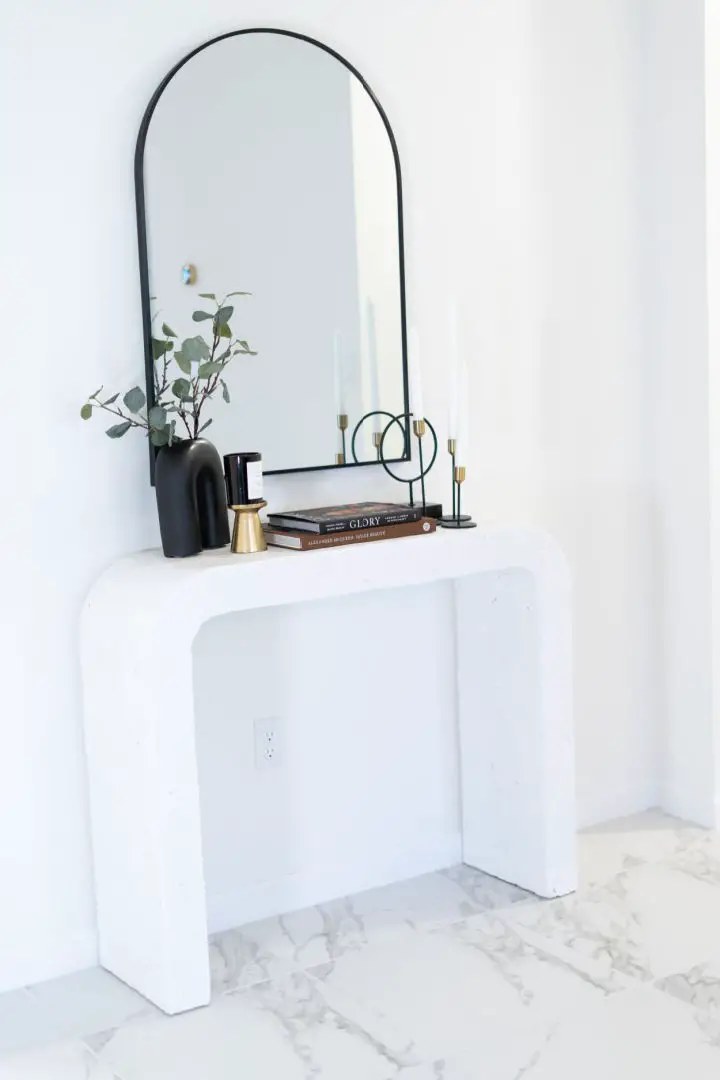
Transform the entrance of your home with a unique and stylish DIY entry table that complements any décor. For those who enjoy hands-on projects, creating a piece of furniture can be an incredibly fulfilling experience. By following Dawn on Life’s comprehensive guide to crafting a chic console table, you’ll be able to replicate a designer-inspired design at a fraction of the cost. The step-by-step process is straightforward, making it accessible to DIY enthusiasts of all skill levels. A key aspect of this project is the attention to detail, with clear instructions on how to properly sand, apply stucco, and add finishing touches that result in a professional-looking finish.
Making a Sofa Table at Home
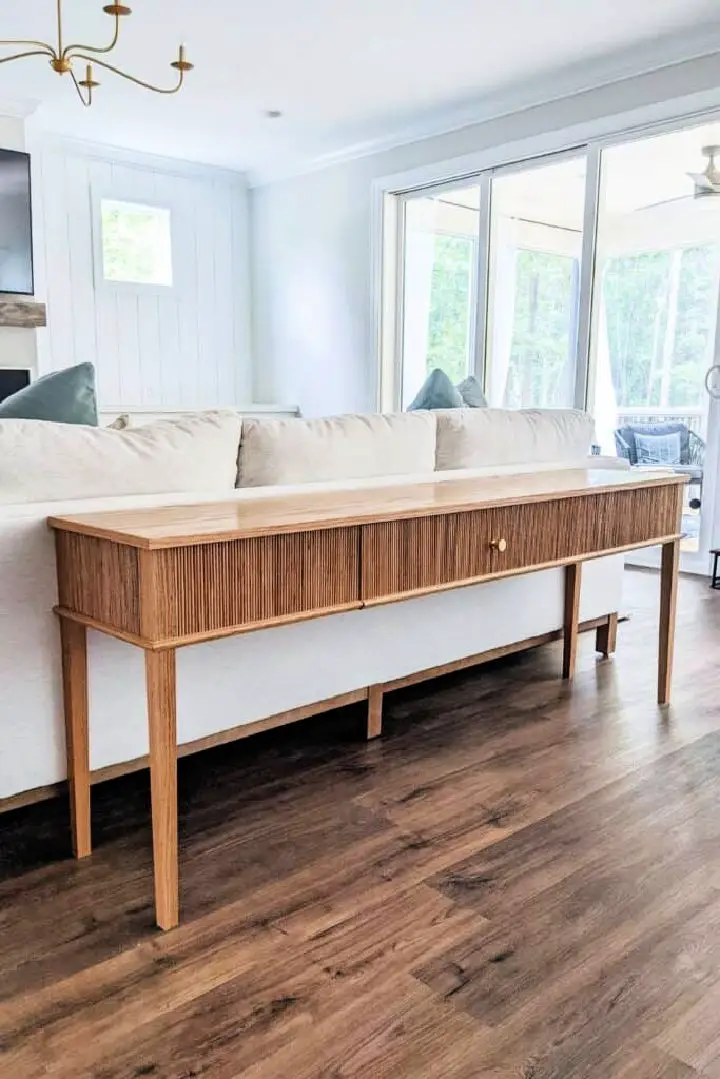
Transforming your living space with a DIY Sofa Table that echoes the refined aesthetic of Studio McGee’s designs is now within reach. Pine and Poplar’s comprehensive guide demystifies the process of crafting a sleek and stylish console table, perfect for building over a weekend. By investing just $350 in oak and oak plywood, you can enjoy an impressive 85% cost savings compared to the designer version priced at $2,200. The step-by-step instructions are crystal clear, providing a detailed cut list, recommended tools, and valuable tips on how to personalize your table to suit your unique taste. With basic woodworking tools and a dash of creativity, you can create a beautiful and functional addition to your home’s décor that rivals the elegance of high-end designs.
Free Waterfall Framed Console Table Plan
To elevate your living space with a one-of-a-kind accent, consider building a stunning waterfall-framed Grand Console Table from scratch. This ambitious DIY project demands precision and skill, but the end result is well worth the effort. With step-by-step instructions, detailed diagrams, and an informative video guide, this plan has everything you need to create a show-stopping table that rivals high-end designs. Using approximately $150 in whitewood boards, you can construct a console table that not only fits your budget but also allows for customization in size and color to perfectly complement your home’s décor. Once complete, the finished piece boasts mitered corners and a solid pine exterior that can be painted or stained to match your personal style. The result is a chic, functional work of art that beautifully frames your treasured possessions.
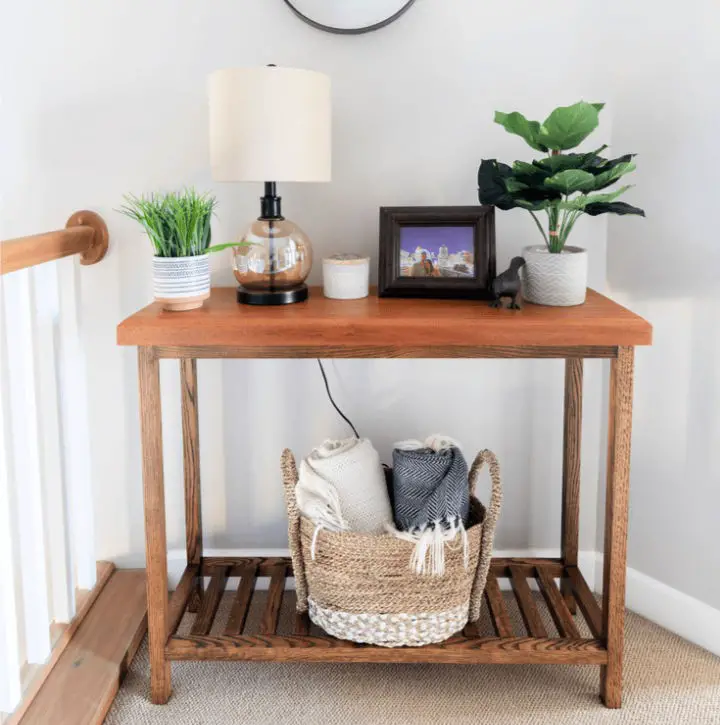
Build Your Own Wooden Sofa Table
Transform your living space with the simplicity of Jaime Costiglio’s sofa table guide. For those seeking functional storage behind their couch, this DIY project utilizes readily available lumber to create a practical surface for daily essentials. The design’s adjustable height of 33 1/2 inches allows seamless alignment with your sofa’s dimensions.To begin, collect basic materials such as select pine boards, a miter saw, and a pocket hole jig. The tutorial emphasizes the strategic placement of pocket holes to maintain a clean appearance. The finishing process is straightforward, involving wood stain and polyurethane for a durable and attractive outcome. Access Jaime Costiglio’s free plans and create a handy addition to your home’s seating area.
DIY 56 Inch Console Table Under $15
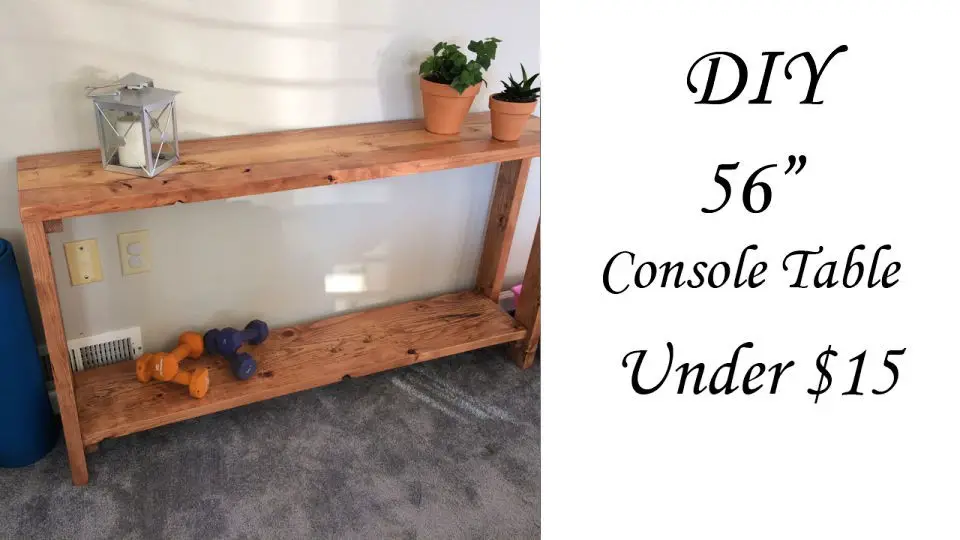
Create a stylish console table in the comfort of your own home with minimal fuss and expense. This comprehensive YouTube tutorial provides the ultimate guide for building a sleek 56-inch console table on a budget of under $15. With crystal-clear instructions, you’ll be equipped to turn raw materials into a stunning piece of furniture that adds a personalized touch to your decor. The best part? You don’t need an extensive toolkit to get started. The video showcases how a few essential tools can still yield impressive results, making this project perfect for a quick and satisfying weekend DIY endeavor.
Simple DIY Console Table
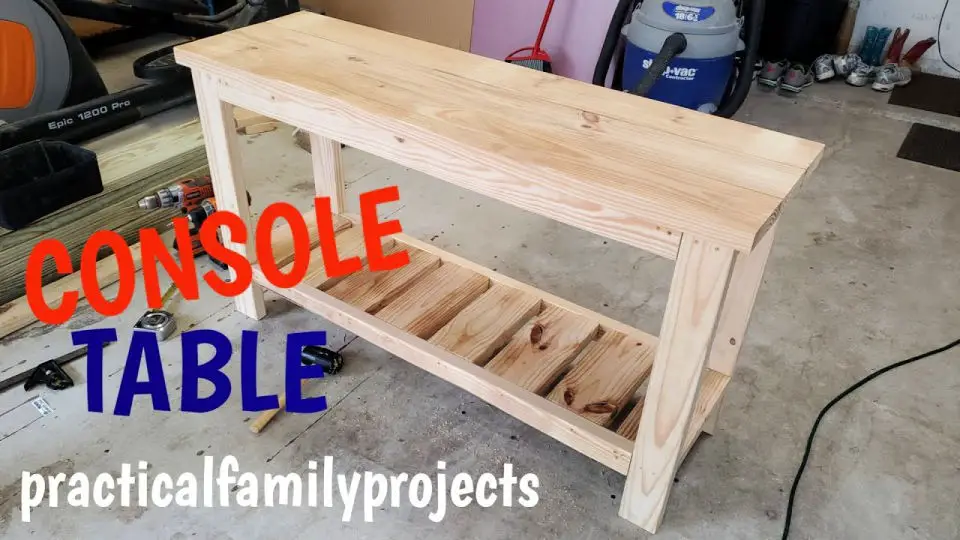
For those seeking an innovative DIY project, YouTube’s treasure trove of tutorials offers a wealth of inspiration. One such video guide stands out – a comprehensive tutorial on crafting two rustic-style console tables perfect for a lakehouse or any cozy corner of your home. Practical Family Projects brings their signature approach to the table, sharing a step-by-step guide that’s as informative as it is entertaining. With clear instructions and budget-friendly tips, even the most novice DIY enthusiast can navigate through common woodworking challenges with ease. The video takes you on a journey, showcasing the actual building process – including any hiccups along the way and how to fix them. By the end of this engaging video, you’ll be equipped with the skills to design a piece that’s both sturdy and stylish, without requiring professional building expertise. So, grab your tools and let your creativity take center stage! With YouTube’s wealth of resources at your fingertips, there’s no excuse not to give it a try.
Conclusion:
As we bring our exploration of 25 simple DIY console table plans to a close, you’re now empowered with the knowledge, creativity, and motivation needed to take on your own project. From choosing the ideal design and materials to adding those final flourishes, we’ve covered every aspect to ensure your DIY endeavor is nothing short of successful. With these newfound skills, you’re mere steps away from crafting a one-of-a-kind console table that not only serves as a functional piece of furniture but also as a stunning centerpiece that sets the tone for your home’s entryway. So, don’t hesitate – gather your tools and let’s get started on bringing your vision to life!
