Why Build a DIY Floating Vanity?
Building a DIY floating vanity is an appealing project for many reasons. Not only does it offer cost savings compared to purchasing a pre-made one, but it also allows for unparalleled customization. By choosing materials that fit your budget, you can achieve a high-end look without breaking the bank. Moreover, the ability to tailor the size, color, and design of your vanity to perfectly match your bathroom’s decor and personal style is unmatched. Additionally, floating vanities are an excellent choice for small bathrooms as they create the illusion of more space by not touching the floor, making cleaning a breeze. Furthermore, there’s a unique sense of pride that comes from building something with your own hands, which you’ll experience every time you use your bathroom. Finally, taking on this DIY project presents an opportunity to enhance your woodworking and construction skills, allowing you to apply new techniques to future projects.
DIY Floating Bathroom Vanity
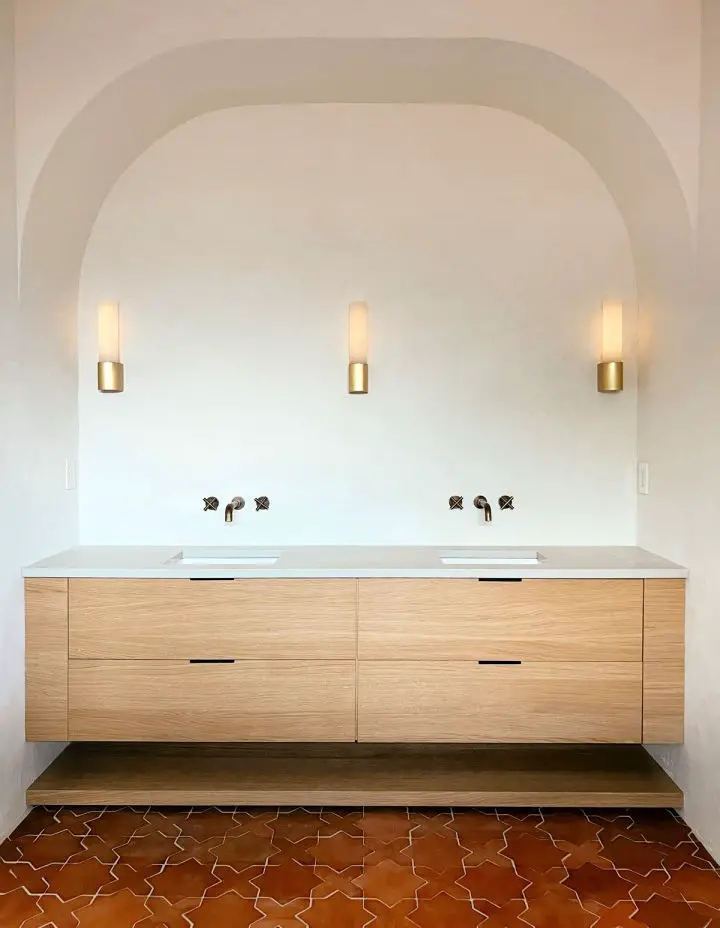
Crafting a DIY floating bathroom vanity injects a sleek, modern essence into any bathroom, effortlessly streamlining space while elevating functionality. This comprehensive guide takes you by the hand through the design and construction process of a straightforward yet sophisticated floating vanity, carefully crafted to be intuitive and accessible for both newcomers and seasoned DIY enthusiasts alike.
Materials and Tools Needed
To create a high-quality cabinet, you’ll need to gather the following essential tools and materials: start with a sturdy foundation, using 3/4 inch plywood with a Birch finish. Next, turn your attention to the internal components, where you’ll be employing a pocket hole jig and screws to assemble the drawers. The exterior will benefit from wood veneer, applied expertly with an edge trimmer. For the actual drawer construction, rely on a brad nailer and nails, as well as a generous amount of wood glue to hold everything together. Secure your project in place with some trusty clamps. Once you’ve got the basic structure intact, it’s time to refine the edges and surfaces using a circular or table saw for cutting and shaping, followed by a sander and sandpaper to smooth out any imperfections. Should any gaps remain, fill them with wood putty before moving on to the finishing touches. A primer and paint of your chosen color will give your cabinet a rich, polished appearance. Don’t forget about the functional elements: drawer slides (side mount) will ensure a smooth opening and closing experience, while hardware for a tip-out tray and drawer pulls adds a touch of elegance.
Step by Step Guide
To create a vanity box that exudes elegance and sophistication, begin by cutting plywood into pieces for the sides, bottom, and drawer fronts. The design described here is for a vanity measuring 30 inches wide by 20 inches tall and deep. The process starts with joinery – drill three pocket holes on each side of the bottom piece using a pocket hole jig to attach it securely to the sides. This clever technique will conceal the holes from view, making them only visible when looking up from the floor. Next, apply wood veneer to the edges of the plywood to give your vanity a finished appearance. Trim any excess veneer for a neat and tidy finish. Once the veneer is applied, assemble the sides to the bottom piece using pocket screws and clamps for added security. Additionally, add braces to the front and back for extra stability. After that, fill visible seams and sand the surface smooth in preparation for painting or finishing. To create the drawer box, build a simple box using half-inch thick plywood. Ensure all pieces fit squarely before fastening them with glue and brad nails. The next step is to install the drawer bottom by placing a cut-to-fit piece of half-inch plywood at the bottom and securing it around its perimeter with brad nails and screws at the plumbing notch, ensuring everything remains straight and square.To add the drawer fronts, attach wood trim around the edges of your plywood fronts, cutting at a 45-degree angle for a clean look. Secure with wood glue and brad nails. Then, fill any gaps with wood putty, seal seams with caulk, prime, and paint your vanity and fronts in your chosen color.Finally, assemble and install the vanity by installing hardware for a tip-out tray according to the manufacturer’s instructions if using one. Attach side-mount drawer slides to the drawer and vanity frame, ensuring they are level and at the correct height. Secure the drawer fronts from the inside with screws, using spacers (like poker cards) to achieve even gaps around them. Once complete, install your choice of drawer pulls or handles to finish the look.
Video Tutorial
By following our step-by-step video tutorial, How to Build a DIY Floating Bathroom Vanity, you’ll gain a deeper understanding of the process and be able to replicate it with ease. The visual demonstrations will help clarify each step, making DIY projects more accessible and tangible. Building a floating vanity is an excellent way to enhance your home’s value and aesthetic appeal. With meticulous planning and attention to detail, you can create a custom piece that seamlessly integrates into your space and meets your specific needs.
DIY Floating Vanity FAQs
For those looking to add a touch of elegance to their bathroom, building a DIY floating vanity is an excellent way to achieve a modern and sophisticated look. To ensure a successful project, it’s essential to address the most frequently asked questions that can arise during the process.
What materials do I need for a DIY floating vanity?
To create a DIY floating vanity, you’ll need to gather the following essential components: a frame made from plywood or MDF, waterproof sealant or varnish for protection, wood glue and screws for assembly, drawer slides if you’re incorporating drawers, a countertop material such as quartz, granite, or sealed wood, and a range of tools including a saw, drill, sander, and measuring tape.
How do I make sure my floating vanity is sturdy?
For a floating vanity that remains stable and secure, it’s crucial to focus on its frame construction. A robust foundation is essential, which can be achieved by using high-quality materials like plywood or MDF. Additionally, you should ensure that the mounting cleat is securely attached to the wall studs, effectively distributing the weight across multiple points. In cases where studs are not accessible in all desired locations, it’s necessary to apply suitable wall anchors to prevent any movement or damage.
Can I install a floating vanity in a small bathroom?
In small bathroom settings, a floating vanity is often the perfect choice. By elevating the fixture above the floor, it creates an optical illusion that makes the room appear more spacious. Moreover, this design simplifies cleaning tasks by keeping the floor free from obstructions. However, to truly maximize the benefits of a floating vanity, precise measurement of your bathroom’s dimensions is crucial to ensure the perfect size and storage configuration for your specific space.
How do I waterproof my DIY floating vanity?
To ensure a long-lasting and durable DIY floating vanity, it’s crucial to implement effective waterproofing measures. A key step is applying a high-quality waterproof sealant or varnish to all wooden components, paying particular attention to edges and seams where moisture can easily seep in. Additionally, consider opting for materials that naturally resist moisture, such as quartz or granite, for the countertop. Regular maintenance and reapplication of the sealant are also essential to extend the life of your vanity and prevent damage from water exposure.
Can I add drawers to my floating vanity?
While it’s entirely feasible to incorporate drawers into your floating vanity setup, doing so can provide a welcome boost in storage capacity. To achieve seamless drawer movement, be sure to employ high-quality drawer slides that promote smooth operation. Additionally, when designing your custom floating vanity, remember to take plumbing considerations into account, leaving sufficient space to prevent any potential interference issues.
How do I choose the right countertop for my floating vanity?
When selecting the ideal countertop, it’s crucial to weigh factors like sturdiness, moisture resistance, and visual appeal. While quartz and granite are often favored for their resilience and water-repellent properties, sealed wood can also be a viable option for those seeking a budget-friendly or design-specific solution. To guarantee a seamless fit, take precise measurements of your vanity base.
Is it necessary to find wall studs when installing a floating vanity?
To ensure a safe and secure installation of a floating vanity, it’s essential to accurately locate and attach the mounting cleat to wall studs. These structural elements provide the necessary support to bear the weight of the vanity and its contents, such as sinks, toilets, or other bathroom fixtures. To detect the location of wall studs, use a stud finder, which can provide an accurate reading of the wall’s internal structure.
20 DIY Floating Vanity Plans for Your Bathroom to Build
Transform your bathroom into a sleek oasis without breaking the bank by exploring 20 unique DIY floating vanity plans. Each tutorial provides a straightforward guide to constructing a modern, eye-catching focal point that’s sure to elevate your space’s aesthetic while minimizing costs.
How to Build a Floating Vanity
Create a sleek and modern floating vanity or TV console with Woodshop Diaries’ step-by-step guide. This DIY project offers a fresh way to add contemporary flair to any room, featuring clean lines and a minimalist design that’s surprisingly easy to build. The adaptable instructions ensure a custom fit for your space, allowing you to tailor the look to suit your home. From assembling the vanity sides to installing drawers and applying the finish, every step is carefully detailed to make the process manageable. Not only does this design provide a stylish addition to any room, but it also serves as a functional floating TV stand with a wood top, perfect for those who value modern furniture that’s both visually appealing and practical. This space-saving solution is ideal for elevating your living space and can be easily adapted to fit your unique needs.
DIY Floating Vanity for Less Than $400
Transform your bathroom into a luxurious retreat with a stunning floating vanity, all for under $400! With our comprehensive DIY guide, you’ll learn how to create a chic and functional space that’s inspired by high-end designs, but without breaking the bank. By following our step-by-step instructions, you’ll discover how to cut and prepare lumber, build interior and exterior boxes, install trim, and finish with sanding and staining. From installing drawer slides to securing your vanity to the wall, we’ve got you covered every step of the way. With this budget-friendly and achievable DIY project, you’ll elevate your bathroom’s aesthetic and create a space that’s truly one-of-a-kind.
Make a Floating Vanity With Reclaimed Wood
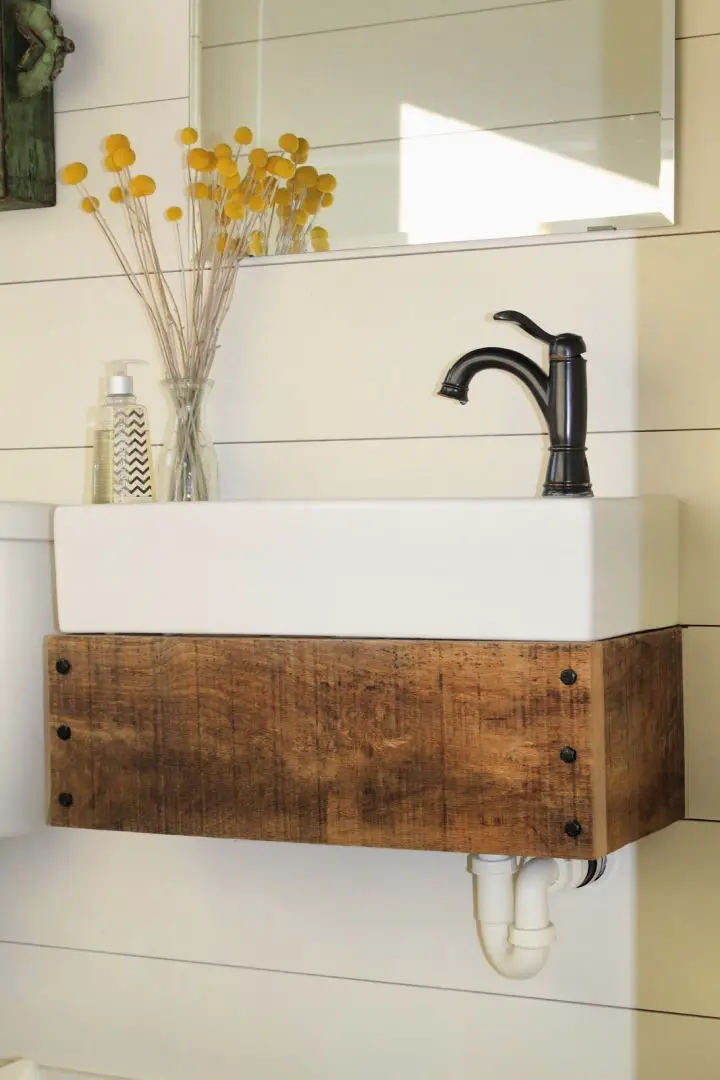
Reinvent your bathroom’s ambiance with a rustic floating vanity crafted from reclaimed wood, as demonstrated on Remodelaholic by Lorene. This budget-friendly DIY project seamlessly blends functionality with the warmth of countryside charm, starting with an affordable IKEA sink. By incorporating old barn wood or weathered lumber, you can create a one-of-a-kind vanity that infuses your space with character. The process involves straightforward cuts, gentle sanding, and a protective linseed oil finish to ensure durability. Secure your custom vanity to the wall and revel in the stylish addition it brings to your bathroom. For a comprehensive guide and more innovative home improvement inspiration, explore Remodelaholic.
Easy DIY Floating Bathroom Vanity
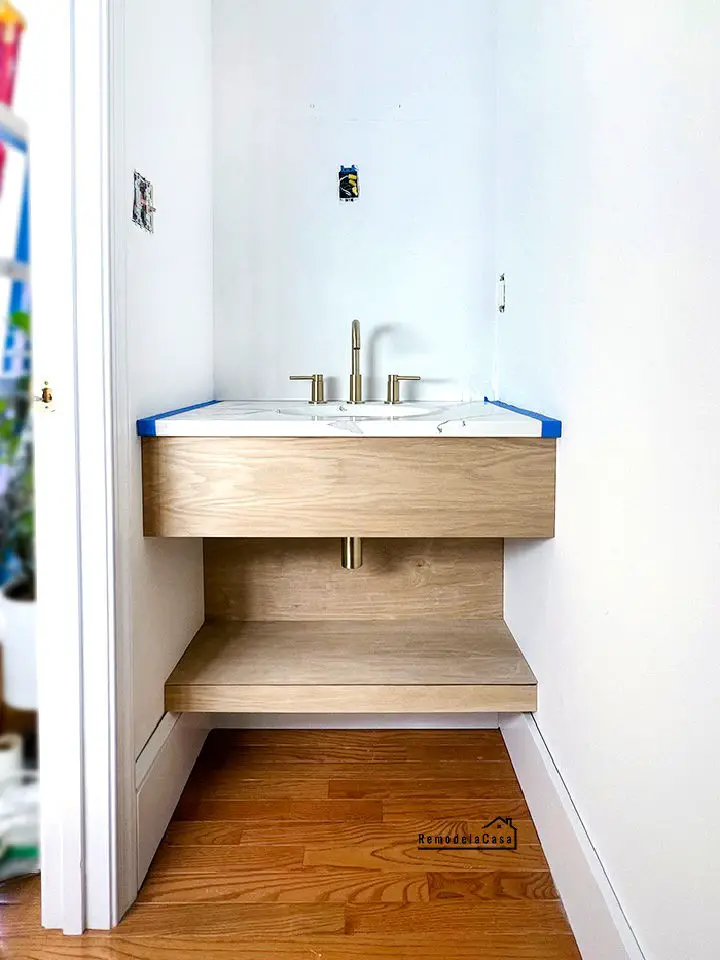
Transforming your small bathroom into a modern oasis can be achieved with a DIY floating vanity project, inspired by Cristina Garay’s innovative approach on Remodelando la Casa. This comprehensive guide will walk you through the process of creating a sleek and practical centerpiece featuring a stunning stone countertop, thereby elevating the room’s overall aesthetic. To ensure a professional-looking outcome, you’ll learn valuable skills such as measuring accurately, locating studs, and installing a wooden cleat for secure support. The tutorial also includes crafting a floating shelf and a false back to cleverly conceal plumbing, providing a seamless finish. With clear instructions and precise dimensions, you’ll have all the necessary information to successfully build a vanity that not only enhances your bathroom’s design but also optimizes its functionality.
How to Make a Floating Wood Vanity
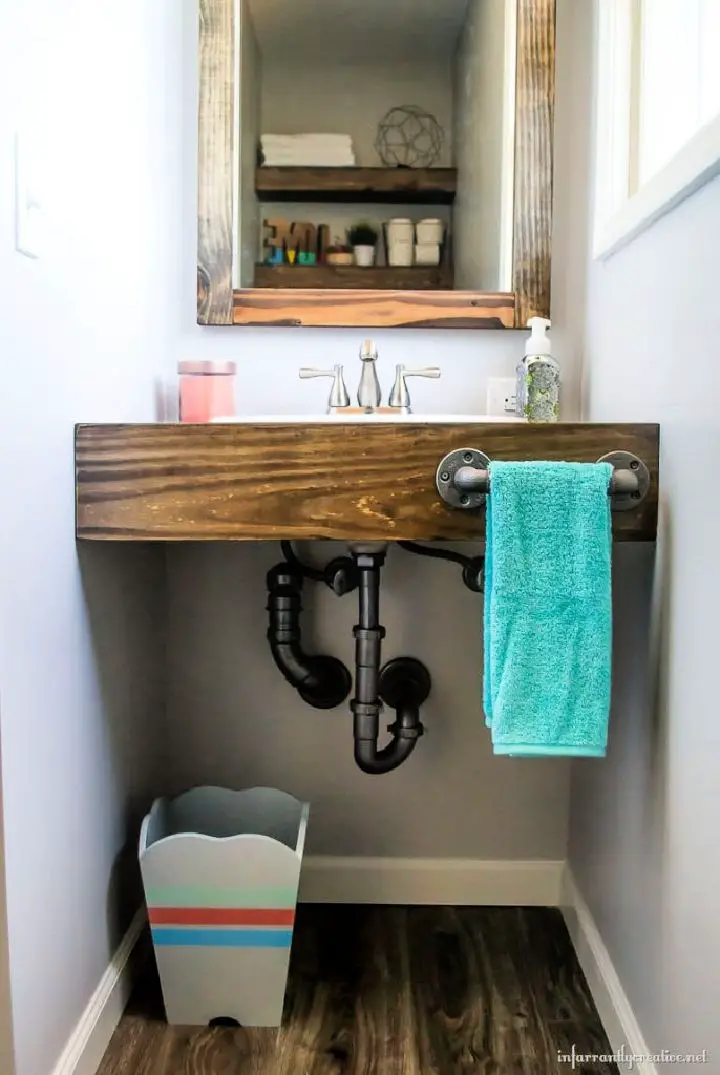
Elevate the ambiance of your guest bathroom by creating a bespoke DIY Floating Wood Vanity, inspired by the elegance of upscale hotels. This comprehensive guide from Infarrantly Creative takes you through every step of building a chic and budget-friendly vanity that optimizes space without sacrificing style. Perfect for compact areas, this project seamlessly blends functionality with aesthetic appeal.With meticulous instructions on measuring, cutting, sanding, and finishing, you’ll gain the expertise needed to craft a sturdy base, attach a face frame, and finesse the finishing touches like caulking and addressing exposed pipes. Get ready to transform your home with this refined and practical DIY project that exudes sophistication.
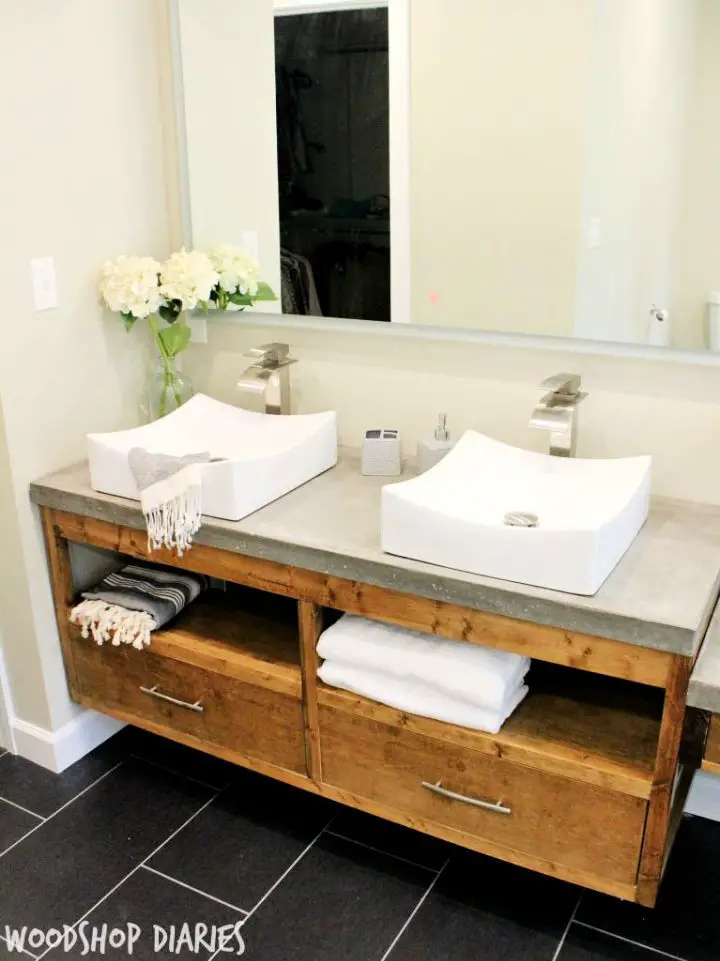
Handmade Bathroom Floating Vanity With Drawers
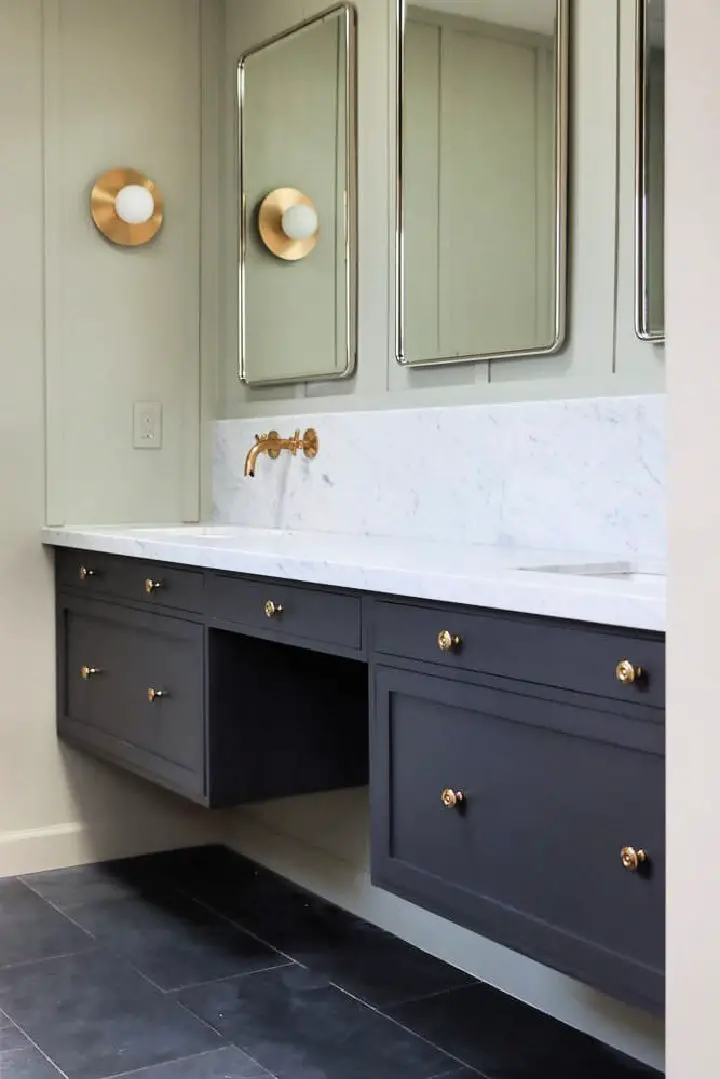
Elevate the style and functionality of your bathroom with a custom DIY floating vanity that provides ample storage and a touch of personal flair. By following Kelin’s comprehensive guide on Hydrangea Treehouse, you can create a sleek double vanity with a dedicated makeup area featuring drawers and tip-out trays, perfectly suited for long walls in master bathrooms. This project offers the ultimate in customization, allowing you to tailor the size and design to your unique needs. The end result is a professionally-appealing vanity that fits seamlessly wall-to-wall, adding a delightful touch to any home. With step-by-step instructions and a detailed list of materials and tools, you’ll be well-equipped to take on this rewarding DIY project.
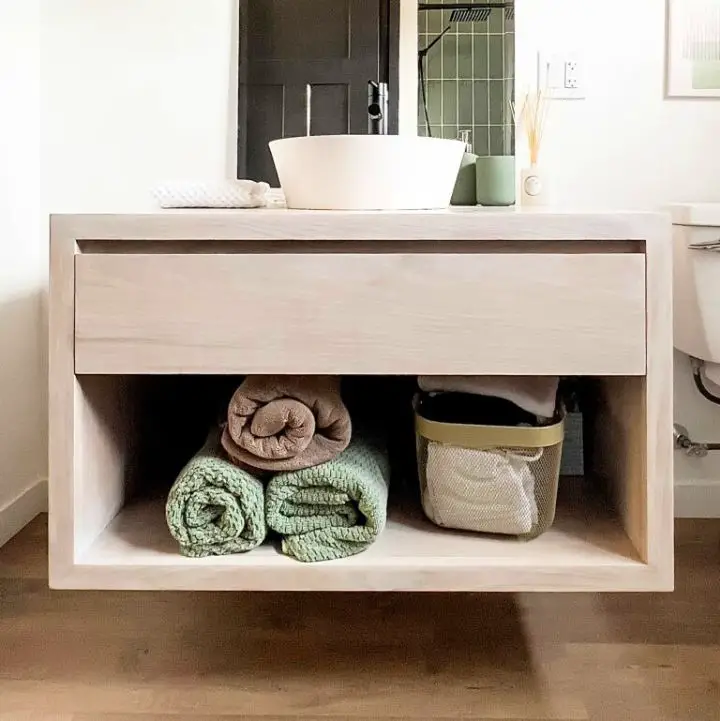
Affordable DIY Wooden Floating Vanity
With Kristina Lynne’s comprehensive guide, you can transform your bathroom into a modern oasis by creating a custom DIY floating vanity. The step-by-step tutorial, complete with precise measurements, breaks down the process into manageable tasks that anyone can achieve. From determining the perfect size and building the frame to applying veneer and adding finishing touches, this guide covers every aspect of the project. By following Kristina’s expert tips and instructions, you’ll be able to build a functional and stylish floating vanity that provides ample storage and complements your bathroom’s aesthetic. The result is a polished and timeless design that will elevate your bathroom’s look and functionality.
How to Build Your Own Floating Vanity

If you’re looking to elevate the style of your bathroom with a custom-designed floating vanity, Instructables has a detailed guide that takes you through the process of building a wall-mounted vanity, ideal for small spaces and accommodating vessel sinks and wall faucets. With step-by-step instructions and expert tips, you’ll be able to create a space-saving vanity that not only frees up floor space but also adds a touch of sophistication to your powder room. This DIY project is both engaging and manageable, providing you with the necessary details to achieve a professional-looking finish. Whether you’re renovating a compact bathroom or simply prefer the streamlined look of a floating vanity, this tutorial serves as a comprehensive resource for a successful home improvement project.
Make a Floating Bathroom Vanity
Elevate your compact or cramped bathroom with a floating bathroom vanity that seamlessly blends functionality and modern design. This DIY project is an affordable and achievable way to maximize your space while incorporating ample storage. By following Home Dzine Bathrooms’ step-by-step guide, you’ll learn how to choose the ideal wood, assemble the frame, and apply a durable finish that withstands the humid bathroom environment. With clear instructions, you’ll be able to create a stylish and long-lasting vanity that perfectly complements your space.
Custom Godmorgon Floating Vanity – IKEA Hacks
Elevate your bathroom’s functionality and style by transforming an Ikea Godmorgon vanity into a bespoke built-in feature with Jenna Sue Design’s step-by-step guide. This tutorial walks you through the process of adding personalized wood drawer fronts and panels, creating a minimalist yet sophisticated aesthetic. Discover how to install a floating shelf, securely fasten the vanity to the wall, and modify drawers for under-mount sinks. Jenna Sue also shares a clever solution for aligning imperfect drawers, as well as a cost breakdown to demonstrate the affordability of this chic makeover. With these expert tips, you can achieve a professional-looking finish without breaking the bank. Visit Jenna Sue Design for the full tutorial and add a touch of custom luxury to your space.
How to Install a Floating Vanity
Install a floating vanity with ease by following Shayna’s comprehensive guide on The Wood Grain Cottage. Her step-by-step tutorial provides a clear roadmap for securing a heavy vanity to the wall, ensuring perfect leveling and stability. Overcome misaligned studs and achieve a sleek, modern bathroom update with her expert advice. Learn how to apply silicone for countertop placement and discover valuable tips for successful installation, including the right hardware choices that enhance the overall look. This guide is a must-read for anyone revamping their bathroom or installing a vanity for the first time, providing a hassle-free and sturdy setup solution.
DIY Small Floating Vanity for Bathroom

Transform your bathroom into a haven of style and functionality by embarking on a DIY adventure! Our comprehensive guide details the construction of a compact floating vanity, specifically designed for cramped spaces. With its clear instructions and thorough materials list, even novice DIY enthusiasts can confidently create a functional piece boasting a drawer and clever tip-out tray storage solution. By following our step-by-step guide, you’ll not only add a personal touch to your bathroom but also gain valuable storage space – the perfect blend of form and function.
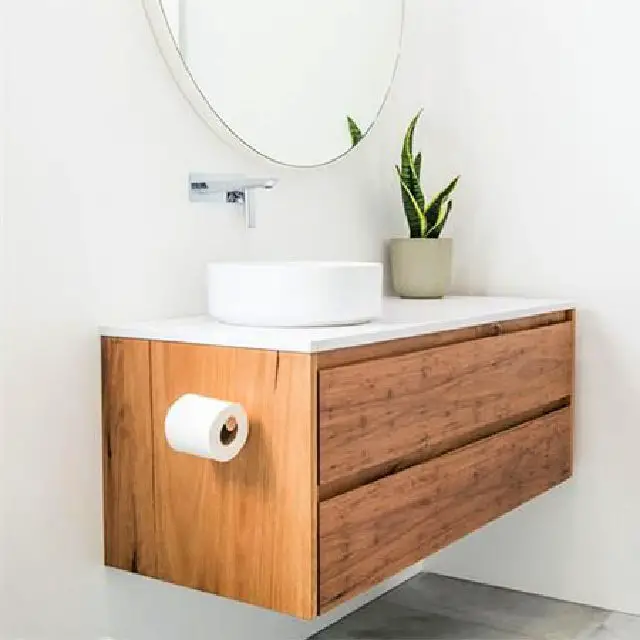
How to Make a Hardwood Floating Vanity
Transform your bathroom’s aesthetic with a stylish floating hardwood vanity using Bunnings New Zealand’s comprehensive guide. This step-by-step tutorial is tailored for DIY enthusiasts seeking to infuse their space with personal touches. By following the clear and detailed instructions, you’ll be guided through selecting quality timber to applying the final varnish. With attention to necessary tools and safety considerations, this project ensures a seamless process, ultimately merging functionality with elegance.
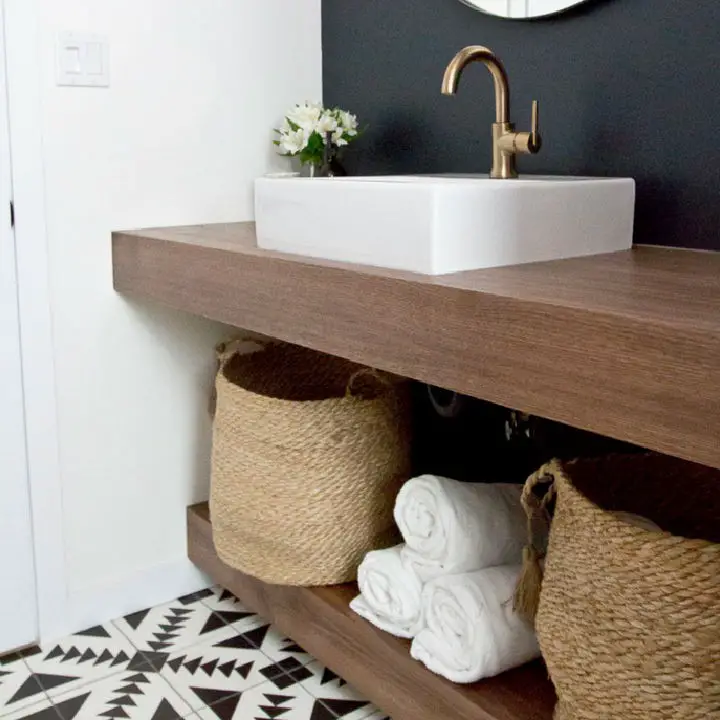
DIY Wood Floating Vanity Under $30
Transforming your bathroom into a serene oasis can be achieved without breaking the bank. This DIY Life’s custom floating wood vanity tutorial offers a budget-friendly approach to creating a spacious and elegant look, even in compact spaces. By following this expertly detailed guide, you’ll learn how to craft a reclaimed beam-inspired vanity that seamlessly incorporates an IKEA Hagaviken sink. Perfect for those who appreciate modern simplicity, this step-by-step tutorial ensures a smooth installation process and provides practical tips for a flawless finish. With this cost-effective project, you’ll elevate your bathroom’s aesthetics while enjoying the satisfaction of a job well done.
Homemade Floating Vanity Station for Kids
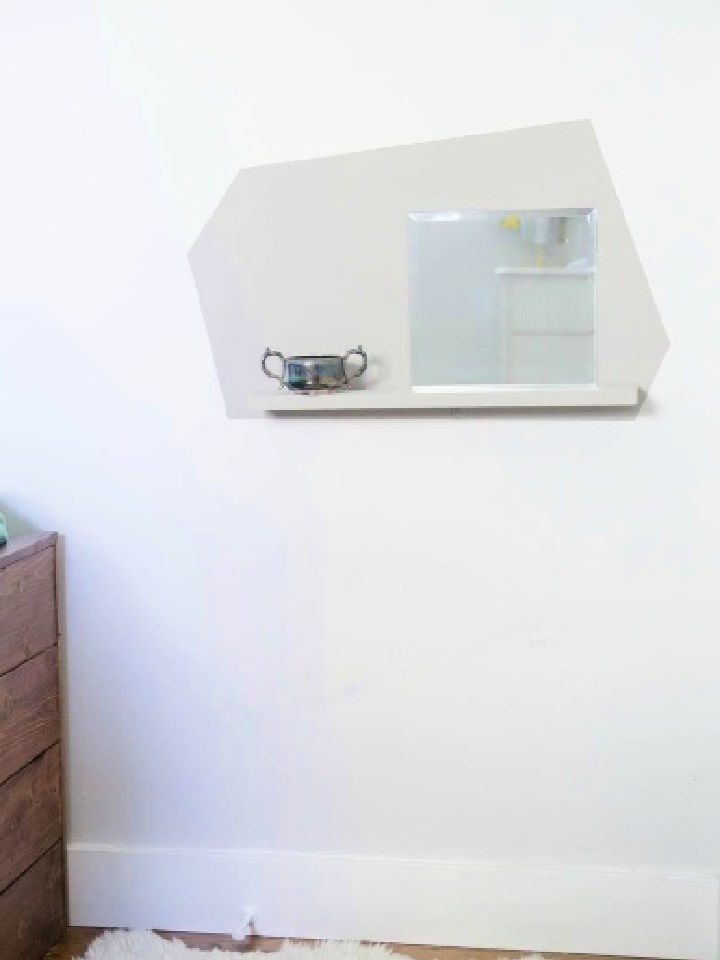
If you’re eager to foster independence and self-care habits in your kids, Remodelaholic has an inspiring DIY project to share with you. By building a floating vanity station for your little ones, you’ll not only be providing a practical space-saving solution but also a charming addition to their bedroom that sparks pride and joy. This comprehensive guide takes you through the process of creating a sleek mirror-and-shelf combo perfect for storing grooming essentials, making mornings smoother and more enjoyable for everyone involved. Whether you’re a parent seeking ways to streamline your family’s daily routine or simply looking to encourage healthy habits in your kids, this engaging tutorial is sure to deliver.
Build a Floating Vanity – Step by Step
Crafting a floating vanity for your bathroom can elevate its modernity while showcasing your woodworking skills. This project, inspired by Canadian Woodworking’s expertise, is perfect for those seeking a balance between practicality and sleek design. With moderate woodworking experience, you’ll be guided through the process of meticulous planning and precise sizing to ensure a seamless installation. By considering room dimensions, plumbing, sink specifications, and material selection, you’ll create a vanity that not only impresses with its visual appeal but also withstands the test of time. Durable materials like plywood and solid wood edging will provide resistance against water damage while enhancing your bathroom’s aesthetic. The end result is a custom-designed vanity that harmonizes with your space.
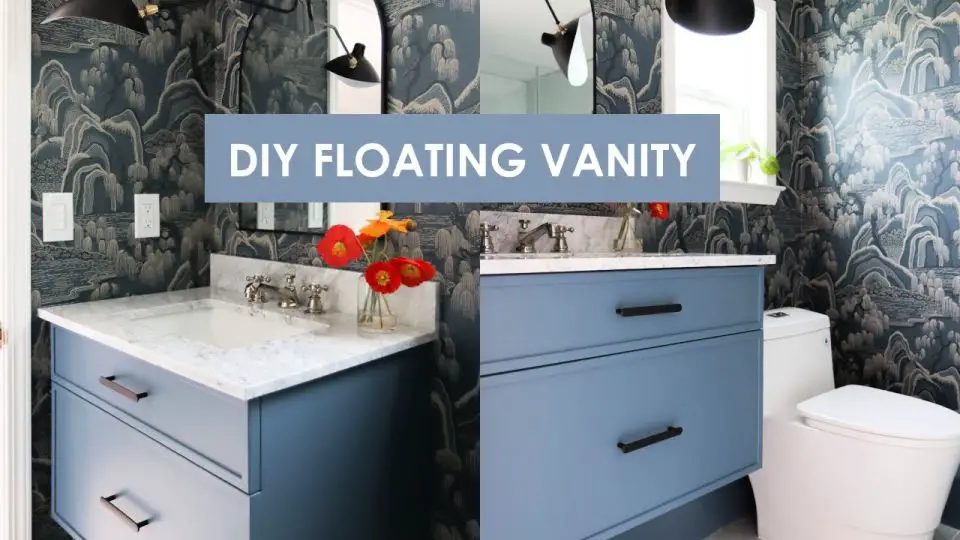
DIY Floating Bathroom Vanity With Led Lights

Before embarking on this woodworking project, utilize 3D modeling software like SketchUp to meticulously plan your build and create a comprehensive cut list. With materials in hand, including solid wood, plywood, and veneer edges for a refined finish, begin assembling the cabinet, taking care to accommodate plumbing and trim components. Next, craft hardwood drawer fronts featuring continuous grain patterns and cut joinery, then assemble the drawers themselves. Install under-mount slides, attach the drawer fronts, and add sleek integrated pulls for a touch of modernity. To complete the vanity top, apply marine varnish and paint for exceptional durability. Once the base is ready, secure the vanity using a French cleat attached to the studs, followed by the installation of the countertop, sink, faucet, and LED lighting with motion sensors – the perfect trifecta for a contemporary bathroom upgrade.
Make a Floating Vanity for the Bathroom
To create a sophisticated DIY floating bathroom vanity, follow Caitlin’s step-by-step guide in this comprehensive tutorial. The essential materials include high-quality plywood for a sturdy base, wood veneer for a seamless finish, and trim pieces to craft a trendy shaker-style drawer front. As you build the vanity box, assemble the drawers, and create the drawer front, Caitlin shares valuable tips on concealing unsightly plywood edges and securing every component in place. This project allows you to optimize storage space in your bathroom while incorporating a stylish, space-saving element into your overall decor. Get inspired and start building your own floating vanity today!
Build Your Own Floating Vanity Tutorial
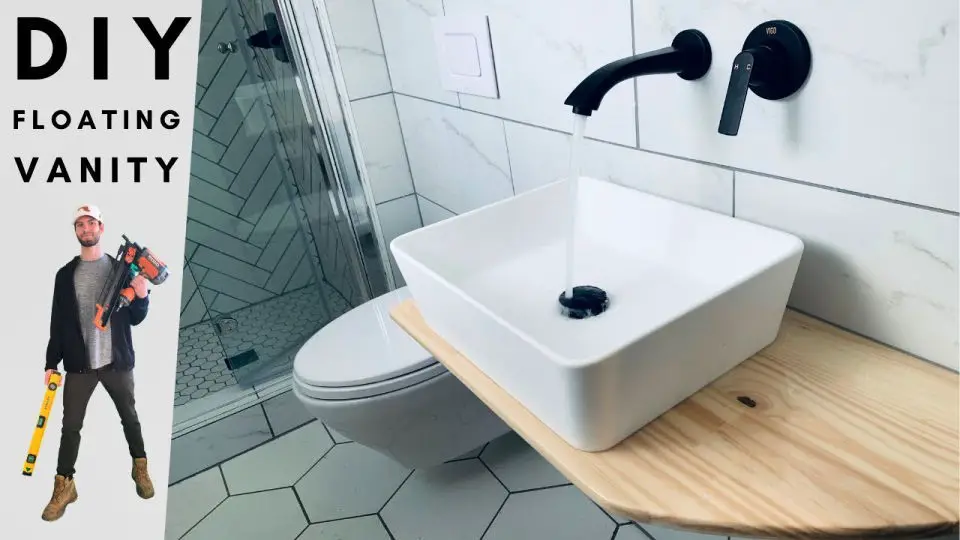
Elevate your bathroom’s visual appeal by transforming it into a modern oasis with a DIY floating vanity that effortlessly blends functionality with style. This comprehensive guide will walk you through the process of creating a sturdy and water-resistant vanity using heavy-duty supports, budget-friendly materials, and epoxy waterproofing. The result is a durable fixture that withstands the test of time.The project’s crowning jewel is the precision attachment of a vessel sink, ensuring a seamless and watertight seal. This unique combination of practicality and aesthetics will give your bathroom a sophisticated makeover, setting it apart from others. For expert guidance, follow along with our accompanying video tutorial to master the art of building a floating vanity that takes your bathroom renovation to the next level.
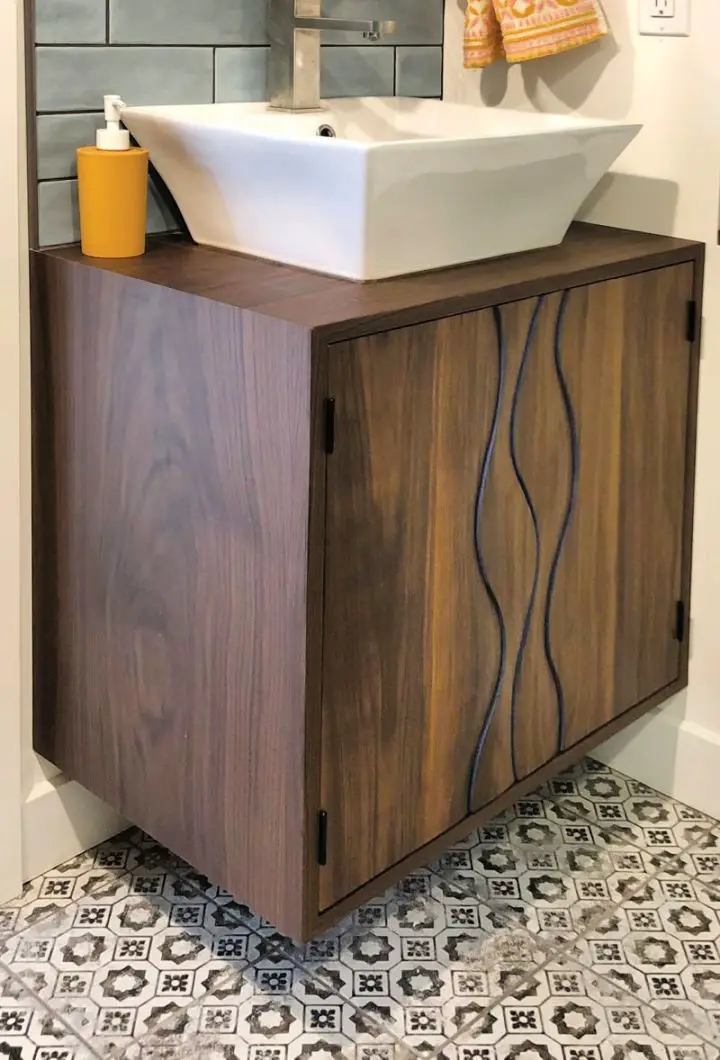
DIY Live Edge Floating Vanity With Brackets
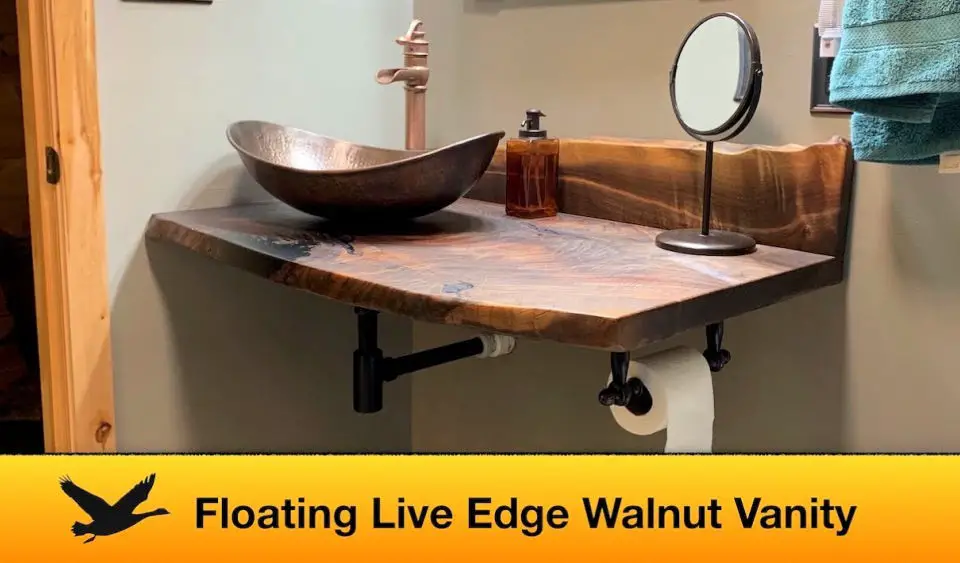
Transform your bathroom into a stunning oasis with a one-of-a-kind DIY project – the Floating Live Edge Vanity with homemade brackets. This innovative woodworking endeavor harmoniously blends form and function, featuring cleverly crafted brackets that not only provide sturdy support but also boast an intriguing triangular design and reinforcing spline. Crafted from quarter-inch cold rolled steel, these brackets are both functional and visually striking.
To ensure a secure attachment, it’s essential to cut into the sheetrock and connect the brackets directly to the wall studs. By adding elongated slots for the countertop bolts, you’ll also account for wood expansion and contraction – a thoughtful touch that elevates this project to new heights. While welding skills are put to the test, the end result is a truly unique and robust vanity that will undoubtedly become the focal point of your bathroom. For detailed instructions and inspiration, be sure to check out the full tutorial on YouTube and embark on your DIY adventure today!
Conclusion:
The DIY journey doesn’t just yield a functional piece of furniture – it also offers an unparalleled opportunity for self-expression and customization. By crafting your own floating vanity, you’re not only adding a stylish touch to your bathroom but also tailoring the space to fit your unique personality. With 20 meticulously curated DIY plans at your disposal, you can create a piece that’s as distinctive as your home. Whether it’s about selecting the perfect materials, ensuring stability and functionality, or maximizing space in even the smallest of bathrooms, this comprehensive guide aims to provide a solid foundation for your creative endeavors. As you embark on this project, get ready to bring your personal style and bathroom’s needs together under one beautiful, floating vanity.
