Why Choose DIY Banquette Seating?
When it comes to enhancing your living space, opting for a DIY banquette seating project can be an incredibly rewarding experience. One of the primary advantages is the potential to save significantly on costs by selecting materials and taking on the labor yourself. This level of control allows you to tailor the project to fit your specific needs, whether that means accommodating a unique space shape or incorporating storage features.Beyond the financial benefits, DIY banquette seating also offers a sense of accomplishment and pride in knowing that you brought your vision to life. Seeing the finished product in person can be incredibly fulfilling, adding a personal touch to your home.From a functional perspective, banquette seating is an excellent way to maximize floor space and add storage capacity, making it particularly useful for smaller homes or areas where space is at a premium. Additionally, these benches offer a comfortable and stylish solution for dining or kitchen areas, allowing you to incorporate your preferred fabrics and finishes to match your home’s aesthetic.Ultimately, embarking on a DIY banquette seating project can have a profound impact on both the functionality and ambiance of your living space, making it an endeavour well worth considering for those looking to elevate their home.
How to Build a DIY Banquette Bench with Storage
Building a banquette bench with flip-up storage can be a highly rewarding DIY project that not only adds functional seating but also cleverly incorporates additional storage into your home’s design. This comprehensive guide takes you through a step-by-step process to create a simple yet elegant storage bench, carefully designed for DIY enthusiasts of all skill levels. With a straightforward approach and attention to detail, you’ll be able to tackle this project with confidence.
Materials and Tools You Will Need
When it comes to building a shed, the right materials can make all the difference. For the framing, you’ll need 2×4 wood, which provides the necessary structural support for your structure. Next, quarter-inch plywood is ideal for sheathing, as it provides an effective barrier against the elements. Trim pieces are typically made from one-by-three wood, while the top layer can be constructed using three-quarter inch plywood. To secure everything in place, you’ll need self-tapping screws and brad nails. Plywood edges can be finished off with edge banding, and any imperfections can be filled in with wood filler. For a smooth finish, sandpaper (both 120 grit and 220 grit) is a must-have tool. To add some color to your shed, semi-gloss paint combined with primer will provide the necessary protection against the elements. Finally, hinges are essential for any doors or windows you might be installing. In terms of tools, you’ll need a circular saw (or table saw) for cutting wood, a brad nailer for fastening trim and sheathing, a paintbrush and roller for applying finishes, as well as a trusty measuring tape to ensure everything is square and accurate.
Step 1: Plan and Cut the Frame
To start building your bench, begin by planning its size. Measure and cut two 2×4 wooden pieces to create the frames that will serve as the foundation of your project. A circular saw is an ideal tool for making these cuts, but be sure to precision-cut them so they fit together snugly.
Step 2: Assemble the Frame and Attach Legs
Employing your self-tapping screws, construct the frames by assembling them together. Next, securely fasten the legs to these frames using the same type of screws. The simplicity of this process allows for a seamless and robust foundation for your bench, making it an essential step in its overall development.
Step 3: Add Sheathing
To complete the exterior of your 2×4 frames, wrap them in quarter-inch plywood for a sturdy yet lightweight solution. This material is easy to handle and manipulate, making it an ideal choice for this step. Secure the plywood to the frame using brad nails, taking care not to worry too much about perfection – any rough edges will be concealed by the trim you’ll apply later.
Step 4: Trim and Detail
To complete the bench’s perimeter, measure and cut one-by-three wood into precision-fit trim pieces. This process involves working around any existing baseboards and verifying each piece fits seamlessly against the wall. The ultimate goal is to conceal the plywood edges and elevate the bench’s aesthetic appeal by incorporating these carefully crafted trim elements.
Step 5: Prepare and Attach the Top
When building your bench top, start by selecting three-quarter inch plywood and cutting it to size using either a circular saw or table saw. To achieve a professional finish, apply edge banding to the front edge of the cut pieces. Once prepared, lay the bench top components onto the frames, taking care to ensure a precise fit for a sturdy and durable assembly.
Step 6: Finishing Touches
To achieve a professional-looking finish on your wooden bench, start by filling any nail holes with wood filler. Once the filler has dried, use 120 grit sandpaper to smooth out the entire surface. This will provide a solid foundation for painting. Before applying paint, lightly sand the area again using 220 grit paper to remove any dust or debris that may have accumulated. When it’s time to apply paint, use a combination of brush and roller strokes to achieve a durable and clean finish. For optimal results, apply three coats of semi-gloss paint, allowing sufficient drying time between each coat.
Step 7: Install the Hinges and Complete the Bench
As the final stages of construction come into focus, take a moment to secure the hinges that connect the bench top and frame. A thorough fastening will confirm the stability of your newly crafted workbench, effectively marking the completion of the building process. With this crucial step complete, your bench is now poised for placement in its intended location.
Maintaining Your Bench
Maintaining the appearance of your workbench is crucial for optimal performance. To achieve this, incorporate regular cleaning into your routine by gently wiping it down with a damp cloth. Be cautious not to introduce harsh chemicals that could compromise the paint or other surfaces, as this may have long-term consequences on its overall condition.
Video Tutorial
To enhance your living space while feeling a sense of accomplishment, consider constructing a DIY banquette bench with flip-up storage. For a visual guide to accompany this written tutorial, watch the YouTube video below. The interactive approach provides a more comprehensive understanding of the building process and encourages a greater sense of confidence. Building a DIY banquette bench not only enhances your living space but also offers the satisfaction of creating something both functional and beautiful for your home.
How to Build Your Own Banquette Seating with Storage
Crafting a DIY banquette seating with storage for your home can be an incredibly fulfilling project that harmoniously blends style, comfort, and practicality. Whether you’re seeking to elevate your dining area, kitchen, or a cozy corner, this comprehensive guide will guide you through the fundamental steps of constructing a banquette seating solution replete with hidden storage capabilities, thus transforming your living space into a haven of warmth and functionality.
Understanding the Basics
Banquettes offer a versatile seating solution for dining areas, boasting a bench-style design that can be tailored to suit your specific space constraints and storage requirements. This type of seating is particularly advantageous in that it allows you to increase the overall seating capacity without sacrificing valuable floor area.
Planning Your Project
To create a functional and aesthetically pleasing banquette, start by measuring the space it will occupy. Record the length, width, and height of the area to ensure the banquette fits comfortably alongside any tables or chairs. Consider the dimensions of these pieces as well, taking care not to overcrowd the space. Next, think about the shape you want your banquette to take on. Will it be a straightforward bench, an L-shape, or perhaps a U-shape? This decision will largely depend on the layout of your room and your personal needs. Once you’ve decided on the design, focus on selecting materials that are both durable and easy to clean. If the banquette is destined for a kitchen or dining area, this becomes especially important. For the frame, plywood is often a popular choice, while cushions can be covered in a fabric that complements your existing decor.
Building the Banquette
To build a functional and stylish banquette, start by constructing the frame using your preferred materials. Ensure it’s robust enough to support the weight of multiple individuals. Don’t forget to account for the dimensions of the storage space you’ll be incorporating into your design. This will provide ample room for storing items like linens, pillows, or even kitchen utensils. Next, decide on the type of storage solution that suits your needs. Drawers or a lift-up bench seat are popular options among homeowners. The key is to seamlessly integrate this storage space into the frame of your banquette. Once you’ve completed these steps, it’s time to focus on the finishing touches. This includes applying a coat of paint or stain to the wood, adding comfortable cushions, and perhaps even opting for custom upholstery that complements your home’s unique decor.
Tips for a Successful DIY Banquette Seating
When designing a banquette seating area with storage, it’s crucial to prioritize quality over quantity. Invest in high-end materials that can withstand frequent use and the test of time. A comfortable seating arrangement is equally important, as it will encourage your loved ones and guests to linger longer, fostering a sense of community and connection.
Safety should also be top of mind, particularly if you’re opting for a lift-up bench seat with storage. Consider installing safety hinges to prevent the lid from slamming shut, ensuring a safe and stress-free experience for all.
Beyond function, banquette seating offers a unique opportunity to express your personal style and add visual interest to your room. Don’t be afraid to get creative with colors, patterns, and textures to build a showstopping focal point that reflects your personality and enhances the overall ambiance of your space.
While building a custom banquette seating area may seem daunting, it’s an achievable DIY project when approached thoughtfully. By carefully planning each step and embracing your creativity, you’ll be rewarded with a one-of-a-kind piece of furniture that perfectly complements your home.
DIY Banquette Seating FAQS
With a solid foundation of knowledge, you’ll be well-equipped to tackle your DIY banquette seating project. To get started, let’s address some of the most frequently asked questions in the world of banquettes. From construction techniques to material selection, we’ll cover the essentials to ensure your endeavor is met with success.
What is Banquette Seating?
In many homes, banquette seating serves as a stylish and functional addition to dining areas. Characterized by built-in benches, this type of seating offers a space-saving solution that can also incorporate storage compartments beneath the seats. By combining form and function, banquette seating provides a practical and visually appealing benefit for any living space.
Why Should I Choose DIY Banquette Seating?
By opting for DIY seating, homeowners can tailor their furniture to perfectly suit their living space and requirements, typically at a more affordable price point compared to purchasing pre-made pieces or hiring a professional. This approach not only provides the opportunity for creative expression but also fosters a sense of accomplishment as you bring your unique design to life in your home.
What Materials Do I Need for DIY Banquette Seating?
The foundation of a well-crafted storage ottoman lies in its individual components, which typically consist of a sturdy plywood frame that provides structural support. To ensure comfort and relaxation, the interior often features cushioning materials such as foam and fabric. For added visual appeal, a coat of paint or stain can be applied to give the piece a unique finish. Furthermore, hinges and hardware are used to create storage compartments, allowing users to neatly stow away items like throw blankets, pillows, or even extra linens.
How Do I Measure My Space for Banquette Seating?
Before selecting a banquette, take precise measurements of the area where it will be installed. This includes capturing the length, width, and height of the space. Moreover, consider the dimensions of your dining table as well as the necessary clearance for chair placement and movement around the table. Make sure to account for any obstructions or obstacles that may impact the banquette’s fit.
Can I Build Banquette Seating if I’m Not Very Experienced in DIY?
While many DIY banquette seating projects can be intimidating, there are plenty of beginner-friendly options available. To get started, look for simple designs and step-by-step tutorials that align with your skill level. By doing so, you’ll set yourself up for success and enjoy a rewarding DIY experience.
How Can I Incorporate Storage into My Banquette Seating?
When it comes to choosing a storage solution for your vehicle, you’re presented with a few notable options. Two of the most popular choices are drawers located beneath the seat, offering quick and convenient access, as well as lift-up bench seats that can be raised to fully utilize the entire bench space for storing items.
What Kind of Cushions Should I Use for Comfortable Seating?
When selecting a banquette, prioritize comfort by opting for high-density foam that measures at least three inches in thickness. Additionally, consider a durable fabric that seamlessly blends with your interior design while also being effortless to clean, particularly if the seating area is anticipated to experience frequent use.
How Do I Ensure My Banquette Seating Is Safe?
When incorporating a lift-up seat with storage capabilities, it’s crucial to prioritize safety by installing secure hinges that prevent the lid from unexpectedly closing and potentially causing harm. Moreover, guarantee the overall structure is firmly attached to the wall to prevent any accidental tilting or shifting, thereby ensuring a stable and safe configuration.
Can Banquette Seating Fit in a Small Kitchen?
When it comes to making the most of limited floor space, banquettes are an excellent choice. By cleverly utilizing vertical space and minimizing footprint, they can comfortably accommodate a number of people without overwhelming the room. To achieve this perfect fit, be sure to take precise measurements of your area before selecting a banquette, ensuring that you get it just right.
How Do I Choose the Right Design for My Banquette Seating?
When selecting a banquette, it’s essential to consider the layout of your room and how you intend to use the space. If you frequently host large gatherings or need to accommodate multiple people, an L-shaped or U-shaped banquette is likely the best choice. Conversely, if your space is smaller or more intimate, a straight bench might be a better fit. To find inspiration for your design, explore online resources and adapt the style to suit your unique needs and aesthetic.
25 DIY Banquette Seating Plans (Build a Storage Bench)
Transform your living space with innovative DIY banquette seating ideas that double as stylish storage benches. Explore 25 inspiring plans, complete with step-by-step instructions, to bring a touch of creativity and functionality to your home.
Making Your Own Banquette Seating
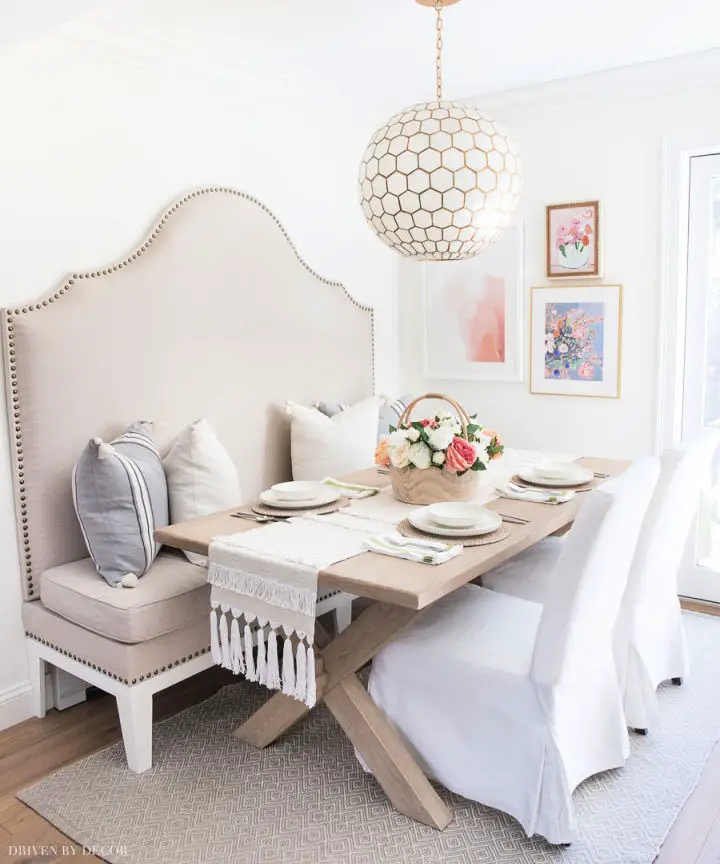
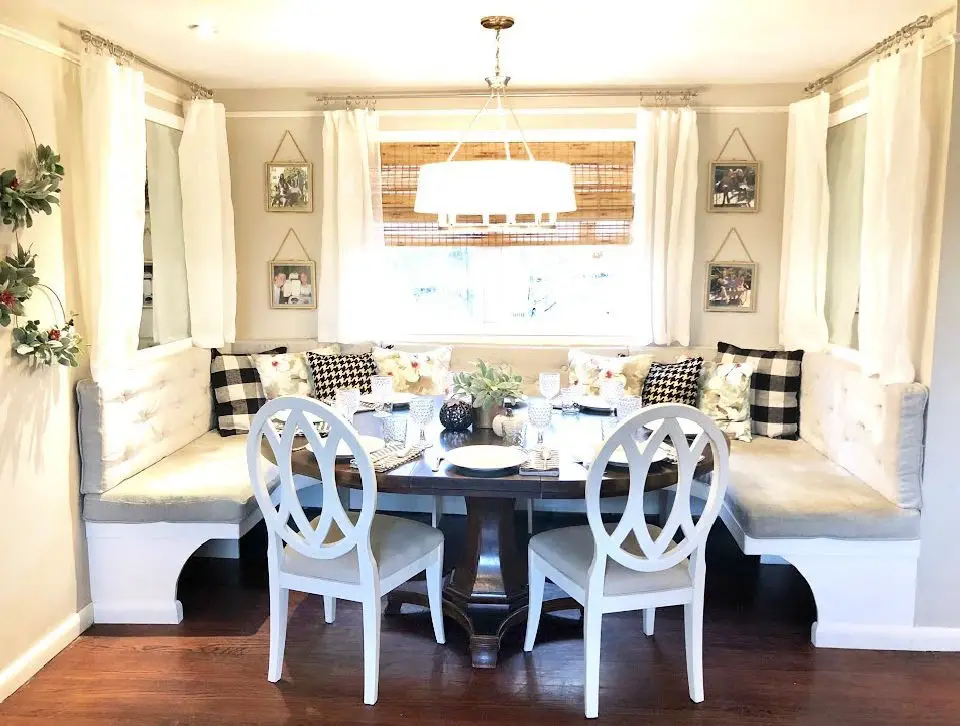
Discover the beauty of DIY banquette seating by embracing creativity and practicality at Driven by Decor. For homeowners seeking innovative solutions, like overcoming baseboard heating challenges for a seamless fit, this comprehensive guide offers an easy-to-follow, step-by-step process. Begin with a custom headboard creation, then elevate your design with luxurious upholstery and stylish nailheads. This engaging tutorial enables you to transform your kitchen into a cozy, inviting corner that seamlessly blends functionality with personal style.
Handmade Banquette Bench With Flip-up Storage
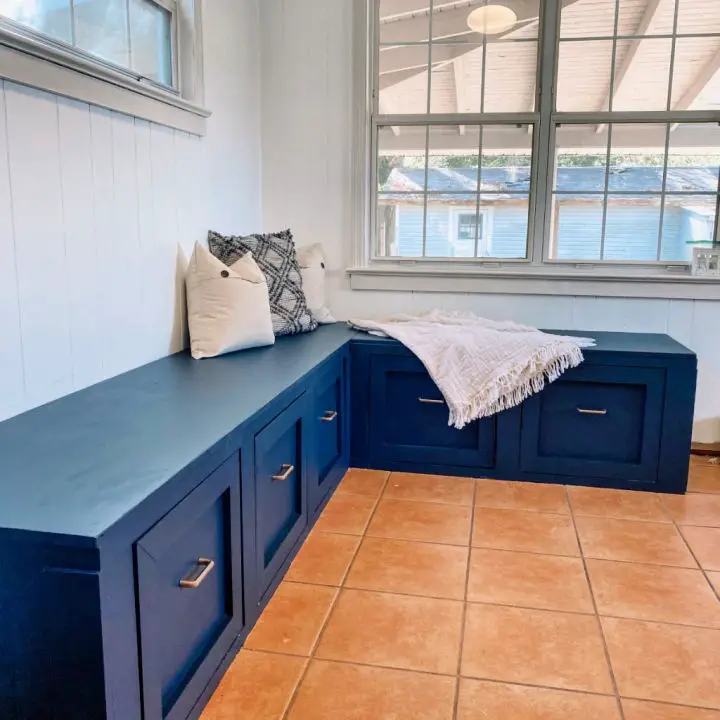
Elevate your living space with a DIY Banquette Bench featuring built-in storage. This adaptable project is perfect for customizing a cozy breakfast nook, corner bench, or window seat. With detailed plans, including diagrams, video tutorials, and a comprehensive materials list, crafting this storage bench becomes an accessible endeavor for intermediates. Not only will you gain additional seating, but you’ll also cleverly maximize your home’s storage capacity while staying within a reasonable budget. By building a banquette tailored to your unique dimensions, you’ll not only create a functional space but also enhance your décor with a thoughtful addition.
DIY Banquette Seating – Step by Step Instructions
Transform your kitchen or dining area into a warm and inviting space with this straightforward DIY banquette seating project. This budget-friendly tutorial guides you through each step, from planning to completion, to create a charming built-in banquette that adds both function and coziness to your home. Perfect for spaces where extra seating is needed without sacrificing flow or comfort, this project is ideal for anyone looking to enhance their space’s warmth and functionality.
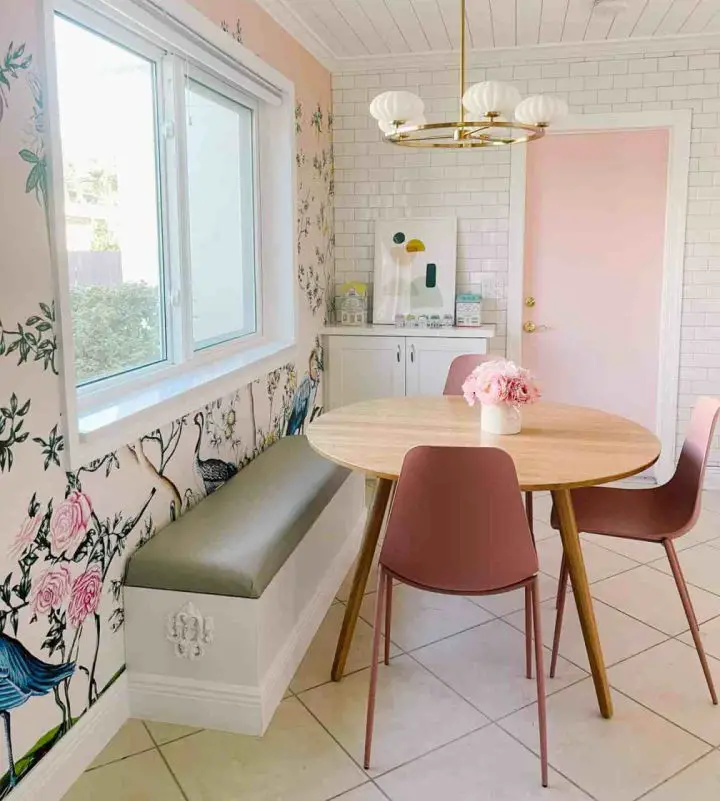
Make a Pink Channel Tufted Banquette Seating
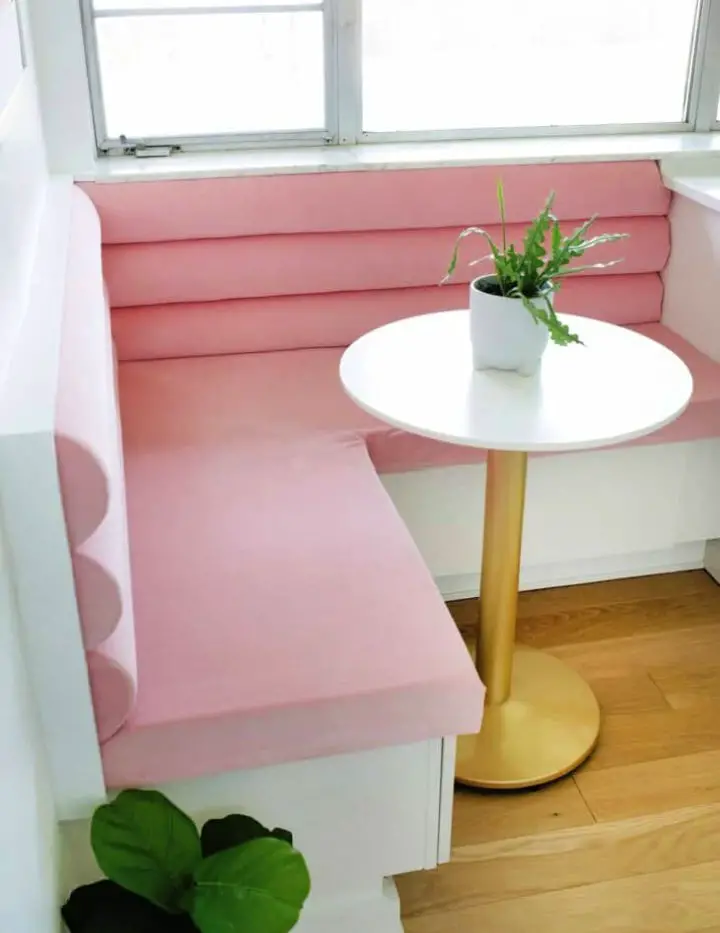
Transform your kitchen into a cozy breakfast nook with the Pink Channel Tufted Banquette DIY project. This comprehensive guide takes you by the hand, offering step-by-step instructions on how to create an L-shaped banquette wrapped in plush pink velvet. With practical advice and clear guidance, you’ll learn how to select the ideal materials and master the channel tufting technique. As a result, your kitchen will be filled with a burst of color and comfort, making it the perfect spot to start your day.
Building a Wooden Banquette Seating
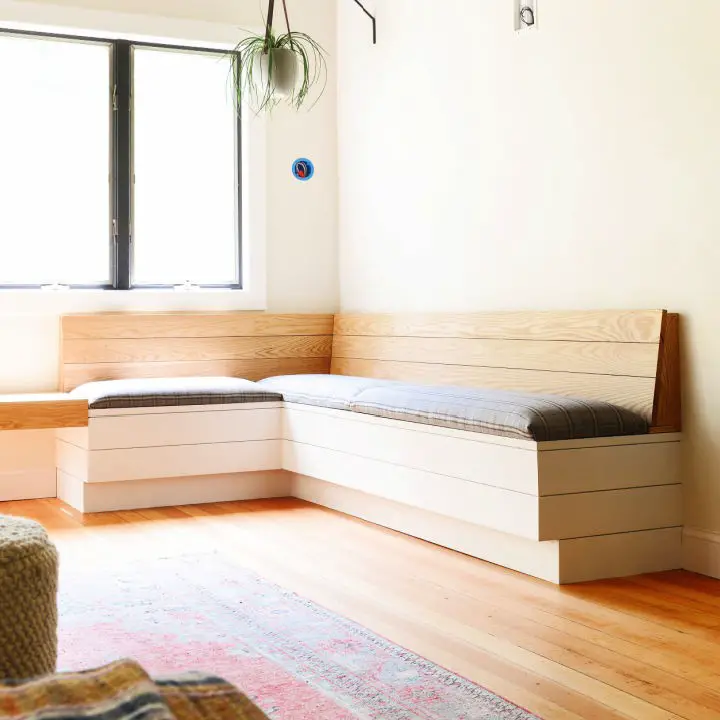
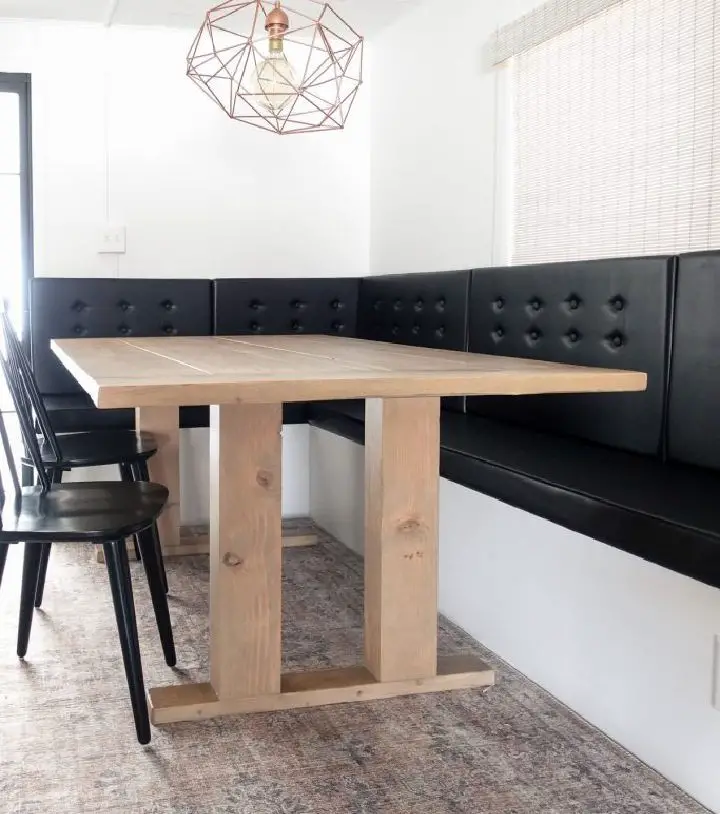
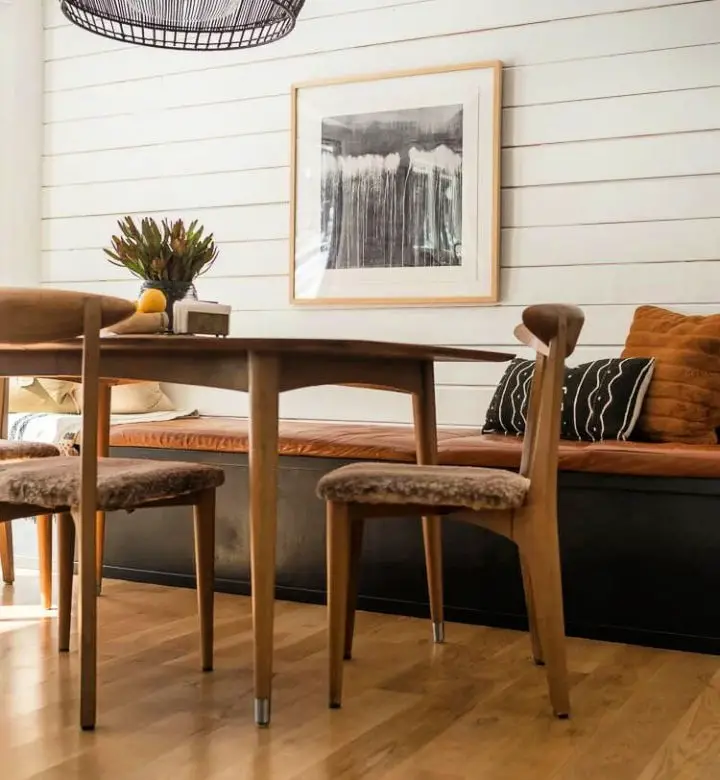
At Yellow Brick Home, you’ll discover a comprehensive guide on how to transform your dining nook into a cozy custom banquette. This hands-on tutorial takes you from planning to execution, leveraging materials from Lowe’s, to create a functional and stylish seating area that’s perfect for gatherings. The focus is on striking a balance between practicality and charm, ensuring your new banquette is both comfortable and useful. Storage solutions and a clever floating side table are just two of the many tips included in this project, designed specifically for DIY enthusiasts looking to elevate their spaces. With Yellow Brick Home’s guidance, you’ll find that building a banquette can be an achievable and satisfying experience.
DIY Banquette Seating With Built-Ina Storage
Reimagine your kitchen’s corner space into a warm and inviting nook with HGTV’s comprehensive guide on building a banquette seating area featuring built-in storage. This detailed tutorial breaks down the process into manageable steps, empowering you to increase your dining area’s seating capacity while cleverly tucking away essential kitchen items out of sight. From laying the foundation to adding finishing touches, discover how to create a cozy gathering spot that not only conserves space but also keeps your belongings organized and within reach. This project offers a unique blend of style and functionality, perfect for personalizing your kitchen design.
Build a Banquette Bench Seating With Storage
Bring your space to life with a bespoke banquette bench seating project! Drawing from her expertise, Mickey Kay’s detailed guide at Mickey Kay’s Blog takes the intimidation out of creating a custom seating solution. With step-by-step instructions, you’ll discover how to craft detailed sketches and select the perfect materials for your unique design. This comprehensive tutorial also shares clever modifications, such as integrating pre-made cabinet drawers and installing electrical outlets. By following Mickey’s guidance, you’ll be able to create a functional and stylish seating area that adds warmth and character to any home. Get inspired and start your banquette bench seating DIY adventure today!
How to Make a Kitchen Banquette Bench Seat
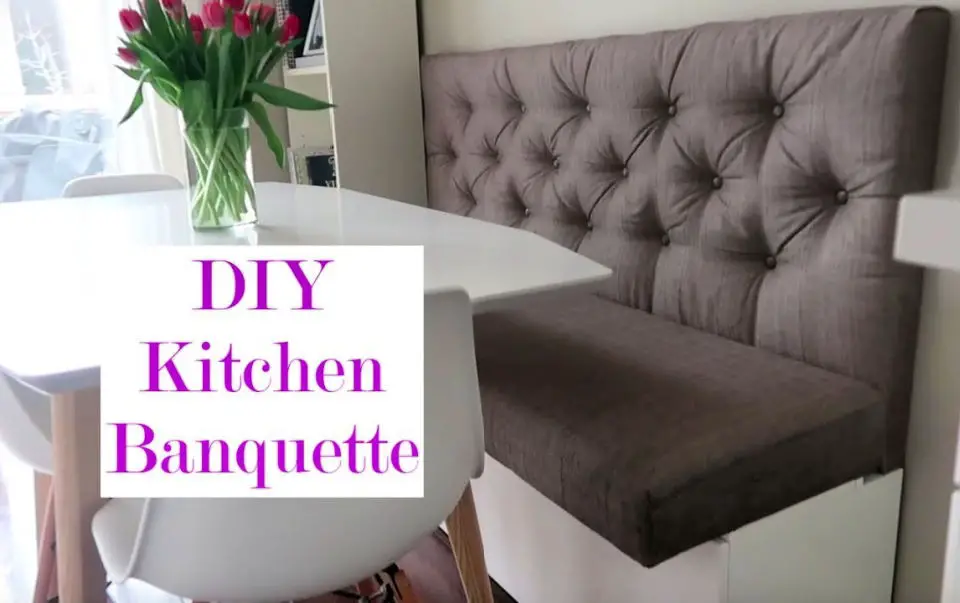
Transform your kitchen into a warm and inviting space with the help of this comprehensive DIY guide to creating a kitchen banquette bench seat with storage. This budget-friendly project not only adds an extra seating area but also provides clever storage solutions for all your essential cooking tools and utensils. Perfect for cozy kitchens, this functional addition will enhance both the functionality and aesthetics of your kitchen. With its easy-to-follow instructions and affordable materials, anyone can create this stylish feature, which is sure to become a hub of activity in your home.
Simple DIY Banquette Bench Seating
Elevate your home’s ambiance with the perfect blend of form and function by mastering the art of building a banquette bench seating. At Gadgets and Grain, you’ll find a comprehensive guide that takes you through every step, from sourcing the right materials like lumber and plywood to crafting a sturdy frame using pocket holes for a seamless look. The tutorial is designed to provide a durable and stylish solution for your dining nook or living space. You’ll learn how to cut and attach paneling with precision, add elegant trim details, and build a resilient top that will withstand the test of time. To ensure your banquette bench seating turns out looking great and feeling solid, the guide also provides detailed insight on primer and painting techniques. Whether you’re a seasoned DIY enthusiast or just starting out, this project offers a fulfilling journey that’s sure to transform your space.
Homemade Breakfast Nook Bench
Transforming your breakfast area with a DIY breakfast nook bench is an excellent way to combine functionality and style. With its free plans and step-by-step tutorial, this project is designed to help you build a beautiful and sturdy bench with drawers for extra storage. Whether you have a small or large dining space, this DIY achievement will enhance the overall ambiance of your home. By following these instructions, you’ll be able to create a cozy and space-saving solution that adds a personal touch to your breakfast area.
IKEA Wooden Banquette Seating Hack
Elevate your dining space with a creative DIY project that transforms an IKEA Kallax bookcase into a functional and stylish banquette seating solution. This comprehensive guide takes you through the process of repurposing this affordable piece of furniture into a unique seating arrangement, perfect for those looking to save time and money. Whether you’re a seasoned DIY enthusiast or just starting out, this project is designed to be accessible and adaptable to your skill level and space constraints.
By following the step-by-step instructions on building, upholstering, and customizing your banquette seating, you’ll not only add comfort and style to your dining area but also gain valuable storage space. With this DIY hack, you can create a one-of-a-kind seating solution that reflects your personal taste and meets your functional needs.
So why wait? Start crafting your dream banquette seating today and discover the joy of creating something beautiful and functional for your home.
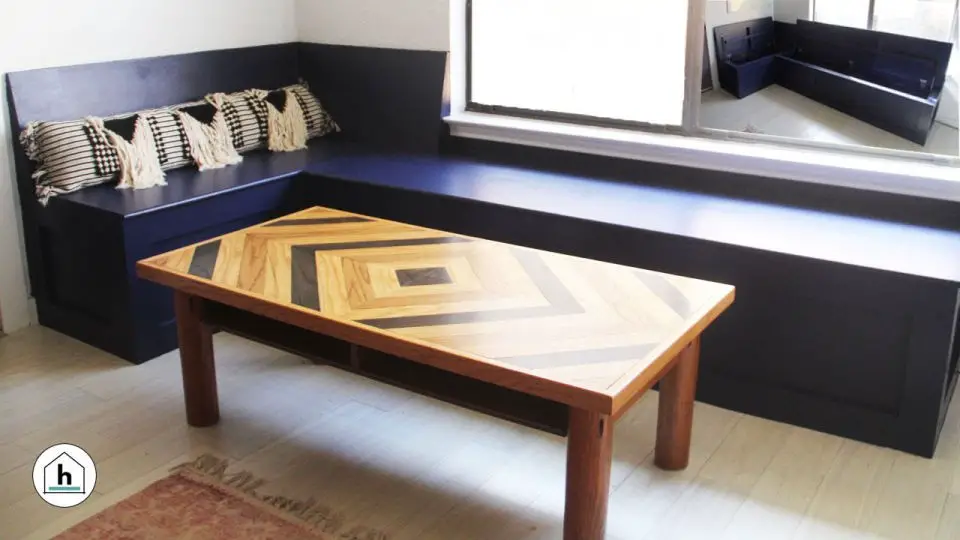
Build a Floating Banquette Seating
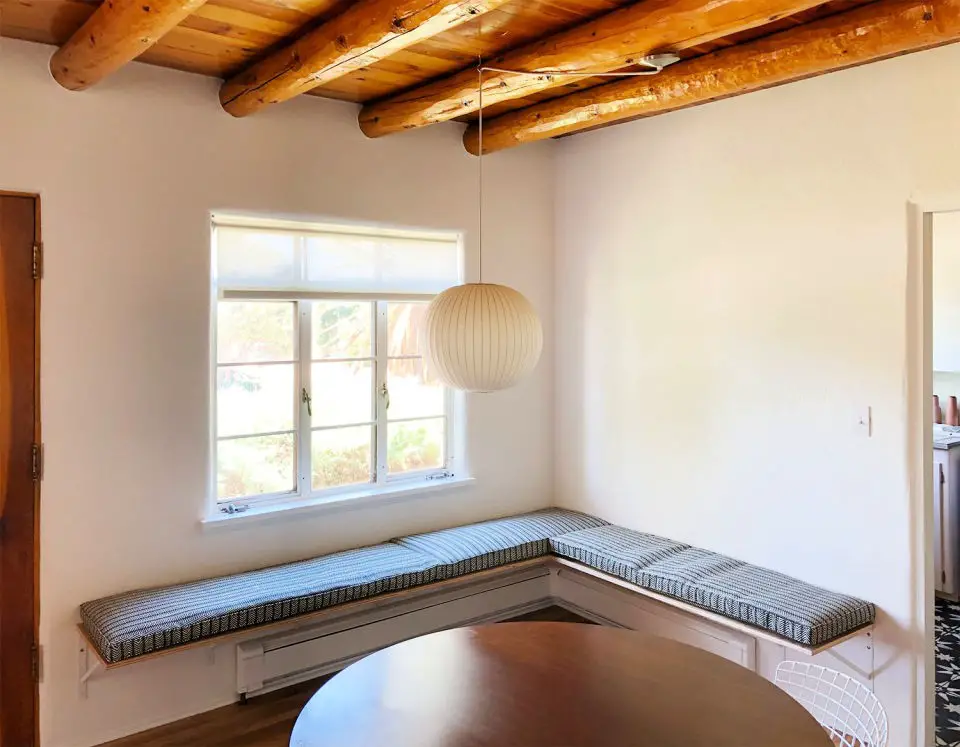
Transform your dining space into a cozy haven by creating a floating banquette that cleverly hides baseboard radiators while providing ample seating. This ingenious DIY project is perfect for maximizing small spaces and can be achieved with industrial shelving brackets, plywood, and some basic tools. By following the step-by-step guide from Door Sixteen, you’ll learn how to build a sturdy and stylish banquette that’s topped off with plush cushions and finishing touches. Whether you’re a seasoned DIY enthusiast or just starting out, this project is designed to be accessible and easy to follow. For the complete walkthrough, head over to Door Sixteen for all the details.
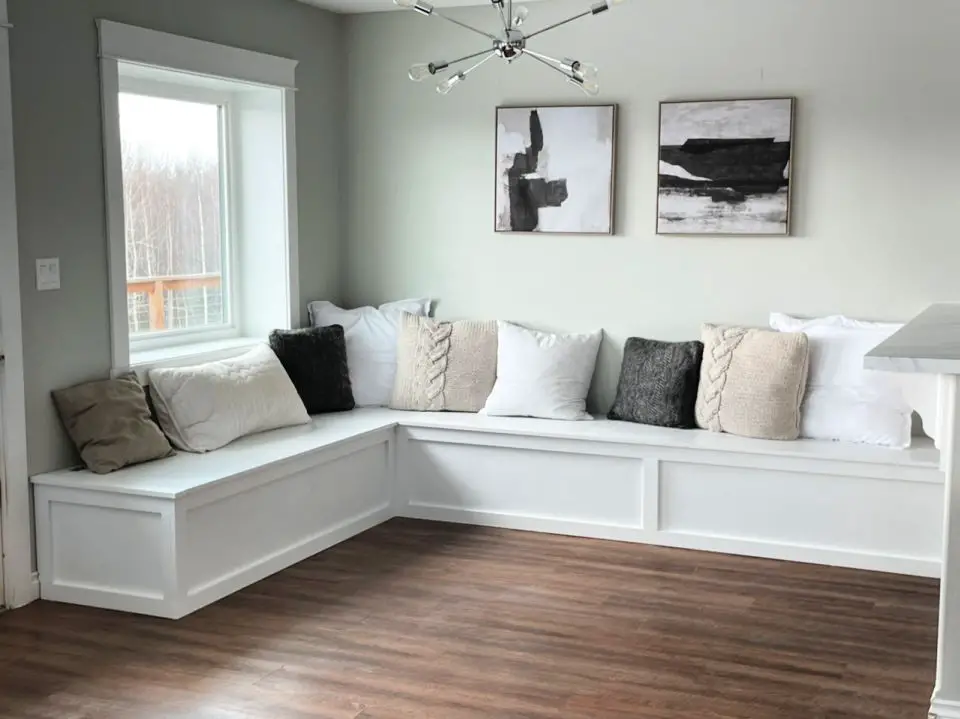
How to Build a Banquette Seating
Transforming your kitchen into a warm and inviting gathering space is easier than you think. At Nesting With Grace, we’re excited to share our banquette seating tutorial with you, which showcases how we cleverly optimized space without compromising on style. The result is a cozy and functional dining area that seamlessly doubles as a comfortable sofa. Not only does this design solution offer ample storage options, but it also accommodates more guests than traditional seating arrangements.
In our step-by-step guide, you’ll get hands-on with the process of building your own banquette, including valuable tips on selecting the perfect cushions, adjusting seat height to achieve the ideal comfort level, and adding those finishing touches that give your space a truly personalized touch. Whether you’re a DIY enthusiast looking to enhance your kitchen’s functionality and warmth or simply seeking inspiration for your home, this tutorial is sure to provide all the guidance you need to get started.
Modern DIY Plywood Banquette Seating
Transforming your dining space into a cozy breakfast nook is a breeze with our comprehensive DIY guide. We’ll take you through each step of the process, from selecting the ideal materials to assembling a sturdy frame, with clear and concise instructions. This project not only enhances your home’s aesthetic appeal but also maximizes available space, making it perfect for family meals or intimate mornings. By following our detailed walkthrough, including essential tools and dimensions, you’ll be able to elevate your dining area with a unique blend of form and function that reflects your personal style.
Turn Havsta Cabinets Into a Banquette Seating
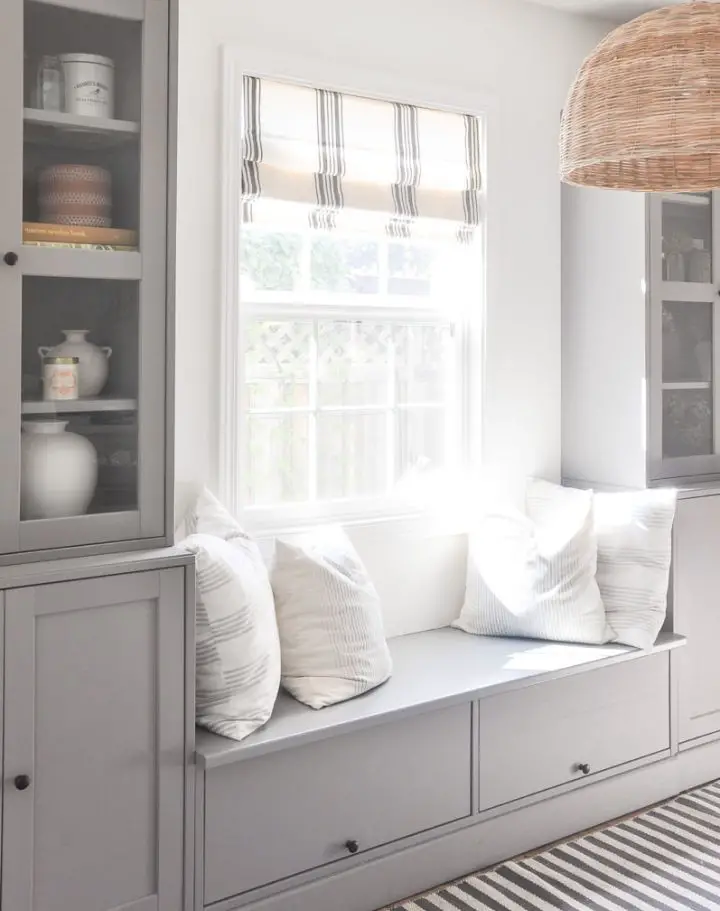
Reinvent your dining space with a creative do-it-yourself project that combines functionality and style. The IKEA Havsta Banquette Seating Built-in hack is an innovative way to transform your room, offering ample storage courtesy of the solid wood cabinets. This DIY endeavour not only adds a personal touch but also provides a comfortable and practical seating solution for mealtime gatherings. Learn about the cost and intricacies of this project, perfect for those seeking to elevate their dining area with a unique blend of coziness and sophistication.
Free Kitchen Banquette Seating Woodworking Plan
Transform your kitchen’s functionality and ambiance by creating a cozy gathering spot with our comprehensive guide. At Full Hearted Home, we’re excited to share our step-by-step instructions for crafting a timeless banquette bench that seamlessly combines extra seating with space-saving efficiency. This practical project requires careful material selection, precise execution, and thoughtful finishing touches. Our expert guidance covers every aspect of the process, from preparation to completion, ensuring a worthwhile outcome that will elevate your kitchen’s charm. To make maintenance a breeze, we also recommend a clever paint choice for easy cleanup – an essential consideration for any family home. By following our DIY guide, you’ll be able to create a warm and inviting atmosphere in no time.
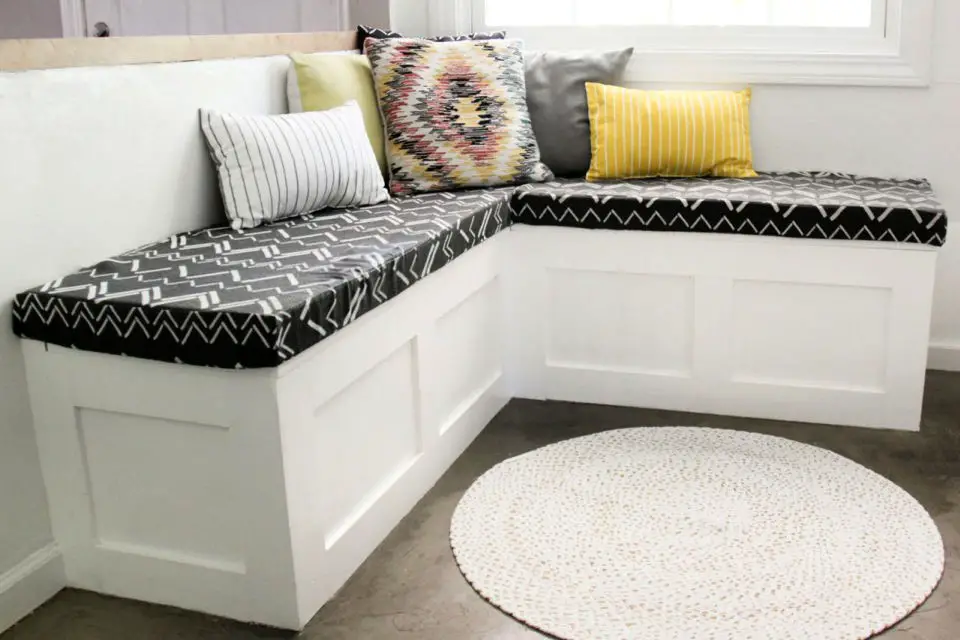
Cool DIY L-Shaped Banquette Bench
Transform your dining space into a cozy hub for family gatherings and everyday conversations by embarking on a DIY adventure. With our comprehensive L-Shaped Banquette Bench Tutorial, you’ll gain access to step-by-step instructions and free building plans. Backed by National Hardware’s expertise, this project offers a unique opportunity to create a functional and stylish seating area with ample storage. Whether you’re hosting game nights or simply enjoying meals together, this custom-built banquette bench will be the perfect centerpiece for your home. Once completed, share your finished project with us and enjoy the fruits of your labor!
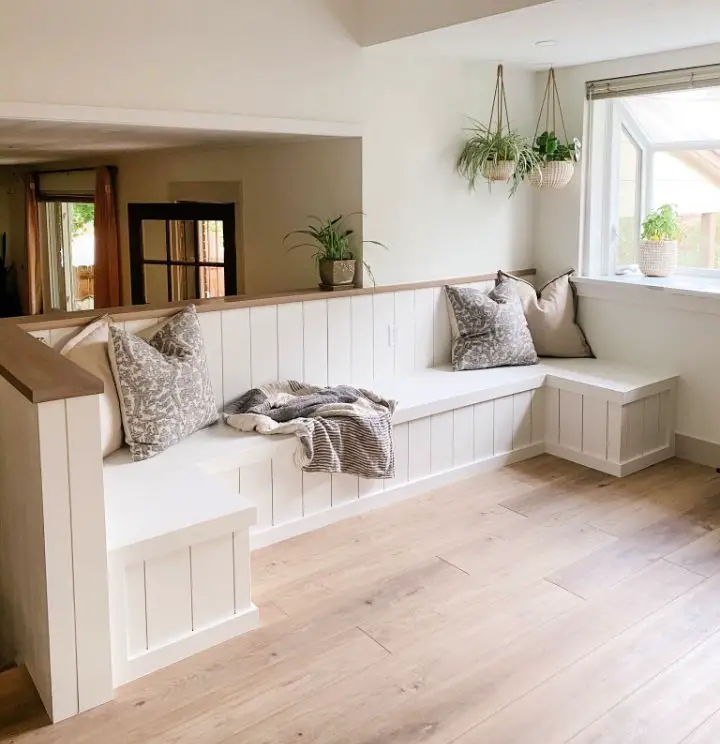
Make a Banquette Seating With Fluted Timber
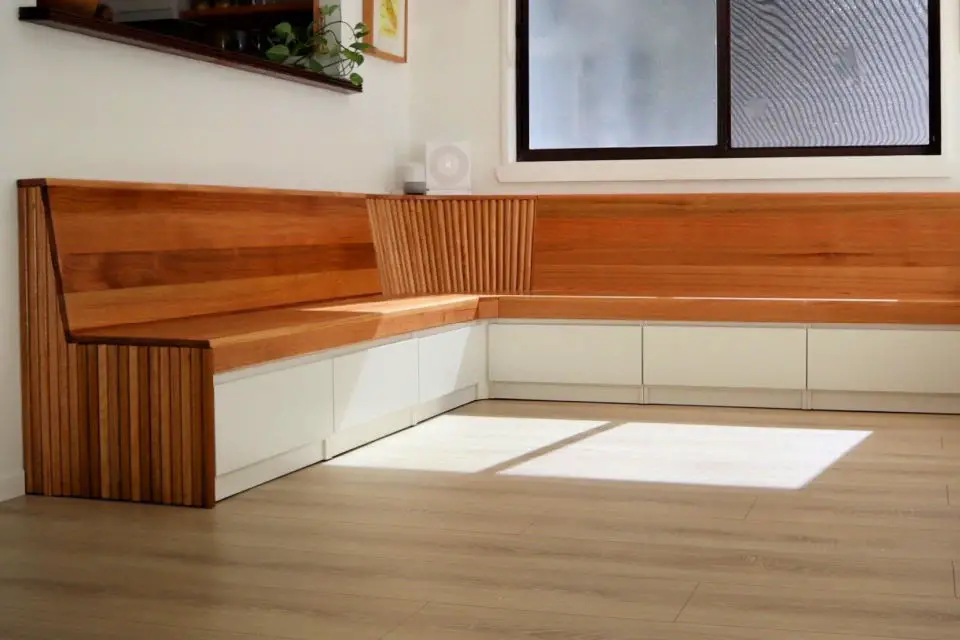
Transform your dining space with the warmth and elegance of a custom-built banquette showcasing exquisite fluted timber details. At Little Red Industries, we’ll guide you through a step-by-step process to create a harmonious blend of style, practicality, and charm. Our approach yields a cozy seating area that seamlessly integrates storage, ideal for those seeking to elevate their home’s ambiance and functionality.
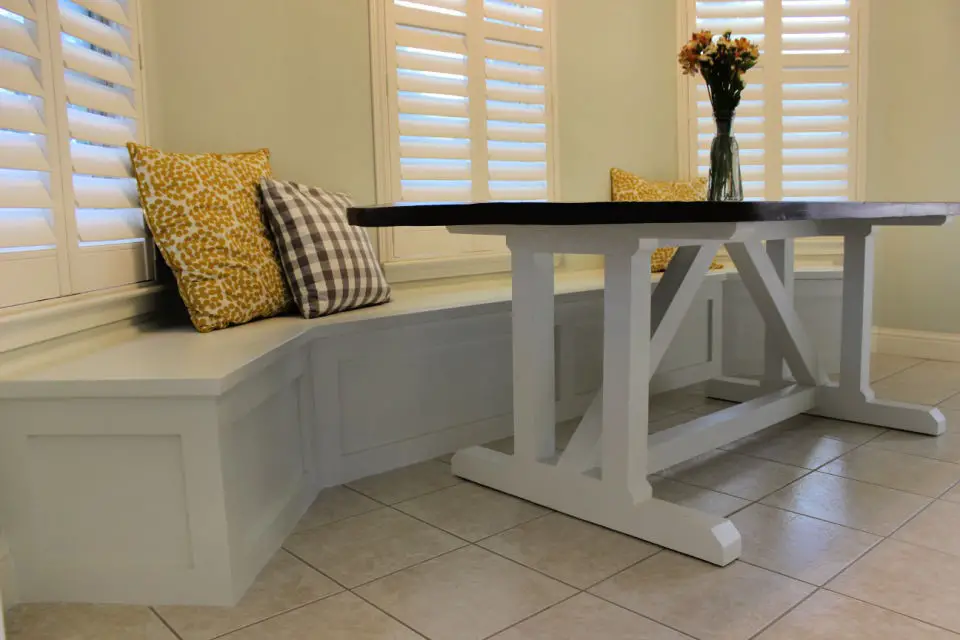
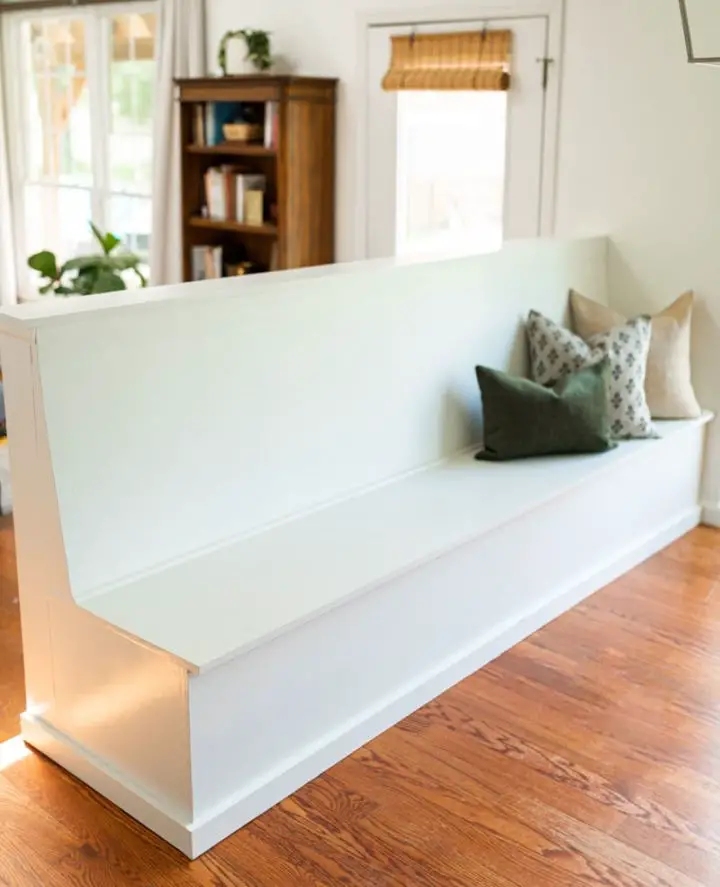
DIY Dining Room Banquette Seating Design

Transform your dining space into a cozy haven by creating a DIY banquette, as showcased by Blue Roof Cabin. This clever solution is perfect for small areas, providing sleek, space-saving seating while elevating the room’s aesthetic with crisp, white woodwork details. In this journey of redesign, we’ll take you through the process of bringing a straight bench design to life, complete with a practical toe kick to minimize wear and tear. This comprehensive DIY guide offers expert insights, ensuring your banquette upgrade is both functional and visually stunning.
Best Way to Make a Kitchen Banquette Seating
Elevate your kitchen’s ambiance by transforming it into a cozy retreat with our straightforward banquette bench guide. This versatile seating solution is perfect for kitchens connected to dining areas, providing both comfort and style. Whether you’re looking forward to reading a book or sharing a meal with family and friends, this DIY project offers a cost-effective way to enhance your kitchen’s aesthetics while creating a warm and inviting atmosphere. Our comprehensive guide features detailed instructions on construction and expert tips on upholstery, ensuring a beautiful and functional banquette bench that becomes the heart of your home.
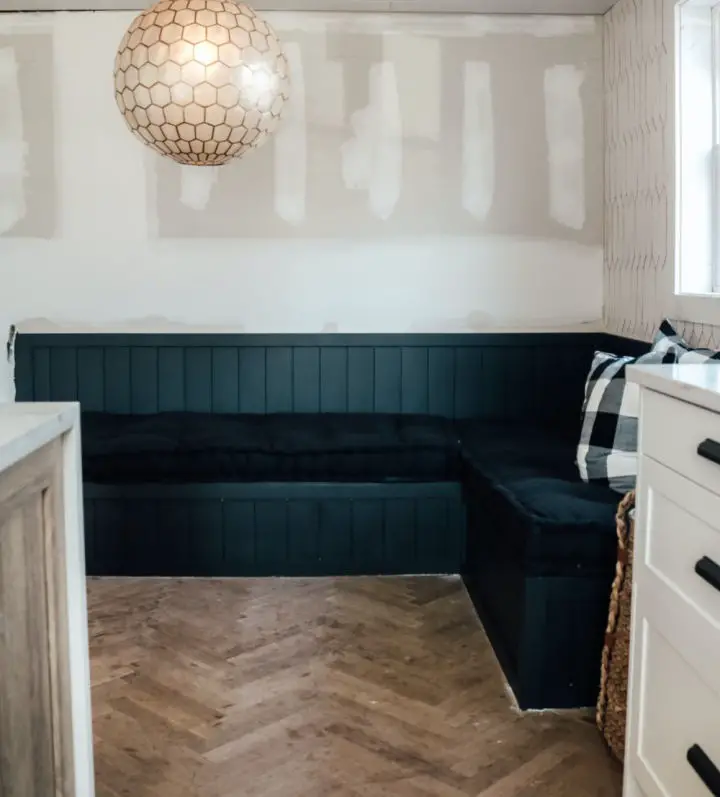
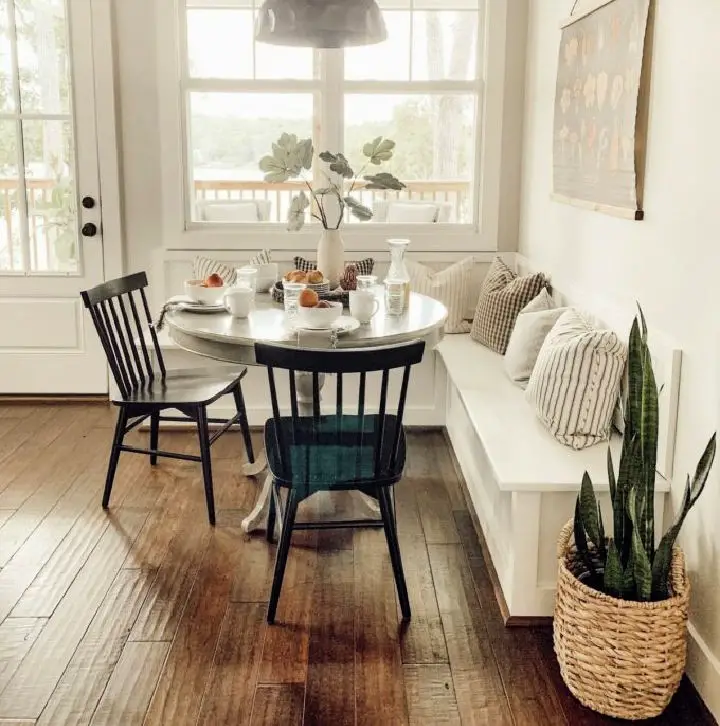
Banquette Bench Booth Seating in the Kitchen
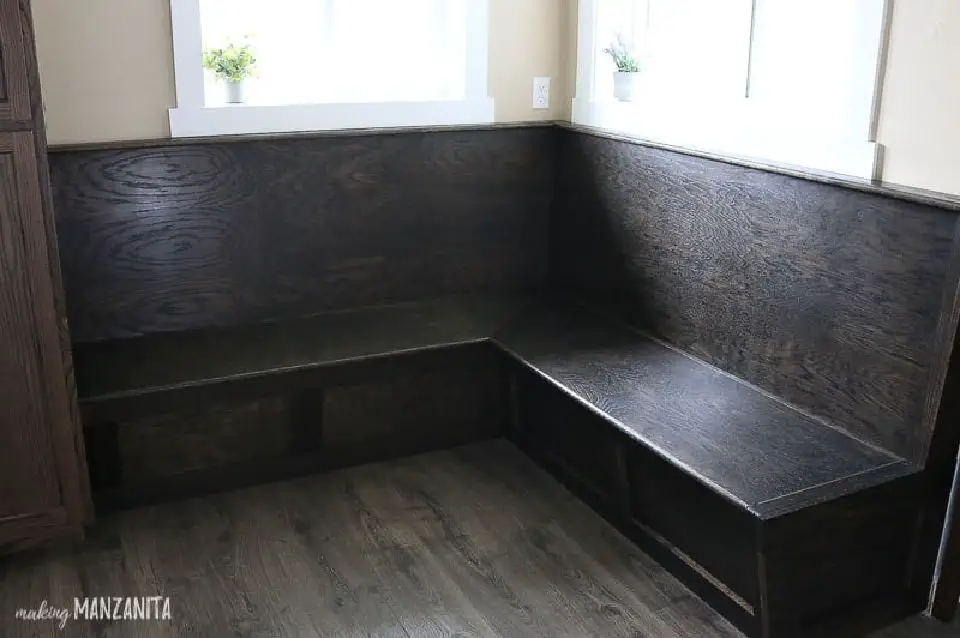
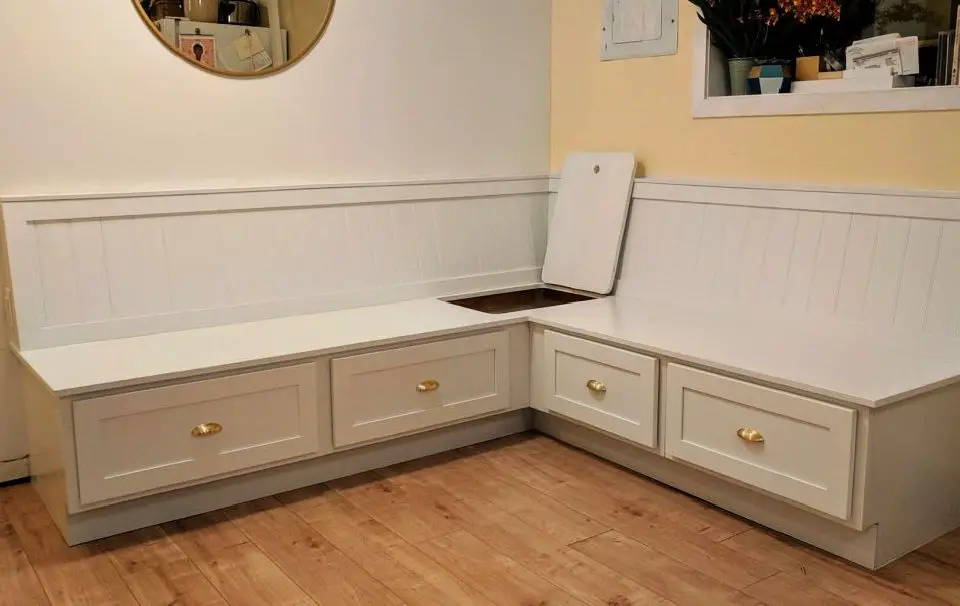
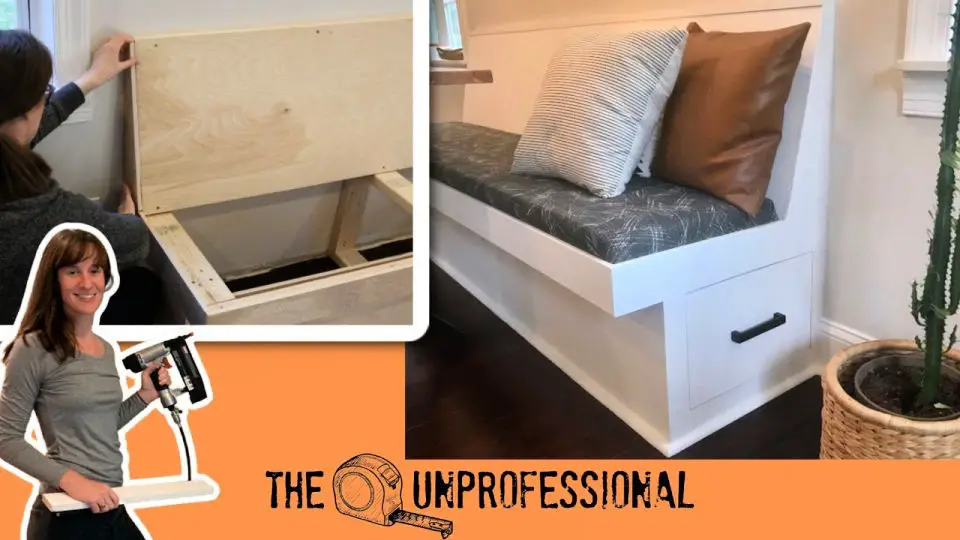
Elevate the charm of your breakfast nook with a DIY banquette bench that doubles as storage! With this straightforward guide from Making Manzanita, you’ll be effortlessly crafting a cozy haven for family gatherings, creative pursuits, or simply enjoying a quiet moment in your kitchen. Whether it’s a spot for casual meals, arts and crafts, or just a peaceful retreat, discover how to create a warm and inviting seating area that’s as functional as it is stylish.
How Do You Make a Corner Banquette Seating
Transform your living space by embarking on a DIY adventure to build a Corner Banquette/Bench Seat with Storage. This comprehensive guide will walk you through the process of constructing a functional piece that adds a touch of coziness to any room. But that’s not all – we’ll also show you how to incorporate struts for safe and secure closing, as well as LED lights to create a warm ambiance and add an extra layer of functionality. Imagine having a multipurpose dining nook that’s perfect for hosting gatherings or enjoying family meals. With our step-by-step guide, even novice DIY enthusiasts can achieve professional-looking results.
Make Your Own Banquette Seating
Transform your dining space into an inviting haven with the versatility of banquette seating. By embracing the creative process, you can design a custom solution that accommodates more guests while optimizing the room’s functionality. Subdue Designs provides a comprehensive guide to help you navigate every aspect of this DIY project, from selecting materials to crafting one-of-a-kind cushions. With our expert advice, you’ll learn how to harmonize your banquette with your dining table, resulting in a charming and intimate setting that perfectly balances form and function. Whether you’re seeking to elevate the ambiance or simply make the most of your available space, this DIY endeavor is an ideal way to revamp your dining experience and unlock the full potential of your home.
Easy DIY Kitchen Banquette Seating
Embark on a DIY adventure with Mr. X’s comprehensive guide to building a functional kitchen banquette, featuring clever storage solutions. With his father as trusty sidekick, Mr. X leads you through a step-by-step process that harmoniously blends practicality and coziness. The journey begins with selecting the ideal materials and culminates in the finishing touches. Watch the accompanying video (link provided) to gain hands-on insight into crafting a warm and inviting dining space in your kitchen. A must-read for those eager to elevate their home improvement skills.
Handmade Banquette Bench With Details Instructions
Create a warm and inviting atmosphere in even the most narrow spaces with a DIY Banquette Bench featuring built-in storage. Ideal for areas where traditional seating is impractical, this project combines functionality with charm, transforming your dining space into a cozy haven. With this easy-to-follow guide, learn how to construct a sturdy frame, design clever storage drawers, and craft a plush, upholstered seating area that’s as comfortable as it is practical. By taking on this DIY challenge, you’ll not only gain the satisfaction of creating something truly unique for your home but also develop valuable skills and confidence in your ability to shape your space.
Conclusion:
Our comprehensive guide on 25 DIY banquette seating plans has provided a clear roadmap for homeowners seeking to elevate their living space with practical and stylish seating solutions. By walking you through the fundamentals, material selection, and storage integration, each step is designed to empower you to craft a warm and inviting banquette seating area in your home. With our expert advice and FAQs at your fingertips, you’re now prepared to take on this engaging project, transforming your kitchen or dining space into a more functional and welcoming haven. The key to a successful DIY banquette seating project lies in meticulous planning, precise measurements, and a dash of creativity. We wish you happy building and look forward to seeing the results!
