Why Choose DIY Interior Shutters?
When it comes to enhancing the aesthetic appeal and functionality of your living spaces, crafting DIY interior shutters can be a game-changer. This hands-on approach not only saves you money but also allows for customization that perfectly suits your unique home and personal style. By taking on this project, you’ll enjoy numerous benefits, including the satisfaction of creating something with your own hands, building new skills, and having control over the eco-friendliness of the materials used.One of the primary advantages of DIY shutters is their cost-effectiveness. You can select materials that fit your budget, ensuring that you don’t overspend on pre-made options that might not meet your specific needs. Additionally, making your own shutters gives you the flexibility to tailor them to your home’s unique dimensions, colors, and styles.The sense of accomplishment that comes with completing a DIY project is unparalleled. Installing shutters you’ve made yourself adds a personal touch to your home that store-bought alternatives simply can’t match. Moreover, this hands-on approach allows you to develop valuable skills that can be applied to future home improvement projects, making you more self-sufficient and confident in your abilities.Furthermore, choosing DIY interior shutters provides an eco-friendly option for upgrading your home’s windows. By repurposing old materials or selecting responsibly sourced wood, you can reduce your environmental impact and contribute to a more sustainable lifestyle.In summary, DIY interior shutters offer a fulfilling way to upgrade your home on a budget, allowing for customization, personal satisfaction, skill-building, and eco-friendly choices. Embrace the DIY spirit, and transform your windows into beautiful focal points of your home.
How to Build DIY Interior Shutters
Transforming your living space with DIY interior shutters offers a unique blend of style and practicality. By adding these custom elements, you’ll not only achieve the perfect balance of light control and privacy but also inject a touch of personal flair into your home’s decor. In this comprehensive guide, we’ll break down the process into manageable steps, empowering even novice DIY enthusiasts to create stunning shutters that elevate their space.
Choosing Your Materials
To embark on the DIY interior shutter project, it’s essential to choose the suitable materials. The classic route involves opting for wood, which provides a timeless look and feel. Alternatively, MDF can be a more budget-friendly option, offering a modern twist. For those prioritizing eco-friendliness, consider repurposing old materials or selecting sustainably sourced wood alternatives.
Measuring Your Windows
When it comes to ensuring a perfect fit, accurate measurements are vital for shutters. To achieve this, start by taking measurements from within the window frame itself. Height and width are the key dimensions to capture here. For added precision, measure in multiple spots and opt for the smallest measurement to guarantee a snug fit.
Designing Your Shutters
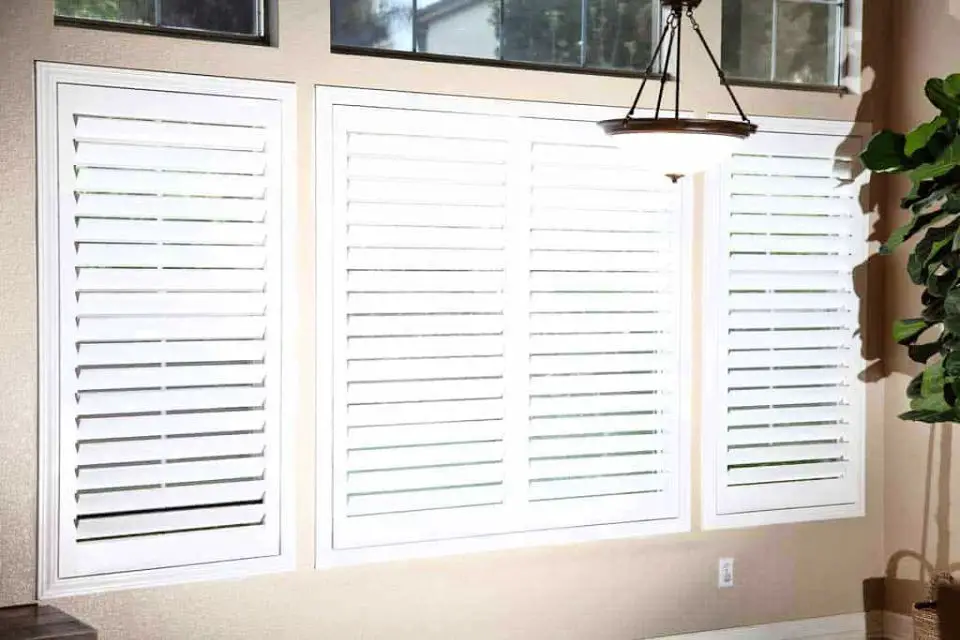
When it comes to selecting shutter styles, homeowners are often faced with a plethora of options. Traditional louvers offer a classic look, while solid panels provide a sleeker, more modern aesthetic. Alternatively, combining elements of both can create a unique and eye-catching design. As you deliberate on the perfect style for your space, consider factors such as room ambiance, privacy needs, and light control to ensure your selection aligns with your desired outcome.
Cutting Your Materials
With your measurements and design in hand, it’s now time to bring your project to life by cutting your materials to precise dimensions. For woodworking, a trusty saw is the tool of choice, while for other materials, select a suitable cutting instrument that suits its unique properties. As you work, ensure you prioritize caution by donning protective gear such as safety glasses and gloves to shield yourself from potential hazards.
Assembling Your Shutters
To start building your shutters, construct the framework that will hold the slats or panels together. This typically involves creating a rectangular structure that provides the foundation for your shutters. Once the frame is assembled, it’s time to add the slats or panels themselves. For louvered shutters, attach each slat to the frame using hinges or pins that allow them to tilt and adjust as needed. In contrast, solid panel shutters require securing the panel directly into the frame. As you’re building your design, consider adding hinges to the sides of the framework to enable secure attachment to your window frame.
Finishing Touches
To give your new shutters a polished finish, start by sanding any rough edges with sandpaper, followed by a coat of paint or stain in the color of your choice. Allow the finish to fully dry before moving on to the installation process. Once complete, attach the shutters to your window frame, ensuring they operate smoothly and securely. This may require drilling holes and using screws to secure them in place.
Enjoying Your New Shutters
As you step back to admire the finished result, a sense of pride and accomplishment washes over you. Your DIY interior shutter project has not only enhanced the aesthetic appeal of your home but also provided a tangible sense of fulfillment from completing a challenging yet rewarding task. The journey to success began with meticulous planning, precise measuring, and an openness to creative experimentation. Whether you’re aiming to create a show-stopping focal point in your living room or a discreet solution for maintaining privacy in your bathroom, the versatility of DIY shutters makes them an ideal project for homeowners eager to flex their creative muscles.
FAQS on DIY Interior Shutters
Embarking on a DIY interior shutter project can be a highly fulfilling experience, allowing you to bring your creative vision to life while enhancing the aesthetic and functionality of your home. To set yourself up for success, let’s tackle some frequently asked questions that will guide you through the process.
What materials are best for DIY interior shutters?
When it comes to DIY interior shutters, homeowners often opt for wood varieties like cedar and pine due to their timeless aesthetic appeal and rugged durability. For a more budget-conscious approach, medium-density fiberboard (MDF) is a practical choice that’s relatively easy to work with. Alternatively, eco-conscious individuals may prefer to utilize reclaimed wood or sustainably sourced materials to reduce the project’s environmental footprint.
How do I measure my windows for DIY shutters?
To accurately measure your window’s dimensions, start by taking precise measurements from inside the frame at strategic points. For width, record the measurements at the top, middle, and bottom of the frame. Similarly, for height, measure the left, center, and right edges of the frame. To guarantee a proper fit, use the smallest measurement obtained to determine the size of your shutters.
What tools will I need to make my own shutters?
When it comes to crafting shutters, having the right basic tools is essential. For a DIY enthusiast or professional, the following essentials should be at your disposal:
First and foremost, you’ll need a reliable tape measure to ensure accurate measurements.
For cutting various materials – from wood to PVC – a versatile saw is a must-have. This could be either a handheld manual saw or a power tool depending on the type of material you’re working with.
Next, a drill and screwdriver combo will come in handy for making precise holes and driving screws into place.
To smooth out any rough edges or surfaces, sandpaper is an invaluable addition to your toolkit.
Finally, don’t forget about the finishing touches! A paintbrush or sprayer can help you apply a coat of sealant, stain, or paint to give your shutters that perfect finish.
Can I make shutters if I’m not very experienced with DIY projects?
For those looking to take on a DIY shutter project, the good news is that there’s something for every level of expertise. Beginners can start with a simple design, such as solid panel shutters, and opt for materials that are easy to work with. By following step-by-step tutorials, even the most novice DIY enthusiast can achieve a professional-looking result.
How can I customize my DIY shutters?
Elevate the aesthetic of your shutters by opting for a design that harmonizes with your home’s distinct style. Inject personality through the selection of one-of-a-kind hardware or by painting them in a hue that perfectly complements your interior decor. Furthermore, you have the creative freedom to adjust the size of the louvers or panels to craft a truly bespoke look that reflects your unique sense of design.
Is it more cost-effective to make shutters myself?
Opting for DIY shutters can lead to substantial cost savings compared to purchasing pre-made options, particularly when using budget-friendly materials and tackling the project yourself. This approach not only reduces expenses but also eliminates customization fees, allowing you to allocate those funds elsewhere or enjoy a higher profit margin on your overall investment.
How do I install DIY shutters?
The installation process for shutters typically depends on the specific design, but it generally involves several key steps. First, you’ll need to attach hinges to both the shutter and the window frame, allowing for smooth opening and closing of the shutters. Next, hang the shutters on the frame, taking care to ensure proper alignment and functionality. Finally, secure the shutters in place using screws or additional hardware as needed. It’s essential to have all necessary tools and hardware on hand before beginning the installation process.
Can DIY shutters be functional as well as decorative?
While DIY shutters can be an excellent way to enhance the functionality and visual appeal of your home, they also provide numerous benefits. Not only do they offer privacy and control over natural lighting, but they also contribute to improved insulation, making them a practical addition to any room. With so many design options available, you’re sure to find a style that perfectly balances both form and function.
DIY Interior Shutters (20 DIY Interior Window Shutter Ideas)
Elevate your home’s aesthetic while keeping costs in check by embracing the versatility of DIY interior shutters. With a plethora of design possibilities, you can revamp your windows into stunning focal points that add depth and character to any room.
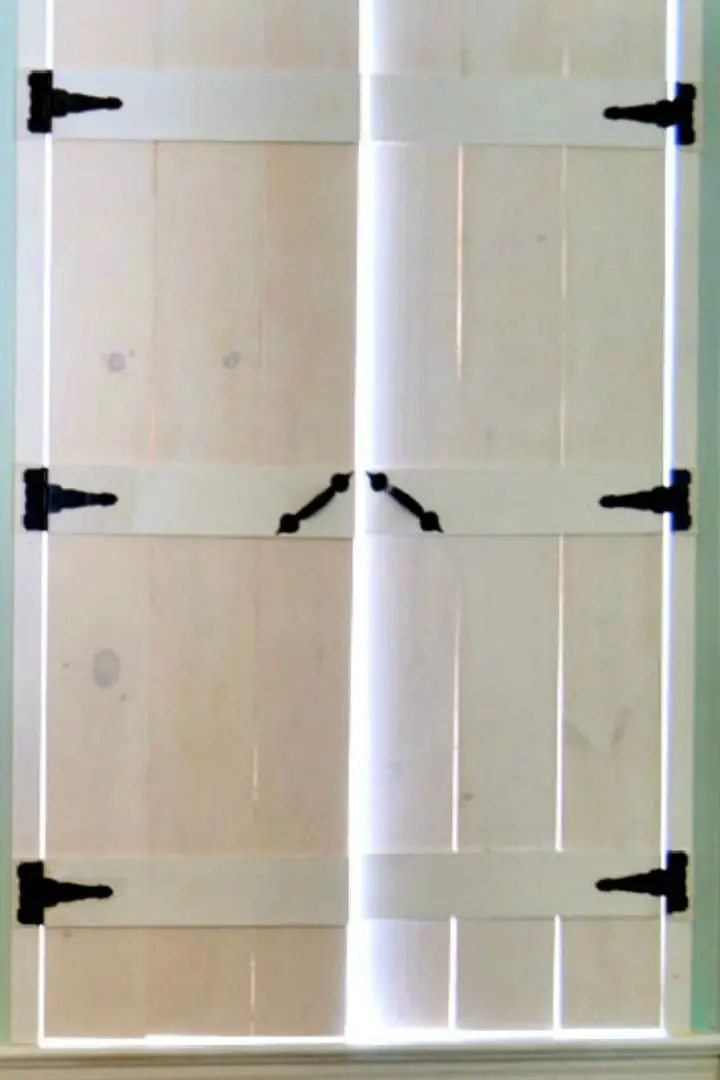
DIY Interior Shutters – Step by Step

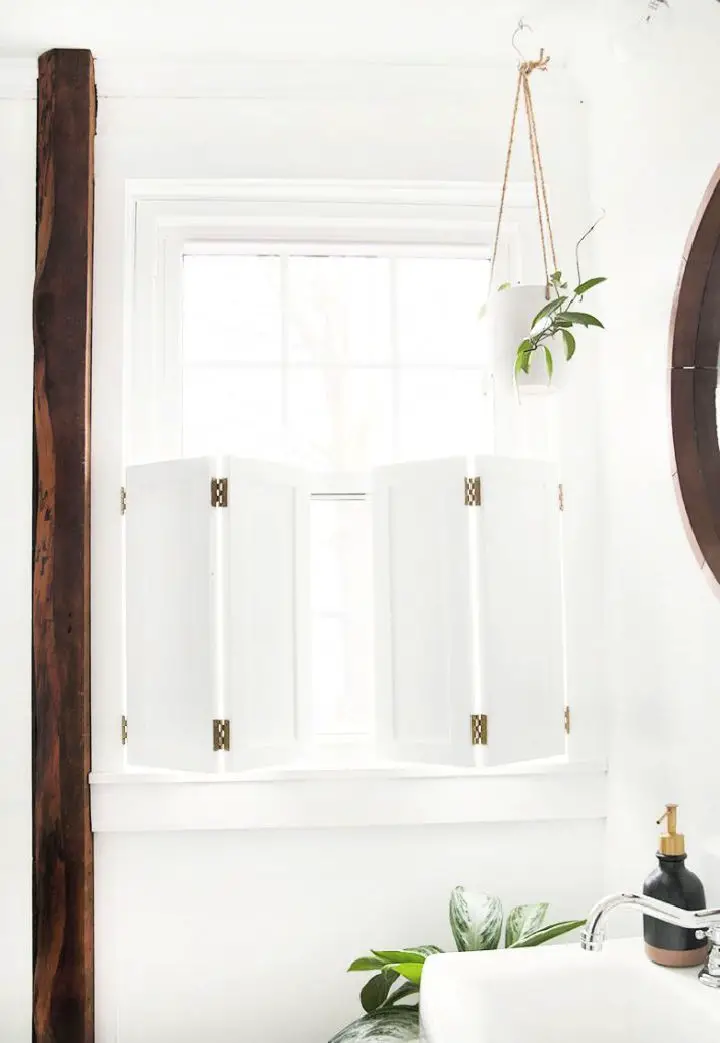
Transform your living space with ease by repurposing DIY interior shutters from Mimzy & Company. This budget-friendly guide reveals how to effortlessly turn bifold closet doors into elegant window coverings that provide unparalleled privacy, sound dampening, and a dash of charm. With minimal tools and a pinch of creativity, you can elevate the aesthetics and functionality of your home – no crafting expertise required. Simply follow our step-by-step tutorial for a seamless installation and a personalized touch to your interiors.
Easy Interior Cedar Shutters
Transform the ambiance of your home with DIY interior cedar shutters, a budget-friendly makeover that seamlessly blends functionality and aesthetics. This hands-on project not only provides privacy and protection from the sun but also adds a statement piece to your living space. By using common cedar planks and hardware readily available at any home improvement store, this guide takes you through each step of crafting and installing your shutters – no specialized tools or expertise required. Whether you’re looking to unify mismatched windows or simply desire a departure from traditional fabric panels, these shutters promise to be an eye-catching addition. Ready to bring warmth and charm to your windows? Learn how to craft and install your cedar shutters by following the simple steps outlined in this comprehensive guide.
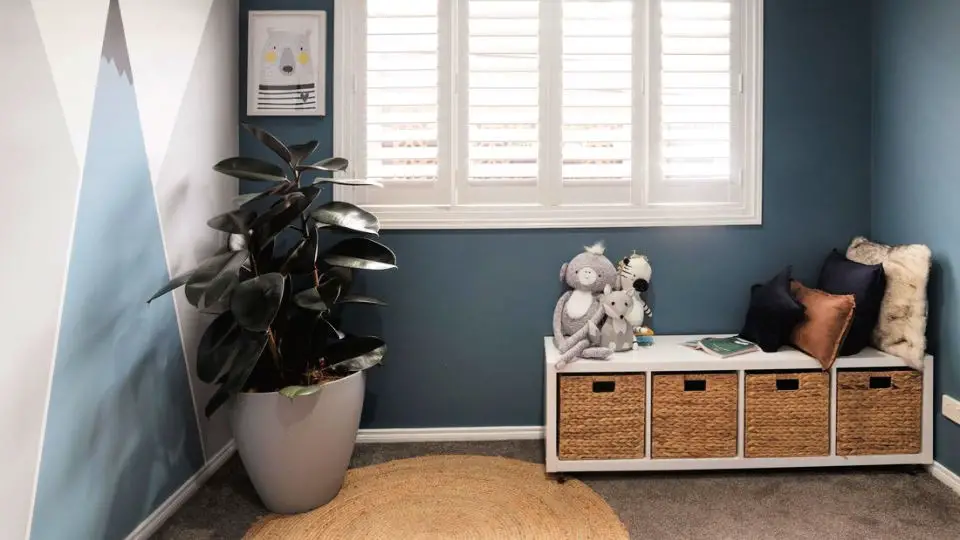
DIY Interior Window Shutters
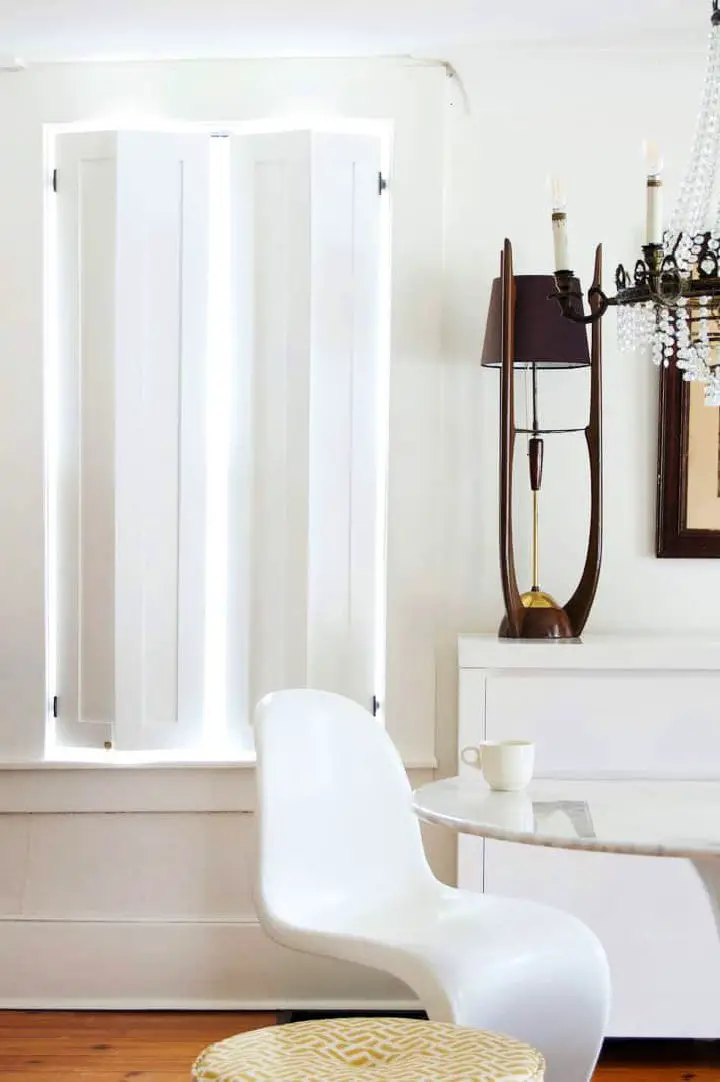
Transforming your space into a serene oasis is achievable by incorporating the understated elegance of DIY interior window shutters. These versatile fixtures strike the perfect balance between letting in the warmth of natural light and maintaining the intimacy of one’s home. For those who cherish simplicity, our step-by-step guide provides a comprehensive roadmap for selecting the ideal materials and effortlessly installing these stylish window treatments. By embracing the beauty of subtlety, you’ll be able to enhance your home’s charm while preserving the essence of your personal sanctuary.
Make Your Own Interior Shutters
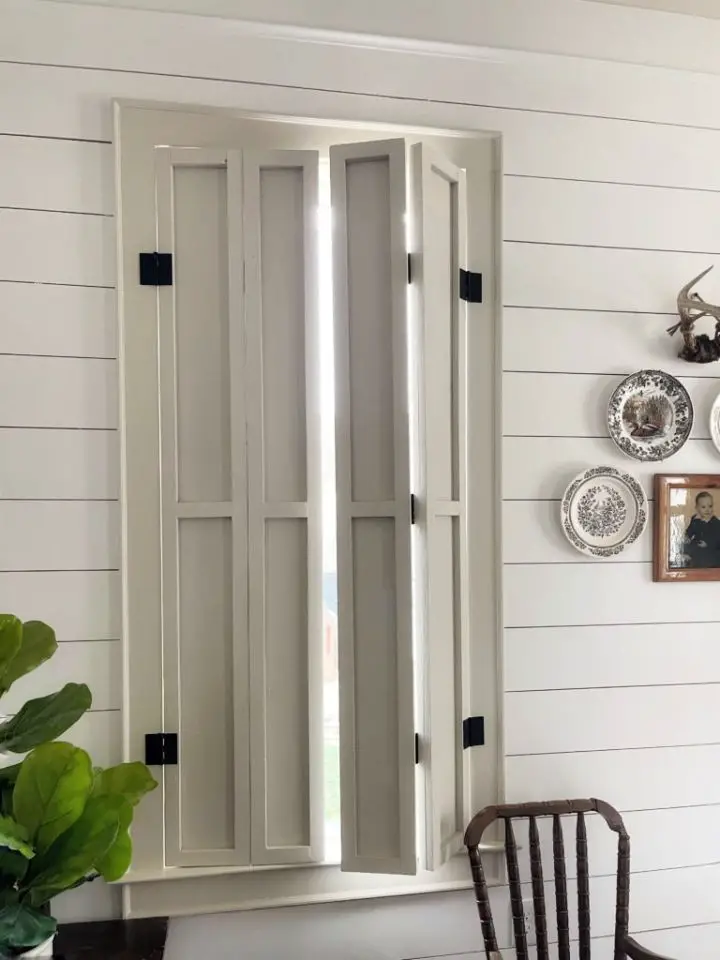
Elevate your home’s aesthetic appeal by crafting bespoke DIY interior shutters, courtesy of Thorn Cove Abode. For those seeking to optimize their windows without compromising on intricate trim work, this comprehensive guide takes you through a step-by-step process, from material selection to final installation. Suited for DIY enthusiasts, these instructions empower you to create timeless and functional shutters that add character and charm to any room. By following this guide, you’ll be able to infuse your space with a personal touch, resulting in a refined and inviting atmosphere.
Build Interior Window Shutters
Transform your space with a dash of creativity and minimal expense! For under $20, you can craft charming DIY interior window shutters that infuse any room with personality. By leveraging easily accessible materials and a step-by-step approach, you’ll be able to elevate the aesthetic appeal of your home without sacrificing budget. Perfect for those seeking a unique touch to enhance their living space, this budget-friendly project is an excellent starting point. Get started today and revitalize your windows in no time!
How to Make Interior Shutter
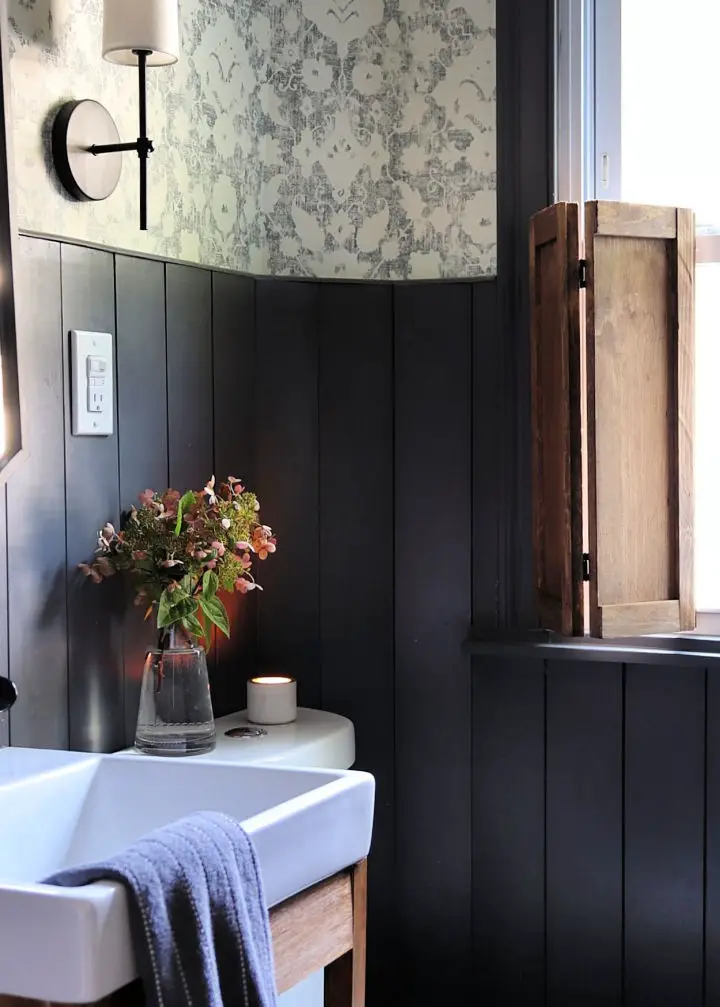
Transform your powder room into a haven of elegance with a custom DIY Interior Shutter project. Follow Carli from Made by Carli as she takes you on a hands-on journey to create a one-of-a-kind privacy solution that perfectly complements the warm wood tones of your space. This comprehensive, step-by-step tutorial demystifies the process, empowering anyone to add a touch of rustic refinement to their bathroom. With practical guidance and straightforward instructions, you’ll be able to give your powder room the functional, stylish edge it deserves, making it a true reflection of your personal style.
Interior Shutters Idea
As you bid adieu to lackluster curtains, discover the enduring allure of interior shutters. More than just a decorative upgrade, these window coverings embody timeless sophistication and practicality. Seamlessly integrating with various home designs, including heritage properties, interior shutters present a minimalist yet effective solution for managing natural light and maintaining privacy. By following a straightforward step-by-step guide, you can skillfully create these beautiful additions and transform your living space into a serene oasis of warmth and elegance.
Handmade Plantation Shutters From Plywood
Crafting your own DIY plantation shutters can be a highly rewarding experience, as outlined in this comprehensive tutorial from TheDIYPlan. By using budget-friendly plywood and following our step-by-step guide, you’ll be able to transform your living spaces with stylish, energy-efficient shutters that not only provide improved privacy but also add a touch of elegance to your home’s interior. With clear instructions and detailed steps, you’ll learn how to gather the necessary materials, assemble the shutters, and install them with ease. Whether you’re looking to block out the summer heat or retain warmth during colder months, our DIY shutters promise both functionality and charm. Not only will you be able to enjoy the benefits of plantation shutters, but you’ll also take pride in knowing that you created them yourself.
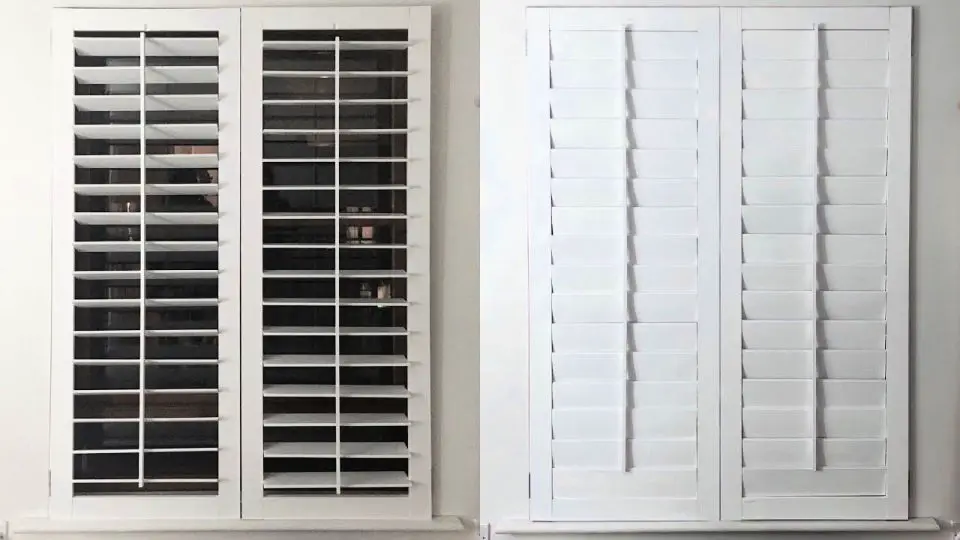
Simple Plantation Shutters
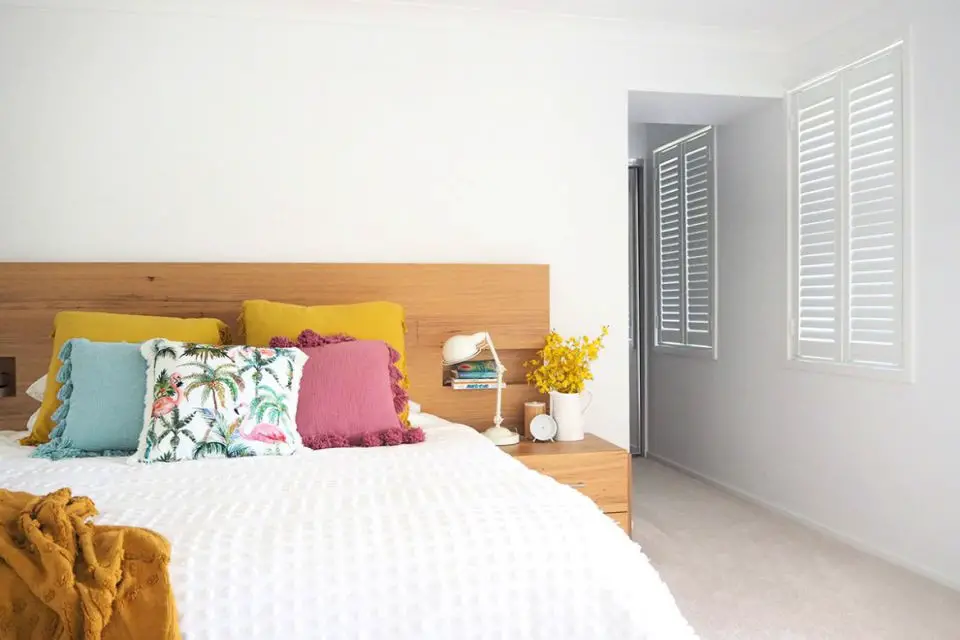
Transform your bedroom into a serene oasis with stunning DIY plantation shutters that prioritize allergy sufferers’ comfort. This straightforward process involved measuring, ordering, and installing custom shutters that effortlessly fit any window frame. The result? A timeless elegance that replaces messy cords with peaceful, light-controlled sleep. For a comprehensive guide on measurement, cleaning techniques, and installation, head to The Organised Housewife for expert insights. By incorporating these dust-free shutters into your space, you’ll create an ambient environment perfect for families seeking relief from allergens.
DIY Plantation Shutter Installation
Discover the ease of transforming your living space with our comprehensive DIY Plantation Shutter Installation guide. What’s surprising is just how effortless it can be to install Norman Woodlore Plantation Shutters from blinds.com, even when dealing with uniquely shaped windows. By breaking down the process into manageable steps and embracing a patient approach, you’ll find yourself feeling accomplished as you unbox the carefully packaged shutters and watch them effortlessly slide into place. Our personal experience is designed to inspire and motivate you to take on your own DIY project, revealing the secrets to creating a space that truly reflects your personal style.
Homemade Indoor Shutters
Creating indoor wooden shutters is a straightforward process that can be completed in just six steps. Starting from measuring your window to securing the shutter in its frame, this comprehensive guide takes you through every stage of the project. You’ll learn how to select the ideal wood type for your design, cut precise pieces with ease, achieve a flawless paint finish, assemble the components effortlessly, and guarantee that your shutters operate smoothly when opened or closed. By following these simple steps, you can enhance your home’s privacy and visual appeal, making it an ideal DIY project for anyone looking to add a personal touch to their living space.
Measure for and Install Wood Shutters Idea

Transforming your home with wood shutters is an effortless way to add elegance and sophistication. Not only do they provide a sense of privacy, but they also elevate the aesthetic appeal of any room. With their natural beauty and versatility, it’s no wonder why many homeowners are opting for this stylish solution. From the selection process to the installation, every step can be streamlined with confidence. For a comprehensive guide that covers all the essential details, visit Just a Girl and Her Blog.
Making Plantation Shutters
Elevate your home’s style without breaking the bank by mounting DIY plantation shutters with ease. At Bunnings New Zealand, we’ve created a straightforward guide to help you navigate the process from selecting the ideal kit in-store to fine-tuning frames for a seamless fit. With our step-by-step approach, you can confidently bring sophistication to any room while keeping costs in check. As an added benefit, these self-installed shutters provide a safe and worry-free environment for kids, giving you peace of mind alongside the aesthetic appeal.
DIY Shiplap Shutters for Windows
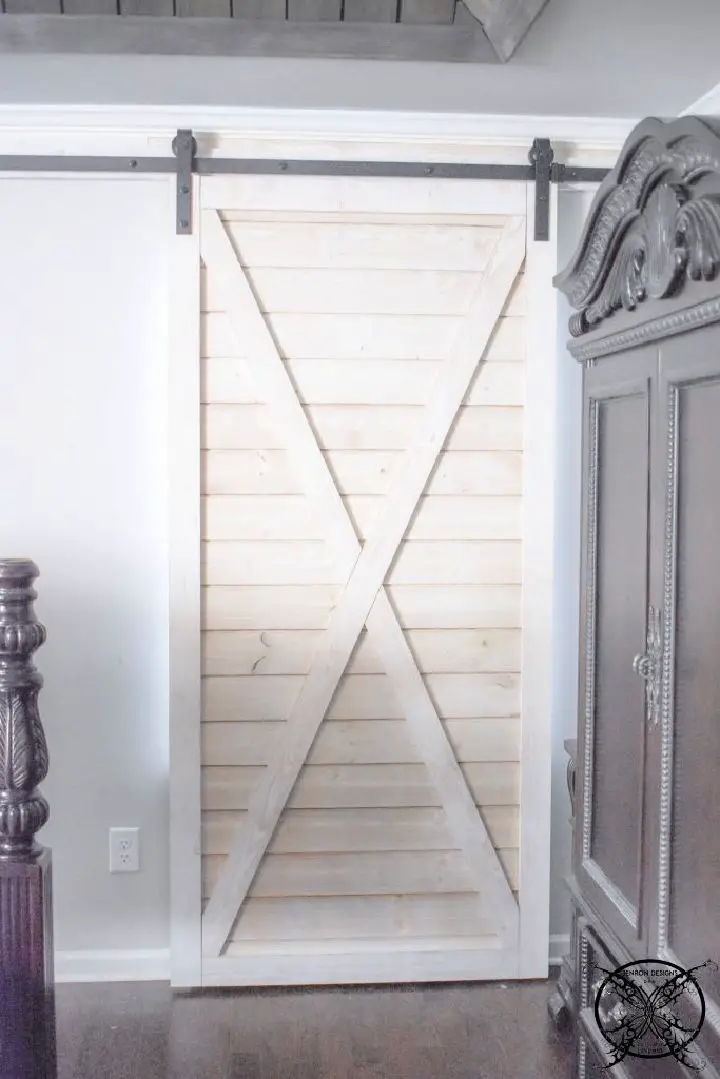
Transform the aesthetic and functionality of your home with a distinctive do-it-yourself project from Jenron Designs. Discover how to create captivating Barn Door Shiplap Shutters that bring charm and light control to any room, effortlessly elevating its ambiance. This comprehensive guide serves as a reliable roadmap for a DIY adventure that’s both enjoyable and successful. By creating these shutters, you’ll not only enjoy the benefits of enhanced privacy but also add a touch of rustic elegance to your space, making it a standout feature in your home.
Ikea Bed Slats Turned Indoor Shutters
Elevate your home decor with an eco-friendly project that won’t break the bank! Candace from Vintage News Junkie took an unlikely material – discarded IKEA bed slats – and transformed them into one-of-a-kind indoor shutters. This creative upcycle brings a touch of rustic charm to any room, while also providing valuable shade. By repurposing materials destined for the landfill, you’ll not only add a personal touch to your space but also reduce waste and promote sustainability.
nThe journey from thrift store find to stunning home feature is just as inspiring as it is practical. With Candace’s step-by-step guide, you can easily recreate these unique indoor shutters in your own home. For the full tutorial, head to At the Picket Fence. Ready to infuse your home decor with personality? Join the upcycling movement and get creative with some slats!
Plantation Shutters With Detail Instructions
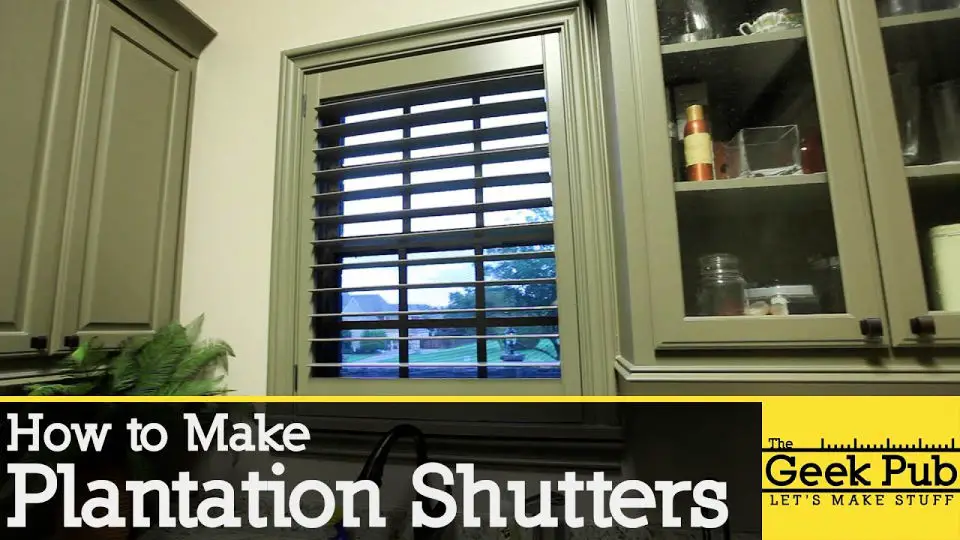
Discover the satisfaction of creating custom Plantation Shutters for your home by following Mike’s comprehensive tutorial at The Geek Pub. This step-by-step guide takes you from measuring your window to final installation, allowing you to achieve a refined and personalized look without breaking the bank. You’ll gain confidence in crafting stunning shutters with precision and style, whether you opt for pre-made materials or utilize tools like the Rockler Shutter System Jigs. For the complete instructional video, click here to get started on transforming your windows into a masterpiece that seamlessly combines functionality and flair.
DIY Plantation Shutters
Transforming your living space into a cozy retreat doesn’t have to break the bank. By embracing a DIY approach to plantation shutters, you can achieve professional-looking results without sacrificing style or budget. Following in the footsteps of The Wood Whisperer’s engaging and informative tutorial, you’ll discover how to craft custom shutters that not only boost your home’s aesthetic appeal but also provide unparalleled privacy and light control. With a step-by-step guide that takes you from measurement to installation, you’ll be able to replicate the expert results without incurring hefty costs. Whether it’s blocking out unwanted sunlight or adding a touch of sophistication, creating your own shutters can be a deeply rewarding project.
Plantation Shutters From Scratch Tutorial
Transforming your living space on a budget is now within reach! With a simple DIY project, you can create stunning plantation shutters that elevate your home decor without draining your wallet. In a step-by-step video tutorial, you’ll learn the ins and outs of crafting these stylish window coverings for under £50. From measuring windows to adding the finishing touches with paint, every crucial stage is meticulously guided. Whether you’re a seasoned DIY enthusiast or just starting out, this budget-friendly project is sure to leave you feeling empowered and inspired. Follow along as the guide takes you on a visual journey, complete with helpful aids, to bring your creative vision to life.
Building Indoor Shutters for Under $200
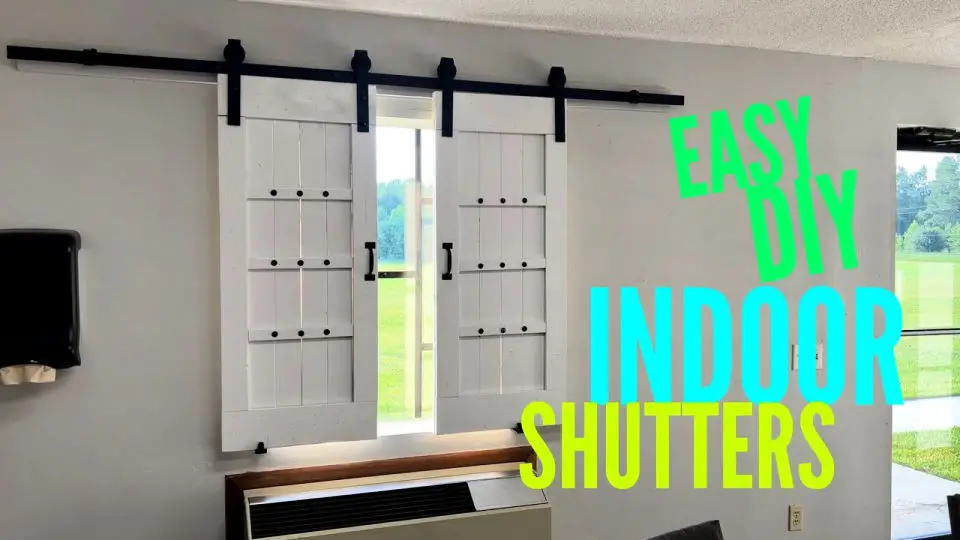
Transform indoor spaces without breaking the bank or sacrificing time. With a creative DIY project, you can create functional shutters that balance privacy and rustic charm for under $200. Perfect for personalizing home decor without overspending, this cost-efficient endeavor is ideal for those seeking to refresh their interior design. By following easy-to-understand instructions and dedicating some crafting effort, your space will undergo a transformation, effortlessly elevating its aesthetics with the magic of DIY ingenuity.
DIY Indoor Window Shutters
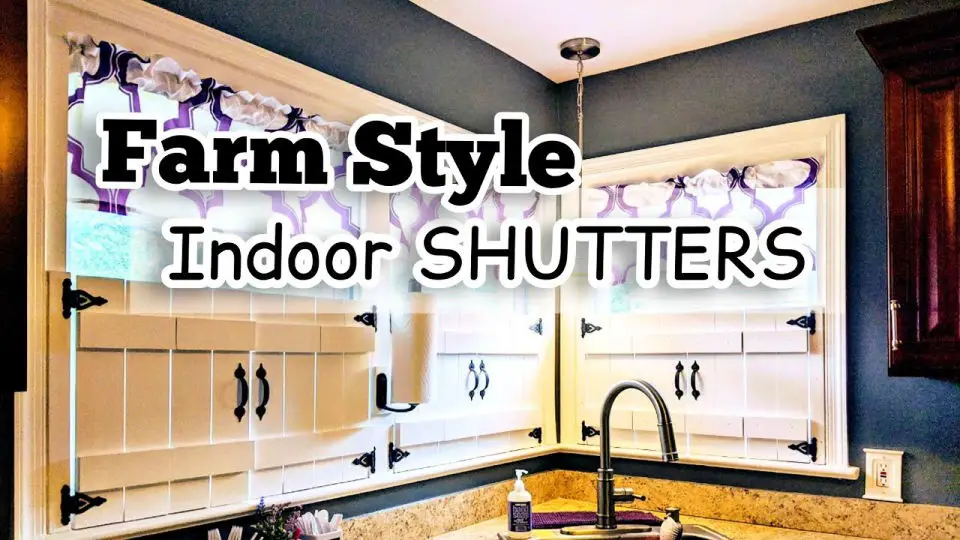
Transforming your home’s aesthetic into a charming farmhouse retreat is now within reach through a DIY shutter project. This accessible guide will walk you through the process of creating functional, budget-friendly shutters for indoor windows. With step-by-step instructions, novice DIY enthusiasts can easily replicate this design and infuse their space with personality. For an immersive experience, check out TheDIYStruggle’s comprehensive video tutorial. Join the creative journey today and elevate your home’s ambiance with rustic flair!
Conclusion:
As our exploration of DIY interior shutters comes to a close, you’re now equipped with the knowledge and skills necessary to tackle this rewarding project. From selecting the ideal materials to adding those finishing touches that make your shutters truly one-of-a-kind, we’ve covered all the essential bases to help you transform your home’s interior. Our collection of 20 DIY interior window shutter ideas serves as a springboard for your creativity to take center stage. With this foundation in place, you should feel empowered to measure, design, and assemble your shutters with confidence, knowing they’ll not only be aesthetically pleasing but also serve their intended purpose. The beauty of DIY interior shutters lies in their unique blend of practicality and personalization, making them a far more compelling option than store-bought alternatives. So, take inspiration from these ideas, gather your tools, and start crafting shutters that reflect your distinct style and elevate the overall ambiance of your home.
