Unleash your creative side with 25 innovative paper mache ideas and art projects that will take you on a journey of self-expression. Imagine transforming ordinary materials into extraordinary works of art, from whimsical creatures to elaborate masks. This treasure trove of inspiration is sure to ignite your imagination and guide you in creating your next masterpiece.
Making an Anthropologie Paper Mache Rabbit Head
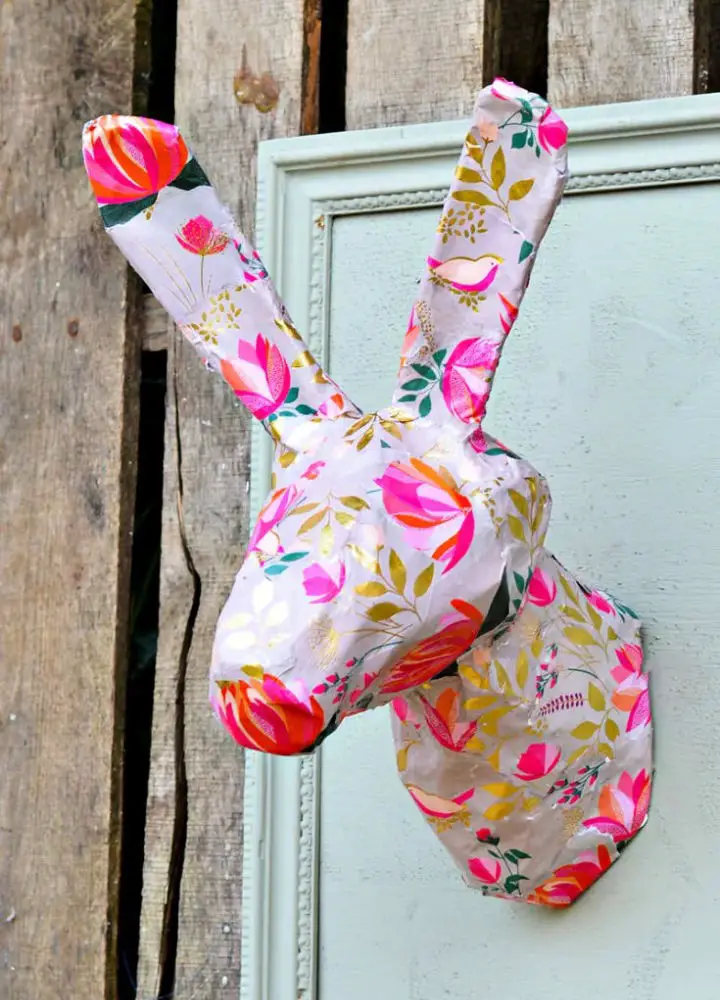
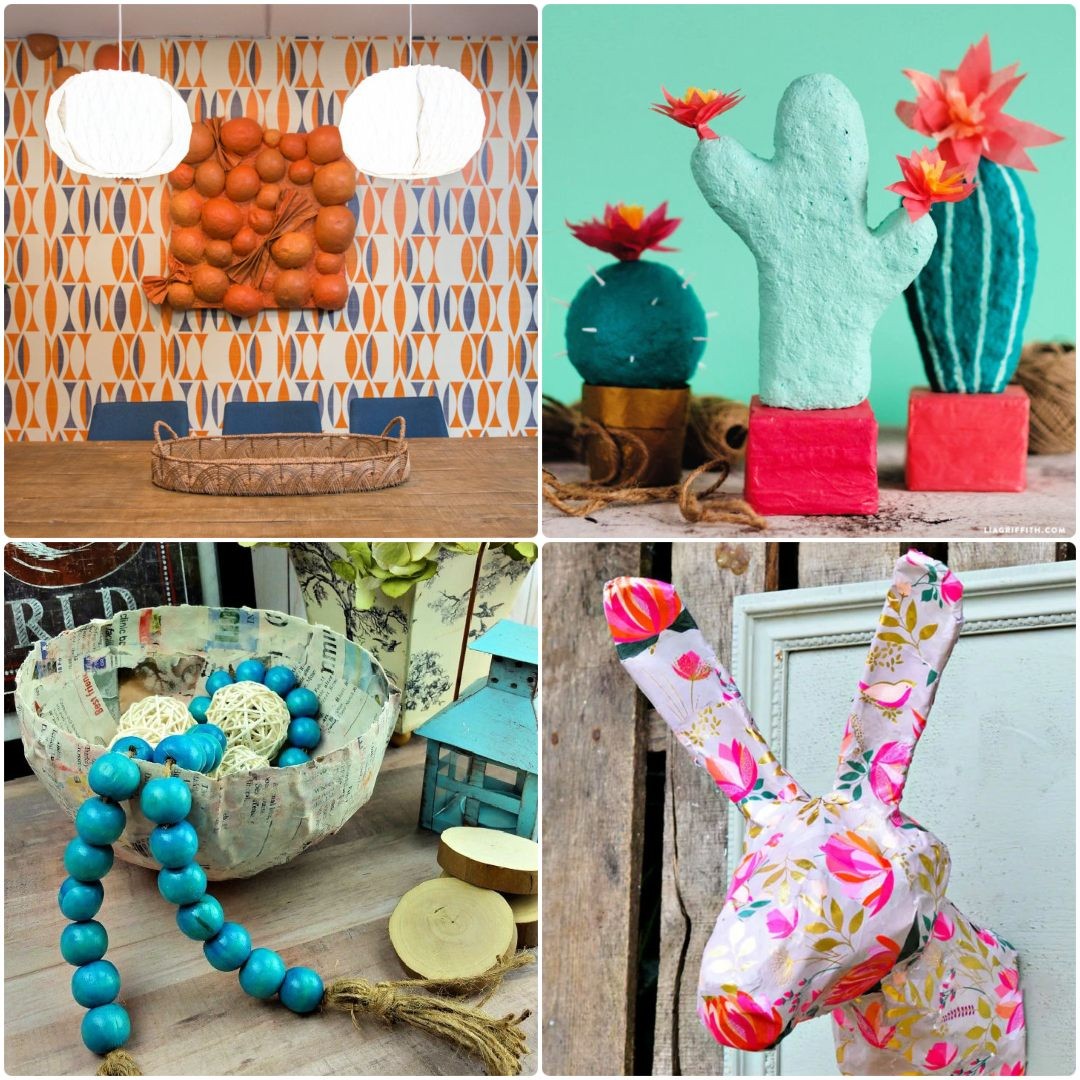
Discover the creative potential of paper mache art, where discarded materials are transformed into breathtaking sculptures and intricate designs. Embrace your inner artist by crafting an exclusive paper mache rabbit head inspired by Anthropologie’s unique style. This DIY tutorial offers a cost-effective and customizable approach to creating a one-of-a-kind piece that mirrors your home decor. Gather essential materials including craft aluminum wire mesh, old newspapers, white school glue or PVA glue, Mod Podge, glue brushes, gesso (optional), and a sheet of beautiful floral wrapping paper.
Start by crafting a wireframe for the neck, head, and ears, then shape it according to your vision before securing the parts with tape or a hot glue gun. Build up the texture of paper mache by layering strips of newspaper soaked in white school glue onto the frame. Allow the mixture to dry before applying Mod Podge and attaching the stunning floral wrapping paper. With this simple yet creative process, you’ll be amazed at what you can create!
Adorable Papier Mache Cacti for Home Decor
Transform your home’s ambiance with a delightful DIY endeavor that yields charming papier mache cacti decorations. To get started, collect the necessary tools: a low-temperature hot glue gun, Mod Podge glue, wire cutters, paintbrushes, and a craft knife. Then, gather an assortment of materials, including papier mache, foam blocks, 18-gauge floral wire, tissue paper popsicle sticks, and acrylic craft paint. Follow the simple step-by-step instructions to shape the foam into cactus forms, cover them with papier mache, and add personalized colors and designs to make them uniquely yours. Finish the look by topping each cactus off with a delicate tissue paper flower for an undeniable charm that will appeal to all ages – begin crafting today!
Make Your Own Paper Mache Bowl
Transform your creative spirit by repurposing newspapers into breathtaking paper mache creations, fostering a sustainable crafting experience that’s as eco-friendly as it is artistic.
Unleash your inner DIY mastermind with this versatile project, where you can shape and size the final product to fit your unique style. Start by mixing a simple flour-based paste at home, then set up a mess-free workspace by covering the area with newspaper or a plastic bag. For best results, use matte-finish paper for optimal adhesion.
As you bring this project to life, revel in the creative benefits and enjoy your new decorative piece while taking pride in reducing waste – an inventive way to elevate your home decor!
Homemade Paper Mache Bubble Art
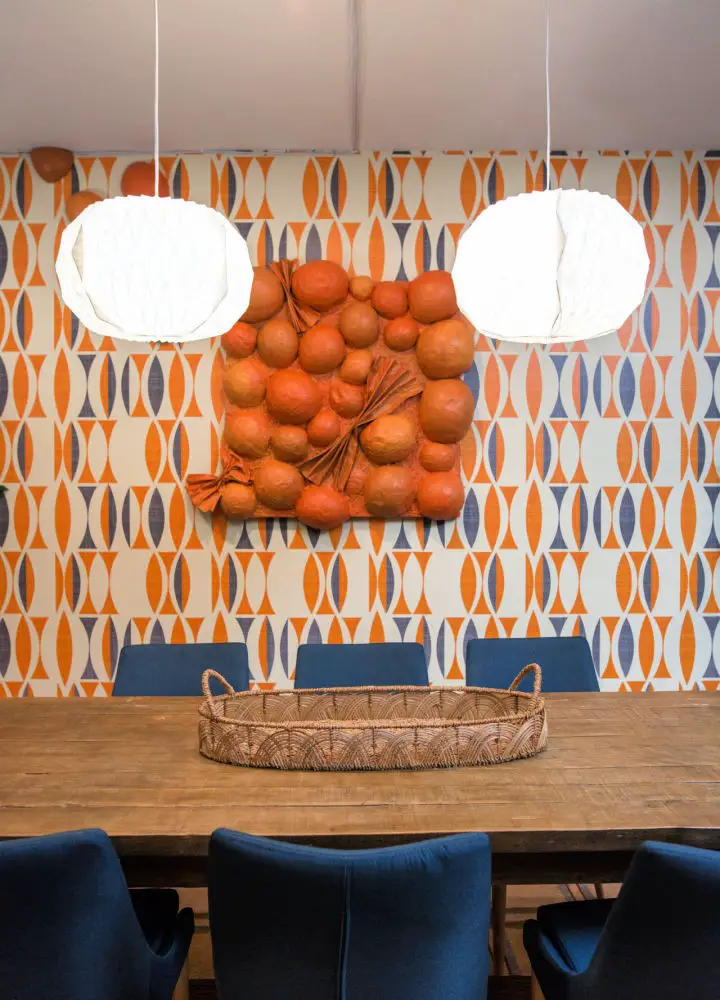
Unleash your artistic flair by crafting one-of-a-kind DIY paper mache bubble art that adds a touch of 70s-inspired maximalism to any room. With just a few simple materials like balloons, newspaper, white glue, water, paintbrushes, and three shades of orange paint, you can create a truly unique piece of art for your walls. Start by mixing together equal parts white glue and water to form the paper mache mixture. Then, coat each balloon with strips of paper mache, allowing them to dry completely before trimming the edges for a clean finish. Once your bubbles are ready, use hot glue to attach them to a canvas, adding other shapes like stars or circles to create an eye-catching design. Let your imagination run wild and get creative with this fun and easy DIY project.
Cool Paper Mache Globe for Decorations
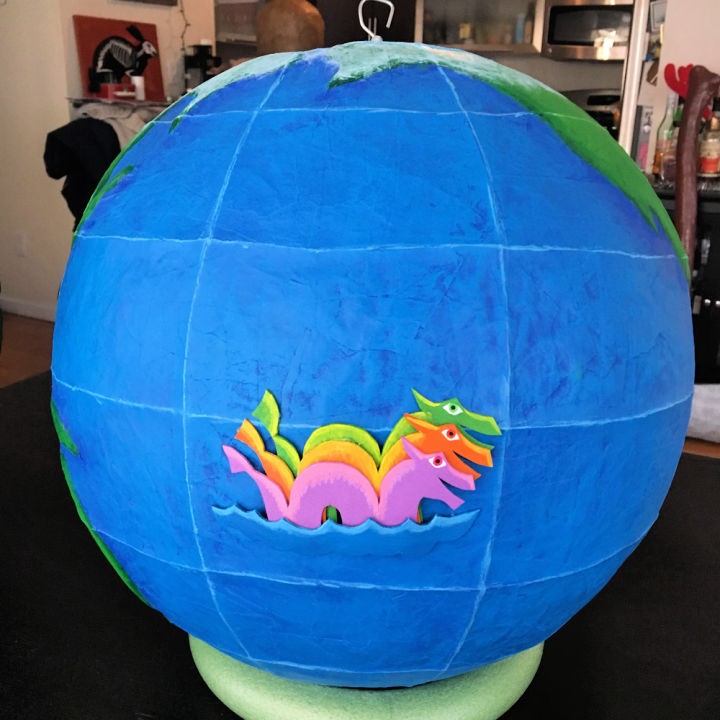
Transform a simple 16-inch inflatable ball into an captivating paper mache globe decoration with this step-by-step guide. Begin by wrapping the foundation in aluminum foil, securing it with masking tape to create a sturdy base. Next, apply six layers of papier-mache, alternating between newspaper and brown wrapping paper, using roman pro-543 universal wallpaper adhesive. To achieve a smooth surface, use blank newspaper for the final layer. Once dry, add latitude and longitude lines to give your globe some visual appeal. Then, carefully remove the base by cutting into the paper mache and create a round hole for the south pole. Finally, attach craft foam continents using adhesive and reattach the circular area with masking tape. With these easy steps, you can create striking globe ornaments that will add a touch of elegance to any room.
How to Make a Paper Mache Fireplace
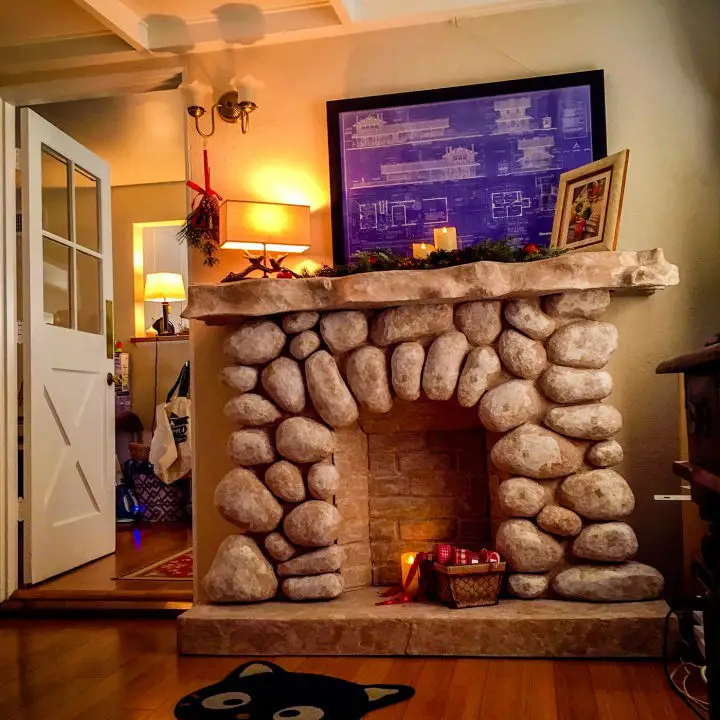
When embarking on your DIY paper mache fireplace creation, follow these expert tips to achieve unparalleled success! Start by mixing a flour-and-water paste for an incredibly strong adhesive, then alternate between different paper types for each layer to precisely track progress. To simplify the removal process, apply flat surfaces to your rock forms and wrap them in cling wrap. For added strength, carefully measure and consider incorporating ball foam into your design. Keep in mind that it’s crucial not to use papier mâché on real rocks or over existing stone features. Allow each layer to dry partially before adding the next, ensuring gaps between stones are slightly larger than needed. When working with utility knives, be sure to maintain a sharp edge and prepare for the project to take longer than initially anticipated.
Quick and Easy DIY Paper Mache Pinata
Get ready to unleash a blast of fun at your next celebration with a DIY piñata that’s easy on the wallet but big on personality. Start by scavenging for materials like cereal boxes, paper bags, or old cardboard containers – they’ll serve as the foundation for your customized masterpiece. Next, mix up some classic paper mache paste and get creative with crepe paper to give your piñata some serious flair. Once you’ve got it hanging from the ceiling, count down until it’s time to break it open and reveal the surprises inside. The best part? You can follow step-by-step instructions to construct the base and whip up the paper mache paste, making this project accessible to DIY enthusiasts of all skill levels.
Handmade Paper Mache Planters Using Plastic Bottle
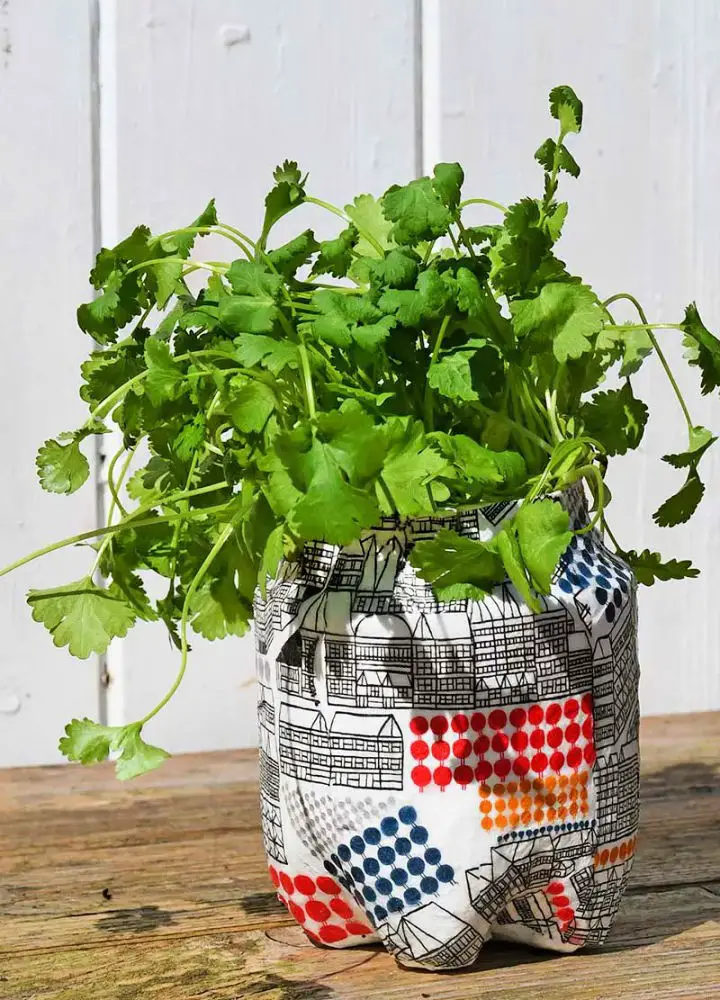
From ancient Chinese artistry to modern-day experimentation, the world of paper mache has evolved significantly over time. This creative medium has allowed artists to push boundaries and bring their imaginative concepts to life. In a surprising twist, the humble plastic bottle is transformed into a stylish planter with a unique marimekko design, making it an eco-friendly craft project perfect for plant enthusiasts. With a few simple materials like empty soda bottles, newspaper, white paint, flour or glue, mod podge decoupage glue, and marimekko paper napkins, anyone can create an exquisite planter suitable for herbs gardens or flowering plants like succulents. This budget-friendly activity not only enhances your gardening experience but also adds a touch of chic decoration to your indoor space.
DIY Paper Mache Animal Heads
Take your simple newspaper strips and turn them into breathtaking works of art by pushing the boundaries of paper mache creativity. Experiment with innovative techniques, mixed-media elements, and diverse textures to create three-dimensional masterpieces that will add a pop of personality to any room.
Get creative and bring a touch of whimsy to a child’s bedroom with DIY paper mache animal heads! Start by crumpling newspaper into balls and securing them with masking tape to form the head. Build upon this foundation by merging multiple newspaper balls, shaping them with tape, and crafting a neck from newspaper that attaches seamlessly to a sturdy cardboard backing. Next, concoct your own unique paper mache paste using flour and water, then dip torn paper towels into the mixture and cover the entire head while sculpting and shaping as you go.
This fun-filled project is the perfect way to unleash your creativity and add a splash of playfulness to any space.
Making a Paper Mache Dinosaur Cave
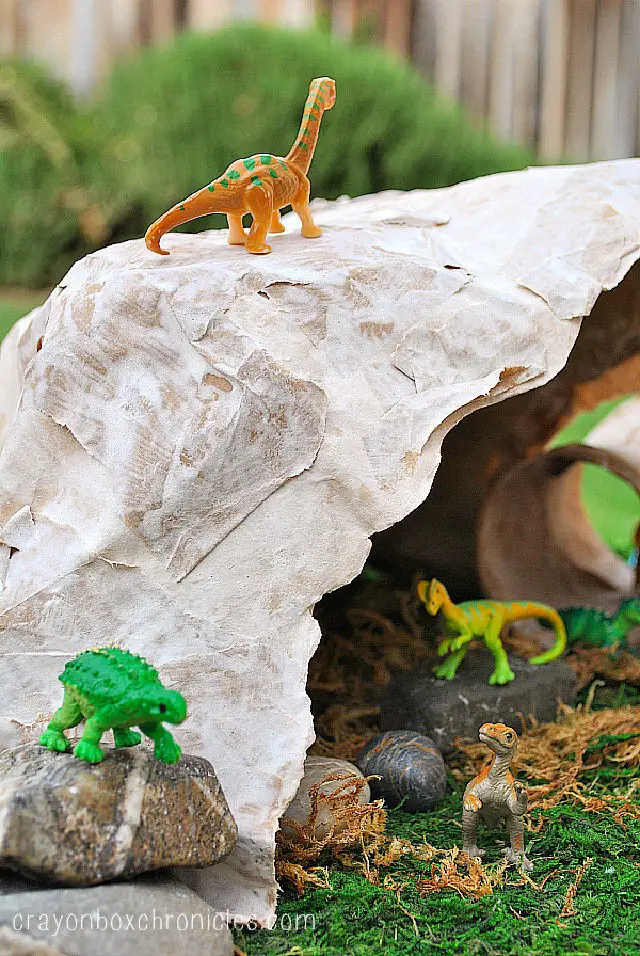
Immerse yourself in a prehistoric adventure by crafting a DIY paper mache dinosaur cave, where imagination knows no bounds. To get started, gather an assortment of materials, including a homemade paper mache glue recipe, a sturdy base made from cardboard, wood or plastic, and various containers or balloons to create the structure’s framework. Don’t forget the finishing touches – paper strips (such as packing paper or newspaper), paintbrushes, and a palette of vibrant colors for decoration. As you delve into this engaging craft project, you’ll discover hidden passageways and caverns, transforming your living space into an awe-inspiring sensory playground. Uncover the thrill of discovery and ignite your creativity with this fun-filled activity!
DIY Paper Mache Bowl for Preschooler’s
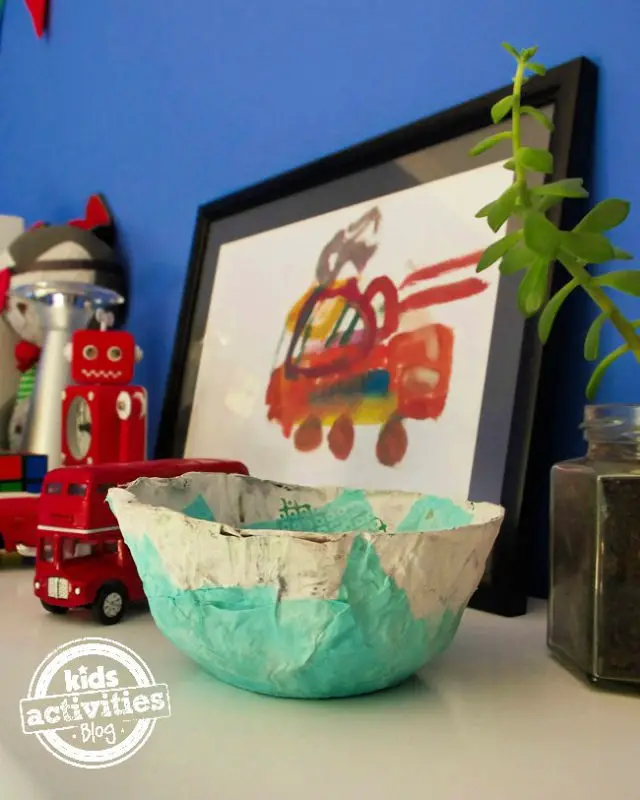
Unleash the artistic potential within by crafting with paper mache, a medium that effortlessly turns discarded newspapers into remarkable works of art. With this straightforward guide, you can embark on a creative journey and bring forth inspiring masterpieces. Start by collecting old newspaper strips to form the foundation of your piece, using a bowling template for added stability. Next, create your paste by combining equal parts water and flour, then dip the newspaper strips into it. Be sure to remove any excess paste and build layers to achieve the desired sturdiness. Allow your creation to dry overnight before removing the bowl template and bringing out the colors with paint and decorations. The result is a one-of-a-kind, fun-filled masterpiece that’s perfect for kids and adults alike.
Paper Mache Mobile for Kids
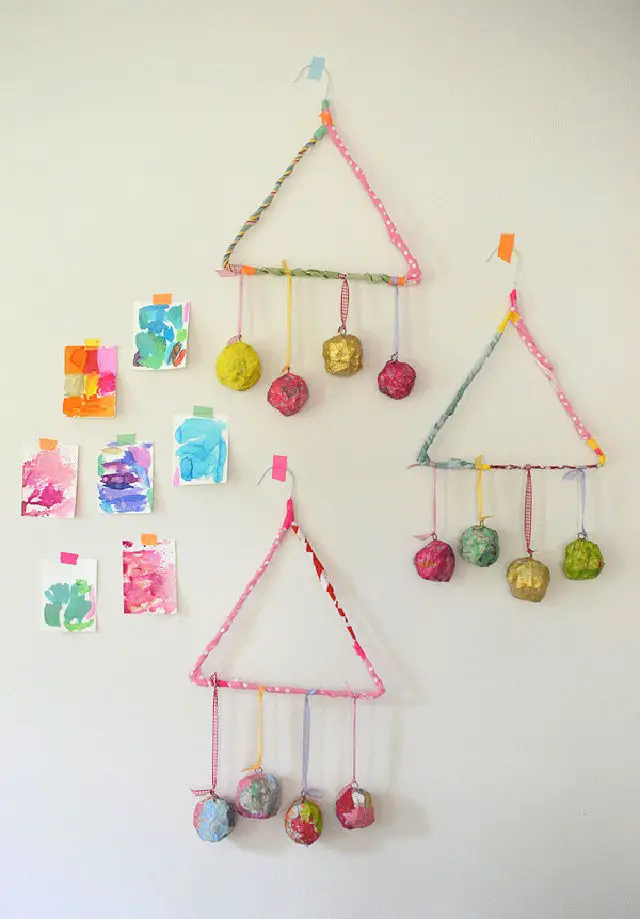
Bring family members together through creative and engaging paper mache projects that not only promote teamwork but also improve fine motor skills and unleash artistic expression. A unique and captivating paper mache mobile is just the project to get everyone excited! Gather a collection of ordinary supplies including wire hangers, fabric or ribbon strips, colored tape, white school glue, tin foil, and newspaper strips. Mix flour with water to create the paste needed for the project. Begin by shaping wire hangers into desired forms using fabric or ribbon wraps and shape tinfoil into base forms. Then, layer on newspaper strips using the flour-water paste. Once dry, add a pop of color with tempera paints and attach the mobile balls to the wire hanger framework using twine and jump rings. Finally, hang it up with a ribbon for an eye-catching display that’s sure to spark conversation and admiration!
DIY Papier-mâché Balloon Bowl
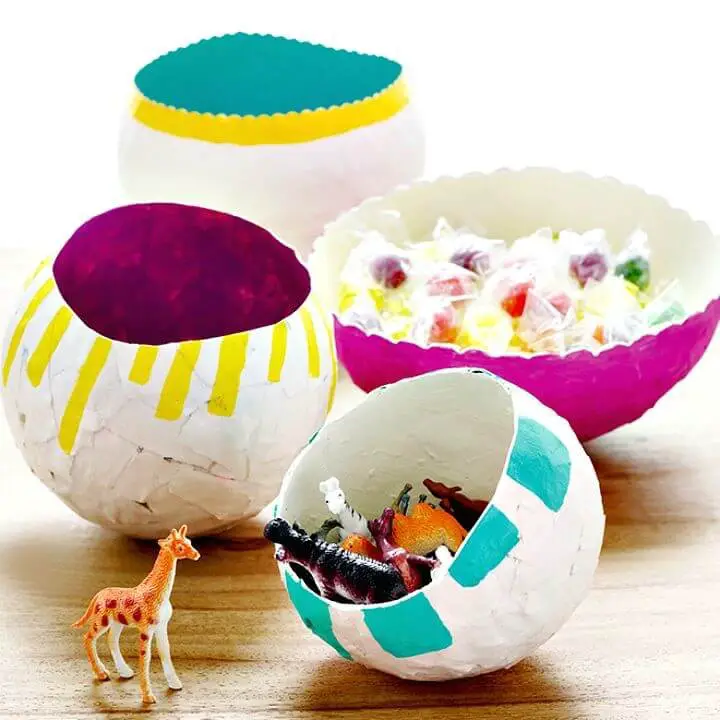
Transform your creative juices into a one-of-a-kind storage solution by crafting a DIY papier-mâché balloon bowl. With just a few simple materials – including balloons, decoupage glue, foam brush, torn newspaper and plain newsprint squares, paint, and paintbrushes – you can create a truly unique and functional piece that adds a touch of personality to any room. Start by inflating the balloon, then cover it with layers of paper, overlapping each piece as you go to ensure a sturdy bond. Once the glue has dried, pop the balloon and carefully remove it from the papier-mâché mixture. Finally, unleash your artistic side and decorate the bowl with paint, adding any finishing touches you desire. The result is a charming, handmade storage solution that’s as functional as it is visually appealing.
Easy Faux Wood Love Letters
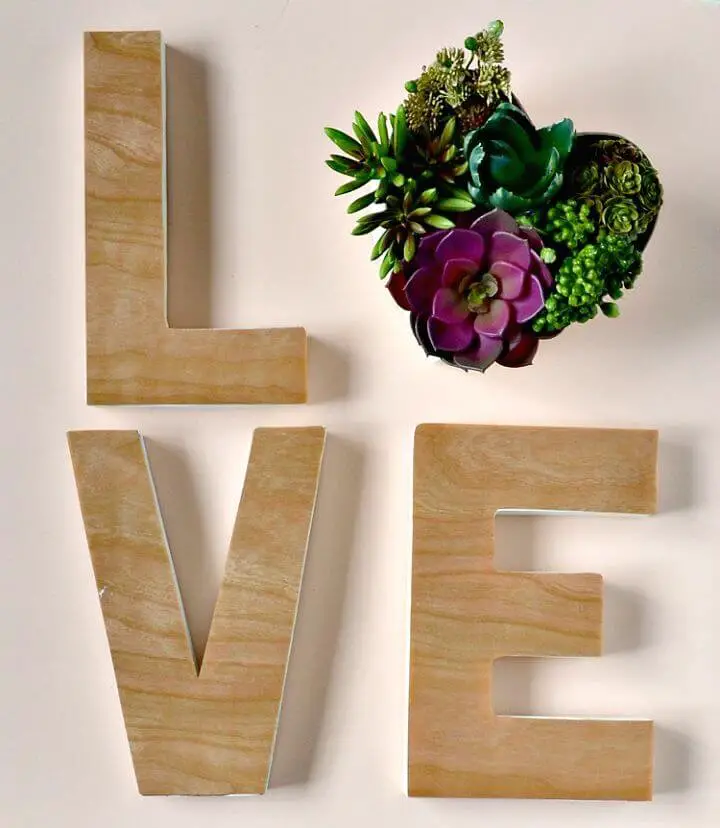
Transform your Valentine’s Day decor with these refined DIY faux wood love letters. Start by using cardboard or paper mache letters as the foundation, then get creative by painting them in any shade you prefer. Next, use adhesive wood veneer sheets to create a precise cutout of each letter – don’t forget to reverse the shapes for the letters L and E! Once you’ve got your wooden letter pieces ready, adhere them to the original cardboard or paper mache base for a sophisticated result that will elevate your home’s interior. This Valentine’s Day, show your loved ones some extra love with these elegant faux wood love letters that exude refinement and charm.
Ikea Vase Hacks With Step by Step Instructions
Transform your IKEA vasen glass vase into an eye-catching masterpiece by combining unconventional materials in a creative, budget-friendly DIY project. Start by gathering wooden curtain rings, shibori print fabric scraps, decoupage glue or modge podge, a small paintbrush, and scissors. Layer the fabric and wooden rings to create a striking Japanese-inspired wabi-sabi effect that adds an air of sophistication to any room. With only a few simple steps and under $6 in materials, you can craft unique indigo vessels that serve as stunning statement pieces.
DIY Paper Mache Hot Air Balloons
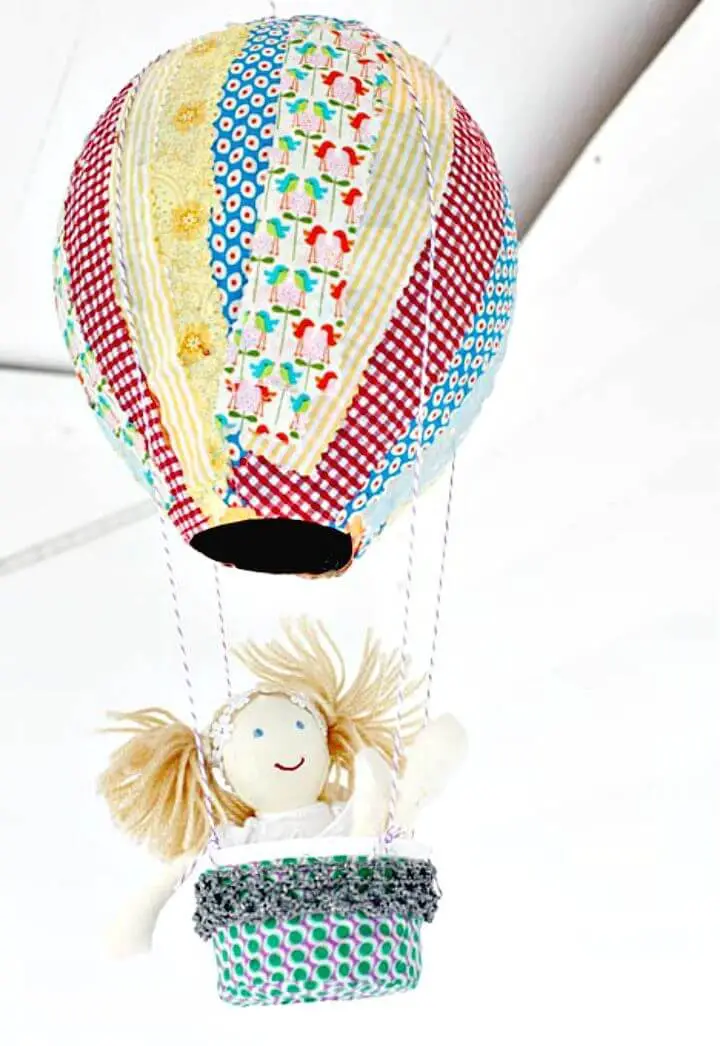
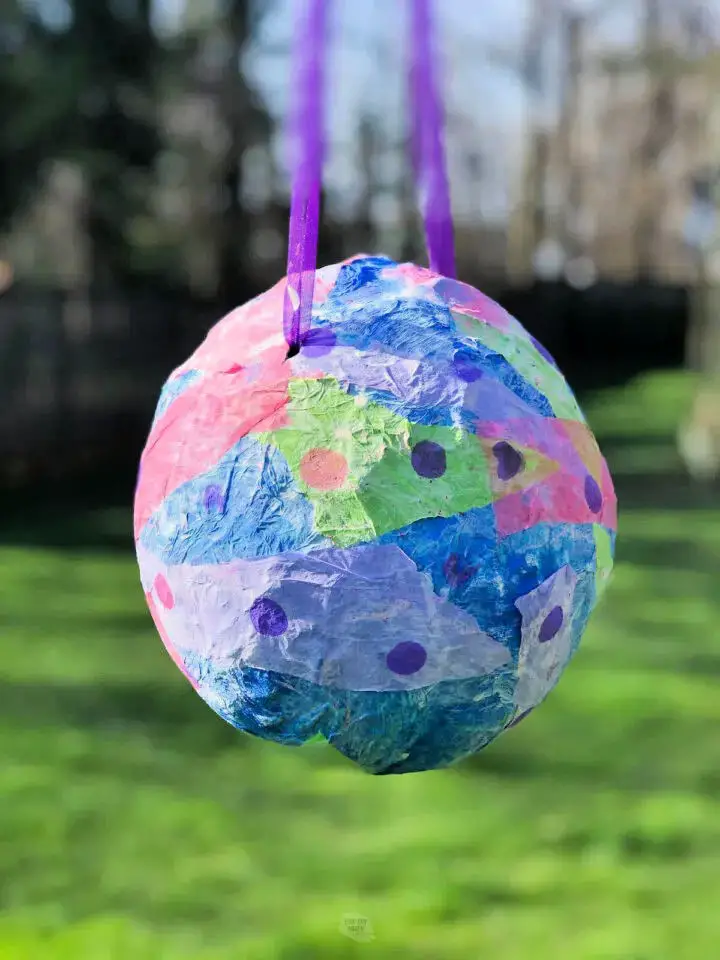
Unleash your artistic expression by exploring the boundless potential of paper mache crafts, accessible to both novices and seasoned creatives alike. This Easter, challenge yourself to create visually striking hot air balloons using a straightforward technique: start by tearing sheets of newspaper into strips, then bind them around inflated balloons with a mixture comprising equal parts PVA glue and water. Next, wrap fabric strips soaked in the same blend around the balloons for an eye-catching effect. To add stability, apply another layer of the PVA mixture before deflating the balloon and trimming off its ends. Finally, display your creations proudly by attaching twine to yogurt pot baskets – a delightful activity perfect for kids to enjoy!
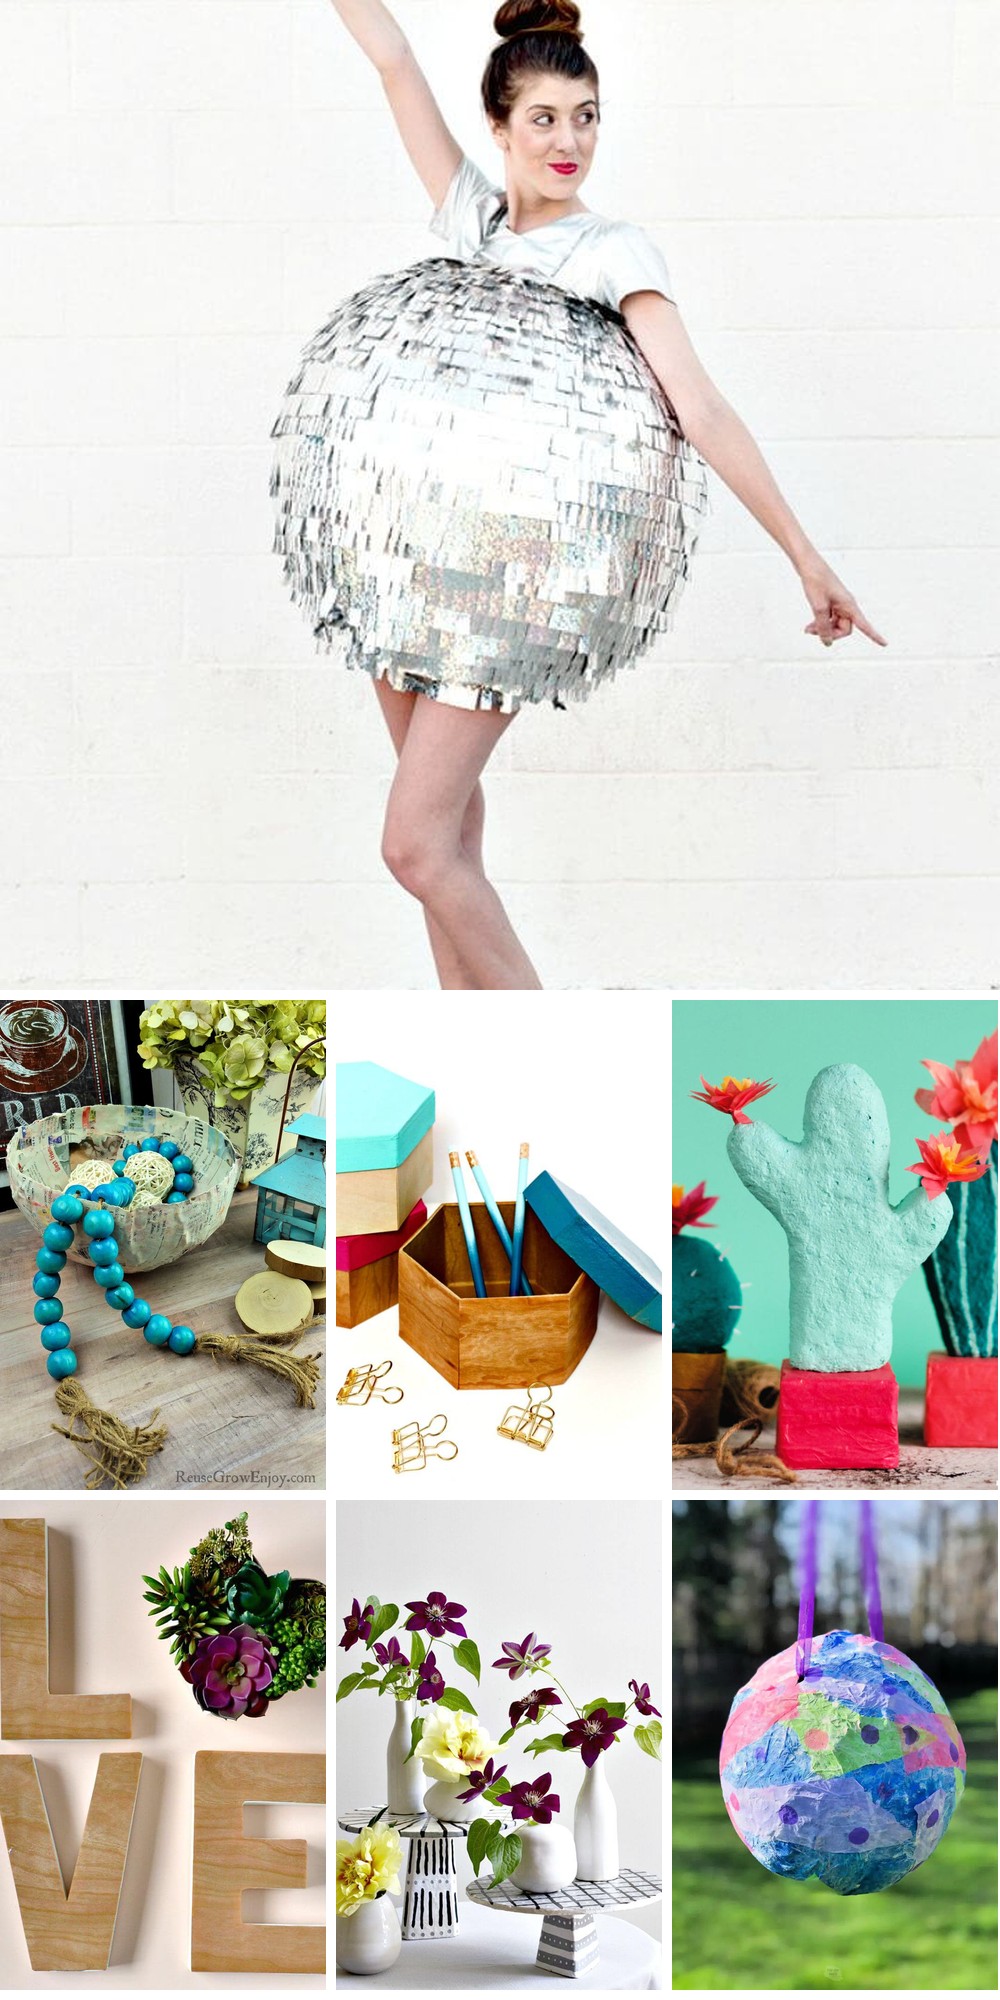
Amazing Paper Mache Disco Ball Costume

Transform into a dazzling DIY disco ball costume with ease! To create your own glamorous attire, gather the following simple supplies: a 36-inch balloon, newspaper, flour, water, holographic bird or ribbon, scotch tape, sequin trim or silver ribbon, and a stapler. By following a straightforward paper mache method, you can turn the balloon into an entrancing disco ball. Complete your look with a shimmery top paired with shorts (or jeans) and disco heels. With this eye-catching costume, you’ll be ready to dance up a storm!
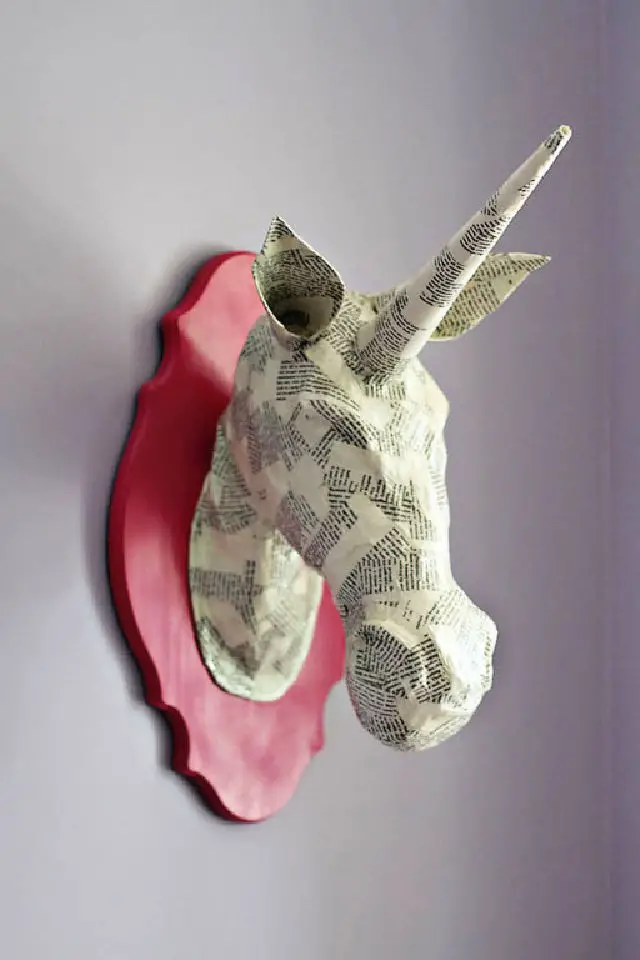
Upcycled Paper Mache Bird Sculpture
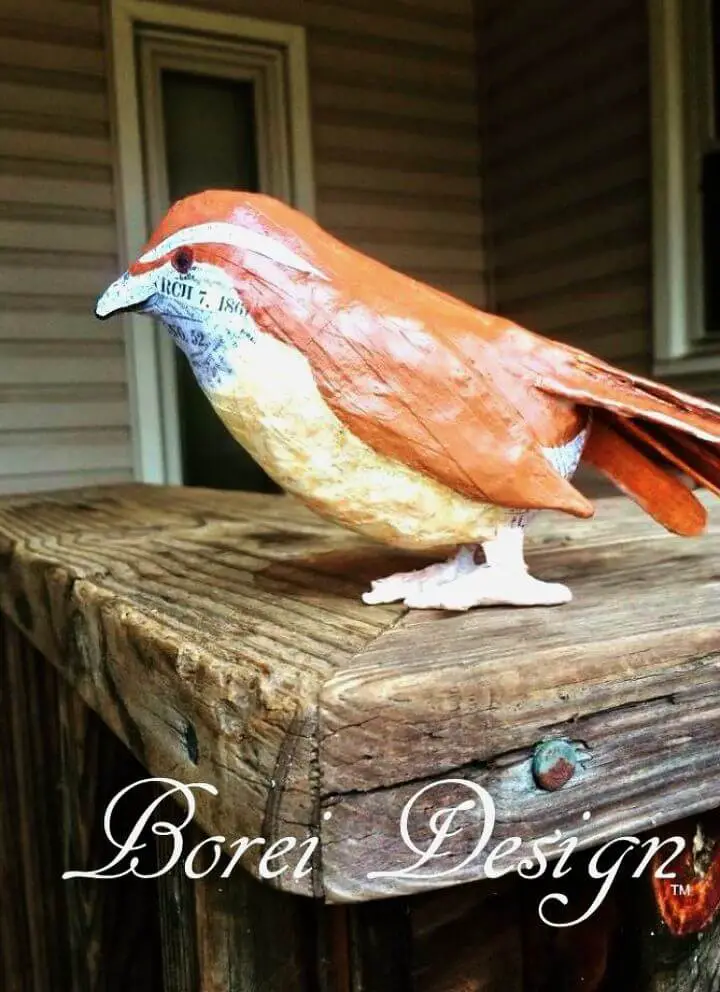
Transform your surroundings with an array of innovative paper mache projects that can be adapted to create unique masks, sculptures, piñatas, and decorative items for your home. One such project is crafting a stunning bird sculpture reminiscent of the Carolina wren or any other species. This DIY tutorial simplifies the process, allowing you to bring this creative endeavor to life in the comfort of your own home.
With just a few basic materials like old cardboard, crumpled newspaper, masking tape, and lightweight cardboard, you can create an endearing ornament for your living space. To add structure, use wire and toothpick legs before wrapping with floral tape and coating with activa fastmache. Finish off the design by applying decoupage using historical newspapers and acrylic paint, resulting in a one-of-a-kind piece that reflects your personal style. For detailed instructions and a complimentary printable pattern, look no further.
DIY Paper Mache Faux Stained Glass House
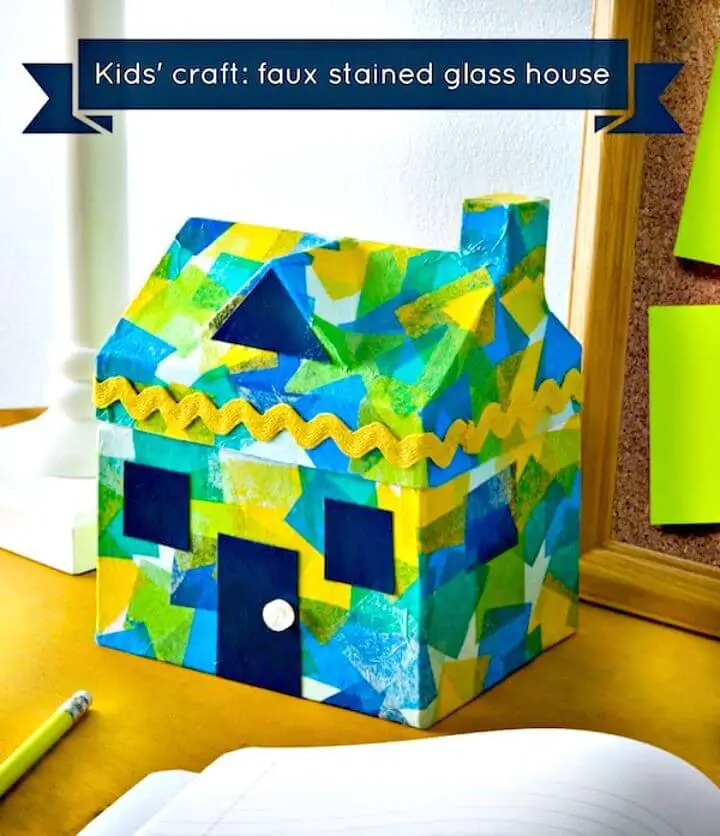
Foster your child’s creativity by embarking on an imaginative adventure – designing a whimsical faux stained glass house! Begin by applying a base coat of white craft paint to the paper mache house, creating a pristine surface for the ‘stained glass’ effect to shine. As you add layers of colorful tissue paper and coordinating cardstock, your child’s imagination will run wild, transforming the ordinary into an extraordinary work of art. The finishing touches – a small white button and ric rac trim – will bring this masterpiece to life, making it a treasured keepsake for years to come. Get ready for hours of fun-filled creativity, as you and your child create something truly unique and breathtakingly beautiful.
Paper Mache Wood Hexagon Storage Boxes
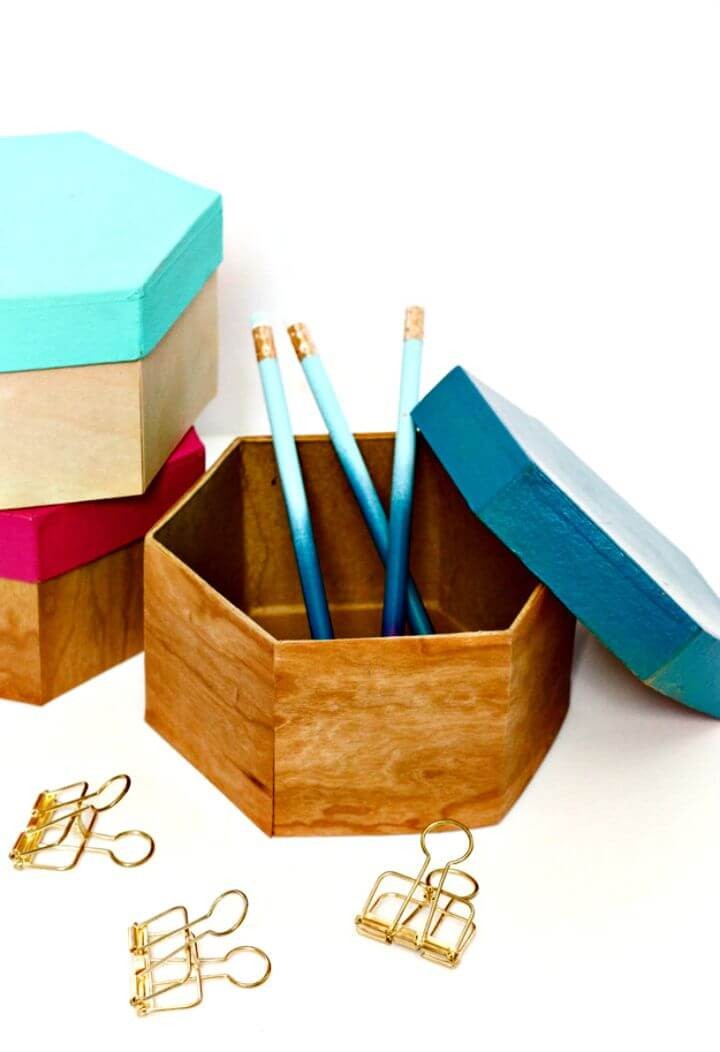
Paper mache boxes offer a world of creative possibilities for both kids and adults. One such idea is crafting darling faux wood hexagon boxes that can be used to organize any space. With minimal materials, including paper mache boxes of various shapes and sizes, adhesive-backed wood grain veneer sheets, acrylic paint, and a paintbrush, you can create stunning storage solutions in no time. Simply adhere the wood grain veneer to the boxes, add a pop of color with the acrylic paint, and enjoy your newly organized space that’s sure to impress.
How to Make a Paper Mache Flower Vase
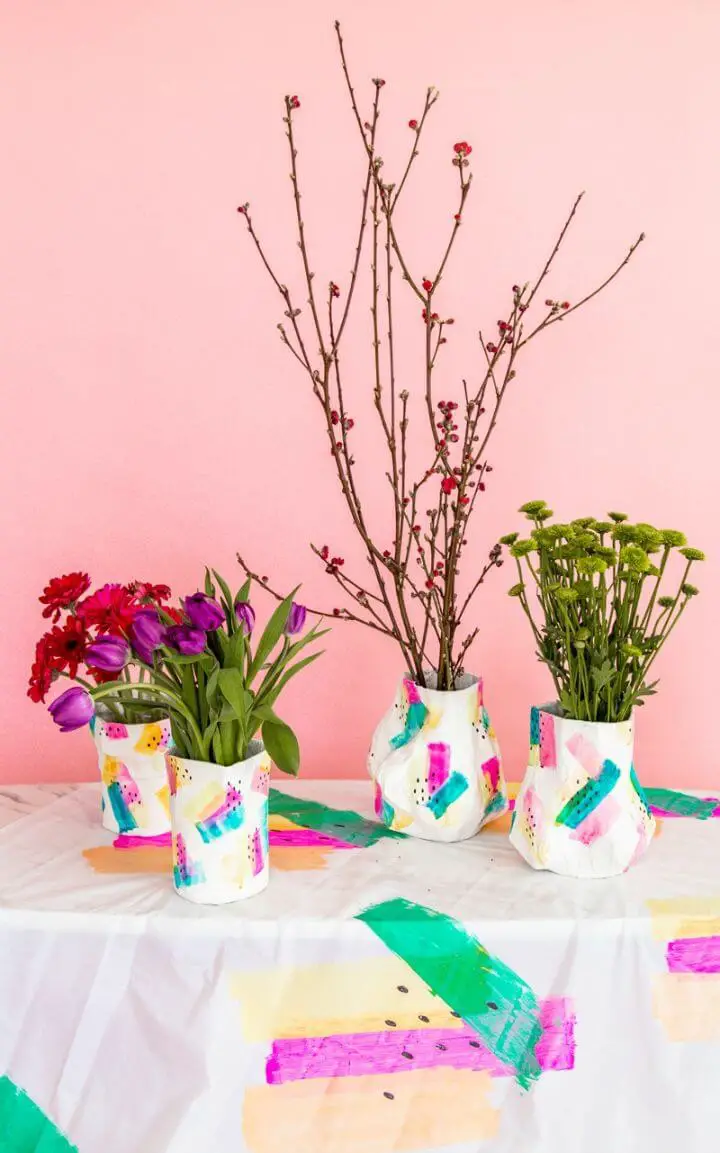
Transform ordinary materials into extraordinary creations with innovative paper mache ideas. By repurposing everyday objects, you can craft unique, eco-friendly home decor and gifts that exude a playful charm. One such delightful DIY project is the organic-shaped flower vase, which radiates a warm springtime ambiance when filled with fresh blooms. This accessible paper mache art form makes it effortless to create these charming vases, perfect for gifting on special occasions like Mother’s Day or adding a pop of color to your home decor. Gather just a few simple supplies – newspaper strips, fabric stiffener, mason jars, and vibrant paint – and you’re ready to unleash your creativity with the whole family. This fun activity is sure to bring a splash of springtime joy into your home.
DIY Papier Mache Cake Stand
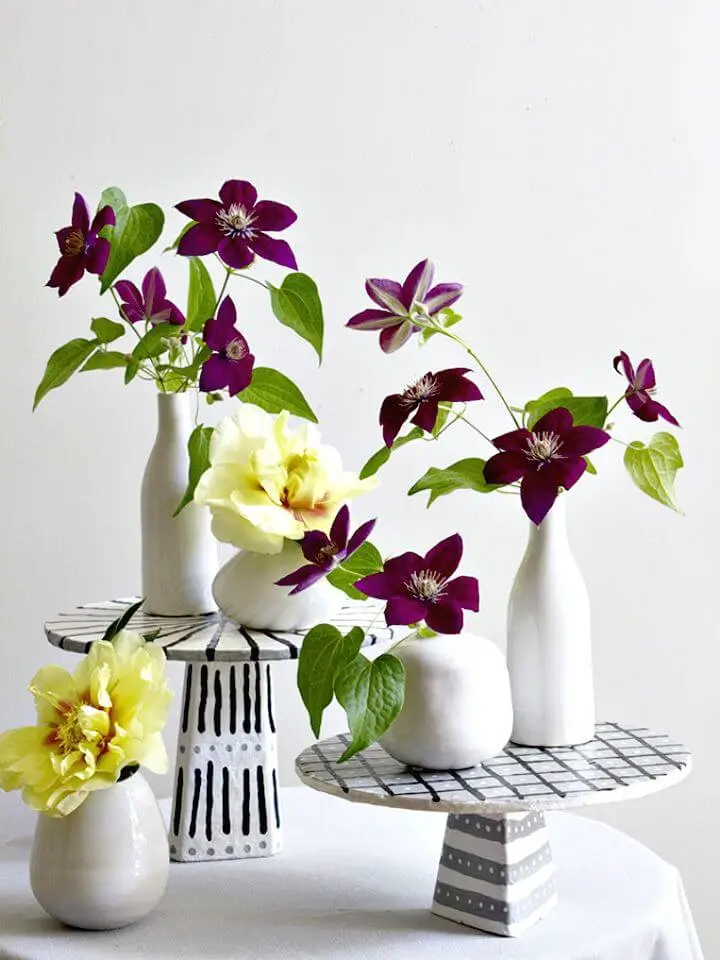
Transform your cake presentation into a masterpiece with this innovative DIY papier mâché cake stand project! The versatility of paper mâché as a decorative technique lies in its ability to create both functional and ornamental objects for your home. By upcycling everyday materials from the recycle bin and utilizing your existing tools and supplies, you can craft unique and eco-friendly cake stands that are sure to impress without breaking the bank or requiring special equipment.
How to Make Paper Mache Pots
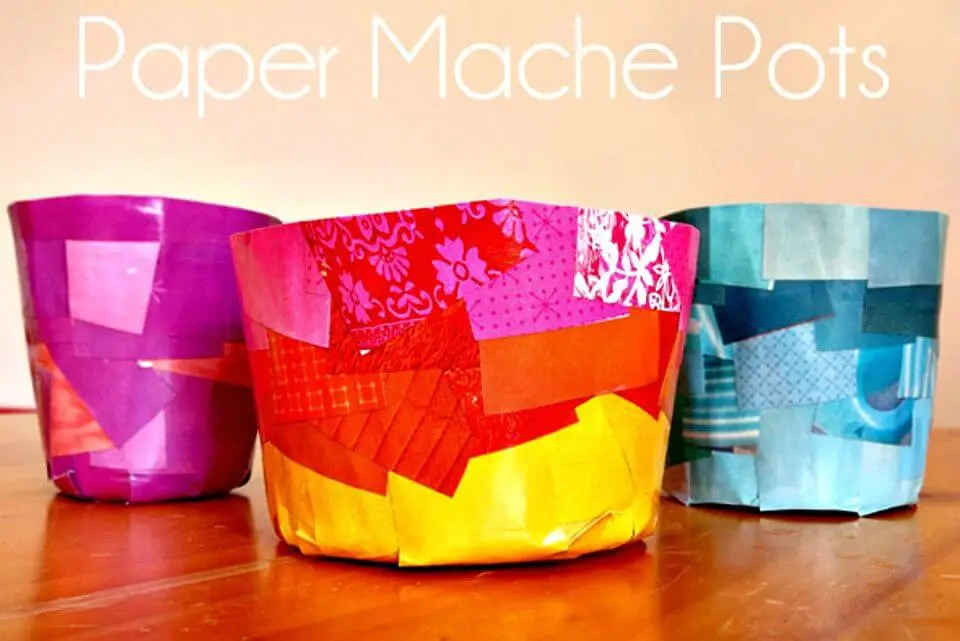
Transform your kids into eco-artists by engaging them in sustainable paper mache art projects! Utilizing recycled magazine pages, white PVA craft glue, and other kid-friendly materials, this creative endeavour is an ideal fit for children aged 5 and above in primary/elementary school. Explore plastic containers with smooth surfaces, magazines, water, a plastic glue tray, and masking tape to create one-of-a-kind paper mache pots that are not only environmentally friendly but also long-lasting. As your child’s imagination runs wild, watch their unique crafts blossom into works of art that will stand the test of time.
Simple Paper Mache Bowls
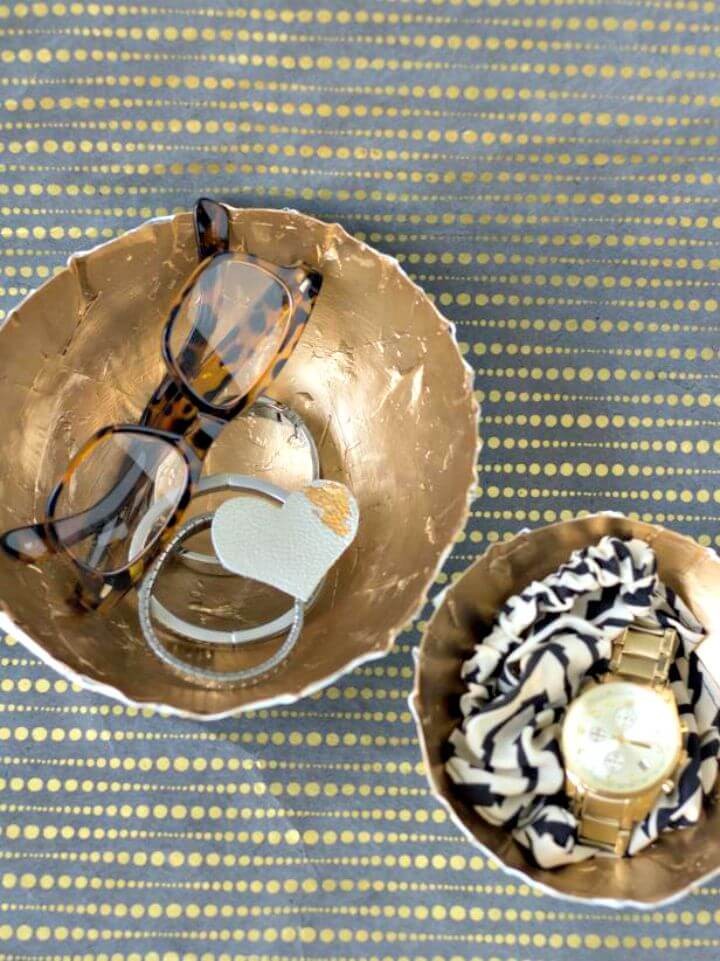
Transform everyday materials into stunning works of art with limitless paper mache possibilities! Imagine creating decorative bowls, whimsical animal sculptures, and vibrant piñatas that can be tailored to any occasion. One such masterpiece is the Marvelous paper mache bowl adorned with gold accents, which effortlessly combines style and functionality in any room. By combining newspaper, Mod Podge, balloons, drying cups, craft paint, and liquid gilding, you can bring your creative vision to life. Begin by layering strips onto a balloon shape, allowing it to dry thoroughly before trimming the edges. Finish with a touch of elegance using craft paint on the exterior and liquid gilding within. Once cured, your beautiful creation is ready for use – a true testament to the power of DIY paper mache projects!
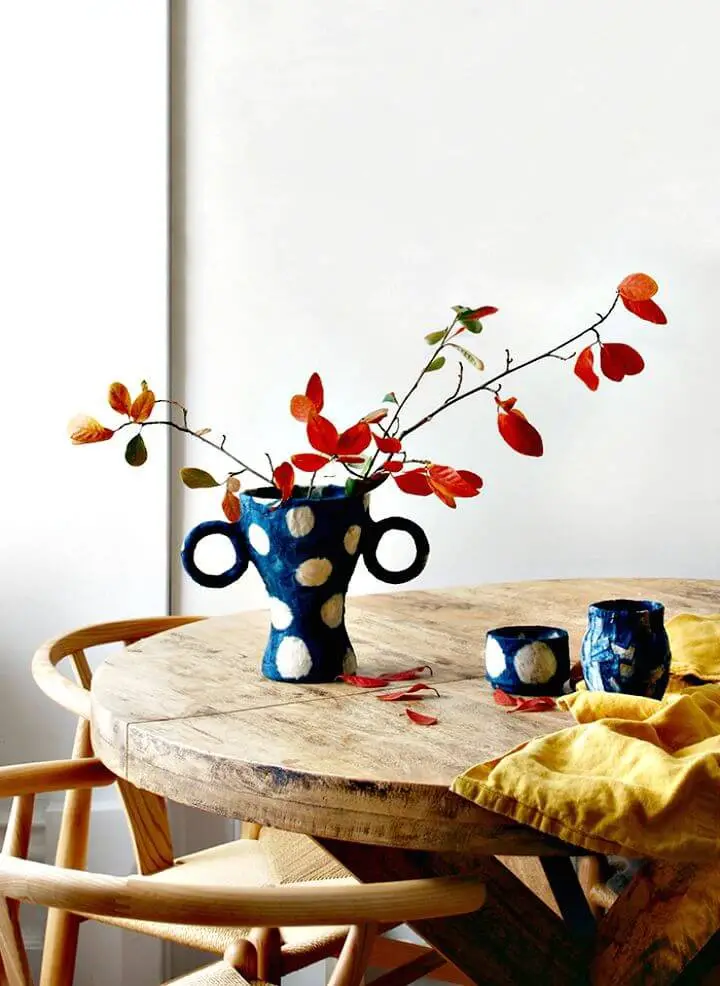
Beautiful DIY Paper Mache Vase
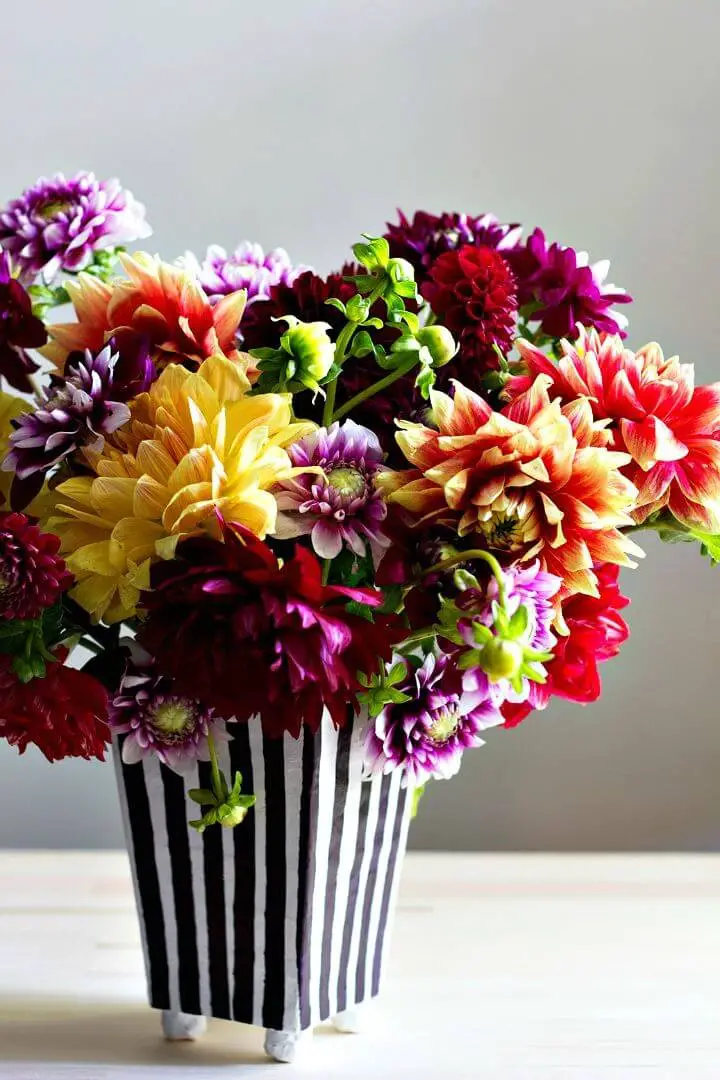
Unleash your creativity and bring a touch of uniqueness to your home with DIY paper mâché vases. This project is perfect for showcasing your artistic side as you craft a one-of-a-kind, ceramic-inspired masterpiece. By following a simple step-by-step guide, you’ll be able to create distinctive designs that make beautiful decorations or thoughtful gifts. Gather your materials, including cardboard, newspaper, flour, water, and a hot glue gun, and let your imagination run wild as you cut, measure, and shape your way to creating something truly special.
Conclusion:
As you wrap up exploring 25 easy paper mache ideas and art projects, you may find that this creative journey not only sparks your imagination but also deepens your appreciation for the rich history and eco-friendly aspects of this medium. From ancient China to modern-day art and decor, paper mache’s versatility and sustainability make it an attractive option for artists, home enthusiasts, and families seeking unique ways to express themselves while promoting environmental consciousness. By mastering the fundamentals, overcoming common challenges, and diving into creative projects, you can not only contribute to a more sustainable artistic community but also infuse your surroundings with personal touches that reflect your personality. As the world of paper mache awaits, full of opportunities for innovative expression, grab your materials and let your imagination be the guide to crafting memorable art pieces that leave a lasting impact.
