Elevate your kitchen’s ambiance with a stunning DIY cutting board that exudes charm. To take your culinary experience to new heights, we’ve curated an impressive collection of 25 homemade cutting board ideas, allowing you to effortlessly combine form and function. By experimenting with colors, stains, and functional additions, the possibilities are endless, making each board uniquely yours.
As you’re ready to push the boundaries of DIY cutting boards, we’ll introduce advanced techniques such as inlay work and juice grooves that not only add visual appeal but also enhance the overall functionality. Additionally, we’ll cover crucial aspects like safety precautions, environmental impact, maintenance tips, and frequently asked questions to ensure your crafting journey is a seamless success.
Are you prepared to unleash your creativity? Let’s dive in!
How to Make a Cutting Board – Step by Step Guide
For novice woodworkers, crafting a wooden cutting board is an ideal project. Not only will it enhance the functionality of their kitchen, but also serve as a stunning piece that showcases their handiwork. Moreover, this DIY endeavor makes for a lovely and personalized gift for friends or family members who appreciate the art of woodworking.
Choosing Your Wood and Cutting Board Type
When embarking on your woodworking journey, it’s essential to begin with a hardwood that boasts a tight grain pattern, such as walnut, maple, or cherry. These types of wood are renowned for their durability and resistance to warping and moisture absorption, making them an ideal choice for crafting cutting boards.As you prepare to create your cutting board, take the time to consider the type of design you wish to achieve. For this project, we’ll be focusing on edge grain construction, which offers a durable and warp-resistant finish that’s perfect for withstanding daily use. While face grain can showcase the wood’s natural beauty, it may be more prone to knife marks and scratches. On the other hand, end grain construction is ideal for maximizing knife longevity, but requires meticulous gluing techniques and can be a bit more complex to execute.
Materials and Tools Needed
To achieve a beautiful and long-lasting hardwood finish, you’ll need to start with the right tools and materials. Begin by selecting the perfect hardwood species for your project – perhaps something like walnut. To shape and cut your wood, rely on the power of a table saw, miter saw, and jointer or a jointer jig attached to your table saw. A planer will also come in handy for smoothing out those rough edges. When it comes time to assemble the pieces, Titebond III waterproof glue is the perfect choice. To keep everything in place while the glue dries, use clamps. For a smooth finish, you’ll need to sand down your wood. A sander equipped with 120 and 220-grit sandpaper will do the trick. As you work, keep yourself clean and tidy with a water spray bottle, mineral oil, board conditioner, and some trusty clean rags.
Step by Step Guide
Step 1: Cutting Your Wood
When it comes time to shape your wooden components, begin by utilizing your miter saw to trim them to the precise length you require – roughly 15-16 inches in this case. Next, employ a jointer or a jointer jig attached to your table saw to refine the edges, guaranteeing they’re as smooth and straight as possible.
Step 2: Rip the Wood into Strips
To begin crafting your cutting board, first ensure your table saw fence is accurately set at a precise 1/8 inch distance. This will allow you to efficiently rip the wood into thin strips that will eventually form the thickness of your final product. As you work, make sure to maintain alignment with the grain direction to achieve optimal results.
Step 3: Preparing the Strips
To achieve a flawless wood strip installation, start by addressing any warping issues using a jointer. This will allow the strips to lie flat and even. Next, employ a planer to guarantee uniform thickness across all pieces. Once your strips are properly prepared, it’s essential to organize them according to your desired pattern or grain alignment before applying adhesive. This meticulous approach will pay dividends in terms of a professional-looking final product.
Step 4: Gluing the Strips
To ensure a strong bond between the wooden strips, begin by applying Titebond III to the edge of each piece. Next, carefully align the strips and secure them with clamps, exercising caution not to apply too much pressure that might compromise the adhesive’s effectiveness. Finally, allow the glue to dry according to the manufacturer’s recommended timeframe, taking care to follow the instructions precisely to achieve optimal results.
Step 5: Finishing Touches
Once the adhesive has fully bonded, proceed by passing the board through a planer or utilizing a sander to ensure the surface is even and level. To achieve a polished edge, employ a crosscut jig or table saw to trim the edges. For added visual appeal, consider incorporating a chamfer or round over technique to eliminate sharp edges. The finishing process begins with 120-grit sandpaper, gradually moving up to 220-grit for a silky smooth finish. A quick spray of water followed by a light sanding will leave your board looking refined and professional.
Step 6: Applying the Finish
For a superior finish, initiate the process by applying multiple coats of mineral oil, allowing each coat to dry for 20 minutes before gently wiping away any excess residue. To further enhance the appearance and provide added protection, conclude by applying a board conditioner that combines the benefits of mineral oil with natural waxes.
Step 7: Maintenance
To ensure your board remains in top condition, it’s crucial to perform regular maintenance. One simple yet effective technique is to apply mineral oil and conditioner at periodic intervals. This practice not only keeps the wood hydrated but also helps prevent cracks from forming. By doing so, you’ll be able to maintain a smooth surface that will withstand daily use without compromising its integrity. As time passes, your board will continue to age beautifully, and with proper care, it can remain a treasured possession for years to come.
Video Tutorial
While a YouTube tutorial can provide an excellent visual guide for crafting a walnut edge grain cutting board, it’s often more engaging and effective when paired with written instructions. This combination of methods allows for a clearer understanding of the techniques involved, making it easier to follow along and achieve the desired result. Building a cutting board from scratch is not only a fulfilling project but also a great way to create a unique, handmade gift or add a touch of personal style to your kitchen. As with any woodworking project, patience and attention to detail are crucial for success. By embracing the process and taking pride in your creation, you’ll be more likely to produce a beautiful and functional cutting board that you can enjoy for years to come.
Customization Ideas for Your DIY Cutting Board
Transforming a DIY cutting board into a personalized masterpiece allows you to infuse your kitchen with a touch of individuality. By incorporating creative elements, you can turn a mundane kitchen tool into a distinctive reflection of your personal style.
Personalize with Patterns and Designs
When it comes to crafting unique designs on wooden boards, start by keeping things simple with geometric patterns like stripes, chevrons, or a classic checkerboard motif. If nature is more your thing, try incorporating leaves, flowers, or even your favorite animal into the design. Alternatively, let your creativity shine by creating abstract art pieces featuring freeform lines and shapes that reflect your personal style.
Engraving and Wood Burning
Add a unique touch to your cutting board by incorporating personal details, inspirational quotes, or heartfelt messages. Consider engraving your name, initials, or a special date that holds significance to make it truly one-of-a-kind. For a more artistic approach, take inspiration from your own designs and use a wood-burning tool to etch them onto the board. Alternatively, opt for an uplifting quote or a meaningful message that resonates with you, turning your cutting board into a thoughtful conversation piece.
Functional Additions
To make your cutting board more functional and safe, consider adding some practical features. For instance, you can attach handles made from rope, metal, or wood with a contrasting color to provide a secure grip when handling the board. Additionally, carve a juice groove around the edge of the board to capture any excess liquids that may occur when cutting through juicy foods. This will not only prevent messy countertops but also make cleaning up easier. Finally, add non-slip feet made from materials like rubber or silicone to the bottom of the board to ensure it remains stationary on your countertop, reducing the risk of accidents and making food preparation more efficient.
Color and Stain
When it comes to crafting a unique cutting board, the right finishing touches can make all the difference. To add some flair, opt for food-safe stains that not only enhance the wood’s natural grain but also provide a pop of color. Alternatively, you can use paint to add bold accents to the edges or back, ensuring your cutting board is both functional and visually appealing. For added depth and visual interest, consider filling engravings with colored epoxy resin, which will give your cutting board a smooth, glass-like finish that’s sure to impress. Remember, DIY projects are all about expressing yourself and having fun, so don’t be afraid to get creative and show off your personality. Just be sure to use safe materials throughout the process to ensure your finished product is not only beautiful but also safe for everyday use.
Advanced Techniques for DIY Cutting Boards
Transforming a basic DIY cutting board into a stunning piece requires more than just a set of plans. By incorporating advanced techniques, you can take your craftsmanship to the next level and create a truly unique piece that reflects your creativity and attention to detail.
Inlay Work
To create visually striking designs on wood surfaces, inlay work involves seamlessly integrating various materials into the wood to form intricate patterns or motifs. The process can be broken down into four essential steps:
Firstly, select woods with contrasting colors or grains to create a bold and eye-catching effect.
Next, utilize sharp tools for precise cuts that ensure accurate placement of the inlay.
Thirdly, apply a strong adhesive to secure the inlay in place, making sure it fits snugly within the surrounding wood.
Finally, once the glue has dried, carefully sand the surface to achieve a smooth and even finish, blending seamlessly with the rest of the wood.
Making Juice Grooves
To elevate your woodworking game, incorporating juice grooves is an excellent starting point. These subtle yet effective details can instantly add a professional touch to any project. To achieve this, follow these steps carefully:
Firstly, define the path: Utilize a compass or a template to create a precise outline for the groove.
Next, select the correct router bit, taking into consideration the desired width and depth of the groove.
Now, make multiple shallow passes with the router to gradually reach the required depth.
Finally, employ gentle sanding to remove any rough edges and achieve a smooth finish.
Safety Precautions in Woodworking
When it comes to working with tools and materials, safety should always be your top priority. To ensure a safe and successful experience, follow these essential guidelines:Firstly, prioritize personal protection by wearing appropriate gear such as safety glasses, gloves, and hearing protection.Next, take the time to thoroughly read and understand the manuals for each tool you plan to use. This will help you grasp how to operate them safely and avoid any potential hazards.Maintaining a clean and organized workspace is crucial in preventing accidents from occurring. Make sure to keep your area free of clutter and tripping hazards.Finally, treat tools with respect by using them for their intended purposes and handling them with care. By doing so, you’ll not only ensure your safety but also prolong the lifespan of your tools.By incorporating advanced techniques and safety measures into your DIY project, you can create a cutting board that’s not only functional but also enjoyable to make.
Environmental Impact of DIY Cutting Boards
To create an environmentally responsible DIY cutting board, it’s essential to consider the ecological footprint of your materials and methods. For instance, opt for sustainable woods like reclaimed or FSC-certified timber, which support reforestation efforts and reduce deforestation. Additionally, choose natural oils and waxes over synthetic finishes, as they tend to be biodegradable and non-toxic.
Select Sustainable Materials
When selecting materials for your eco-friendly home renovation, consider the following sustainable options. Bamboo is an excellent choice due to its rapid growth rate and renewable nature. Another viable alternative is recycled wood, which can be sourced from old furniture or buildings that are being repurposed. Additionally, opting for locally-sourced wood reduces transportation emissions and supports local economies. By choosing these eco-friendly materials, you’ll not only contribute to a more sustainable future but also add unique character to your home renovation project.
Use Eco-Friendly Finishes
When it comes to finishing your cutting board, consider opting for natural oils like linseed or walnut oil. These eco-friendly options not only provide a beautiful sheen but also offer a more sustainable choice. Alternatively, you can apply a beeswax coating, which provides a non-toxic and water-resistant seal. For an added layer of protection and a touch of character, look to plant-based stains derived from natural sources. By making these conscious choices, you not only create a unique and functional piece but also contribute to a healthier planet in the process.
Maintenance and Care for Your Cutting Board
To extend the lifespan and maintain the cleanliness of your cutting board, it’s essential to practice proper maintenance techniques. Here are some simple tips to get you started:
Regular Cleaning
When it comes to maintaining your board’s cleanliness and longevity, there are a few key steps you should follow. Firstly, wash the surface gently using warm soapy water after each use. This will help remove any dirt or debris that has accumulated during play. It’s also important to avoid soaking the board in water as this can cause warping or damage over time. Instead, stand the board up to air dry completely, allowing it to fully dry before being used again.
Periodic Oiling
To maintain the health and appearance of your wooden boards, it’s essential to establish a regular oiling routine. This can be achieved by applying a food-safe oil once a month. To ensure an even application, use a soft cloth to rub the oil in the direction of the grain. As you apply the oil, take care not to over saturate the wood. After a few hours, use a clean cloth to wipe away any excess oil that has not been absorbed. This simple process can help keep your boards looking their best and ensure they remain safe for food preparation.
Handling Stains and Odors
When it comes to tackling stubborn stains on your cutting boards, there are a few effective methods you can try. One approach is to start by seasoning the board with a combination of salt and lemon juice. The acidity in the lemon helps break down any lingering odors or residue, while the salt acts as a natural abrasive to gently scrub away any tough stains. Simply rub the cutting board with the mixture, paying particular attention to any areas where stains have accumulated. For more stubborn stains, you can also try applying a paste made from baking soda and water. The gentle abrasion provided by the baking soda is often enough to lift away even the toughest stains.
FAQs About DIY Cutting Boards
Immerse yourself in a comprehensive resource that addresses frequently asked questions about DIY cutting boards, empowering you with the knowledge and skills to create your own cutting board from the comfort of your own home.
What is the best wood to use for a DIY cutting board?
When it comes to crafting the perfect cutting board, the choice of wood is crucial. Opting for a hardwood with a tight grain pattern is ideal. Maple, walnut, and cherry woods fit this bill perfectly. Their density and hardness make them resistant to knife marks and other forms of wear and tear, ensuring your cutting board remains in top condition.
How thick should my cutting board be?
When it comes to the ideal thickness of a cutting board, a sweet spot emerges between 1.5 to 2 inches. This range strikes a perfect balance between stability and durability, neither overwhelming nor underwhelming in terms of weight.
Can I use any wood finish for my cutting board?
When it comes to finishing your wood projects, it’s crucial to prioritize the health and safety of those who will be using them. For this reason, opt for food-safe finishes like mineral oil and beeswax, which are gentle on the palate and free from toxic chemicals. A combination of both can also provide an added layer of protection and a subtle sheen. By choosing eco-friendly options, you’ll not only ensure your creations are safe for consumption, but also reduce the risk of exposure to harsh chemicals that can have negative impacts on human health.
How do I prevent my cutting board from warping?
When working with wood, it’s essential to take preventative measures to ensure its integrity. This includes allowing the wood to fully dry out before use, as excessive moisture can cause warping. Furthermore, applying a uniform finish to all surfaces can help protect the wood from damage. Additionally, prolonged exposure to water should be avoided, as this can lead to further degradation and compromise the overall quality of the wood.
How often should I oil my cutting board?
To keep your cutting board looking its best, make it a habit to apply oil regularly. We recommend doing so every 30 days or when you notice the surface starting to appear dry. This simple maintenance routine will help preserve the wood’s natural beauty while preventing damage and cracking.
Can I put my wooden cutting board in the dishwasher?
While the temptation to toss your wooden cutting board into the dishwasher may be strong, it’s crucial to resist this urge. The intense heat and powerful jets of water can lead to warping and cracking, rendering your board useless for future culinary endeavors.
How do I remove stains from my cutting board?
When encountering minor stains, try combining one tablespoon of baking soda with two tablespoons of water to create a gentle scrubbing paste. Apply this solution directly to the stained area and gently rub it in using a soft cloth or sponge. For more stubborn discolorations, mix equal parts lemon juice and salt to create a pungent yet effective stain-fighting agent. Apply this mixture to the affected area and work it in with a gentle scrubbing motion before rinsing thoroughly.
Is it safe to cut raw meat on a wooden cutting board?
While some may raise concerns about cutting raw meat on a wooden cutting board, provided proper cleaning and sanitizing procedures are followed, the risk of contamination is mitigated. In fact, many chefs and home cooks swear by the durability and non-reactive properties of wood when it comes to preparing raw meats.
How do I sanitize my cutting board?
For optimal hygiene, after cleaning your cutting board, employ a gentle sanitizing method to eliminate any remaining bacteria or germs. Mix one tablespoon of bleach with one gallon of water and use the solution to thoroughly wipe down the surface. This simple step can significantly reduce the risk of cross-contamination and keep your cutting board in pristine condition.
Can I repair a crack in my cutting board?
While minor fissures can often be mended using wood adhesive and pressure from clamps, more extensive damage requires a different approach. If the crack is significant or the panel is showing signs of separation, it’s generally advisable to opt for replacement rather than attempting to salvage the original piece.
What can I do with an old cutting board?
A discarded cutting board can breathe new life into your home by being transformed into a functional serving platter, a foundation for a kitchen organizer system, or even restored to its original glory through a refinishing process. Moreover, acquiring a comprehensive grasp of the necessary materials and techniques enables you to create your own DIY cutting boards with confidence.
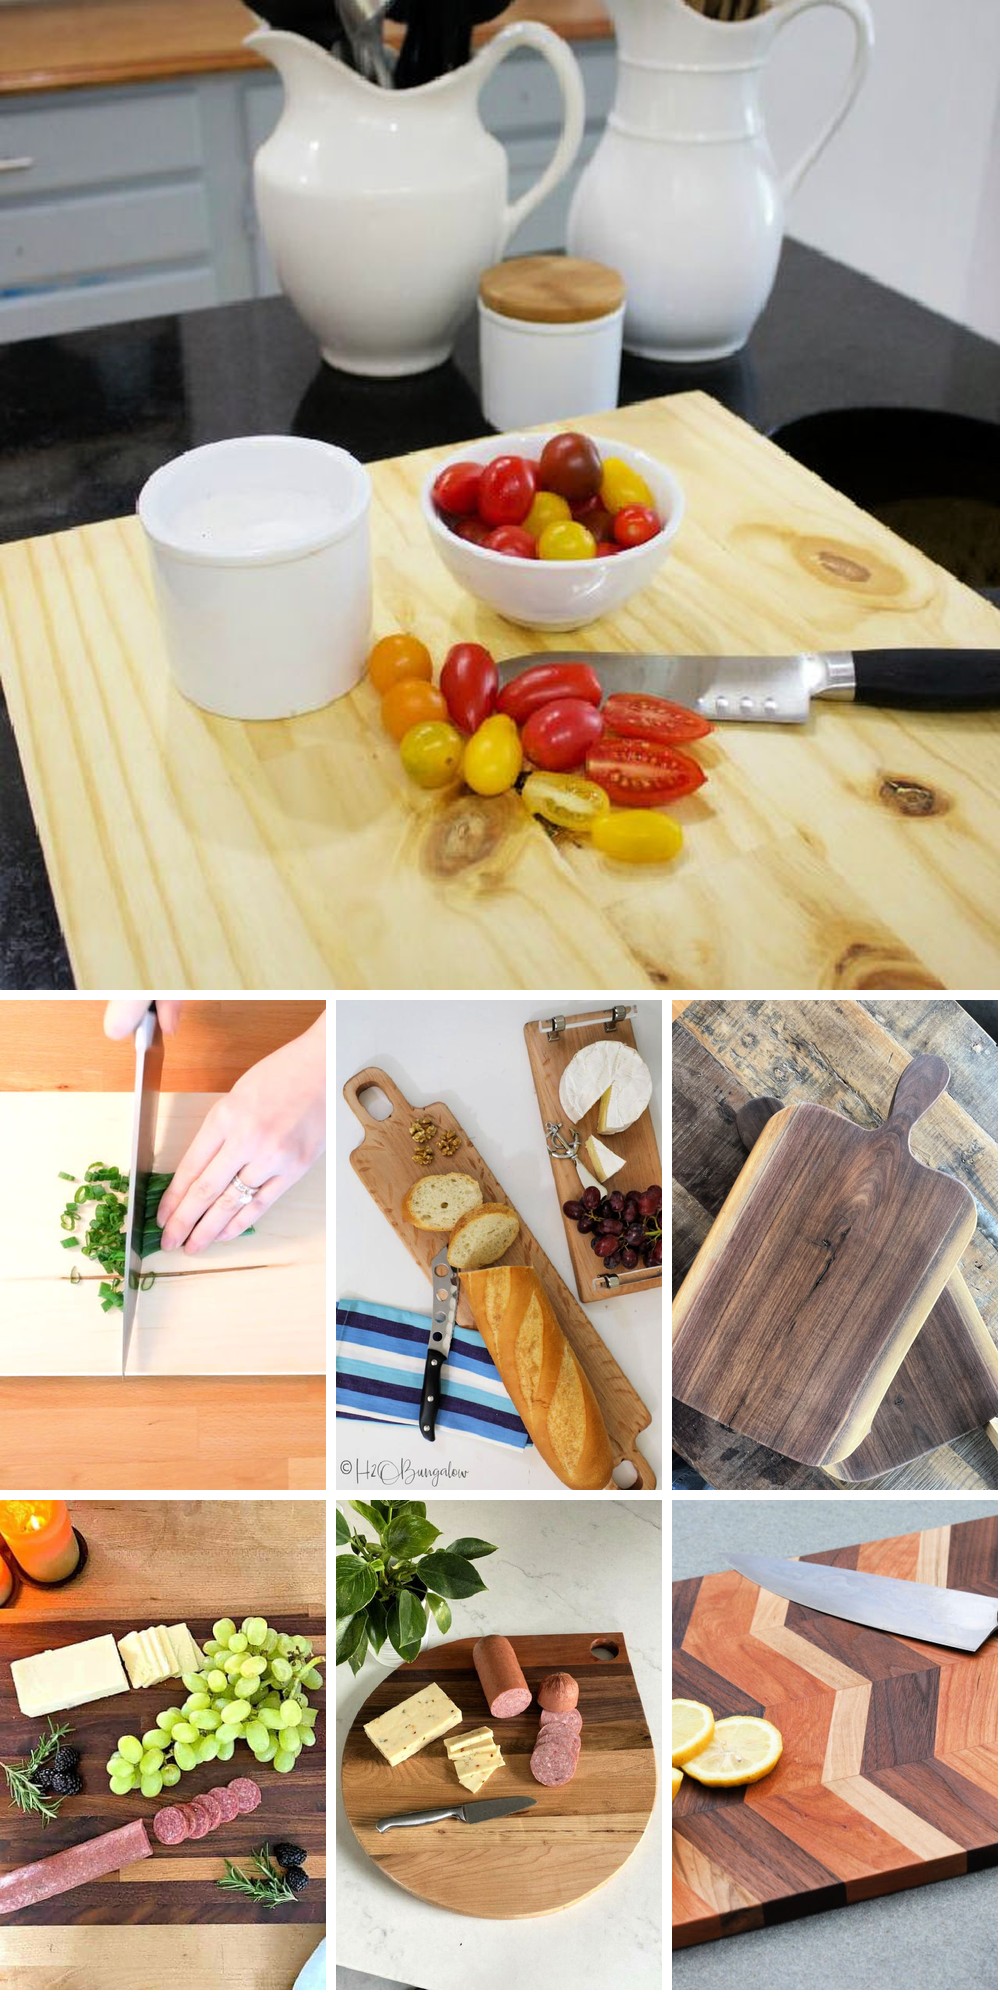
25 Homemade DIY Cutting Board Ideas
Transform your kitchen with a personalized touch by crafting your own cutting board. Explore 25 creative and diverse DIY projects that range from unconventional designs to timeless classics. Each unique piece is an opportunity to infuse your cooking space with personality and style.
End Grain Cutting Board Woodworking Project

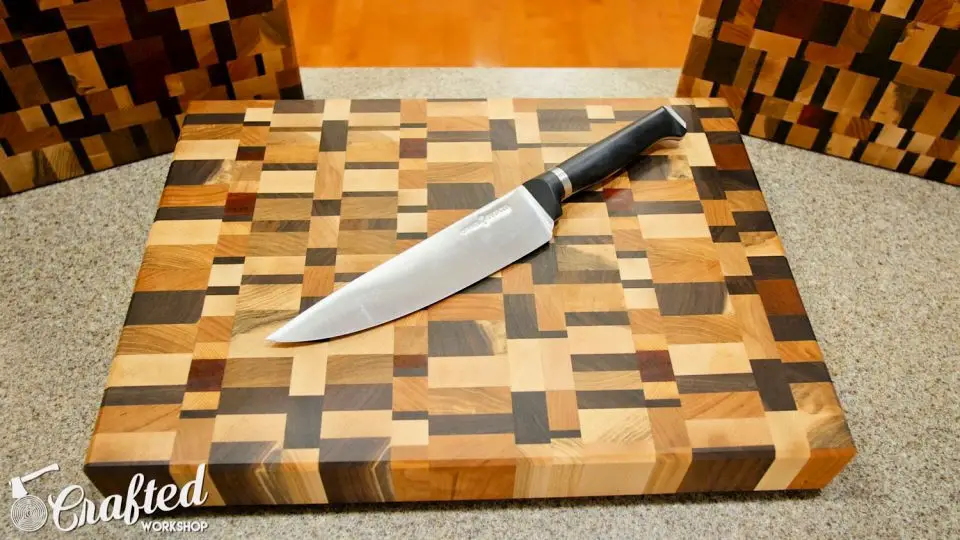
Transform your kitchen with a one-of-a-kind end grain cutting board, crafted from four distinct types of wood – walnut, hard Maple, red heart, and jatoba. The intricate pattern on this exquisite piece not only showcases the beauty of its individual woods but also highlights their unique textures and colors. This masterpiece is not only visually stunning but also remarkably durable, making it an ideal addition to any kitchen.
The end-grain cutting board’s gentle interaction with your knives extends their lifespan, while its natural texture masks slice marks, preserving its appearance for years to come. With just six simple steps, you can create this stunning piece of craftsmanship and elevate the ambiance of your culinary space.
Make a Cutting Board Out of Wood
Transform your kitchen with a custom-made wooden cutting board, crafted to match your personal style and needs. This accessible DIY project requires only basic power tools, including a table saw, sander, and miter saw. By combining hardwoods like Maple, padauk, and walnut, along with cutting board oil, assorted sanding discs, and DAP Weldwood Glue, you’ll create a functional and visually appealing kitchen accessory that showcases your DIY skills and appreciation for simplicity. As a beginner-friendly project, this wood cutting board is an excellent starting point for those who want to explore the world of DIY without breaking out the heavy artillery. So, get creative and start building today!
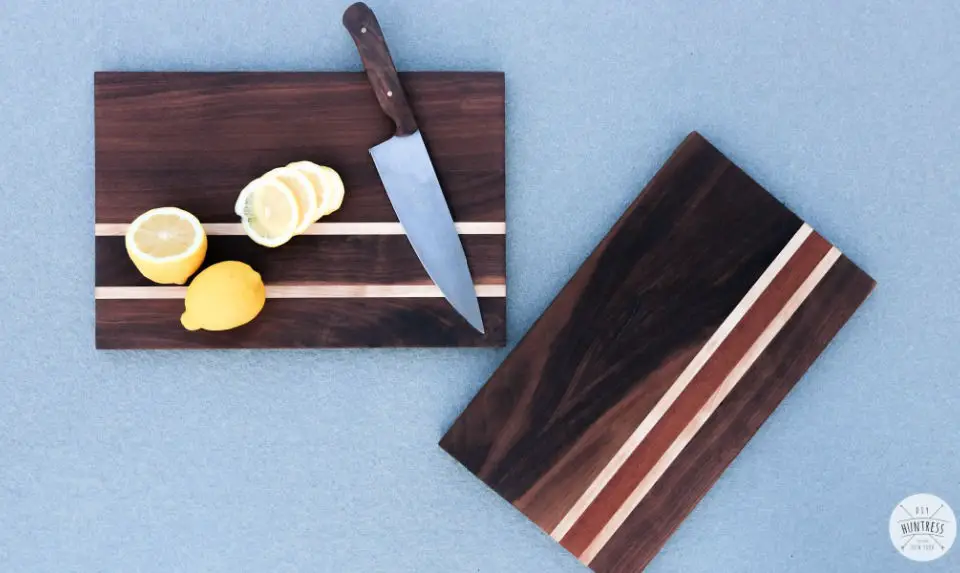
DIY Two-Tone Cutting Board
Create a one-of-a-kind DIY wooden cutting board by following this comprehensive guide. Not only will it provide a practical surface for food preparation, but its unique style will also add a touch of rustic charm to your kitchen. This step-by-step tutorial will walk you through the process of selecting and preparing your wood, applying wood glue, sanding and trimming, and adding optional features such as handles or holes. With access to a range of tools like miter saws, jig saws, drills, sanders, and clamps, as well as materials including hardwoods like maple, walnut, or teak, wood glue, and various finishes, you’ll be able to customize your board’s size, style, and finish to suit your personal taste. You’ll also learn about the different finish options available and how to apply them effectively. Whether you’re a seasoned woodworker or just starting out, this guide will empower you to craft a truly unique cutting board that reflects your personality.
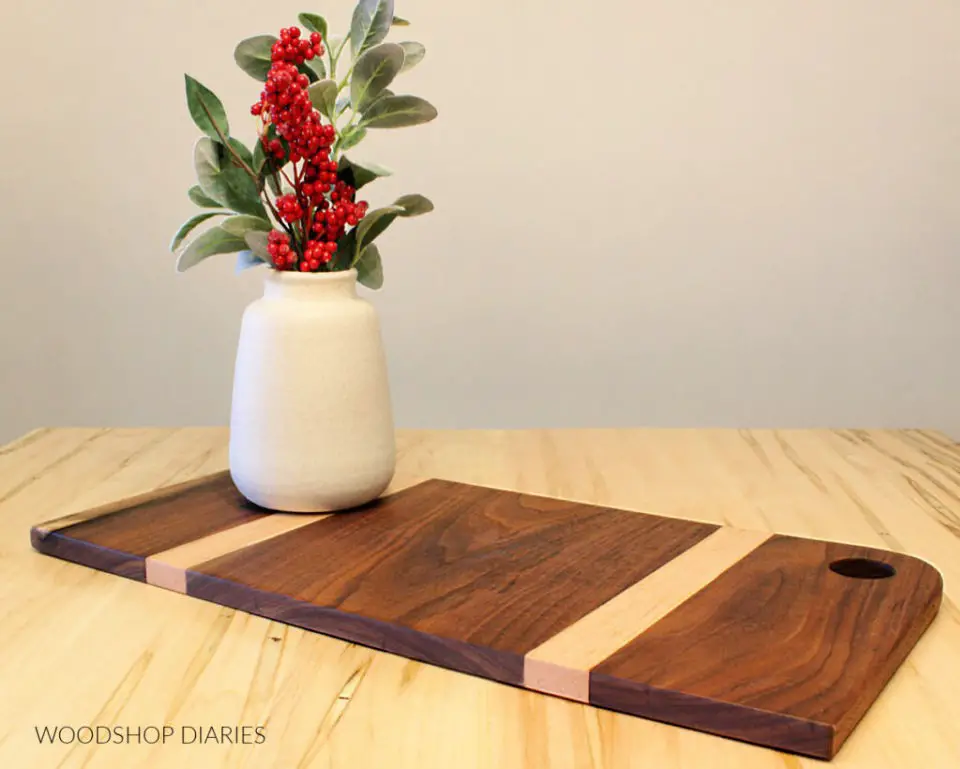
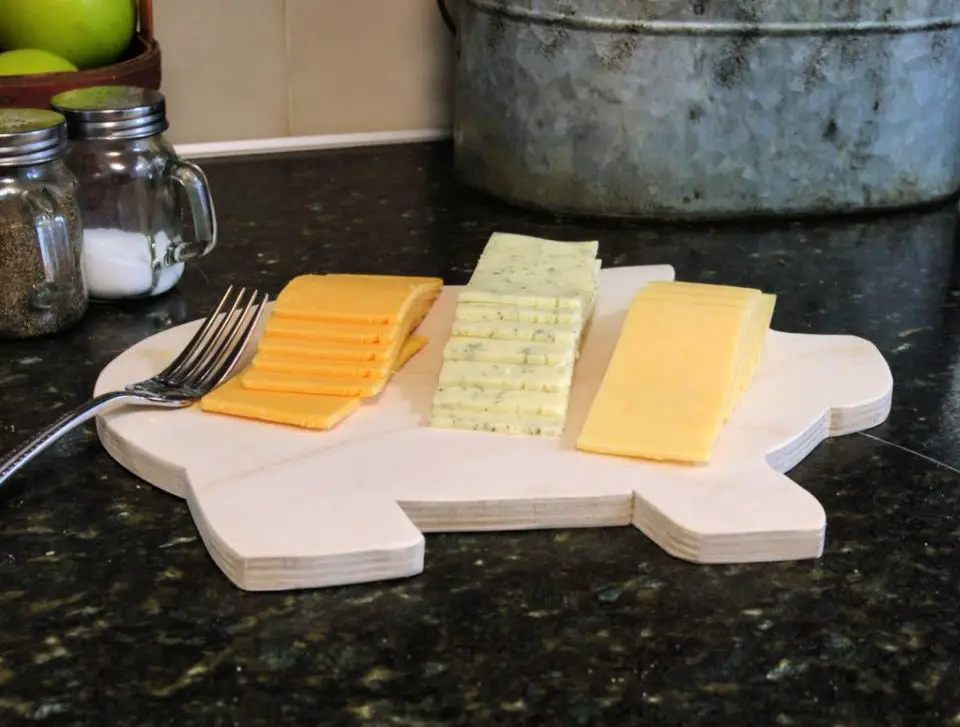
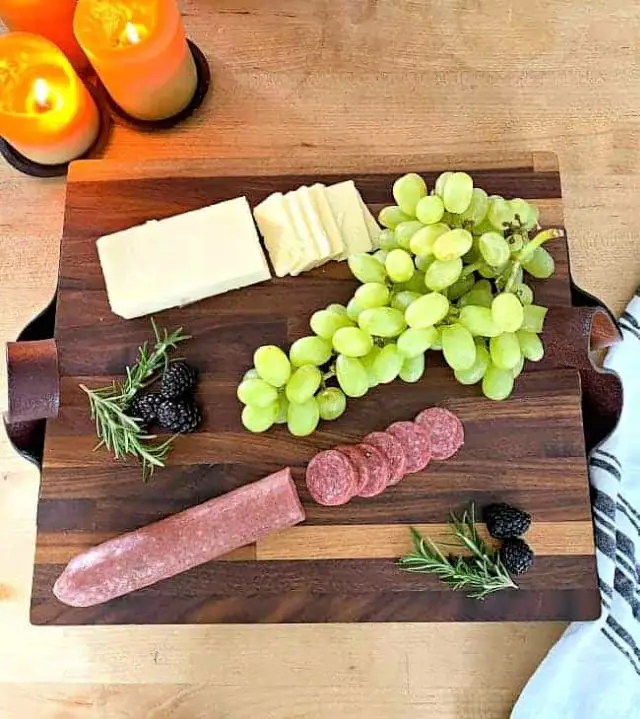
DIY Cutting Board in 4 Steps
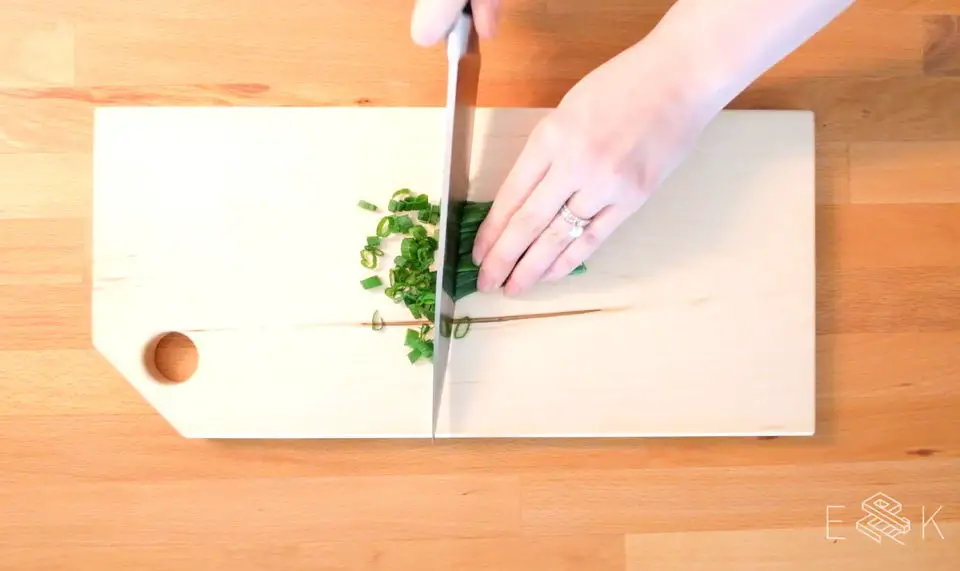
Transform your kitchen with personalized DIY cutting board ideas and designs. In just four steps, you can breathe new life into your cooking space with a one-of-a-kind cutting board. By repurposing scrap wood, you’ll infuse your kitchen with a trendy touch that’s as functional as it is stylish. This accessible project requires only a few hours of your time and some basic hand tools – think jigsaw, drill, and random orbital sander for the serving plank, or just a drill and sander for the cheese board with cabinet handles. To get started, gather key materials like a 1-inch by 6-inch hardwood plank, sandpaper in various grits, and food-grade mineral oil or Pure Simple Finishing oil to achieve a safe and glossy finish. With these simple steps, you’ll be able to create not only functional cutting boards but also beautiful serving trays that add a touch of rustic charm to your kitchen. It’s all about making the most of what you have – and these DIY cutting boards are the perfect example!
Building a Wooden Pig Shaped Cutting Board
Imagine the warmth and nostalgia that comes from creating something with your own hands. A DIY wooden pig cutting board is more than just a functional kitchen tool – it’s a tangible connection to childhood memories and homemade traditions. Crafted from 3/4″ birch plywood, this rustic charm-infused piece invites you to rediscover the joy of simplicity and practicality. With a mere 15-minute investment of time, using a pig silhouette, repositionable adhesive spray, and a scroll saw, you’ll be rewarded with a charming addition that not only serves its purpose but also stirs emotions. It’s an invitation to revisit cherished moments and bring them back to life through the act of creation. By crafting this unique cutting board, you’re embracing the magic of storytelling and infusing your kitchen space with the essence of handmade warmth. Let the tales of yore live on as you spruce up your kitchen decor with a pig cutting board that’s sure to delight.
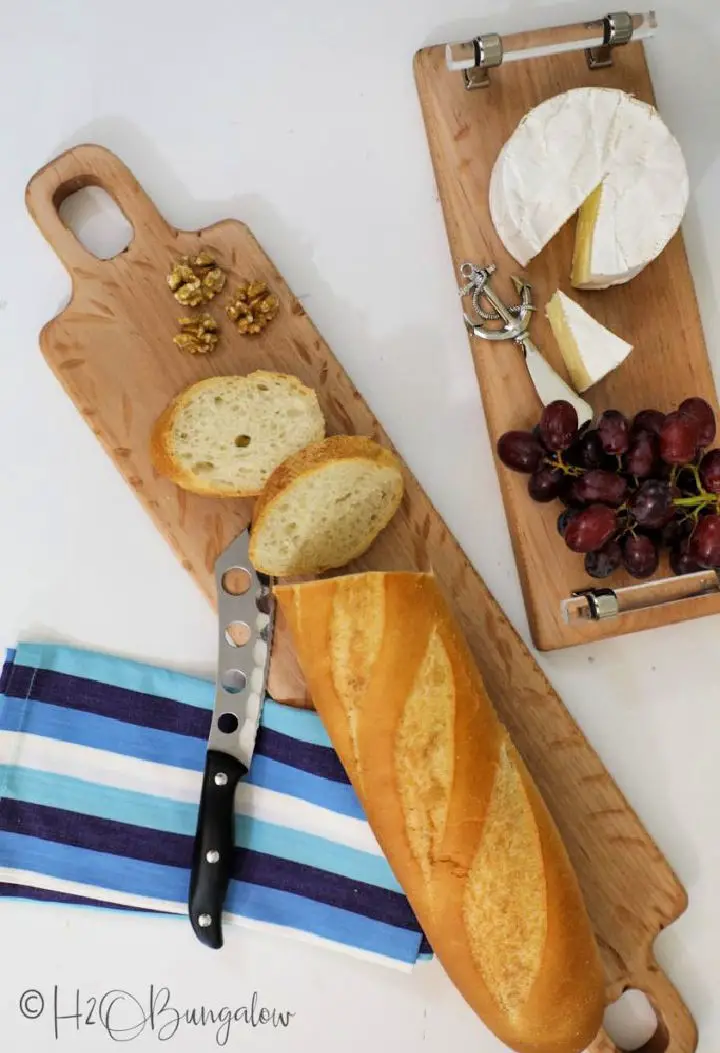
Easy Cutting Board Tutorial for Beginners
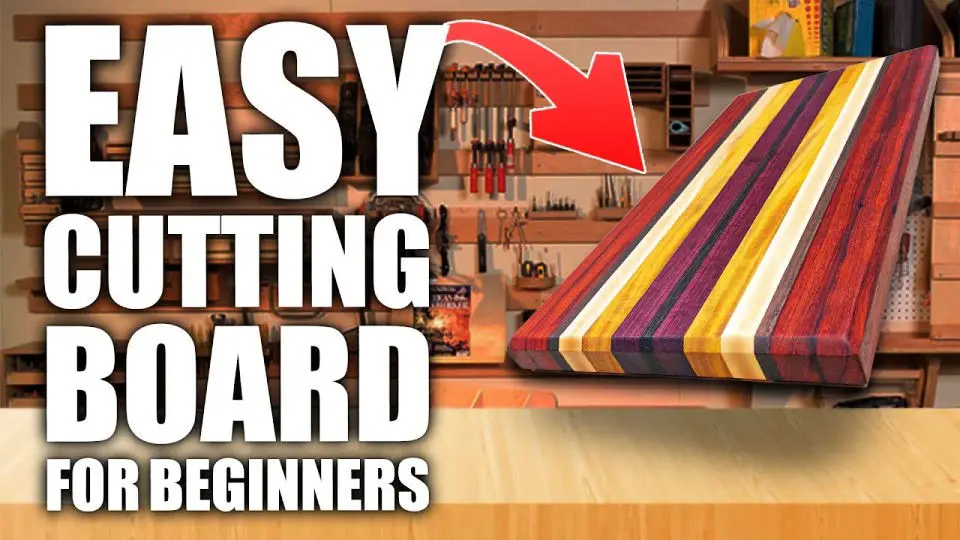
A cutting board is more than just a practical kitchen tool – it’s an opportunity to express your creativity and add a personal touch to your cooking space. With these DIY cutting board ideas, you can transform a simple piece of wood into a beautiful work of art that showcases your craftsmanship. One such project is the edge grain cutting board, which boasts a 1.5-inch thickness and durable construction made from hardwoods like maple, cherry, pecan, or walnut. This handmade cutting board is designed to withstand the demands of daily use while also providing a food-safe surface for preparing meals.
To create this stunning piece, you’ll need only a few basic tools – a miter saw, clamps, and a sander – making it an accessible project for woodworking enthusiasts. You can customize your cutting board by mixing different hardwoods to create a striped effect or opting for a monochrome finish using the same species.
Not only is this DIY cutting board a wonderful addition to any kitchen, but it also makes a thoughtful and practical gift for friends and family who appreciate cooking. This step-by-step guide takes you through every stage of the project, from selecting the right wood and planning the dimensions to gluing and clamping the boards, sanding, and sealing. With these instructions, you’ll be well on your way to creating a beautiful and functional cutting board that’s sure to become a treasured possession.
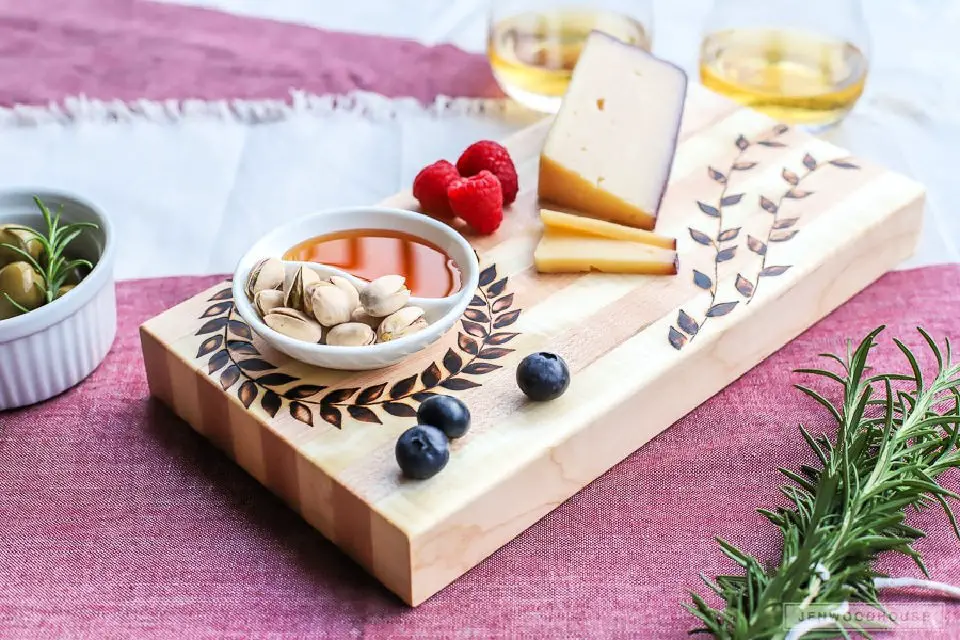
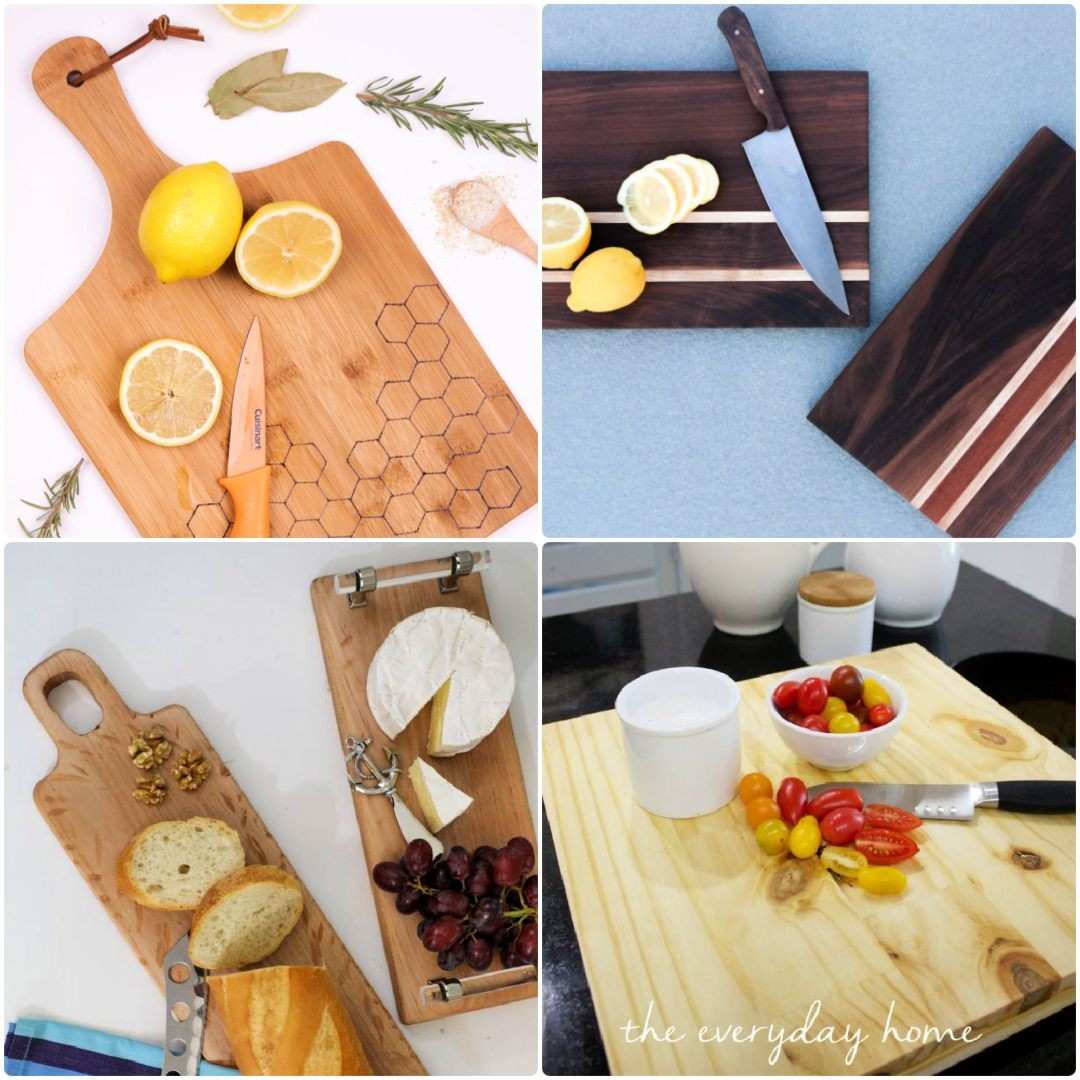
Homemade Honeycomb Wood Burned Cutting Board
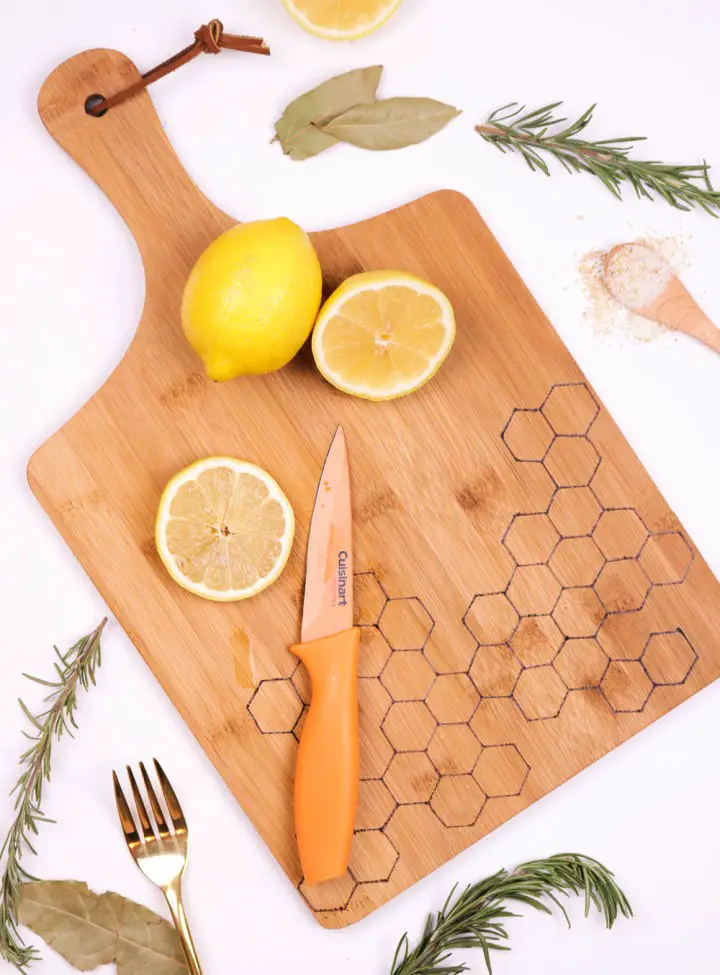
Transforming a standard cutting board into a stunning work of art is now within reach with this easy DIY project. By combining a simple wood burning technique with a hexagon stencil, you’ll be able to create a beautiful honeycomb pattern on your cutting board, elevating it from a mundane kitchen tool to a showstopping centerpiece. Perfect for chopping veggies, slicing fruits, or even styling culinary photos, the finished product adds a touch of creative flair to your kitchen ensemble while being easy to maintain and adding character to your space.
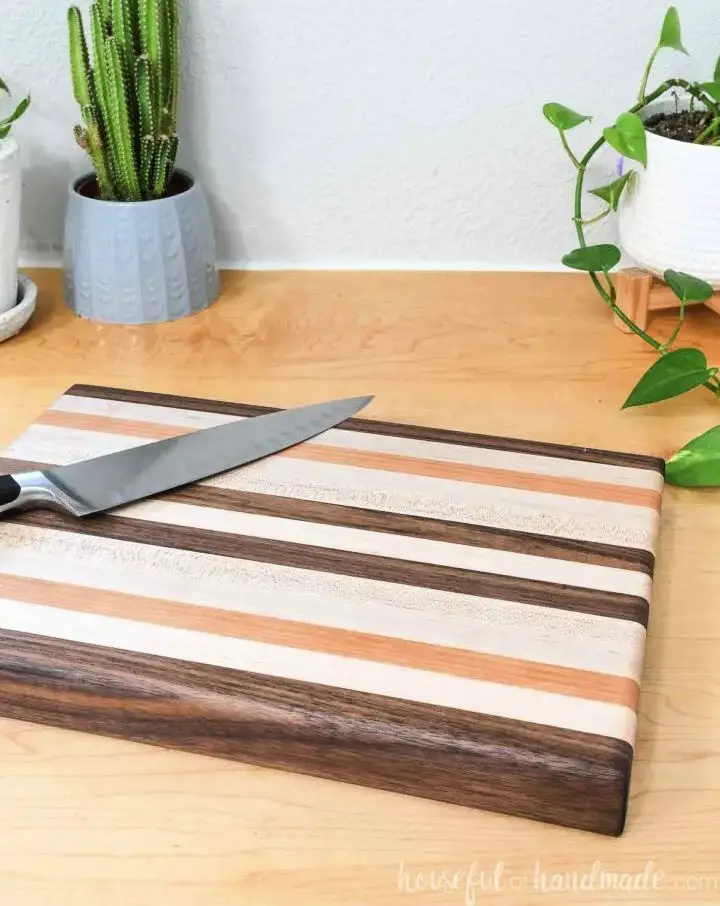
Free Chevron Cutting Board Plan
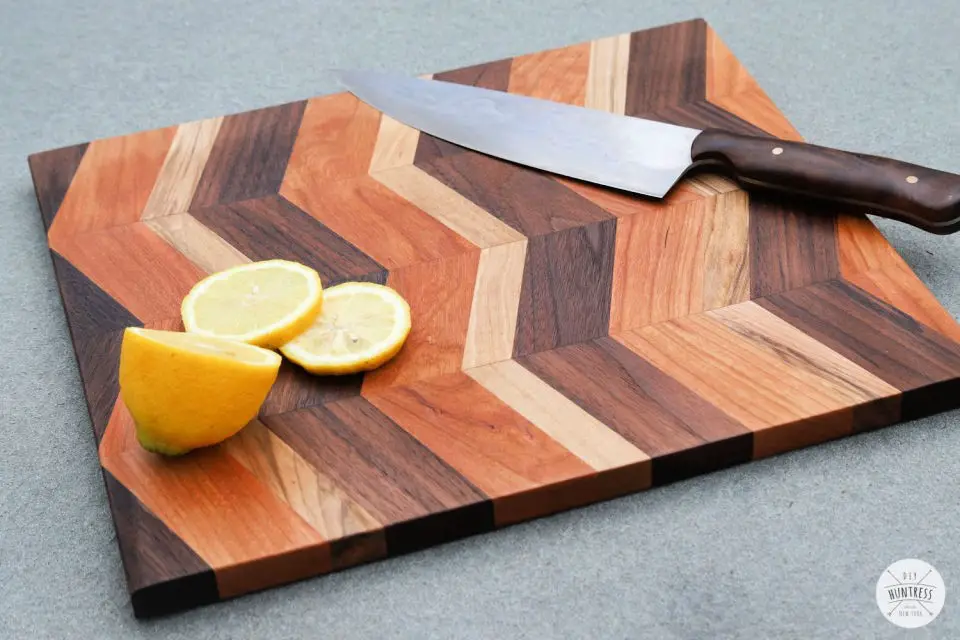
Transform your culinary space with a one-of-a-kind DIY cutting board that harmoniously blends form and function. By combining patterned plywood and woodworking expertise, you can create a bespoke Chevron cutting board that’s as elegant as it is practical. This unique project brings together walnut and maple boards to produce a stunning piece that’s both functional and visually striking. To bring your vision to life, you’ll need access to a table saw, sander, wood clamps, and a cordless glue gun, among other essential tools. If you’re looking for a step-by-step guide, the process begins with milling your lumber and cutting the boards into the desired dimensions. You’ll then glue these strips in an alternating pattern before cutting and aligning them to form the captivating chevron design. After drying, thoroughly sand the board and finish it off with a coat of cutting board oil. The result is a truly custom-made Chevron cutting board that makes for a thoughtful gift or a delightful addition to your kitchen.
Cool DIY Wood Burned Cutting Board
Elevate your DIY skills by crafting a one-of-a-kind wooden cutting board that showcases your creative flair! This thoughtful gift is perfect for Mother’s Day, as a token of appreciation for any food lover, or simply to add a personal touch to your own kitchen. To bring this project to life, you’ll need a wood-burning set, specialized tips, an unfinished cutting board, and mineral oil. The design process begins with creating a pattern on the board, carefully burning your design into the wood, and finally sealing it with mineral oil. The end result is a stunningly customized cutting board that not only adds functionality to any kitchen but also serves as a unique conversation piece. This project seamlessly blends creativity and practicality in a tangible keepsake that will be treasured for years to come.
Simple DIY Cutting Board
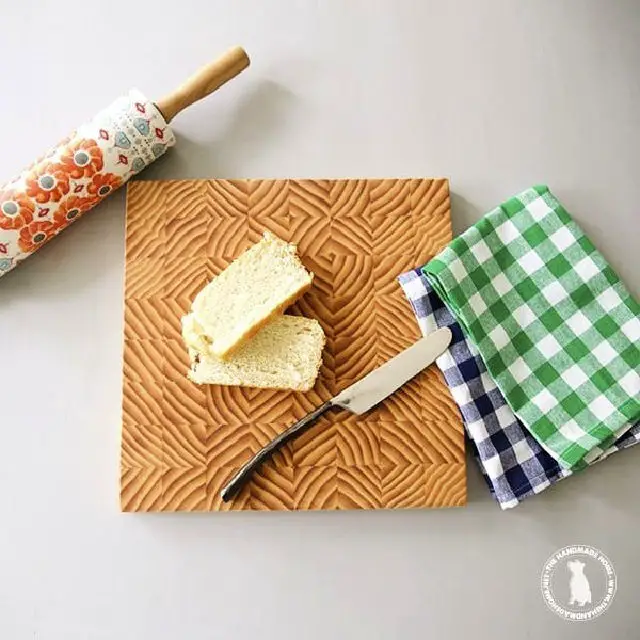
Step into the nostalgic world of the 80s, where creativity and curiosity thrived, with this innovative DIY cutting board project. By combining the pleasures of cooking and power tools, you’ll be introduced to a delectable homemade bread and a stunning cutting board pair that will leave you impressed. With a wide range of wood options at your disposal, from rich walnut to elegant Maple, you can tailor your creation to suit your unique style. Using basic equipment such as a miter saw, wood glue, and bar clamp, you’ll be able to craft a 12×12 end-grain design that exudes sophistication. This functional cutting board is an indispensable kitchen companion, making it an ideal gift for friends and family. By opting for this DIY project instead of shelling out over $50 for a store-bought alternative, you’ll experience the joy of creating your one-of-a-kind masterpiece.
Creative Wooden Cutting Board
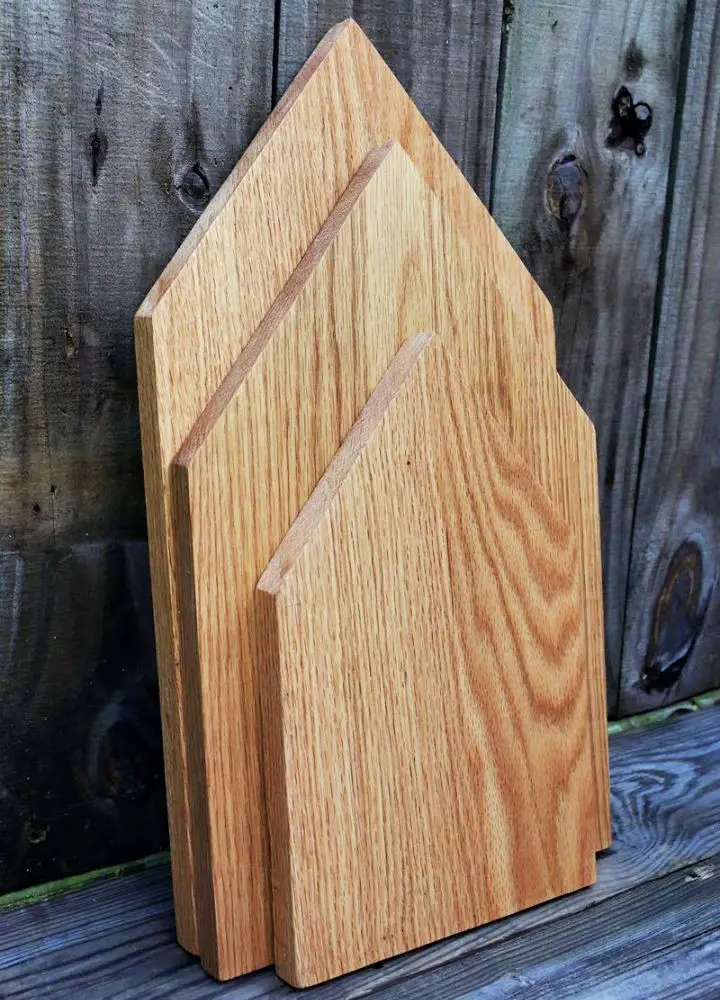
Transform your kitchen into a reflection of your personal style by crafting a one-of-a-kind DIY cutting board. Using untreated hardwoods like oak, you can create functional pieces that infuse warmth and character into your space. This project requires minimal tools, including a circular or table saw, sandpaper, and food-grade mineral oil. While straight-line designs are ideal for beginners, more advanced equipment allows for intricate patterns to be achieved. To maintain the cutting board’s integrity, reapply oil every 3-6 months and hand wash it only. This thoughtful DIY project also makes for a unique and impressive gift idea that will elevate your cooking experience with its added warmth and personality.
Unique DIY Ombre Cutting Board

Transform scraps of hardwood into a one-of-a-kind cutting board that’s as functional as it is stylish. This DIY project combines creativity with practicality, perfect for cooking enthusiasts or crafty individuals. With minimal equipment and basic materials like wood glue, pipe clamps, and butcher block oil, you can craft a striped cutting board featuring an ombre effect. The unique teardrop shape, achieved through the use of a scroll saw or jigsaw, sets this project apart from traditional rectangular designs. To add a touch of finesse, use a round-over bit to create smooth, rounded edges. Finally, seal your masterpiece with butcher block oil, allowing the rich colors and wood grain to shine. With these simple steps, you can turn scrap wood into a treasured addition to your kitchen arsenal.
How to Make a Walnut Cutting Board With Brass Inlay
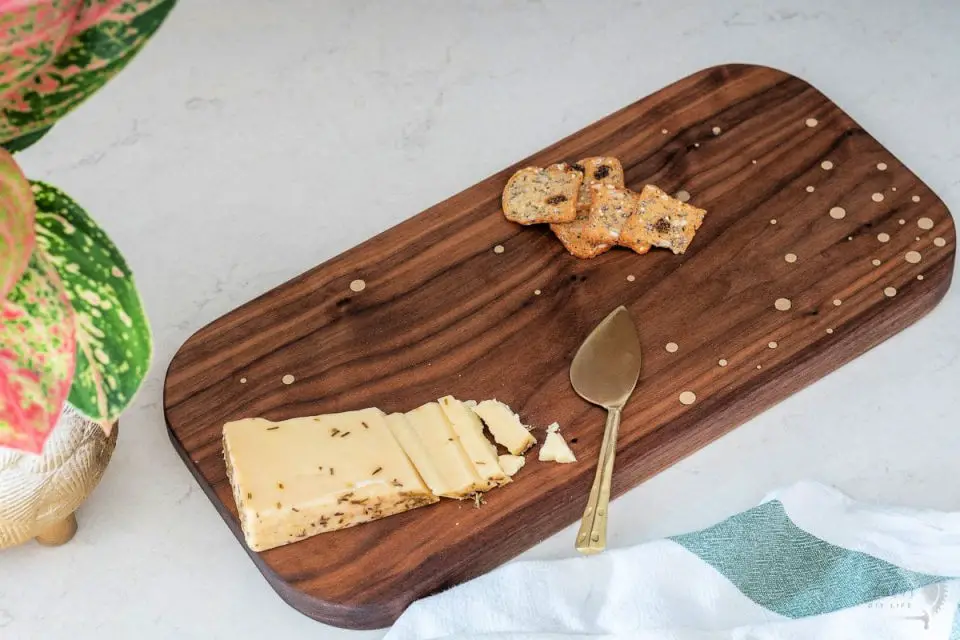
Transform your kitchen with a show-stopping walnut DIY cutting board featuring a striking sunburst brass inlay. This engaging tutorial walks you through the process of creating a stunning piece from scratch, using basic woodworking tools like a miter saw, power drill, and random orbital sander. The journey begins by drilling holes into the wood, followed by the intricate process of inlaying brass rods, and finally, sanding and finishing the piece for a professional-grade finish. The crowning glory is the sunburst brass design, adding a unique decorative element to this functional piece of art. With no advanced machinery required, anyone can achieve this beautiful and one-of-a-kind cutting board, making it a rewarding experience from start to finish.
DIY Cutting Board From Scrap Wood
Transform your kitchen into a haven of creativity by upcycling an old leather belt into vintage-inspired handles for your walnut butcher block cutting board. With minimal materials – a leftover piece of butcher block, an old leather belt, and basic tools like a drill and sandpaper – you can elevate your cooking experience and inject a unique touch to your decor. The best part? This project is not only budget-friendly but also surprisingly easy to complete.
Start by giving your walnut wood a nice sanding to smooth out any imperfections. Next, apply a food-safe wood conditioner to bring out the grain and enhance the natural beauty of the material. Once your wood is prepped, fix the belt pieces as handles using brass screws for a sturdy and rustic finish.
The end result is a customized, durable, and stylish kitchen accessory that not only serves as a functional chopping surface but also becomes a conversation piece in your home. As the old adage goes, ‘the most valuable things in life are often made, not bought,’ making this project a true reflection of your creativity and resourcefulness.
DIY Wood and Marble Cutting Board
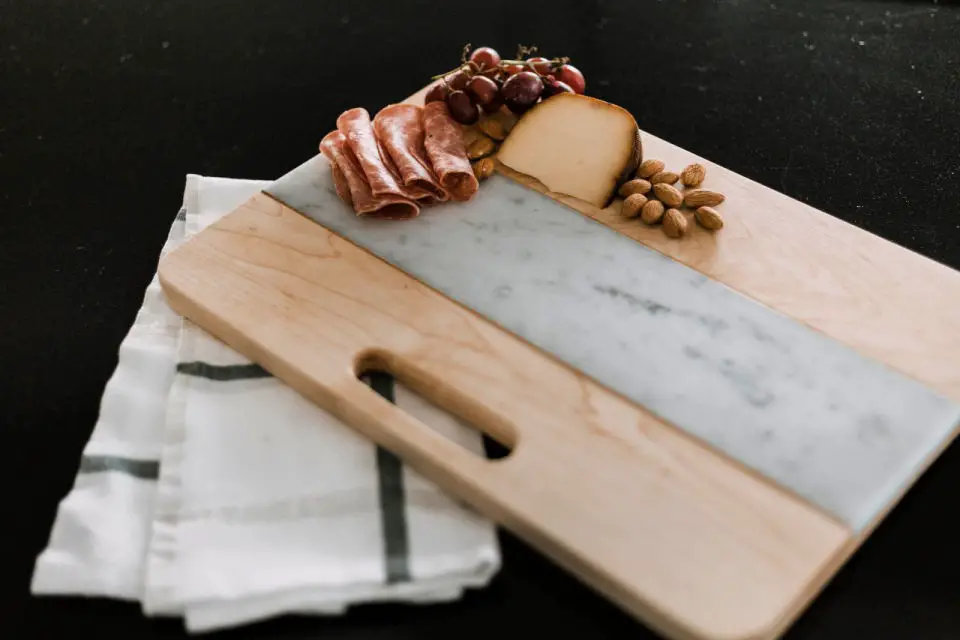
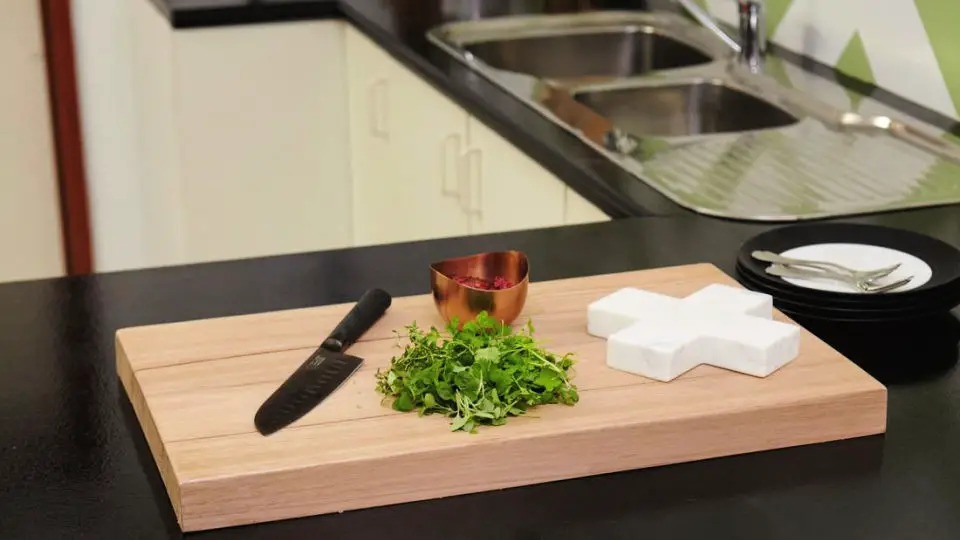
Elevate your kitchen with a bespoke cutting board that seamlessly combines the warmth of wood and the elegance of marble. By joining forces with a 1×6 Maple board and a 4×16 Italian Carrara Marble tile, you’ll create a one-of-a-kind accessory that’s as functional as it is visually stunning.To bring this DIY project to life, you’ll need a few essential tools: a table saw, drill, router table, sander, and specific glues. Start by notching the wood to accommodate the tile, then add a handle for effortless use. Next, sand the board to smooth out any imperfections and route the edges for a refined finish.Finally, secure the tile in place with the right adhesives and seal the board to protect it from daily wear and tear. The end result is a show-stopping cutting board that will undoubtedly become the centerpiece of your kitchen. And the best part? You’ll have saved significantly compared to purchasing a similar high-end piece from a store.
How to Make a Pineapple Cutting Board
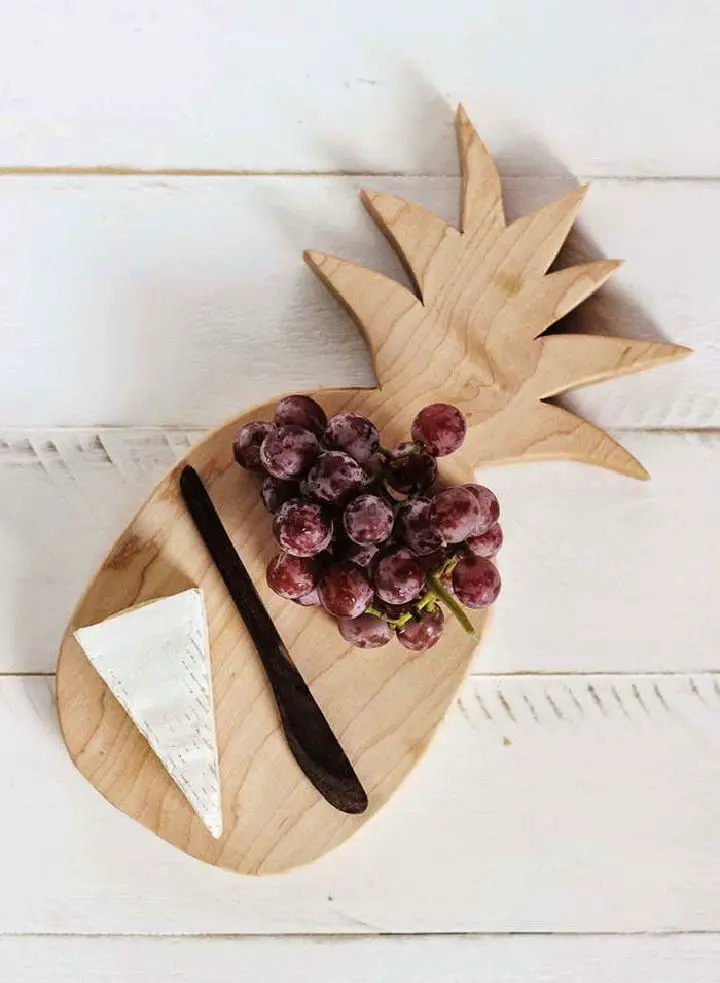
Bring a touch of tropical flair to your kitchen with these easy-to-make DIY cutting board ideas! Inspired by a pineapple’s sweet and tangy charm, this custom cutting board is the perfect combination of fun and functionality. Whether you’re whipping up a recipe or snapping a photo for social media, this unique addition will elevate your cooking experience.
What makes this project so special? The ability to customize it to your heart’s desire! Choose from a variety of hardwoods like Maple, and get creative with the design. All you need is a printer, pencil, scroll saw, belt sander, sandpaper, and butcher block finish to bring your pineapple-shaped cutting board to life.
The best part? This DIY project requires minimal effort but yields maximum impact. Imagine having a one-of-a-kind kitchen tool that reflects your personality and cooking style. With this simple yet stylish DIY cutting board, you’ll be the envy of all your friends who love cooking as much as you do!
Making a Large Cutting Board
Transform your kitchen prep with a DIY large cutting board that’s as functional as it is elegant. This custom-made masterpiece is perfect for daily slicing and dicing, or as an impressive charcuterie board for special gatherings. The woodworking process involves a glue-up design, requiring precision and attention to detail – no hardware needed! As a novice-friendly project, you’ll have the opportunity to refine your woodworking skills while creating a stunning piece that’s ready to elevate your culinary presentation. With the freedom to choose your own wood type, this unique cutting board will be a reflection of your personal style. Whether you’re using it in your kitchen, gifting it, or showcasing it at your next event, this DIY project is sure to impress.
How to Make Your Own Cutting Board

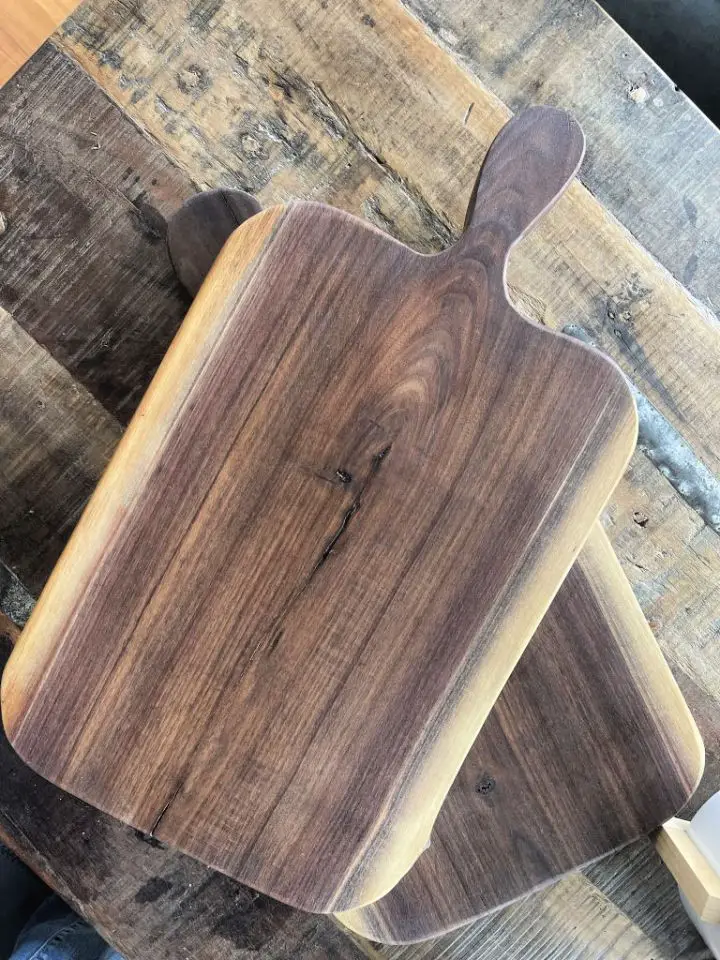
Infuse your kitchen with a personal touch by crafting a DIY cutting board that’s as unique as it is functional. Drawing inspiration from timeless traditions, this handmade piece can withstand the rigors of daily use while serving a variety of purposes, from slicing meats and veggies to chopping seafood and pork. To create your own, you’ll need shelving boards, a hand sander, wood glue, a dowel for the feet, and a butcher block sealer. With an investment of just $15 for the main material, this project transforms an ordinary kitchen tool into a custom-made work of art that’s sure to become a treasured possession. And as a bonus, you can share this thoughtful gift with loved ones this holiday season.
Ultimate DIY Cutting Board With Knife Storage
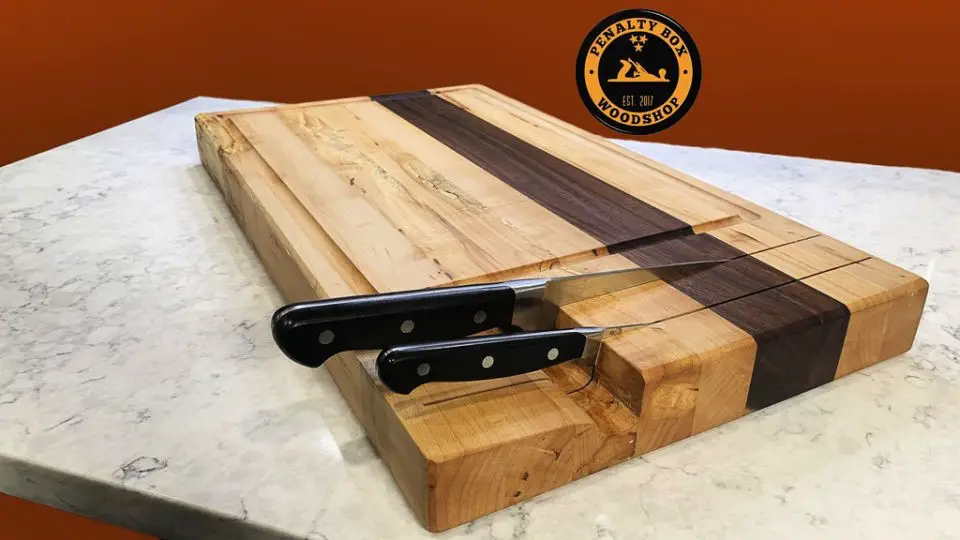
Transform your culinary space into a haven of efficiency with this DIY cutting board boasting integrated knife storage. The harmonious blend of Maple and walnut creates a visually stunning piece that keeps your knives within easy reach. To embark on this project, start by selecting the right lumber, arranging it, and bonding the pieces together. Once the glue has set, move on to flattening the board, crafting the knife slots, and carving out recesses for the handles. Drainage concerns are addressed by drilling small holes to allow excess liquid to escape. The finishing touches include creating a juice groove, sanding the surface, and applying an all-natural finish. This practical yet aesthetically pleasing addition is sure to elevate your kitchen experience.
How to Make a Cutting Board at Home
Transform your kitchen space by crafting a stunning DIY black walnut charcuterie or cutting board. The dense, dark texture of black walnut adds an undeniable charm to your cooking essentials. To create this masterpiece, start by procuring logs and allowing them to dry for approximately one year per inch of thickness, ensuring the wood adjusts to its natural moisture levels and preventing any cracks or splits from forming.
With meticulous planning, precise cutting, and gentle sanding, followed by a final application of mineral oil, your handcrafted board will unveil the breathtaking beauty of black walnut. Your unique charcuterie or cutting board will exude a warm, sophisticated aura, perfect for serving hors d’oeuvres or showcasing in your kitchen.
This project requires a few essential tools – a jigsaw, palm sander, and mineral oil – to transform a basic black walnut log into a one-of-a-kind kitchen treasure. Unleash your creativity and master the art of woodworking by embarking on this captivating DIY journey.
How to Build a Cutting Board
Add a personal touch to your kitchen by crafting this unique DIY cutting board. Not only will it provide a stylish surface, but also protect your benchtop from the wear and tear of knife marks and scratches. The process begins with pre-cut hardwood timber, where you’ll drill holes for dowels and then assemble the pieces using PVA glue, clamping them together to ensure a strong bond. Next, sand the board for a smooth finish before applying a food-grade stain or oil to give it a rich, lasting color. With this homemade butcher block, you’ll have a durable cutting board that complements your kitchen decor while being easy to maintain – simply sand and reapply the oil or stain as needed. This cost-effective and creative project is perfect for DIY enthusiasts looking to add their personal touch to their kitchen.
End Grain Cutting Boards From Scrap Wood
Combine the art of DIY woodworking with functional kitchen design by transforming leftover hardwood scraps into beautiful cutting boards. Whether you’re looking for a unique gift or a stylish upgrade for your own kitchen, this step-by-step guide will walk you through the process of making end-grain cutting boards that are both aesthetically pleasing and beneficial for your knives.
With the right tools at your disposal, such as a Dewalt impact driver, a Bosch random orbit sander, and Titebond III wood glue, you’ll be well-equipped to break down scraps, plane pieces, glue and cut them, and finally apply a food-safe mineral oil finish. This hands-on project allows you to immerse yourself in the creative process and add a personal touch to your kitchen tools.
As a result of this DIY endeavour, you’ll create a cutting board that not only enhances your kitchen’s visual appeal but also provides a functional advantage for your knives. So why not get started today and craft a custom cutting board that reflects your unique style?
Build Your Own Cutting Board
Transform your culinary experience by crafting a personalized DIY cutting board from scratch. This beginner-friendly woodworking project requires only a single piece of wood, making it an accessible endeavor for those new to the craft. The finished product boasts a stunning face grain display, allowing you to showcase the natural beauty of the wood. To bring this vision to life, gather your materials: a high-quality piece of wood, a miter saw, a drill press equipped with a 1-1/8 inch hole saw, a router featuring a 1/8 inch radius round over bit, a random orbit sander paired with 220 grit sandpaper, additional 220-320 grit sandpaper, and wood oil, such as the renowned Natchez Solution. This straightforward guide to creating your cutting board offers a unique chance to delve into woodworking in a practical, everyday setting. By following this process, you’ll be able to craft a functional, durable, and stylish addition to your kitchen that reflects your personal touch.
Cutting Board Beginners Woodworking Project
Transform your cooking experience with a unique, handmade cutting board that reflects your personal style. Instead of settling for a mass-produced option, create your own masterpiece using domestic and exotic hardwoods. This DIY project is perfect for woodworking enthusiasts of all levels, as it requires only basic tools like a speed square, pipe clamps, sanders, and CA glue for filling cracks.By following a step-by-step video tutorial, you’ll learn how to select the perfect wood, build your cutting board from scratch, and add the finishing touches with conditioner. The tutorial also covers expert tips on using a clamping jig, acetone on exotic woods, and ensuring your board sits flat.This engaging project is an excellent introduction to woodworking and results in a functional and beautiful kitchen addition that will be the envy of all who see it. Start your creative journey today! Simply head to the provided YouTube link (https://www.youtube.com/watch?v=fh3h-2CpbPU&ab_channel=731Woodworks) for a comprehensive guide on making your own cutting board.
Handmade Hickory Chop Board

Transform an ordinary hardwood board into a smart and practical cutting board with this quick and easy DIY project. Perfect for everyday kitchen tasks, serving cheese or platters to guests, and adding a unique charm to your culinary space. Start by acquiring an 8×18 inch hickory or walnut board from your local hardware store. Then, embark on the process of sanding, marking, and applying safe and wipeable Plasti Dip paint. The end result is a customized, food-safe cutting board ready in just a few hours. This project presents the perfect opportunity to add a personal touch to your kitchen essentials.
Conclusion:
In conclusion, our comprehensive exploration of 25 unique homemade DIY cutting board ideas has provided a thorough guide for creating your own custom cutting board. From selecting the ideal wood type and cutting board design to mastering maintenance and care techniques, we’ve covered all the essential steps and offered innovative customization ideas to take your woodworking project to the next level. Notably, our discussion highlights the significance of eco-friendly practices in DIY projects, emphasizing the importance of considering the environmental impact and choosing sustainable materials. For those looking to add a personal touch to their kitchen or embark on a fulfilling DIY adventure, these insights into crafting a personalized cutting board are truly invaluable. Remembering that proper safety precautions are crucial for enjoying the creative process and achieving optimal results, we encourage you to get started on your own DIY journey. Happy crafting! As you begin, keep in mind that the possibilities are endless, and with creativity and patience, your one-of-a-kind cutting board will be a testament to your craftsmanship.
