For those who crave individuality in their outdoor spaces, DIY floating deck ideas offer a harmonious blend of practicality and flair. Ranging from understated designs to elaborate multi-level creations, these decks can elevate the aesthetic appeal of your backyard. By combining 20 free DIY floating deck plans with personal creativity, transforming your outdoor area into a cozy retreat has never been more attainable. This comprehensive guide will take you on a journey through various design concepts for your DIY floating deck, including theme selection and incorporation of built-in features for enhanced usability. From choosing the perfect railings to incorporating lush greenery and ensuring ambient lighting that sets the tone, we’ve covered all the essentials to help you craft a space that invites relaxation and social gatherings. As we explore the art of bringing your floating deck vision to life.
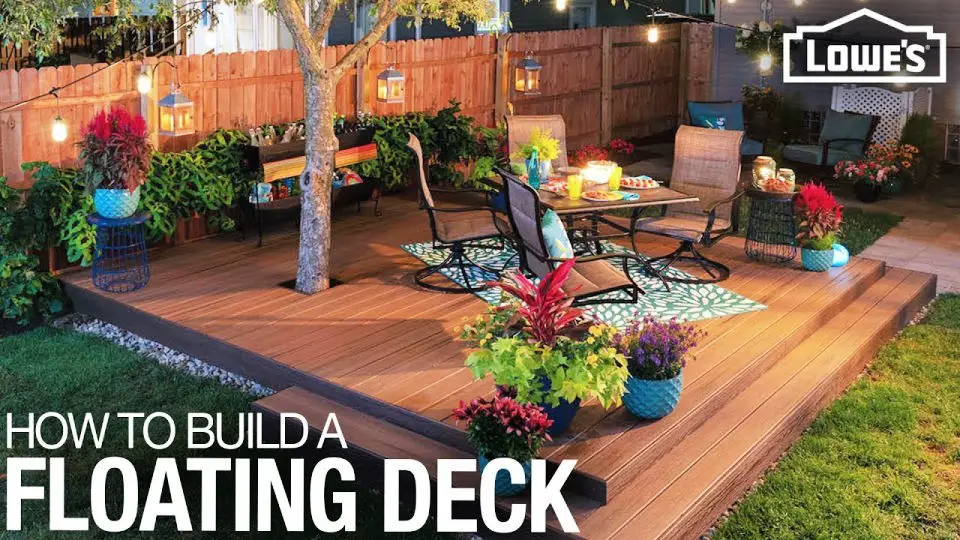
How to Build a Floating Deck
When it comes to enhancing the ambiance of your outdoor space, building a floating deck is an excellent option. Unlike traditional decks that are attached to a house or structure, floating decks stand alone, offering a unique and versatile way to create a gathering spot. If you’re looking for a DIY project that’s both challenging and rewarding, building a small floating deck around a tree can be a great starting point.
Planning and Preparation
Step 1: Check Local Regulations
Before embarking on your decking project, it’s essential to consult with your local building authority to determine whether a permit is required. This initial step will not only ensure compliance with relevant regulations but also provide valuable insight into size restrictions and placement guidelines for your property. By doing so, you’ll be well-prepared to tackle the construction of your deck and avoid any potential issues or complications down the line.
Step 2: Call Before You Dig
Before commencing a project, it’s crucial to take a proactive approach in ensuring the safety and success of your endeavor by identifying potential hazards that may lie beneath the surface. One simple yet effective step is to notify 811, the universal hotline for marking underground utilities, allowing you to avoid costly mishaps or disruptions caused by accidental strikes. By making this phone call, you can confidently proceed with your project, knowing that any hidden obstacles have been identified and mitigated.
Step 3: Design Your Deck
To begin designing your outdoor deck, start by determining its dimensions. For our illustration purposes, let’s consider a 14-foot by 14-foot square structure. To gain a better understanding of the area, use a tape measure to mark each corner with batter boards and string. This visual representation will help you envision the space and plan your design accordingly.
Step 4: Ensure the Area is Square
To achieve a precise corner setup using the 3-4-5 method, start by stretching strings along two adjacent walls. Then, measure out three feet along one string, mark four feet along the adjacent string, and make any necessary adjustments to ensure the diagonal distance between these marked points equals five feet. By doing so, you’ll guarantee a square corner layout.
Building the Foundation
Step 1: Clear the Ground
To prevent weeds from sprouting through your deck’s wooden slats, consider removing the sod above it. This task is best accomplished using a shovel or, if you’re looking for greater efficiency, renting a sod cutter. By doing so, you’ll be able to effectively eradicate unwanted vegetation and maintain the aesthetic appeal of your outdoor space.
Step 2: Set the Blocks
To establish a solid foundation for your deck, you’ll rely on concrete deck blocks as the anchor point. Before proceeding, take a moment to plan out where each block will be placed according to your design layout. For our project, we opted to position blocks near the ends of each joist and a few under a center beam for added stability. To guarantee level placement, ensure the ground beneath is even by using a shovel to adjust any necessary areas and adding paver base as required.
Framing the Deck
Step 1: Place the Joists
When it comes to constructing the framework of your project, start by installing the outer joists and central beam onto your concrete blocks. For added protection against decay, opt for pressure-treated lumber for these components. Before securing them in place, double-check that they’re perfectly level. Use galvanized nails or deck screws to fasten everything together firmly.
Step 2: Square and Attach
When verifying the squareness of your frame, start by measuring the diagonals – a crucial step to ensure accuracy. The diagonals should meet at the center point, forming an ‘X’ shape. This simple check guarantees that your frame is properly aligned and ready for the next stage: securing the outer frame with corner braces. By screwing these in place, you’ll prevent any movement or shifting during construction, ensuring a perfectly square deck from start to finish.
Step 3: Install Intermediate Joists
To proceed with the installation, carefully measure and cut your intermediate joists to ensure a precise fit. As you work with the wood, pay attention to the natural arch or ‘crown’ that may occur. It’s essential to position this crown facing upwards to maintain structural integrity. Once prepared, place the joists in their designated spots on the frame and secure them using high-quality joist hangers and screws or nails. A sturdy connection is vital to support the weight of your floor or ceiling.
Decking & Final Touches
Step 1: Prepare for Decking
To ensure your deck remains sturdy and resilient, take the time to apply a waterproof barrier prior to installing the decking material. Start by covering the tops of the joists with a reliable waterproof tape, effectively shielding them from potential moisture intrusion.
Step 2: Install the Deck Boards
As you begin constructing your deck, secure the initial board firmly in place by attaching it to each joist using start-stop clips. From there, proceed to lay down additional boards, ensuring they’re snugly locked into position with hidden fasteners. It’s also crucial to account for any trees or other obstacles on your property, making sure to leave a small gap to accommodate future tree growth as the roots expand and contract.
Step 3: Add Fascia and Accessories
After installing the deck boards, complete the look by wrapping the exterior edges with fascia boards for a polished finish. Consider adding features that not only elevate the visual appeal but also boost usability. This could include installing steps, incorporating ambient lighting, or even integrating planter boxes to create a unique and inviting outdoor space.
Step 4: Anchoring (Optional)
When building or installing a deck in areas prone to strong winds, it’s crucial to ensure its structural integrity by securing it to the ground. A viable solution is to employ shed anchors, which provide an added layer of stability and peace of mind. This simple yet effective measure can significantly reduce the risk of damage or even collapse, making it an essential consideration for homeowners and builders alike.
Video Tutorial
If you’re looking for a more interactive way to learn how to build a floating deck, look no further than Lowe’s Home Improvement’s YouTube video tutorial. The step-by-step video perfectly complements this written guide, providing a visual representation of the techniques and processes discussed here. By combining both formats, you’ll gain a deeper understanding of the material and be better equipped to tackle your own project.
Design Ideas for Your DIY Floating Deck
A floating deck is more than just a functional addition to your outdoor space – it’s also a chance to showcase your personality and create a unique atmosphere. As you plan your project, consider these design inspirations to bring your vision to life:
Choose a Theme
To begin with, pinpoint a theme that harmoniously aligns with your personal aesthetic and complements the exterior of your home. This guiding principle will inform your decisions on materials, color schemes, and decorative elements, allowing you to curate a space that seamlessly integrates with its surroundings.
Play with Shapes and Levels
Imagine breaking free from the traditional confines of deck design. Instead of limiting yourself to standard shapes like squares and rectangles, why not think outside the box (or circle, hexagon, or freeform)? By embracing unconventional forms, you can inject a sense of visual excitement into your outdoor space. Take it a step further by incorporating multiple levels, which can cleverly define distinct areas for dining, relaxation, or even gardening.
Add Built-In Features
Transform your outdoor living space by incorporating cleverly designed elements that serve multiple purposes. Consider installing built-in seating, such as benches or tables, which not only optimize your deck’s square footage but also add visual cohesion. Alternatively, incorporate planters or a fire pit to create a harmonious atmosphere and maximize the functionality of your outdoor area.
Select the Right Railings
The addition of railings to your deck can have a profound impact on its aesthetic appeal. A clever choice of railing material can subtly yet effectively alter the overall ambiance. Glass panel railings offer a perfect blend of safety and visual integrity, allowing you to enjoy the view without any obstructions. For those seeking a more industrial-chic look, cable railings provide a sleek and modern touch. Alternatively, for a timeless classic, consider incorporating wooden balusters or decorative metalwork elements into your railing design.
Lighting for Ambiance
Transforming your deck into an enchanting evening oasis is just a matter of proper lighting. Consider installing LED strip lights along the edges, which can create a cozy ambiance. Alternatively, you could opt for solar-powered post caps that radiate a soft glow or string lights above to add warmth and visual interest.
Incorporate Greenery
Transform your deck into an organic oasis by thoughtfully incorporating plants and greenery into its design. Consider adding potted plants, suspended hanging baskets, or trellises adorned with climbing vines to seamlessly blend the space with its surroundings. This harmonious fusion can effortlessly turn your deck into a natural continuation of your garden’s beauty.
Focus on Comfort
To create a truly inviting outdoor retreat, prioritize investing in high-quality furniture designed specifically for the great outdoors. Look for pieces featuring weather-resistant materials like water-repellent cushions, durable throw pillows, and vibrant outdoor rugs that not only withstand the elements but also add pops of color to your space. By doing so, you’ll be able to relax and unwind in style, surrounded by the beauty of nature.
Personal Touches
To truly make your deck your own, incorporate personal touches that reflect your passions and interests. This might include displaying a curated collection of items, such as wind chimes, sculptures, or other decorative pieces that speak to your personality. Alternatively, consider adding functional elements like a hammock or outdoor seating area that encourages relaxation and socializing. The key to achieving a beautiful and inviting deck is striking a balance between form and function, allowing you to enjoy the space while also appreciating its aesthetic appeal.
Essential Tools and Equipment for Building a Floating Deck
To embark on a successful floating deck building project, it’s essential to have the correct tools and equipment in place from the outset. This comprehensive guide will walk you through the essential items required to ensure a seamless construction process, minimizing potential hiccups along the way.
Must-Have Tools
When it comes to building a deck, having the right tools can make all the difference. Precision and accuracy are crucial, which is why you’ll want to start with a reliable tape measure that provides precise measurements. For cutting lumber to the desired dimensions, a circular saw is an essential tool. And when it’s time to secure screws, a power drill will streamline the process. To ensure your deck is perfectly horizontal, a level is a must-have. Finally, for marking out your deck area with accuracy, a string line is a valuable addition to your toolkit.
Safety Gear
When it comes to protecting yourself while building, there are a few essential items you should always have on hand. First and foremost, gloves are crucial for shielding your hands from potential hazards such as cuts, scrapes, and abrasions. Safety glasses are another must-have, designed to shield your eyes from any debris that may be flying around the work site. And finally, ear protection is vital when operating loud power tools or machinery, which can cause permanent damage to your hearing if proper precautions aren’t taken.
Quality and Reliability
When selecting the right DIY tools, it’s essential to prioritize quality and reliability. To ensure you’re making a wise decision, focus on reputable brands that have earned a reputation for producing high-quality products. Additionally, take the time to read reviews from fellow DIY enthusiasts, as their experiences can provide valuable insights into a tool’s performance and potential drawbacks.
Construction Techniques for a Sturdy Floating Deck
Proper construction methods play a vital role in the longevity of a deck. To build a sturdy and long-lasting structure, consider these key guidelines.
Building a Solid Frame
When it comes to building a deck or a structure that will be exposed to the elements, it’s essential to prioritize durability and longevity. One way to achieve this is by using pressure-treated lumber, which offers remarkable resistance to rot and insects. This type of lumber has undergone a process that involves treating the wood with preservatives to make it more durable and less susceptible to damage from moisture or pests.
In addition to selecting the right type of lumber, proper spacing of joists is also crucial for a sturdy deck or structure. Typically, joists should be spaced 16 inches apart, allowing for adequate airflow and preventing warping or sagging over time.
Securing Deck Boards
When it comes to building or renovating a deck, attention to detail is crucial. One often overlooked yet essential step is ensuring proper spacing between wood boards. This allows for the natural expansion and contraction of the wood as it responds to temperature and humidity changes. A general rule of thumb is to leave a small gap – about 1/8 inch – between each board. This small allowance can make a big difference in preventing warping, cracking, or even more serious issues like structural failure.In addition to proper spacing, using the right fasteners is also vital. Deck screws are specifically designed for this purpose and offer superior holding power compared to standard nails or other types of fasteners. They’re engineered to withstand the harsh outdoor conditions and resist corrosion, ensuring a secure and long-lasting deck.
Finishing Strong
When building a floating deck, it’s essential to take steps to ensure a smooth and secure finish. One crucial aspect is sanding the edges, which not only prevents splinters but also provides a polished appearance. Furthermore, applying a sealant is vital for protecting your deck from the elements and preserving its integrity. By employing the right tools and adhering to tried-and-true construction techniques, you can create a stunning and functional floating deck that will serve as a great addition to any outdoor space.
Cost Estimation for Your DIY Floating Deck
To ensure a successful DIY floating deck project, it’s essential to have an accurate understanding of the costs involved. This helps prevent overspending and minimizes the risk of encountering unforeseen expenses during construction. By breaking down the estimated costs into manageable categories, you’ll be better equipped to plan your project and make informed decisions along the way.
Material Costs
When it comes to building a deck, there are several expenses to consider. One of the biggest is lumber, which will depend on the size of your deck and the type of wood you choose. The cost of lumber can vary significantly depending on these factors. Additionally, hardware such as screws, nails, and hangers will also add to the overall expense. To minimize costs and ensure a long-lasting deck, it’s essential to opt for rust-resistant options in this category. Finally, deck blocks – typically made of concrete – provide the structural support needed to keep your deck stable and secure.
Tool Rental or Purchase
When considering the Rent vs. Buy dilemma, weigh the costs and benefits of acquiring tools for a one-time project versus purchasing them for potential future use. To make an informed decision, start by comparing prices from various rental shops and retailers. This thorough approach will help you determine whether renting or buying is more cost-effective in the long run.
Additional Expenses
When planning your outdoor deck project, don’t forget to factor in the expenses that come with bringing your vision to life. This includes obtaining the necessary building permits, which can add up quickly. Additionally, consider the cost of any post-construction landscaping you might want to do to enhance the overall aesthetic of your deck and surrounding outdoor space.
Labor Costs
When it comes to saving money on projects or home repairs, there are two key strategies to consider. The first is to take matters into your own hands and do the work yourself. By doing so, you can avoid labor costs altogether, which can be a significant chunk of change. On the other hand, if you’re not feeling confident in your DIY abilities or don’t have the time to tackle a project, hiring professionals can still be a cost-effective option. To get the best deal, it’s essential to shop around and compare quotes from multiple contractors. By doing so, you’ll be able to find the right professional for the job at a price that fits within your budget.
Contingency Fund
When planning a floating deck project, it’s essential to set aside an extra sum to account for any unforeseen expenses that might arise. A general rule of thumb is to allocate 10-15% of the total estimated cost as a contingency fund. This proactive approach can help prevent financial shocks and ensure your project stays on track.
Overcoming Common Challenges in DIY Floating Deck Projects
While building a floating deck can be an exciting DIY project, it’s essential to be prepared for the potential challenges that may arise. In this section, we’ll explore some of the most common hurdles homeowners face when constructing a floating deck and provide practical advice on how to overcome them.
Ensuring a Level Foundation
When it comes to building or renovating outdoor spaces, one common challenge homeowners face is uneven terrain. Specifically, this issue can manifest itself in the form of a wobbly deck, which not only compromises its aesthetic appeal but also poses safety risks. To ensure that your decking project gets off on the right foot, it’s crucial to address this problem head-on by utilizing a trusty level to inspect the ground and adjust the deck blocks accordingly. By doing so, you’ll be able to create a stable base that can support the weight of your deck, allowing you to enjoy your outdoor oasis with peace of mind.
Dealing with Weather Elements
When it comes to maintaining the integrity of your outdoor deck, it’s essential to be aware of the potential threats posed by Mother Nature. Prolonged exposure to the elements can cause significant wear and tear, leading to costly repairs or even complete replacement. To safeguard your investment, consider selecting materials that are naturally resistant to weathering conditions, such as moisture and intense sunlight. Additionally, applying a high-quality sealant can provide an extra layer of protection against the harsh outdoor environment, ensuring your deck remains strong and sturdy for years to come.
Navigating Tight Spaces
When working with limited space, a common challenge is navigating the installation process for deck components. This constraint can be frustrating, especially when dealing with bulky or heavy materials. A clever solution lies in meticulous planning and selecting smaller, lighter components that simplify the installation process. By carefully designing your project and opting for more manageable materials, you’ll find it easier to maneuver and complete the job efficiently.
Maintenance Tips for Your DIY Floating Deck
For a floating deck to continue looking its best, a consistent maintenance routine is crucial. To ensure your outdoor space remains a beautiful haven, follow these essential tips to keep your decking in top condition.
Routine Cleaning
To maintain the integrity and appearance of your deck, adopt a two-pronged approach: regular sweeping and gentle cleaning. Start by removing any debris that may have accumulated, taking care to prevent mold growth from forming. This simple task will help keep your deck safe and healthy. Additionally, use a mild soap solution and a soft-bristled brush to carefully clean the surface of your deck without causing damage to the wood. By combining these two techniques, you’ll be able to enjoy your outdoor space for years to come.
Annual Check-Up
When inspecting your deck, take a closer look for any signs of wear and tear, including loose boards, exposed nails, or visible signs of rot. If you notice any issues, prioritize making the necessary repairs to ensure the structural integrity of your deck remains intact. This may involve tightening loose screws and replacing damaged boards as needed.
Protecting the Deck
To maintain the integrity and appearance of your deck over time, consider implementing a regular maintenance routine. Every few years, reapply a water-repellent sealant to shield the wood from the elements, ensuring it remains protected against moisture and UV damage. Additionally, you may want to refresh the look of your deck by applying a new coat of stain or paint. This not only enhances its aesthetic appeal but also provides an extra layer of protection against wear and tear.
FAQs About DIY Floating Decks
For those embarking on a DIY floating deck adventure, uncertainty often precedes excitement. To alleviate this trepidation and ensure a successful project, we’ve compiled answers to some of the most commonly asked questions regarding building a floating deck.
What is a floating deck?
Unencumbered by the constraints of a traditional deck, a floating deck offers the freedom to create a standalone structure that floats effortlessly above the ground. Unlike its tied-down counterpart, this self-contained oasis is supported by deck blocks that rest directly on the earth, liberating it from any architectural anchorage.
Do I need a permit to build a floating deck?
Before embarking on a deck-building project, it’s essential to familiarize yourself with your local building codes. While some jurisdictions have strict regulations requiring permits for all decks, others may have more lenient standards that exempt smaller or lower-lying structures from permit requirements. To avoid any potential issues, it’s crucial to consult with local authorities and determine what specific regulations apply in your area.
How do I choose the right location for my floating deck?
When selecting a spot to build your outdoor project, give due consideration to several key factors. Start by evaluating the impact of natural light on the site, as well as any privacy concerns that may arise from its location. Additionally, take note of the proximity to your house and how it will affect the overall functionality of the space. Furthermore, aim for a level area to make construction easier and avoid areas that might collect water or pose other challenges.
What materials should I use for my floating deck?
When it comes to building or renovating, homeowners often seek out materials that can withstand the elements while minimizing upkeep. Two popular choices are pressure-treated lumber and composite decking. Pressure-treated lumber stands out for its impressive durability and resistance to rot and pest damage. Composite decking, on the other hand, boasts a unique combination of low maintenance requirements and longevity.
How do I ensure my floating deck is level?
To guarantee a stable and even foundation for your deck, use a spirit level or string line to check the blocks’ alignment. As you construct the structure, periodically adjust the blocks to ensure they’re perfectly level, preventing any potential issues with drainage or structural integrity.
Can I build a floating deck on uneven ground?
When it comes to building a deck, one often overlooked aspect is creating a stable and level foundation. This can be achieved by adding or removing soil as needed to ensure the blocks are perfectly aligned. This extra effort upfront can make all the difference in the long run, providing a sturdy base for your outdoor space.
How big should the gaps between my deck boards be?
In most cases, it’s essential to leave a gap between the top of the deck boards and any surrounding structures, measuring approximately 1/8 inch to 1/4 inch in width. This deliberate opening enables proper drainage and accommodates natural wood expansion caused by temperature fluctuations.
How often should I maintain my floating deck?
To ensure your outdoor space remains safe and attractive, it’s crucial to conduct a thorough annual inspection of your deck. This involves searching for any loose boards, protruding nails or signs of rot. Furthermore, regular cleaning is essential to maintain its appearance, while reapplying sealant every few years will provide added protection against the elements.
What tools will I need to build a floating deck?
When it comes to tackling DIY projects or professional construction tasks, having the right tools is crucial for success. The essential toolkit should include a reliable tape measure for ensuring precise measurements, a circular saw for making accurate cuts, a drill for driving screws and other fasteners, and a level for guaranteeing straight lines and even surfaces. Additionally, a string line can be used to mark out straight lines or curves with precision. Furthermore, safety should always be a top priority, and that’s where essential safety gear comes in. A good pair of gloves will provide protection from cuts and abrasions, while safety glasses will shield your eyes from debris and other hazards.
Can I add features like railings or built-in seating to my floating deck?
Railings can significantly boost both safety and style on your deck, while built-in seating can elevate the functionality and visual appeal of this outdoor space. With these FAQs answered, you’ll be well-prepared to embark on your DIY deck project with confidence. Assembling a plan and adhering to best practices are essential for constructing a deck that will withstand the test of time.
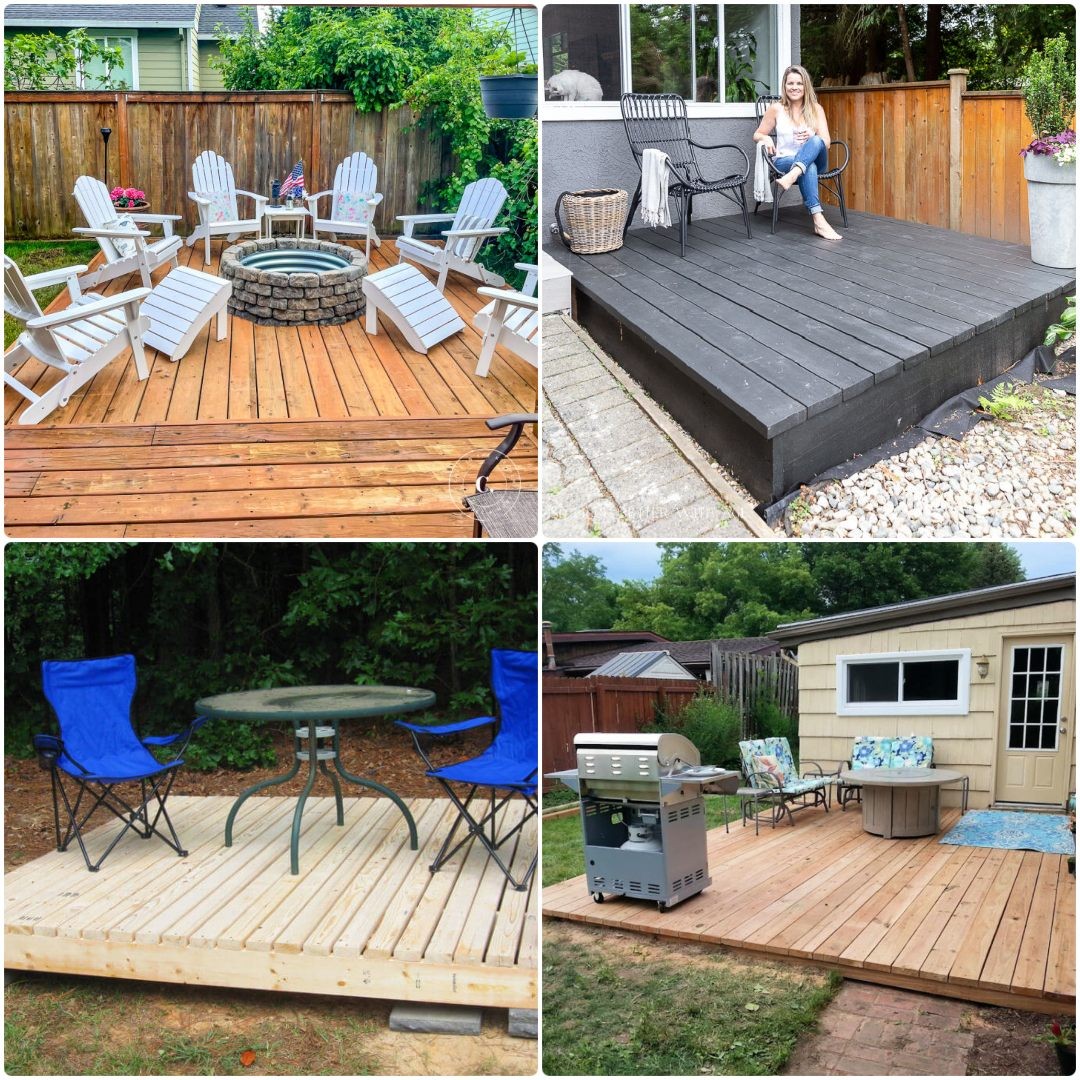
20 DIY Floating Deck Ideas and Free Plans
Transform your outdoor space into a stunning oasis by bringing the beauty of floating decks into your own backyard. With 20 innovative DIY designs and accompanying free plans, you’ll have everything you need to create a stylish and inviting atmosphere that’s perfect for relaxing, entertaining, or simply enjoying nature.
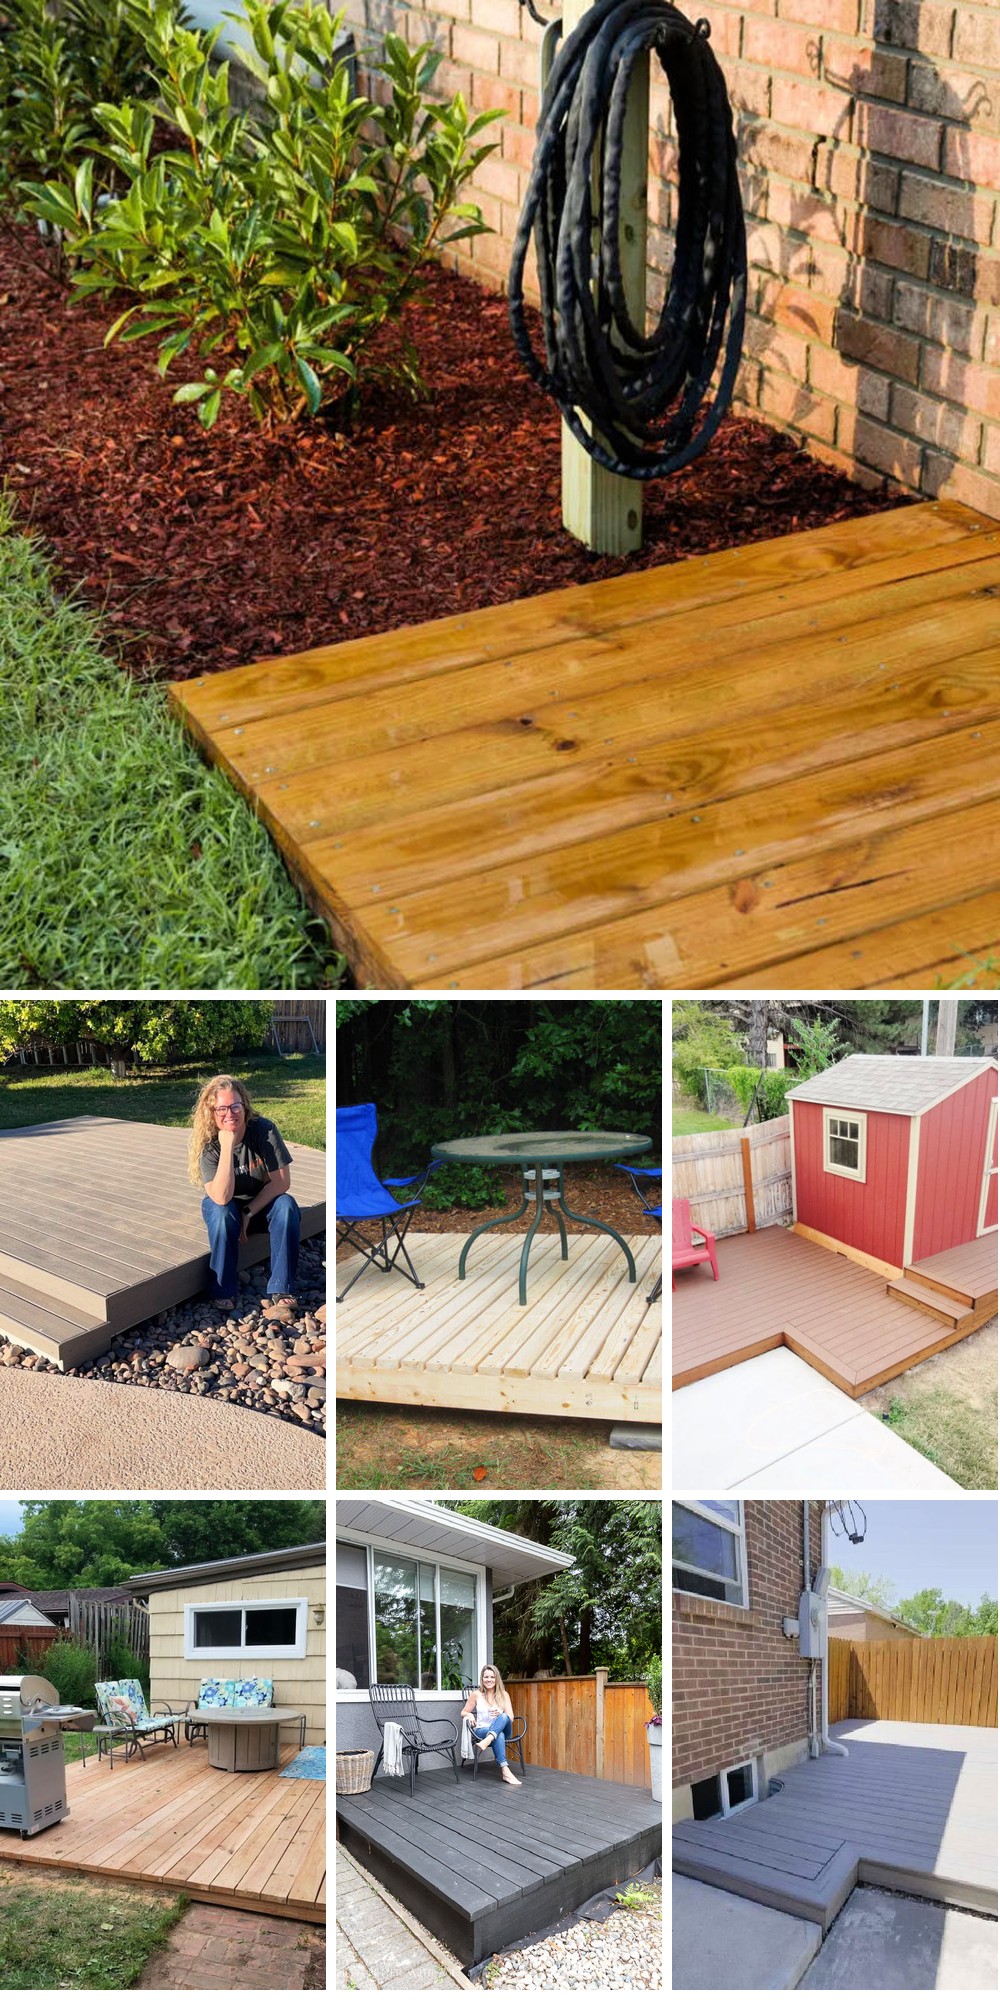
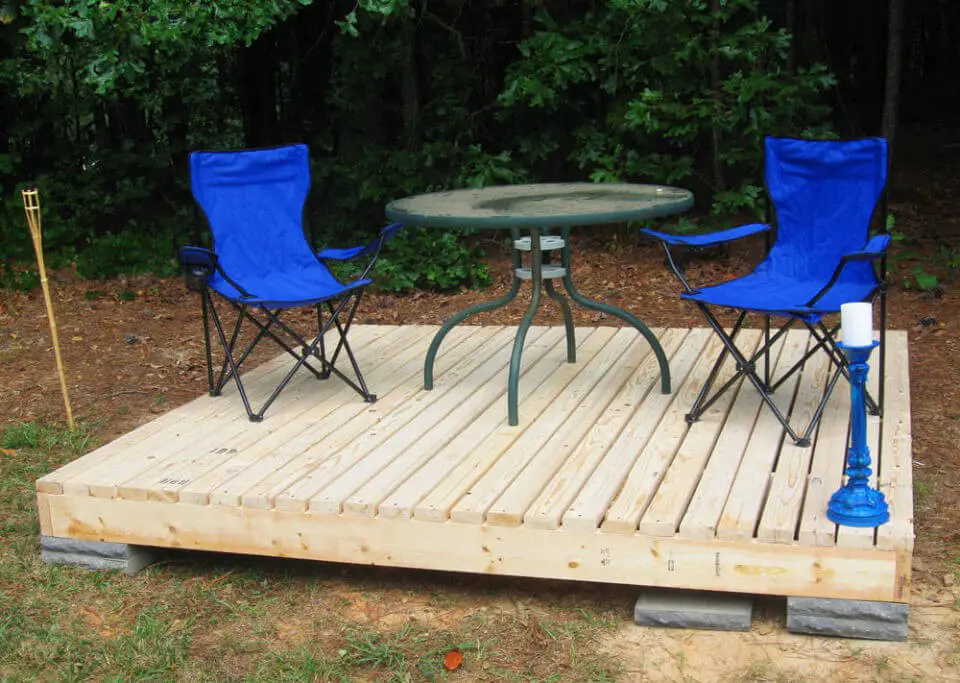
Build a Freestanding Floating Deck
Transform your front yard into a serene oasis with a DIY freestanding deck. This floating structure offers the freedom to place it anywhere, without being anchored to the house. Perfect for warm climates, the deck posts only require about 6 inches of drainage rock beneath them, making this project accessible and straightforward. To get started, prepare the area by clearing away shrubs and leveling the ground. Next, spray paint the desired square footage – in this case, an 8×8 feet space – and carefully remove any shrub roots to prevent regrowth through your deck. The required building supplies include 4-way deck blocks, 2x6s and 2x10s for joists, decking boards and fascia, drainage rock, and landscape fabric. As the perfect spot for evening relaxation, don’t forget to add some finishing touches by landscaping around your deck for an enhanced aesthetic appeal.
Handmade Floating Deck With Fire Pit
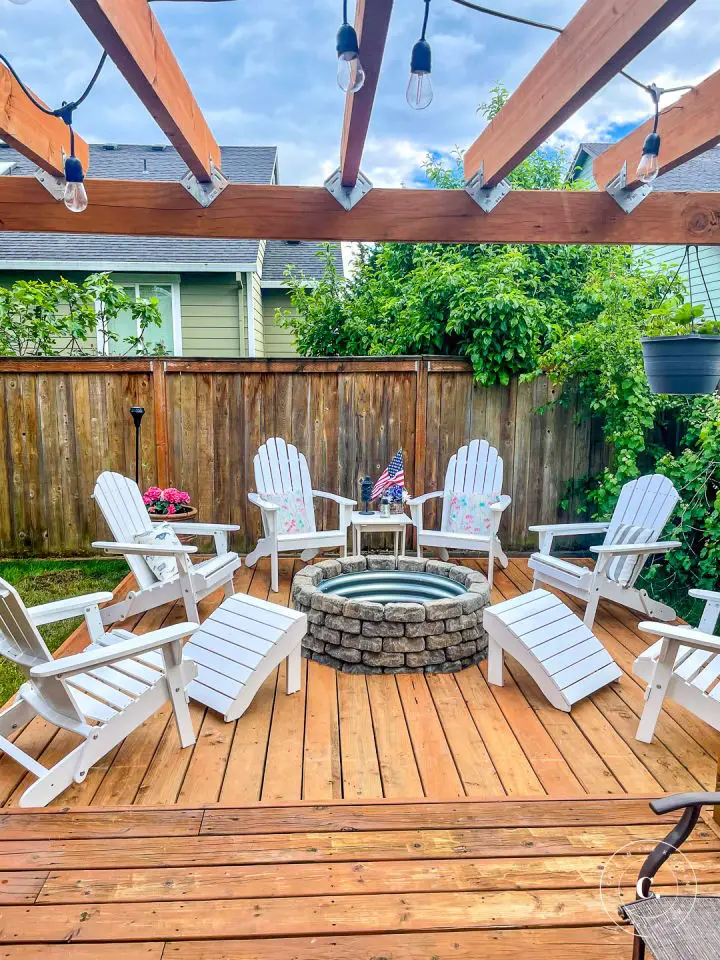
Creating a floating deck without hiring a contractor is a feasible DIY project that can transform your outdoor space into a cozy retreat. By following these DIY floating deck ideas, you can build a personal outdoor haven with a functional extension to your home and a gathering spot for family and friends. The addition of a traditional brick fire pit takes it to the next level, perfect for s’mores on warm summer evenings. While this project requires dedication and some physical effort, the end result is well worth the investment of time and elbow grease. So, gather your tools and get started on creating your backyard paradise!
Building a Floating Deck With Composite Decking
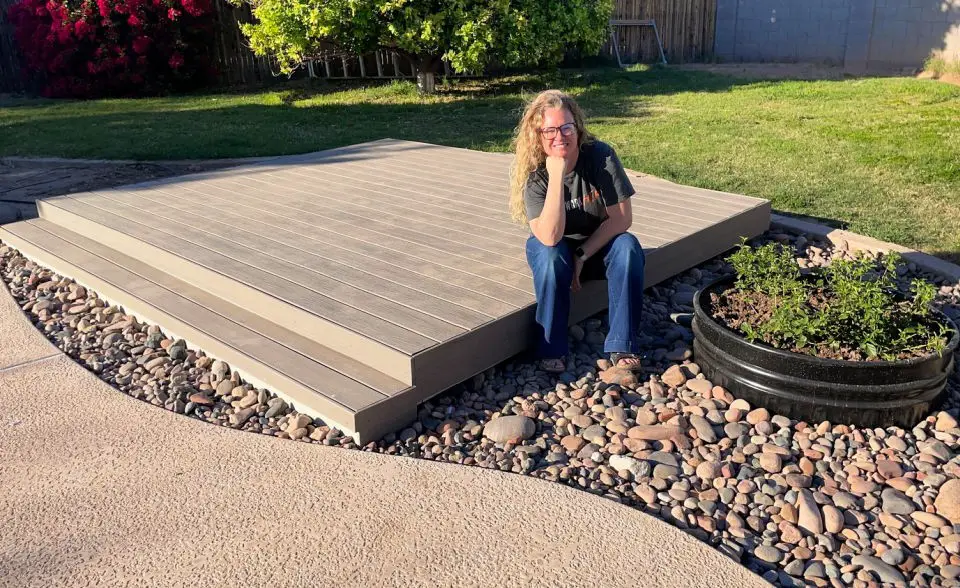
Transform your outdoor space into an inviting oasis with DIY floating deck ideas that cater to lounging, dining, and entertaining. Tap into the versatility of composite decking material to create a unique area near your pool or utilize unlevel backyard spaces for a sunny retreat. The key to success lies in utilizing reliable fasteners and connectors like Simpson Strong-Tie. To streamline the process, leverage advanced deck designer software, which may not include a floating deck option per se, but can be adapted using tools like SketchUp to accommodate your specific needs. For instance, a 12’x10′ deck can become a sun-kissed space without professional intervention, allowing you to unleash your backyard’s potential with creative and practical solutions.
Making a Wooden Floating Deck
Unlock the creative potential within and bring your outdoor vision to life by crafting a breathtaking DIY floating deck. This comprehensive guide provides a straightforward, step-by-step process for building an inviting retreat using readily available materials such as pressure-treated wood, deck screws, and pebble rocks. With minimal effort and planning, you can transform your outdoor space into an alluring home office entrance or relaxing haven. From conceptualization to installation, this tutorial empowers you with the skills necessary to achieve success. A floating deck not only offers practical benefits but also elevates your home’s visual appeal. By utilizing recycled materials and custom designs, you’ll not only save money but also increase your property’s value. So, gear up and get ready to revolutionize your outdoor oasis with this comprehensive floating deck guide!
Make Your Own Wooden Floating Deck

Get ready to elevate your living space with these innovative floating deck ideas, where creativity meets functionality. To create an extraordinary indoor floating deck and pergola, you’ll need to master the art of construction, combining style with practicality. Inspired by a trade show booth, this project requires materials like painter’s tape, floor planning software, 6×6 posts, extra joists, decking boards, and a range of stain colors. The pièce de résistance is the striped deck, painted with Behr’s Premium Stain and Sealer, which adds an unmistakable outdoor flair. To bring this vision to life, map out your layout, build the deck in sections for easy transport, and let the staining process unfold. This DIY guide will walk you through the steps to create a visually stunning indoor deck that doubles as an entertaining space, perfect for showcasing products or simply enjoying with friends.
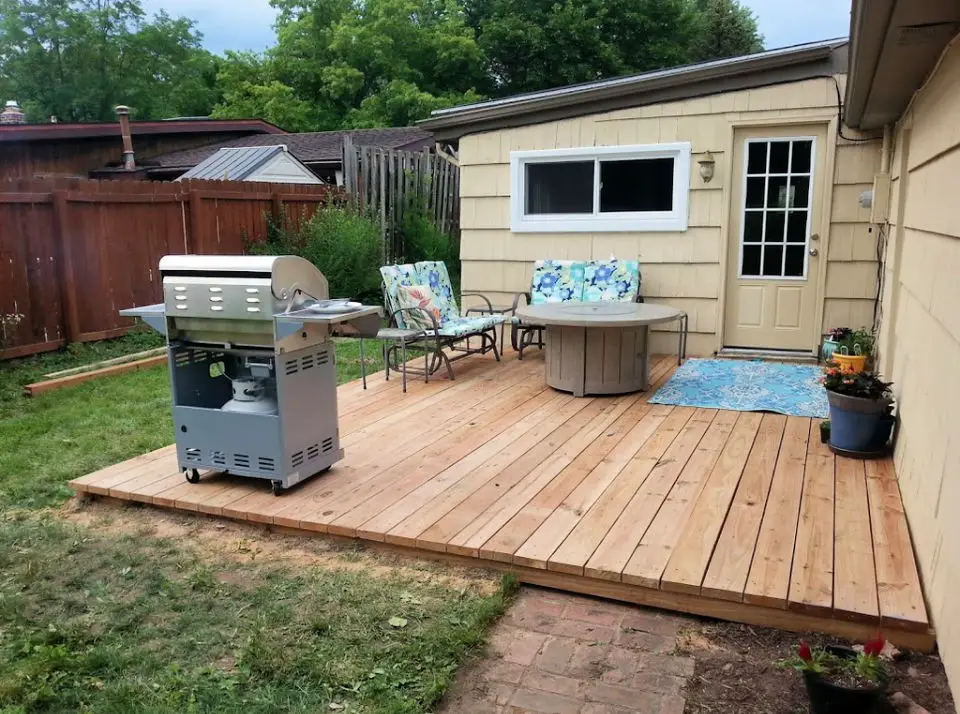
Small DIY Floating Deck for Garden
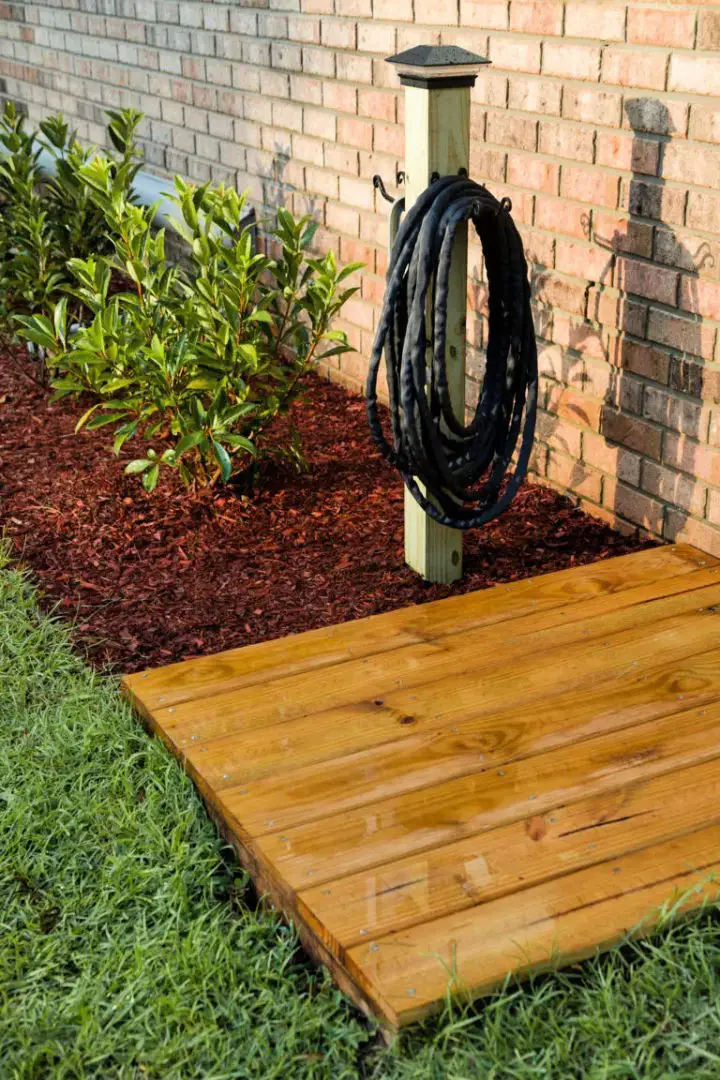
A reimagined backyard is just a DIY project away. Gone are the days of weeds and disarray, replaced by a floating deck, lush shrubs, and a creative A/C cover. The once-muddy area near the fixture has been transformed into a vibrant deck, now serving as a canvas for your imagination to run wild.
The deck itself is constructed from pressure-treated lumber, featuring 2 x 4 x 8 joists, 4 x 4 x 8 headers, and 1 x 4 x 8 fascia. This comprehensive guide will walk you through the process of turning a cleared space into a completed deck.
This revitalizing project is a masterclass in transformation – taking an overgrown backyard and turning it into a cozy retreat that’s just begging to be explored. Follow this blueprint to recapture the charm of your backyard, and discover the magic that awaits when you unleash your creativity.
Awesome DIY Wooden Floating Deck
Transform your outdoor space without sacrificing style or budget. With our comprehensive DIY floating deck guide, you’ll have a beautiful and functional addition to your backyard that’s perfect for relaxation, gatherings, or simply enjoying the fresh air. This hands-on project requires minimal materials, including concrete deck blocks, weatherproof screws, stain, and deck boards. Our step-by-step instructions, complete with diagrams and expert tips, ensure a smooth and achievable build process. With the right tools, such as a table saw, extra-long level, and power drill, you’ll be able to create your dream floating deck in no time. Best of all, this project won’t break the bank – you can expect to spend around $500 for a stunning result that will have you enjoying every moment outdoors.
Free Floating Deck Woodworking Plans
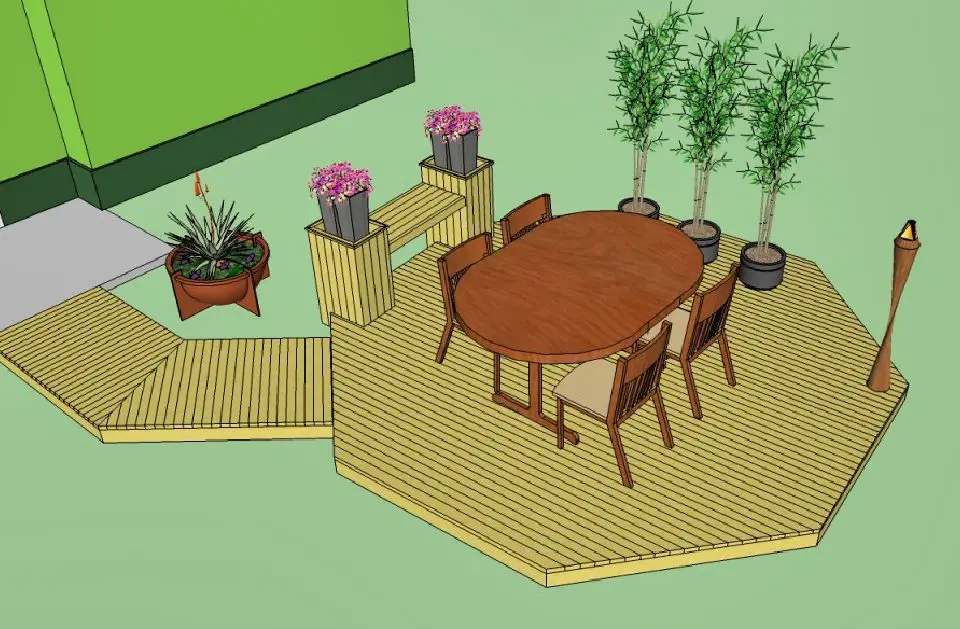
Create a unique octagonal floating deck in your backyard with our comprehensive guide. Ditch traditional platforms near your house and instead opt for an eight-sided deck nestled amidst lush greenery. Enjoy meals with loved ones while basking in nature’s loveliness from the comfort of your personalized outdoor retreat.
Our guide provides plans for a ground-level octagonal floating deck, allowing you to customize dimensions to fit your needs. This innovative design features an unsecured joist structure, simplifying the building process and making it perfect for a relaxing weekend project. The result is a cozy, functional, and aesthetically pleasing outdoor space that’s sure to become your go-to spot.
To maximize functionality, our guide also includes instructions for a deck bench and two wooden cabinets, turning your backyard into a fully-fledged outdoor oasis. Take the opportunity to transform your yard with this floating deck and enjoy the serenity of your private retreat.
How to Make a Wooden Floating Deck
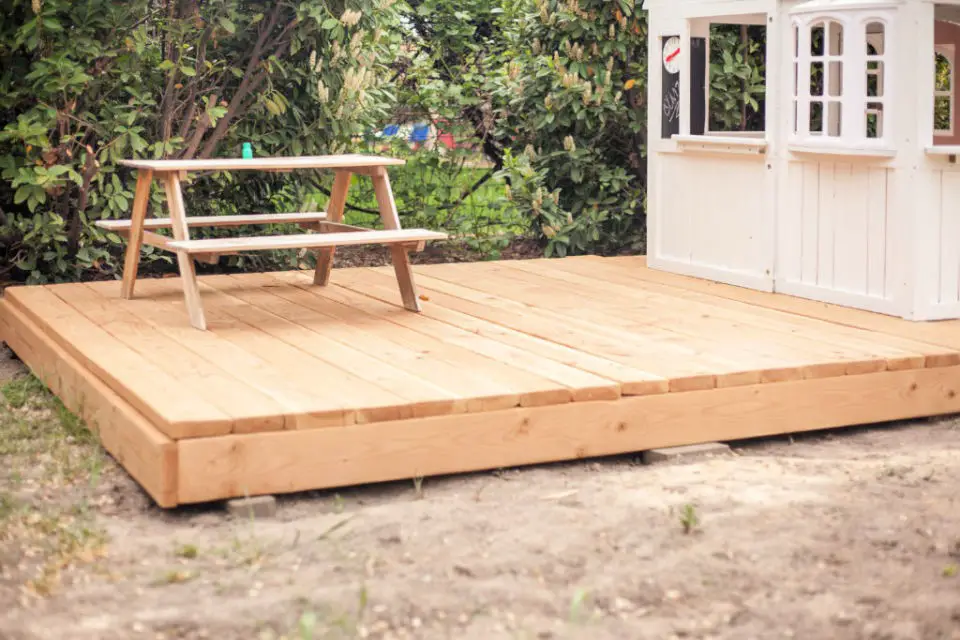
Create a magical outdoor haven for kids by constructing a DIY floating deck with ease. To get started, gather the essential supplies: 2x6x8 planks, screws, L-angles, face-mount hangers, nails, deck sealer, and blocks for elevation control. Begin by crafting a box-like structure using the planks, securing the corners with galvanized brackets. Next, add central support using face-mount hangers. Finish the design by attaching boards on top and apply a few coats of protective stain. If desired, you can extend the play area with an additional deck and sandbox for even more fun. By completing this project, you’ll provide kids with a safer and more enjoyable outdoor environment, significantly enhancing their playtime experience. This creative endeavor combines safety, functionality, and imagination, making it a fantastic addition to any backyard.
Build a Floating Deck for the Backyard
Elevate your outdoor living space with a stunning and durable DIY floating deck, perfect for relaxation and al fresco meals. This comprehensive guide will walk you through the construction process using high-quality materials such as Trex Enhance composite decking, pressure-treated lumber, Tuffblocks, and hidden fasteners for a sleek finish. To complete the project, you’ll need additional materials like exterior screws, deck screws, joist tape, joist hangers, landscape edge guard, gravel, weed barrier fabric, and optional sandpaper for a polished look. But it’s not just about aesthetics – this floating deck will also provide a long-lasting and low-maintenance outdoor space perfect for soaking up the sun and making the most of your backyard. As you build this beautiful structure, enjoy the transformation process and get ready to elevate your outdoor living experience.
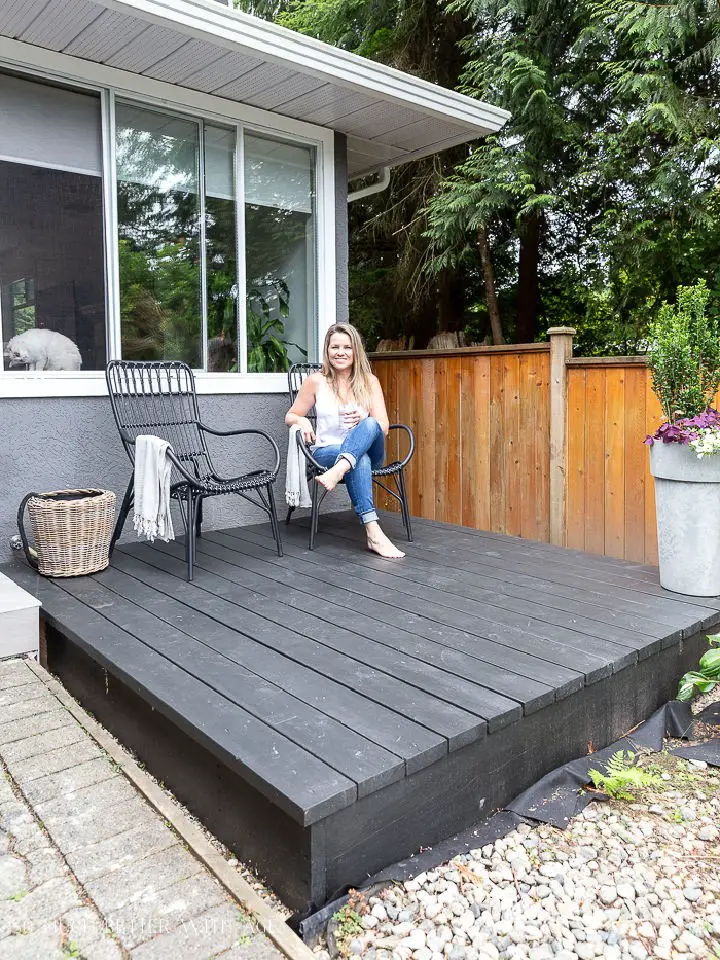
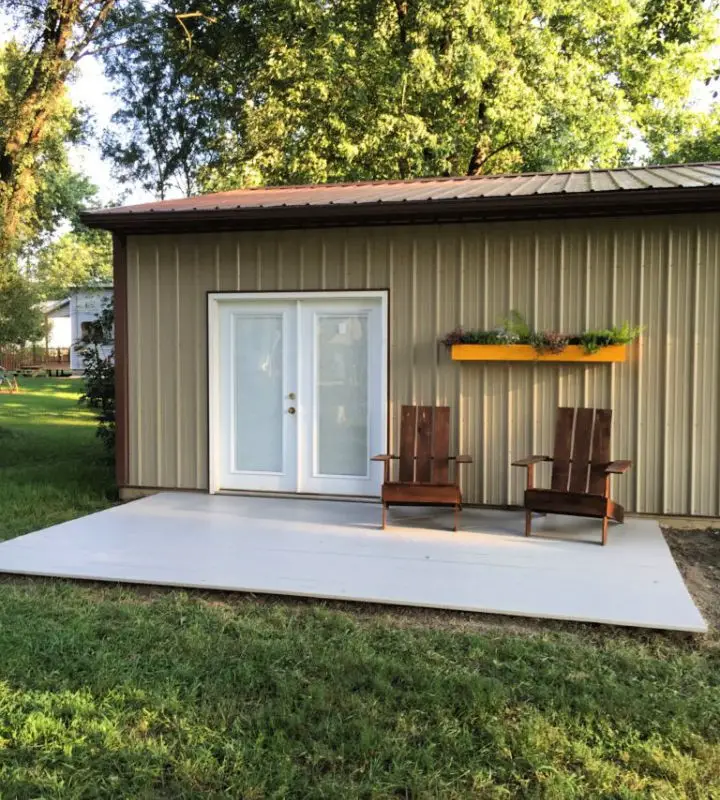
Homemade Floating Ground Level Deck
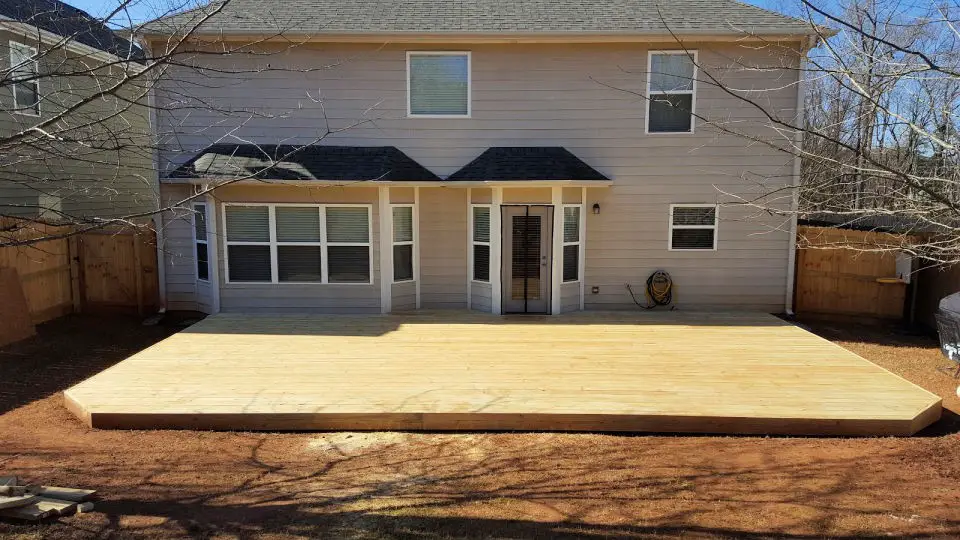
Enhance your backyard with a DIY floating deck that doubles as extended living space. Spanning 650 square feet, this project is an affordable addition to your home, with a total cost of around $2,000, inclusive of permit fees and necessary materials like lumber, decking screws, brackets, quickcrete, and concrete pads. The journey to building the deck involved meticulous attention to local building codes and inspection procedures, ensuring a strong foundation for the 34-foot wide by 19-foot deep structure.
nThe project’s unique feature is its placement over a low-lying waterlogged area in the backyard, creating an inviting spot for relaxation while also addressing existing flooding and drainage issues. By taking on this DIY endeavor, you’ll not only save thousands in labor costs but also enjoy quality time with family members and unleash your creativity. It’s the perfect opportunity to bring your dream deck to life.
Elegant DIY Wooden Floating Deck
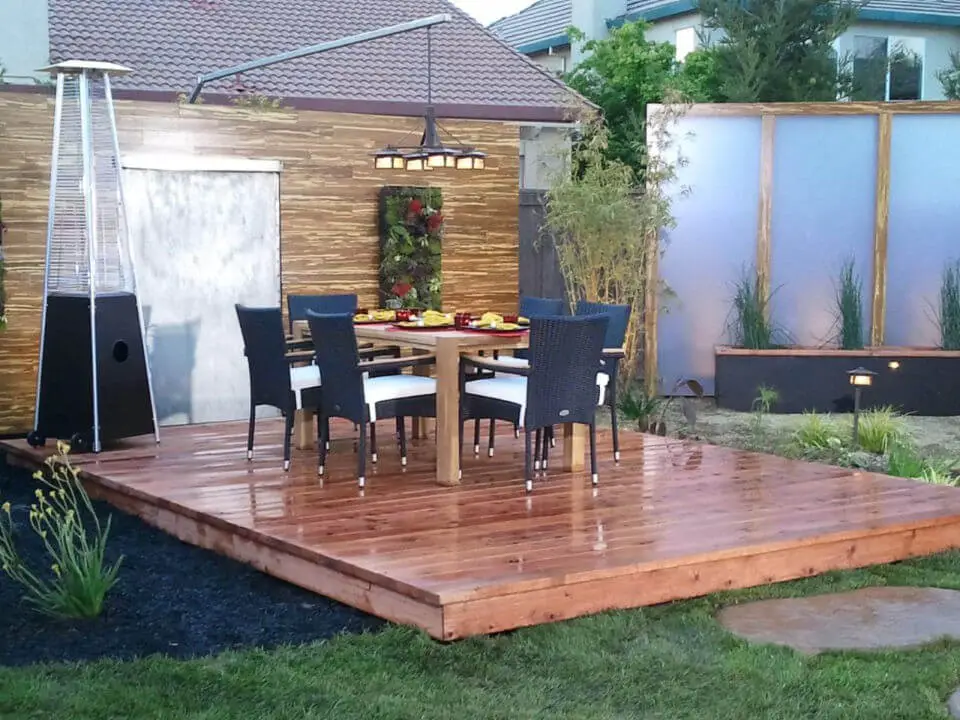
Transform your backyard into a serene oasis by crafting a stunning DIY wooden floating deck. This ingenious outdoor feature appears to defy gravity, offering a unique perspective to appreciate the natural beauty of your surroundings. To achieve this, start by preparing the chosen area for construction. Level the ground to ensure a firm foundation, then proceed with setting and leveling corner blocks within a structured 7’x19′ rectangle. The next step is to place interior blocks, paying meticulous attention to detail. A laser level is essential in maintaining absolute flatness throughout the process. Once the blocks are in place, fill them with concrete and allow it to dry. Next, install 2”x6” pressure-treated deck joists, ensuring even spacing for a sturdy foundation. With this floating deck, you can elevate your outdoor living experience and infuse a touch of whimsy into your garden.
Building a Wooden Floating Deck
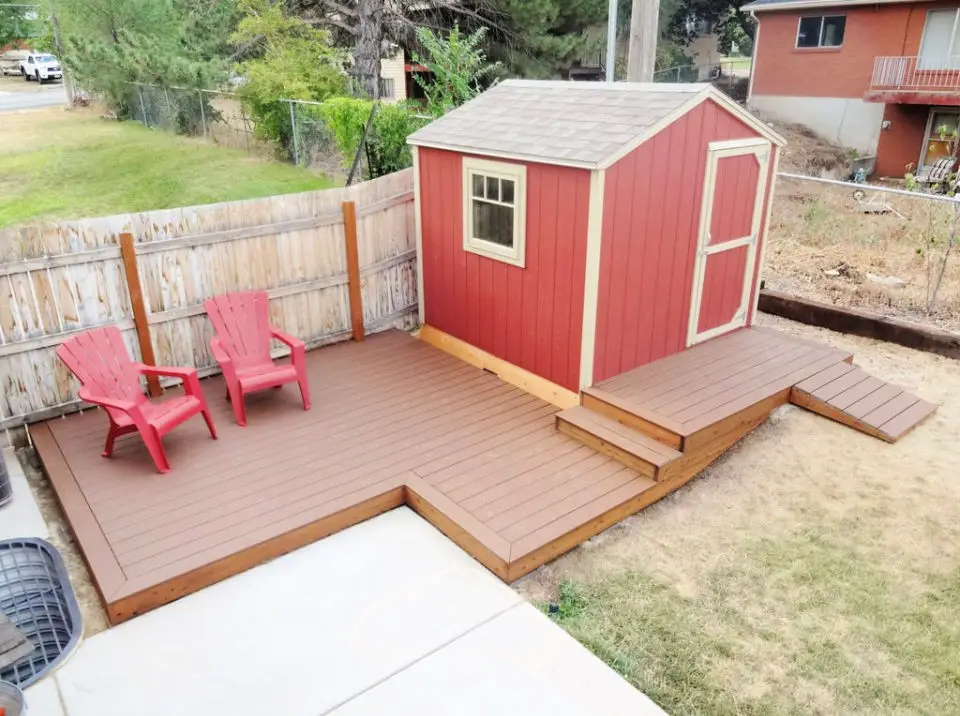
Transform your backyard into an inviting oasis with a DIY floating deck. By combining pressure-treated lumber and high-quality composite decking material, you’ll create a structure that not only stands the test of time but also boasts a visually appealing design. Unlike traditional decks that require deep anchoring, this ‘floating’ design rests on blocks, making it a cost-effective and feasible DIY project for homeowners. With an average total cost of $1600, this multi-week construction process involves essential tools like a circular saw, corded drill, measuring tape, and level. Each step, from laying foundation blocks to building the frame to decking, is carefully executed to ensure durability and a level structure. The end result is a versatile outdoor space perfect for relaxing, entertaining, or simply connecting with nature. With your new DIY floating deck, you’ll be just steps away from creating unforgettable memories in your very own backyard masterpiece.
How to Build a Floating Deck – Step-by-Step
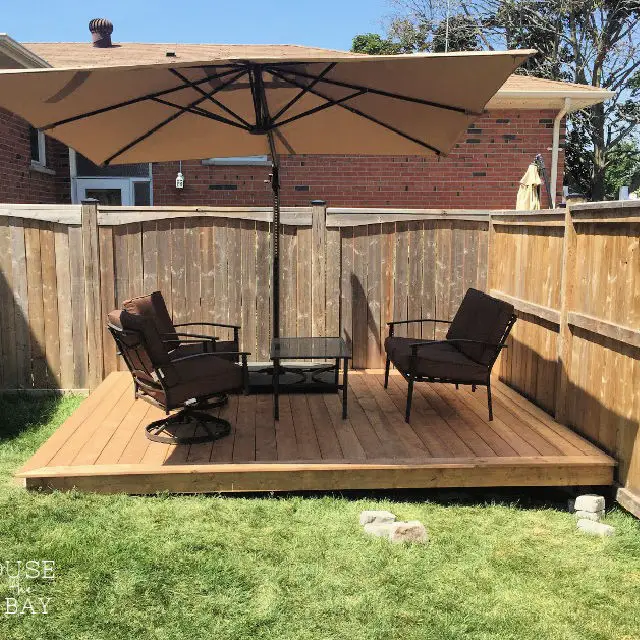
Transforming your backyard into an idyllic retreat has never been easier with DIY floating deck plans. Perfect for those who want to avoid the hassle of digging holes or attaching the deck to the house, these comprehensive guides will walk you through every step of building a stunning floating deck from scratch. With a weekend’s worth of effort, you can create a unique and functional outdoor space that’s sure to impress. To get started, gather your materials: pressure-treated wood, deck blocks, landscape fabric, galvanized nails, and deck screws. The process involves securing the footing, leveling the posts, controlling weed growth, and installing beams, joists, and deck boards. As you bring your floating deck to life, envision the countless memories you’ll make with friends and family in this charming new addition to your home.
How to Make a Wooden Floating Deck
Elevate your backyard oasis with these innovative DIY floating deck ideas that can be accomplished with minimal tools and materials. Without breaking the bank or dealing with property tax hassles associated with attached decks, this project is perfect for those looking to create a stunning outdoor space. With a drill, miter saw, level, and Kreg Deck Jig at your disposal, you’ll be well-equipped to transform deck blocks, 4x4s, screws, and cedar decking into a show-stopping focal point in your yard.
The beauty of this design lies in its simplicity and understated elegance, allowing the natural charm of the wood to take center stage. To get started, carefully position deck blocks on solid ground, ensuring precise alignment and leveling of beams, securing joists, and finally laying down the decking. The Kreg Deck Jig is a game-changer for achieving a sleek, screwless finish with your cedar decking.
As with any DIY project, it’s essential to check local codes and potentially secure permits before breaking ground. But trust us – the end result will be well worth the effort. So why not take the leap and start building your very own floating deck today? Rogue Engineer
Quick and Easy DIY Floating Deck
Transforming your outdoor living space into a vibrant gathering area is now within reach with this DIY 13ft x 16ft floating deck project. By using ground contact lumber, cedar joists, and deck screws, homeowners can effortlessly upgrade their backyard without requiring extensive expertise.Spread across two days, the meticulous leveling process ensures an exceptionally sturdy structure that will withstand the test of time. While a $700 investment may seem daunting, it paves the way for years of enjoyable summer gatherings, forging unforgettable memories with loved ones.To further elevate your deck’s ambiance, consider incorporating outdoor furniture, solar lights, a grill, and even a charming pergola. These thoughtful touches can quickly turn your new floating deck into a social hub where lasting connections are forged.
Build Your Own Floating Deck

A floating deck is an excellent way to transform your outdoor space without breaking the bank. With a comprehensive guide, you can design and build a floating deck that suits your style and budget. The journey begins with a gratifying DIY project that requires dedication over several weekends. In about ten weeks, you’ll be rewarded with a breathtaking outdoor oasis. Simpson Strong-Tie’s fasteners provide the sturdy foundation for a robust and aesthetically pleasing structure. This step-by-step guide covers every crucial aspect, from obtaining necessary permits to preparing the ground, installing posts, and laying the deck, all while prioritizing safety measures. By following this guide, you’ll be able to elevate your outdoor living with a spectacular DIY floating deck and pergola.
Affordable DIY Wooden Floating Deck
Transform your outdoor area with a simple yet effective DIY floating deck that won’t break the bank. This ingenious project requires just a few basic materials: 2x6s for the frame’s square structure, 2x4s for added support, and garden stones to ensure level footing. The result is an 8×8 deck design that can be assembled in no time, providing a budget-friendly solution for duplex dwellers seeking a temporary outdoor space.
How to Build a Wooden Floating Deck
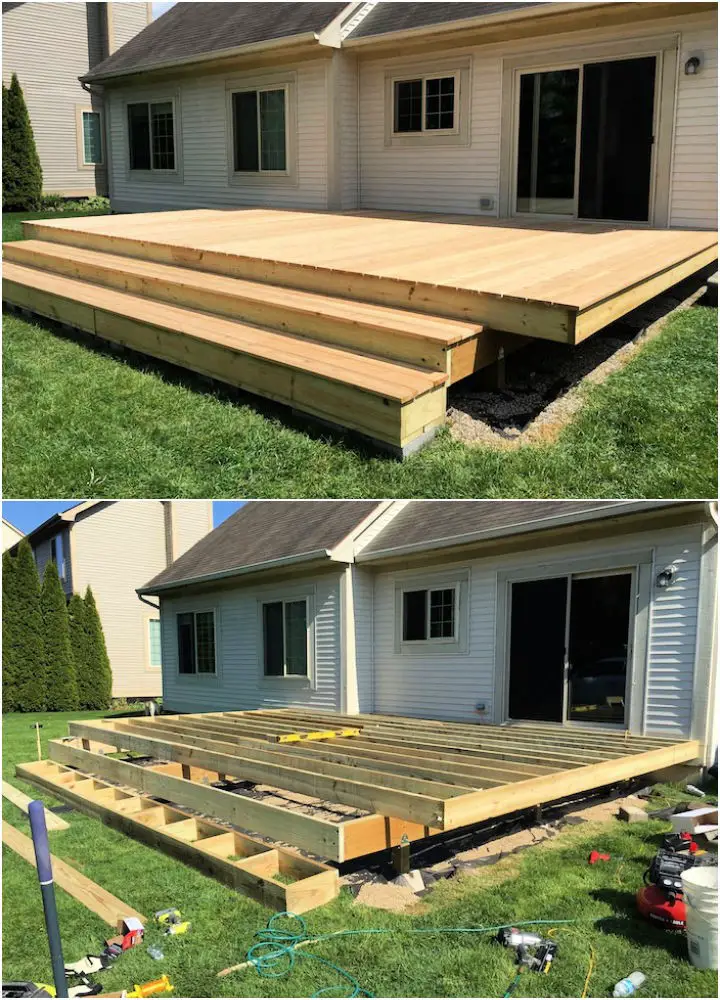
Transform your backyard into an inviting oasis by building a DIY floating deck. This comprehensive guide will walk you through the process of planning, framing, installing deck boards, and adding the final touches to create a unique outdoor space that’s both functional and visually stunning. While this project may require some expertise, the use of high-quality materials like deck blocks, 2×6 joists, paver base, and Trex deck boards ensures a robust and durable structure that will withstand the elements. As you enjoy your new deck, enhance its ambiance with decorative elements such as a dining table, lanterns, string lights, and outdoor rugs to create a cozy retreat perfect for relaxing or hosting unforgettable gatherings.
Cheap DIY Floating Deck Tutorial
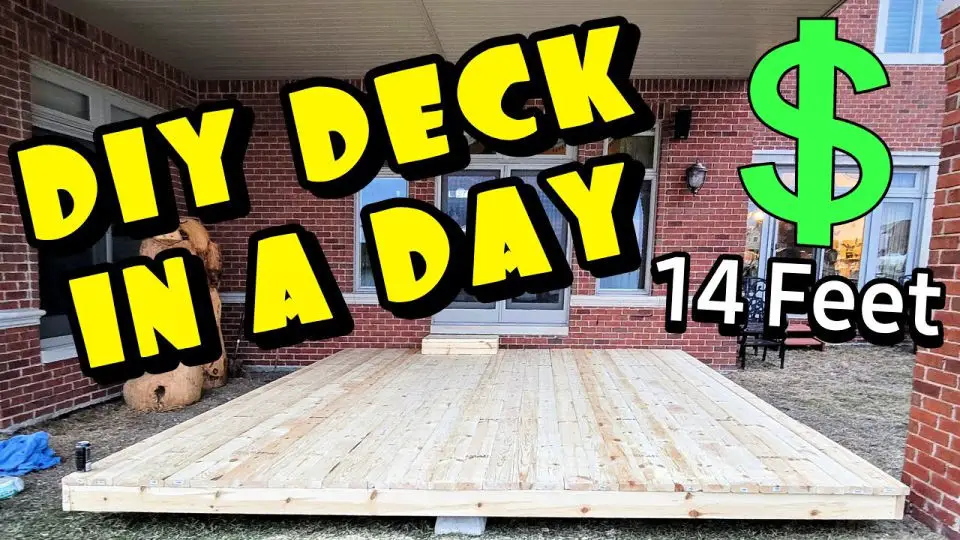
Transforming your yard into an inviting oasis has never been easier or more affordable. Free-floating deck plans offer a blank canvas waiting to be customized with your personal style. With this efficient DIY project, you can create a stunning 14-foot floating deck in under six hours – a feat originally quoted at $5500 but achieved for just $800. This impressive transformation is not only budget-friendly but also serves as a testament to the power of DIY ingenuity. By leveraging easily accessible tools and materials, you’ll be empowered to reimagine your outdoor space without breaking the bank. While this guide isn’t a step-by-step tutorial, it provides enough inspiration and guidance to motivate those eager to embark on similar projects. So why wait? Begin your journey today and watch as the magic of DIY brings your outdoor landscape to life.
Conclusion:
As we conclude this comprehensive guide to building DIY floating decks, it’s clear that we’ve covered all the crucial aspects – from innovative design concepts to the necessary tools and equipment, construction methods, budgetary considerations, common obstacles, maintenance strategies, and frequently asked questions. Whether you’re a newcomer to DIY projects or a seasoned expert, the wealth of information presented here can empower you to create a stunning floating deck that perfectly complements your outdoor living space. With this foundation in place, it’s time to roll up your sleeves and embark on your project, bringing your vision to life.
