If you’re eager to create a unique epoxy resin table but aren’t sure where to begin, fear not! In this comprehensive guide, we’ll delve into the intricacies of working with epoxy resin, covering everything from the material science behind it to troubleshooting common issues that may arise. As you embark on your DIY adventure, you’ll gain valuable insights into safety precautions, design inspiration, cost analysis, and maintenance tips, making your project a success. But that’s not all – we’ll also explore 25 innovative epoxy resin table ideas, ranging from striking river tables to mesmerizing glow-in-the-dark creations, guaranteed to spark your creativity. So, are you ready to unlock the endless possibilities of working with epoxy resin? Let’s dive in and start creating your one-of-a-kind DIY epoxy resin table project!
How to Make an Epoxy Resin Table
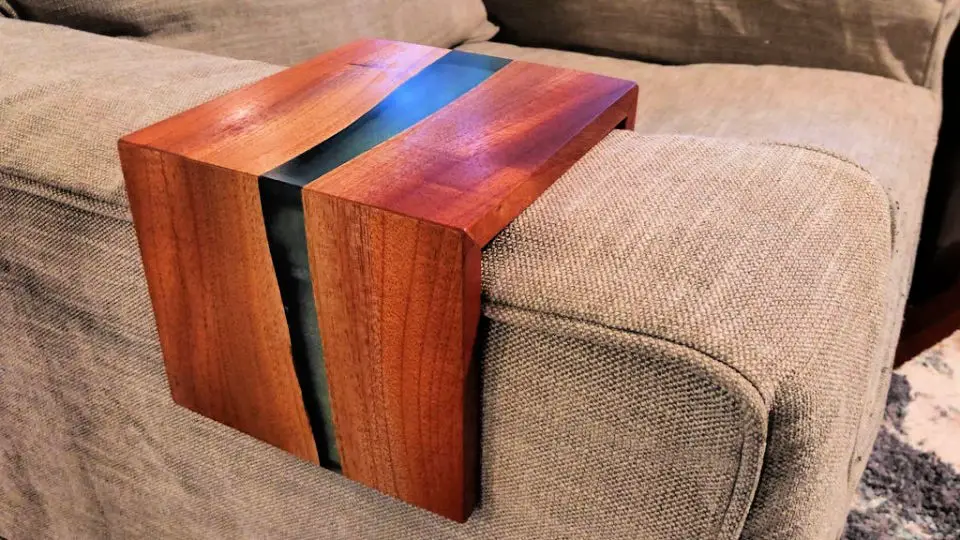
Transform your home decor with a unique epoxy ocean table that’s easier to create than you think. Follow this step-by-step guide and discover the thrill of crafting without the frustration.
Materials You Will Need:
A unique combination of materials has been brought together to create a one-of-a-kind beaverboard, requiring the following components: a piece of tape, a cutting board for precise shaping, hot glue for bonding, epoxy resin and hardener for added durability, white dye for coloring, sand for texturing, stones and amber for decorative elements, shells and artificial moss for a natural appearance, turquoise dye for an additional pop of color, a gas burner to remove air bubbles, a hair dryer for quick drying, and transparent resin for coating the finished product. To provide stability and elevate the beaverboard, universal table legs will also be used.
Step by Step Instructions
Step 1: Preparing the Mold
Before embarking on the table-making process, start by preparing a mold of the desired size using a piece of beaverboard. Cut the board to the exact dimensions you envision for your table, ensuring a precise fit. To prevent any unwanted resin leakage, secure the edges with tape. Additionally, seal any gaps or crevices with hot glue, achieving an airtight seal that will help ensure a smooth finish in the final product.
Step 2: Mix and Pour the First Layer of Resin
To create your epoxy resin masterpiece, begin by combining the epoxy resin with its corresponding hardener, following the manufacturer’s guidelines for the optimal ratio of ingredients. Once mixed, introduce white dye to the blend and thoroughly stir until it’s fully incorporated into the mixture. Next, pour this concoction into the mold, taking care to ensure an even distribution across the base. Finally, utilize a gas burner with caution to carefully eliminate any air bubbles that may form as you work.
Step 3: Adding the First Set of “Ocean” Features
As the initial layer begins to set, it’s time to add the foundation for your oceanic landscape. Spread a thin layer of sand across the surface, allowing it to settle like the seafloor. Next, carefully arrange an assortment of natural materials such as stones, amber, shells, and artificial moss to craft the underwater scene you envision. With these elements in place, gently pour another layer of mixed resin over the top, ensuring that everything is securely embedded and ready for the next stage of creation.
Step 4: Creating Waves and Depth
As you continue to craft your ocean-inspired art piece, incorporate a new batch of resin that’s been infused with turquoise dye. Use a gentle touch to pour this mixture over the previous layer, allowing it to flow freely before using a hair dryer to subtly spread and blend the colors. This will create undulating patterns reminiscent of ocean waves. To add an extra layer of realism, introduce streaks of white dye to mimic the foamy texture of wave crests. Once again, employ the hair dryer to blend these new hues seamlessly into the existing design. For added depth and visual interest, feel free to repeat this process, allowing each subsequent layer to build upon the last.
Step 5: Final Layer and Finishing Touches
To complete your ocean-inspired art piece, apply a final layer of transparent resin, covering the entire project to ensure everything remains in place. Utilize a gas burner once more to meticulously eliminate any remaining air bubbles that may have formed during the pouring process. With the curing and hardening phase initiated, allow sufficient time for the resin to fully set according to its specific instructions, which can take several days depending on the product used.
Step 6: Unmold and Polish
To unveil the true beauty of your newly cured tabletop, begin by delicately removing any residual tape or mold that may have formed during the curing process. Next, employ fine-grit sandpaper to gently smooth out any imperfections or rough edges, taking care not to scratch the surface. Finally, treat the table to a polishing regimen, carefully working to reveal a radiant, glass-like sheen that showcases your handiwork.
Step 7: Attaching the Legs
After meticulously preparing and polishing your tabletop, it’s time to secure the universal table legs according to the manufacturer’s guidelines. Confirm that they are firmly attached to withstand the weight of the resin table, guaranteeing stability and durability.
Video Tutorial
Complementing your hands-on experience with an immersive visual journey, we recommend watching the Epoxy Ocean Table / resin art video on YouTube. This 15-minute tutorial not only provides a step-by-step guide but also offers a unique perspective on the crafting process, enhancing your understanding and execution of the project.
Understanding the Material Science of Epoxy Resin
Epoxy resin is a versatile material that has gained popularity in recent years, particularly among DIY enthusiasts and makers. Its unique combination of physical and chemical properties makes it an ideal choice for creating durable and visually appealing surfaces. In this section, we’ll take a closer look at the science behind epoxy resin to help you select the right type for your project. Understanding the fundamental characteristics of epoxy resin is crucial in determining its suitability for various applications.
What is Epoxy Resin?
When discussing the properties of epoxy resin, its remarkable adhesive capabilities and impressive resistance to chemicals often take center stage. A key aspect of this thermosetting polymer’s character is its ability to undergo a chemical transformation when combined with a hardener, resulting in the formation of a solid, durable substance known as cured epoxy. This curing process is a crucial aspect of epoxy resin’s functionality.
Key Properties of Epoxy Resin
One of the most impressive aspects of epoxy resin is its robust set of properties, which enable it to excel in various applications. Its exceptional tensile strength allows it to withstand significant loads without compromising on structure or integrity. Additionally, epoxy resin exhibits excellent adhesion capabilities, forming strong bonds with a wide range of materials such as wood, metal, and plastic. Furthermore, once cured, epoxy demonstrates remarkable durability by resisting water, heat, and chemical corrosion. Moreover, its electrical insulation properties make it an ideal choice for various electronic applications, where reliable insulation is crucial.
Choosing the Right Epoxy Resin
When choosing the perfect epoxy resin for your table project, it’s essential to consider several key factors. First and foremost, think about the curing time of the resin. Different types have varying drying times, so you’ll want to select one that aligns with your project schedule. Additionally, the viscosity of the resin is another crucial consideration. Thicker resins are ideal for filling gaps or creating textured surfaces, while thinner ones are better suited for applying a smooth, even coat. Finally, don’t overlook the color of the resin – clear options can beautifully showcase embedded objects, while colored resins can add a pop of personality to your design.
Safety Precautions
When tackling projects involving epoxy resin, it’s essential to prioritize caution and take necessary precautions. A well-ventilated workspace is crucial, accompanied by the use of protective gear such as gloves, safety glasses, and any other relevant equipment. By understanding the science behind epoxy resin, you’ll be better equipped to make informed decisions for your DIY endeavors, ultimately yielding a durable and long-lasting end product – think a sturdy table that will withstand the test of time.
Design Inspiration for Your DIY Epoxy Resin Table
Unleashing creativity and showcasing personal style, crafting a DIY epoxy resin table is an artistic expression as much as it is a functional endeavor. To create a truly one-of-a-kind piece, consider the following innovative concepts that marry beauty with uniqueness.
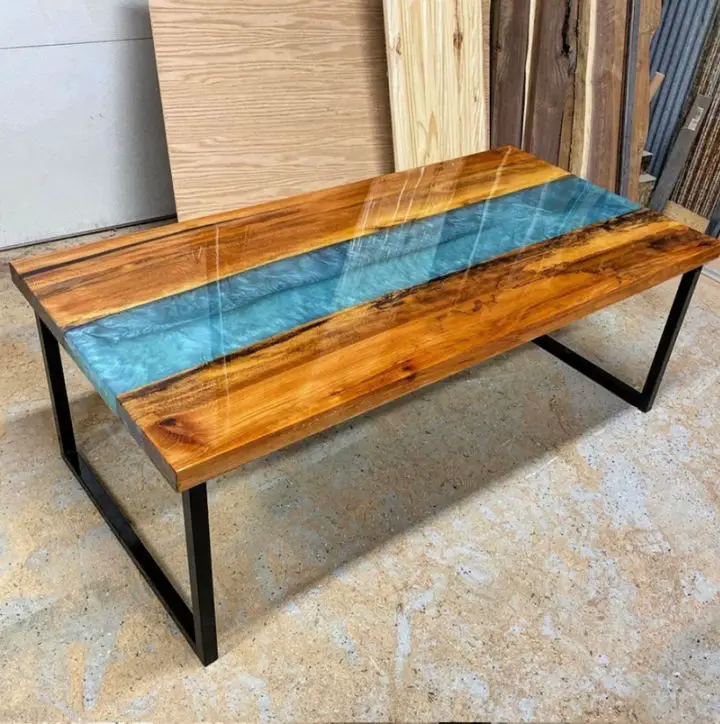
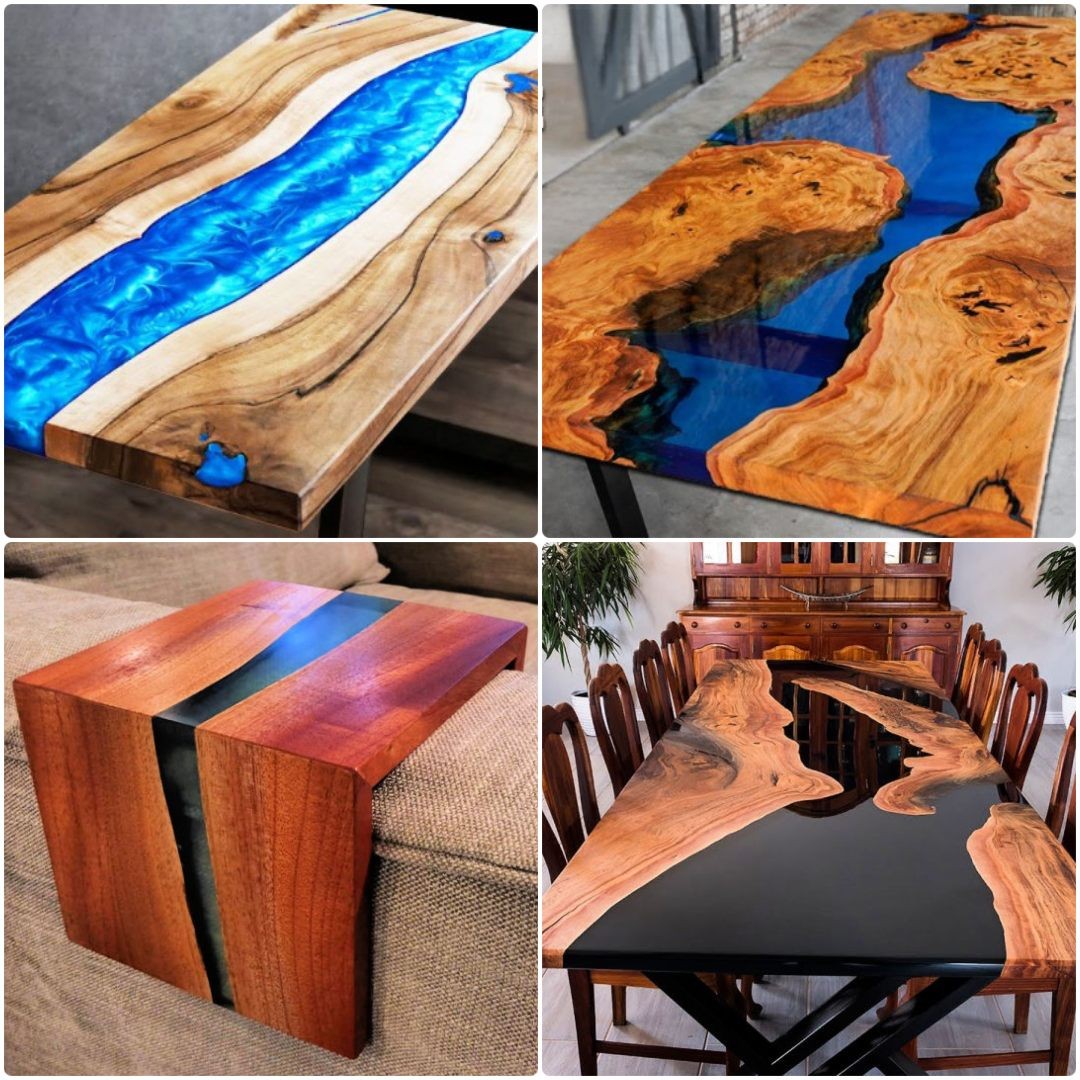
Epoxy River Tables
Epoxy river tables have become a coveted design, conjuring up the captivating flow of water. To achieve this effect, you can sandwich a strip of clear or tinted epoxy between two wood slabs, creating an illusion of a river’s currents. For added organic flair, consider using wood with natural edges or incorporating elements like stones, shells, and leaves into the epoxy for a visually interesting texture.
Glow-in-the-Dark Tables
To create an extraordinary table that shines bright, infuse glow-in-the-dark pigments into your epoxy. This unique design seamlessly blends functionality with whimsy during the day and transforms into a mesmerizing display of light at night, making it an ideal choice for adding a touch of magic to any space.
Embedded Objects
Transform your table into a one-of-a-kind masterpiece by infusing it with meaningful objects that hold sentimental value. This can be achieved by encapsulating cherished photographs, coins, or memorabilia within a durable epoxy coating, effectively preserving their essence and creating a unique conversation starter for your home.
Colorful Creations
When it comes to epoxy resin, don’t be afraid to get creative with color! By mixing the resin with a wide range of pigments, you can unlock a world of stunning effects. From bold and vibrant patterns to subtle and nuanced swirls, or even abstract art pieces that defy categorization, the possibilities are endless when you experiment with different hues. Whether you’re looking to add a pop of color to a small decorative item or create a truly show-stopping piece of art, the versatility of epoxy resin is sure to inspire.
Themed Tables
As you embark on designing your table, consider infusing it with a theme that truly speaks to you. This could be a whimsical nautical design featuring embedded seashells and a soothing blue hue reminiscent of the ocean’s depths. Alternatively, you might opt for a nature-inspired aesthetic, complete with intricate leaf patterns and a verdant ‘forest’ river flowing through the design. The beauty lies in allowing your personal interests to guide your creative process. By doing so, you’ll not only produce a unique and meaningful piece, but also cultivate a sense of joy and fulfillment that comes from bringing your vision to life.
Safety Precautions for Crafting with Epoxy Resin
To safeguard yourself while working with epoxy resin, it’s crucial to prioritize safety above all else. To guarantee a secure and satisfying crafting experience, heed the following vital safety guidelines:
Personal Protective Equipment (PPE)
When handling hazardous materials, it’s crucial to take necessary precautions to ensure your personal safety. This can be achieved by donning several essential pieces of protective equipment. First and foremost, wear nitrile gloves to shield your skin from potential exposure to harmful substances. Additionally, consider using a respirator mask to prevent inhaling fumes that may be present in poorly ventilated areas. Furthermore, protect your eyes from splashes and other forms of debris by wearing safety glasses.
Ventilation
To optimize your crafting space, prioritize a well-ventilated environment. Consider opening windows to allow fresh air in, or utilize a fan to effectively circulate the air around you.
Safe Handling
When working with epoxies, it’s crucial to prioritize caution from the start. Before diving into a project, take the time to thoroughly review the safety data sheets (SDS) provided by the manufacturer for both the resin and hardener you’ll be using. This will ensure you’re aware of any potential hazards or precautions to take.In addition to understanding the SDS, it’s also vital to accurately mix your epoxies according to the manufacturer’s guidelines. This means following the recommended ratio of resin to hardener, as specified in the instructions. By taking these simple yet essential steps, you’ll be well on your way to a successful and safe project.
Cleanliness
Maintaining a well-organized workspace is crucial for ensuring a safe and healthy working environment. A cluttered or disorganized space can lead to accidents, as loose objects and scattered materials can pose tripping hazards. Moreover, it also reduces the risk of slips and skin contact by eliminating the possibility of spills and messes going unnoticed. To achieve this, ensure that your workspace is kept tidy at all times.
Troubleshooting Common Epoxy Resin Issues
When the unexpected arises and your epoxy resin project hits a snag, it’s essential to have a plan B (or C, or D…) in place. To get you back on track, here’s a comprehensive guide to troubleshooting common problems that may arise during the epoxy resin process.
Tackiness
Resin that remains sticky after curing can often be attributed to incorrect mixing techniques or inadequate temperature levels. To resolve this issue, it’s essential to ensure accurate measuring of the resin components and maintain a warm working environment.
Bubbles
When combining the resin, it’s crucial to avoid introducing air pockets by mixing too rapidly. Instead, adopt a deliberate approach and take your time to ensure a smooth blend. If you do notice any surface bubbles forming, a gentle heat application from a heat gun can be employed to effectively eliminate them.
Uneven Finish
To avoid an imperfect finish, it’s crucial to start with a levelled working surface. Verify the flatness of your workspace using a level, as any slight unevenness can lead to issues later on. Meanwhile, by implementing necessary safety precautions and employing troubleshooting techniques, you’ll be well on your way to creating stunning and secure epoxy resin projects.
Cost Analysis for DIY Epoxy Resin Tables
When embarking on a DIY epoxy resin table project, it’s crucial to consider the expenses involved to ensure a realistic and achievable budget. To help with this process, let’s break down the typical costs associated with such a project.
Factors Influencing Cost
When it comes to crafting a bespoke table, several factors influence the final cost. The size and intricacy of the design itself are significant considerations. Larger, more complex tables naturally require more materials and labor to bring them to life. Additionally, the type of wood selected will also impact the price. Hardwoods, for instance, tend to be pricier than softwoods due to their denser, higher-quality composition. Furthermore, the quality of epoxy used in the finishing process can significantly affect the overall cost. Higher-end epoxies offer superior durability and a more refined finish, but at a correspondingly higher price point. Finally, don’t overlook the costs associated with tools and equipment – whether purchasing or renting them – which may be necessary to complete the project.
Budgeting Tips
When embarking on a DIY project, it’s essential to consider all aspects of the process to ensure a successful outcome. One key step is comparing prices from various suppliers to find the best deals on materials. This simple act can result in significant cost savings and make a substantial difference in your overall budget.In addition to material costs, it’s crucial to weigh the pros and cons of doing everything yourself versus seeking professional help. Depending on the scope and complexity of your project, hiring a professional may be more cost-effective in the long run. Consider their expertise, time, and equipment as potential factors that can impact your overall expenses.Finally, it’s wise to purchase a small surplus of materials to account for any mistakes or design changes that may arise during the process. This buffer will help you avoid costly revisions or last-minute scrambles to find alternative solutions. By taking these steps into consideration, you’ll be well-prepared to tackle your DIY project and enjoy a more satisfying outcome.
Maintenance Tips for Epoxy Resin Tables
To preserve the aesthetic appeal and durability of your epoxy resin table, regular maintenance is crucial. A well-cared-for table not only enhances its visual appeal but also prolongs its lifespan. To achieve this, consider the following guidelines:
Routine Cleaning
For daily maintenance, rely on the gentle touch of a soft cloth or sponge to wipe down surfaces. When it comes to tackling tougher messes, a mild soap solution should suffice, providing a gentle yet effective clean.
Protecting the Surface
When it comes to maintaining your epoxy-coated furniture, there are a few key factors to consider. First and foremost, make sure you’re always using coasters or trivets to protect the surface from hot items that could potentially damage the finish. Additionally, prolonged exposure to direct sunlight can cause the epoxy to yellow over time, so it’s essential to keep your table in a shaded area or use UV-blocking window treatments to minimize this effect.
Minor Repairs
When it comes to maintaining the appearance of your DIY epoxy resin table, there are a few simple techniques to keep in mind. Small scratches can often be addressed by gently buffing the area with a soft cloth, eliminating any unsightly marks. Similarly, stubborn stains can be tackled using a paste made from baking soda and water – simply apply it to the affected area, let it sit for a brief moment, and then rinse off any residue. By taking these proactive steps, you’ll be able to preserve the beauty of your epoxy resin table for years to come, ensuring it remains a stunning focal point in your home.
FAQs About DIY Epoxy Resin Tables
As you prepare to embark on the adventure of creating a DIY epoxy resin table, it’s natural to have numerous questions lingering in your mind. To provide clarity and confidence, let’s tackle some of the most commonly encountered concerns, addressing them head-on and setting the stage for a successful project.
What materials do I need to make an epoxy resin table?
To create a stunning epoxy resin table, you’ll require a sturdy wooden base, a comprehensive kit containing epoxy resin and hardener, a palette of pigments or dyes for customization, a mold or form to shape the design, an assortment of tools including a drill and sander, and essential safety gear such as gloves and goggles to ensure a seamless and secure crafting process.
How do I choose the right type of wood for my table?
When it comes to selecting wood for your project, consider both your personal taste and budgetary constraints. If you’re looking for durability and a touch of sophistication, hardwoods such as walnut or cherry may be the way to go. These premium options offer a rich, refined appearance that’s sure to impress. On the other hand, if you’re working with a tighter budget, softwoods like pine can provide a cost-effective solution that still delivers on quality. Ultimately, the type of wood you choose will depend on your unique priorities and needs.
Can I add color to my epoxy resin?
When it comes to customizing the appearance of your epoxy resin project, one effective way to do so is by introducing pigments or dyes into the mixture. This allows you to achieve the desired color scheme for your final product. Interestingly, there’s a range of pigment options available, encompassing liquid, powder, and metallic varieties. By selecting the right type and shade of pigment, you can create a vast array of hues and effects, from subtle pastels to bold metallic finishes.
What safety precautions should I take when working with epoxy resin?
When engaging in DIY projects or working with hazardous materials, it’s crucial to prioritize your safety above all else. To ensure a safe and healthy work environment, make sure to dedicate a well-ventilated area exclusively for your project. Additionally, don’t forget to equip yourself with the necessary protective gear such as gloves, goggles, and a respirator mask. Furthermore, take the time to thoroughly review the safety data sheets provided for each product you’re utilizing, as this will help you better understand their potential risks and take necessary precautions.
How do I prevent bubbles in my epoxy resin?
To ensure a smooth and bubble-free application process, it’s crucial to mix the resin with deliberate slowness, thereby minimizing the introduction of air pockets. As you pour the mixed resin, maintain a steady pace to prevent unwanted air from entering the mixture. If surface bubbles do form during this process, consider employing the use of a heat gun or blowtorch to carefully dispel them, thus preventing any imperfections in your final product.
What is the curing time for epoxy resin?
When it comes to curing time, products often exhibit varying rates of reaction. Typically, this process takes anywhere from a day and a half (24 hours) to three days (72 hours). To ensure you’re getting the most accurate information, always consult the manufacturer’s guidelines for specific product recommendations.
How do I achieve a smooth finish on my epoxy table?
To achieve a flawless finish on your cured epoxy resin table, begin by sanding the surface using progressively finer grits of sandpaper. Start with a coarse grit and work your way up to a high-grit paper, gradually refining the texture until you’re left with a silky-smooth, glossy finish.
Can I embed objects into the epoxy resin?
One of the most exciting aspects of working with resin is the ability to infuse personal touches into your finished piece. This can be achieved by embedding various natural objects like stones, shells, or even photographs within the resin before it hardens. By incorporating these unique elements, you’re able to add a layer of personality and character to your table that’s all your own.
How do I maintain my epoxy resin table?
To preserve the integrity of the table’s surface, gently wipe it down with a soft cloth and mild soap solution. Additionally, take measures to shield it from excessive heat and direct sunlight exposure, as these can cause damage or discoloration over time. Finally, utilize a gentle buffing motion to address minor scratches, ensuring the table remains aesthetically pleasing and well-maintained.
What should I do if my resin is sticky after curing?
When issues arise with sticky resin, it’s often due to a mismatched resin-to-hardener ratio or an environment that’s too cool for proper curing. To avoid this, double-check the ratio and ensure the workspace is warm enough for the epoxy to set correctly.
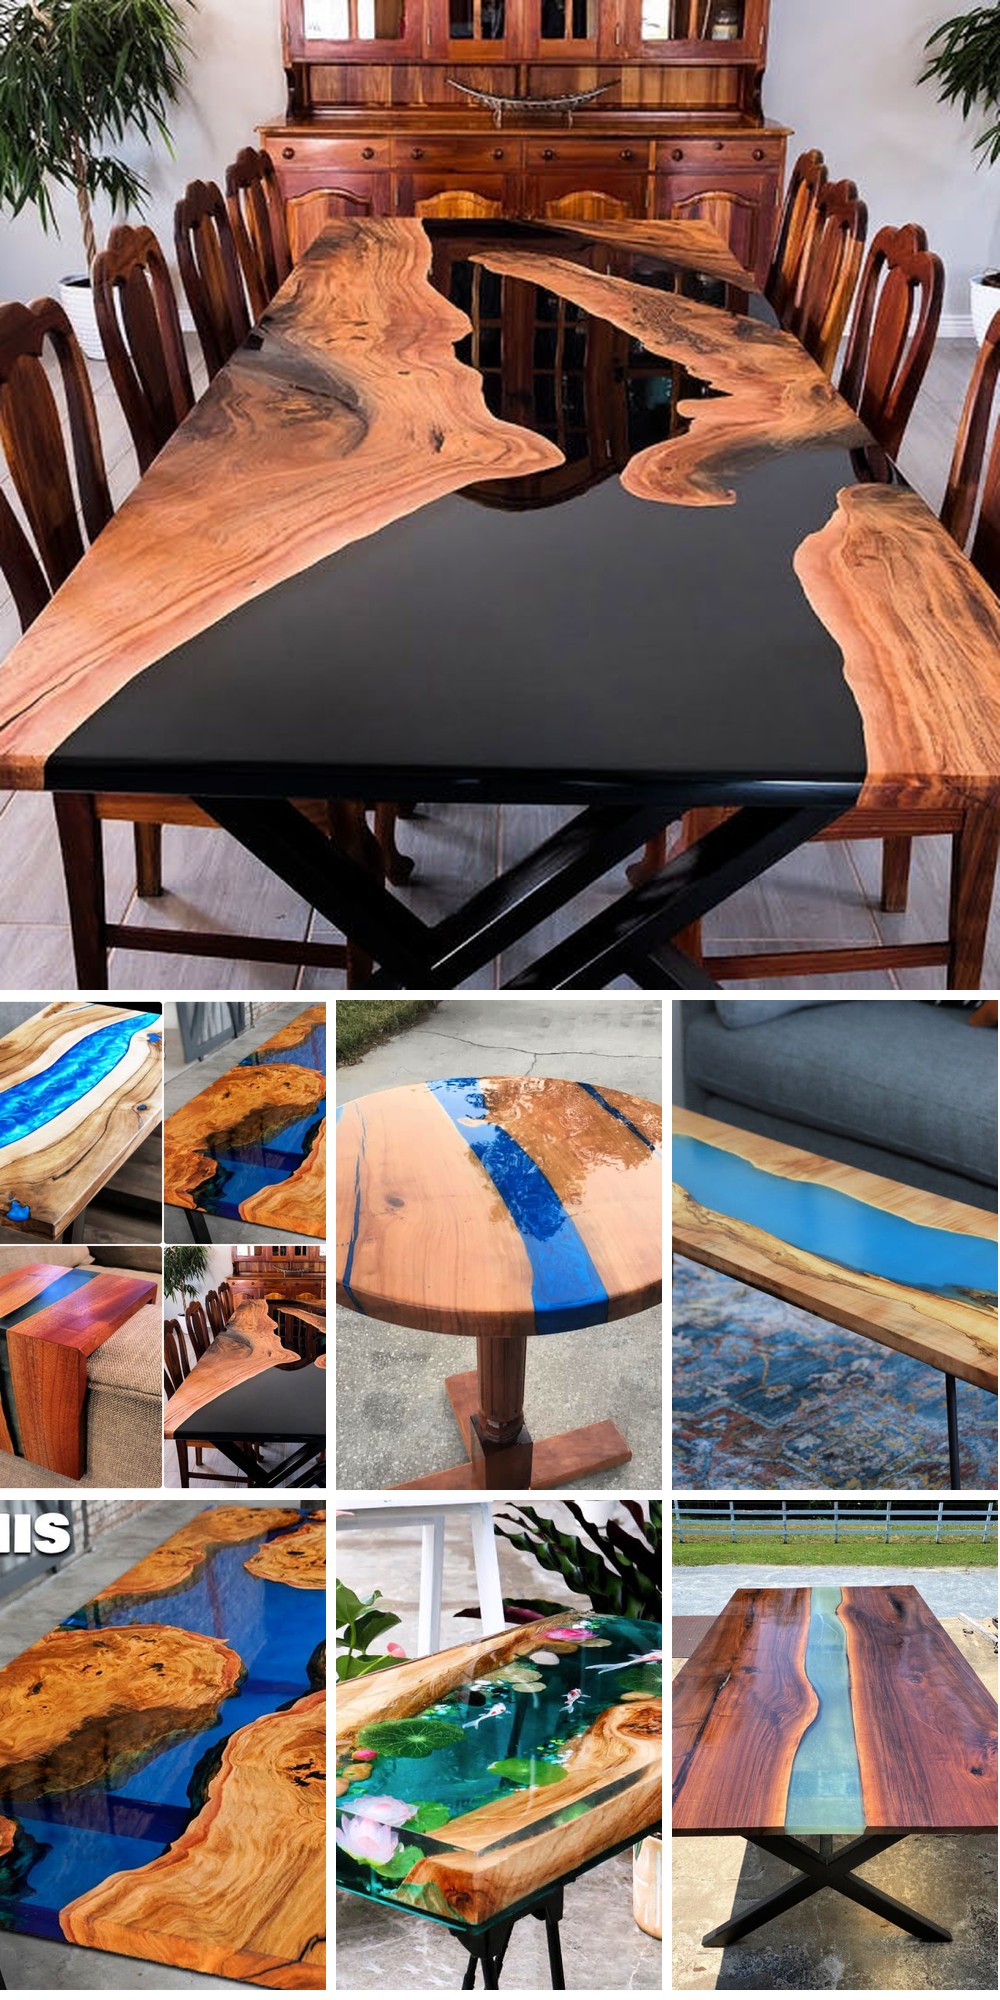
25 DIY Epoxy Resin Table Ideas
Elevate your home’s aesthetic with a plethora of creative and visually striking DIY epoxy resin table ideas. This comprehensive collection boasts an impressive 25 one-of-a-kind designs that blend vibrant colors, innovative textures, and unique shapes, guaranteeing inspiration for any design enthusiast.
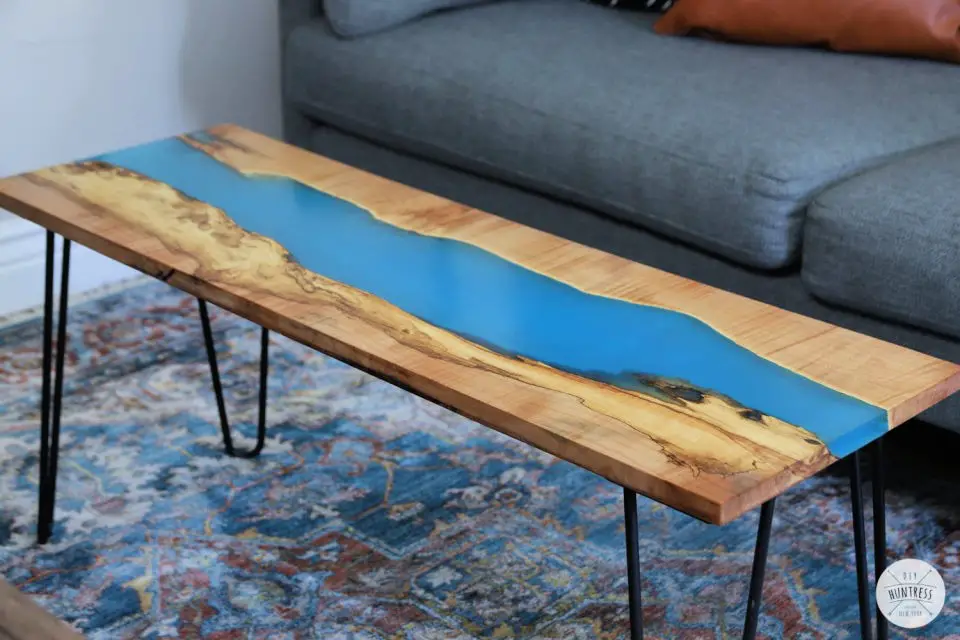
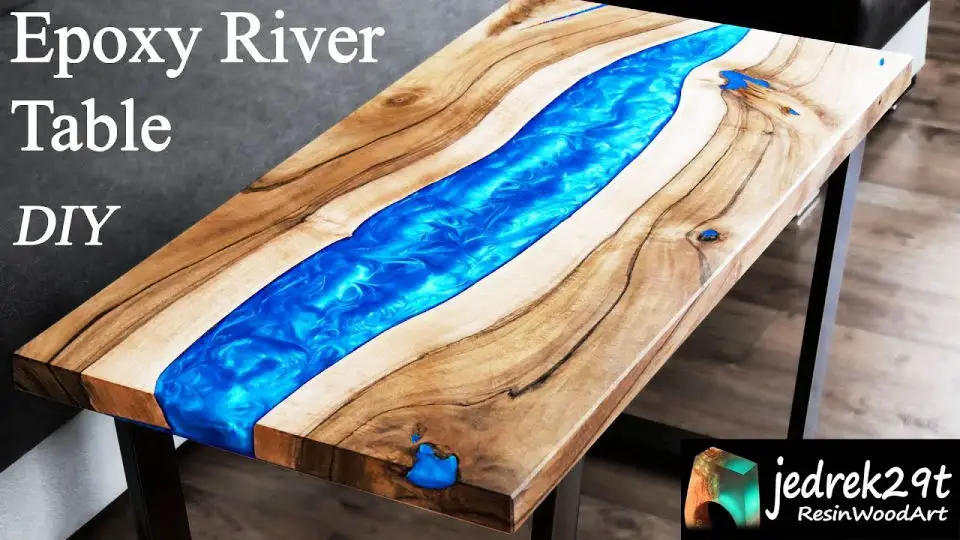
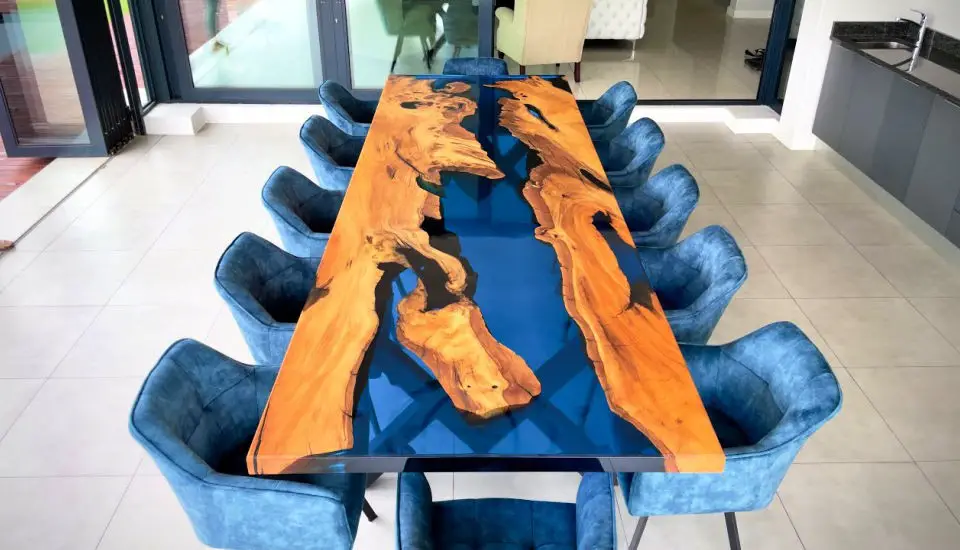
DIY Epoxy Resin River Table
Indulge in the world of DIY crafting by creating an epoxy river table that’s as unique as it is captivating. This intricate project combines recycled wooden planks and epoxy resin to produce a stunning piece that seamlessly blends artistry with functionality. As you recreate the serenity of a river’s flow on your table, you’ll be able to infuse your space with natural beauty and serenity.
Detailed instructions guide you through every step, from selecting the right materials to making the table, incorporating essential safety precautions along the way. You’ll also discover how to add pops of color to make your piece truly one-of-a-kind. As you bring your vision to life, you’ll experience the fulfillment that comes with crafting a unique piece that reflects your personality and creative essence.
Your finished epoxy river table won’t just be a beautiful piece of furniture – it’s a conversation starter that will undoubtedly pique the interest of every visitor.
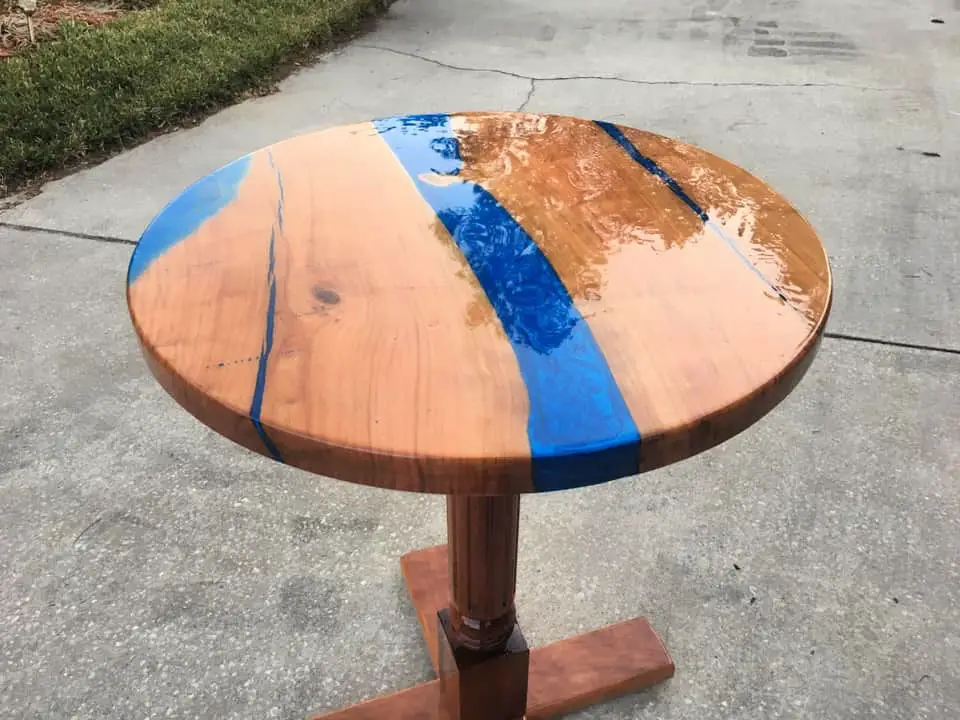
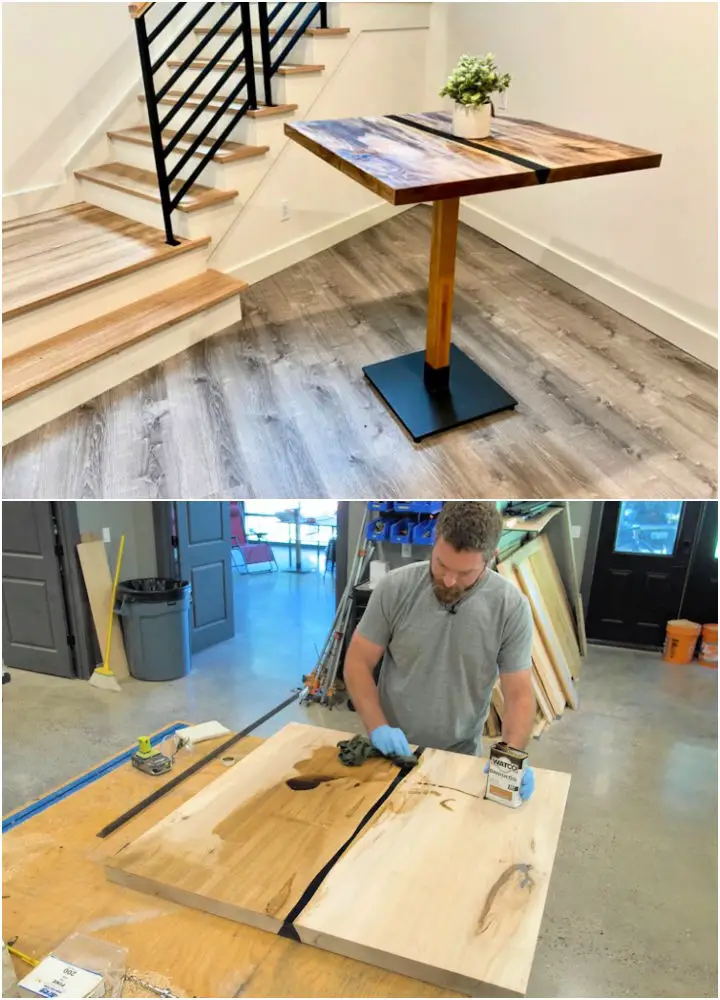
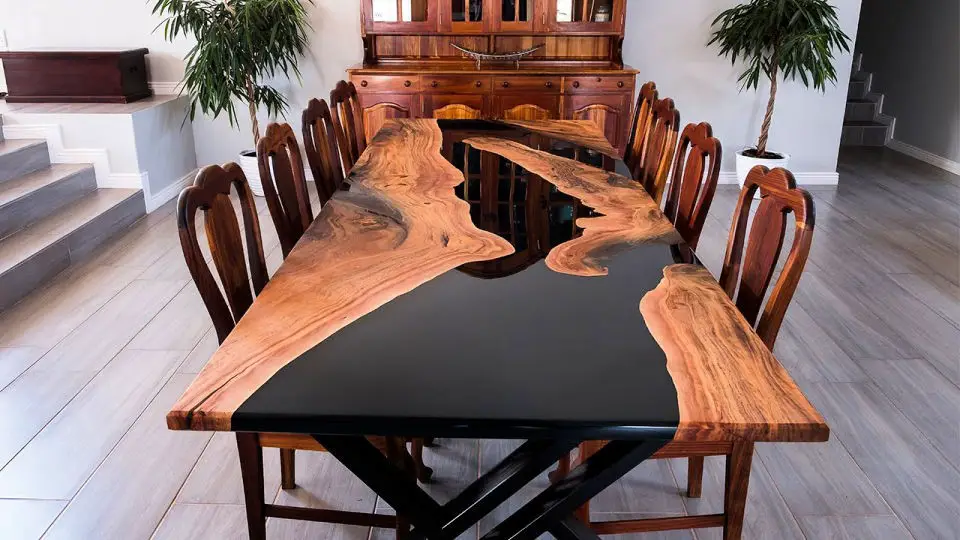
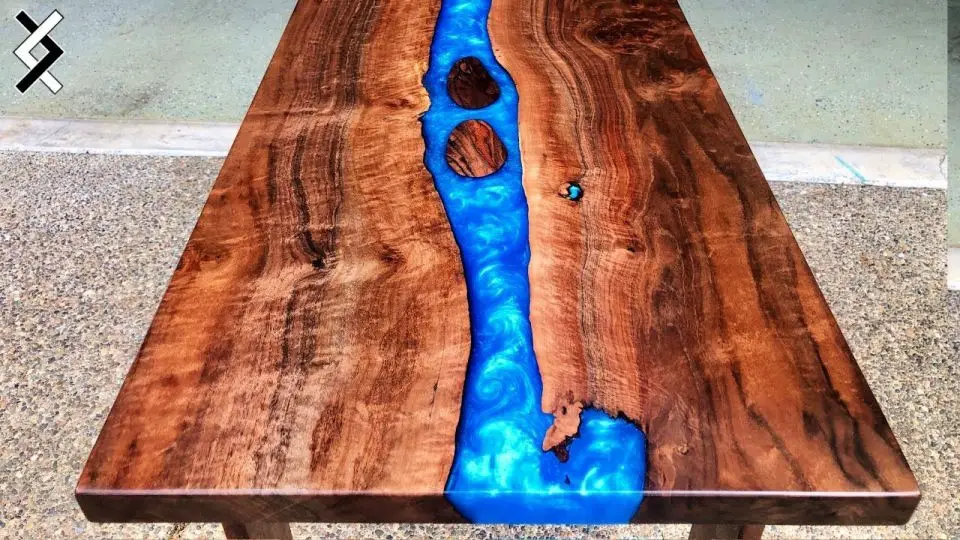
How Do You Make an Epoxy Resin River Table
Transform your dining room into a stylish haven with a one-of-a-kind DIY epoxy resin river table project. This unique masterpiece seamlessly integrates natural elements with a radiant, glossy finish, making it a show-stopping centerpiece. To create this stunning piece of furniture, you’ll embark on an intricate journey involving two live edge slabs and epoxy resin. You’ll start by selecting your slab, cutting and flattening it, crafting a mold, mixing and pouring the epoxy, and finally mounting the finished table top onto a base. The addition of epoxy resin lends a mesmerizing ‘river’ effect, imbuing your creation with character and charm. With meticulous preparation and patience, you’ll produce a bespoke piece that becomes the focal point of any room. Your river table is more than just a piece of furniture – it’s a testament to your creativity and craftsmanship, inspiring conversation and admiration.
Handmade Epoxy Poured Resin River Table
Embark on an artistic journey to create a breathtaking DIY epoxy resin table that will elevate your living space. This comprehensive guide will walk you through every step, sharing expert advice and insights to help you build a unique wooden masterpiece that rivals professional craftsmanship.To embark on this creative adventure, you’ll need a variety of tools and materials at your disposal, including high-quality casting and laminating resins, vibrant liquid color pigments, large mixing cups, silicone caulking, a reliable caulking gun, silicone spray, duct tape, an MDF board, sturdy screws, flexible F-Clamps, a soft mallet, and a trusty wood chisel. With these essential components, you’ll be well-equipped to tackle the process with precision and finesse.Throughout this process, quality is paramount, as the chosen resin requires careful handling during curing to achieve a flawless finish. By following expert techniques and tips, you’ll be amazed at how effortlessly you can create your very own epoxy river table that exudes sophistication and style.
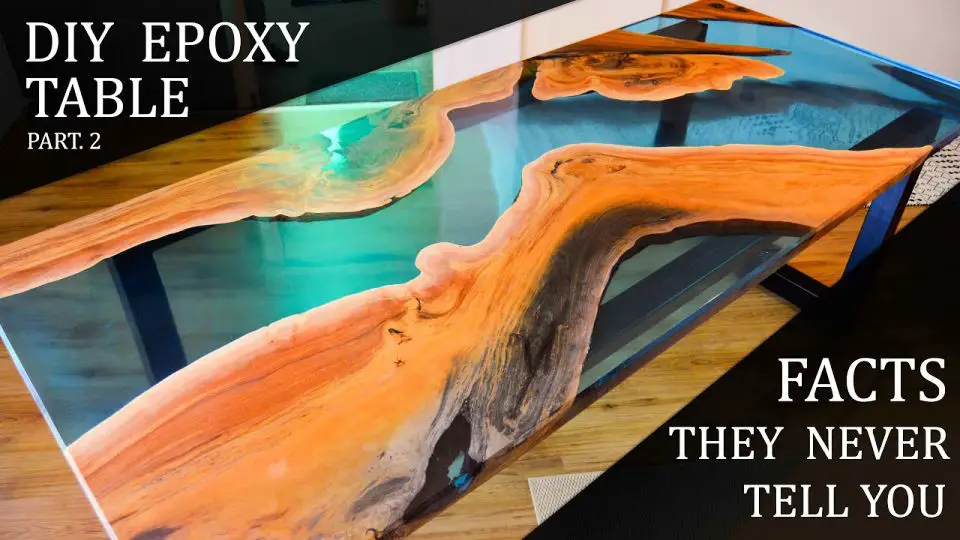
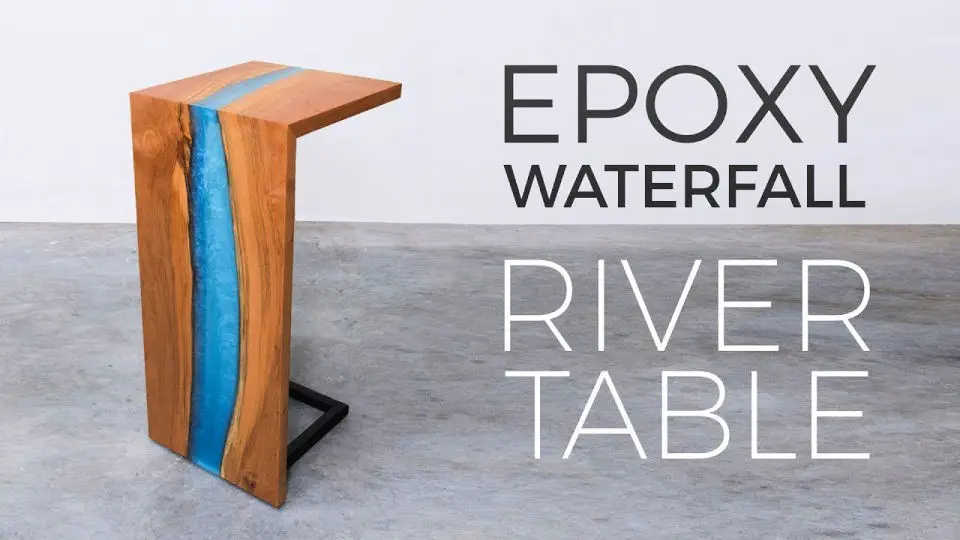
DIY Dark Epoxy Resin River Table – Step-by-Step Instructions
Transform your living room with an otherworldly, glow-in-the-dark DIY resin table that defies ordinary decor standards. This modern marvel of design and chemistry utilizes a unique combination of a live-edge slab, deep-pour epoxy, and luminous pigment powder to create a mesmerizing centerpiece that shines brightly long after the sun has set.
The secret lies in blending the resin with glow-in-the-dark pigment powder, crafting a radiant ‘river’ that flows through the table and illuminates the room when the lights dim. A dash of silicone secures the slab within a reusable mold, ensuring a flawless pour.
As the resin cures, a few finishing touches – sanding, filling any remaining voids, and applying a wood finish – bring the table to its full glowing potential. So why wait? Join the ranks of the illuminated with this glow-in-the-dark resin table project and illuminate your home with an unparalleled visual effect.
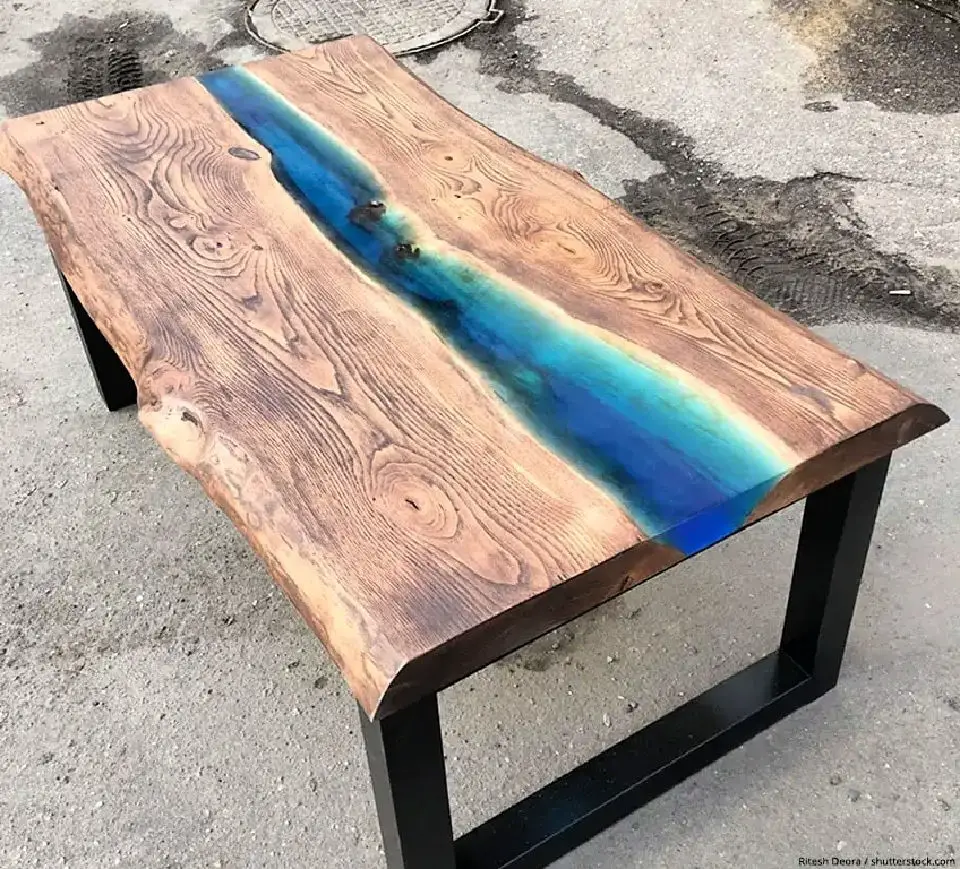
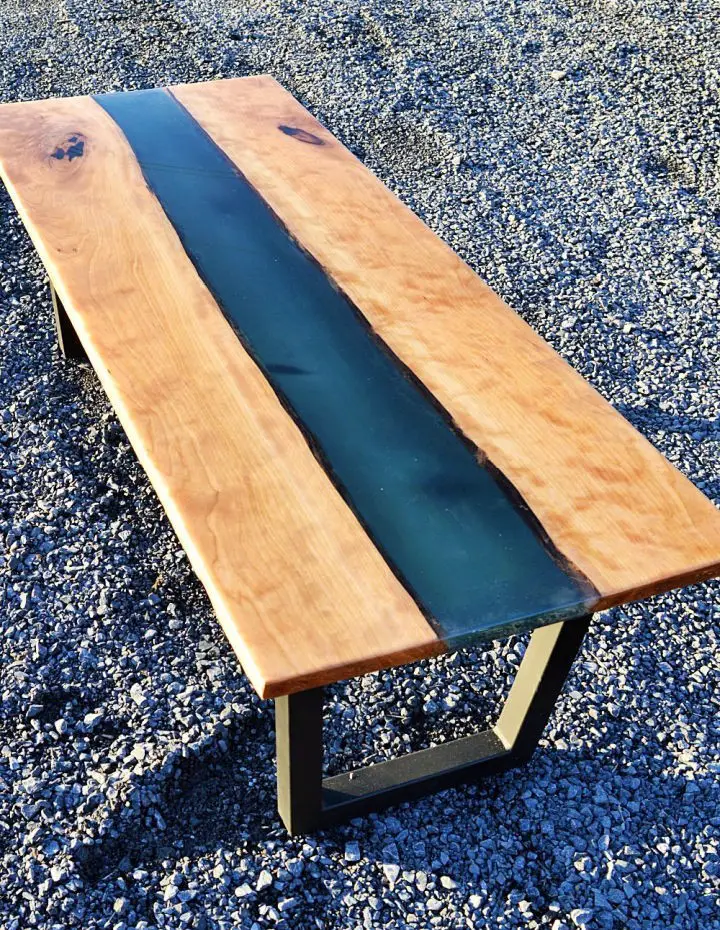
How to Make an Epoxy River Table
Craft a masterpiece with this extraordinary DIY epoxy river table project. Start with a stunning 70-inch-long, 2-inch-thick cherry live edge slab from Eco Relics, then employ a rockler circle router jig, miter saw, and table saw to shape the wood, allowing its natural beauty to shine through. As you work, carefully fill in any cracks, level the pieces, and pour layers of epoxy to create a breathtaking blue-hued river design that showcases your craftsmanship. This guide emphasizes the importance of understanding the chemical reactions involved with working with epoxy, ensuring a seamless blend between the tabletop and turned-leg base coated in epoxy. As you work on this project, remember that woodworking not only creates functional pieces but also reveals and highlights the inherent aesthetics of the material itself. If the interplay of wood and epoxy fascinates you, this cherry wood epoxy river table will undoubtedly inspire your next creative endeavor.
DIY Epoxy Resin River Wooden Table
Transform your home with a stunning DIY epoxy resin river table, no professional expertise required. This in-depth guide empowers you to become a skilled artisan by providing the essential techniques and insights necessary for creating a one-of-a-kind masterpiece. As global trends continue to celebrate these artistic tables, learn how to build a piece that reflects your personal style and harmonizes with your living space. The tutorial places paramount importance on selecting premium natural wood for both durability and visual appeal. From material selection to finishing touches, this comprehensive guide ensures your epoxy resin river table is a testament to your creativity and craftsmanship, serving as a show-stopping centerpiece in any room.
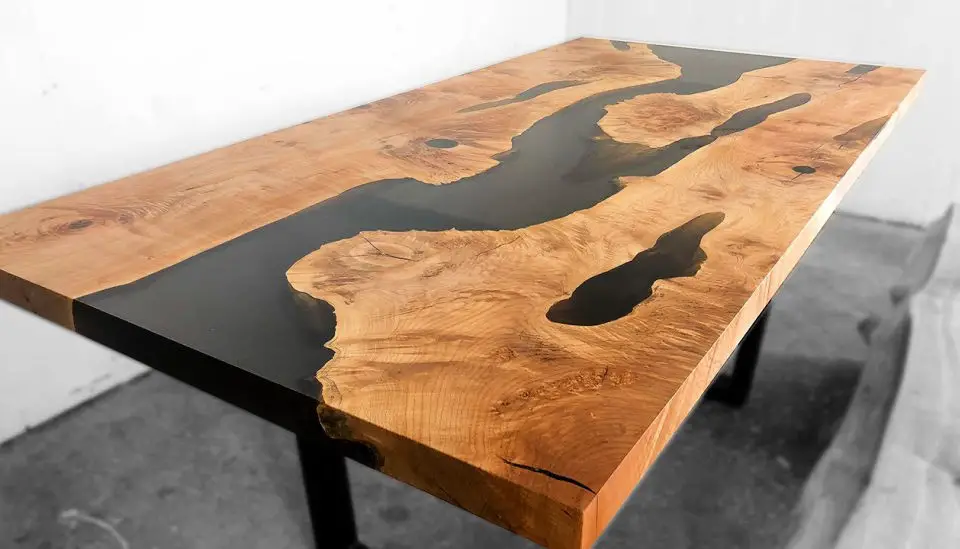
DIY Live Edge Epoxy Resin Reverse River Table
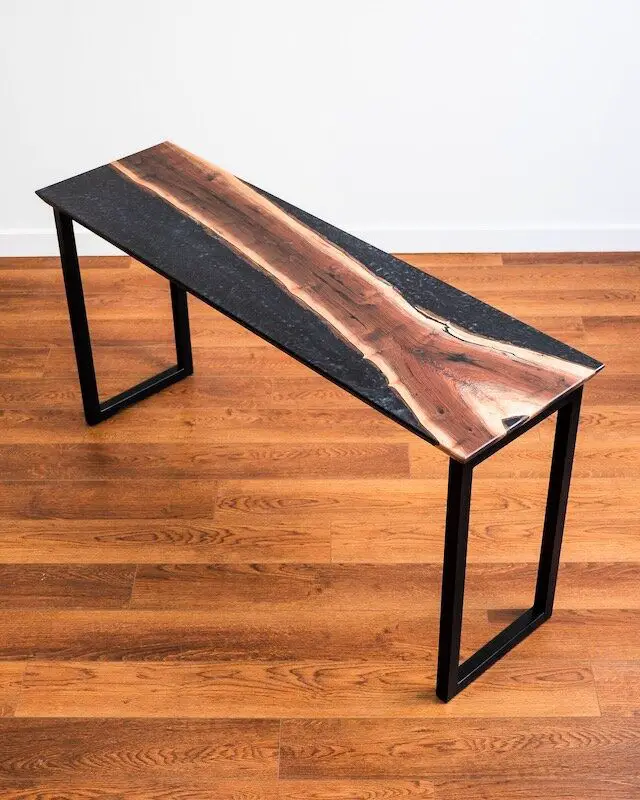
To create a one-of-a-kind, DIY live-edge epoxy resin table, I embarked on a journey that combined artistry with technical skill. The project entailed employing various materials, including Totalboat thickset casting epoxy resin, Rockler zip driver screws, black epoxy pigment, a walnut slab, and Enduro black poly. The process commenced by flattening the walnut slab on a jointer, setting the stage for the subsequent steps. These included preparing the slab for the epoxy pour, crafting a casting form to contain the epoxy, and finally, casting the walnut slab in epoxy. Next, I constructed the wooden table base, followed by an exhaustive sanding process, finish preparation, and assembly. The final stages involved spraying a black polyurethane finish, cleaning the epoxy resin, beveling the edge of the epoxy casting, and ultimately, assembling the epoxy cast tabletop with its wooden base.
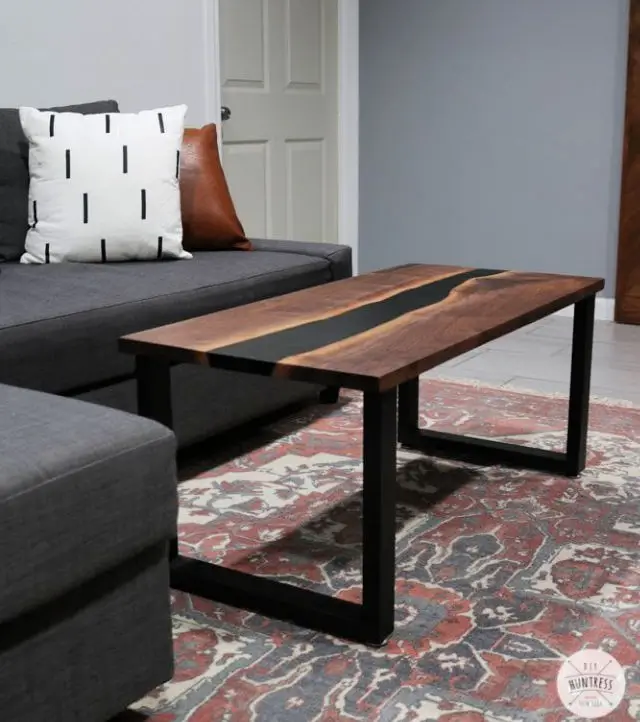
DIY Live Edge Epoxy Resin River Coffee Table
Transforming raw materials into an exquisite live edge epoxy river coffee table requires skill, patience, and attention to detail. Our comprehensive guide is designed to walk you through the process, dispelling common misconceptions and highlighting potential pitfalls. By sharing our own experiences and expertise, we’ll empower you to create a stunning piece of furniture that effortlessly blends natural charm and elegant design.
To begin, selecting the right wood for your project is crucial. We’ll delve into the world of wood choices, helping you navigate the options and make informed decisions. Once you’ve selected your perfect plank, we’ll guide you through the process of preparing it for epoxy application.
The art of choosing the ideal resin is another critical aspect. Our tutorial will provide valuable insights on how to select a resin that complements your wood choice, ensuring a flawless finish. And, as with any project involving resin, timing is everything; we’ll stress the importance of allowing for proper cure time.
The final step, installing the table legs, may seem straightforward, but it’s an opportunity to add the finishing touches to your masterpiece. With our guidance, you’ll be able to confidently complete this crucial stage and stand back to admire your handiwork.
Make Your Own Epoxy River Glow Table

Transform the world of DIY craftsmanship with this captivating epoxy resin river table that radiates in the dark without any need for artificial lighting. Combining woodworking and chemical artistry, this table features live edge sinker cypress wood infused with blue fire glass and glow-in-the-dark powder, creating an otherworldly ambiance. To begin, meticulously prepare the wood by removing bark and ensuring a smooth surface.Next, create an epoxy mold and pour in the mixed resin, carefully eliminating bubbles to achieve a flawless finish. Layer fire glass or acrylic rocks within the mold, followed by a final clear epoxy pour. Once removed from the mold, trim the ends and enhance the glowing effect with a UV LED light strip if desired.After sanding and finishing, attach hairpin legs to complete your luminous masterpiece. This comprehensive guide will guide you through each step, breaking down what seems like a complex process into an achievable task. Not only does this table serve as a functional centerpiece, but it also adds an element of enchanting, celestial beauty to your space.
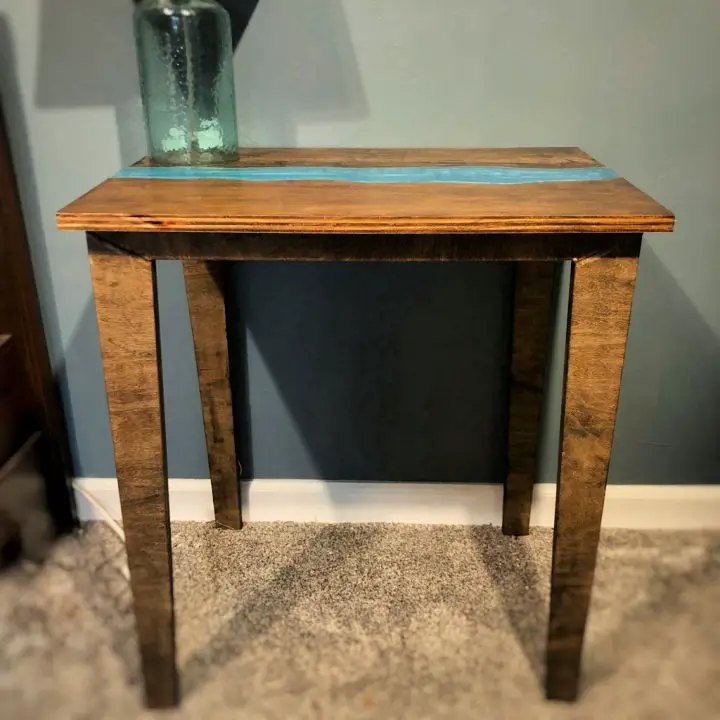
Easy DIY Epoxy River Pub Table
Unleash your creativity with an innovative DIY project that transforms a humble slab into a stunning square pub table featuring a breathtaking blue metallic epoxy river. This comprehensive guide harnesses the power of Rustoleum’s Watco Super Glaze Pre-Tinted Epoxy to breathe new life into a ordinary surface, making it a showstopping focal point in any space.The project requires crafting the epoxy river and involves meticulous steps in table assembly, sanding, and finishing. This hands-on approach combines practical woodworking skills with artistic flair, offering a rich learning experience that will leave you feeling proud of your accomplishment. With careful attention to detail and dedication, this project promises to yield a breathtaking final product that sets your DIY journey apart.
Faux Live Edge Epoxy River Table for Under $100
Transform your space with a DIY faux live edge epoxy river table, crafted using maple plywood and rustoleum epoxy super glaze, all within a budget-friendly $100. This project embodies the perfect blend of functionality and artistic expression, ideal for serving as a bedside table or adding a touch of natural elegance to any room. With just basic tools such as a table saw, jigsaw, drill, epoxy resin, Tyvek tape, and color pigment at your disposal, you’ll be guided through a comprehensive process involving four distinct steps: first, cutting and staining the wood; next, creating a faux live edge effect that mimics the organic beauty of nature; then, crafting a mold to contain the epoxy mixture; and finally, pouring the epoxy resin to bring the entire design together. As with any creative endeavor, there’s always room for error correction, ensuring a flawless finish that showcases your unique craftsmanship. Allow yourself to become fully immersed in this project, and bask in the pride of having created a one-of-a-kind furniture piece that reflects your personal style.
Free Epoxy Resin River Coffee Table Plans
Transform your living room with a one-of-a-kind DIY river resin coffee table. By combining simple handheld power tools with readily available accessories from your local home improvement store, you’ll embark on a creative journey that brings the beauty of nature indoors. The process unfolds in several steps: first, you’ll need to carefully cut and prepare the slabs; next, construct a form to contain the resin pour; then, work with tabletop resin to achieve a smooth, bubble-free finish. To take it to the next level, add pigmentation to create a stunning ‘river’ effect that adds visual interest to your coffee table. Finally, sand the surface and attach legs to complete the piece and give it a polished appearance. This project is more than just building a table – it’s an opportunity to craft a unique work of art that combines functionality with conversation-starting charm. Let your imagination run wild and make this coffee table your next exciting DIY adventure!
How to Build River Table Using Epoxy
When embarking on a DIY epoxy river table building adventure, it’s essential to roll with the punches – literally. This unorthodox approach harnesses the power of Australian Red Cedar and epoxy resin to create a showstopping masterpiece. As you navigate the process, each hurdle becomes an opportunity to flex your creative muscles and showcase your resilience. From meticulously preparing the surface to perfecting the waterfall effect via miters, this guide is your comprehensive companion for overcoming obstacles and achieving ultimate success. So, don’t be discouraged by unexpected setbacks – instead, turn them into a catalyst for something truly remarkable. This unconventional river table project is the perfect antidote to stagnation, encouraging you to tap into your DIY spirit and create something truly unique.
Luxurious DIY Epoxy River Table
Transforming your living space has never been more exciting! With this innovative DIY luxurious epoxy river table, you’ll unlock endless possibilities for creative expression. By following simple and easy-to-understand instructions, you’ll discover how to breathe new life into your home or office with unique decor pieces that reflect your personal style. Whether you’re looking to add a touch of elegance to a single room or embark on a full-scale renovation, our DIY guide will empower you to achieve stunning results without breaking the bank. As you explore the world of DIY and home renovation, you’ll find that the beauty lies in the limitless possibilities for creativity and self-expression. Join us on this inspiring journey as we show you how to turn your house into a true reflection of yourself!
Epoxy Resin River Table Design
Step into the creative world of woodworking and resin artistry as you embark on this hands-on DIY journey. Our comprehensive video tutorial will walk you through the process of crafting an awe-inspiring epoxy river table, where natural wood elements harmonize with luminous resin to create a one-of-a-kind masterpiece resembling a flowing river. With the right tools, equipment, and high-quality resin at your disposal, you’ll be empowered to bring this project to life in your workspace. This step-by-step guide takes you from preparation to final assembly, ensuring you grasp every detail, including securing the legs. Beyond its stunning visual appeal, this table also serves as a functional piece of furniture that’s sure to spark conversations in your home or office. By fusing natural elements with man-made materials, we’re not only creating something visually striking but also fostering a sense of balance and creativity. Take the opportunity to craft an epoxy river table, a testament to the union of nature and artistry.
Build an Epoxy Resin River Table
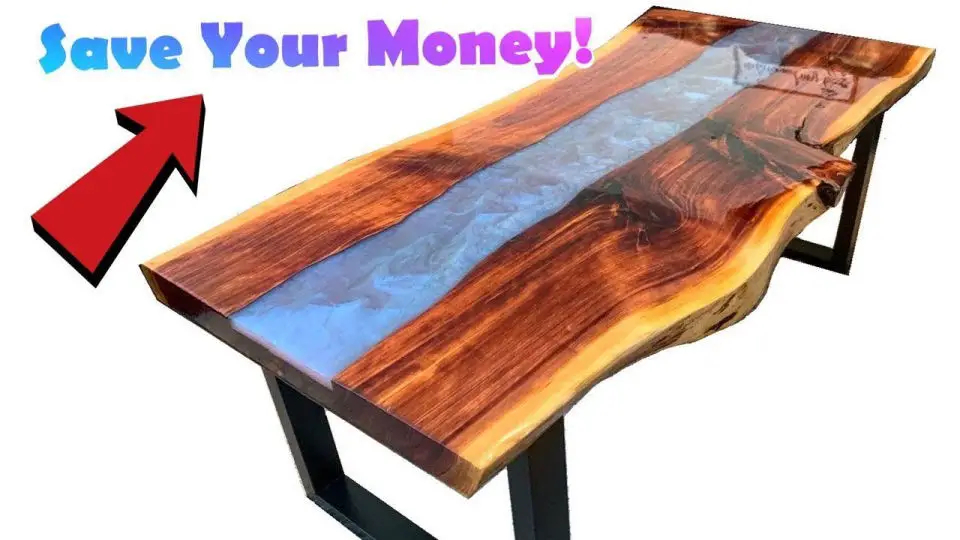
Experience the thrill of creating a DIY epoxy resin river table on a budget that’s hard to resist. Discover how to craft this striking piece of furniture without breaking the bank by skipping the melamine mold and opting for just one epoxy kit, which can save you up to $430 compared to traditional methods. Say goodbye to excess costs like caulk and hello to a stunning, professionally-looking river table that won’t dent your wallet.
Creative Epoxy Resin River Table With Mold
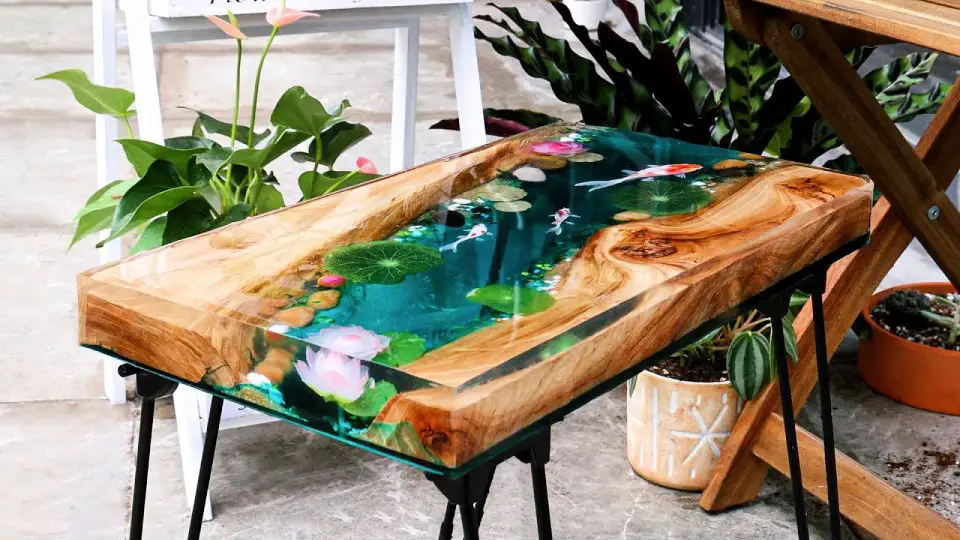
Transform your indoor décor into an immersive artistic experience by crafting a one-of-a-kind epoxy resin river table featuring intricate koi fish designs. This DIY project harmoniously combines the natural beauty of wood with the versatility of epoxy resin, resulting in a truly unique piece that serves as both a stunning centerpiece and a conversation starter. To bring this vision to life, you’ll need a creative mindset, wooden materials, and a few essential crafting tools. As you work through this project, you’ll discover the joy of creating something truly special that reflects your personal style and adds an air of sophistication to any room. The symbolic koi fish design not only adds visual interest but also carries cultural significance, representing prosperity and good fortune. With each brushstroke or layer of epoxy resin, you’ll be one step closer to crafting a show-stopping river table that will captivate anyone who lays eyes on it.
How to Make an Epoxy River Table
Unlock your creativity and build a one-of-a-kind epoxy table with ease. This comprehensive guide takes you through the process of combining functionality and aesthetics, starting with the assembly of essential tools like epoxy, a table frame, and hand tools. As you work through this DIY project, remember to prioritize safety measures to ensure a secure and enjoyable building experience.
As you craft your unique piece of furniture, you’ll discover that the prime ingredient – epoxy – is the key to transforming a common material into a stunning masterpiece. Embark on this DIY adventure today and revel in the satisfaction of creating an exclusive epoxy table from scratch.
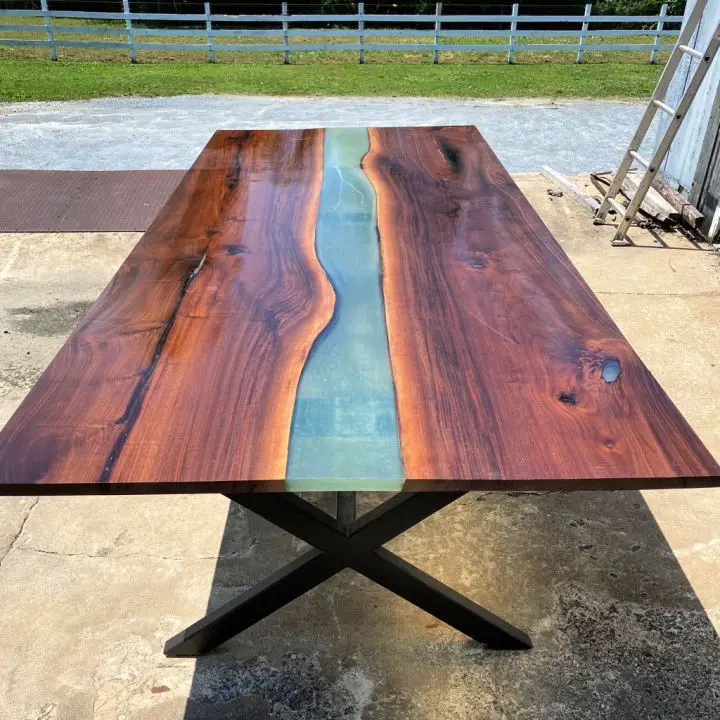
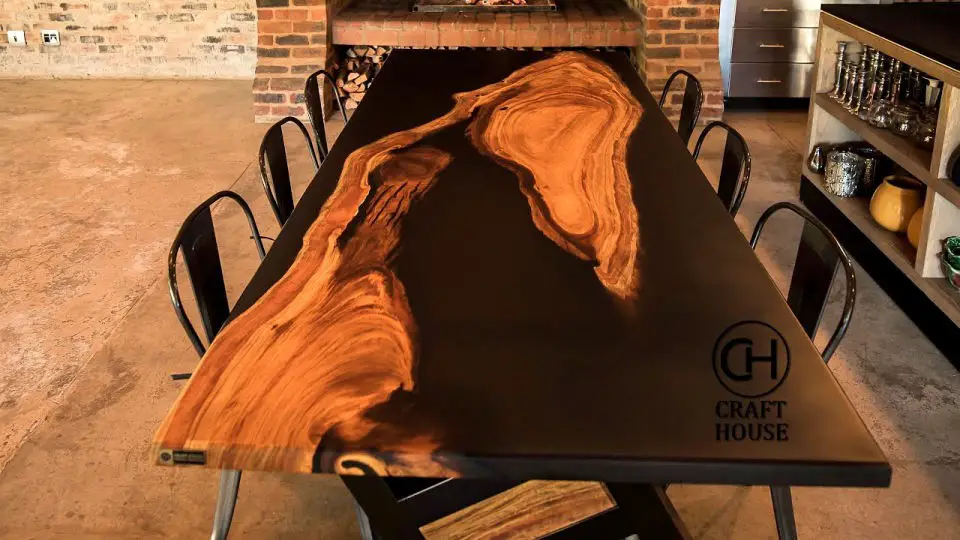
Building a Huge Epoxy River Dining Table
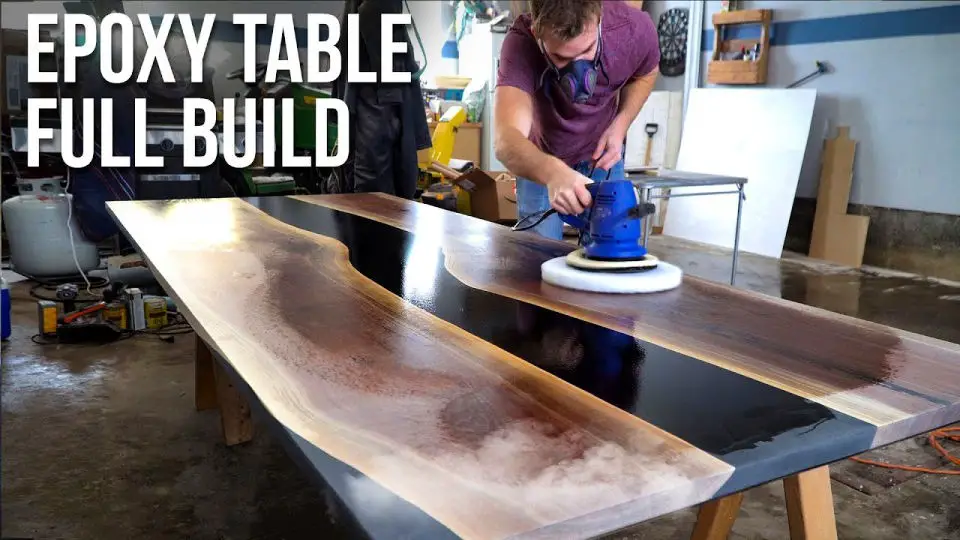
Elevate the ambiance of your dining room with a bespoke black walnut and black DIY epoxy dining table, crafted with precision and care. This ambitious project is perfect for woodworkers seeking to showcase their skills while creating a unique piece of furniture that exudes sophistication.By combining black walnut slabs with slow-setting casting epoxy, you’ll gain a comprehensive understanding of the entire process, from start to finish. The resulting river table will be a masterpiece that impresses friends and family alike.To bring this vision to life, gather the following materials: a 5-inch Makita Sander, high-quality casting epoxy, buffing pads, Osmo PolyX 3043, and steel legs from Fractal Designs. With these tools at your disposal, you’ll be able to build an elegant dining table that embodies your personal style and craftsmanship.
How to Build an Epoxy River Table for Beginners

Crafting a luxurious epoxy table in the comfort of your own home is now within reach with this comprehensive guide, tailored for DIY enthusiasts seeking to unleash their creativity. By following a series of clear and concise steps, you’ll be guided through the process from sourcing essential materials to applying the final touches. The key elements include premium hardwood planks, high-quality epoxy resin, a range of pigments for customized coloration, and standard woodworking equipment. Meticulously combining these components will yield a stunning outcome, as you bring your vision to life. Not only does building an epoxy table add a unique touch to your space, but it also provides a profound sense of accomplishment from creating something truly exceptional. With this guide, the process has never been more accessible or enjoyable.
How to Make Your Own Island Epoxy River Table
Embark on a thrilling DIY escapade by constructing a stunning island epoxy table that seamlessly blends artistic flair with functional practicality. The journey begins with gathering essential materials, including a robust wood slab, epoxy resin, and the requisite woodworking tools. With clear-cut guidance, you’ll be empowered to transform raw supplies into a breathtaking piece of furniture. The project’s crowning achievement lies in the marriage of the wood slab and epoxy resin, yielding an intriguing design that will undoubtedly turn heads. Beyond its aesthetic allure, this project serves multiple purposes, making it an ideal addition to any space. Get ready to unleash your creativity and craft your masterpiece today with this engaging and informative guide!
Cool DIY Epoxy River Table
Step into a world of artistry and functionality with this breathtaking DIY epoxy river table project! Worth a whopping $40,000 in value, you’ll have the opportunity to unleash your creativity and bring a touch of nature’s beauty indoors. With the help of specialized tools like geared eccentric sanders, routers, and circular saws, you’ll shape and refine your masterpiece to perfection. The polishing agents will add a high-gloss finish, elevating the overall aesthetic to a sophisticated level. As you combine epoxy resin with a wooden slab, you’ll create a one-of-a-kind conversation piece that showcases your craftsmanship. This project is not only an impressive addition to your home but also a testament to your artistic skills. Join us on this mesmerizing journey and build your stunning river table today!
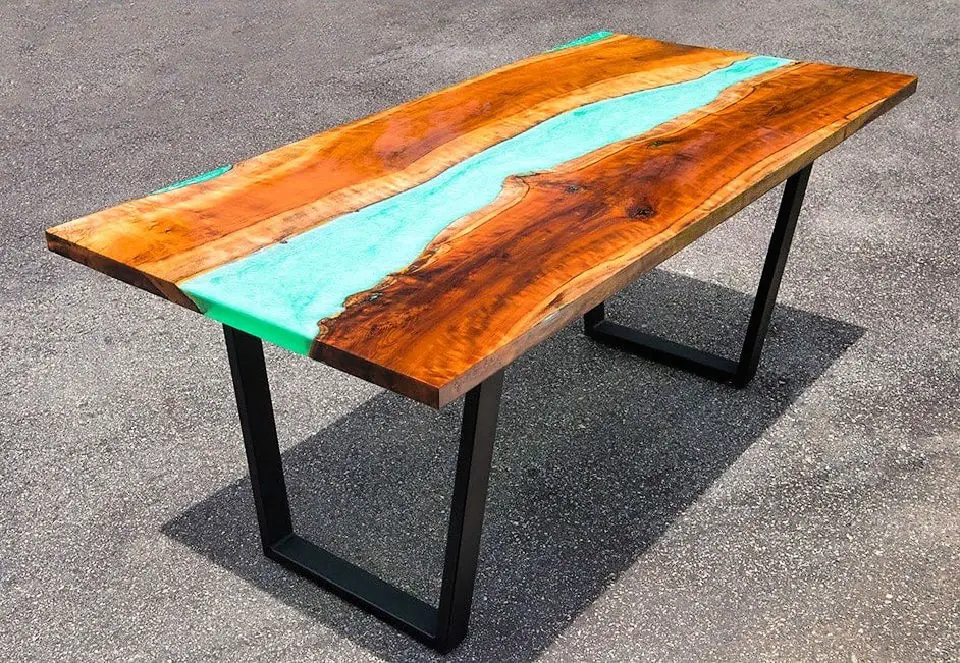
Homemade Colored Epoxy Resin River Table
As you gaze upon the winding curves of the river-inspired table, the shimmering hues of blue epoxy resin dance across the rich walnut surface, captivating the senses. In this guide, we’ll embark on a creative journey to craft a one-of-a-kind DIY colored epoxy resin table that will add an unparalleled touch to your home decor.
Combining the warmth of walnut with the vibrant energy of blue epoxy, this project presents an opportunity to flex your woodworking skills and unleash your artistic expression. The result is a stunning piece that harmoniously balances form and function, perfect for elevating the ambiance of any room. Join us in this hands-on adventure as we explore the art of crafting an epoxy resin table that’s equal parts beauty and functionality.
Making Your Own Floating Epoxy Waterfall River Table
Immerse yourself in the world of DIY woodworking by crafting a breathtaking centerpiece for your home – a stunning floating epoxy waterfall river table. This project is a perfect opportunity to work with unique materials like live edge cherry slabs and Ecopoxy resin, allowing you to experience the thrill of creating a one-of-a-kind piece that seamlessly blends natural elements with modern aesthetics. As you delve into this venture, you’ll not only develop your woodworking skills but also learn the art of welding and pouring epoxy resin – a trifecta of DIY crafts that will expand your creative horizons. The journey may be challenging, but the end result is well worth the effort, offering a functional piece of furniture that’s sure to captivate anyone who lays eyes on it.
Simple DIY Epoxy River Table
Embark on a creative journey by crafting a one-of-a-kind DIY live edge wood and epoxy dining table. This comprehensive guide takes you through the process of merging the organic charm of live edge wood with the sleekness of epoxy resin, resulting in a truly unique dining centerpiece. With clear instructions and essential materials like epoxy resin, wood, and basic crafting tools, this project invites you to unleash your creativity and bring your vision to life.
Conclusion:
Unleashing creativity, 25 DIY epoxy resin table ideas offer a wealth of possibilities to craft a one-of-a-kind piece of furniture that perfectly reflects your personal style. By delving into the intricacies of epoxy resin’s material properties and following step-by-step guides, you’ll be empowered to create a breathtakingly beautiful table that seamlessly integrates with its surroundings. It’s crucial to prioritize safety measures, address potential hiccups, and commit to regular maintenance to ensure the longevity and vibrancy of your handcrafted masterpiece.
