Imagine the warmth and ambiance of a crackling fire pit on a starry night, with toasted marshmallows and good company. Our in-depth guide provides 40 innovative DIY fire pit ideas to help you create the ultimate outdoor gathering space. From selecting the perfect style and materials to adding personal touches and considering eco-friendly options, we’ve got everything you need to know to get started.
Discover how to choose the ideal design inspiration for your backyard oasis, including safety guidelines and maintenance tips to ensure a stress-free experience. We’ll also provide valuable insights on budgeting effectively and optimizing your fire pit’s performance. Whether you’re looking to create a cozy retreat or a lively gathering spot, our comprehensive guide is here to help you bring your vision to life.
How to Build a Fire Pit – Step by Step Guide
To create a cozy outdoor gathering space, follow these straightforward steps to construct a functional and visually appealing fire pit. Start by selecting a suitable location for your fire pit, considering factors such as wind direction, proximity to flammable materials, and accessibility. Next, prepare the site by clearing any debris, grass, or other obstacles from the area where you will be building the pit. Mark out a circle of approximately three feet in diameter with a hose or rope, then begin digging the fire pit by hand or using a shovel and/or trowel. As you dig, create a shallow trench around the perimeter to contain heat and sparks. Continue excavating until your pit is about 12 inches deep and 3-4 inches wide at the bottom. Fill any gaps with sand, gravel, or small rocks to provide drainage and stability.
Step by Step Instructions
Choosing the Right Stone
When it comes to selecting the perfect stone for your fire pit, choosing the right one is crucial. Retaining wall bricks are a popular choice due to their unique wedge shape, which naturally forms a circle when laid edge to edge, making them an ideal option for circular fire pits. You can easily find these bricks at home improvement stores like Home Depot. For a standard-sized fire pit, you’ll need around ten bricks to form a tight circle with an opening of approximately 25 inches. If you desire a larger fire pit, additional stones can be added, but this might result in gaps between the stones. Another option is wall stone, which offers a natural appearance and a tumbled brick look. However, they may require more effort to level due to their irregular surface.
Incorporating a Fire Ring Insert
While a fire ring insert isn’t strictly necessary, it’s a highly recommended addition that can significantly prolong the lifespan of your bricks and elevate the overall aesthetic and functionality of your fire pit. When choosing an insert, several factors should be taken into consideration. First and foremost, material selection is crucial – galvanized options are best avoided in favor of those featuring a durable black powder coating to prevent rusting. Additionally, the height of the insert should align with your design goals, whether that’s a compact three-layer arrangement or something more elaborate. For instance, a ten-inch tall insert would be well-suited for a fire pit featuring multiple tiers.
Selecting the Location
When setting up a fire pit, it’s crucial to carefully select its location, taking into account not only local regulations but also structural and aesthetic considerations. Specifically, ensure you’re meeting distance requirements from buildings, fences, and other nearby features. Furthermore, think about the placement of seating around the fire pit, optimizing both enjoyment and safety for all users.
Preparation and Construction
To begin constructing your fire pit, start by marking the area where you’ll lay the bricks. Use a flat shovel to outline the perimeter of your design. Once you’ve defined the space, it’s time to excavate. Dig out 2-3 inches of soil within the marked area, taking care to create sufficient drainage, especially if you’re working with clay soil. For optimal results, dig a central hole approximately 12 inches wide and 8-10 inches deep, then fill it with gravel. This will help regulate water flow around your fire pit.Next, spread a layer of paver base (2-3 inches thick) across the excavated area, ensuring a stable foundation for your structure. Tamp the paver base down to create a level surface before moving on to the next step.Lay the first layer of bricks, taking care to position each one accurately and levelly. Use a dead blow mallet and a level to achieve precise placement. As you build subsequent layers, stack the bricks carefully, aligning their seams for a polished appearance. If you anticipate making adjustments later on, don’t worry about using landscaping adhesive – it’s better to leave room for flexibility.Once your brick structure is complete, place the fire ring insert into the circle of bricks. This should fit snugly, providing stability to your fire pit. Finally, fill the gap between the fire pit and the surrounding grass with landscaping rocks, giving your finished project a professional finish. For the interior of your fire pit, consider using lava rocks due to their porous nature, which facilitates airflow and drainage.
Video Tutorial
Building a budget-friendly fire pit requires more than just throwing some bricks together. To get started, head over to our YouTube channel for a comprehensive video tutorial that breaks down the process into manageable steps. By following along with the video, you’ll gain a deeper understanding of each technique and be better equipped to tackle the project on your own.
Design Inspirations for Your DIY Fire Pit
Transforming your backyard into a cozy retreat is achievable with a DIY fire pit installation, combining functionality with visual appeal. For inspiration, explore these innovative designs that will elevate your outdoor space.
Choose Your Style
When it comes to choosing a fire pit, there are several styles to consider. A classic and timeless option is the traditional round pit, which can be constructed using materials such as stone, bricks, or concrete pavers. Its circular shape makes it perfect for gathering around and creating cozy ambiance. For a more modern look, square designs offer a sleek and geometric aesthetic that can be achieved with cinder blocks or metal sheets. These clean lines and sharp edges provide a contemporary feel that’s sure to elevate any outdoor space. If you’re looking to add a touch of rustic charm to your patio or backyard, consider a fire pit made from natural rocks or boulders. This style effortlessly blends with the surrounding environment, creating a warm and inviting atmosphere that’s perfect for relaxing with family and friends.
Selecting Materials
Fire pits can be crafted from a variety of materials, each offering unique benefits and aesthetics. Bricks, for instance, provide a timeless look while retaining heat effectively. Their versatility also allows for arrangement in multiple patterns. Concrete rings or blocks bring a clean, minimalist vibe to the space, handling high temperatures with ease. For those seeking an industrial feel, repurposed metal items like steel drums or old washing machine drums can be transformed into a chic fire pit.
Adding Personal Touches
When it comes to designing your outdoor space, it’s essential to consider the seating arrangements that complement your fire pit. Built-in benches or a circle of Adirondack chairs can create a cozy and inviting atmosphere that draws people together. To add an extra layer of visual interest, incorporate decorative elements such as colorful stones or glass within the pit itself. This way, even when the fire isn’t lit, your outdoor space will still be visually appealing. Additionally, consider functional features like grill grates for cooking or removable covers that can convert your fire pit into a table when not in use, making it a versatile and practical addition to your outdoor living area.
Safety Guidelines for Your DIY Fire Pit
When it comes to building and enjoying a DIY fire pit, safety should be top of mind. To ensure a stress-free experience, consider these essential precautions: Firstly, make sure your fire pit is installed at a safe distance from flammable materials such as leaves, branches, and overhanging trees. A general rule of thumb is to maintain a clearance zone of at least three feet around the pit. Additionally, position your seating area and any surrounding structures in a way that minimizes the risk of sparks or embers igniting nearby combustible materials.
Location and Setup
When setting up your fire pit, it’s essential to consider its proximity to surrounding structures and trees. A safe distance to maintain is at least 10 feet away from any buildings, sheds, or overhanging tree branches. This will help prevent any accidental fires from spreading to nearby flammable materials.Additionally, check the weather forecast before lighting up your fire pit. Avoid using it on windy days as gusts can easily spread sparks and embers, potentially causing harm to people or property. Instead, opt for a calm day with minimal wind activity.Lastly, ensure that your fire pit is placed on stable, level ground. This will prevent the unit from tipping over or experiencing uneven burning, which can lead to poor heat distribution or even safety hazards.
Fire Pit Materials
When it comes to building a fire pit, safety should be top of mind. A key aspect of this is selecting non-flammable materials for the structure itself. Stone, brick, and metal are all excellent options that won’t pose a risk of catching fire. Additionally, when it comes to fueling your fire, make sure to avoid using treated wood or construction materials, which can release toxic fumes into the air. By taking these precautions, you’ll be able to enjoy your outdoor gatherings while minimizing the risks associated with fire pits.
Fire Management
When setting up a fire pit, it’s crucial to prioritize safety to ensure a enjoyable experience for everyone involved. A fundamental step is having a reliable water source nearby – whether that’s a bucket or a hose – in case you need to quickly extinguish the flames. Additionally, children and pets should be kept at a safe distance from the fire pit at all times, with constant supervision. Finally, when it’s time to put out the fire, make sure it’s completely doused before leaving the area unattended. By following these guidelines, you can rest assured that your fire pit experience will be worry-free.
Cost Analysis for Your DIY Fire Pit
While building a do-it-yourself (DIY) fire pit can be an economical option, it’s crucial to acknowledge the various costs that may arise. From sourcing materials to labor and potential design modifications, the total expense of creating a DIY fire pit can add up quickly.
Budgeting for Materials
Prefab fire pit kits come with a price tag ranging from $200 to $700, providing an affordable entry point for outdoor enthusiasts. On the other hand, custom-built fire pits offer a more tailored approach, with costs varying from $325 to $2,000, largely dependent on size and materials used.
Labor Costs
By taking a DIY approach to building your fire pit, you can avoid labor costs that might otherwise range from $60 to $125 per hour. This self-sufficiency not only saves you money but also gives you the freedom to design and construct your outdoor feature exactly as you envision it.
On the other hand, if you do decide to hire a professional for installation, especially when it comes to gas fire pits that require specific expertise, be prepared to pay a premium for their skills. This additional cost is a reflection of the heightened level of craftsmanship and attention to detail required to ensure your outdoor feature functions safely and efficiently.
Additional Features
When designing a fire pit installation, it’s essential to weigh the importance of seating, decorative elements, and overall aesthetic appeal against your budget constraints. While adding seating options or incorporating decorative stones or glass may increase costs, these features can significantly enhance the overall experience and ambiance of your outdoor space. By carefully considering these factors, you can create a fire pit project that balances your needs with your budget, ultimately elevating your outdoor area.
Eco-Friendly Options for Your Fire Pit
Transforming your fire pit into an eco-friendly haven not only benefits the planet, but it also elevates your outdoor experience. By incorporating sustainable elements, you’ll be able to enjoy warm gatherings with friends and family while minimizing your environmental footprint. Here’s how you can create a harmonious balance between relaxation and responsibility:
Choosing Eco-Friendly Fuels
When it comes to fuels for your outdoor heating needs, consider opting for eco-friendly options that reduce smoke and pollutants. Recycled wood and coffee ground logs are excellent choices as they burn cleaner than traditional woods. Seasoned wood is also a great option as it’s drier, burns hotter, and produces less smoke compared to unseasoned wood. For a more modern approach, consider propane and natural gas fuels which produce fewer emissions and less particulate matter. Alternatively, bioethanol is a renewable plant-based fuel that burns cleanly with minimal emissions. And for a truly unique and sustainable heat source, solar-powered fire pits harness the power of the sun to provide warmth without any environmental impact.
Durable Materials
When selecting a fire pit, opt for models constructed from long-lasting and eco-friendly materials to minimize your carbon footprint. By doing so, you’ll not only create a warm and inviting outdoor space but also contribute to a more environmentally responsible lifestyle.
Maintenance and Care for Your DIY Fire Pit
For a fire pit to remain both aesthetically pleasing and safe over the long haul, it’s crucial to perform regular maintenance tasks. This includes ensuring the structure remains in good condition, checking for any damage or wear, and making necessary repairs to prevent accidents.
Regular Cleaning
To ensure a safe and efficient burning experience, it’s essential to establish a routine of maintaining your fire pit after each use. Start by removing any ashes that have accumulated, as this will prevent the buildup of debris and maintain optimal airflow. Additionally, make regular inspections a part of your maintenance schedule to identify any damage or cracks that could compromise safety. By addressing these issues promptly, you’ll be able to enjoy your fire pit for years to come.
Seasonal Care
When you’re not using your fire pit, take steps to cover it and protect it from the elements. This simple act can help prolong its lifespan and keep it in good working order. It’s also important to ensure proper drainage around your fire pit to prevent water accumulation and potential damage. By following these practical tips, you’ll be able to enjoy your outdoor space while prioritizing safety and reducing your environmental impact. Just remember to always check with local authorities for any regulations that may apply, and don’t forget to take necessary precautions to minimize risk.
FAQs About DIY Fire Pits
Creating a do-it-yourself fire pit can be a fulfilling experience, but it’s natural to have doubts and uncertainties. To alleviate these concerns and guide you through the process, we’ve compiled a comprehensive section addressing frequently asked questions. This information will not only help you avoid common pitfalls but also ensure your fire pit project is both enjoyable and safe for everyone involved.
What Size Should My Fire Pit Be?
The dimensions of your fire pit will be influenced by the available space and how you envision using it. A typical diameter for a circular fire pit is around 36 to 44 inches, which strikes a balance between providing ample space for gathering and keeping the flames at a reasonable size.
What Materials Are Safe to Use?
When constructing a fire pit, it’s essential to select materials that can withstand high temperatures without posing a risk of combustion or releasing hazardous fumes. Fire-resistant and non-flammable options such as refractory ceramic bricks for the inner wall and natural stones, concrete pavers, or heat-treated gravel for the outer perimeter are ideal choices. On the contrary, using flammable or chemically treated materials can lead to the emission of harmful toxins when heated, posing a significant health risk.
Should I Use a Fire Pit Ring?
When incorporating a fire pit into your outdoor space, consider utilizing a ring made from steel or another durable metal. This type of barrier provides a safeguard between the flames and surrounding materials, allowing for a more controlled and contained combustion experience. By shielding the materials from direct heat exposure, you’ll be able to maintain the integrity of the fire pit and prolong its lifespan, ensuring it remains a central gathering point for years to come.
How Deep Should My Fire Pit Be?
When it comes to building or installing a fire pit, the recommended depth is crucial for both safety and performance. A depth of 6 to 12 inches provides a perfect balance between containing the flames and ensuring sufficient airflow. This range allows for a consistent burn while minimizing the risk of overheating or smoke buildup. By maintaining this optimal depth, you can enjoy your outdoor fire pit without compromising on its functionality.
Can I Use a Gas Burner Instead of Wood?
When considering a fire pit, many people overlook the benefits of using a gas burner. Compared to traditional wood-burning options, gas burners offer a more convenient, easy-to-use experience with cleaner burning properties. However, it’s crucial to select a gas burner specifically designed for outdoor use and follow the manufacturer’s guidelines for installation and operation.
What Is the Best Way to Extinguish the Fire?
When it’s time to put out a wood-burning fire pit, start by carefully scattering the embers and ash across the surrounding area. Next, slowly pour water over them until the hissing sound ceases. For gas fire pits, simply shut off the fuel supply. It’s also essential to have a fire extinguisher or a nearby bucket of sand at the ready in case of emergencies. To ensure your DIY fire pit project is successful, it’s crucial to plan ahead, gather the necessary materials, and follow important safety guidelines.
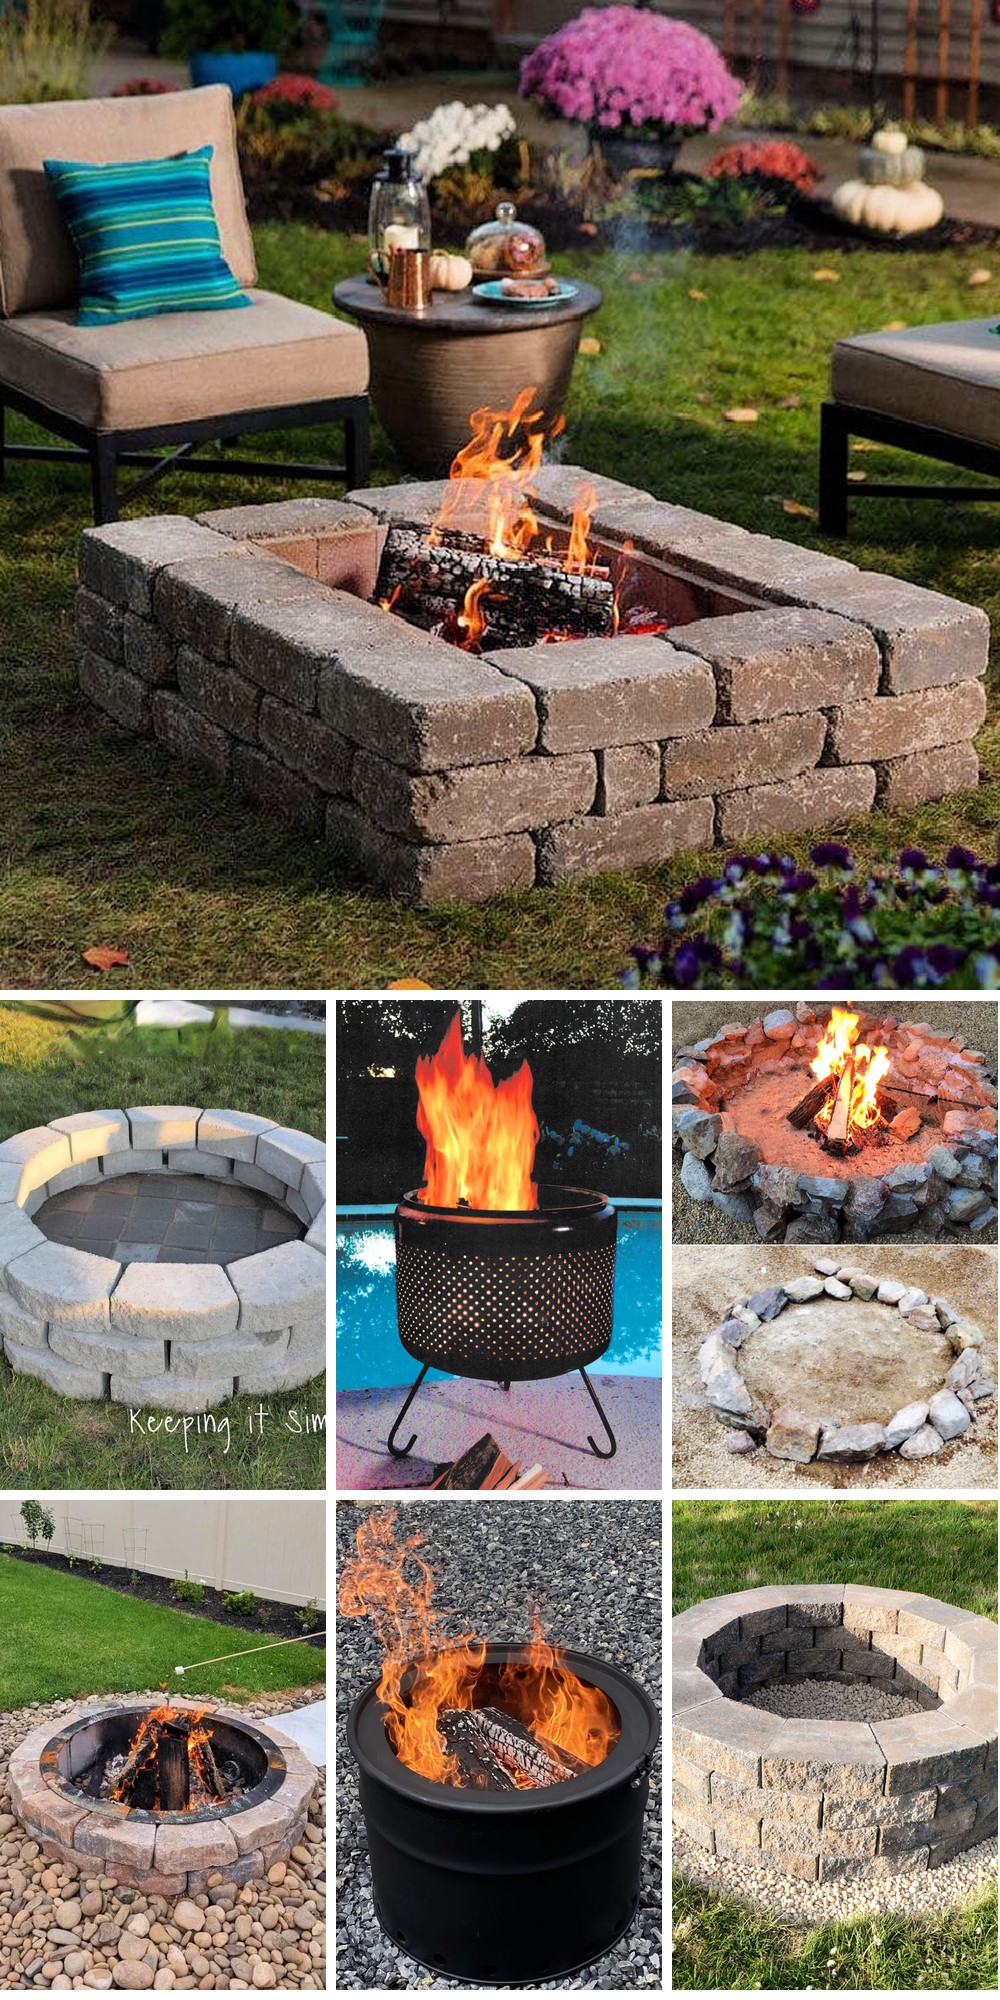
40 Homemade DIY Fire Pit Ideas for Backyard
Transform your backyard into an inviting haven by crafting 40 unique DIY fire pit ideas that bring warmth, comfort, and joy to gatherings with loved ones. Get ready to ignite conversations and create lasting memories with these innovative, homemade designs for a cozy outdoor space.
Make Your Own Fire Pit
To create a DIY backyard fire pit, follow a straightforward process that begins with planning and preparation. The first step is to define the perimeter of the fire pit by measuring and marking the area where you want to build it. Next, use dry-fitting techniques to lay out the stone kit and ensure a proper fit before making any cuts. This also allows you to visualize the final product and make adjustments as needed.Once the fire pit is planned and laid out, focus on creating a seating area by marking its boundaries. Then, use spray paint to outline both the fire pit and the seating area, providing a clear visual guide for your construction process. This step-by-step approach helps ensure accuracy and precision throughout the project.The following steps involve edging the painted lines using heavy-duty landscape fabric, removing any grass or weeds with a cultivator, rolling out the fabric to create a smooth surface, and placing edging stones to define the fire pit’s perimeter. Finally, add pea gravel to complete the look and provide a comfortable walking surface around your new DIY backyard fire pit.When you’re finished building, take some time to enjoy the fruits of your labor by lighting a fire and gathering with family and friends in your newly enhanced outdoor space.
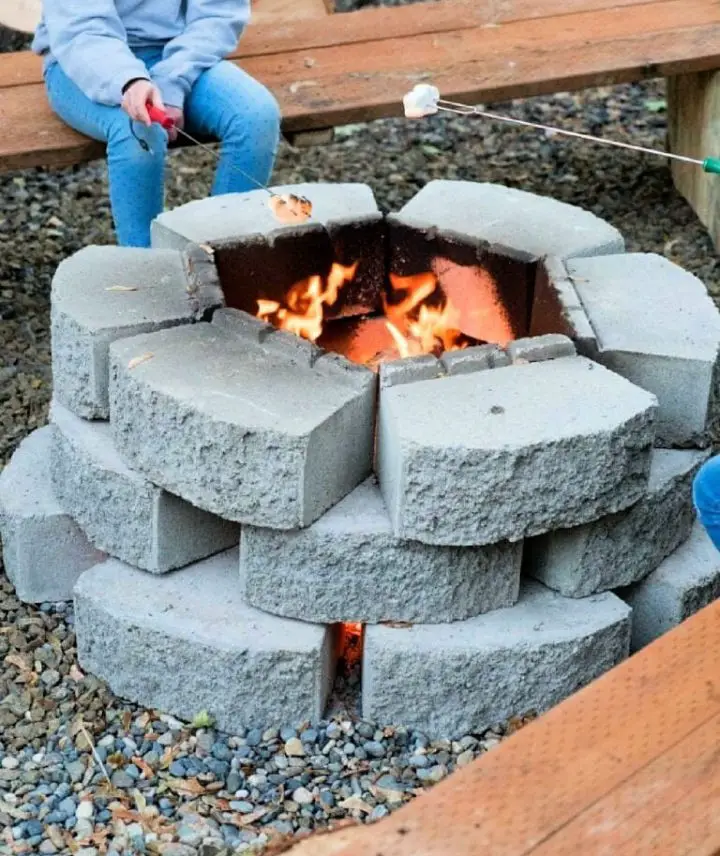
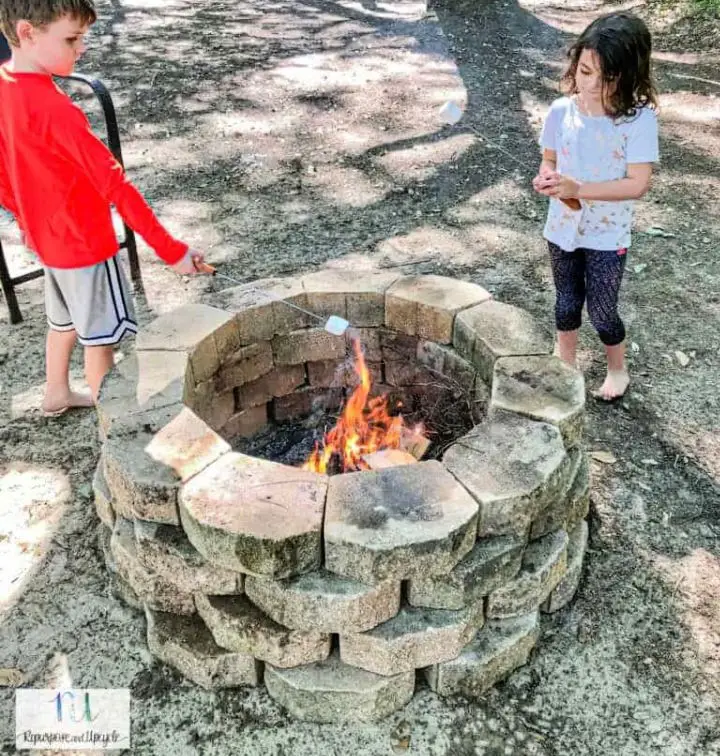
DIY Fire Pit – Step-by-Step Instructions
To transform your backyard into a cozy camp spot, create a DIY fire pit that’s perfect for outdoor fun and s’mores. Before embarking on this project, ensure you’re aware of your local fire code regulations to avoid any issues. Once you’ve got the green light, start by gathering your necessary supplies: sturdy bricks, gravel, twine, tape measure, stake, shovel, trowel, tamp, and level. Begin by marking a circular outline on the ground, then dig out the grass and compact the dirt using a trowel to achieve a level surface. Next, add a layer of gravel to provide drainage and stability before constructing the fire pit wall with the bricks. For added safety, consider lining the inner layer with firebricks. Once your DIY fire pit is complete, you can unwind and enjoy your backyard oasis around the warm glow of the flames.
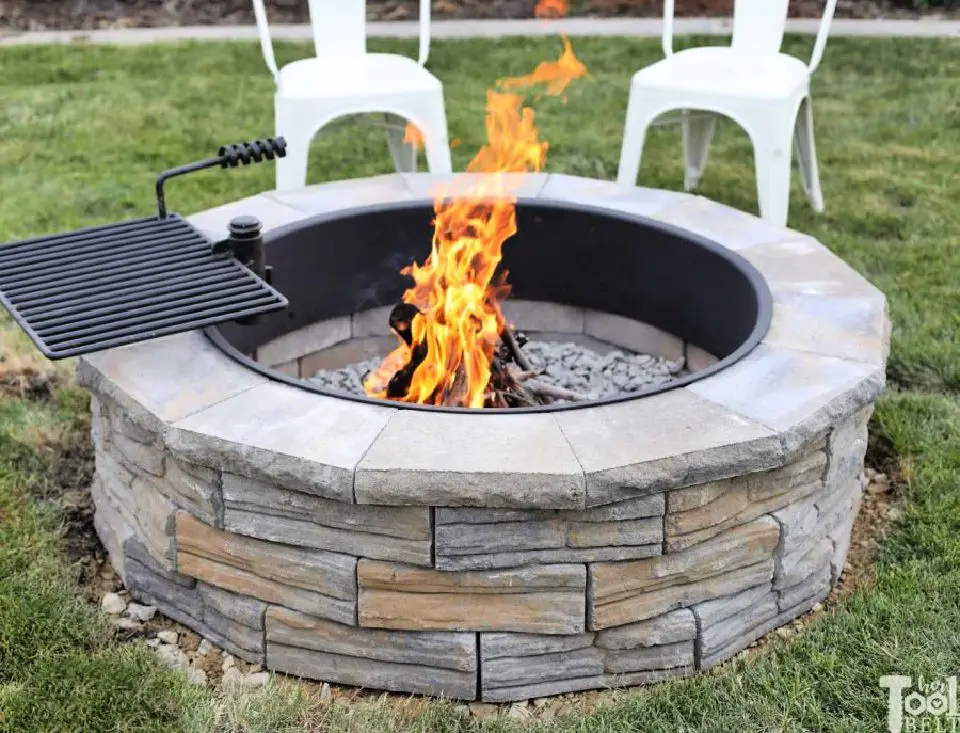
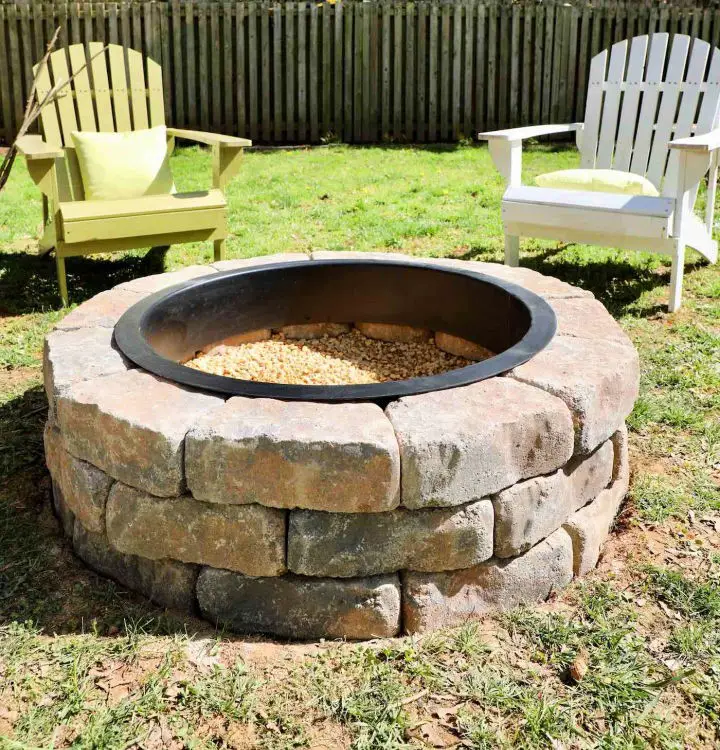
DIY Fire Pit Under $75
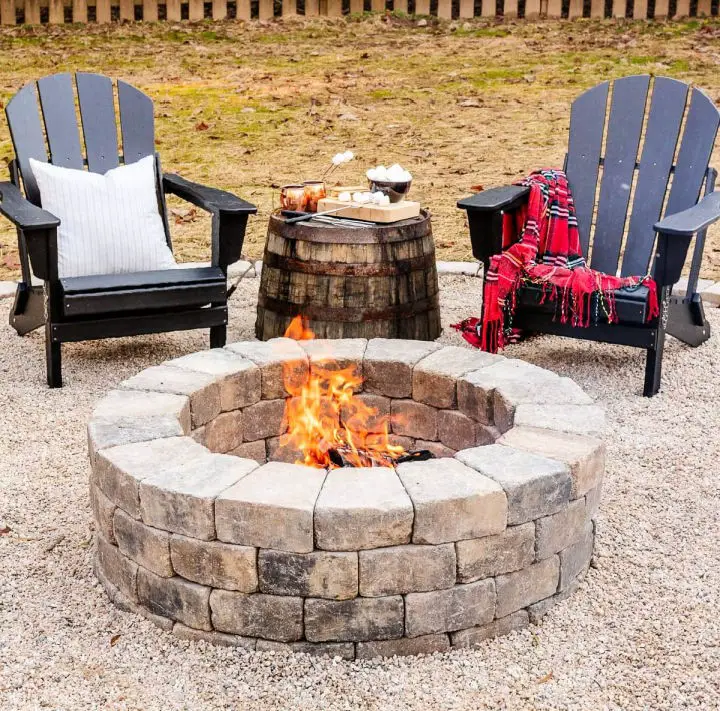
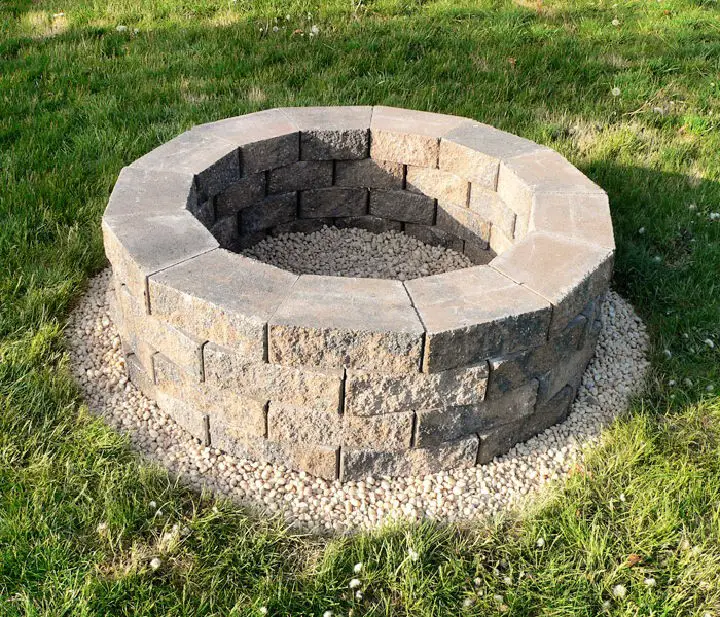
Create a long-lasting DIY stone fire pit without sacrificing your wallet with this thorough guide. By combining affordable pavers and a fire ring insert, you can build a durable and functional outdoor focal point that will become a hub for cozy gatherings and memories. This comprehensive guide walks you through the process of selecting the right materials, assembling the fire ring, preparing the site, stacking the pavers, and adding gravel for proper drainage. With expert tips and insider knowledge, you’ll be able to transform your backyard into an inviting oasis in no time. The result is a cost-effective project that will bring warmth and joy to your outdoor space.
Small Backyard Propane Fire Pit Design

Transform your side yard into a haven for relaxation and entertainment by creating a cozy DIY propane fire pit area and incorporating comfortable Adirondack seating. This comprehensive guide will walk you through the step-by-step process of building a fire pit, covering the essential materials and tools required, as well as offering valuable tips to ensure success. The result is a transformed space that seamlessly blends functionality with coziness, featuring a play zone for kids and a comfortable seating area perfect for unwinding and socializing. To add ambiance and warmth, this project also delves into the installation of string lighting and the selection of sustainable Adirondack chairs. With this comprehensive guide, you’ll be able to create an inviting outdoor space that’s perfect for relaxing with family and friends.
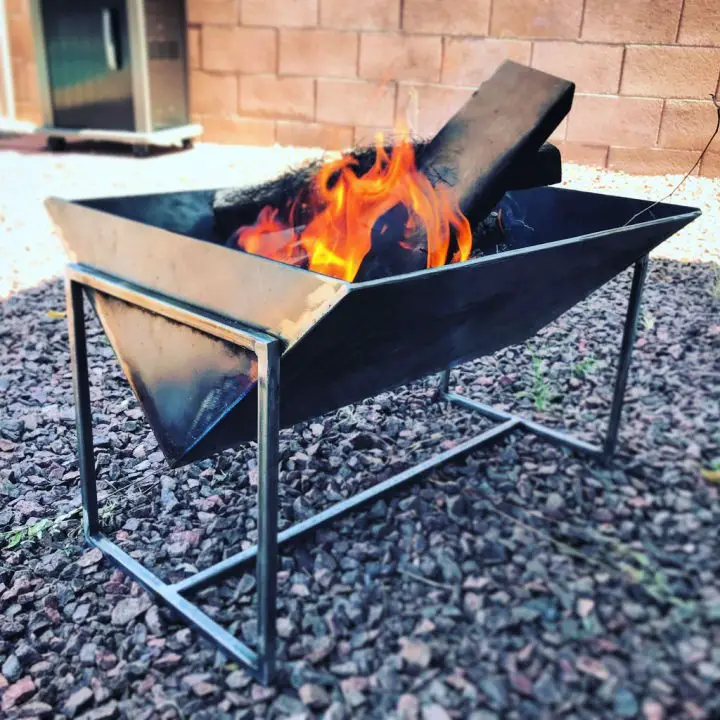
Building a Custom Steel Fire Pit

Elevating DIY projects to new heights, we’ll dive into constructing a one-of-a-kind steel fire pit that’s sure to mesmerize with its sparking flames! By following this comprehensive guide, you’ll learn the ins and outs of crafting a hexagonal masterpiece with robust steel legs. This project delves into techniques for precision cutting patterns, welding metal sides together, and adding crucial features like drainage holes and a protective cover. With the right tools and materials at your disposal, you can create a functional and visually stunning fire pit for your backyard, perfect for cozying up around a warm outdoor blaze in your very own custom-made steel fire pit.
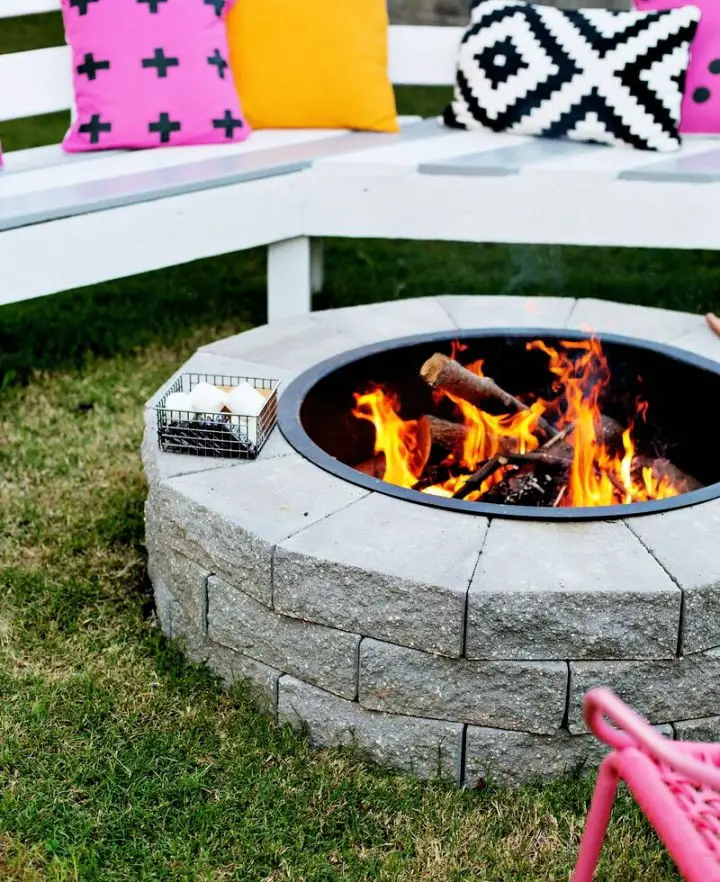
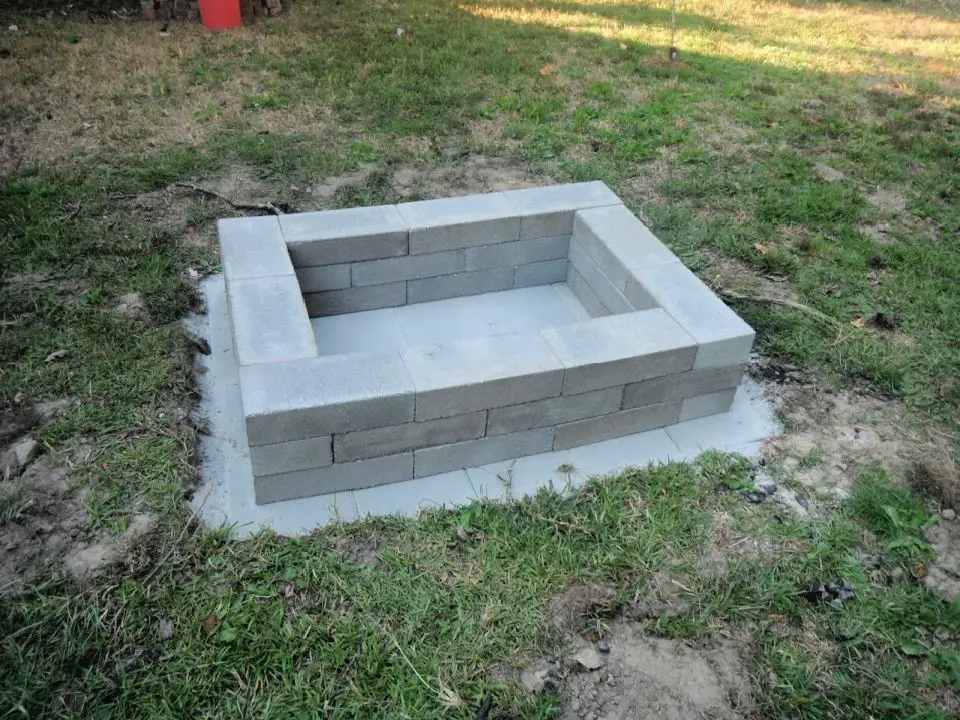
Homemade Concrete Blocks Fire Pit
Transform your backyard into an inviting haven with a homemade concrete block fire pit, perfect for warm gatherings and making lifelong memories. Follow this step-by-step guide to construct your DIY fire pit, a unique feature that will become the heart of your outdoor space. To get started, prepare for a budget-friendly investment of approximately $200 by gathering essential tools and materials, including gravel, sand, and 52 retaining wall blocks. Optional extras include a steel ring and metal grate. Once you have everything at hand, begin by digging a hole that’s level and ready to receive your fire pit. Then, carefully assemble the stone layers using a steel ring or stacking the blocks with precision. Continue building until you’ve reached your desired height, considering adding a metal grate if you plan on cooking over the flames. As you gaze into the warm glow of your fire pit, surrounded by loved ones and the beauty of nature, you’ll know that this DIY project was well worth the effort.
Cool DIY Fire Pit From Satellite Dish
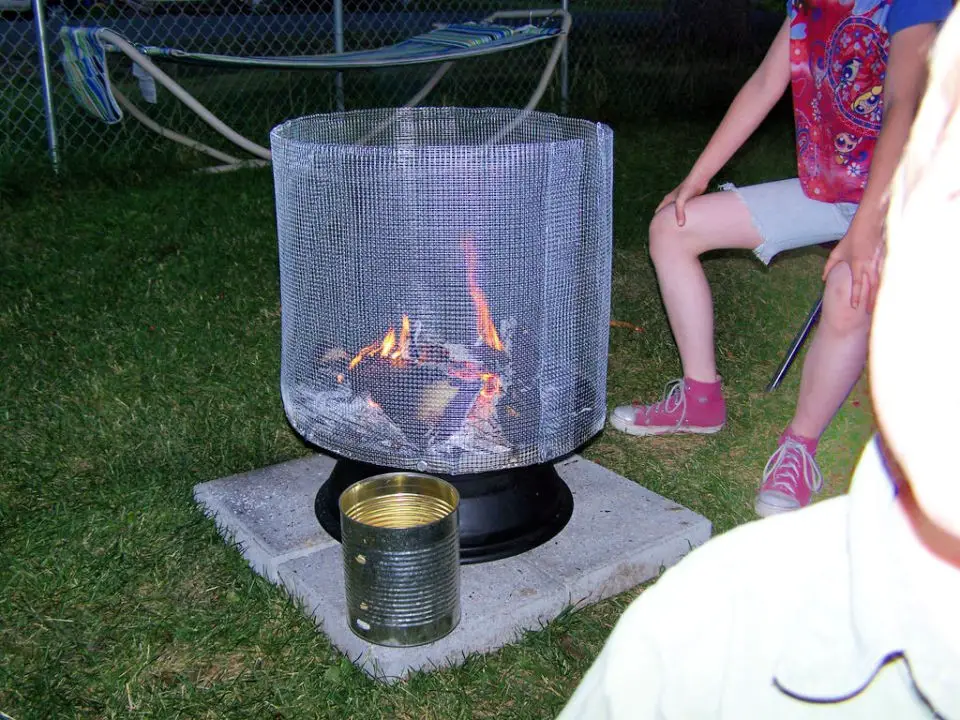
Our backyard fire pit ideas span a wide range of styles, from rustic simplicity to modern elegance. With options to suit every budget and taste, you’re sure to find a fire pit that perfectly complements your outdoor space. Take, for instance, the ingenious DIY fire pit crafted from a repurposed satellite dish. This unique project not only provides warmth and ambiance but also offers an opportunity to get creative with some basic materials like wire mesh, a truck tire rim, and a bit of spray paint. With step-by-step instructions and a comprehensive materials list at your disposal, you’ll be able to assemble the components and bring this stylish fire pit to life. Whether you prefer charcoal or wood fuel, this versatile brazier is sure to become a focal point for your backyard gatherings, providing warmth and ambiance that’s perfect for cozy nights in with friends and family.
Beautiful DIY Fire Pit Table
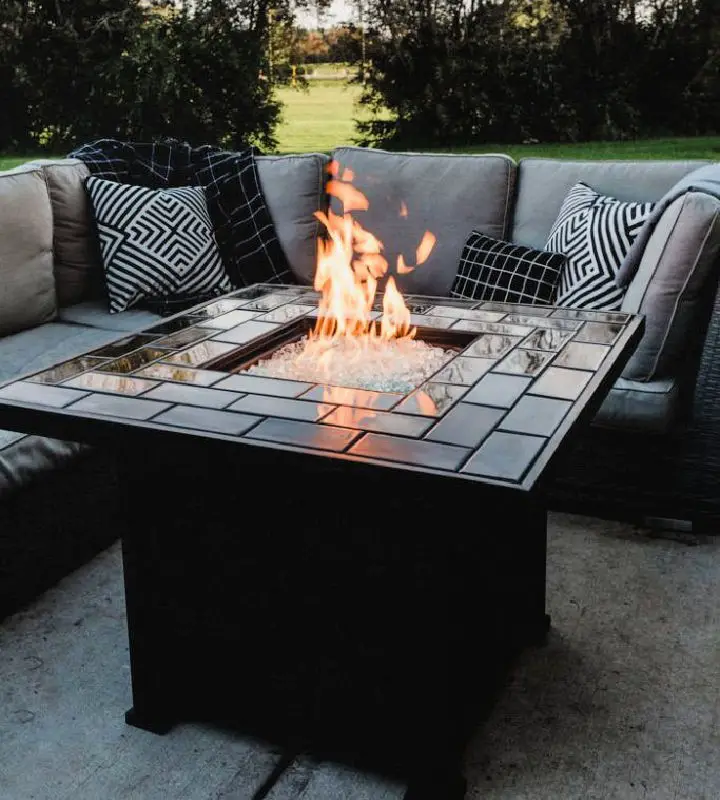
Create unforgettable outdoor experiences anywhere with this DIY fire pit table tutorial! Rather than investing in an expensive fire pit, breathe new life into an old propane fire table to craft a stunning centerpiece for your backyard retreat. This project involves three key steps: constructing a new frame around the fire pit, overlaying the existing tabletop with tile, and adding edging for a polished finish. With materials such as thinset, black tile, black grout, clear fire glass, and black tile edging at your disposal, you can transform your outdoor space into a sleek and stylish oasis that will leave your guests in awe. Follow along and enjoy cozy nights surrounded by the warmth of your personalized fire pit table.
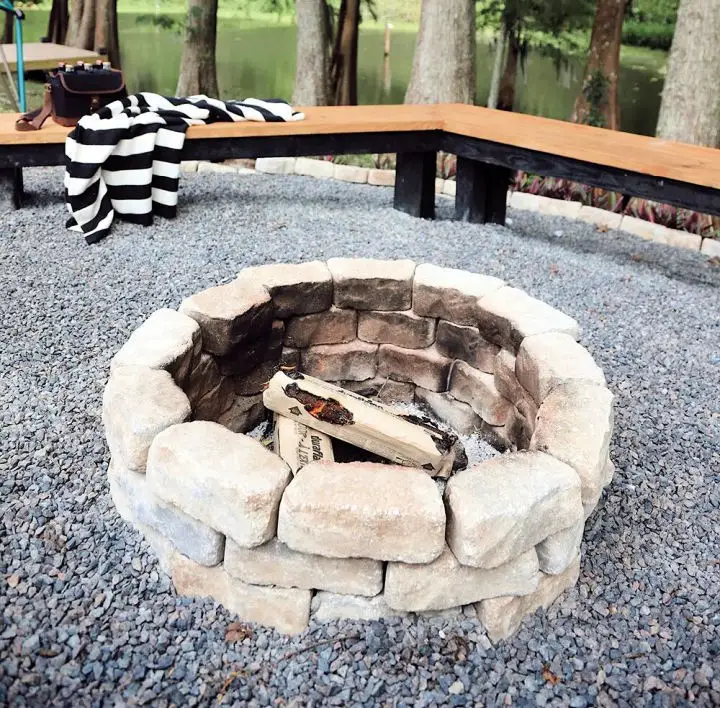
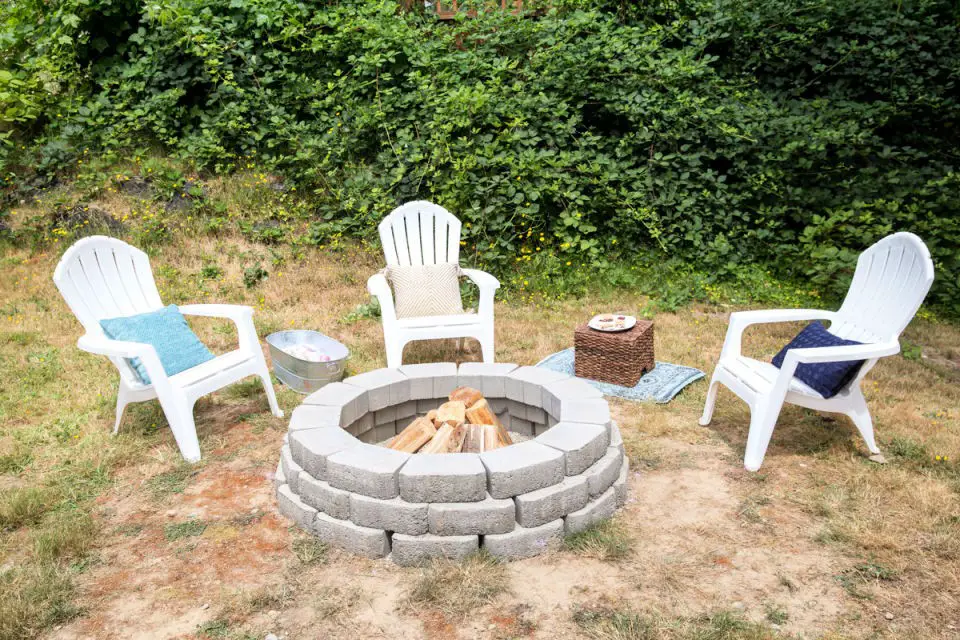
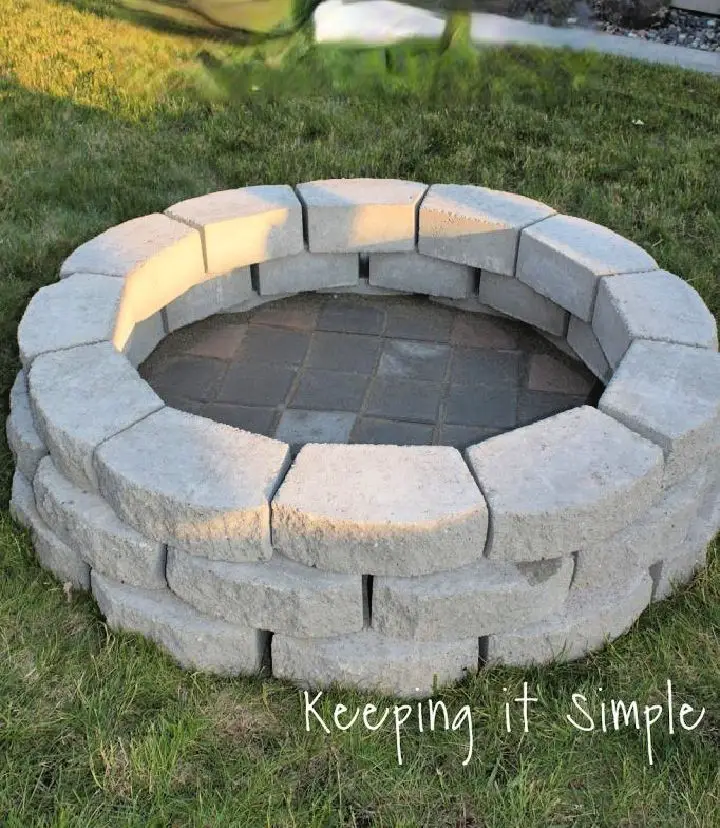
Simple DIY Brick Fire Pit
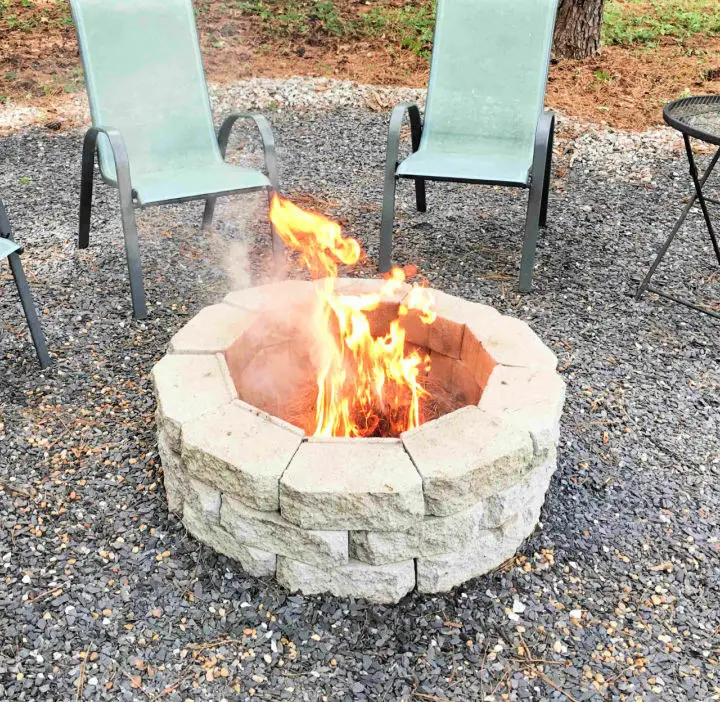
Transform your backyard into an inviting hangout spot with a DIY brick fire pit that’s easy on the wallet and big on charm. With just a few simple steps, you can create a cozy gathering place perfect for crisp fall, winter, and spring evenings. The best part? You’ll be able to host gatherings without breaking the bank, thanks to a budget-friendly estimate of $68.To get started, you’ll need just a handful of materials, including pewter concrete retaining wall blocks, pea pebbles, and a paver base. From clearing the area to assembling the blocks and adding pebbles for drainage, this comprehensive guide will walk you through every step of the process.The result is a warm and welcoming fire pit that’s sure to become your new favorite gathering spot. So why wait? Grab some friends and family, and get ready to create memories that will last long after the flames have died out.
Makeshift Smokeless Fire Pit
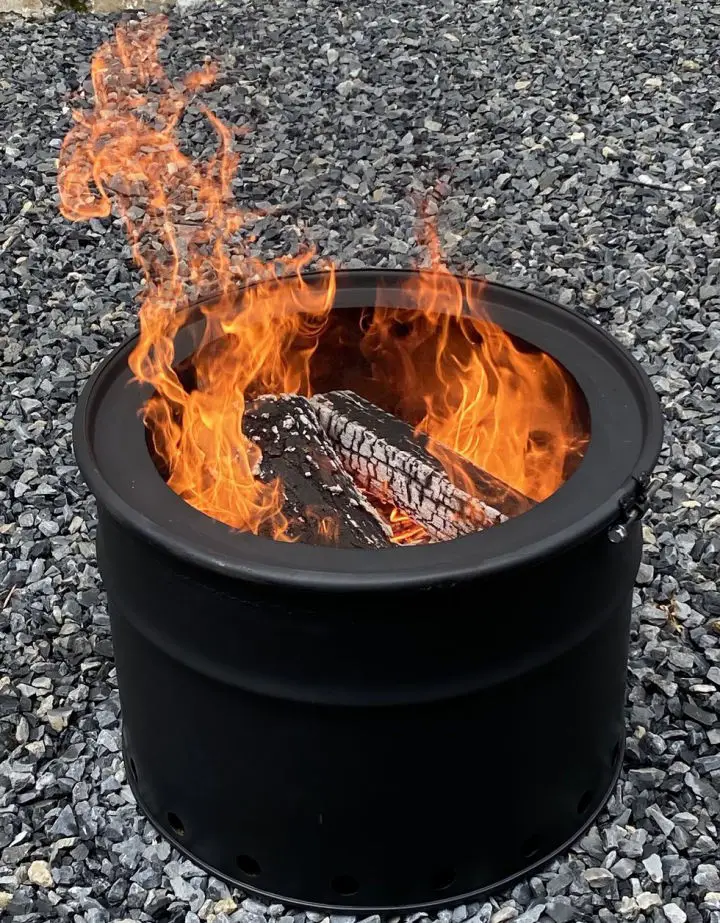
Crafting a smokeless fire pit has never been more accessible than with this DIY makeshift approach. Transform your backyard into a cozy haven with a campfire that’s both warm and smoke-free! This step-by-step guide will walk you through the process of creating a double-wall construction using a 55-gallon drum, cut in half horizontally. By leveraging proper airflow and secondary combustion, you’ll enjoy a fire that minimizes smoke and maximizes ambiance. The project involves adding a base, crafting a cap, and strategically cutting holes for optimal airflow. While it may not boast the sleek design of commercial fire pits, the pride of building something with your own hands adds an undeniable charm. To get started, gather your tools, including a metal-cutting saw, angle grinder, drill, and wire feed welder. As you complete this project, you’ll be rewarded with a homemade fire pit that efficiently burns fuel while leaving minimal ash behind.
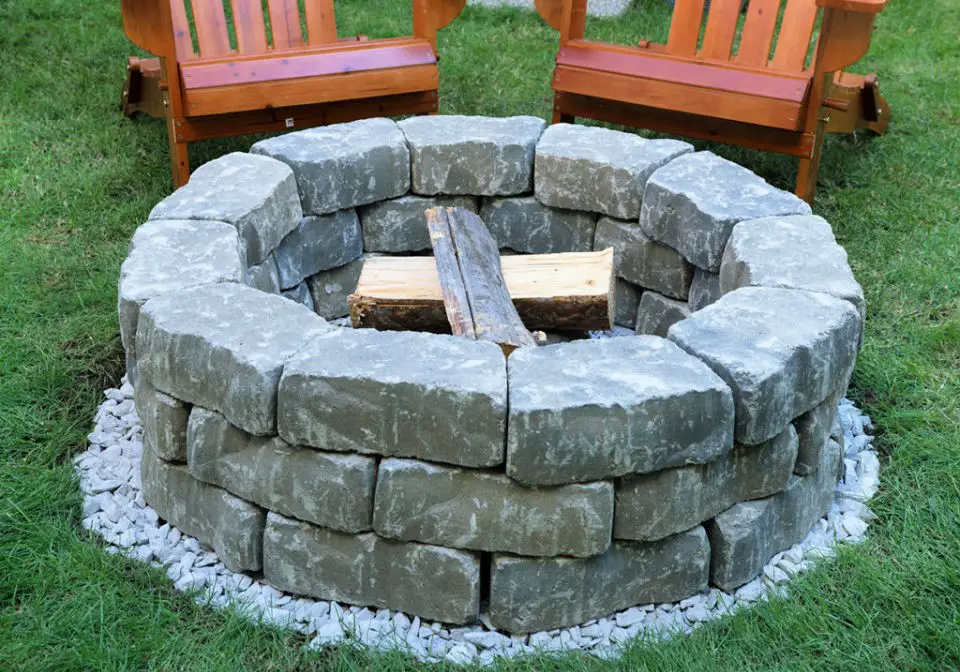
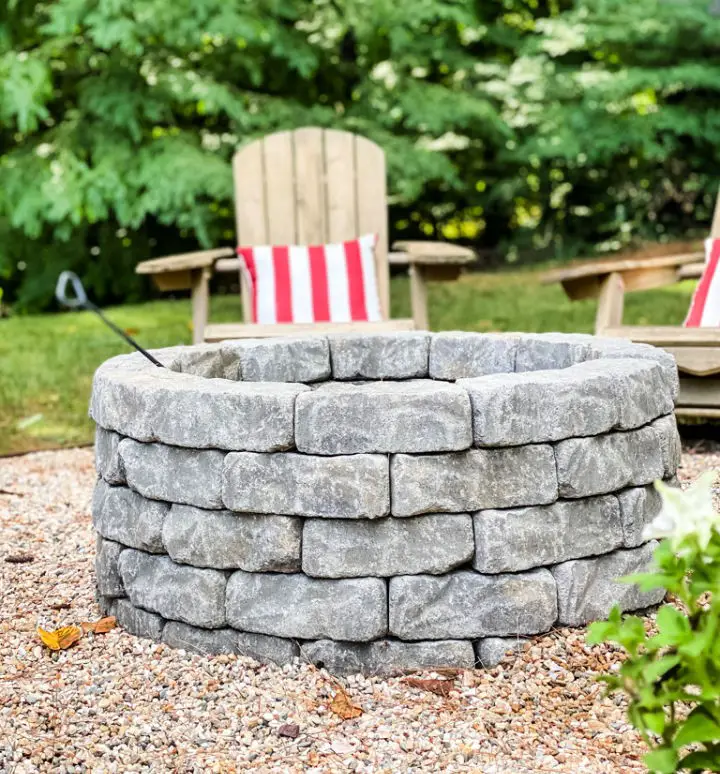
DIY Large Fire Pit Using Bricks
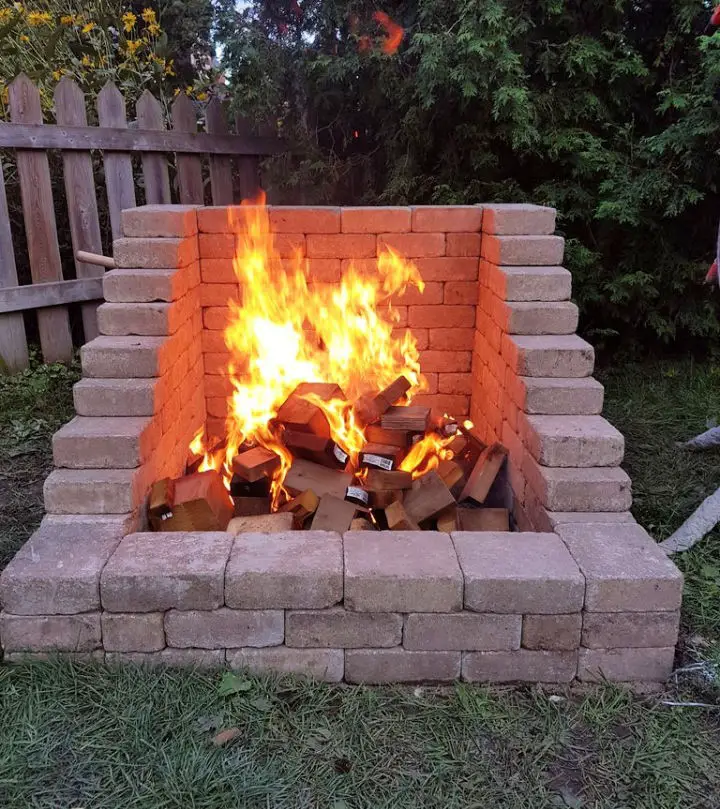
Transform your backyard into a cozy oasis by building a DIY fire pit. This compact design is perfect for smaller spaces, boasting a high back wall that allows it to be nestled against a fence or corner. To get started, gather the necessary materials, including crusher run, stones (often free or affordable), and essential tools like levels, tape measure, and shovels.
Follow the straightforward instructions to mark out the area, dig, backfill, level the space, construct the base row, and meticulously stack the stones until you’ve reached your desired height. With this fire pit, you’ll be able to create a warm and inviting atmosphere that’s perfect for gathering with family and friends around the crackling flames.
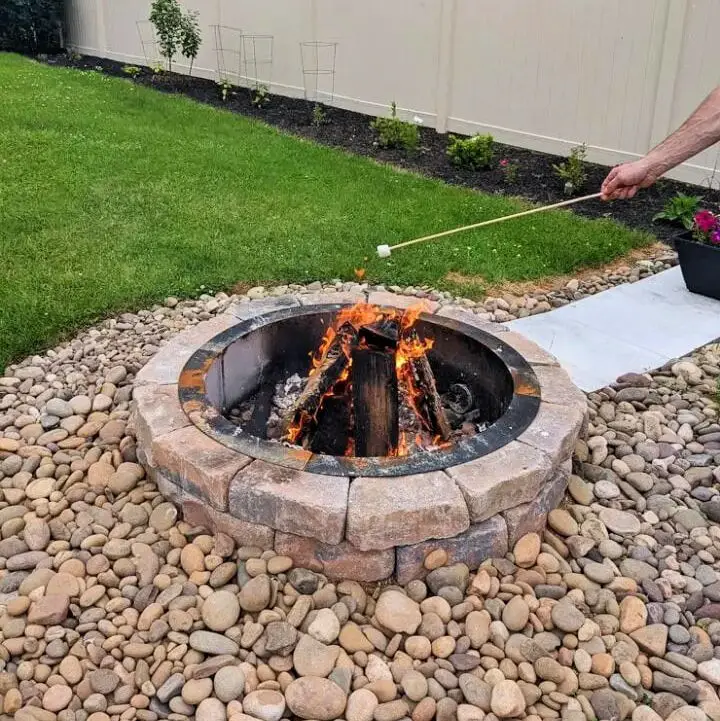
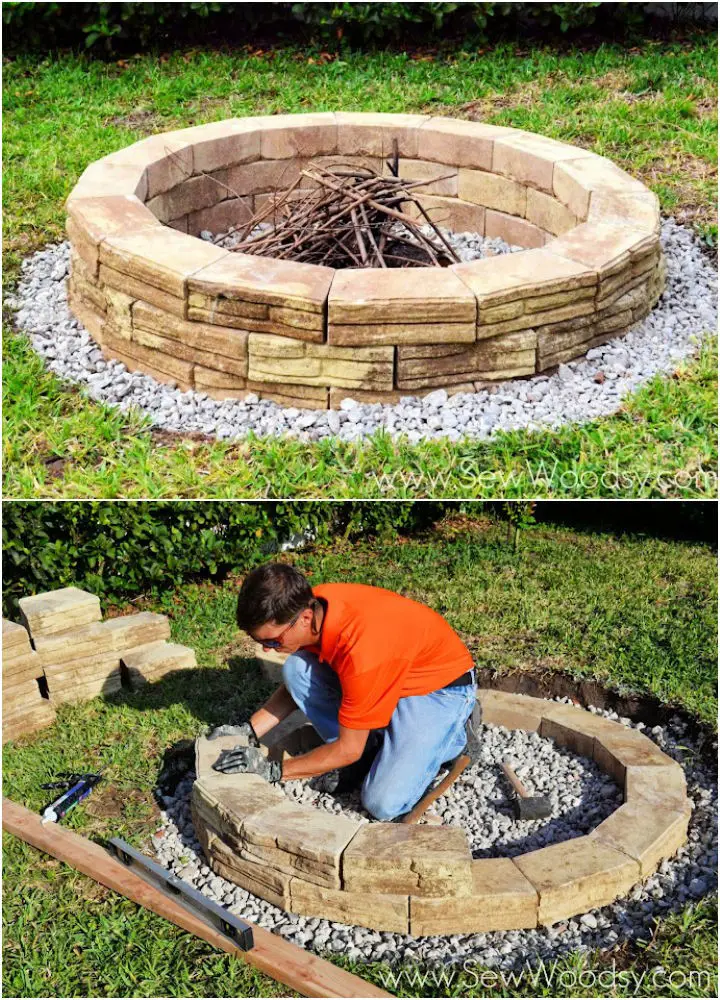
Building a Fire Pit at Home
Transform your backyard into an inviting oasis by installing a professional-looking fire pit using this straightforward DIY guide. Begin by defining the fire pit area with concrete landscaping stones or a metal ring, ensuring a solid foundation for your project. Next, excavate a 6-inch deep hole and fill it with gravel to promote proper drainage.Proceed to build the fire pit by layering the stones, securing them with masonry adhesive, and using a rubber mallet to achieve a flat and even surface. Once the structure is complete, ignite the flames with newspaper, dry leaves, and sticks, gradually adding larger branches and logs as needed.To maintain the integrity of your fire pit, regularly remove ash buildup to prevent damage. Elevate your outdoor experience by pairing your new fire pit with a matching bench, allowing you to enjoy cozy campfires in the comfort of your own backyard.
Easy DIY Fire Pit
Elevate your backyard experience by constructing a DIY fire pit that’s both budget-friendly and easy to execute. This comprehensive guide walks you through the process of building a fire pit using concrete landscaping stones, gravel, and masonry adhesive, providing step-by-step directions for a successful outcome. Notably, this project emphasizes the importance of adhering to local fire codes and maintaining a safe distance from surrounding structures to ensure a safe and enjoyable experience. The guide also offers valuable insights on selecting the right stones and constructing a sturdy structure that will withstand the elements. Once complete, your fire pit becomes an extension of your home, perfect for cozying up with loved ones and creating lasting memories during the cooler months.
Homemade Metal Fire Pit
Transform yourself into a DIY blacksmithing master and create a custom metal fire pit with this straightforward, step-by-step guide. With minimal investment and basic welding skills, you can construct a robust and visually appealing fire pit in just a day. Start by cutting a 24-inch square steel plate and two gussets from steel stock, then weld the components together to form the basin. Next, cut and assemble the base using square steel tubing, ensuring everything is precisely aligned before attaching it to the basin. Finally, smooth out any remaining welds for a polished finish. This budget-friendly project will bring warmth and ambiance to your outdoor space. Follow the detailed instructions and accompanying video for a stress-free construction process.
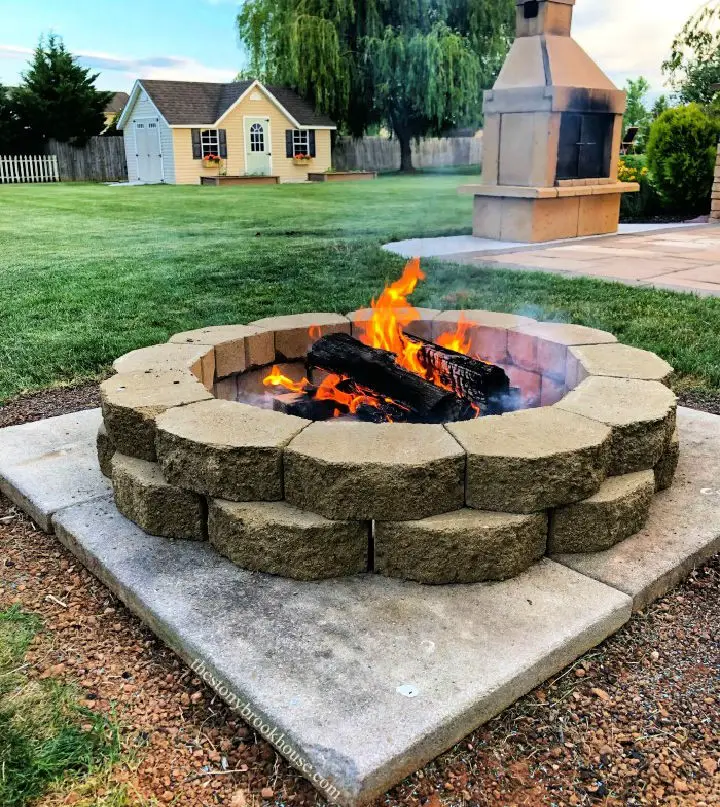
DIY Permanent Backyard Fire Pit
Elevate your backyard gatherings by infusing your personality into your DIY fire pit. Choose a design that resonates with your theme or mood, and create a warm and inviting space for friends and family to congregate. This comprehensive guide will walk you through the process of building a permanent fire pit, selecting the ideal materials and supplies, including blocks, caps, adhesives, paver bases, and granite rocks. A step-by-step approach ensures a level and sturdy structure, from cutting the blocks to laying the foundation. As you add the finishing touches, complete with granite rocks and s’mores roasting sessions, you’ll be left with a functional and aesthetically pleasing fire pit that’s perfect for summer evenings spent with loved ones.
Making a Smokeless Fire Pit
Imagine a campfire’s warmth without the haze – a DIY smokeless fire pit is like entering a tranquil realm! This comprehensive guide takes you on a step-by-step journey to create a smokeless fire pit using an innovative battery-powered blower, which optimizes oxygen circulation and minimizes smoke. You’ll uncover the secrets behind smoky fires and the significance of properly seasoned firewood, as well as learn about the essential materials and supplies required for this project, including a steel fire pit ring, metal duct pipe, blower, and more. With crystal-clear instructions and valuable tips, you’ll be able to enjoy a smokeless fire pit in your own backyard, perfect for creating a cozy atmosphere for gatherings and relaxation.
How to Build an Outdoor Fire Pit
As the sun sets on your backyard, it’s time to conjure up a warm and inviting atmosphere with an outdoor fire pit. This DIY project will walk you through the process of building a functional and visually stunning concrete landscape block fire pit that will be the centerpiece of your outdoor oasis.Start by selecting the perfect location for your fire pit, taking into account factors like wind direction and distance from flammable structures. Next, prepare the area by clearing any debris or obstructions, then dig the pit to the desired depth. Arrange the cement blocks in a pattern that suits your style, ensuring stability with adhesive and a layer of gravel at the base.To add an extra layer of safety, consider incorporating a metal fire screen into your design. With these simple steps, you’ll be enjoying cozy nights by the fire with friends and family in no time.
Build a Custom Sized Fire Pit

Transform your backyard into a warm and welcoming oasis by creating a custom DIY fire pit that doubles as a focal point and gathering spot. With this comprehensive guide, you’ll learn how to build a fire pit that suits your style and meets safety standards. From selecting fire-resistant materials to choosing the perfect location, we’ll walk you through every step of the process. You’ll also discover tips on ideal size and depth, local regulations to consider, and how to create a cozy ambiance with comfortable seating, accessories, and decorative elements. Whether you prefer a traditional fire pit, an in-ground design, or a ring style, this guide offers a variety of DIY fire pit ideas to suit your needs and preferences.
Cheap DIY Fire Pit
Building a DIY fire pit can be an enjoyable and cost-effective way to create an inviting outdoor gathering spot. With minimal tools and basic supplies, you can craft a cozy ambiance that’s perfect for chilly nights or casual get-togethers. The best part? You can achieve this look without breaking the bank! By repurposing materials like old bricks, cinder blocks, or rocks, you can construct a simple yet effective fire pit. This tutorial takes you through every step of the process, from gathering your materials to setting up your new outdoor feature. And if that’s not enough, we’ll also show you how to build wooden benches using tree stumps or 4×4 pieces of wood. Whether you’re looking for a rustic charm or simply want to save some cash, this budget-friendly project is an excellent way to get started. With the right materials and a little creativity, you can create a warm and welcoming atmosphere that’s sure to be the envy of your friends and neighbors.
DIY Fire Pit for Outdoor Space
Transform your outdoor space into an inviting haven by crafting a unique homemade fire pit. This DIY project is perfect for enthusiasts of all skill levels, providing a comprehensive guide to create a stunning and functional focal point for your backyard gatherings. Start by measuring and digging out the area, then build the fire pit using paver stones and add finishing touches like edging and landscaping. A list of required materials and tools, along with helpful tips and instructions, ensures a beautiful and long-lasting creation that will bring years of enjoyment. Say goodbye to store-bought options and indulge in the satisfaction of building your own, as you elevate your outdoor space with this step-by-step tutorial.
Brick Fire Pit in Your Backyard
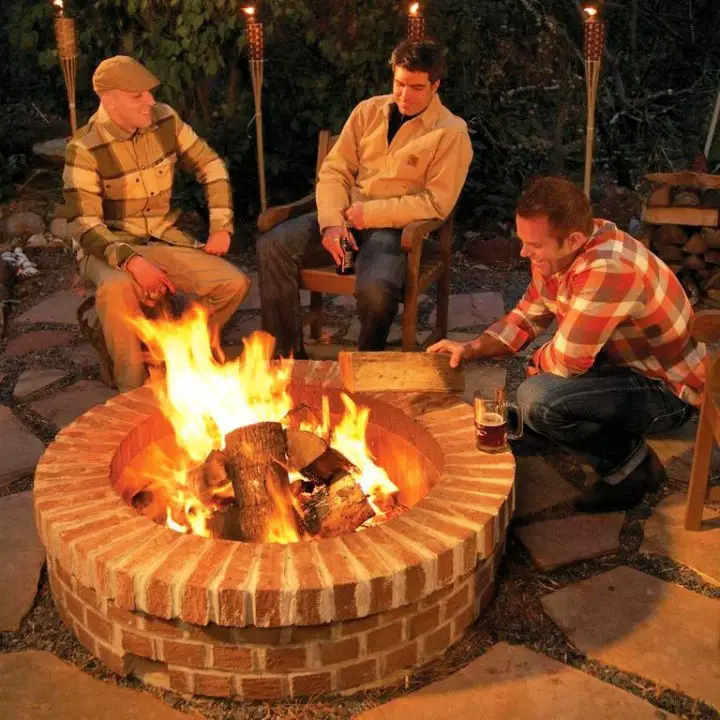
As you gather friends and family around your custom-built fire pit, you’ll be enveloped in the warm, inviting ambiance of a crackling wood fire. This intermediate-level DIY project is not only budget-friendly, with an estimated cost of $101-$250, but also yields a sturdy and long-lasting structure that meets safety codes. With the guidance of an experienced bricklayer, you can construct a fire pit that will become the centerpiece of your backyard gatherings.
The project requires a range of materials, including face bricks, firebricks, concrete forms, mortar mix, rebar, and refractory cement. By following a step-by-step guide that covers marking the pit, leveling the area, pouring a footing, setting the firebrick liner, mortaring the firebrick and face brick, and finishing with a protective cap, you’ll be able to enjoy cozy evenings around your fire pit with minimal effort.
$50 DIY Fire Pit in 30 Minutes
Create a warm and inviting outdoor gathering spot by repurposing stacking wall blocks to build a cozy DIY fire pit. This budget-friendly project requires minimal materials and can be completed in no time. By removing the lip from each block, you’ll achieve a seamless finish that will make your backyard feel like an extension of your living room. With only 12 blocks per layer, assembly is quick and easy, leaving ample space for air circulation to ensure a safe and enjoyable fire-pit experience. This step-by-step guide provides helpful tips and cost breakdowns to help you get started.
Make a Patio Fire Pit With Gravel
Transform your outdoor space into a cozy retreat with a DIY patio fire pit crafted from gravel. This comprehensive guide walks you through building a fire pit accompanied by a stone walkway, creating a sturdy and visually appealing seating area in your backyard. A step-by-step process is provided, including the necessary materials such as a fire pit kit or concrete blocks, Pavestone Rumblestone edgers, pea gravel, and more. Additionally, this guide highlights crucial tips, such as calling 811 to mark utility lines before digging and checking local building codes for fire pit placement. As you follow along, you’ll turn your outdoor area into a warm and inviting haven where loved ones can gather and relax.
Building a Fire Pit With Pavers
Get ready to ignite conversations in your own backyard with a one-of-a-kind handmade fire pit! This step-by-step guide will walk you through building a unique outdoor space using Pavestone’s Keystone Hardscapes round stone fire pit kit, specifically designed for paver wall blocks. With this comprehensive resource, you’ll learn how to plan and prepare the perfect setting, select the right materials, level the ground, and assemble your new focal point. Whether you’re looking to elevate your backyard or create a cozy gathering spot for family and friends, a fire pit is an unbeatable addition. Imagine sharing warm, laughter-filled moments with loved ones around the crackling flames of your very own handmade fire pit – it’s the perfect way to make memories that will last a lifetime.
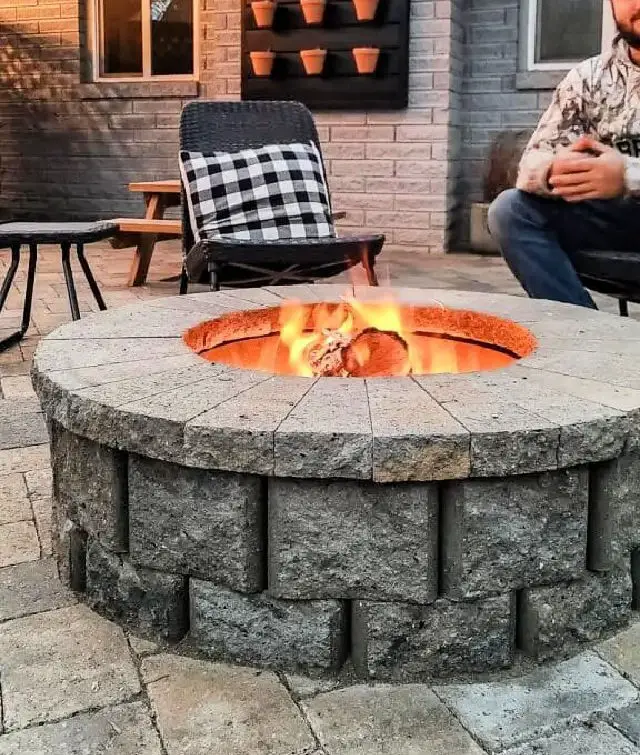
Simple Concrete Paver Fire Pit in One Hour
Transform your backyard into a serene oasis by crafting a DIY concrete paver fire pit in just an hour! This straightforward and budget-friendly guide will lead you through the process of creating a functional and stylish focal point for your outdoor space, complete with step-by-step instructions, essential tool and material requirements, and valuable safety and durability tips. With crystal-clear explanations and helpful visuals, you’ll be able to create your own concrete paver fire pit and enjoy warm, cozy nights with friends and family.
DIY Wooden Fire Pit
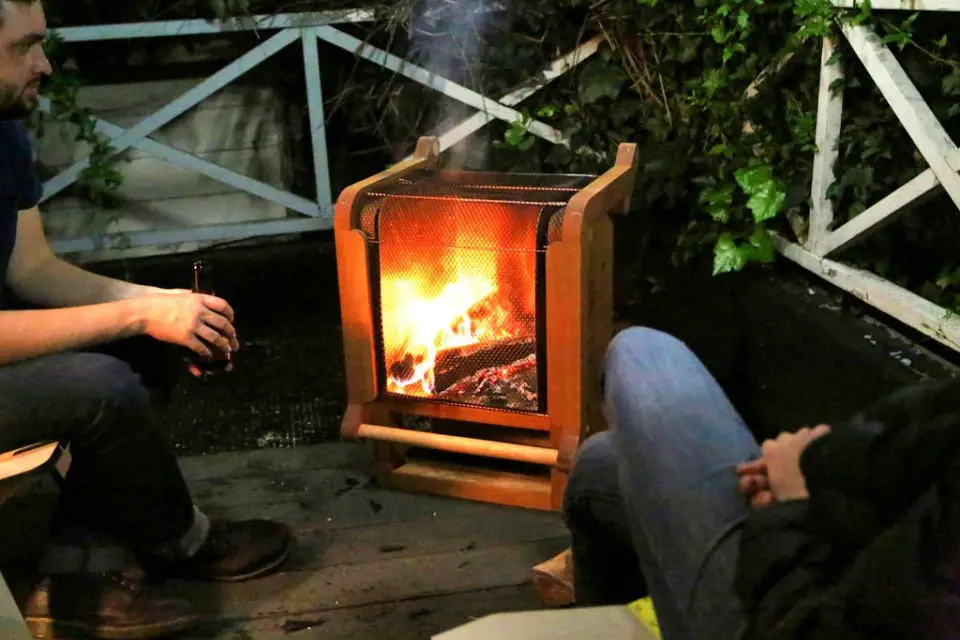
Transform your backyard gatherings with custom-made fire pits that cater to your unique style and needs. With these budget-friendly DIY ideas, you can select from various sizes, shapes, fuels, and designs to create a one-of-a-kind focal point for your outdoor space. Imagine gathering around the warmth of a handcrafted wooden fire pit with loved ones, forging unforgettable memories. This comprehensive DIY guide showcases a innovative design featuring a metal bucket with a 1-inch air gap between the wood and metal, ensuring a safe and enjoyable experience. The ‘clam shell’ design includes a hatch with a screen to contain sparks, guaranteeing a worry-free ambiance for your outdoor gatherings. To create this masterpiece, you’ll need Alder wood, renowned for its durability, as well as woodworking and sheet metal supplies. The step-by-step instructions and templates will walk you through the process of cutting, laminating, joining, and assembling the wooden and metal components. With this DIY fire pit project, you’ll be rewarded with a stunning centerpiece that blends form and function, elevating your outdoor space to new heights.
Handmade Fire Pit for Under $60
Transform your backyard into an inviting haven this summer by building a DIY fire pit that won’t break the bank. With just 36 gray pavers and a dash of creativity, you can create a sturdy and stylish focal point for outdoor gatherings. This comprehensive guide takes you through the process step-by-step, providing valuable insights on leveling the ground and adding a sand-filled floor to ensure a stable and comfortable seating area. By following this tutorial, you’ll be able to enjoy warm summer nights with loved ones, roasting marshmallows and sharing stories around the fire pit, all for an affordable cost of just $53.29 before taxes. This budget-friendly project is perfect for those looking to add some cozy charm to their outdoor space without sacrificing quality or style.
Modern DIY Welded Fire Pit

Transform your outdoor haven by upcycling an old DIY fire pit into a sleek and inviting area perfect for savoring sunset moments or roasting marshmallows with loved ones. Begin by constructing a sturdy box using pressure-treated lumber, ensuring a solid foundation. Next, lay down landscaping fabric to prevent weeds from sprouting and create a smooth surface.To add visual appeal, cover the surrounding area with dolomite gravel, creating a beautiful, textured landscape. For an added touch of sophistication, learn to weld a modern fire pit using a flux core wire feed electric welder and a metal sheet. Incorporate cross-bracing for enhanced structural integrity and top it off with Rust-Oleum’s High Heat Enamel Spray Paint for protection and a stylish finish.This revitalized DIY fire pit is an ideal focal point for your outdoor space, fostering warm gatherings and creating lasting memories.
DIY Concrete Fire Pit From Scratch
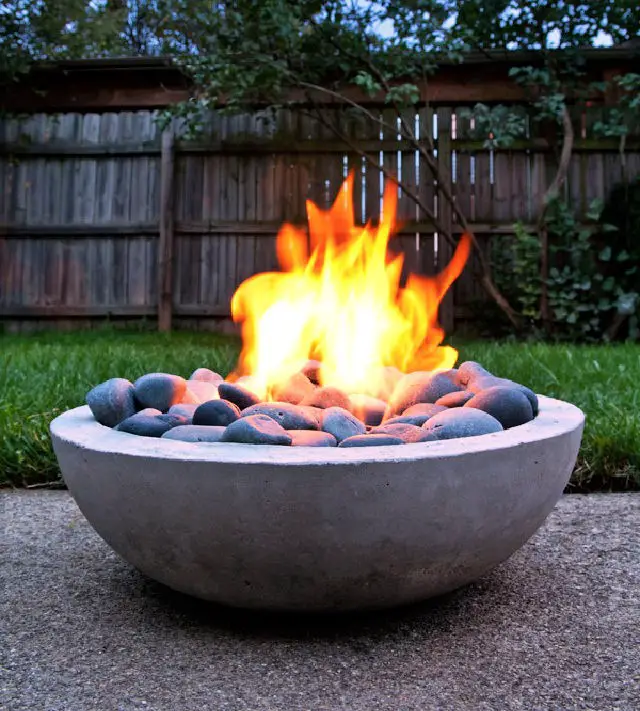
Transform your backyard into a cozy retreat with this straightforward DIY concrete fire pit project! By leveraging affordable, weather-resistant concrete, you can create a modern and sleek fire pit that’s both portable and sturdy. Powered by gel fuel, these 30-minute fires provide the perfect ambiance for a quick gathering or relaxation session.
With minimal investment of under $50 in materials and just a few hours of your time, you can complete this project with ease. Our comprehensive guide provides a detailed list of required tools and materials, as well as step-by-step instructions to ensure a successful build.
To guarantee a safe and enjoyable fire pit experience, we’ve also included essential safety precautions and tips. Elevate your outdoor space with this stylish fire pit and enjoy countless cozy evenings by the warmth of the flames.
How to Make a Fire Pit
Transform your outdoor space into an inviting oasis with our DIY concrete fire pit project! Using a variety of materials such as bricks, stones, metal, or concrete, you can create a unique and functional fire pit that adds character to your backyard and increases your home’s value. This easy-to-execute DIY project requires minimal effort, just half a day of your time, and yields a stunning permanent fire pit that will be the focal point of your outdoor gatherings. A video guide accompanies this tutorial, walking you through the simple steps of construction. Gather essential supplies like a shovel, crushed concrete rock, flagstone blocks, and construction adhesive to get started. As our DIY enthusiasts will attest, even those initially hesitant will be thrilled with the final result and enjoy countless cozy evenings around the crackling fire.
DIY Outdoor Concrete Fire Pit
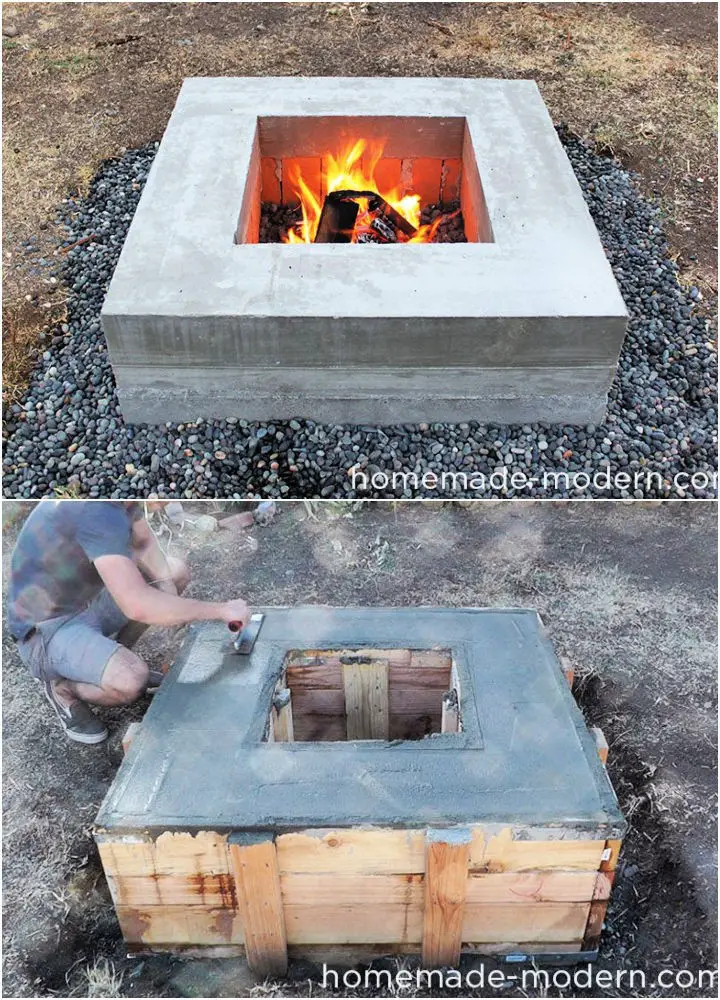
Elevate your outdoor ambiance by crafting a unique DIY concrete fire pit that fits your style and budget. This comprehensive guide will walk you through the process of building a stunning modern fire pit, perfect for gathering around on chilly evenings. With minimal materials and tools, including Quikrete 5000 concrete mix, fire bricks, rebar, gravel, and lava rock, you can create a functional centerpiece that’s as durable as it is visually appealing. By focusing on a sturdy frame and lining with fire brick to prevent cracking, this project offers valuable insights for both warm and cold climates. Additionally, the guide provides essential tips on curing techniques, ensuring your creation stands the test of time. This labor-intensive yet rewarding DIY project is perfect for those seeking to transform their outdoor space into a cozy haven.
How to Set Up a Firepit
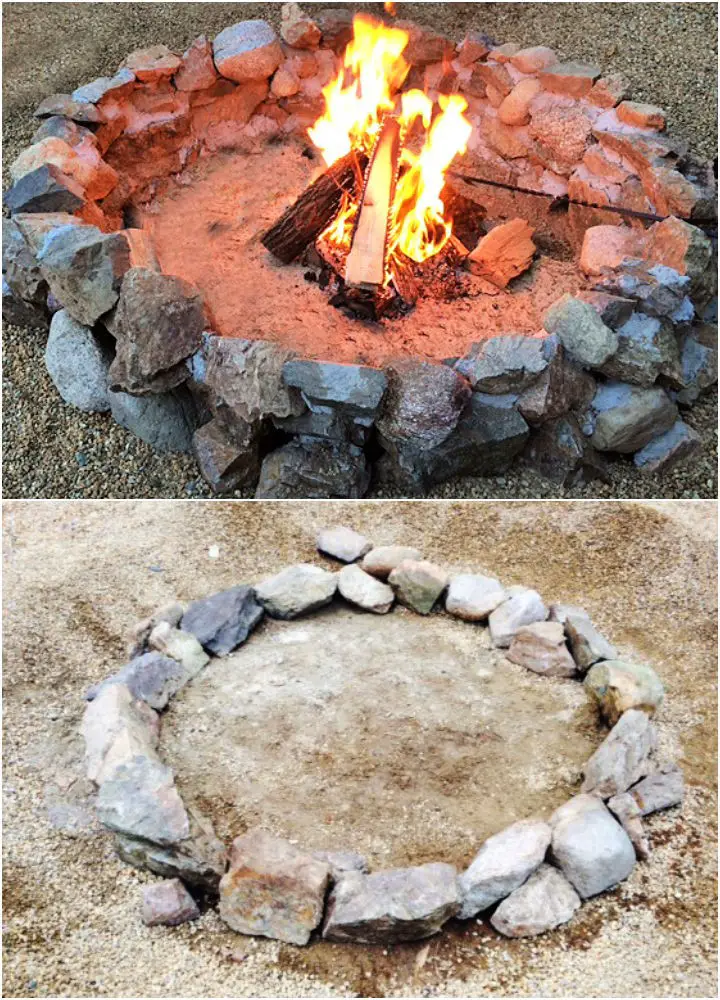
Transform your backyard into a cozy oasis without breaking the bank! With a DIY firepit setup, you can create a warm and inviting space for summer gatherings and relaxing evenings. This straightforward guide will walk you through the process of clearing and leveling the area, using rocks and cement to build the pit, and adding layers until you reach your desired height. Once hardened, simply add some logs and enjoy the ambiance. Bring warmth and charm to your outdoor space with this budget-friendly project that’s sure to become a favorite spot for years to come.
Unique Propane Fire Pit Using Gabion Baskets
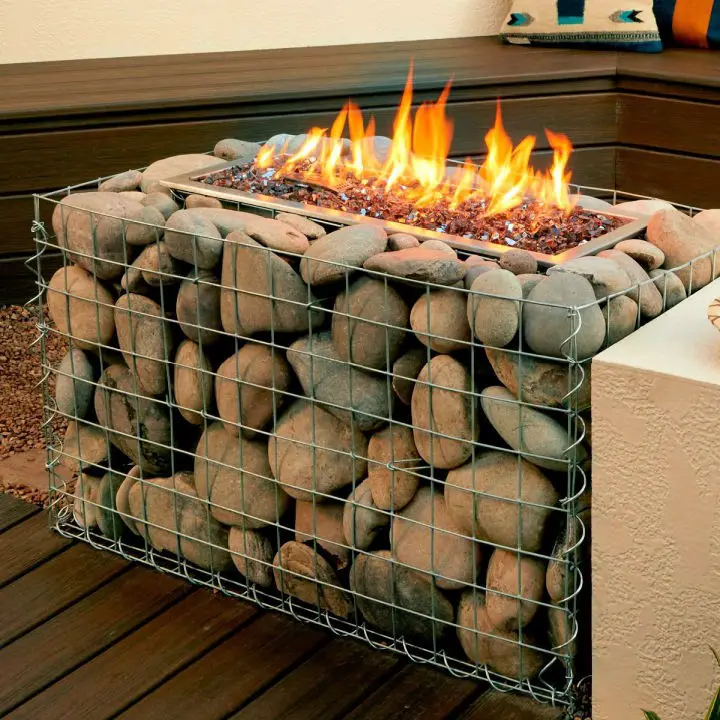
Transform your backyard into an inviting oasis by crafting a one-of-a-kind propane fire pit using gabion baskets. This intermediate-level DIY project can be completed in just two days, making it the perfect addition to any outdoor space. With step-by-step instructions covering every detail, from selecting the ideal location and materials to filling the gabion baskets with rocks and securing the fire pit controls, you’ll have a stunning focal point that’s both safe and functional. The guide also places a strong emphasis on safety precautions and provides valuable maintenance tips to ensure your fire pit remains in top condition. As you follow this comprehensive guide, you’ll be able to create a cozy gathering spot that will become the heart of your outdoor living space.
Washing Machine Drum Fire Pit
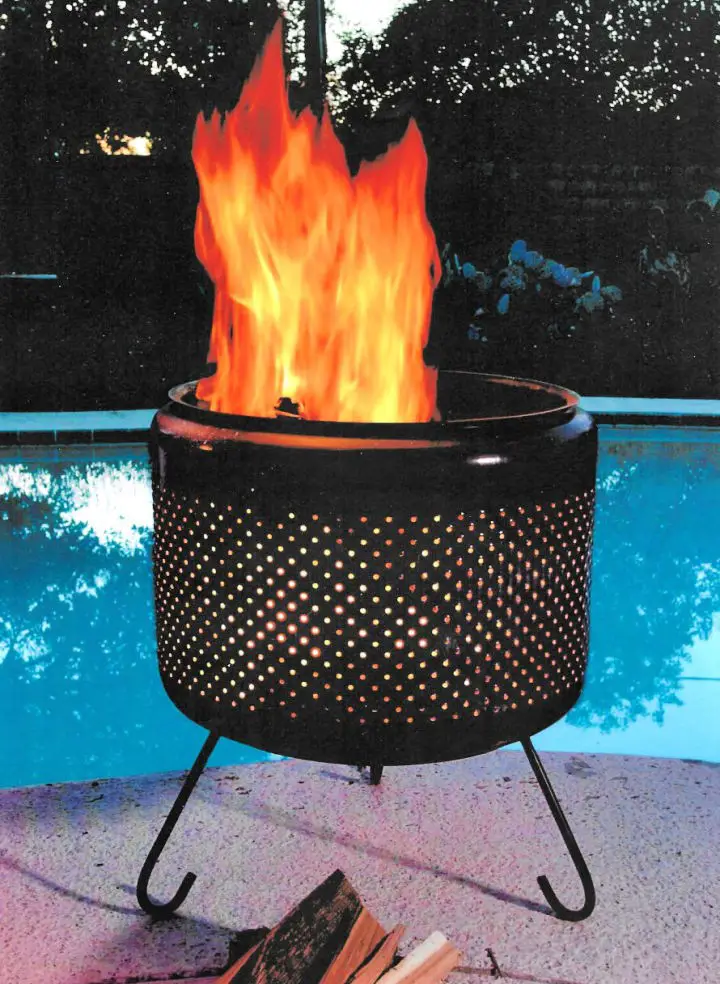
Transform an old washing machine drum into a unique and functional fire pit with this simple DIY project. The durable metal construction can withstand high temperatures, making it perfect for warming up, cooking, or having fun with loved ones. By repurposing the enameled tub, pre-made steel pot stand, cable clamps, and lock washers, you’ll create a stylish and cozy outdoor space that’s perfect for gatherings and relaxation. After thoroughly cleaning the tub, flip it upside down and secure the pot stand using U bolts, lock washers, and nuts. Flip the tub over and adjust everything until centered before tightening the bolts. As with any fire pit, exercise caution and follow safety tips to ensure a fun and safe experience. Take your DIY project to the next level by using multiple fire pits for a larger backyard party or repurposing the drum as a planter, seat, or art piece. Get creative and enjoy your transformed washing machine drum fire pit!
DIY Square Fire Pit
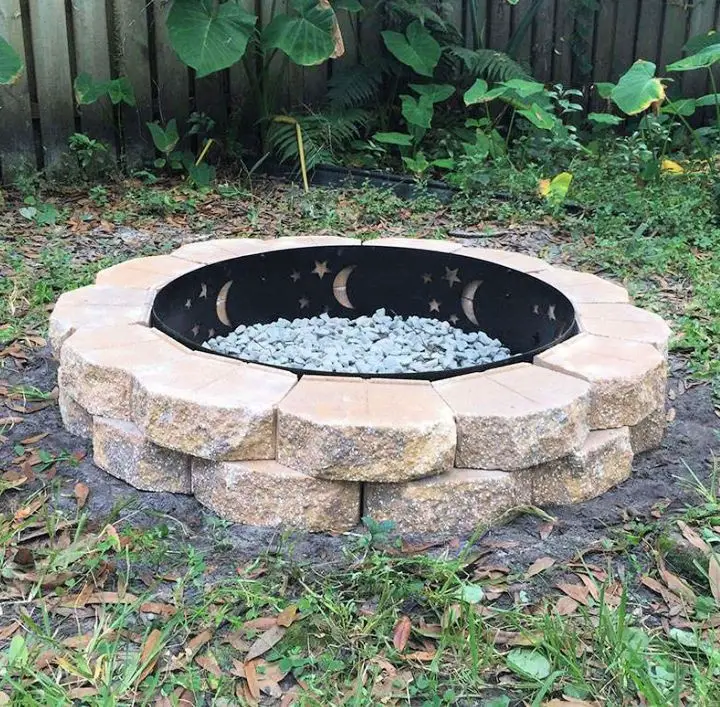
Transform your outdoor space into a serene haven with this easy DIY fire pit project. With just $75 and a few hours of effort, you can create a cozy gathering spot for quality time with loved ones. Follow the step-by-step instructions to build a sturdy and stylish fire pit that’s perfect for roasting marshmallows, enjoying the outdoors, or keeping pets at bay. Say goodbye to worries about your furry friends getting too close to the flames and hello to relaxing in a safe and cozy atmosphere. This project is a great way to get inspired and give your backyard a new lease on life.
Modern DIY Sunken Fire Pit
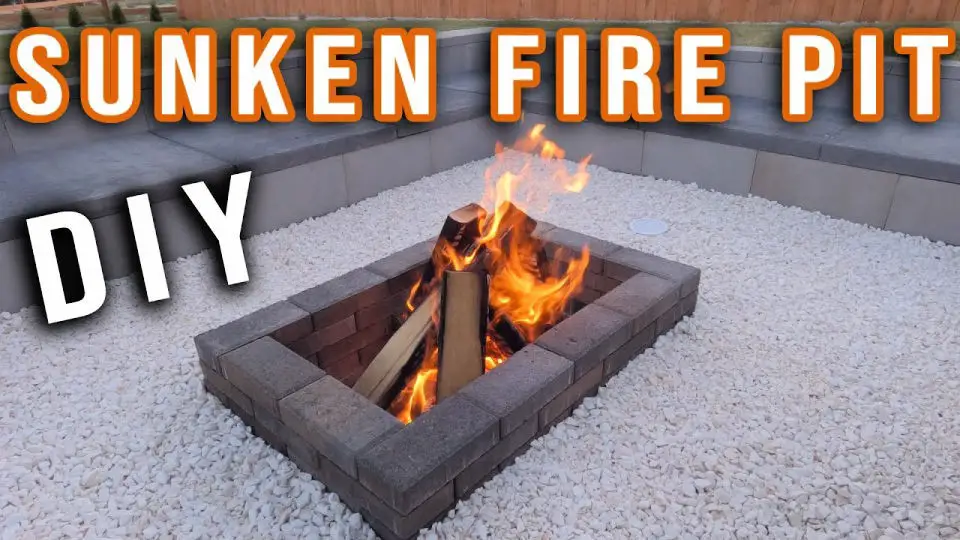
Transform your outdoor space into a warm and inviting retreat by building a modern in-ground fire pit. This comprehensive guide will lead you through the process of creating a stunning focal point for your backyard, perfect for gathering with friends and family. Whether you’re a seasoned DIY enthusiast or just starting out, this step-by-step tutorial will provide the necessary tools and materials to bring your vision to life.
$50 DIY Texas Fire Pit
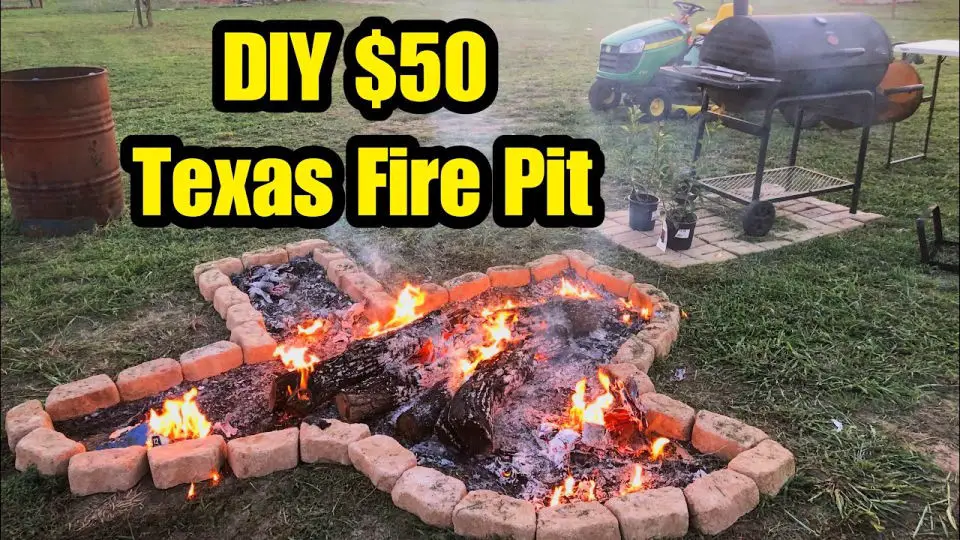
Transform your outdoor space into a Texas-sized haven with a DIY fire pit that’s as easy on the wallet as it is warm and inviting. For just $50, you can create a cozy gathering spot that’ll make all your neighbors green with envy. This straightforward guide walks you through every step of building a homemade fire pit, making it simple to turn your backyard into an outdoor oasis perfect for entertaining, cooking, or just relaxing under the stars. With materials that are easy to find and budget-friendly, this project is a must-have for anyone looking to upgrade their home’s curb appeal and create a warm and welcoming atmosphere.
Fire Pit With Eziwall Blocks
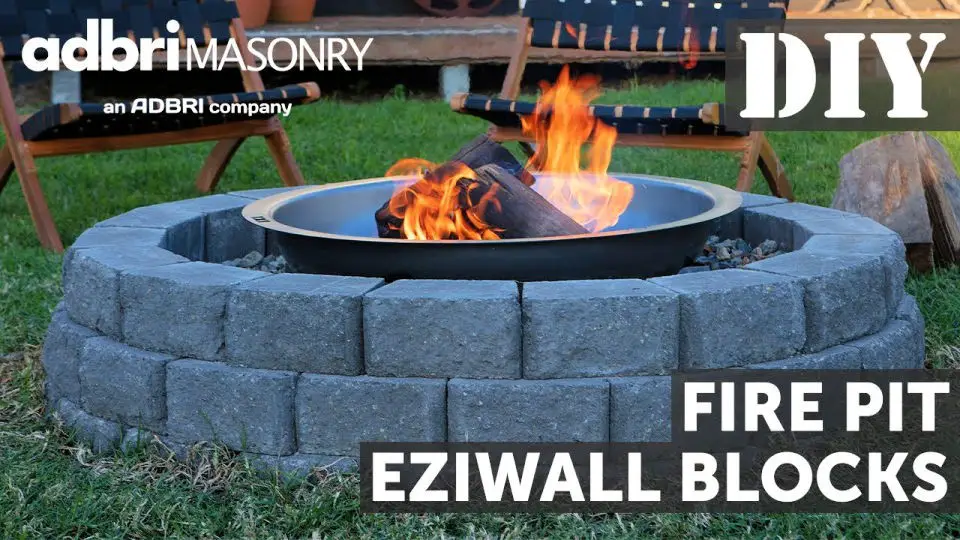
Turn your backyard into a warm and inviting haven with these creative DIY fire pit ideas. For a hassle-free solution, construct your own fire pit using Eziwall blocks – it’s a breeze! Watch an informative DIY video that takes you through the process step-by-step, guaranteeing you can make the most of your outdoor space during winter’s chill. With this comprehensive guide, discover the necessary materials and supplies, as well as detailed instructions to build your fire pit with confidence. This engaging project will elevate your outdoor living experience, making it a perfect addition to your home.
Cheap DIY Propane Fire Pit
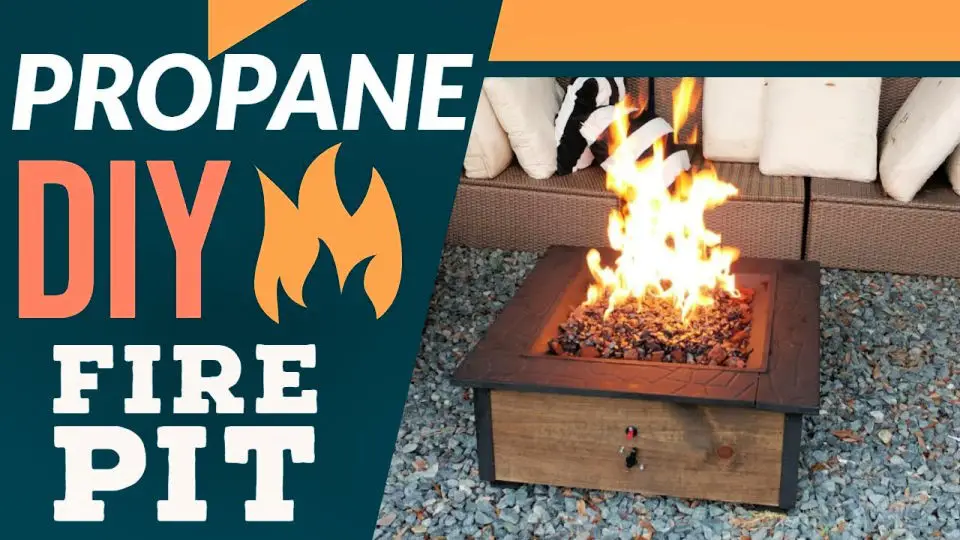
Transform your outdoor space into a warm and inviting haven without breaking the bank! A DIY propane fire pit is a great way to do just that. With some simple materials and basic crafting skills, you can create a unique and adjustable flame fire pit that complements your landscape and decor. Imagine being able to match the fire pit’s design with your furniture, plants, or accessories, creating a seamless fusion of style and functionality. By repurposing an existing black iron pipe and fire pit, you’ll be surprised at how easily you can bring this idea to life. This guide takes you through every step of the process, from preparation to completion, ensuring that you don’t miss any crucial details. You’ll learn what materials are needed, the cost breakdown (approximately $200), and gain valuable insights into the preparation process. The result is a one-of-a-kind propane fire pit that’s not only affordable but also a testament to your creativity. So why wait? Get cozy this evening with your very own personalized propane fire pit!
DIY Rectangular Fire Pit
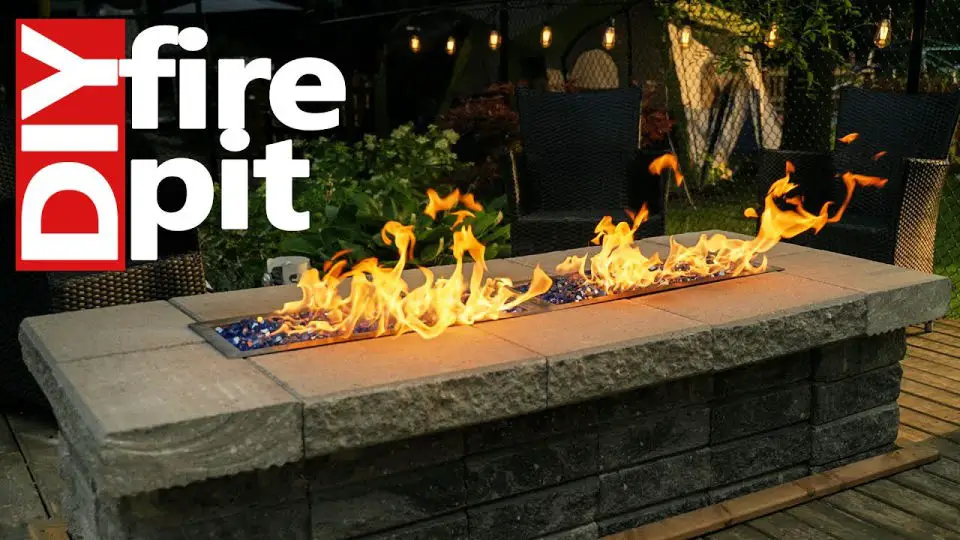
Transform your backyard into a cozy haven by building a DIY rectangular fire pit that’s perfect for sharing with loved ones. Without breaking the bank, you can create a stunning outdoor gathering space using affordable materials and tools. Follow along as we guide you through the process of constructing a gas-powered fire pit, incorporating essential elements like landscaping stones, compacted granular material, and convenient hardware. By evenly distributing the weight on the ground, integrating the fire pit into your existing patio or deck ensures a secure design. The step-by-step process involves planning the layout, cutting stones to fit, reinforcing the deck, and adding layers of compacted granular material. To complete the look, achieve a symmetrical pattern with stacked stones and connect propane gas flame trenches filled with decorative fire glass. With this project, you’ll be able to transform your outdoor space into a cozy retreat perfect for sharing with friends and family.
Conclusion:
With the 40 DIY fire pit ideas presented earlier, homeowners now have a wealth of inspiration to create their own backyard retreats. From rustic charm to modern sleekness, each design offers a unique blend of style, functionality, and sustainability. By incorporating these creative concepts into your outdoor space, you can craft a warm and inviting atmosphere that’s perfect for gathering with friends and family.
