Elevate your style with the art of DIY pocket squares. This comprehensive guide provides 15 stunning ideas to create one-of-a-kind, personalized pocket squares at home. With styling tips, folding techniques, and pairing suggestions, you’ll master the art of accessorizing in no time. Whether a beginner or an experienced fashion enthusiast, our tailored guidance will help you level up your fashion game. From selecting the perfect fabric to overcoming common challenges, we’ve got expert advice and creative inspiration at your fingertips.
How to Make a Pocket Square: A Step-by-Step Guide
Elevate your fashion game by crafting a stylish pocket square that adds a touch of elegance to your ensemble. To achieve this, follow our step-by-step guide and discover how easy it is to create a personalized accessory that complements your outfit.
Materials Needed
For a successful sewing project, you’ll need the right tools to get started. These essentials include your chosen fabric, a reliable sewing machine or a trusty needle and thread for those who prefer a more manual approach. Additionally, an iron and ironing board are crucial for pressing seams and achieving crisp folds. A measuring tape or ruler will also come in handy for taking precise measurements throughout the project. Scissors are a must-have for cutting your fabric to size, while pins or sewing clips will help you secure your fabric as you work. If you’re looking for an extra level of precision, consider investing in a mini sewing iron designed specifically for small areas and intricate details.
Step 1: Measuring and Cutting the Fabric
When it comes to selecting the ideal pocket square size, consider a range of 10-17 inches (25-40 cm) wide. Your decision may hinge on the pocket size you’re dressing up for or personal preference. With the desired width in mind, use your measuring tape or ruler to mark the fabric accordingly.
To ensure a precise cut and maintain symmetry, fold the fabric over at the marked width before cutting through multiple layers at once. This folded approach also helps keep the edge straight, resulting in a professional-looking finish.
Step 2: Preparing and Ironing the Hem
To create a secure foundation for your hem, use pins or sewing clips to hold a 1/4 inch fold along the fabric’s edge. This folded edge will serve as the starting point for your hem. Once secured, iron over the fold to set it firmly in place. A mini iron can be especially useful here, providing precision and ease of use.
Step 3: Sewing the Hem
To achieve a crisp, durable edge, fold the fabric over once more, aligning the new fold with the initial 1/4 inch (0.63 cm) measurement. As you work, secure the fold with pins or clips to prevent shifting. This double fold is essential for creating a clean, professional finish.Next, iron the folded edge to set the crease and prepare it for sewing. This secondary press not only ensures accuracy but also makes the sewing process smoother, reducing the risk of errors or puckering.To complete the pocket square’s perimeter hem, sew a straight stitch around the entire square, starting at one corner and working your way around. For beginners, practicing a straight stitch on a scrap piece of fabric first can help build confidence and ensure a smooth finish.
Step 4: Finishing Touches
As you inspect the edges of your pocket square, ensure that the stitches are uniform and the corners are neatly creased. Satisfied with its current state, take out the iron to give it one final press from edge to edge. This will not only enhance its overall appearance but also impart a sense of refinement and professionalism.
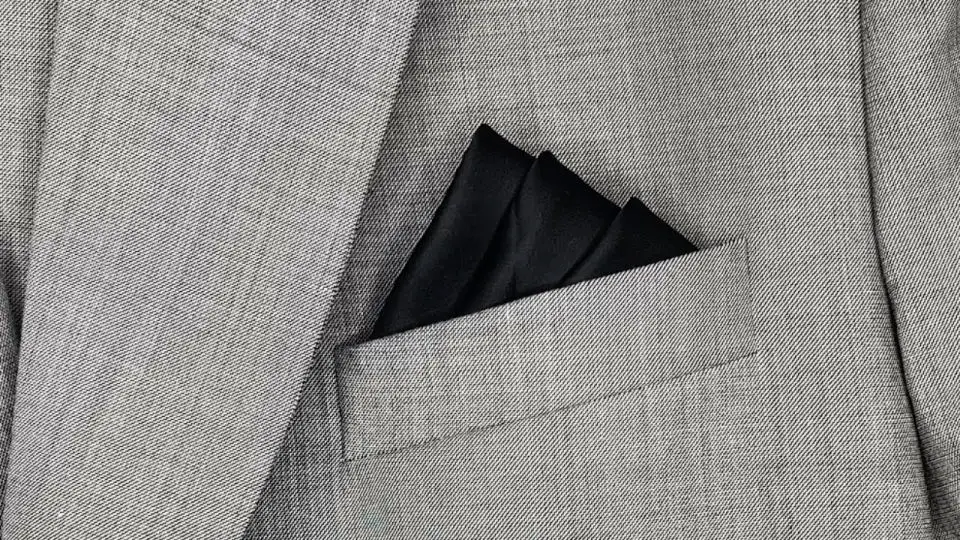
Step 5: Folding and Styling
With your pocket square now created, it’s time to explore its versatility through various folding techniques. The classic square fold provides a timeless elegance, while more complex designs like the puff or three-point fold can add a touch of sophistication to your outfit. Don’t be afraid to experiment with different folds to discover the ones that harmonize best with your personal style and the occasion.
Video Tutorial
Watch Wendy’s comprehensive video tutorial to learn the intricacies of crafting a stylish pocket square. This step-by-step visual guide perfectly complements our written guide, allowing viewers to absorb and apply the information in a more immersive and engaging manner.
Styling Tips for Pocket Squares
Elevate your wardrobe with the subtle yet striking addition of a pocket square. This often-overlooked accessory has the power to transform an ordinary outfit into an extraordinary one. To master the art of styling a pocket square, consider the following guidelines for any occasion:
Choosing the Right Pocket Square
The nuances of a well-chosen pocket square can elevate the overall style quotient. The fabric itself plays a crucial role in adding texture and depth to the look. For formal events, silk is an excellent choice, while cotton or linen are more suitable for casual settings. When it comes to color coordination, aim to match the hue of your pocket square with a secondary color in your outfit, such as your tie or shirt, to create a cohesive visual narrative. Finally, consider the pattern of your outfit: if it’s plain, a patterned pocket square can add a touch of whimsy, whereas if your outfit is already visually busy, opt for a solid-colored square to strike a balance.
Folding Techniques
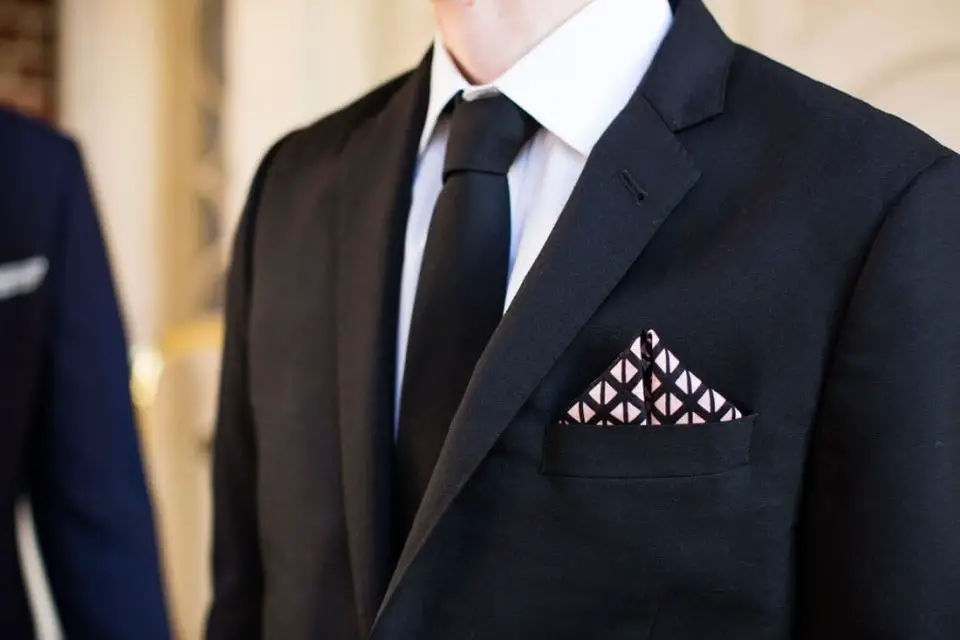
When it comes to styling a pocket square, there are several techniques to choose from, each with its own unique character. For a touch of elegance and sophistication, consider the Classic Fold, also known as the presidential fold. This simple yet effective method creates a flat fold that is perfect for formal events or business gatherings. Alternatively, you can opt for a more relaxed look by going for the Puff Fold. Simply pinch the center of the pocket square and let the edges hang loosely – this fold works well for casual occasions when you want to add a touch of whimsy to your outfit. For a versatile option that suits various settings, try the One-Point Fold. This involves folding the pocket square diagonally so that one corner points upward, creating a stylish and understated look.
Pairing with Outfits
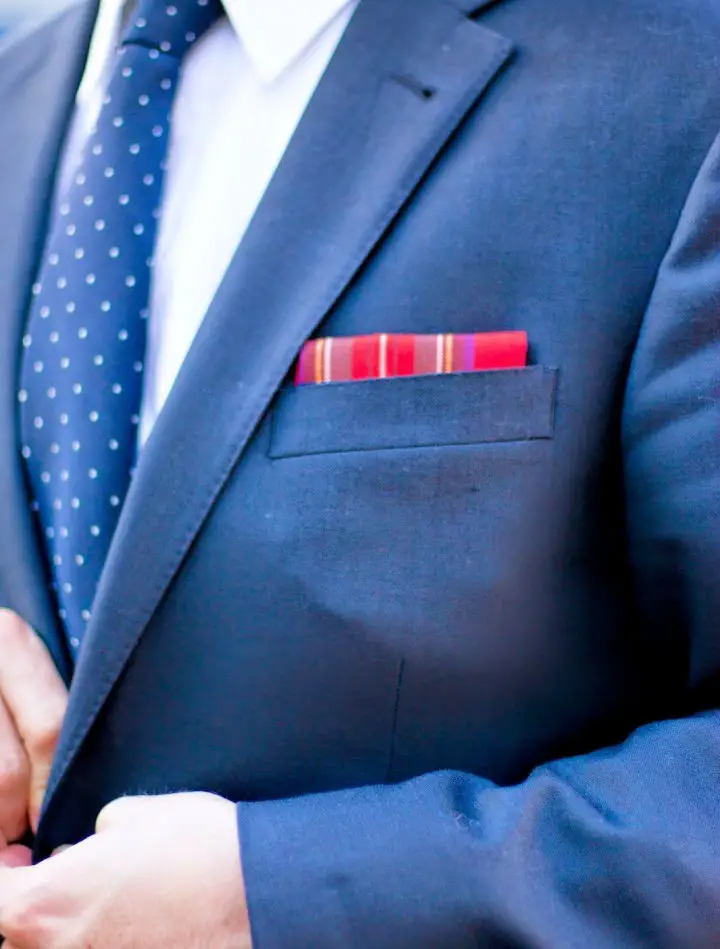
When it comes to dressing up, stick with timeless styles by opting for classic folds and understated patterns. A white silk pocket square with a subtle fold is a versatile choice that works well in most business settings. However, don’t be afraid to let your personality shine through when dressing down. For casual occasions, feel free to experiment with bolder colors and more dramatic folds like puffs or pleats to add some flair to your blazer or sports coat. And when it comes to formal events like weddings, coordinate with the color scheme to show respect for the occasion. A simple one-point fold on your pocket square can add a touch of sophistication without overpowering the groom.
Final Touches
When it comes to incorporating a pocket square into your ensemble, the key is to strike a balance between visual harmony and personal flair. Rather than letting the pocket square draw attention away from the rest of your outfit, aim for a subtle accent that enhances your overall look. This means selecting a color or pattern that complements your clothing without overpowering it. A well-coordinated pocket square can make a positive impact on your overall style and confidence. Ultimately, the goal is to wear your pocket square with poise and self-assurance, as this will convey a sense of individuality and attention to detail.
Tips for Beginners
Crafting a DIY pocket square can be an empowering experience, allowing you to infuse your personal style into your outfit. For those new to this project, fear not – with a straightforward guide, anyone can create a unique and stylish pocket square that reflects their individuality.
Selecting the Right Fabric
When selecting fabrics for your pocket squares, consider starting with lightweight options like cotton or linen. These materials are easier to handle and fold, making them ideal for beginners. In terms of size, a standard square measures 12 inches across. However, if you’re working with larger pockets, you may need to opt for a slightly larger design. To add visual interest without overwhelming the senses, look for fabrics featuring small, subtle patterns. For your first project, a simple yet stylish pattern can elevate the overall appearance.
Cutting and Sewing Techniques
When it comes to working with fabric, attention to detail is key. Start by using sharp fabric scissors to achieve a clean cut, and consider following a template or ruler to ensure the edges are straight and even. Once you’ve got your fabric cut to size, move on to sewing the edges in place. For a simple and secure finish, opt for a running stitch around the perimeter – if you’re using a machine, a straight stitch will suffice. Finally, give your project a professional touch by ironing the edges to create a crisp, finished look. With these basic steps under your belt, you’ll be ready to add your new pocket square to your outfit and start showing it off.
Advanced Techniques
As you become more proficient in incorporating pocket squares into your wardrobe, you can begin to experiment with more sophisticated styles and techniques that will take your look to the next level.
Making Different Folds
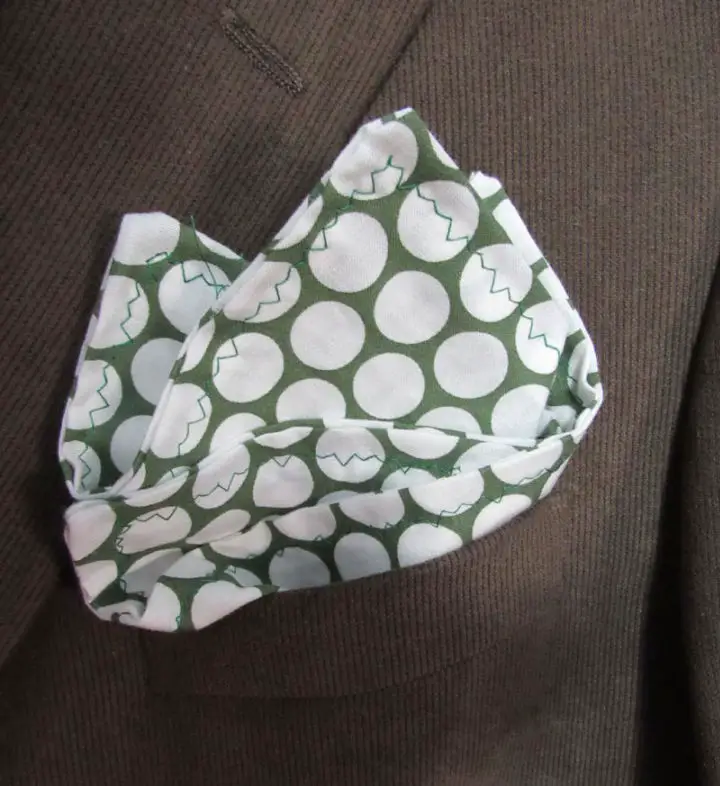
Transforming a simple square into a stylish accessory requires a little creativity and some folds. One such technique is the Winged Puff Fold, which adds a dynamic flair to your square. To achieve this look, start by folding the fabric in half diagonally, then fold each corner back to create triangular ‘wings’ that protrude from the main body. The resulting design adds visual interest and can be paired with various styles.For a more sophisticated approach, consider the Three-Point Fold. This technique involves creating three distinct points that peek out of the pocket, giving your accessory a refined touch. By folding the fabric in a specific way, you can create a series of triangular shapes that add depth and visual appeal to your square.
Adding Personalized Embroidery
When it comes to personalizing your pocket square, there are several techniques you can employ to give it a touch of elegance. One classic approach is monogramming – simply adding your initials in a contrasting or complementary thread color that complements the fabric. This adds a subtle yet sophisticated flair to your accessory. Another option is incorporating decorative stitches, which can be used to create unique patterns or borders on your pocket square. By experimenting with different stitch styles and colors, you can add an extra layer of visual interest to your finished product. Ultimately, using these techniques allows you to put your own personal stamp on your pocket square, making it a one-of-a-kind accessory that reflects your individuality. With practice, you’ll be able to refine your skills and create a truly unique piece that showcases your handcrafting abilities.
Troubleshooting Common Issues
While creating a DIY pocket square can be a relatively simple process, there are times when unexpected issues may arise. To help you overcome these obstacles and produce a stylish accessory, I’ve outlined some common problems you might encounter and provided solutions to rectify them.
Fabric Fraying
To prevent unwanted fraying from occurring, it’s crucial to take proactive measures beforehand. Start by applying a thin layer of fray check solution along the perimeter of your fabric, ensuring a smooth and even coat. This simple step can go a long way in preserving the integrity of your material. In the event that fraying does occur, address the issue promptly by delicately trimming away any loose threads. Next, apply another layer of fray check solution to reinforce the edges and prevent further damage. By implementing these straightforward steps, you’ll be able to maintain the overall appearance and longevity of your fabric.
Uneven Edges
To prevent imperfect cuts, invest in a reliable rotary cutter and complement it with a sturdy cutting mat. This duo will enable you to achieve crisp, precise edges on your fabric. If, despite your best efforts, the edges do turn out uneven, don’t worry – simply re-trim them using a ruler as a guide to restore a straight edge.
Maintenance and Care
The lifespan of a pocket square depends on proper care and maintenance. To ensure your accessory remains stylish for years to come, follow these guidelines: Ensure it’s made from high-quality materials that can withstand regular wear and tear. Store it in a protective case or cloth bag when not in use to prevent creases and wrinkles. When washing is necessary, choose a gentle cycle with cold water and a mild detergent. Allow the pocket square to air dry, avoiding direct sunlight and heat to prevent fading.
Washing and Ironing
When it comes to cleaning and maintaining your pocket square, there are a few simple steps you can follow to ensure it remains looking its best. To start, wash your pocket square by hand in cold water using a mild detergent. Be sure to avoid wringing or twisting the fabric as this can cause damage. Instead, gently squeeze out any excess water and allow the square to air dry.If your pocket square requires ironing, use a low heat setting appropriate for the type of fabric it’s made from. To prevent scorching or damage, place a pressing cloth between the iron and the fabric. This will help protect the pocket square while also smoothing out any wrinkles.
Storage
To maintain the integrity of your pocket square, adopt a thoughtful approach to storing it. When folding, aim for a flat or neatly folded design that minimizes creasing. Additionally, provide ample space in your drawer or closet to prevent compression and subsequent wrinkles from forming. By taking these precautions, you’ll be able to address common issues and care for your pocket square in a way that ensures its longevity. As with any delicate task, patience and attention to detail are essential components of achieving a flawless finish.
FAQs About DIY Pocket Squares
Embarking on a DIY adventure to create your very own pocket square can be an exhilarating experience. To ensure a smooth start, here’s a comprehensive guide addressing frequently asked questions, empowering you to bring your creative vision to life.
What size should a pocket square be?
Typically, a standard pocket square measures 12 inches by 12 inches, offering a balance between versatility and discreetness. This size allows for a range of folds, from subtle to statement-making, while still being compact enough to tuck away in your pocket without drawing attention to itself.
Can I use any fabric for a pocket square?
When it comes to creating a neat and tidy fabric arrangement, silk, cotton, and linen are top contenders. Not only do they offer a crisp appearance, but they’re also relatively easy to fold and manipulate into desired shapes.
How do I prevent the fabric from fraying?
For optimal durability and to minimize fraying, consider employing two methods to reinforce the cut edges of your pocket square. Firstly, apply a fray check liquid along the affected area to provide an added layer of protection. Alternatively, take a few minutes to sew a straightforward hem around the perimeter of the pocket square, ensuring a neat and secure finish.
What’s the easiest fold for beginners?
The quintessential approach to pocket square styling, the Presidential Fold is characterized by its simplicity and timeless elegance. To achieve this look, fold the pocket square into a neat rectangle and secure it in your pocket with one edge subtly peeking out.
How do I match my pocket square with my outfit?
When building an outfit, consider adding complementary pieces instead of matching them perfectly. A subtle yet impactful approach is to introduce a contrasting element, such as a boldly colored pocket square, to add visual interest to a straightforward ensemble. This technique allows you to create a stylish and harmonious look without adhering strictly to a monochromatic color scheme.
Can I wash my pocket square?
When it comes to cleaning your pocket squares, the approach often depends on the material they’re made from. For the most part, many types of pocket squares can be gently hand washed using a mild detergent. However, if you have silk pocket squares in your collection, it’s best to opt for dry cleaning to preserve their luxurious quality and prevent any potential damage.
How many pocket squares do I need?
Having a versatile collection of pocket squares can elevate your style and ensure you’re always prepared for any occasion. Consider stocking up on at least three different designs: a crisp white square, a simple yet elegant solid-colored option, and a statement piece with an eye-catching pattern. This trio will provide a solid foundation for dressing well and adapting to various social situations.
What are some advanced pocket square folds?
As your skills improve, consider elevating your origami game by attempting the Three-Point Fold or the Puff Fold, both of which can add a touch of sophistication to your creations.
How do I store my pocket squares?
When storing your clothes, consider laying them flat on a surface or folding them neatly to prevent wrinkles. Averting overcrowding is also crucial, as it can lead to creases and damage to the fabric.
Can I iron my pocket square?
For those who dare to venture into the realm of styling their own pocket squares, it’s reassuring to know that yes, you can indeed iron them – albeit with caution. When working with delicate fabrics such as silk, employ the use of a pressing cloth to shield these textiles from potential damage. By doing so, you’ll be able to achieve crisp folds and precise creases without compromising the integrity of your materials.
Is it okay to mix patterns with my pocket square and tie?
While incorporating multiple patterns can create a stylish look, it’s crucial to balance them by using different scales to prevent one from overpowering the others. As you develop your skills, remember that practice is key to mastering the art of selecting fabrics, folding techniques, and harmoniously pairing with your wardrobe. By doing so, you’ll be able to craft pocket squares that not only complement your outfits but also showcase your personal style.
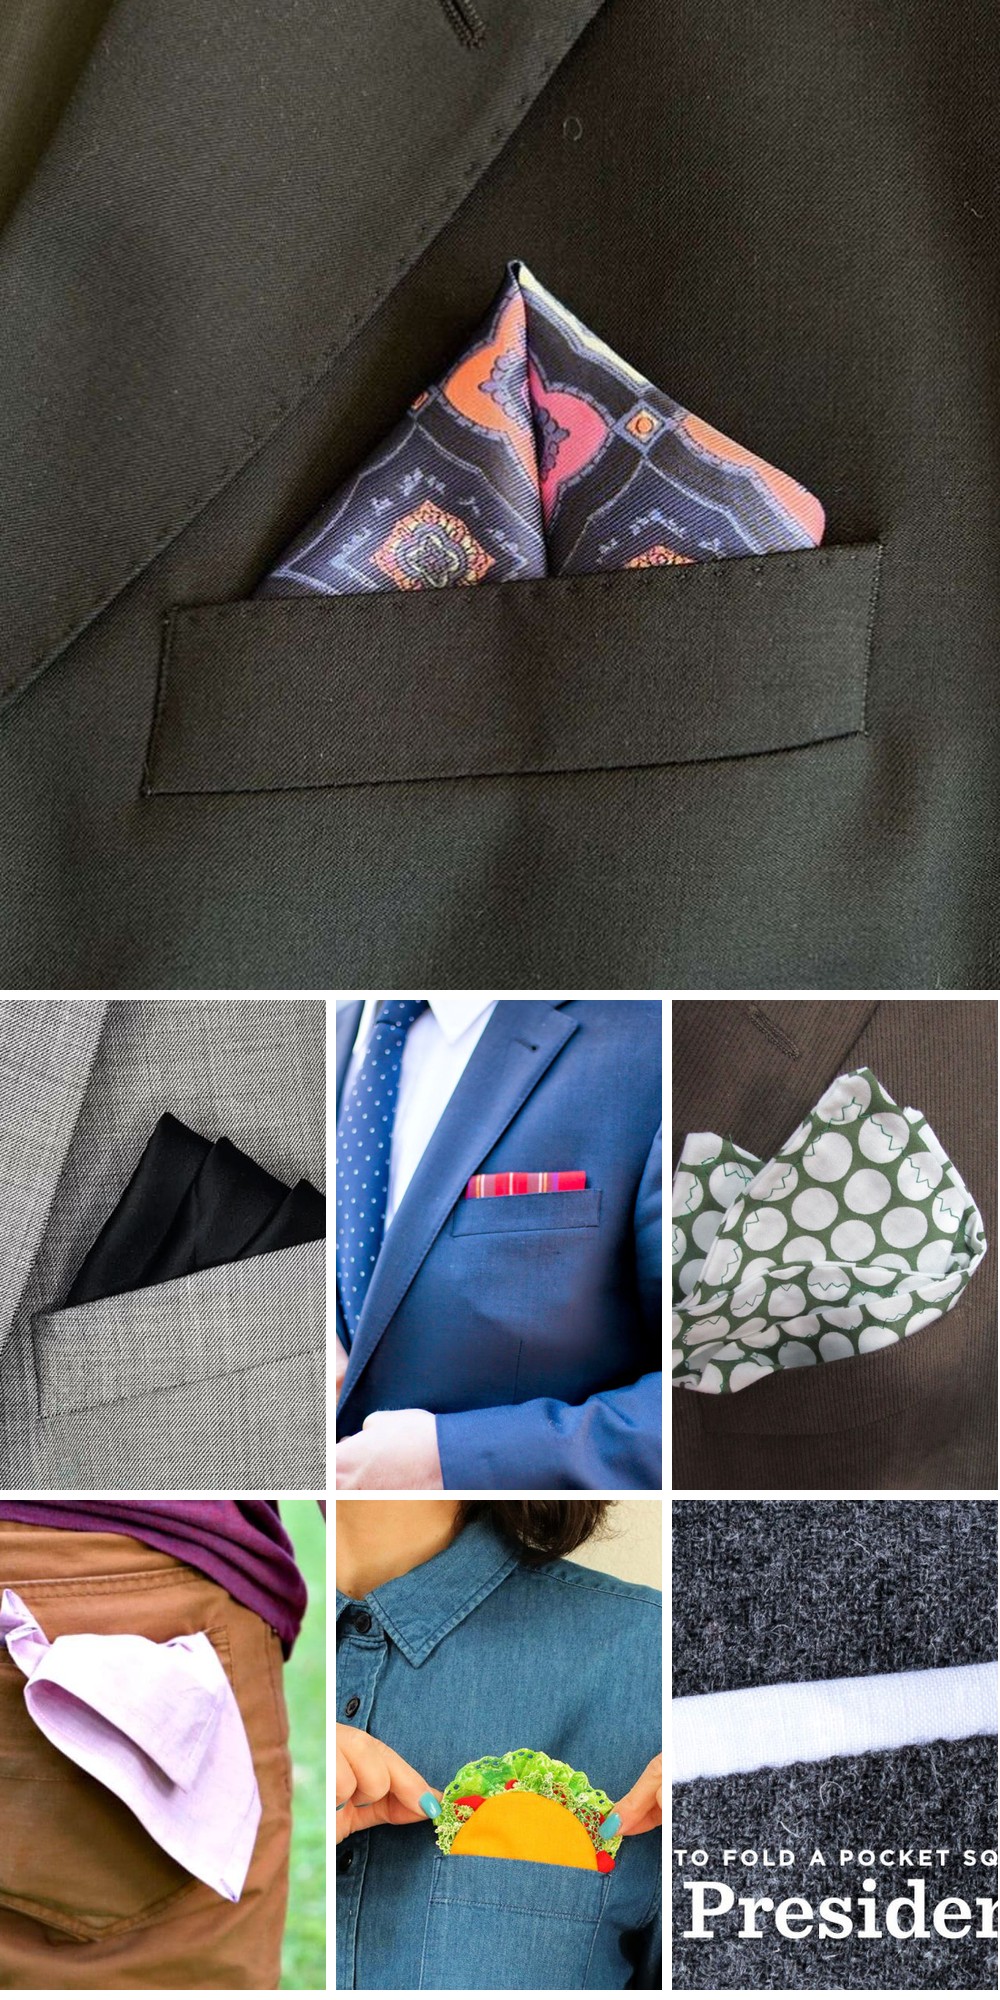
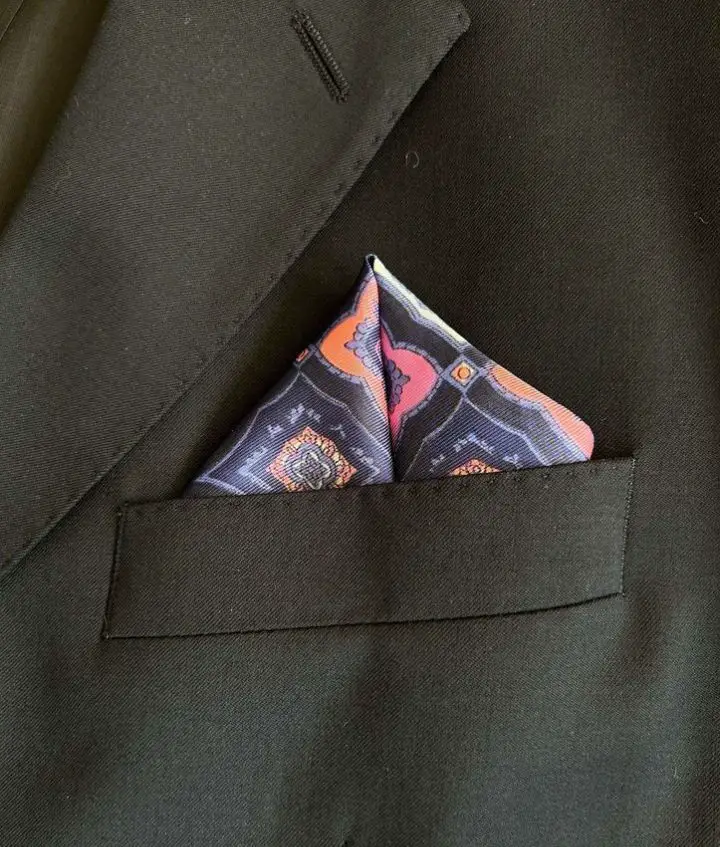
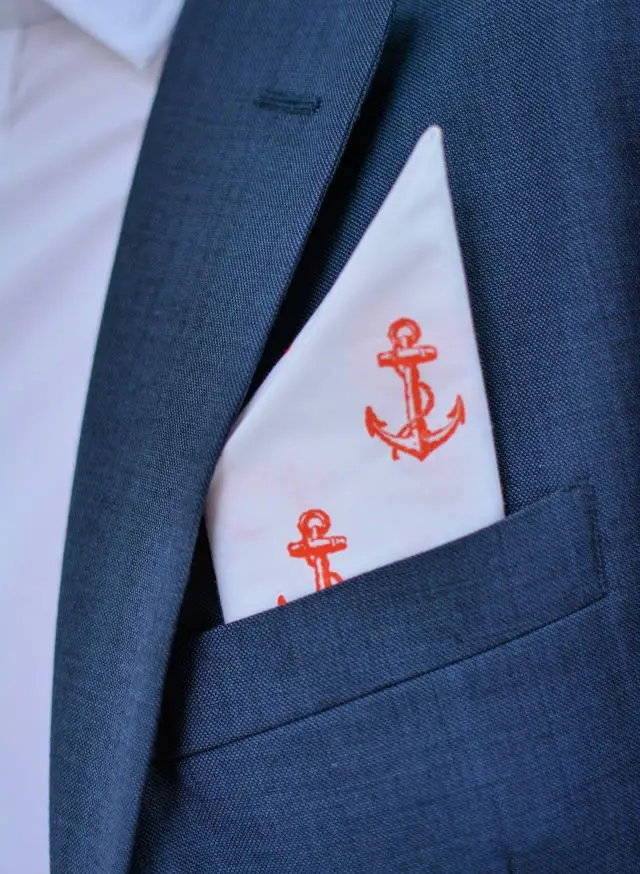
15 Beautiful DIY Pocket Square Ideas
Elevate your personal style by creating one-of-a-kind accessories with these easy-to-follow DIY pocket square projects. With 15 innovative designs, you’ll be inspired to craft your own statement piece.
Folding a Pocket Square in 7 Simple Steps
Discover the art of effortless folding with Homify’s step-by-step guide to mastering the perfect pocket square. Our clear instructions cater to both beginners and style enthusiasts seeking to elevate their look with this timeless menswear staple. From the sophisticated winged puff fold to the understated elegance of a classic pocket square fold, our expert advice will have you confidently folding your way to a polished, refined appearance. Whether dressing up for a formal event or adding a touch of personality to your everyday attire, our guide ensures that your pocket square becomes an integral part of your ensemble’s charm, exuding sophistication and refinement on any occasion.
How to Make a Printed Pocket Square
Transform a plain pocket square into a one-of-a-kind fashion statement with Orly Shani’s DIY guide from the Hallmark Channel. To get started, gather the following materials: artwork that can be hand-drawn or selected via an image app, silk fabric paper, a scanner, and a printer. Begin by loading the silk fabric paper into your printer’s tray. Next, scan or upload your artwork onto your computer and print it onto the fabric paper. Allow the ink to dry completely before carefully peeling away the paper backing, revealing your custom silk pocket square. For an added touch, dye the fabric after the artwork has dried to give it a personalized color twist. With this easy-to-follow method, you’ll be able to elevate your style and add a personal flair to any outfit.
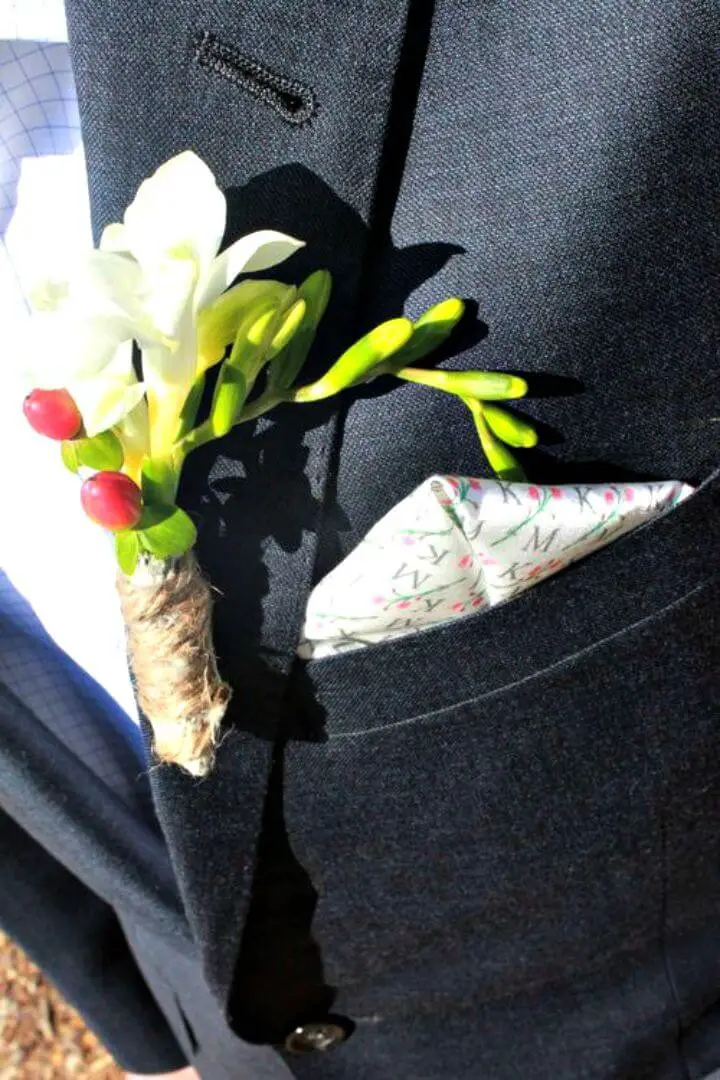
Unique DIY Floral Pocket Square
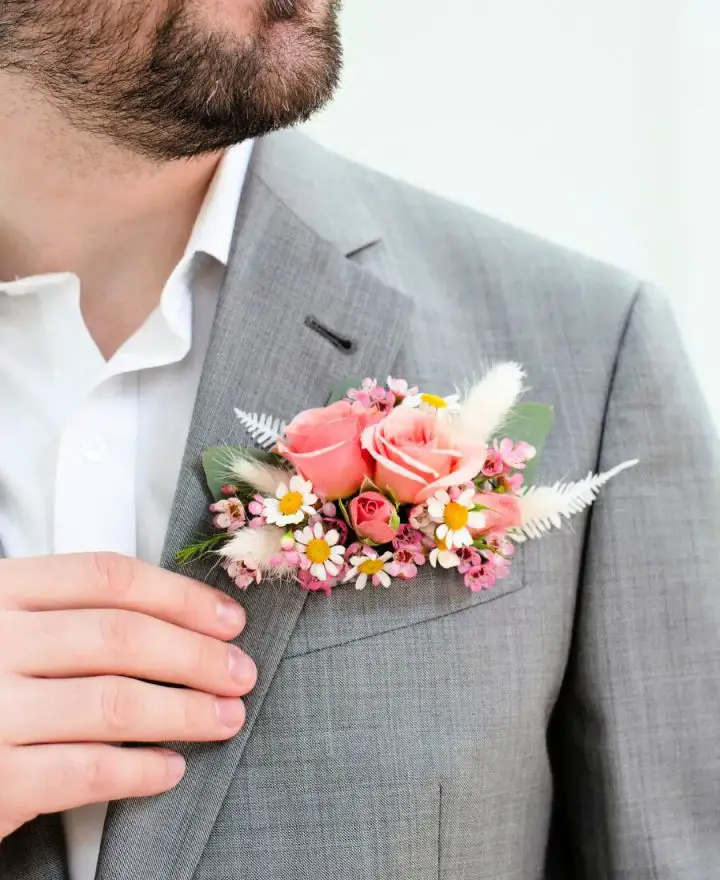
Add a dash of creativity to classic wedding attire with a DIY floral pocket square from Bloom Culture Flowers. Alison Fleck’s step-by-step guide, accompanied by a video demonstration, empowers you to craft a one-of-a-kind accessory that deviates from traditional boutonnieres. This charming alternative is perfect for grooms or groomsmen, offering a personalized touch to their wedding-day ensemble. With a comprehensive supplies list, flower recipes, and expert tips, making this fresh floral accent has never been more accessible. By following this engaging project, you’ll bring a unique charm to your special day’s attire.
Making Your Own Pocket Square
Discover the art of elevating your style with a bespoke pocket square. With just a few essential tools and this straightforward guide from Brit + Co, you’ll be able to create a one-of-a-kind accessory that adds a touch of handmade sophistication to any suit. By mastering the basics of cutting and hemming your fabric square, followed by three unique folds – including the Presidential, Two Point, and Winged Puff – you’ll be able to add a dapper flourish to your look. Whether you’re attending a formal event or simply want to inject some personality into your everyday attire, this tutorial provides the perfect recipe for creating a truly unforgettable accessory that’s sure to turn heads.
Homemade Father’s Day Pocket Square
In need of a spontaneous yet thoughtful Father’s Day gift? Look no further than crafting a unique pocket square with Leanne Barlow’s straightforward guide. With just a few simple steps and minimal materials, you can create a stylish accessory that any dad will appreciate. All it takes is 17 inches by 17 inches of fabric, matching thread, and the option to use a serger. By cutting, serging, folding, and stitching the edges, you’ll produce a pocket square that adds a touch of sophistication to your husband’s suit ensemble. Feel free to get creative with different colors and patterns to match his personal style. This tutorial makes sewing for your loved one a breeze, perfect for those who enjoy adding a personal touch to their gifts. Simply visit Leanne Barlow’s blog to access the full guide and make this Father’s Day gift truly special.
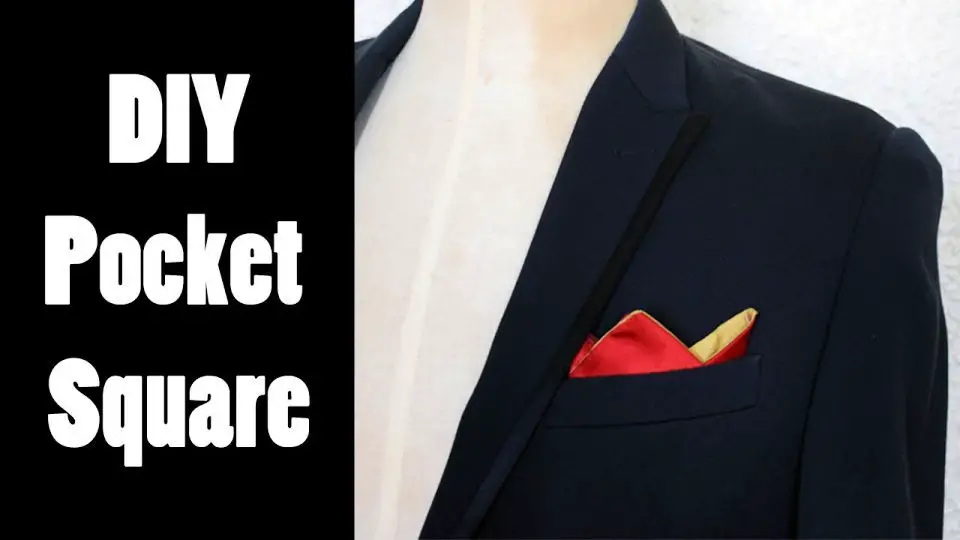
DIY Pocket Square – Step by Step Instructions
Creating a bespoke pocket square is an enjoyable DIY venture that adds a personal touch to your outfit. With Passport by Design’s user-friendly tutorial, you can effortlessly turn a piece of fabric into a stylish accessory. The guide’s simplicity makes it suitable for anyone looking to try their hand at sewing. By following the step-by-step instructions, you’ll learn how to cut, sew, and finish a pocket square, with the option to add a decorative topstitch for an extra layer of sophistication. Grab your sewing tools and embark on this engaging and practical sewing activity that guarantees a polished result.
Easy DIY Faux Pocket Square
Transform your outfit with the charm of a handmade faux pocket square! By following Amber’s comprehensive tutorial, you’ll discover how to create a stylish accessory using just a few simple supplies like scrap fabric, cardboard, and basic sewing tools. With minimal materials, you can craft a sophisticated piece that adds a touch of elegance to any ensemble. Choose from classic folds or puffed designs to give your outfit an extra layer of polish. This tutorial makes it easy to create a pocket square that slips effortlessly into your pocket, perfect for special occasions like weddings or adding a finishing touch to everyday attire. Get creative and elevate your style with this practical guide from Leah Leaf Designs.
Make a Custom Pocket Square for Weddings
For couples looking to add a personal touch to their special day, designing custom pocket squares for the groom and groomsmen can be a thoughtful and meaningful way to make the occasion truly unforgettable. With just a few simple steps, you can learn how to create unique pocket squares using high-quality fabrics like Cotton Silk or Kona Cotton. This DIY project is perfect for crafty couples who want to add an elegant and handmade touch to their wedding attire.
The process begins with measuring and cutting the fabric to the right size, followed by a simple hemming technique that ensures a polished look. By following this tutorial, you’ll be able to create custom pocket squares that perfectly complement your wedding theme and add a special something to your big day.
DIY Stamped Pocket Square at Home
For a thoughtful Father’s Day gift that showcases your creativity, consider crafting a customized stamped pocket square. This easy DIY project from A Joyful Riot requires minimal materials – simply gather a white pocket square, fabric paint, and some stamps. With just 10 minutes of your time, you can create a one-of-a-kind present that adds a touch of personality to the classic accessory. Start by laying out your pocket square, alternating stamp patterns to achieve a half-brick look. Then, iron the paint to set the design in place. Finally, wrap up the finished piece with some twine and you’re ready to give a unique gift that’s sure to impress.
Handmade Taco Pocket Square
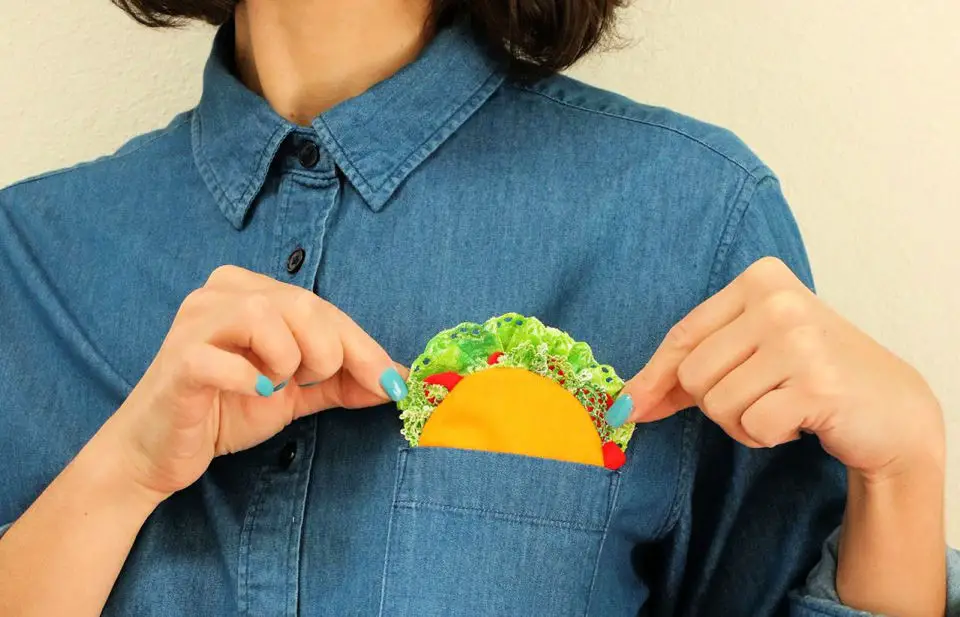
Bring a dash of whimsy to your outfit with a DIY taco pocket square from Frankie Magazine. For those who crave a touch of quirkiness in their everyday attire, this guide by Cintia Gonzalez is the perfect starting point. To create this charming accessory, you’ll need yellow cotton, red ric rac, lace, and basic sewing supplies. The process involves coloring lace to resemble lettuce, crafting a fabric taco shell, and assembling the components into a unique pocket square. Not only will you have fun while making it, but the finished product is sure to spark conversations and smiles. With these straightforward steps, you can craft your own taco pocket square and infuse your wardrobe with creativity.
How to Turn Old Shirt Into Pocket Square
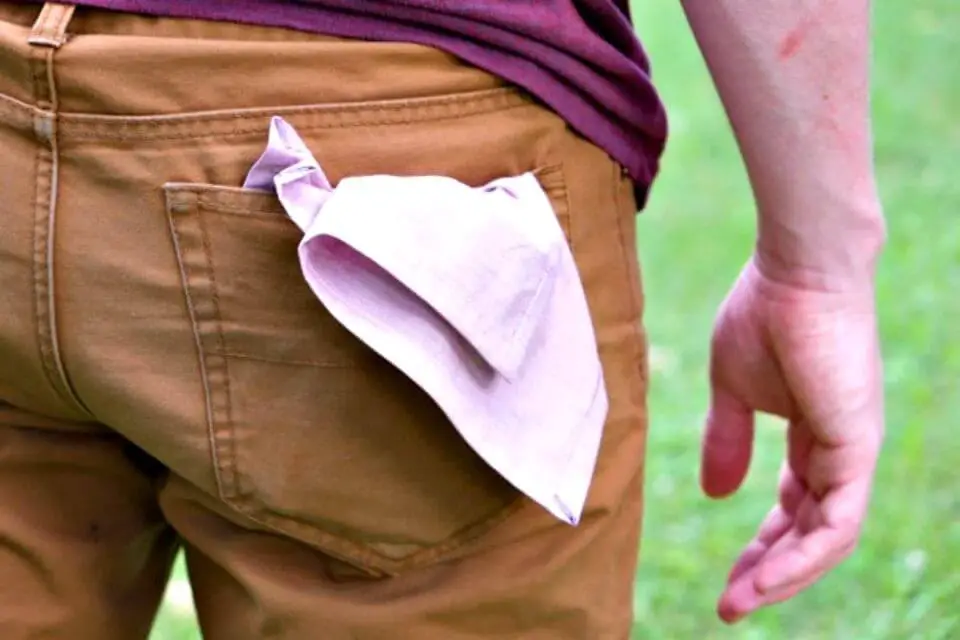
Give new life to an old favorite by transforming it into a stylish handkerchief or pocket square. This DIY guide will walk you through the process of upcycling unworn garments, breathing new purpose into forgotten treasures. Gather your tools – fabric scissors, measuring tape, and iron – and get ready to create something unique. Perfect for adding a personal touch to your outfit or gifting a meaningful piece of fabric, this project is all about redefining what’s possible with a little creativity and some basic sewing skills.
How to Fold a Pocket Square
Elevating one’s formal attire to new heights is as simple as mastering the art of pocket square folding, thanks to YouTube’s comprehensive tutorial on the Three Stairs Fold. This refined technique adds a touch of sophistication and style to any ensemble, making it perfect for special occasions such as weddings, proms, or high-end events. The engaging video provides clear step-by-step guidance, ensuring a seamless learning experience even for those new to pocket squares. With ease, you can achieve a polished look that exudes panache, thanks to the Three Stairs Fold’s elegant simplicity. Simply visit YouTube and follow along with the helpful guide to give your outfit the finishing touches.
How to Make Your Own Pocket Square
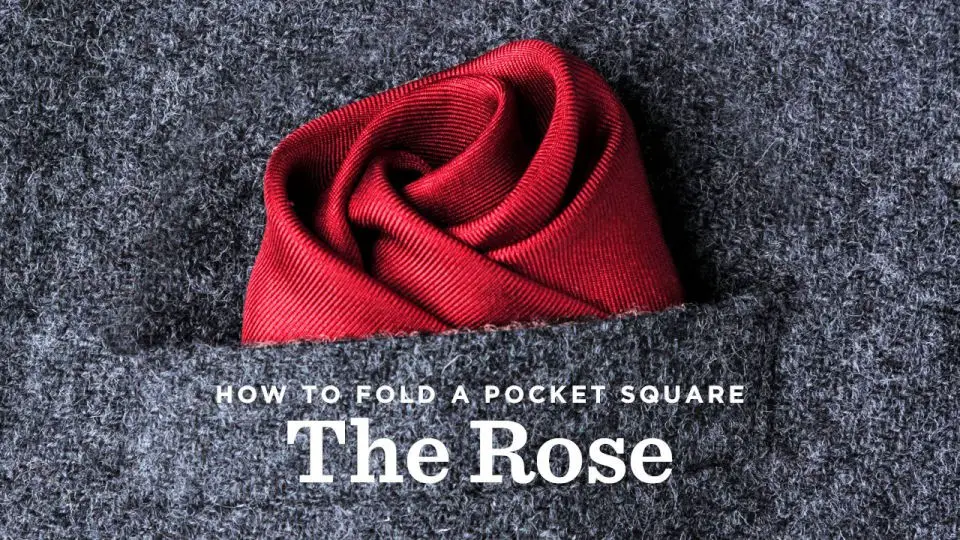
Step up your suit game by incorporating the refined elegance of the Rose fold pocket square technique. To achieve this stylish look, Ties.com offers a clear and concise video tutorial that walks viewers through the simple process of creating this sophisticated fold, ideal for special occasions like weddings or formal events, as well as everyday wear. Not only does this method bring an air of refinement to your ensemble, but it also becomes second nature with a little practice. By mastering this classic accessory technique, you’ll be able to effortlessly transform a humble piece of fabric into a fashion statement that commands attention and showcases your keen sense of style. For those seeking to elevate their wardrobe with a timeless and versatile accessory twist, the Rose fold is an excellent place to start.
How to Sew a Pocket Square
Embark on a creative journey with K. T. Tyrell’s YouTube tutorial, where you’ll learn the art of crafting a DIY Pocket Square from scratch. The comprehensive guide breaks down the process into manageable steps, covering fabric selection, tool preparation, precise cutting, and expert sewing machine usage. As you follow along, you’ll discover how to transform a simple piece of material into a stylish accessory that adds a touch of personality to your outfit or makes for a thoughtful, handmade gift. Whether you’re a seasoned seamstress or a novice crafter, this tutorial’s clear instructions make it easy to get started and enjoy the process. So, join So Sew! and take your fashion sense to the next level with a one-of-a-kind pocket square that reflects your unique style.
Best DIY Pocket Square Tutorial

Master the art of the Presidential fold with Ties.com’s instructional YouTube guide. This simple yet impactful technique can elevate your suit to new heights of sophistication. The video tutorial takes you through each step, teaching you how to achieve a crisp and elegant fold perfect for formal occasions. Whether you’re looking to add a touch of class to your outfit or simply improve your knowledge of this timeless fashion statement, this easy-to-follow guide is the perfect place to start. With historical tidbits and clear visuals, Ties.com’s video not only teaches you how to fold but also enriches your understanding of pocket squares in general.
Conclusion:
With the skills learned from this DIY pocket square guide, you’ll be able to effortlessly elevate your personal style and add a touch of sophistication to any outfit. Whether you’re a novice or an experienced crafter, this comprehensive resource has provided a wealth of information on selecting the perfect fabric, mastering advanced folds, and more. By putting these tips and techniques into practice, you’ll create a one-of-a-kind pocket square that perfectly reflects your personality and sense of style. So why wait? Start creating your unique piece today!
