Optimizing kitchen storage has never been easier! With a plethora of DIY pantry shelving ideas, you can transform your kitchen into a tidy and functional space in no time. Whether you’re seeking inspiration for choosing the perfect materials or adding personal touches to make your shelves truly unique, this comprehensive guide is here to help. From selecting eco-friendly options to maintaining your shelves’ pristine condition, we’ll walk you through every step of the process. Say goodbye to cluttered countertops and hello to a streamlined kitchen experience!
How to Build Pantry Shelves – Step by Step Instructions
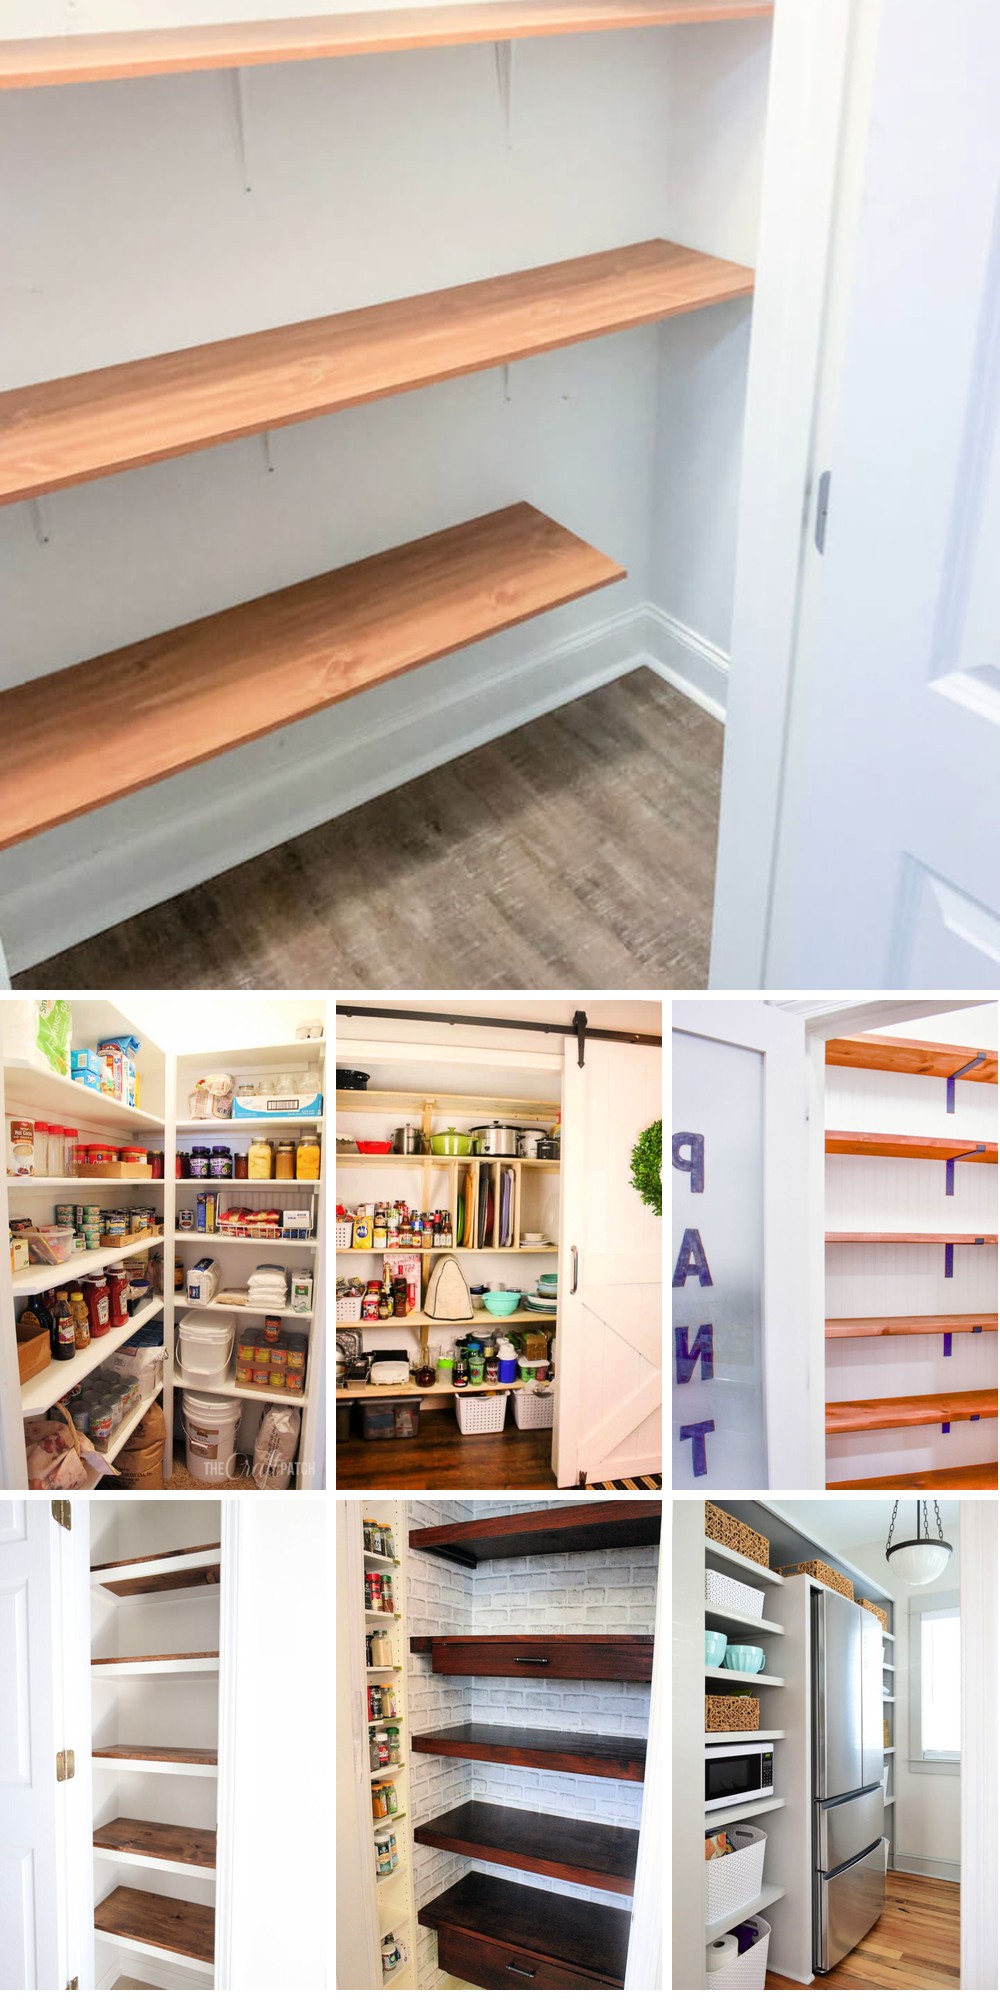
While building pantry shelves sans support posts may seem daunting, a strategic approach makes it achievable. By optimizing storage and achieving a streamlined appearance, this endeavor can be successfully undertaken. The following guide provides a dependable framework for your shelving requirements.
Materials and Tools Required
To initiate your project, it’s essential to have all the required materials and tools within reach. The essential items you’ll need include wood for constructing shelving units and supports, screws for secure fastening, wood glue for bonding joints, and optional plywood for added shelf strength. You’ll also require a pocket-hole jig for precise joinery, a drill for driving screws, a saw for cutting lumber to size, spackle for filling gaps and imperfections, caulk for sealing edges and surfaces, sandpaper for smoothing out rough textures, and primer and paint for finishing touches.
Build Pantry Shelves with Step by Step Guide
To create a functional and organized pantry space, follow our comprehensive guide on building pantry shelves. This process involves several straightforward steps that can be completed with basic DIY skills.
Step 1: Preparing Your Space
Before commencing the installation process, it’s crucial to prepare the area where your new shelves will reside. This involves a thorough cleansing of the pantry and the surrounding space. Start by removing any existing shelving units, as well as nails and screws that may be embedded in the walls. This will provide a blank canvas for you to work with, ensuring a smooth and successful installation process.
Step 2: Planning Your Shelving
Before starting your shelving project, take the time to accurately measure the space where the shelves will reside. This will enable you to determine the ideal size and number of shelves required to effectively organize your belongings. Furthermore, consider the types of items you’ll be storing on each shelf, as this will influence their placement. For instance, heavier or bulkier items should be placed on lower shelves for added stability, while lighter or more delicate items can be stored on upper levels. Having a rough plan in place will also serve as a valuable reference point during the build process, helping you to stay organized and ensure that your finished shelving unit meets your needs.
Step 3: Installing Supports
To create shelving without visible support posts, you’ll employ a system of wooden cleats or ledgers attached to the wall on three sides of the pantry. This innovative solution eliminates the need for obtrusive columns, maintaining a sleek and modern appearance.Cutting the Wood to Size: Measure carefully and cut the wood to precise dimensions based on your calculations.Installing Horizontal Cleats: Begin by securing wooden cleats to the side and rear walls of the pantry where each shelf will ultimately rest. Utilize screws with sufficient length to penetrate the studs behind the drywall, ensuring a secure and sturdy fit.
Step 4: Strengthening the Shelves
To amplify structural integrity, particularly when dealing with heavier loads or extensive shelving, consider fabricating Laminated Veneer Lumber (LVL) style reinforcements by meticulously layering plywood sheets and allowing them to bond together. Once dry, cut the resulting composite to the required width for a robust foundation.
To create these custom supports, begin by carefully stacking multiple layers of plywood, securing them with clamps until the adhesive has fully cured. Subsequently, precision-cut the combined material to achieve the desired dimensions.
Next, pre-drill and install pocket holes at the ends of each support, ensuring seamless attachment to the shelf cleats.
Step 5: Attaching the Shelves
Once you’ve put the supporting structures in place, it’s time to bring your shelving units to life. Measure and cut your chosen materials to exact specifications, ensuring a precise fit that will provide stability and longevity. Next, carefully position the shelves onto their respective supports, taking care not to compromise the structural integrity of either component. Finally, secure each shelf from beneath using high-quality screws, effectively locking them into place and preventing any unwanted shifting or movement.
Step 6: Finishing Touches
To create a sleek and streamlined display, consider adding an extra layer of detail beneath each shelf. Start by applying a thin plywood sheet to provide a clean and uniform base. For added polish, install hardwood face framing along the front edge of each shelf, effectively concealing the underlying structure and presenting a refined appearance. Once the shelves are in place, focus on achieving a smooth finish by sanding down any imperfections. To complete the look, fill any holes or gaps with spackle and seal around the edges using caulk, ensuring a seamless transition between the shelves and surrounding surfaces.
Step 7: Priming and Painting
To achieve a professional-looking finish, begin by applying a primer to every wooden surface. Allow the primer to fully dry before moving on to the painting stage. Next, apply two coats of paint in your desired color, ensuring that each coat has ample time to dry completely.
Step 8: Finishing Touches and Clean-Up
Once the paint job is complete, it’s time to put the finishing touches on your built-in pantry shelves. If necessary, add trim pieces or reapply caulking to ensure a seamless finish. Remove any painter’s tape, tidy up your workspace, and take pride in your newly constructed pantry storage solution.
Video Tutorial
To take a more visual approach to building in-pantry shelves without support posts, I recommend watching the step-by-step video tutorial available on YouTube. This visual guide complements the written instructions provided here, allowing you to learn through both methods and better understand the techniques involved. With careful attention to detail and adherence to the steps outlined, you’ll be able to create sturdy built-in pantry shelves that maximize your storage space without compromising on aesthetics. As a result, you can enjoy the added functionality and enhanced organizational capabilities of your upgraded pantry.
Customization Ideas for DIY Pantry Shelves
Transforming your pantry shelves into personalized spaces that harmonize with your unique requirements is an achievable and satisfying DIY endeavour. To infuse your pantry shelves with a dash of personality, while maintaining their functional essence, follow these steps to create a seamless blend of style and practicality.
Choose Your Materials Wisely
When selecting materials for your kitchen shelving, consider durability and aesthetic appeal. To achieve a rustic ambiance, opt for reclaimed wood, which adds warmth and character to the space. Alternatively, metallic or glass shelves can provide a sleek, modern contrast that enhances your kitchen’s overall decor.
Adjustable Shelving
To maximize versatility, consider incorporating adjustable brackets or tracks that enable shelves to be moved up or down at will. This added flexibility empowers you to effortlessly adapt to changing storage needs and accommodate a diverse range of item sizes, allowing for seamless reconfiguration as your requirements shift over time.
Pull-Out Drawers
When dealing with deep shelves, consider installing pull-out drawers to enhance accessibility. These types of drawers not only simplify the retrieval process for items located towards the rear, but also offer customization options through the use of dividers, promoting a more organized storage experience.
Door Racks and Hooks
By leveraging the often-underutilized real estate on the back of your pantry door, you can create a functional storage system that keeps essential items within easy reach. Consider installing adjustable spice racks or sturdy hooks for hanging aprons, reusable bags, and other frequently used items. This clever hack not only optimizes space but also promotes organization and convenience in the kitchen.
Lighting
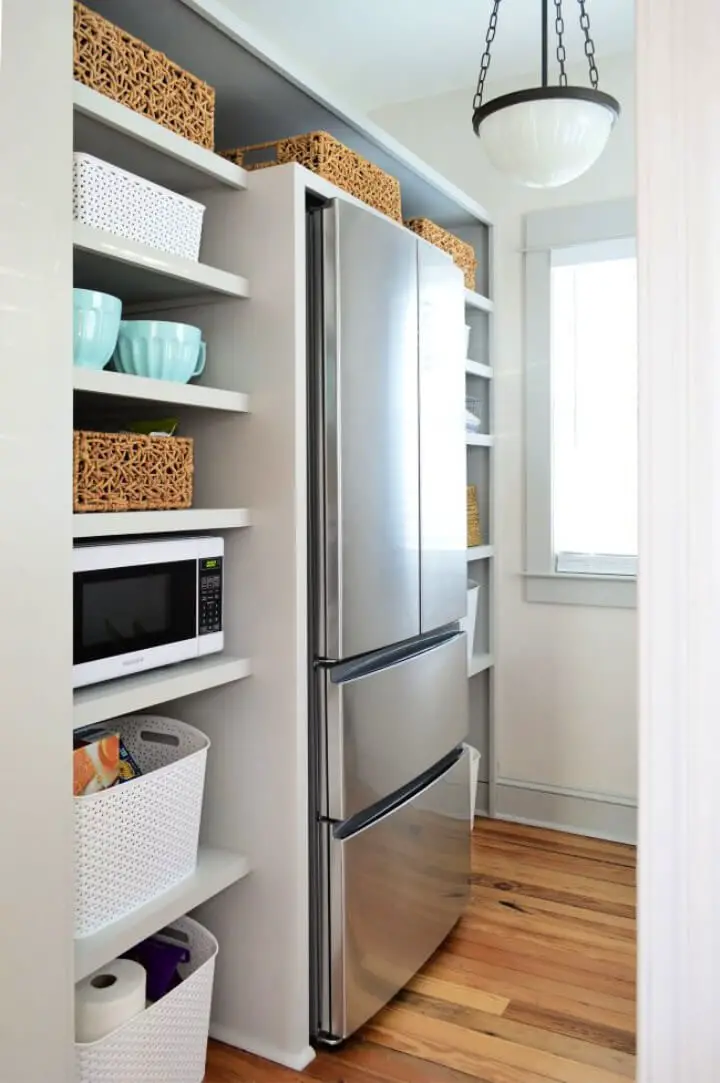
To illuminate your pantry’s inner recesses and streamline your search process, consider installing LED strip lights underneath each shelf. This thoughtful addition will not only add a warm glow to the space but also serve as a visual aid, making it effortless to locate specific items even in the most depth-challenged areas.
Labels and Containers
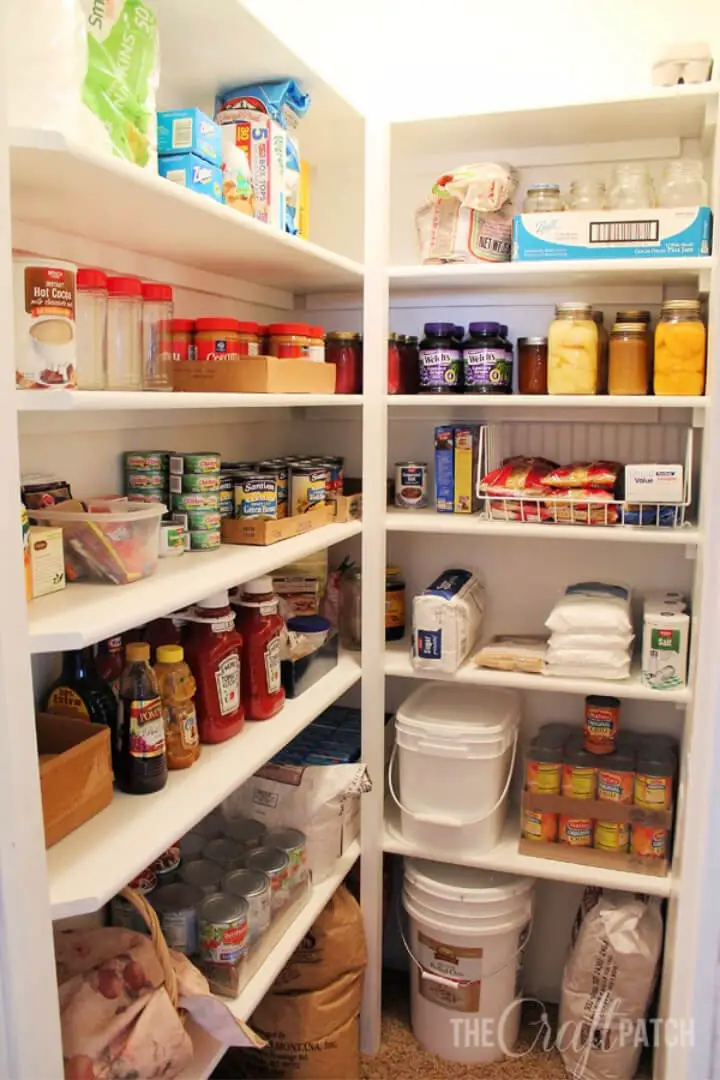
When it comes to storing dry goods like flour or rice, simplicity is key. Designate specific containers with clear labels to keep your pantry organized and pest-free. This visual system not only keeps your storage area tidy but also provides a quick reference point for when you need to replenish supplies. With this approach, you’ll be able to easily identify when it’s time to restock and maintain a consistent inventory, streamlining your cooking and baking processes.
Personal Touches
Infuse your pantry shelves with personality by incorporating decorative shelf liners that reflect your unique taste or painting the edges in a hue that harmonizes with your kitchen’s aesthetic. This thoughtful approach will not only elevate the functionality of the space but also make it a true representation of your family’s lifestyle and preferences.
Troubleshooting Common Issues with DIY Pantry Shelves
While constructing your personalized pantry shelving, you may come across some recurring challenges. To overcome these hurdles and create an efficient storage space, consider the following solutions.
Ensuring Shelf Stability
Ensure the stability of your shelves by anchoring them directly to the wall studs. Verify that any brackets or fasteners are securely tightened and capable of bearing the weight of your stored items, thereby preventing unwanted wobbling or potential collapse.
Avoiding Overcrowding
When it comes to designing an organized pantry, one crucial aspect is the depth of your shelves. If they’re too deep, you may find yourself struggling to locate specific items or dealing with a disorganized space. To avoid this, consider keeping your shelves at a maximum depth of 12 inches. This height allows for effortless access and visibility of your stored goods, making it easier to maintain a tidy pantry.
Dealing with Sagging Shelves
When your shelves start to buckle under the strain, it’s time to get creative with reinforcements. You can opt for thicker plywood sheets, such as the industry-standard 3/4-inch thickness, or go a step further and add supplementary supports beneath the shelves. For extra stability, consider using 1 1/4-inch plywood, which provides a robust foundation for your storage needs.
Sustainable Practices in DIY Pantry Shelves
Embracing eco-friendly approaches in DIY endeavors has a dual benefit – it fosters a healthier planet while elevating the durability and excellence of your pantry shelving. By adopting sustainable practices, you’ll not only contribute to environmental stewardship but also create functional storage spaces that will serve you well for years to come.
Choose Eco-Friendly Materials
When it comes to building or renovating your pantry, consider opting for eco-friendly materials that boast a lower environmental footprint. Reclaimed wood and bamboo are excellent choices, as they not only possess impressive durability but also bring a one-of-a-kind charm to the space. The incorporation of these sustainable options can significantly minimize your impact on the environment, while also elevating the overall aesthetic of your pantry.
Minimize Waste
To optimize efficiency, meticulously plan your project from start to finish. This strategic approach will help minimize the generation of offcuts and waste. Consider repurposing any leftover materials for smaller DIY endeavors or creative initiatives around the house, such as crafting, woodworking, or upcycling. Alternatively, consider donating them to local schools, community centers, or non-profit organizations that focus on arts and education, allowing others to benefit from your efforts while promoting sustainability.
Upcycling and Repurposing
Transform old materials into eco-friendly pantry shelving by leveraging your creativity and existing resources at home. Repurpose crates or drawers to create functional storage solutions that not only reduce waste but also promote sustainability. As you plan and execute this project, keep in mind the impact of your choices on the environment and strive for mindful decision-making throughout. By addressing common challenges and adopting innovative approaches, you’ll be able to create a pantry shelving system that’s both practical and eco-conscious.
Maintenance Tips for Your DIY Pantry Shelves
To maintain the functionality and aesthetic appeal of your kitchen’s DIY pantry shelves, it is essential to keep them well-maintained. By following these simple tips, you can ensure your pantry shelves continue to be a valuable and visually appealing addition to your kitchen.
Regular Cleaning
To maintain the cleanliness and appearance of your shelves, it’s essential to establish a regular cleaning routine. A simple yet effective approach is to use a soft cloth or a duster to gently wipe down the surfaces, removing any dirt, dust, or debris that may have accumulated. For more stubborn spills or sticky messes, a damp cloth with mild soap can be used to effectively remove the residue without leaving streaks or marks.
Check for Wear and Tear
To maintain the quality of your shelves, it’s essential to perform routine inspections. During these checks, be on the lookout for any visual signs of wear and tear, such as loose screws or chipped wood. Addressing any issues promptly will help prevent further damage from developing. Take a few moments to tighten any loose fittings and gently sand down rough spots to ensure everything remains smooth and even.
Organize Wisely
When organizing your shelves, it’s crucial to avoid overwhelming them with excessive weight. A key principle is to distribute the weight evenly, ensuring that no single area becomes too heavy or unstable. Furthermore, refraining from stacking items too high not only preserves the structure of your shelves but also makes individual items more accessible and easier to retrieve.
Protect from Moisture
When humidity levels are high in your pantry, it’s crucial to take measures to prevent moisture from seeping into the wooden surfaces. One effective solution is to utilize a dehumidifier, which can help mitigate the risk of warping or mold growth by reducing the amount of moisture present.
Refresh the Finish
To breathe new life into your DIY pantry shelves, consider giving them a fresh coat of paint or sealant every now and then. This dual approach not only rejuvenates their appearance but also provides an additional layer of protection against the wear and tear that comes with frequent use. By adopting a proactive maintenance routine, you can effectively extend the lifespan of your shelves, ensuring they remain sturdy and reliable for years to come.
FAQs About DIY Pantry Shelves
As you prepare to tackle a DIY pantry shelf project, it’s natural to feel uncertain about various aspects of the process. To alleviate any concerns and set yourself up for success, consider these frequently asked questions and their answers.
What is the ideal depth for pantry shelves?
When it comes to designing the perfect pantry, the optimal shelf depth is a crucial consideration. Aim for a height of around 12 to 16 inches, as this strikes a balance between accessibility and storage capacity. With shelves at this depth, you can easily retrieve items without having to strain or stretch, making the experience much more enjoyable and efficient.
How do I ensure my pantry shelves are sturdy?
When it comes to constructing sturdy shelves, it’s essential to prioritize the right materials and secure fastening methods. Specifically, opt for high-quality brackets and screws that can withstand the weight they’ll be supporting. Additionally, take advantage of opportunities to attach the shelves directly to wall studs, as this will significantly enhance their overall sturdiness.
Can I adjust the height of my pantry shelves after installation?
When it comes to customizing your shelving system, one of the most convenient options is installing adjustable brackets or tracks. These allow you to easily modify the height of your shelves to suit different storage needs, providing a high degree of flexibility and versatility.
What materials are best for pantry shelves?
When it comes to selecting the right material for your project, plywood stands out as a top contender thanks to its remarkable strength and cost-effectiveness. However, if you’re looking to add some extra flair, you may also want to consider solid wood or melamine, which can bring a touch of elegance to your final product.
How can I maximize space in a small pantry?
To maximize your kitchen’s vertical real estate, consider investing in taller shelving units that can hold more items without sacrificing counter space. Additionally, incorporating door racks or installing pull-out drawers can provide a convenient and accessible means of storing kitchen essentials, freeing up countertops to focus on food preparation and cooking.
What tools will I need for building pantry shelves?
To embark on your shelving project, you’ll typically require a few essential tools, including a measuring tape to ensure accurate measurements, a level to guarantee straight installation, a drill for making precise holes, and a set of screws to secure everything in place. Additionally, you’ll need brackets to support the shelves themselves, as well as the material of your choice for constructing the shelves, such as wood or metal.
How can I protect my pantry shelves from moisture?
When it comes to protecting your pantry shelves, selecting the right sealant is crucial. Consider the material of your shelves and choose a sealant that’s compatible with it. Additionally, don’t forget to ensure good airflow in your pantry to prevent moisture buildup, which can lead to dampness and potential damage to your stored food items.
Is it necessary to sand the shelves before installation?
When it comes to preparing your shelves for painting or sealing, taking the time to sand them down can be a game-changer. Not only does this process help to smooth out any rough edges or imperfections, but it also ensures that the finish adheres properly and evenly to the surface.
How do I choose the right brackets for my shelves?
When it comes to choosing brackets for your shelves, it’s crucial to select ones that can effectively support the weight of the shelves themselves as well as any items you plan to store on them. For heavier loads, it’s recommended to opt for heavy-duty brackets that are specifically designed to handle larger weights and provide added stability.
Can I add doors to my pantry shelves?
When it comes to maintaining a tidy space, installing doors is an effective way to shield your belongings from dust and preserve a clean appearance. To achieve optimal results, ensure that the doors you choose have sufficient clearance and are securely mounted to prevent any potential issues.
How often should I check my pantry shelves for wear and tear?
To ensure a sturdy and long-lasting DIY pantry shelf, it’s crucial to perform regular inspections on your shelves every few months. Take note of any signs of damage or loose fittings and address these issues promptly. By doing so, you’ll be better equipped to tackle your project with confidence. A well-planned approach and the right materials are vital for achieving success in this DIY endeavor.
25 Useful DIY Pantry Shelves You Can Build
To elevate the functionality and aesthetic appeal of your kitchen, consider constructing one of the 25 inventive DIY pantry shelving solutions that will help optimize your storage capacity and organizational prowess. Let these creative ideas spark your enthusiasm to embark on a pantry renovation adventure.
How to Make Pantry Shelves

To transform your pantry into a tidy and functional space, follow these simple steps to create custom shelves that will keep your food and kitchen essentials neatly organized. The process begins by filling any holes or gaps in the wall with joint compound and allowing it to dry before sanding it smooth. Next, give the area a fresh coat of paint using semi-gloss or satin finish, depending on your desired aesthetic. Once the paint is fully dry, you can install your shelves, choosing from a variety of materials and designs to suit your needs. The best part? This DIY project doesn’t require extensive wall damage, thanks to the use of trim paint for a durable finish that will withstand daily wear and tear. With these easy-to-follow instructions, you’ll be able to create extra storage space in your pantry without sacrificing style or functionality.
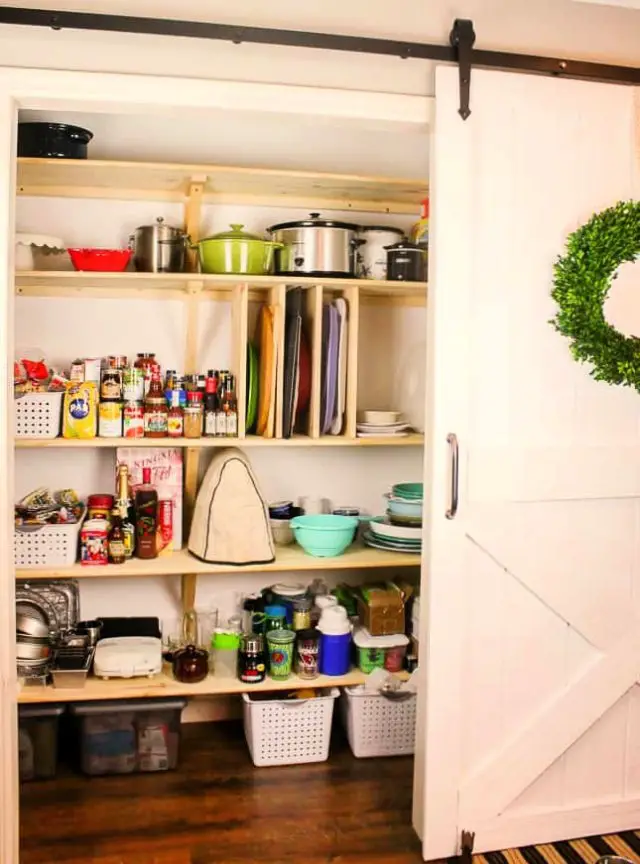
Ultimate Custom DIY Pantry Shelves
Craft your ideal pantry with custom DIY shelves that offer unparalleled flexibility. This comprehensive kit comprises plywood, a table saw, lattice wood, wood filler, a nail gun with brad nails, and precision-cut 1×3 strips. Enhance the professional appearance by incorporating sturdy corner brackets for added support. Give your shelves a personalized touch by applying primer and paint to match your unique décor. With this ultimate DIY package, you can bring your creative vision to life – making organization a breeze!
DIY Pull Out Pantry Shelves

Craft a tailored pantry storage system with DIY pull-out pantry shelves that fit your unique kitchen needs. By following this straightforward tutorial, you’ll be guided through the process of building custom, pull-out shelves that perfectly complement your pantry’s dimensions. To get started, gather essential tools: a table saw equipped with a Dado saw blade, miter saw, hand sander, power drill, level, clamps, brad nailer, and air compressor. With these simple assembly techniques and durable construction materials, you’ll be able to optimize your pantry space in no time.
Free 2×4 Storage Shelving Plan

A hassle-free DIY storage shelving project awaits with this accessible 2×4 storage shelving plan. Begin by measuring the wall to determine the ideal length and depth of your shelves, then cut each corner shelf from a single 2×4 piece, leaving about 1-1/2 inches at the desired depth for support. Next, ensure the top shelf is perfectly level from front to back before proceeding with the leg measurements and cuts. By following this straightforward plan, you’ll be able to create a functional and organized space that suits your needs.
How to Install Pantry Shelving
To transform your pantry’s functionality and aesthetic, start by installing the supports that will hold up your custom shelving solution. This initial step sets the stage for the entire process, allowing you to then move on to painting and installing the shelves themselves. A front-facing finish adds a touch of elegance, making it effortless to access items at the back of each shelf. As the project comes together, you’ll have the satisfaction of organizing your food into neat rows or sections, creating a space that’s not only functional but also visually appealing.
How to Make Pantry Shelves at Home
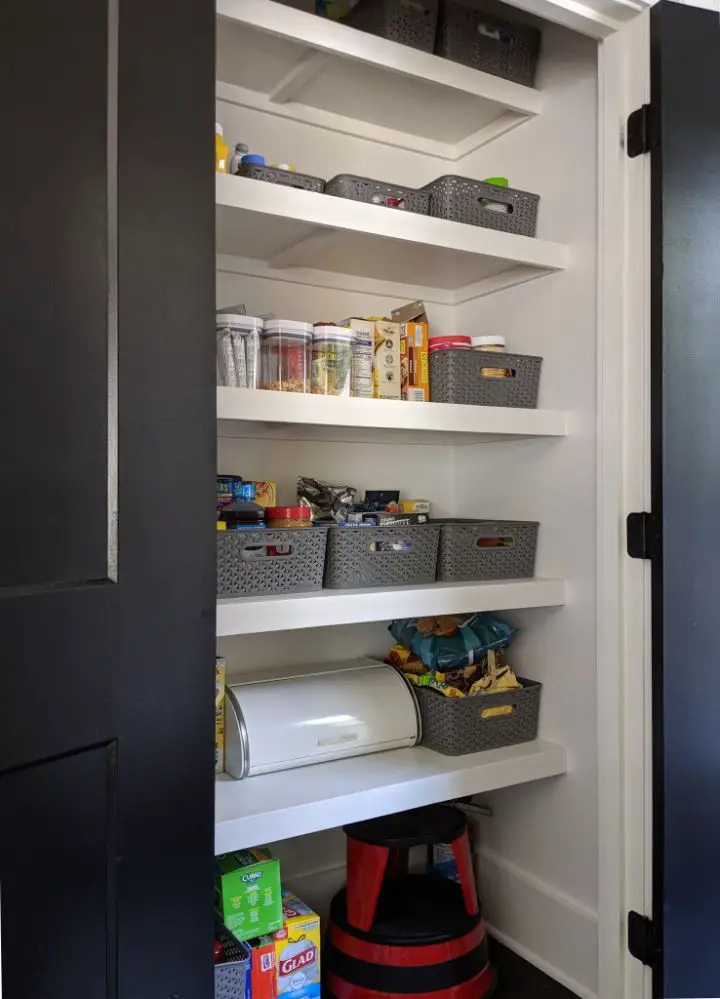
Building pantry shelves at home can be a straightforward DIY project. To get started, use a miter saw to cut shelf supports from pre-primed trim, measuring 12 inches wide for the first layer and increasing by 3 inches for each subsequent layer. Next, cut particle board shelves to fit the space, using the previously measured dimensions as a guide. Begin construction from the bottom up, securing each shelf onto its respective support underneath before moving on to the next level. This layered approach not only provides ample storage but also creates a visually appealing and organized pantry space.
How to Build Pantry Shelving
Transform your pantry into a streamlined haven with this straightforward guide to creating custom shelves at home. Begin by crafting and installing shelf supports using 1.5-inch pre-primed trim, cut precisely on a miter saw. Next, fabricate particle board shelves to fit the available space, then construct from bottom to top, securing each shelf onto the support framework. To achieve a seamless finish, add horizontal shelves of 12 inches and 15 inches in length, with the shorter ones nestled snugly against the longer ones.
Built-in Pantry Shelves Ideas
Transform your pantry with custom-designed and built-in shelves that can become a reality with the right tools, materials, and simple steps. With some planning and preparation, you can turn your dream into a functional and stylish space.
To get started, you’ll need 3/4-inch thick MDF panels, 1×2-inch pine boards for finishing the front of shelves, 3/4-x-3/4-inch wood boards for shelf supports (or cut your 1x2s in half using a table saw), and essential tools like a circular saw, miter saw (optional), finish nail gun, power drill, tape measure, levels (large and small), stud finder, and crowbar or hammer. Remember to double-check your measurements before cutting – once these beautiful new shelves are installed, you’ll be enjoying an entirely new room!
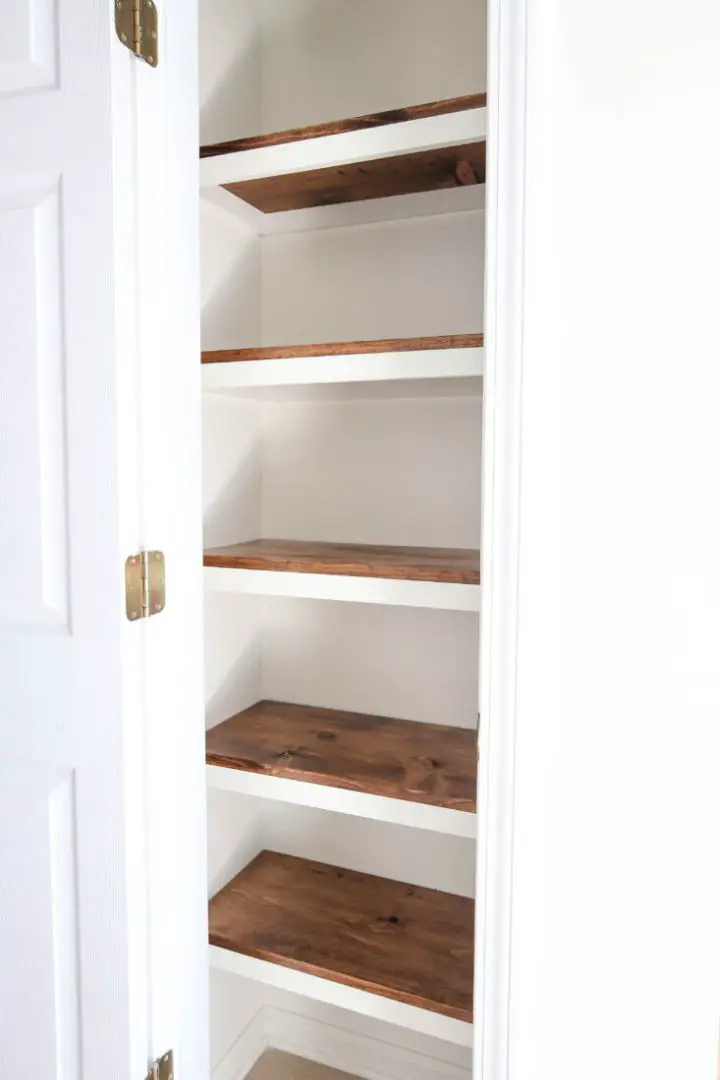
Easiest DIY Wooden Pantry Shelving
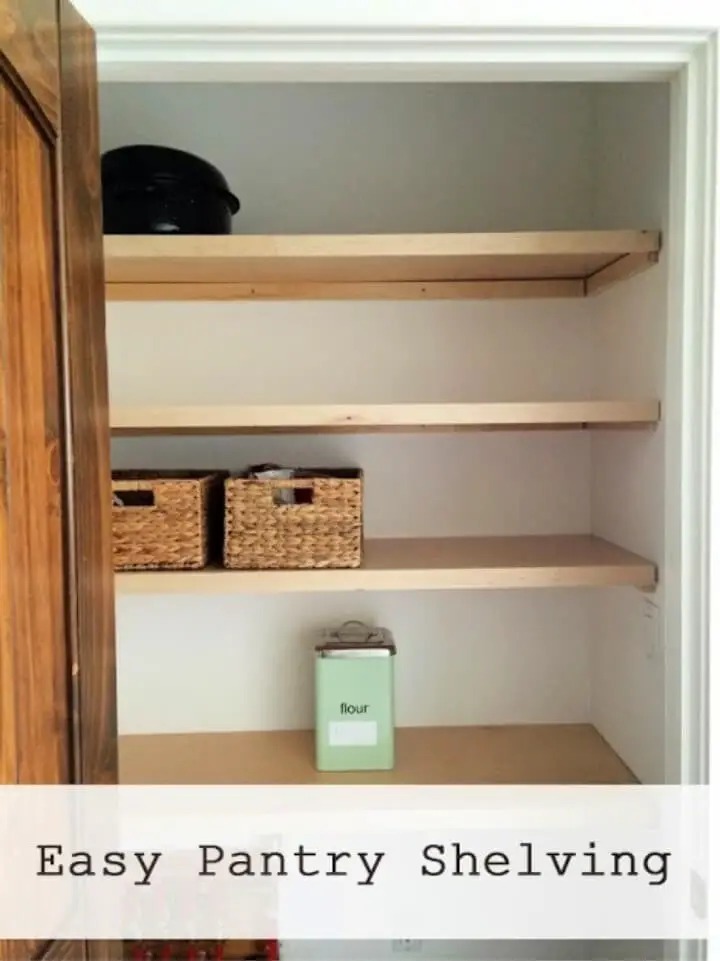
Transform your kitchen’s functionality with a DIY wooden pantry shelving project that’s easy on the eyes and effortless to assemble. This comprehensive guide will walk you through the process of constructing sturdy shelves, complete with shelf supports underneath and front legs for added stability. Begin by cutting prefinished plywood into 15-3/4-inch wide strips – enough for three pieces from a single sheet. Next, secure your wall cleats to anchors or directly into studs using screws that can penetrate the cleat, drywall, and several inches of wall studs. With this simple yet effective storage solution, you’ll be whipping up meals in no time.
Affordable DIY Pantry Floating Shelves
Transform your pantry into a haven of organization and style with these budget-friendly, easy-to-create DIY floating shelves. Crafted from sturdy materials like 3/4″ plywood for the ribs, 1/2″ plywood for the tops, and 1/4″ for the bottom – these shelves boast impressive strength and durability. The attractive faces are made from 1×3 poplar, ensuring a beautiful finished product that will withstand the test of time. With these DIY pantry floating shelves, you can unlock the full potential of your kitchen space without sacrificing style or breaking the bank!
Build Your Own Pantry Shelving

Transform your kitchen pantry into a tidy haven without breaking a sweat! Start by identifying the wall studs and marking the horizontal lines where each shelf will reside. Then, precision-cut boards to size and assemble them in your closet before installing brackets. Begin by screwing in the first bracket, followed by placing the board onto it while securing from underneath. No expertise or complex tools required – simply DIY this clever project yourself and enjoy a more organized kitchen with custom-built shelves, all within a snap!
DIY Custom Pantry Shelves
Transforming your pantry with a unique DIY project has never been more exciting! One such endeavor is creating custom shelves that not only add functionality but also a touch of personality to the space. To get started, begin by removing any existing wire racks and clearing the area. Next, use a pencil to sketch out a faux subway tile pattern on the walls, followed by a paint pen to bring the design to life. As you construct each shelf, ensure they’re 16 inches from the ground up, leaving sufficient clearance above for small appliances or heavy items like stand mixers. With some elbow grease and dedication, you can turn your pantry into a showstopper that’s all yours!
DIY Pantry Shelf Under $50
Transform your pantry without breaking the bank! With this budget-friendly DIY project, you can create a customized shelf that perfectly suits your needs. To get started, grab the essential tools: hand drill, miter saw, Kreg Jig, level, measuring tape, and stud finder. Measure the space where your new shelf will reside, then head out to buy the necessary materials, including wood glue and screws. Cut the wood according to your desired dimensions, remembering to sand the surfaces for a smooth finish before painting or staining. To add stability to the joined pieces, utilize pocket holes for a sturdy and reliable construction. Unleash your creativity and turn this DIY project into a masterpiece that’s uniquely yours.
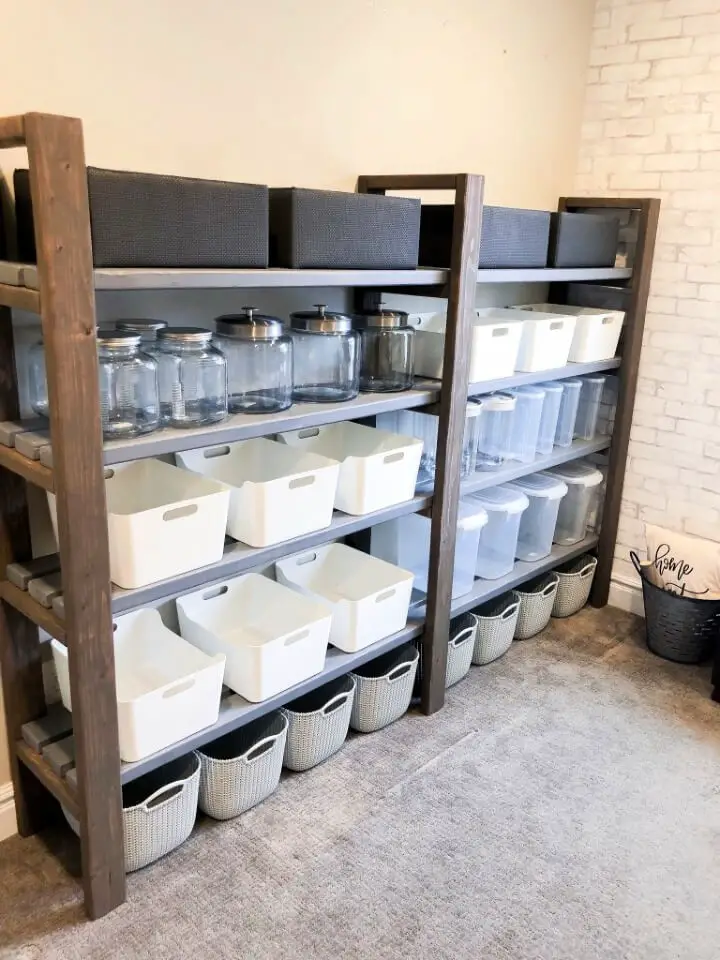
Simple DIY Wooden Pantry Shelves
Elevate your kitchen’s organizational game by transforming metal organizer baskets and frames into customized wooden pantry shelves. This DIY project requires minimal tools, including a standard screwdriver, and can be completed in under an hour for less than $40. With the simplicity of these wooden shelves, you can create ample storage space for your kitchen essentials, ensuring everything has its designated place. Simply gather the necessary supplies and get started on this straightforward DIY endeavor.
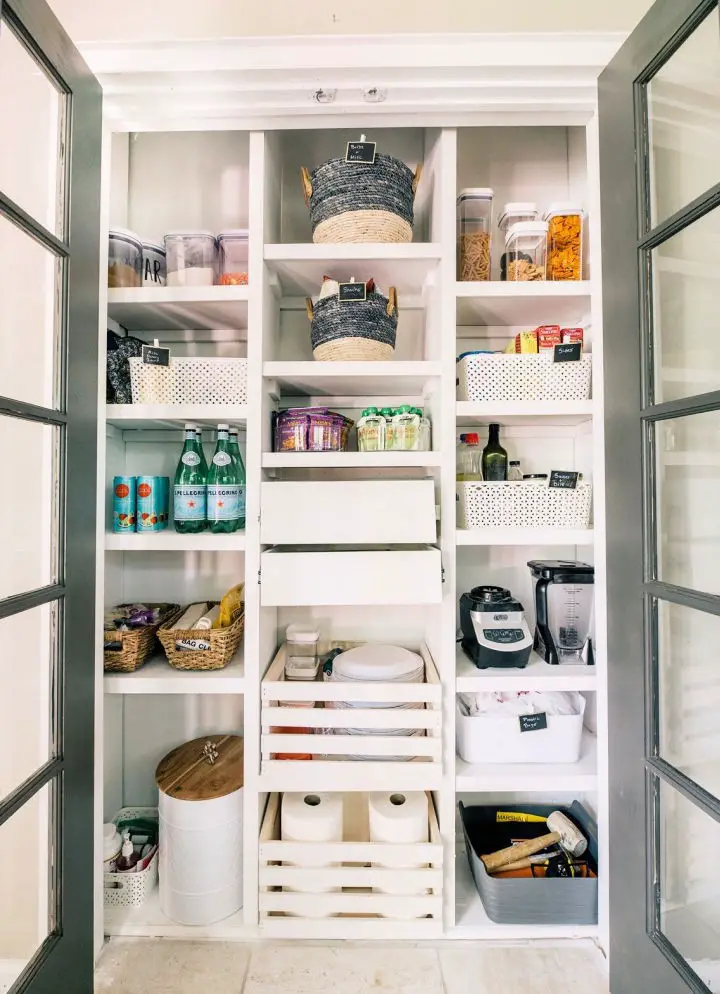
Built-in Pantry Shelves With Drawers
Transform your kitchen storage capabilities with the ultimate built-in pantry shelves boasting drawers! These bespoke creations provide an abundance of storage for all your culinary needs, seamlessly integrating into any kitchen design. Crafted from 3/4-inch plywood or boards, these sturdy shelves boast drawers and trim fashioned from matching 3/4-inch boards, offering a robust and stylish solution.
To embark on this project, you’ll require a table saw, miter saw, circular saw, drill, finishing nails, drawer slides (14 inches), knobs, deck screws, and construction adhesive. With only basic tools at your disposal, you can effortlessly customize your pantry shelf system to flawlessly accommodate any space within your home.
Build Your Own Pantry Shelves
Transforming an underutilized kitchen space into a beautiful and functional storage area is easier than you think, thanks to this comprehensive guide on building your own pantry shelves. With a few simple materials at hand, including two 1×12 MDF boards (8ft long), five 1×2 MDF boards (8ft long) pre-primed for effortless staining, 1/4 inch brad nails, 2-inch screws, wood stain, and polyurethane or paint, you can create the perfect shelves to organize your kitchen essentials. Before getting started, make sure you have the necessary basic tools at your disposal, including a miter saw, drill, brad nailer, clamp, tape measure, stud finder, and level. This step-by-step guide will walk you through every stage of the process, from measuring walls to securing the final shelf in place. Unlock the full potential of your kitchen’s unused wall space today by embracing the world of DIY pantry shelving!
Industrial Pantry Shelving Ideas

When it comes to creating a dependable pantry shelving system, consider relying on the sturdy foundation provided by 8 x 1/2 galvanized floor flanges. Even if you’ve selected top-notch panels, these floor flanges will guarantee that your shelves remain rigid and secure. Assembling them is a straightforward process that simply requires following the included instructions. By doing so, you’ll be able to enjoy a stronger, more reliable shelf solution for all of your items, ensuring your pantry remains organized and clutter-free at all times.
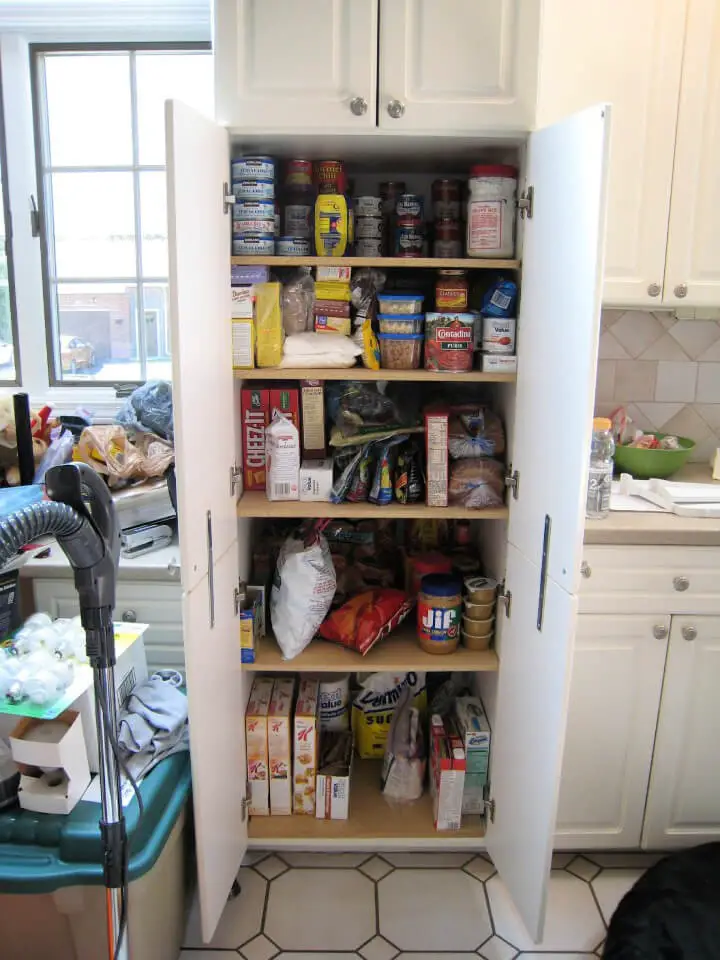
DIY Farmhouse Pantry Shelves

When you open the doors of my pantry, you’re met with the unsightly remnants of builder-grade wire shelving – a far cry from the charming farmhouse aesthetic I’m going for. To give it that rustic touch, I added a flat molding to the top before selecting a stain that complements the natural beauty of the wood. The project required some upfront planning to get the shelf layout and spacing just right, but once that was done, I was able to easily put everything back in its place – on the new shelves! This DIY endeavor is a great way to add a personal touch to your pantry, giving it a unique and welcoming flair that’s perfect for any farmhouse-style home.
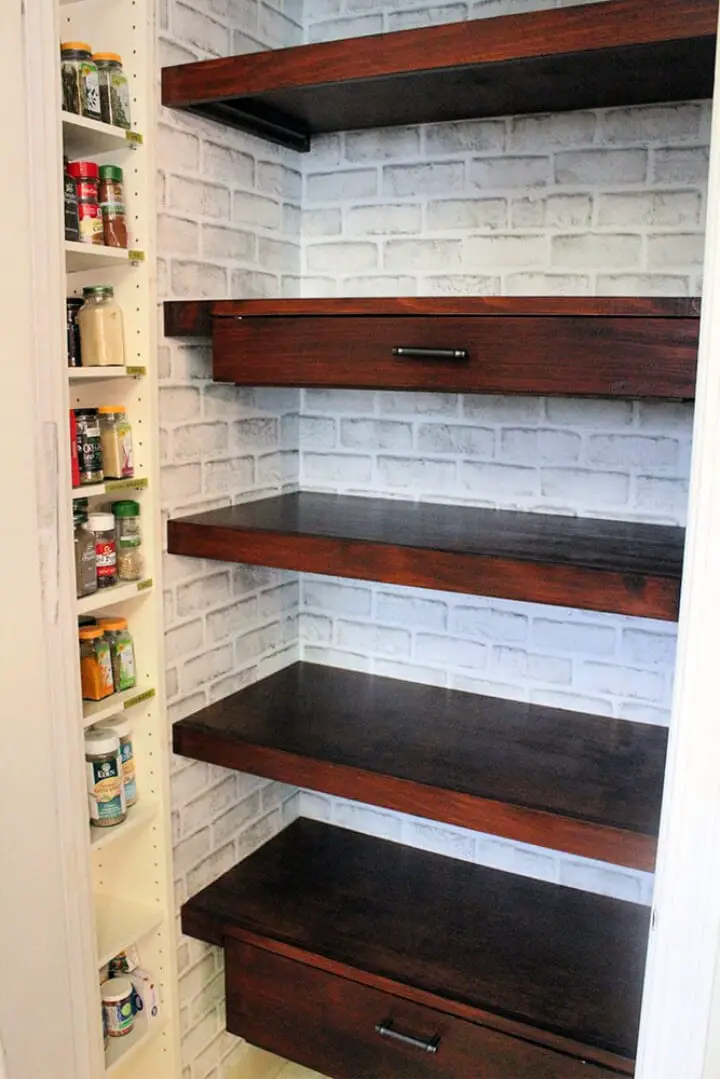
DIY Shiplap and Stained Wood Shelves for Pantry
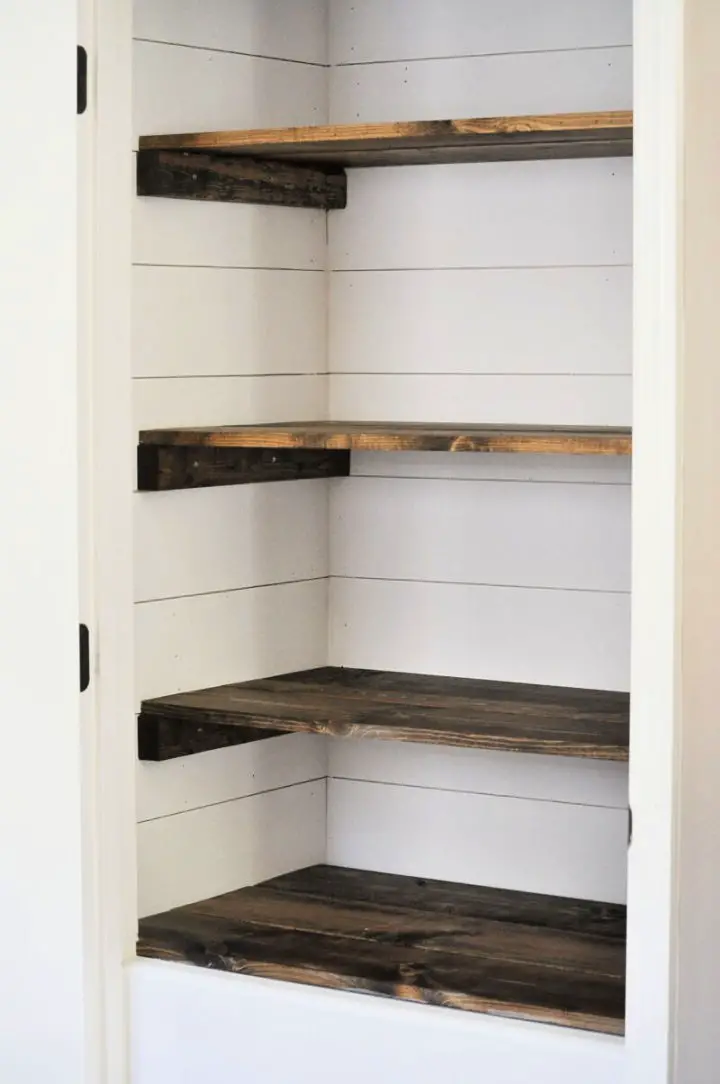
Transform your pantry into a dream space by crafting easy DIY shiplap and stained wood shelves. All you require is 2 sheets of 1/4-inch thick, 8×4-foot plywood underlayment, a miter saw, hand sander, nail gun, nails, 2 nickels for spacers, level, white paint, and a paintbrush/paint pail. Get creative with the stain or paint color to perfectly match your home’s decor. With just basic tools, you can create custom-looking shelves at an affordable price in no time. Not only will you add value to your home, but also gain extra storage and organization with these stunning shiplap and stained wood shelves. Start building today!
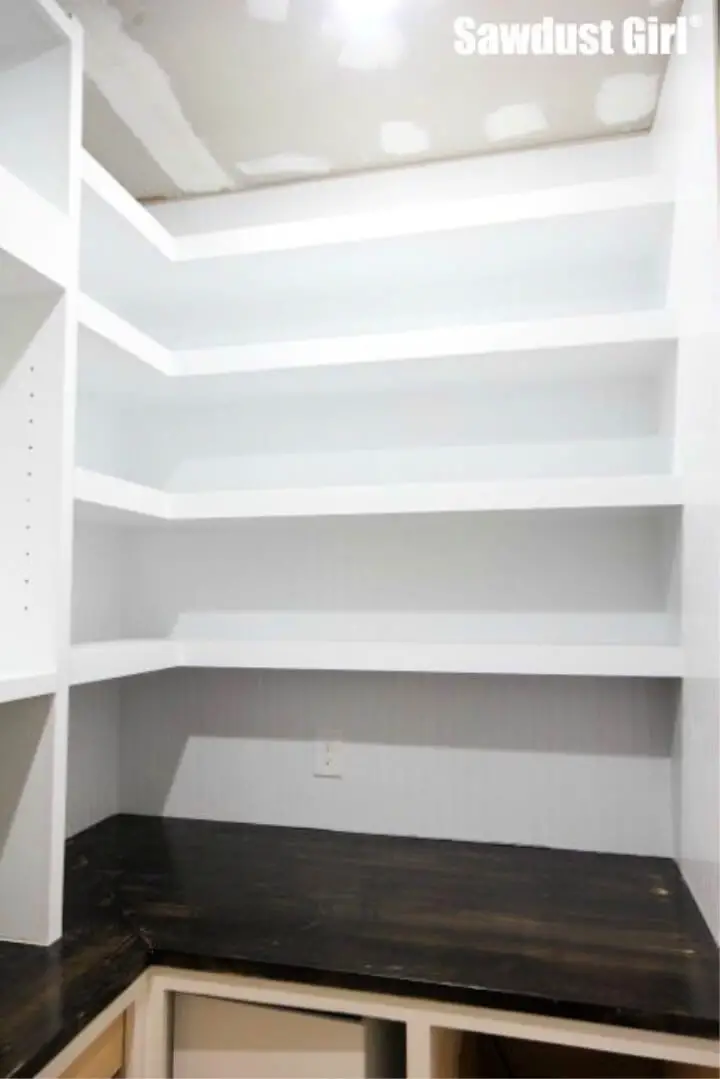
Build Strong and Sturdy Pantry Shelving

For a sturdy and well-built pantry shelving system that can withstand daily use, consider creating your own DIY solution. This comprehensive guide will walk you through the process of constructing pantry shelves that seamlessly fit around corners where two boards meet. Once complete, caulk can be used to eliminate screw holes, cracks, and imperfections, leaving a smooth and refined finish. To achieve the desired outcome, carefully follow these straightforward instructions and you’ll be on your way to beautifully crafted pantry shelving.
How to Build Pantry Shelves
Transform your pantry’s storage capabilities with a simple DIY project that maximizes space. Follow these easy steps to construct custom shelves: gather 5 pine boards (1″x16″x8′), 1 (1″x2″x8′) board, 6 (2″x2″x8′) boards, 5 L-brackets, a nail gun, 3” screws, a leveler, stud finder, and router (optional). Begin by marking the wall with the leveler to determine where each shelf will be placed. Utilize the stud finder to secure each shelf firmly in place when installing lags or brackets. If necessary, cut the pieces down to size before assembling them together and screwing them into place. To add a touch of aesthetics, consider routing down the edges if desired, then revel in your newfound storage capacity.
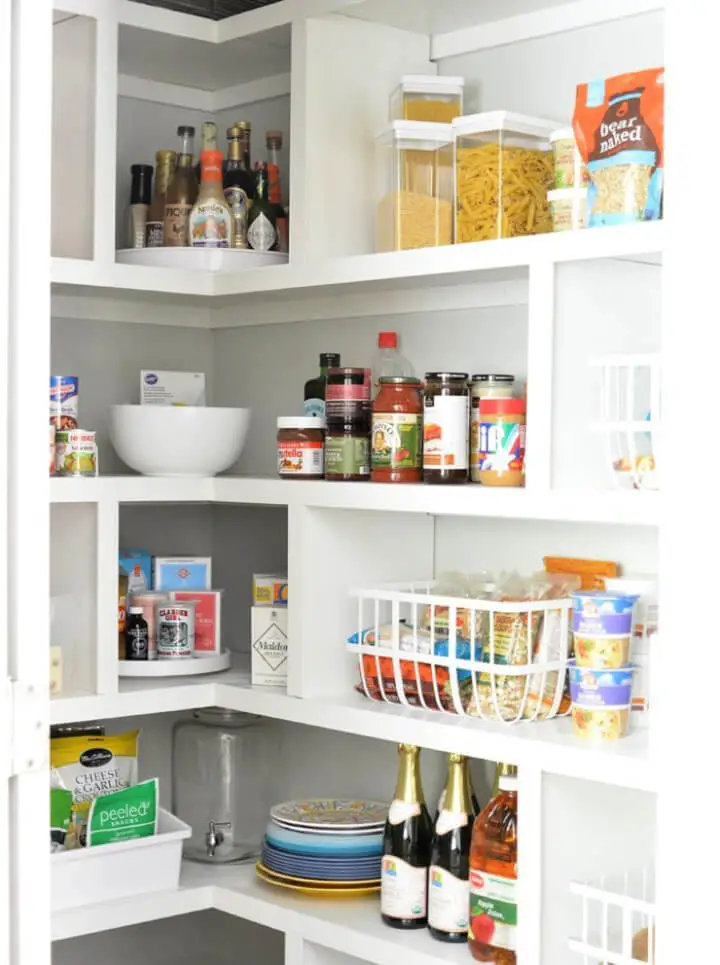
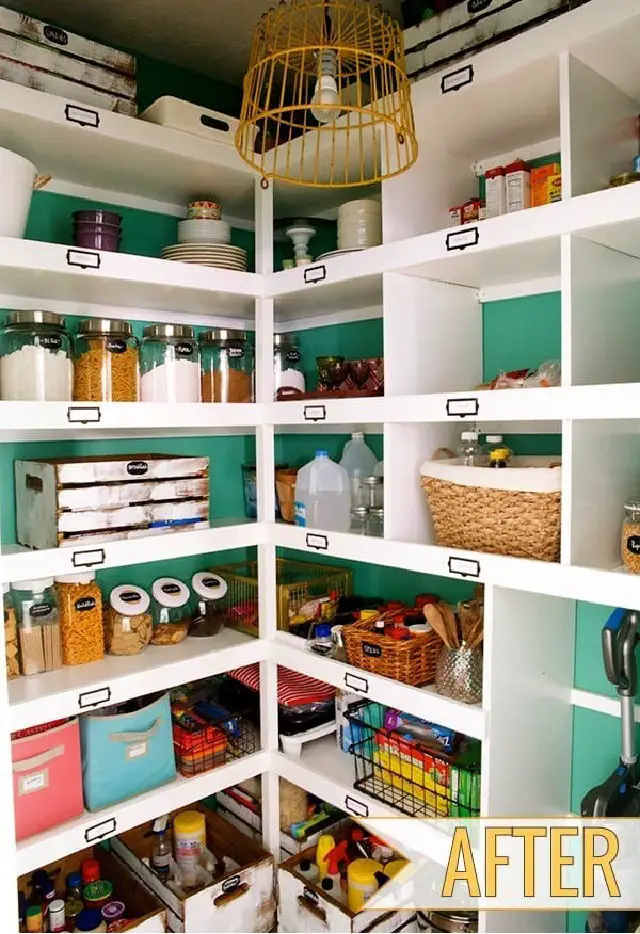
Homemade Corner Pantry Shelves

To elevate your kitchen’s storage game without breaking the bank, consider crafting your own corner pantry shelves from scratch. This DIY endeavor requires some basic tools like a miter saw, drill, brad nailer, Kreg Jig, clamps, and a tape measure. With these essentials at hand, you can create a bespoke shelving solution tailored to your kitchen’s unique layout. Begin by employing a stud finder and level to pinpoint the wall studs, ensuring accurate placement of your shelves. Next, use either a table saw or circular saw to cut plywood pieces to size, taking into account angles and measurements to achieve a seamless fit. Once all the components are prepared, assemble them using glue and nails before securing them to the wall studs. By doing so, you’ll not only gain valuable storage space but also inject some personality into your kitchen with a one-of-a-kind shelving installation.
DIY Pull Out Pantry Shelves and Drawers
Elevate the functionality of your kitchen cabinets by crafting DIY pull-out pantry shelves and drawers. Start by measuring the distance between the cabinet frame to determine the size requirements for each pull-out drawer. Secure all the pieces together using Kreg screws, followed by the addition of sliding hardware for a seamless installation process. To further simplify the installation, consider adding drawer brackets inside your cabinets – a task that can be completed in no time at all! Don’t forget to unleash your creativity when designing your kitchen, incorporating cupboard doors and other design elements that strike a perfect balance between style and practicality.
Build Your Own Pantry Shelves
Transform your pantry space with a DIY shelving solution! Begin by preparing the walls, measuring their length, and cutting wooden brackets to fit. Apply wood glue to secure the brackets in place. With clear instructions, you’ll create shelves that not only add a touch of style but also provide ample storage for your food items. This project is ideal for any kitchen or home organization endeavor, helping you achieve a more streamlined and efficient space.
Functional DIY Pantry Shelving
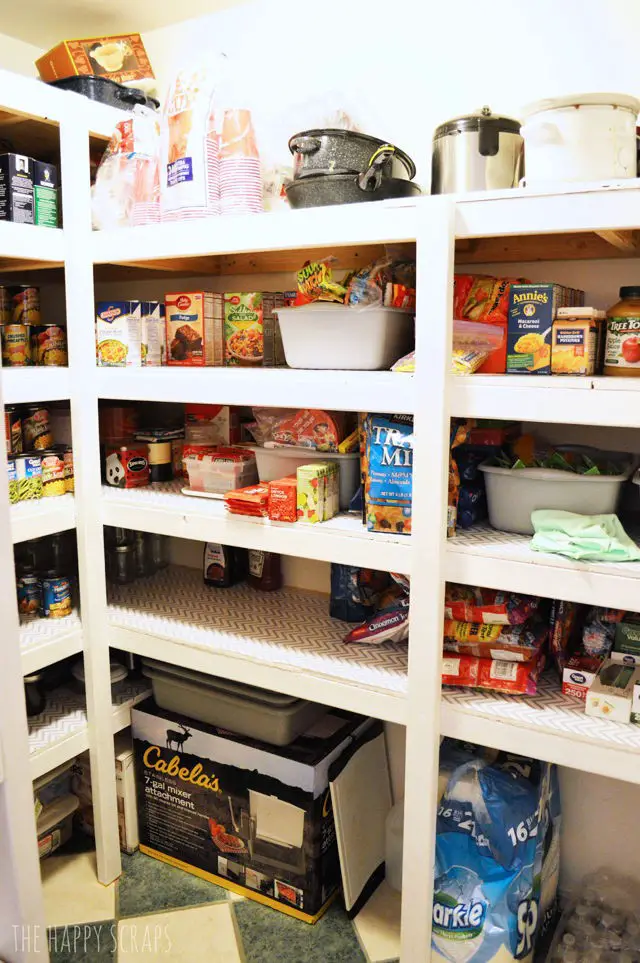
When it comes to maximizing storage space in your home, one often overlooked area is the pantry. A simple yet effective way to boost storage capacity is by installing DIY pantry shelving. To get started, measure the desired spacing between shelves and the distance each shelf should be from the floor. This will ensure a seamless installation process. Next, screw two rails together to guarantee alignment before attaching upright boards to the front rail. With these basics covered, you’ll be well on your way to creating a functional and organized pantry that’s perfect for storing all your favorite snacks, spices, and other essentials. For a step-by-step guide on building DIY shelving units tailored to your pantry size, click through the link provided by The Happy Scraps.
Conclusion:
In conclusion, the 25 DIY pantry shelves featured here provide an array of customization possibilities to suit individual needs. By combining adjustable shelving, door racks, and hooks, users can create solutions that cater to pantries of all sizes. Furthermore, embracing eco-friendly materials and maintenance tips enables homeowners to cultivate a sustainable pantry that is not only functional but also long-lasting. With the ideas and troubleshooting guidance presented, individuals can confidently design and build a personalized pantry that meets their unique preferences.
