Immerse yourself in the world of DIY wooden boxes, where functionality meets style. A treasure trove of 25 creative ideas awaits, offering a kaleidoscope of eco-friendly and upcycled options to suit your storage needs and personal taste. From selecting the perfect wood to mastering essential tools, every step is guided by expert tips on safety, protection, and preservation. As you explore the art of crafting wooden boxes, discover how regular maintenance and care can ensure their longevity and beauty. Our comprehensive guide also addresses common questions, covering topics like choosing the right wood, adding a lid, and personalizing your masterpiece. Get ready to unleash your creativity and transform plain storage into stunning works of art that reflect your unique personality.
How to Make a Wooden Box – Step by Step Guide
For those just starting out in woodworking, crafting a wooden box is an excellent place to begin. Not only will it yield a practical and aesthetically pleasing result, but it also provides a solid foundation for tackling more complex projects down the line. With our straightforward guide, you can master the process of making a wooden box even if you’re entirely new to woodworking – no prior experience necessary.
Materials and Tools Required
To embark on this woodworking project, it’s crucial to collect all the required materials and tools beforehand. A comprehensive list of necessities includes wooden boards of suitable sizes depending on your desired box dimensions. Additionally, you’ll need wood glue, clamps, sandpaper in various grits for smoothing out surfaces, a finish such as oil, wax, or varnish for protection and aesthetic appeal. Furthermore, a saw whether manual or powered will be necessary for cutting the wooden boards to shape. To ensure precise measurements, bring along a measuring tape or ruler. A pencil is also essential for marking cut lines and other details. If you plan to add handles or decorative features with holes, don’t forget your drill. Having all these materials at your disposal will facilitate a smooth and successful woodworking experience.
Step by Step Instructions
Step 1: Design Your Box
When embarking on a woodworking project that involves building a custom box, it’s essential to start by defining its dimensions. Think about how you intend to use the finished product – will it be a storage container for small items or a decorative display case? Having a clear understanding of your purpose will guide your decision-making process. Take some time to sketch out a basic plan, noting down the length, width, and height that best suit your needs.
Step 2: Cutting the Wood
To begin crafting your wooden box, start by marking the cutting lines onto your boards using a pencil. It’s crucial that these lines are straight and precise, serving as a guide for your subsequent cuts. Next, use your saw to carefully cut along the marked lines. For a straightforward box design, you’ll need to create four sides and one bottom panel. If you’re new to woodworking or unsure about your cutting skills, take your time to ensure smooth, accurate cuts that will result in a professional-looking finish.
Step 3: Sanding the Pieces
When you’ve finished cutting your materials, it’s crucial to prepare their surfaces for assembly or further processing. Begin by using a coarser grade of sandpaper to remove any debris and imperfections, gradually progressing to finer grits to achieve a smooth finish. Don’t forget to give extra attention to the edges and corners, as these areas are prone to roughness.
Step 4: Assembling the Box
To construct your wooden box, begin by preparing the individual pieces for assembly. First, apply a thin layer of wood glue along the edges where the sides will meet, then press the sides firmly together and secure them with clamps until the adhesive has fully dried. It’s crucial to ensure that the box remains square and the corners are tight during this process. Once the sides are in place, move on to the bottom piece. Apply a small amount of glue around the edges of the bottom section of each side, then carefully place the bottom panel into position. Use clamps once more to maintain a snug fit as the glue sets.
Step 5: Finishing Touches
Once the glue has fully set, carefully remove any clamps that held the pieces in place. If necessary, use fine-grit sandpaper to smooth out any uneven edges, ensuring a seamless and polished appearance. The next step is to apply a finish, which not only protects the wood but also enhances its natural beauty and adds a professional touch. Follow the manufacturer’s guidelines for your chosen finish – whether you opt for oil, wax, or varnish – to achieve a flawless and durable result.
Step 6: Adding Details (Optional)
When incorporating handles or decorative elements into your project, precision is key. To achieve a polished look, take the time to carefully drill the necessary holes, making sure they’re evenly spaced and aligned with your design vision.
Video Tutorial
To further enhance your understanding of the woodworking process, we’ve created a comprehensive video tutorial – ‘How to Make a Wooden Box for Beginners (The Simple Way)’ – which complements our written guide perfectly. This visual companion brings the techniques to life in an easy-to-follow and captivating manner, making it an ideal accompaniment to our step-by-step guide.
Design Ideas for DIY Wooden Boxes
With the world of DIY wooden boxes at their fingertips, individuals can unleash their creativity and bring their unique vision to life. From functional storage solutions to decorative pieces, the possibilities are virtually limitless. Here, we’ll delve into a diverse range of design ideas that cater to various needs and tastes, offering something for everyone.
Functional and Stylish Storage Solutions
Imagine a world where your belongings are neatly organized, easy to access, and visually appealing. That’s the beauty of creating custom wood storage solutions that cater to your unique needs. With stackable crates, you can create a modular system that adapts to any space, perfect for corralling books, toys, or pantry items. For more precious items, consider crafting a wooden jewelry box with multiple compartments and a luxurious velvet lining. Not only will it keep your treasures safe, but the added mirror inside the lid provides an unexpected touch of elegance. And when you need to stash away larger items like blankets and throws, build a rolling storage box equipped with casters, allowing you to easily move it around or tuck it away when not in use.
Decorative and Personalized Designs
Designing a centerpiece box is an excellent way to add a touch of elegance to your dining or coffee table. Fill it with seasonal decorations, candles, or fresh flowers to create a warm and inviting atmosphere in your home. For a more personal touch, consider creating keepsake boxes with personalized engravings for special occasions like weddings or anniversaries. Alternatively, you can make a wooden toy bin with chalkboard labels on the front, allowing you to easily label and change the contents of the box, making it a fun and interactive storage option for children.
Eco-Friendly and Upcycled Options
Transforming discarded pallet wood into functional and charming creations is not only an eco-friendly approach, but also a testament to the power of creativity. By upcycling old materials, you’re giving new life to what would otherwise be destined for the landfill, and imbuing your finished projects with unique character. This ethos can be applied to a variety of DIY endeavors, such as crafting a reclaimed pallet wood box that exudes rustic charm, building a planter box perfect for small-scale gardening on balconies or in gardens, or even repurposing old wood to create a vintage-inspired crate that adds a touch of nostalgia to any room. The possibilities are endless when you think outside the box (or crate, as the case may be!) and let your imagination run wild with what can be created from reclaimed pallet wood.
Tool and Material Recommendations for DIY Wooden Boxes
Crafting DIY wooden boxes offers a fulfilling experience, combining functionality with visual appeal. To achieve success in this project, having the correct tools and materials at hand is crucial. In the following guide, we’ll explore the essential considerations to ensure your woodworking endeavor turns out both strong and visually appealing.
Selecting the Right Wood
When it comes to choosing the right type of wood for your project, there are several factors to consider. Softwoods like pine and fir are a great option for beginners due to their affordability and widespread availability. However, they can be prone to warping and may not take stain as well as other options. On the other hand, hardwoods such as oak and poplar offer a beautiful grain pattern and can be stained or oiled to enhance their appearance. While they may be more expensive than softwoods, they can add a level of sophistication to your project. For truly special projects, consider using mahogany or cherry wood for an ornate touch that’s sure to impress.
Essential Tools for Crafting
To achieve precision in your woodworking project, it’s essential to have the right tools at your disposal. A table saw and miter saw are particularly valuable for making accurate cuts, while wood glue ensures that the pieces fit together seamlessly. For a professional-looking finish, an orbital sander is a great investment. If you’re aiming to add complex details or joinery to your project, consider upgrading with a Kreg jig, which can greatly enhance the overall quality of your work.
Safety Tips for Woodworking
When working with wood and tools, it’s crucial to prioritize safety above all else. To ensure a safe and successful experience, heed these fundamental guidelines: Firstly, always wear proper personal protective equipment (PPE) such as goggles, gloves, and ear protection to shield yourself from potential hazards. Secondly, maintain a clean and organized workspace to prevent tripping or slipping accidents. Moreover, it’s vital to store sharp objects and heavy machinery safely away from your work area to avoid any unexpected mishaps.
Personal Protective Equipment (PPE)
When working with power tools, materials, and equipment, it’s crucial to prioritize personal protection to safeguard your senses from potential hazards. To begin with, consider donning safety glasses that shield your eyes from dust, debris, and other particles that might pose a risk to your vision. Additionally, when sanding or cutting wood, put on a dust mask to prevent inhaling particles that can exacerbate respiratory issues. Moreover, it’s vital to take hearing protection seriously, as loud tools like routers can cause permanent damage to your ears if proper precautions aren’t taken.
Safe Work Practices
When working with tools and equipment, it’s essential to prioritize safety by adopting certain habits. For instance, opt for fitted clothing that won’t get caught in machinery, eliminating the risk of accidental entanglement. Additionally, maintain a safe state of mind by ensuring you’re always sober when operating tools – this eliminates the possibility of impaired judgment due to substance use. Furthermore, establish a standard procedure before making any adjustments or replacements to your equipment: ensure power is fully disconnected before altering blades or bits, thereby preventing unexpected start-ups and minimizing potential hazards.
Maintenance and Care for Your DIY Wooden Boxes
To extend the lifespan and preserve the aesthetic appeal of your DIY wooden boxes, it’s crucial to perform regular maintenance tasks. By following this comprehensive guide, you’ll be able to keep your wooden creations in exceptional condition for years to come. For instance, make sure to clean your boxes regularly using a soft cloth and mild soap solution. This will help remove dirt, grime, and oils from human contact that can damage the wood over time.
Regular Cleaning
To maintain the aesthetic appeal of your wooden boxes, it’s essential to adopt a regular dusting routine. Using a soft, dry cloth is sufficient for this task, as it prevents dirt and grime from accumulating and dulling the wood’s natural beauty over time. When you need to perform a more thorough cleaning, opt for a damp cloth infused with mild soap. It’s crucial to avoid using harsh chemicals that can potentially damage the wood, thereby preserving its integrity.
Protecting the Wood
To ensure the longevity of your wooden creations, prioritize protection with a coat of varnish, oil, or wax. This not only safeguards against moisture and wear but also accentuates the natural grain patterns, allowing the beauty of the wood to shine through. Additionally, take steps to shield your wooden boxes from direct sunlight and excessive moisture. By doing so, you’ll prevent unwanted warping and discoloration, preserving the integrity and aesthetic appeal of your craftsmanship.
Handling and Usage
To ensure the longevity of your wooden boxes, take extra precautions when handling and placing them. For instance, consider using coasters or felt pads under each box to prevent unsightly scratches on surfaces. Additionally, be mindful of how you lift and move the boxes – avoid sudden shocks and rough movements that can cause damage. By adopting a gentle and cautious approach, you’ll be able to preserve the beauty of your wooden creations for years to come.
Long-Term Preservation
Regularly inspecting your wooden boxes is crucial to ensure their longevity. Perform periodic checks to identify any signs of wear or damage, allowing you to address issues before they worsen. Additionally, reapply protective coatings as needed to maintain the integrity of the wood. This may involve reapplying varnish, oil, or wax to restore the natural barrier against moisture and other external factors. By taking these simple steps, you can extend the life of your wooden boxes and keep them in excellent condition for years to come.
FAQs About DIY Wooden Boxes
For many, creating handmade wooden boxes is a delightful pastime that offers a sense of accomplishment. To facilitate a seamless DIY adventure, we’ve addressed common concerns and provided essential insights to guide you through the process.
What is the best wood to use for DIY wooden boxes?
When selecting the ideal wood for your project, it’s essential to consider both your budget and the intended use of the box. For those on a budget or just starting out, pine and fir are excellent options due to their affordability and ease of working with. However, if you’re looking for a more durable and visually appealing box, hardwoods such as oak or poplar may be the way to go. Alternatively, if your project calls for an ornamental touch, mahogany or cherry wood can add a sophisticated flair.
Do I need advanced woodworking tools to make a wooden box?
While it’s possible to build a basic structure with minimal tools, having the right equipment can make all the difference in achieving precision and quality. For instance, using a simple saw, hammer, nails, and wood glue can get you started on building a straightforward box. Yet, for more intricate cuts or smooth finishes, specialized tools like table saws, miter saws, or orbital sanders might be necessary to ensure accuracy and polish.
How do I ensure my wooden box is sturdy?
When crafting a sturdy wooden box, attention to detail is crucial. The type of glue used plays a significant role in ensuring the joints hold strong. A high-quality wood glue provides a robust bond, while proper joinery techniques, such as reinforcing corners with nails or screws, can significantly enhance the structure’s overall strength. When employing power tools like drills, it’s essential to select screw lengths carefully to prevent wood splitting, thereby guaranteeing a solid and durable final product.
Can I make a wooden box without nails or screws?
When it comes to assembling wooden boxes without the use of nails or screws, various joinery techniques come into play. Dovetail and rabbet joints are two such methods that demand greater precision but ultimately yield a sleeker appearance.
How do I add a lid to my wooden box?
When it comes to selecting a lid for your box, you’re presented with various choices that cater to different design preferences and functional requirements. Hinged lids offer an elegant solution, while sliding lids provide a sleek and modern look. On the other hand, a simple top-sitting lid can be a practical choice, offering versatility in its simplicity. Ultimately, the decision hinges on your unique needs and design aesthetic.
What kind of finish should I apply to my wooden box?
A protective finish is crucial for preserving the integrity and aesthetic appeal of your box. Among the available options – varnish, oil, and wax – it’s essential to select one that aligns with your desired visual outcome and the level of defense required. This thoughtful consideration will ensure a well-protected and visually stunning box.
How can I personalize my wooden box?
To infuse your furniture with personality, consider a range of customization options. Painting and staining allow you to add unique colors and textures, while decorative hardware can introduce subtle flair. For a more intricate approach, engraving or wood burning techniques can be used to create one-of-a-kind designs that truly reflect your style.
Is it necessary to sand the wood before assembling the box?
For optimal results, it’s essential to sand the wood prior to assembly. This crucial step ensures a silky-smooth surface that not only looks great but also provides a solid foundation for any subsequent coats of finish or stain. By doing so, you’ll be able to achieve a strong bond between the wood and these added layers, resulting in a professional-looking final product.
Can I make a wooden box from reclaimed wood?
When incorporating reclaimed wood into your box design, its unique character and historical charm are undeniable. However, to ensure the wood’s integrity and prevent any potential issues, it’s crucial to verify that the material is thoroughly cleaned, dried, and pest-free prior to use.
How do I maintain my wooden box?
To keep your wooden boxes looking their best, a simple dusting routine is usually all that’s required. If the finish does start to wear away, reapply it as needed to maintain both protection and appearance. As you follow these guidelines, you’ll be well on your way to creating beautiful wooden boxes that will remain a joy for years to come. And don’t forget to let your creativity shine through – after all, the most important part is having fun!
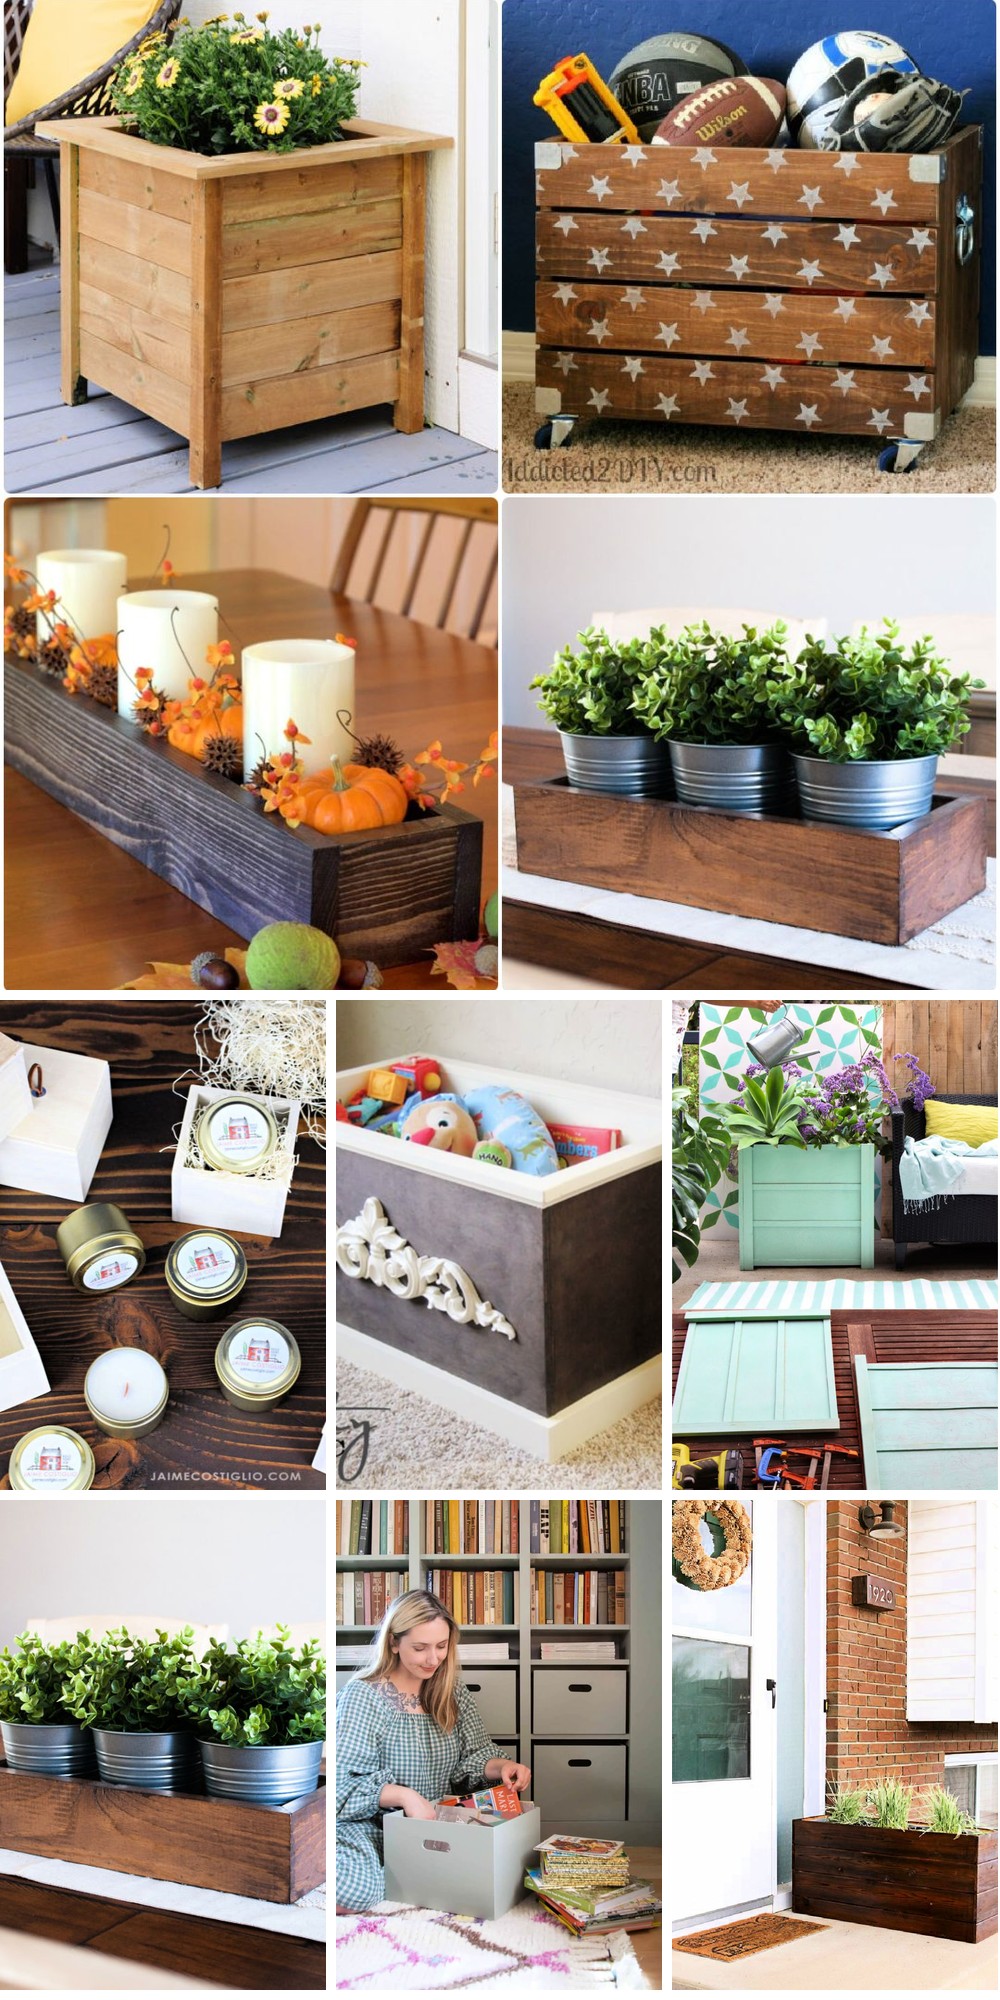
25 DIY Wooden Boxes for Efficient Storage and Decor
Transforming your space just got a whole lot easier, thanks to these 25 ingenious DIY wooden box creations that offer both functional storage solutions and decorative flair. Get ready to unlock a world of possibilities and bring a touch of creativity into your daily life!
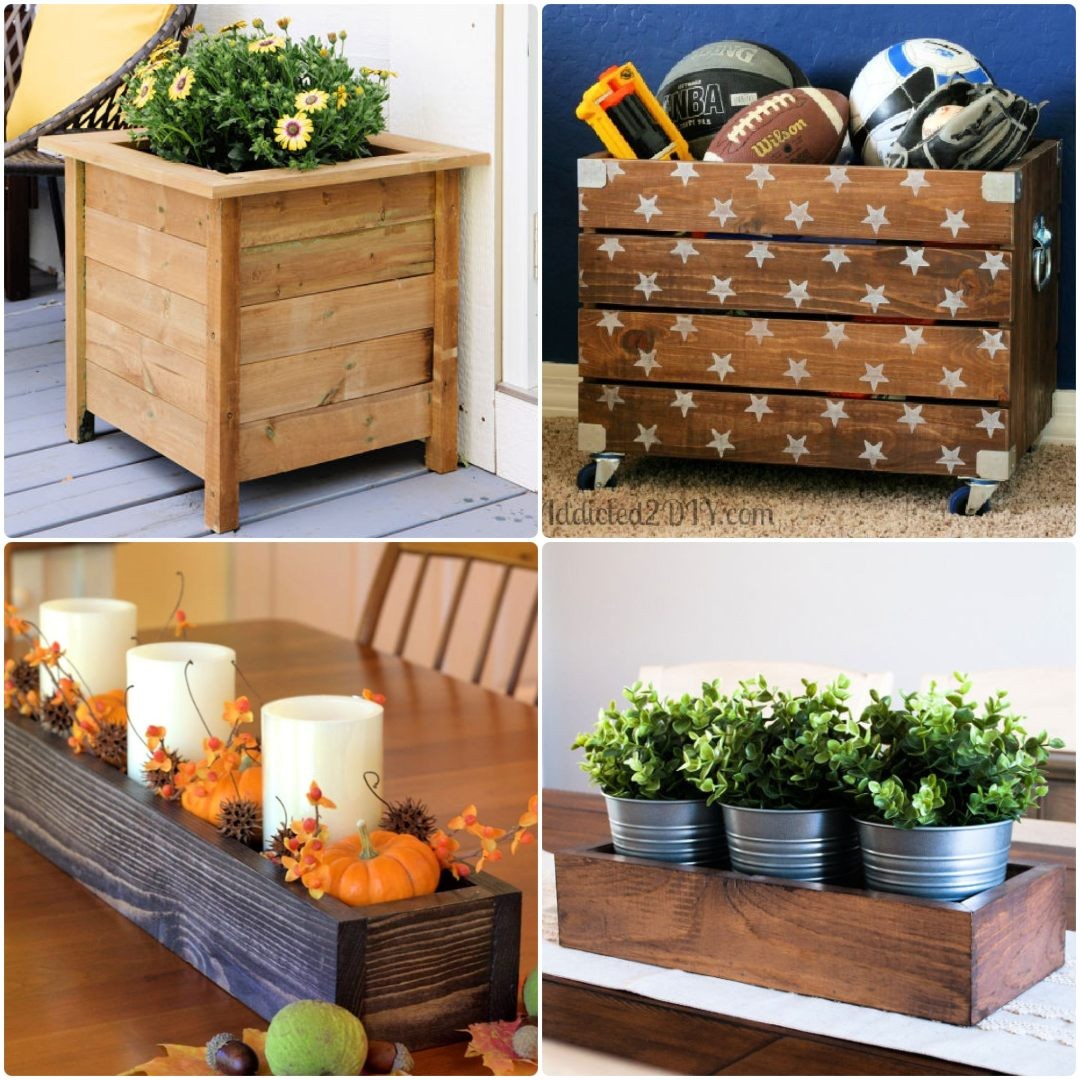
How to Make a Wooden Box Centerpiece
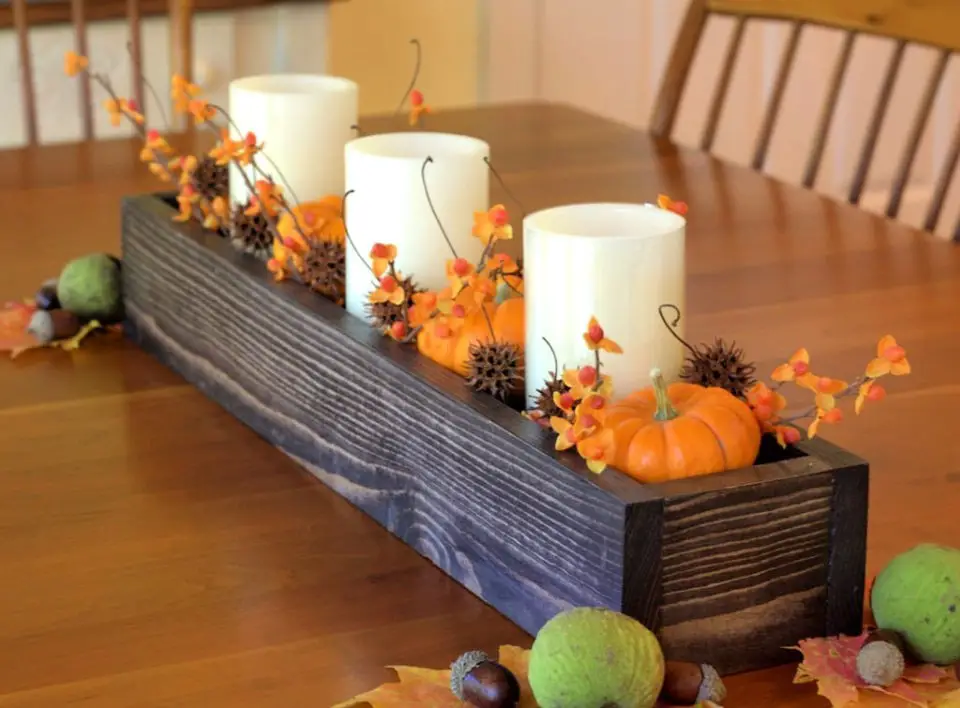
Transform your living space with these adaptable DIY wooden box projects, ideal for storage, gifting, or adding a touch of rustic sophistication. Learn how to construct a versatile and budget-friendly DIY wood box centerpiece in under $10. This woodworking project is easy to complete and perfect for a weekend activity, providing an opportunity to express your creativity while adding a rustic elegance to any room.
By using pine bed slats, basic tools such as a miter saw, orbital sander, and some wood glue, you’ll create an attractive centerpiece that can be customized to fit any season. Fill the box with flameless candles, small pumpkins, and faux Bittersweet for a warm fall atmosphere. As winter arrives, swap the decor with greenery for a festive feel.
This DIY wood box centerpiece project not only offers a fun and creative outlet but also provides an opportunity to express your personal style through seasonal decorating. Plus, it can be used as storage! Build your centerpiece and bring a unique charm to your space.
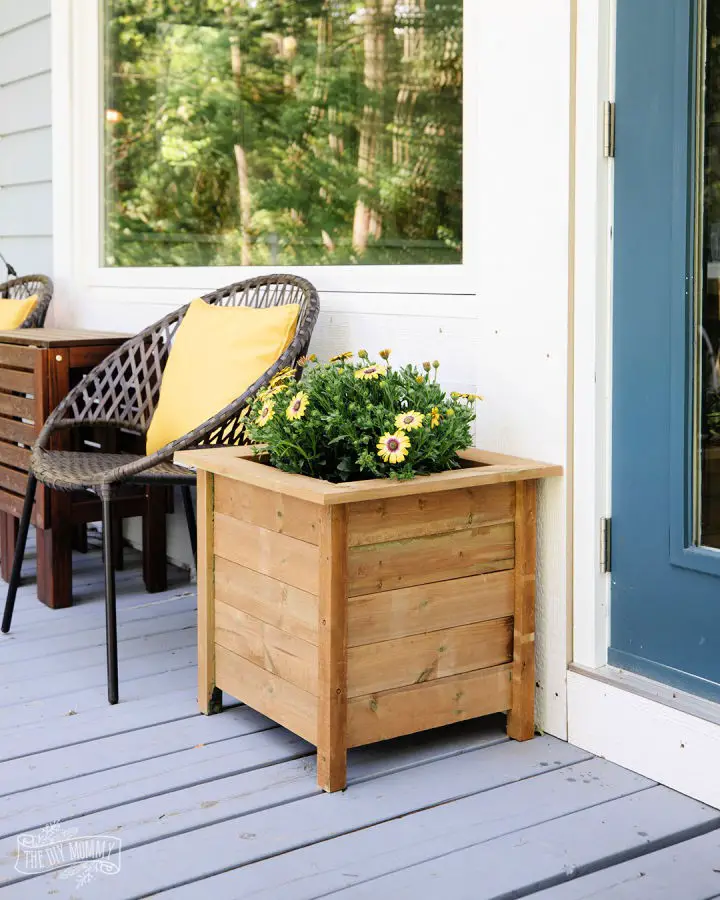
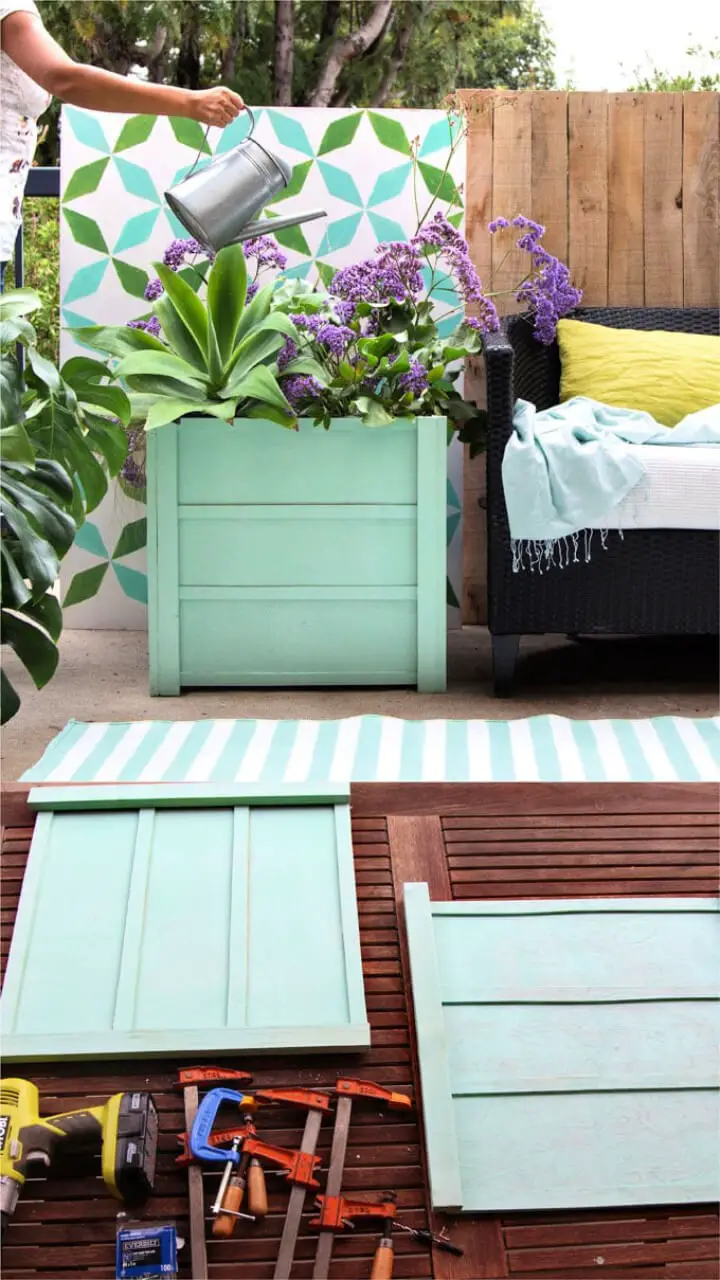
Quick and Easy DIY Wood Planter Box
Transform your outdoor space without breaking the bank by creating a lasting impression with a DIY wood planter box. This two-hour project is surprisingly straightforward, requiring only basic materials like pine boards, a saw, sandpaper, a power drill, screws, paint, and sealer. The result is a stunning piece that adds depth, charm, and value to your yard.
This large yet cost-effective planter box is designed for pre-potted arrangements, offering the convenience of easy change-outs, less mess, and more variety. Whether you’re looking to add some curb appeal or create a welcoming atmosphere in your backyard, this piece can be customized to fit your space – whether it’s a square or rectangle.
What’s more, with proper painting, staining, and sealing, this planter box promises durability, ensuring it remains a beautiful addition to your outdoor space for years to come. Elevate your front yard with this low-cost, high-impact wood planter box today!
Making an Industrial Wood Crate Toy Box
Discover the joy of crafting wooden boxes with a unique DIY project that combines functionality and imagination. By stenciling a star toy box, you can create a one-of-a-kind storage solution for your child’s cherished playthings. This project is not only an excellent way to showcase your creativity but also encourages quality time spent with your kid as you work together on this engaging activity. The use of industrial-inspired materials such as boards, casters, corner straps, and storage chest handles adds a rugged charm that complements the sports-themed design. The Polka Star Stencil from Royal Design provides a fun and easy way to add visual interest to the box, while the Pearl Oyster Stencil Creme adds a touch of sophistication to the finished piece. This collaborative project is sure to spark your child’s enthusiasm for their favorite sport, making it an ideal activity for families who love DIY and spending time together.
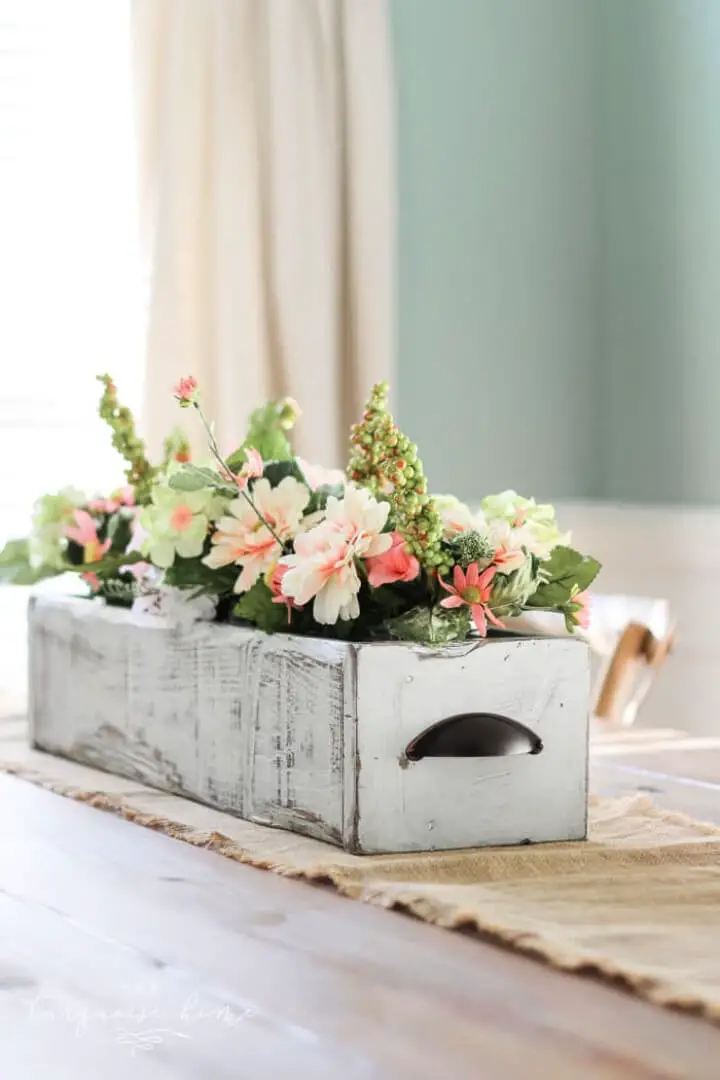
Handmade Wooden Box Centerpiece

Transform the charm of spring into your home with an eco-friendly DIY rustic wood box centerpiece crafted from repurposed wood scraps. This versatile design can be adapted for various seasons, swapping out plants like poinsettias for Christmas or succulents for a summer look. To build this charming piece, gather a 6ft long 1×4 lumber, a 4ft long 1×6 lumber, wood glue, and small finishing nails. The finish features a unique blend of Minwax’s special walnut and classic gray stain, applied with foam brushes and old rags. The best part? This creative project can be completed for under $5. So why not get started today and add a personal touch to your dining table or gift it to someone special?
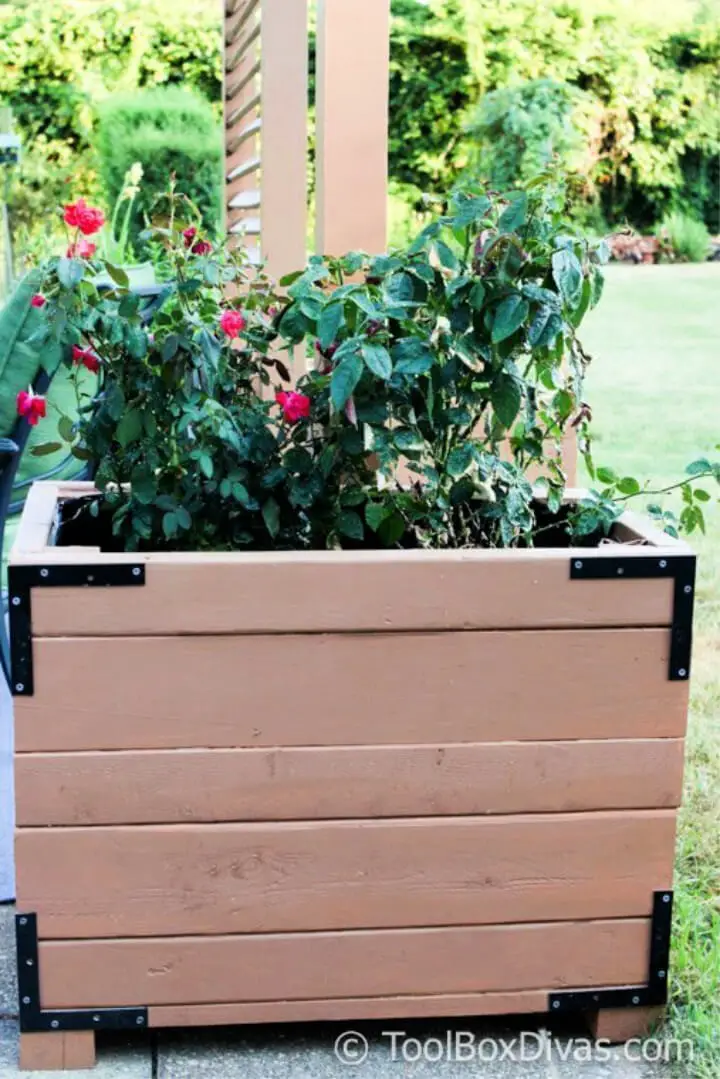
DIY Tall Wooden Planter Box Under $20
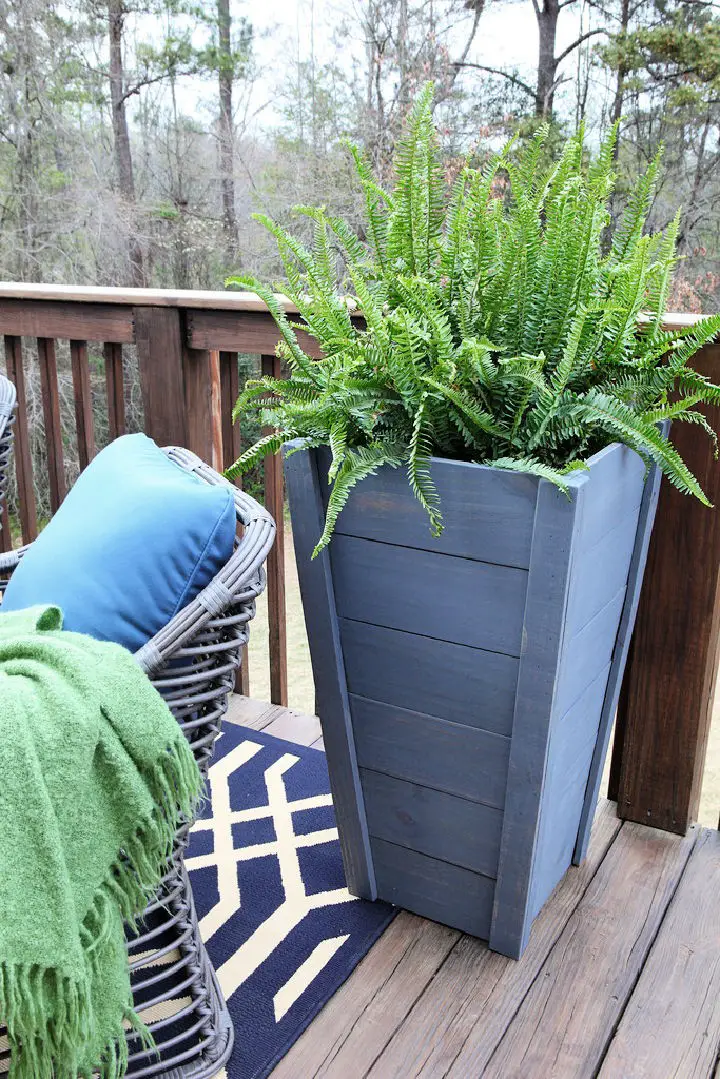
Transform your outdoor space with these extraordinary DIY tall planters, crafted from resourceful materials like dog ear pickets and scrap 2x2s. A testament to the beauty of repurposing, these striking structures house 15 square, 24 QT pots, boasting a unique blend of rustic charm and modern elegance. With detailed measurements and cut lists guiding your construction journey, you’ll be able to assemble planter sleeves that seamlessly integrate with your favorite foliage. The subtle angle cuts add visual interest, while strategic brad nail application ensures the structural integrity of your creation. To complete the look, apply a touch of Weathered Gray stain from Rust- Oleum, imbuing your planters with a sophisticated rustic flair. These one-of-a-kind vessels not only showcase your greenery but also become a statement piece in your outdoor space, elevating your decor to new heights.
Make Patterned Boxes From Scrap Wood
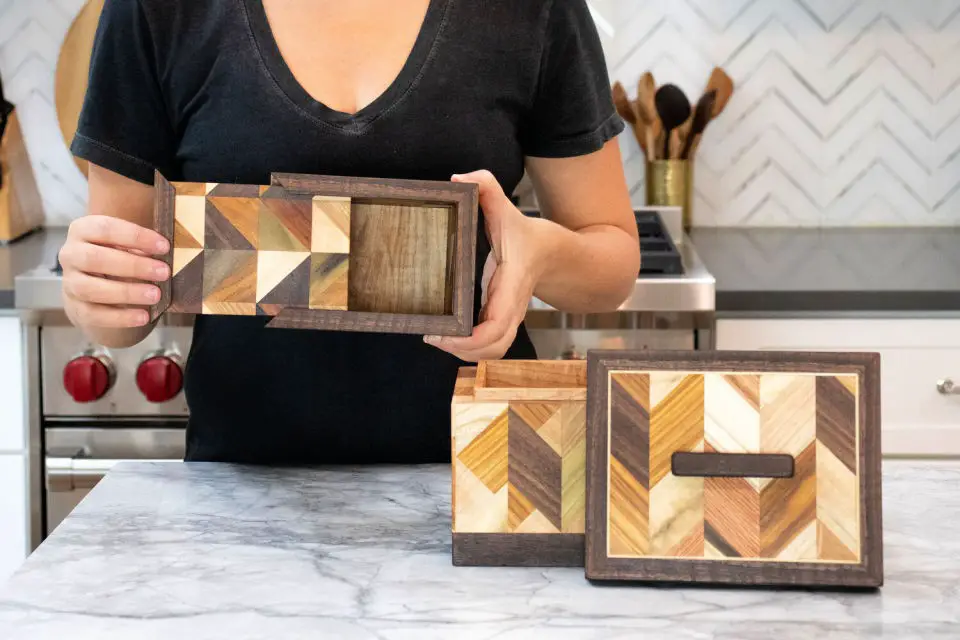
Transform your home decor by breathing new life into old materials with a creative DIY project. By repurposing scrap wood, you can create unique patterned boxes that not only provide functional storage but also add an artisan touch to any room.
Start by collecting a variety of wood scraps and cutting them into uniform thickness and width. Then, randomly arrange the pieces to form a blank canvas, securing it with glue. Once you’ve achieved the desired look, use a miter saw or hand saw to cut the blank into strips at a 45-degree angle.
Reassemble the strips into a distinctive chevron pattern, creating a visually striking design. Alternatively, use longer scrap strips to craft a mesmerizing zigzag design that adds depth and visual interest to your storage solution.
These functional boxes not only provide storage but also serve as conversation starters due to their unique, handmade nature. So why wait? Gather your tools and begin your creative journey today, turning scraps of wood into treasured pieces that will elevate the aesthetic appeal of any room.
Building a Pallet Wood Crate
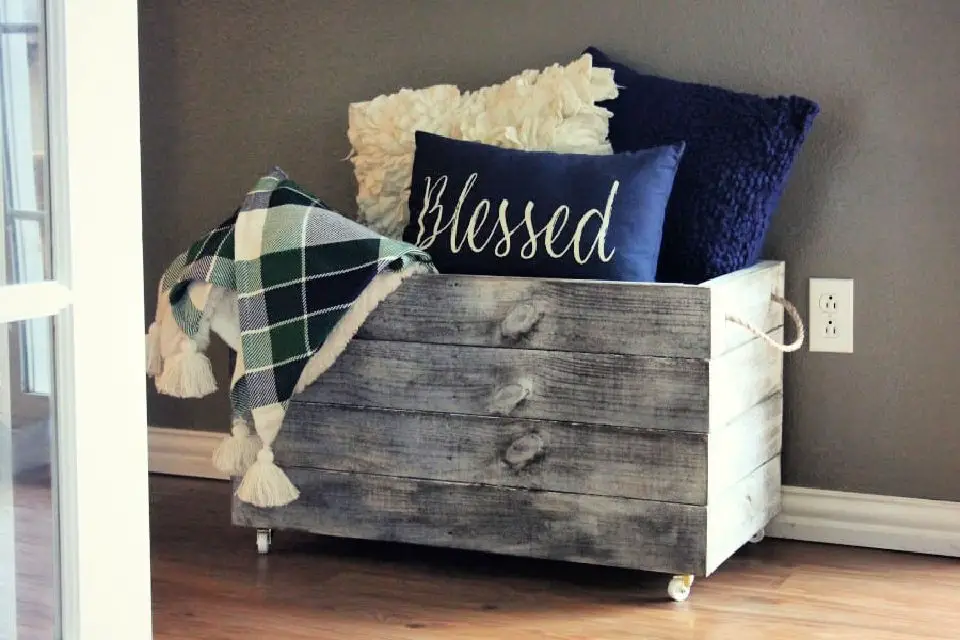
Transforming a humble wooden pallet into a chic, functional storage unit is easier than you think. With a range of DIY wooden box ideas catering to different skill levels, from beginner-friendly projects to more advanced designs, the possibilities are endless. For those new to woodworking, a rustic storage crate made from a repurposed pallet offers an accessible and rewarding project. This versatile container can be used in various areas of your home, serving as both a decorative piece and a practical storage solution.
To get started, you’ll need some essential tools, including the pallet itself, boards, wood glue, nail gun, wood stain or paint, sander, rope, caster swivel wheels, screws, and basic workshop equipment. Follow our step-by-step guide to disassemble the pallet, cut the wood, assemble the crate, sand it down, drill holes for handles, apply a finish of your choice, and finally attach the rope handles and wheels.
The end result is a sturdy, aesthetically pleasing crate that combines function with style. Perfect for storing extra linens, toys, or pantry items, this rustic storage unit adds charm to any room in your home.
Cheap DIY Small Wooden Box
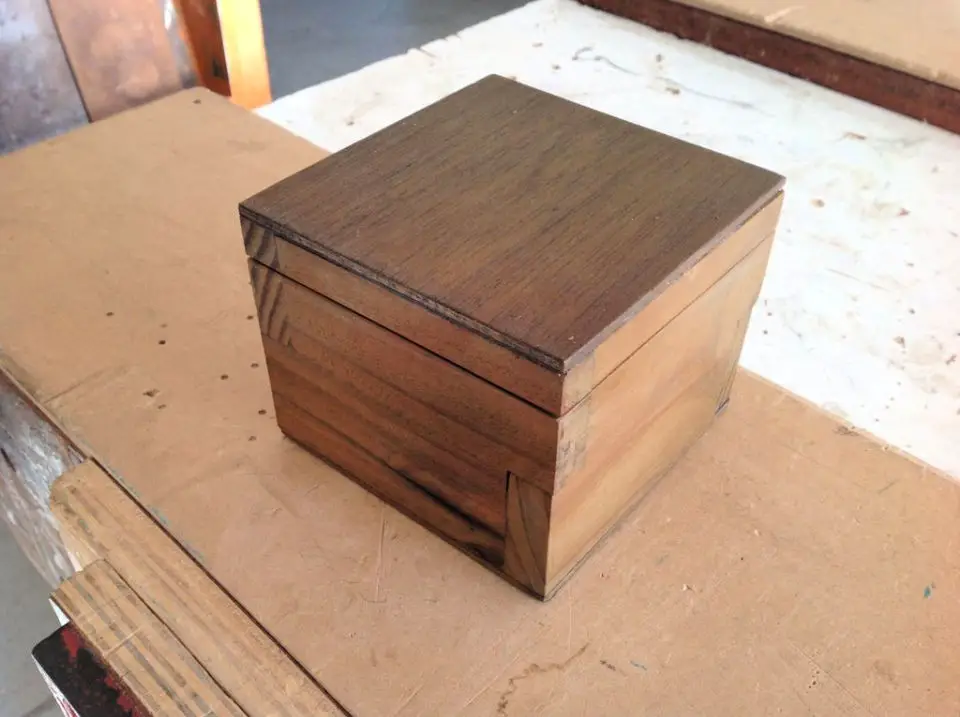
Embark on a journey to hone your manual skills by crafting a charming DIY wooden box. This engaging project presents an accessible challenge with corner joinery that will test your precision and patience. With only a few essential supplies – plywood, dowel, and basic tools – you’ll work through marking and cutting materials, joining pieces together, and applying finishes with meticulous care.
As you saw waste away to shape the box’s body, carefully sand surfaces to smooth out any imperfections, and glue parts together with precision, each step contributes to the creation of a unique treasure holder. The added dowel serves as a lid locator, ensuring a snug fit that will keep your valuables secure.
Finally, bring a touch of professionalism to your handmade box by applying a natural stain. With this project, you’ll step into the satisfying world of DIY crafts, creating something both practical and visually appealing.
Free Wooden Planter Box Plan
Transform your home’s exterior with a stylish DIY planter box that’s both functional and aesthetically pleasing. This beginner-friendly project requires minimal power tools, making it an ideal entry point for those eager to hone their skills. With a few simple materials – including treated lumber, wood glue, a miter saw, and a finishing nail gun – you can create your own high-quality planter box that rivals store-bought options. Not only will this project add a touch of elegance to your front porch or back deck, but it’s also built to last, making it a practical investment of time and resources. The comprehensive building instructions and detailed cut lists ensure a seamless DIY journey. Perfect for showcasing planters up to 14 inches in diameter, this easy planter box project allows you to turn your outdoor space into a captivating display of your craftsmanship and horticultural prowess.
How to Build a Wooden Tool Box
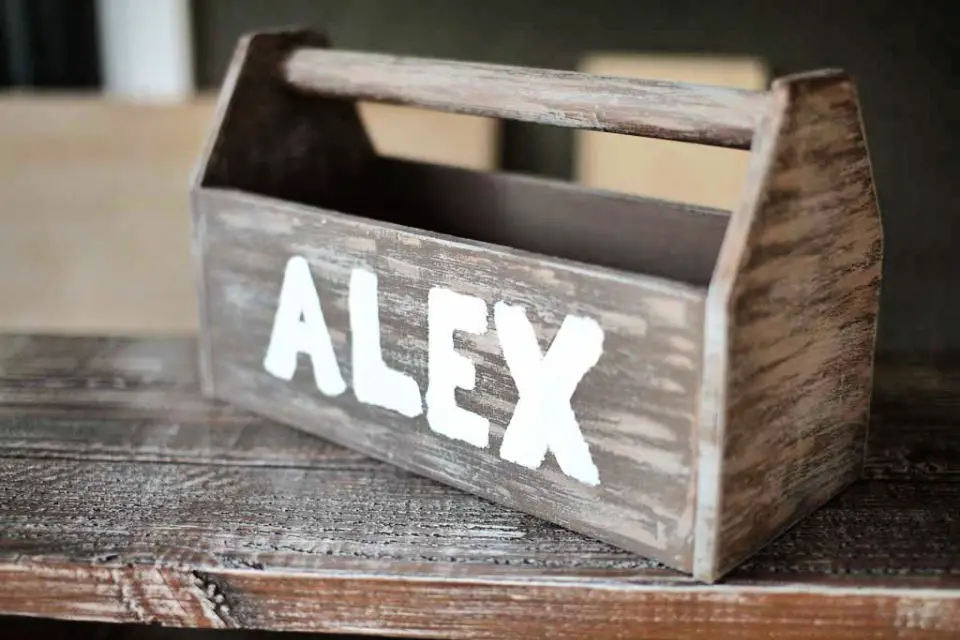
Embrace an opportunity to bond with your child while fostering their creativity and organizational skills by constructing a DIY wooden toolbox together. This straightforward project requires assembling a few basic materials, including plywood, a dowel rod, and finish nails, all guided by a clear and easy-to-follow set of instructions.
Starting with pre-cut pieces from scrap wood, this hands-on endeavor presents a chance to teach your young one valuable skills while piquing their interest in DIY projects. The building process is brief, making it an ideal introduction to the world of crafting.
As an added bonus, a comprehensive printable PDF guide is available for a small fee, providing detailed instructions, cut diagrams, and a list of necessary supplies. This supports the continued creation of engaging content that sparks curiosity and inspires creativity in young minds.
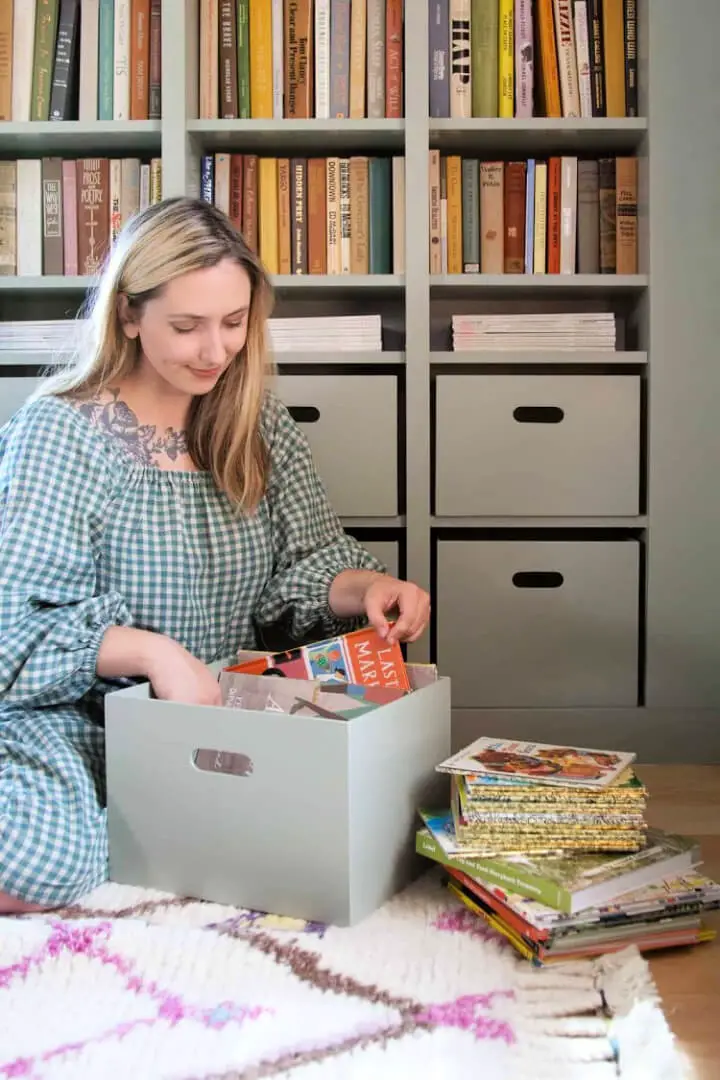
How to Make a Wood Storage Box
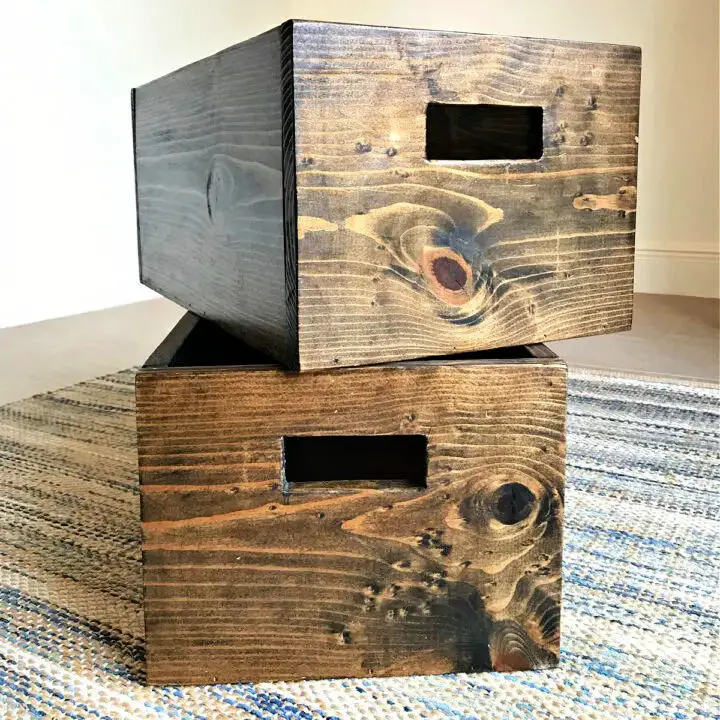
Transform your living space with bespoke DIY wooden boxes that blend functionality and style. For a low-cost, high-impact project, create a customized wood storage bin that not only elevates the aesthetic of your home but also maximizes shoe storage in areas like mudrooms. With dimensional lumber and plywood as the foundation, this beginner-friendly project leverages the Kreg Jig R3 to deliver pocket hole joinery with ease, even for those new to using the tool. The result is a one-of-a-kind bin that reflects your personal taste at an affordable $12 per unit. By combining practicality with panache, you’ll be well on your way to creating a more organized and visually appealing home.
Make Your Own Decorative Wooden Box
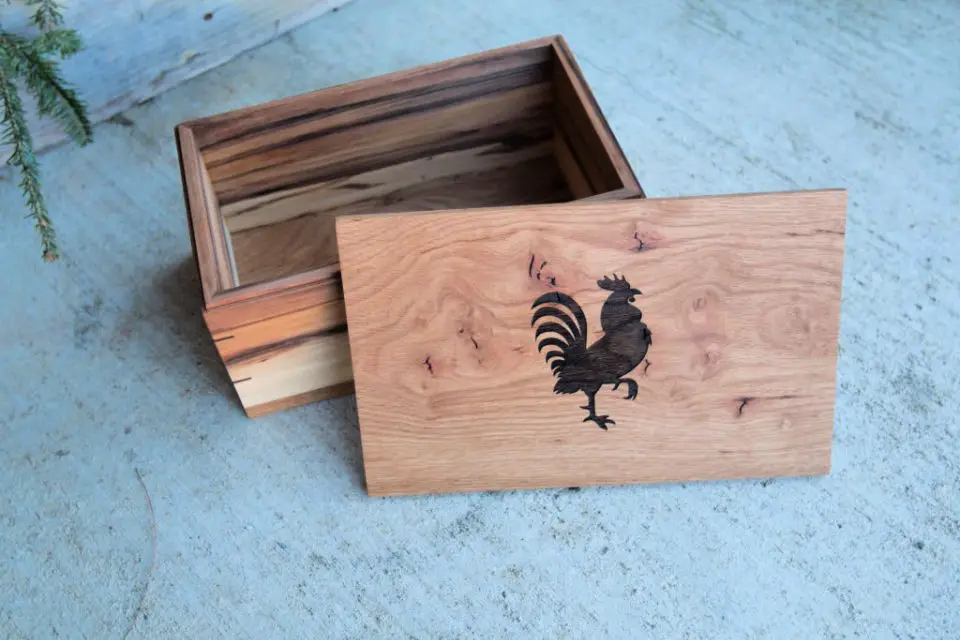
Transform your crafting skills by crafting a captivating DIY wooden box using red gum and white oak. This intricately detailed and textured gift box presents an alluring DIY challenge, yielding a truly one-of-a-kind creation. To bring this project to life, employ a range of tools including table saws, drum sanders, planers, jointers, and more to refine your raw materials.Each step in this meticulously designed process is tailored to unlock your full crafting potential. From the initial milling stages to cutting precise miters, every stage infuses the box with character. The ease of assembly, courtesy of painter’s tape, ensures a seamless experience, while laser engraving adds an unparalleled touch to the lid.Perfect as a thoughtful gift or personal treasure, this box serves multiple purposes while showcasing your woodworking prowess. Take on this project and revel in the allure of artisanal craftsmanship.
Simple and Easy DIY Wooden Box
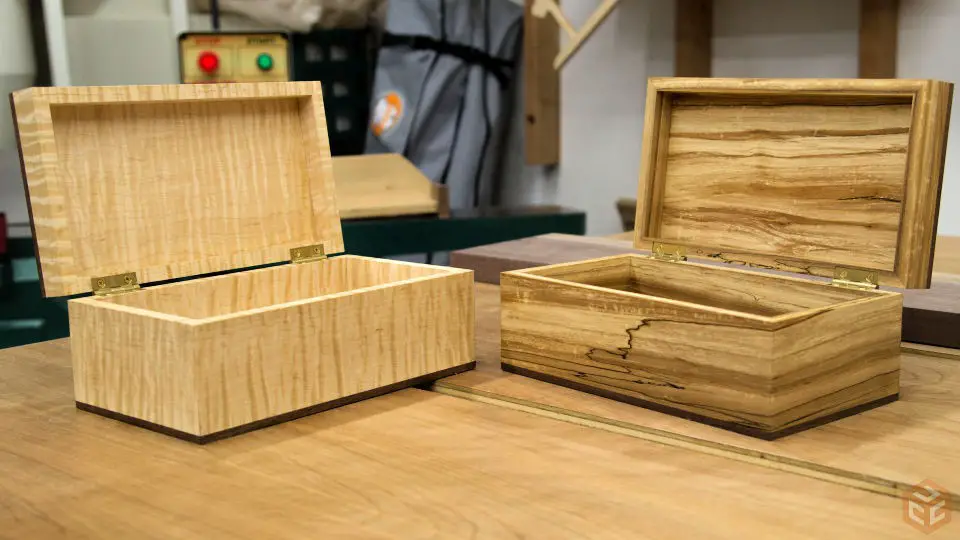
As you embark on the creative journey of crafting an exceptional DIY gift box from curly and spalted soft maple, ordinary boards are transformed into treasured keepsakes. The meticulous process of selection, cutting, and planning brings out the natural charm of wood, showcasing its vibrant figure in all its glory.
While patience is required to achieve the precise 45-degree angles for the walnut inlays or secure the hinges, the end result is a refined, one-of-a-kind gift box that seamlessly blends practicality with beauty. Finished with a touch of shellac, these handmade masterpieces make for an extraordinary present for any occasion. The sense of accomplishment that comes from building something by hand that will stand the test of time is truly unparalleled.
Custom Plywood Storage Boxes
Transform your space into a haven of serenity by crafting stunning DIY wooden boxes that serve as both functional and decorative storage solutions. For the uninitiated, this beginner-friendly woodworking project provides an excellent opportunity to develop new skills while tackling cluttered shelving situations. With custom-made plywood storage boxes, you’ll be able to turn chaos into harmony, just like in a built-in Billy bookcase unit project. The result is not only a tidy and organized space but also the ability to easily move items from one room to another, thanks to the portability of these versatile containers. By following our step-by-step guide, you can create boxes that perfectly fit your needs, bringing a sense of beauty and order to any room in your home.
Build Your Own Wooden Box
Transform your decor with a unique and rustic charm by crafting a DIY wooden box centerpiece. This cost-effective yet stylish addition to your space is perfect for turning scrap wood and screws into a delightful focal point. Bring this Kreg Jig project to life on your table, mantel, or anywhere else you’d like it to be. The best part? You can customize the dimensions to fit your needs – whether you want an elegant table centerpiece or a modest decorative item, it’s yours! This project is versatile enough to accommodate mason jars, faux flowers, or any other display items you desire. To get started, you’ll need just one 1x6x8 piece of wood, Kreg Pocket Hole Screws, a screwdriver, and some paint. With these simple materials, you can bring your creativity to life and add a personalized touch to your home.
DIY Wood Planter Boxes Under $10
Transform your outdoor space into a stunning sanctuary by crafting your own DIY wood planter boxes that boast a unique blend of functionality and visual appeal. By leveraging lightweight materials such as plywood or 1-inch lumber, you’ll create durable and long-lasting planters that can withstand the elements. The design is not only aesthetically pleasing but also cleverly incorporates a 15-gallon plastic nursery pot to house your plants, making it easy to transport and maintain. With dimensions of approximately 21 inches cubed, these versatile planter boxes are perfect for an entryway, patio, or porch. Not only do they serve as beautiful decor, but they also enable you to cultivate a variety of plants with ease. So why not unleash your creativity and build your own beautiful garden oasis today?
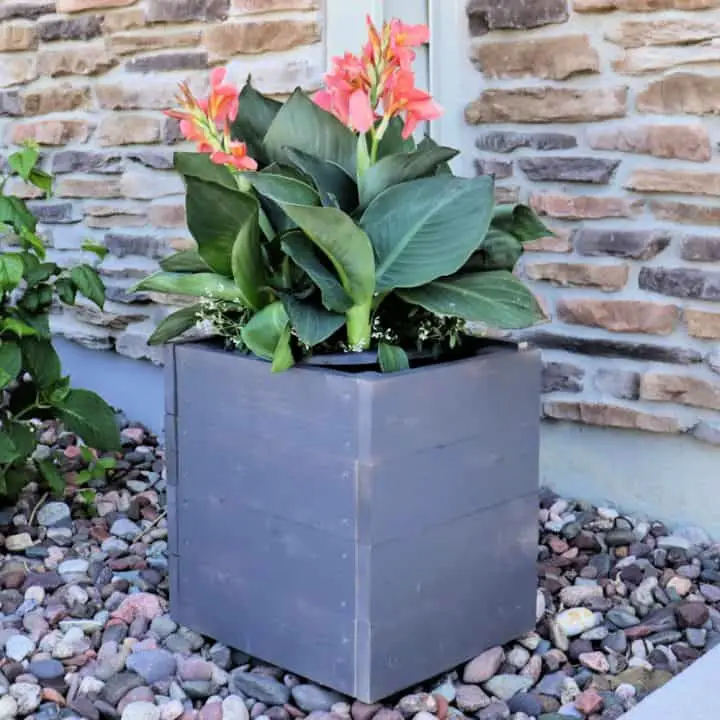
Large Planter Box Using Scrap Wood
Transform your outdoor space with a stunning DIY large privacy planter, crafted from scrap wood using only a circular saw and drill! This eco-friendly project not only adds elegance but also creates a sense of seclusion. By repurposing scraps of 2x3s, 2x4s, 2x6s, 1x6s, and 4x4s, you’ll be reusing and recycling materials to build a one-of-a-kind planter box that can showcase your favorite plants. With straightforward steps, you’ll create a beautiful and practical outdoor feature that’s sure to become the focal point of your backyard. This weekend project is all about breathing new life into discarded wood, turning it into something truly functional and visually appealing.
Inexpensive Wooden Tool Box Caddy
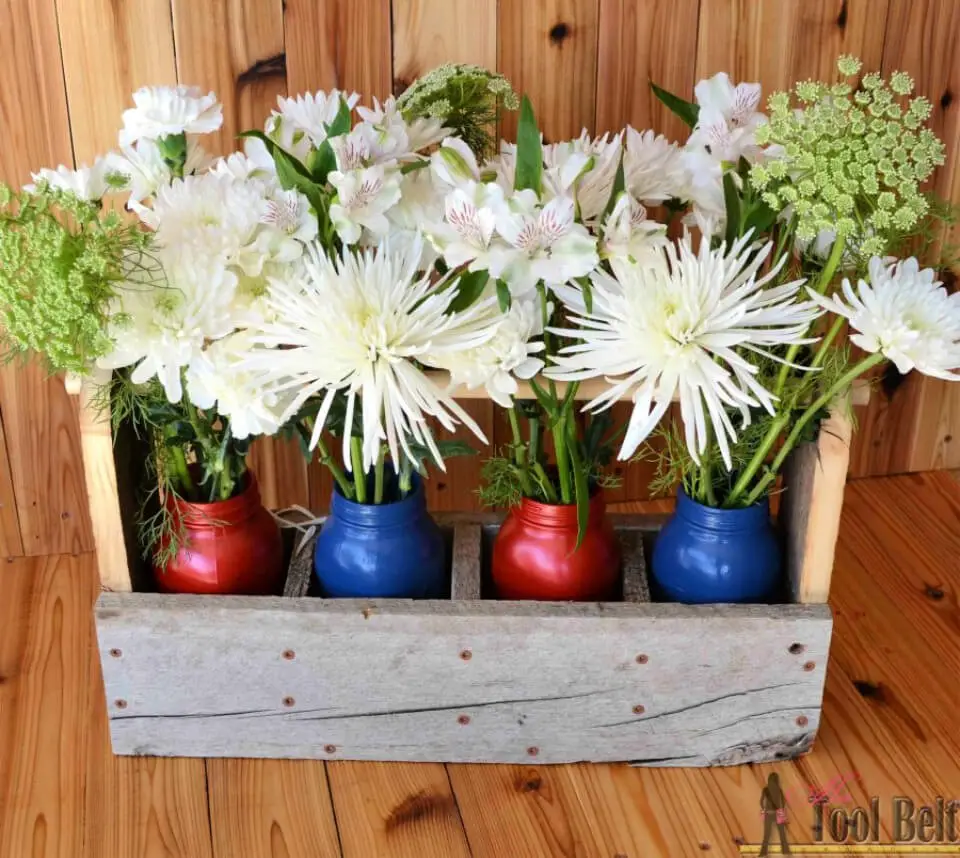
Elevate the ambiance of any gathering with a one-of-a-kind DIY wooden toolbox caddy designed specifically to cradle mason jars. This creative centerpiece effortlessly brings rustic charm to your decor, whether you’re hosting a casual lemonade party or a star-spangled 4th of July celebration.
To create this unique piece, you’ll need a few simple supplies: a 1x6x8 board, a 3/4″ dowel, deck screws, pocket screws, wood glue, and sandpaper. Follow the provided cut list and instructions to craft your caddy, which features removable partitions and a convenient handle.
Take it to the next level by personalizing your toolbox with painted mason jars and white flowers in a festive Red, White, and Blue theme. This innovative project not only stores but also transports mason jars, creating a cozy and inviting space that’s sure to delight.
Make a Rustic Wood Planter Box
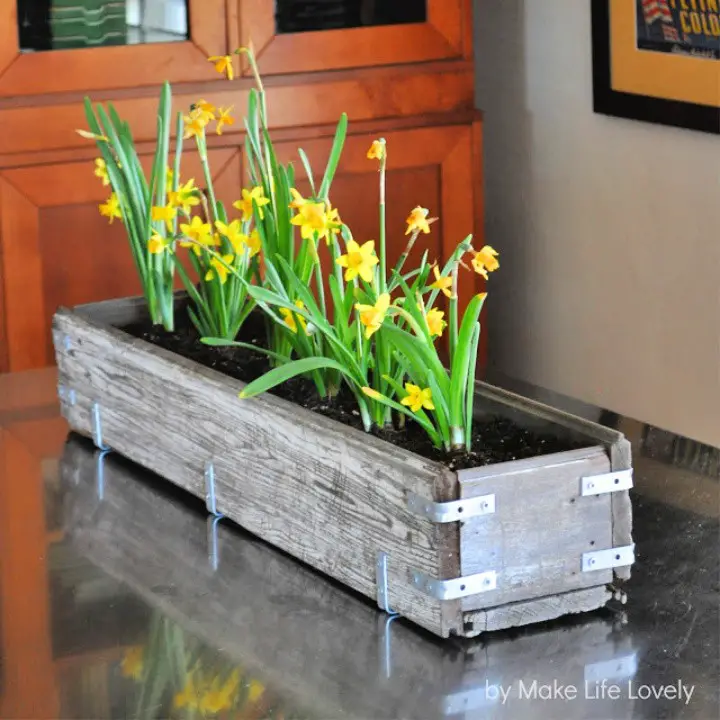
Add a touch of vintage charm to your home decor by upcycling old wood into a distressed planter box. This DIY project is perfect for showcasing your favorite flowers, herbs, or succulents. To get started, gather the following materials: wooden planks, L-brackets, a drill, saw, hammer, dried coconut husks, soil, and your chosen flora.Begin by cutting the wooden planks into desired lengths – use longer pieces for the sides and base, and shorter ones for the ends. Assemble the box using L-brackets to secure the pieces together. The rustic design will be enhanced by the distressed wood, giving it a unique, weathered look.To prevent any potential leaks, line the bottom of the planter with dried coconut husks. These natural absorbents will help keep your soil and plants dry. Next, fill the box with soil, leaving enough room for your chosen plants to flourish. Place your new planter on a coffee table, console table, or dining table to add a touch of rustic elegance and fresh ambiance to any room.
Wood Planter Box Using Wood Shims
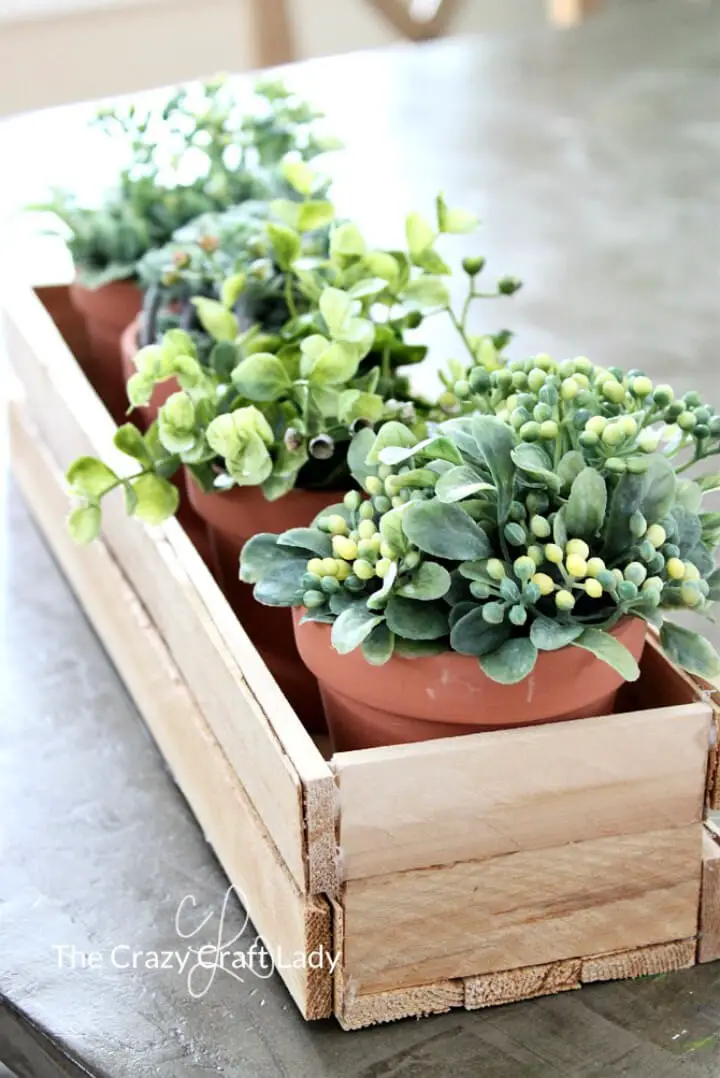
Unleash your inner gardener by creating a unique DIY wood planter box that’s perfect for spring herbs or blooming flowers. This project utilizes affordable wood shims, an X-acto knife, and dual glue types (E6000 and hot glue) to craft a charming space. The materials are easily accessible, making it an engaging and rewarding crafting experience.The step-by-step process involves strategically constructing the planter box by carefully arranging the wood shims, securely adhering them using E6000 and hot glue, and adding a personal touch with spring plants or faux greenery. With these simple steps, you’ll be able to create a beautiful and functional piece that brings nature closer.By harnessing your crafting skills and following this guide, you’ll be delighted by the sense of accomplishment that comes with creating something beautiful and useful for years to come.
DIY Small Wooden Gift Boxes With Lid
Unleash your creative flair by crafting these exquisite DIY small wood gift boxes, ideal for presenting personalized candles or thoughtful gifts. Constructed from readily available poplar hobby boards, each box features a removable lid adorned with a chic leather loop pull, providing effortless access to its contents.
The lids themselves are crafted from scrap plywood, secured in place by an interior poplar stopper. A touch of sophistication is added through the incorporation of flat leather cording and metal washers, creating a unique and elegant design.
Upon completion, you’ll be left with a charming keepsake box perfect for storing small treasures or serving as distinctive decor. By engaging in this enjoyable and fulfilling activity, you’ll not only create something special for your loved ones but also infuse it with the value of creativity, love, and effort.
Simple DIY Wood Box for Table
Create a stunning DIY wooden centerpiece box that elevates your dining or living room décor while also serving as a thoughtful, handmade gift for loved ones. With just one 1x6x8 board and minimal materials like wood glue, brad nails, and a choice of finish, this project is an excellent starting point for novice woodworkers. The process begins by shaping the box with a miter saw, nailer, and sander, cutting and assembling the wooden pieces to form the sides and bottom. To add a modern touch, optional risers can be incorporated for a sleek aesthetic. Once complete, fill the box with seasonal decor to create a timeless piece that allows for personal customization and brings warmth to any home.
Building a Wooden Toy Box
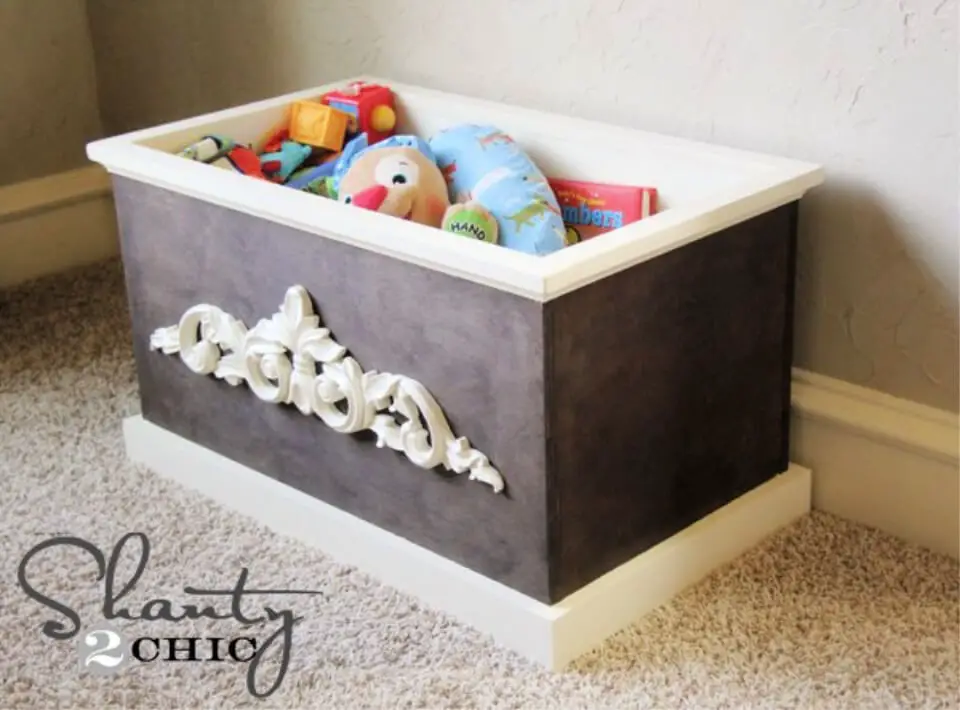
Indulge in a weekend of creative productivity by transforming leftover Purebond plywood scraps into a one-of-a-kind toy box and blanket basket hybrid. This innovative DIY project combines the natural charm of stained wood with the warmth of cream latex paint, further enhanced by the addition of a wooden scroll detail. By leveraging your Kreg Jig and 3/4″ pocket holes, you can construct a sturdy storage solution that efficiently organizes toys or blankets while adding a touch of rustic elegance to your room decor. Not only will this project save you money, but it also encourages repurposing and creative reuse of materials, allowing you to build something truly unique from your scrap pile.
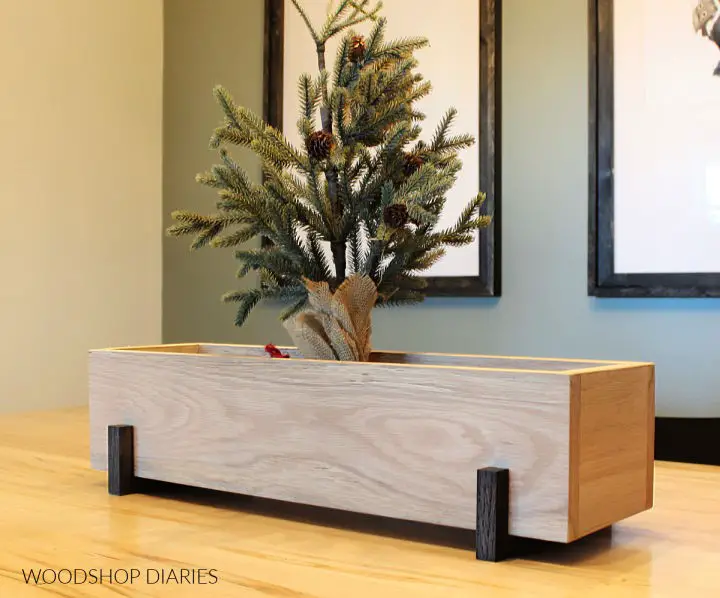
Modern DIY Wooden Planter Box

Indulge in the charm of DIY projects by creating a modern planter box that seamlessly blends with your outdoor space. With a little creativity and basic tools, you can craft a stunning container to showcase your favorite seasonal greens. From selecting the perfect size and style to choosing materials that match your aesthetic, this project allows for endless customization possibilities.
Using simple tools and supplies like a plastic planter, cedar planks, a crosscut saw, a drill, and a blow torch, you can build an impressive structure that’s not only functional but also visually appealing. The straightforward steps are designed to cater to all skill levels, ensuring a delightful crafting experience.
Not only will this planter box add a touch of elegance to your outdoor space, but it’s also easy to store during the winter months, making it a practical and thoughtful addition to your home’s exterior.
How to Make a Wooden Window Box
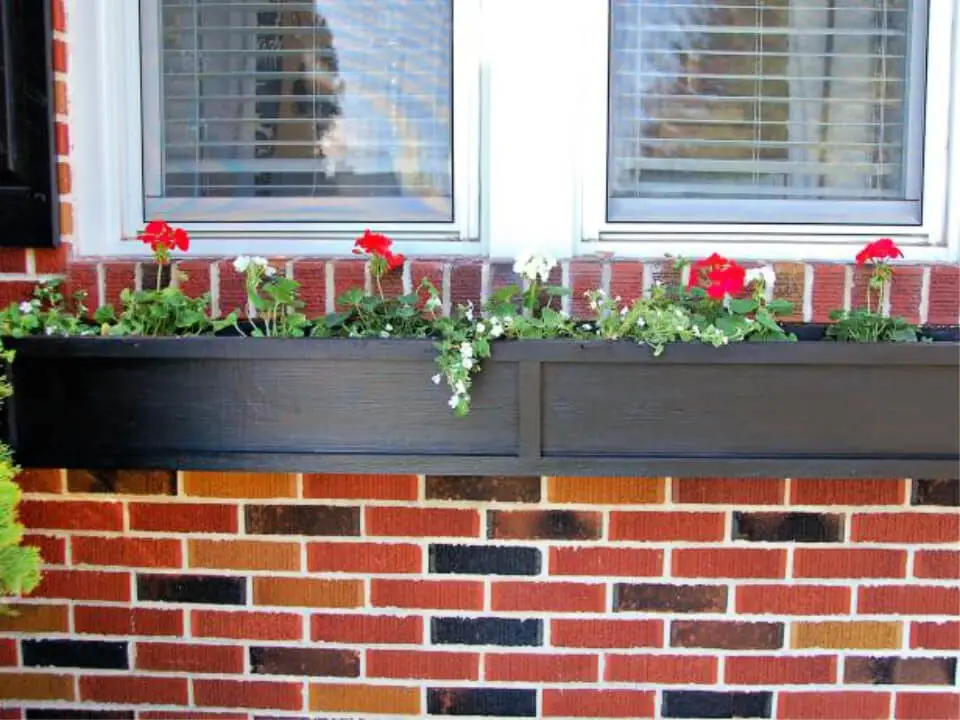
Transform your home’s exterior into a charming oasis by creating a vibrant DIY window box in just a day. To get started, gather materials such as cypress or cedar boards, pressure-treated lumber, and essential tools like a drill, sash brush, and screws.
Begin by cutting the boards to precise dimensions, then secure the cleats for mounting the window box. Next, assemble the box’s front, back, and sides before adding trim for a polished finish. Don’t forget to add a coat of primer and paint to ensure the box withstands the elements.
The final steps involve hanging the window box securely, creating proper drainage, filling it with gravel and potting soil, and planting your favorite flora. With this quick, simple, and cost-effective project, you can turn your house into the most fascinating on the block.
Conclusion:
In the final analysis, crafting your own wooden boxes presents a practical and stylish solution for storage and decoration, with an astonishing array of design possibilities at your fingertips. Whether you’re looking for functional or decorative solutions, eco-friendly or upcycled options abound, catering to every aesthetic preference and need. By opting for the right wood, tools, and adhering to essential safety guidelines, you can create sturdy and bespoke pieces that reflect your unique creative vision. Open yourself up to a world of 25 DIY wooden box possibilities today!
