Transforming your party tables with DIY cupcake toppers is an effortless way to take your festive spread to the next level, making every detail a lasting memory. By following our 20 creative and easy-to-follow DIY cupcake topper tutorials, you’ll unlock expert tips on selecting materials, designing with precision, and crafting unique decorations that complement any celebration. With a focus on customization and straightforward instructions, you’re empowered to create personalized embellishments that elevate your party decor. From birthday bashes to weddings, our guide ensures that anyone can enhance their gathering’s aesthetic appeal.
Expert Insights on DIY Cupcake Toppers
To take their DIY cupcake toppers to the next level, it’s wise to seek guidance from those who have mastered this art. Here, we’ll tap into the collective wisdom of experienced crafters and bakers, distilling their valuable insights into actionable tips and expert tricks that will transform our cupcake topper creations.
Choosing the Right Materials
When it comes to cake toppers, durability and safety are crucial considerations. To ensure your toppings don’t compromise the integrity of your dessert, experts suggest opting for materials that not only withstand handling but also meet food-grade standards. Cardstock is a reliable option, available in a range of colors and patterns, making it easy to find a match for your cake’s aesthetic. For those who prefer a sweet treat, edible options like fondant and sugar flowers offer a delightful alternative. Not only do they add visual appeal, but they can also be savored as part of the overall dessert experience.
Designing with Precision
When it comes to crafting the perfect cupcake topper, size matters – but not just any size. The ideal topper should harmonize with the cupcake itself, typically measuring around 2 inches wide. Of course, this can be adjusted to accommodate different cupcake sizes. What’s equally crucial is attention to detail. Cutting and assembling your toppers requires precision, which experts recommend achieving through the use of cutting machines for intricate designs, resulting in a polished, professional finish.
Adding a Personal Touch
To elevate the personal touch in your party favors, incorporate customization elements that resonate with the recipient. This could be as simple as adding a name, age, or a heartfelt message, making each topper truly one-of-a-kind and cherished. Moreover, thematic alignment is crucial to ensure seamless integration with the event’s overall ambiance. Whether it’s a birthday bash, wedding celebration, or seasonal extravaganza, your toppers should harmonize with the occasion’s theme, echoing the spirit of the gathering.
Assembly and Presentation
To keep your cupcake toppers securely in place, employ a reliable adhesive like double-sided tape or glue dots. This will not only prevent them from shifting but also maintain a clean appearance. When it comes to presentation, strategically position the toppers on your cupcakes to create an visually appealing arrangement that complements the overall dessert table display. With these tips, you’ll be well on your way to creating impressive and creative cupcake toppers, so don’t be afraid to get imaginative and have fun with the process!
How to Make Cupcake Toppers – Step by Step Guide
Elevate the charm of any celebration by crafting your own DIY cupcake toppers and wrappers. Whether it’s a birthday, graduation, or simply a reason to rejoice, take control of your creativity and cut costs by following this step-by-step guide.
Supplies You’ll Need
To elevate your cupcakes, you’ll need the right tools. For printable cupcake toppers, head to Etsy shops like Designed by Maria, where you can find a variety of designs. Once you’ve got your design, use a 2-inch circle punch or scissors to cut out the shapes. You’ll also need toothpicks for securing the toppers in place, as well as glue to adhere them to the cupcakes. If you want to add some extra flair, you can use ribbon to create a decorative accent.For cupcake wrappers, start by gathering pattern paper from Etsy shops or other craft stores. Use glue dots or hot glue to attach the paper to the wrapper template, which can be found for free on blogs like Skip to My Lou. You’ll also need scissors, both straight and decorative, to cut out the wrapper design. Simply wrap the finished wrapper around your cupcake and secure it with a small amount of glue.
Step by Step Instructions
Master the art of creating adorable cupcake toppers by following these simple, easy-to-follow steps. With a little creativity and some basic crafting supplies, you can turn your cupcakes into show-stopping masterpieces that will impress friends and family alike.
Making Cupcake Toppers:
To create your cupcake toppers, begin by printing and cutting out the desired designs. Use a 2-inch circle punch to achieve a precise round shape or carefully cut out the designs with scissors. Next, apply a generous amount of glue to the back of one circle and a small amount along the top half of a toothpick. Place the toothpick on the glued circle, ensuring it’s straight and then cover with another circle, creating a sandwich-like structure. Make sure both sides face outwardly and align correctly. If desired, add a small ribbon bow at the base of the topper for an extra touch of decoration. Finally, allow the glue to fully dry before using the toppers on your cupcakes.
Making Cupcake Wrappers:
To begin, print and cut out the wrapper template from pattern paper using straight scissors along the bottom and sides. If you’re feeling creative, use decorative scissors to add a decorative edge along the top of the wrapper for an extra touch.
Next, assemble the wrapper by wrapping it around a cupcake to determine the perfect size. Secure the wrapper with a glue dot or a small dab of hot glue, taking care not to leave any visible adhesive. You can adjust the tightness based on the size of your cupcakes.
Finally, once secured, your wrapper is ready to be used and add a professional touch to your cupcakes.
Additional Tips
To achieve a unified look, opt for topper and wrapper designs that share a common theme or set. This consistency will provide a visually appealing cohesion. For added efficiency and reduced waste, repurpose leftover paper scraps from wrapping materials as the foundation for your toppers. When hosting larger events, consider preparing these elements in batches to streamline the process.
Video Tutorial
To take your baking game to the next level, we’ve got you covered with a comprehensive guide to creating custom cupcake toppers and wrappers. If you’re eager to learn the process in action, be sure to check out Maria’s informative video tutorial on YouTube that walks you through each step. With this valuable resource, you’ll be well on your way to crafting unique and visually appealing cupcakes that are sure to impress.
Customization Ideas for DIY Cupcake Toppers
Adding a personal touch to any celebration is effortless with homemade cupcake toppers. The creative possibilities are endless, allowing you to tailor the design to fit the occasion’s unique character. Whether it’s a milestone birthday, a joyous wedding, or an intimate gathering, these DIY toppers will make your event stand out.
Choose a Theme
When crafting a custom topper, begin by selecting a theme that complements the occasion. To get started, consider the following popular options:
Seasonal themes are always a hit – picture pumpkins for fall, snowflakes for winter, flowers for spring, and suns for summer. For holidays like Christmas or Easter, align your topper with festive symbols such as trees or eggs.
For kids’ parties, cartoon characters are a great way to bring smiles to faces. Alternatively, opt for elegant designs featuring simple shapes like hearts or stars in metallic colors like gold or silver. These more refined options are perfect for formal events.
Play with Colors and Patterns
Transforming cupcake toppers with color and pattern is an art form. To create a visually stunning design, consider the following principles. First, establish a harmonious foundation by limiting your palette to two or three core colors. This will provide a sense of cohesion throughout the design. Next, introduce visual interest through the strategic use of patterns such as stripes, polka dots, and chevrons.
Add Text
Elevate your personalized toppers by incorporating thoughtful, concise messages that leave a lasting impression. Opt for short and sweet phrases that highlight the occasion or recipient’s name, such as: ‘Happy Birthday, Emma!’ – a classic and heartfelt greeting; ‘Cheers to 50 Years!’ – a celebratory message for a milestone birthday; ‘Welcome, Baby Noah!’ – a warm welcome for the newest addition to the family. By keeping your messages brief, you’ll maximize their impact and make each topper an even more meaningful keepsake.
Use Different Materials
When it comes to crafting, the type of material you use can make all the difference. To get the desired results, experiment with various options to find what works best for your project. Paper is a great starting point – it’s easy to cut and offers a wide range of colors and patterns to choose from. If you’re looking for something more sturdy, cardstock is a good choice, perfect for creating stand-up toppers or other three-dimensional elements. Felt adds a soft texture and comes in vibrant colors, making it ideal for projects that require a tactile element. Finally, foam sheets provide a lightweight option with a 3D effect – great for adding depth and dimension to your designs.
Incorporate Embellishments
Elevate your topper game by incorporating thoughtful embellishments that add an extra layer of sophistication. To get started, consider the following options:Glittering accents can be the perfect way to give your toppers a burst of sparkle. A small amount goes a long way in creating a stylish and eye-catching design.For a touch of understated elegance, try adding small beads to your creations. A gentle application of adhesive is all it takes to secure these tiny details in place.Ribbon accents can also be used to great effect. Whether you choose to tie tiny bows or use thin strips to create borders, the result will be a visually appealing and polished finish.
Safety First
While creative endeavors are essential, ensuring the well-being of those involved is crucial. This means verifying that all materials used are non-toxic and can coexist with food without posing any risks. Additionally, when working with small parts, it’s vital to exercise caution to prevent potential choking hazards, especially in environments where young children may be present.
Troubleshooting Tips for DIY Cupcake Toppers
When it comes to crafting DIY cupcake toppers, there’s nothing quite like the satisfaction of seeing your creative vision come to life. However, even with the best intentions, things can sometimes go awry. To help you navigate any obstacles and produce top-notch toppers, here are some practical troubleshooting tips to keep in mind.
Material Issues
When it comes to crafting with paper, a few common issues can arise. One of the most frustrating is when your paper curls or tears easily. This might be due to its thinness, so consider switching to a thicker cardstock or photo paper that will hold up better under handling. On the other hand, if ink smudging is an issue, it’s essential to give your printed designs sufficient time to dry before touching them. This simple step can make all the difference in preventing smudges and preserving the crispness of your work. Additionally, investing in an inkjet printer with high-quality ink specifically designed for photo printing can help minimize this problem altogether.
Design Challenges
When it comes to designing images for your cupcakes, clarity is key. Ensure that your high-resolution PNG files have transparent backgrounds to achieve crisp, clean edges. Additionally, pay close attention to sizing to avoid any issues when applying the toppers to your baked goods. For standard cupcakes, aim to keep the width of your designs between 2 inches and 2.75 inches. Before printing, make adjustments in your design software to guarantee a perfect fit on each cupcake.
Assembly Difficulties
When crafting with toppers, it’s not uncommon to encounter two common issues: toppers that don’t stick properly and misaligned backs. To resolve the former, consider using double-sided tape or a hot glue gun for added security. On the other hand, when creating double-sided toppers, it’s essential to include mirrored copies of your design to guarantee a correct alignment when assembled.
Final Touches
When crafting with toppers, it’s not uncommon for them to droop due to the flimsiness of the sticks used. A simple solution is to swap out these weak options for sturdier alternatives like lollipop sticks or sandwich picks, which will provide a more stable foundation. Additionally, when working on intricate designs, uneven cuts can be frustrating. To avoid this issue altogether, consider investing in a cutting machine such as a Cricut or Silhouette Cameo. These machines are designed to deliver precise and even cuts, making them ideal for projects that require accuracy.
FAQs About DIY Cupcake Toppers
As you embark on the creative journey of crafting your own DIY cupcake toppers, it’s natural to encounter some uncertainty. To equip you with the necessary knowledge and confidence, this section addresses the most frequently asked questions, providing a comprehensive guide to help you create stunning toppers that elevate your baking experience.
What is a Cupcake Topper?
Perching atop each delightful cupcake, a topper is the crowning glory that elevates this sweet treat to new heights. Crafted from an array of materials including cardstock, fondant, or even edible images, these tiny treasures can be tailored to match any theme or occasion. Whether you’re celebrating a birthday, wedding, or simply want to add a personal touch to your cupcakes, a well-chosen topper is the perfect way to make them truly special.
How Big Should a Cupcake Topper Be?
When it comes to topping your cupcakes, the size of the topper should be carefully considered and matched to the size of the cupcake itself. For standard-sized cupcakes, a topper width of approximately 2 to 2.75 inches is generally ideal, providing a proportional and visually appealing finish. If you’re working with mini cupcakes, however, it’s best to opt for a topper that’s slightly smaller in scale, measuring around 1.5 to 2 inches wide to avoid overwhelming the overall design.
What Materials Do I Need?
Begin by gathering the necessary materials and tools for this project. You’ll need a cutting device, such as a machine or scissors, to trim your materials to size. In addition to these primary tools, you’ll also require a printer to print out any designs or templates you may want to use. For the actual card-making process, you’ll need cardstock or photo paper, which will serve as the base for your creation. To bring all the elements together, you’ll need some type of adhesive, such as double-sided tape or glue, to secure the various components in place. Finally, you may also want to have some sticks or thin objects on hand, like lollipop sticks or toothpicks, which can be used to add extra dimension and interest to your card.
How Do I Attach the Topper to the Stick?
To ensure a seamless and long-lasting attachment of your topper to the stick, consider employing double-sided tape, a glue stick, or a hot glue gun. When utilizing any of these adhesives, take care to apply them in a manner that guarantees a secure bond, thereby preventing your topper from accidentally detaching and compromising its overall appearance.
Can Cupcake Toppers Be Reused?
While durability is a key factor in the lifespan of cupcake toppers, their reusability ultimately depends on the material used in their construction. Cupcake toppers crafted from sturdy substances like cardstock or acrylic can withstand multiple uses and be reused with ease. Conversely, those fashioned from edible materials or having previously come into contact with frosting are likely to be single-use items due to their inherent fragility.
Are There Any Safety Concerns?
When preparing edible decorations, it’s crucial to utilize materials that meet the necessary safety standards for direct contact with food. Furthermore, when introducing small decorative elements, parents and caregivers should exercise caution to prevent potential choking hazards, particularly in the presence of young children.
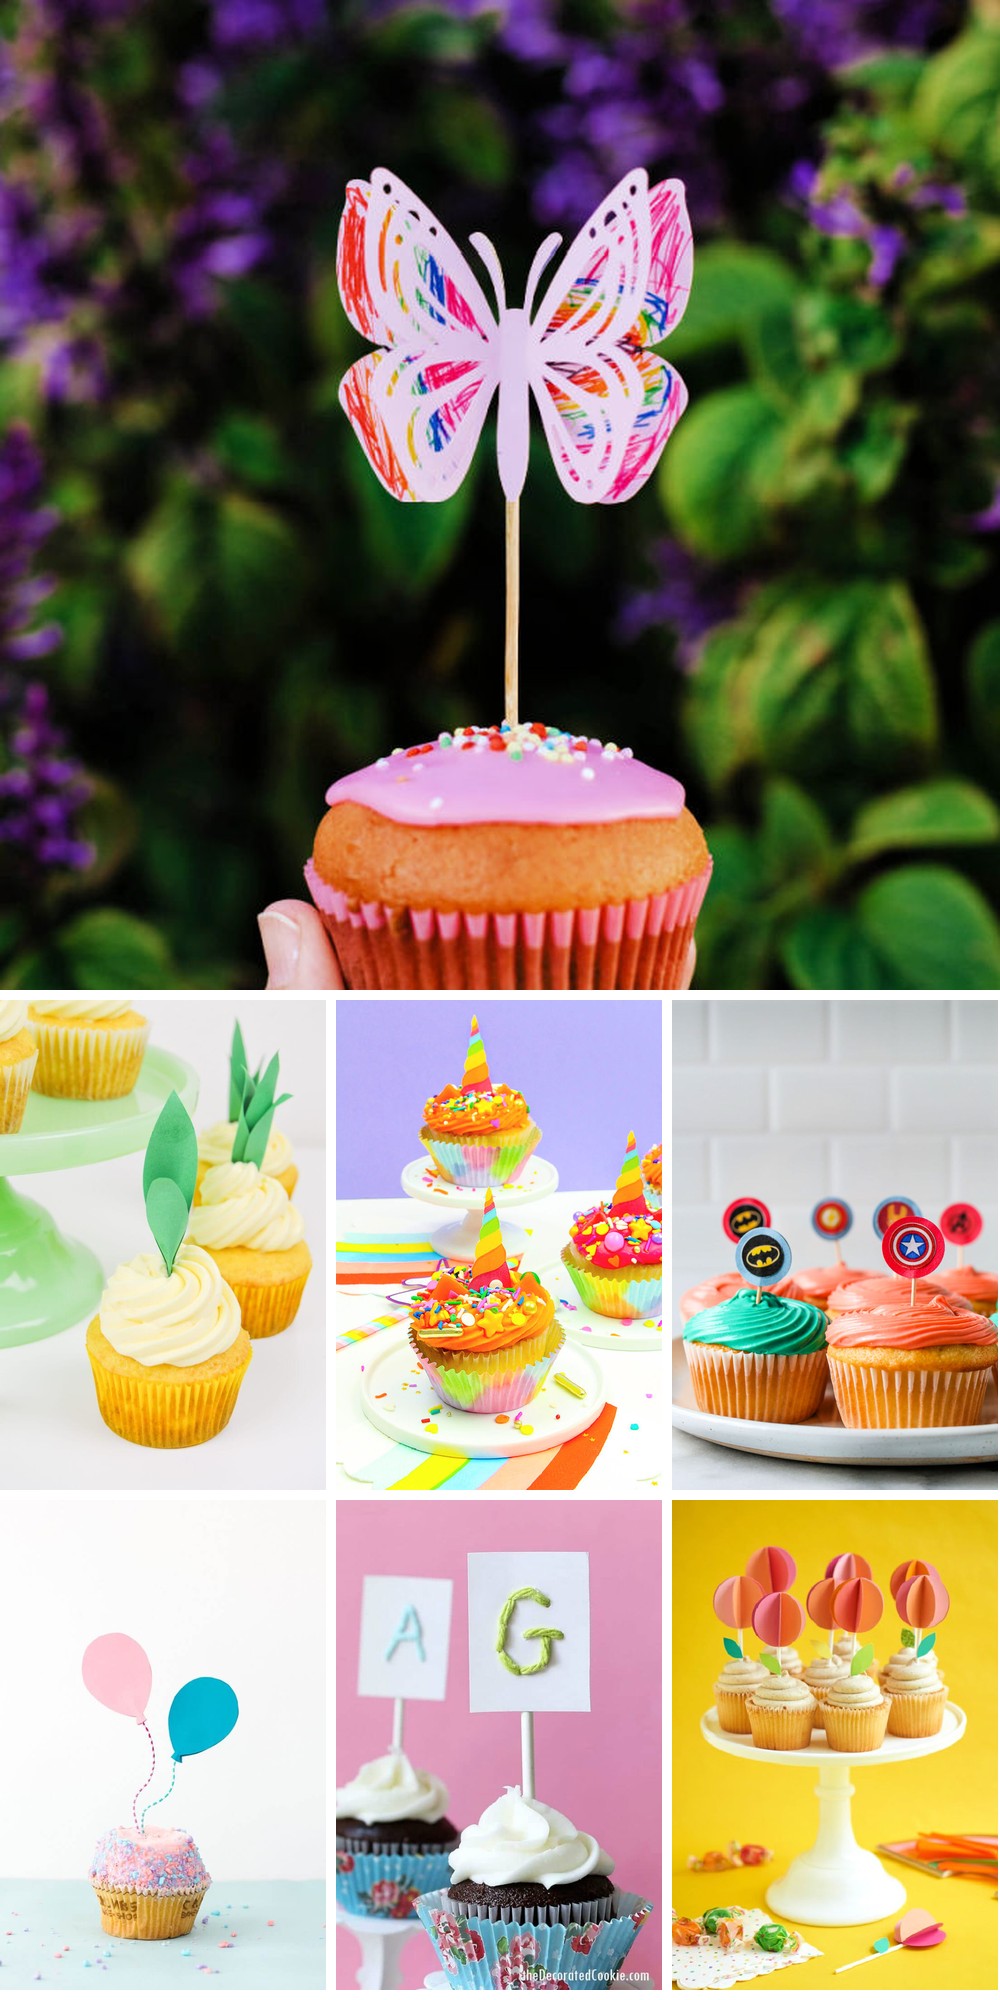
20 DIY Cupcake Toppers To Decorate Your Party Tables
Transform your party atmosphere with a creative touch by crafting 20 unique DIY cupcake toppers that will add a personal and festive flair to your table settings. Discover the simple steps to design and create captivating decorations that will elevate the overall ambiance of your celebration.
Making a Unicorn Cupcake Toppers
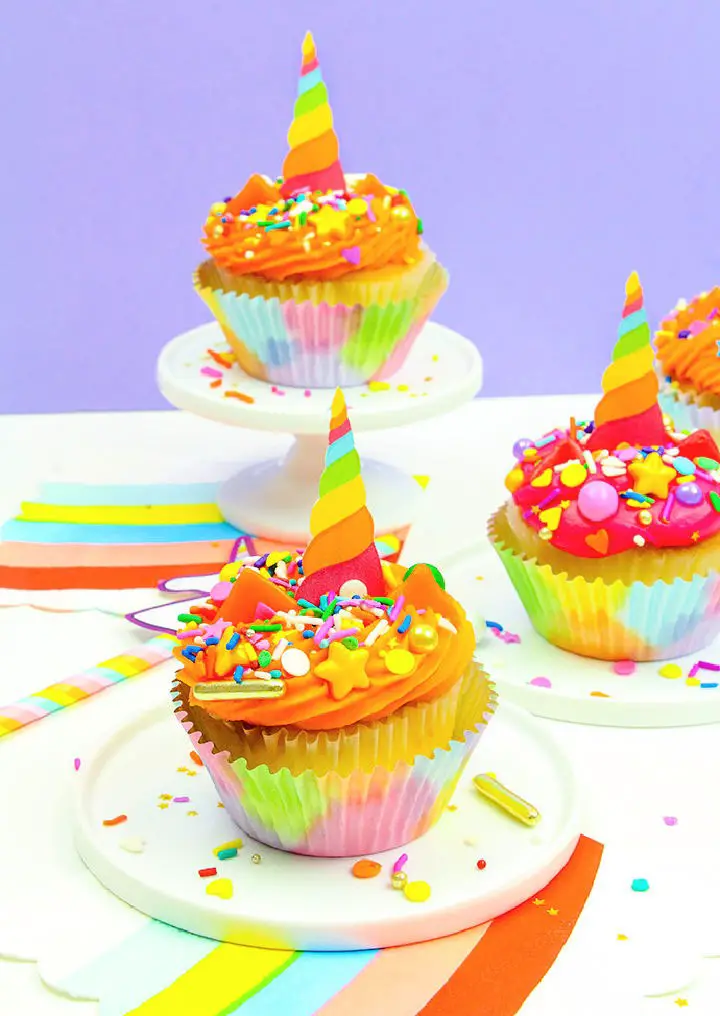
Imagine the delight of serving DIY unicorn cupcake toppers at your next celebration! Handmade Charlotte’s guide makes it easy to create enchanting treats that are sure to captivate both kids and adults alike. With a few simple supplies like cupcakes, Airhead candies, toothpicks, and sprinkles, you can transform ordinary sweets into extraordinary creations. The tutorial is straightforward and perfect for anyone looking to add a touch of whimsy to their unicorn-themed party or gathering. As you craft these delightful treats, get ready to spread joy and amaze your guests with the magical combination of flavor and fantasy.
DIY Butterfly Cupcake Toppers
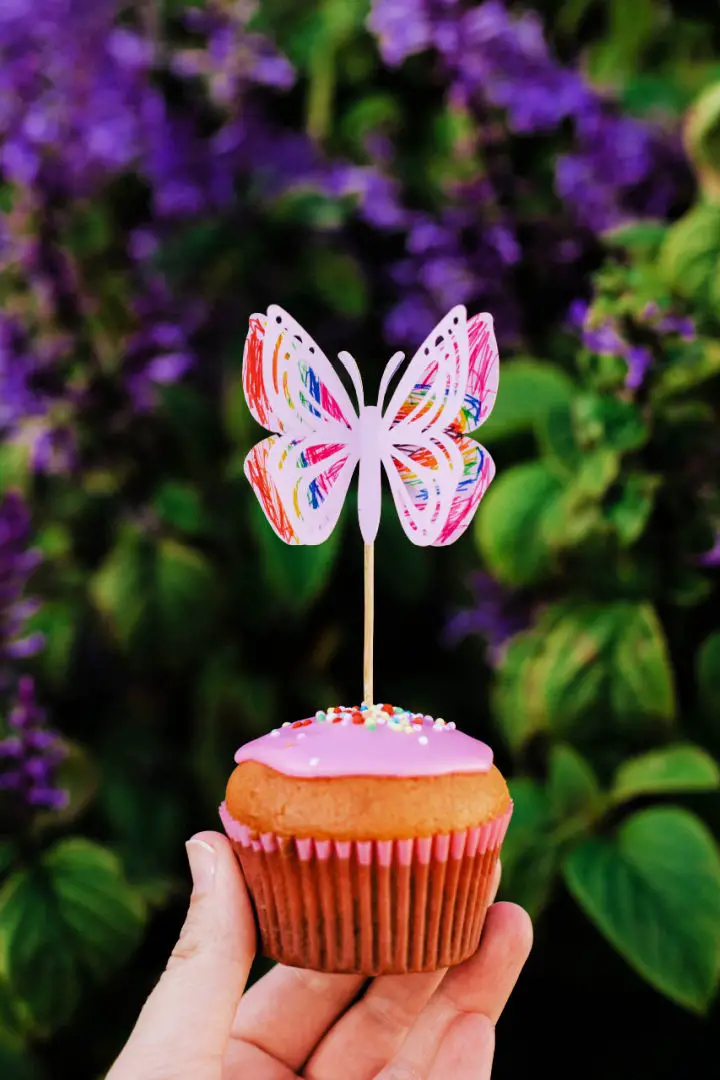
Transform any birthday party or special occasion into a whimsical celebration by engaging your kids in a fun crafting session with Pure Sweet Joy’s DIY butterfly cupcake toppers. With just a few simple supplies like cardstock, coloring tools, a glue gun, and toothpicks, you can create these charming decorations that are sure to delight. Begin by selecting your favorite butterfly designs from Cricut’s Design Space and cutting them out. Let the kids’ creativity shine by decorating the wings with their preferred colors and patterns. Once they’re done, assemble the toppers using a toothpick for a realistic fluttering effect. This activity is both instructive and enjoyable, allowing you to create visually appealing cupcakes that are almost too beautiful to eat.
Making Cupcake Toppers With Your Cricut
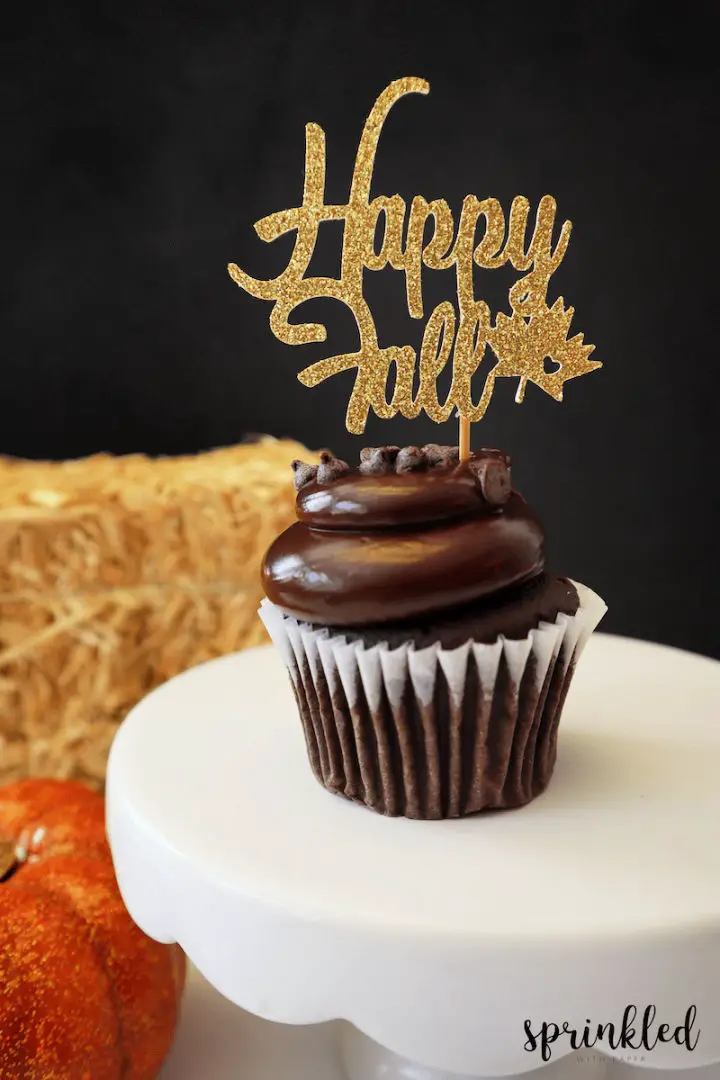
Elevate your cupcake game with ease, thanks to Julie Swansen’s comprehensive guide on Sprinkled with Paper. The tutorial focuses on simplicity, providing straightforward instructions for crafting one-of-a-kind paper toppers that will impress. To ensure durability and stability, Julie recommends using sturdy glitter cardstock and a thick font for cutting. Additionally, she shares valuable tips like securing elements with a hot glue gun and adjusting topper size to match standard or mini cupcakes. Perfect for personalized celebrations, these handmade creations add a special touch to any event. By following the step-by-step process outlined in Julie’s engaging tutorial, you’ll learn how to design, assemble, and delight your guests with your unique handcrafted toppers.
Father’s Day Cupcake Topper
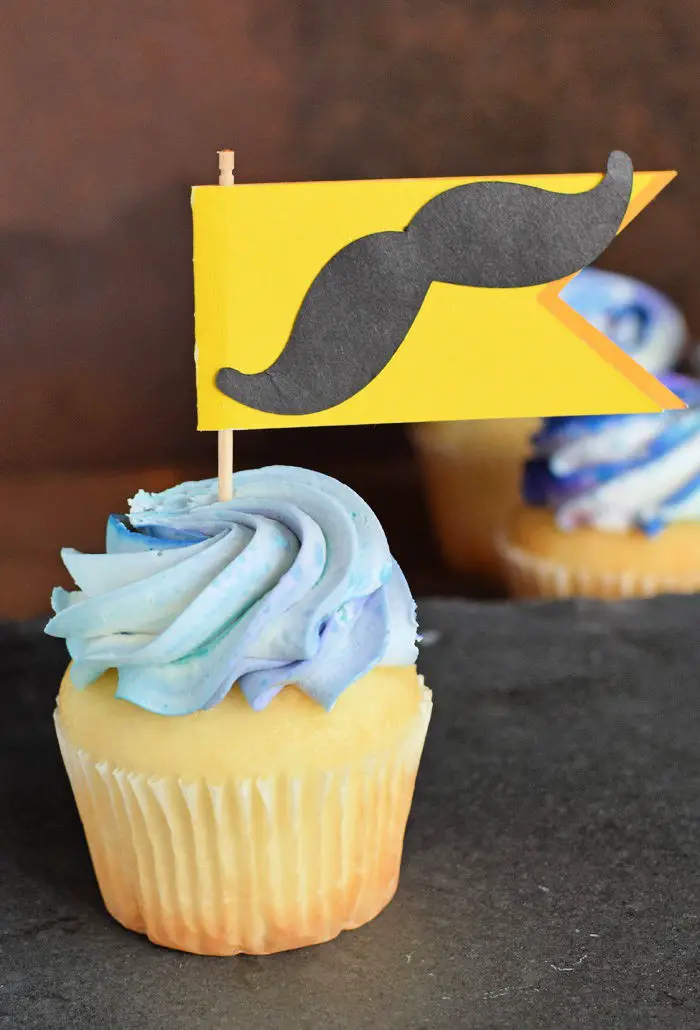
Add a personal touch to Father’s Day celebrations by crafting a unique DIY Cupcake Topper using your Cricut machine. With a simple and engaging tutorial from It Happens in a Blink, you can create a festive mustache-adorned topper that will surely bring a smile to Dad’s face. To make this special addition to his favorite dessert, gather cardstock, Glue Dots, and a toothpick. This project is ideal for those who enjoy adding customized flair to special occasions. By following the tutorial, you’ll be able to give your cupcakes a fun and fatherly twist that will make Dad feel truly celebrated.
How to Make a Cupcake Toppers
Crafting DIY cupcake toppers is an excellent way to add a personal touch to any celebration without breaking the bank. Fab Everyday provides a comprehensive guide that makes it easy to get creative and produce delightful decorations. With just a few simple materials like scrapbook paper, circle punches, and toothpicks, you can create custom toppers that perfectly match your party’s theme or color scheme. By following the step-by-step instructions, you’ll be able to effortlessly craft charming homemade additions that will surely impress your guests and elevate your festive cupcakes.
Easy DIY Glitter Star Cupcake Toppers With Toothpicks
Elevate your celebrations with a thoughtful touch by crafting personalized DIY glitter star cupcake toppers. This delightful project requires only a few materials: toothpicks, a star punch, a glue gun, and glitter cardstock. With these simple components, you can create charming decorations in no time. Simply punch out the stars, attach them to the toothpicks using a small amount of hot glue, and let them cool before use. These sparkly embellishments are perfect for decorating cupcakes or appetizers, instantly transforming them into show-stopping party treats. For more creative DIY party ideas, visit Pink Peppermint Design and discover how to elevate your next gathering with these easy-to-make, budget-friendly decorations.
DIY 3 d Paper Flower Cupcake Topper

Transform the ordinary into an extraordinary spring celebration with a delightful DIY project: 3D paper flower cupcake toppers. With just scissors, a hole punch, and a hot glue gun, you can create a stunning garden effect on your baked treats. Begin by cutting out vibrant circles from colorful cardstock, then fold and glue them together to achieve a layered flower design. To add a touch of realism, attach a green paper leaf to a cake pop stick, finishing off the look. This charming DIY project not only adds a pop of color to your dessert table but also offers a personalized touch to your springtime festivities. Get ready to craft your way to a show-stopping display of cupcake beauty that will leave your guests in awe.
DIY Bowling Ball Cupcake Toppers:
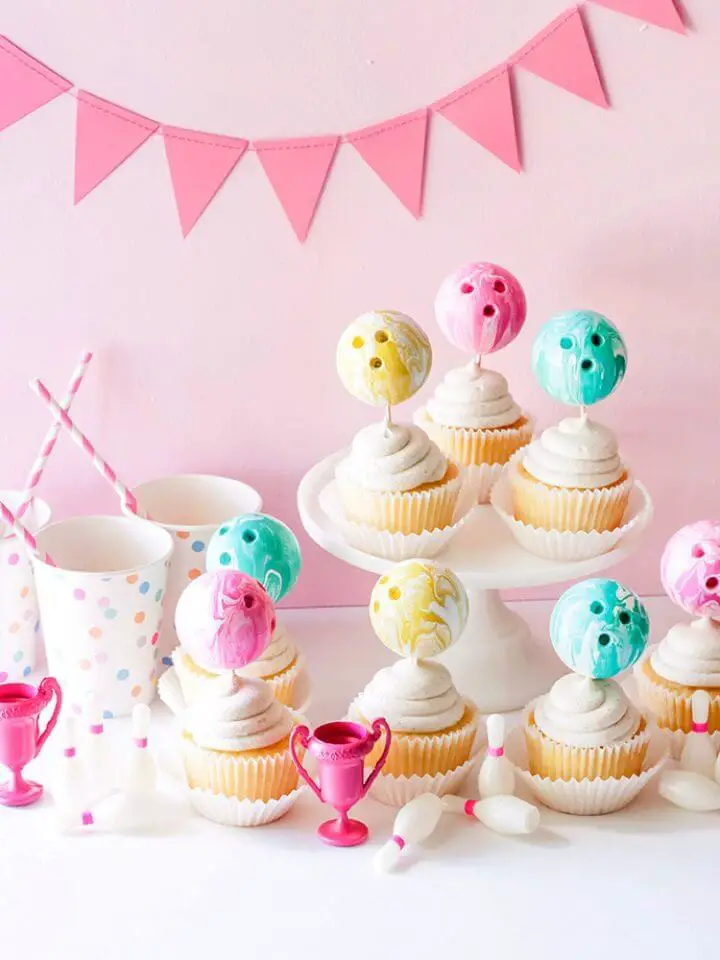
Transforming a bowling-themed birthday party with a creative twist, handmade toppers take center stage. By combining Styrofoam balls, paint, and Mod Podge, you can replicate the marbled appearance of a real bowling ball. This unique dessert decoration is perfect for bakers and crafters seeking to elevate their presentation game. With its striking visual appeal, these toppers are sure to impress party guests and become the focal point at any bowling-themed celebration. To achieve this impressive design, learn how to skillfully create holes, mix paints for a marbled effect, and apply a glossy finish. This helpful tutorial enables you to turn ordinary cupcakes into an extraordinary treat that captures the excitement of a day spent at the bowling lanes.
How to Make Valentine Cupcake Toppers:
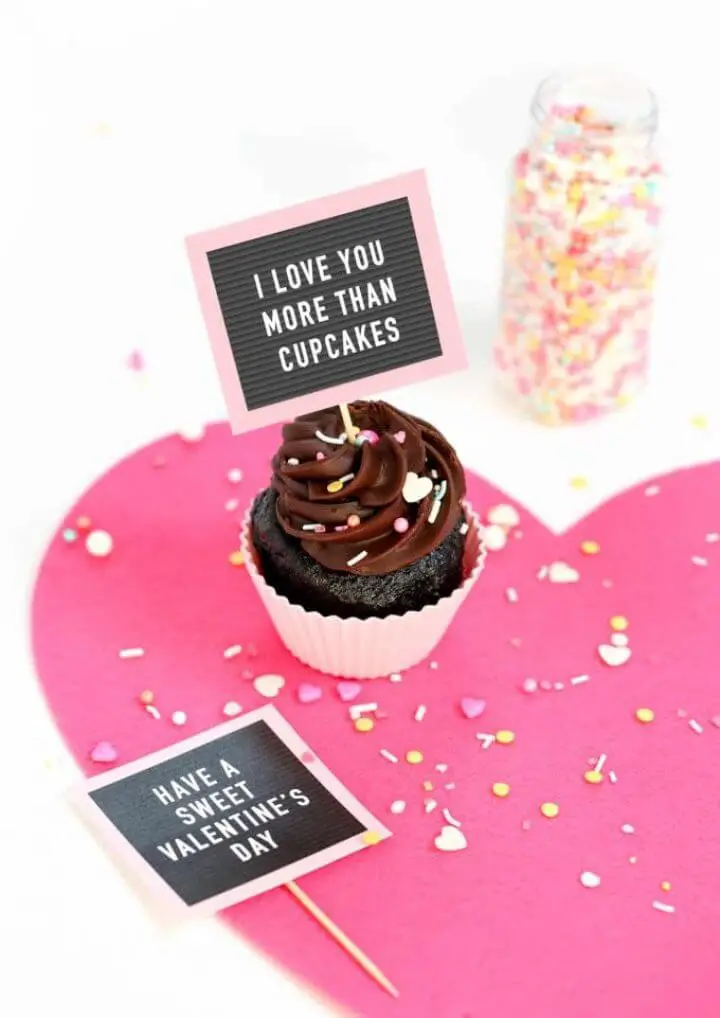
Transform your Valentine’s Day treats with a personal touch using Design Eat Repeat’s Free Printable Valentine Cupcake Toppers. These mini letterboard-inspired designs can elevate both homemade and store-bought cupcakes, making them ideal for gifting to classrooms, coworkers, or that special someone. With a simple and quick craft requiring minimal materials like cardstock, toothpicks, tape, and scissors, anyone can create thoughtful, customized gifts. Simply download the free printable, follow the easy-to-follow instructions, and you’ll have charming cupcake toppers ready to impress in no time. This DIY project is perfect for engaging older kids in a fun family crafting experience or preparing a unique batch of cupcakes as a last-minute surprise without needing to rush out for supplies.
DIY Cacti Pipe Cleaner Cupcake Toppers:
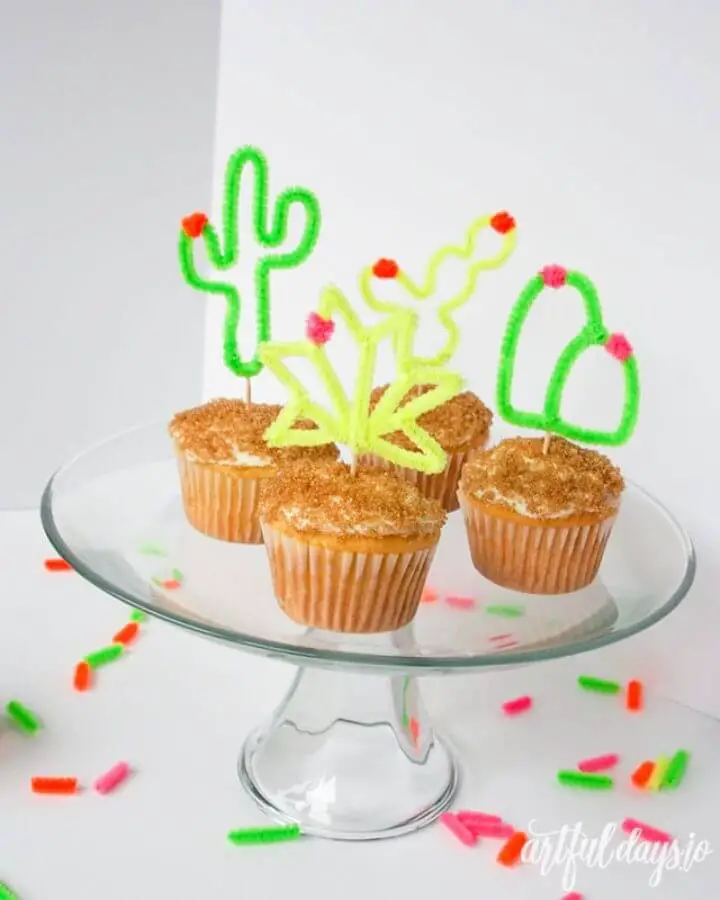
Transform ordinary cupcakes into extraordinary masterpieces by creating vibrant and fun cacti toppers using a simple DIY guide from Artful Days. With just a few basic materials like neon pipe cleaners, scissors, toothpicks, and a hot glue gun, you’ll be able to add a burst of creativity to your desserts. By following our step-by-step instructions, you’ll learn how to bend and shape the pipe cleaners into adorable cacti shapes complete with tiny blooms, making them perfect for adding a festive touch to any celebration. Whether you’re hosting a fiesta, baby shower, birthday party, or wedding, these handmade toppers will surely be a hit. Plus, they’re not just limited to cupcakes – cluster them together for a cheerful cake decoration that’s sure to impress. So why settle for ordinary when you can have extraordinary? Get crafting and watch your treats transform with these charming, spiky accents!
DIY Vicious Perler Bead Shark Cupcake Toppers:
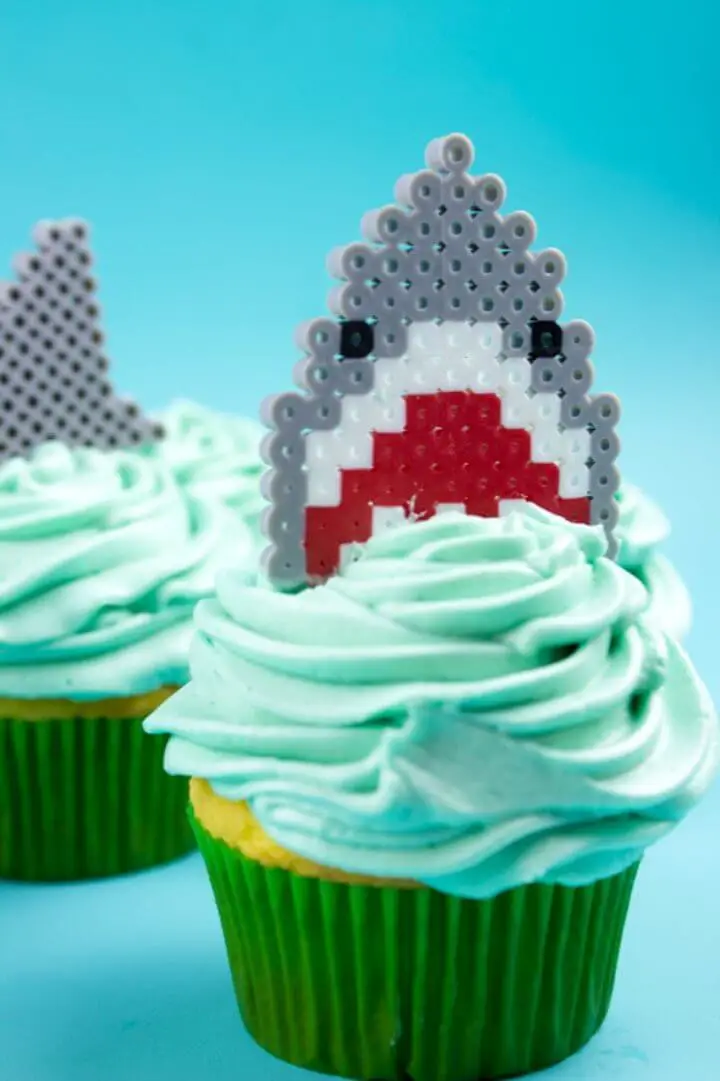
For those who can’t get enough of sharks or baking, the Do It Your Freaking Self blog offers a delightful tutorial on creating Perler Bead Shark Cupcake Toppers. Whether you’re celebrating Shark Week or simply looking to add a playful touch to your party decorations, these toothy treats are not only a fun and creative activity but also an excellent way to involve older children in the process. The guide is straightforward and requires minimal materials like a square Perler bead peg board, iron, beads in various colors, and ironing paper. With simple, easy-to-follow patterns and helpful tips, you’ll be able to craft these charming yet menacing shark toppers to elevate your cupcakes and make them truly one-of-a-kind. As with any crafting project, remember to allow the beads to cool completely for the best results, and indulge in a bite of your deliciously decorated treats with an extra dash of personality!
DIY Quote Bubble Cupcake Topper:
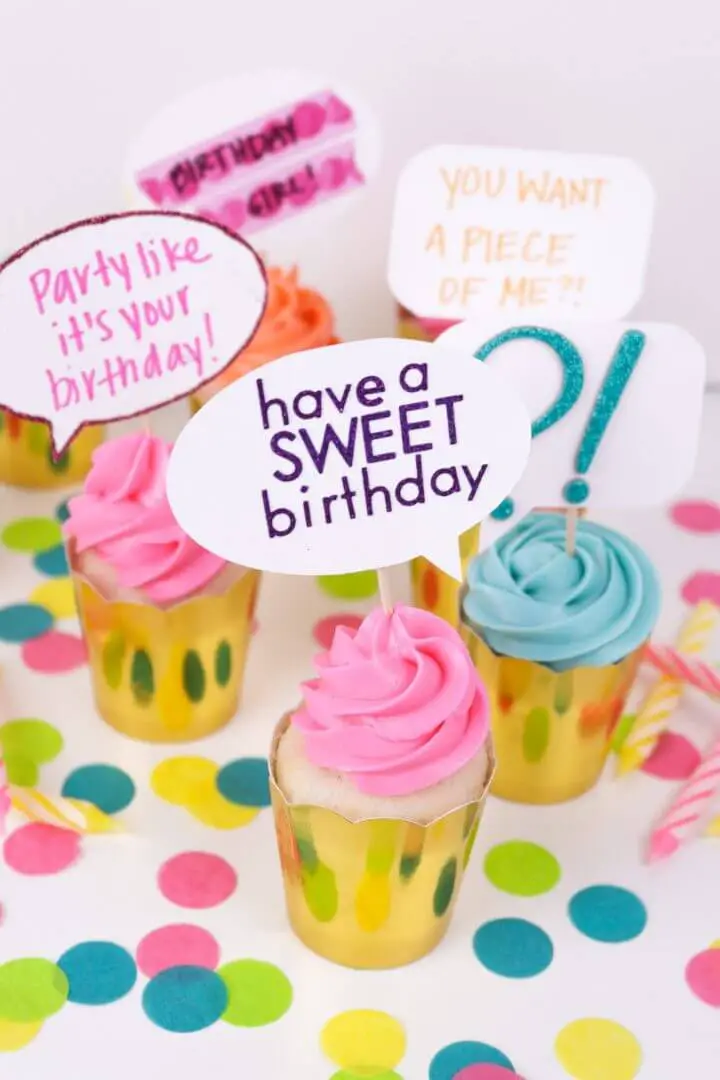
Transform your cupcakes into personalized treats with a touch of whimsy using Club Crafted’s DIY quote bubble cupcake toppers! This fun and creative project adds a delightful surprise element, perfect for parties, birthdays, or just because you want to show someone you care. To get started, simply print out the template, cut out the bubbles, and inscribe them with clever sayings that match the occasion. Next, glue the bubbles onto toothpicks and embellish with stickers, glitter, or other decorative elements if desired. Finally, place these charming toppers into your frosted cupcakes and watch as they elevate your baking game and delight your guests. With this easy-to-make craft, you can make any celebration feel extra special.
DIY Pineapple Cupcake Toppers:
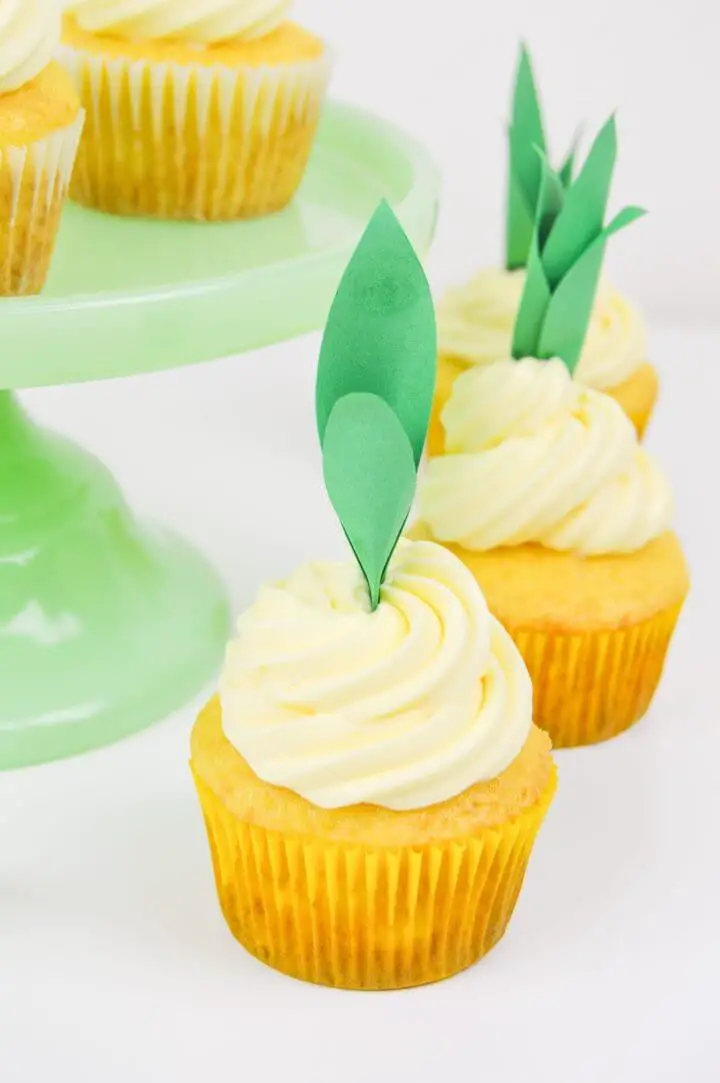
Indulge in the sweet serenity of tropical flavors by crafting Club Crafted’s pineapple cupcake recipe, a delightful treat for any celebration or whim. The secret to these moist and flavorful cupcakes lies in a clever boxed cake mix hack that combines melted butter and pineapple juice. A homemade pineapple buttercream frosting adds the perfect balance of sweetness and creaminess. Elevate your baking experience by adding DIY pineapple cupcake toppers made from green paper, ensuring a charming presentation that’s as visually appealing as it is delicious. With these easy-to-follow instructions, you’ll be transported to a tropical paradise with every bite.
DIY Fondant Rainbow Cupcake Toppers:
Add a splash of color and delight your guests with this simple yet effective fondant rainbow cupcake topper tutorial from The Decorated Cookie. Perfect for Girl Scouts events, birthday parties, or any celebration looking for an injection of whimsy, these charming rainbows can be easily created by stacking vibrant fondant stripes. With no advanced decorating skills required, simply roll, cut, and assemble the fondant to produce a visually stunning dessert that’s sure to impress. This tutorial also covers the secrets to mixing the perfect shades and handling fondant with ease, ensuring your cupcakes are as delightful to look at as they are to eat.
Quick DIY Balloon Cupcake Toppers:

Create whimsical paper balloon cupcake toppers for your next celebration with this simple guide. These charming adornments are perfect for adding a playful touch to your baked goods, making them ideal for baby showers, birthday parties, or any festive occasion. To get started, shape paper clips into holders and cut out colorful cardstock shapes resembling balloons. Secure the two together to form the topper. Remember to remove these decorative additions before indulging in your sweet treats, as they’re meant to enhance their appearance rather than be consumed. By crafting these delightful toppers, you’ll elevate the sweetness level of your party.
Awesome DIY Yarn Monogram Cupcake Toppers:
Transform ordinary cupcakes into extraordinary treats by incorporating hand-stitched monogrammed toppers from The Decorated Cookie. This innovative craft harmoniously blends paper crafting and needlepoint techniques to infuse any celebration with a personal touch. With minimal supplies like cardstock, yarn, a tapestry needle, and lollipop sticks, you can create customized initials or messages that will surely captivate your guests. Begin by cutting the cardstock into your desired shape, sketching out your design, and stitching it together with vibrant yarn. Secure your masterpiece onto a cupcake using a lollipop stick, and bask in the joy it brings to the party. This fun activity elevates any event with a personalized flair that will leave a lasting impression.
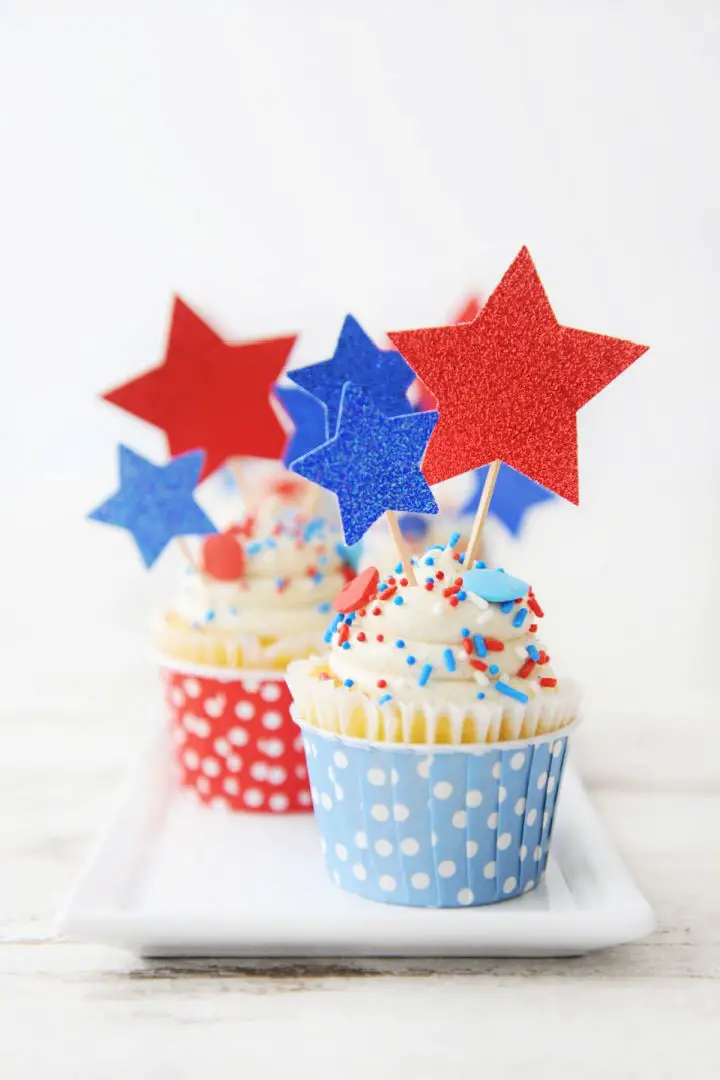
Red White and Blue Painted Cupcake Topper
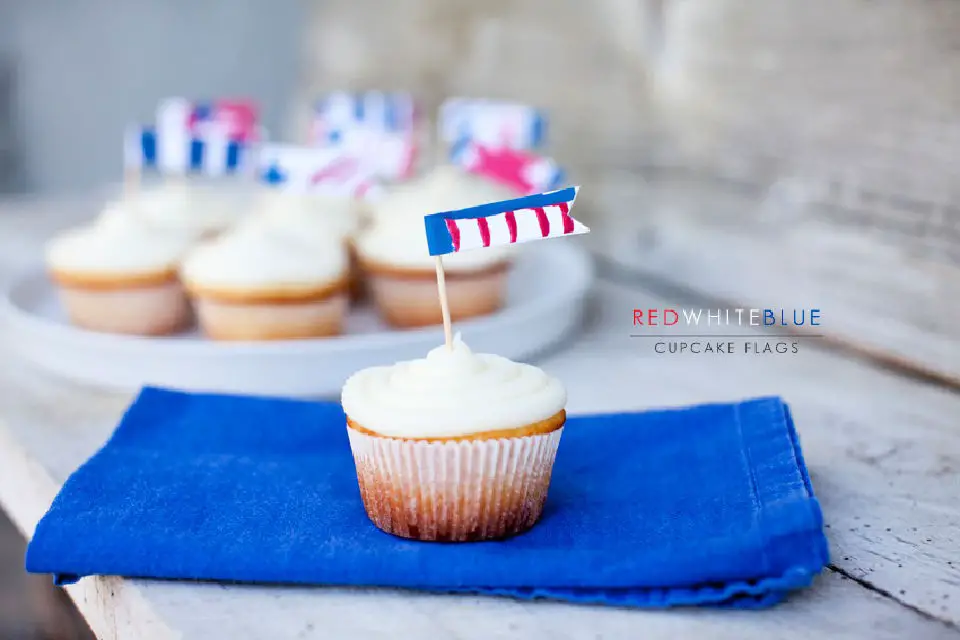
Get ready to celebrate Memorial Day with a fun and creative activity that’s perfect for the whole family. Kristin Eldridge shares an engaging way to add a patriotic touch to your holiday treats using simple craft supplies. Have your little ones unleash their creativity by painting red, white, and blue designs on card stock. Then, transform their artwork into unique cupcake topper flags by cutting strips, making a notched end, and attaching them to toothpicks with a bit of glue. This DIY project is not only a great way to involve the kids in festive preparations but also adds a personal touch to your celebration. The result is sure to be loved by all – just look at those adorable 4th July flag cupcake toppers! By following these easy steps, you’ll enjoy a memorable day filled with pride and delicious cupcakes.
Super Easy DIY Horse Cupcake Toppers:
Planning a horse-themed party for a young equestrian enthusiast? The Decorated Cookie is here to guide you through an unforgettable celebration. To start, create adorable cupcake toppers using stickers, which are not only easy but also add a personal touch. For activities, consider arranging stable tours and horse rides that will leave your guests in awe. When it comes to party favors and supplies, opt for items that reflect the magic of horses, ensuring every child feels like they’re part of a special equine experience. To make things even simpler, focus on easy-to-prepare snacks and utilize the natural beauty of a horse center as your party’s backdrop. With these ideas in mind, you’ll be well on your way to hosting an amazing celebration that will delight both kids and adults alike.
Make Cupcake Paper Toppers:

Transform the ordinary into extraordinary by creating one-of-a-kind cupcake paper toppers, just like Cake Journal’s Louise demonstrates in her easy-to-follow tutorial. The key to this creative process lies in scavenging scrapbooking materials and combining them with glue sticks, hot glue guns, and ribbons. Start by punching out various shapes from your preferred papers, then assemble the designs using your chosen adhesives. Add a finishing touch with a stick or skewer, allowing you to further embellish your creations with crepe paper, beads, or other craft supplies that catch your eye. To complete the look, tie everything together with a dainty ribbon. Just remember to keep an eye on curious little ones, as these charming toppers aren’t playthings. With this simple yet effective technique, you’ll be ready to wow at your next gathering with cupcakes that exude a polished air.
Quick DIY Origami Heart Cupcake Toppers:
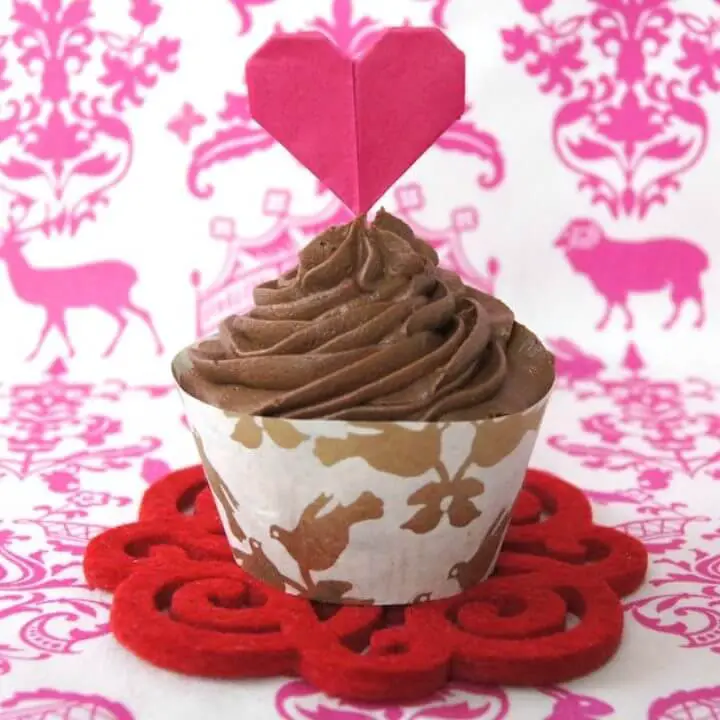
Add a romantic touch to your Valentine’s Day celebrations by crafting origami heart cupcake toppers that exude affection and creativity. This sweet project requires only a few simple materials: Tant 12 Shades of Red origami paper, toothpicks, and a small amount of glue. By folding origami hearts that can be perched atop cupcakes using toothpicks, you’ll create a visually appealing presentation that’s perfect for parties or as a thoughtful gesture. To get started, visit Omiyage.ca for the origami paper and backdrop fabric featured here, and let your creativity shine!
Conclusion:
Mastering the art of crafting 20 DIY cupcake toppers is a creative outlet that adds a unique touch to any celebration. This comprehensive guide provides a wealth of insights, from selecting the right materials and designing with precision to ensuring safe and appealing assembly. With an array of customization ideas and troubleshooting tips at your disposal, you’ll be well-equipped to overcome any challenges that may arise during your DIY project. As you gather your supplies and let your creativity shine, you’ll create memorable cupcake toppers that will undoubtedly leave a lasting impression on your guests.
