Immerse yourself in the world of crafting by exploring our comprehensive guide, 25 Simple Ways to Make Paper Roses. This delightful art form allows you to add a personal touch to gifts, decorations, or simply brighten up your space with charming creations. Our step-by-step templates cater to various skill levels and interests, ensuring that anyone can find a project that suits them. The clear instructions make the process enjoyable, stress-free, and easy to follow. As you delve into this guide, you’ll discover the secrets of selecting the ideal paper type, mastering the art of paper flower crafting, and adding those final touches that bring your creations to life. We’ve structured our guide into sections dedicated to materials, step-by-step processes, customization options, and troubleshooting common issues. This wealth of information empowers you to create stunning paper flowers.To accommodate visual learners, we’ve also included a video tutorial that guides you through the process. With this comprehensive resource, you’ll be all set to add a floral twist to your crafts and spread beauty with paper roses.
How to Make Paper Roses: A Step-by-Step Guide
Crafting paper roses is an invigorating experience that brings a splash of elegance and artistry into any environment. Whether you’re seeking to create a special gift, inject a personal touch into your home decor, or simply unwind with a calming craft session, this guide has been crafted to empower you to produce exquisite paper roses with minimal fuss. By following these straightforward and crystal-clear steps, you’ll be able to conjure up a breathtaking bouquet of paper blooms that will leave onlookers in awe.
Materials Needed:
To bring your DIY floral arrangement to life, you’ll need a few essential materials. Start by gathering supplies such as vibrant colored paper – ideally in a textured crepe or construction paper – which will add an artistic touch to your creation. Next, gather scissors for trimming and shaping the paper, along with floral wire, floral tape, and glue for securing everything together. A pencil is also helpful for sketching out initial designs, while a ruler can come in handy for measuring and creating straight lines. With these basic materials at hand, you’ll be well on your way to crafting a unique and beautiful floral arrangement that reflects your personal style.
Step 1: Preparing Your Paper
When starting the process of creating artificial roses, it’s essential to begin by choosing the colored paper that best suits your vision. To achieve a lifelike appearance, use a ruler and pencil to carefully mark out various petal sizes on your paper. Aim to create around 5 large, 5 medium, and 5 smaller petals for each rose, as this will help capture the natural nuances of the real thing.
Step 2: Cutting the Petals
As you prepare to shape your flower’s delicate petals, take a moment to carefully trim them free from their stem using your scissors. For an added touch of realism, you can employ a gentle curling motion with your pencil or use the scissors to subtly wave the edges, imbuing your petals with a soft, organic appearance that will bring depth and dimensionality to your creation.
Step 3: Forming the Rose Core
Begin by taking one of the smaller petals and carefully rolling it into a tight spiral shape. This will serve as the foundation of your rose. Secure the rolled petal with a small amount of glue to keep it in place. Next, take the next smallest petal and wrap it around the first one, slightly offsetting it to create the beginnings of a rose pattern. Continue this process, gradually increasing the size of the petals as you build your rose, allowing each layer to softly curve and blend with the ones beneath.
Step 4: Assembling the Rose
To create a realistic rose, start by adding petals around the core, securing each one at the base using a strong adhesive. As the petals begin to unfurl, adjust their placement to achieve a fuller, more natural appearance. Once you’re satisfied with the size and shape of your rose, allow the glue to dry completely before moving on to the next step.
Step 5: Making the Stem
Begin by cutting a length of floral wire that matches the desired height of your rose’s stem. Next, secure the wire to the base of the flower using floral tape. Start by wrapping the tape around the wire at the base of the rose, then work your way downwards, creating a seamless transition from the flower to the stem. If you want to add some greenery to your arrangement, cut out leaf shapes from paper and attach them to the stem using additional floral tape. This will give your rose a natural-looking foundation that adds depth and visual interest to your overall design.
Step 6: Final Touches
As you finalize the construction of your artificial rose, take a moment to finesse the positioning of its delicate petals. With a light touch, you can subtly manipulate the petals’ shape by gently bending or curling them outward. This subtle adjustment will give your rose a more natural, open appearance as if it were freshly bloomed.
Video Tutorial
To delve deeper into the art of crafting paper roses, I recommend exploring a comprehensive video tutorial available on YouTube. The step-by-step instructions provided in ‘DIY Paper Roses’ by Amazing Super Craft offer a detailed look at the process, allowing viewers to follow along and perfect their own paper rose creations.
Variations and Customizations for Paper Roses
With the versatility of making paper roses, you can infuse your creations with personalized touches that reflect your individuality. Whether you’re crafting a one-of-a-kind gift or incorporating them into your home decor, this craft allows for endless experimentation and customization.
Choosing the Right Paper
When it comes to choosing the perfect paper for your roses, texture and color can make all the difference. To achieve a realistic look, consider using crepe paper for its tactile appeal or opt for brightly colored construction paper for a pop of vibrancy. For added visual interest, patterned paper is also an excellent choice. But why settle for new when you can get creative with recycled materials? Repurpose old book pages, sheet music, or wrapping paper to give your roses an eco-friendly twist and add a unique story to each one. Not only will this reduce waste, but it’ll also make each rose truly one-of-a-kind.
Adding Personal Touches
Crafting realistic paper roses requires attention to detail and creative flair. To begin, utilize floral wire for stems that can be molded into desired shapes. Secure these stems using green floral tape or paint them to match the hue of your petals, ensuring a seamless blend. For an added sensory experience, lightly mist your paper roses with a preferred perfume or essential oil. However, test this on a small area first to guarantee the paper’s color remains unaffected.
To imbue your creations with distinct personalities, cut the edges of your petals in various patterns – think scalloped, fringed, or pointed – to mimic different rose species. Then, gently curl these edges using a pencil or skewer to impart a natural curve. With patience and imagination, you’ll be able to craft paper roses that exude the charm and beauty of their real-life counterparts.
Presentation Ideas
A paper rose can make a stunning solo statement, but it’s equally impressive when combined with others to create a vibrant bouquet. Experiment with different colors and sizes to craft an arrangement that’s truly unique.
Beyond the traditional vase display, you can also get creative with your paper roses by incorporating them into various decorative settings. Consider attaching them to a wreath or using them as part of a table centerpiece to add a touch of elegance to any room. Alternatively, use them as embellishments on gift wrapping or incorporate them into handmade cards for a personal touch.
Advanced Techniques for Crafting Paper Roses
As you’ve developed a solid foundation in crafting paper roses, it’s time to take your skills to the next level by mastering advanced techniques. These intricate methods will enable you to create exquisite, professionally-styled flowers that showcase your expertise and creativity.
Making Gradient Petals
To create a realistic and visually appealing flower arrangement, consider incorporating subtle color transitions into your design. Start by using a soft brush to gently blend two or more colors on the edges of each petal, gradually transitioning from a lighter shade at the base to a deeper hue towards the tip. This delicate approach mimics the natural gradations found in real flowers.
To add depth and dimensionality to your arrangement, try layering different shades of watercolor paint. Allow each layer to dry before applying the next, allowing the colors to build upon one another. This technique will give your petals a rich, lifelike quality that appears almost three-dimensional.
Assembling a Full Bouquet
To create a visually appealing bouquet, it’s essential to strike a balance between colors and sizes. Begin by placing larger roses at the center and then surround them with smaller blooms to form a rounded shape. This foundation sets the tone for the rest of the arrangement, allowing you to build upon it with complementary elements.
In addition to your showpiece flowers, incorporate foliage and filler blooms like baby’s breath or ferns to fill gaps and add depth. These textural additions not only complement your roses but also enhance the overall aesthetic of the bouquet.
Special Touches
To elevate the simplicity of rose arrangements, incorporate subtle yet striking accents that catch the eye. Consider adding delicate pearl beads to the center of each bloom or subtly dusting the petal edges with glitter, allowing the light to dance across the arrangement. This touch of elegance adds a sophisticated ambiance to any setting. Additionally, create custom arrangements tailored to specific occasions by incorporating themed elements. For instance, a wedding bouquet could feature white and soft pastel hues, while a holiday display might incorporate bold reds, greens, and metallic accents.
Troubleshooting Common Issues with Paper Roses
When crafting paper roses, it’s not uncommon to encounter minor setbacks. However, with this troubleshooting guide, you’ll be able to identify and overcome common problems, ultimately resulting in stunning, professional-looking blooms. Whether you’re a seasoned crafty enthusiast or just starting out, this guide will help you navigate any issues that arise and achieve the desired outcome.
Petal Problems
When crafting flowers from paper, there are common issues that can arise, such as wilting or floppy petals, and torn petals. To prevent the former, it’s essential to use thicker paper like cardstock for added rigidity. You can also enhance the structural integrity of your petals by reinforcing them with a thin wire glued to the base. On the other hand, torn petals can occur due to delicate paper or improper handling. To minimize this issue, handle the paper gently and utilize sharp scissors to make precise cuts. If tears do occur, you can easily repair them by applying a small piece of clear tape to the backside of the petal.
Stem Sturdiness
When crafting with flowers, one common challenge is dealing with weak stems that have a tendency to bend or collapse. To combat this issue, consider using floral wire instead. This type of wire offers a perfect blend of strength and flexibility, allowing it to support the weight of the rose without compromising its natural appearance. For an added touch of realism, cover the wire with floral tape, which will seamlessly integrate with the surrounding petals. Additionally, ensuring that the stem is securely attached to the rose head is crucial to prevent any unwanted detaching. To achieve this, apply a generous amount of glue to the end of the stem and carefully insert it into the base of the rose. Hold the rose in place for a few moments until the glue sets, guaranteeing a secure bond that will last.
Color Consistency
When crafting paper roses, it’s essential to consider the factors that can affect their appearance over time. One significant concern is the fading of colors caused by sunlight exposure. To preserve the vibrancy of your creations, either keep them away from direct sunlight or apply a UV-resistant spray for added protection.In addition to light-induced color loss, uneven dyeing can also compromise the aesthetic appeal of your paper roses. To achieve consistent results, ensure that your paper is fully immersed in the dye and stir gently to avoid any streaks or blotches. Once dry, you’re ready to assemble your rose and admire its newly restored beauty.
Final Touches
When it comes to crafting life-like rose flowers, one common issue is dealing with flattened petals. To revive them, gently reshape the petals with your fingers, taking care not to cause any further damage. A light mist of water can be used to help make the paper more pliable for reshaping, allowing you to restore the natural curvature of the petals.
To take your rose flowers to the next level of realism, consider adding subtle details such as veins on the petals using a fine-tip pen or lightly brushing the edges with a darker shade of paint. These small touches can make a significant difference in creating an authentic and visually appealing representation of real roses.
FAQs About Paper Roses
As the world of paper crafting continues to bloom, many novices find themselves entangled in a sea of queries surrounding the art of creating paper roses. To set your creative endeavors on firmer ground, here’s a compilation of answers to some frequently asked questions that will guide you through the intricacies of this delightful craft.
What type of paper is best for making paper roses?
When it comes to crafting paper roses, two materials stand out for their durability and ability to maintain their shape: crepe paper and cardstock. The former boasts an inherent elasticity that makes it ideal for molding delicate petals, while the latter provides a sturdy base that ensures your creations remain intact. Both options are excellent choices for creating beautiful, long-lasting paper flowers.
Can I use regular printer paper for paper roses?
While traditional printer paper can be used to create paper flowers, its limitations become apparent when attempting a more realistic or durable outcome. A better option for beginners or those seeking a sturdy result is crepe paper or cardstock, which provide a more textured and substantial base for crafting flat, stylized roses or practicing the technique.
How do I make my paper roses look more realistic?
Elevate the realism of your paper roses by incorporating an assortment of petal shapes and sizes. Furthermore, incorporate subtle nuances such as delicate vein patterns and soft color transitions achieved through the use of paint or markers. Additionally, curling the edges of the petals can effectively mimic the organic texture found in nature, thereby adding to the overall illusion of realism.
What can I use for the stems of paper roses?
For stem attachments, consider opting for floral wire, which offers flexibility and seamless wrapping capabilities with floral tape to achieve a lifelike appearance. Alternatively, skewers or pipe cleaners provide a more straightforward solution.
How do I attach the petals to the stem?
Begin by carefully wrapping the smallest petals around the base of the stem, using floral tape or a small amount of adhesive to secure them in place. As you work your way up the stem, gradually add larger petals, overlapping each one slightly as you go. Make sure to secure each layer before moving on to the next, taking care not to distort the natural shape of the flower.
Can I add scent to my paper roses?
When it comes to imbuing your paper flowers with fragrance, a light misting of perfume or an essential oil blend can be a lovely touch. However, before doing so, it’s crucial to conduct a small-scale test on a discreet area to verify that the scent won’t damage the paper. A little caution upfront ensures your beautiful creations remain intact and fragrant.
How long do paper roses last?
When preserved properly, paper roses can remain intact for extended periods – even up to several years. To achieve this, it’s essential to keep them away from harsh environmental factors such as direct sunlight, excessive moisture, and extreme temperatures. Additionally, opting for acid-free paper can significantly reduce the likelihood of yellowing or discoloration over time.
Can paper roses be used for outdoor events?
While paper roses are suitable for outdoor events, it’s crucial to ensure their durability against moisture and wind exposure. To achieve this, consider applying a sealant spray to provide an extra layer of protection, allowing your creations to thrive in various environmental conditions.
How can I make a bouquet of paper roses?
Crafting a beautiful bouquet requires some planning and creativity. Start by selecting a variety of rose flowers in different sizes to create visual interest. Once you have your roses, arrange them together in a harmonious composition, using floral tape to secure the stems in place. To add depth and texture, incorporate greenery such as eucalyptus or ferns, and sprinkle in some filler flowers like baby’s breath to fill out any gaps. Finally, finish off your bouquet by wrapping the stems with a ribbon or piece of fabric for a polished look.
Are there any eco-friendly alternatives to making paper roses?
To minimize your ecological footprint, consider opting for recycled paper or eco-friendly biodegradable alternatives. Furthermore, embracing natural dyes and plant-based adhesives can significantly decrease the environmental consequences of your creative endeavors.
What are some creative uses for paper roses?
With their delicate petals and intricate details, paper roses can be transformed into an array of creative applications. Beyond their use as decorations for events, gifts, or home décor, they can also be utilized in art projects, where their fragile beauty lends itself to manipulation and arrangement. Furthermore, the versatility of paper roses extends to fashion, where they can be incorporated into accessories like headbands, brooches, or even jewelry pieces.
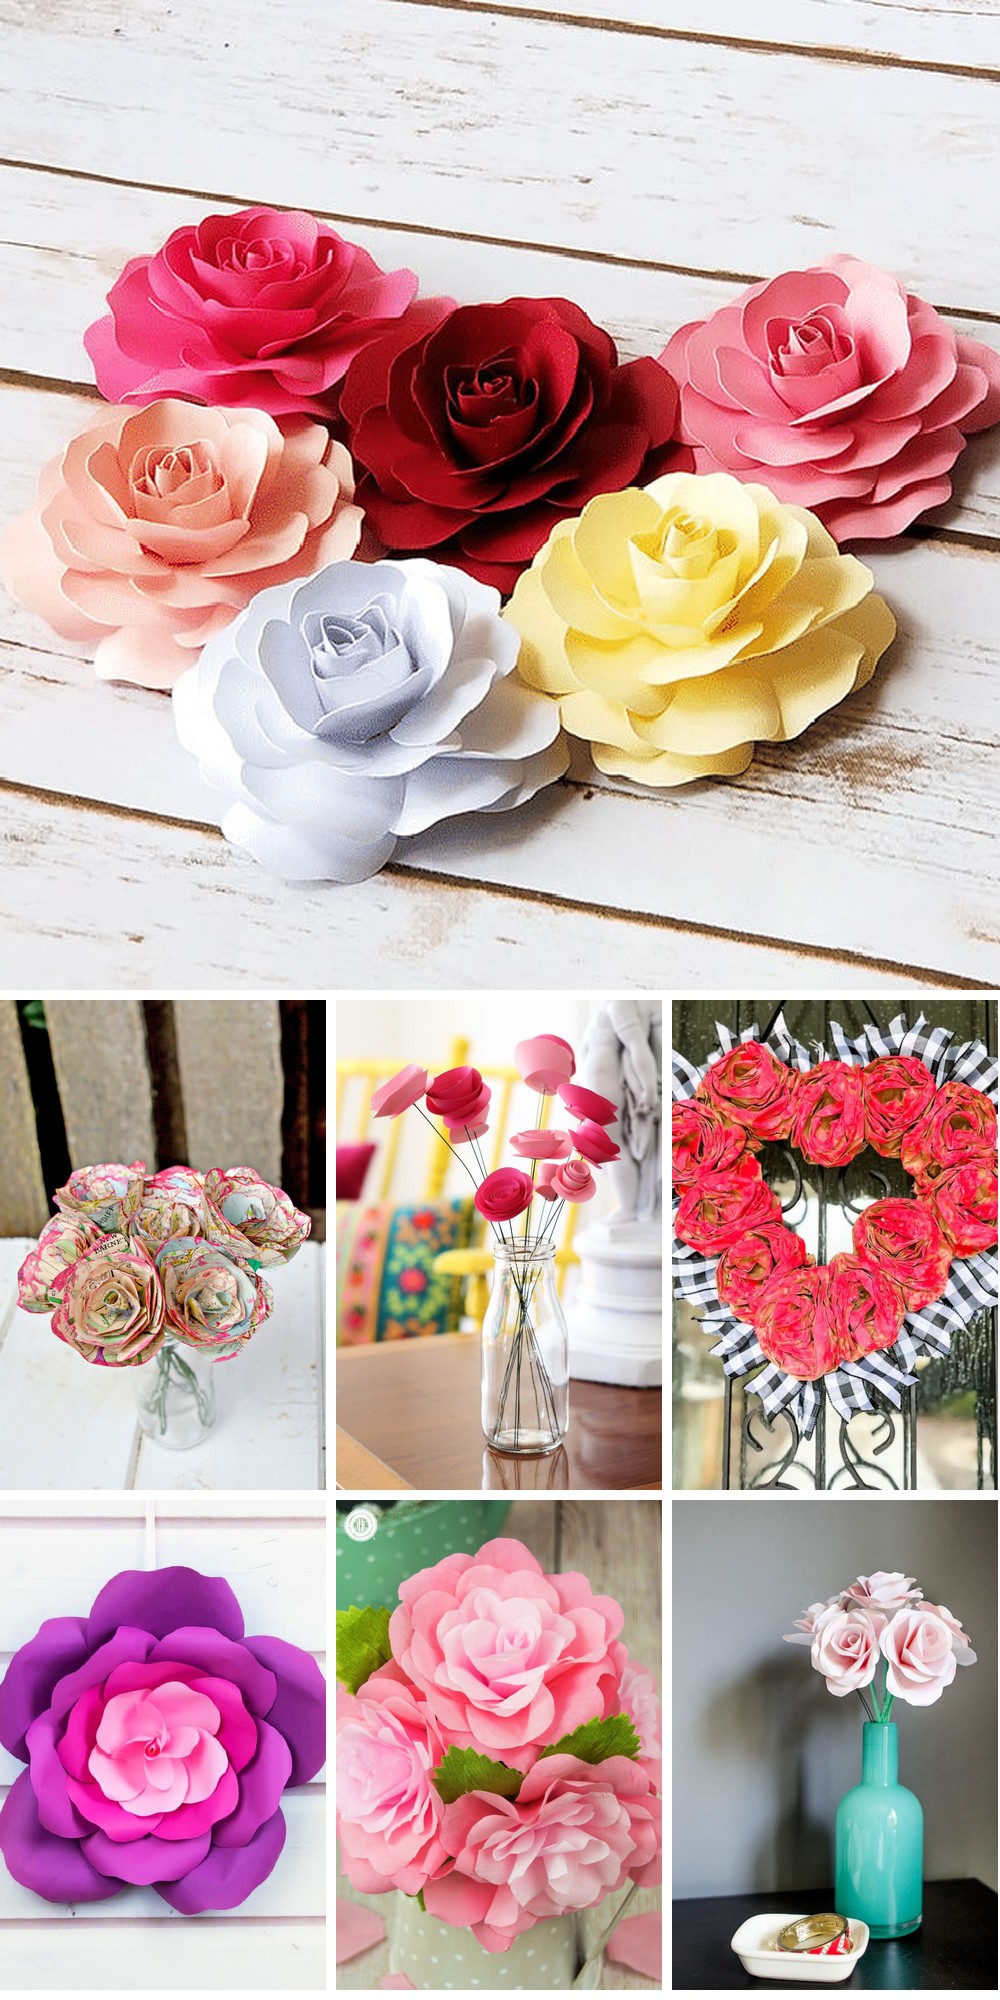
25 Simple Ways To Make Paper Roses
Unleash your creativity with these 25 effortless techniques to craft breathtaking paper roses, perfect for any celebration or special moment. Let the art of paper flower-making inspire you!
Giant DIY Crepe Paper Rose

Step into the world of elegant DIY creations with our comprehensive guide on crafting giant crepe paper roses. This meticulously crafted tutorial is designed to walk you through each stage of the process, from selecting the perfect hues of crepe paper to shaping and assembling your petals. With every phase carefully explained, you’ll be able to create these breathtaking blooms with ease. Throughout the guide, we’ve included helpful tips to ensure a successful and enjoyable crafting experience. Whether you’re looking to add a touch of sophistication to an event or create a one-of-a-kind gift, our handmade flowers promise to impress. As you craft your own paper garden, watch as it comes to life with blooms that never wilt.
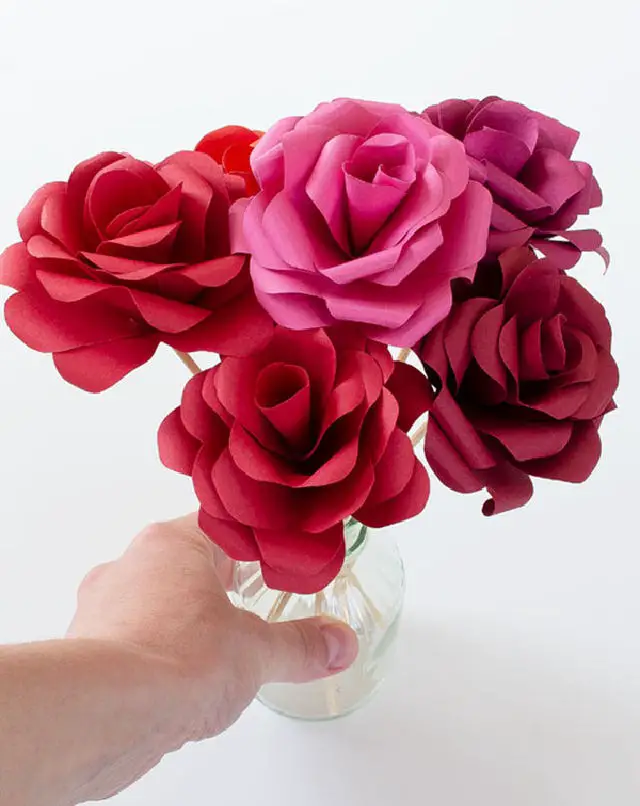
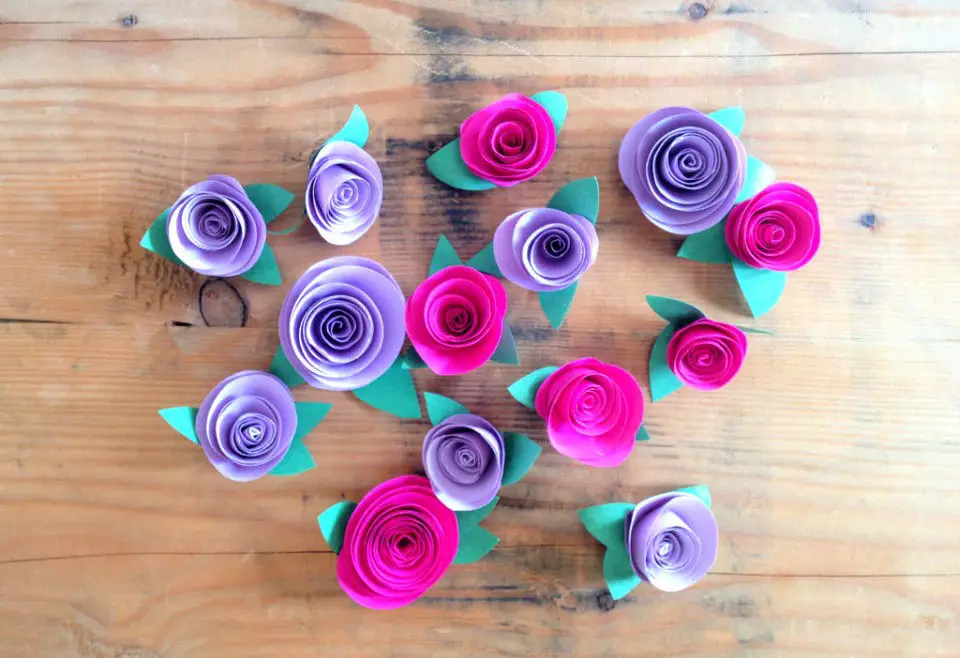
How to Make Construction Paper Rose
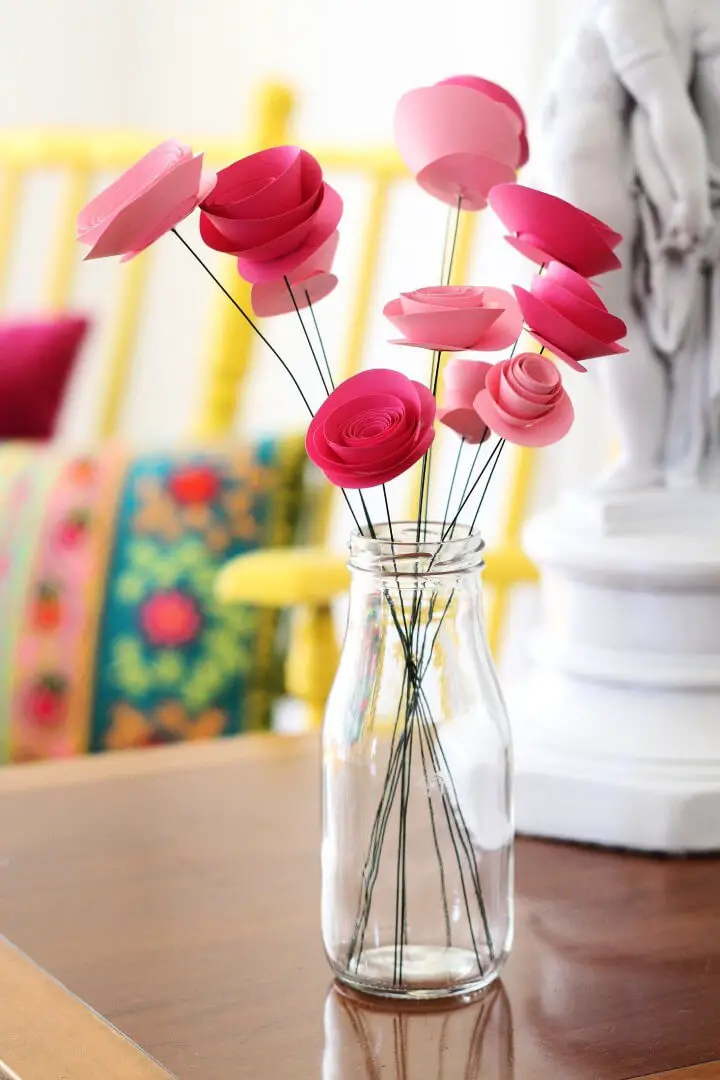
Transforming ordinary spaces into extraordinary ones is as easy as adding a dash of handmade charm with paper spray roses! By following the simple and engaging guide offered by Apartment Therapy, you can create breathtaking paper flowers that bring warmth and beauty to any room. With just cardstock, scissors, and a glue gun at your disposal, you’ll discover how effortless it is to craft stunning blooms that rival their natural counterparts in terms of vibrancy and longevity. This DIY project is perfect for those new to crafting, as the step-by-step instructions ensure that anyone can achieve impressive results with minimal prior experience. As you get creative and bring these paper flowers to life, you’ll be amazed at how quickly they elevate any space into a haven of elegance and sophistication.
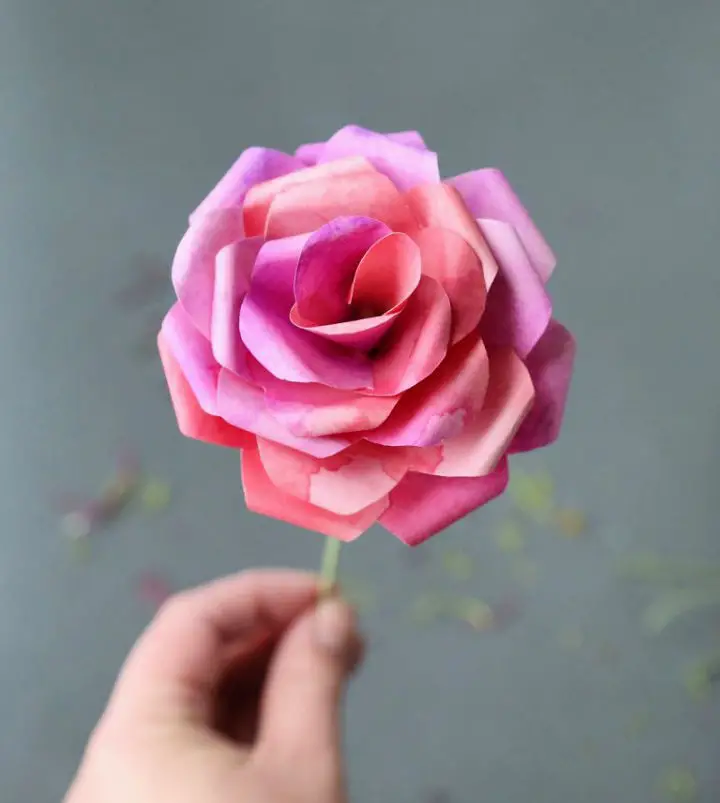
Make a Water Color Paper Rose
Whether you’re seeking to infuse your wedding decor with a touch of handmade elegance or simply want to create a breathtaking paper flower arrangement for your home, this DIY Water Color Paper Rose tutorial from Capitol Romance Blog is the perfect resource. By combining traditional paper flowers with innovative watercolor techniques, Ribbons & Bluebirds presents a unique approach that yields stunning results with a modern and artistic flair. With clear instructions and a step-by-step guide, anyone can craft these beautiful roses, from selecting the right paper to assembling the final product. This project is perfect for a relaxing crafting session, promising to bloom into a lovely outcome that will impress and inspire.
Simple DIY Map Paper Rose

Transform your old maps into stunning paper flowers with Pillar Box Blue’s engaging tutorial. These unique blooms not only add a touch of elegance to any room but also make for thoughtful and lasting gifts. By repurposing vintage maps, you can create a bouquet that will never wilt, making it perfect for Valentine’s Day or as a heartfelt token of affection. The process is surprisingly straightforward, requiring only basic craft supplies, and the end result is a beautiful arrangement of map roses that are sure to impress. With clear step-by-step instructions and a free petal template, this guide is ideal for anyone interested in upcycling materials into unique home decor pieces.
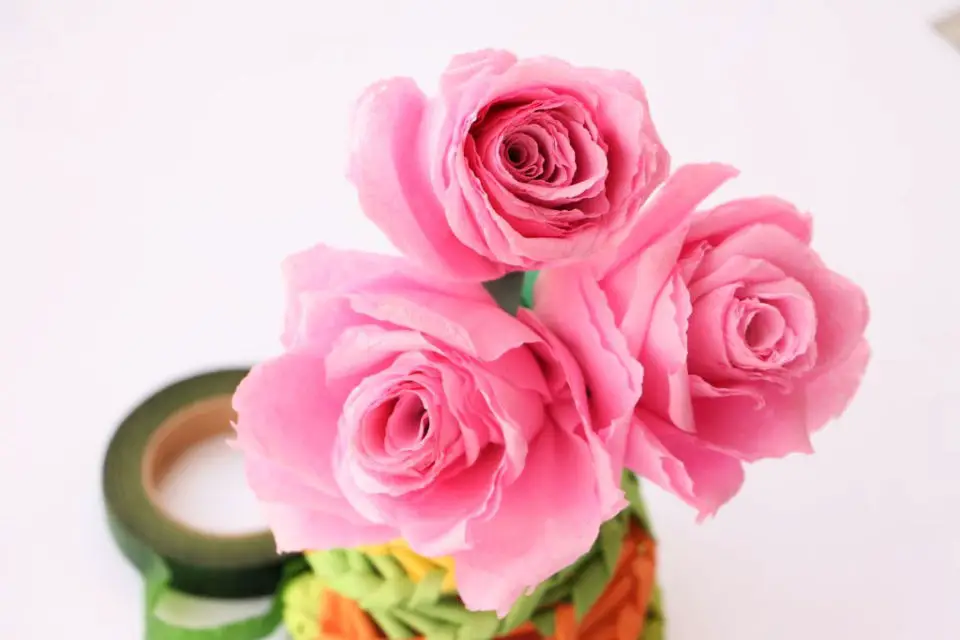
Homemade Crepe Paper Rose
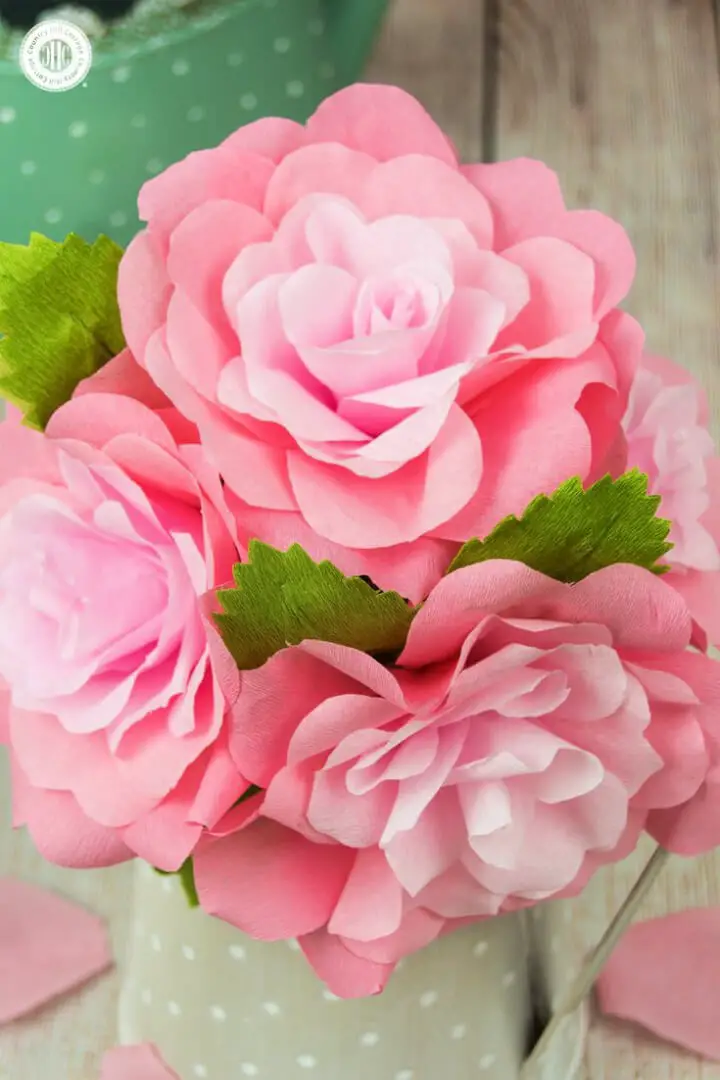
Embark on a romantic adventure with Country Hill Cottage’s comprehensive guide to creating exquisite crepe paper roses. This charming craft is perfect for adding a touch of whimsy to your living space, elevating wedding decorations, or infusing floral arrangements with understated elegance. Begin by utilizing the free printable template available on their website to effortlessly cut out petal and leaf shapes. Then, select from an array of vibrant crepe paper hues to personalize your bouquet. Gather your materials – a medley of pink crepe paper, green crepe paper, wires, adhesives, scissors, pliers, and a hot glue gun – to embark on this engaging crafting experience. As you work your magic, delight in the beauty of handcrafted roses that promise to bring a lasting bloom to any setting.
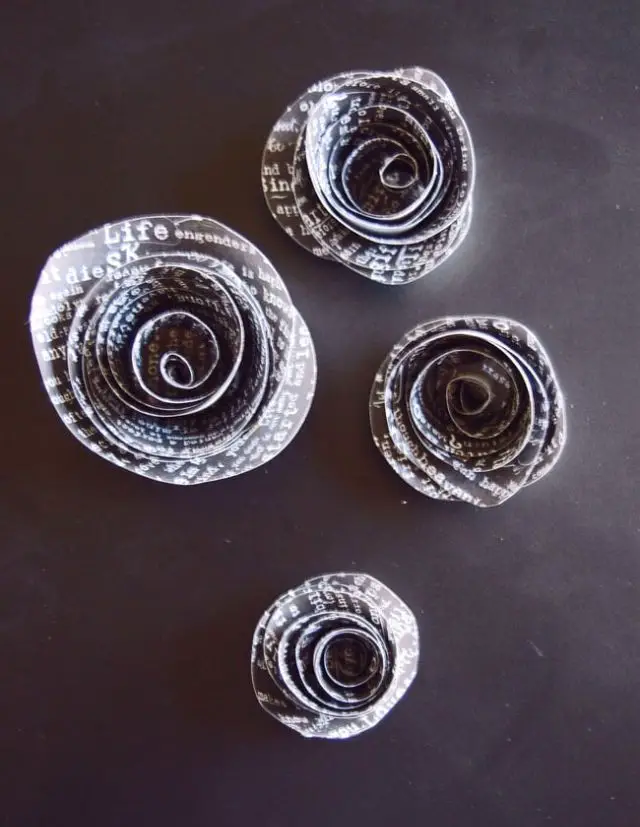
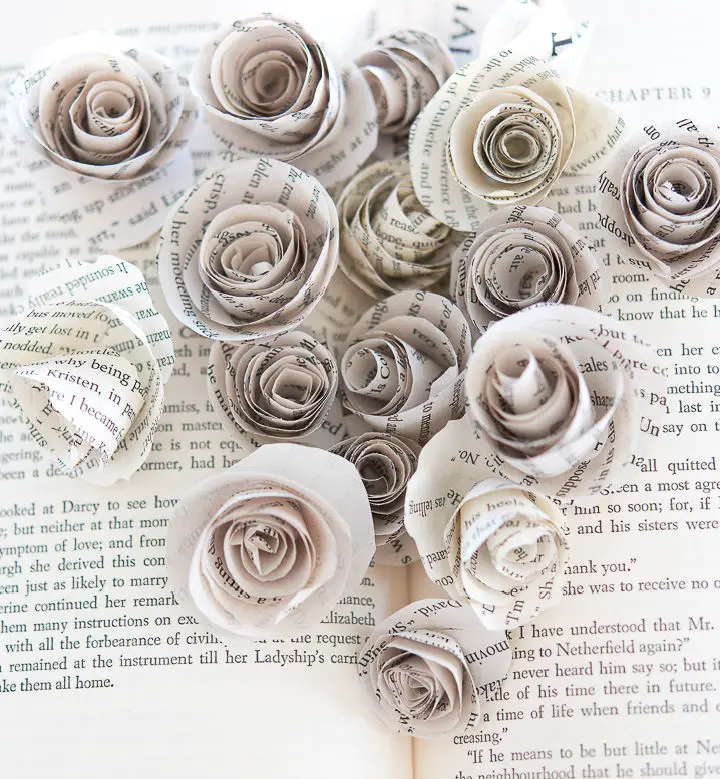
DIY Book Page Paper Roses
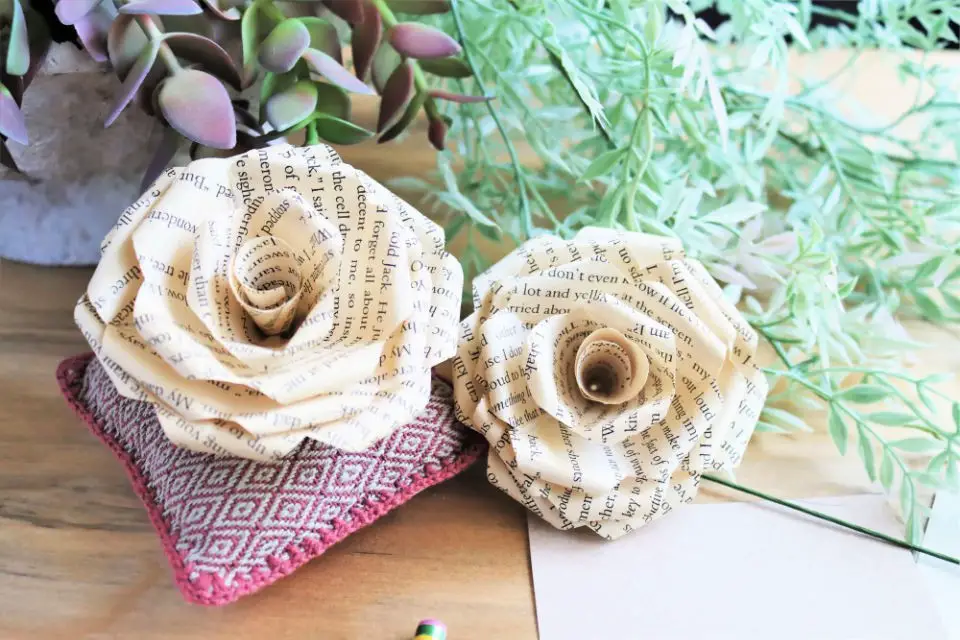
With With Love, Melissa’s step-by-step guide, you can effortlessly transform ordinary book pages into breathtakingly beautiful paper roses. The comprehensive tutorial on her website is packed with vivid imagery and a printable stencil to help you bring these stunning creations to life. Whether you’re looking to add a touch of elegance to your home decor or create heartfelt gifts for loved ones, this charming project is perfect for anyone who enjoys crafting with paper. Melissa’s clear, engaging, and easy-to-follow instructions make the process enjoyable and rewarding for crafters of all skill levels. So why wait? Get inspired and start creating your own exquisite book page paper roses today!
DIY Paper Rose – Step by Step Instructions
Transform ordinary sheets of paper into breathtakingly lifelike roses with Papershape’s comprehensive guide. By following this step-by-step tutorial, you’ll effortlessly create stunning paper blooms using minimal materials like colored paper, glue, and scissors. Perfect for gifting, decorating, or simply as a creative outlet, this resource is designed to provide a seamless crafting experience. As you work through the instructions, you’ll master the techniques needed to craft beautiful paper flowers that are sure to leave a lasting impression. Whether adding a personal touch to your home or handcrafting a thoughtful present, Papershape’s paper roses offer an excellent opportunity to refine your artistic skills and bring warmth to any space.
Giant Paper Rose With Free Template
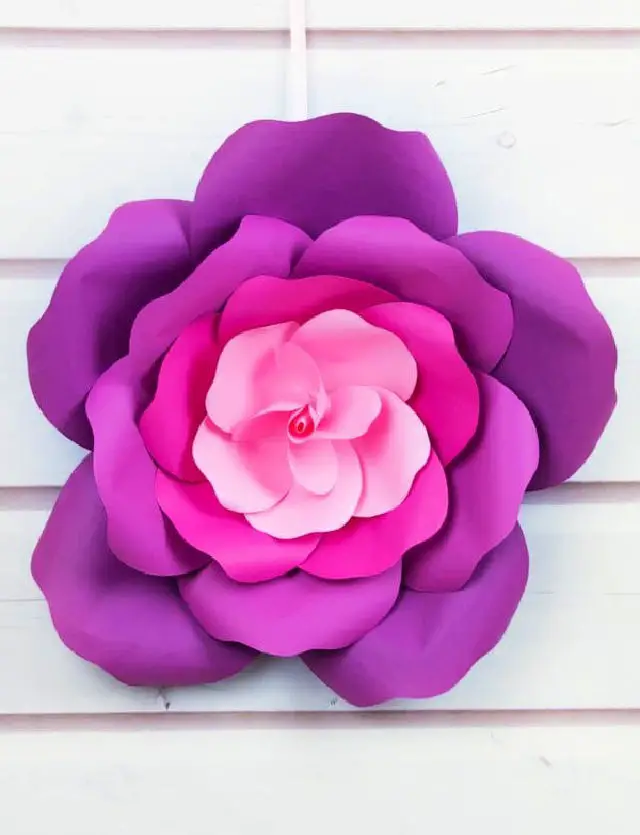
Craft stunning giant paper roses with ease using the comprehensive guide from Country Hill Cottage. This tutorial provides a free template, making it accessible for crafters to create breathtaking decorations for any occasion. By working with lightweight cardstock, you’ll find that these roses are surprisingly simple to shape and assemble.The step-by-step approach takes you through the process of crafting a paper flower, from carefully shaping petals with a wooden spoon to building the centerpiece and bringing your final arrangement together. You’ll also discover helpful tips on how to beautifully display your completed roses, whether you’re dressing up a party backdrop or adding a touch of romance to your home décor. With these gorgeous paper roses, you’ll be able to add an air of sophistication and creativity to any setting.
Making Your Own Tissue Paper Rose
Crafting tissue paper roses with Instructables offers a straightforward and enjoyable DIY experience for those seeking handmade decorations or creative outlets. By breaking down the process into manageable steps – from preparing the tissue paper to shaping petals, assembling the flower, and adding finishing touches like leaves – this tutorial makes it easy for anyone to create their own beautiful blooms. With just a few essential supplies such as tissue paper, a wooden chopstick, flower tape, and glue, you can produce stunning roses that convincingly mimic real flowers. Perfect for gifting, decorating, or simply indulging in a fun DIY project, these charming paper creations will effortlessly elevate any occasion with their touch of elegance.
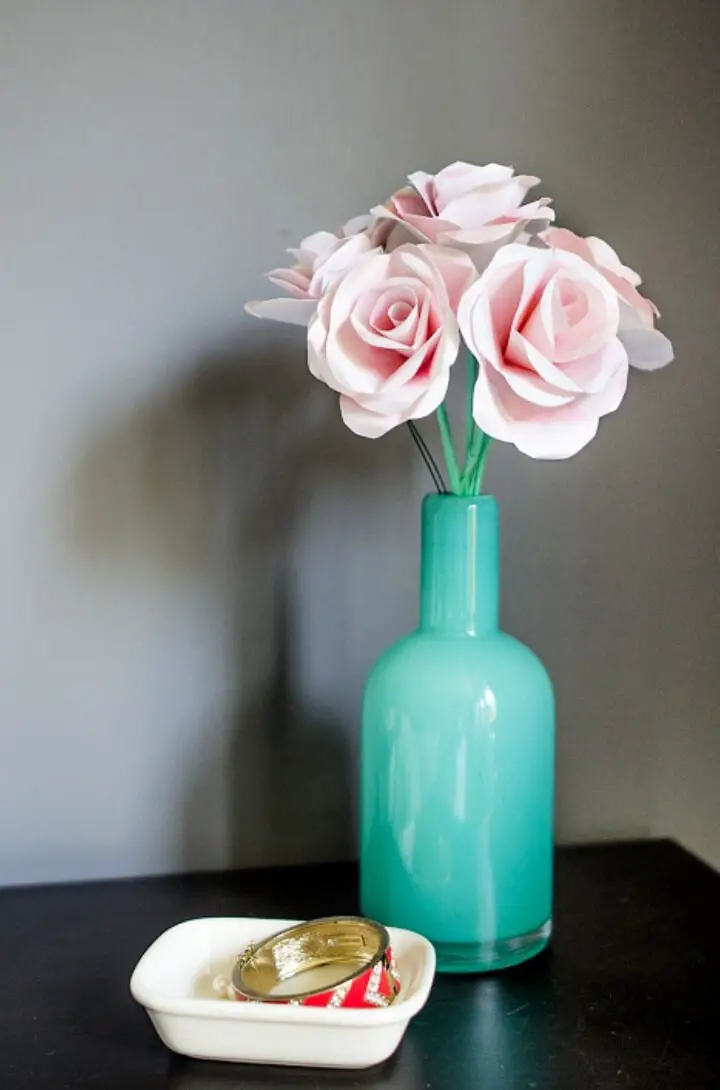
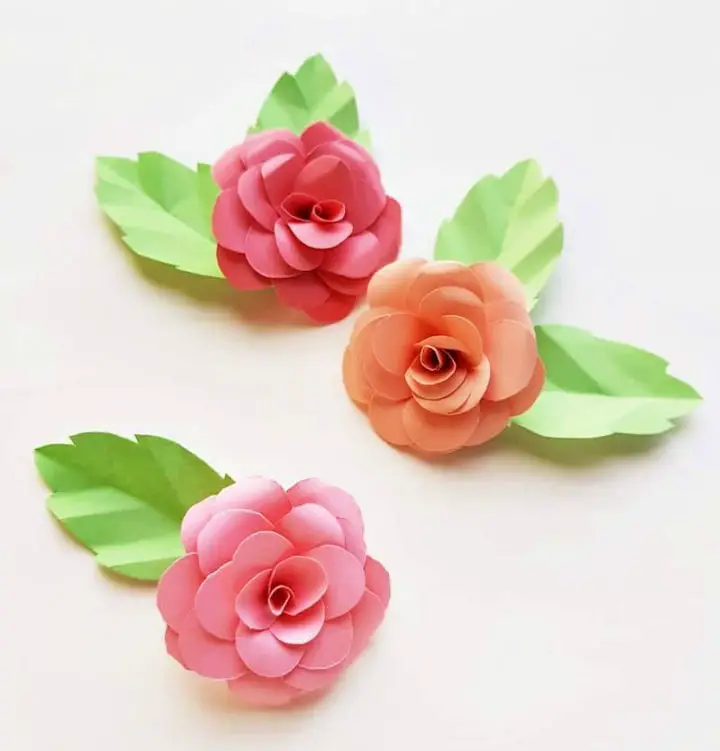
How to Make a Mini Paper Rose

Embark on a journey to create enchanting mini paper roses with our DIY guide. These petite yet elegant blooms are perfect for adding a touch of sophistication to any room or special occasion. With minimal materials like cardstock paper and glue, you’ll be amazed at how easily these charming flowers can be crafted. The tutorial provides clear step-by-step instructions and a downloadable template, making it accessible to crafters of all skill levels, from beginners to seasoned DIY enthusiasts. As you fold, cut, and assemble the delicate petals, you’ll transform ordinary paper into extraordinary floral decorations that can be used to personalize gifts or become part of your home decor. Allow yourself to get lost in this delightful and creative activity as you bring the beauty of nature indoors.
Tissue Paper Full Bloom Rose Ideas

Transforming a simple tissue paper into an exquisite bloom is a delightful DIY project that can be achieved by anyone, regardless of their skill level. With Lia Griffith’s step-by-step guide, crafters can follow along and learn the techniques to create realistic roses that exude elegance and charm. The tutorial provides clear instructions and valuable tips to ensure that your creation turns out beautifully, whether it’s for decorative purposes or a special event. By embracing this accessible resource, you’ll be able to craft flowers that seem almost lifelike, inviting you to engage with the beauty of handcrafted florals within the creative community at Lia Griffith.
Free Printable Paper Rose Template
Transform ordinary paper into extraordinary paper roses with It’s Always Autumn’s free printable template and a few simple supplies. With just printer paper, scissors, and hot glue, you can create realistic and vibrant flowers that will add a touch of elegance to any room or make a thoughtful gift for someone special. Follow along with these easy-to-follow instructions and discover the joy of crafting your own paper roses – a charming project that’s sure to bring out your artistic side.
Simple and Easy Paper Flower
Craft stunning paper flowers with ease using One Crazy Mom’s straightforward guide. Whether you’re preparing for a baby shower or looking to add a personal touch to your home decor, this creative activity is perfect for any special occasion. By following the step-by-step instructions, anyone can transform simple paper materials into breathtaking roses without needing complex templates. The process not only provides a sense of accomplishment but also allows you to express your creativity and bring your floral designs to life. With just a few basic supplies like paper, scissors, glue, and a little patience, you’ll be well on your way to creating your own unique flower arrangements.
Tissue Paper Candy Rose for Valentine’s Day
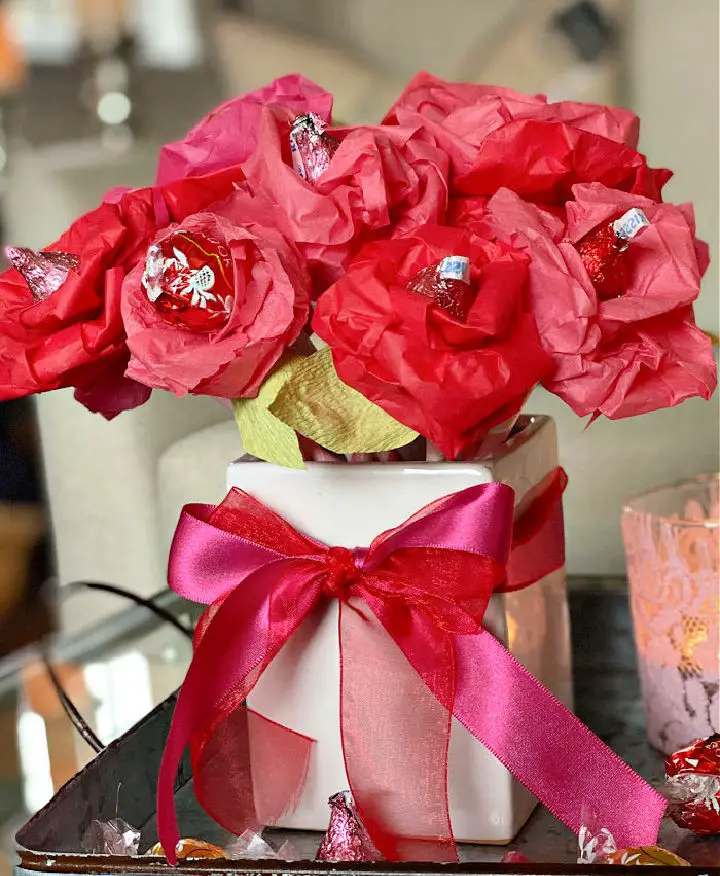
Valentine’s Day gifts don’t have to be store-bought to impress. With Satsuma Designs’ simple tutorial on making tissue paper candy roses, you can create unique and charming presents that combine the sweetness of candy with the beauty of handmade flowers. The guide is designed for crafters of all levels, including those who are new to crafting. By following along with their straightforward instructions, you’ll be able to bring a personal touch to your gifts in no time. All you need to get started is some tissue paper, scissors, and glue – and the instructional video provided will help ensure your success. This fun DIY project can be enjoyed solo or shared with friends and family, making it an excellent way to show someone you care.
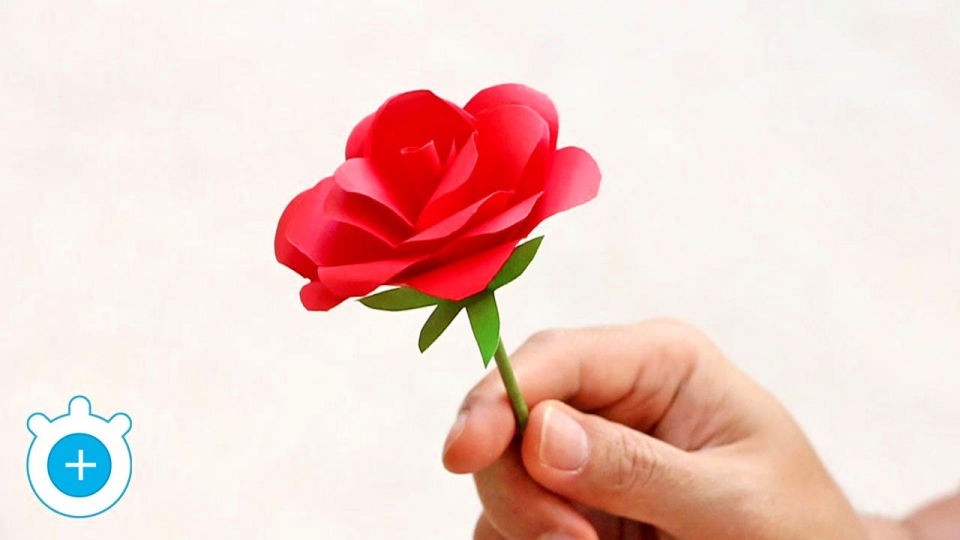
How to Do You Make a Paper Rose
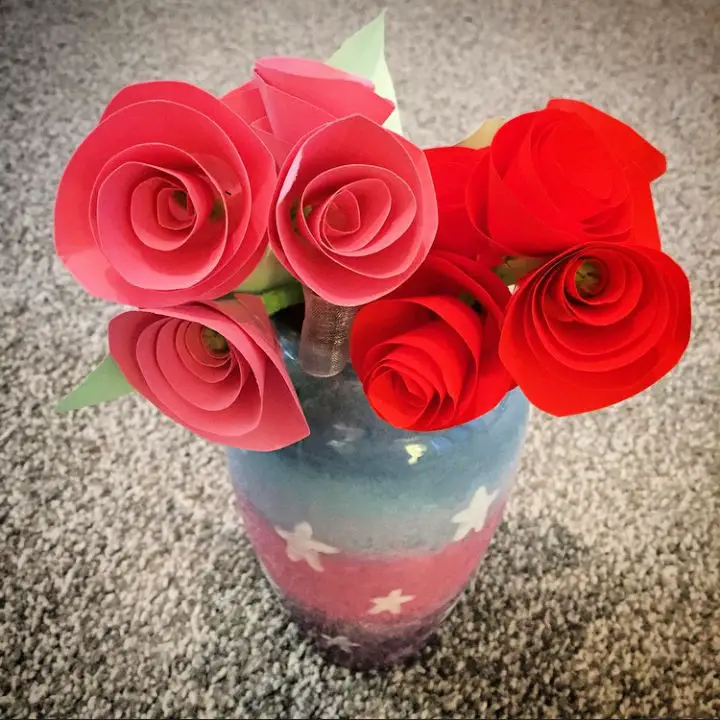
Transform ordinary paper into extraordinary flowers with this delightful Valentine’s Day project from dearmummyblog. Perfect for crafting with kids, this activity turns a simple sheet of paper into a beautiful, long-lasting bouquet. Begin by gathering pink or red paper, scissors, green pipe cleaners, sellotape, and ribbon. Start by cutting the paper into quarters, then create rough circles. Next, snip spirals and roll them into rose shapes, securing each one to a pipe cleaner stem with sellotape. Once you’ve got your roses in bloom, bunch them together and tie them up with ribbon. This fun and budget-friendly project makes for a thoughtful gift or decoration, ideal for sharing with loved ones, parents, friends, or adding a touch of whimsy to your own space.
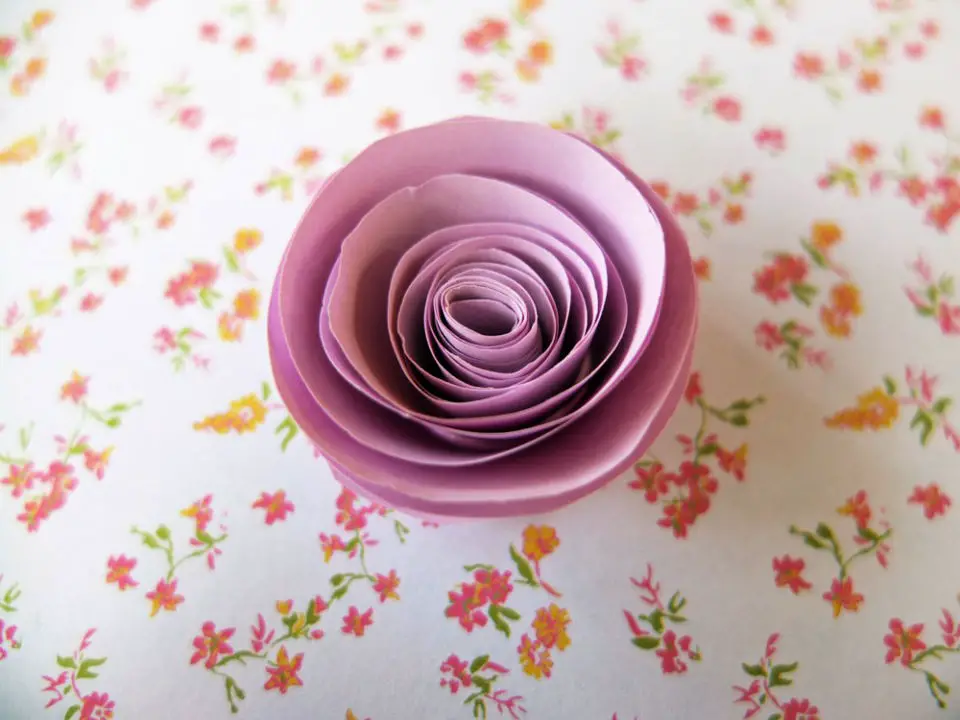
Make Your Own Paper Flower
Discover the joy of crafting with Tauni Everett’s comprehensive guide to creating stunning spiral paper flowers. This accessible tutorial transforms a flat sheet of paper into a breathtaking, three-dimensional bloom that can be tailored to fit any color scheme. With only basic materials like paper, scissors, and glue required, you’ll be amazed at how quickly you can create beautiful decorations for your home, perfect for adding a touch of handmade elegance to mirrors, picture frames, or party decor. The step-by-step instructions and expert tips ensure that even novice crafters can achieve a delightful result.
How to Make Your Own Paper Rose
Learn the art of creating breathtakingly beautiful paper roses through The Craftaholic Witch’s comprehensive step-by-step guide. This user-friendly tutorial is packed with clear instructions, a free template, and expert tips that make it effortlessly simple to bring stunning blooms to life from the comfort of your own home. Whether you’re looking to add an elegant touch to decorations, gift embellishments, or scrapbooking accents, these paper roses will undoubtedly elevate any project with their delicate charm. With the Craftaholic Witch’s guidance, even beginners can shape and assemble these flowers with confidence, making them a perfect addition to your next craft adventure.
Large Paper Flowers From Cardstock
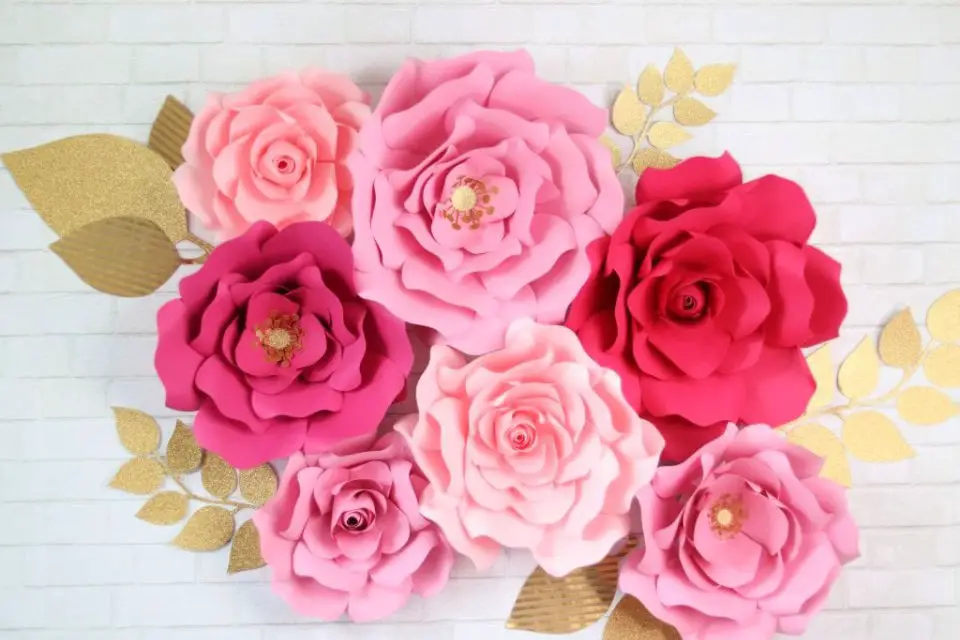
Transforming any space into a vibrant oasis of handmade beauty is just a petal away. With the comprehensive guide from Sweet Red Poppy, you can bring stunning large paper flowers to life using cardstock and your preferred cutting method – whether that’s a hot pair of scissors or the precision of a Cricut machine. The tutorial walks you through every step, from crafting lifelike petals to constructing a sturdy base for display. To get started, gather your materials: cardstock, a trusty hot glue gun, and a few additional tools. As you work on this fun and rewarding project, imagine the joy of brightening events, adding charm to home decor, or bringing a touch of whimsy to a nursery.
Easy DIY Paper Rose for Children
Transform simple materials into breathtaking paper roses with this step-by-step tutorial from Thinlyspread. Perfect for spring decorations or special gifts, this guide takes you through each stage of creating stunning flowers that add a personal touch to any occasion. Suitable for crafting with older children or as an activity for adult craft enthusiasts, these charming paper roses require patience and practice to master the spiral technique. With clear instructions and helpful tips, you’ll be able to transform paper into delicate petals with confidence.
How to Make Paper Rose
Unleash your creativity by transforming everyday materials into stunning paper roses with a simple yet charming craft from Finding Silver Pennies. Perfect for craft enthusiasts seeking to infuse their decor or gift something extraordinary to fellow book lovers, this step-by-step guide is designed to be easy to follow and enjoyable to execute. By mastering the art of drawing, cutting, and rolling paper into breathtaking blooms, you’ll discover a fulfilling crafting experience that culminates in the delightful creation of your very own paper roses at home.
DIY Paper Rose With Details Instructions
Transforming your space with the eternal charm of paper roses is just a craft away. At Craftify My Love, you’ll find a comprehensive guide that demystifies the process of creating these exquisite floral accents. With minimal materials like craft paper or recycled book pages, anyone can craft stunning paper roses that add a personal touch to gifts, decor, or even special occasions. The beauty of this project lies in its accessibility – with patience and practice, you’ll be rewarded with unique, handcrafted creations that reflect your personality.
Making a Paper Rose for Wreath

Elevate your Valentine’s Day decor with a charming homemade touch using Southern Crush at Home’s straightforward guide to creating a paper rose wreath. By following this simplified tutorial, you can craft an eye-catching decoration from basic materials like brown paper bags, a heart-shaped frame, and some paint. The step-by-step instructions are designed to be engaging and easy to follow, ensuring that you can assemble your wreath with confidence. Perfect for adding a festive touch to your home or adorning your front door, this DIY project promises a delightful outcome with minimal fuss. Give it a try and savor the satisfaction of crafting a special piece that will be admired by all who see it.
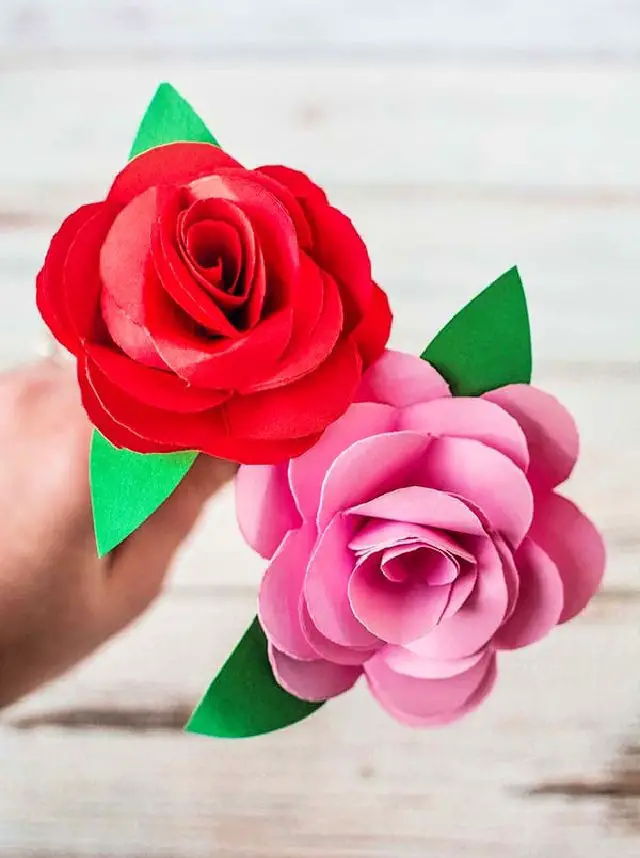
Beautiful DIY 3D Paper Rose
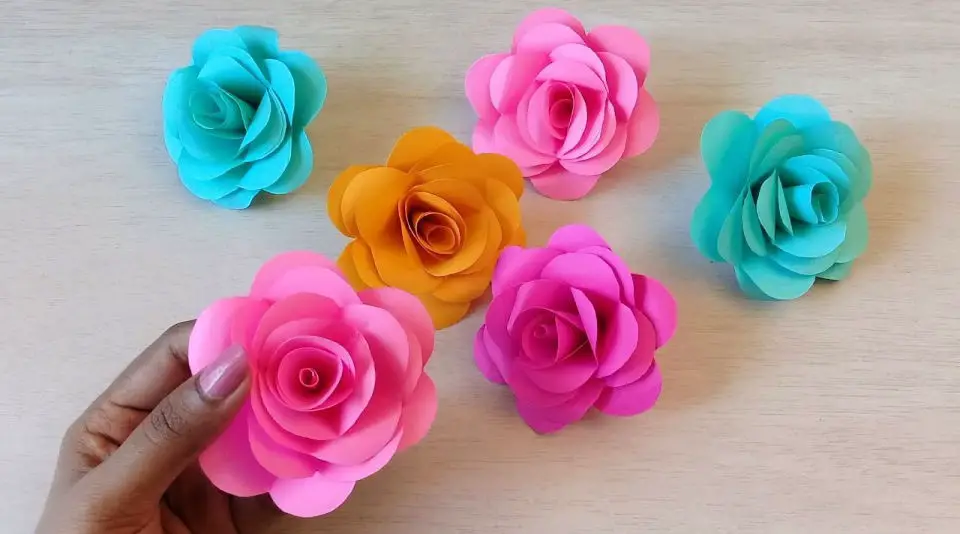
Elevate your crafting skills and transform plain paper into breathtaking, lifelike roses with this intuitive DIY guide. Perfect for crafty enthusiasts and decorators alike, creating these stunning 3D paper flowers is an ideal activity for anyone looking to add a touch of sophistication to their space or surprise loved ones with a unique gift. With just basic supplies such as coloring papers, glue, and scissors, you can effortlessly recreate the mesmerizing beauty of real roses in paper form. Beyond being an enjoyable hobby, this craft also yields a deeply satisfying outcome that will leave you feeling proud of your creative accomplishment. By following the video tutorial on YouTube, even novice crafters can master the art of turning a simple sheet of paper into a masterpiece.
Handmade Paper Rose Flower Tutorial
Discover the art of crafting stunning paper rose flowers with ease, thanks to LampZoom’s comprehensive video guide. This step-by-step tutorial is perfect for anyone looking to explore the world of paper crafts, providing crystal-clear instructions that empower you to create breathtaking, handcrafted blooms. Whether you’re decorating your home or crafting a thoughtful gift, this technique demystifies the process of making realistic paper roses that are sure to leave a lasting impression. With the ability to customize color and size using various paper types, this creative endeavor allows for endless possibilities. As you engage in this artistic pursuit, add a personal touch to your celebrations with your very own paper rose creations.
Best DIY Rose With Paper Strip
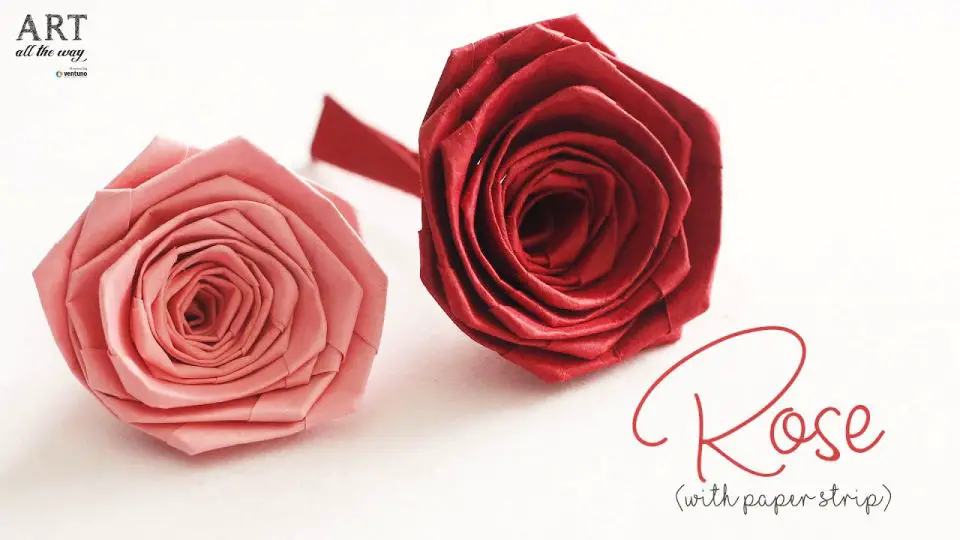
Transforming a humble paper strip into an exquisite rose is a captivating craft project that brings refinement to any setting or celebration. The comprehensive YouTube guide from Ventuno Art masterfully walks viewers through the meticulous process of folding and rolling paper, painstakingly replicating the intricate petals of a real rose. This engaging tutorial is perfect for enthusiasts of papercraft, offering a clear and detailed instructional journey that allows anyone to effortlessly create their own breathtaking paper bloom. Whether you’re looking for decorative accents, meaningful gifts, or simply a creative outlet, learning to craft a paper rose is a deeply satisfying experience that will leave you feeling accomplished and inspired. For the complete tutorial, search for ‘How to make Rose with Paper Strip’ by Ventuno Art on YouTube and elevate your crafting skills today.
Conclusion:
As you complete the 25 simple ways to make paper roses, you’ll not only expand your DIY project repertoire but also infuse your home or event spaces with creativity and beauty. This comprehensive guide has equipped you with the essential steps and tips to create stunning paper rose templates that will thrive under your care.
With a solid foundation in place, you’re now well-equipped to tackle any petal-related conundrums or colour consistency issues that may arise during the crafting process. Our troubleshooting section is designed to guide you through these common challenges, ensuring a seamless and enjoyable experience as you bring your paper rose creations to life.
As you gaze upon your finished paper roses, remember that they’re not only a testament to your craftsmanship but also a reflection of the endless possibilities that paper artistry has to offer.
