Transforming your travel gear from ordinary to extraordinary can be achieved by crafting your own DIY luggage tags. This comprehensive guide provides 25 creative and innovative ideas for homemade luggage tags, suitable for all levels of DIY enthusiasts. From gathering materials to personalizing the final product, every step is covered to ensure your luggage stands out in style. Not only does this project offer a fun creative outlet, but handmade tags also add a personal touch to your belongings, making them instantly recognizable at airport baggage claims. As we delve into the process of making luggage tags, including step-by-step guides and troubleshooting tips, you’ll gain valuable insights on ensuring durability, privacy, and creativity in your designs. Whether your focus is on sustainability by crafting eco-friendly luggage tags or finding ways to personalize your tags, this guide has something for everyone. The sense of accomplishment that comes from creating something both beautiful and functional is just a few steps away. As you continue reading, you’ll discover expert tips and tricks to elevate your luggage tag game.
How to Make Luggage Tags – Step by Step
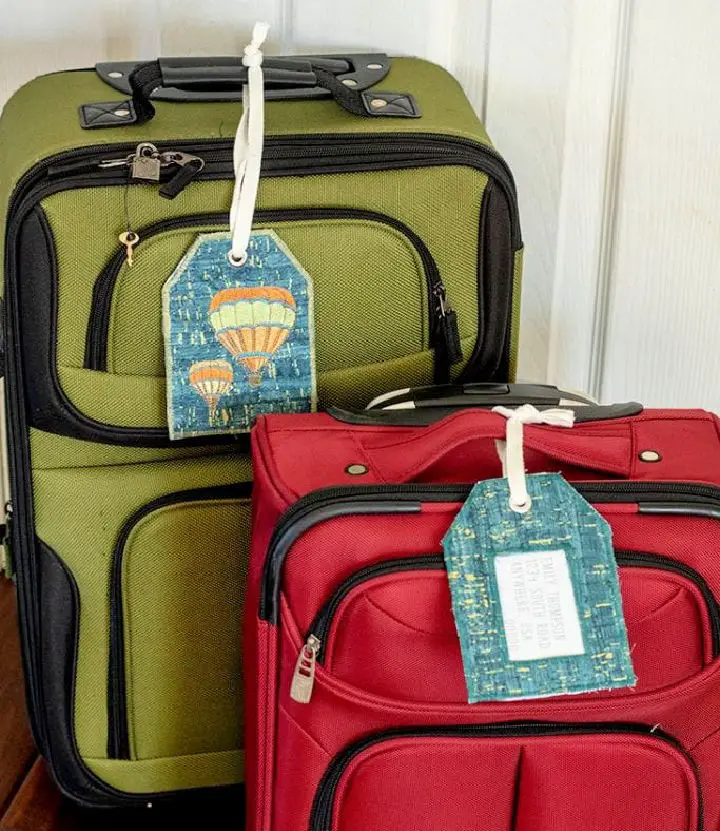
Crafting your own fabric luggage tag is an enjoyable and effortless DIY endeavor that enables personalization of your travel accessories. This simple project allows for creative expression, whether it’s to make your luggage easily identifiable on the baggage carousel or to add a splash of color to your travel gear. With a downloadable pattern available at no cost, you can dive straight into this project without any unnecessary complications.
Materials Needed:
When it comes to working with textiles, having the right tools and materials can make all the difference. At the heart of any sewing project are a few essential supplies that every crafter should have in their arsenal. These include cotton fabric for creating garments or home decor items, bias tape for adding a professional finish to seams, scissors for cutting through even the toughest fabrics, and a ruler for ensuring precise measurements. Additionally, fusible interfacing helps stabilize delicate materials, while fabric markers allow for easy customization of designs. Clips are also essential for holding together tricky seams, and clear vinyl can be used to create custom patterns or templates. Finally, an iron is crucial for setting seams and giving fabrics a crisp finish.
Step by Step Guide:
To create personalized luggage tags, start by preparing the pattern by printing it out, cutting along the outlines, and discarding the center rectangles as instructed. Next, cut out the following fabric pieces: two main body fabrics, two main body interfacings, one pocket fabric, one pocket interfacing, and one piece of clear vinyl. Also, cut a 12-inch length of bias tape for later use.
Fuse the interfacing pieces to their respective fabrics by centering them on the wrong side of the fabric, with the shiny side facing down, and ironing them together for at least 10 seconds. Then, prepare the pocket by snipping its inner corners down to the interfacing, folding the edges to the wrong side, and pressing them to create clean edges.
Place clear vinyl on the wrong side of the pocket fabric, clip it in place, and sew around the edges close to the edge to attach it. If the vinyl sticks while sewing, place wax paper underneath it and tear it away afterwards.
Assemble the tag by folding over the top edge of the pocket a quarter of an inch to the wrong side, pressing, then topstitching across this folded edge. Next, place bias tape on the bottom of one main body section, overlapping its ends at the center, and cover it with the prepared pocket and the other main body piece.
Sew around the periphery with a quarter-inch seam allowance, leaving an opening just below the pocket for turning the tag right side out later. Backstitch at both ends to secure. Trim the corners to reduce bulk, then turn the tag right side out using a pointy tool to neatly poke out the corners.
Finish the tag by folding in the edges of the opening and topstitching all around the tag close to the edge. This not only closes the opening but also adds a neat finish.
Video Tutorial
Enhance your understanding of creating fabric luggage tags with a comprehensive video tutorial that provides a step-by-step guide. This accompanying visual resource not only reinforces but also simplifies the techniques outlined in this guide, rendering the process seamless and engaging for viewers.
Personalization Techniques for DIY Luggage Tags
Personalizing your luggage tags is an art form that not only adds a touch of individuality but also makes it easier to identify your belongings in the crowd. To get started, begin by selecting a material that speaks to your style – leather for a classic look, fabric for a soft touch, or recycled materials for an eco-friendly option. Once you’ve chosen your canvas, think about what designs resonate with your personality. You could go for geometric shapes, floral patterns, or even a quote that inspires you. Use stencils or freehand drawings to bring your design to life on the tag.To add some color and vibrancy to your creation, use fabric markers, acrylic paints, or natural dyes to fill in your design. If you’re working with leather, leather paint or a simple leather stain can work wonders. Next, incorporate text into your design using letter stamps or a permanent marker. Make sure the text is legible and stands out against the background.To add some extra flair, incorporate embellishments like buttons, beads, or embroidery to give your tag texture and dimension. These small details can make a big difference in the overall aesthetic of your luggage tag. Once you’re happy with your design, apply a clear sealant over the tag to protect it from wear and tear. For fabric tags, a fabric sealant will do, while for leather, a leather conditioner can provide both protection and a polished finish.Finally, attach your tag securely to your luggage with a sturdy strap or cord. Ensure it’s secure so you won’t lose it during your travels. With these simple steps, you can create a unique and personalized luggage tag that reflects your personality and makes travel more enjoyable.
Troubleshooting Tips for DIY Luggage Tags
When embarking on a DIY luggage tag project, it’s not uncommon to encounter some bumps along the way. To help you overcome these common challenges, here are some troubleshooting tips to keep in mind: If your tag material starts to fray or tear, switch to a sturdier option like thick cardstock, leather, or durable fabric and reinforce the edges with clear tape or use a laminator for paper tags. For ink-based designs, choose waterproof and fade-resistant options and ensure they dry completely before handling. Consider applying a clear sealant for added protection. To prevent your tag from detaching from the luggage, secure it with a strong loop like a metal ring or cable tie rather than just string or ribbon. Double-check that the attachment is tight and secure before traveling. If you’re struggling to write on certain materials, lightly sand the surface where you’ll be writing to help the ink adhere better. Use permanent markers or paint pens designed for the material. Finally, if your tag looks bulky or cluttered, simplify your design by focusing on essential information and a few decorative elements – remember, less is often more when it comes to design. By planning ahead and addressing these potential issues, you can ensure your homemade luggage tags are both durable and visually appealing, making them perfect for all your travels.
Sustainability Focus: Crafting Eco-Friendly DIY Luggage Tags
Sustainability is no longer just a buzzword – it’s a crucial practice in today’s world. When crafting DIY luggage tags, considering the environmental impact is essential. To create eco-friendly luggage tags that are both stylish and sustainable, consider the following:Firstly, opt for materials that are biodegradable or recyclable. Repurposed items, fabric scraps, and recycled paper can be excellent choices. These materials not only reduce waste but also promote a circular economy.Next, choose adhesives and inks that are labeled non-toxic and eco-friendly. These products minimize harmful emissions and ensure a safer environment for both humans and wildlife.To reduce waste and make your luggage tag more functional, design it with digital information slots instead of writing your details directly onto the tag. This way, you can easily update your information without creating a new tag each time.Another key consideration is designing your luggage tag to be reusable for multiple trips. Make sure the design allows for easy updates to the information section, reducing the need for frequent replacements.Finally, provide education on how to properly dispose of the luggage tag at the end of its life cycle. This ensures that it doesn’t harm the environment and promotes a culture of sustainability.By following these tips, you’ll not only create a unique item for your travels but also contribute to a more sustainable future. Every small step counts!
Maintenance and Care for DIY Luggage Tags
To keep your DIY luggage tags in top condition throughout your journeys, follow this straightforward guide:
Firstly, consider the material of your tag. For leather, use a gentle conditioner to maintain its suppleness. Fabric tags can be spot cleaned with a mild detergent, while plastic or laminated ones are best wiped down with a damp cloth.
Next, take steps to avoid water damage. If your tags do get wet, dry them promptly to prevent mold growth and damage.
Regularly inspect your tags for signs of wear and tear before and after each trip. Check for loose threads, fading colors or detachment from the luggage.
When not in use, store your luggage tags in a cool, dry place away from direct sunlight to prevent fading and deterioration. This will help extend their lifespan.
Finally, ensure your contact information remains up-to-date. If you change phone numbers or addresses, update your tags accordingly to stay connected.
By following these simple steps, you can confidently enjoy safe and stylish travels with your DIY luggage tags for years to come.
FAQs About DIY Luggage Tags
Uncover the answers to all your DIY luggage tag concerns and embark on a journey to create one-of-a-kind identifiers for your travel gear. This exhaustive FAQs section is designed to equip you with the knowledge necessary to craft bespoke tags that reflect your personal style.
What materials can I use to make a luggage tag?
When it comes to creating unique and personalized journal covers, the possibilities are endless. From traditional materials like leather and fabric to more unconventional options like plastic, cardstock, or even upcycled items such as vintage maps or book covers, the key is to select something that not only reflects your personal style but also stands the test of time. Whether you’re looking for a classic and elegant finish or a bold and eye-catching statement piece, the choice ultimately depends on your individual aesthetic and creative vision.
How do I ensure my luggage tag is durable?
To ensure the longevity of your luggage tag, start by reinforcing it with robust materials. Consider applying a clear sealant or laminate to shield it from wear and tear. For added security, attach it firmly to your luggage using a reliable attachment method such as a metal ring or cable tie. This will prevent it from coming loose during travel and minimize the risk of loss.
Can I waterproof my luggage tag?
To enhance the durability of your paper-based tags, you can apply a laminate coating or utilize a waterproof sealant to ensure they remain intact in wet conditions. Alternatively, if you’re working with fabric tags, a fabric protector spray can be an effective solution for maintaining their integrity.
What information should I include on my luggage tag?
When providing personal contact information in a professional setting, it’s common to include one’s name, phone number, and email address. Some individuals may choose to disclose their home address as well, while others might opt for a work address or post office box to maintain privacy. A concise and accurate presentation of this essential information is crucial for establishing credibility and facilitating communication with colleagues, clients, or customers.
How can I make my luggage tag stand out?
Make your journal stand out from the crowd by infusing it with personality through creative embellishments. Consider adding pops of color using bright hues, bold patterns, or eye-catching shapes that reflect your unique style. Take it a step further by personalizing it with meaningful elements like your initials, a favorite quote, or a design that speaks to you. This thoughtful touch will make the journal instantly recognizable and serve as a reflection of your individuality.
Is it possible to update the information on my luggage tag?
Incorporate a removable compartment into your design that allows for seamless updates to the included business card. This thoughtful detail enables you to modify the card’s contents at will, ensuring your professional contact information remains current and accurate.
How do I attach the tag securely to my luggage?
When it comes to securing your watch during travel, it’s essential to opt for a durable and reliable fastening system. Consider using robust loops or straps that can withstand the stresses of frequent handling. Leather straps, stainless steel rings, and high-quality cable ties are all excellent choices, each offering unique benefits and levels of security.
What are some creative ways to personalize my luggage tag?
Elevate the simplicity of a plain tag by incorporating unique embellishments. Stamps can be used to leave a lasting impression, while stickers offer a quick and easy way to add visual interest. For those with a creative streak, embroidery or hand-painting provide opportunities to infuse your tags with personal touches that reflect your personality. By getting artistic with your tag, you can transform it from an ordinary accessory into a one-of-a-kind expression of yourself.
How do I protect my privacy with a luggage tag?
When sharing your contact information, consider alternative methods beyond handwriting your full address. For instance, you can provide a business card or create a QR code that directs individuals to your digital contact info. Another option is to utilize a flap or cover to discreetly conceal your details, offering an added layer of security and convenience for those seeking to get in touch.
Can I make a luggage tag if I’m not crafty?
While it’s true that creating a luggage tag from scratch may seem daunting, the good news is that there are numerous simple designs and kits available that don’t require extensive crafting expertise. For those who prefer to add their own personal touch, pre-made tags can be easily customized with stickers or markers, allowing you to infuse your unique personality into your travel accessories. By addressing these frequently asked questions, you’ll be well-equipped to craft a luggage tag that not only serves its practical purpose but also showcases your individuality.
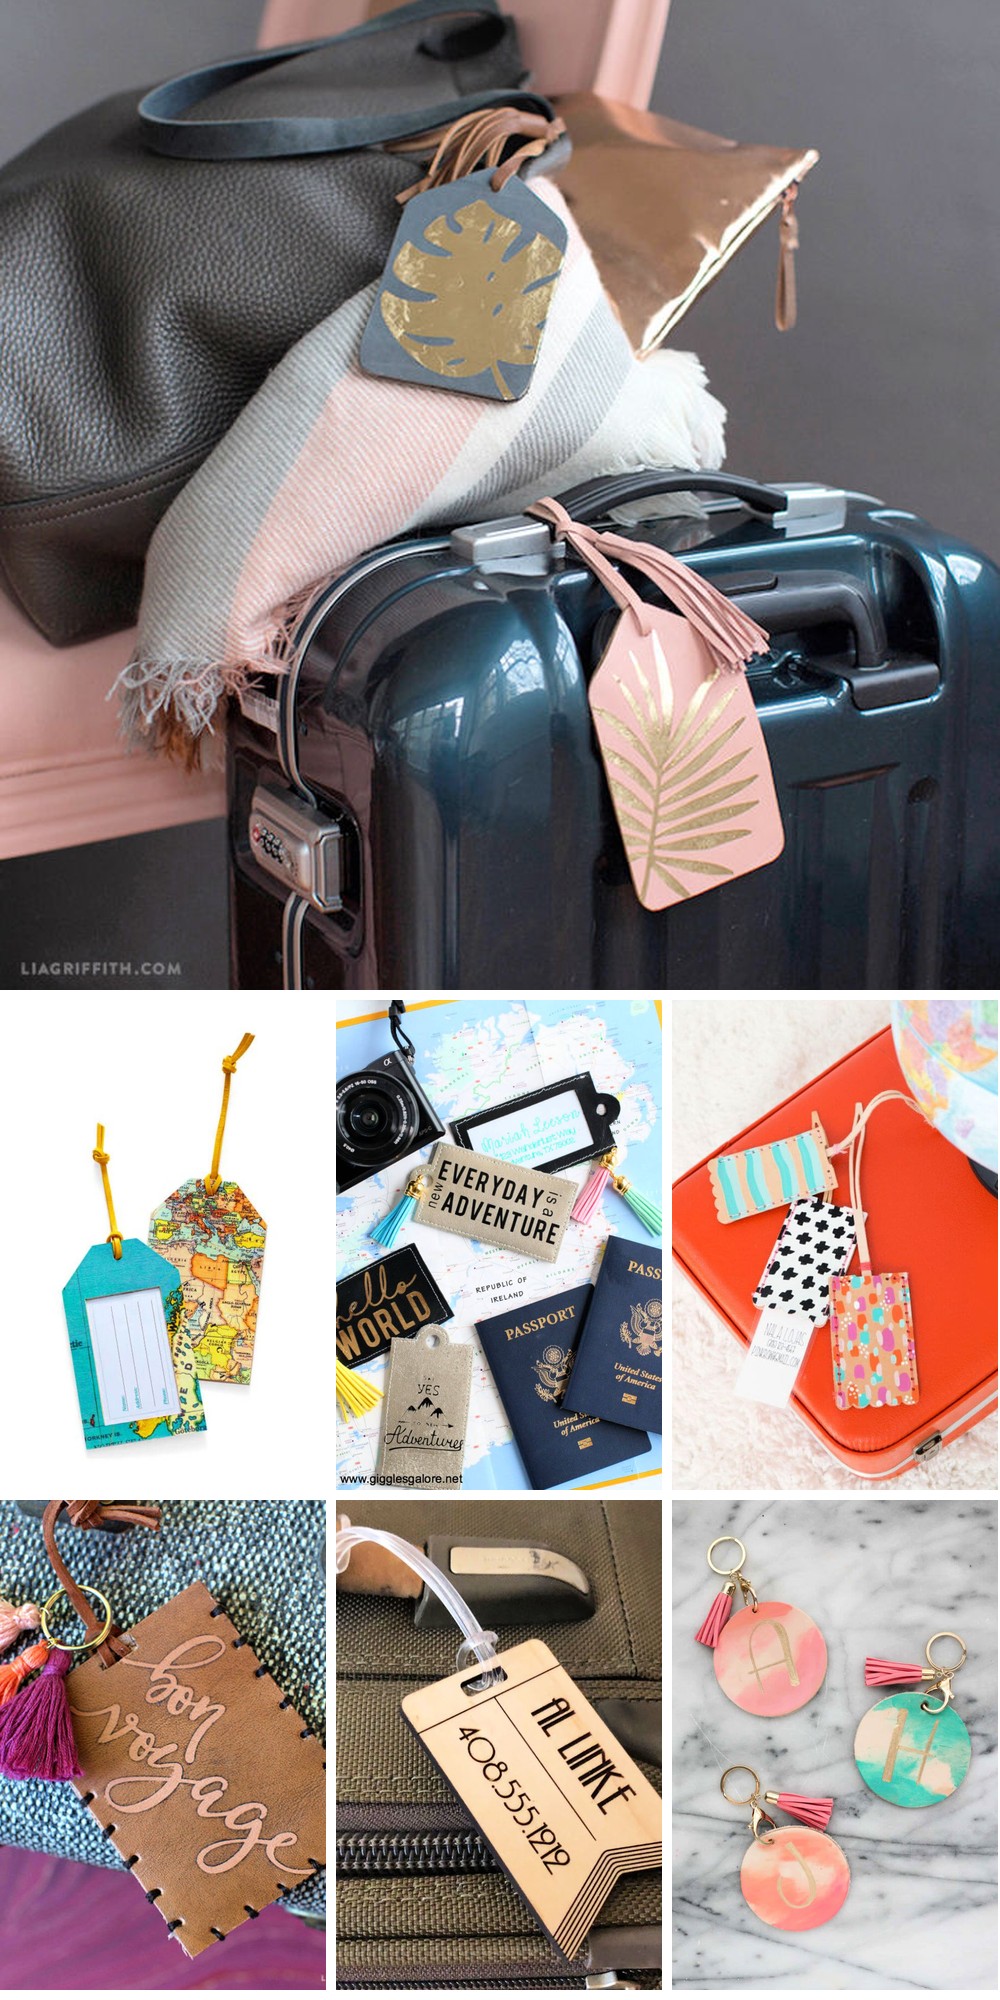
25 DIY Luggage Tags: Homemade Luggage Tag Ideas
Transform your luggage with unique, handmade flair by exploring these 25 innovative DIY projects for creating personalized luggage tags. Turn ordinary travel gear into a reflection of your personal style and make a statement at the airport or on the go.
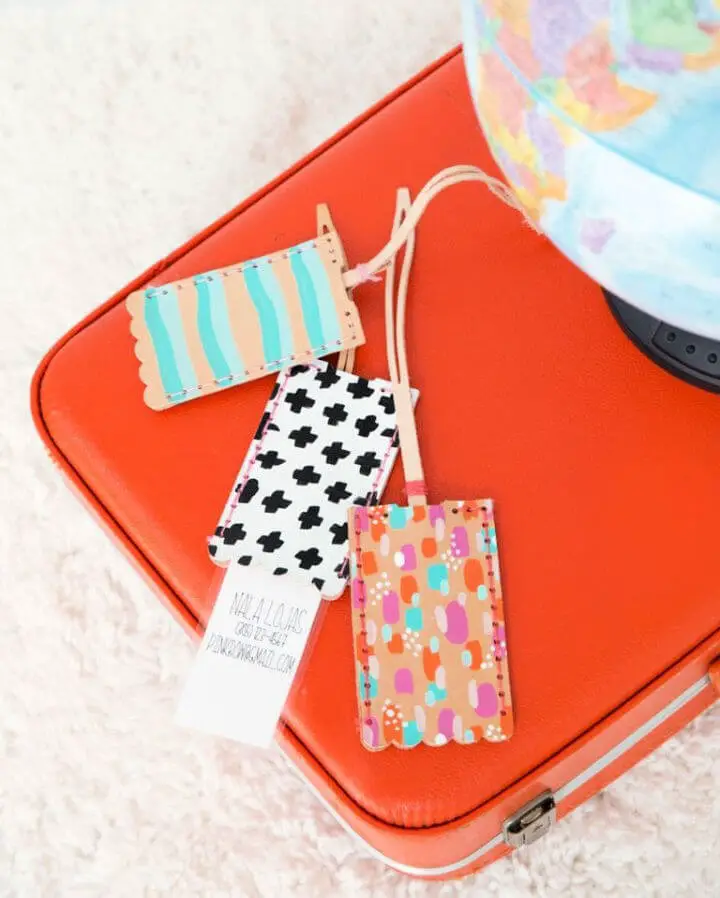
DIY Foiled Tropical Luggage Tag
Elevate your travel style with stylish foiled tropical luggage tags, crafted through Lia Griffith’s easy-to-follow DIY tutorial. Not only do these eye-catching tags make a fashion statement, but they also serve as a practical tool for identifying your luggage at the baggage claim. The process involves combining leather scraps, foil iron-on, and basic tools like scissors and an iron to create unique and personalized tags. To take it to the next level, simply insert your business card into the tag, ensuring that you’ll never misplace valuable items again. With Lia Griffith’s membership, you’ll gain access not only to this full project tutorial but also to a vast library of creative DIY projects, templates, and instructional videos designed to enhance your crafting experience. Join the community to tap into high-quality, creative projects that add a personal touch to every aspect of your life.
Summer Camp Luggage Tag for Kids
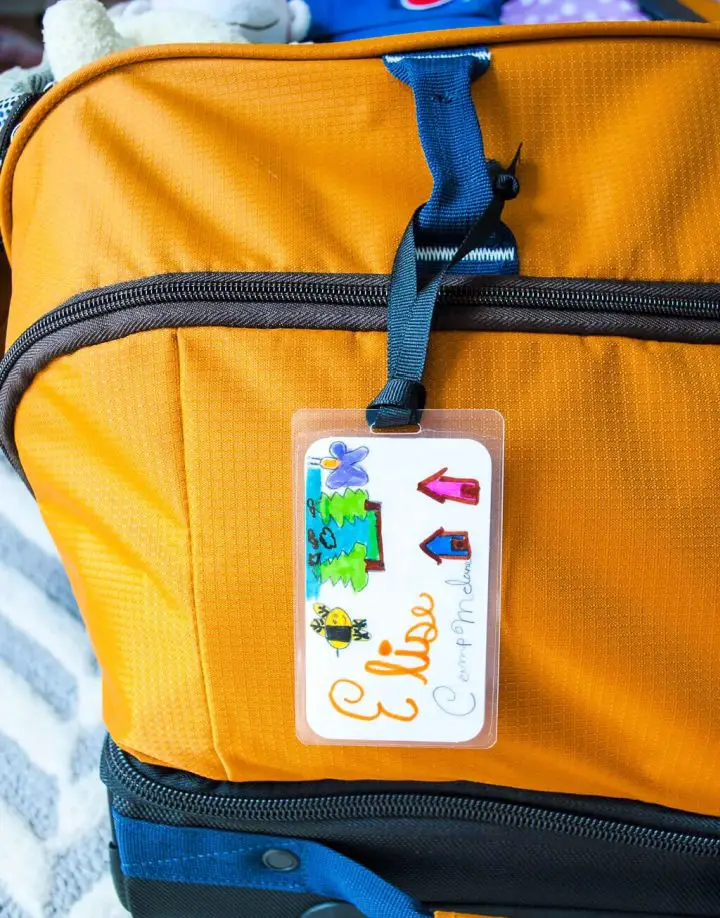
Get ready for a summer of adventure with a fun and easy DIY luggage tag project that’s perfect for kids! By following Merriment Design’s simple, step-by-step tutorial, your child can create a personalized luggage label that’s both practical and a unique keepsake. In under 30 minutes and for less than $2, they’ll have a custom tag to call their own, making their camp gear stand out from the crowd. The project requires basic supplies like card stock, markers, a corner punch, self-laminating pouches, ribbon, and scissors. With this activity, your child can express their creativity by decorating their tag with their name and camp details before sealing it for durability. Add a touch of elegance with a ribbon attachment, making it the perfect finishing touch. This enjoyable DIY project is a great way to get your child excited about summer camp and adding a personal flair to their gear.
Free Printable Beach Luggage Tag
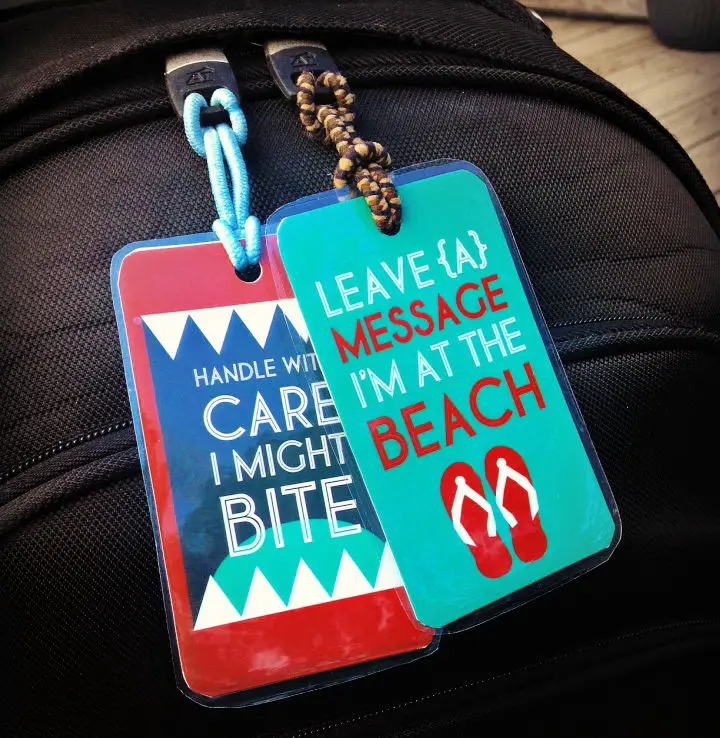
Get set for a stress-free beach vacation with Redefined Mom’s DIY Printable Beach Luggage Tags guide! With just a few simple supplies like a printer, card stock or photo paper, scissors, a hole punch, and laminating materials, you can create personalized, beach-themed tags that make your luggage stand out. Simply print the templates, cut them out, fill in your details, laminate for durability, and attach with a ribbon or rubber band. Not only will these tags help identify your bags quickly, but they’ll also add a charming touch to your travel gear. With uniquely labeled bags, you can hit the beach with confidence, knowing your belongings are less likely to get mixed up with someone else’s.
How to Make a Leather Luggage Tag
Elevate your travel game by creating one-of-a-kind DIY leather luggage tags using Lia Griffith’s comprehensive template and tutorial. This innovative guide not only showcases a trendy way to label your luggage but also reveals a groundbreaking method for staining leather with personalized designs or text. As you embark on this creative journey, you’ll gain access to a detailed materials list, step-by-step instructions, and expert tips to ensure a flawless outcome. With visual aids at your fingertips, crafting these unique tags becomes an enjoyable and fulfilling experience that adds a personal touch to your travel accessories.
Easy DIY Art Deco Luggage Tag

Crafting personalized Art Deco luggage tags is an engaging DIY endeavour that imbues travel essentials with a touch of personality. While traditional methods may involve tedious manual cutting, Instructables offers a comprehensive guide leveraging laser-cutting techniques to produce sleek and stylish accessories. To embark on this project, gather the essential materials: 1/8″ plywood, clear luggage tap loops or leather cord, lacquer for finishing, and access to a reliable laser cutter. The supplied source files streamline the process, allowing you to achieve professional-looking results with ease. As you work, remember to prioritize safety when operating laser equipment and apply lacquer in a well-ventilated area. These bespoke luggage tags not only serve as functional identifiers but also showcase your artistic flair, making them a unique reflection of your travel style.
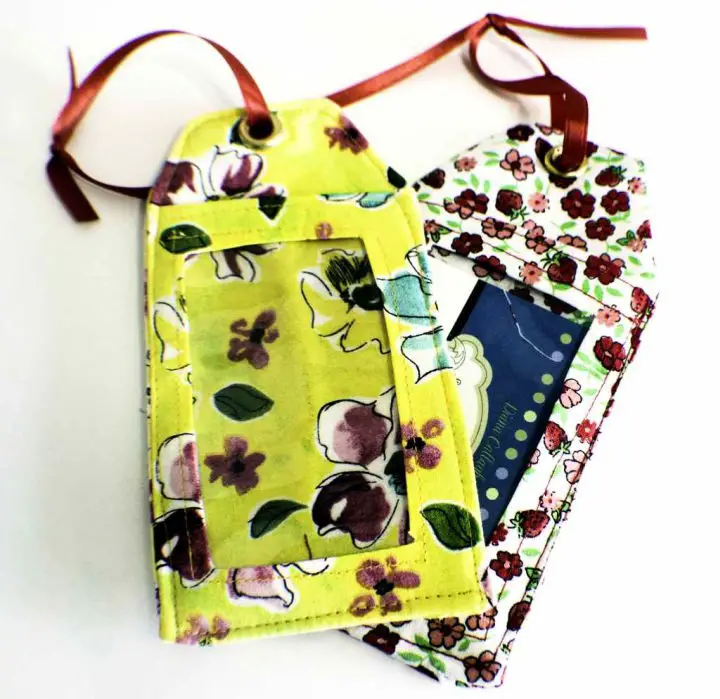
Make a Luggage Tag From Jeans
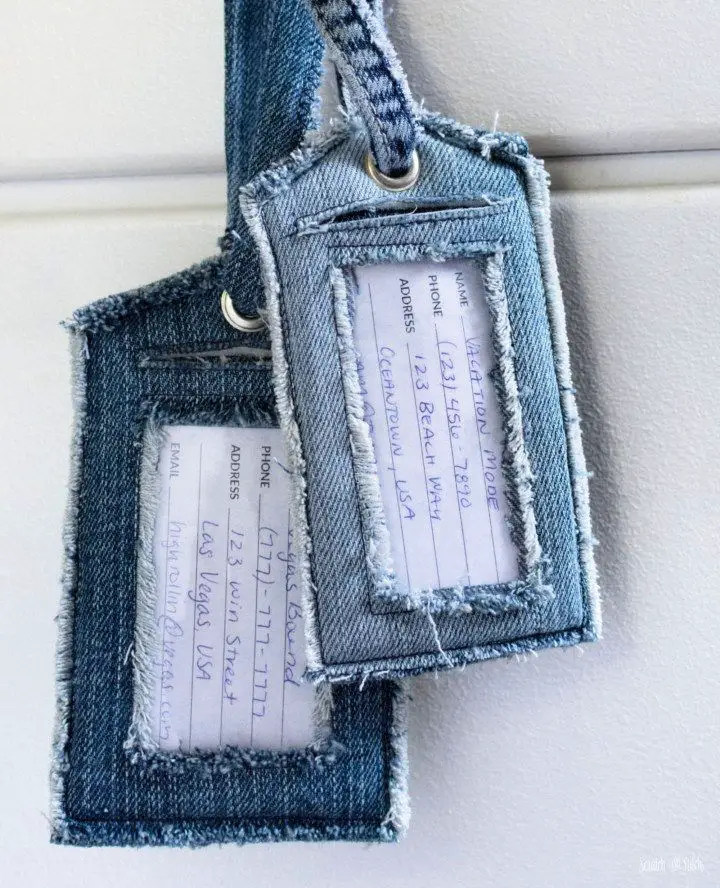
Upcycle old denim jeans into stylish and sturdy luggage tags with Scratch and Stitch’s DIY guide. Cathi takes you through the process of transforming worn-out denim into chic travel accessories, combining durability with ease of identification. The provided pattern and step-by-step instructions ensure a seamless crafting experience, guiding you in creating a frayed-edge design featuring a vinyl window for your contact information. With this eco-friendly upcycling project, adding a touch of personal flair to your travel gear is a breeze, making it an excellent way to repurpose denim scraps. Get ready for your next adventure with luggage tags that are uniquely yours and environmentally responsible.
Sew Your Own Luggage Tag
If you’re planning to add a personal touch to your travel gear, consider crafting your own unique luggage tags using basic sewing skills. Sewverycrafty’s step-by-step guide is perfect for DIY enthusiasts who want to create durable and eye-catching tags from their favorite fabrics. With clear instructions and helpful tips, you’ll be able to make customized tags that not only reflect your personal style but also ensure your bags stand out on the carousel, eliminating any confusion with someone else’s luggage. By following this practical project, you’ll elevate your travel accessories with a homemade flair that showcases your creativity and individuality.
Unique Rustic Wooden Luggage Tag

Creating rustic wooden DIY luggage tags is an accessible and fulfilling project that injects a personal touch into your travel essentials. By following Lori Greco’s step-by-step guide on Ideas for the Home, you’ll craft a sturdy and unique luggage tag that stands out from the rest. The process begins with selecting the right plywood sheet and culminates in adding personalized details with a Sharpie. As you bring this project to life, you’ll not only create a functional accessory but also add a creative flair to your bags, making them instantly recognizable. The instructions are straightforward, making it an enjoyable experience for crafters of all skill levels. With these charming, handmade tags, you’re ready to elevate your luggage and make a statement.
Mod Podge and Scrapbook Paper Luggage Tag

Looking to add a personalized touch to your travel gear? Creating DIY luggage tags is an engaging project that can be uniquely yours. By combining MDF wood, scrapbook paper, and Mod Podge Matte, you can craft durable and one-of-a-kind luggage tags. This activity is perfect for those who enjoy crafting and want their luggage to stand out from the crowd. With minimal requirements – a paintbrush, craft knife, and basic crafting skills – this project offers endless customization options. Embellish your tags with washi tape, paint, or decals to give them an extra pop of personality. By following simple instructions, you’ll be able to create a set of luggage tags that not only secure your identification but also reflect your unique style. This DIY endeavor is the perfect way to make your next trip just a little more special.
Make Your Own Watercolor Luggage Tag

Kara Whitten’s DIY watercolor luggage tag tutorial at A Beautiful Mess offers an innovative way to infuse personality into your travel gear. Perfect for summer vacationers or those seeking a distinctive keychain accessory, this craft harmoniously blends the rustic charm of leather with the ethereal beauty of watercolor. To create this unique piece, you’ll need basic supplies like leather rounds, watercolor paints, and a paintbrush, readily available at most craft stores. The step-by-step guide is clear and easy to follow, making it accessible for anyone looking to make a custom luggage tag. With the ability to personalize colors and monograms, your luggage will stand out with flair and refinement on your next trip.
Homemade Typographic Luggage Tag

Discover the art of personalizing your travels with DIY typographic luggage tags, courtesy of Sarah Khandjian’s engaging tutorial. With the help of a Silhouette or Cricut cutting machine and heat transfer vinyl, you’ll be able to craft unique tags that not only showcase your creative flair but also make it easy to identify your bags at the airport. This quick and practical project is perfect for craft enthusiasts and anyone looking to add a touch of personality to their luggage. With clear instructions and essential supplies provided, you’ll be well on your way to creating a set of colorful, custom luggage tags ready for your next adventure.
DIY Leather Luggage Tag at Home
Unleash your creativity and create one-of-a-kind personalized leather luggage tags with the Cricut Explore. Following Damask Love’s comprehensive DIY guide, you’ll be able to craft durable and customized tags that reflect your personal style. With the precision of Cricut technology and a few simple tools, you can cut through tooling leather, add a pop of color with Angelus leather paint, and secure your details inside with a Xyron Sticker Maker. Once assembled, this travel accessory is not only functional but also showcases your unique flair. Get ready to elevate your luggage game on your next adventure.
Sweets-Inspired Luggage Tag Ideas
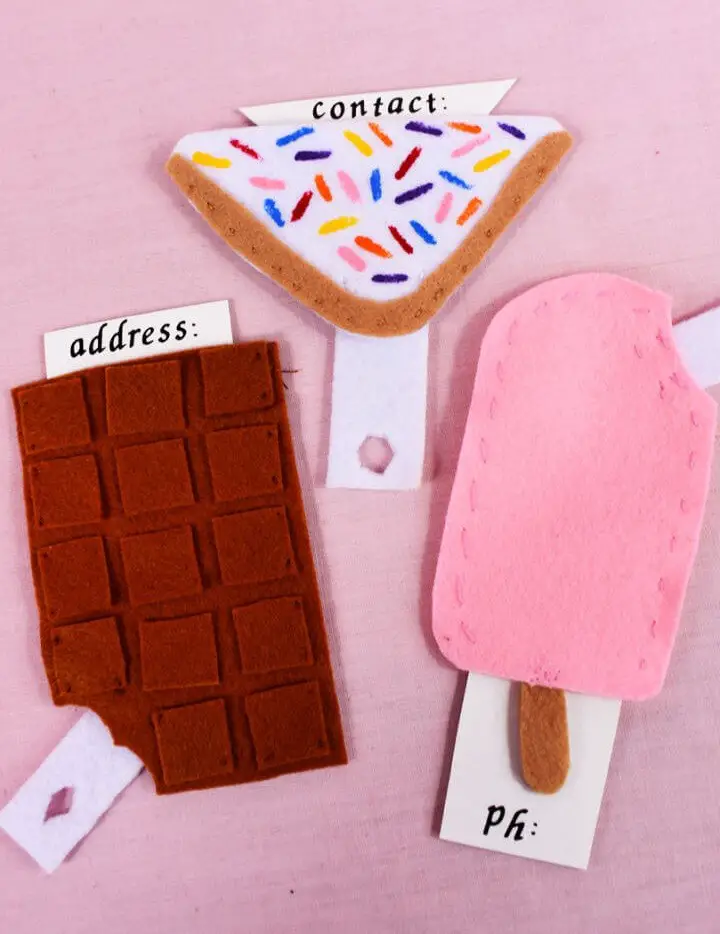
Elevate your travel style by creating your own DIY sweets-inspired luggage tags, a project that’s both fun and accessible. With this step-by-step guide, you’ll learn how to craft unique tags featuring designs like chocolate bars, fairy bread, or ice cream cones using simple materials like felt, acrylic paint, and cardstock. Whether you’re handy with a sewing machine or prefer to use glue, this project is designed to be enjoyable for all skill levels. The added security of a concealed contact information slip provides peace of mind while traveling. Not only are these handmade tags practical, but they also add a delightful touch of personality to your luggage, making it easy to identify and keep track of your belongings. So, get creative and make a tag that’s as sweet as your next adventure.
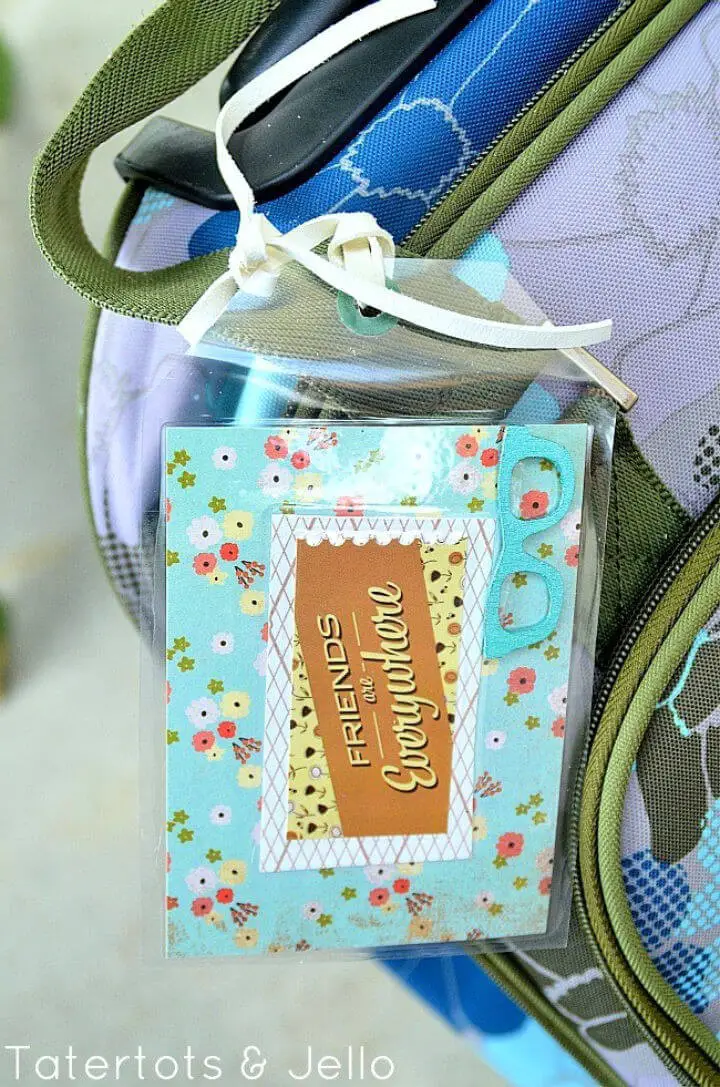
Make Your Own Luggage Tag
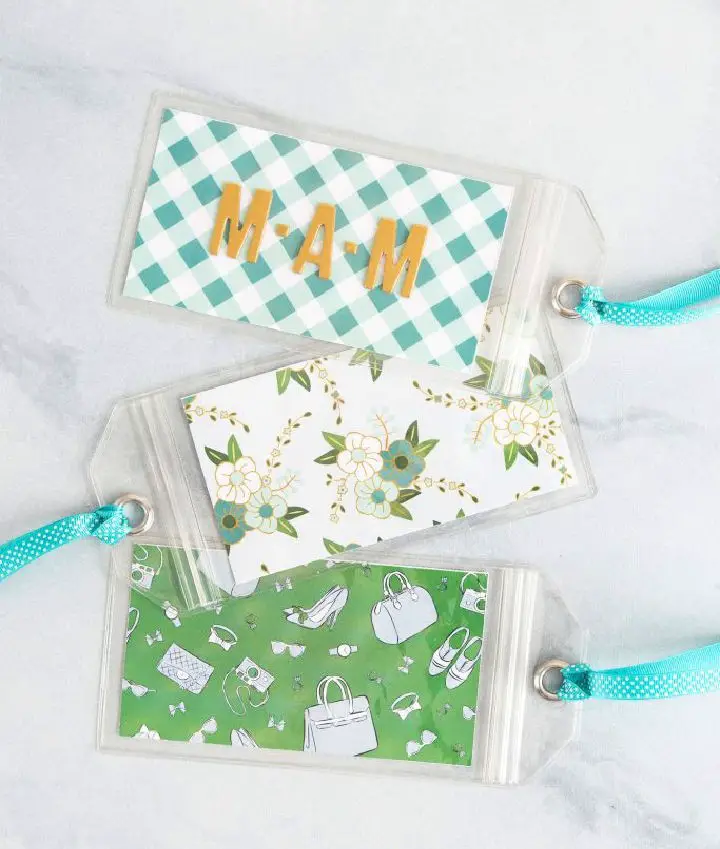
Elevate your travel experience by transforming ordinary luggage tags into personalized masterpieces using a DIY project from The Idea Room. This creative endeavor turns your suitcases into instantly recognizable treasures at the baggage claim. Start by gathering essential materials, such as printable tags, plastic luggage tag sleeves, a glue stick, scissors or a paper cutter, and optional letter stickers for adding a personal touch. Print out the tags, sandwich the fronts and backs together, and slide them into the sleeves. To add an extra layer of uniqueness, customize your tags with monogrammed letters before securing them to your luggage with a ribbon or attachment. This fun activity not only adds a personal flair to your travel gear but also ensures that your bags stand out from the crowd as you embark on your next adventure.
How to Make Your Own Luggage Tag
Before embarking on your summer adventures, why not get your kids involved in a fun and creative activity that’s both practical and exciting? One great way to do this is by crafting their own personalized luggage tags. Not only will these tags serve as a unique identifier for their suitcases and bags, but they’ll also add a touch of personal style to the travel experience. With the help of BasicGrey’s Hipster line and a simple tutorial, you and your children can design custom tags that reflect their personalities and interests. To give your creations an extra layer of protection, consider laminating them for added durability. And to make them even more secure, you can add a pop of color with leather lacing. Plus, be sure to download the complimentary luggage tag printable to ensure all the necessary information is easily readable. By involving your kids in this family-friendly craft project, you’ll not only be creating something special and meaningful, but you’ll also be making travel more enjoyable and memorable for everyone.
Simple DIY Polka Dot Luggage Tag
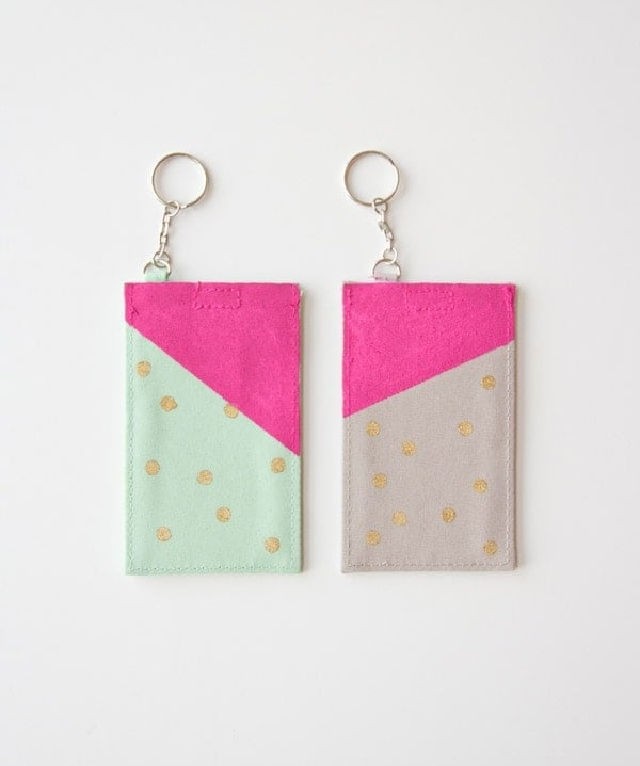
Transform your travel gear into a reflection of your personality by creating one-of-a-kind polka dot luggage tags. With a few simple materials, you can take plain tags to the next level using a unique DIY technique from Lovely Indeed. The process is easy: first, punch holes in washi tape for a playful mask design, then attach it to the tag. Next, add some color with craft paint and brushes, being sure to peel off the excess before it dries. For an added pop of personality, try adding a diagonal paint block for a striking visual effect. With your new luggage tags, you’ll be ready to make a statement at baggage claim and take your travel style to new heights.
Custom Bag Tag Using Leather

For those looking to elevate their travel accessories game, The House That Lars Built presents a delightful and functional project: crafting one’s own leather luggage tag. In this comprehensive guide, Brittany leads you through a 15-minute creative process, accompanied by a printable insert for adding personal details. Utilizing basic materials such as leather, scissors, and embroidery floss, individuals can create a stylish and long-lasting tag to adorn their suitcase. This step-by-step guide is perfect for anyone seeking to infuse personality into their travel gear while enjoying a quick and fulfilling DIY experience.
Handmade Duct Tape Luggage Tag

Add a personalized touch to your luggage with a creative duct tape tag. Following Instructables’ straightforward guide, you can craft a one-of-a-kind identifier that will make your baggage easily recognizable at the airport. This DIY project is ideal for travelers seeking to infuse their journey with personality and also serves as a fun crafting idea for gifts or personal use. With minimal materials required, this activity is perfect for those who want to add a dash of individuality to their luggage without breaking a sweat.
No Sew Fabric Luggage Tag
Transform your luggage with a personal touch by crafting unique no-sew luggage tags using a simple step-by-step guide from Thirty Handmade Days. This DIY project requires minimal materials – fabric, Heat N Bond Ultra, clear vinyl or a shower curtain liner, a grommet, and ribbon. The transparent window design allows your contact information to be easily visible on a crowded baggage carousel. Beyond being practical, these tags add a splash of color and whimsy to your bags, making them truly one-of-a-kind. As you create this personalized accessory for your next adventure, consider exploring other creative projects that can elevate your travel experience.
DIY Luggage Tag – Step by Step Instructions
Embellish your travel gear with personality by embracing the creative DIY Luggage Tags project from Lydi Out Loud. Bid farewell to the woes of lost or misplaced luggage with these vibrant and expressive tags that set you apart from the rest. This comprehensive guide takes you through a step-by-step process, utilizing materials like printable vinyl and a Cricut Explore Air. You’ll gain valuable insights on leveraging design software, choosing the ideal vinyl, and sealing your work to ensure durability. With Lydi Out Loud’s expertise, your luggage will exude style and convey a clear message, making it perfect for personal use or as a thoughtful gift. For any traveler, these DIY tags are an indispensable accessory that elevates their travel experience.
Leather Luggage Tag With Cricut Knife Blade
Elevate your travel game by creating personalized leather luggage tags with the Cricut Knife Blade and Cricut Maker. With Giggles Galore’s comprehensive guide, you can craft unique designs that add a touch of elegance to your baggage in just an hour. The tutorial provides a step-by-step process for design, assembly, cutting, and adhering materials, making it accessible to crafters of all skill levels. As you personalize your luggage tags, you’ll not only ensure your contact information is easily readable but also showcase your creativity and style. These custom tags are not just functional; they’re a statement piece that reflects your personality and adds a personal touch to your travels.
DIY Gift Map Luggage Tag
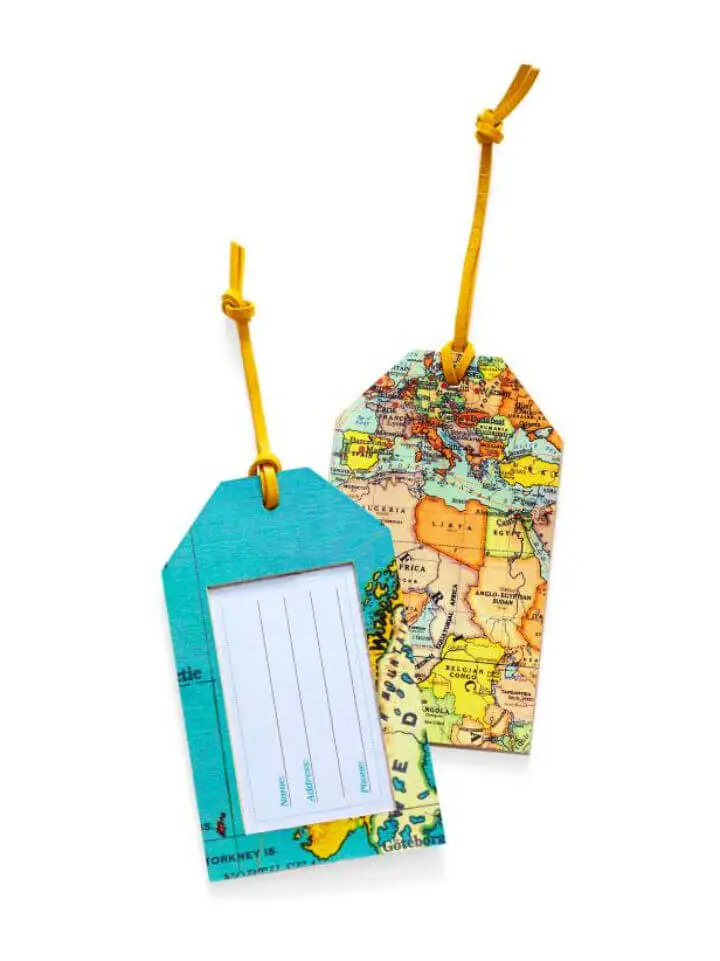
HGTV makes creating one-of-a-kind DIY gifts a breeze with its step-by-step guide to custom map luggage tags. These handmade tags not only add a touch of personality to any traveler’s luggage but also serve as a thoughtful present. To get started, download the provided templates and print them out. Next, scan your map design onto T-shirt transfer paper, then iron it onto a piece of light-colored leather. Cut out the shapes, glue them together, and insert a clear plastic window along with an address label. Finally, thread a leather cord through the tag to complete the project. This endeavor is ideal for anyone who enjoys crafting and personalizing gifts, offering a practical yet charming way to help friends and family identify their luggage on any adventure.
How to Do You Make a Luggage Tag
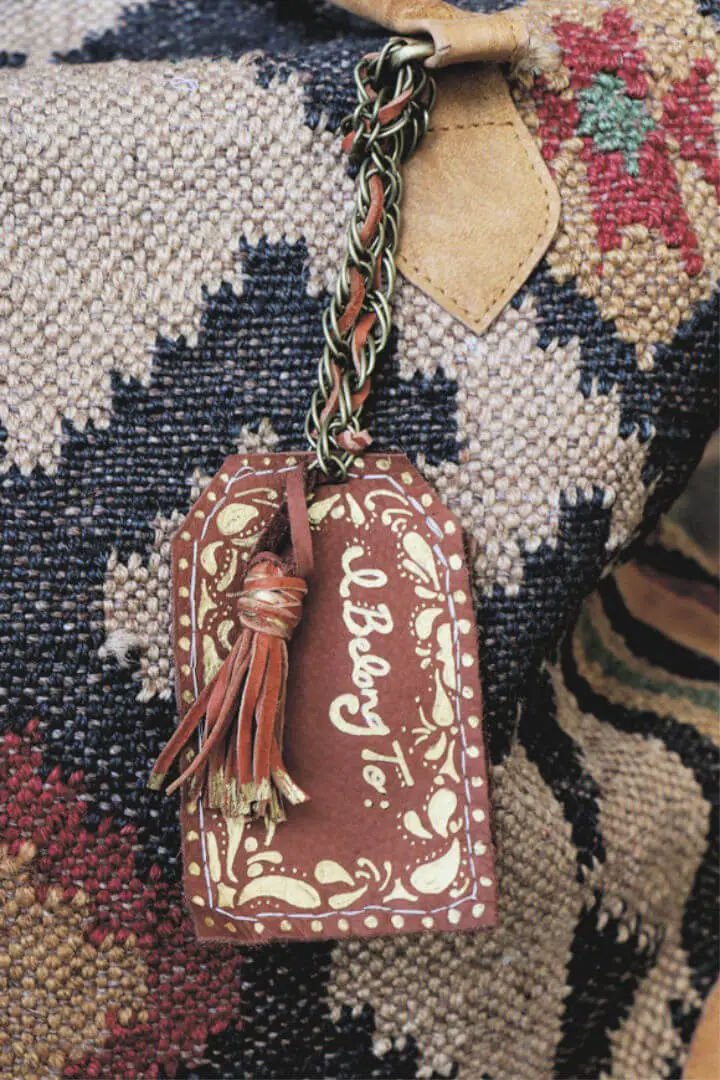
Transform your travel experience by creating a distinctive custom luggage tag using leather. The process is surprisingly easy, thanks to the helpful DIY guide from the Free People Blog. This comprehensive tutorial breaks down the necessary materials – think leather scraps, cord, and paint markers – into manageable steps. As you sew, cut, or glue your way through the project, you’ll be crafting a sturdy and stylish tag that not only adds a personal touch to your luggage but also serves as a reliable identifier in crowded baggage claim areas. With this creative endeavor, travelers can infuse their gear with individuality, making it easier to spot their belongings quickly and enjoy added peace of mind during their journeys.
DIY Luggage Tag With Embroidery
Create personalized luggage tags that reflect your unique style with ease using the step-by-step guide from Life Sew Savory. The addition of embroidery adds a touch of elegance to these tags, setting your bags apart on any journey. Perfect for travelers who want to combine practicality with flair, these DIY tags are not only visually appealing but also serve as a quick identifier among a sea of similar luggage cases. The tutorial is designed to be clear and engaging, providing you with a free template, easy-to-follow instructions, and helpful photos to ensure your success. With Life Sew Savory’s guidance, your next trip can be both organized and expressive, thanks to your custom-made luggage tags.
Personalized Photo Art Luggage Tag
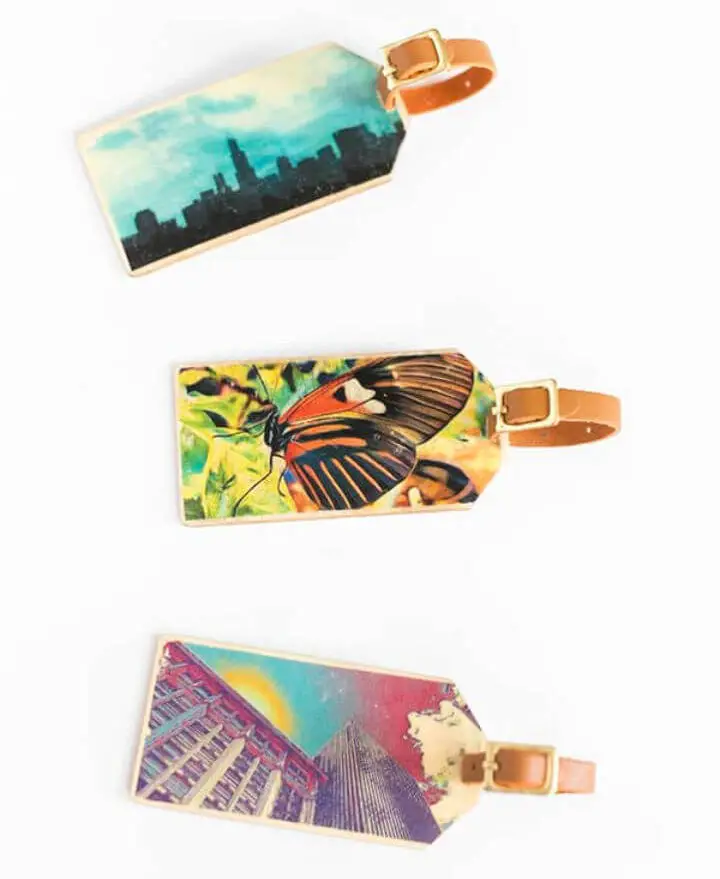
Transform ordinary luggage tags into works of art with the help of Little Red Window’s DIY guide. By following Cassie May’s inventive process, you can turn your favorite photos into unique wooden tags that will make your bags stand out at the airport. The best part? You don’t need any prior photo editing experience because BeFunky’s user-friendly platform offers a range of digital art effects that are easy to apply. Simply follow the step-by-step instructions to print your images with a laser printer, add a layer of Mod Podge for durability, and secure them to wooden tags for a finish that’s both eye-catching and long-lasting. Not only will these DIY luggage tags make your travel gear more personalized, but they’re also a fun project that showcases your creativity.
Conclusion:
As you conclude this DIY luggage tag project, remember that the perfect blend of practicality and creativity has come together to elevate your travel experience. The process of selecting materials, adding personal touches, and overcoming potential setbacks has been guided by these step-by-step instructions, troubleshooting tips, and eco-friendly advice. Ultimately, a well-crafted luggage tag not only secures your belongings but also serves as an extension of your personality, reflecting your unique style. By taking these ideas and making them your own, you’ll travel with confidence, flair, and the satisfaction of having crafted something special.
