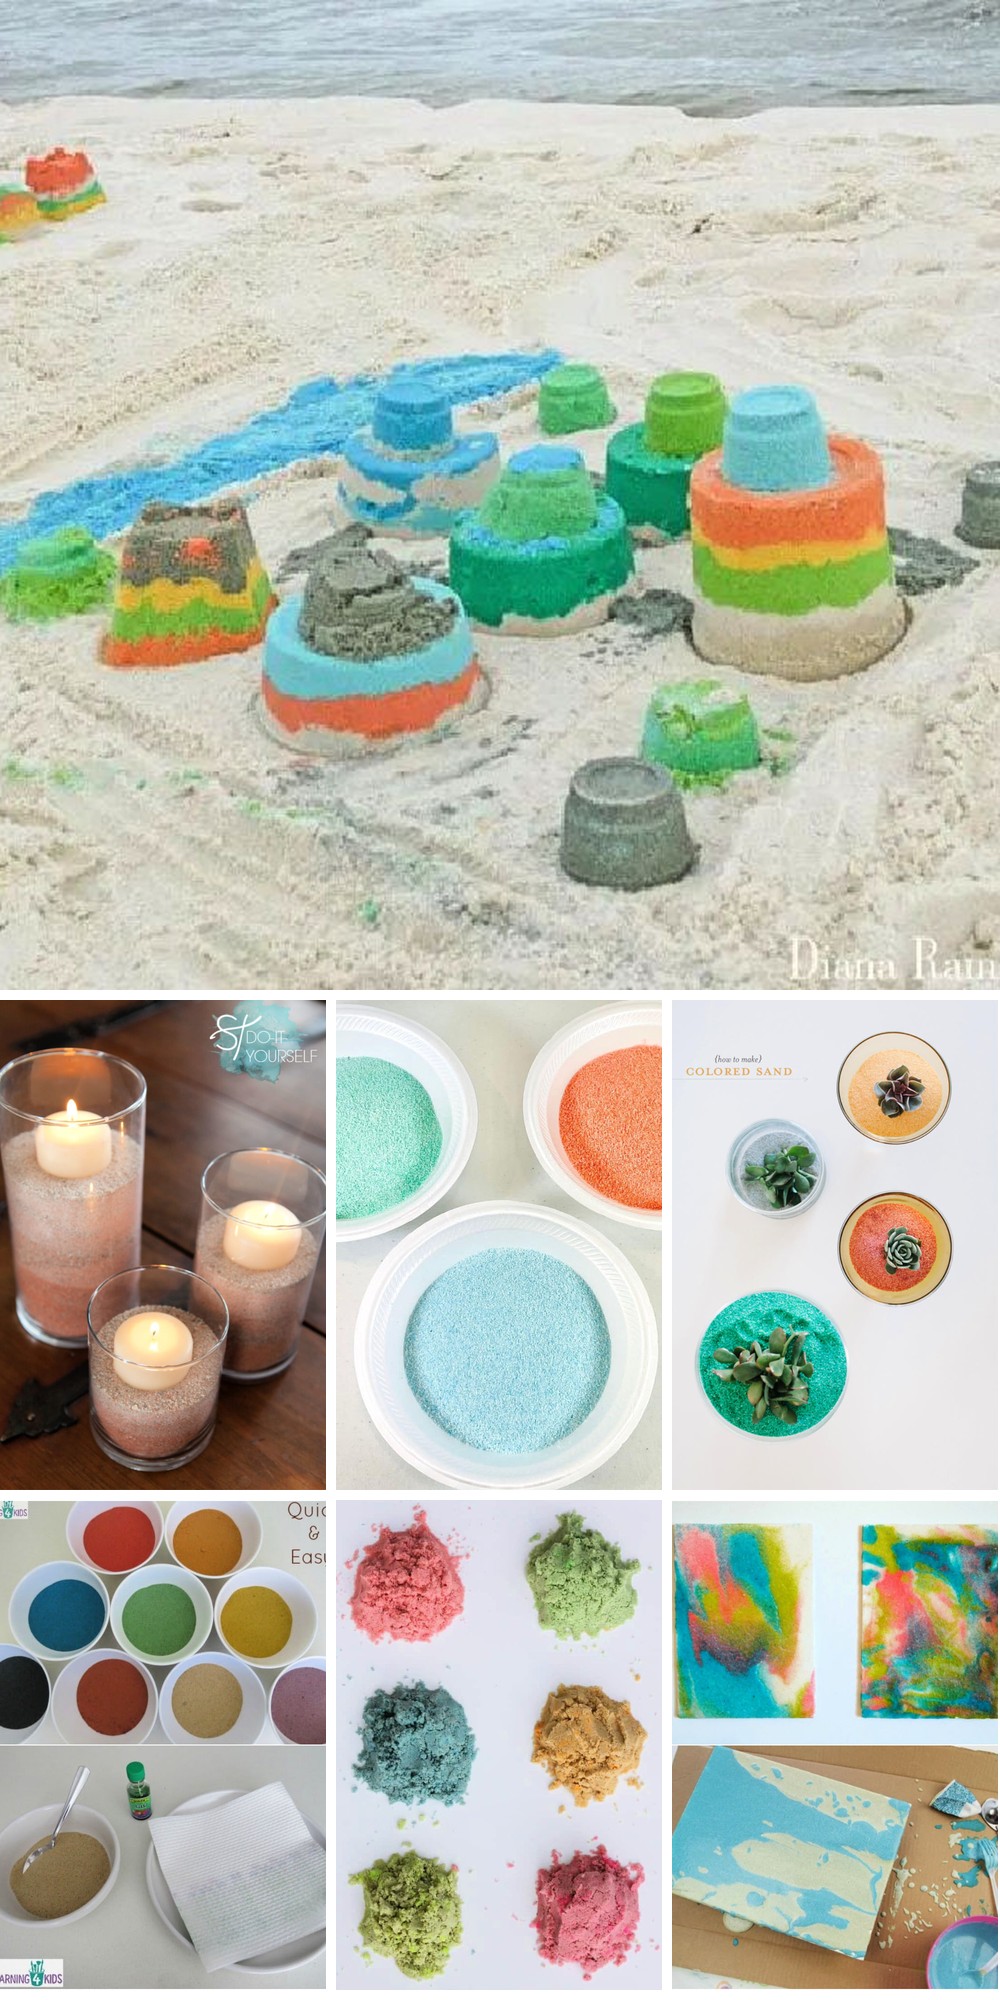
Crafting with 15 vibrant colors of sand unlocks a realm of endless possibilities. Whether you’re envisioning mesmerizing art pieces, serene zen gardens, or customized decorative accents, the creative scope is as vast as your imagination. Each unique piece offers an opportunity to infuse character, texture, and personality into your surroundings or gifts, making it truly special. The adaptability of colored sand enables it to take on various forms, from elegant vases to functional coasters, ensuring each creation reflects its creator’s distinct touch.
Embarking on the journey of creating colored sand at home is a rewarding and uncomplicated process. With minimal effort, materials you likely already possess, and a dash of creativity, you can transform ordinary sand into a kaleidoscope of hues. This practice not only serves as an engaging and fun activity but also highlights sustainability through the utilization of natural materials and promotes recycling. As we guide you through each step, from preparation to drying, get ready to unlock a world filled with color and boundless potential in crafts.
Creative Project Ideas with Colored Sand
Beyond its traditional use as a decorative filler, colored sand offers a world of creative possibilities. From sparking imagination to adding vibrant hues to various projects, this versatile material is waiting to be explored. Here are some innovative and easy-to-follow ideas that can be adapted for home or classroom use.
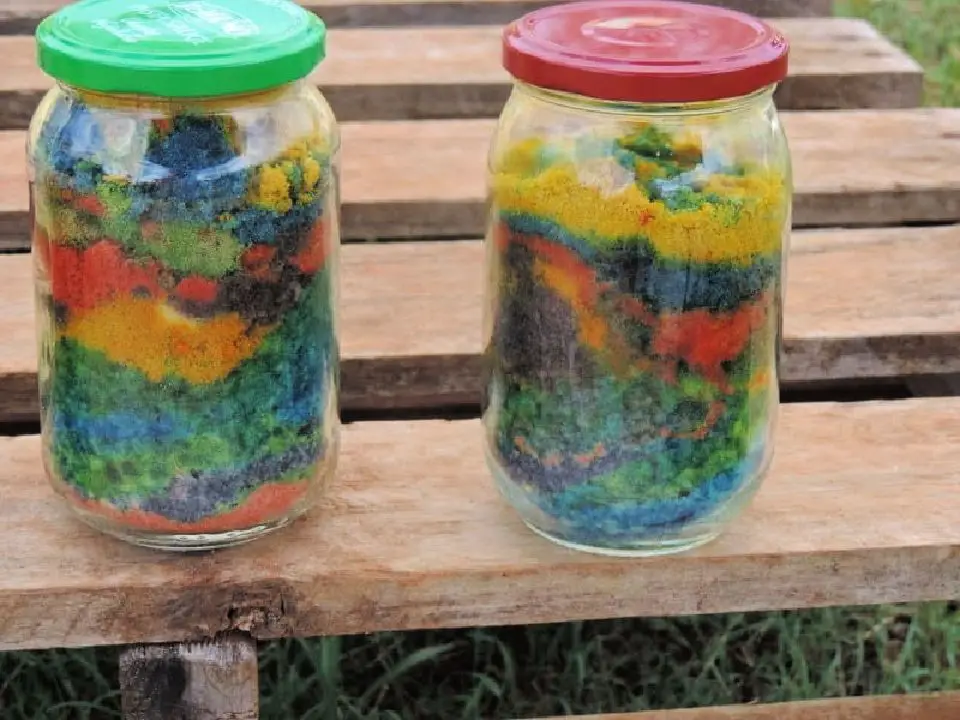
Sand Art Bottles
Creating layered designs in clear bottles is a timeless and engaging way to utilize colored sand. To achieve this, start by carefully pouring the sand into the bottle through a funnel, crafting stripes, zigzags, or even three-dimensional landscapes. For an extra layer of visual appeal, experiment with unique-shaped vessels or incorporate small objects like charms or shells to add texture and depth.
Personalized Terrariums
Terrariums are a unique way to bring some natural beauty into your home. To create a visually striking display, start by layering colored sand at the bottom of the container. This will provide a subtle yet eye-catching backdrop for the soil and plants that follow. The layered effect can be tailored to match the color scheme of the surrounding space or simply reflect your personal preferences.
Decorative Vases
Transform your clear vase into a stunning piece of art by infusing it with vibrant colored sand. For a mesmerizing ombre effect, carefully layer different shades of the same hue, allowing each color to blend seamlessly into the next. Alternatively, make a bold statement by combining contrasting colors in a striking mosaic pattern. To preserve your design and ensure it remains unchanged over time, apply a thin layer of mod podge, or leave the sand loose for a dynamic, adjustable decoration that can be easily rearranged.
Sand “Paintings”
Unleash your creativity by employing a unique medium – colored sand! Start by laying the foundation with glue on a flat surface, such as cardboard or wood. Next, create your design using the glue, taking care to maintain a steady hand. Once you’ve finalized your artwork, sprinkle the colored sand over it, ensuring an even distribution. Finally, gently shake off any excess sand to reveal your stunning, textured masterpiece.
Customized Coasters
Create personalized coasters by layering colorful sand within small, spherical molds and subsequently enveloping the mixture with a resin coating. This DIY project allows for complete customization to harmonize with your distinct interior design aesthetic while also providing effective protection against surface damage.
Zen Gardens
Transform your space into a serene oasis by creating a mini zen garden in a shallow tray filled with vibrant colored sand. Employ a small rake or fork to meticulously craft patterns and designs, adding subtle nuances with the gentle placement of stones or miniature figures. As you work, remember that the essence of any craft project lies not only in the end result but also in the joy of the journey. Allow yourself to become fully immersed in the process, freely exploring different colors and textures as you go. In doing so, you’ll find that the simple act of creation can be a powerful source of calm and contemplation.
How to Make Colored Sand at Home – Step by Step
Transforming your home garden into a vibrant oasis is now easier than ever! By making colored sand, you can add a pop of color and whimsy to your space, particularly if you’re a fan of low-maintenance plants like cacti and succulents. The process itself is surprisingly simple and budget-friendly, requiring just a few basic steps. In this guide, we’ll walk you through each step in detail, making it easy for anyone to get started and create their own unique colored sand masterpiece.
What You’ll Need
When it comes to crafting with natural materials, having the right tools and supplies can make all the difference. For creating unique textures and designs with river sand, you’ll need a few essential items. First, gather some natural river sand, which can be found at many craft stores or online. Next, grab some poster paints or tempera paints to add color and vibrancy to your creations. If you want to create a more fluid consistency, have some water on hand as well. To mix and blend the ingredients together, you’ll need a sifter, plates or dishes, and a spoon or stick.
Step 1: Preparation of Sand
To prepare your natural river sand for coloring, begin by sieving it through a sifter or a fine-mesh screen. This step is essential in removing any impurities such as pebbles, stones, or organic matter that might be present in the sand, leaving you with a smooth and consistent material ideal for dyeing.
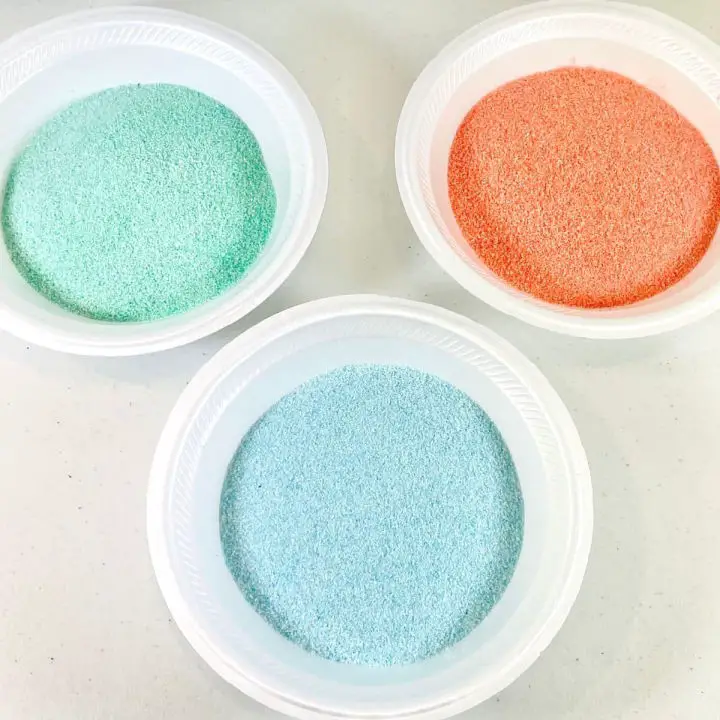
Step 2: Dividing the Sand
To organize your colored sand, place the sifted sand into individual compartments or containers, one for each distinct color you aim to produce. The number of containers needed will naturally correspond to the variety of colors you’re working with.
Step 3: Adding Color
To create a vibrant design on your plates of sand, start by pouring a generous amount of poster paint or tempera paint over the surface. These types of paints are well-suited for this project because they dissolve easily in water, allowing for effortless blending with the sand and hassle-free cleanup afterwards. Their water-soluble properties also make them an excellent choice for creating unique textures and patterns by manipulating the paint and sand mixture.
Step 4: Mixing
To combine the paint and sand effectively, use a spoon or stick to thoroughly blend them together. If the paint appears too thick or you desire a lighter hue, consider mixing in a small amount of water with the paint prior to adding it to the mixture. To achieve an even color distribution, ensure that the sand is fully saturated with the paint.
Step 5: Drying the Sand
Allowing the mixed colored sand sufficient time to dry is crucial, as this step can take around 24 hours. During this period, it’s essential to let the mixture sit undisturbed to prevent any accidental spreading of colors or messiness that might hinder its usability in future projects.
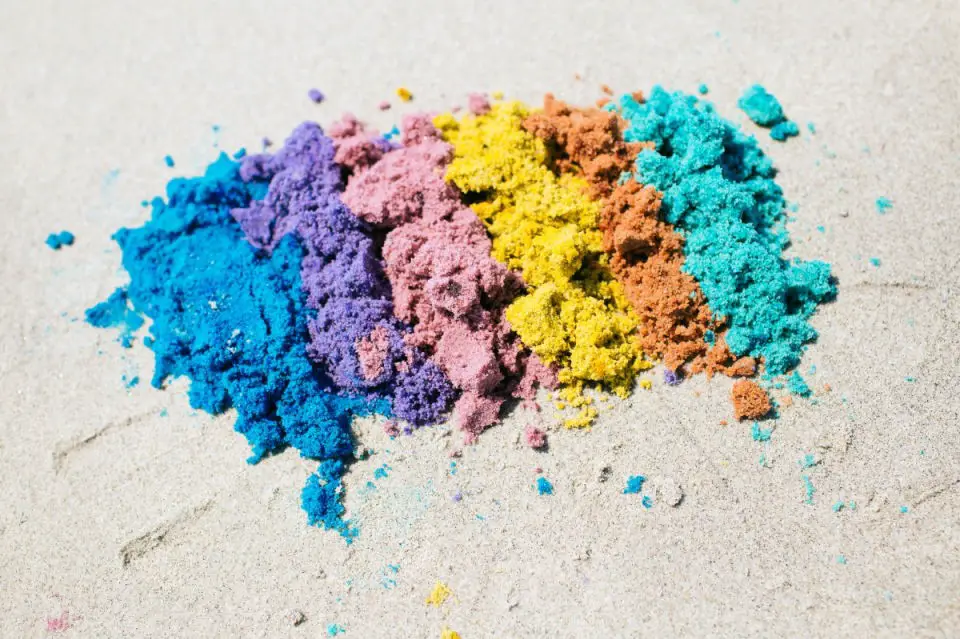
Step 6: Sifting the Colored Sand
After the colored sand has fully dried, a second sifting process is crucial to achieve the desired consistency. By passing the sand through the sifter once more, any remaining clumps are effectively broken down, resulting in a smooth, even texture that’s ideal for various applications.
The Sand is Now Ready
With the final touches applied, your vibrant colored sand is now primed for use in various creative endeavors. Whether you’re an enthusiast of innovative gardening techniques, a skilled artisan, or simply someone who appreciates unique decorative elements, this colorful mixture presents limitless opportunities for self-expression and home decor inspiration.
Video Tutorial
To further enhance your understanding of creating colored sand at home, I recommend watching the step-by-step video tutorial by Green Plants. This visual accompaniment perfectly complements the written guide that follows, offering a holistic learning experience suitable for both newcomers and experienced crafters seeking to refine their skills.
Tips for Longevity of Colored Sand Crafts
To preserve the vibrancy and beauty of your colored sand crafts for a long time, it’s crucial to employ the right techniques. By following these expert tips, you’ll be able to maintain their original charm and prevent fading or dulling over time. For instance, storing your creations in airtight containers can significantly reduce exposure to air and moisture, which are common culprits of color degradation. Additionally, avoiding direct sunlight and extreme temperatures can also help protect the colored sand from premature aging.
Protecting from Sunlight
When showcasing your stunning sand creations, it’s essential to consider the impact of direct sunlight. Prolonged exposure can cause the vibrant colors to dull and lose their intensity. To preserve the beauty of your artwork, position it in an area that is not directly exposed to windows or invest in UV-protective glass to filter out harsh rays and maintain the original hues.
Proper Storage
To preserve the beauty of your sand art, it’s essential to store it properly. When you’re not displaying it, transfer the sand to an airtight container that can be kept in a cool, dark place. This will help prevent moisture from seeping in and causing clumping or mold to form.
Sealants
When working with ephemeral materials like those used in sand paintings or decorative objects, it’s crucial to stabilize your design with a clear sealant. This helps retain the integrity of your creation by preventing loose grains from dispersing or shifting. A spray-based sealant is an efficient way to achieve a consistent and uniform coating, allowing you to preserve your artistic vision.
Handling with Care
With colored sand crafts being as intricate as they are, it’s essential to handle them with care to prevent the delicate layers of sand from becoming dislodged. When relocating these creations, ensure you’re supporting their base while minimizing any sudden movements or tilts, thereby preserving the integrity of your beautiful and unique art pieces.
Refreshing Faded Sand
When the vibrant hues of your colored sand craft begin to dull, don’t worry – a quick revamp is just a layer away. Gently add a new coat of colored sand on top, allowing the original design to peek through as you do so. This clever trick gives your masterpiece a revitalized look without requiring a complete overhaul. With these straightforward yet powerful tips, you can relish your colorful creations for years to come. The secret to their enduring appeal lies in careful handling and shielding them from the elements’ harsh conditions.
Sustainability Focus in Colored Sand Crafts
As you delve into the world of colored sand crafts, consider infusing sustainability into your creations, not just as a means to reduce environmental impact but also to imbue them with deeper significance. By adopting eco-friendly practices, you can transform your art into a symbol of responsible creativity. Here are some ways to integrate sustainability into your sand craft endeavors:
Use Natural Materials
When it comes to creating a unique and eco-friendly beach scene, consider opting for natural materials whenever possible. One creative way to achieve this is by substituting artificial dyes with spices that can serve as natural pigments. For instance, turmeric can be used to create a warm yellow hue, while paprika can produce a vibrant red color. Not only will this approach add depth and visual interest to your sand design, but it will also eliminate the need for harsh chemicals, making it an environmentally friendly choice.
Recycle and Reuse
As you prepare to purchase new containers for your sand art creations, consider scouring your home for glass jars and bottles that can be cleverly repurposed. This eco-friendly approach not only minimizes waste but also lends a unique, personalized flair to your craft. By reusing items you already own, you’re not only saving resources but also adding an element of storytelling to each piece.
Biodegradable Options
When creating temporary projects, such as ephemeral art installations or seasonal decorations, consider the environmental impact of your materials. Opt for biodegradable options that can naturally decompose without causing harm to the ecosystem. This sustainable approach ensures a minimal footprint and promotes ecological harmony, even when the project’s lifespan is limited.
Support Eco-Friendly Brands
While shopping for colored sand, consider the brand’s commitment to sustainability in its manufacturing process. Companies that adopt eco-friendly methods and utilize environmentally responsible materials can significantly minimize the environmental impact of your craft project.
Educate Through Crafting
As you work on your craft, seize the opportunity to share your passion for sustainability with others. Engage in conversations about eco-friendly practices and how even the smallest adjustments can collectively have a profound effect. By emphasizing sustainability, not only are you creating stunning art, but you’re also playing a vital role in ensuring a healthier planet for future generations.
Educational Value of Colored Sand in Crafts
Incorporating colored sand into craft activities presents a unique opportunity to engage children in creative play while simultaneously fostering their cognitive, emotional, and social development. Not only do these projects offer an entertaining outlet for self-expression, but they also provide a means of exploring and learning various concepts, such as color theory, texture, and spatial awareness.
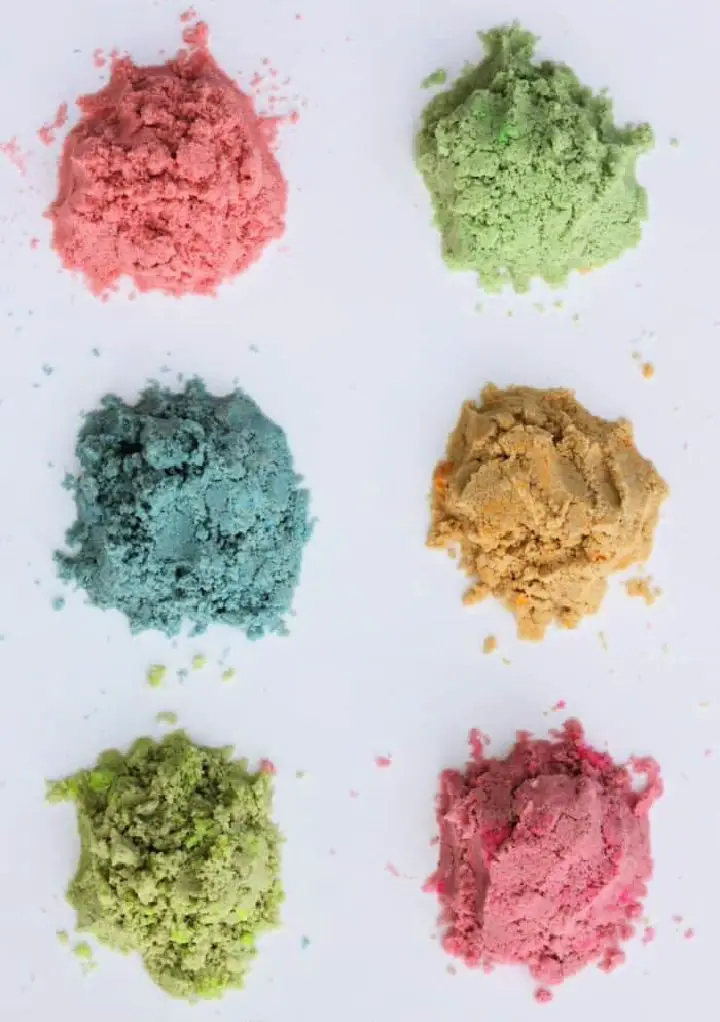
Understanding Color Theory
Exploring color theory has never been more tactile than when working with colored sand. By mixing various hues, you can create a hands-on learning experience that teaches children about the fundamental principles of primary, secondary, and tertiary colors. This sensory exercise not only demonstrates how new colors emerge but also showcases how they interact with each other in fascinating ways, making for an engaging and interactive lesson.
Developing Fine Motor Skills
Manipulating sand through pouring, sprinkling, and shaping enables the development of precise fine motor skills. Crucial for everyday activities such as writing, fastening clothing, and other tasks that require dexterity, these skills are refined through the deliberate manipulation of sand. The act of creating intricate designs or patterns requires coordination between hand and eye, further enhancing this proficiency.
Boosting Creativity and Imagination
With its vibrant hues, colored sand invites children to unleash their creativity and bring their imaginative concepts to life. The sheer versatility of this medium empowers them to craft one-of-a-kind designs and patterns, reflecting the distinct personality and artistic voice that emerges with each project.
Enhancing Concentration and Patience
As individuals embark on the intricate journey of creating detailed sand art, they are immersed in a meditative process that demands unwavering focus and an abundance of patience. Young minds, in particular, develop their capacity for concentration as they meticulously layer sand upon sand to bring their artwork to life. This calming yet challenging activity not only fosters a sense of calm but also imparts the importance of perseverance, instilling valuable lessons in those who dare to create.
Learning About Textures and Materials
While many art supplies share similar characteristics, sand stands out for its unique texture that sets it apart from others. Engaging with sand provides children with a tactile learning experience, allowing them to discover and understand various textures and their potential applications in artistic expression. Furthermore, exploring the properties of sand reveals how it behaves distinctively compared to mediums like paint or clay, enriching kids’ understanding of art materials.
Encouraging Sensory Play
The tactile nature of sand art provides a multisensory experience that can have a profound impact on cognitive development in children. By incorporating this sensory play into educational activities, educators can create a more engaging and effective learning environment. Additionally, the tactile sensation of sand can be calming and provide a much-needed respite for individuals seeking to unwind. Moreover, introducing colored sand to art projects can elevate the creative experience and foster a deeper understanding of various concepts.
FAQs About Colored Sand for Crafts
Unlock the creative potential of colored sand by exploring frequently asked questions about its uses, storage, and applications in crafting. Discover tips and tricks on how to harness this versatile medium to create breathtaking projects that showcase your artistic flair.
What is colored sand?
Regularly occurring sand, when infused with vibrant hues through a dyeing process, takes on a new persona – one that’s perfect for creative endeavors, artistic expressions, and aesthetic embellishments.
How can I make my own colored sand?
To create a mesmerizing display of colorful sand, simply combine regular sand with a dash of creativity – literally! Mix a pinch of food coloring or paint into the sand, stirring until the pigments are evenly distributed. Allow the concoction to dry completely before displaying your vibrant creation.
Is colored sand safe for children to use?
When it comes to using colored sand with kids, safety is a top priority. As long as the material is non-toxic and free from hazardous substances, you can breathe easy knowing your little ones are in good hands. And, of course, it’s always a good idea to keep a watchful eye on them during craft time, ensuring they stay safe and have fun while creating.
Can colored sand be used outdoors?
When venturing outside with colored sand, it’s essential to acknowledge its sensitivity to environmental factors. Prolonged exposure to sunlight and varying weather conditions can cause the vibrant hues to gradually lose their intensity, altering the overall aesthetic. As a result, you may want to consider using the colored sand in protected areas or applying a protective coating to help preserve the colors for as long as possible.
How do I prevent colored sand from fading?
To preserve the vibrant hues of colored sand, it’s essential to shield it from harsh sunlight. A simple yet effective way to do this is by keeping it away from direct rays altogether. For added protection, consider applying a specialized sealant designed specifically for colored sand. This will help lock in the colors and prevent them from fading prematurely.
What kind of projects can I use colored sand for?
The versatility of colored sand is undeniable, as it can be utilized in a wide range of creative endeavors. From crafting intricate designs within glass containers or adding a pop of color to miniature ecosystems, to serving as the foundation for scented candle creations or bringing visual interest to decorative vessels, this type of sand has the ability to bring people’s artistic visions to life.
How do I store colored sand?
To preserve the vibrancy of your colored sand, it’s essential to store it in airtight containers that prevent moisture from seeping in and compromising the color intensity. By doing so, you’ll be able to maintain the unique hues and shades of your art supplies for a longer period.
Can I mix different colors of sand together?
While the versatility of sand is often associated with its texture and grain size, it’s equally fascinating that you can create unique hues and designs by combining different colors of sand.
What should I do if the sand gets wet?
When working with colored sand that has become damp, it’s essential to allow it to fully dry before reusing. To achieve this, simply spread the sand out evenly on a flat surface and permit it to air dry. This step is crucial in maintaining the integrity of the colored sand and ensuring its continued use.
Are there eco-friendly options for colored sand?
While the idea of colorful sand crafts may seem daunting due to environmental concerns, rest assured that eco-friendly alternatives do exist. Consider opting for natural dyes or getting creative by concocting your own using spices like turmeric or beet powder. With these options in mind, you’ll be well-equipped to craft stunning and sustainable pieces.
15 Ways to Make Colored Sand for Crafts
Unleash your creativity and bring a splash of color to your crafts by learning how to make colored sand at home. With just a few simple steps, you can create a variety of vibrant hues perfect for embellishing decorations, jewelry, and other unique DIY projects.
Making Your Own Colored Sand
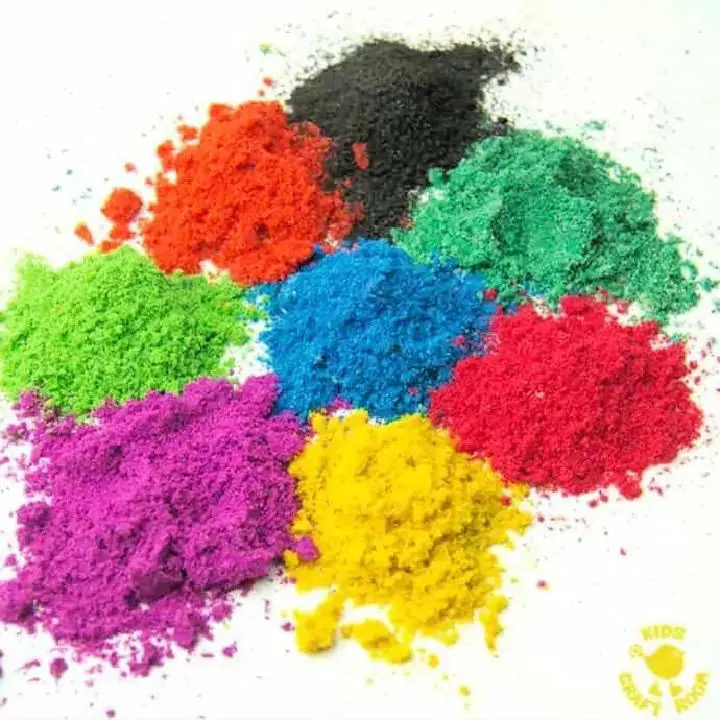
Here’s how you can bring a burst of vibrant colors to your craft projects without breaking the bank. Making your own colored sand at home is an easy and cost-effective way to add creativity and customization to any project. By combining play sand, powder paint, and ziplock bags, you can create a rainbow of colors that are ready for use once dried. Simply mix your ingredients in a bag, give it a good shake, and watch as the colors come together. Your homemade colored sand is perfect for storing indefinitely and using in a variety of fun and educational crafts, from sensory play to art projects. With this DIY solution, you can add a splash of color to any project without worrying about limited quantities or expensive store-bought options.
Homemade Colored Sand Recipe
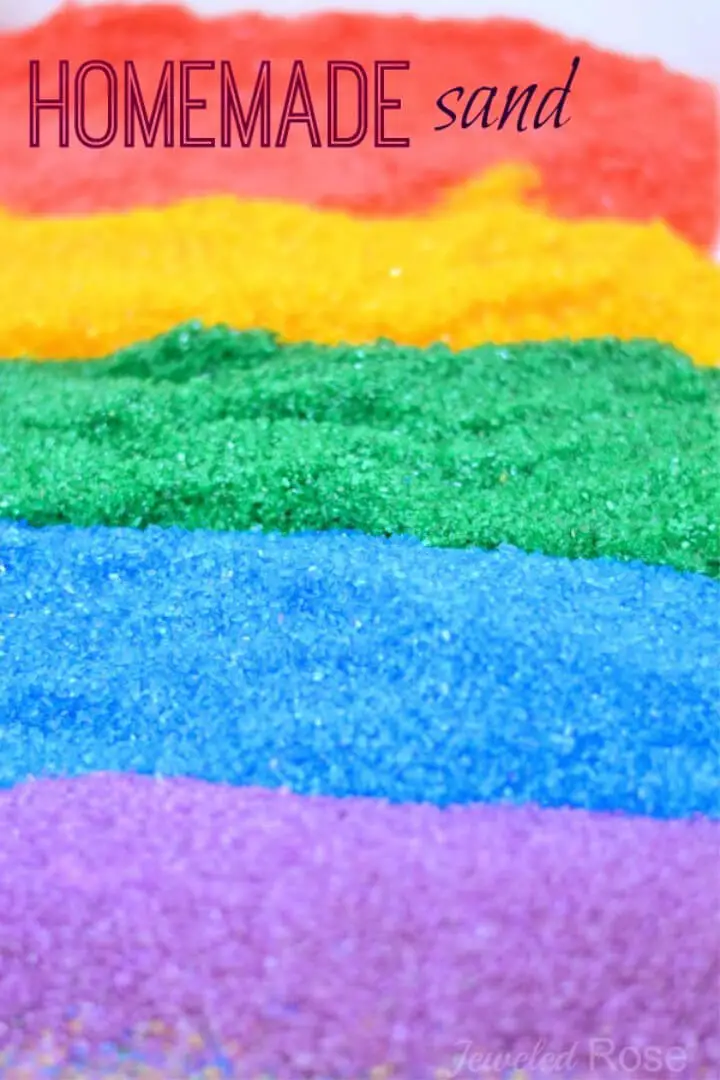
With a few simple materials and some creativity, you can create your own colorful sand for various art and sensory activities. Crystal Underwood’s guide to crafting jeweled roses offers a straightforward and engaging method that allows for personalization in your creative projects. By mixing Epsom salt, food coloring, and zip-seal bags, you can produce a vibrant array of colors. This homemade sand is not only a hit with kids, providing hours of entertainment, but it’s also easy to clean up, making it a preferable alternative to store-bought options. Just be sure to let the sand dry completely to prevent color transfer. Perfect for arts, crafts, and sensory play, this homemade colored sand will add a unique touch to your projects without breaking the bank.
How to Make Colored Sand at Home
Creating your own vibrant colored sand at home is a fun and budget-friendly way to elevate crafts and playtime. By combining sand with water and food coloring, you can produce a kaleidoscope of colors to add a pop of personality to projects or decorations. The process is straightforward: soak the sand in water, add a splash of color, let it dry, and then collect your freshly made colored sand. This engaging activity offers endless possibilities for artistic expression and creative experimentation. Just be sure to use protective materials when working with food coloring, as it can stain surfaces. With a little patience and some sunshine, you’ll have homemade colored sand ready to inspire your next imaginative project.
Easy DIY Ombre Colored Sand
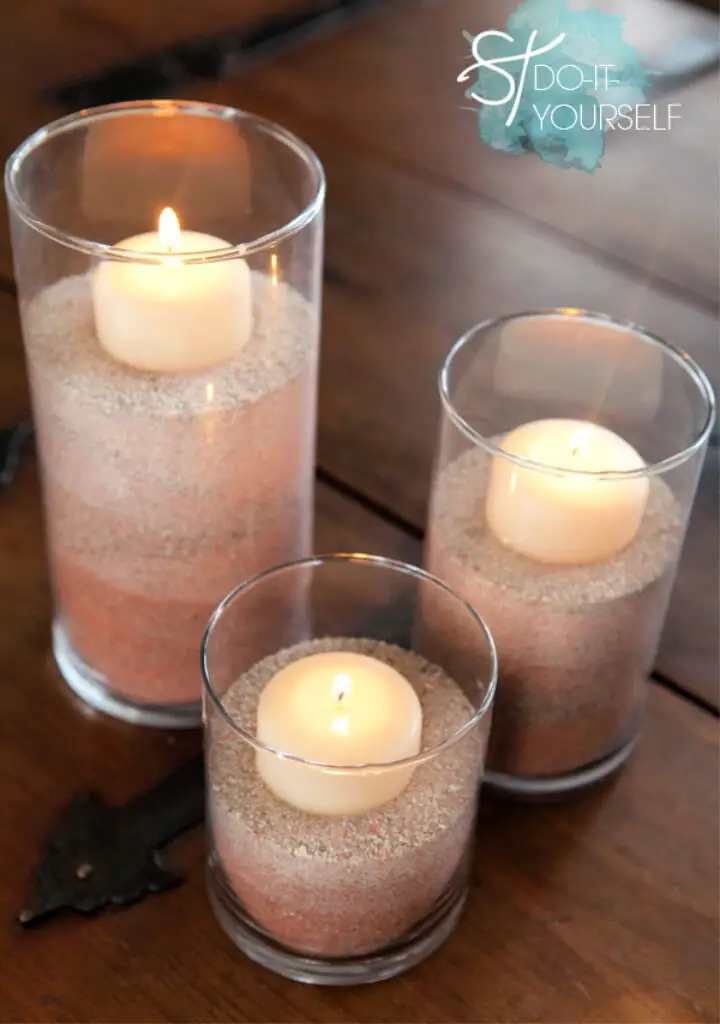
Transform your home decor or special event with a pop of color by learning how to infuse play sand with vibrant hues using food coloring. With a simple step-by-step process that requires minimal supplies, you can create stunningly romantic designs perfect for crafting unique candle arrangements or adding colorful layers to glass vases. Whether you’re looking to add a personalized touch to weddings, parties, or your living space, this easy and fun activity is sure to bring joy and invite creativity to flow in every grain. By following a straightforward process, you can create eye-catching results that will leave a lasting impression.
Make a Colored Sand for Sensory Play
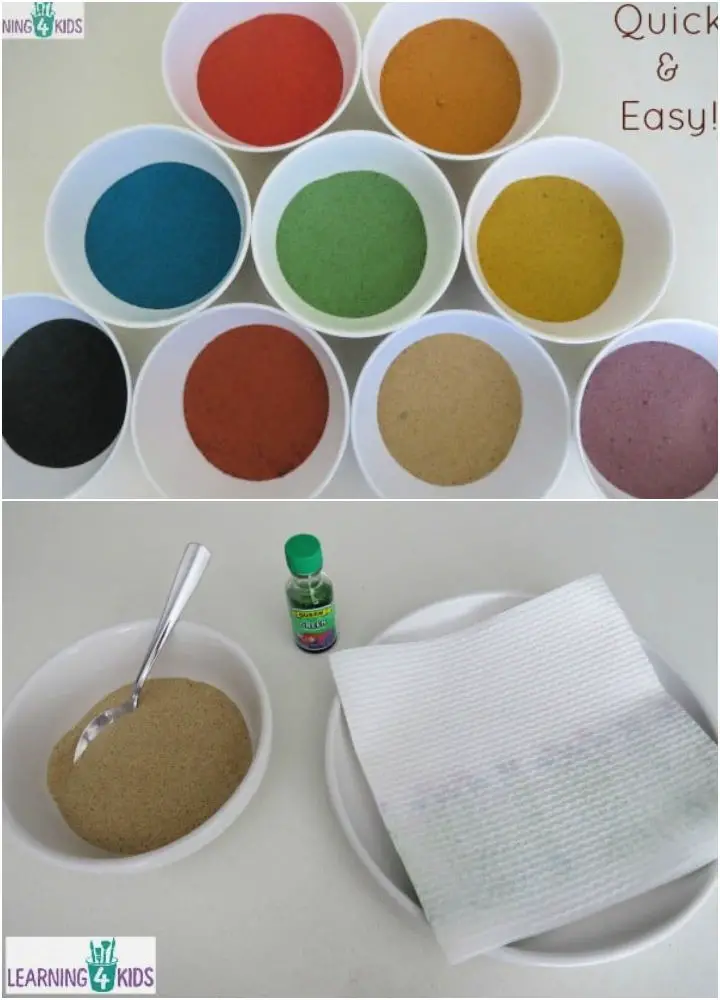
Creating colorful sand for sensory play is an excellent way to engage children in hours of tactile fun. To make your own vibrant sand, you’ll need a few simple materials, including clean dried sand, food coloring, paper towels, and a tray or plate for drying. For those who prefer alternative methods, you can also use paint or edicol dye to achieve different hues. Once the color is mixed into the sand and allowed to dry, you’ll have a long-lasting resource for various play activities. This easy-to-follow tutorial provides everything you need to enhance sensory experiences for kids while fostering creativity and exploration.
DIY Colored Sand – Step by Step Instructions
Transforming plain play sand into a vibrant creative medium is an effortless activity perfect for kids’ sensory play and art projects. With just three simple ingredients – basic play sand, colorful chalk, and a grater – you can create a kaleidoscope of colors to enhance writing trays or craft stunning rangoli designs. The best part? This DIY recipe is mess-free and non-staining, as the color won’t transfer to hands like regular sand would. As children delve into this engaging craft, they’ll discover the sensory thrills of colored sand.
How to Dye Beach Sand
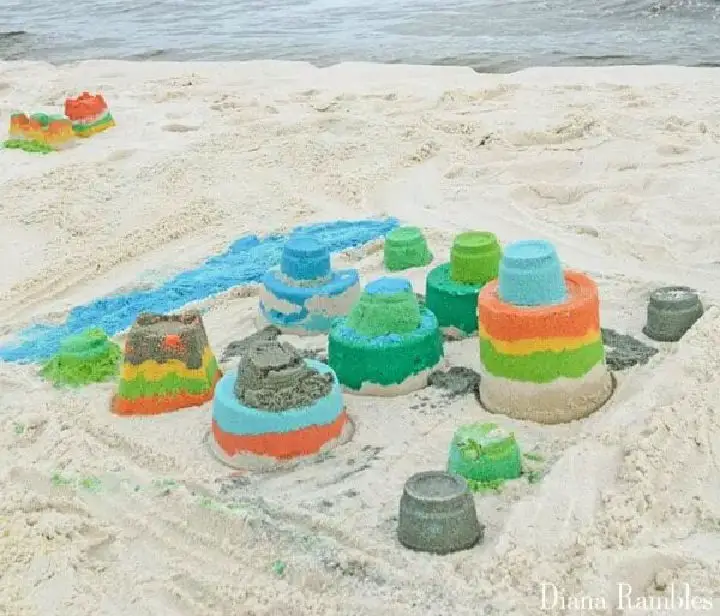
Unleash your creativity and transform a ordinary beach day into an unforgettable adventure with Diana Rambles’ step-by-step guide on dyeing sand. This fun and easy tutorial uses natural food coloring to add vibrant hues to plain beach sand, making it perfect for creative spirits of all ages. By following these simple instructions, you’ll be able to create stunning sandcastles or eye-catching beach art that will leave a lasting impression on your fellow beachgoers. All you need is some quart or gallon zipper bags, natural food dye, and a willingness to get creative. With this eco-friendly and fun process, you’ll not only enhance your beach experience but also leave behind a fleeting masterpiece for the waves to admire.
Simple DIY Colored Sand Art Bottle
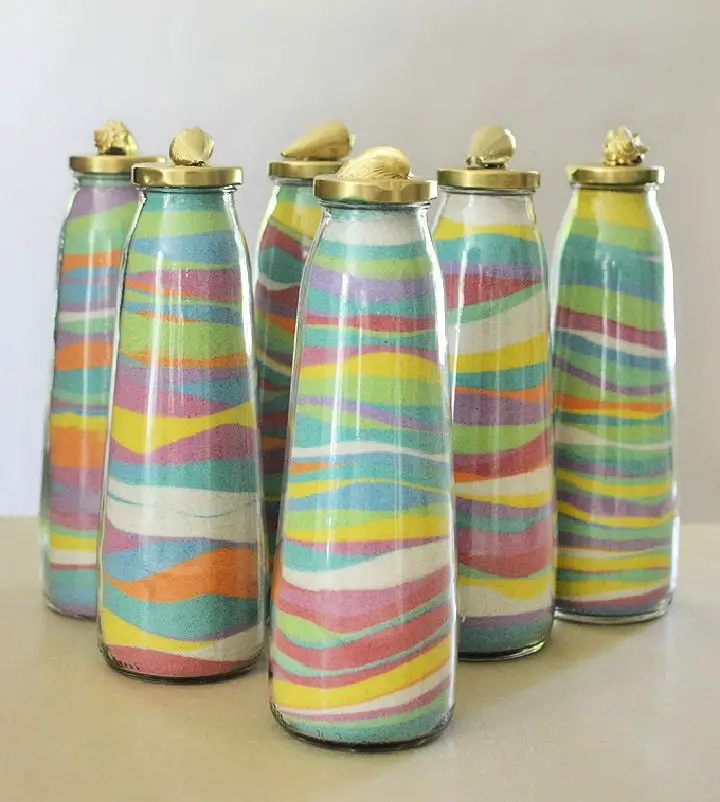
Step into the enchanting realm of sand art with ARTBAR’s comprehensive guide on creating one-of-a-kind sand art bottles! This captivating craft transforms ordinary beach souvenirs and recycled jars into breathtaking keepsakes, perfect for kids’ summer activities or anyone seeking a fun and budget-friendly creative outlet. Discover how to infuse sand with vibrant hues using liquid watercolor or food coloring, and follow simple, step-by-step instructions to layer your creation within the bottles for an awe-inspiring visual display. Complete the look by attaching intricately spray-painted shells to the lids, adding a charming finishing touch. These sand art bottles promise to be a treasured and visually stunning addition to any collection.
Making a Colored Sand Painting
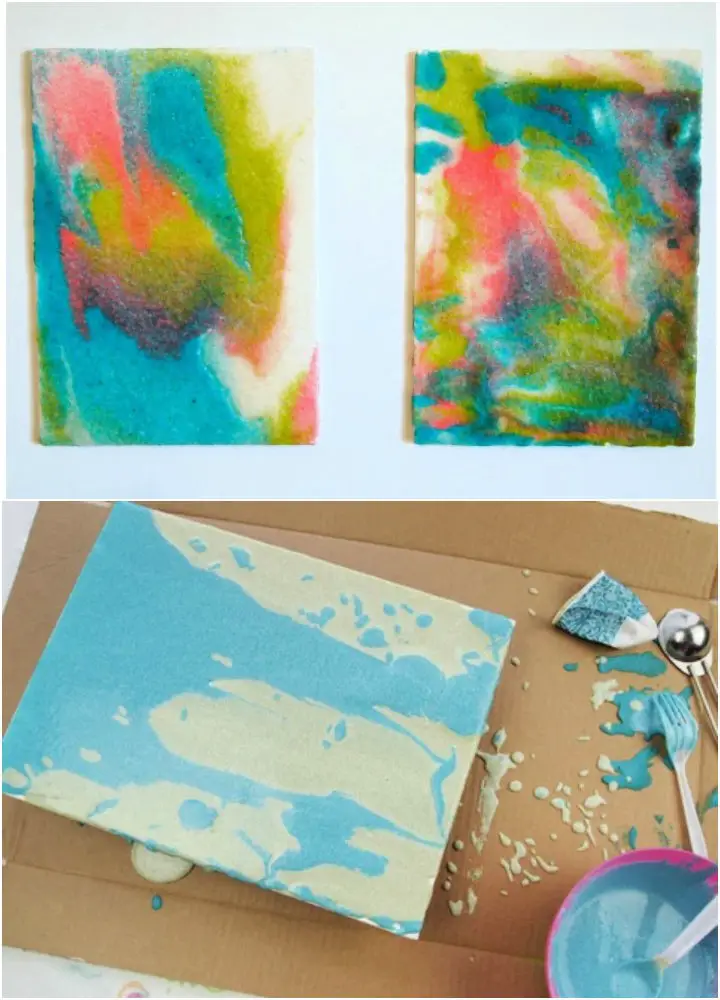
Transform your creative pursuits with the dynamic world of sand painting! ACTIVA Products is a treasure trove of top-notch arts and crafts supplies, boasting the largest assortment of colored sands in North America. Since 1959, their reputation for excellence has been built on providing superior materials like instant paper mache, Rigid Wrap plaster cloth, and an array of sculpting essentials, all crafted with precision and dedication right here in the USA. By leveraging ACTIVA’s premium supplies, you’ll unlock the secrets to crafting breathtaking sand art that exudes texture and vibrancy, perfect for enthusiasts seeking unique and captivating artistic expressions.
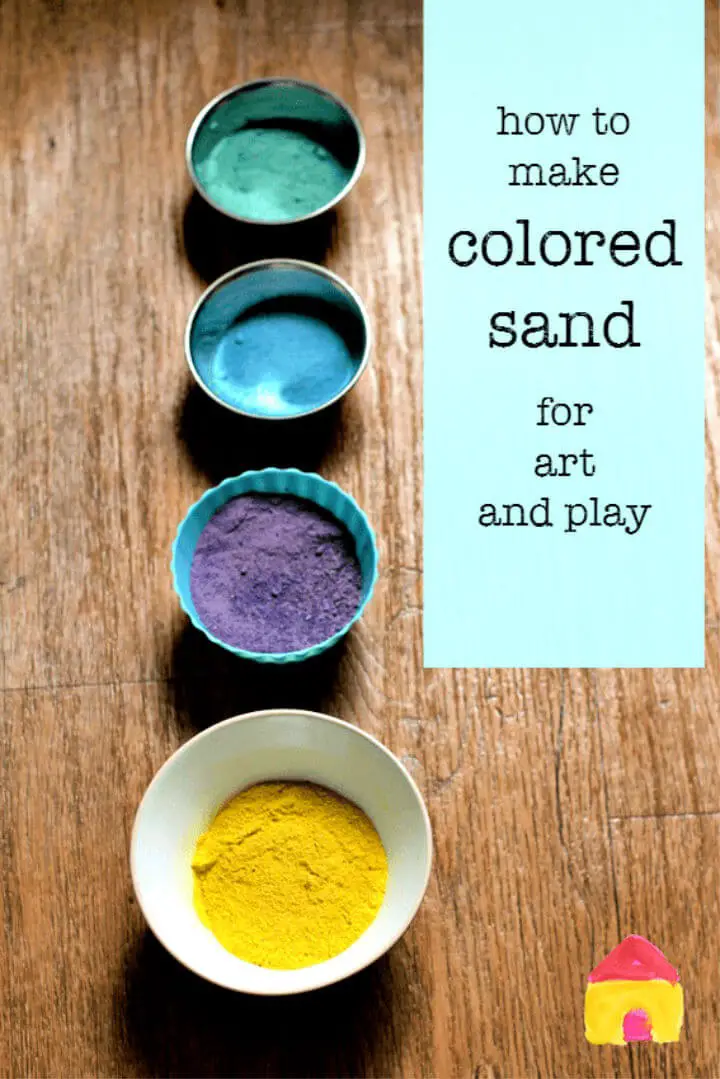
Colored Sand for Home Decor Piece

Want to add a pop of color to your indoor garden? A simple yet creative DIY project can help: making vibrant colored sand for a stunning terrarium. Perfect for those looking to inject some personality into their home decor, this craft requires just a few easily accessible materials – sand, food coloring, and a couple of large baking sheets. Create your own unique hues by mixing and matching colors to match your springtime vibe. Not only will you learn the basics of quick-drying colored sand, but also get inspired to elevate your plant arrangements with a personalized touch. This DIY activity is perfect for brightening up a windowsill or creating an eye-catching table centerpiece.
DIY Colored Sand With Food Coloring
Want to add a pop of color to your craft projects or create an immersive sensory experience for kids? Our guide shows you how to make colorful sand at home with just three simple supplies: white or light brown sand, food coloring, and plastic storage bags. With this DIY project, you can mix and match colors to achieve the perfect hue, creating a rainbow of possibilities for use in sand art bottles, crafts, sensory bins, and more. The best part? This colored sand won’t stain fingers, making it worry-free fun for kids and adults alike. Explore the endless creative possibilities and enjoy the thrill of personalized sand art today!
Making Your Own Colored Sand
Transforming ordinary beach sand into a kaleidoscope of colors is easier than you think. With just a few simple supplies – including sand, food coloring, water, and plastic bags – you can create a stunning palette perfect for art projects, building sandcastles, or even crafting terrariums. This adaptable and fun DIY project is suitable for all ages, making it an excellent activity to enjoy with family and friends. The best part? With a little creativity, the mess is manageable, and the results are truly mesmerizing. So, don your protective gear, get creative, and let the magic of crafting with color begin!
Colored Sand With Details Instructions
Crafting with colored sand is a delightful and accessible activity that kindergarten students thoroughly enjoy. To get started, collect dry sand in bowls and select your preferred colors. Then, add a small amount of edicol dye to create a range of vibrant hues. This dye is particularly noteworthy for being washable and safe. Children can then layer the sand in jars, creating visually stunning and educational crafts that also facilitate learning. The sensory experience of this activity fosters imagination and non-verbal communication through creative expression, making it an ideal choice for crafting sessions.
How to Make Your Own Colored Sand
Transforming plain play sand into a kaleidoscope of vibrant colors is easier than you think! The method shared on Coffee Cups and Crayons requires just two simple ingredients: play sand and liquid watercolors. This DIY approach opens up endless possibilities for art projects, sensory play, and even more creative endeavors like coloring rice, dough, or other materials. To get started, simply combine a small amount of liquid watercolor with the sand in a bag, shake it well to distribute the color evenly, then knead until you achieve the desired hue. The result is a washable, non-toxic colored sand perfect for spreading out and letting dry, or diving into sensory activities right away. With its ease of use and endless creative possibilities, this method is sure to become a go-to technique in your crafty repertoire.
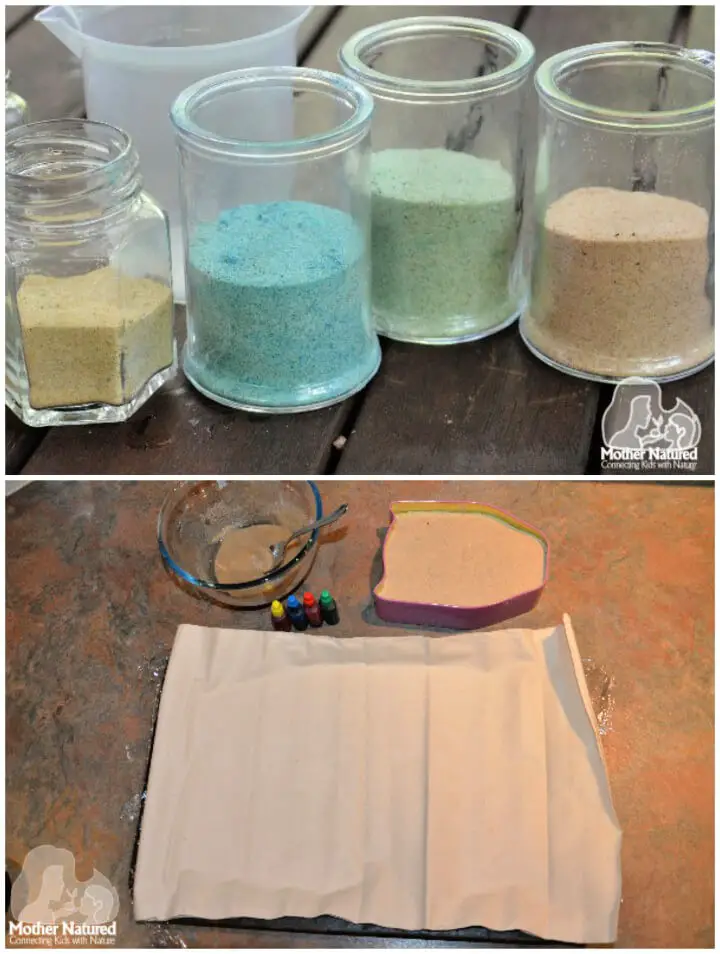
Handmade Colored Sand Tutorial
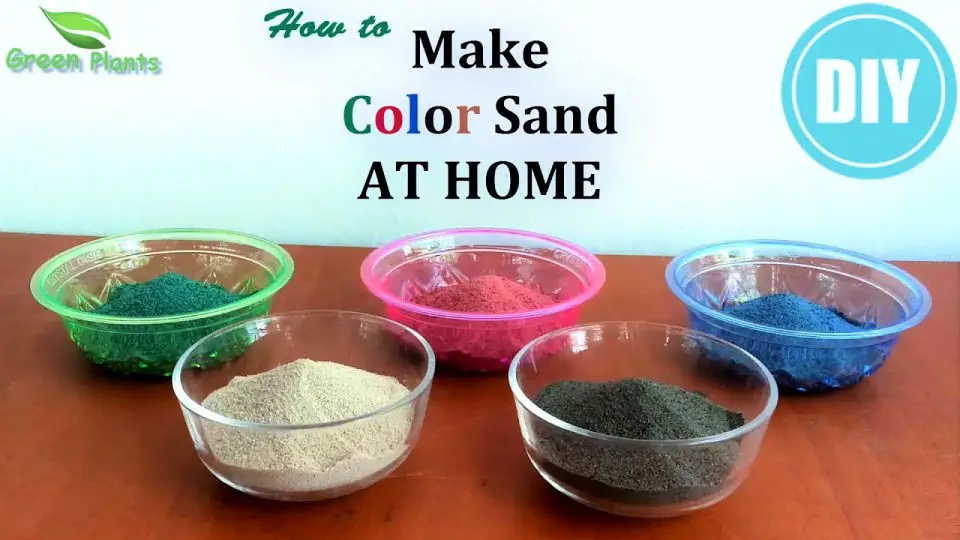
Transform plain sand into a kaleidoscope of colors with this easy-to-follow DIY guide from GREEN PLANTS. Perfect for adding a pop of color to decorative bottles, planters, or other creative projects, our step-by-step tutorial will walk you through the process of refining natural river sand, mixing it with vibrant paints, and drying it to achieve the perfect texture. This fun and engaging technique lets you put your personal touch on home decor or garden accessories, allowing your creativity to shine. Simply watch the accompanying video and take your crafting skills to the next level!
Conclusion:
Mastering the art of creating 15 different colors of sand for crafts is more than just adding a pop of color to your DIY projects – it’s a key that unlocks a world of creative possibilities. From intricately designed sand art bottles to meticulously crafted zen gardens, colored sand has the power to transform simple items into unique, personalized masterpieces. As we’ve explored, making colored sand at home is surprisingly straightforward, with steps that not only encourage creativity but also promote sustainability. Moreover, these projects offer a wealth of educational value, making them an excellent way to develop skills and learning in a fun and engaging manner. With the ability to elevate any craft project with homemade colored sand, you’re not just creating beautiful items – you’re crafting lasting memories.
