Crafting a unique DIY fascinator at home offers an exciting opportunity to infuse your personal style into a beautiful piece of headwear. With 15 straightforward and easy-to-follow DIY projects, anyone can find inspiration that suits their skill level and preferences. Each step-by-step guide is carefully structured to walk you through the creative process from selecting materials to adding the final touches, ensuring a stress-free and satisfying experience. Whether you’re preparing for a special occasion or simply looking to try something new, these tutorials cater to all your needs. As you embark on this DIY journey, we invite you to explore the next section for valuable insights on styling, maintaining, and troubleshooting common issues, guaranteeing success in bringing your creative vision to life.
How to Make Your Own Fascinator
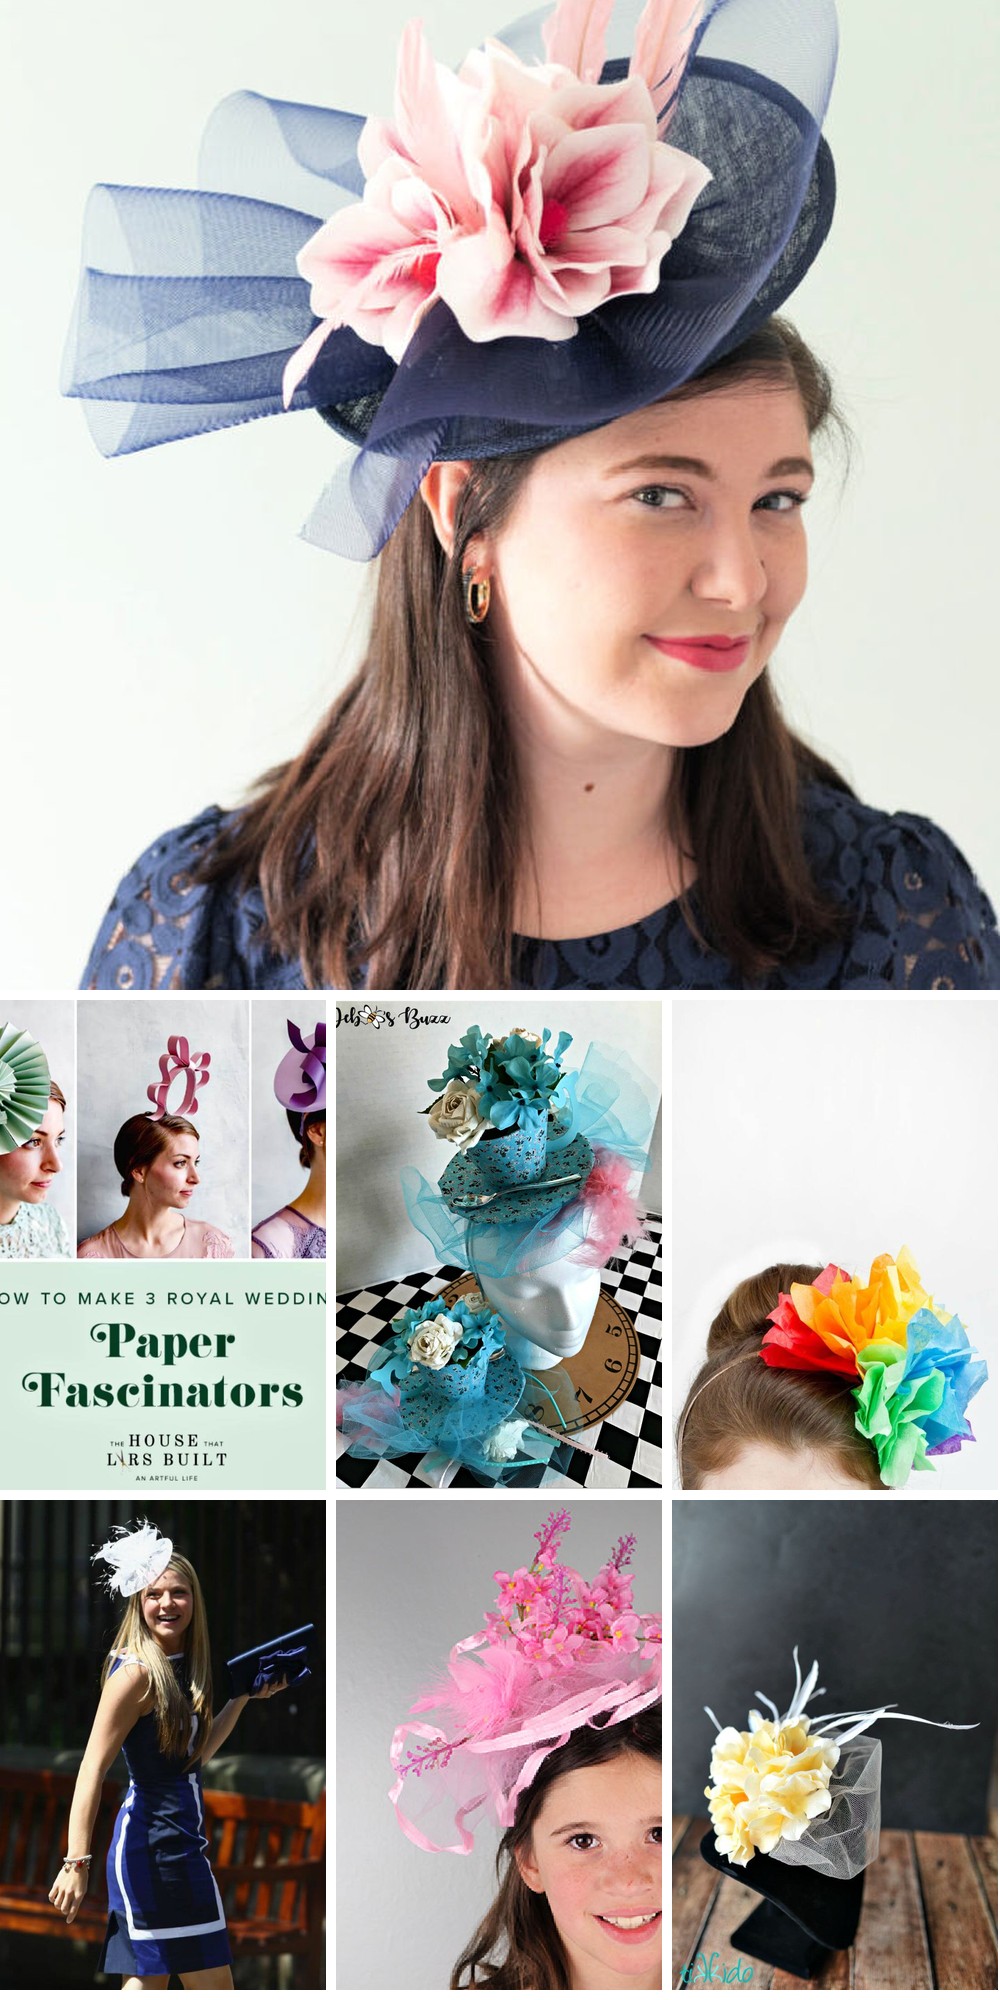
Transforming a plain outfit into a stylish masterpiece is just a few steps away with the art of crafting a fascinator. This elegant headpiece can elevate your personal style, making it perfect for special occasions like weddings, horse racing events, or even everyday wear. With these easy-to-follow guidelines, you can create a one-of-a-kind fascinator that reflects your unique taste and flair.
What You Need
To create a show-stopping fascinator, you’ll need to start with a solid foundation – the base itself. This typically takes the form of a disc-shaped structure that has a slot or attachment point for the headband. For this component, you can rely on hot glue and glue sticks, which will provide a strong bond as you assemble your design. Next, add some visual flair with flower decorations, carefully arranged to create a unique and eye-catching arrangement. To add depth and texture, consider incorporating crinoline or netting, which will also help to stabilize the entire structure. If you want to take your fascinator to the next level, add some extra embellishments like ribbon or feathers. To give your design some added stability and shape, use covered wire to create a framework that will hold everything in place. Finally, don’t forget to have a pair of scissors on hand to make any necessary cuts or adjustments as you work.
Steps to Make the Fascinator
To create your own fascinator, follow these easy steps. First, prepare the base by deciding which side of the head you want to wear it on. If your base has a slot for a headband, apply a small amount of glue underneath and secure it in place. For easier handling, consider placing the base on a wig head or mannequin. Next, focus on adding the main decoration. Choose a large flower as your centerpiece and cut the stem close to ensure it stays intact. To prevent petals from falling off, you can reinforce the cut end with a small amount of hot glue. Apply a generous amount of hot glue to the back of the flower and press it onto the fascinator base in your chosen location. Use a cooling spray to speed up the gluing process.Once the main decoration is secure, it’s time to cover the base. Measure out about a yard of crinoline and use it to create a ruffled or looped design behind the flower. Secure this arrangement with covered wire and apply glue to hold everything in place. If you prefer a simpler look, you can skip the ruffling process altogether.Next, add additional decorations such as feathers or loops of ribbon. Tuck these into the spaces around the flower and netting, securing them with hot glue. Feel free to experiment with different textures and colors to make your fascinator truly unique. You can also form additional netting into loop shapes and attach them with glue.Finally, take some time to check for any visible gaps or exposed base mechanics. Add more decorations as needed to cover these areas and ensure a balanced design. Once all elements are attached, adjust the decorations to achieve a visually appealing arrangement and trim any excess materials if necessary.
Video Tutorial
To take your fascinator making skills to the next level, I recommend supplementing this written guide with a step-by-step video tutorial that walks you through each stage of the process. This visual representation of the steps will not only enhance your understanding but also provide a sense of accomplishment as you successfully complete your project. By following along and putting these steps into action, you’ll be able to create a one-of-a-kind fascinator that’s perfect for any special occasion or just for personal enjoyment.
Customization Ideas for Your DIY Fascinator
Transforming your DIY fascinator into a true reflection of your unique personality is an exciting creative challenge. To get started, consider these innovative ways to put your personal touch on the project:
Add a Personal Touch with Embellishments
Infuse your look with boldness by embracing vibrant colors. Instead of playing it safe, add a dash of personality with feathers, beads, or ribbons in hues that reflect your unique spirit. Additionally, bring meaningful charms into the mix by attaching small pendants or trinkets that hold sentimental value to you, such as vintage brooches or family heirlooms passed down through generations.
Reflect Your Interests
When crafting a fascinator, consider infusing it with personal significance by basing it on a theme that resonates with you. This could be an interest, hobby, or even a beloved animal or flower. By doing so, you’ll add a narrative element to your accessory that makes it truly one-of-a-kind. Additionally, think about drawing inspiration from your cultural heritage. Incorporate patterns, fabrics, and motifs that reflect your background, effectively turning your fascinator into a celebration of your identity.
Experiment with Textures
When crafting a unique fascinator, consider combining different textures to create visual interest and provide a tactile experience. Soft tulle, smooth satin, and delicate lace can be blended in ways that stimulate the senses. Beyond repurposing existing materials, think outside the box by recycling and upcycling elements from old clothing or accessories. This not only adds texture but also contributes to a sustainable approach, making your fascinator both stylish and environmentally conscious.
Play with Shapes and Sizes
Embrace Unconventional Aesthetics: One way to create visual interest is by adopting an asymmetrical design, where elements are deliberately placed off-center for a modern twist. This unconventional approach can instantly grab attention. To add depth and dimension, incorporate decorations of varying sizes. Larger pieces can serve as focal points, while smaller ones can fill gaps and provide intricate details.
As you experiment with different customization ideas, you’ll be able to craft a fascinator that truly reflects your personality. The key is to find the perfect balance of elements that aligns with your fashion sense. Ultimately, your fascinator should be an extension of yourself, making you feel confident and happy.
Styling Tips for Wearing a DIY Fascinator
To master the art of donning a DIY fascinator, one must strike a balance between harmonizing with their attire and the event’s atmosphere, all while prioritizing both comfort and poise. To achieve this trifecta, consider these expertly curated guidelines for incorporating your handmade fascinator into your overall aesthetic.
Choosing the Right Hairstyle
When it comes to pairing a fascinator with your hairstyle, simplicity can be key. A straightforward look like a sleek bun or low ponytail allows your fascinator to take center stage. If you do opt for something more elaborate, consider balancing it out with a simpler hairdo. To ensure your fascinator stays put, start by securing the base of your style. For fine hair, lightly backcomb the section where you’ll attach the fascinator to add extra grip. On the other hand, if you have thicker locks, make sure the fascinator’s foundation is substantial enough to remain stable.
Matching with Your Outfit
When it comes to styling a fascinator, one of the most crucial aspects is creating a harmonious color scheme. To achieve this, focus on matching the colors in your fascinator to one element of your outfit, such as your dress, shoes, or bag. This will create a cohesive look that ties everything together. Additionally, it’s essential to balance the proportions of your outfit and accessories. If you’re wearing a voluminous or dramatic outfit, a smaller fascinator can help bring the overall look back down to earth. On the other hand, if you’re going for a minimalist approach, a larger fascinator can add a touch of drama and glamour. By finding this balance, you’ll be able to create a stylish and polished ensemble that makes a statement.
Comfort is Crucial
Before donning your fascinator at the event, conduct a comfort test at home first. Try on the piece and make any necessary adjustments to ensure it sits just right – not too tight or loose. Additionally, consider the weight of your fascinator. A lightweight design is crucial for maintaining wearer comfort throughout the occasion. This attention to detail will set you up for a confident and stylish appearance.
For Different Occasions
When it comes to crafting the perfect fascinator, consider the occasion and let that guide your design choices. For weddings, opt for elegant and romantic elements like soft feathers, pearls, or floral patterns to add a touch of sophistication. Horse racing events, on the other hand, call for bold and playful designs featuring bright colors and unique shapes to make a statement. Garden parties offer a chance to get creative with nature-inspired motifs like flowers, leaves, or even butterflies to create a whimsical atmosphere.Ultimately, the key to pulling off your DIY fascinator is confidence. By embracing your creation and wearing it proudly, you’ll not only feel great but also earn plenty of compliments from others. So go ahead, let your personality shine through in your design, and enjoy the attention that follows.
Troubleshooting Common Issues with DIY Fascinators
When crafting a DIY fascinator, it’s not uncommon to run into minor setbacks that can quickly turn an otherwise enjoyable project into a frustrating experience. However, with some simple guidance and troubleshooting tips, you can overcome common hurdles and create a truly stunning piece of headwear for any special occasion.
Problem: The Fascinator Keeps Slipping Off
When crafting a fascinator, it’s crucial to establish a solid foundation. A base that’s too small can struggle to grasp your locks effectively, making it prone to slipping or falling off. To overcome this issue, you might consider augmenting the base with a comb or hair clips for enhanced hold. Moreover, applying a light mist of hairspray to the area where the fascinator will sit can provide an additional layer of grip, further ensuring a secure fit.
Problem: Difficulty Attaching Decorations Securely
When it comes to crafting and DIY projects, choosing the correct adhesive can be a crucial step in achieving a successful outcome. The type of adhesive you use depends on the materials you’re working with, as different adhesives excel at bonding specific substances. For instance, fabric glue is an excellent choice for attaching cloth or felt, while hot glue is better suited for heavier decorations. It’s essential to allow sufficient drying time for the glue to set properly before handling, ensuring a strong and lasting bond.
Problem: The Design Looks Unbalanced
Before bringing your design to life, take a step back and visualize its overall aesthetic. Walk around the space, observing how the various components interact with one another. As you do this, pay attention to any visual imbalances that may be present. If something feels off, don’t hesitate to make adjustments – whether it’s repositioning elements or introducing smaller decorative details to fill gaps and create a more cohesive look.
Problem: Choosing the Wrong Materials
To create a visually stunning fascinator, it’s essential to select materials that harmonize in texture and color. A combination of complementary textures and hues will add depth and visual interest to your design. When choosing materials, be mindful of their weight, as heavy components can cause the fascinator to tilt or become unbalanced. Instead, opt for lightweight options like feathers, tulle, or netting that provide volume without compromising on the overall structure.
Problem: The Fascinator Is Uncomfortable to Wear
To ensure a comfortable wearing experience for extended periods, focus on the attachment mechanism’s design. Opt for a secure yet gentle hold that doesn’t irritate your scalp. Consider adding a thin layer of padding to the base using felt or another soft material, providing a cushioned foundation for your fascinator. While crafting your DIY masterpiece, don’t be afraid to experiment and adjust as needed until you’re thrilled with the result. With patience and persistence, you’ll create a one-of-a-kind piece that exudes confidence and style.
Maintenance and Care for Your DIY Fascinator
To preserve the integrity and appearance of your handcrafted fascinator, it’s essential to implement a consistent maintenance routine. This involves a combination of gentle handling, selective cleaning, and strategic storage. By following these simple steps, you’ll be able to keep your DIY creation in top condition for years to come.
Storing Your Fascinator
When storing your fascinator, prioritize maintaining a dry environment by keeping it away from humid areas that can lead to mold and mildew formation. This is crucial in preserving its delicate structure and intricate details. To ensure the fascinator’s integrity, utilize a sturdy hat box or a roomy container that provides ample space for it to retain its shape without becoming crushed or creased.
Cleaning Tips
When it comes to spot cleaning your fascinator, a gentle approach is key. Use a soft cloth and a mild detergent to delicately remove any stains that may have appeared. However, be sure not to soak the entire piece, as this could damage the materials or cause them to lose their shape. When cleaning around embellishments, exercise extreme care to avoid dislodging these delicate features. It’s essential to handle your fascinator with a light touch to ensure its beauty and functionality are preserved.
Environmental Considerations for DIY Fascinators
Crafting an eco-friendly fascinator offers a dual benefit – it’s a step towards sustainability and infuses your accessory with a one-of-a-kind narrative. By choosing environmentally responsible materials, you’re not only making a stylish statement but also supporting a greener future.
Choosing Sustainable Materials
To minimize environmental impact, consider creative approaches to decor. One effective way is to repurpose fabrics by utilizing scraps from old clothing or offcuts. This not only reduces waste but also adds a touch of uniqueness to your space. Additionally, opt for natural decorations that are biodegradable, such as dried flowers or leaves. These organic elements bring an effortless charm to any room while promoting sustainability.
Eco-Friendly Practices
When crafting a sustainable fascinator, it’s crucial to adopt eco-friendly practices that minimize waste and reduce environmental impact. One effective approach is to ‘sew’ elements together instead of relying on glue, creating a more durable and recyclable product. Additionally, sourcing materials from local suppliers can significantly decrease your carbon footprint, making your fascinator not only beautiful but also environmentally responsible. By incorporating these mindful strategies into your design process, you’ll not only prolong the lifespan of your creation but also demonstrate your commitment to sustainability.
FAQs About DIY Fascinators
As you embark on your DIY fascinator adventure, it’s only normal to have questions. To alleviate any uncertainty, I’ve compiled a detailed FAQ section that will guide you through the process with clarity and assurance. This comprehensive resource covers everything from getting started to overcoming potential obstacles, empowering you to create unique and stunning pieces with confidence.
What materials do I need to start making a fascinator?
To embark on this creative journey, you’ll require a foundation – think of it as a humble headband or comb serving as the base. Beyond that, you’ll need fabric to drape elegantly over your creation, embellishments such as feathers, flowers, or beads to add visual flair, and an arsenal of essential tools like scissors, glue, and needle and thread to bring everything together.
How do I choose the right base for my fascinator?
When it comes to choosing a base for your hair decorations, consider the weight and style you’re aiming for. For a more versatile and comfortable option, a headband might be the way to go. If you’re looking to add some subtle flair to a lighter design, a comb is a great choice.
Can I make a fascinator without sewing skills?
While it’s true that many fascinators can be crafted with glue alone, incorporating sewing techniques can significantly enhance their overall durability – particularly when dealing with heavier components. The addition of stitching provides an added layer of stability and ensures that your creations will withstand the test of time.
How can I make my fascinator stay in place all day?
To achieve a snug fit, begin by ensuring the foundation of your hairstyle lies securely on your scalp. For added stability, employ hairpins to keep everything in place. If the base still feels like it’s trying to make a break for freedom, consider introducing a subtle elastic band that wraps discreetly behind the crown.
What’s the best way to attach feathers to my fascinator?
When it comes to attaching feathers to your project, there are a couple of approaches you can take. One option is to apply glue directly to the base and then attach the feather. This method provides a strong bond between the two. Alternatively, you can add an extra layer of stability by first gluing the feather to a piece of felt before attaching it to the base. If you’re opting for a more permanent solution, sewing is also an effective way to secure the feather in place. In this case, focus on stitching the quill end of the feather to the base, ensuring a sturdy connection.
How do I transport my fascinator without damaging it?
When storing your DIY fascinator’s delicate components, it’s essential to use a hat box or a sturdy container filled with soft padding. To prevent damage, avoid stacking any items on top of the container and keep it in a cool, dry place. By following these guidelines, you’ll be well-prepared to create a stunning and functional piece. Remember, experimentation is key to mastering this craft, so don’t be afraid to try new techniques and learn from your experiences as you go.
15 Easy DIY Fascinators to Make at Home
Transform your style with effortless ease by crafting one of the 15 innovative DIY fascinators featured in this post. Each project comes equipped with a step-by-step guide, allowing you to create unique and captivating headpieces that are perfect for any occasion.
How to Make a Cute Fascinator
Elevate the charm and sophistication of your hairstyle with a bespoke fascinator that exudes elegance and whimsy. This step-by-step guide provides a straightforward approach to creating a stunning accessory perfect for capturing special moments, such as photo shoots, weddings, or any other notable occasion. The incorporation of feathers adds a touch of playfulness, while the use of millinery lace lends a vintage flair.Beginning with a free satin flower hairclip pattern, you’ll bring this delightful creation to life using everyday materials like felt, satin, tulle, and a few decorative buttons or jewels for added luminosity. This project’s adaptability allows for personalized expression based on your preferred style or color palette. Whether you opt for a mini top hat or a pirate-inspired fascinator, the end result will be an accessory that harmoniously complements your outfit.
Adorable DIY Flowery Bow Fascinator
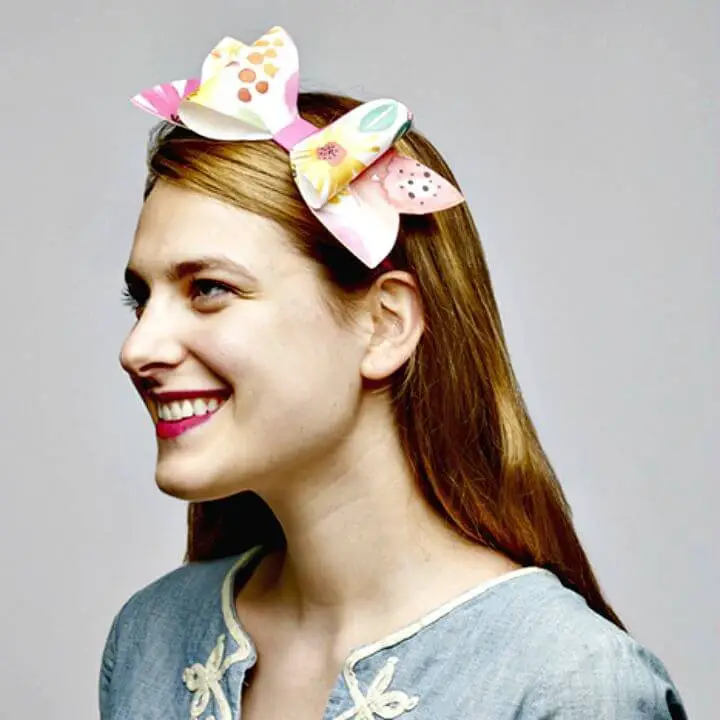
Get ready to channel your inner crafter and add a touch of elegance to your Kentucky Derby outfit with these DIY fascinators that require minimal effort and no specialized skills. Two show-stopping designs, the flowery bow and the tip-top flower, are brought to life using a headband, washi tape, wildflower flat sheet wrapping paper, hot glue gun, scissors, satin ribbon, and a paper flowers kit. The creative process is remarkably straightforward, making it an enjoyable project for crafters of all levels. Each design showcases its unique charm, effortlessly combining functionality with style. By incorporating these handmade fascinators into your Derby attire, you’ll not only elevate your fashion game but also infuse personality into your look. So, don’t hesitate; unleash your creativity and create a one-of-a-kind Derby style today!
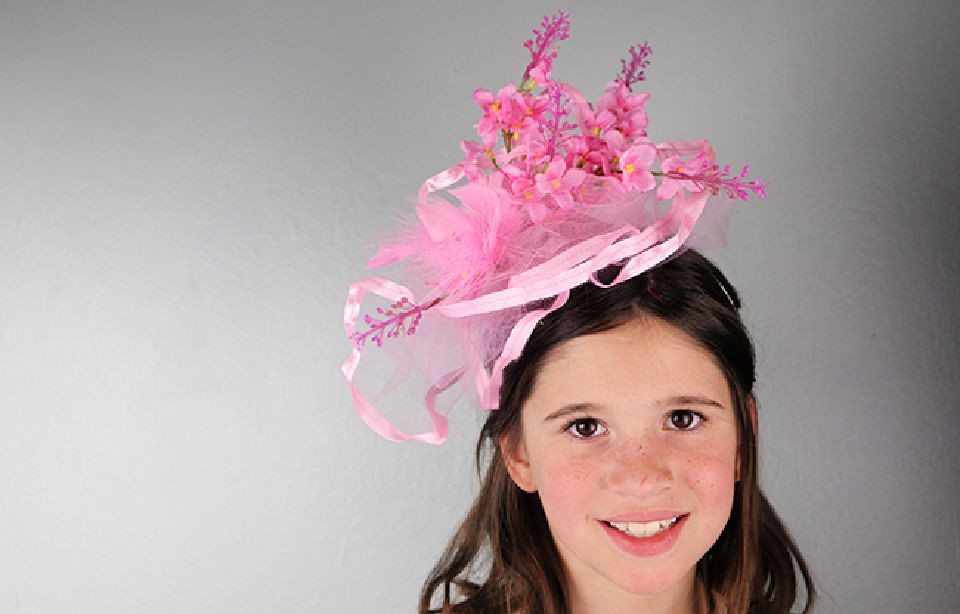
Making a Kentucky Derby Fascinator
Add a touch of Kentucky Derby flair to your party or kid’s event with a charming DIY tissue paper fascinator that’s both easy to make and stylishly affordable. With just under $10 worth of materials, including tissue paper, a headband, floral wire, string, a glue gun, netting, and an extra silk flower, you can craft a show-stopping headpiece in under an hour.
Begin by attaching the handmade giant tissue paper flower to the headband, then give it a playful twist with some netting. This delightful DIY project is perfect for capturing the Derby atmosphere without breaking the bank – and our step-by-step guide ensures a fun and frustration-free crafting experience that yields a truly stunning result.
Fancy Feather Fascinator Hat Tutorial
Unleash your creativity and give your style a stylish boost by crafting two exquisite fascinator designs using readily available materials like craft feathers, silk flowers, felt fabric, and a hot glue gun. This DIY guide will walk you through the process of creating these beautiful headpieces from scratch, making it perfect for special occasions such as high tea parties or Kentucky Derby celebrations. What sets this project apart is the emphasis on having fun and being creative – so don’t be afraid to get crafty and bring a touch of elegance to your outfit with these charming creations.
DIY Three Paper Fascinators
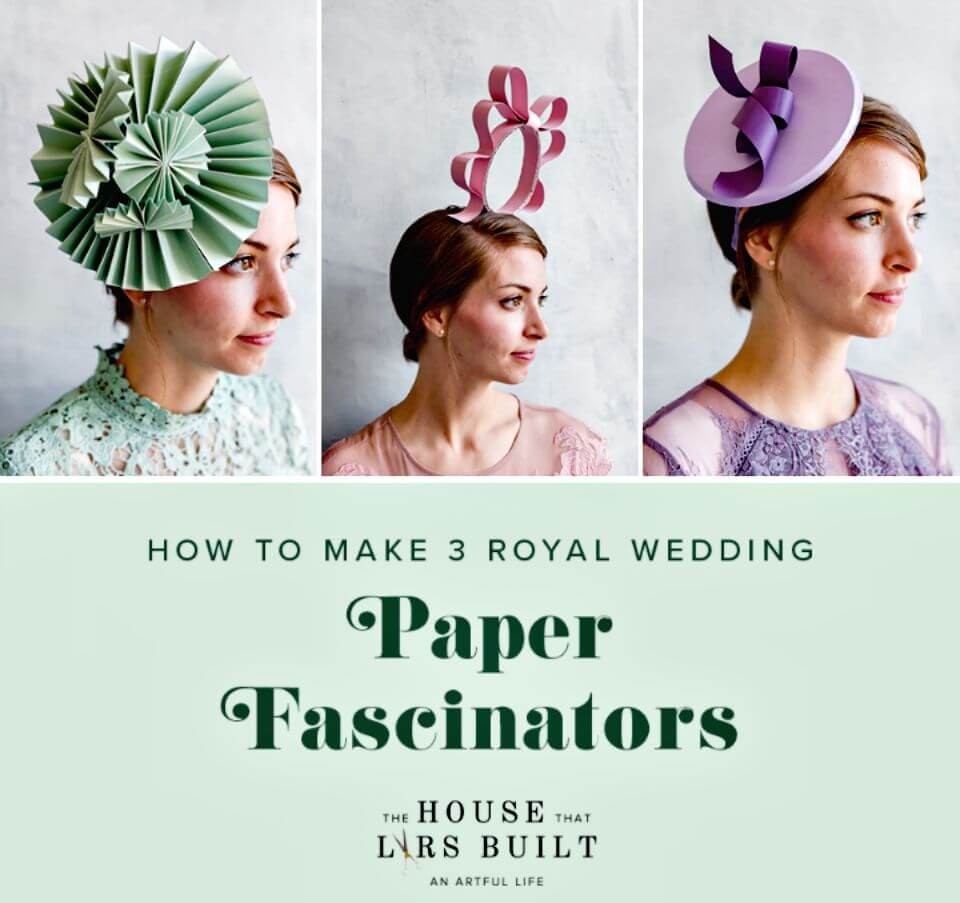
Transform any occasion into a majestic celebration by crafting your own DIY paper fascinators, reminiscent of royal weddings. Using cardstock, hot glue, and a headband, you’ll create chic and budget-friendly accessories perfect for commemorating regal events like Harry and Meghan’s special day. Follow three distinct designs: the elegant fan fascinator, the whimsical Curly Q Fascinator, and the Princess Beatrice-inspired masterpiece. Each design boasts unique elements such as accordion-folded paper medallions, intricately looped strips, or a delicate bow. With step-by-step instructions, this DIY project is accessible to crafters of all skill levels. Join in on the festivities by adorning yourself with these magnificent paper fascinators and experience the essence of royal flair without breaking the bank.
Easy-To-Make Witch Hat Fascinators
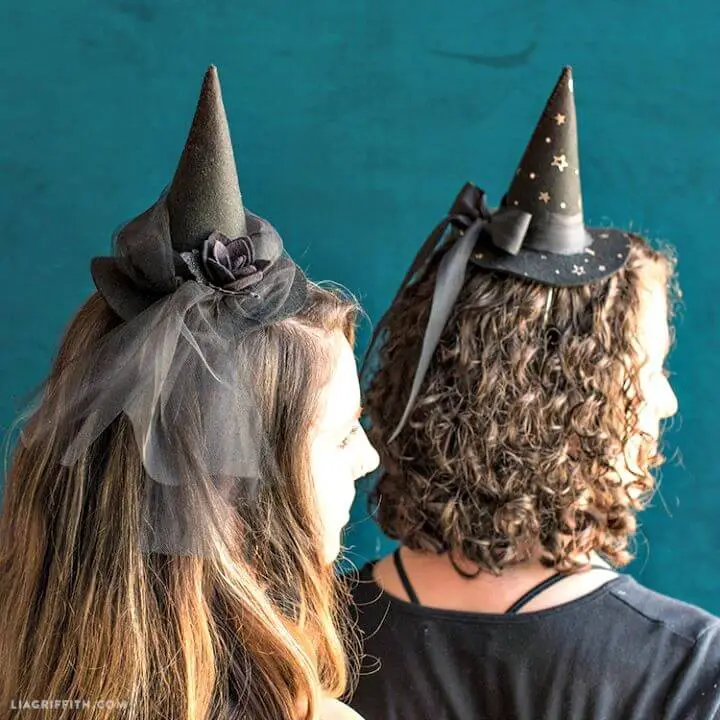
Transform into a bewitching beauty this Halloween by crafting your own DIY witch hat fascinator. This enchanting headpiece requires no full costume, yet will make your All Hall’s Eve celebration unforgettable. With just a few simple steps, you can create a spellbinding accessory that will cast a magic spell on all who see it.
To conjure up this mesmerizing masterpiece, gather the following materials: a low-temperature hot glue gun, scissors, a cutting machine, sewing needle and iron, as well as black felt, iron-on black glitter and rose gold foil, black ribbon, headband, tulle, black thread, floral wire, white fabric pencil or crayon, and a black marker. Once you’ve crafted your hat and adorned it with tulle and a mini felt rose, your Halloween accessory will be ready to steal the show! So, cast your spells this Halloween and manifest your inner witch with our bewitching project.
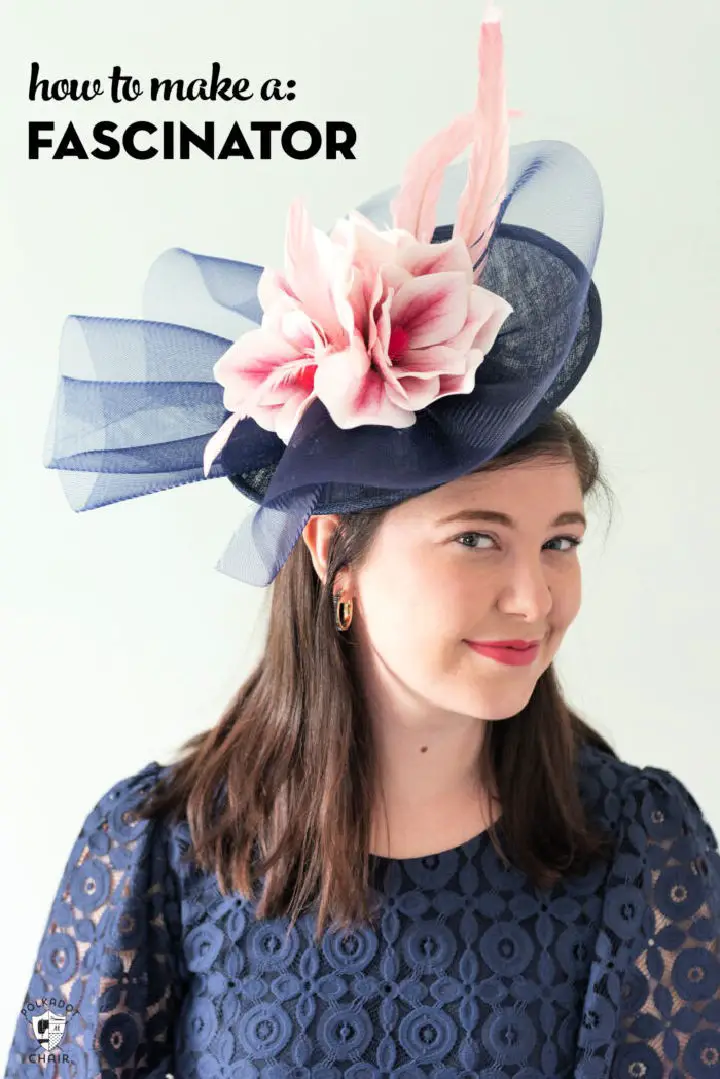
How to Make a Fascinator Hat
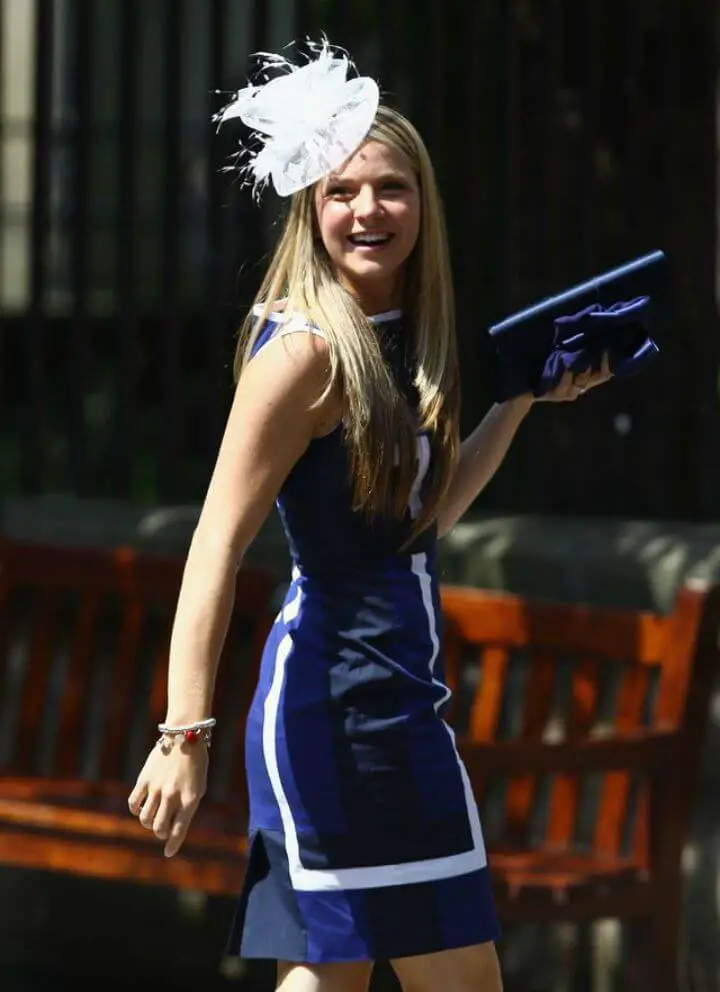
Transform your outfit with a stunning, handmade fascinator that exudes elegance and sophistication. This exquisite hat, featuring meticulously placed feathers, will captivate all eyes as it moves with every gesture. Despite its grandeur, the foundation of this masterpiece is surprisingly understated, providing a blank canvas for striking feathers and other embellishments to take center stage.
To bring your vision to life, you’ll need just a few essential materials: sinamay fabric, hat wire, crimp wire, ribbon, and feathers. With a few straightforward steps, you can shape the fabric and wire, create a beautiful ribbon decoration, and arrange the feathers in a breathtaking bouquet. The possibilities are endless!
Feel free to add your personal touch by incorporating additional decorations such as plastic flowers, netting, or sequins. This creative endeavor allows you to express your unique style while crafting an accessory that’s sure to turn heads at any special occasion.
DIY Headband Fascinators for The Royal Wedding
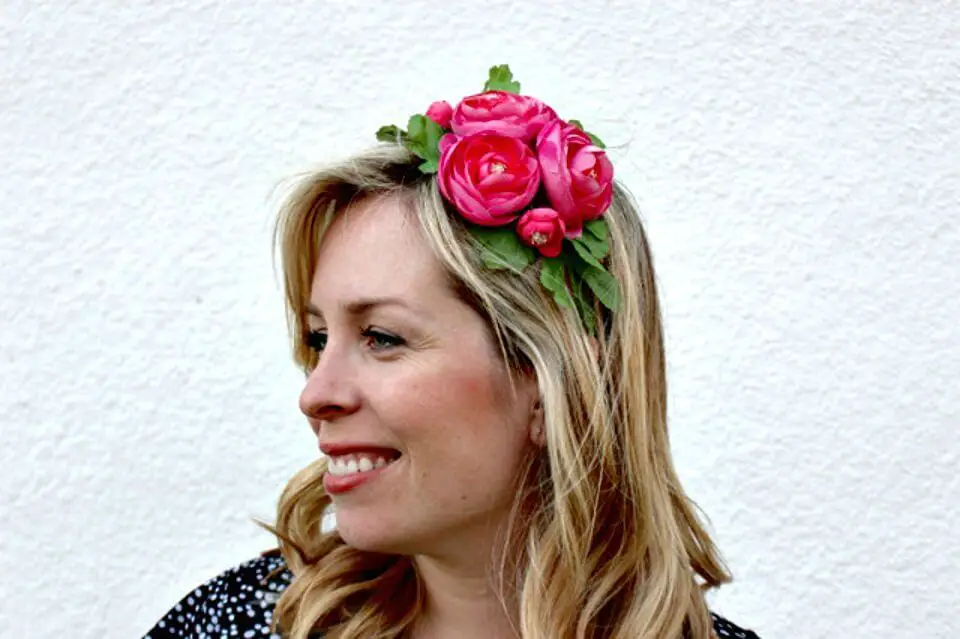
Elevate your sense of style with this DIY headband fascinator project, perfect for dressing up for special occasions like royal weddings, horse racing events, or themed parties. Using affordable materials from a local dollar store, you can create a range of elegant pieces that showcase versatility through distinct styles. From faux flowers and feathers to tulle and brooches, the materials are endless. The best part? This craft is easy to make and fully customizable, allowing you to tailor your design to your preferred colors and themes. A step-by-step guide is provided to help you assemble the headbands, complete with helpful tips on choosing a headband color that complements your hair or the decorative elements. Whether you’re drawn to the lush look of faux ranunculus, the bridal elegance of white peony with tulle, or the dramatic allure of black feathers with a brooch, these DIY headband fascinators are a fun and fashionable project to take on.
Make Your Own Felt Fascinator
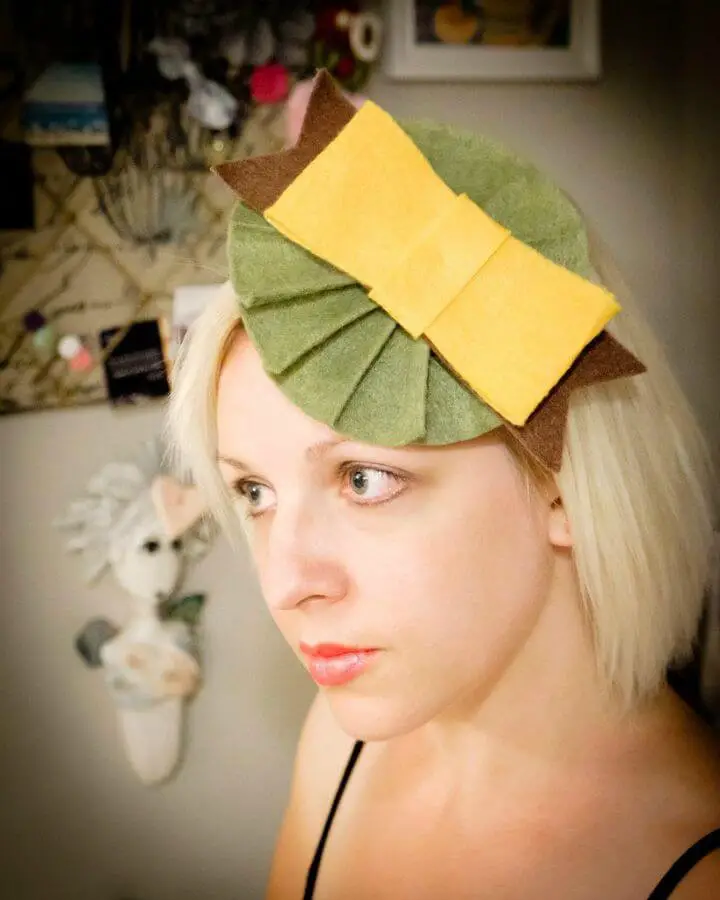
Transform your fashion sense with a one-of-a-kind homemade felt fascinator, effortlessly crafted using the Cricut Explore. Inspired by the art of millinery, this vibrant yellow DIY accessory combines felt, interfacing, and a headband to create a unique piece. The process begins with ironing the interfacing onto three pieces of felt and cutting out intricate bow and donut designs with precision using the Cricut Explore. Once assembled and stitched together, your stylish fascinator is ready to be attached to a headband and take center stage. The Cricut Explore simplifies this creative journey, making it an enjoyable and accessible craft project that yields a show-stopping fascinator sure to turn heads wherever you go.
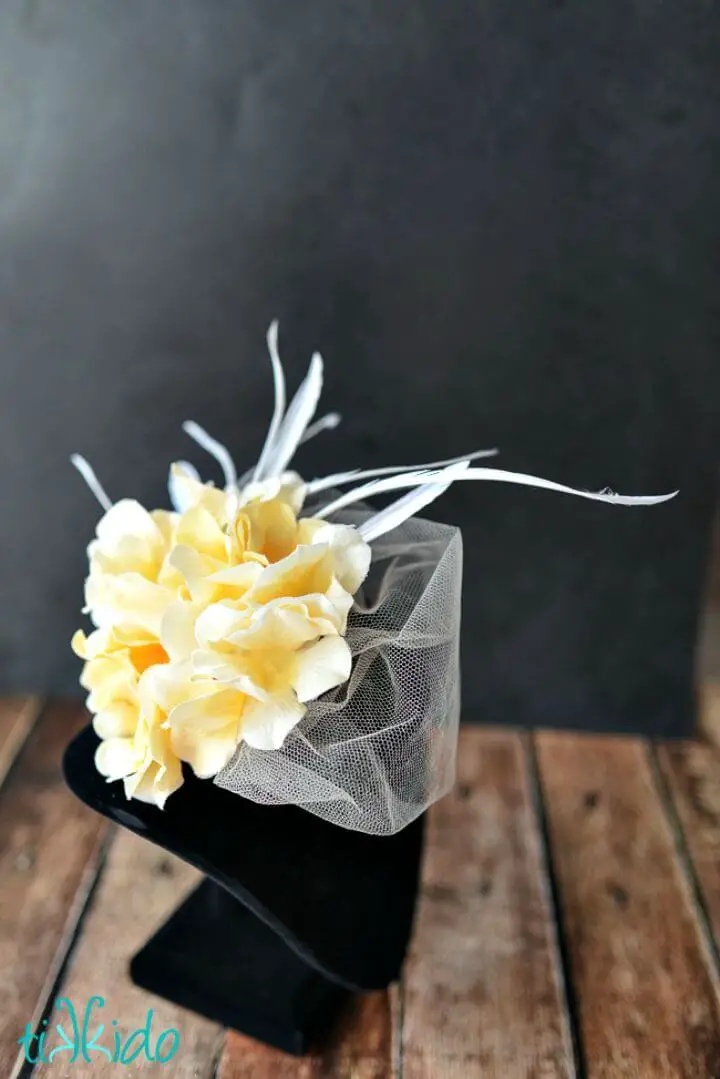
Simple + Stylish DIY Fascinator Hat
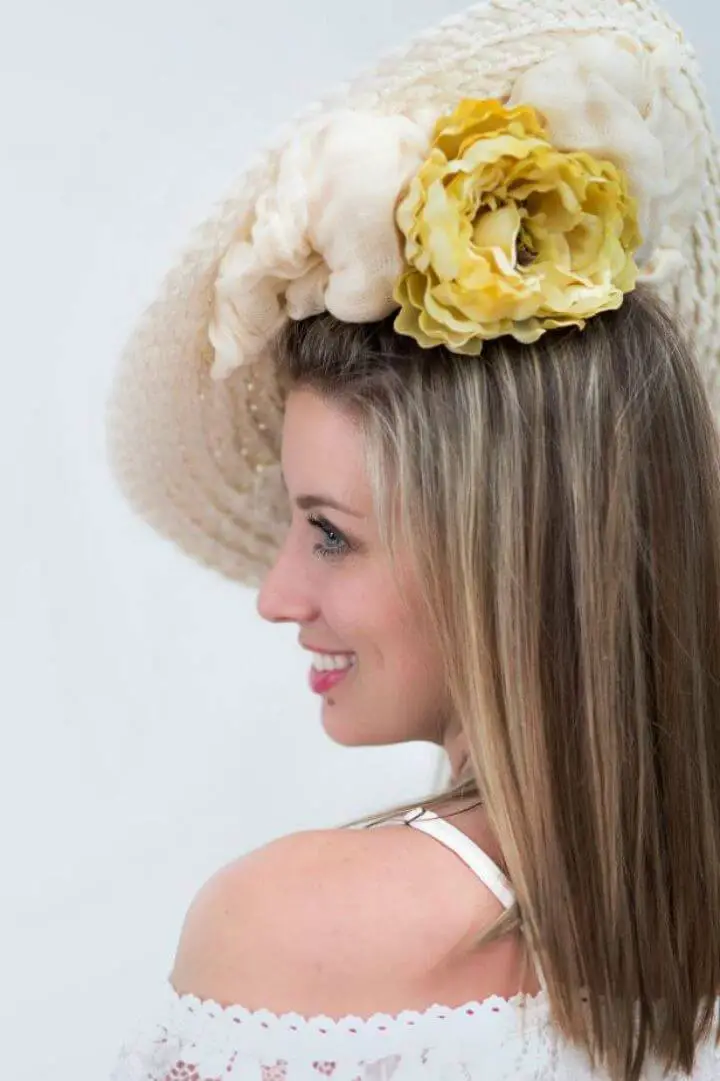
Transform yourself into royalty with this DIY hair accessory inspired by the timeless elegance of Kate Middleton. By incorporating a placemat and some basic crafting supplies, you can create a stunning piece that’s reminiscent of Gina Foster designs – all for under $10. Start by crafting a delicate bow using cheesecloth, then secure it to the placemat. Add a pop of color with a large faux yellow flower at the center, creating a striking focal point. To ensure a secure fit, attach a pair of duckbill hair clips using small pieces of felt. This show-stopping accessory is perfect for adding a touch of royal charm to your outfit for fancy events or garden parties.
Easy DIY Rainbow Fascinator
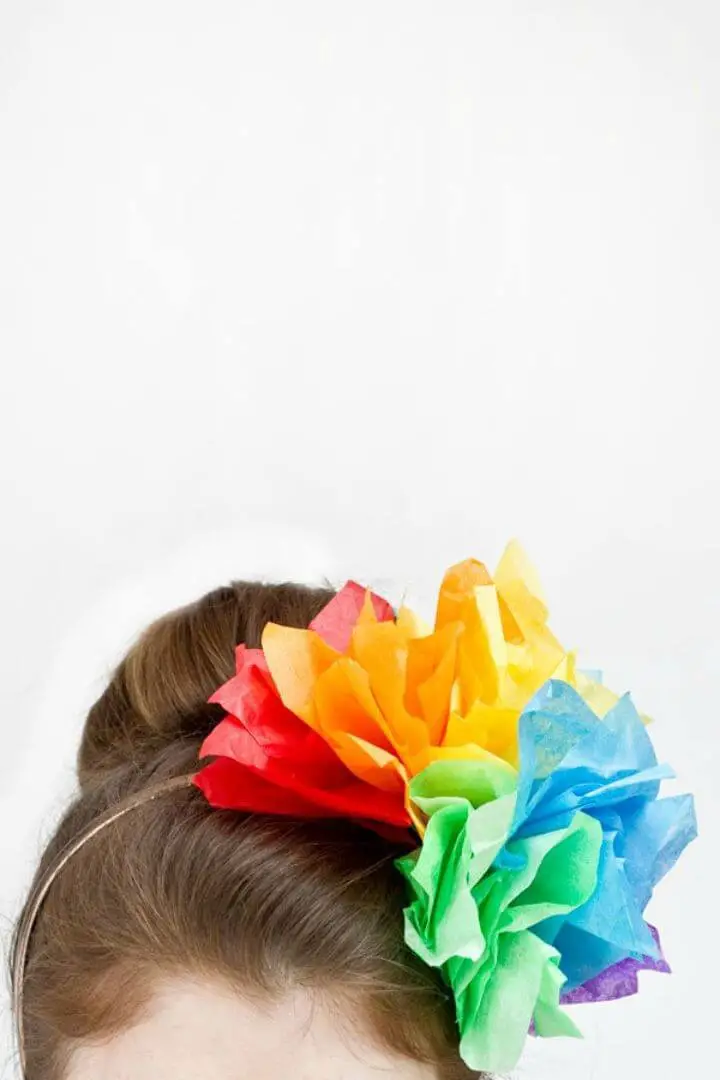
Transform any celebration into a vibrant spectacle with this DIY rainbow fascinator project! This whimsical hair accessory is perfect for adding a pop of color to tea parties, bridal showers, or any event that calls for a touch of magic. With its customizable design and easy-to-follow steps, you can adapt the project to fit your personal style or match the theme of your party. Simply create colorful ‘poofs’ using tissue paper, attach them to a headband, and fan them out to reveal a stunning rainbow effect. This engaging DIY project is an ideal way to express your creativity and get ready to party!
DIY Fascinators Hat
Elevate your celebrations by crafting unique and eye-catching fascinators using unconventional materials from the dollar store. This DIY guide reveals how to transform simple headbands and paper plates into stylish bases that can be customized with a variety of textures, heights, and whimsical touches. With fake flowers, feather boas, loofahs, and ballerina skirts as your creative canvas, you’ll create a one-of-a-kind masterpiece that’s sure to spark conversations at your next special occasion. This fun and easy craft project is perfect for sharing with friends over a festive night in, adding a touch of elegance and playfulness to any celebration.
Make A Fascinator Hat For Under $10
Transform your celebration with a unique DIY fascinator hat that exudes royal flair without breaking the bank. Perfect for Kentucky Derby Parties or Royal wedding celebrations, this budget-friendly guide shows you how to create a bespoke accessory using scrap fabric, small paper plates, tulle, deco-mesh, ribbon, and a large flower. By following our step-by-step instructions, you’ll craft a hat base, add lining and clipping mechanism, incorporate mesh and embellishments, and create a show-stopping piece that’s sure to capture attention. Whether you’re channeling your inner Duchess of Sussex or simply looking for a one-of-a-kind accessory, this project is the perfect way to tap into your creativity and make a statement.
How to Make Whimsical Teacup Fascinators
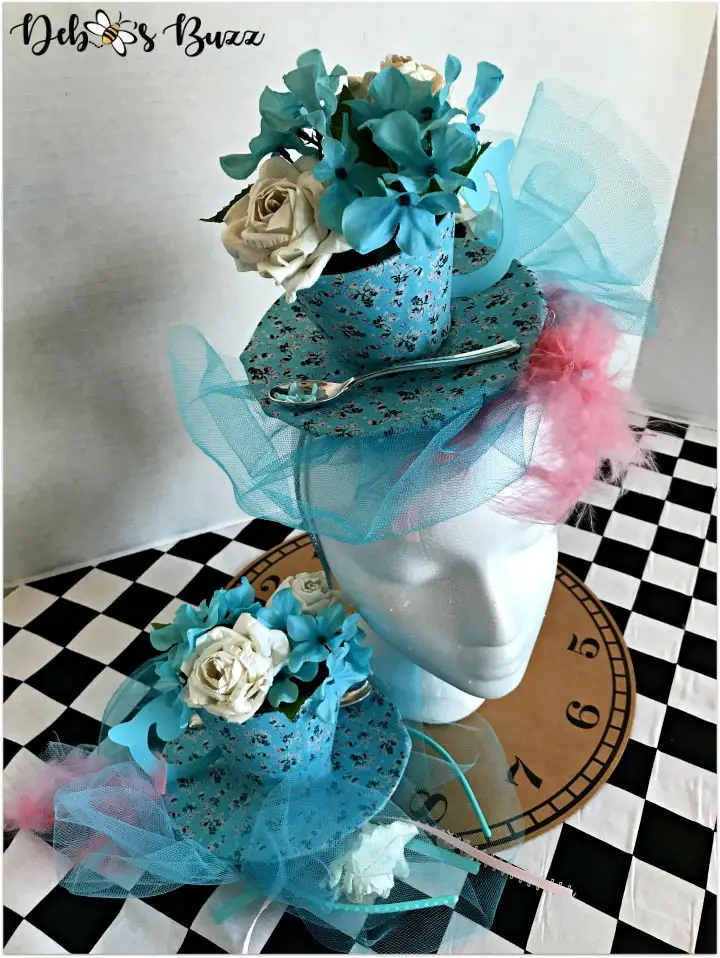
Immerse yourself in a creative adventure by crafting whimsical DIY teacup fascinators that will leave everyone in awe at your next tea-themed event or costume party. Not only are these unique pieces a thrilling craft project, but they also make extraordinary party favors or costume accessories. The meticulous process of designing and assembling these lightweight and balanced creations allows for comfortable wear throughout the event. What’s more, no prior expertise is required – just a passion for creativity and a love for one-of-a-kind, handcrafted treasures. Your next gathering will be an unforgettable experience with these delightful teacup fascinators.
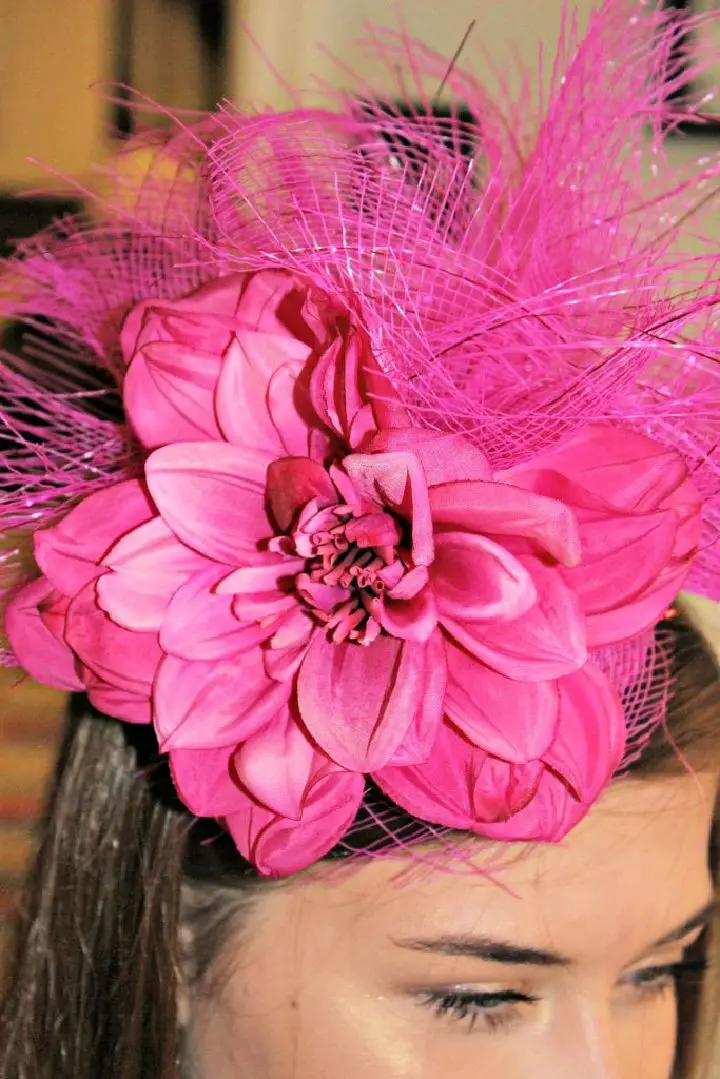
Perfect Fascinator for the Derby
Elevate your Kentucky Derby style with a one-of-a-kind, handmade fascinator that reflects your unique personality. This comprehensive guide takes you on a step-by-step journey to create a bespoke piece using a combination of materials such as headbands, silk flowers, feathers, and hot glue guns. By following the easy-to-follow instructions, you’ll not only craft a stunning accessory but also achieve all-day comfort and stability through thoughtful positioning. Let your creativity shine and make this year’s Derby event a memorable fashion statement.
Conclusion:
Crafting your own DIY fascinators is a thrilling experience that lets you unleash your creativity and showcase your individuality. By combining the right materials with patience and imagination, you can create stunning pieces that perfectly complement any occasion. We’ve covered the essentials, from choosing the perfect base to adding decorative touches, as well as common challenges to overcome. At its core, DIY fascinator-making is about self-expression and customization. So, gather your supplies and get ready to bring your unique vision to life. With our 15 easy-to-make DIY fascinators, you’ll be well-equipped to add a dash of handmade charm to your outfit and make a lasting impression.
