
Transforming the ambiance of your living space is just a DIY poster frame away. By following this comprehensive guide, you’ll be able to craft a one-of-a-kind masterpiece that showcases your favorite artworks or posters in a way that elevates any room’s aesthetic appeal. From selecting materials and cutting frame pieces to assembly and customization, we’ll walk you through every step of the process with expert guidance. Additionally, we’ll share valuable insights on sustainability practices, maintenance tips, and troubleshooting common challenges to ensure your framing journey is seamless and rewarding. With this treasure trove of ideas and techniques at your disposal, you’re ready to turn simple materials into stunning decorative pieces that reflect your personal style.
How to Make a Poster Frame – Step by Step Guide
For the DIY-savvy individual seeking a unique way to display their treasured posters, creating a custom swing-open frame is an excellent project. This practical and stylish solution enables easy poster rotation, ensuring your favorite artworks are always prominently displayed. By following this step-by-step guide, you’ll be able to craft a frame that not only showcases your prized possessions but also accommodates effortless switching whenever the mood strikes.
Materials and Tools Needed:
The wooden cabinet requires several key components to come together seamlessly. At its core, it’s built around a sturdy frame constructed from 3/4 inch thick solid birch or preferred wood. To add an extra layer of protection and visual appeal, you can opt for matting on the front panel. The backing is provided by foam core, which ensures stability and prevents warping. To bring everything together, you’ll need wood glue to secure the joints. A strap clamp helps maintain a consistent pressure, while V nails are used to reinforce the frame corners. For added functionality, consider incorporating a continuous hinge that allows for smooth opening and closing of the cabinet door. When it comes to cutting the various components, you can rely on a table saw or miter saw to make precise cuts. A chisel is also necessary for any fine-tuning adjustments. To add an extra layer of durability, Gorilla super glue gel can be used to reinforce any joints or seams. For plywood-backed cabinets, iron-on edge banding offers a clean and professional finish. Finally, a picture hanging kit ensures that your artwork or decorative items are properly displayed, while a magnetic door latch provides an optional securing mechanism for the cabinet door.
Step 1: Preparing Your Wood
Before you begin assembling your frame, start by cutting your wood into the required dimensions. If the wood isn’t perfectly square, use a table saw to straighten it out, ensuring a smooth and professional finish. Additionally, cut a groove (rabbet) on the backside of each piece for the glass and matting to sit in neatly. Make sure these grooves are chiseled clean for a precise fit, which will be essential for a strong and sturdy frame.
Step 2: Cutting the Frame Pieces
When preparing your frame, it’s essential to measure and cut the pieces to the correct length with precision. To achieve this, use a 45-degree miter at each end, which enables the corners to fit together seamlessly. One effective method is to utilize one of the cut pieces as a template to double-check that all four sides are identical in both length and angle, guaranteeing a perfect fit.
Step 3: Frame Assembly
To create a sturdy joint, first apply an ample amount of wood glue to the mitered ends of your frame pieces. Then, use a strap clamp to secure them together and maintain precise alignment as the glue dries. Once the adhesive has fully set, further fortify the corners by driving V nails into place, thereby guaranteeing a robust bond that will withstand the test of time.
Step 4: Preparing the Back Panel
To complete the frame’s rear panel, first cut a piece of plywood to fit snugly within its dimensions. If desired, apply iron-on edge banding to provide a seamless finish around the plywood’s edges. Next, attach the continuous hinge to one side of the panel, ensuring it remains aligned and parallel to prevent the frame from sagging or becoming misshapen in the process.
Step 5: Adding the Poster and Glass
To complete the framing process, start by attaching the poster to the back panel using acid-free artist tape for a secure hold. Next, cut your chosen material – glass or plastic – to size and carefully position it atop the poster within the frame. If you’re incorporating matting into your design, insert it between the glass and the poster, taking care to ensure a precise fit.
Step 6: Finishing Touches
When it comes time to apply the finishing touches to your wooden creation, consider applying a finish that not only provides protection against wear and tear but also enhances its aesthetic appeal. Allow the finish to fully dry before moving on to the next step, which involves assembling the frame. This can be done by attaching the back panel via the hinge, ensuring a secure and sturdy structure. To add an extra layer of convenience and functionality, consider installing a magnetic door latch that keeps the frame closed when not in use.
Step 7: Hanging Your Frame
To ensure a sturdy and secure installation, opt for a French cleat or a hanging system of your choice to mount the frame. When attaching the frame to the wall, double-check that it’s firmly secured, taking extra precautions if you’re working with heavier glass frames.
Troubleshooting Tips
Before dealing with a stubborn frame that refuses to close, it’s essential to identify the underlying issue. One potential culprit is misaligned hinges, which can prevent the back panel from swinging shut properly. To troubleshoot this problem, double-check the alignment of your frame’s hinge and ensure that the back panel isn’t obstructing the door’s natural swing. If these simple adjustments don’t resolve the issue, you may need to fine-tune the placement of the magnetic latch to keep the door securely closed.
Video Tutorial
For those seeking a comprehensive understanding of building a swing-open poster frame, I recommend supplementing this written guide with a step-by-step video tutorial. The visual aspect offered by the video perfectly complements the techniques presented in this guide, allowing for a deeper comprehension of the project’s requirements and execution. With this combination, you’ll be well-equipped to craft a custom swing-open poster frame that adds a unique touch to any room. As you create your own frame, you’ll appreciate the ease with which you can swap out posters, keeping your space fresh and dynamic.
Customization Ideas for Your DIY Poster Frame
When crafting a DIY poster frame, you’re not limited by standard designs or materials. The freedom to customize allows you to infuse your personal style into the final product. To make yours truly unique, consider these creative approaches:
Selecting the Right Material: Wood offers warmth and sturdiness, while metal or acrylic provide a modern touch. For a budget-friendly option, cardboard or foam board can be surprisingly durable and easy to work with.
Painting and Finishing: Once your frame is built, painting it can dramatically alter its appearance. Choose a color that complements your poster or room’s decor, and consider matte, gloss, or satin finishes for varying effects.
Adding Decorative Flair: Incorporate decorative elements to give your frame personality. This might include washi tape borders for a playful look, attaching small objects related to the poster’s theme, or adding simple twine for a rustic touch.
Interchangeable Frames: If you frequently change posters, consider building a frame with interchangeable sides. Use magnets or clips to make swapping easy without damaging your art.
Lighting it Up: To add ambiance and highlight your poster, consider installing LED strip lights behind or around the frame.
Eco-Friendly Options: For those concerned about sustainability, use recycled materials, upcycle old frames, or opt for natural stains made from coffee or tea.
Personalizing Your Frame: Finally, make it truly yours by adding a personal touch. This could be as simple as signing your name on the back or as intricate as carving a design into the wood.
The key to a successful DIY project is embracing creativity and having fun. Your poster frame isn’t just a holder for art – it’s a piece of art itself.
Embracing Sustainability in Your DIY Poster Frame Project
When it comes to creating a DIY poster frame, incorporating sustainability into your project not only benefits the environment but also adds a unique touch to your artwork. To achieve this, start by selecting materials that are renewable or recycled. Bamboo, for instance, is a fast-growing resource that can be used to create sturdy frames, while recycled wood or metal can be repurposed into beautiful frames. Additionally, opt for natural oils or waxes as finishes, which are less harmful to the environment and safer for you during application. Avoid volatile organic compounds (VOCs) commonly found in many paints and finishes.Before buying new materials, consider upcycling old frames or other items. An old window frame, for example, can be transformed into a rustic poster frame with character. When planning your project, take steps to minimize waste by using leftover materials for smaller projects or donating them to local schools or community centers. If adhesives are required, look for water-based or eco-friendly options.To further reduce waste and environmental impact, use digital tools to plan your frame design, eliminating the need for physical prototypes and their associated waste. Finally, try to source materials locally to minimize the carbon footprint associated with transportation. By following these tips, you can create a stylish, personalized, and eco-friendly poster frame that not only looks great but also makes a positive impact on the environment.
Troubleshooting Tips for DIY Poster Frames
When creating a custom poster frame, you may encounter some unexpected obstacles. To overcome these challenges, consider the following troubleshooting tips: Warped wood can often be attributed to excessive moisture. Ensure your wooden frame is stored in a dry environment before starting your project. If warping occurs after assembly, gently sand the area and apply flat pressure until the wood settles. To strengthen loose joints, use corner braces or L-brackets and apply wood glue for added security. For glass or acrylic issues, consider switching to shatter-resistant acrylic if breakage occurs. Scratches on acrylic can be buffed out using a specialized cleaner or a mixture of water and baking soda. Uneven paint jobs can often be resolved by lightly sanding the area and reapplying a coat once the first layer is completely dry. If your frame is too heavy for standard hanging methods, use wall anchors designed for heavy items and ensure they are suitable for your wall type. To prevent posters from slipping inside their frames, secure them with acid-free tape or poster putty that won’t damage the paper. Finally, if a poster doesn’t fit its frame, measure both the poster and the frame opening to ensure proper sizing. Trim the poster carefully or adjust the frame dimensions as needed. By anticipating and addressing these potential issues, you can create a successful DIY poster frame.
Advanced Techniques for Your DIY Poster Frame
To take your DIY poster framing project to the next level, consider incorporating advanced techniques that can add a touch of professionalism to the final result. One way to do this is by mastering various joinery methods, such as mitre joints or half- lap joints, which provide a cleaner and stronger frame than traditional butt joints.Another approach is to create a layered effect by stacking different materials, such as metal and wood, to achieve an industrial chic look. You can also use a router to add decorative edges to your frame, including bevels, ogees, or coves, which can transform a plain frame into a work of art.In addition to these techniques, you can also incorporate inlays featuring contrasting materials like mother-of-pearl, metal, or different wood types to create unique patterns. Alternatively, you could build a shadow box frame that not only displays the poster but also showcases related memorabilia.To complete the look, consider adding acid-free matting and picture frame lighting to protect your poster and enhance its colors. With practice, these advanced techniques can help you create a DIY poster frame that stands out with a refined and custom-made appearance.
Maintenance and Care for Your DIY Poster Frame
To keep your DIY poster frame in top condition and preserve both the frame and the artwork it displays, follow these simple steps: Dusting is crucial – use a soft, dry cloth to remove dust regularly, avoiding water or cleaning solutions unless the frame’s material is water-resistant. Avoid direct sunlight exposure to prevent fading of the poster and warping or discoloration of the frame material. Maintaining a consistent humidity level in the room where the frame is displayed is also important – excessive humidity can damage both the frame and the poster. For frames with glass or acrylic, use a microfiber cloth and gentle cleaner designed for the specific material to avoid scratches. Periodically check screws or hanging hardware to ensure they are tight and secure. Consider rotating displayed artwork to give your space a fresh look while preserving the posters from long-term exposure. When storing the frame, wrap it in acid-free paper or bubble wrap and keep it in a dry, cool place. By following these steps, you can extend the life of your DIY poster frame and keep it looking great for years to come.
FAQs About DIY Poster Frames
Embark on a journey to create bespoke DIY poster frames that exude style and elegance, without breaking the bank. This exhaustive guide will equip you with the necessary knowledge to craft your own unique frames from the comfort of your own home.
What materials do I need to make a DIY poster frame?
To create a unique and personalized DIY poster frame, start by gathering your essential materials: the frame’s structural component – wood, metal, or acrylic – and the necessary tools to shape it into its final form. This includes a saw for precision cutting, sandpaper for smoothing out any rough edges, and a brush or roller for applying paint or stain. Don’t forget the hardware needed to assemble the frame, such as screws, nails, or glue, which will provide the stability and structural integrity required to hold your poster in place.
How do I measure and cut the frame accurately?
To ensure accurate framing, it’s essential to measure the poster carefully and account for the frame width by adding a margin. Begin by using a ruler and pencil to mark your cuts on the material. For added precision, consider employing a miter saw or hand saw with a miter box. This combination of measurement and cutting tools will help you achieve clean, accurate edges for a professional-looking finish.
Can I make a frame without power tools?
While traditional methods may require more manual labor and dedication, it’s entirely feasible to employ hand tools like saws and miter boxes, hammers, and nails to complete the task. With a bit more time and elbow grease, you can successfully execute the project without relying solely on power tools.
What’s the best way to protect my poster in the frame?
To add a professional touch and protect your artwork, consider placing a clear acrylic sheet or glass over the front of your poster. Make sure to trim it precisely to match the dimensions of the frame’s opening, ensuring a snug fit.
How do I hang my DIY poster frame securely?
When it comes to hanging pictures, it’s crucial to choose the right type of hook based on the weight and size of your frame. Heavier frames require more substantial fastening methods to prevent them from falling or becoming loose over time. Wall anchors and French cleat systems are ideal solutions for larger or heavier frames, as they provide a secure and sturdy hold that can withstand the weight without compromising the integrity of the wall or surrounding area.
Can I use recycled materials to make a poster frame?
Imagine transforming everyday materials like weathered wooden planks, rusted metal sheets, or durable cardboard into one-of-a-kind display cases for your treasured posters. The possibilities are endless when it comes to upcycling and giving new life to discarded items.
How do I make sure the corners of my frame are square?
When building the frame, it’s crucial to ensure accurate angular measurements. A carpenter’s square is an essential tool for achieving this goal. In addition to measuring the angles, corner clamps can be used to securely hold the pieces together while you fasten them in place.
What kind of paint should I use for my frame?
When it comes to choosing a suitable paint medium for your frame, acrylics are generally a great option. However, if you’re working with wood, consider complementing the natural grain with a subtle wood stain or finish to create a harmonious and understated appearance.
How can I add a decorative touch to my frame?
Elevate your space by introducing visual interest through clever combinations. Consider incorporating decorative elements like trim, metallic tacks, or stencil designs that add depth and personality. For an added wow factor, layer multiple materials or juxtapose contrasting colors to create a stunning focal point.
How do I maintain my DIY poster frame?
To maintain the quality and appearance of your poster frame, it’s essential to follow a regular cleaning routine using a soft cloth. Additionally, exposure to direct sunlight should be avoided as it can cause fading over time. If your frame is made from wood, consider reapplying a protective finish every few years to preserve its condition. By providing clear answers to frequently asked questions, you’ll empower DIY enthusiasts with the knowledge they need to successfully complete their poster frame projects, while also ensuring that the language used is accessible and easy to understand for all readers.
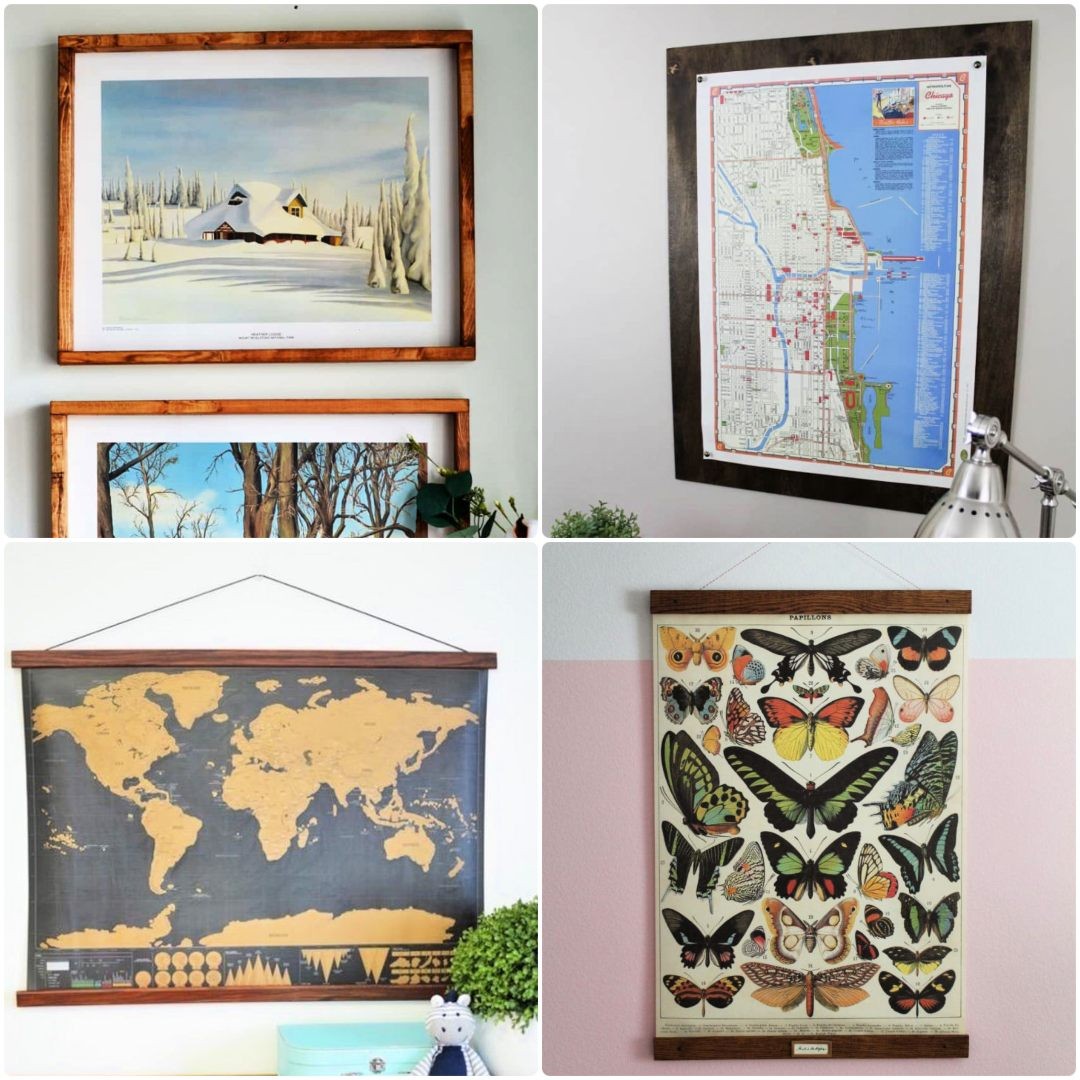
25 DIY Poster Frame Ideas to Elevate Your Home Decor
Transform your home’s aesthetic with 25 innovative DIY poster frame ideas that cater to diverse tastes. Spanning from earthy and vintage-inspired to sleek and contemporary, these creative solutions will help you find the ideal framework to highlight your favorite artwork or cherished memories.
DIY Picture Frame for Art or Posters
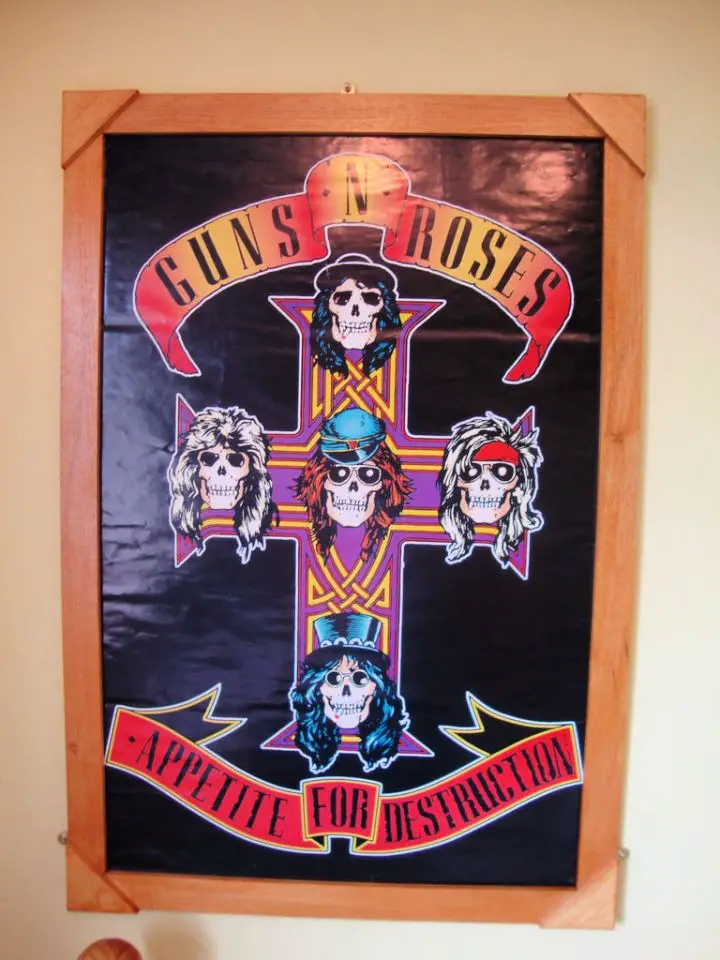
Transform your home’s aesthetic with a straightforward DIY picture frame perfect for showcasing large art prints or posters. Crafted from 1×2 boards, this rustic charm-filled frame is an ideal addition to any farmhouse or cottage setting. To bring this project to life, you’ll need basic tools like a miter saw, air brad nail gun, and staple gun. Don’t forget to add a touch of personality with wood stain and a sawtooth hanger for effortless hanging. With these fundamental supplies and step-by-step instructions, you can effortlessly create a custom picture frame that not only saves you money but also adds a personal touch to your decor. This DIY project is the perfect way to elevate any room with the art that speaks to you.
Make Poster Frames for Printables
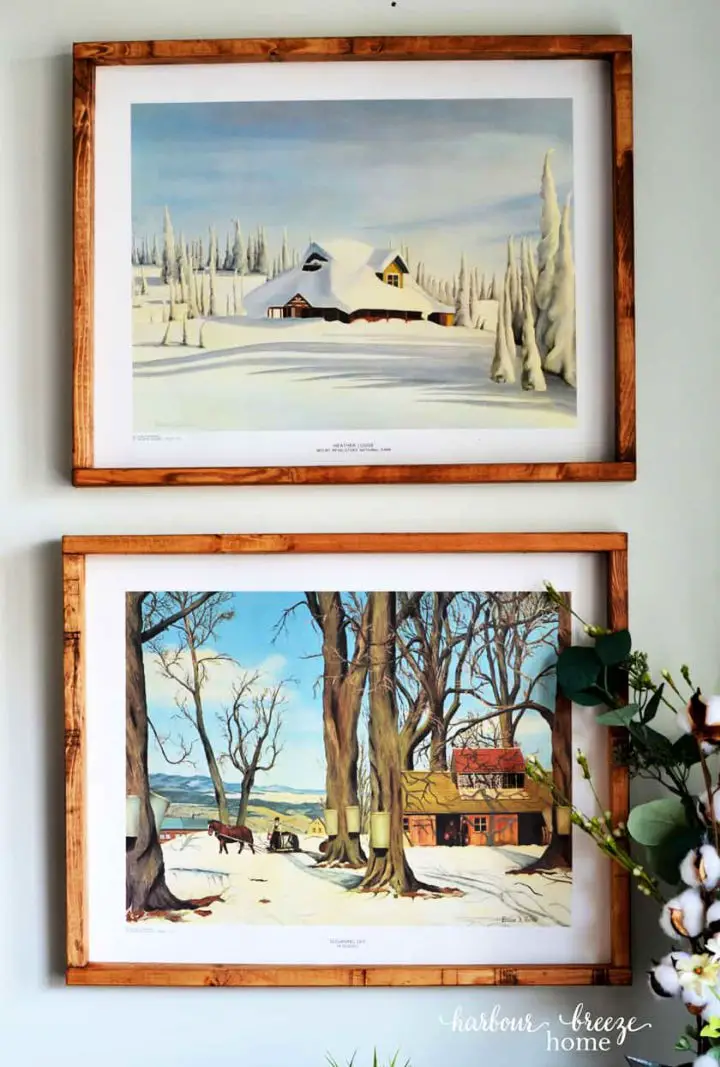
Transform your interior space with ease using this uncomplicated DIY poster frame tutorial, perfect for showcasing printables. This project’s affordability and simplicity will resonate with crafty individuals seeking budget-friendly decor ideas. To create this charming frame, you’ll need poplar hobby boards, a miter saw, fine-grit sandpaper, and a staining rag. Personalize the wood by staining or painting it to match your unique style. A game-changer is the magnetic tape, allowing for effortless printable changes. Additionally, take advantage of the complimentary farmhouse bathroom printables included in this guide, which can elevate your bathroom’s decor. By following these straightforward steps, you’ll be able to bring your printable displays to life quickly and efficiently.
How Do You Make Poster Frame Less Than $10
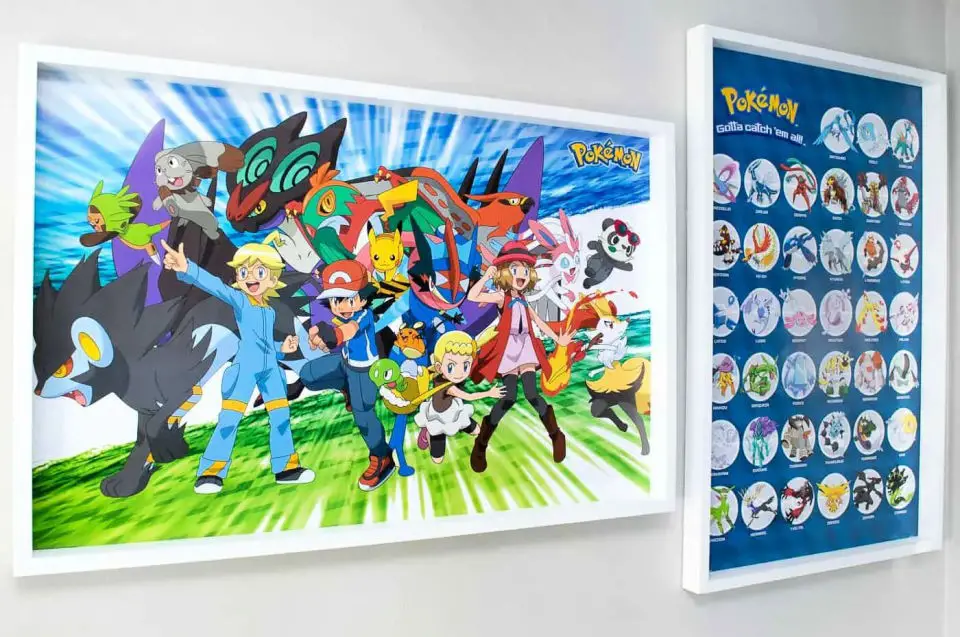
Transform any space with a personalized touch by creating a custom DIY wooden frame for your favorite posters! This cost-effective and adaptable project allows you to tailor the size and color of the frame to perfectly complement your room’s decor, all while showcasing your unique style.With just a few essential materials, including a poster, two 1 x 2 boards, wood screws, paint or stain, a staple gun, and a sawtooth picture hanger, you can craft a stunning frame for under $10. This DIY endeavor also offers a great opportunity to introduce kids to practical math lessons.Follow the step-by-step instructions carefully, prioritizing safety by wearing protective gear when woodworking. As you bring your poster to life with this inexpensive and customizable frame, you’ll be amazed at how it elevates the aesthetics of your room.
How to Make Your Own Poster Frame
Elevate your home decor with a simple DIY poster frame that will cost you just 10 euros. This accessible project is perfect for any room, seamlessly blending with its surroundings. To create it, you’ll need just a few basic materials: whitewood or your preferred wood type, pin nails, wood glue, stain, varnish, a poster, and cardboard. A glue stick is also essential for securely attaching your poster to the frame. By measuring, cutting, and assembling the frame around your poster, you can add a touch of creativity and flair to your space. The finishing touches involve attaching your chosen poster and treating the wooden frame with varnish to ensure longevity and a polished appearance. This DIY project is an excellent way to engage in something rewarding and create a unique decor piece that reflects your personal style. With these straightforward steps, you can customize your living or workspace today.
Easy DIY Poster Frame

Transforming your interior decor with a stylish yet budget-friendly DIY poster frame is an effortless way to elevate your space. By combining basic materials like flat timber molding and dark walnut stain, you can create a one-of-a-kind art piece that adds an industrial- chic touch to any room. This simple yet effective project involves cutting, staining, and varnishing the timber before attaching your favorite poster with a staple gun. The result is a stunning piece that’s not only easy on the wallet but also offers an inexpensive alternative to expensive art pieces. Whether you’re looking to add a unique touch to a child’s nursery or simply want to enhance the ambiance of your home, this DIY project is sure to inspire creativity and bring a personal touch to any space.
Simple DIY Poster Frame
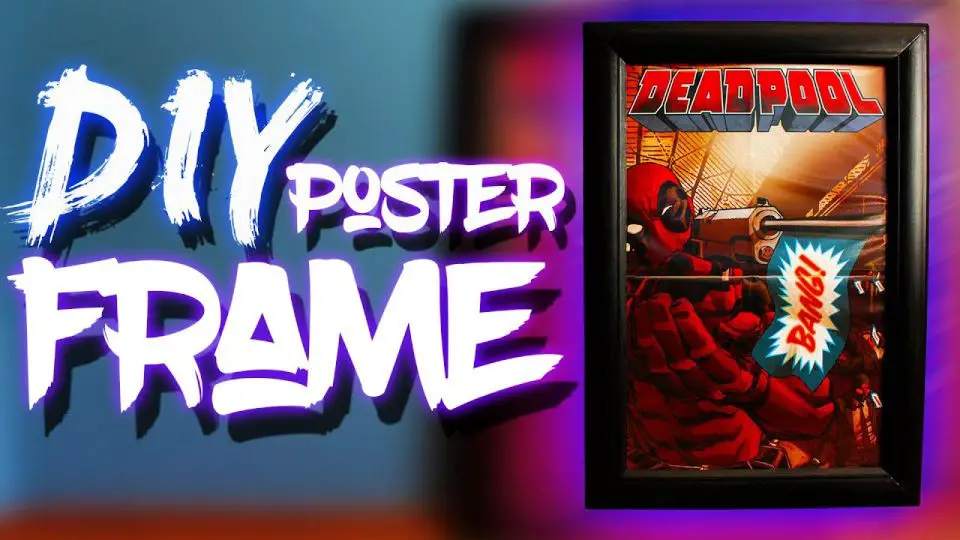
Transforming an oversized poster into a stunning piece of art doesn’t have to dent your wallet. For a cherished vintage Empire Strikes Back Star Wars poster, discover a budget-friendly approach to create a custom frame that’s as impressive as it is affordable. The solution lies in repurposing everyday materials like trim, acrylic sheets, and hardboards to craft a sturdy, visually appealing frame that rivals commercial offerings. This DIY guide takes the guesswork out of creating a masterpiece, providing step-by-step instructions on how to upcycle ordinary items into an extraordinary piece that showcases your beloved posters at a fraction of the cost. By embracing your inner frugal Jedi, you’ll give new life to long-forgotten posters and create a stylish focal point in your home.
Making a Metal Framed Movie Poster
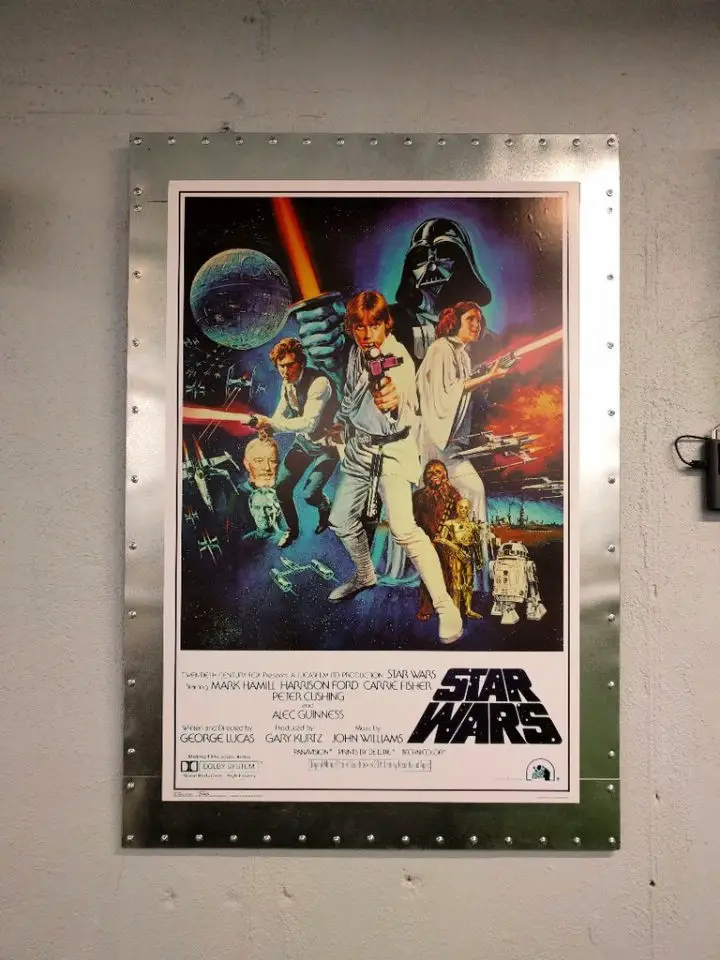
Transform your lounge with bespoke metal-framed movie posters, a clever DIY project that not only adds an industrial touch but also fits within your budget. Start by collecting essential supplies, including MDF sheets, spray adhesive, spray paint, galvanized flashing, screws, and basic tools such as a circular saw, drill, tin snips, and a marker. Once you have all the necessary materials, follow these steps: Begin by cutting, sanding, and painting the MDF pieces to create the perfect canvas for your movie posters. Measure, cut, and adhere the metal strips to the backplate, carefully aligning them as you go. Next, mark screw locations, drive screws, align, drill, and countersink alignment holes to ensure a sturdy frame. With your frame complete, secure the poster backing in place and add D-rings for easy hanging. Finally, glue your movie poster to the backing and hang your unique creation with pride.
DIY Dirty Movie Theater Framed Poster
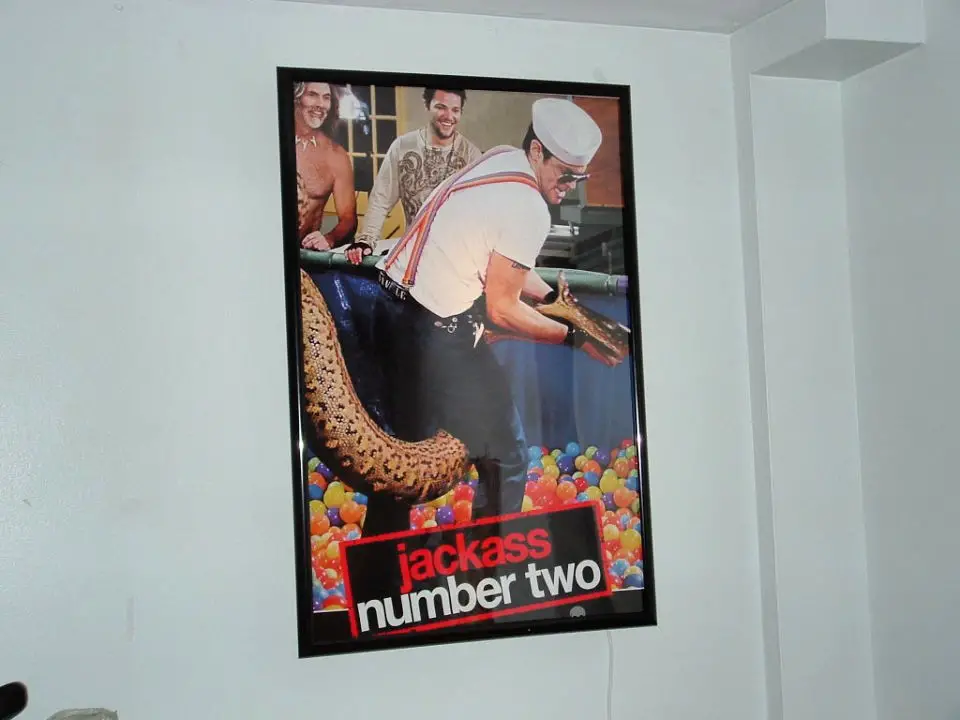
Transform any room into a cinematic haven by creating a mesmerizing backlit movie theater poster at home. This easy-to-conceptualize DIY project requires just a few simple materials, including a double-sided movie poster, a matching frame, a fluorescent lamp assembly, corrugated cardboard, and basic tools.
Start by trimming the poster to fit the frame seamlessly. Next, construct a light cardboard box, carefully placing the lamp assembly at its center for an even glow. Assemble everything with precision, ensuring no light escapes, and voila – your captivating backlit movie poster is ready to be marveled at.
This project embodies creativity and functionality, effortlessly transforming a bland wall into a striking movie-themed display that adds a unique charm to your interior decor. So roll up your sleeves and embark on this cost-effective and engaging DIY adventure today!
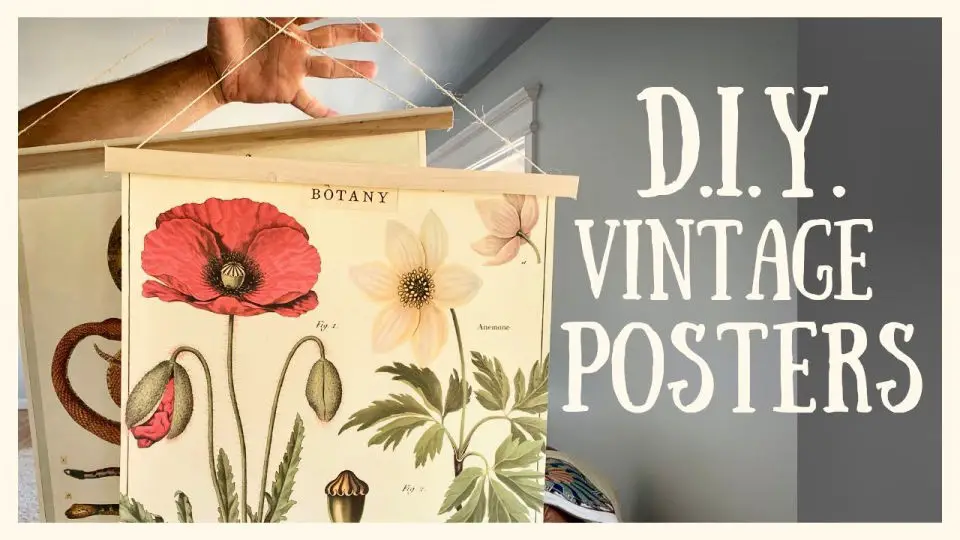
Vintage Poster Frame for Greta’s Butterflies
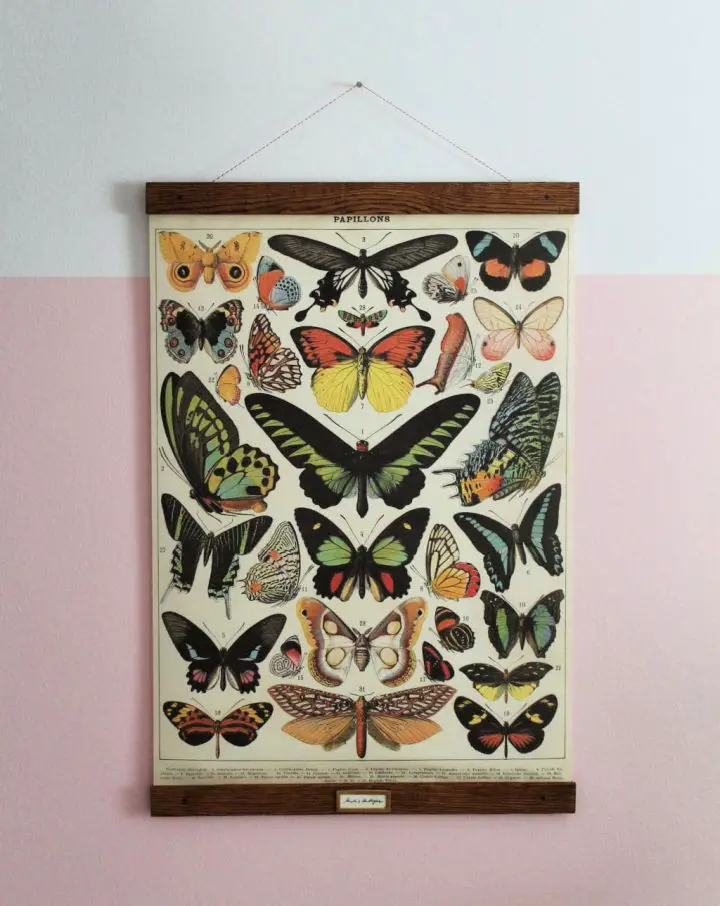
Transform any room into a whimsical wonderland with these DIY poster frames, which not only save you money but also add a touch of elegance to your space. For a truly magical atmosphere, create a showstopping butterfly-themed display that’s sure to delight both kids and adults alike. This project was inspired by Greta’s passion for butterflies, and it’s a great way to pay tribute to her love while adding a unique decorative element to any room. The star of the show is a high-quality butterfly specimen poster from Urban Outfitters, which features a textured canvas-like design that grabs your attention right away. To take it to the next level, create a homemade frame using pine and white oak, then coat it in a rich walnut stain for a sophisticated finish. Add some extra flair with a red and white twine hanging string, and consider adding a label frame sprayed with gold and featuring the words ‘Greta’s Butterflies’ for a personal touch that makes the display truly special. This easy project can be completed in just about an hour, and it not only recreates a lost treasure but also gives you a new keepsake that might even surpass the original in terms of charm and joy. With this DIY butterfly wonderland, you’ll be able to create a one-of-a-kind piece that’s sure to bring a smile to your face for years to come.
Handmade Poster Frame
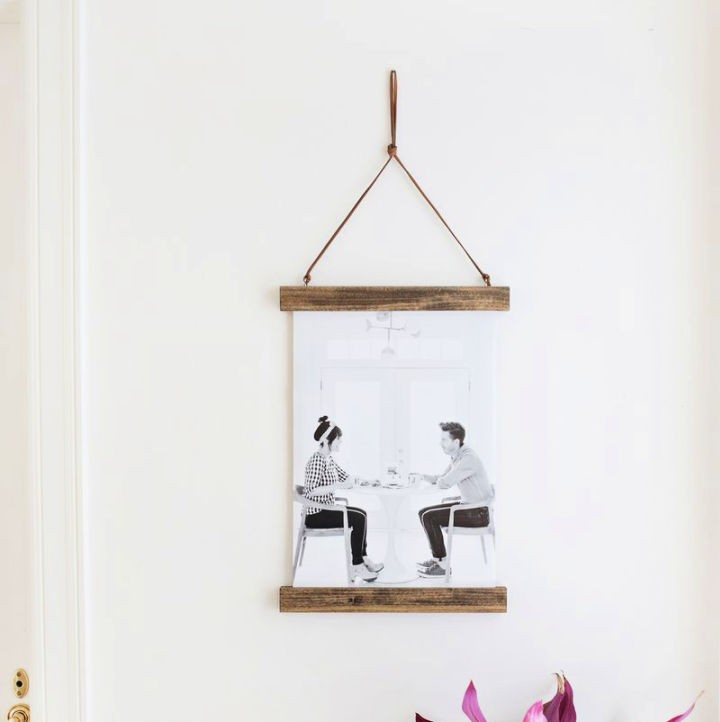
Transform your living space into a visual masterpiece by creating a one-of-a-kind DIY corner photo frame that perfectly captures your unique style. This budget-friendly project requires minimal effort, but yields maximum impact as you showcase your cherished memories.
To get started, gather essential supplies like 14-inch wood strips, screws or nails, and a high-quality printer, such as the Canon PIXMA iP8720. Once you’ve printed your desired photo size, bring out the wood stain to give it a personalized touch.
Assemble the wooden pieces around your prized photo, securing it in place with screws or nails. For a seamless finish, add a simple leather cord that serves as the perfect hanging mechanism.
This hands-on project not only decorates your walls but also infuses your home decor with a personal touch. Make memories come alive and display your favorite moments today with this easy-to-create corner photo frame!
How to Make a Plywood Picture Frame

Elevate your home’s aesthetic with these innovative DIY poster frames that beautifully showcase your favorite art pieces, posters, or photographs while adding a rustic charm. By creating a budget-friendly plywood picture frame using 1/4″ birch plywood, wood stain, spray adhesive, and decorative furniture tacks, you’ll not only save money but also infuse your space with personality and character. The best part? This DIY project allows you to tailor the frames to match your unique decor, effortlessly bringing a homely yet stylish touch to any room. Get creative, add an individual touch, and enjoy the rewarding experience of crafting something truly special.
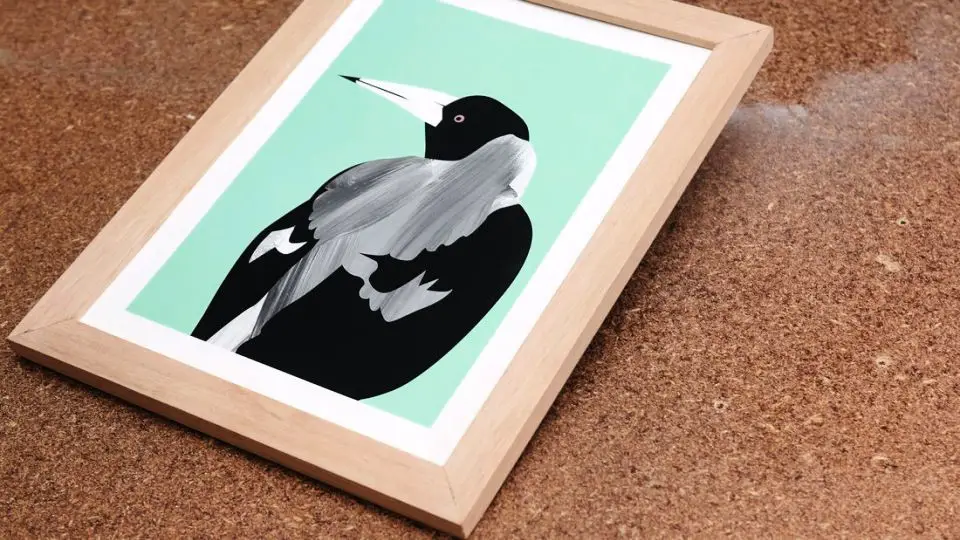
DIY Wooden Poster Frame

Elevate your poster game by turning a simple wall decoration into an eye-catching work of art using this DIY guide to crafting a wooden frame. Ditch the thumbtacks and scotch tape for a more substantial and stylish approach, combining materials like common pine board, thin backer board, a saw, and a brad nail gun to create a sleek frame that makes any poster stand out.
This straightforward project empowers you to transform a Cavallini & Co’s vintage-themed poster or your favorite print into a beautiful home decor piece. Add your personal touch with optional paint or stain, then hang or lean your masterpiece anywhere in your home to elevate the ambiance and showcase your favorite posters in a classy and tasteful manner.
Build Your Own Poster Frame

Transform your home’s interior by creating a unique DIY poster frame that showcases your favorite art piece in a way that harmonizes with your personal style. Gone are the days of generic frames and simple wall tacks – instead, opt for a hands-on project that requires minimal materials like wooden planks and color-matching stains to create a personalized piece that reflects your home’s aesthetic. Start by selecting your preferred artwork and follow this easy-to-follow guide, which involves cutting, drilling, and assembling the frame. With an overall cost of just $10, you can create a one-of-a-kind frame that elevates your artwork and enhances your room’s ambiance.
How to Make Wood Frame for Large Posters
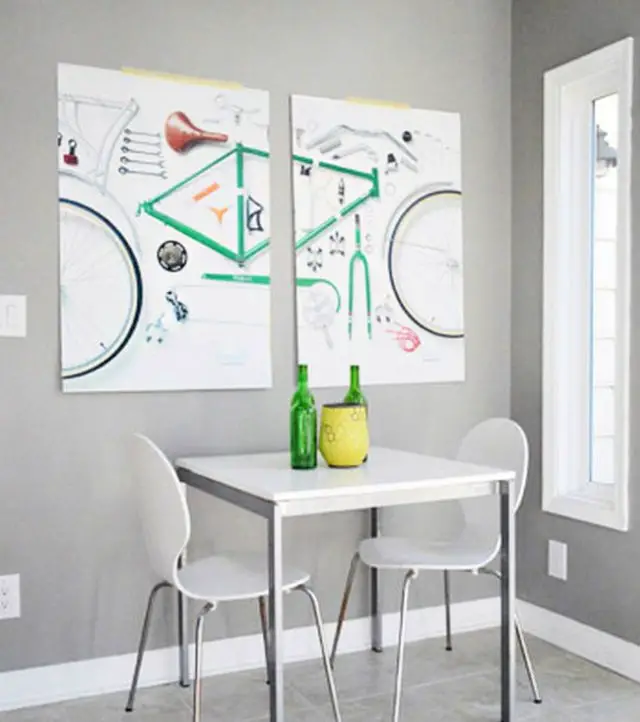
Transform your home decor with an artistic expression of your passion for bicycles and DIY projects. This simple yet creative endeavor requires minimal materials – a 6-foot-long 1×2 pine board, a miter saw, and wood stain – to craft rustic bike frames that showcase your unique style. With just $14 invested, you can turn any wall into a stunning tribute to cycling culture.
This step-by-step guide walks you through the process of cutting and assembling the boards into minimalist frames, adding a sophisticated touch with wood stain, and finally attaching your chosen art piece. The result is a dynamic space that reflects your personality and love for biking. So, take the first pedal stroke on this creative journey and manifest your enthusiasm for all things bike-related.
How to Make Poster Frame at Home
Transform your living space with a unique DIY poster frame, a budget-friendly yet captivating solution to inject personality into those bare walls! This creative project requires just a few accessible materials, including a hardwood dowel, wood glue, clamps, a picture hanger kit, wood stain, a paintbrush, a staple gun, a tape measure, and sandpaper. The process begins with precise measuring and cutting, followed by meticulous gluing and sanding, finishing with a rich stain treatment for a polished finish. Next, secure your cherished print to the frame and install the hardware to proudly display your handmade masterpiece. The pride of creating something special for your home is unparalleled. With these custom poster frames, you’ll enjoy a personalized touch and visually striking decor that makes your space truly feel like yours.
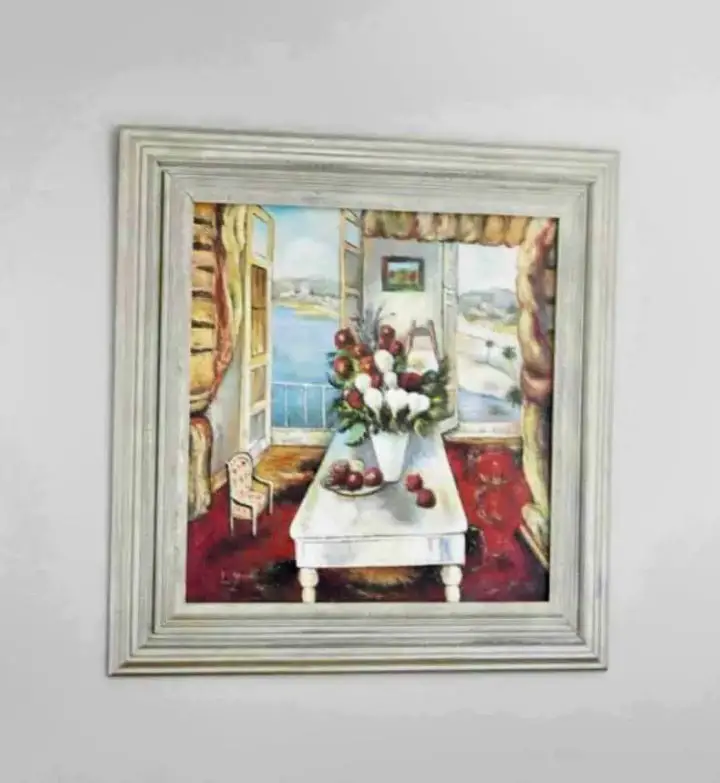
DIY Vintage Poster Frame Display

Transform your room into a haven of vintage elegance by creating a stunning DIY poster frame. This comprehensive guide walks you through the process of crafting a custom-sized frame that perfectly complements your space using a range of essential supplies, including lumber, molding, nails, glue, spackle, spray paint, and gold leaf. The result is a one-of-a-kind piece of wall art that exudes charm and character, adding a touch of sophistication to your home decor. With its focus on customization and creativity, this project allows you to put your unique stamp on the design, making it a true reflection of your personal style.
DIY Large Custom Picture Frames
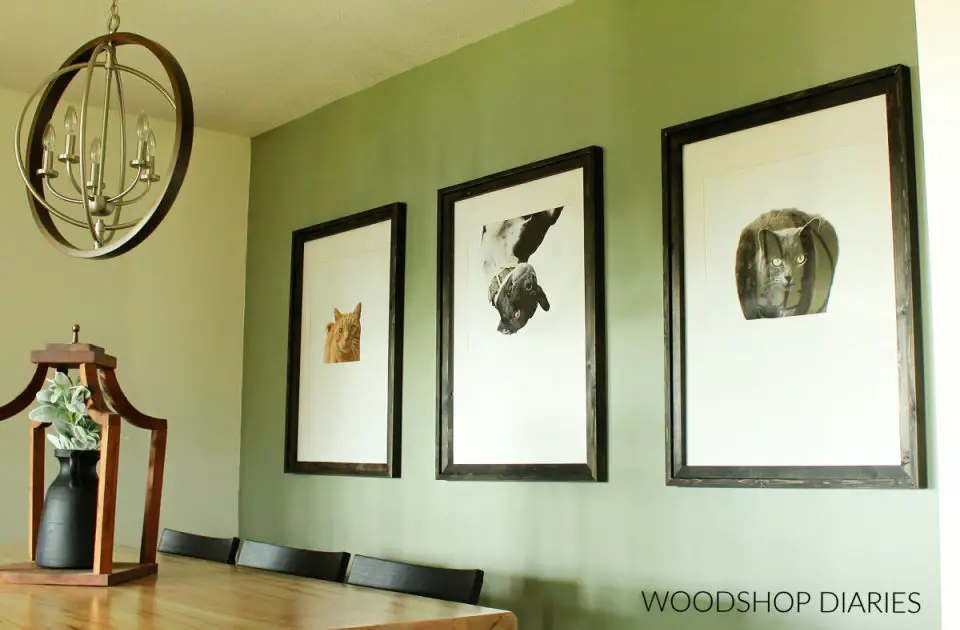
Transform the look of your space by crafting your own DIY poster frames, tailored to fit any style or size. This easy-to-follow guide allows you to create a frame that perfectly showcases your cherished memories, giving your home a unique character. By repurposing everyday items like pictures, plexiglass, mat board, 1×2 boards, square dowels, and cardboard, along with essential tools like wood glue, picture frame tabs, and a sawtooth hanger, you can create a stunning display that highlights your favorite moments – whether they’re portraits of your beloved pets or treasured memories. With this practical and fun project, you’ll not only save money but also bring a touch of personality to your home’s interior design.
Easy DIY Picture Frame
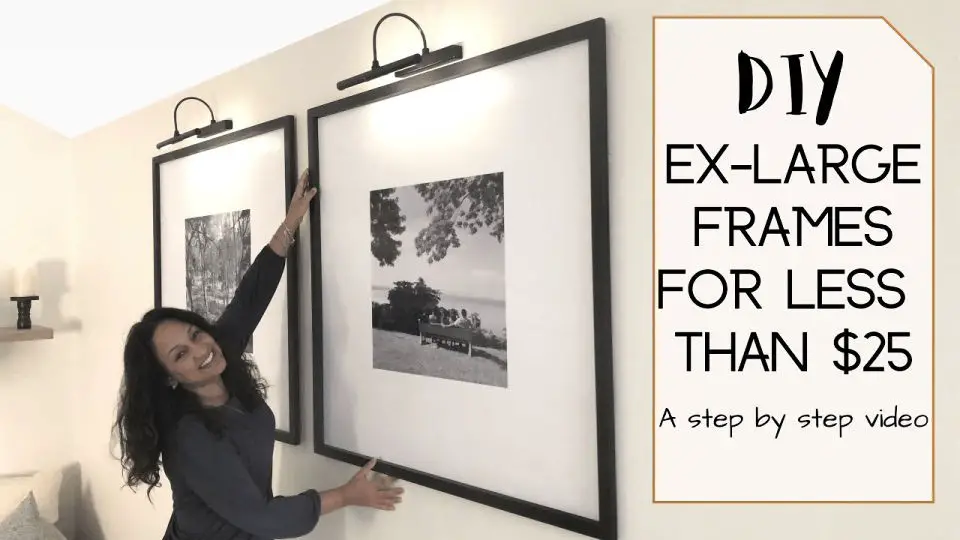
Transform an ordinary photo frame into an extraordinary oversized piece of art with this comprehensive DIY guide! By following these simple steps, you can create a stunning frame that’s both cost-effective and visually appealing. Perfect for those who love making a statement with their home decor, this project provides a step-by-step process to help you achieve professional-looking results without breaking the bank.
To get started, you’ll need some basic materials, including Rustoleum Matte black spray paint, a wireless picture light, gorilla wood glue, and mod podge matte glue. From selecting the perfect photos to final assembly and lighting installation, every detail is covered in this easy-to-follow guide.
So why settle for an ordinary photo frame when you can create something truly extraordinary? With this DIY guide, the possibilities are endless, and your living space will thank you!
Make a Custom Poster Frame on Budget
Elevate your wall decor by repurposing existing poster frames into bespoke solutions that adapt to your unique artwork dimensions. This straightforward process transforms readily available frames from department stores into custom-fit wonders, eliminating the need for power tools or complicated procedures. By upcycling pre-made frames, you’ll not only save money but also expand your design options beyond standard sizes typically found in physical stores. With this innovative approach, you can unlock your creativity and create a visually stunning living or working space that reflects your personal style.
DIY Picture Frame With Wood Molding
Transform your wall decor with creative DIY poster frames that infuse personal touches to cherished memories. By following this step-by-step guide, you’ll unlock a unique way to elevate canvas or artwork with wood molding, adding an air of sophistication to your interior design. With a focus on precision and creativity, you can craft a one-of-a-kind frame using baseboard molding, decorative trim molding, a miter saw, wood glue, and spray paint. As you work with these tools, remember to prioritize safety, utilizing them responsibly. The result is not only a stunning frame but also a sense of accomplishment from your DIY project. Begin today and turn your picture-perfect memory into a stylish focal point that tells a story.
Making Your Own Picture Frame
Transform your walls with a personalized DIY picture frame, showcasing your cherished memories in a truly unique way. This easy-to-follow guide is the perfect starting point for adding an air of ingenuity to your space. To bring this project to life, you’ll need a range of essential tools, including miter corner clamps, a drill, measuring tape, mini Phillips head screwdriver, miter saw, and basic safety equipment.The key materials required are timber picture frame molding, MDF board, disposable gloves, frame stays, PVA wood glue, sandpaper, and wood filler. What’s more, this flexible custom project allows you to tailor the frame’s dimensions to your exact needs. Follow along as we walk you through making precise miter cuts, assembling the frame, and securing your artwork in place. Not only will you be adding a one-of-a-kind touch to your space, but you’ll also be saving money by creating your own custom picture frames from scratch.
How to Make Poster Frame
Transform your home decor with a custom-made frame that embodies vintage charm. This DIY endeavor brings new life to unique or non-standard poster sizes, making it the perfect solution for showcasing your favorite prints. By combining basic materials like wood molding, corner braces, screws, and spray paint, you can create a mid-century modern-inspired frame that perfectly complements your posters.
To bring this project to life, you’ll need a band saw or miter box for precise cuts and a utility knife to resize the clear acrylic. This endeavor harmoniously blends practicality and aesthetics, offering an engaging activity that leverages your creative skills. Plus, the added bonus of upcycling soda can pop tabs as hangers will delight and inspire you.
Take the first step in crafting your bespoke frame today, and elevate your living space with a touch of artistic flair.
Homemade Swing Open Poster Frame
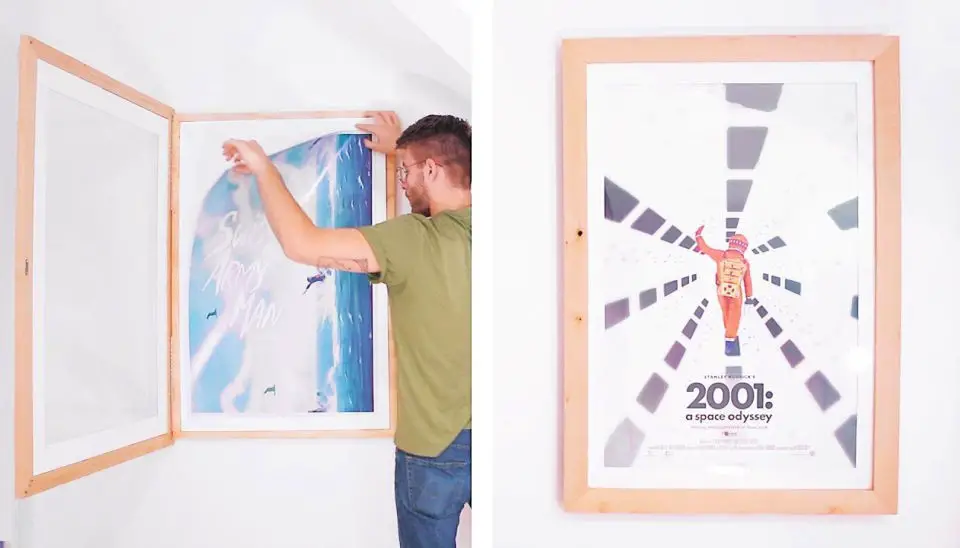
Transform your living space into a personalized masterpiece by showcasing your favorite artwork in stylish and budget-friendly DIY poster frames. By upcycling readily available picture frames and cardboard materials, you can create a sophisticated piece that effortlessly complements any interior design. The innovative project allows for easy access to interchange posters as often as you desire, making it perfect for those seeking to add a touch of elegance to their space with minimal effort.
The clever approach featured in this DIY project involves gluing the hinge before drilling and securing, ensuring a seamless fit that will leave your display looking polished. This economical and versatile project is ideal for anyone looking to add a personal touch to their home decor without breaking the bank. With creativity and your chosen posters, you can create a unique display that reflects your personality and style.
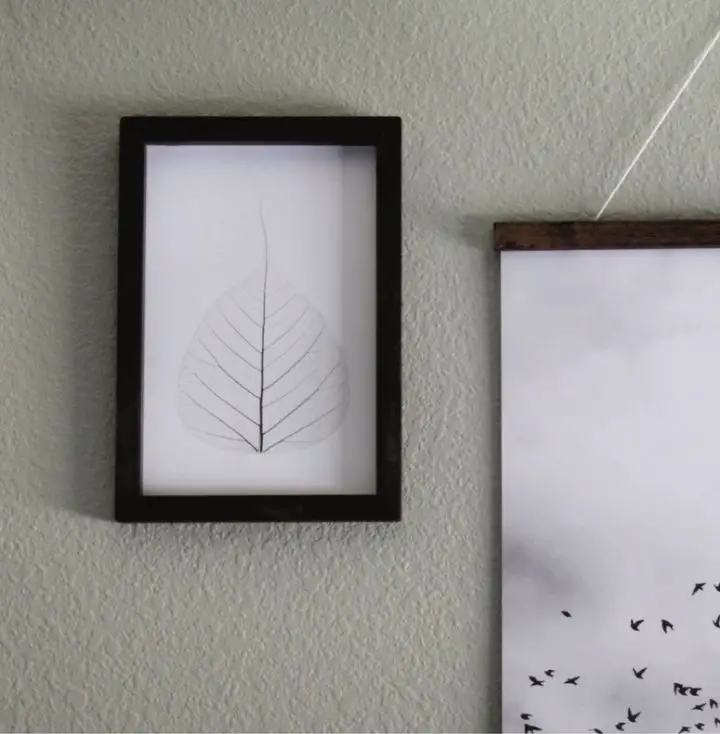
Hanging Poster Frames Ideas
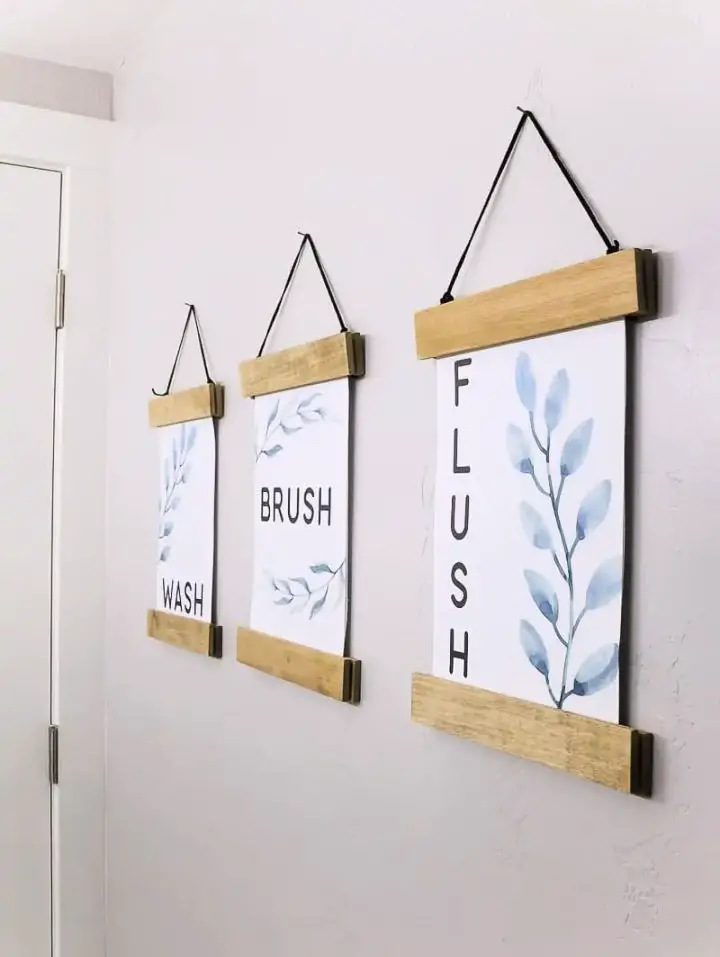
Unleash your inner artist with these DIY hanging poster frames, transforming any space into a true reflection of your unique style. This budget-friendly yet elegant decor idea is perfect for a homeschool room or dorm, elevating the atmosphere in no time. With just a few simple supplies and some creativity, you can turn ordinary posters into a sophisticated interior accent that’s easily switchable to suit your mood. By following our easy-to-follow guide, you’ll be able to create a high-end look without breaking the bank. So why settle for bland decor when you can make a statement with your own creative flair? Craft your hanging poster frames today and watch your space come alive!
Cheap DIY Poster Frame
Transform your wall decor with a unique and budget-friendly DIY poster frame that exudes style without breaking the bank. By following this straightforward project, you can easily create a personalized frame for your cherished posters or photos. With just a few basic supplies like picture mounting board, glue, and simple tools, you’ll be able to bring your creative vision to life. The step-by-step guide ensures that your finished frame aligns with your distinct taste and interior decor, adding a personal touch to your space. This cost-effective DIY solution allows you to create a professional-looking frame without sacrificing style or budget. Your completed poster frame will be an elegant addition to any room, showcasing your favorite visuals in a way that reflects your personality.
Conclusion:
As we wrap up our exploration of 25 DIY poster frame ideas, it’s clear that this treasure trove of inspiration and practical expertise has empowered you to transform your living space with ease. By mastering the art of selecting the perfect materials and following a clear construction guide, you’ve gained the confidence to not only safeguard your cherished posters but also infuse your home with a distinct personality. With expertly crafted troubleshooting advice and an array of customization options at your fingertips, you’re now equipped to tackle this rewarding DIY project head-on. As you put your own creative stamp on each decorative piece, you’ll be amazed by the way it brings every room to life, imbuing your space with a unique energy that’s all your own.
