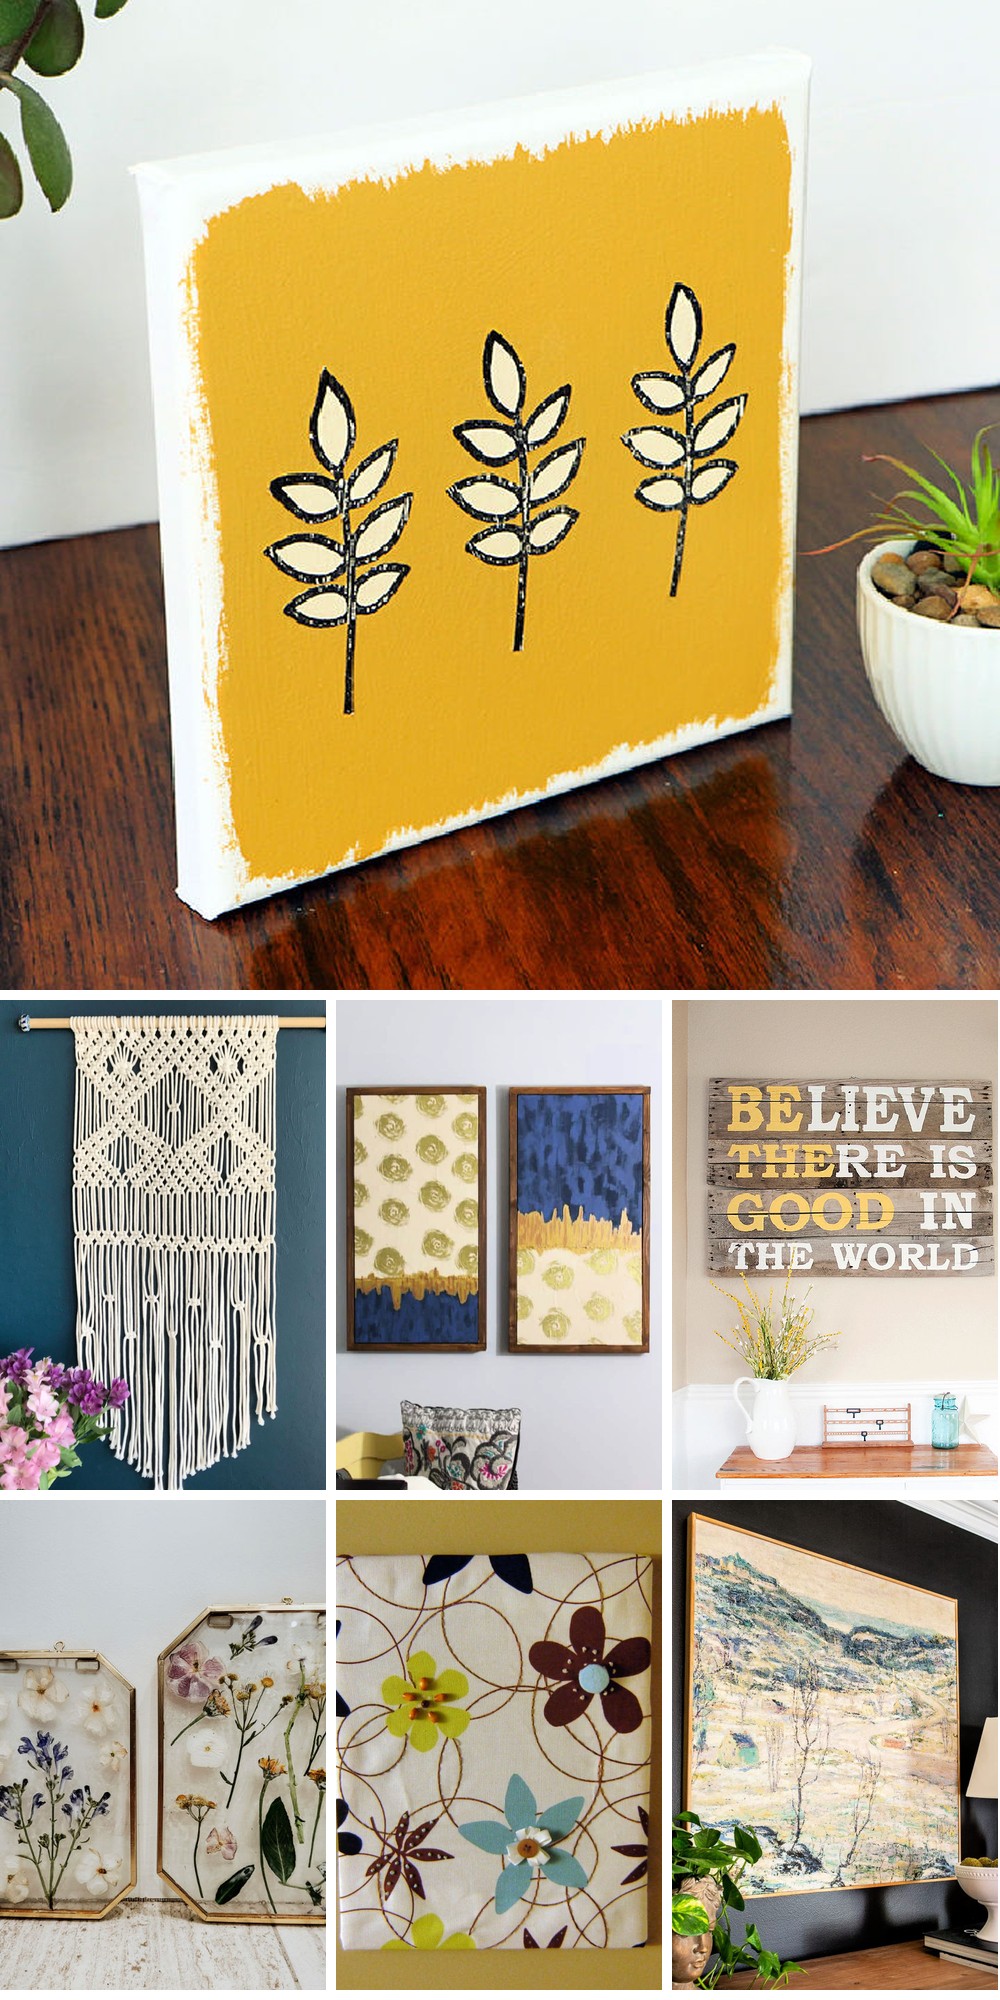
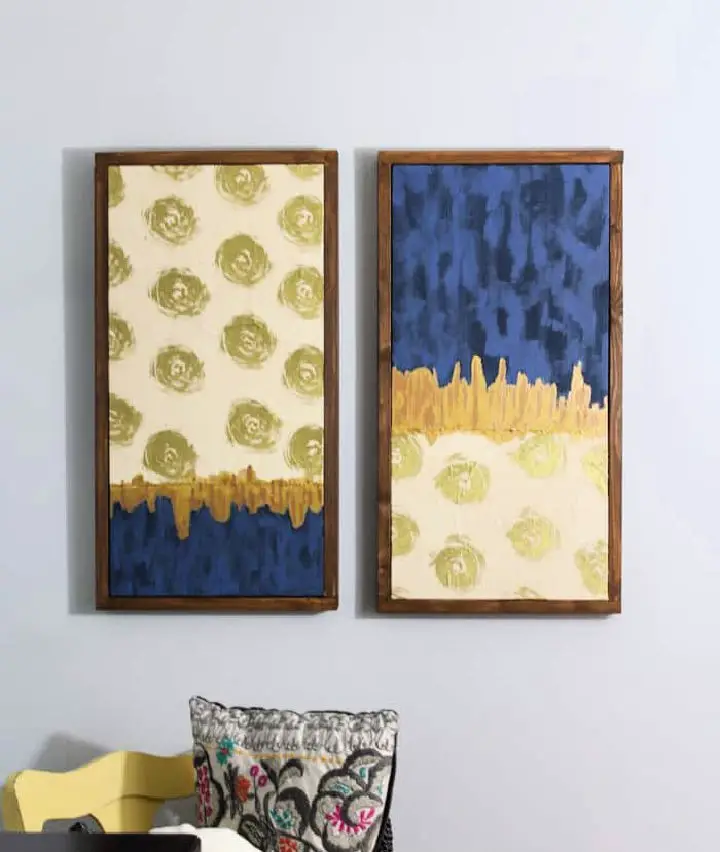
Transforming your living space into a gallery of your own design sounds like an exciting endeavor! With 15 DIY wall art ideas and projects at your fingertips, you can unleash your creativity and turn your blank walls into a masterpiece. From the tactile texture of macrame art to the vibrant colors of rug tapestries and faux watercolor landscapes, there’s an endless array of options catering to every skill level and personal taste. Our comprehensive guide offers step-by-step instructions and expert tips to ensure your DIY project is nothing short of exceptional. This isn’t just about adding a personal touch to your home – it’s about embracing customization and self-expression in ways that store-bought art can’t replicate. Whether you’re drawn to budget-friendly options or eco-friendly upcycling ideas, our curated collection of creative inspiration is designed to support your artistic journey. Let’s embark on this exciting adventure together and give your walls a fresh new look!
How to Make DIY Large Wall Art on a Budget
Transforming your living space into a personalized gallery doesn’t have to be an expensive or artistic endeavor. By leveraging simple materials and unleashing your creativity, you can create stunning DIY wall art that adds a touch of uniqueness to any room. Here, we’ll delve into three budget-friendly large wall art ideas that seamlessly blend transitional and aesthetic appeal, making them perfect for any space.
Textured Macrame Art
To create your mixed media masterpiece, start by preparing your 16×20 inch canvas. Divide it into two sections – the top two-thirds and a smaller bottom third. Next, add texture to the canvas using hot glue and macrame cord. Create an endless rectangle pattern that slightly overlaps at each end, giving the illusion of continuity. Once you’ve achieved the desired texture, apply tissue paper to the entire surface, smoothing it into the crevices to unify the design. After the tissue paper is dry, seal it with Mod Podge before painting the entire canvas off-white. For added visual interest, consider adding a slightly darker shade to the bottom third of the canvas.
Rug Wall Tapestry
To create a unique and eye-catching tapestry display, you’ll need a few simple materials. First, gather an accent rug, a wooden dowel, wood stain (if desired), brass nails, nail tacks, fabric glue (washable), and cream-colored tassels. Once you have your supplies, follow these steps to bring your design to life.
Start by preparing the dowel: if you want to add some color or texture, now’s the time to stain it and let it dry. This dowel will serve as the hanging rod for your tapestry.
Next, attach the rug to the dowel. Fold the top of the rug over the dowel and secure it with brass nails, making sure the set-up is removable.
To add some extra flair, use washable fabric glue to adhere tassels along the bottom edge of the rug. This will give your tapestry a finished look.
Finally, hang your new tapestry by tying string, twine, or leather strips around the dowel. With these simple steps, you’ll have a one-of-a-kind display that showcases your unique style.
Faux Watercolor Landscape
To create a stunning watercolor landscape, gather the following materials: watercolor paper, acrylic paints in various colors, paintbrushes, a water container, and an optional picture frame and duck cloth canvas for matting.Begin by lightly sketching the horizon line on your watercolor paper. From there, follow these steps:Start by creating the sky and shoreline. Mix off-white acrylic paint with water to achieve a diluted consistency that allows for smooth application. Use this blend for the sky, gradually increasing in intensity towards the top of the canvas. For the shoreline, dilute beige or tan paint and apply it to the bottom portion of the paper.Next, add distant mountains by mixing the sky and shoreline colors together. This will create a seamless transition between the two. For the foreground, use a darker tone for added contrast and visual interest.Once your artwork is completely dry, you can frame it using an optional picture frame. Consider adding a unique touch with duck cloth canvas as a matte or backing if desired.
Video Tutorial
While this written guide provides a solid foundation for enhancing your home’s aesthetic, we recommend pairing it with the accompanying video tutorial on YouTube. The visual aids will not only deepen your understanding of each project but also inspire you to think creatively and try new things. With these guides, you’ll be empowered to find unique and affordable wall art solutions that perfectly reflect your personal style and complement your existing decor.
Customization Tips for Personalized DIY Wall Art
When it comes to DIY wall art, it’s not just about filling a blank space – it’s about infusing your personality into every corner of your home. To do this, start by incorporating personal elements that reflect who you are and what you’re passionate about. This could be as simple as printing out favorite memories on canvas or fine art paper, or going all out with a gallery wall featuring cherished moments.Next, consider using meaningful quotes to add an extra layer of depth to your artwork. Choose phrases that inspire you, motivate you, or simply make you smile – and then find creative ways to display them, such as stenciling them onto canvases or creating lettering with vinyl decals.Colors can also play a crucial role in your DIY wall art. Think about the hues that bring you joy and use them as inspiration for your creations. Whether it’s calming blues, energizing yellows, or elegant neutrals, let your favorite colors guide your artistic expression.To add some extra texture and interest to your artwork, don’t be afraid to mix and match different materials. This could include combining fabric, paper, metal, or other textures to create unique, tactile pieces that invite interaction.If you’re passionate about a particular hobby or interest, why not make it the focus of your DIY wall art? For example, if you love music, use old vinyl records or sheet music as part of your design – and don’t be afraid to get creative with other materials like fabric, paper, or even recycled materials.Of course, your heritage and cultural background can also provide rich inspiration for your DIY wall art. Use patterns, symbols, or traditional art forms that hold personal significance to you – and feel free to incorporate elements from different cultures or traditions to create a truly unique piece.Finally, don’t forget about the option to switch up your DIY wall art with the changing seasons or holidays. This can be a great way to keep your decor fresh and exciting, while also celebrating different times of the year. And who knows – you might even find that certain pieces become family heirlooms that are passed down through generations.Ultimately, the best DIY wall art is the kind that speaks to you on a deep level and brings joy every time you look at it. So don’t be afraid to get creative, have fun with it, and make it your own!
Maintenance and Care for Your DIY Wall Art
To preserve the vibrancy and allure of your DIY wall art for years to come, it’s essential to follow a few simple guidelines. First, take steps to shield your artwork from the sun’s damaging rays by hanging it in a spot that receives moderate indirect light or using UV-protective glass if it’s framed. Regular dusting with a soft, dry cloth is also crucial, as harsh cleaning products can damage the surface. Additionally, keep your art away from humid environments like bathrooms and kitchens to prevent warping or moisture damage. When handling your artwork, be gentle and avoid applying pressure or leaving fingerprints by holding it by the frame or edges. To add some variety to your decor and prevent prolonged exposure to environmental factors that could cause harm, consider rotating your artwork periodically. If any damage occurs, address it promptly to prevent further deterioration. Finally, when creating your wall art, prioritize using high-quality materials that will withstand the test of time. By following these guidelines, you’ll be able to enjoy your DIY wall art for years to come and maintain its beauty and personality in your home.
Upcycling Ideas for Eco-Friendly DIY Wall Art
Transforming everyday items into stunning DIY wall art is not just a creative outlet, it’s also a sustainable way to reduce waste. With a little imagination, you can turn discarded materials into one-of-a-kind masterpieces that reflect your personal style and add character to your home. Here are some innovative ways to upcycle common items: Cut out images and words from old magazines and newspapers to create a collage or roll pages into tubes for a textured mosaic effect. Use leftover fabric scraps to cover canvas or create a patchwork design, combining patterns and textures for a vibrant look. Salvage beautiful illustrations or interesting text from damaged books to use in your artwork, or fold book pages into intricate shapes for a 3D effect. Collect wine corks and arrange them into a board for a rustic look that can be painted or carved into mini sculptures. Break old CDs and DVDs into pieces to use as shimmering mosaic tiles, adding sparkle to your art. Dismantle wooden pallets and use the wood to make frames, signs, or even a canvas for painting. Flatten bottle caps and nail them to a wooden board in a pattern or shape, creating an industrial-chic piece of art. Use broken or outdated jewelry pieces to add glamour and shine to your wall art, gluing them onto canvases or hanging them in a shadow box. By upcycling, you’re not only crafting beautiful wall art but also making an environmentally conscious choice. Get creative and see what unique pieces you can make from the items around you!
Expert Interviews: Adding Professional Insight to Your DIY Wall Art
Elevate your DIY wall art projects by incorporating expert advice into the mix. Here’s how you can tap into professional insights and take your creations to the next level:
Seek Out Local Inspiration: Connect with local artists, ask for tips and techniques, and learn from their hands-on experience.
Online Learning: Look for online tutorials, workshops, and classes that focus on the type of wall art you’re interested in. This is a great way to gain new skills and methods.
Social Media Insights: Follow artists and designers on social media platforms like Instagram or Pinterest. They often share their creative process and can be a source of inspiration.
Expert Interviews: Read interviews with professionals in the field of art and design. They can offer valuable insights into the latest trends and how to incorporate them into your work.
Collaborative Learning: If possible, collaborate on a project with an artist. This hands-on experience is invaluable and can teach you techniques that might not be learned otherwise.
By leveraging expert advice, you can discover new approaches to DIY wall art and create projects that truly stand out. Remember, every artist started somewhere, so don’t hesitate to reach out and learn from those who have mastered their craft.
Trending Techniques in DIY Wall Art
To give your DIY wall art projects a fresh and contemporary look, stay on top of the latest trends. Here’s how: Start by experimenting with paper crafts – yes, you read that right! Paper can be molded into shapes or origami figures to add a three-dimensional element to your artwork. For a bold and vibrant design, try color blocking by dividing your space into distinct blocks of color. If you want to mix things up, combine different materials like fabric, metal, or wood to create a piece with varied textures and depth. And why not add some luxury with gold leaf? It’s a simple way to elevate the look of your DIY wall art. Don’t be afraid to go big – large-scale pieces can be a focal point in a room and are perfect for spaces like living rooms or over the bed. You can also make eco-friendly art by using recycled or upcycled materials, adding an extra layer of meaning to your creation. For added energy and life, incorporate bold and bright colors into your design. If you want to take it to the next level, try incorporating lighting into your artwork with LED strips or fairy lights that can change the ambiance of a room. Finally, add some warmth and natural charm with wooden accents like a wooden frame or carved piece.
Budgeting and Planning for Your DIY Wall Art
To ensure your DIY wall art project is both financially feasible and artistically successful, it’s crucial to strike a balance between planning and budgeting. Here are some practical tips to help you achieve this equilibrium:
Start by estimating the costs of all the materials you’ll need, including paints, brushes, canvases, and any special tools or supplies. This will give you a comprehensive understanding of your expenses.
Set a realistic budget for your project, taking into account your estimated costs. This will help you make cost-effective decisions when purchasing materials and prevent overspending.
When shopping for supplies, be smart about it. Look for deals at craft stores, use coupons, and consider buying certain materials in bulk. Don’t forget to scour thrift stores and online marketplaces for second-hand items that can be repurposed into your art.
Get creative with your DIY supplies too. You can make your own stencils or mix paint colors instead of buying them pre-made. This will not only save you money but also give you a sense of accomplishment.
Before diving into the project, plan out your design on paper. Sketching it beforehand will help you avoid wasting materials and provide a clear idea of what you need to complete your vision.
Manage your time wisely as well. Consider the time you have available and set realistic goals for completing your project. Break down the process into smaller steps and schedule them accordingly.
Don’t forget to be mindful of waste. Use leftover materials from previous projects or find ways to repurpose scraps. Not only will this save you money, but it’ll also promote sustainability.
While staying within budget is essential, don’t compromise on quality either. Investing in certain high-quality materials can result in a better and longer-lasting piece of art.
Finally, keep track of your expenses as you go along. Keep receipts and update your records regularly. This will help you stay on budget and provide a reference for future projects.
By following these budgeting and planning tips, you can create beautiful DIY wall art that won’t break the bank.
Frequently Asked Questions About DIY Wall Art
As you take on the creative challenge of crafting your own wall art, common queries often arise. To guide you through this DIY adventure, we’ve compiled a list of frequently asked questions and answers, providing valuable insights to ensure your project’s success.
What materials do I need to start making DIY wall art?
To start, gather the essential materials for your creative endeavor. This typically includes canvas, paint, brushes, and a palette. However, depending on the specific nature of your project, you may also require additional supplies such as paper, glue, fabric, or recycled materials to bring your vision to life.
Can I make wall art if I’m not good at drawing?
While the idea of creating wall art may conjure up images of traditional drawing or painting skills, there are numerous ways to produce stunning pieces without having to be a skilled artist. From abstract compositions to collages and innovative uses of stencils and stamps, the possibilities for creative expression are vast. By exploring these alternative methods, you can bring unique character to your space and showcase your personal style.
How do I choose a color scheme for my wall art?
When selecting artwork for display, it’s essential to consider the surroundings where the piece will reside. Take note of the room’s existing color scheme and decor, and opt for a palette that harmoniously complements the space. Alternatively, draw inspiration from the natural world, fashion trends, or influential art movements that resonate with you.
What’s the best way to frame DIY wall art?
Whether you opt for a pre-made solution, a bespoke creation, or get crafty with DIY, framing your artwork is all about finding harmony between the piece and its surroundings. The perfect frame will not only complement the art itself but also blend seamlessly into the room’s aesthetic.
How can I make my wall art look professional?
As you embark on your creative journey, it’s essential to take a deliberate approach, allowing yourself ample time to thoroughly prepare each stage. This might involve carefully selecting high-quality materials or conducting meticulous research to guarantee a refined outcome. By doing so, you’ll be able to thoughtfully consider each element and avoid any hasty decisions that may compromise the overall integrity of your work.
Is it possible to make large-scale wall art at home?
When it comes to creating large-scale artworks, one of the most important considerations is space – both in terms of working area and final display. While it’s certainly possible to produce impressive pieces by using larger canvases or combining smaller components, it’s crucial to have sufficient room to work comfortably and showcase the finished product.
How do I protect my wall art from fading?
When it comes to preserving your art, one crucial consideration is minimizing its exposure to direct sunlight. A simple yet effective way to achieve this is by applying a UV-protective varnish that shields the artwork from harmful rays. Additionally, opt for archival-quality materials, carefully curated to withstand the test of time and ensure your art remains vibrant and intact for generations to come.
Can I use digital tools to make wall art?
With the rise of digital technology, creating unique wall art has never been more accessible. By harnessing the power of software like Adobe Photoshop or freely available options such as GIMP, artists can craft their own designs and transform them into visually stunning pieces that can be printed and beautifully framed, making for a truly personalized addition to any room.
What are some eco-friendly options for DIY wall art?
As part of your eco-friendly artistic journey, focus on incorporating recycled materials into your creations. Opt for non-toxic paints and explore innovative ways to repurpose items like fabric scraps or old magazines, turning waste into unique works of art. This approach not only minimizes environmental impact but also fosters a sense of longevity in your art, reducing the need for frequent updates and replacements.
How do I hang my DIY wall art securely?
When it comes to showcasing your DIY wall art, the foundation is crucial. Choose the right hanging hardware that can support the weight of your piece, whether it’s picture hooks, nails, or sturdy wall anchors. Ensure the artwork is properly aligned and securely fastened to the wall. This attention to detail will not only ensure a professional-looking finish but also give you peace of mind knowing your creations are safely displayed. As with any DIY project, embracing the process and allowing yourself to experiment and learn is just as important as the final result. By doing so, you’ll discover that every imperfection becomes an opportunity for growth and a testament to your creative journey.
DIY Wall Art Ideas and Design Inspiration
Transform your space into a masterpiece by drawing inspiration from our innovative DIY wall art ideas. Unleash your creativity and give your home a personal touch with these one-of-a-kind decorative solutions. Take the first step towards a unique interior design and start crafting your dream DIY project today!
Large DIY Scale Wall Art and Winter Landscape Printable
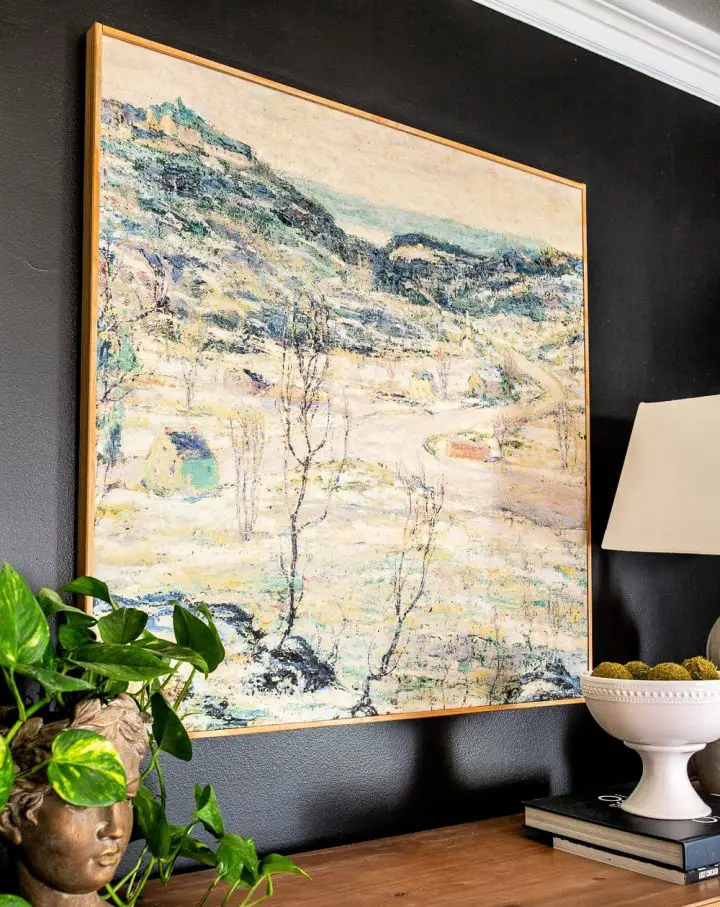
Transform your space into a stunning work of art without breaking the bank. Our DIY guide at Blesser House will show you how to create a breathtaking winter landscape piece that’s sure to impress, all for under $50. This versatile design is perfect for displaying year-round and requires minimal tools and materials. With step-by-step instructions, you’ll learn how to print your image, frame it with a modern twist, and add a touch of elegance to any room. Whether you’re a DIY novice or looking to save on decor, this accessible project is the perfect way to elevate your space without sacrificing style.
Make a Canvas Art With Wrapping Paper
Transform your home decor into a masterpiece without breaking a sweat! By repurposing luxurious wrapping paper, you can create unique DIY canvas art using an effortless technique from averageinspired. Not only is this project budget-friendly and stress-free, but it also adds a personalized touch to any room, reflecting your personal style. All you need are basic supplies like canvas panels, Mod Podge, and a splash of paint. Simply follow these straightforward steps to turn your walls into an art gallery that leaves a lasting impression.
Homemade Pressed Flower Frame Wall Art
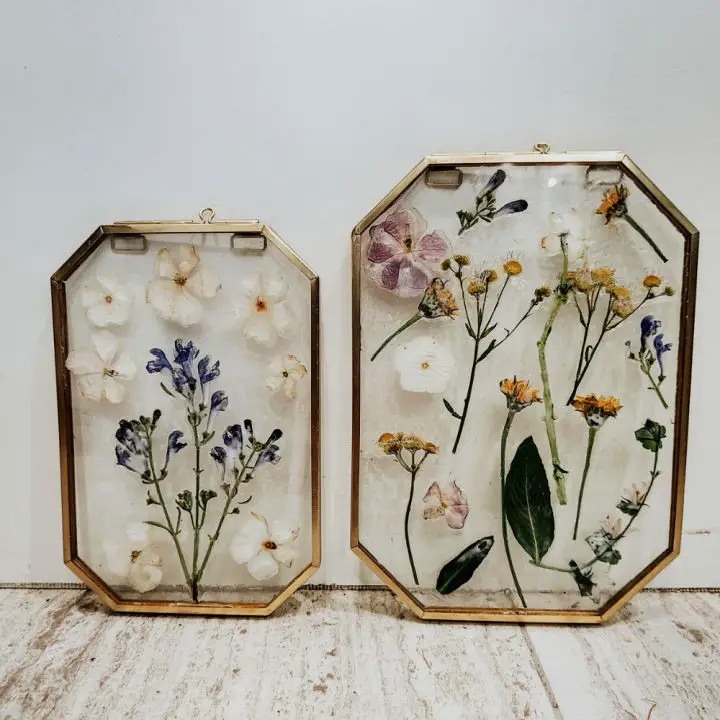
Transform your cherished summer moments into a captivating piece of art with a timeless DIY pressed flower frame. This delightful project, shared on Cool Mom and Collected, reveals the simplicity of preserving memories in a visually stunning way. By carefully pressing flowers and arranging them within a frame, you can create an enchanting decor piece that embodies the essence of the season. This DIY project is not only an excellent way to add a personal touch to your living space but also allows you to relive your summer memories with every glance. Follow these easy steps to craft a beautiful pressed flower frame that brings nature’s artistry into your home, ensuring your cherished moments remain alive for years to come.
How to Make a Geometric Wood Art Piece
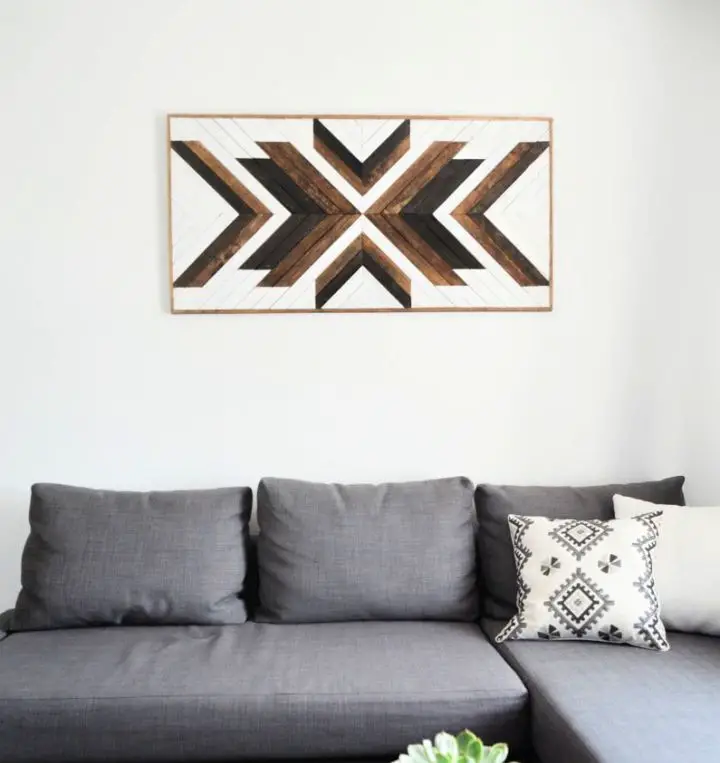
Transform your home decor with a one-of-a-kind geometric wood art piece that exudes rustic charm and modern flair. This DIY guide takes you by the hand and shows you how to create an impressive wall installation that’s not only visually striking but also budget-friendly, all for under $50. With just a few simple tools, some paint, and a dash of creativity, you can bring your personal touch to your living space. Perfect for anyone looking to infuse their home with a handmade feel, this tutorial is both easy to follow and rewarding to complete. Farewell to blank walls and hello to your new, distinctive art piece that’s uniquely yours.
Simple Yarn Wall Hanging on a Budget

Add a splash of personality to your space without breaking the bank by creating a unique DIY yarn wall hanging. This easy-to-follow guide is perfect for those new to crafting, as it requires no prior experience. Simply follow along with this step-by-step tutorial and let your creativity shine. From selecting bold yarn colors to tying and trimming, you’ll be guided through each stage of the process, with helpful tips on customization throughout. By embracing the simplicity of this craft, you’ll add color, texture, and warmth to any wall, making it an ideal DIY project for anyone looking to elevate their home’s aesthetic.
Abstract Canvas Painting for Beginners
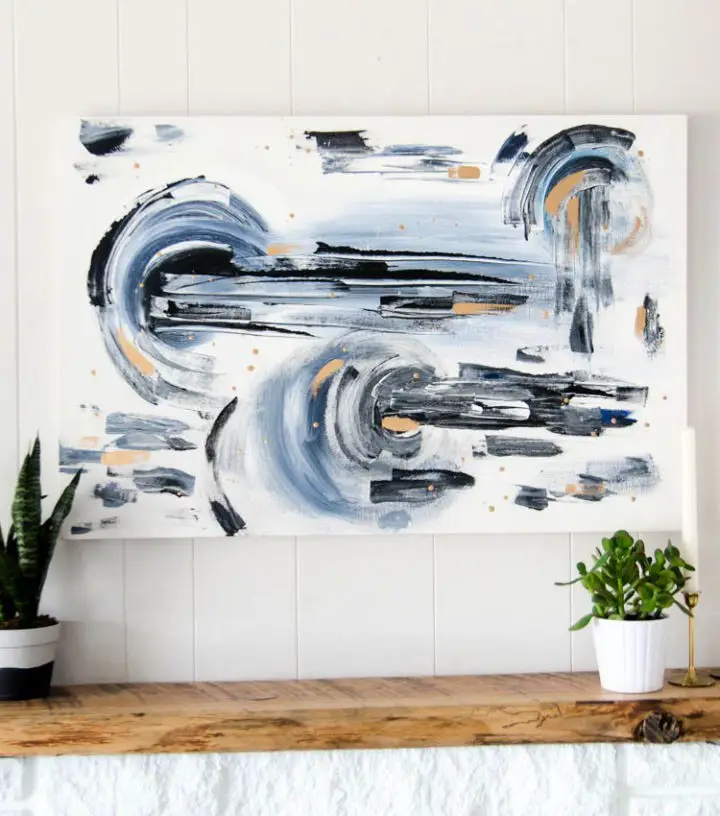
Unleash your artistic side with a straightforward approach to DIY abstract painting, specifically designed for beginners. This comprehensive guide simplifies the process into bite-sized steps, guaranteeing a both enjoyable and informative experience. With acrylic paints, chip brushes, and palette knives as your creative tools, you’ll discover the dynamic possibilities of abstract art on canvas. The tutorial also ventures into incorporating liquid gold leaf for an added touch of sophistication, making it perfect for those looking to start their painting journey with confidence and flair.
Fabric Panel Wall Art With Embellishments
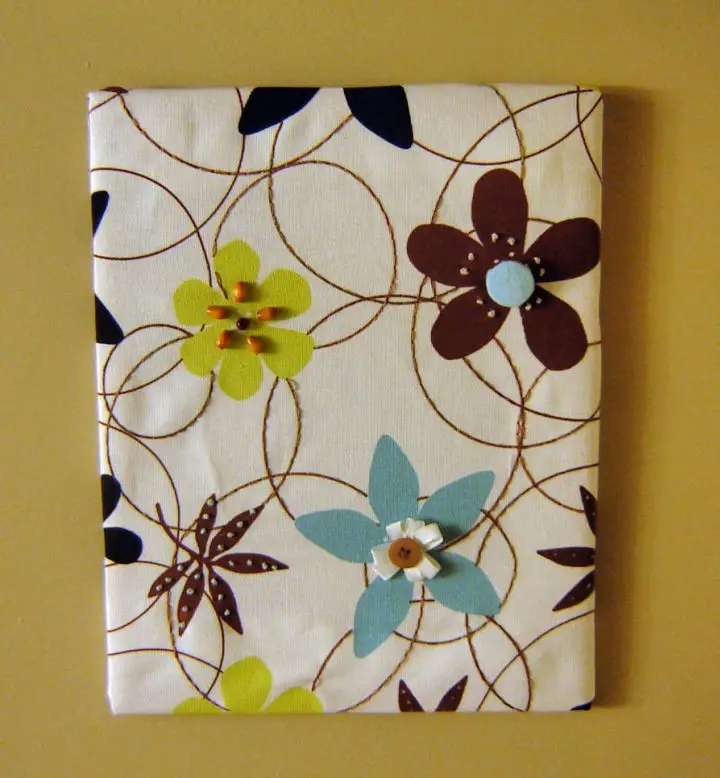
Transform your home decor with a one-of-a-kind fabric panel wall art that exudes creativity and personality. By following this straightforward DIY guide, you can add an exclusive touch to any room without breaking the bank. The best part? This project is incredibly versatile, allowing you to let your imagination run wild. For a step-by-step approach on turning ordinary materials into extraordinary wall art, head over to Instructables for inspiration. With this easy-to-follow guide, anyone can create a show-stopping piece that reflects their personal style and elevates their living space.
Making a Pallet Wood Sign
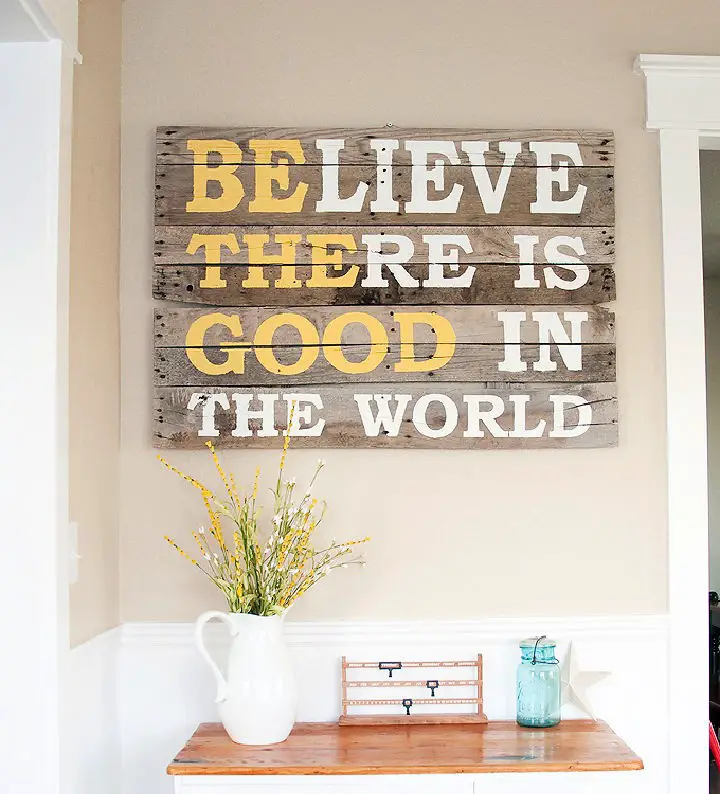
Bring a personal touch to your decor by creating a one-of-a-kind DIY pallet wood sign. This engaging project, outlined in detail at Blooming Homestead, provides a comprehensive overview of the process, covering everything from gathering pallet wood and designing stencils to bringing your vision to life with paint. With its step-by-step approach, this guide is perfect for makers of all skill levels, ensuring that even the most novice DIY enthusiast can achieve a delightful result. From selecting the ideal wood to adding the finishing touches, each stage is carefully crafted to help you infuse your space with the charm and character of handmade craftsmanship.
Easy DIY Macrame Wall Hanging for Beginners

Embark on a creative adventure and bring warmth and charm to your living space by making a beautiful macramé wall hanging. In this beginner-friendly guide, you’ll discover the joy of weaving intricate patterns from the comfort of your own home. With easy-to-follow instructions and a step-by-step approach, even newcomers can achieve stunning results. This tutorial cuts through complexity, empowering you to create a unique piece that reflects your personal style. Perfect for anyone looking to start their macramé journey, this guide promises a rewarding experience with a sense of accomplishment. So why wait? Start crafting your masterpiece today and elevate your space with a one-of-a-kind handmade piece.
Handmade Embroidery Hoop Wall Art
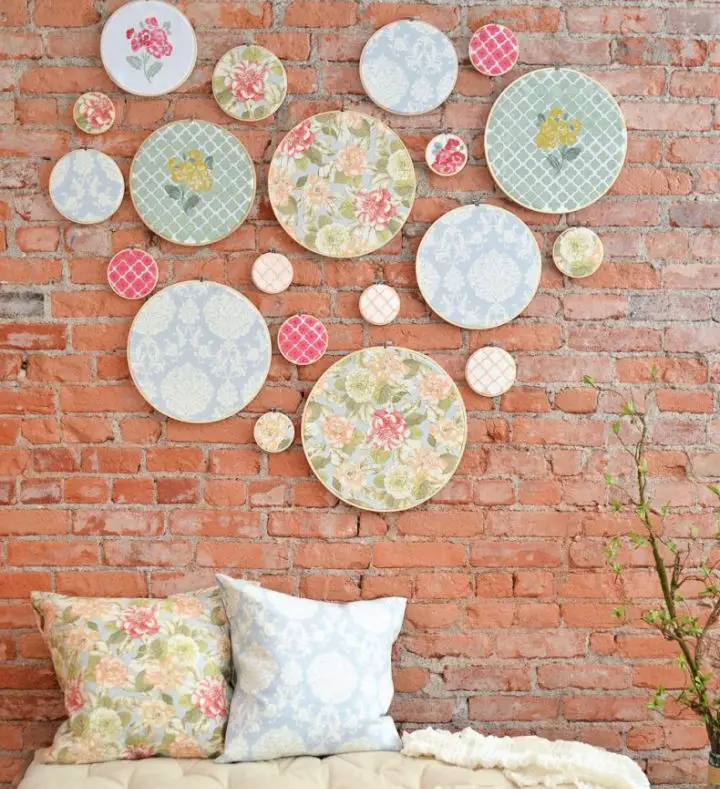
Transform your home’s ambiance with ease by crafting DIY embroidery hoop wall art, an affordable way to infuse personality into your spaces. By combining fabrics, stencils, and creativity, you can create a show-stopping piece that perfectly reflects your unique style. The process is straightforward: select the perfect hoops, pair them with vibrant fabrics, add personalized touches through custom stencils, and finally, mount your art in a seamless manner on the wall. For a comprehensive guide to bringing these one-of-a-kind decorative pieces to life, visit Home Stories A to Z. This engaging project offers endless customization options, allowing you to effortlessly tailor the final product to suit any room’s decor.
DIY Photo Display From an Old Window
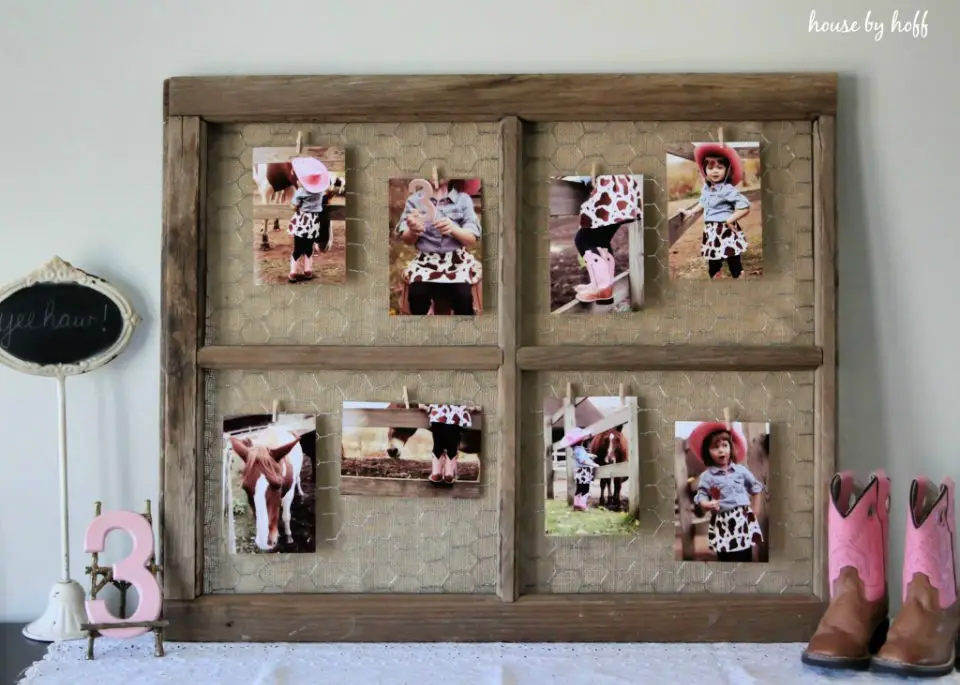
Breathe new life into an old window by turning it into a unique photo display with this easy DIY guide from House by Hoff. By attaching chicken wire and burlap to an antique frame, you’ll create a rustic yet refined piece that’s perfect for showcasing cherished memories. Whether you’re planning a themed party or simply looking to add a personal touch to your decor, this transformation is sure to impress.
Make Your Own Hand-Stamped Canvas
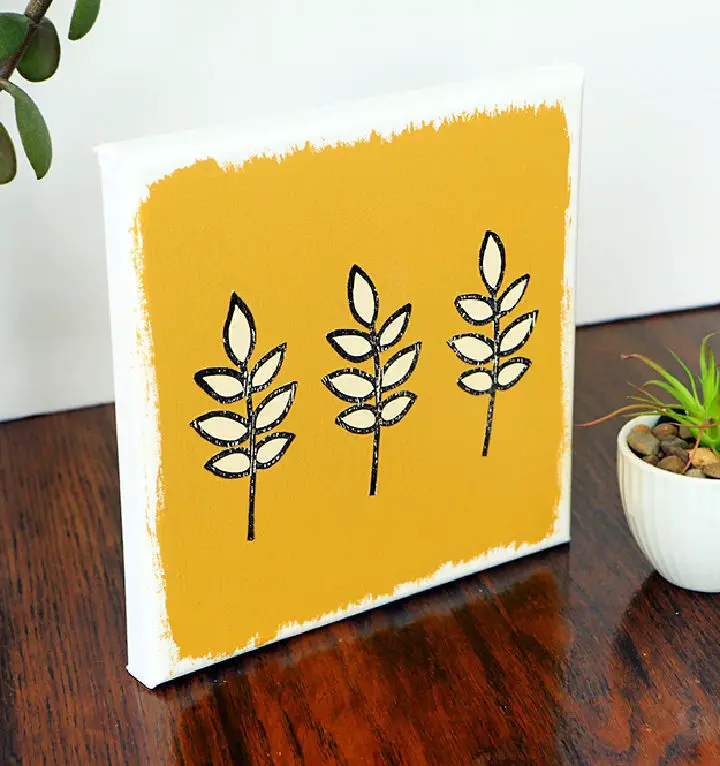
Transform an ordinary canvas into a stunning piece of décor with this effortless DIY stamped canvas art project. No artistic skills required! Using a simple Olive Branch Stamp from Happiness is Creating, you can easily add affordable artwork to any room. This project is not only easy to execute but also allows for personal customization, giving your home or office a unique touch. With a step-by-step guide, you’ll be able to make your mark and brighten up your living space.
DIY Wall Art Decor With Beach Stones
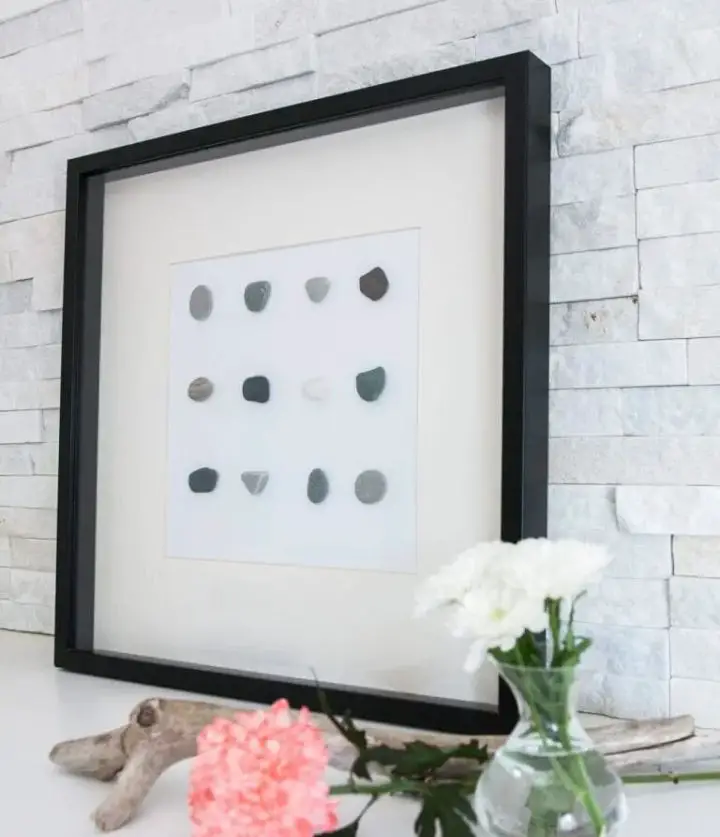
Transform your living space by creating one-of-a-kind DIY wall art using beach stones. This budget-friendly project allows you to infuse personal touches without sacrificing style. At Sustain My Craft Habit, find step-by-step guidance on turning a collection of stones into a modern masterpiece that seamlessly blends simplicity and creativity, inviting a touch of nature into any room.
Affordable Scrapbook Paper Wall Art
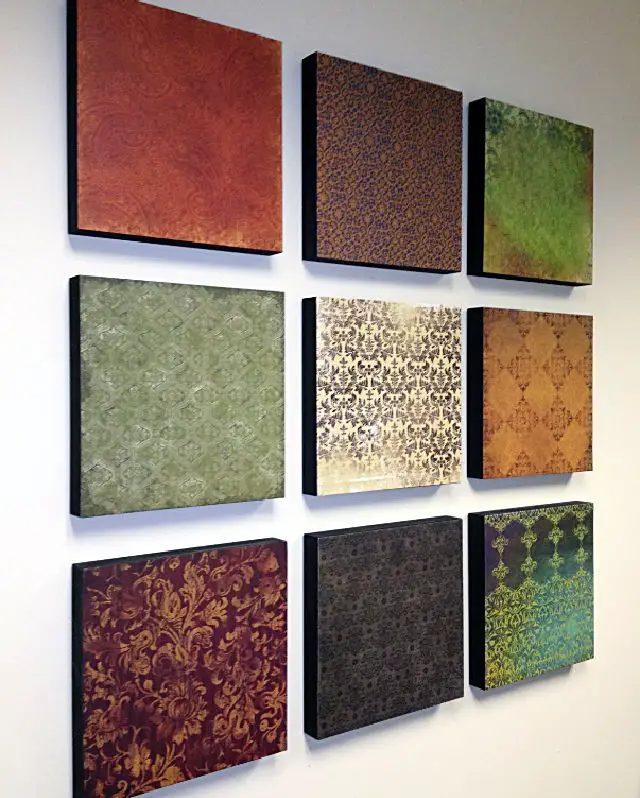
Transforming your walls into vibrant works of art is now easier than ever, thanks to Nomadic Decorator’s step-by-step guide on upcycling scrapbook paper into stunning wall decor. By leveraging affordable materials and a dash of creativity, you can create personalized art pieces that reflect your unique style while adding a pop of color and pattern to any room. This DIY project not only saves you money but also allows for endless customization options, making it the perfect solution for those seeking to put their personal stamp on their space. With this fun and budget-friendly project, you can bid adieu to blank walls and hello to a kaleidoscope of colors that bring your personality to life.
Paper Quilling Artwork Design
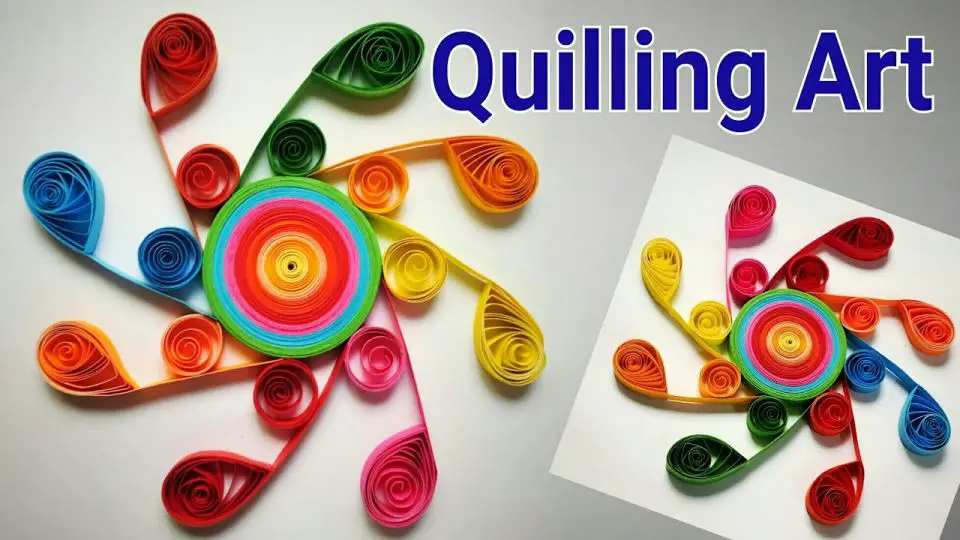
Embark on a creative adventure with the world of quilling art! Our comprehensive DIY guide takes you by the hand, guiding you through the process of crafting breathtaking paper designs that will elevate any project or card. With step-by-step clarity, even beginners can master this timeless craft and produce stunning artwork in no time. Whether you’re an experienced crafter or looking to try something new, our tutorial promises a fun-filled and satisfying experience. Get ready to unleash your creativity and start quilling: click here to begin your journey.
Conclusion:
As we conclude our exploration of 15 DIY wall art ideas and projects, we hope the creative possibilities presented have inspired you to turn your home into a unique reflection of your personality. By mastering techniques like textured macrame art or crafting a stunning faux watercolor landscape, this guide has aimed to empower you with the skills to bring your artistic vision to life. As you embark on your DIY adventures, remember that the true essence of these projects lies in the personal touches and memories you create along the way. Allow your walls to become a canvas for telling your story, and let your creativity flourish.
